11. Open Source Hardware - Timelapse Camera
A Raspberry Pi-based camera for capturing timelapses. To quote myself from the previous page,
I have used timelapses for technical stuff like battery life cycle testing, LED thermal management, etc for a while now over the years. Earlier with a webcam on a PC or laptop, then cellphones.
In the course of the Fabricademy program as well, I created a number of timelapses for Digital Bodies, and other assignments using the cellphone.
The problem with cellphone based timelapses is the obvious one - it blocks your cellphone for a long period of time, so you tend to avoid timelapses; you can't use your cellphone for anything else at all, including taking normal pictures; and depending on the software and settings, any incoming calls, notifications, battery loss, etc could interrupt your timelapse and you may not recover any of it. Also, overly long lengths of time are impractical - I would not want my cellphone to be taking a ten hour timelapse.
Hence, for long-arc tracking of the growths and decays in biomaterials, crystals, kombucha, as well as the observation of nature around us itself, a dedicated timelapse camera itself seems like a good idea.
Need
One of the recurring requirements across my documentation, material experiments and fabrication work is the ability to create long-duration timelapses.
Typical applications include:
- Fabrication processes
- Biomaterial drying
- Crystallization
- Machine operation
- Workshop activity
While a mobile phone can create timelapses, it occupies the phone for long periods and introduces limitations in framing, stability, battery life and post-processing.
Since I already owned a Raspberry Pi 4B and a USB webcam, this became an opportunity to build a dedicated timelapse camera while learning the Raspberry Pi ecosystem from scratch.
Concept
The objective was to build a portable, standalone timelapse camera capable of:
- Configurable capture parameters
- Live camera preview
- Automatic video generation
- Wireless file transfer
- Headless operation, AND/OR
- Standalone touchscreen operation
From a usability perspective, I wanted the Hardware + Software to be easy to use, so ideally, it should also have, atleast for the end user
- avoid scripts to execute manually
- easy 1-2 click usage
- avoid CLI based interaction
- avoid multiple steps
I also wanted separation between the camera and the base unit so
- the camera would not be disturbed even if the Pi itself had to be operated/connected/disconnected from peripherals, etc
- work with any webcam that was available, so image quality could be upgraded simply by plugging in a better webcam, without deep tinkering in the rest of the hardware
Rather than designing the entire system upfront, the project evolved through successive refinements. Each iteration solved a usability issue discovered during practical testing.
Brief Note on Raspberry Pi
This was my first Raspberry Pi project.
Although I have extensive experience with Arduino, ESP32 and embedded systems, the Raspberry Pi introduced a different style of development by combining a complete Linux operating system with hardware interfaces and GPIO.
For this project it effectively became a dedicated Linux computer for image capture.
Methodology
My experience with C++ or JS or Windows scripting does not lend itself to bash scripts or Python. Since the Pi is primarily programmed in Python, a language I do not code in extensively, I decided that using AI to generate the actual code while I provided the intent and direction, as well as checking and testing at a functional level if not at a codebase level, was a fair collaboration.
I initially used ChatGPT to generate script files that I would transfer over to the RasPi's memory and run.
Later, since AI tools were evolving continuously, I was able to install VSCode with Codex and ClaudeCode plugins onto the Pi, and worked v1.0 directly onboard the Pi itself, making the testing and refinement so much easier.
AI-assisted Development Methodology
The software for this project was developed collaboratively with ChatGPT, and later with Claude Code
The development process was iterative rather than prompt-and-generate.
Typical workflow:
- Identify the next problem.
- Ask ChatGPT to generate or modify the script.
- Run it on the Raspberry Pi.
- Test the workflow.
- Identify limitations.
- Request additional features or refinements.
- Repeat.
My role
- Define desired behaviour
- Design the workflow
- Test on hardware
- Report bugs
- Evaluate usability
- Decide future direction
ChatGPT/Claude Code/Codex's role
- Generate Bash scripts
- Explain Linux concepts where needed
- Suggest software packages
- Explain Raspberry Pi configuration
- Revise scripts after testing
- Create the GUI based frontend
The final implementation therefore emerged through many cycles of testing and refinement.
This documentation page, specifically, is also similarly created by a back-and-forth with ChatGPT. The AI provided a backbone of the process as it happened (since the development went through many iterations and requests by me for things to be a certain way, and the conversation itself was the best source of tracking for that evolution) while I tweaked the text, added some more details where I felt necessary, and provided all the images.
Everything before the Hardware section is handwritten by me, after Hardware section onwards is collaborative, and the Appendices are largely generated, reconstructed from the conversations.
Phases
The process section will detail the actual development in each phase, but broadly, the 3 phases were
Phase 1 - Simple bash scripts to do each task, resulting in a bunch of individual scripts that needed to be run one afte rthe other as needed
Phase 2 - Combining the scripts into a single python app, early version
Phase 3 - Reworked app with unified preview, controls, settings, and shutdown commands.
Hardware
Current Hardware
- Raspberry Pi 4B
- 32 GB microSD card
- UVC-compatible USB webcam, kept separate from the Raspberry Pi so it can be positioned without disturbing the controls
- SPI touchscreen, operating at 480 x 640 pixels in portrait orientation
- Off-the-shelf Raspberry Pi enclosure
- USB power supply
- Wi-Fi network or mobile hotspot for remote access and file transfer
Tools
Software Used for v1.0
- Raspberry Pi OS
- Python 3 and Tkinter
- Pillow / ImageTk
- fswebcam
- FFmpeg
- OpenSSH
- Raspberry Pi Connect
- FileZilla
- Visual Studio Code
- Codex extension for Visual Studio Code
- Claude Code extension for Visual Studio Code
Software Used in Earlier Versions
- Bash
- Geany
- MJPG-streamer
- Termius
Software, Downloads and References
The following software was used during development.
Current v1.0 Software
| Software | Purpose | Website / Download |
|---|---|---|
| Raspberry Pi Imager | Flash Raspberry Pi OS to the SD card | raspberrypi.com/software |
| Raspberry Pi OS | Operating System | Operating Systems |
| Raspberry Pi Connect | Remote desktop access | Pi Connect |
| Visual Studio Code | Main development editor | code.visualstudio.com |
| Codex extension for VS Code | AI-assisted coding within VS Code | OpenAI Codex IDE documentation |
| Claude Code extension for VS Code | AI-assisted coding within VS Code | Claude Code IDE documentation |
| fswebcam | USB webcam image capture | GitHub Repository |
| FFmpeg | Convert captured images into video | ffmpeg.org |
| OpenSSH | Remote terminal access | Included with Raspberry Pi OS |
| FileZilla | SFTP file transfer | filezilla-project.org |
| Python 3 | Language used for the v1.0 application | python.org |
| Tkinter | GUI toolkit used for the v1.0 application | Included with Python |
| Pillow / ImageTk | Displays images in the Tkinter application | python-pillow.org |
Earlier Development Software
| Software | Purpose | Website / Download |
|---|---|---|
| Bash | Run the original capture and preview scripts | Included with Raspberry Pi OS |
| Geany | Edit the early scripts on the Raspberry Pi | geany.org |
| MJPG-streamer | Browser-based preview used before the integrated application | GitHub Repository |
| Termius | Mobile SSH access during early testing | termius.com |
Process
Phase 1 - Building the Timelapse Camera
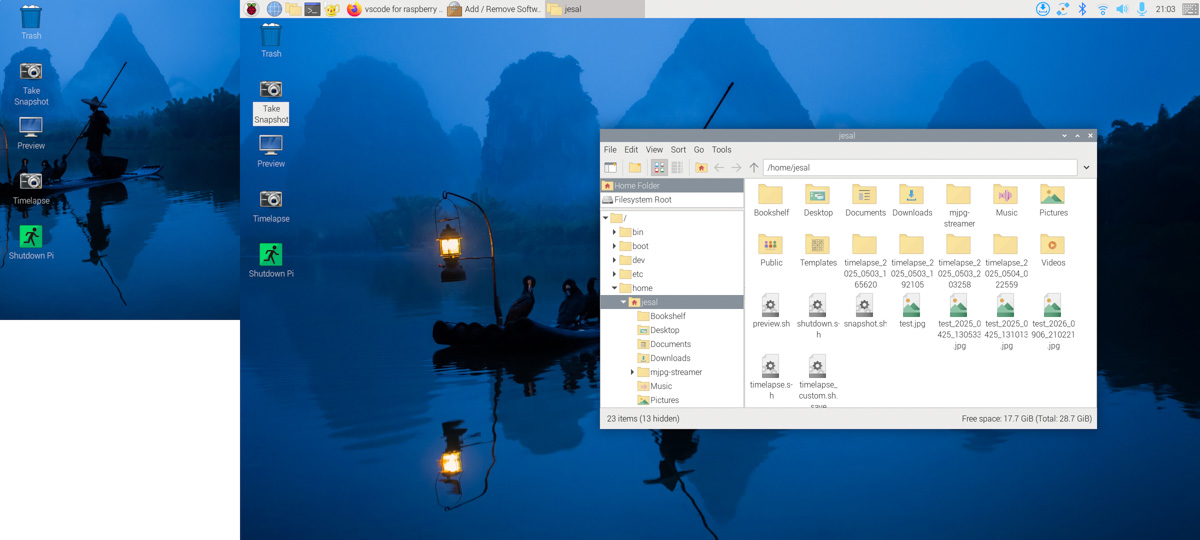
1. Raspberry Pi Initialisation
Need
Learn the Raspberry Pi environment.
Process
- Install Raspberry Pi OS
- Configure networking
- Enable SSH
- Install required packages
Outcome
Working Raspberry Pi development environment. This established a stable platform on which the remainder of the project could be developed.
Insert screenshots: - Raspberry Pi Imager - Desktop after first boot
2. Basic USB Webcam Capture
Need
Verify that a standard USB webcam could replace the official Raspberry Pi Camera.
Process
- Install fswebcam
- Capture first image
- Add timestamped filenames
- Organise capture folders
Observation
- Preview colours incorrect
- Saved images correct
- Since saved images were unaffected, I continued development while treating this as a preview-only issue.
Insert screenshots: - First successful capture - First capture script insert script
3. Automated Timelapse
Need
Automate repeated capture.
Initial implementation
- Fixed interval capture
Refinement
During testing I realised that different projects required different ways of specifying a timelapse. Sometimes I knew how long I wanted to record, while at other times I cared more about the duration of the final video. The script was therefore extended to support multiple calculation modes.
Added three operating modes:
- Duration + Interval
- Duration + Video Length
- Duration + Output FPS
The script now:
- Calculates parameters
- Confirms settings
- Captures images
- Automatically renders the final video
Insert screenshots: - Mode selection - Image folder - Final video
Phase 2 - Making it a Standalone Device
Every refinement addressed a practical usability issue that emerged as I started using the device.
1. Automatic Video Generation
Need
Remove manual FFmpeg processing.
Solution
Integrate FFmpeg directly into the script.
2. Headless Operation
Need
Operate away from the PC.
Solution
- SSH
- Raspberry Pi Connect
3. Live Preview
Need
Frame the camera before capture.
Solution
- MJPG-streamer
- Preview script
4. Wireless File Transfer
Need
Avoid removing the SD card.
Solution
- FileZilla over SFTP
5. Touchscreen
Need
Remove dependence on a phone or computer.
Solution
- Added an SPI touchscreen, operating at 480 x 640 pixels in portrait orientation.
- Continued using the existing Bash scripts while interacting directly through the Raspberry Pi.
6. Enclosure
Need
Package the system into a portable workshop device.
Solution
- Installed all hardware into an off-the-shelf Raspberry Pi enclosure.
Insert screenshots: - MJPG preview - SSH - Raspberry Pi Connect - FileZilla - Touchscreen - Enclosure - Final assembled device
Phase 3 - Standalone Python Application (v1.0)
The earlier Bash scripts proved that image capture, preview and video rendering worked. An early Tkinter prototype then explored how these controls could be brought into a graphical interface. Version 1.0 combined both stages into a single application so that normal operation no longer required switching between scripts and terminal commands.
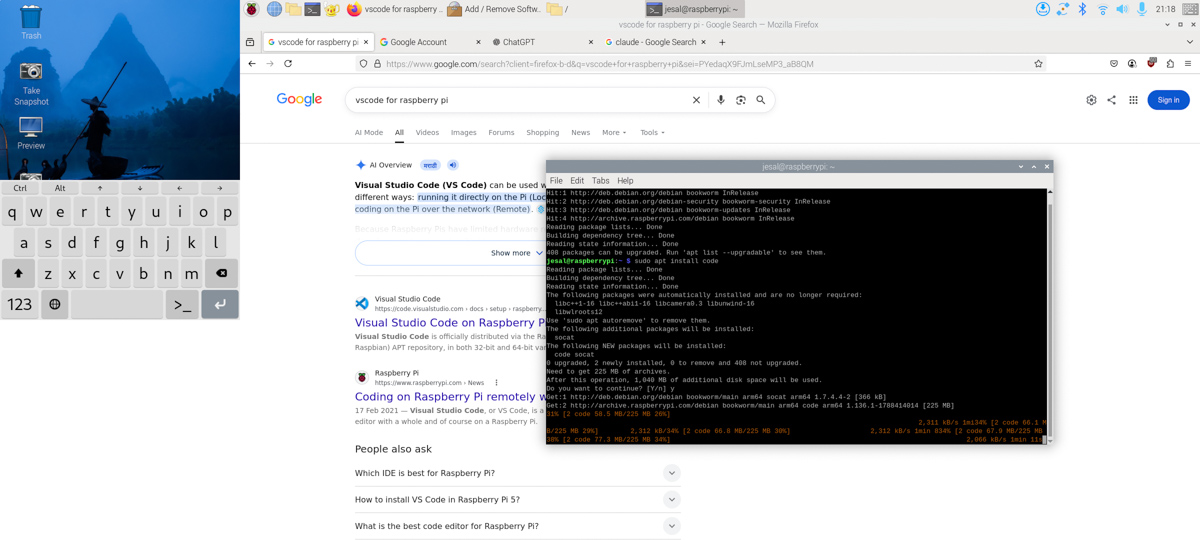
Installing VSCode
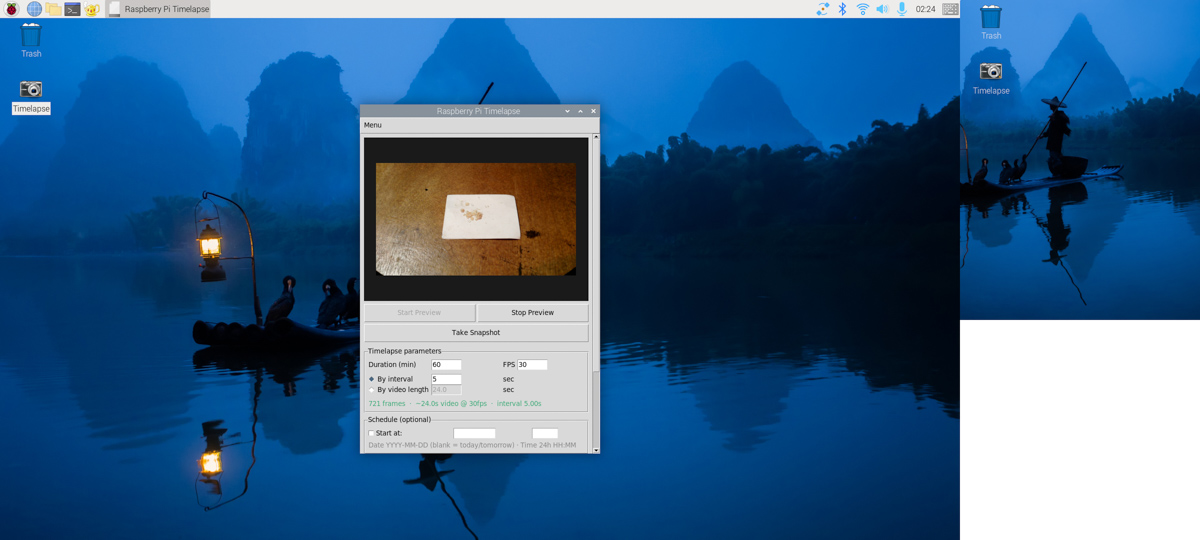
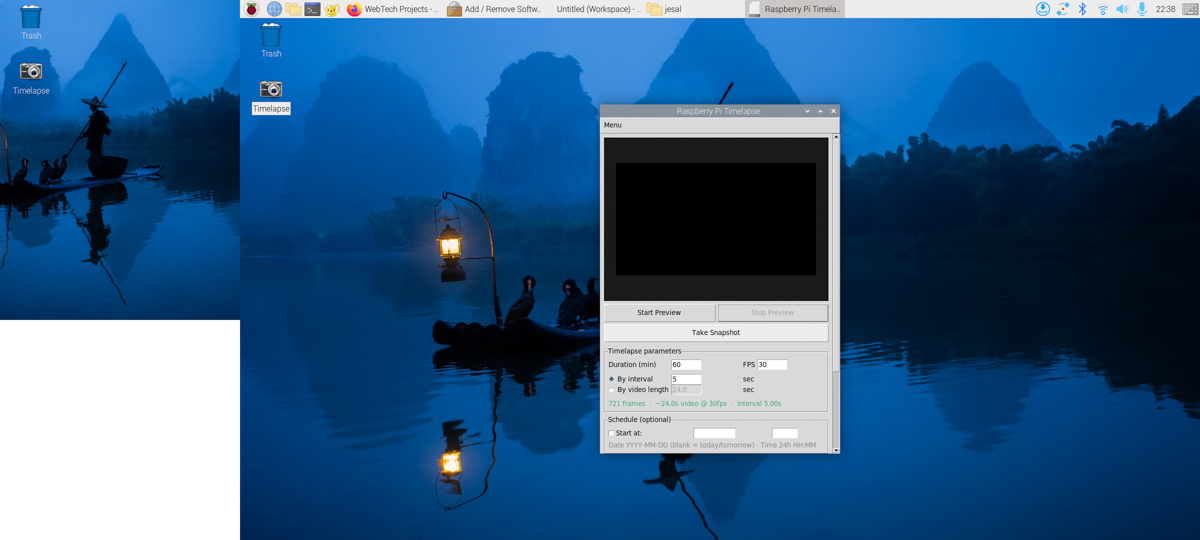 The initial interface for v1.0
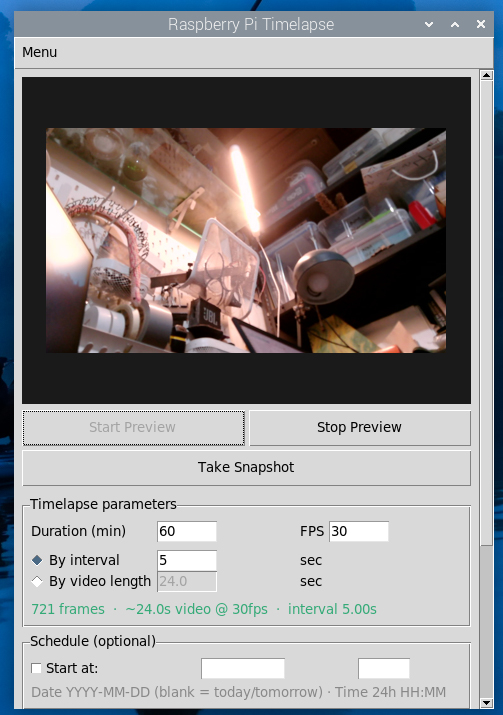
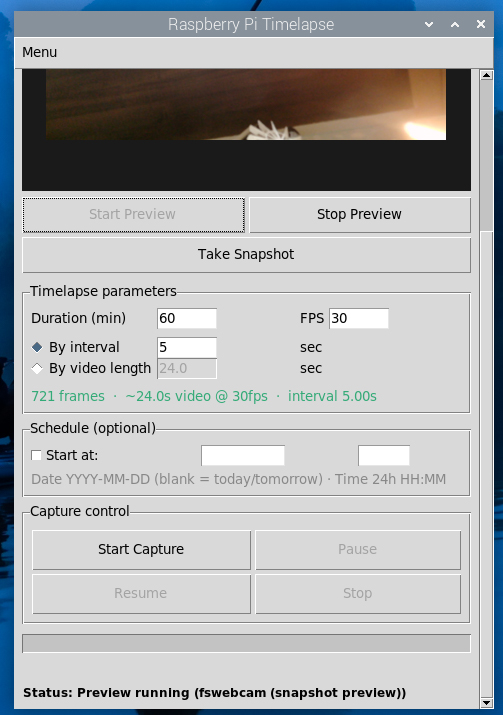
Interface for v1.0 details
1. Integrated Application
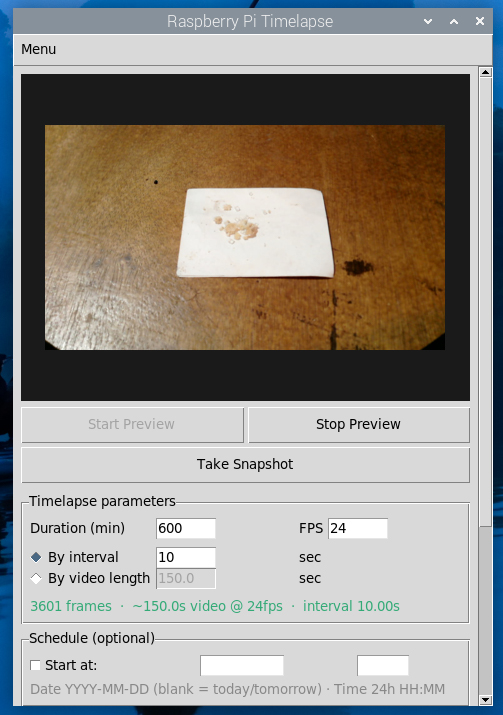
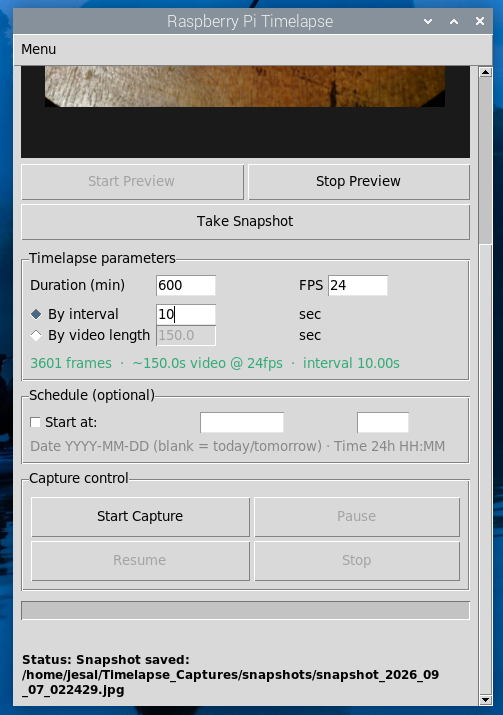
The v1.0 interface controls live preview, snapshots, timelapse capture, pause, resume, stop, scheduled starts and video rendering. It also provides menu actions for settings, opening the output folder and shutting down the Raspberry Pi.
Capture settings are saved between sessions. Captures are placed in an organised, configurable output directory instead of relying on fixed /home/pi/ paths.
2. Touchscreen Rework
The first v1.0 layout was designed on an HDMI monitor and was too wide for field use. The attached touchscreen was measured at 480 x 640 pixels in portrait orientation, so the interface was reorganised into a single vertical column.
Less frequently used actions were moved into a menu, and the page was made scrollable so that no control becomes unreachable. The main preview and capture controls remain visible on the touchscreen, while the window can still be enlarged when the HDMI monitor is available.
3. Live Preview Blackout
During testing, the preview repeatedly disappeared and returned. Direct camera tests showed that fswebcam was sometimes saving completely black frames because the webcam's automatic exposure had not settled after the camera was reopened.
The capture command was changed to skip the first five frames and average the following three. Before the fix, five of six test captures were black. After the change, ten out of ten captures were consistently exposed. Because preview, snapshots and timelapse capture use the same camera path, this also prevented black frames from appearing in the final timelapse.
4. File Transfer and ZIP Output
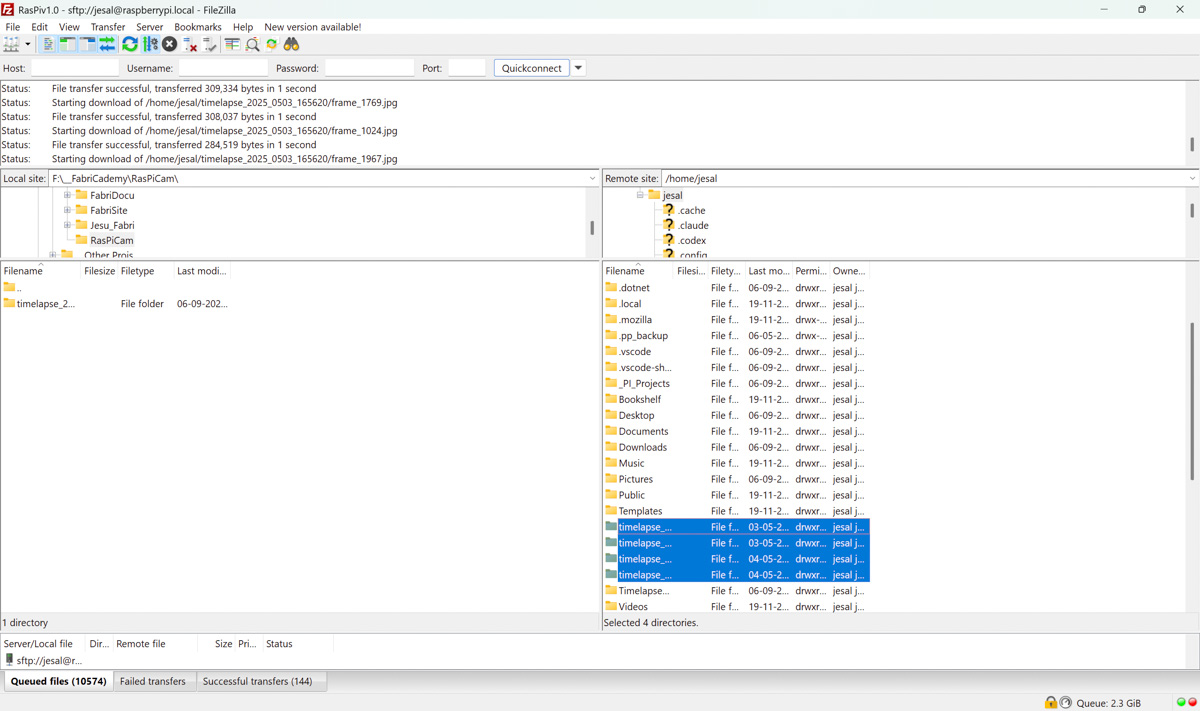
FileZilla transfers through a phone hotspot became slow when a capture contained hundreds or thousands of separate JPEG files. The issue was not the size of the final video, but the repeated network exchanges required for many small files.
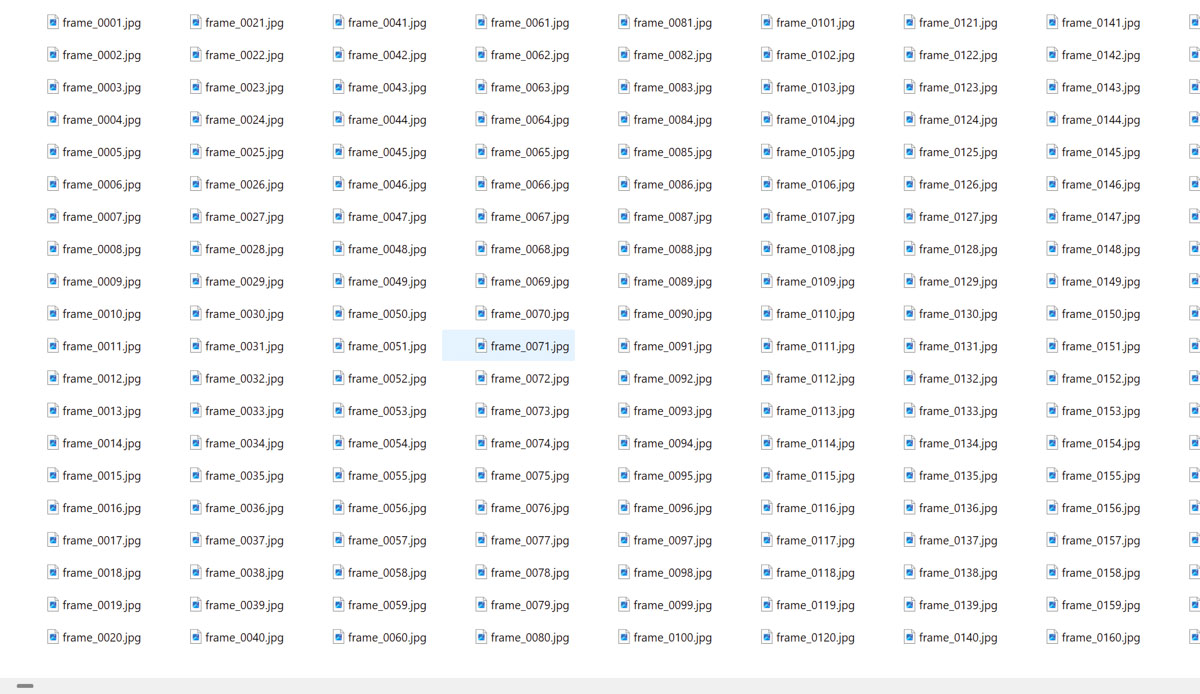
Version 1.0 now places the source frames into a ZIP archive after capture. The archive is checked before the original JPEG files are removed. A completed capture folder normally contains only:
- The rendered MP4 video
- A ZIP archive containing the source frames
The purpose of the ZIP is to bundle the frames for easier transfer rather than to significantly compress JPEG images that are already compressed.
5. Desktop Launch
Four obsolete desktop shortcuts pointing to old /home/pi/ locations were replaced with one working Timelapse shortcut. The application can therefore be launched directly from the Raspberry Pi desktop.
Current Capabilities
The v1.0 system currently provides:
- A standalone Python and Tkinter interface
- Touchscreen operation at 480 x 640 portrait resolution
- Live camera preview
- Timestamped snapshots
- Configurable capture by interval or target video length
- User-selectable output FPS
- Immediate or scheduled capture
- Pause, resume and responsive stop controls
- Automatic FFmpeg video rendering
- Automatic verified ZIP archiving of captured frames
- Organised, configurable output folders
- Desktop shortcut launch
- SSH and Raspberry Pi Connect for remote access
- FileZilla/SFTP transfer over Wi-Fi or a mobile hotspot
Current Status and Operation
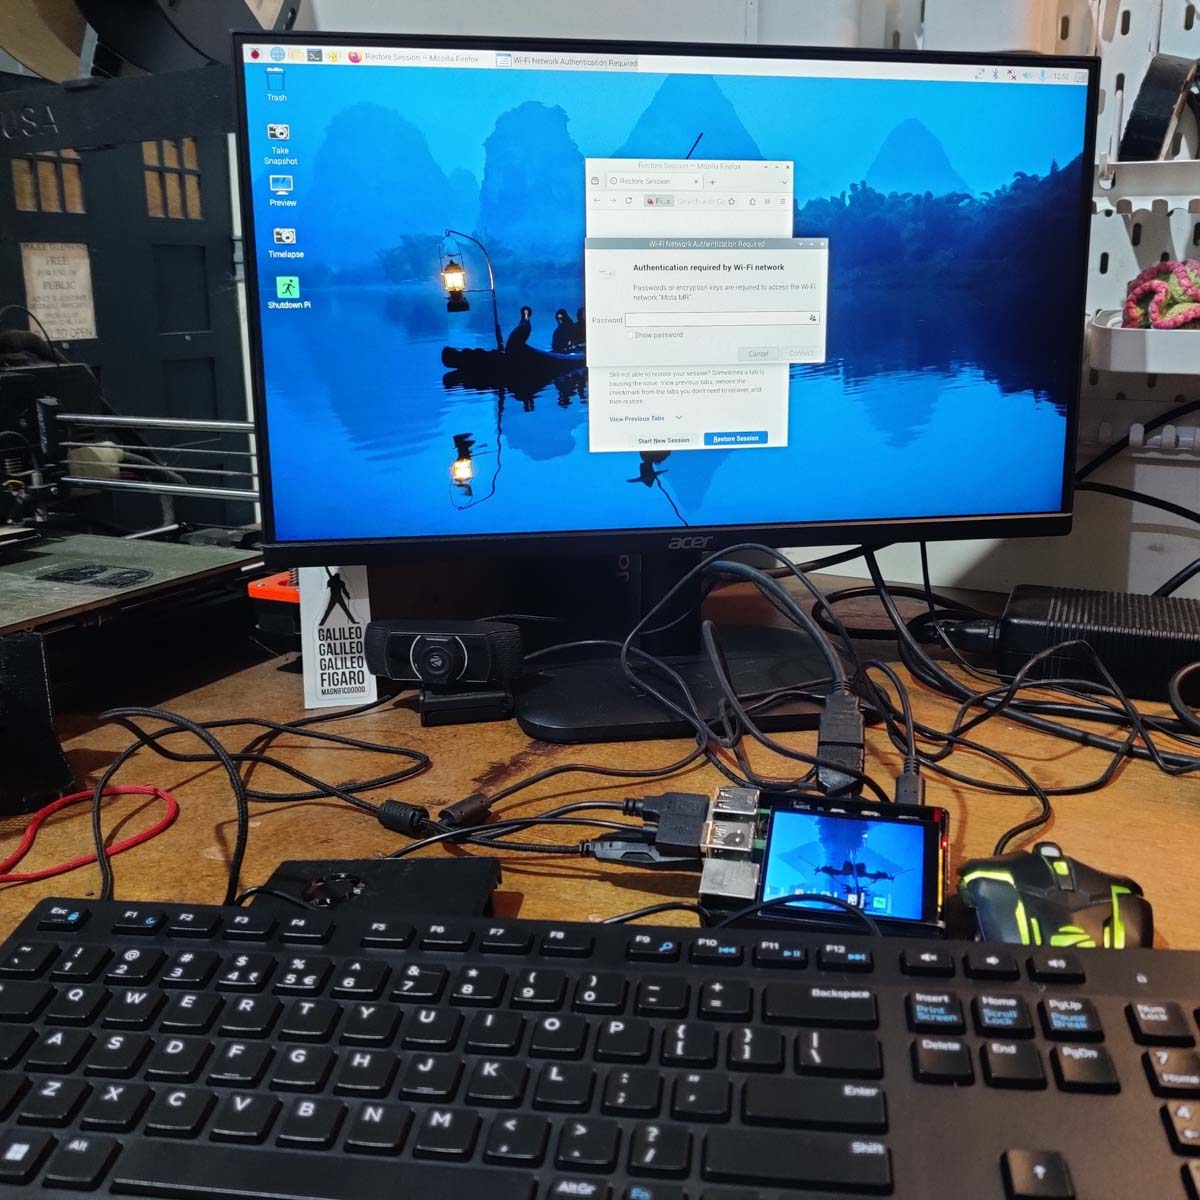
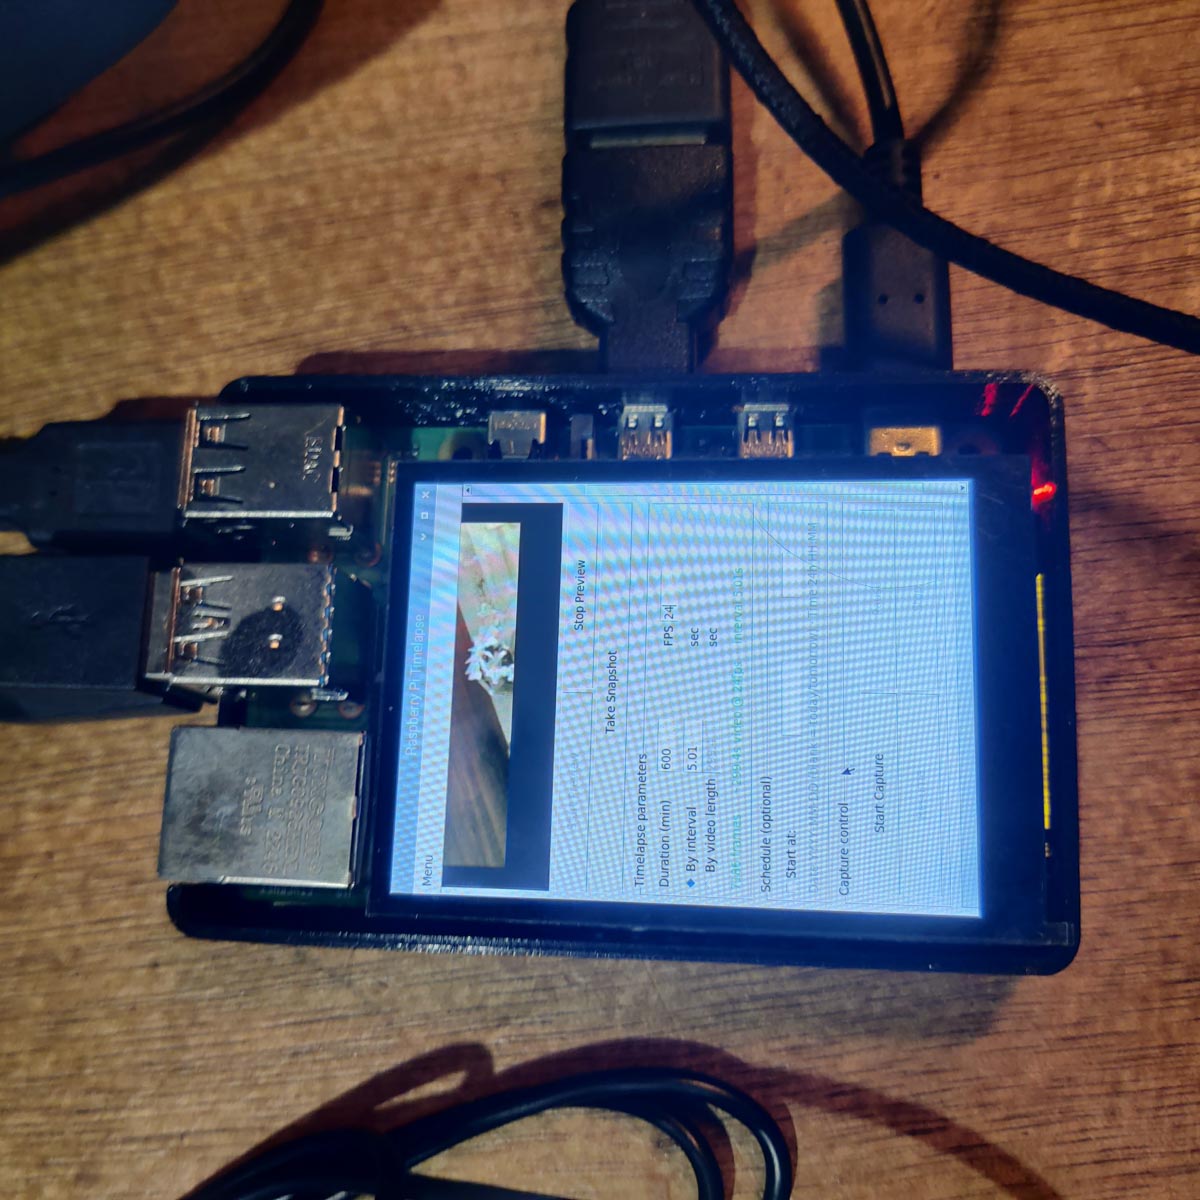
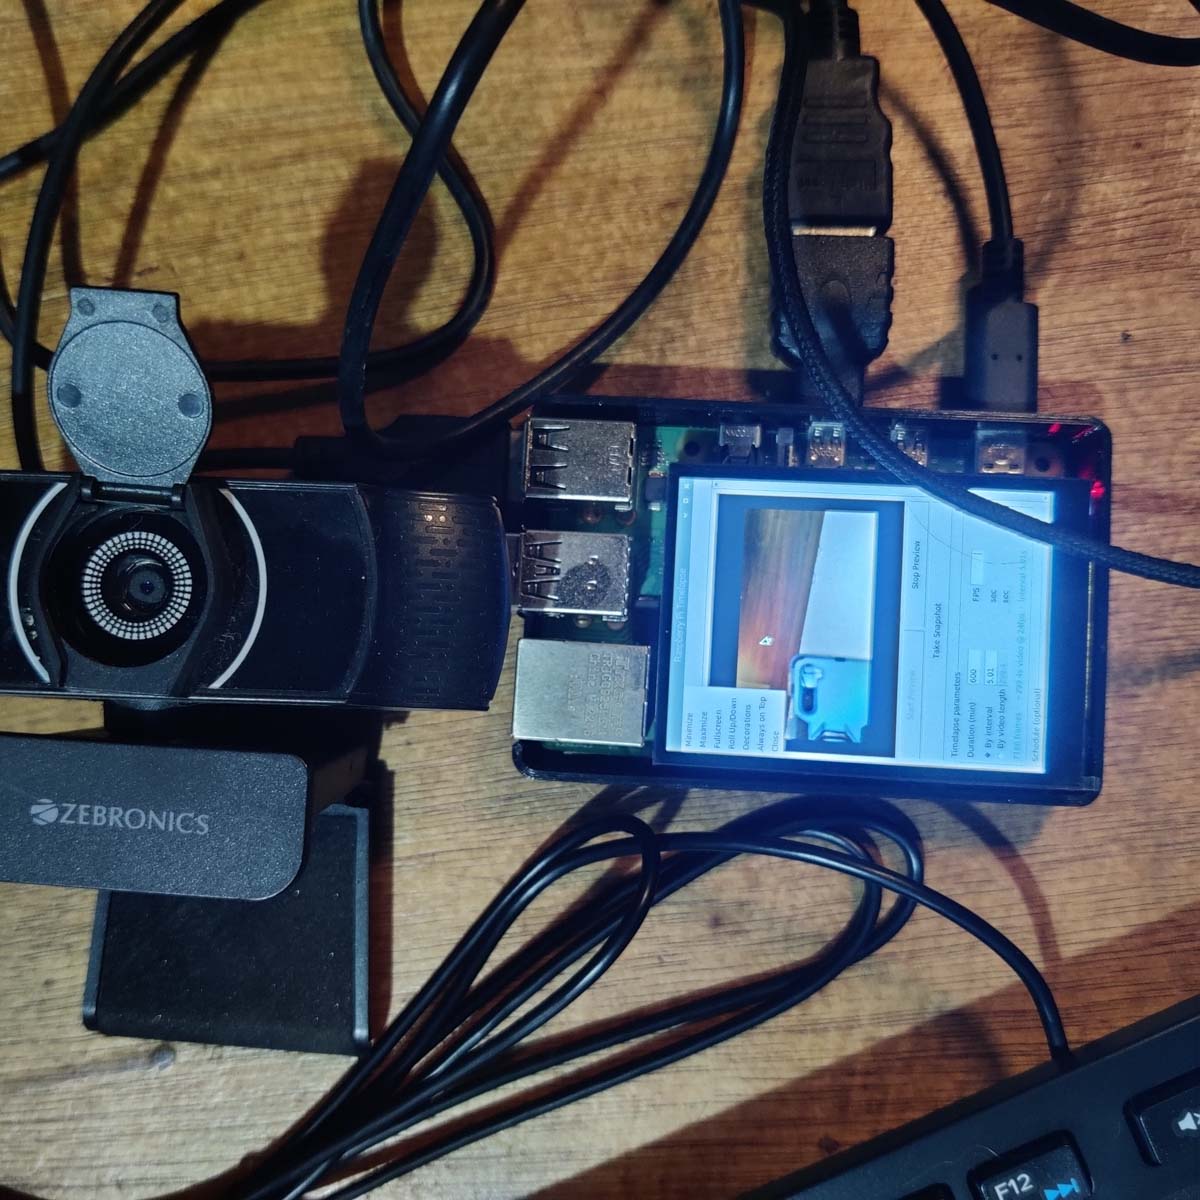
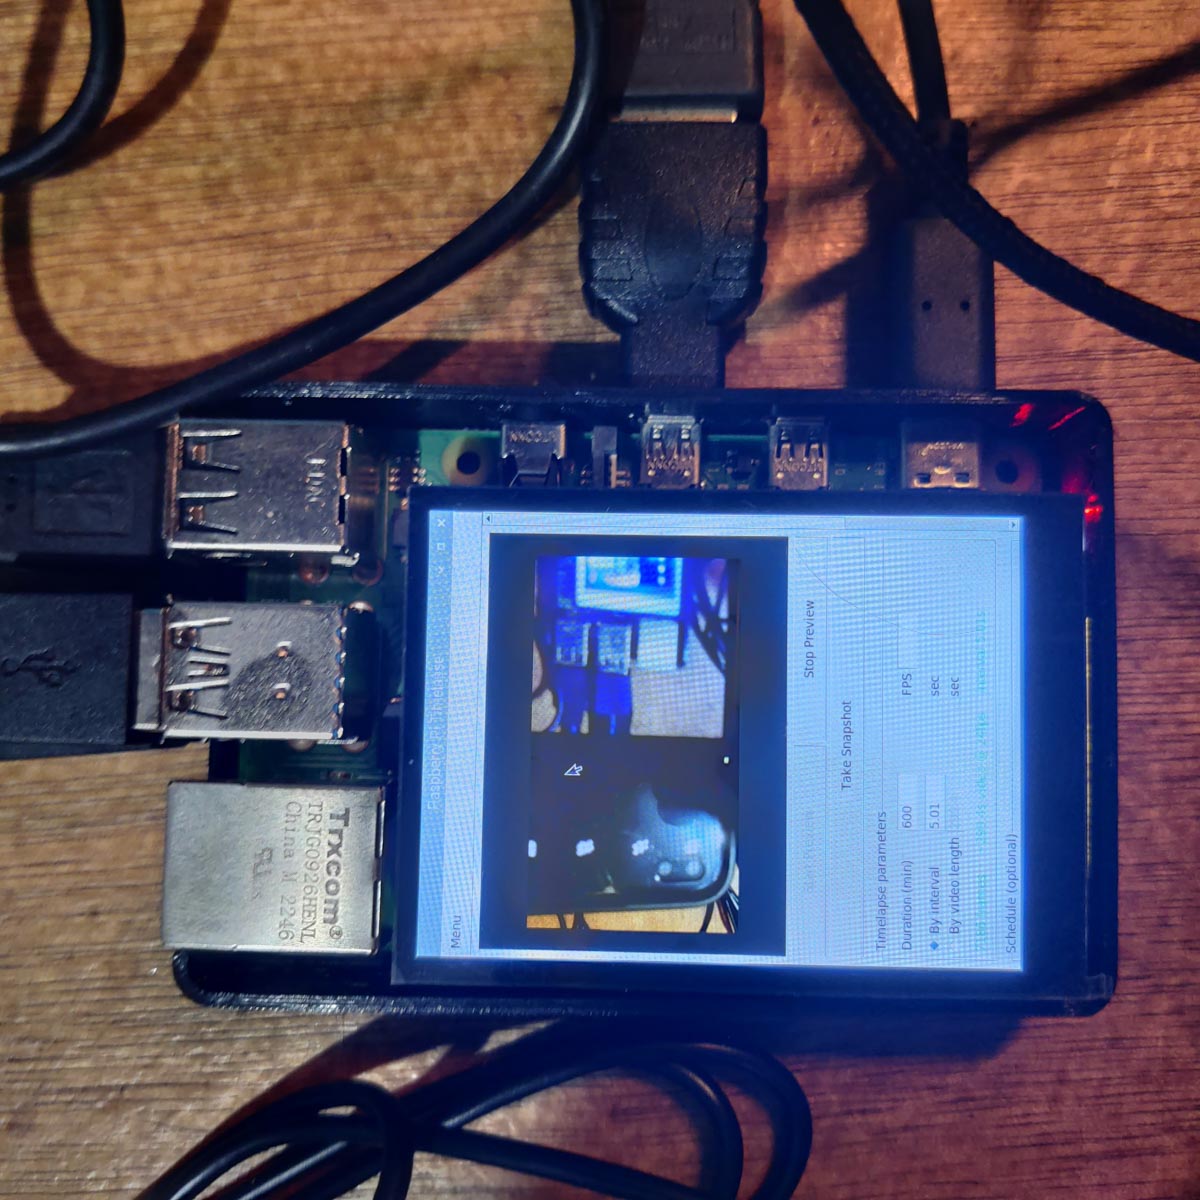
The project has evolved into a working standalone Raspberry Pi timelapse camera suitable for workshop documentation. The v1.0 Python application has replaced the earlier collection of Bash scripts as the main user interface, while those scripts remain a record of the development process.
Operation steps :
- Turn on the Pi
- Plugin the webcam, mouse and keyboard
- Click on the Timelapse app on the desktop
- Enter your settings
- Click Start capture.
Use By interval when the delay between photographs is known, or By video length when the desired final video duration is known. Set the output FPS independently, and use the schedule fields only when the capture should begin later.
During capture, the application provides Pause, Resume and Stop controls. When capture finishes, it renders the MP4 and bundles the source frames into a ZIP automatically.
You can now remove the keyboard and mouse as well if you dont want the wire tangles. Since the webcam is a separate unit, there is no danger of moving it when plugging or unplugging the Pi accessories.
After Capture :
- Connect the RasPi and the main machine to the same network
- Use Filezilla to move the 2 files from the Pi memory to the main machine - the video file (.mp4) and the zip file of the frames (.zip)
By default, output is saved under ~/Timelapse_Captures:
Timelapse_Captures/
|-- snapshots/
`-- timelapse_<timestamp>/
    |-- timelapse_<timestamp>.mp4
    `-- frames_<timestamp>.zip
Results
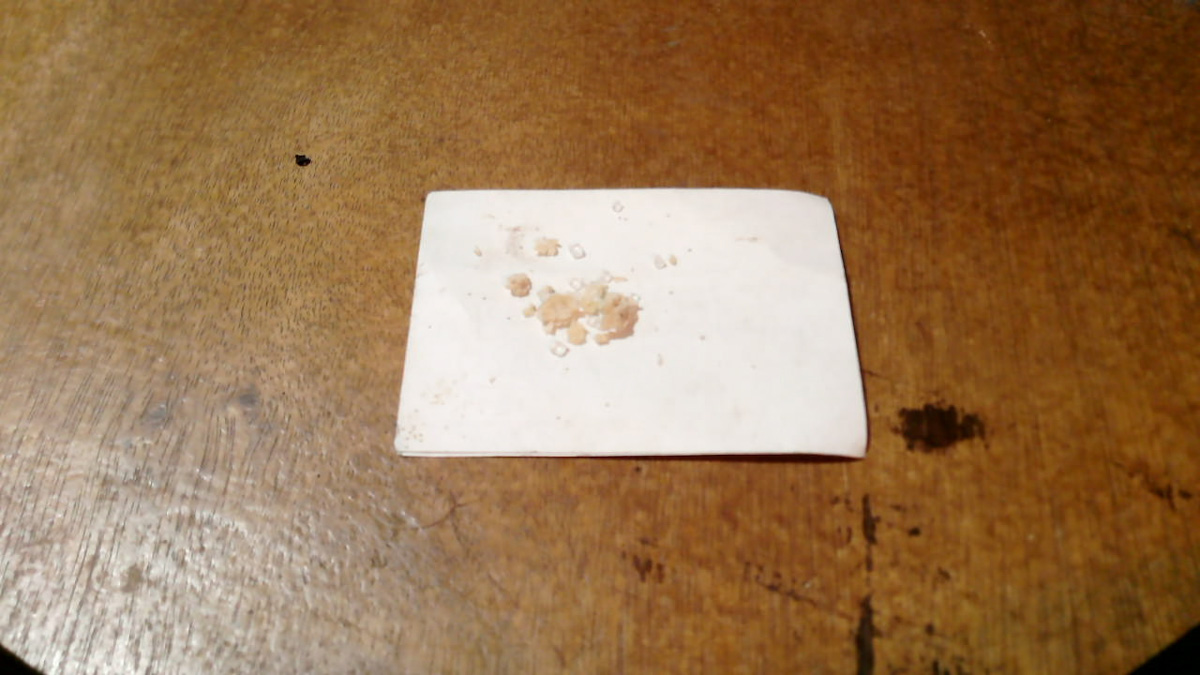
I decided to make an overnight timelpase of ants attacking some sugar.
Setup :
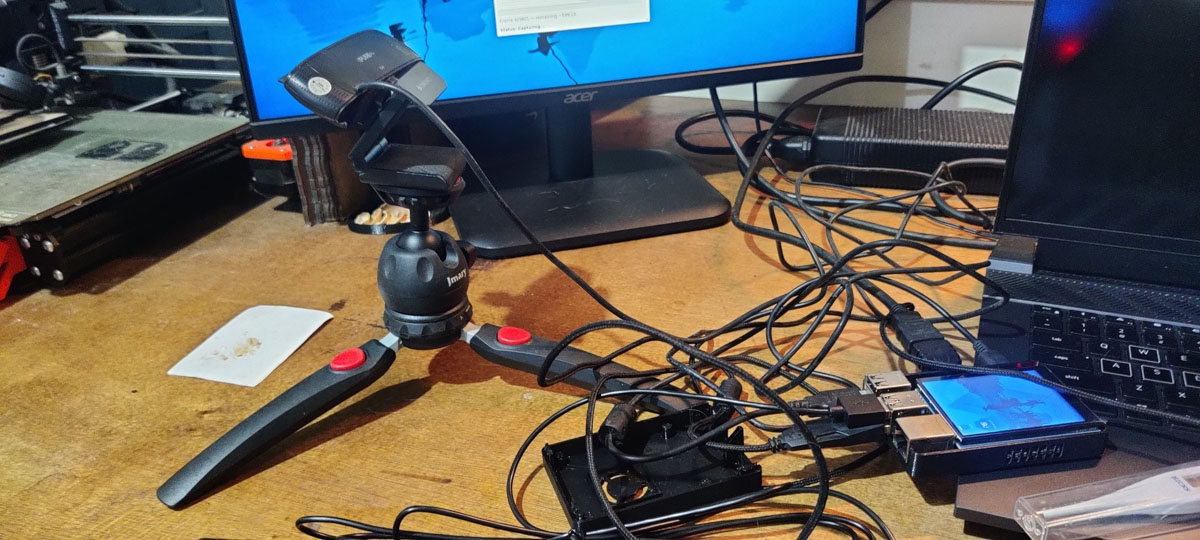
Another one of the 3D Print in progress - would have worked better if the camera was on the bed.
Conclusion
This project began as an attempt to automate timelapse photography using existing hardware.
Along the way it became my introduction to the Raspberry Pi ecosystem and evolved into a reusable platform for future physical computing projects.
The immediate outcome is a practical standalone timelapse camera.
The longer-term outcome is a flexible Raspberry Pi platform capable of supporting many future tools beyond timelapse photography.
Appendices
The following appendices provide the additional information required to reproduce, troubleshoot and further develop the project. While not essential to understanding the overall workflow, they document the practical details encountered during implementation.
Appendix 1 - Bill of Materials (BOM)
Hardware
| Item | Qty | Approx. Price (INR) | Purchase Link | Purpose |
|---|---|---|---|---|
| Raspberry Pi 4 Model B (4 GB) | 1 | ₹5,649 | Robu - Raspberry Pi 4 Model B 4 GB | Main controller |
| Official Raspberry Pi 32 GB A2 microSD Card | 1 | ₹412 | Robu - Raspberry Pi Peripherals | Operating system and storage |
| Official Raspberry Pi 4 Case | 1 | ₹308 | Robu - Raspberry Pi Case | Enclosure |
| SPI Touchscreen, 480 x 640 portrait | 1 | ₹940 | Existing unit | Local user interface |
| USB Webcam (UVC Compatible) | 1 | ₹700–1,500 | Generic USB webcam | Separately positioned camera for preview, snapshots and timelapse capture |
| Raspberry Pi USB-C Power Supply (5V 3A) | 1 | Included | Supplied with the Raspberry Pi | Power supply; not a separate purchase |
| microSD Card Reader | 1 | ₹250 | Generic | Flash Raspberry Pi OS |
| Wi-Fi Router / Mobile Hotspot | 1 | Existing | Existing infrastructure | Headless networking |
Estimated Project Cost
| Configuration | Approx. Cost |
|---|---|
| Without webcam | ~₹7,550 |
| With webcam | ~₹8,250–9,050 |
Software Used for v1.0
| Software | Cost | Download |
|---|---|---|
| Raspberry Pi OS | Free | https://www.raspberrypi.com/software/operating-systems/ |
| Raspberry Pi Imager | Free | https://www.raspberrypi.com/software/ |
| fswebcam | Free | https://github.com/fsphil/fswebcam |
| FFmpeg | Free | https://ffmpeg.org/ |
| OpenSSH | Free | Included with Raspberry Pi OS |
| Raspberry Pi Connect | Free | https://www.raspberrypi.com/software/connect/ |
| FileZilla | Free | https://filezilla-project.org/ |
| Python 3 | Free | Included with Raspberry Pi OS |
| Tkinter | Free | Included with Python / Raspberry Pi OS |
| Pillow / ImageTk | Free | https://python-pillow.org/ |
| Visual Studio Code | Free | https://code.visualstudio.com/ |
| Codex extension for VS Code | See provider terms | https://learn.chatgpt.com/docs/codex/ide |
| Claude Code extension for VS Code | See provider terms | https://code.claude.com/docs/en/ide-integrations |
Software Used in Earlier Versions
| Software | Cost | Download |
|---|---|---|
| Bash | Free | Included with Raspberry Pi OS |
| Geany | Free | https://www.geany.org/ |
| MJPG-streamer | Free | https://github.com/jacksonliam/mjpg-streamer |
| Termius | Free (Basic) | https://termius.com/ |
Appendix 2 - Software Installation & Setup
1. Install Raspberry Pi OS
- Download and open Raspberry Pi Imager.
- Flash Raspberry Pi OS to the microSD card.
- Configure the hostname, username, password and Wi-Fi details.
- Enable SSH if remote access is required.
2. Update System
sudo apt update
sudo apt full-upgrade -y
3. Install Required Packages
sudo apt install python3-tk python3-pil python3-pil.imagetk fswebcam ffmpeg unzip
4. Install the v1.0 Application
Download RasPiTimelapse_app_v1.0.zip from the Files section and transfer it to the Raspberry Pi. Then extract and run it:
mkdir -p ~/Timelapse
unzip RasPiTimelapse_app_v1.0.zip -d ~/Timelapse
cd ~/Timelapse/v1.0
python3 main_app.py
The application stores its settings in ~/.config/pi_timelapse/config.json and saves captures to ~/Timelapse_Captures by default. The output directory can also be changed from the Settings menu.
5. Add a Desktop Shortcut
Create a desktop launcher pointing to the extracted main_app.py, or adapt the following command to the installation path:
python3 /home/<username>/Timelapse/v1.0/main_app.py
6. Optional Remote Access and File Transfer
- Install or enable OpenSSH and Raspberry Pi Connect if remote access is required.
- Install FileZilla on the main computer for SFTP file transfer.
- Connect the Raspberry Pi and main computer to the same Wi-Fi network or hotspot.
MJPG-streamer, Geany and the earlier Bash scripts are not required to operate v1.0. They are retained as part of the development history.
7. Verify
Confirm that:
- The desktop shortcut opens the v1.0 application.
- The webcam preview and snapshot controls work.
- A timed capture can be started, paused, resumed and stopped.
- A completed capture produces an MP4 and a ZIP archive in the selected output folder.
- FileZilla can transfer both output files to the main computer.
The completed system was functionally verified with an approximately ten-hour overnight timelapse. The setup photographs and resulting video are included in the Results section above.
Appendix 3 - Troubleshooting
Webcam Preview
Problem : Live preview appeared green/magenta.
Observation : Saved images were correct.
Conclusion : The issue affected only the preview pipeline.
Intermittent Black Frames in v1.0
Problem : The fallback preview repeatedly disappeared and returned, and some camera captures were completely black.
Cause : Reopening the webcam for each fswebcam capture did not allow enough time for automatic exposure to settle.
Solution : The command was changed to skip five initial frames and average the following three. Retesting produced ten correctly exposed captures out of ten attempts.
SSH Password Forgotten
Reset using
sudo passwd <username>
Dynamic IP Address
When using a mobile hotspot, the Raspberry Pi may receive a different numerical IP address after reconnecting. Instead of finding the new IP address each time, the Raspberry Pi can be reached through its local hostname.
Current solution
- Connect the Raspberry Pi and the other device to the same network.
- Use
raspberrypi.localinstead of the numerical IP address. - For SSH, connect with
ssh <username>@raspberrypi.local. - In FileZilla, enter
raspberrypi.localin the Host field and connect using SFTP.
This avoids having to check which numerical IP address the hotspot has assigned after every reconnection.
MJPG-streamer Camera Conflict
MJPG-streamer occupies the webcam.
Solution
- Stop preview
- Start timelapse
Only one process may access the webcam at a time.
File Transfer
Instead of removing the SD card,
- Enable SSH
- Connect with FileZilla using SFTP
- Copy files wirelessly
Transferring hundreds of individual JPEG images over a mobile hotspot was slow. Version 1.0 therefore bundles the source frames into one verified ZIP archive after capture, allowing the MP4 and frame archive to be transferred as two files.
Executable Scripts
If a script will not run:
chmod +x scriptname.sh
Safe Shutdown
Shutdown using
sudo shutdown now
Avoid disconnecting power while the Raspberry Pi is writing to the SD card.
Appendix 4 - Design Evolution
The earliest stages were reconstructed from the surviving scripts and project notes rather than formal releases. The three packaged versions show the main software milestones.
| Stage / Version | Milestone | What it established |
|---|---|---|
| Early experiments | Raspberry Pi setup and USB webcam tests | Established the operating environment, confirmed webcam compatibility and produced the first timestamped images |
| v0.5 | Bash script workflow | Added snapshot, preview, configurable timelapse capture and automatic FFmpeg rendering through separate scripts |
| v0.8 | Tkinter GUI prototype | Explored calculation modes and on-screen preview/capture controls, but did not yet form a complete standalone workflow |
| v1.0 | Working standalone Python application | Combined preview, snapshots, settings, scheduling, capture controls, rendering, ZIP output and desktop launch in one application |
Lessons Learned
The most significant observation from the project was that nearly every major improvement resulted from practical testing rather than initial planning.
The development process therefore became a cycle of:
- Build
- Test
- Identify limitations
- Refine
- Repeat
This iterative process gradually transformed a simple Bash script into a portable standalone Raspberry Pi timelapse application and laid the groundwork for future Raspberry Pi-based physical computing projects.
Files
RasPiTimelapse_Scripts_v0.5.zip
- snapshot.sh - capture one timestamped test image
- preview.sh - start the MJPG-streamer browser preview
- stop_preview.sh - stop the preview and release the webcam
- timelapse.sh - basic timelapse capture
- timelapse_advanced.sh - configure and capture the timelapse, then generate the MP4
- timelapse_full.sh - preview, confirm framing, configure, capture and render in one workflow
- Development Handoff.md - development notes, dependencies and usage guidance
- Early Tkinter GUI prototype
- Standalone Python GUI with preview, snapshot, capture, scheduling, rendering and output controls
Future Scope
The main capture workflow is complete. Future work concerns field usability and optional extensions:
- Add a USB power bank for longer portable operation
- Add dedicated GPIO push buttons or a rotary encoder for physical control
- Improve the enclosure and camera mount
- Consider an official Raspberry Pi Camera as an optional upgrade
- Explore motion-triggered capture
Possible Future Hardware
| Item | Approx. Price (INR) | Purpose |
|---|---|---|
| USB Power Bank (10,000–20,000 mAh) | ₹900–2,000 | Portable operation |
| GPIO Push Buttons | ₹20–100 | Physical controls |
| Rotary Encoder | ₹80–150 | Menu navigation |
| Camera Mount / Tripod Adapter | ₹150–500 | Adjustable framing |
| Custom 3D Printed Enclosure | Material cost | Dedicated enclosure |
| Official Raspberry Pi Camera V2 (optional upgrade) | ₹1,649 | Native Raspberry Pi camera interface |