9. Textile Scaffold
This week we discovered and used several techniques like paper clay and crystallization and biodegradable & 3D printing methods.
References & Inspiration
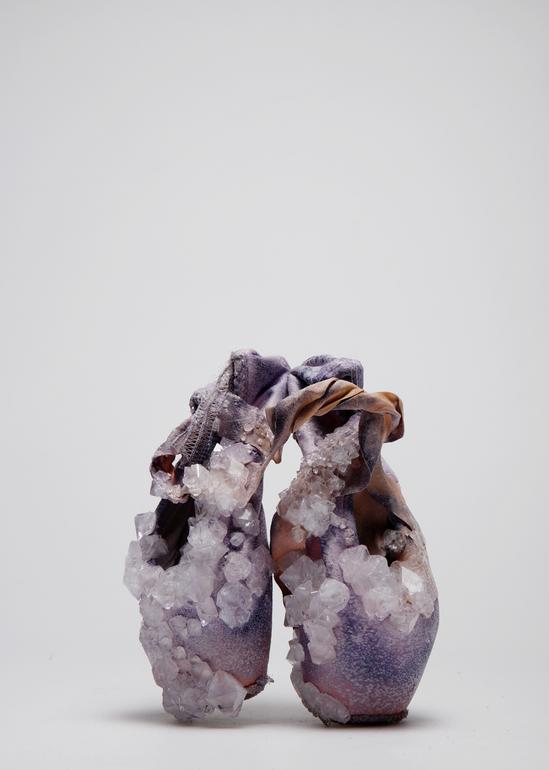
A very nice work that I explored is by Alice Potts that makes crystal from human sweat ,regarding it is human factor coded in the crystal … I think open a big debated . yet the design she made is fascinating.
Below some of Alice's designs:
Crystallization
Crystallization is a state of change from liquid to solid form in Nature. The crystallization process is used to obtain a pure solid substance from liquid form, whose atoms gather with each others to make highly connected groups and take the crystal shape.
Thermochromic crystals
Recipe used
- Alum: 400gr
- Water: 1L
- Thermochromic powder
Tools
- Glass Jar
- Wooden Stick
- Petri dishes
- Pot
- Electric Coker
- wool, natural fibers
- 3D printed Pattern "TPU Filament"
Workflow
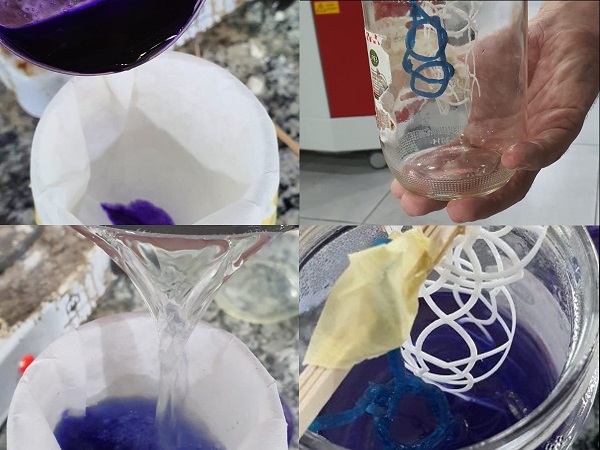
I started with boiling water then add ALUM according to the recipe to have a saturated solution for growing crystals. I stirred and filter the solution with coffee filter to remove impurities, then add Thermochromic powder .
I poured it in glass jar and add my fiber from the top of the jar using the wooden stick in the middle to have the shape without touching the button side of the jar.
Note that this process is the same for generate crystals with recycled dye bath from hibiscus and soda below.
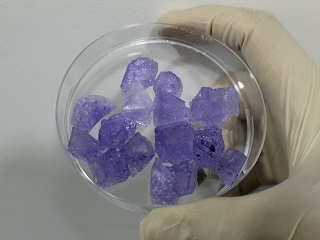
After 1 day crystals start growing and I waited for a week to have bigger size of crystals. Thee more we wait the more in size they will grow.
After that I harvested the crystal I polished them with nail transparent polish to preserve the shapes.
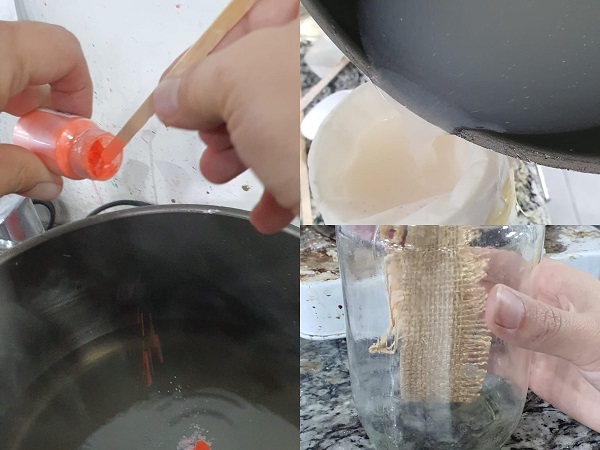
- work process for growing crystals with thermochromic ink.
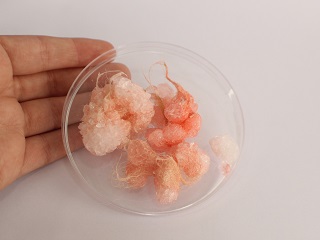
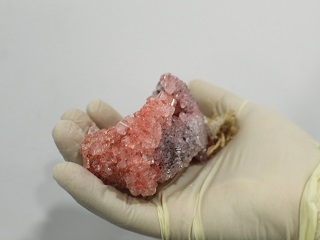
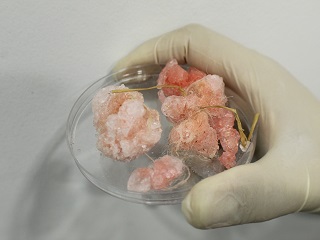
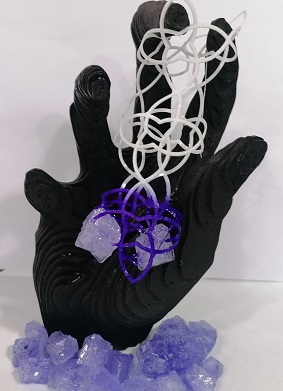
Blue crystals
Recipe used
- Alum: 400gr
- Previous hibiscus dye bath: 1L
Workflow
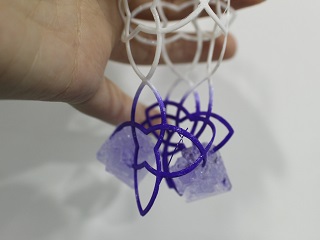
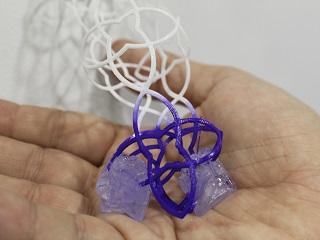
As above process, follow the same workflow. I filtered the solution before adding my 3D TPU design from week No#7 and I waited 3 days. The crystals started to grow on my mesh after 2 hours and became bigger.
Paper Making with master class of Ala Janbek
During the week we had a masterclass with master Ala Janbek on how to make recyled paper DIY with basic equipment.
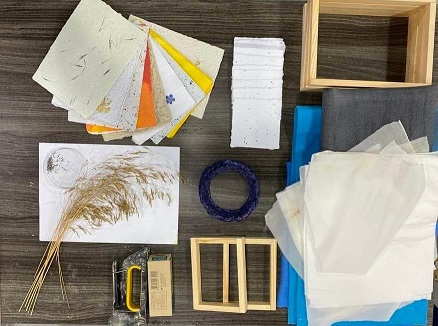
- Above picture from Ala Janbek materials that she brought with her
-
First you need to make your frame according to the size you want using wood and stapler machine
-
put sieve on one frame and tight it well using a stapler for making the frame
-
shred your used papers and put them the blender with about half liter of water
-
use a large container filled with water to cast you mixture in (the water should reach half of the second frame when put on top of each other)
-
pour you mixture into the frame then take it of the water
-
remove the frame and let it dry onto a cotton fabric
-
demold after 24h
Final result
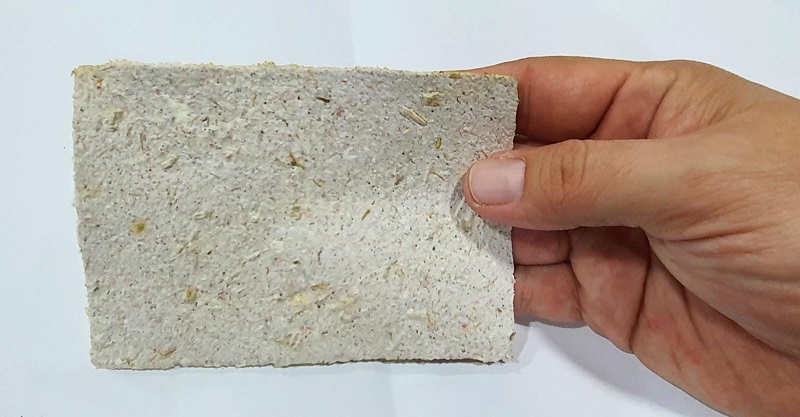
Composites: Paper Clay
Recipe used
- Water: 100ml
- Recycled Paper: 80gr
- Coffee powder and flowers for additive
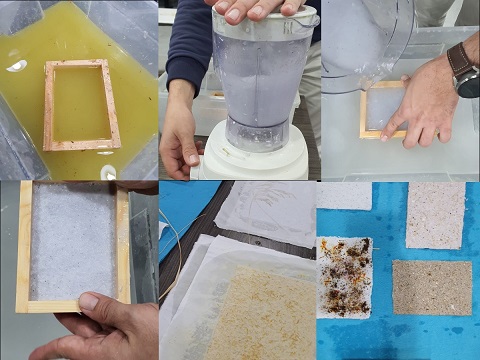
Work Process:
-
1st step: I cut the Recycled Paper into small pieces then put it inside a mixer machine with water.
-
2nd step: add a cup of water inside mixer machine, and some coffee then stair it for 1 min.
-
3rd step: add the rice glue to the solution and stair it by hand until it gets mixed together.
-
4th step: paste it into a mold of 2 parts.
-
5th step: let it in dry place until the water evaporate.
Molding (3D printing)
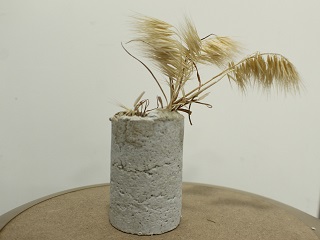
I decided to make a mold in Fusion 360 for a vase to be used as food packaging .the reason I choose a vase as it has different than packaging and it made from recycled paper that can be also easily recycled again beside it is made of biodegradable materials.
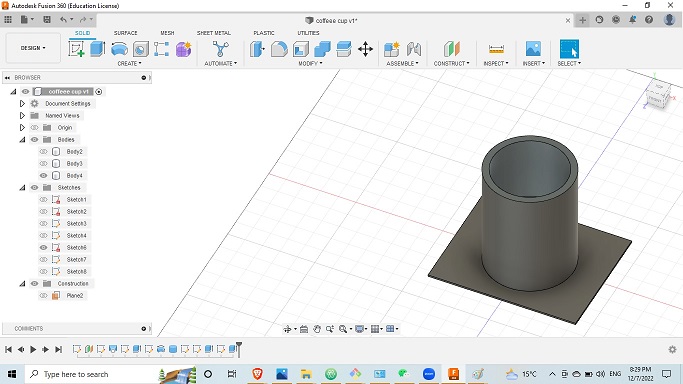
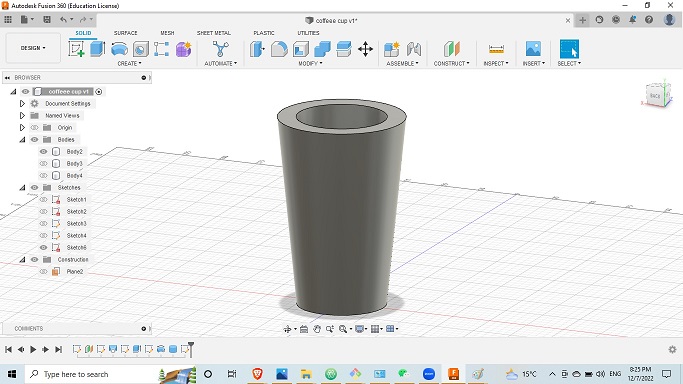
Through below picture you can watch design process to make a parametric design mold made of 2 part male & female based on cylinder shape that i used to build the vase mold.
starting from quick sketch on fusion to build cylinder then extrude the shape in to different bodies than can be exported in stl file for 3D printing .
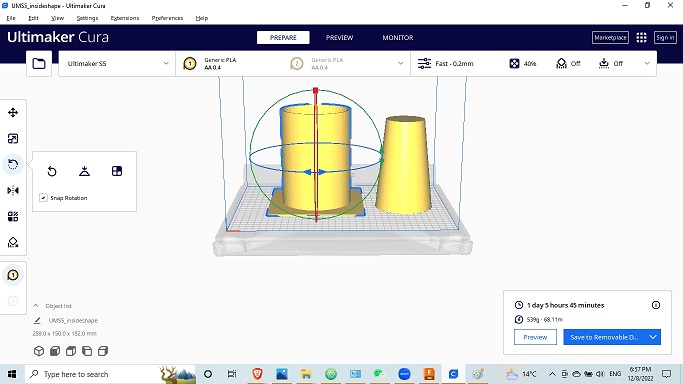
Cura software
Note : double check the size of both part for the mold as can be printed together in the same time if the printer bed size is big and make sure to keep small distance between the meshes bodies.
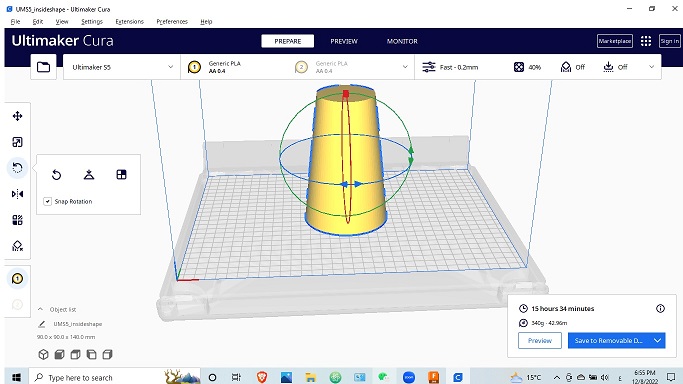
- Setting of the printer for PLA filament:
Printer: Ultimaker s5
Material: PLA

Layer height: 0.20 mm
Infill Density: 100%
Infill Pattern: Lines "highly recommended "
Printing Temperature: 205 °C
Build Plate Temperature: 60 °C
Print Speed: 25.0 mm/s
Enable retraction
Retraction Disance: 6.5 mm
Retraction Speed: 15.0 mm/s
Fan Speed: 20%
Build Plate Adhesion Type: None "Recommended to use None" .
My PLA 3D printed molds
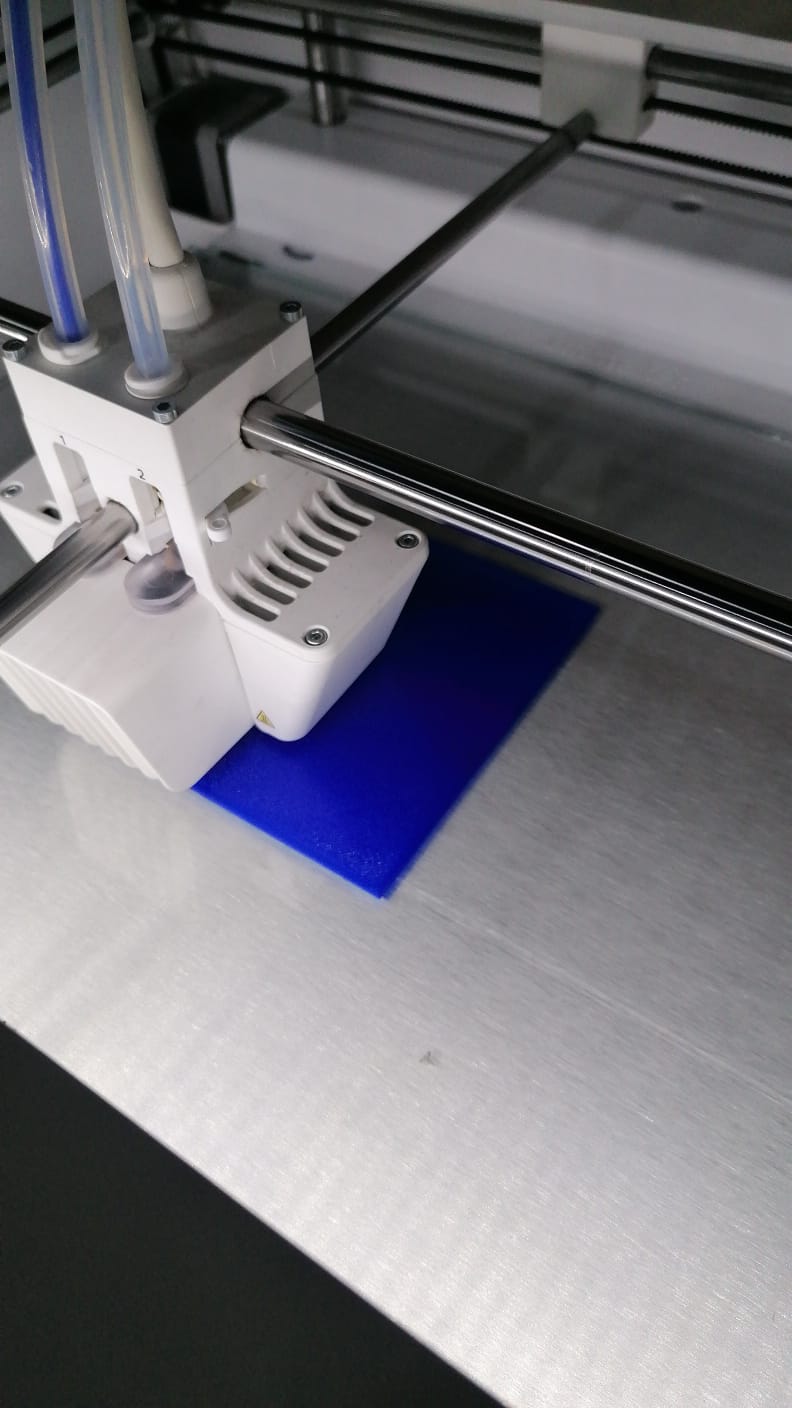
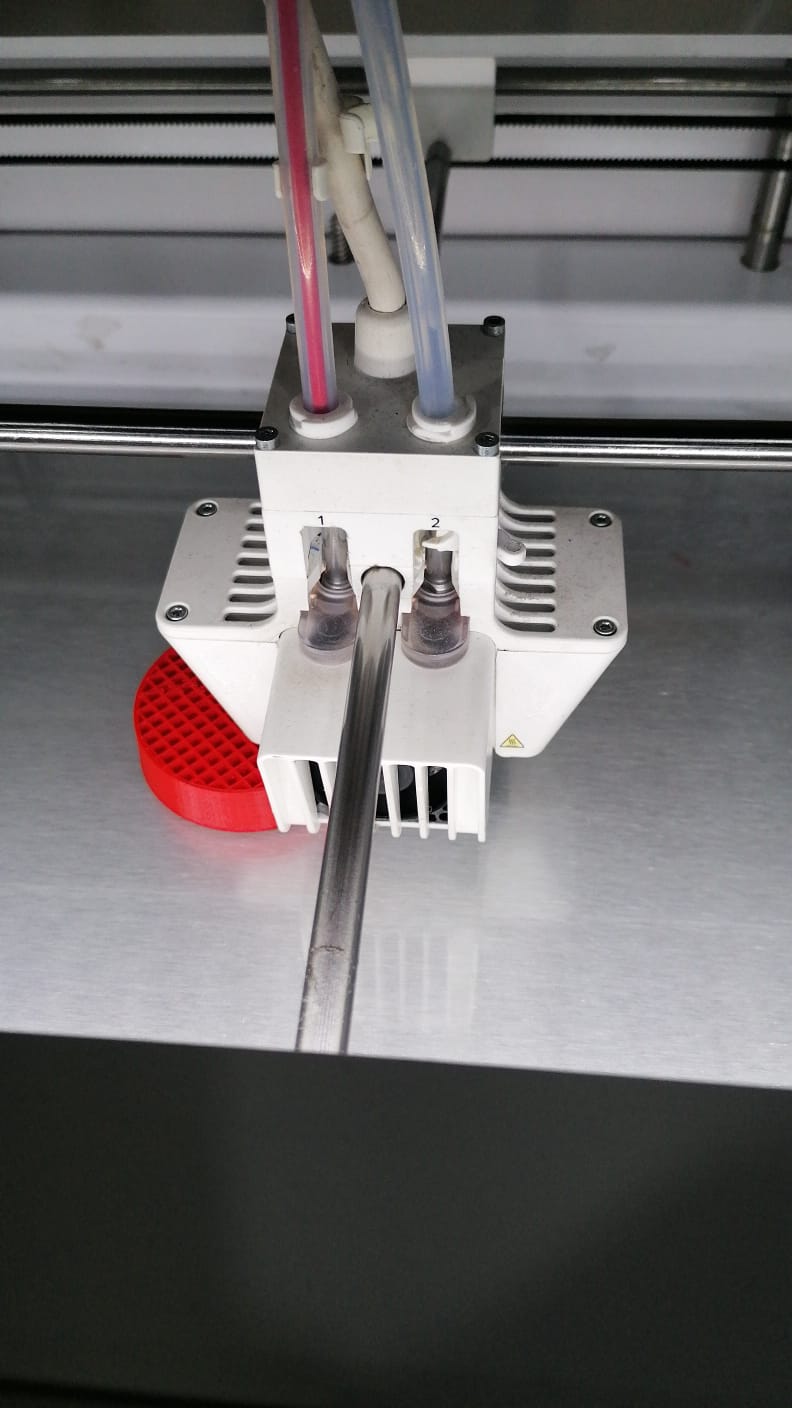
Workflow
- Recommendation: I used PLA filament to create the mold, ABS filament, which is more heat resistant, will be more indicated.
Note here the male part as a tool that can be used to squeeze and compress the paper into the button .
Final Result
Second Experiment with BioResin:
I wanted to make a composite with bioresin and the local palm fiber collected locally in Jordan.
Recipe:
- Gelatine: 48
- Glycerine: 8
- Water: 240ml
- Fibers: palm fibers
Worfklow:
We let the water almost boil before adding plasticizer and gelatine according to the amounts in the recipe.
after that we add the fiber into the mold then add the solution inside the mold .
we let the solution dry outdoor which unfortunately get extra days to get dry .
note the solution were hot which affect the mold as the mold material PLA which get affect by heat .
the final result was not super goods but the good part it can be recooking again and have better result .
Result:

Fabrication files:
-
File: Female part ↩