3. Circular Open Source Fashion
Our focus this week was circular open-source fashion, where we learned about modular fashion, how to reduce waste and create interlocking structures.
Origami has been a part of my life for some time now, and I learned the skills from the artist Ankon Mitra in Mumbai, India. Since then, I have been very interested in working with structural forms. I began this week with the intention of making the origami look in fabric since I have been working with paper and have seen videos showing how to manipulate fabric/ pleat techniques, so I wanted to try the sandwich pleating method.
References & Inspiration - 1
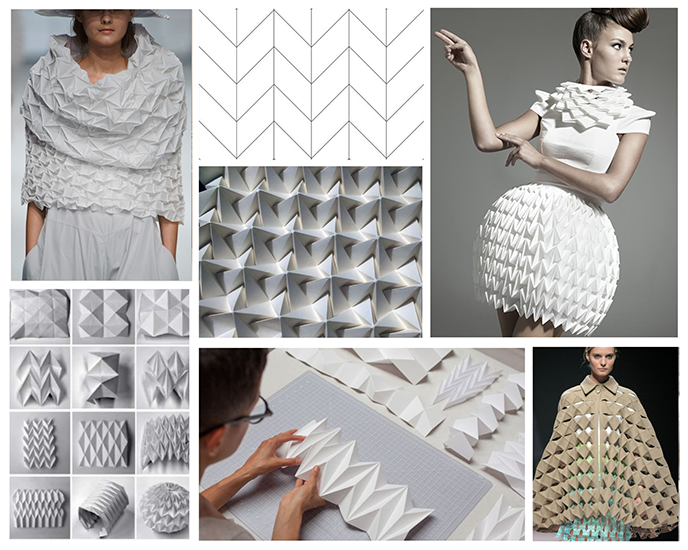
It has always fascinated me how simple 2D paper can be converted into interesting geometric forms through origami. There are many designers who have already created origami-inspired collections. Simple pleating techniques are always in fashion, and nowadays modern origami is being explored with various shapes and forms.
The interpretation of the fabrics and silhouettes in Issey Miyake's S/S 2015 women's wear collection was extremely inspiring to me. To work on the experiments, here are some of Issey Miyake's collection looks and some interesting and simple forms.
Artist Research
Ankon Mitra
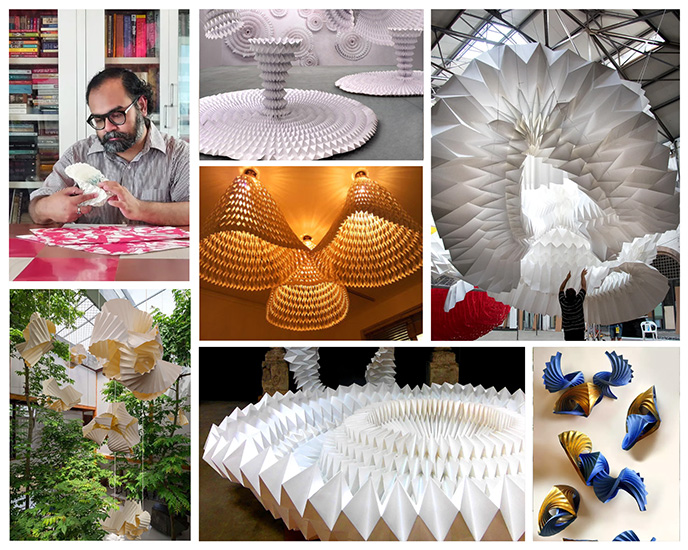
I know Ankon Mitra, an Indian origami artist, after attending his three-day workshop back in Mumbai. My goal was to learn structural form, and origami provides endless possibilities for achieving that goal. In his installations, Ankon Mitra transforms basic origami into more contemporary forms. The following are some of his works.
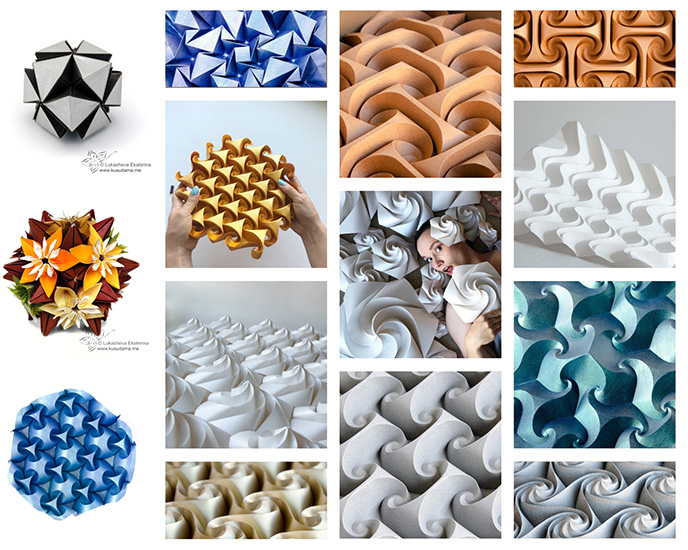
Ekaterina Lukasheva
My favourite origami artist, Ekaterina Lukasheva, transforms 2D papers into very unique shapes and forms; she inspires me greatly and I would love to learn how to work with more complicated shapes.
Earlier Project - Origami Explorations
I experimented with some origami forms in the following.
Op art + Origami = Opigami
After Ankon Mitra's workshop, I made my own project that combined the Optical Illusion with origami and tried to incorporate more illusions into my forms. Here are some visuals of how I combined optical illusion and origami to create Opigami looks.
Origami Stimulator
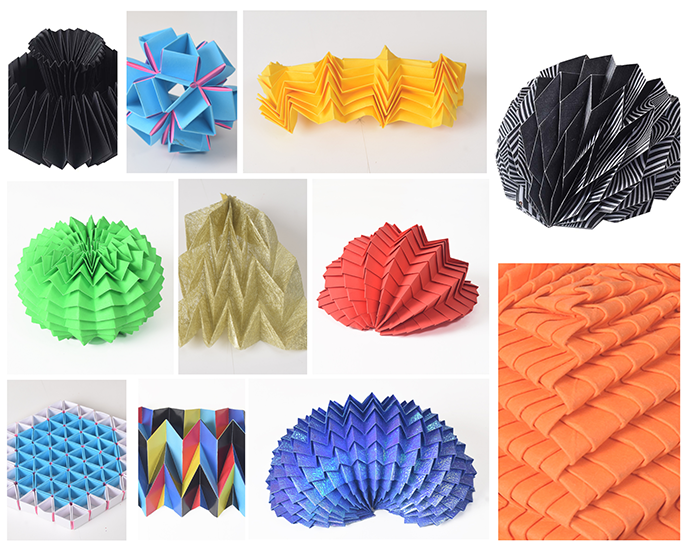
A very interesting website I found online is called Origami Stimulator, where you can download and try out a few ready patterns by the artist like Miura, Huffman, Lang, Ron Resh and also can stimulate the pattern and adjust the percentage of flat to fold.
The best part is we can create our own patterns and check the stimulation by uploading the patterns on this website. Below are the visuals about the usage of the website.
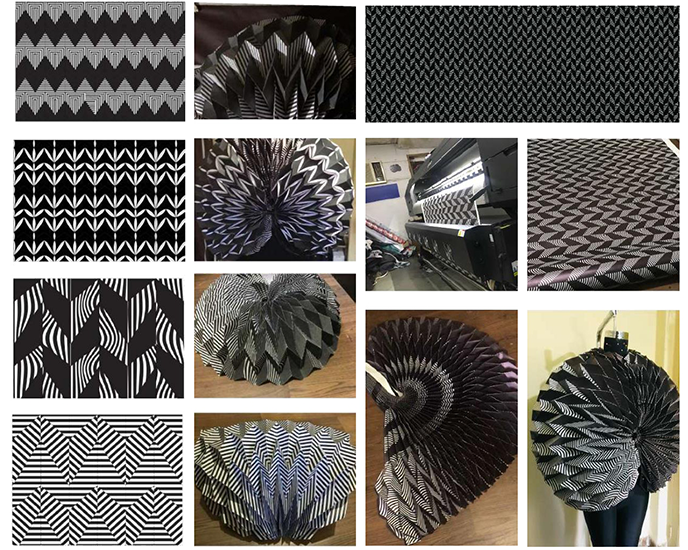
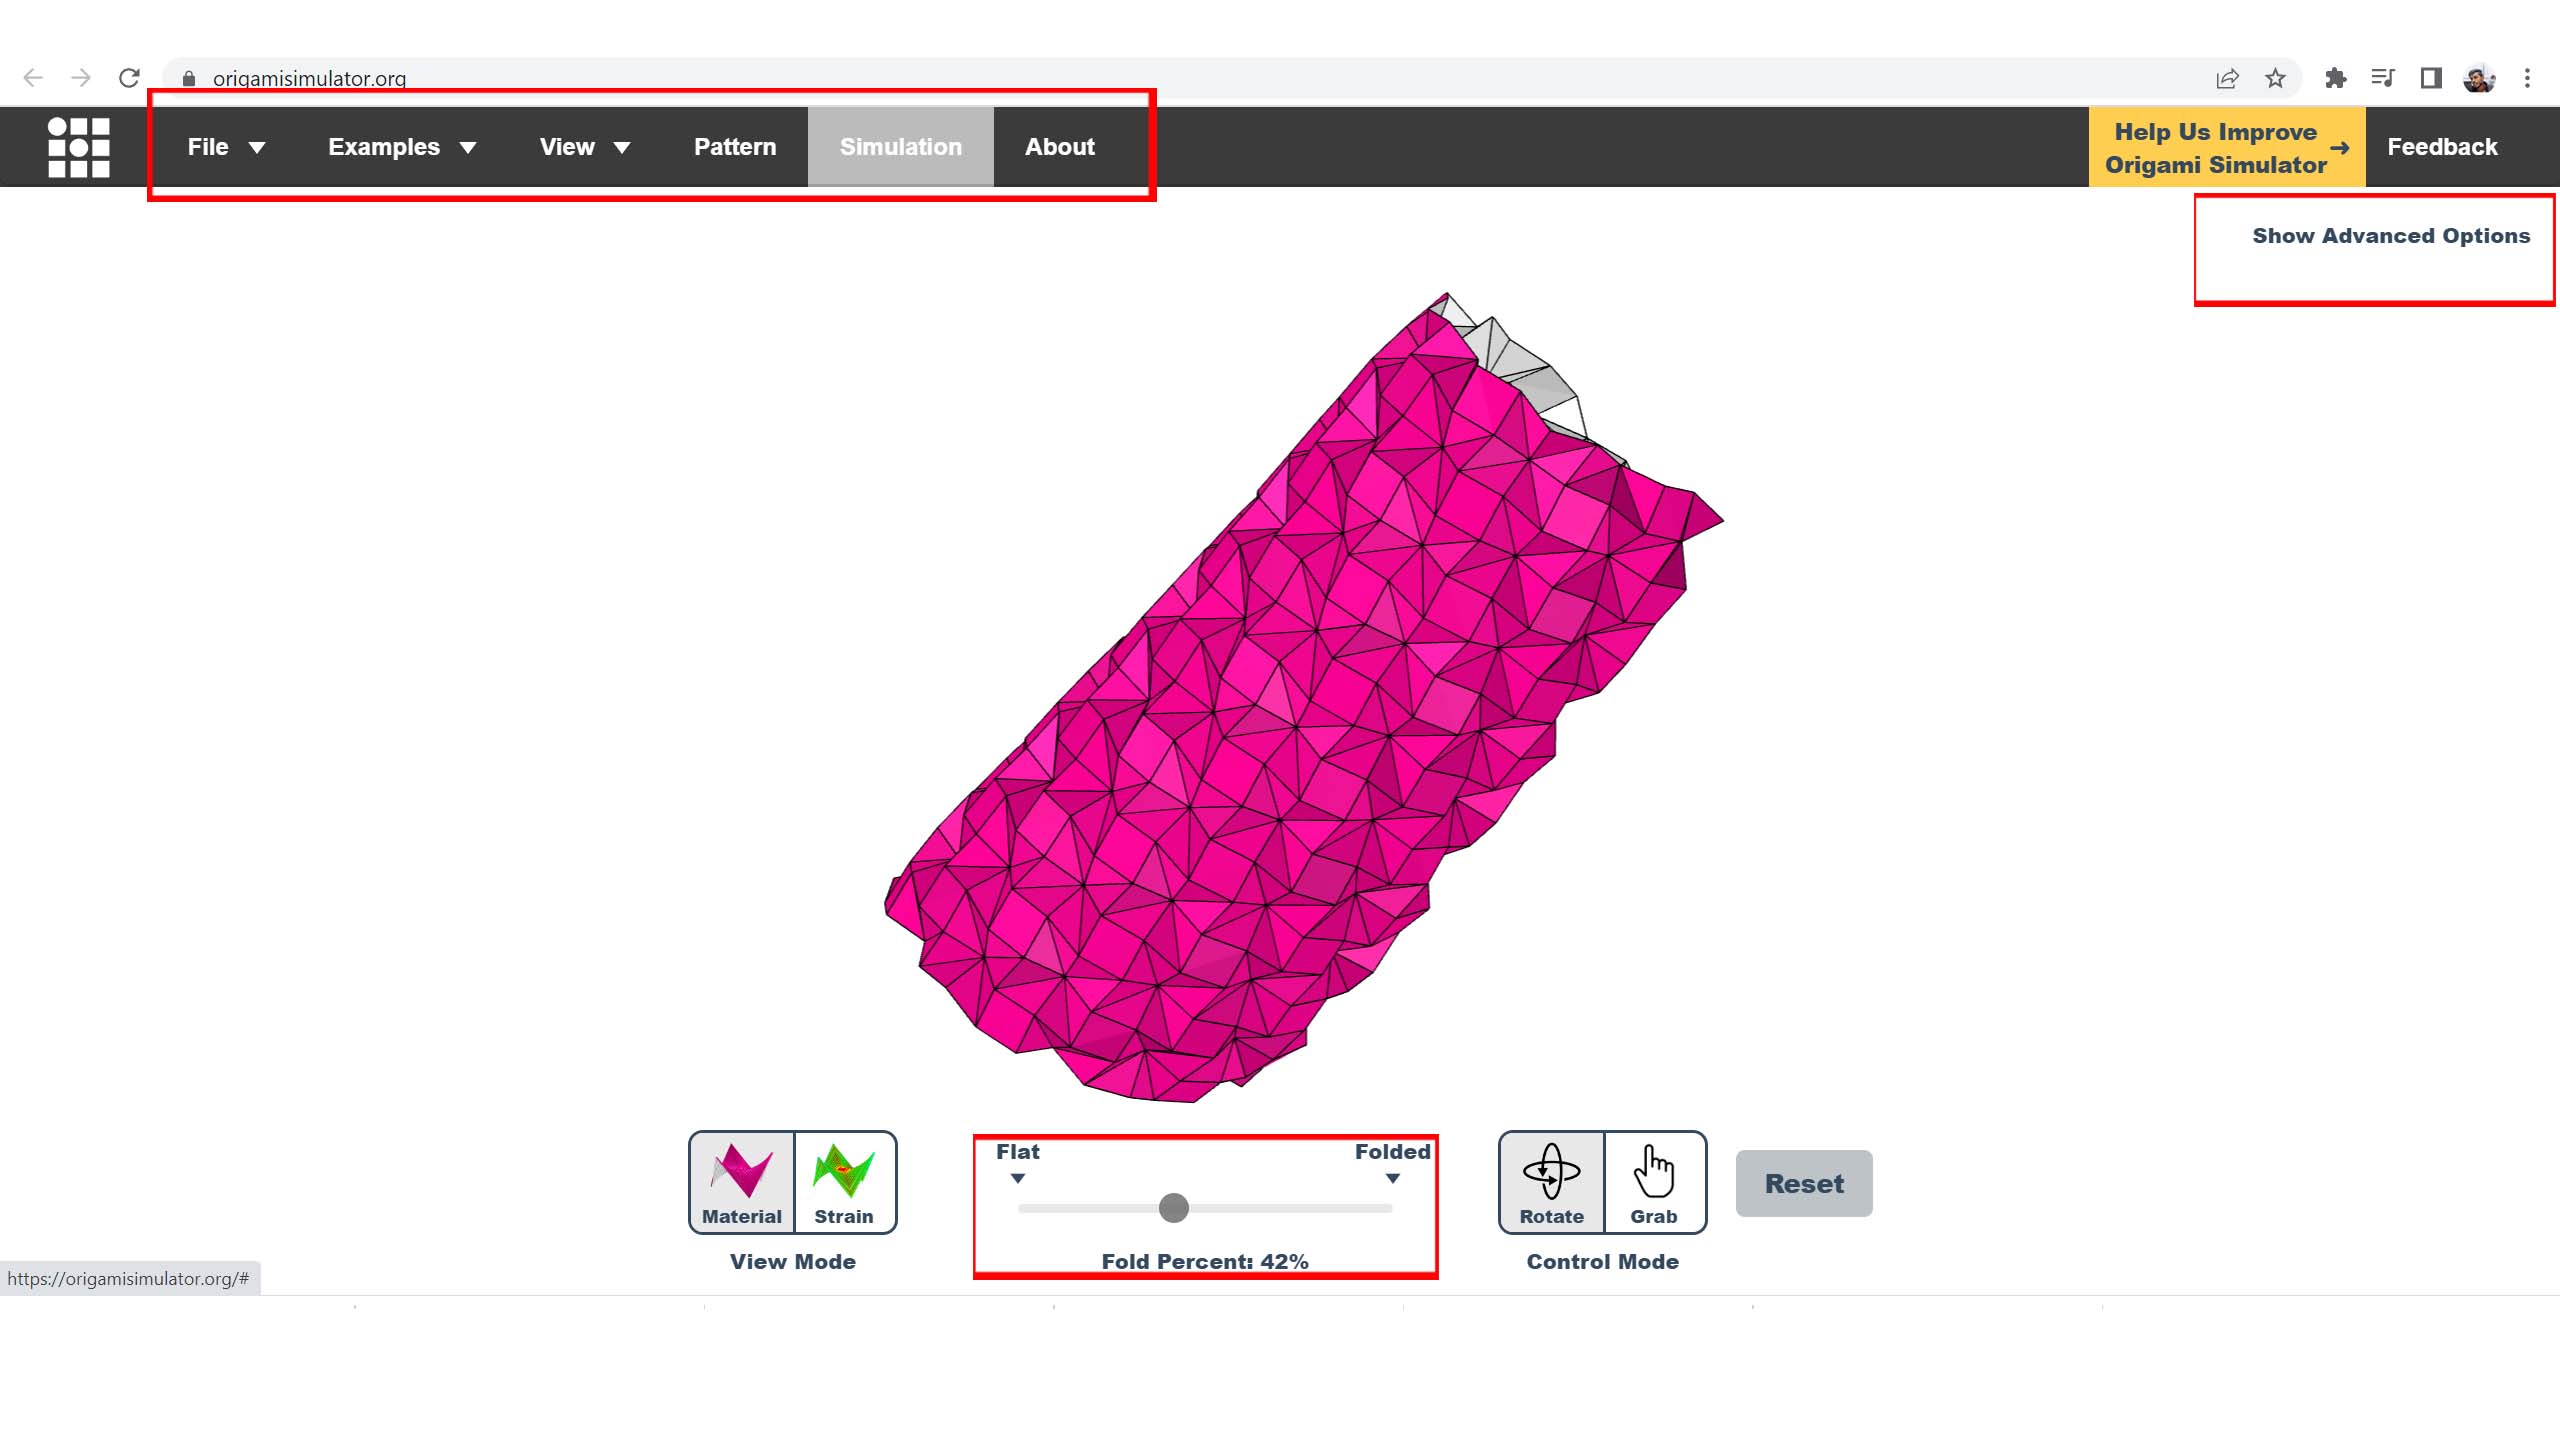
Interface
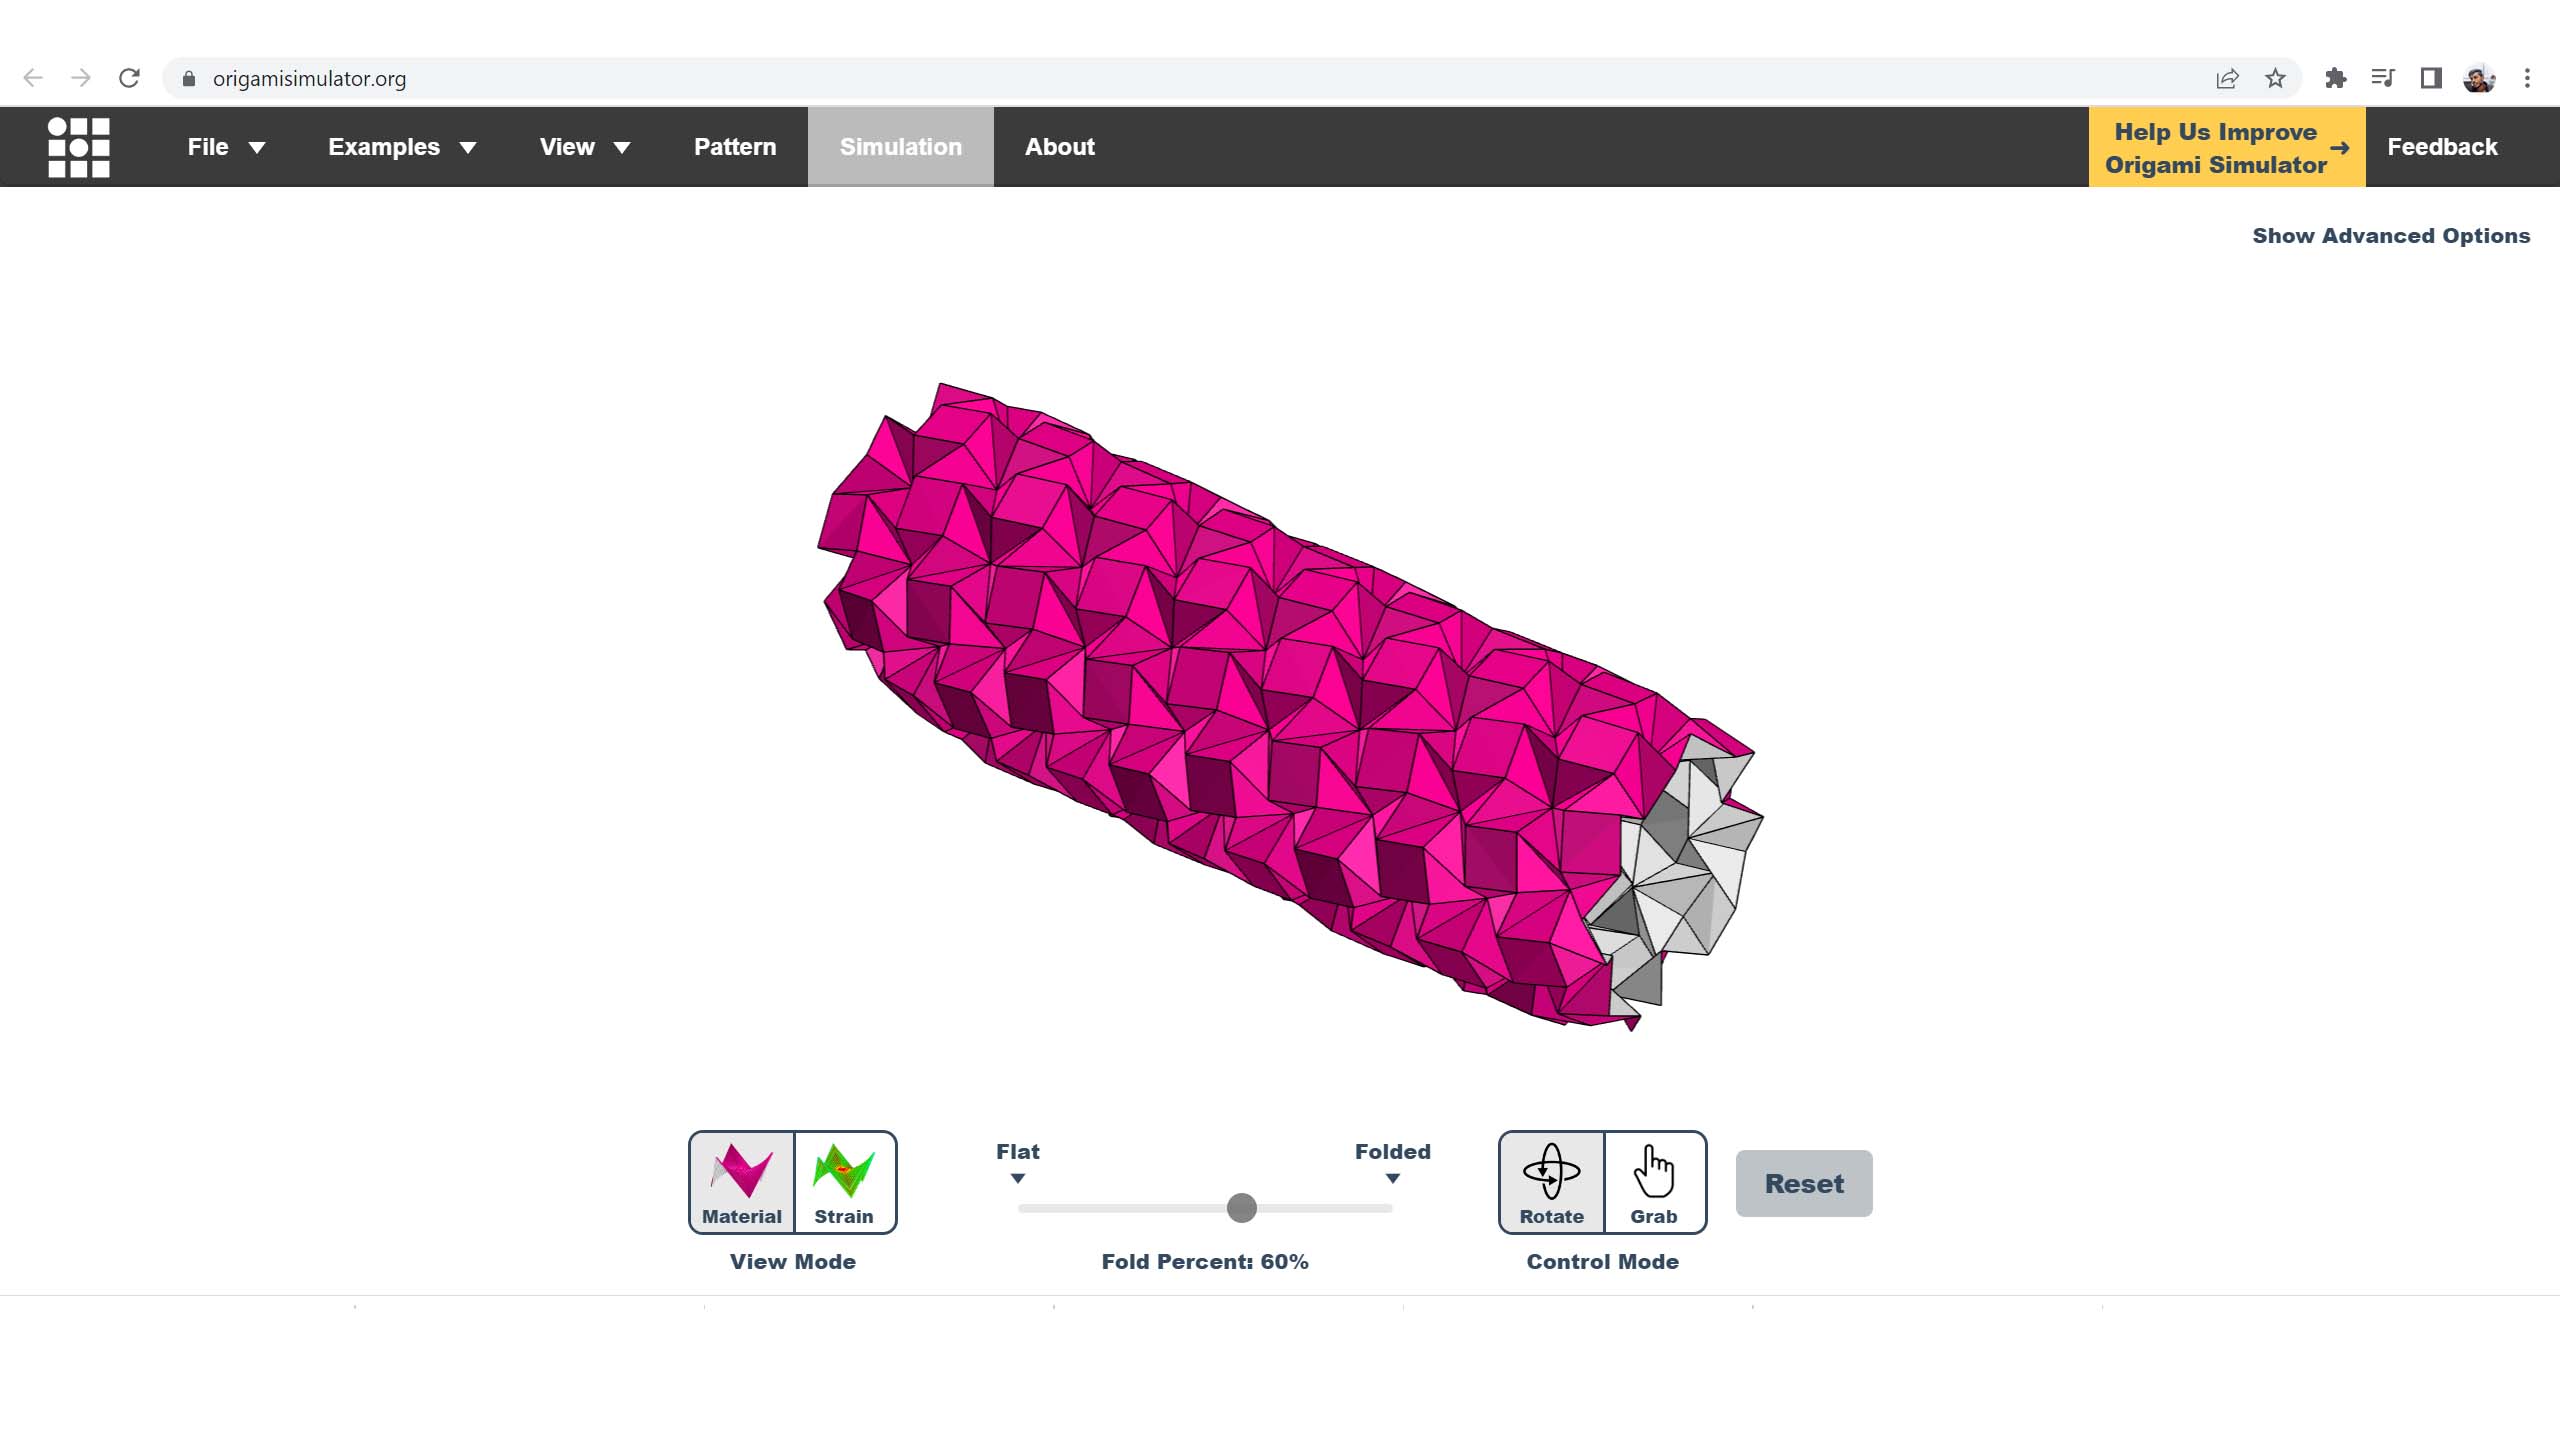
In The below visual you can find where to Import/Export the files, Examples of different origami techniques, Patterns and simulation.
In the below visuals you can find how to create your own pattern and upload, You can convert your dxfs/pdfs files to .svg format. Simulator site accepts only .svg format. You can get all the tips from File Design Tips. While converting pdfs into .svg from online converter make sure your pdf’s in coloured format and Linetype should be in continuous not dashed.

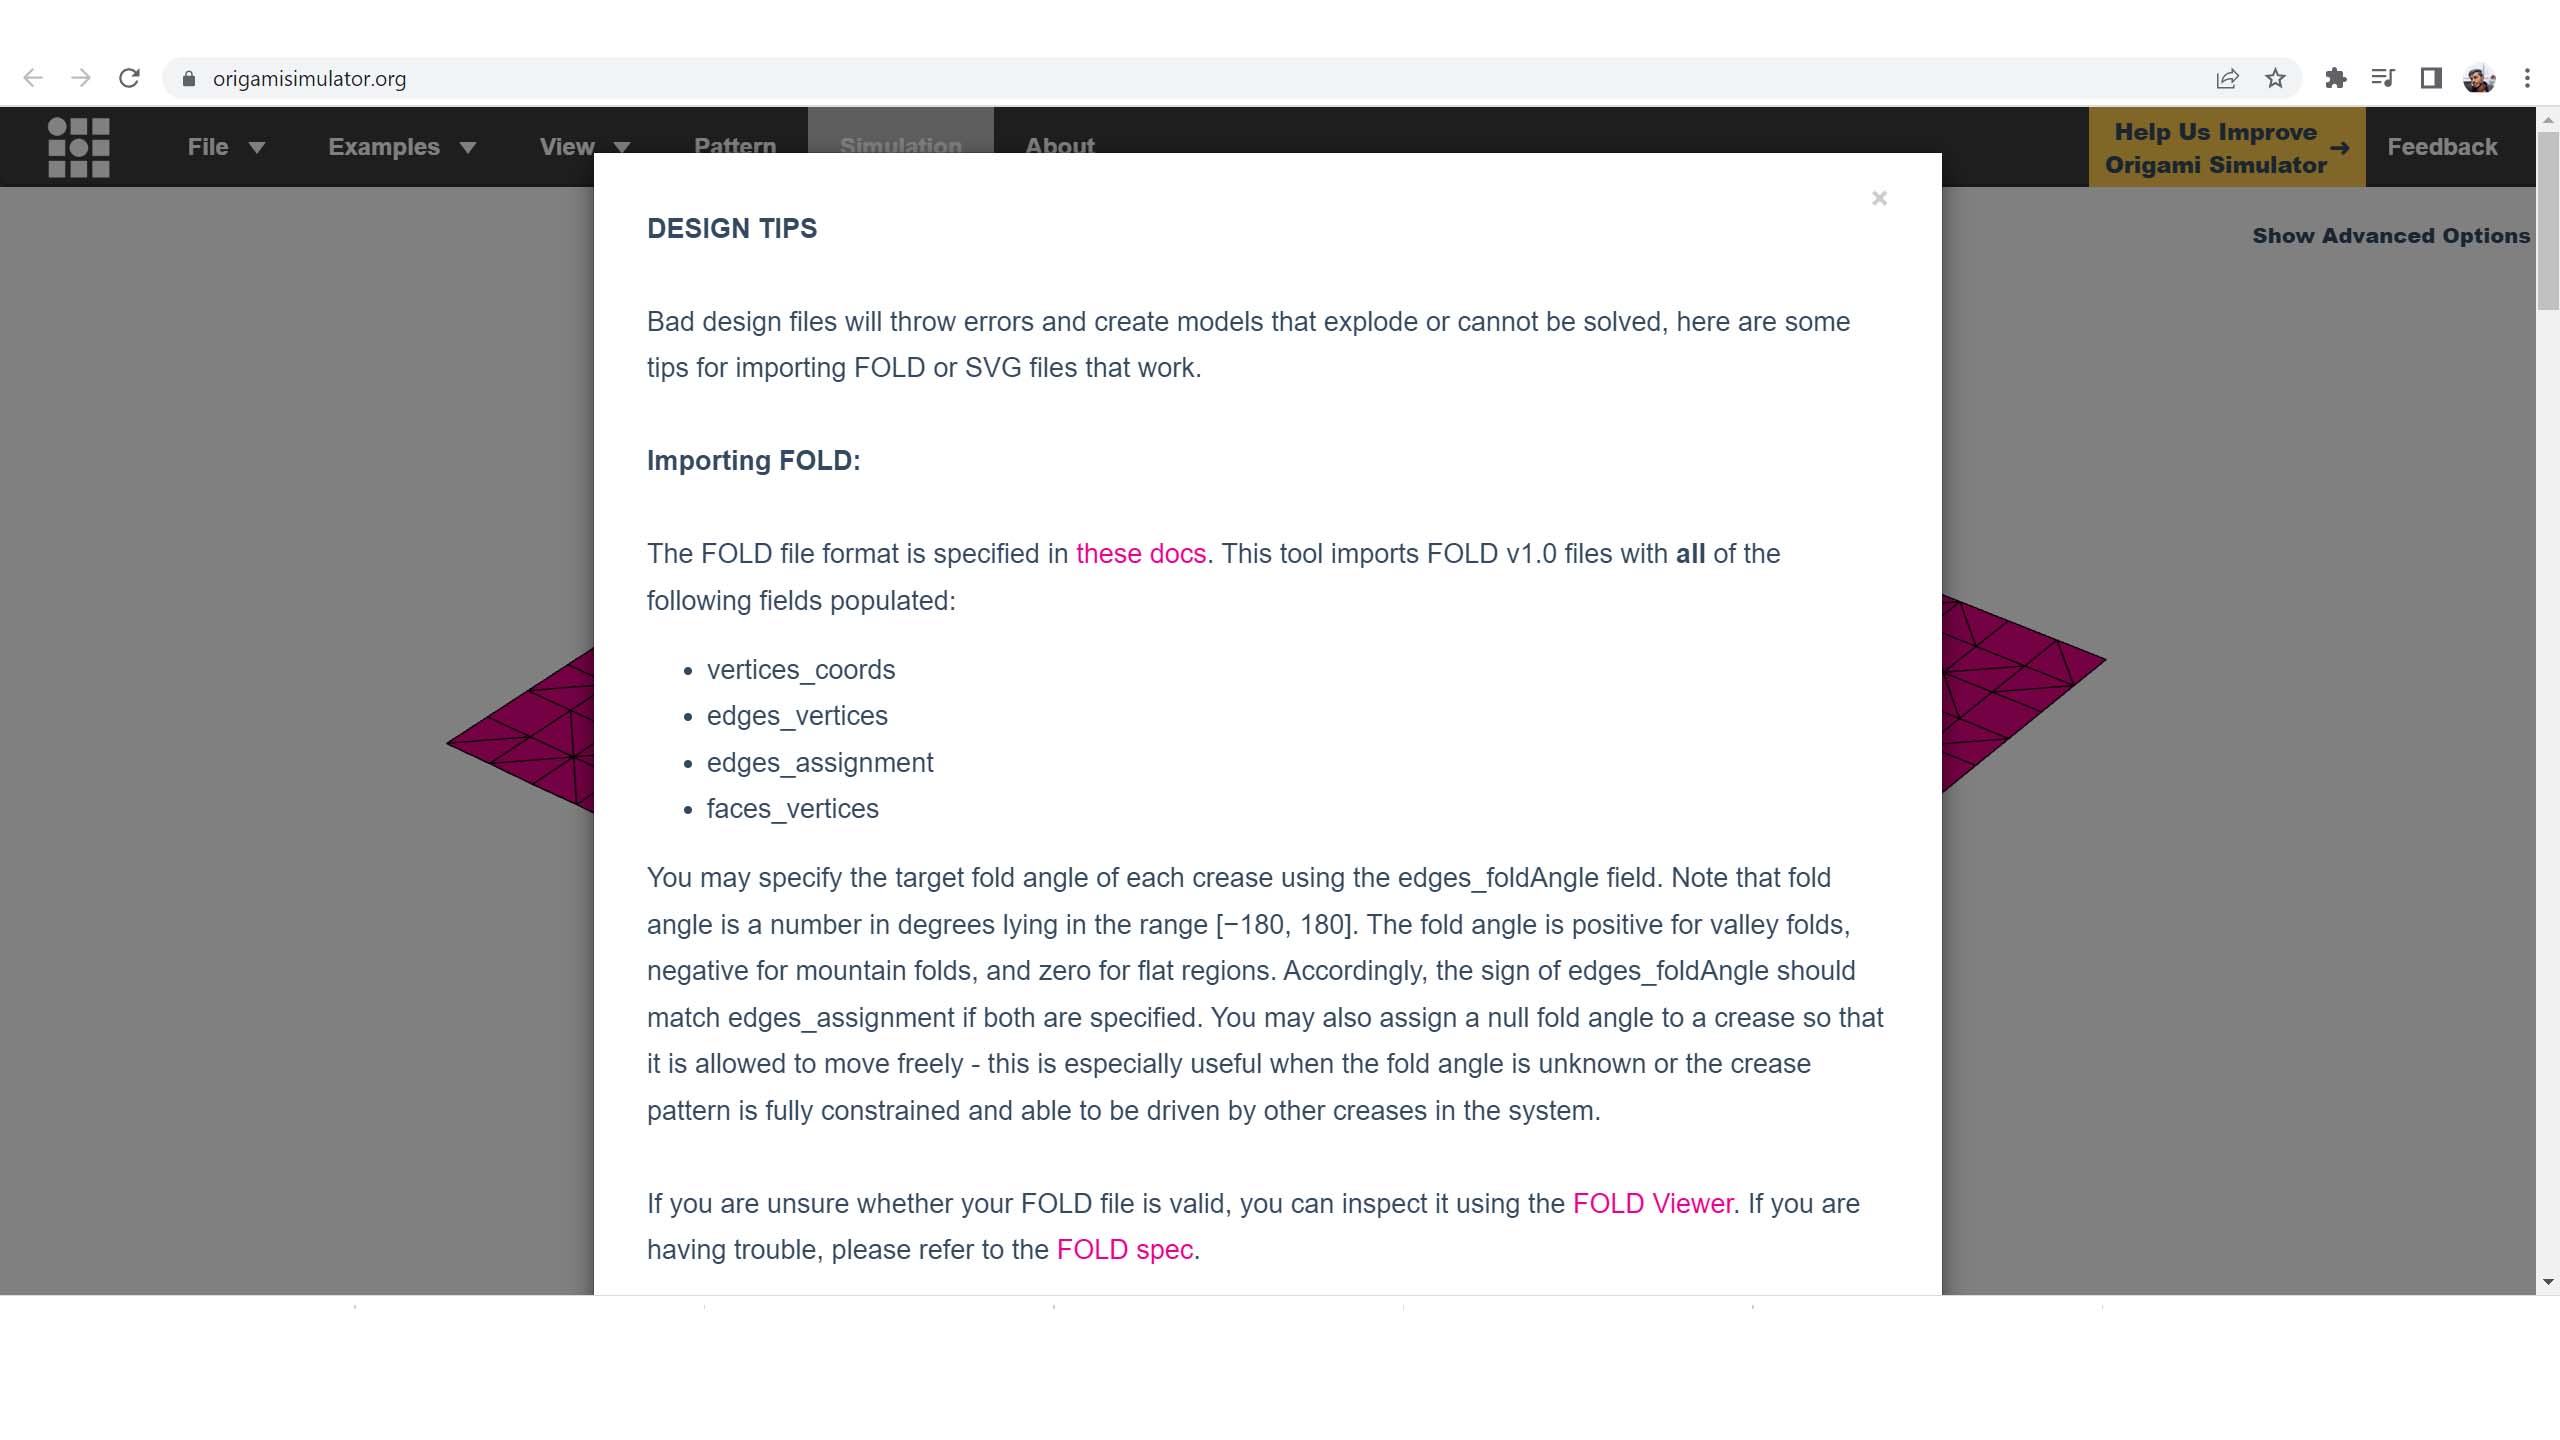
Importing SVG:
The SVG importer supports path, line, rect, polygon, and polyline objects with the appropriate stroke color:
• Mountain folds have red stroke - rgb(255, 0, 0), hex #ff0000
• Valley folds have blue stroke - rgb(0, 0, 255), hex #0000ff
• Boundary edges have black stroke - rgb(0, 0, 0), hex #000000 - use this edge type for both the outline of the pattern, and any internal holes.
For further details you can check the File Design tips as shown in the picture.
Origami Patterns I downloaded and worked are Here
Step-1 Design Process in Digital
To start with the basics and save time I downloaded the Miura-Oritesellation pattern from an Origami stimulator to work on this project.Below is the image of how the downloaded patterns look with colour differentiation for mountain and valley folds
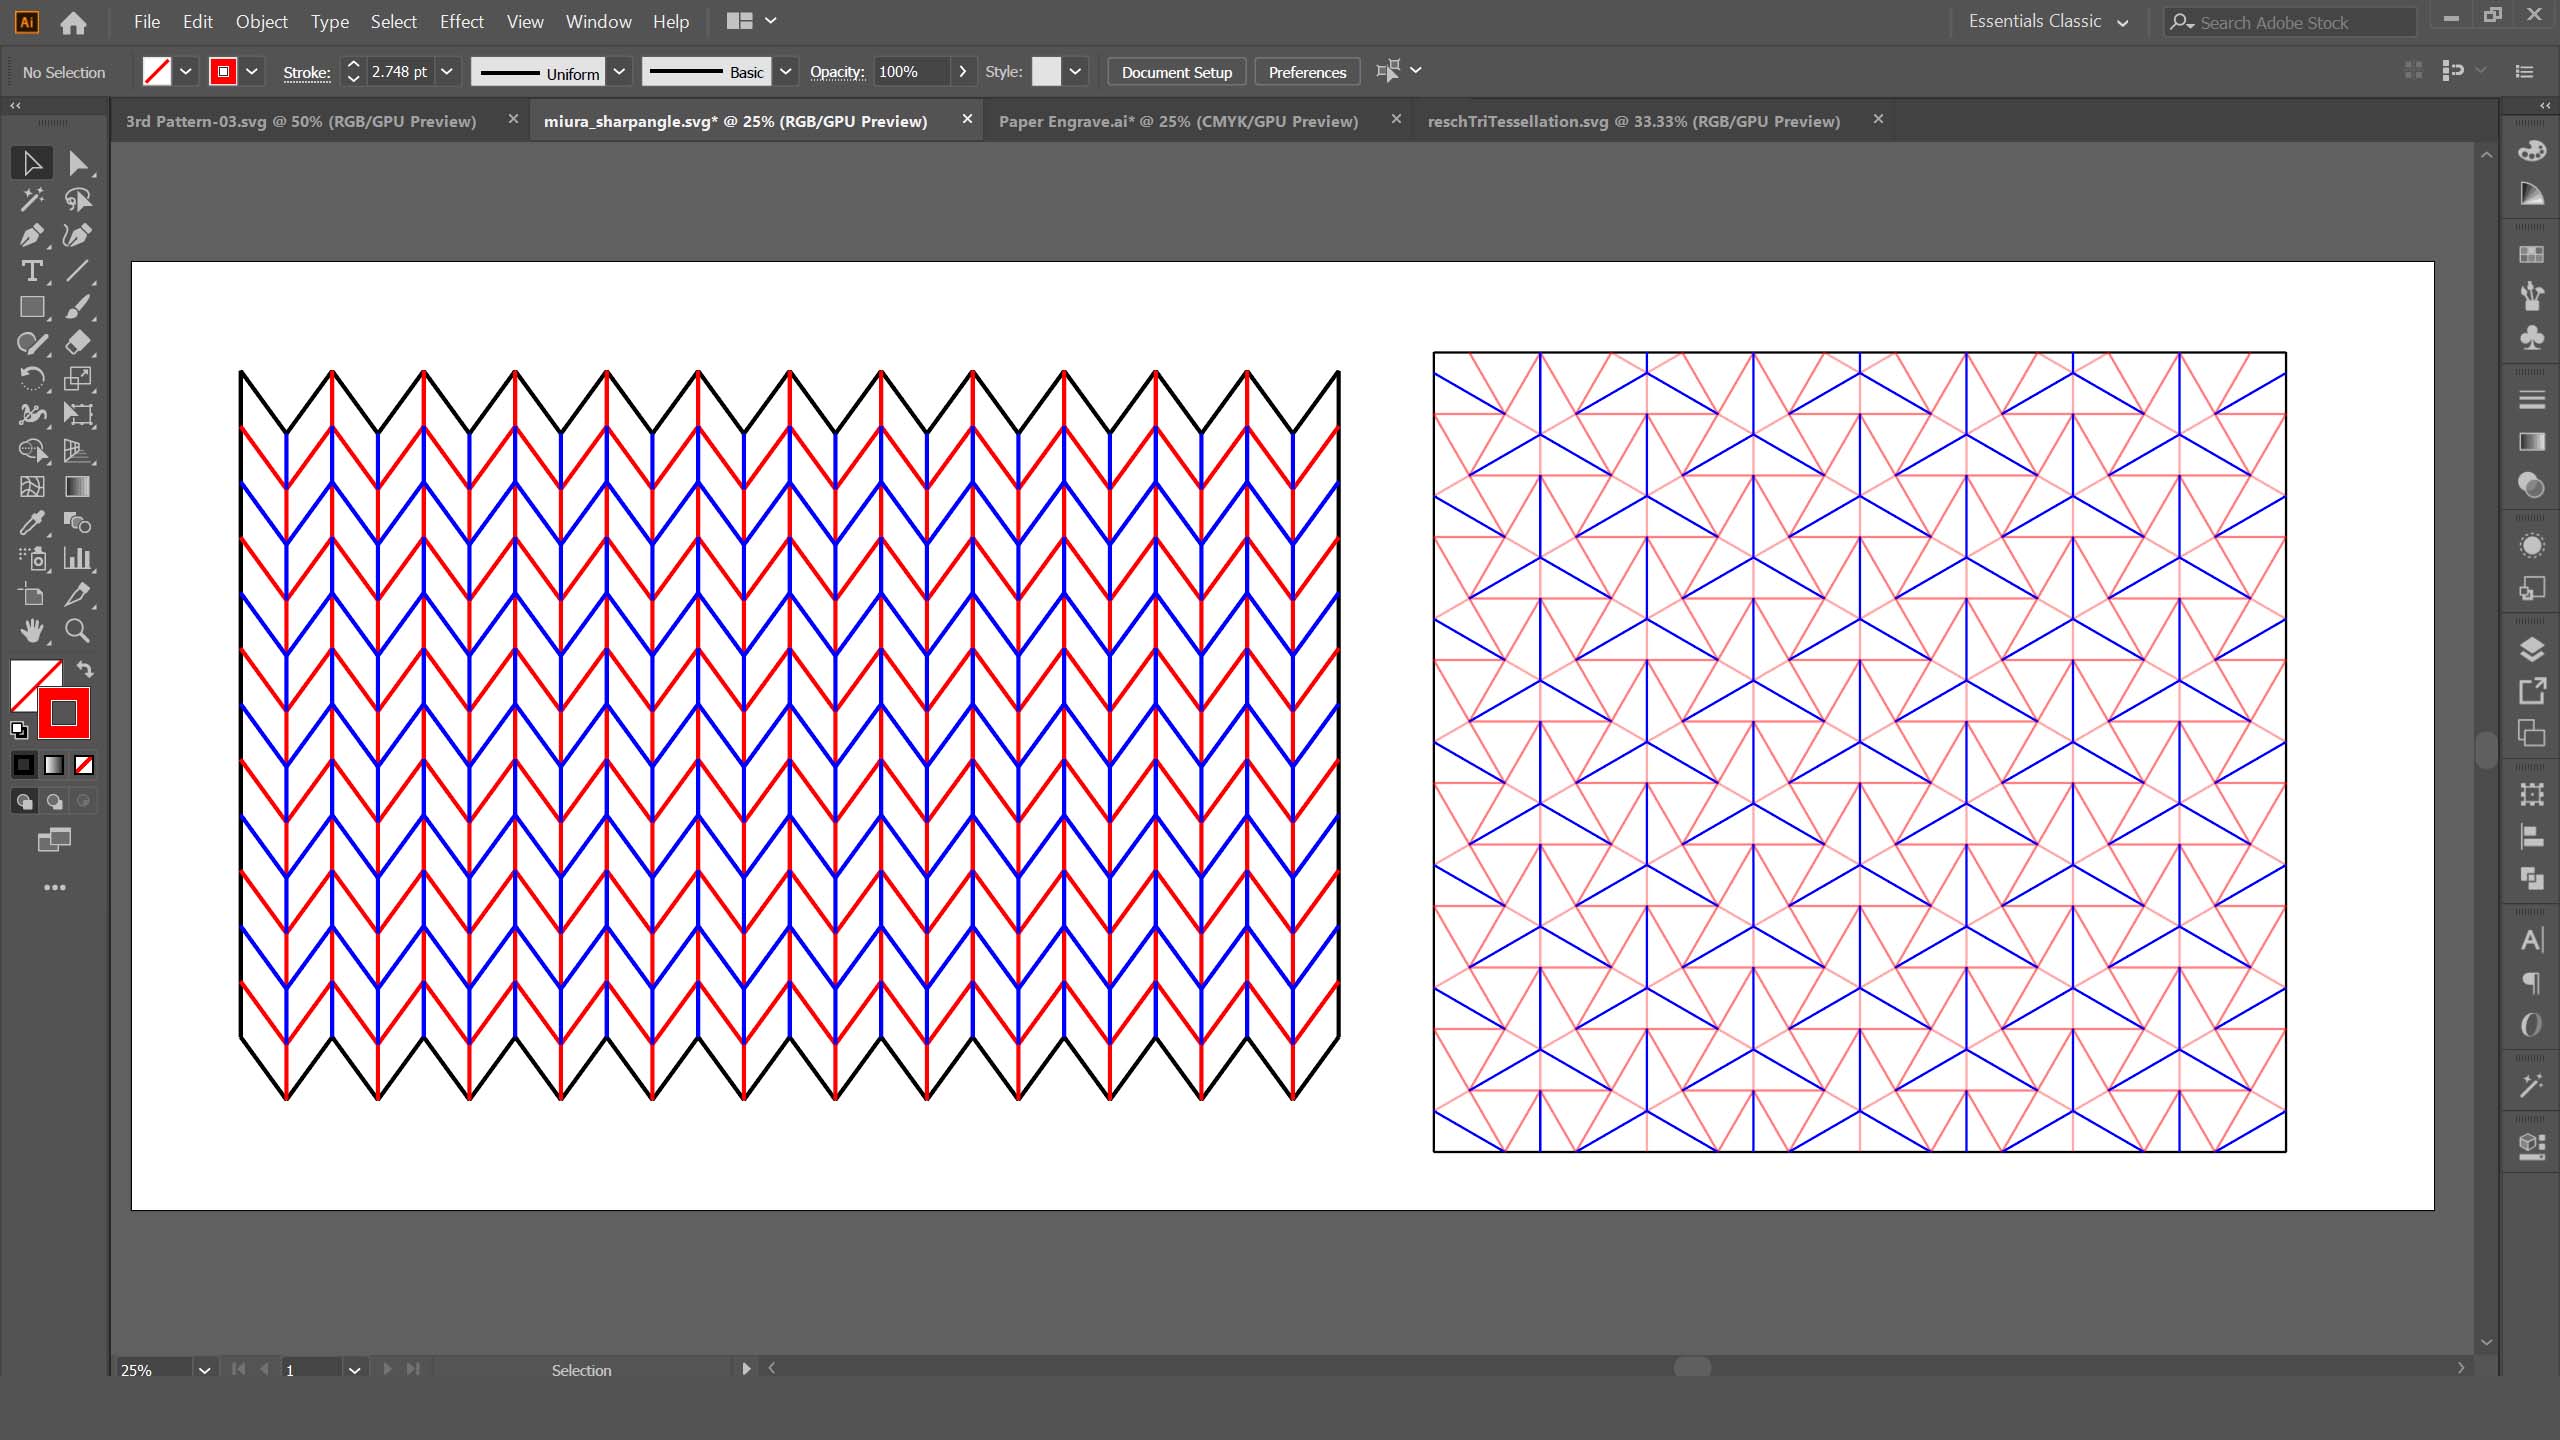
I then converted it into a single line using Illustrator and saved it in SVG format to work on the Rhino.
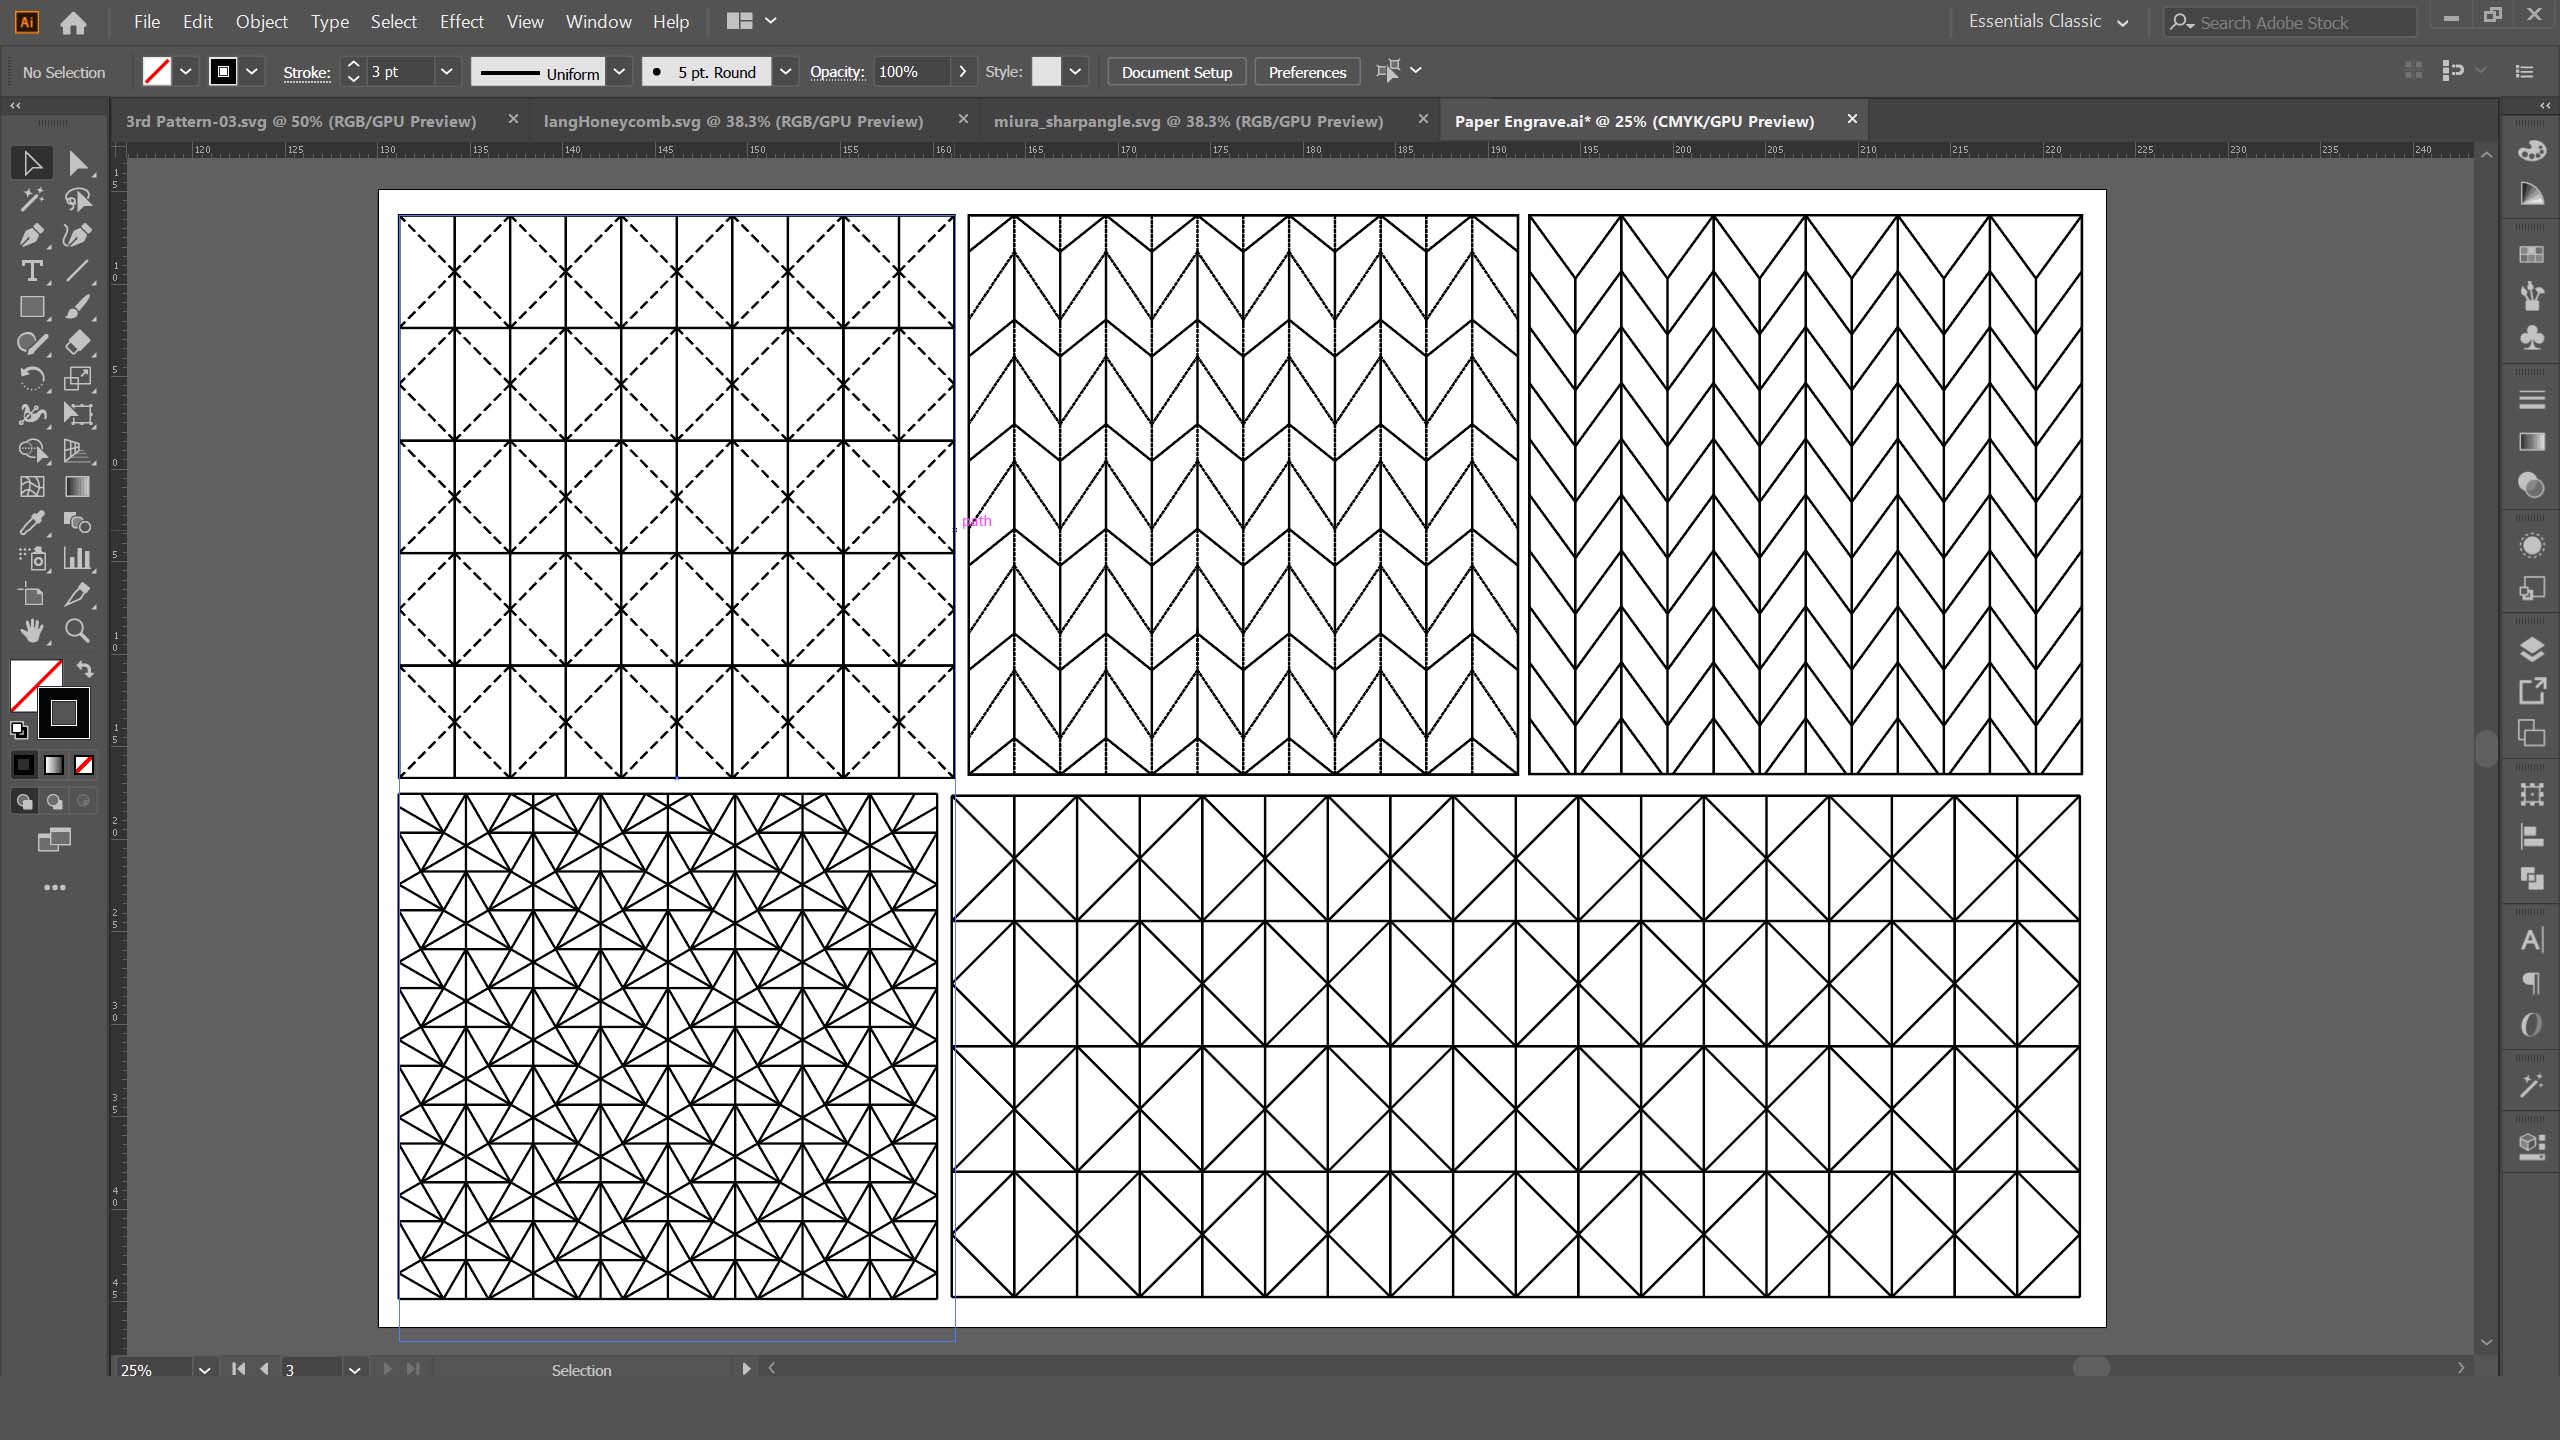
In Rhino I differentiated the colour to cut the outline and engrave the origami patterns on the paper. I will then fold the paper and use as a mold to sandwich the fabric.
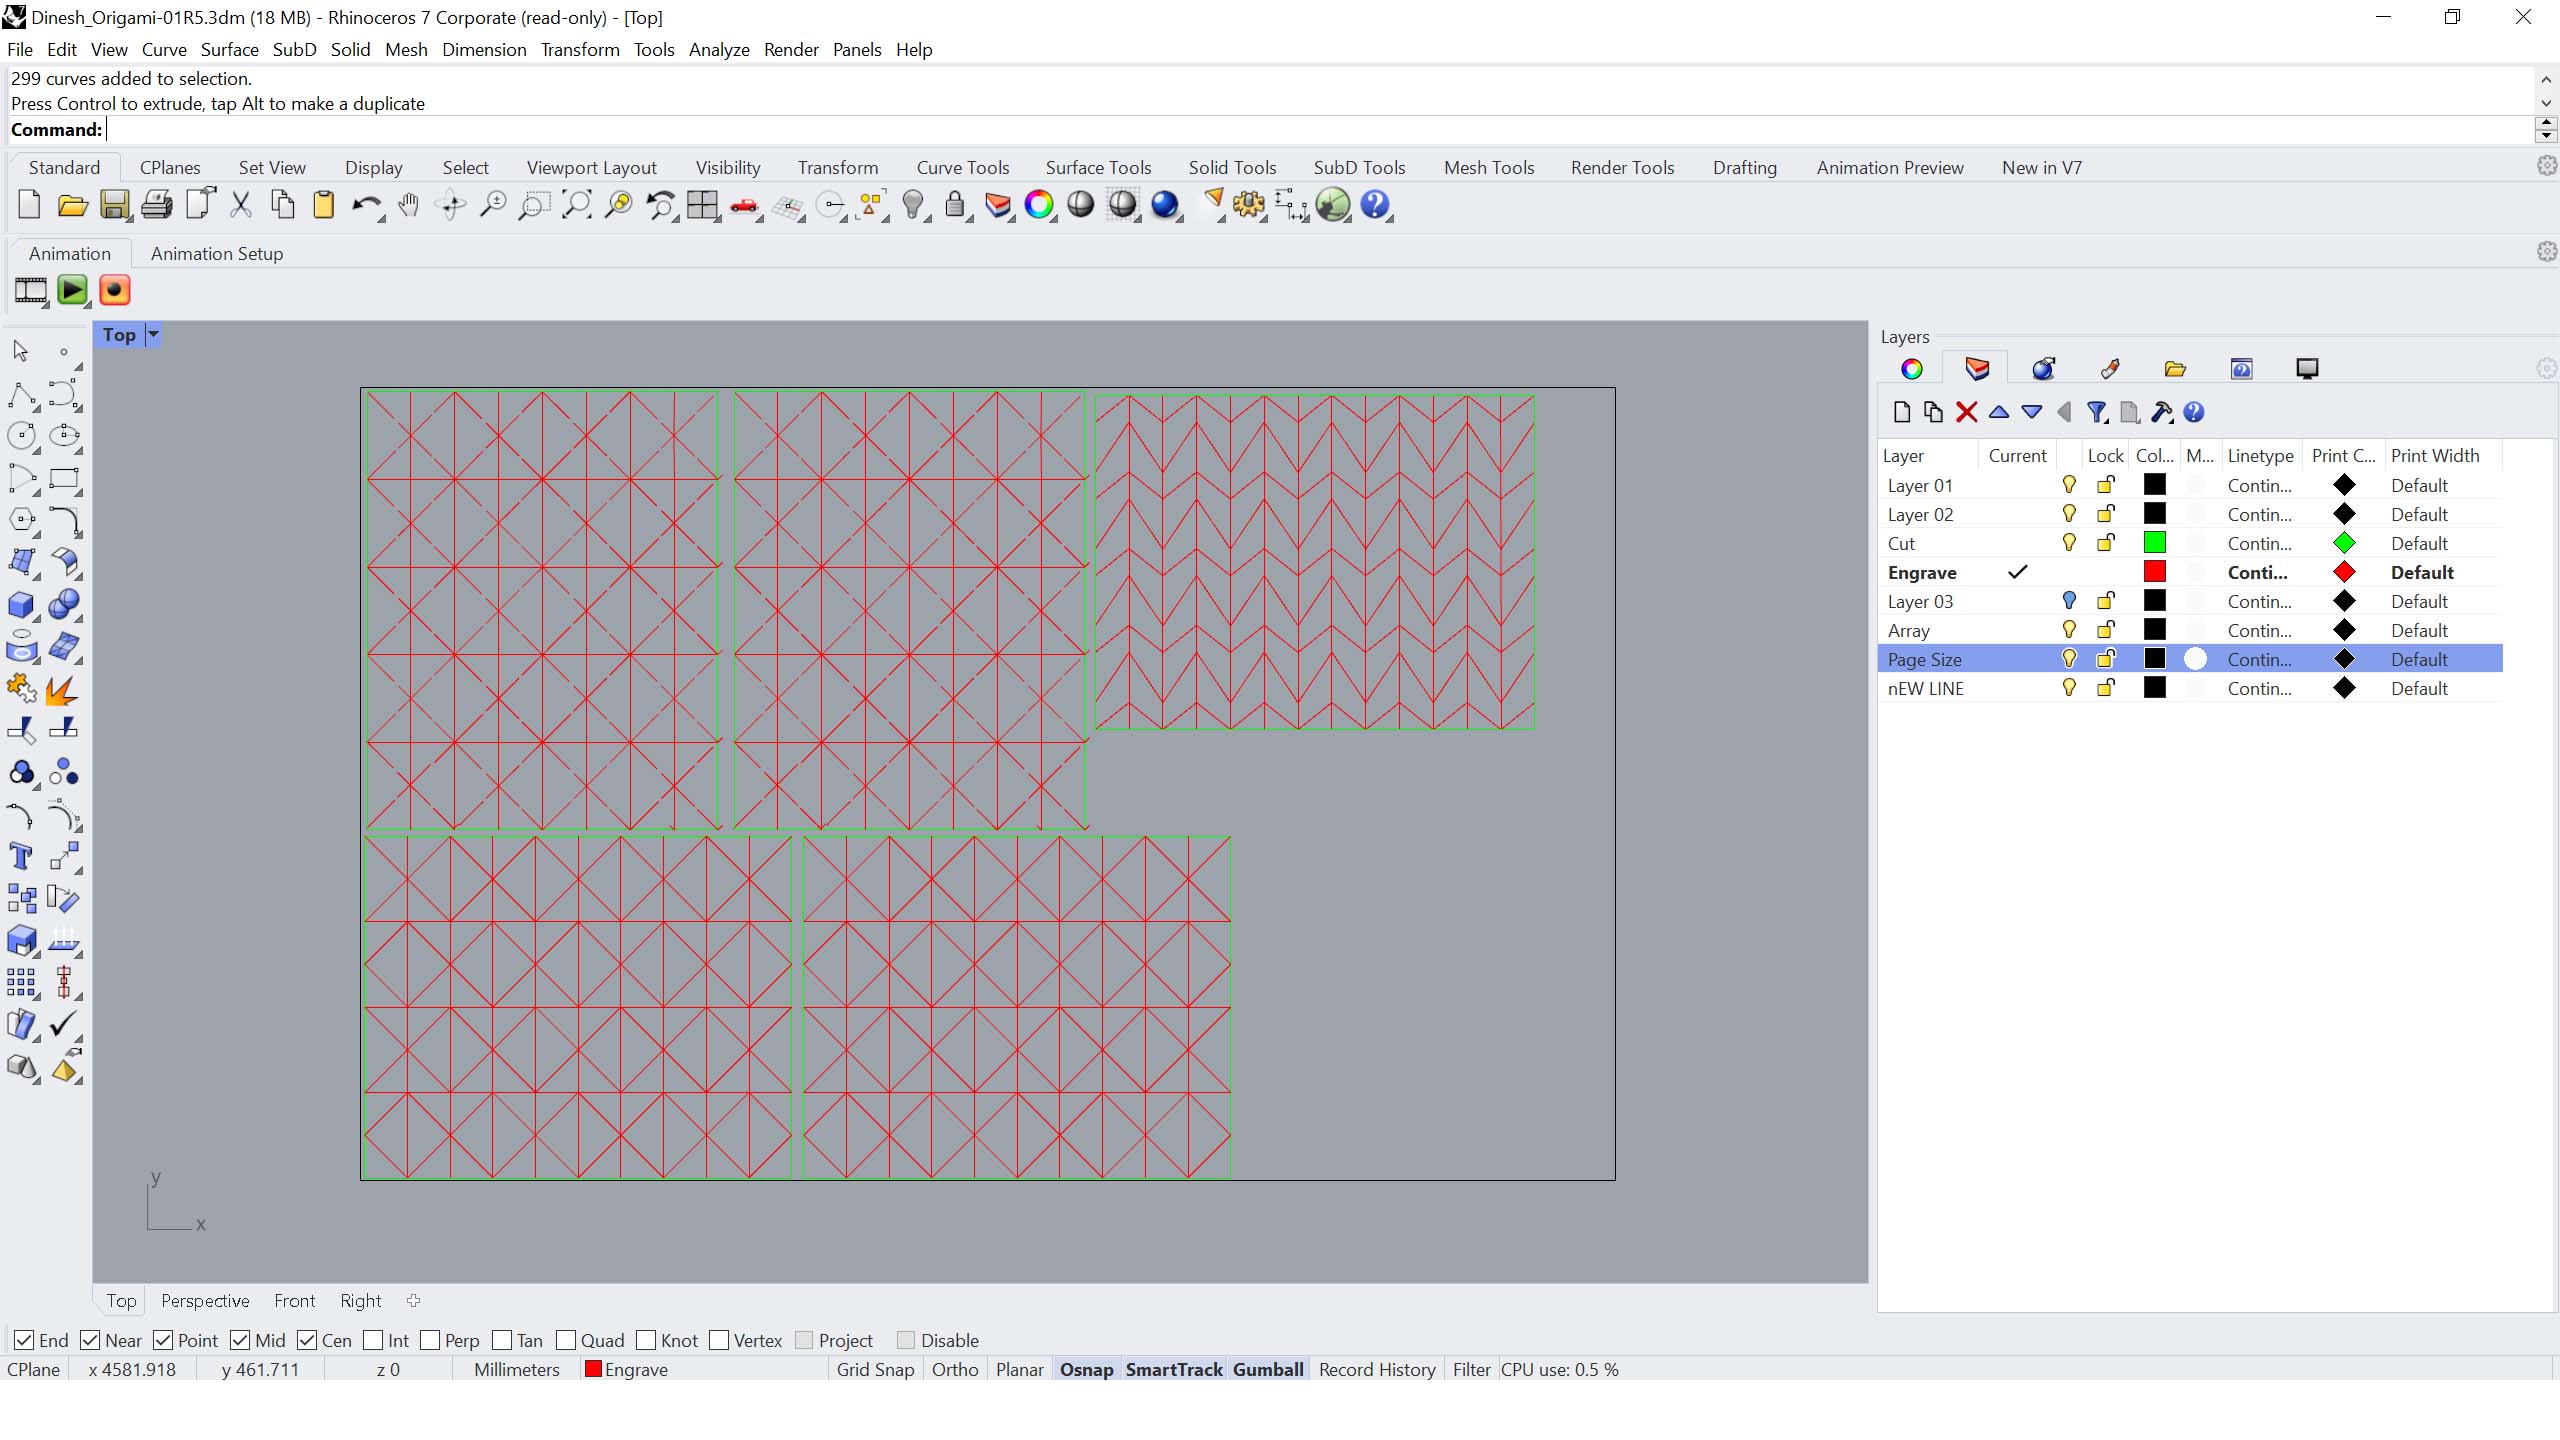
below are the points to engrave the Paper.
Step-2 Paper exploration to Fabric Manupulation
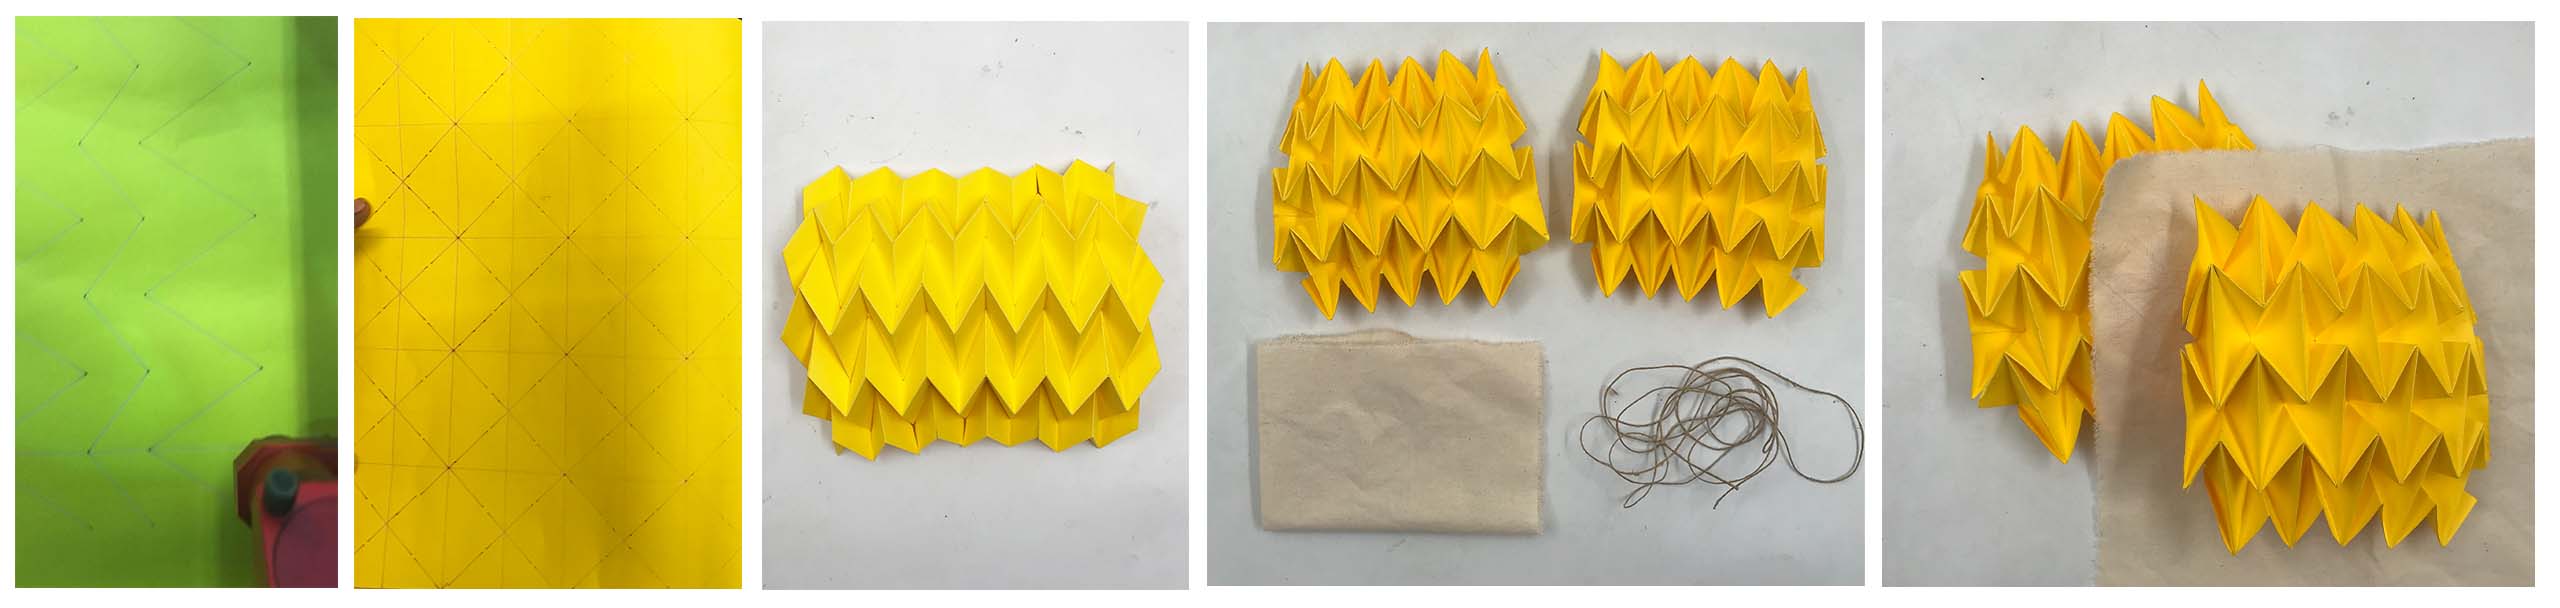
Once engraved / scored the paper, it will be easy to fold the paper and the require materials to manipulate the fabric are Fabric with flat paper size and thread to tie.
Belwo are the self worked origami folds without patterns.
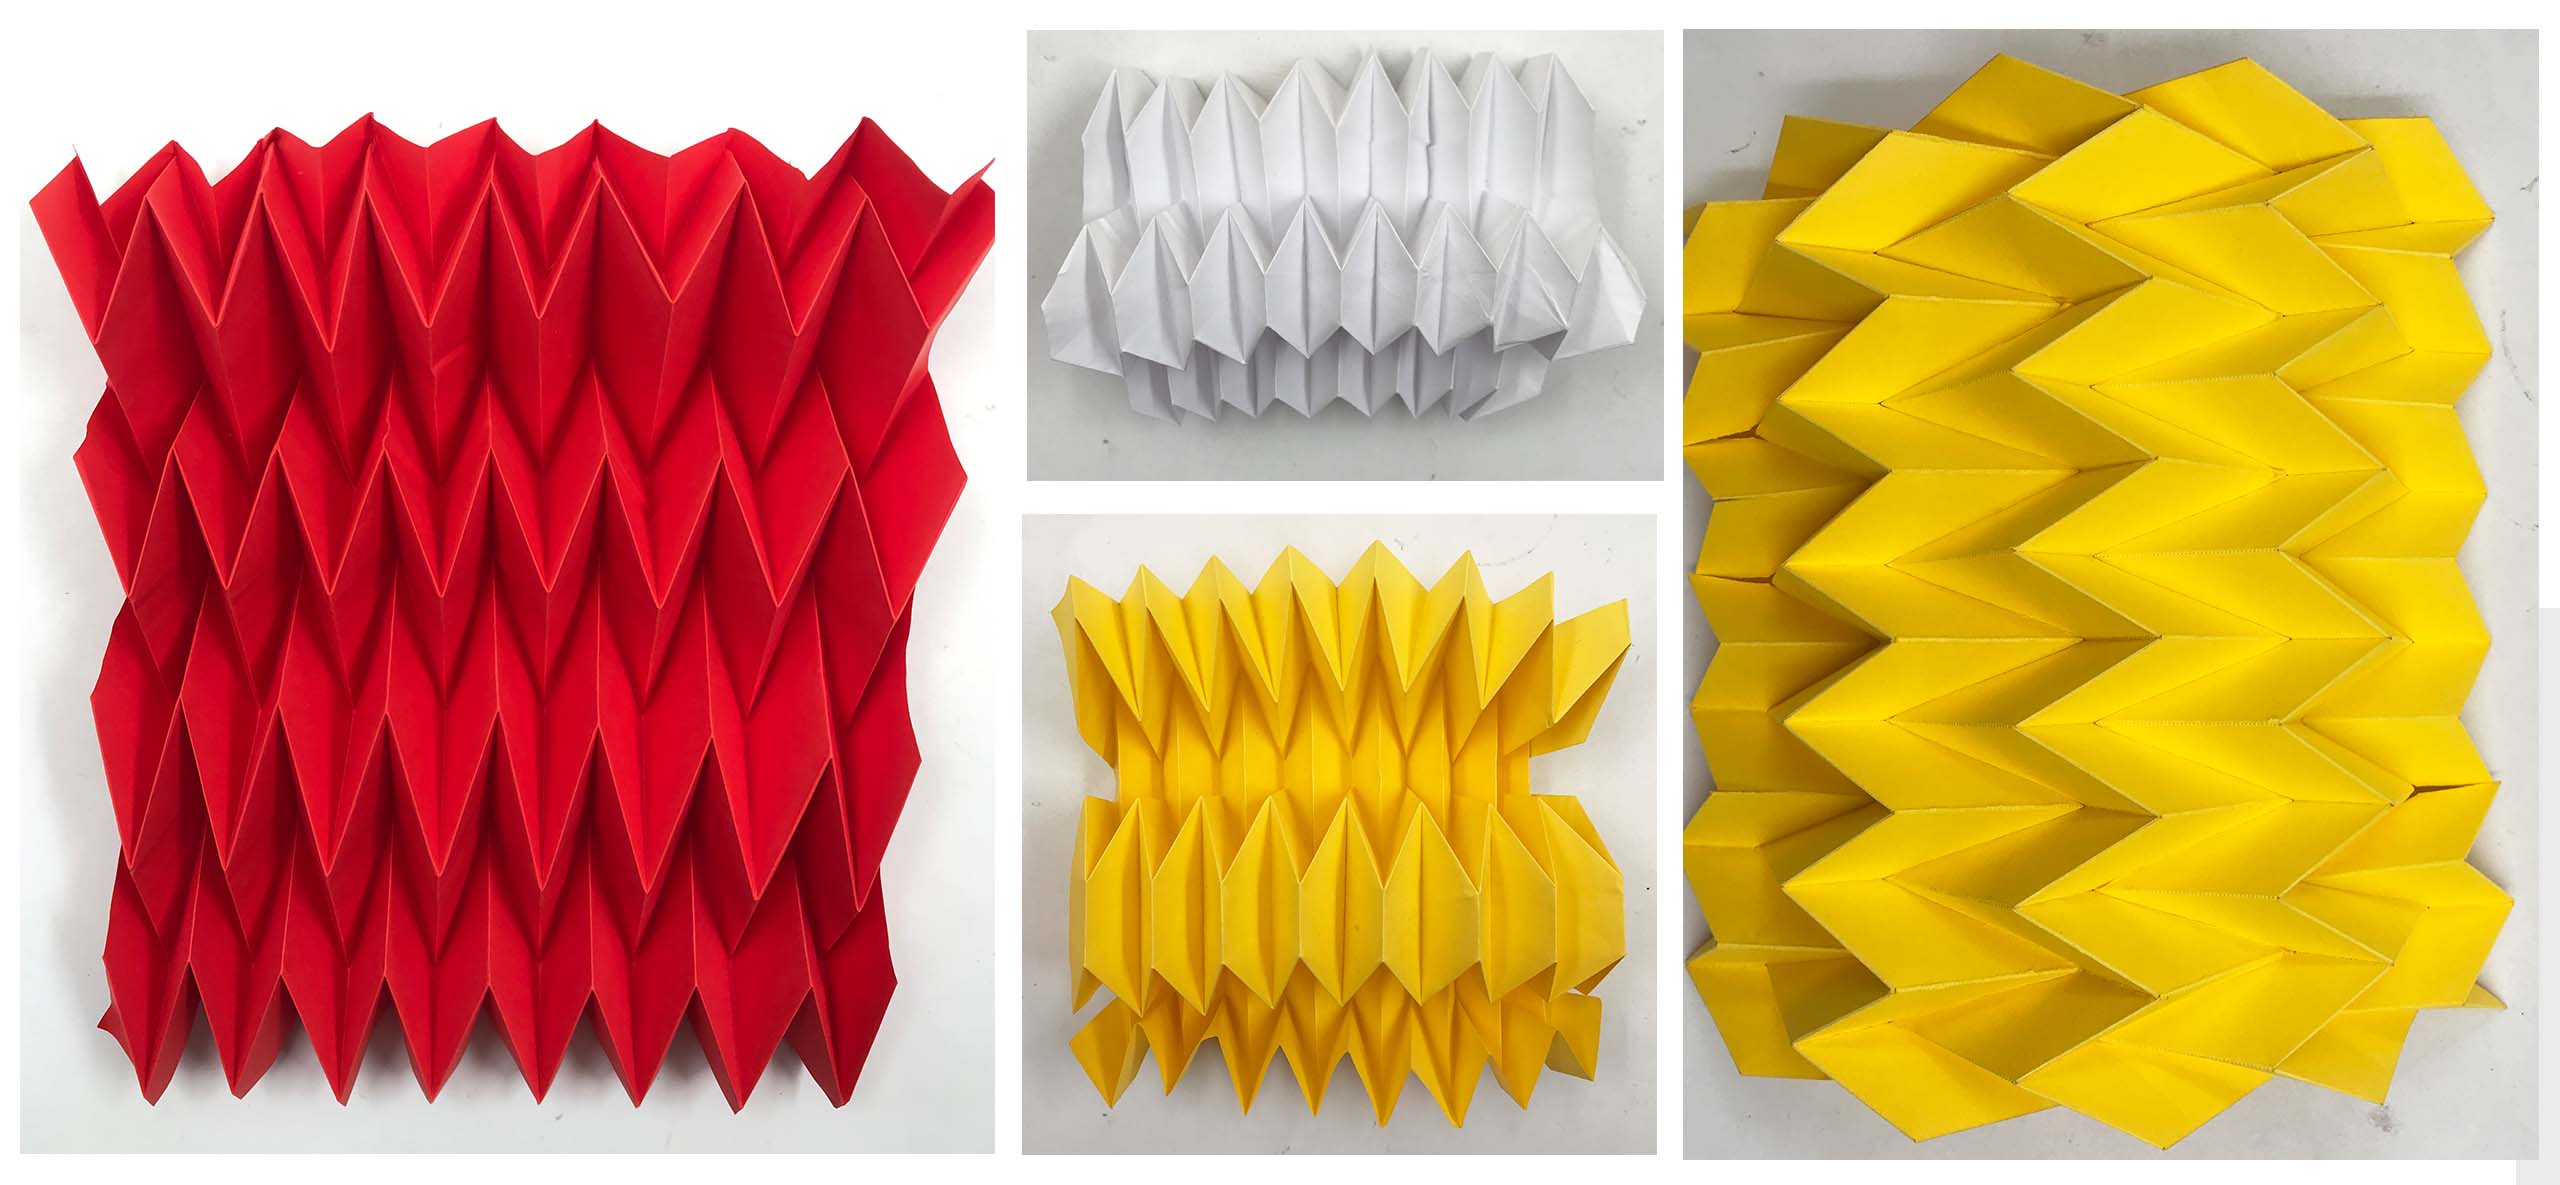
Below are the folding process. Fold 2 same patterns, sandwich the fabric in between and fold again by inserting all the corners and then close it tightly and tie with thread. Origami pleats usually done by Heat setting process. Though I dont have enough time and material I uses this simple technique.
For origami we usually use thin and lightweight paper but Thicker and stiff Papers are sutable for heat setting process.we hould avoide glossy paper, It may melt while the heat setting process.
Suggested fabrics are synthetic fabric, which can easily achieve our desired structure and geometry due to their thermoplastic nature.
Fabrics :
Natural Fibers
-
Silk
-
Wool
Synthetic Fibers
-
Polyster
-
Nylon
Here I used Muslin cloth.
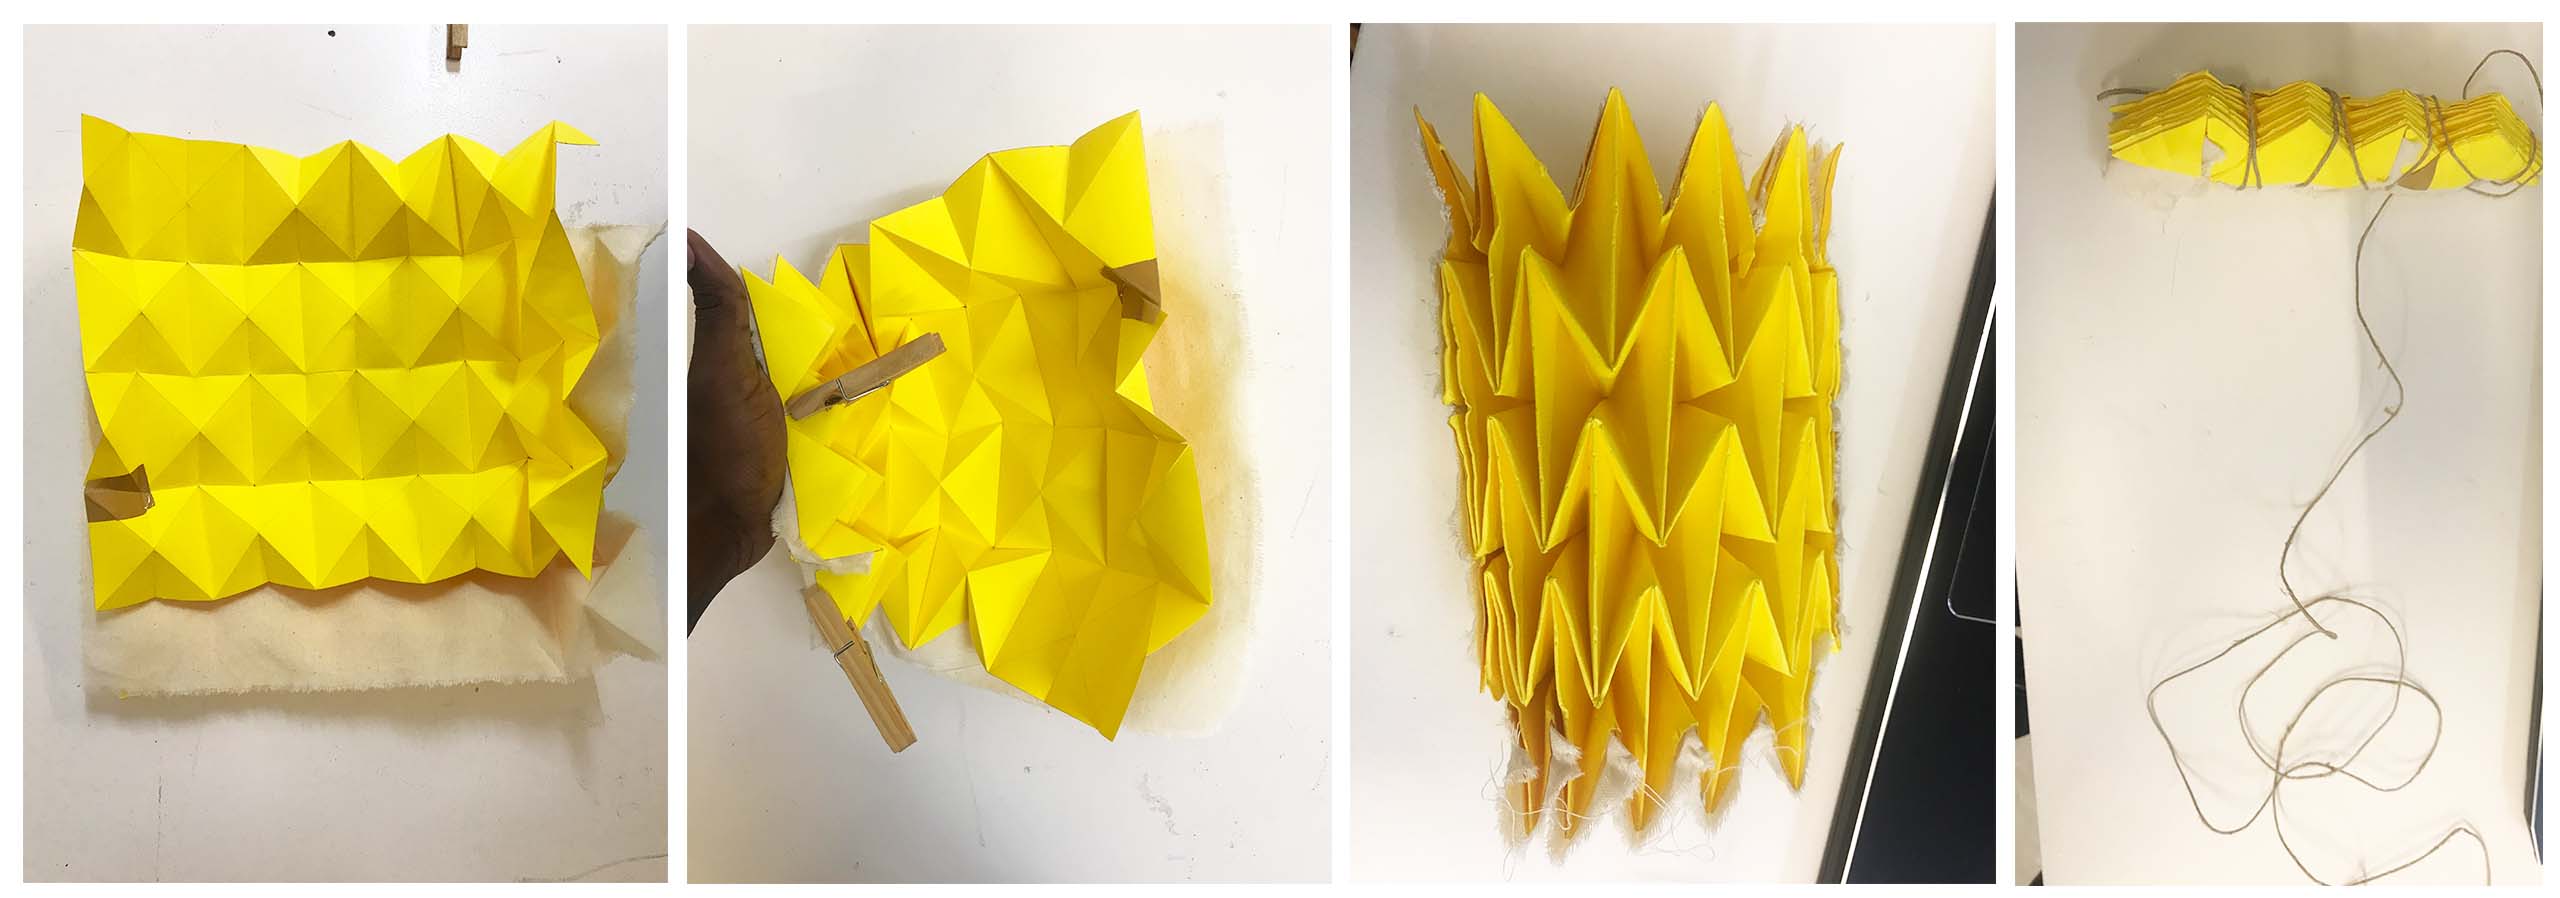
Molded fabric final look
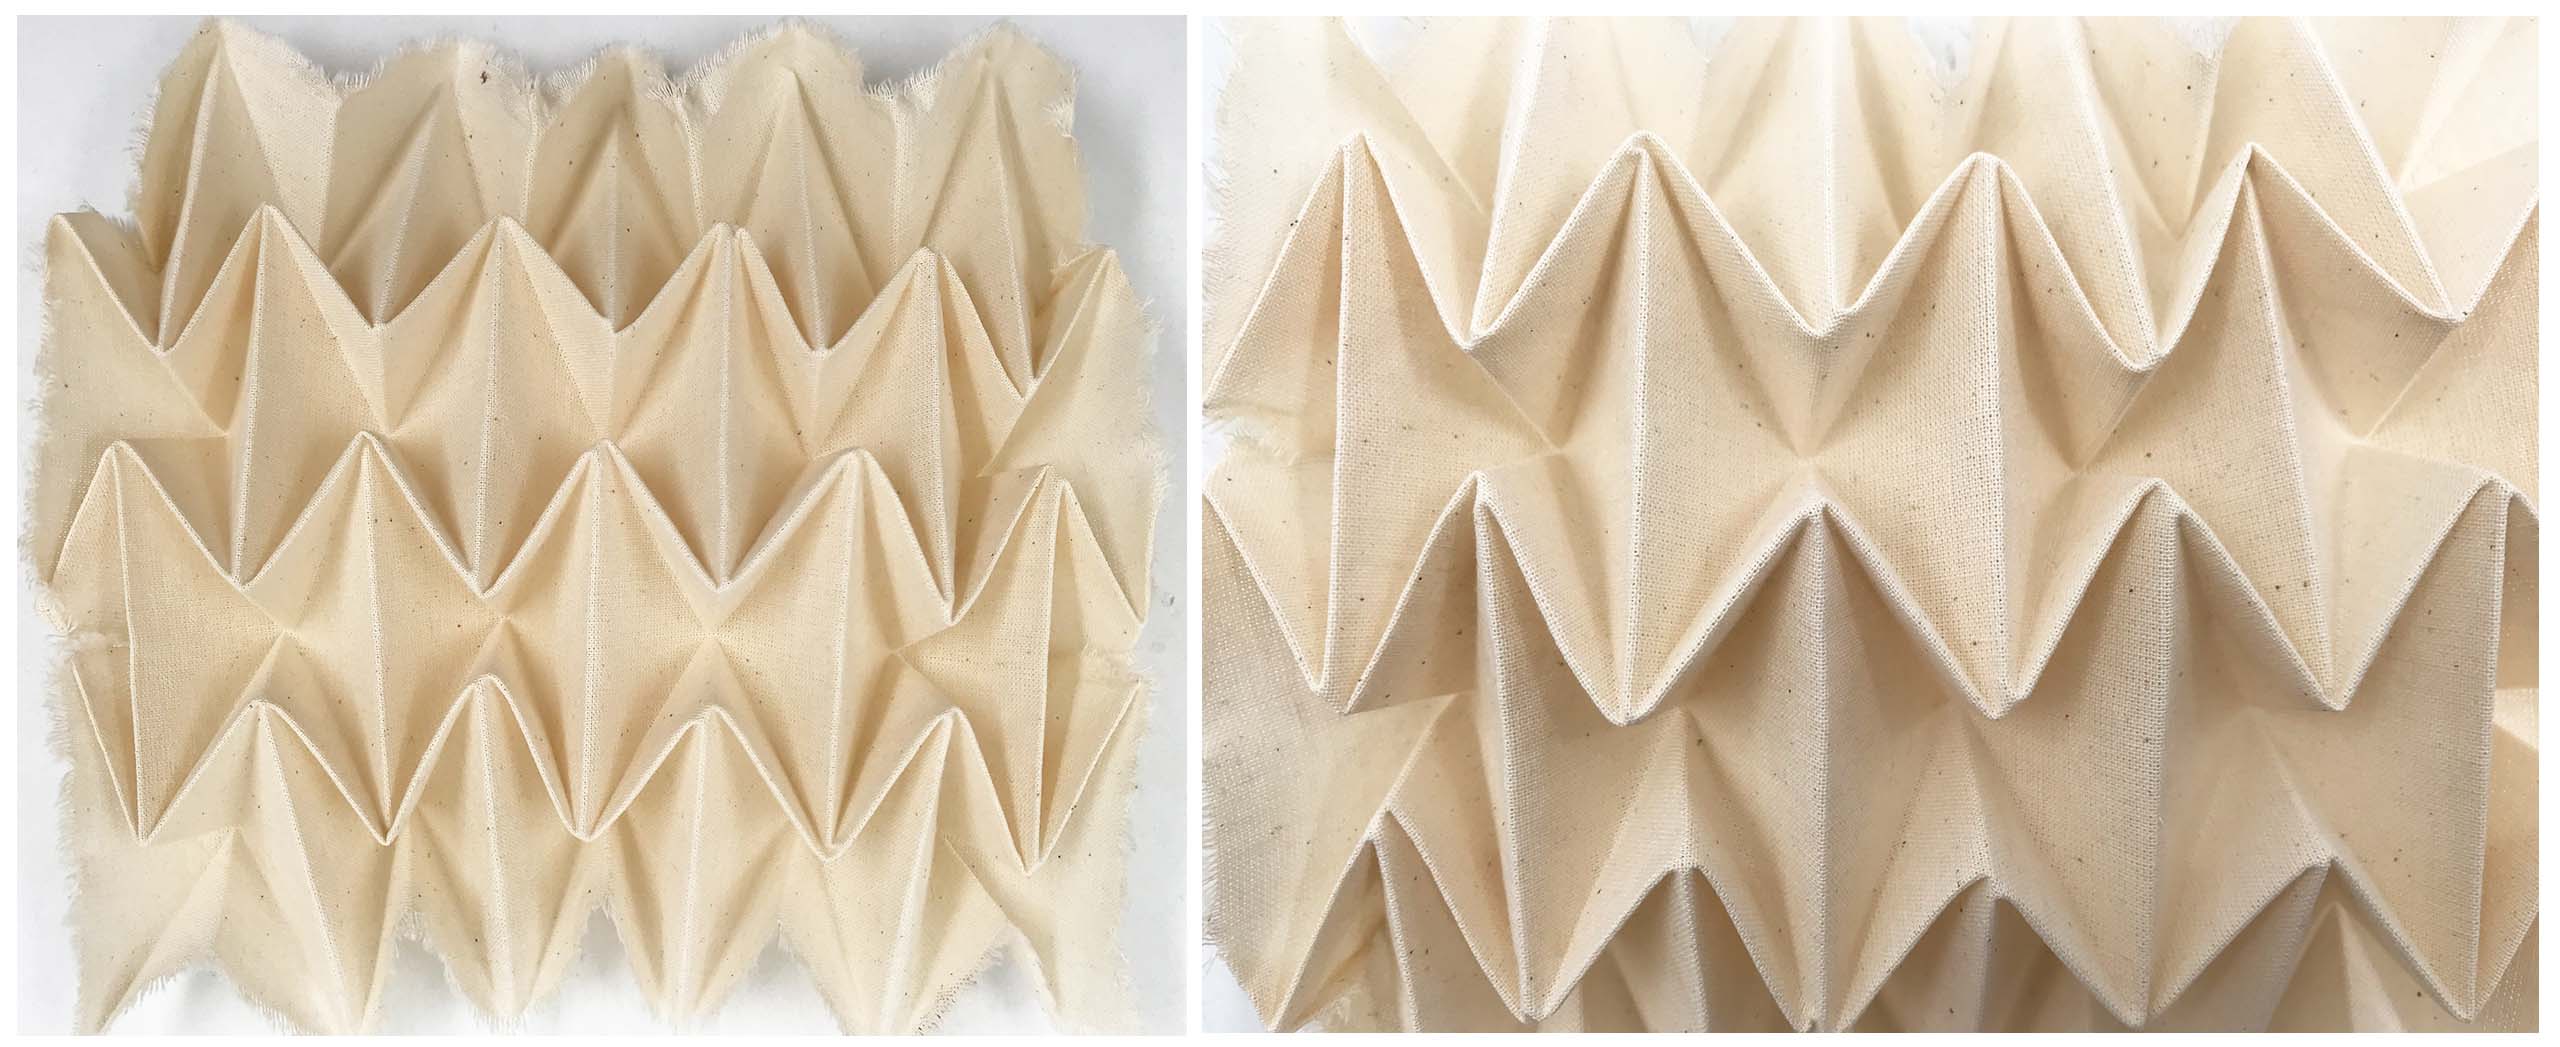
Useful link to learn about Paper mold origami fabric Here
Conclusion
As this process is time-consuming and requires a few papers and fabrics of high quality, as well as a heat setting machine, I would like to end it here. To explore more self-created patterns and forms, I would love to continue processing this in the future. Thank you
References & Inspiration - 2
Here is my second project I started simultaneously as a backup option. We discussed a number of references during class, and some that inspired and guided me while working on this project are listed below.
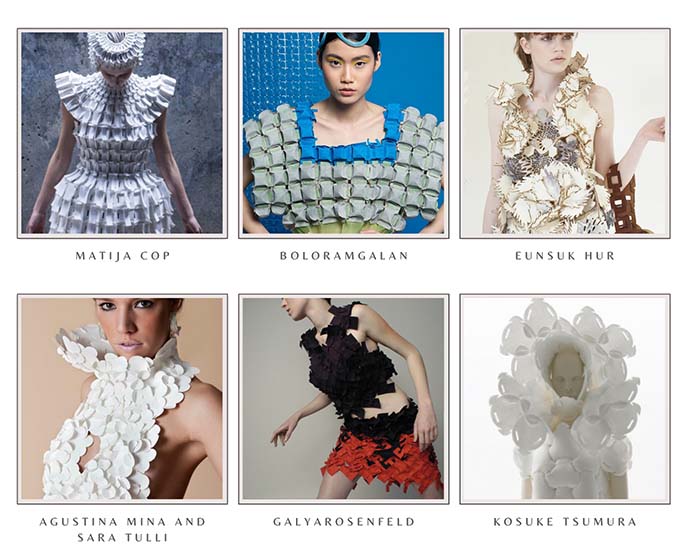
Artist Research
The artists below inspire me so much that I would love to be inspired to work on this project.
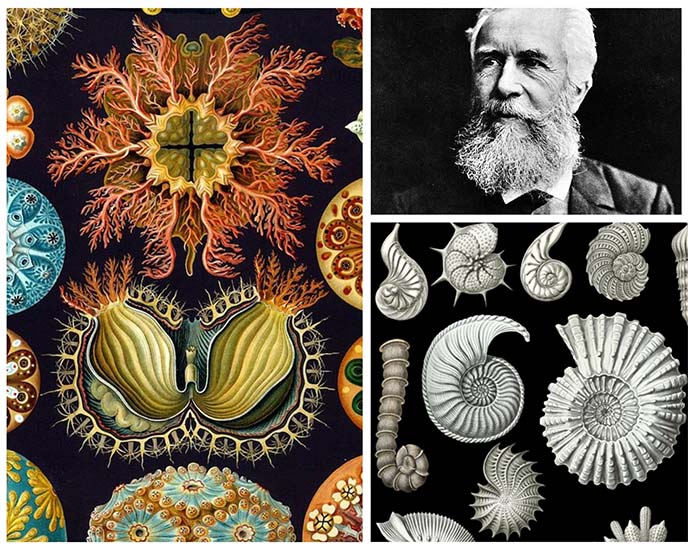
Earnst Hackel
Having known about Earnst Hackel's art of micro organisms, organic shapes and forms, I have been inspired to the core ever since I discovered his work. These are very intricate and unique works of art. I used some of his works as references for this project below.
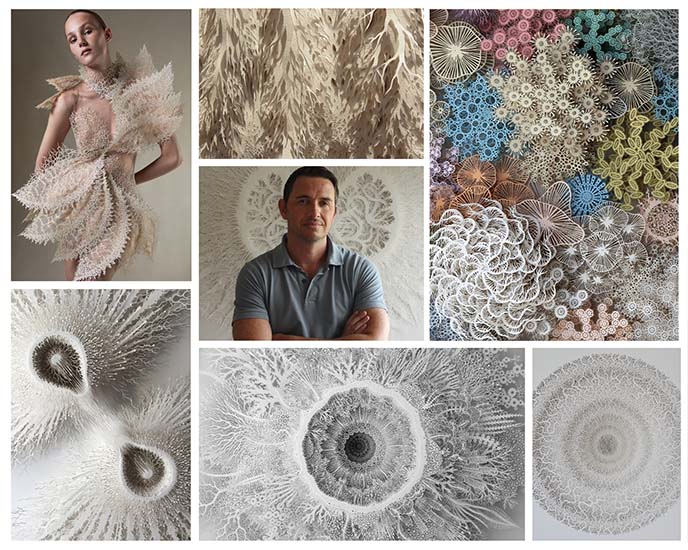
Rogan Brown
You must have got to know about my tase by now, Below is the artist Rogan Brown, who works on the paper sculpture , a very unique and extremely intricate art he makes. My first exposure to Rogan Vrown's work was through a collaboration with Iris Van Herpan. I then researched his work and was completely blown away by it. I have used some of his references below to inspire and motivate me to work.
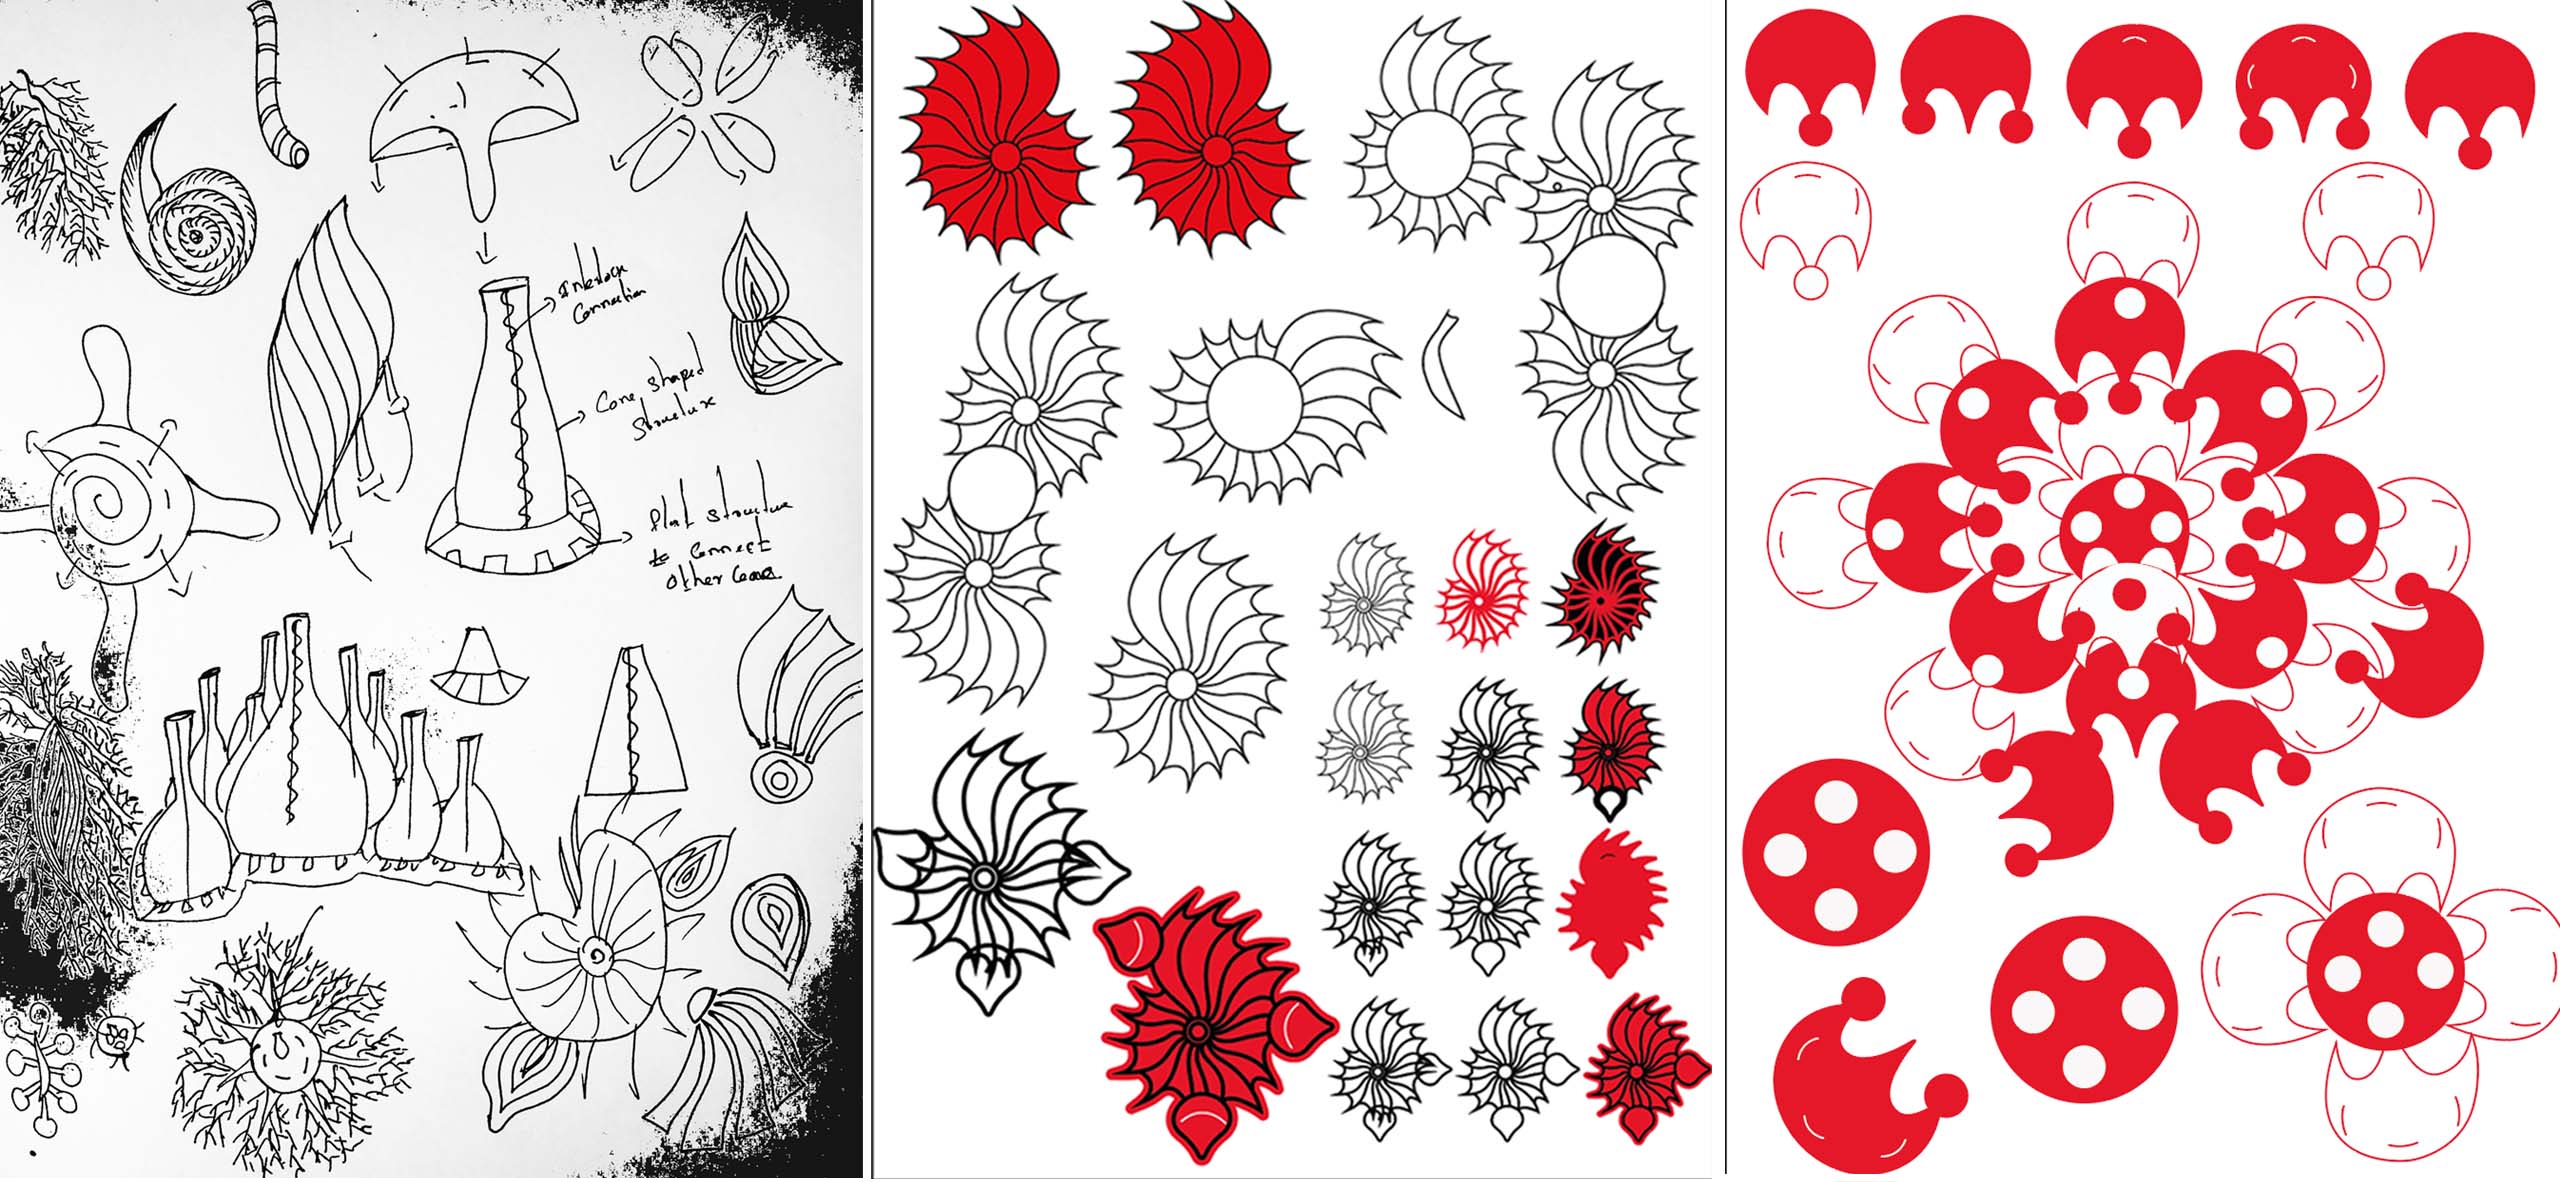
Step-1 Design explorations
As a starting point, I sketched motifs and looked for different ways to use the fabric and at the same time interlocking without closures. Next, I used Illustrator to trace the motif and tweak the shapes, sizes, and connections. Using 2-3 motif that I liked, I tried to make it look organic and artistic at the same time.
Step-2 Testing with paper
As part of my exploration of working on the fashion top, I tried interlocking the shapes with the paper. The connections between the shapes were actually challenging as I had only used three sides and it created a very asymmetrical pattern.

Step-3 Testing with Fabric
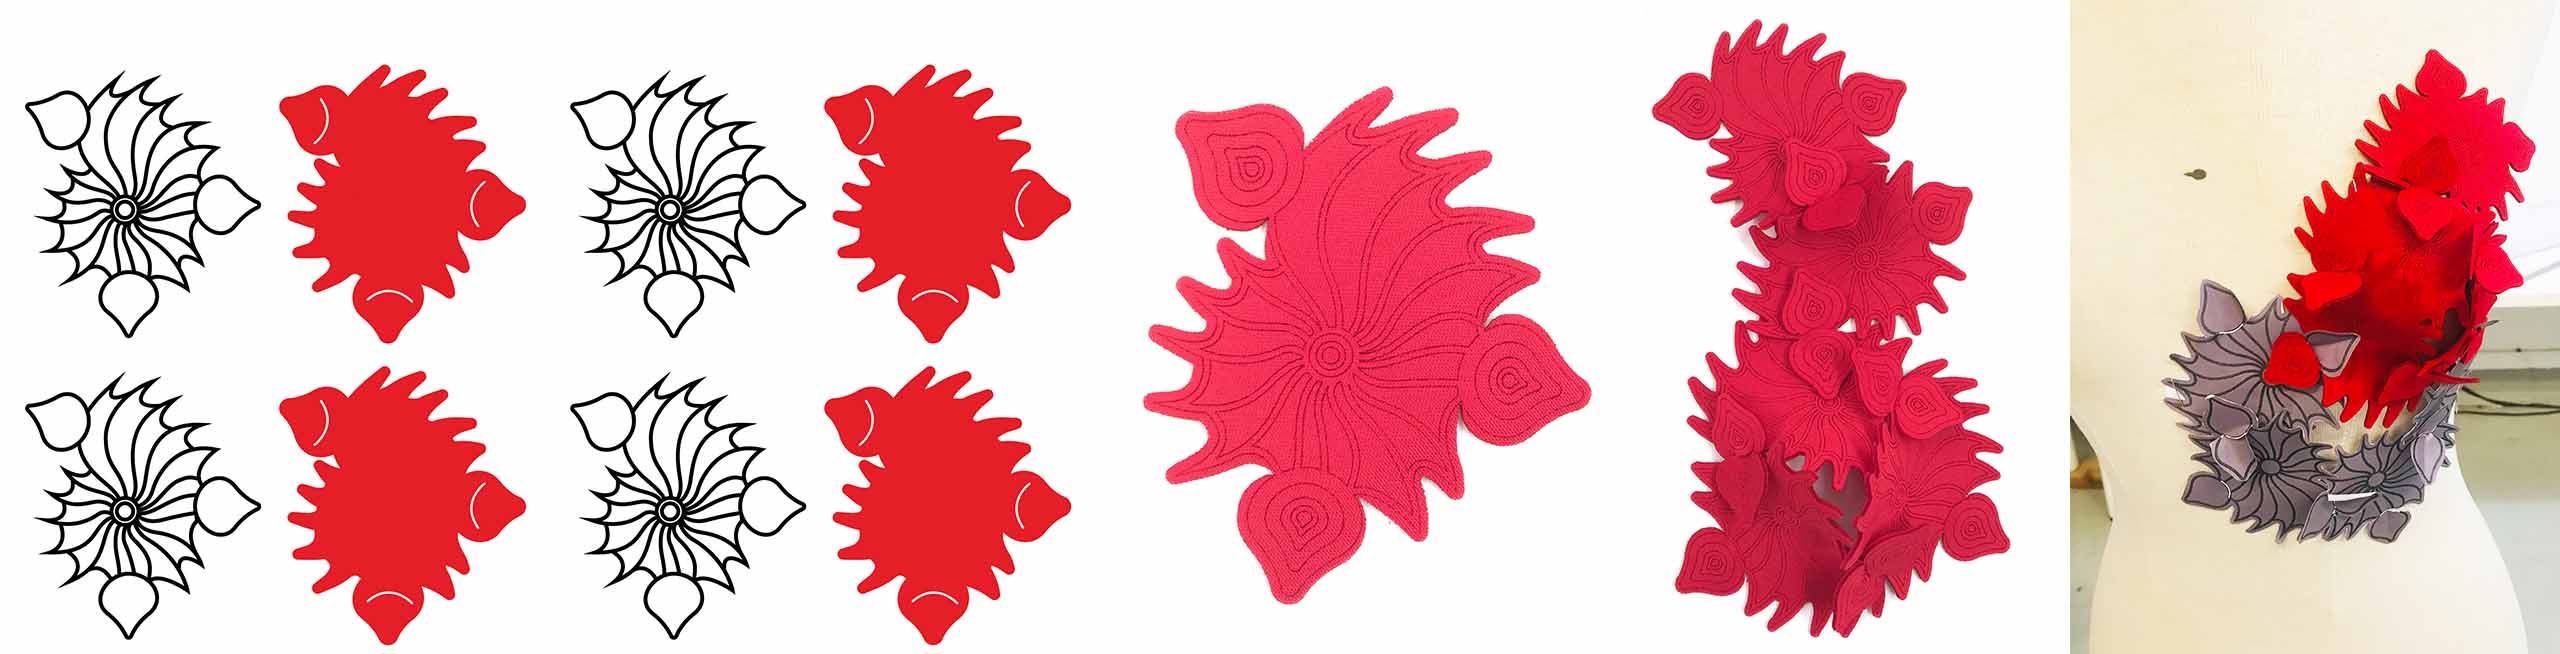
As I figured keeping the motif plain would not work, I created a few lines inside to engrave to create a texture and pattern, which turned out well. Therefore, I planned to engrave and cut the shapes using noepren fabric - 1mm.
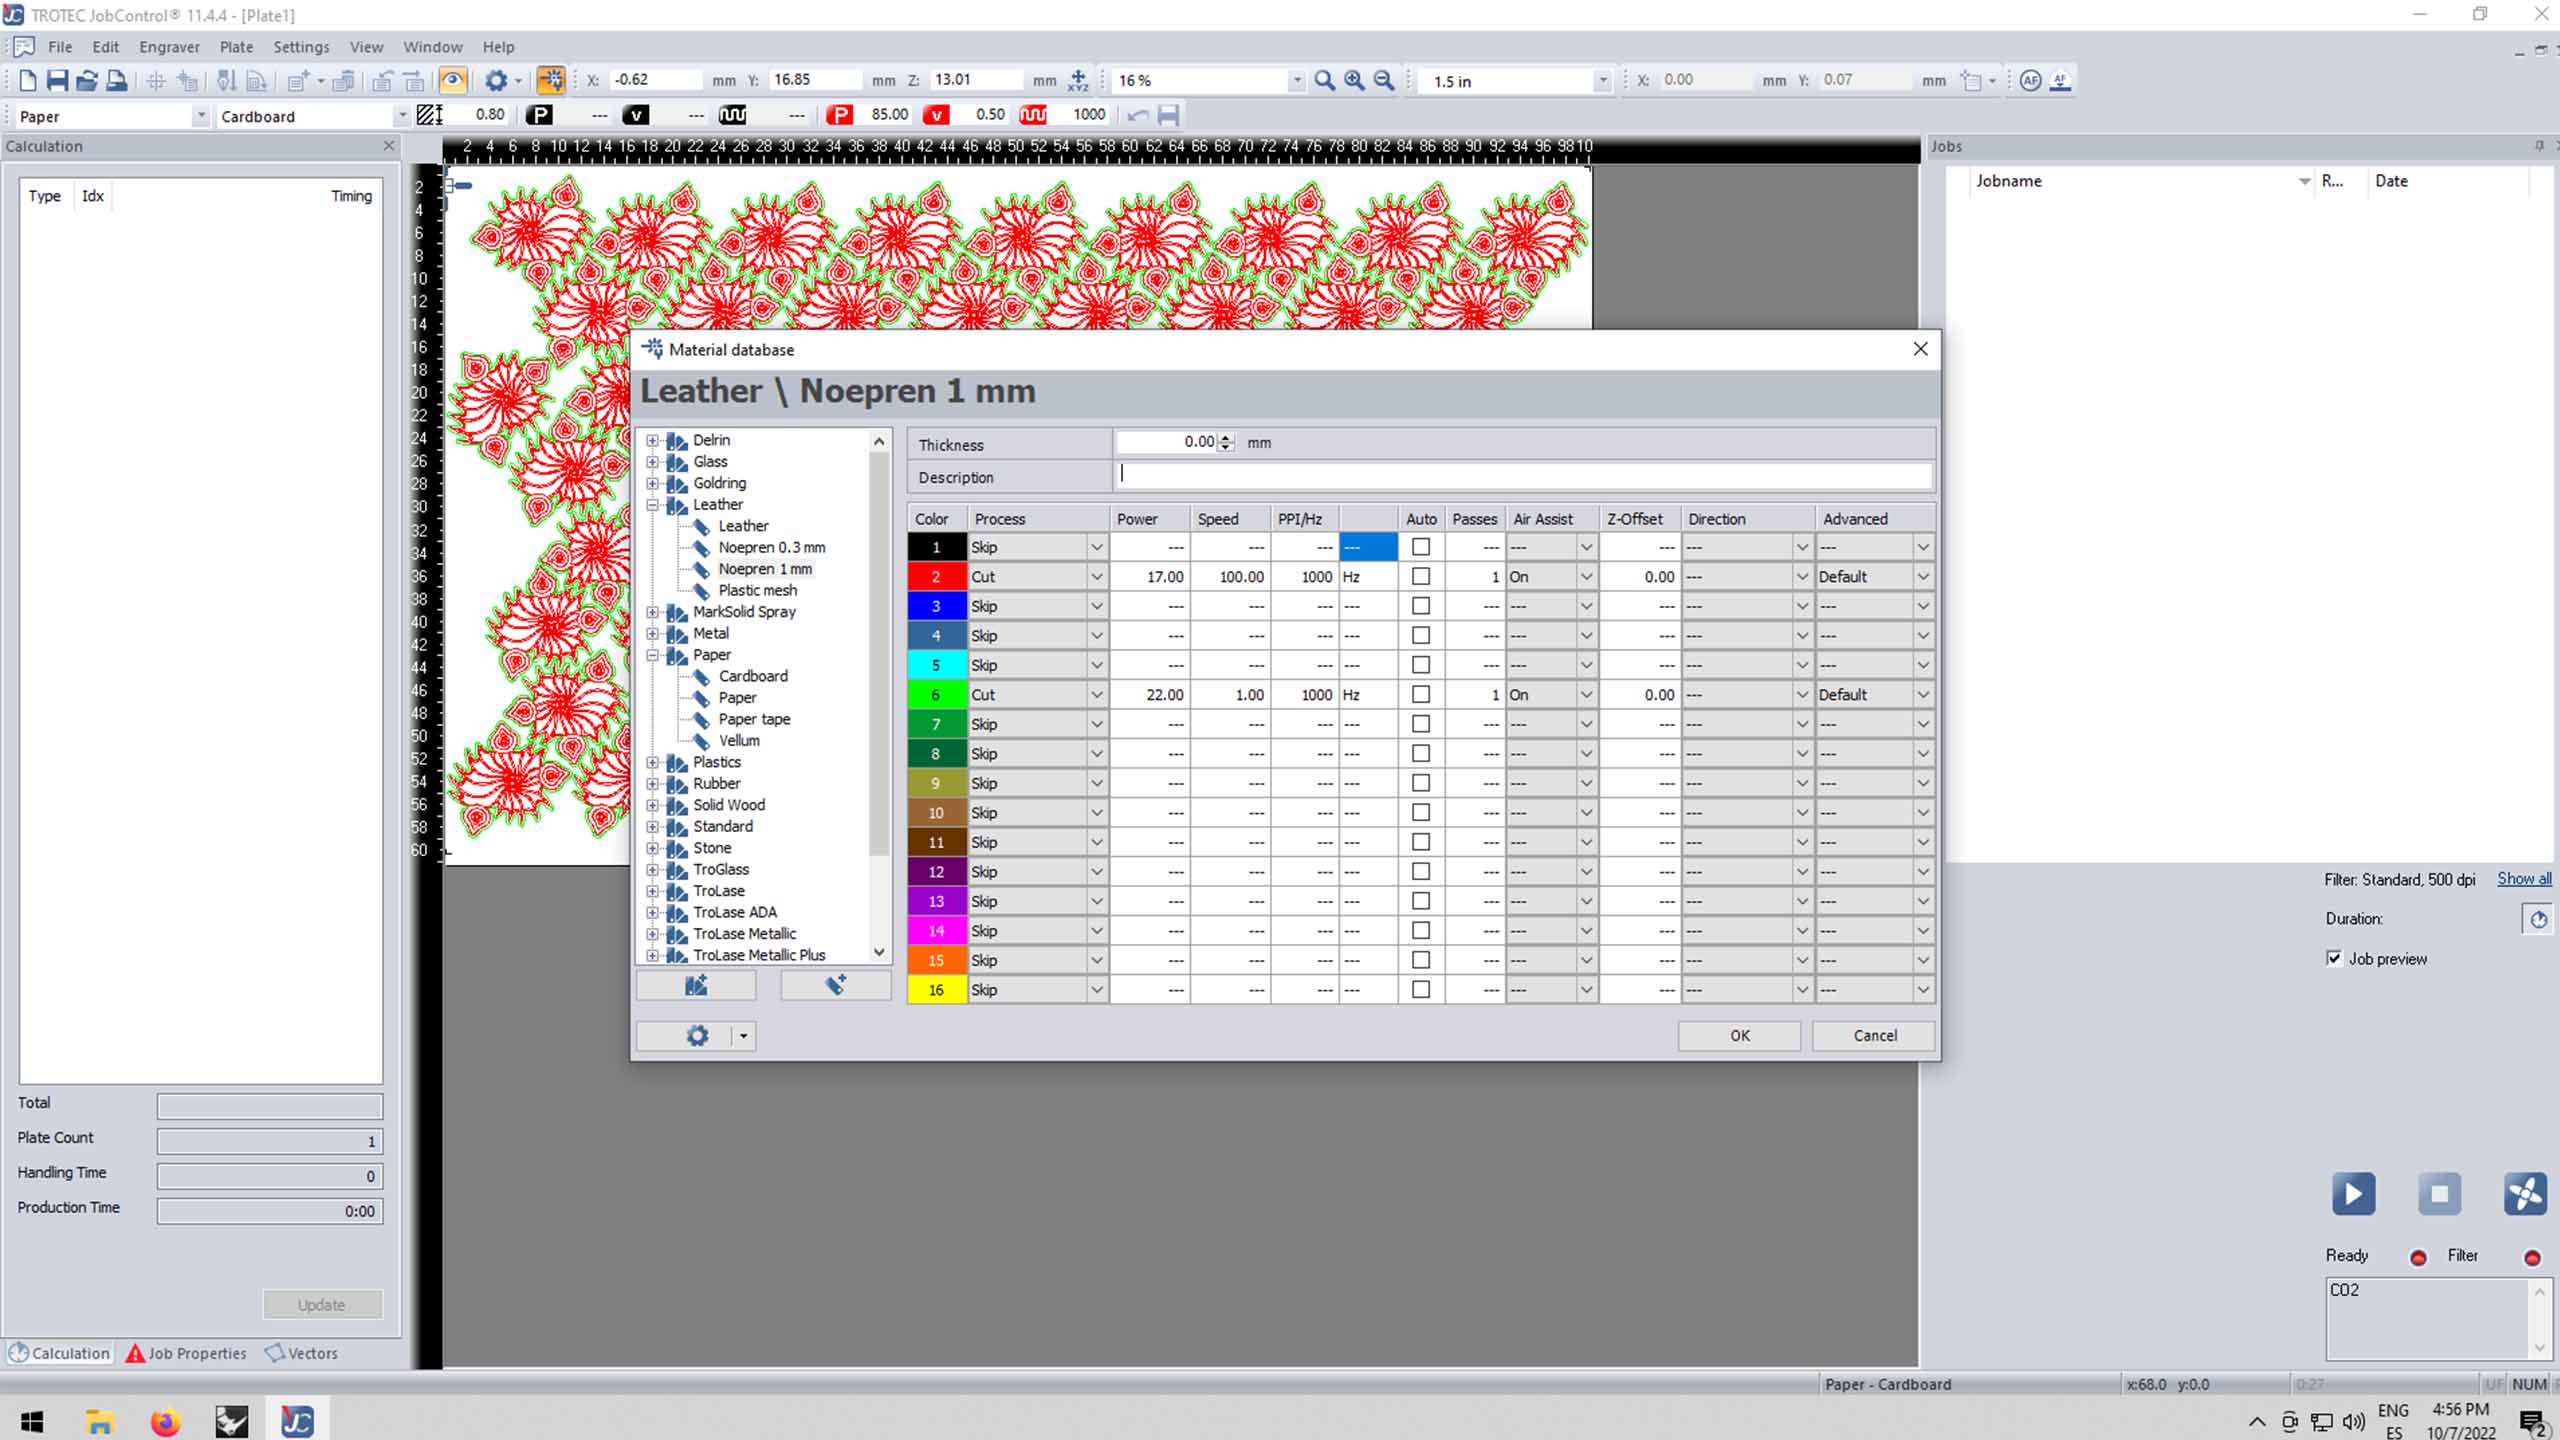
Step-4 Final Laser cutting process
Below is an image showing the nesting of the shapes in the file to cut and engrave in the 1000x600 size fabric. The shapes were a bit confusing at the beginning, but Ana helped us figure out how to arrange them.
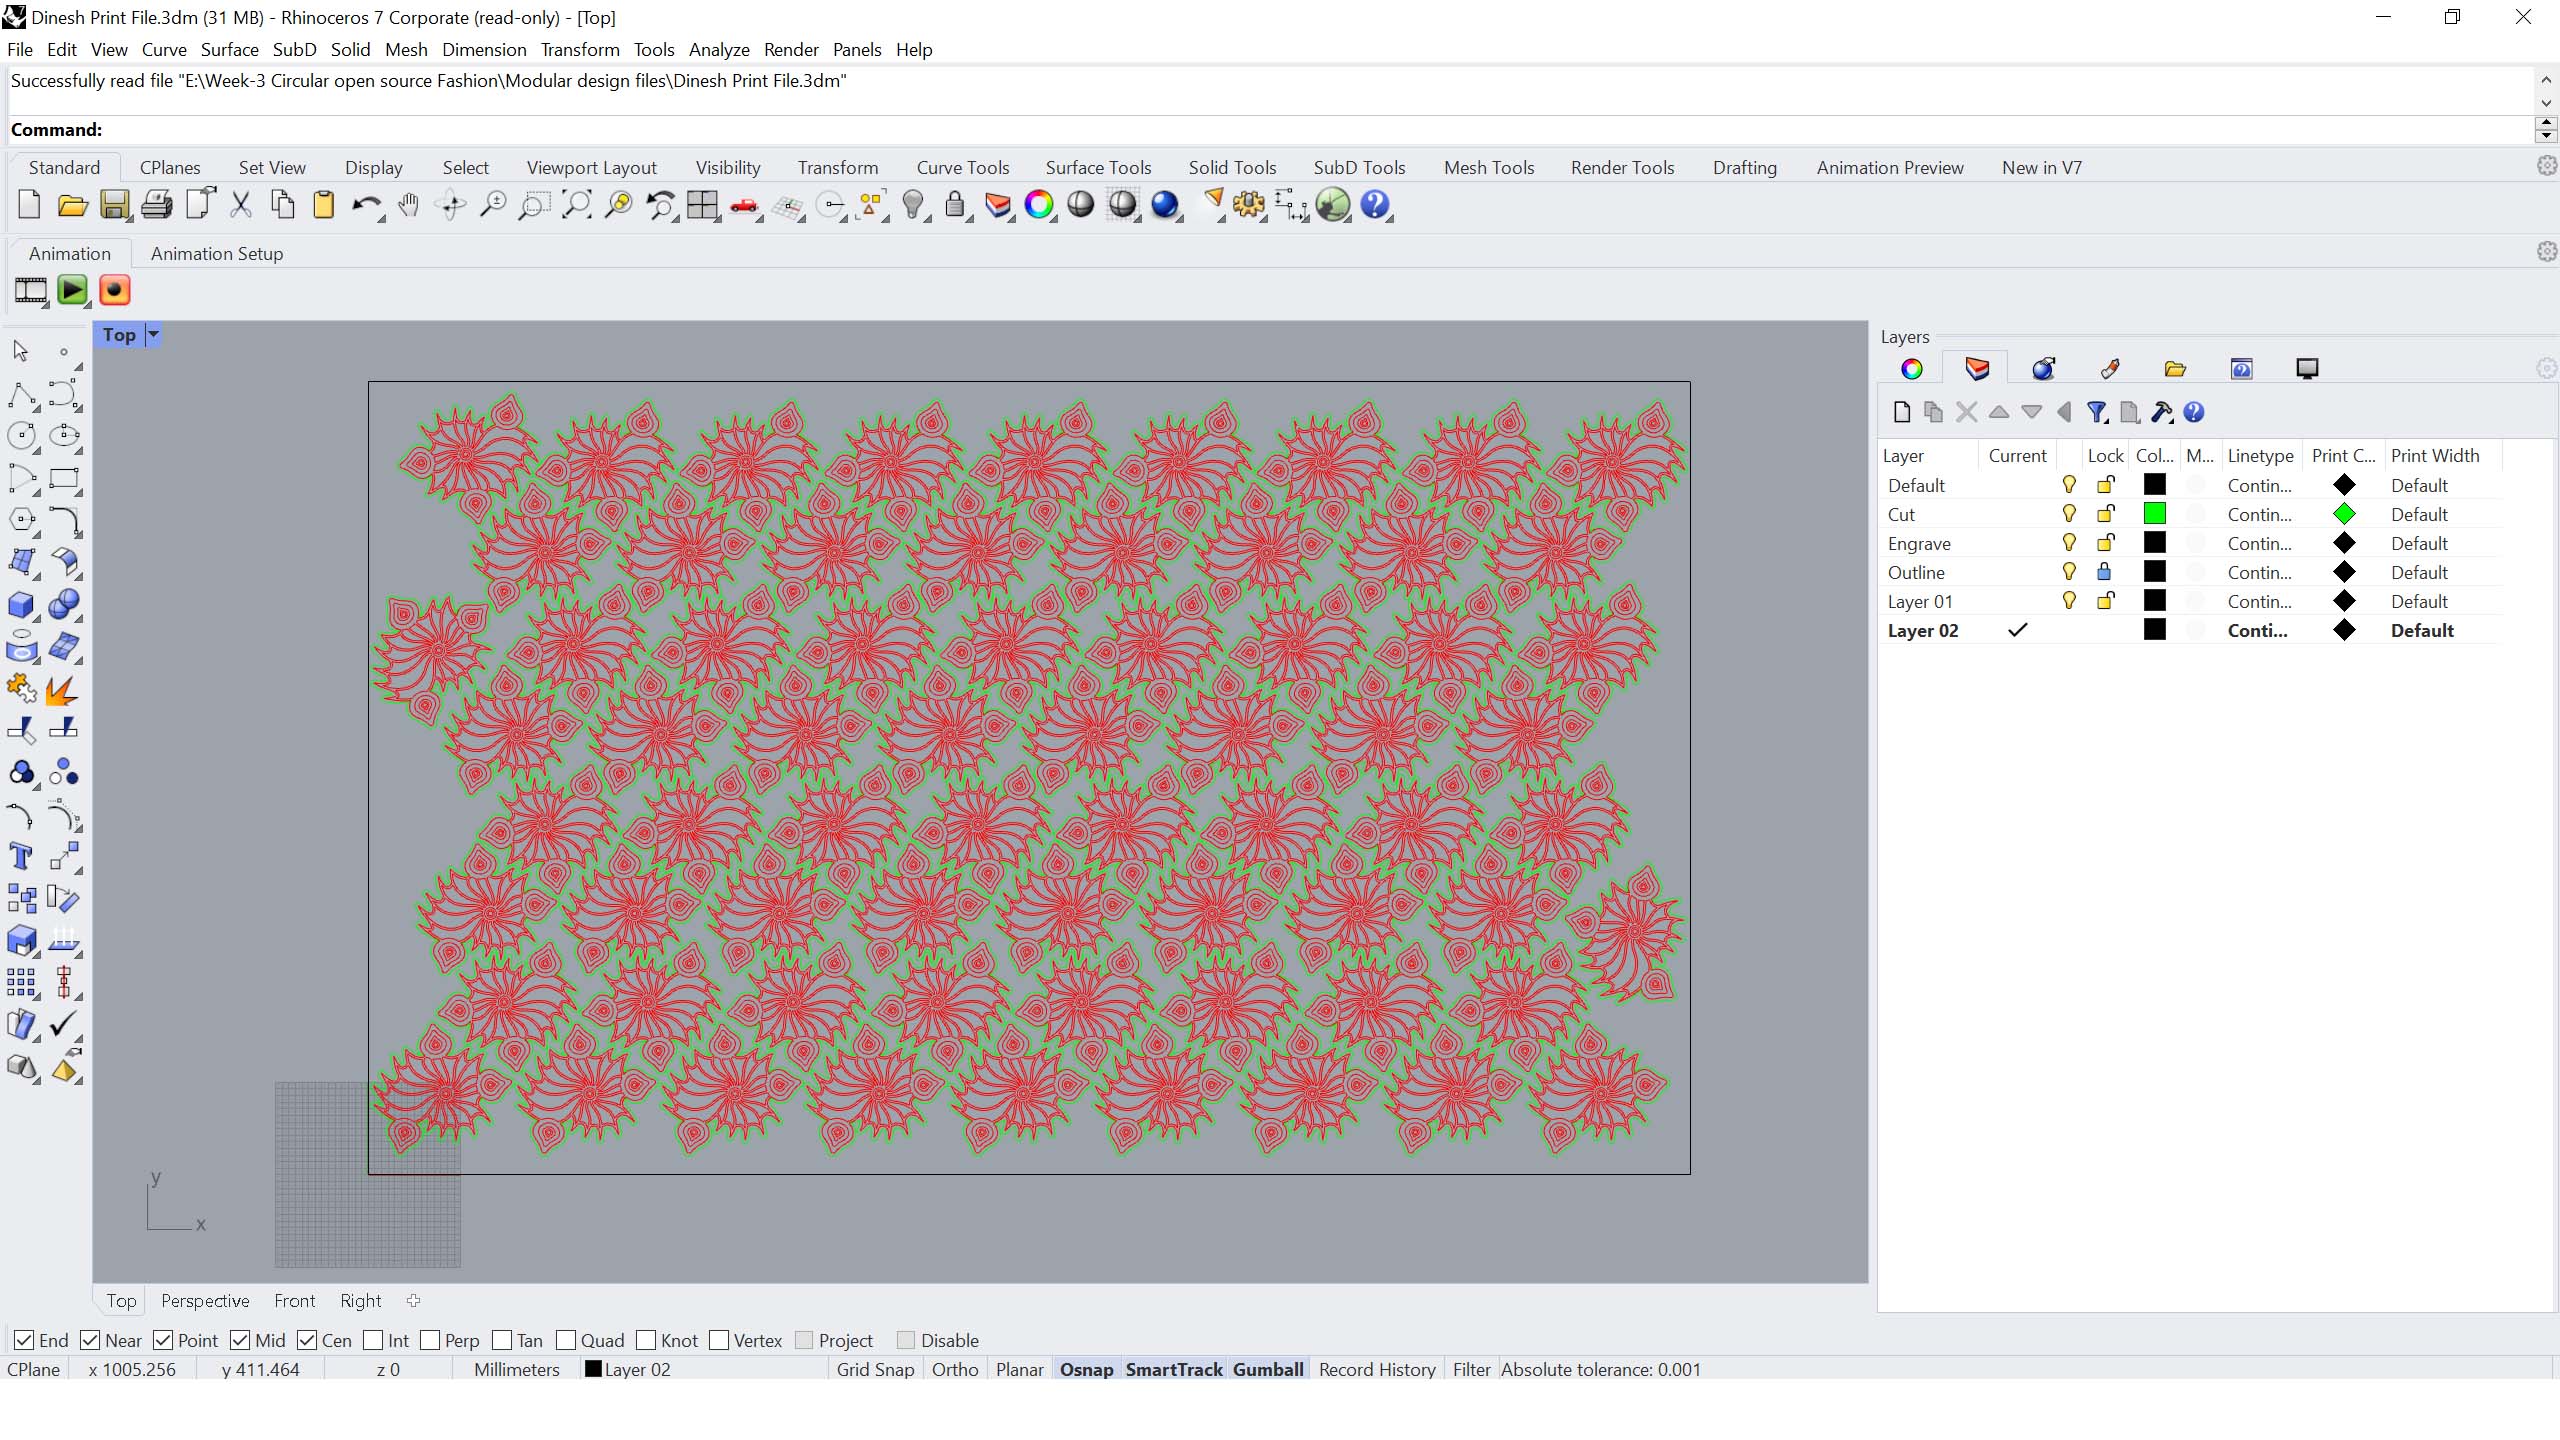
The final cutting and engraving took some more time as expected due to engraving the designs.
Rhino File Here
Step-5 Seamless Construction / Assembly Process
Final Assembling process
Fabric used- Neoprene 1mm thickness
Fabric size- 1000X600 I used Laser cutting machine bed size.
No of pieces- 68
No of pieces used- 53
No of pieces left- 15 I have planned to use the leftover cutting pieces to create accessories.
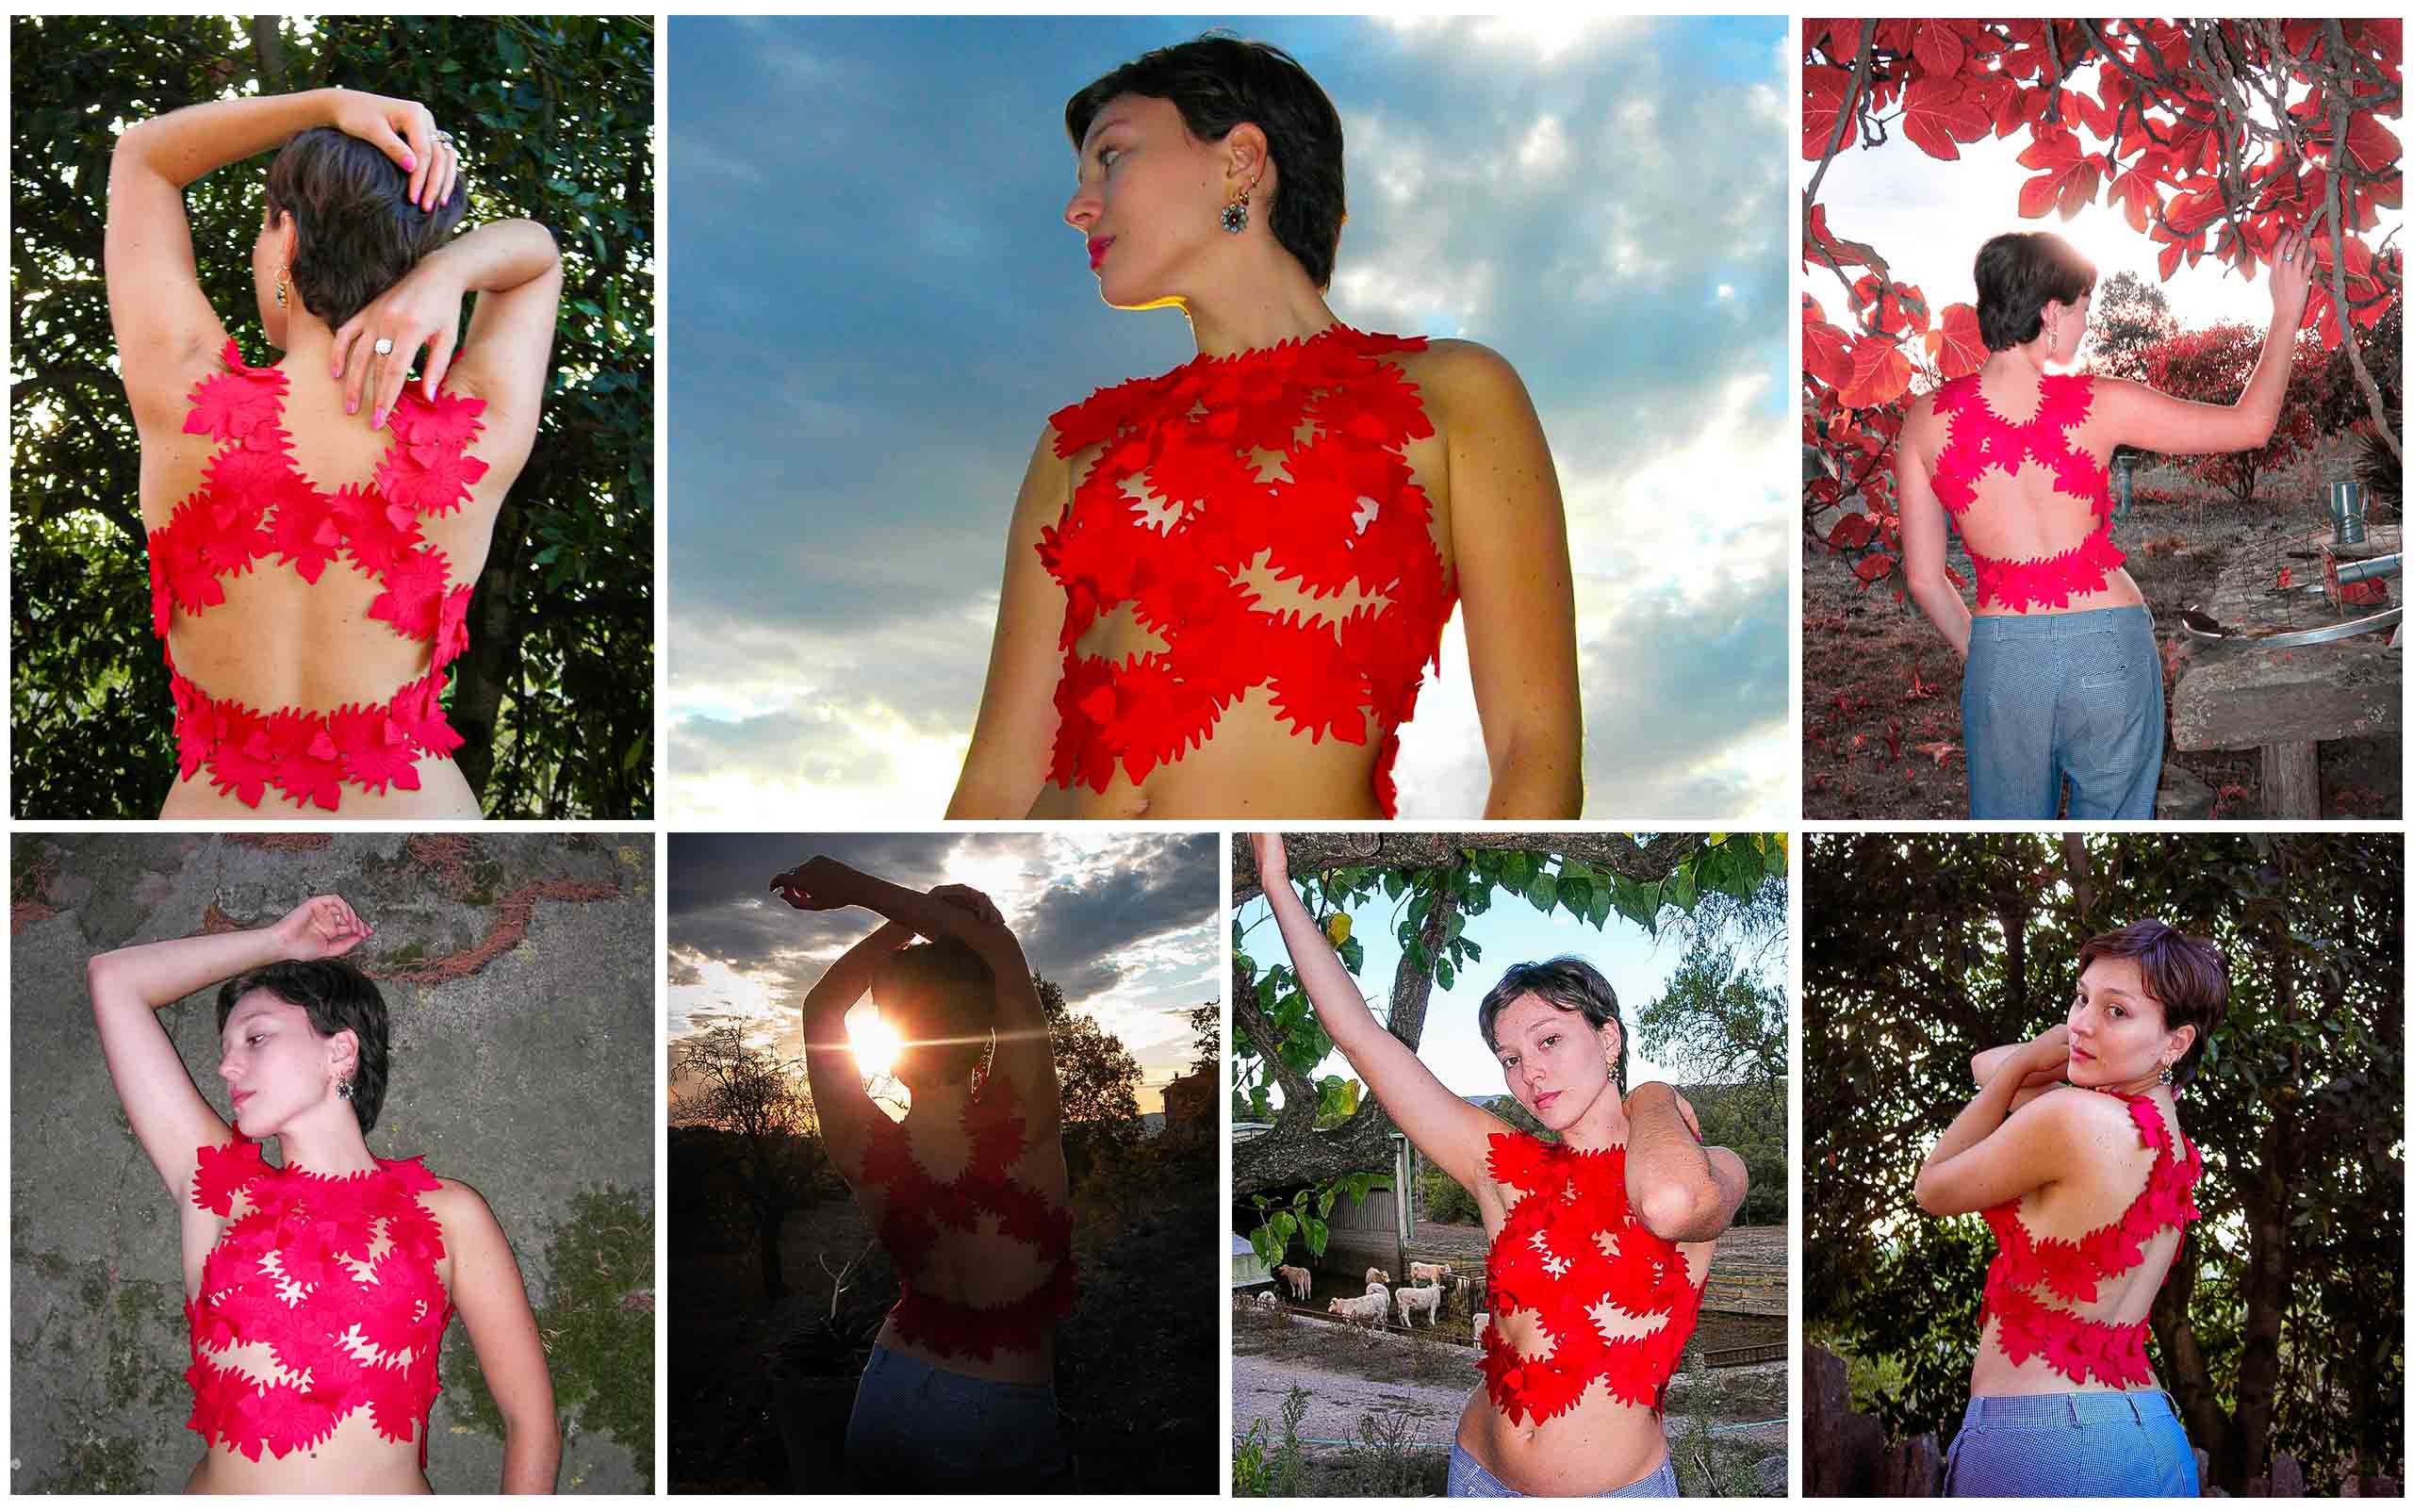
Step-4 Final Look

Photoshoot