5. E-textiles
I'm here! It wasn't easy jumping to the documentation of another exciting topic for this week, E-Textiles.
"Take a deep breath"
Research and Inspiration
In order to focus on the week's projects, I was inspired by a few of the following artists. It is incredible to see, through the use of different materials and the applications of the final outcome, how much there is to explore in textiles.
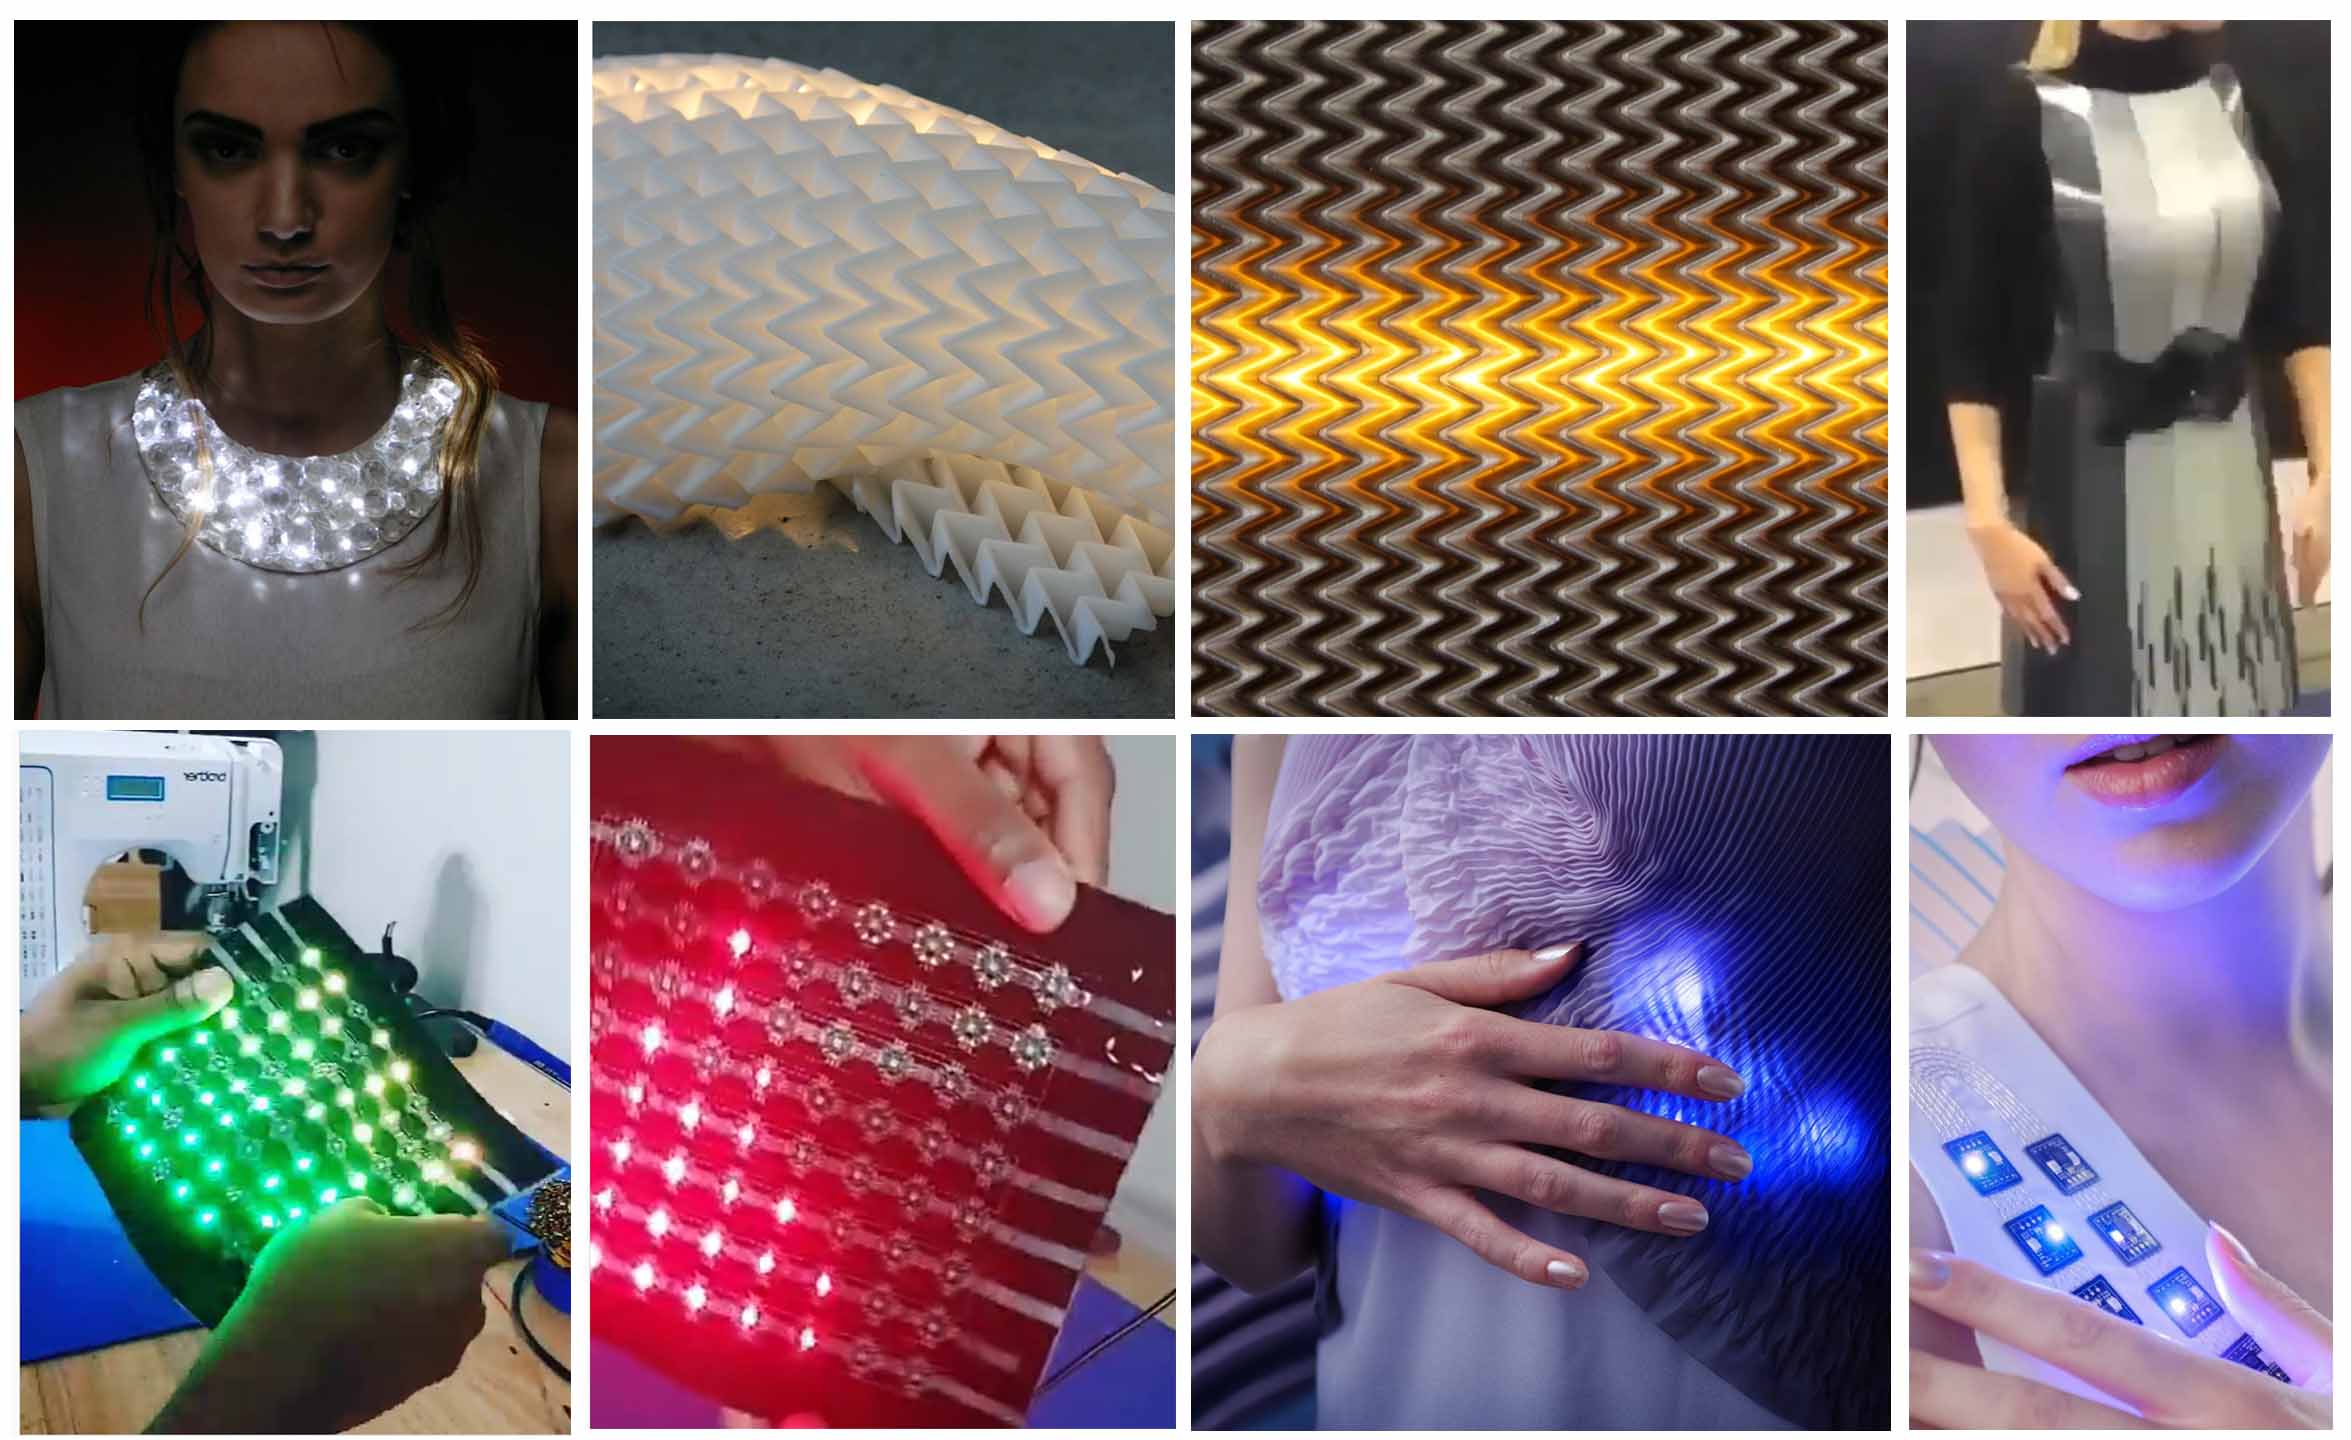
( OriMetric – new rubber origami driven material exploration by Mads Hansen ) - Here
( Second skins by Malou Beemer ) - Here
( Very cool works by Rodney Trusty ) - Here
( Very Inspiring works by design_dnp ) - Here
E-Textiles
Before we get into what E-Textiles are. My first thought when hearing the term "E-textiles" is that in industry artists work with automatic moving electronics, lights in clothes, colour-changing materials, etc.
In order to gain a deeper understanding of E-textiles, let's take a closer look.
What are E-Textiles? Embedding electronics into textiles using components like conductive threads/fabrics, batteries, lights, sensors, microcontrollers etc.
Indeed, we have used these terms in our lives, but now it's time to learn what they mean.
Circuit - A circuit is a path for electricity to move. what creates an Electric current? Electrons - A stream of moving electrons creates an electrical current. Electricity always travels from the + side of the battery to the - side. There are 2 types of circuits, Series and parallel.
Voltage - Voltage is the pressure from an electrical circuit's power source that pushes charged electrons (current) through a conducting loop, enabling them to do work such as illuminating light. In brief, voltage = pressure, and it is measured in volts (V).
Current - The flow of electricity through an object. This is measured in amperes (A) or milli-amperes (mA), 1000 mA = 1A.
Resistance -Resistance is a measure of the opposition to current flow in an electrical circuit. It allows the number of electrons to pass, The higher the resistance, the lower the current flow. Resistance is measured in ohms, symbolized by the Greek letter omega (Ω).
Ohms's Law -Ohm's law states that the current through a conductor between two points is directly proportional to the voltage across the two points. Introducing the constant of proportionality, the resistance.
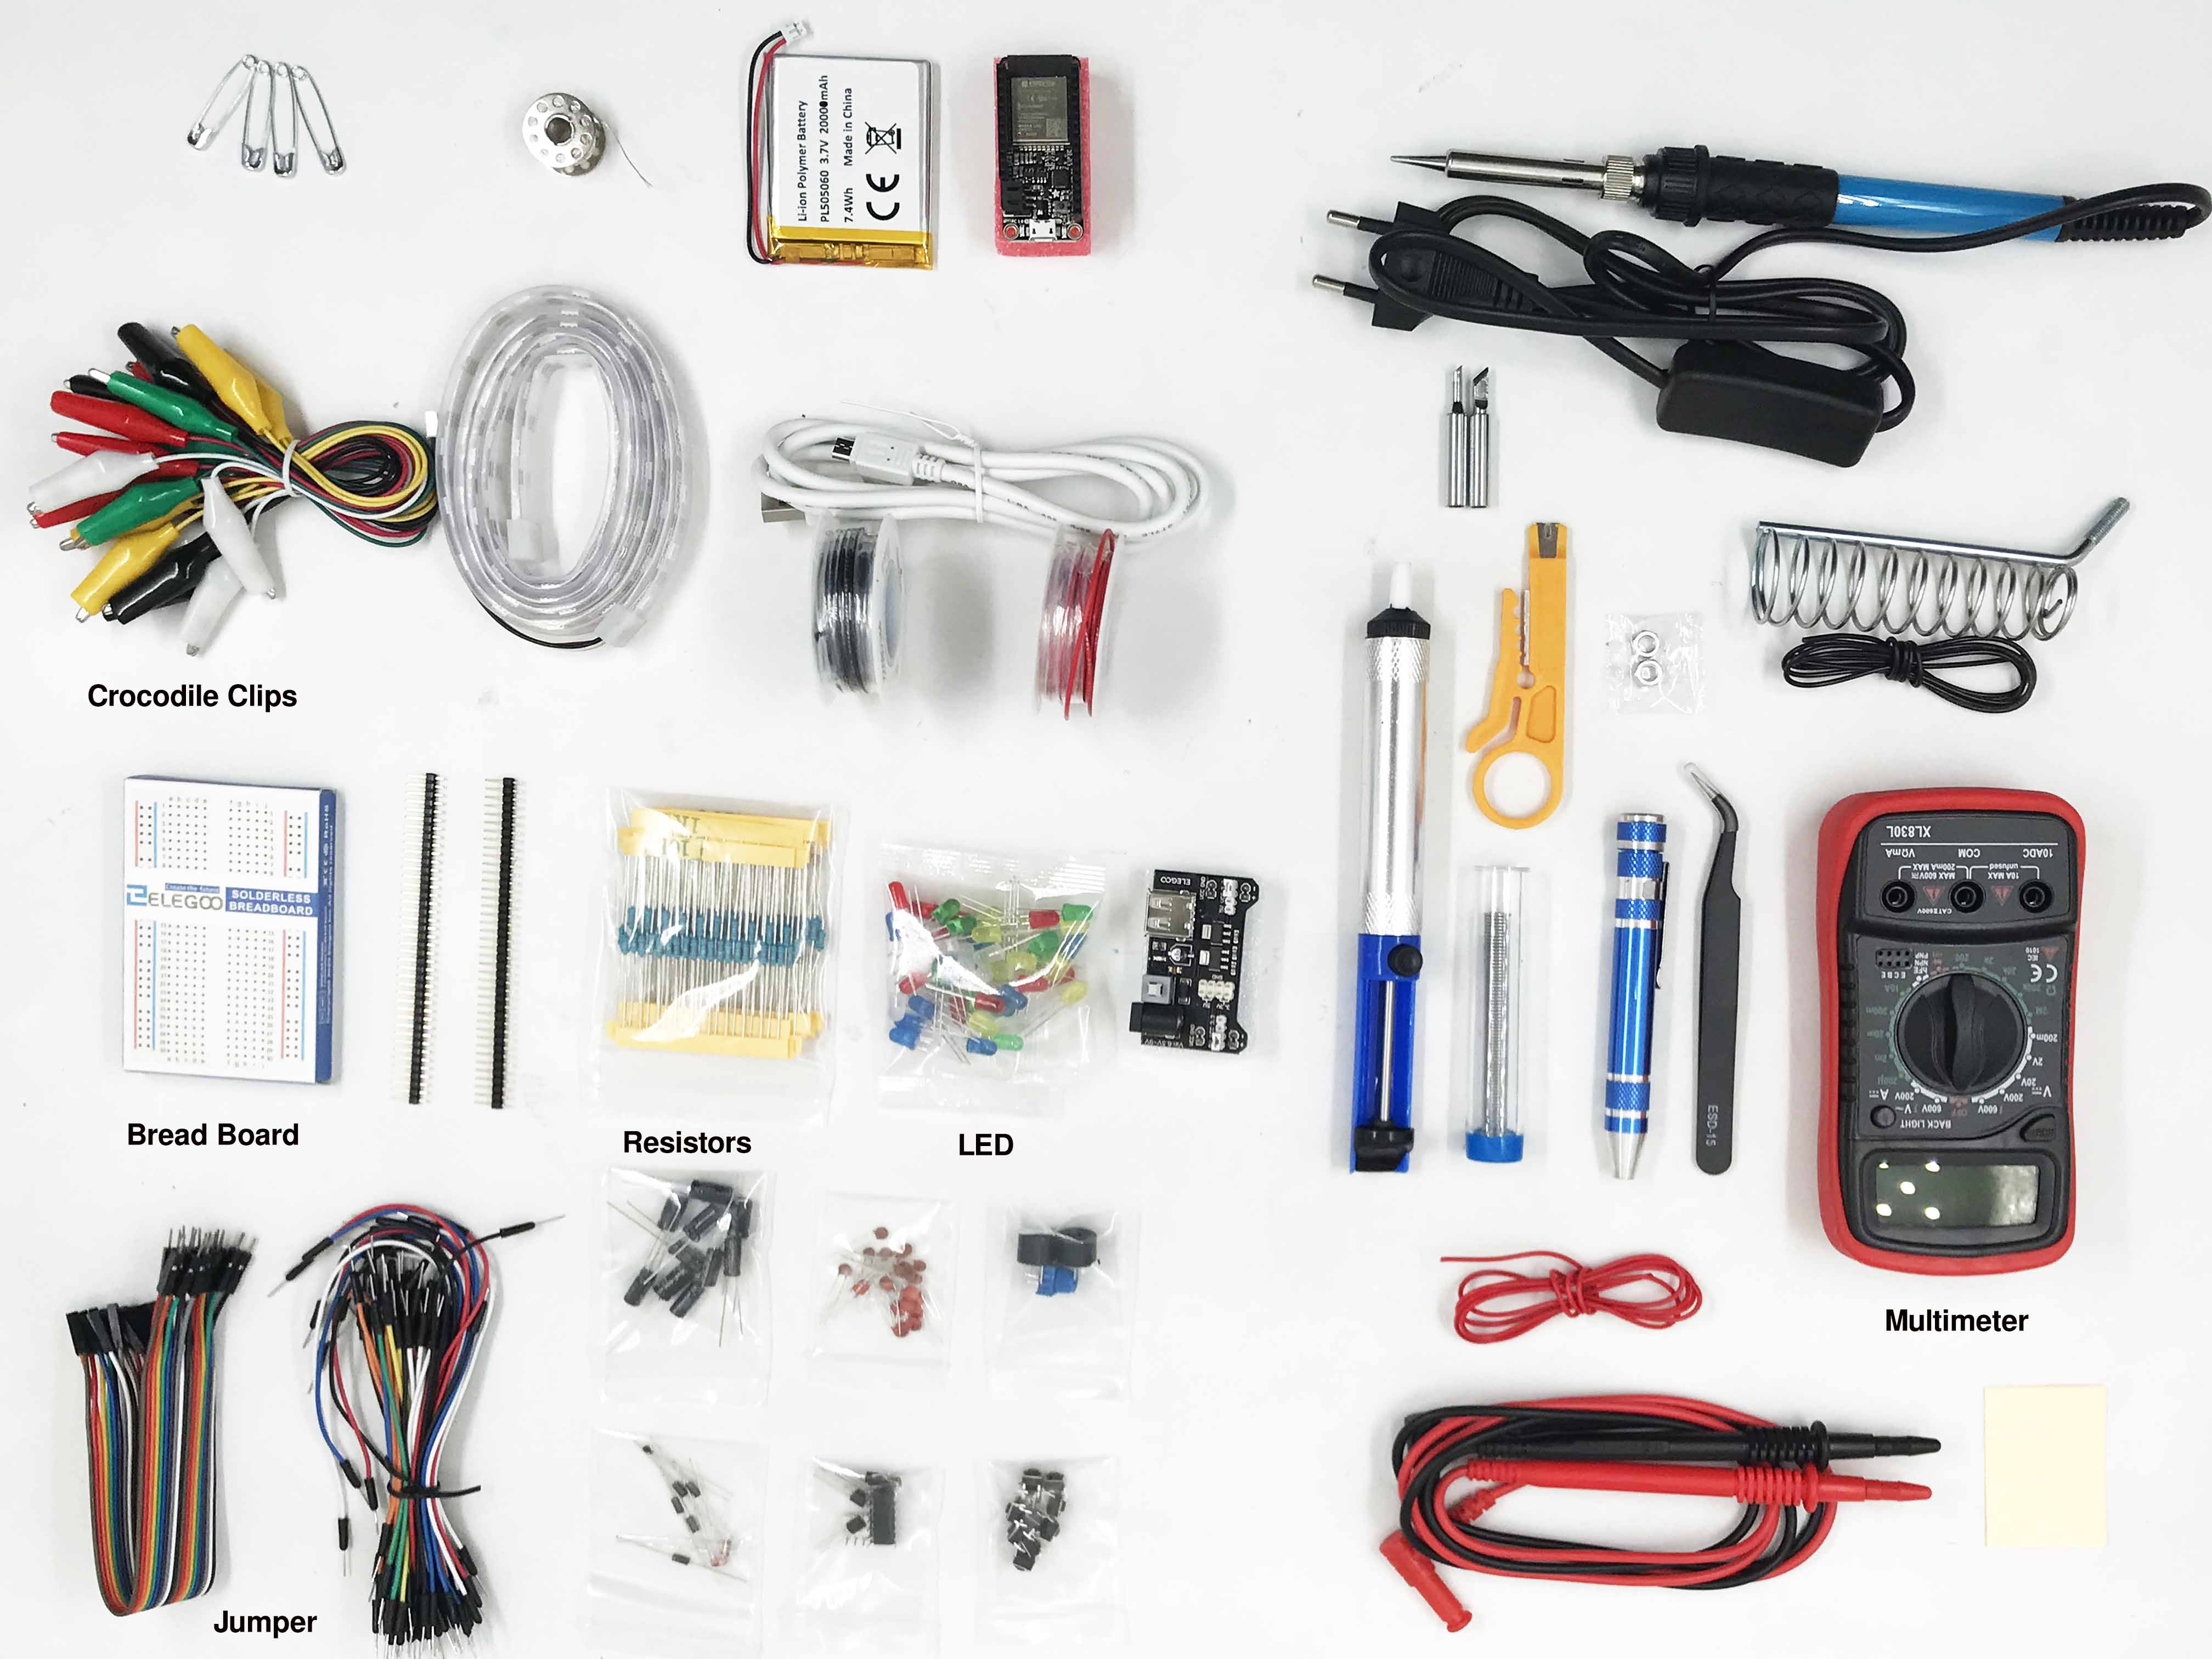
Tools
Here are some materials we may or may not use this week, but they are very helpful and useful for E-textiles. We all found our best friend for the week. Please meet Mr Helpful " MultiMeter"
Conductive Materials

The above mentioned conductive materials sheet is available in our studio, it is very helpful to see the different conductive fabrics and threads that are available to explore.
Day-1 Introduction to basic electronics and sensors with Emma Pareschi
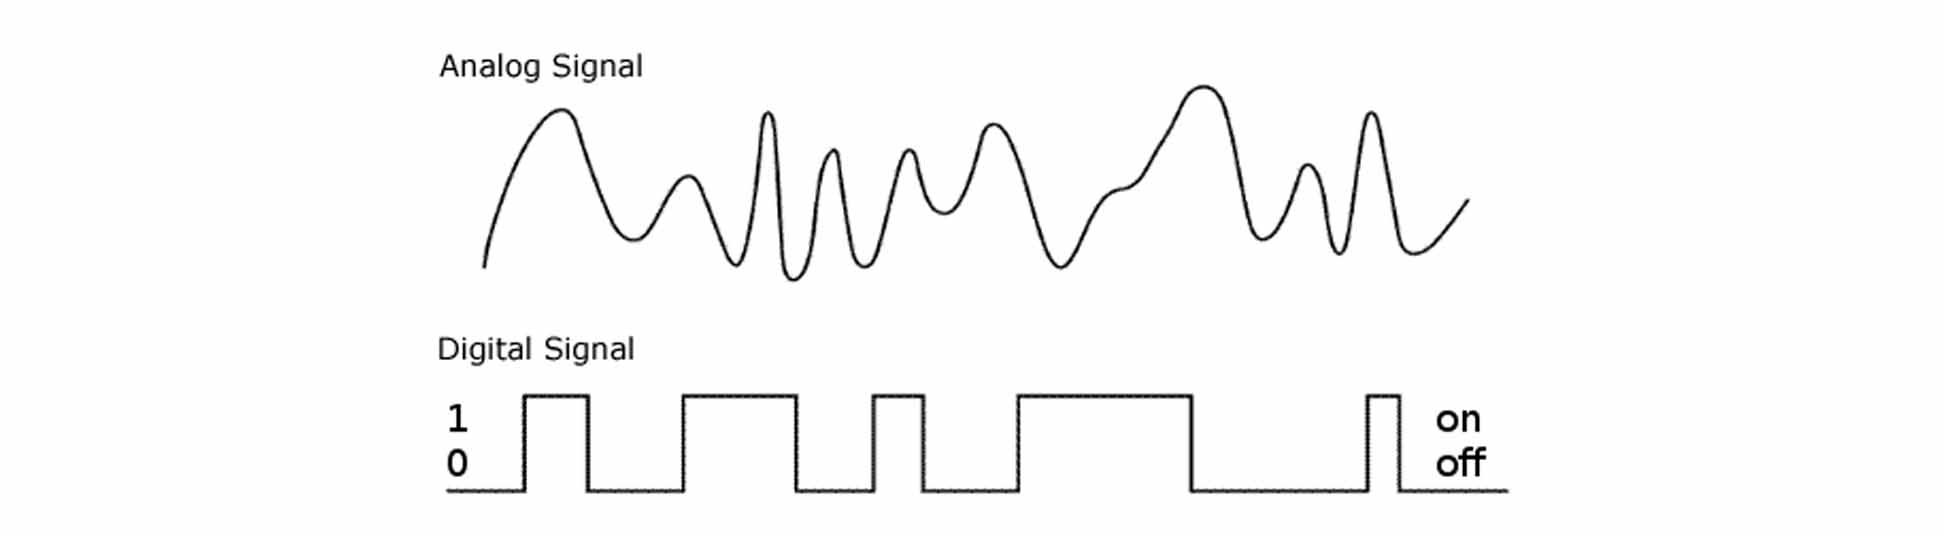
Digital Sensor - toggle (ON / OFF SWITCH)
Analog Sensor - pressure (through the material, across the material, bend,), stretch, location, bend and their combinations
Circuit - A circuit is a CLOSE LOOP in which electrons can travel in.
Resistor - A resistor is a passive two-terminal electrical component that implements electrical resistance as a circuit element.
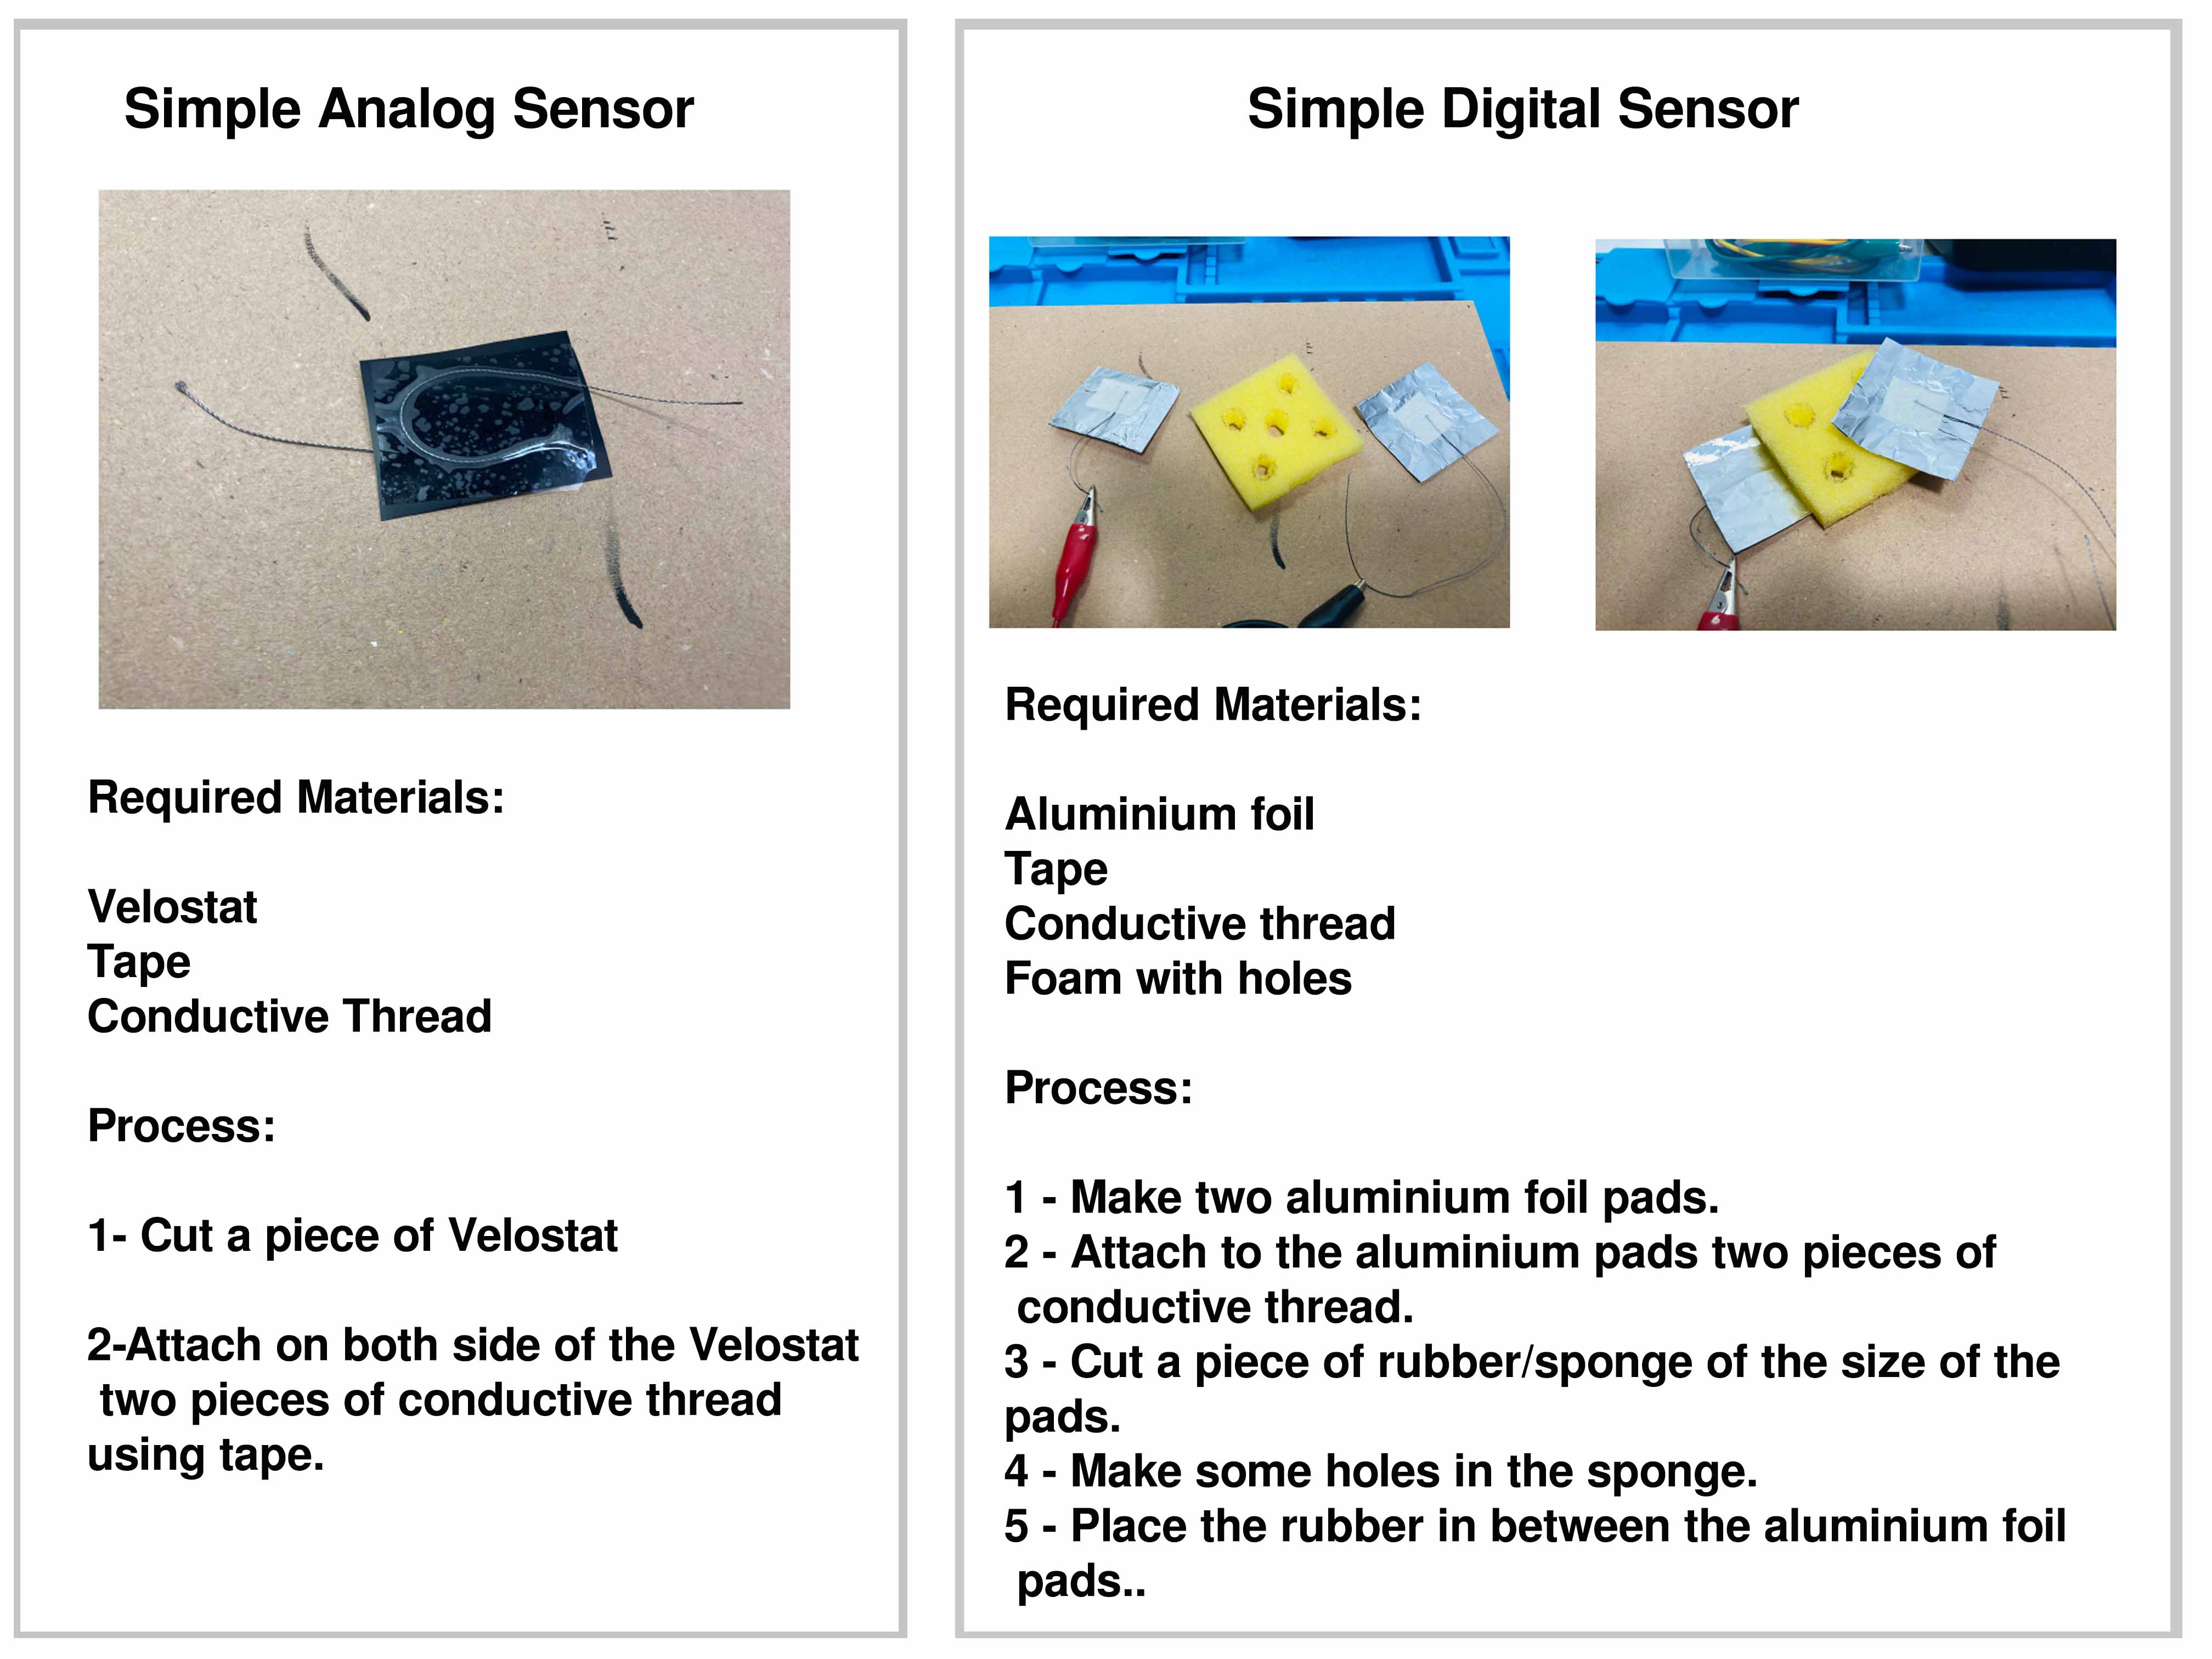
Velostat - This conductive material is also known as "Velostat" or "Linqstat".
Day-2 Introduction to basic electronics and sensors with Emma Pareschi
Arudrino Software

Arduino boards are able to read inputs - a light on a sensor, a finger on a button, and turn them into an output. You can tell your board what to do by sending a set of instructions to the microcontroller on the board.
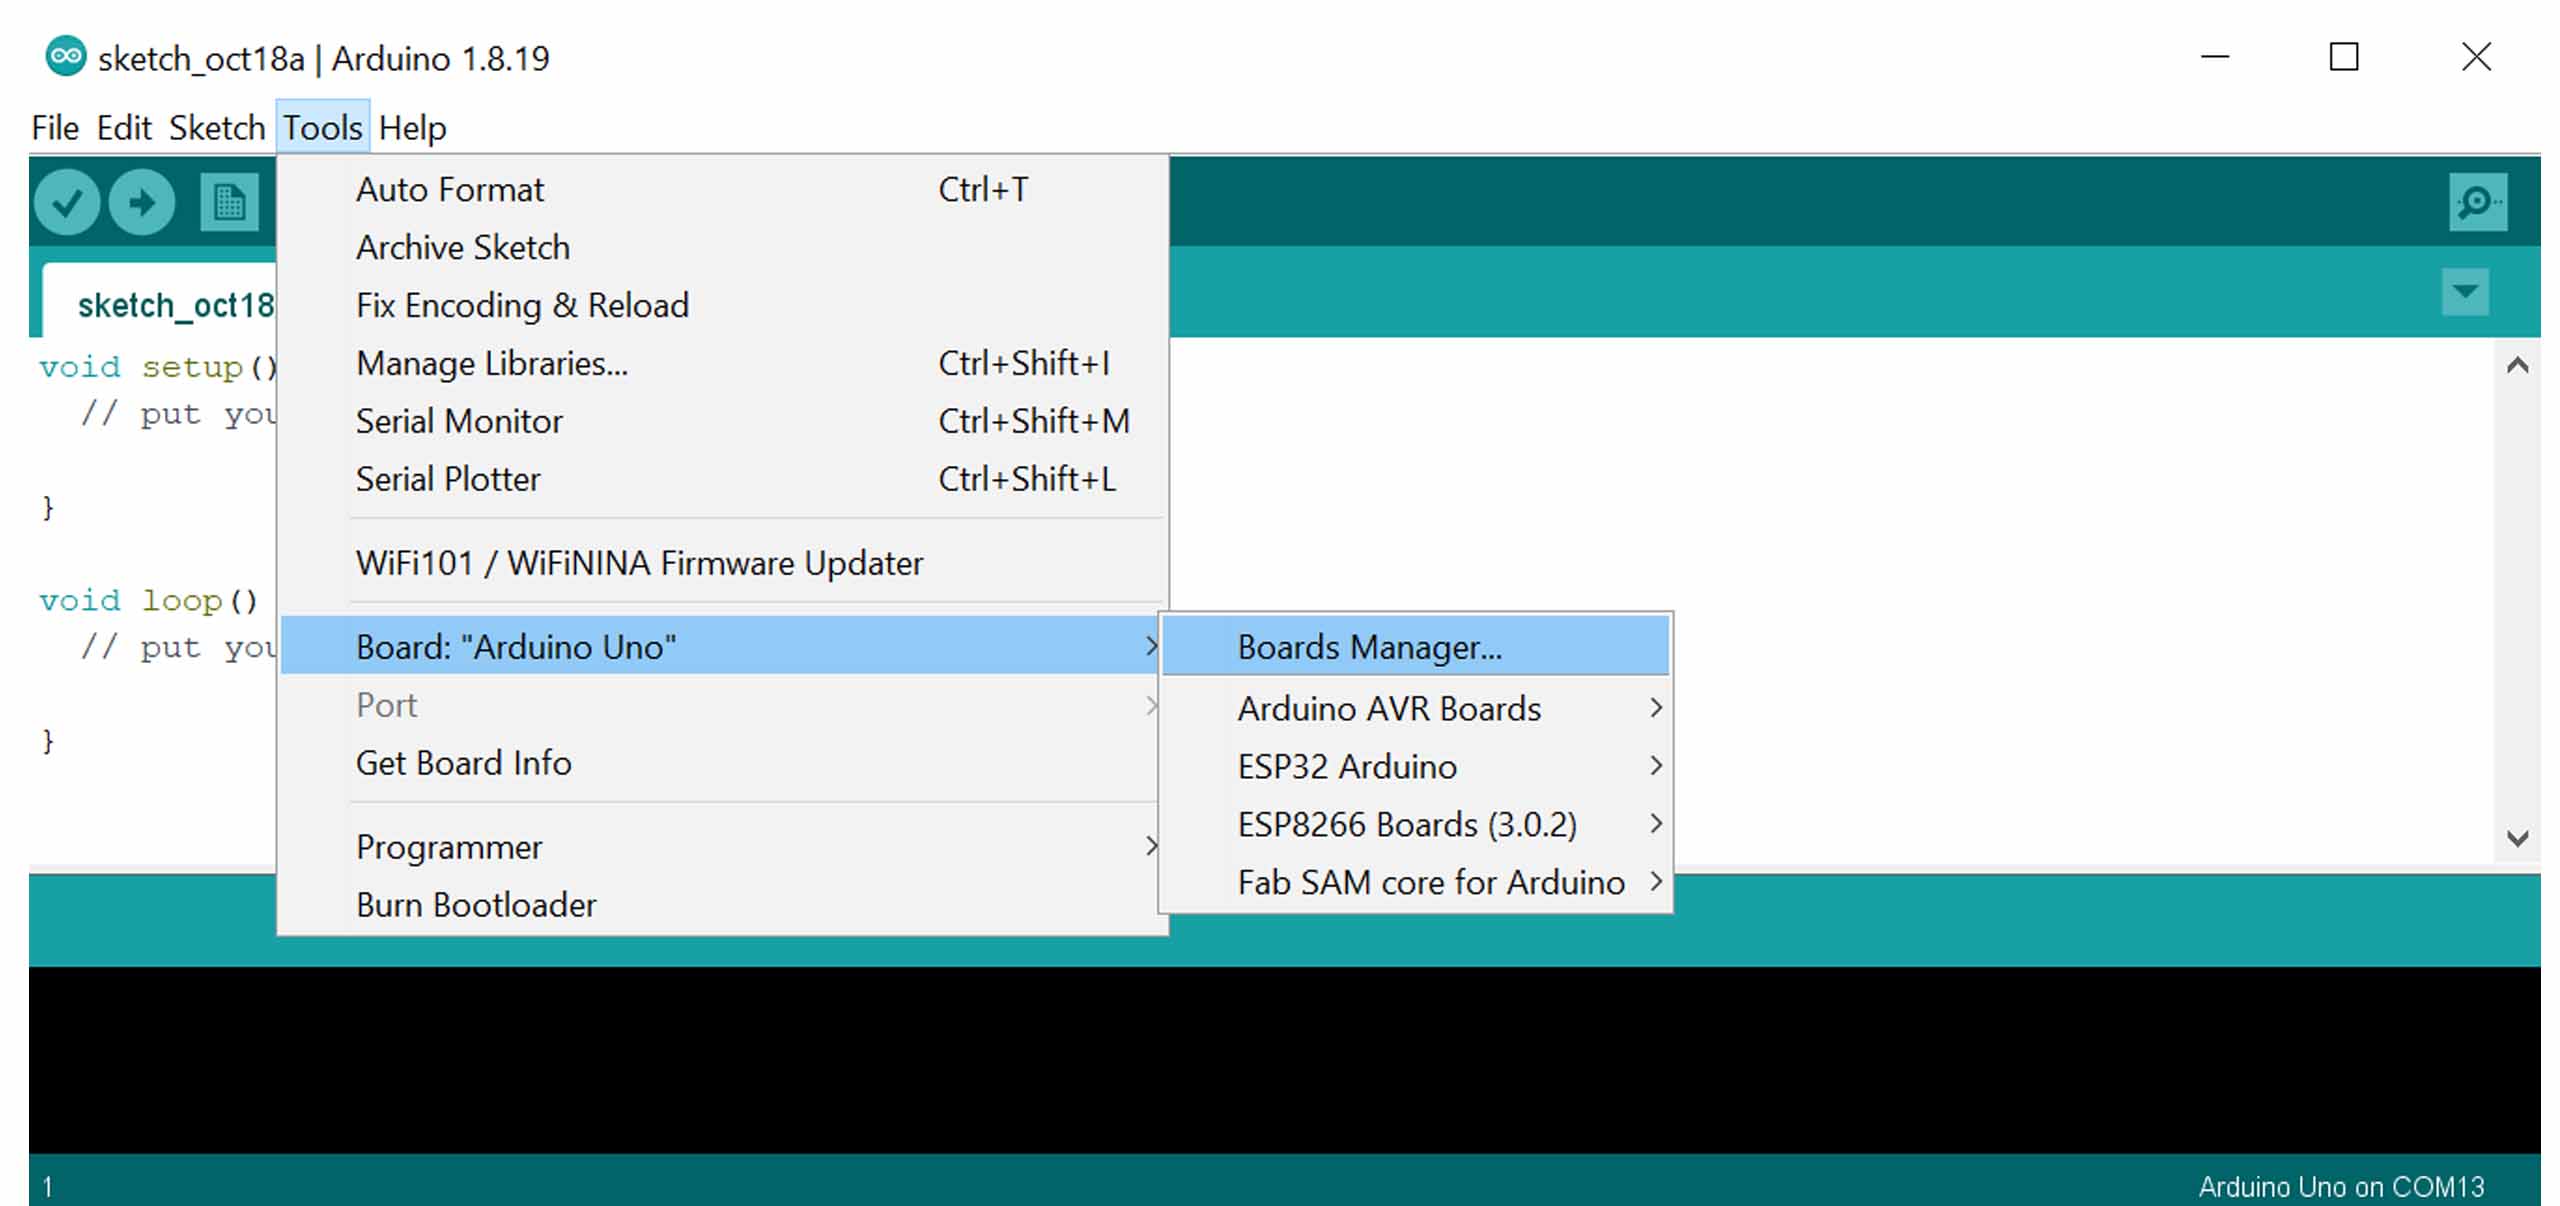
Esp32 Installation process
Follow the below process to Install Esp32. The process is same for other product installation as well. Visuals are from Fablab Bcn documentation.
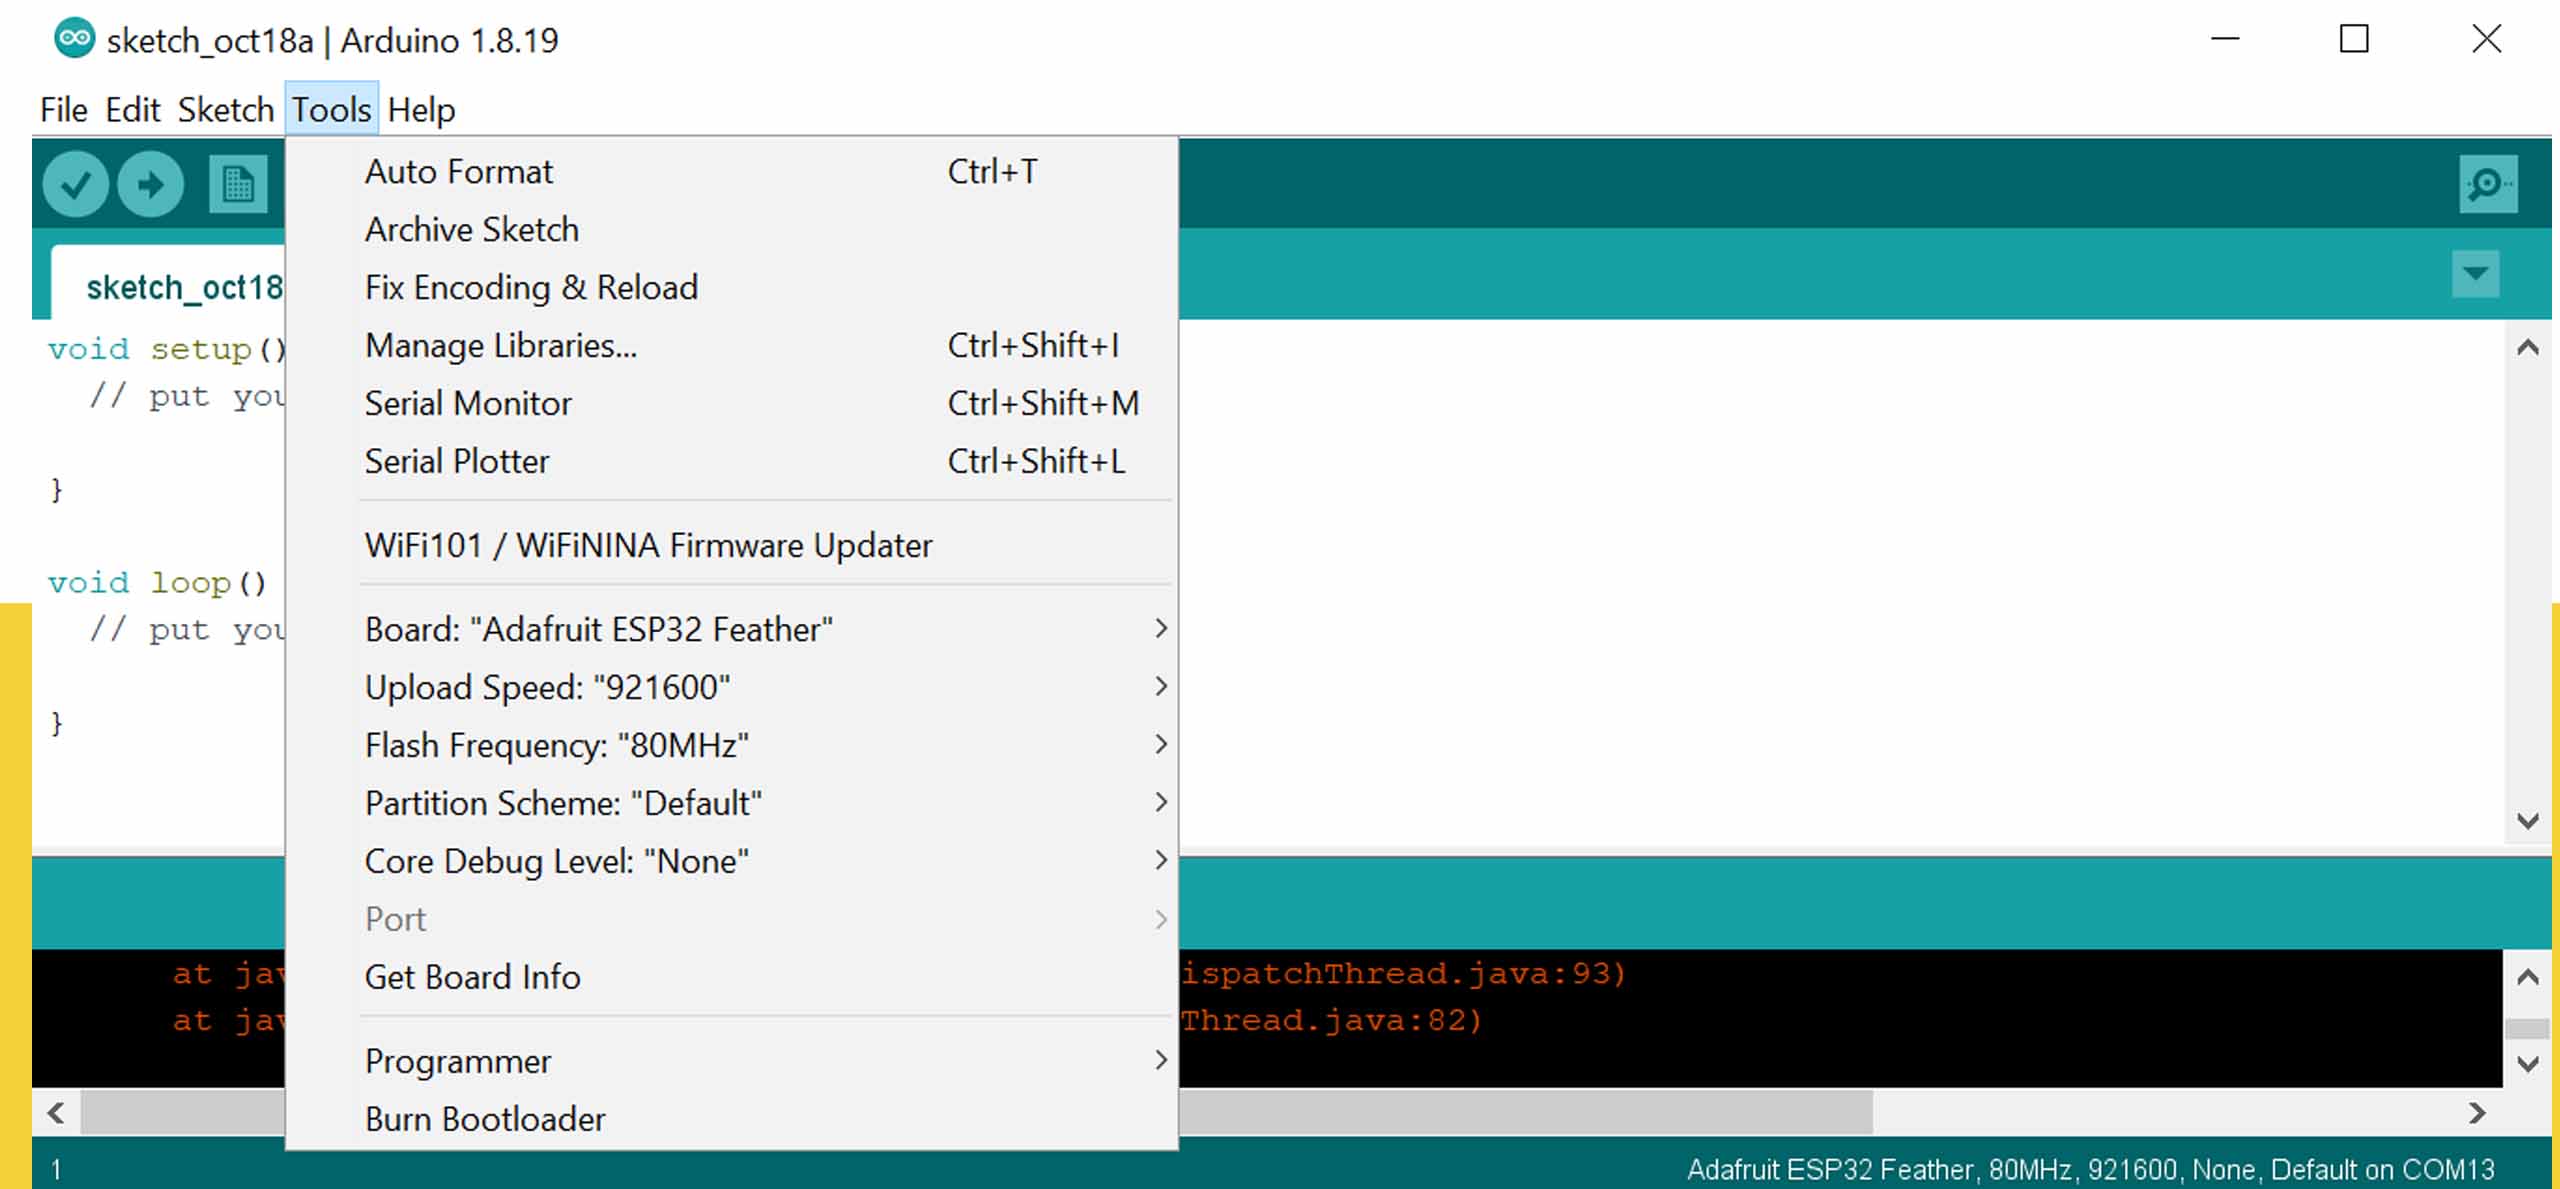
Go to Tools-Boards Arduino Uno- Boards Manager.
In Boards Manager, Type Esp32 and Click Install and click ok after Installed.
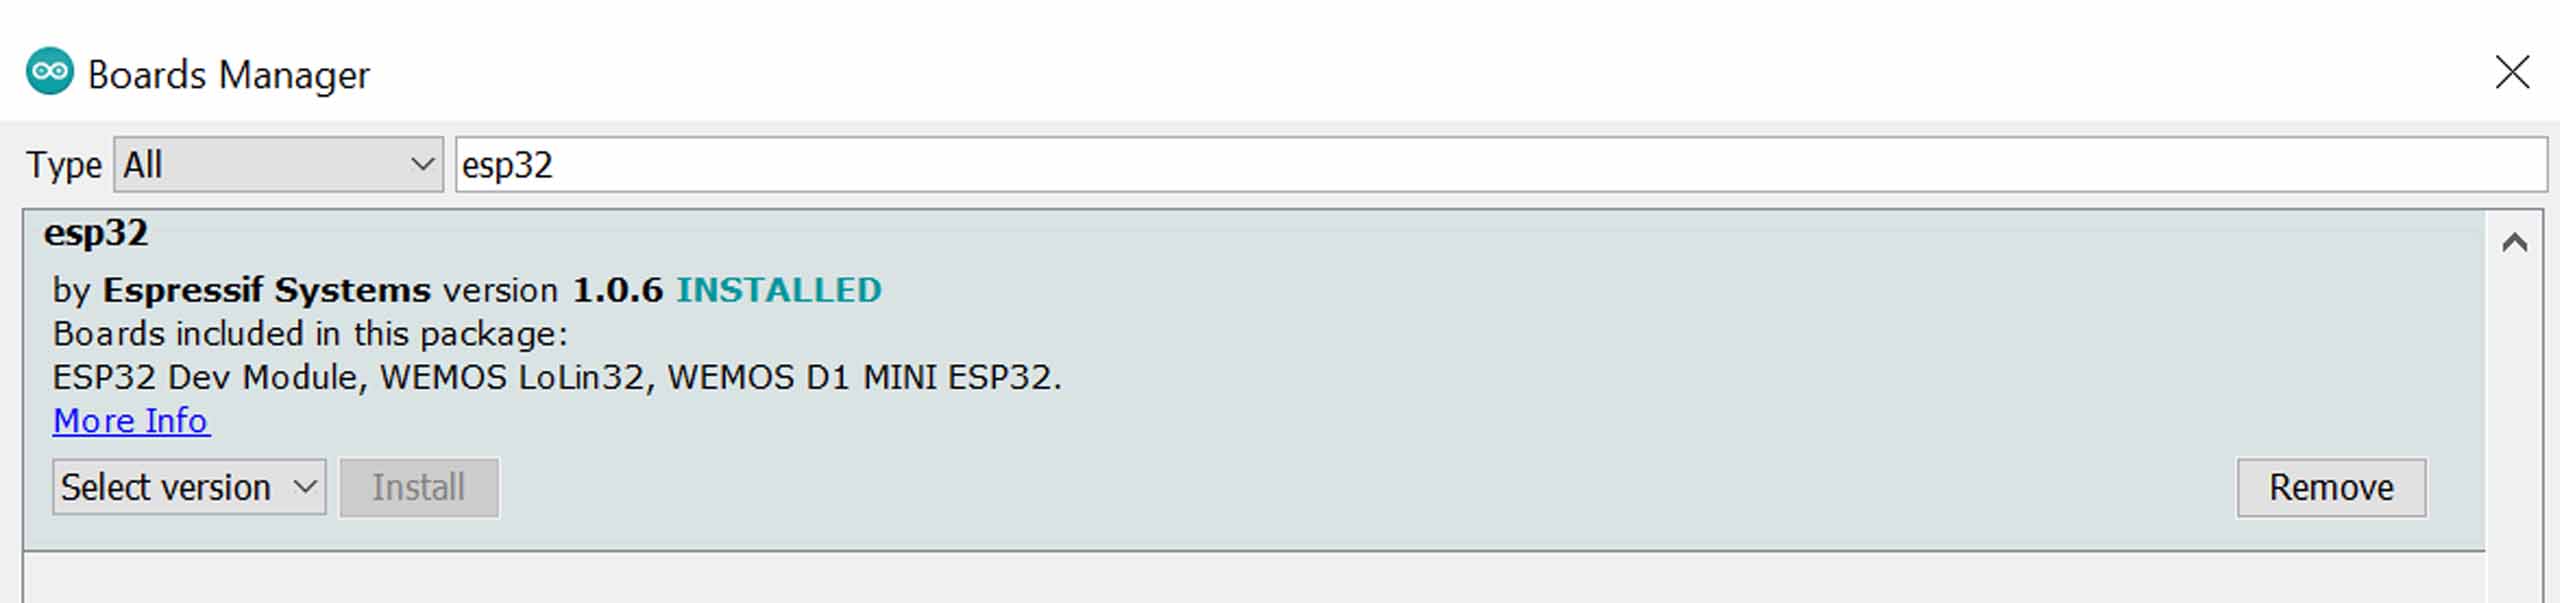
After Installed, Now you can see the Board:Adafruit ESP32 feather in tools drop down menu. We are now ready to work with the Adafruit ESP32 Feather.
Adafruit ESP32 Feather Pin details
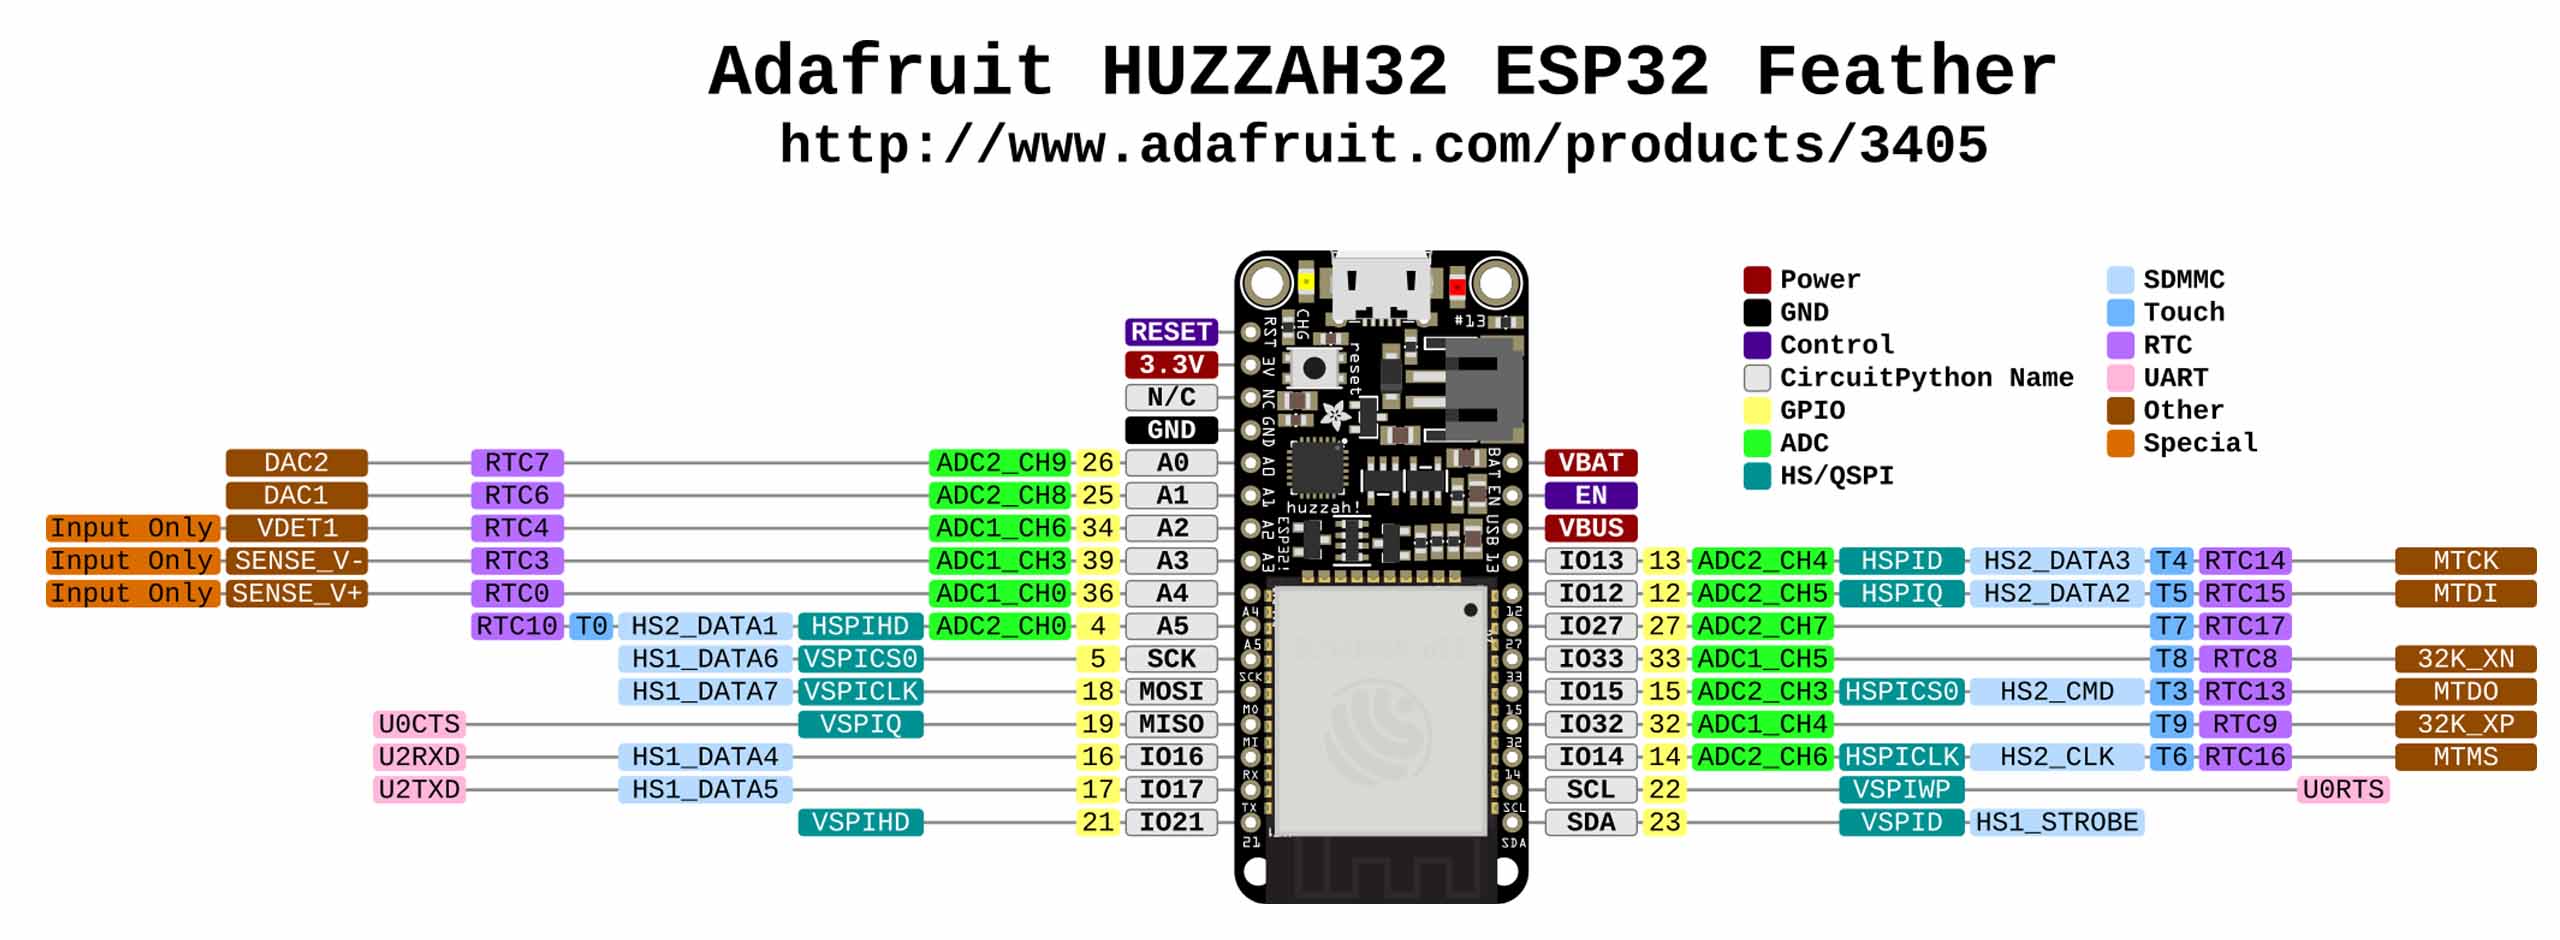 Visual from Fablab Bcn Documentation
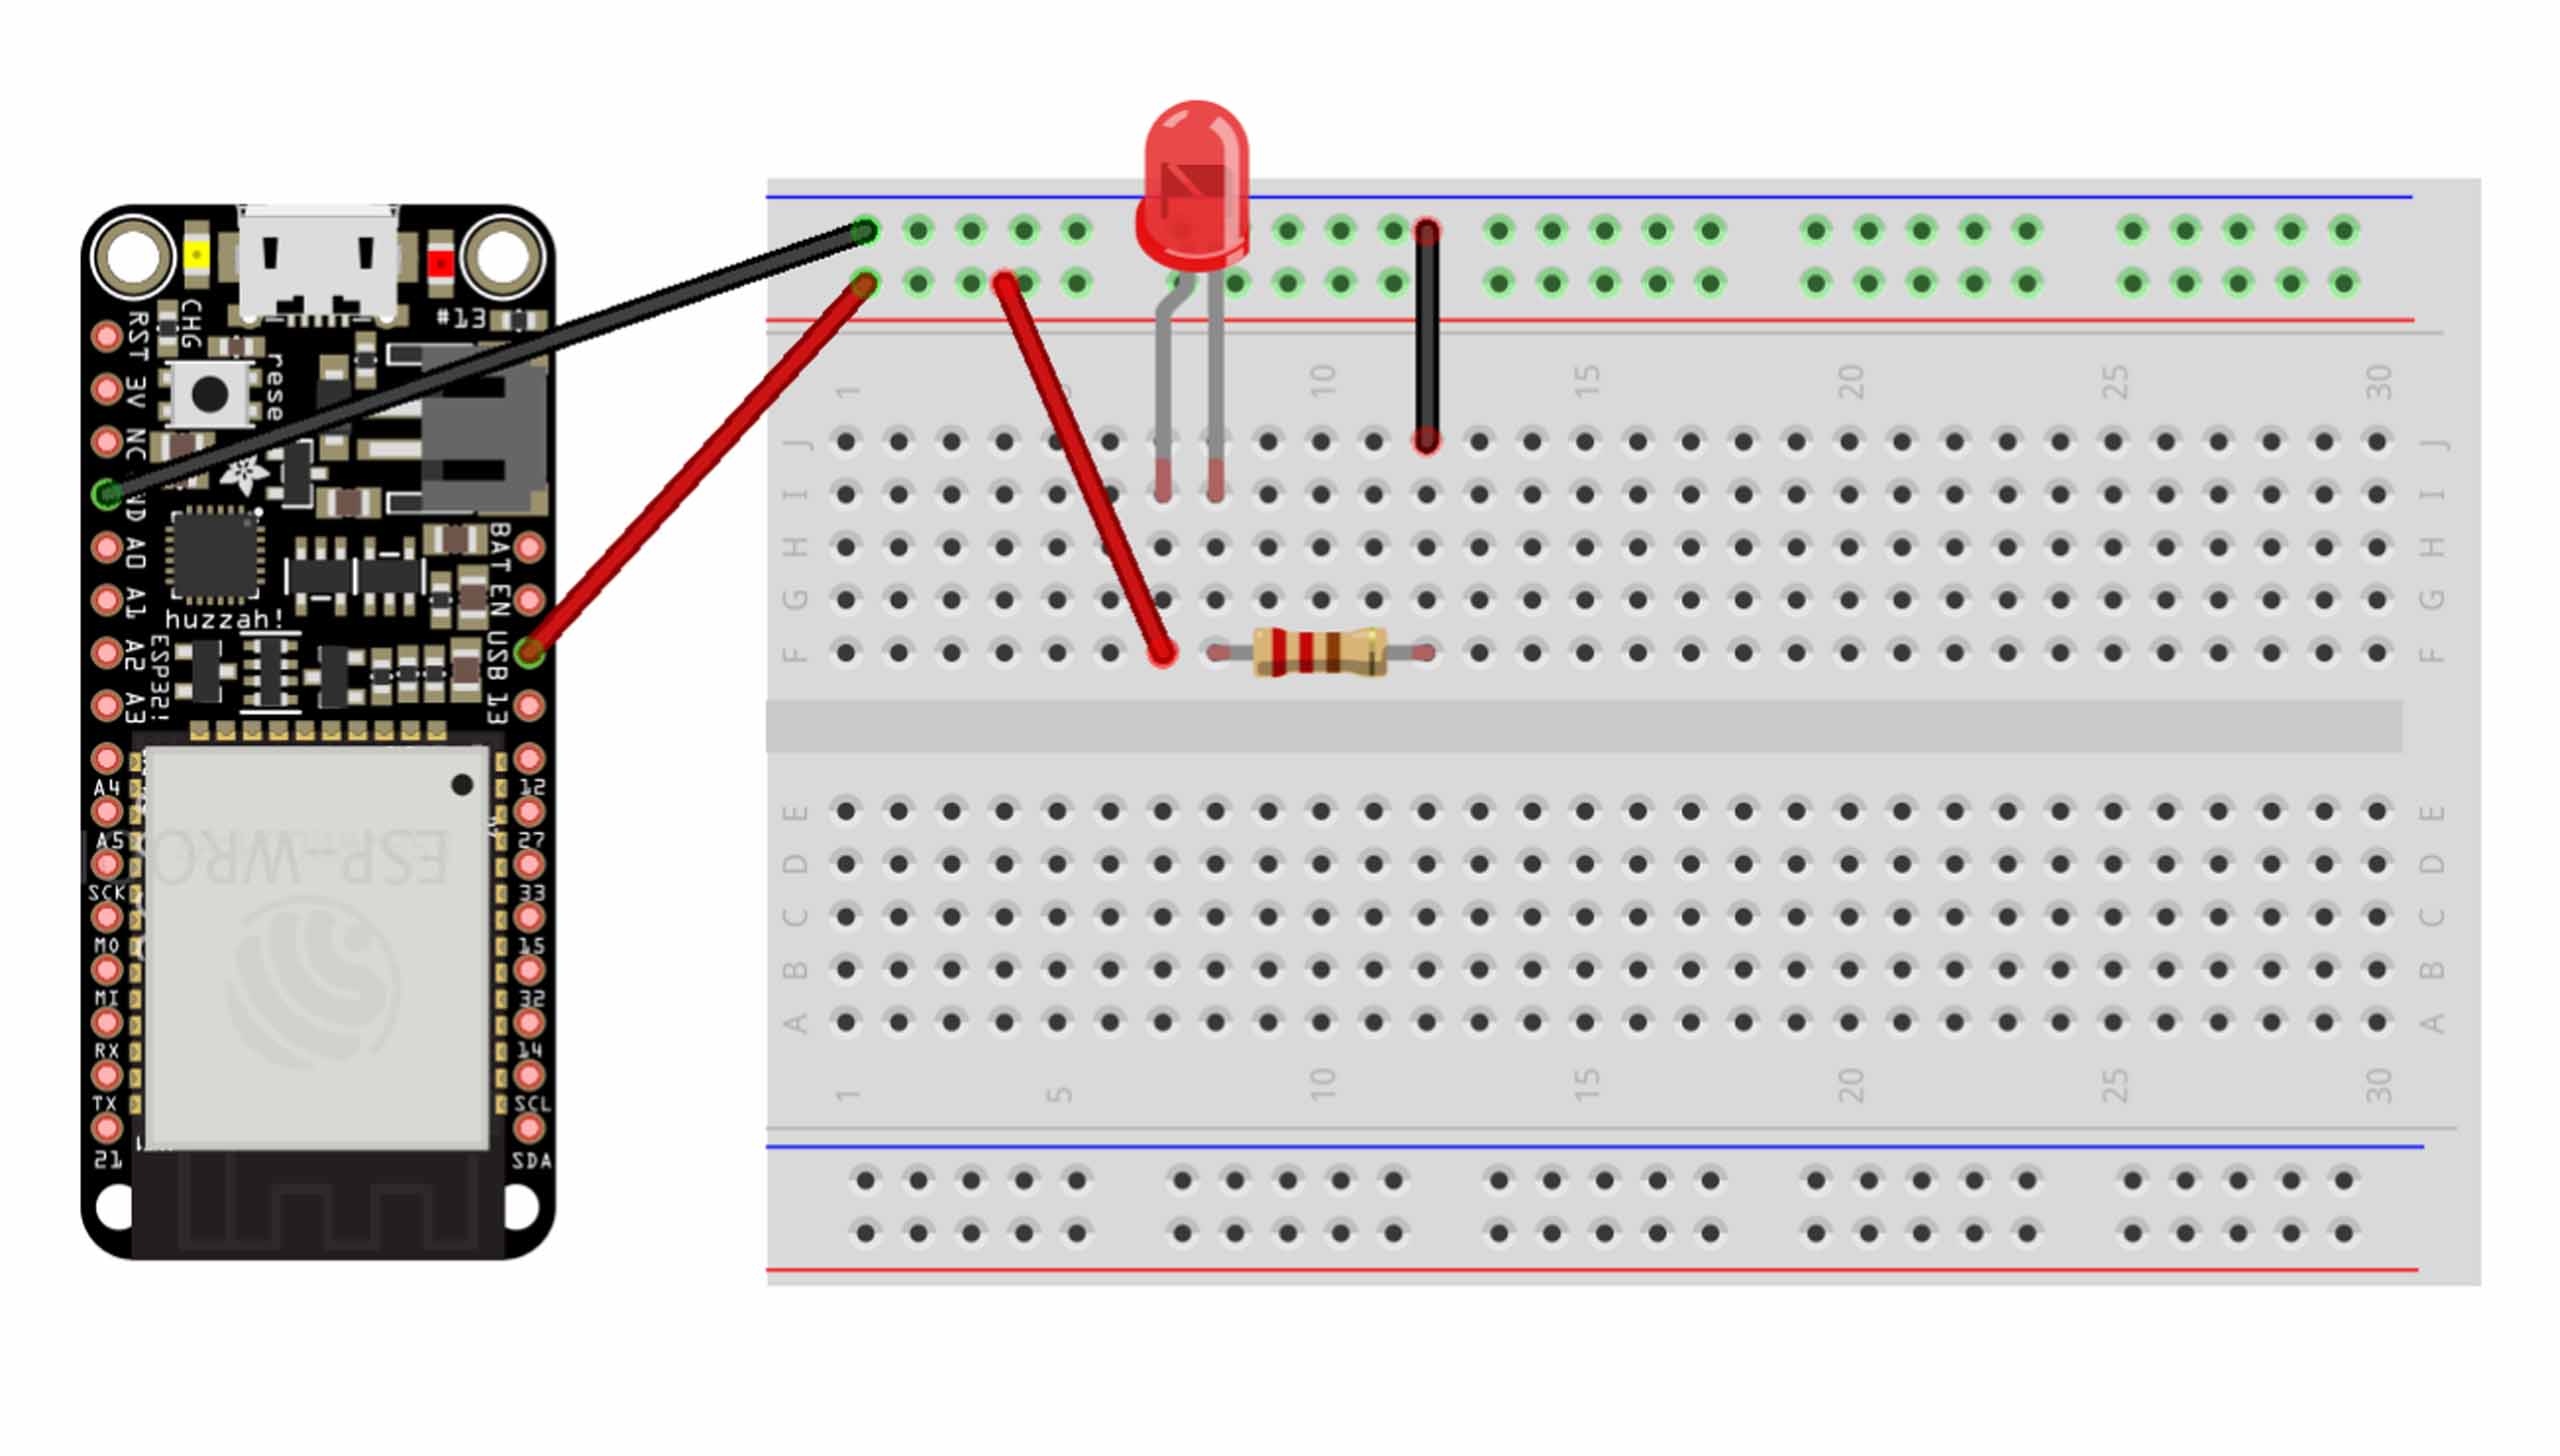
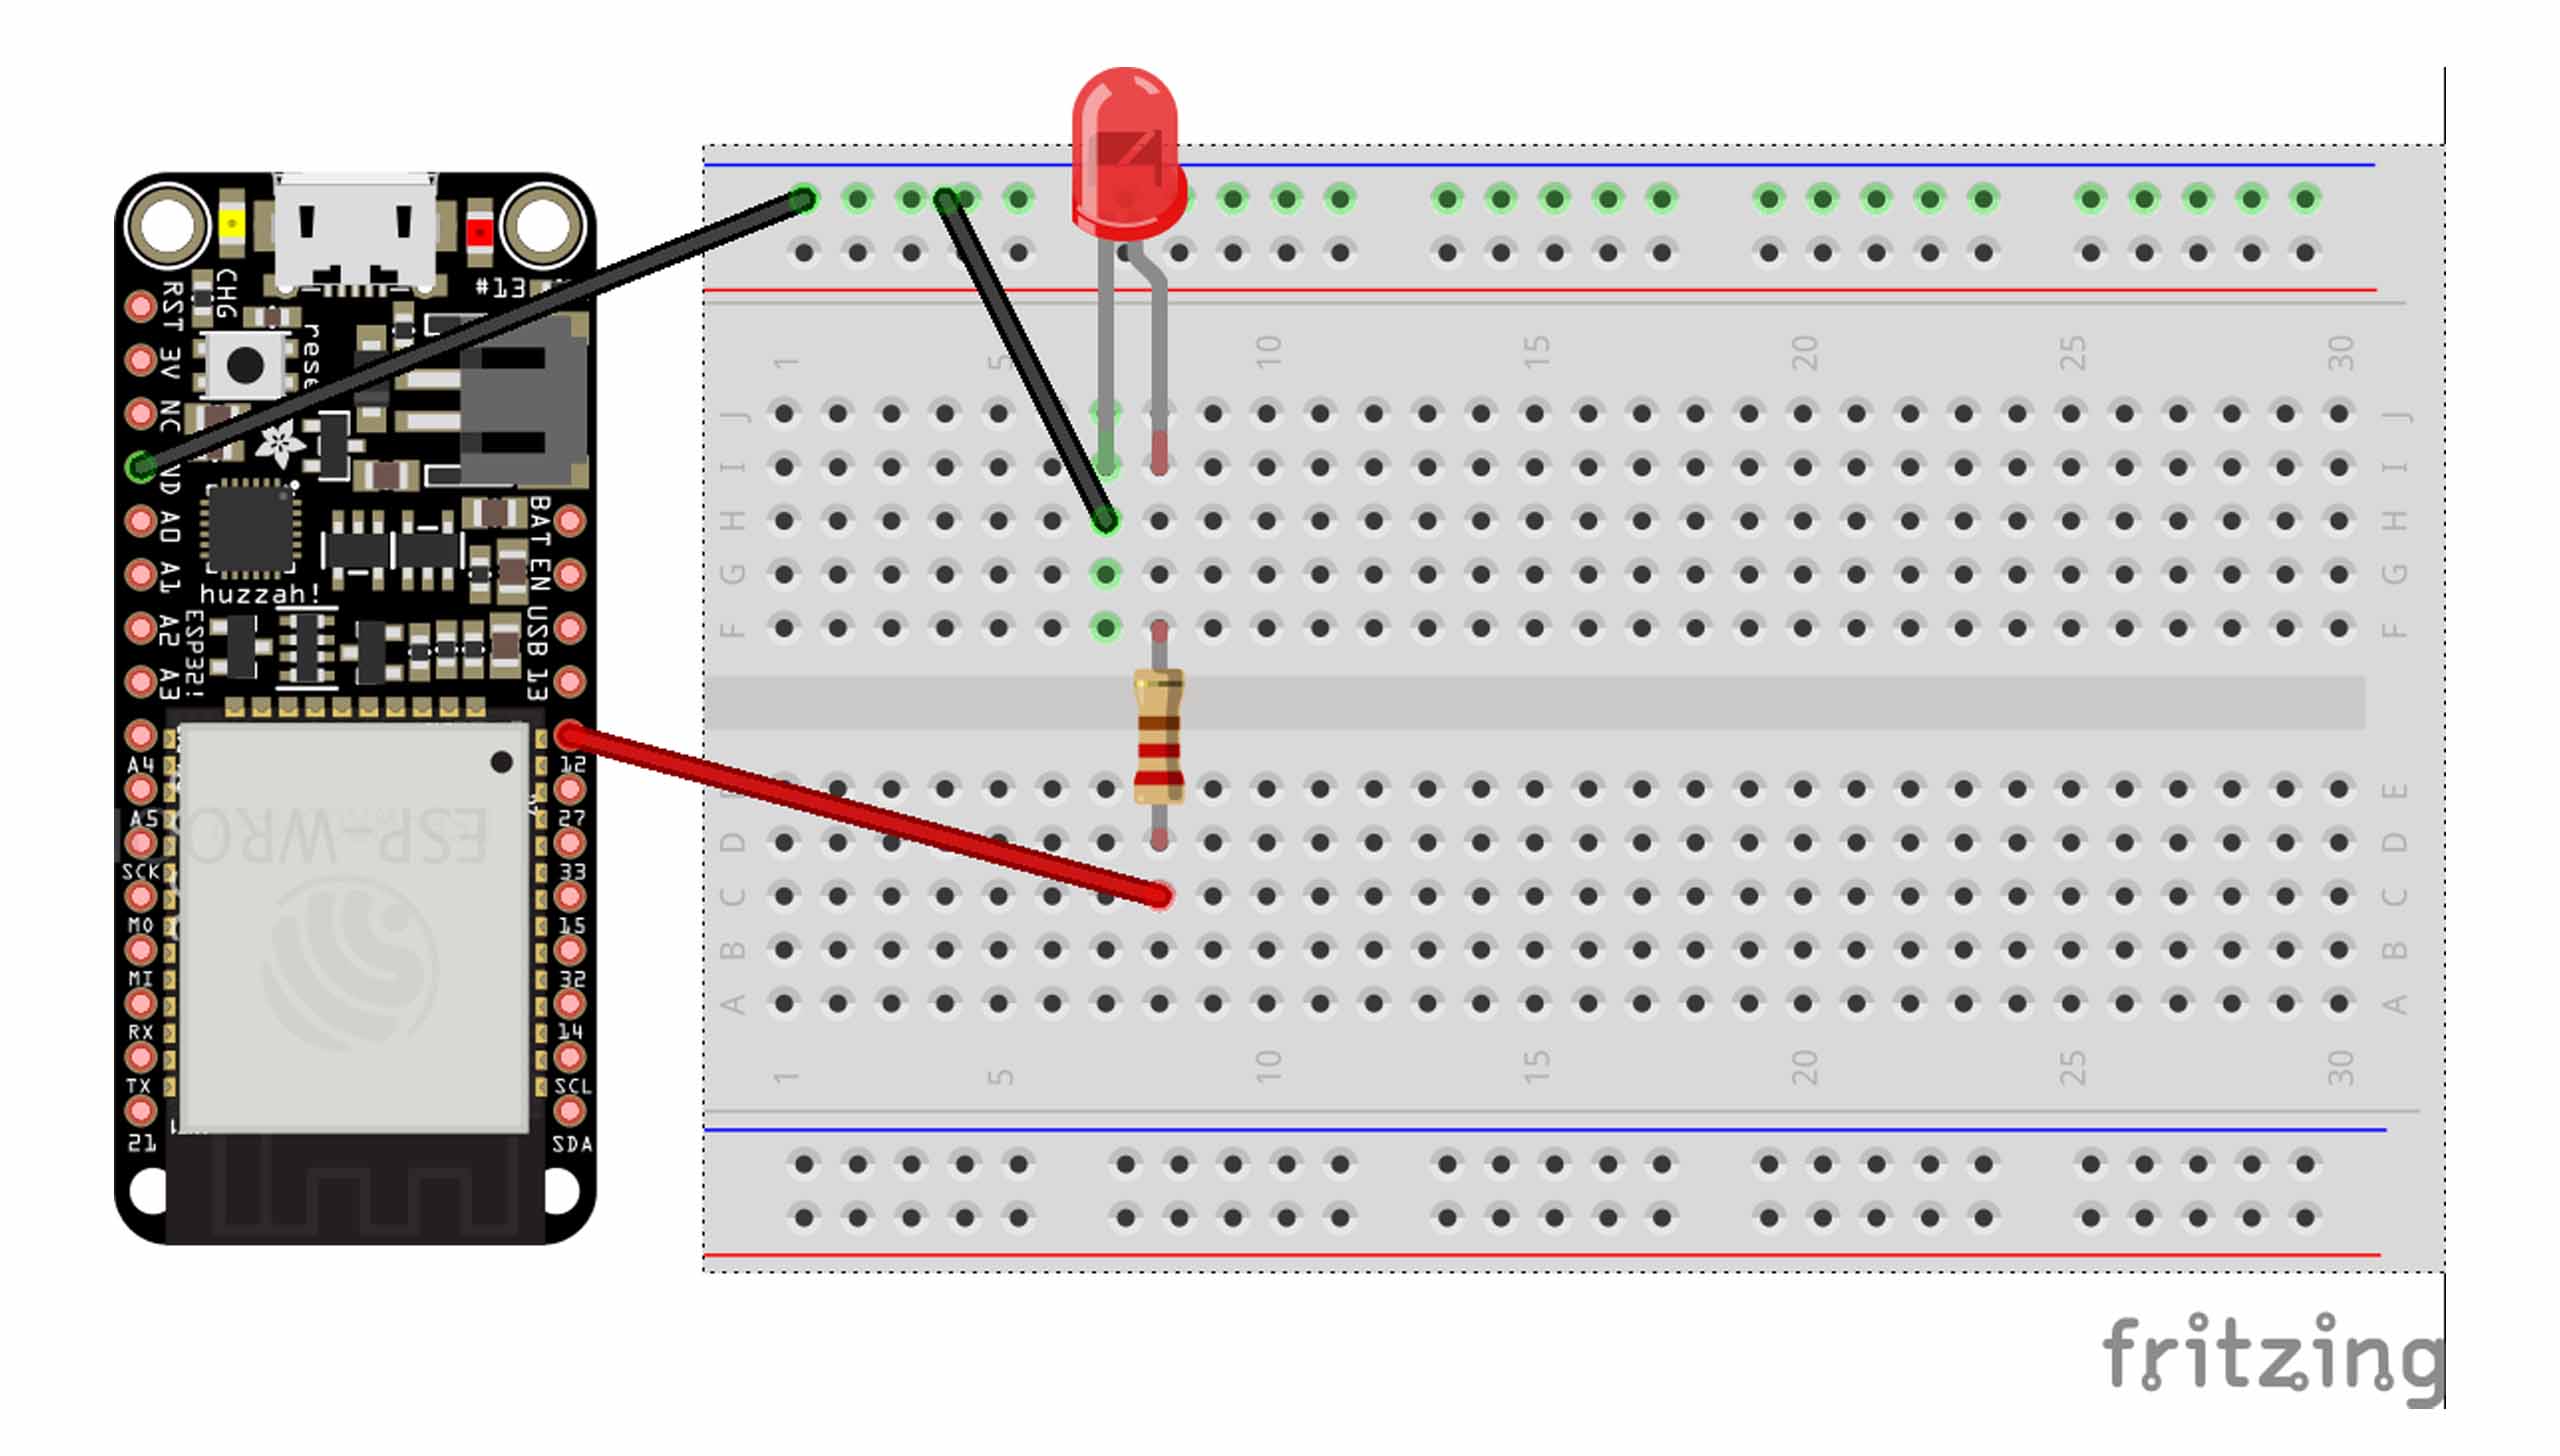
We made a simple circuit using Breadboard, Feather, Jumping wire, Resistor and battery.
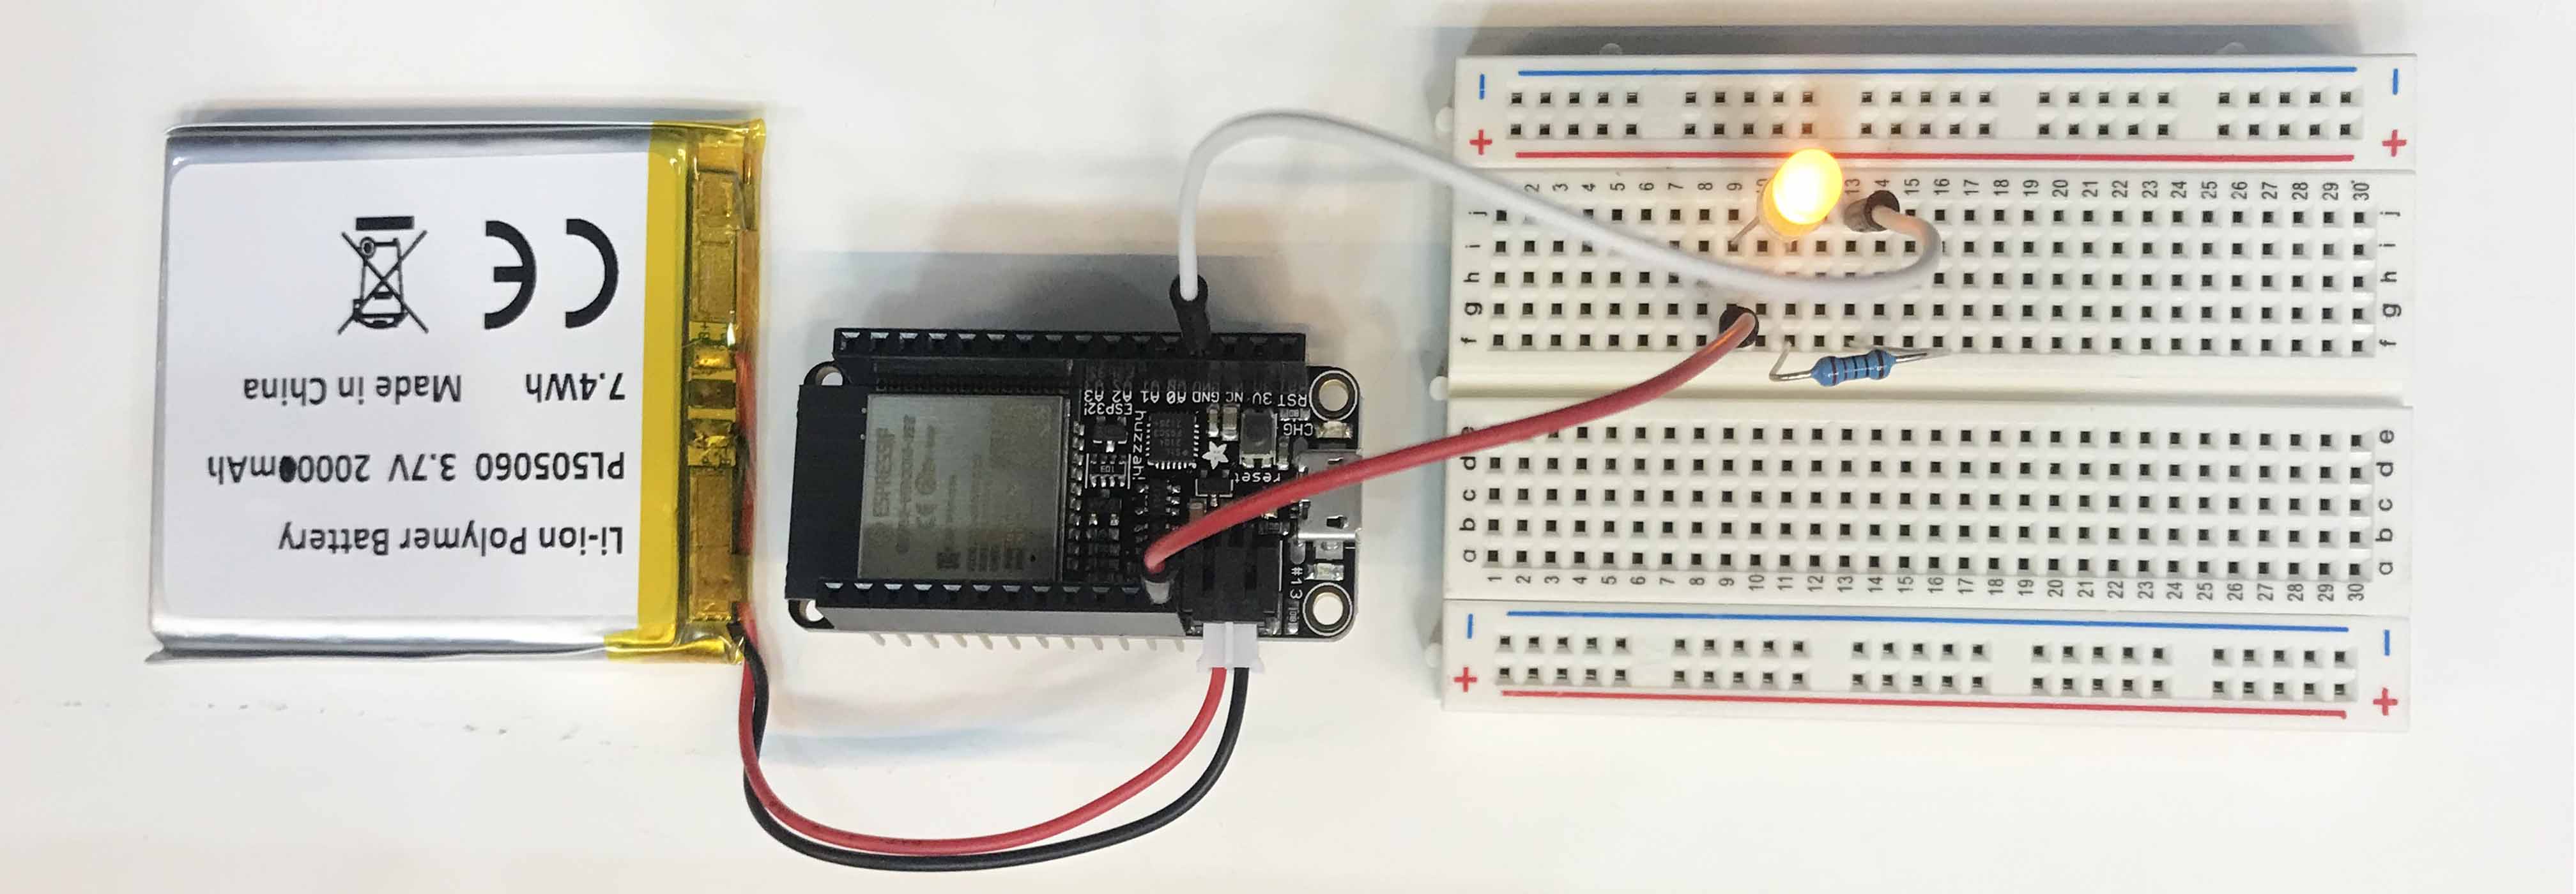
To start with Arudrino we tried using blink that are in built in the programme. We also tried changing the blink delay with the numbers to check the difference.
Blink Working
 Visual from Fablab Bcn Documentation
Digital output with digitalWrite() using delay function.
<br /><br />
void setup() {
  pinMode(13, OUTPUT);    // sets the digital pin 13 as output
}

void loop() {
  digitalWrite(13, HIGH); // sets the digital pin 13 on
  delay(1000);            // waits for a second
  digitalWrite(13, LOW);  // sets the digital pin 13 off
  delay(1000);            // waits for a second
}
 Visual from Fablab Bcn Documentation
Digital read:

int ledPin = 13;  // LED connected to digital pin 13
int inPin = 7;    // pushbutton connected to digital pin 7
int val = 0;      // variable to store the read value

void setup() {
  pinMode(ledPin, OUTPUT);  // sets the digital pin 13 as output
  pinMode(inPin, INPUT);    // sets the digital pin 7 as input
}

void loop() {
  val = digitalRead(inPin);   // read the input pin
  digitalWrite(ledPin, val);  // sets the LED to the button's value
}
include <analogWrite.h>

int Sensor = A5;
int LED = 12 ;

void setup() {
  // put your setup code here, to run once:
  pinMode (Sensor, INPUT);
  pinMode (LED , OUTPUT) ;
  Serial.begin (9600) ;

}

void loop() {

  int SensorReading = analogRead (Sensor) ;
  Serial.println (SensorReading);
  int mapValue = map (SensorReading, 1300, 4095, 255, 0);
  mapValue = constrain (mapValue, 0, 255);
  Serial.print ("Maped value;   ");
  Serial.println (mapValue);
  analogWrite(LED, mapValue) ;
  delay (100);
}
Day-3 Making Sensor Swatches with Jessica Stanley
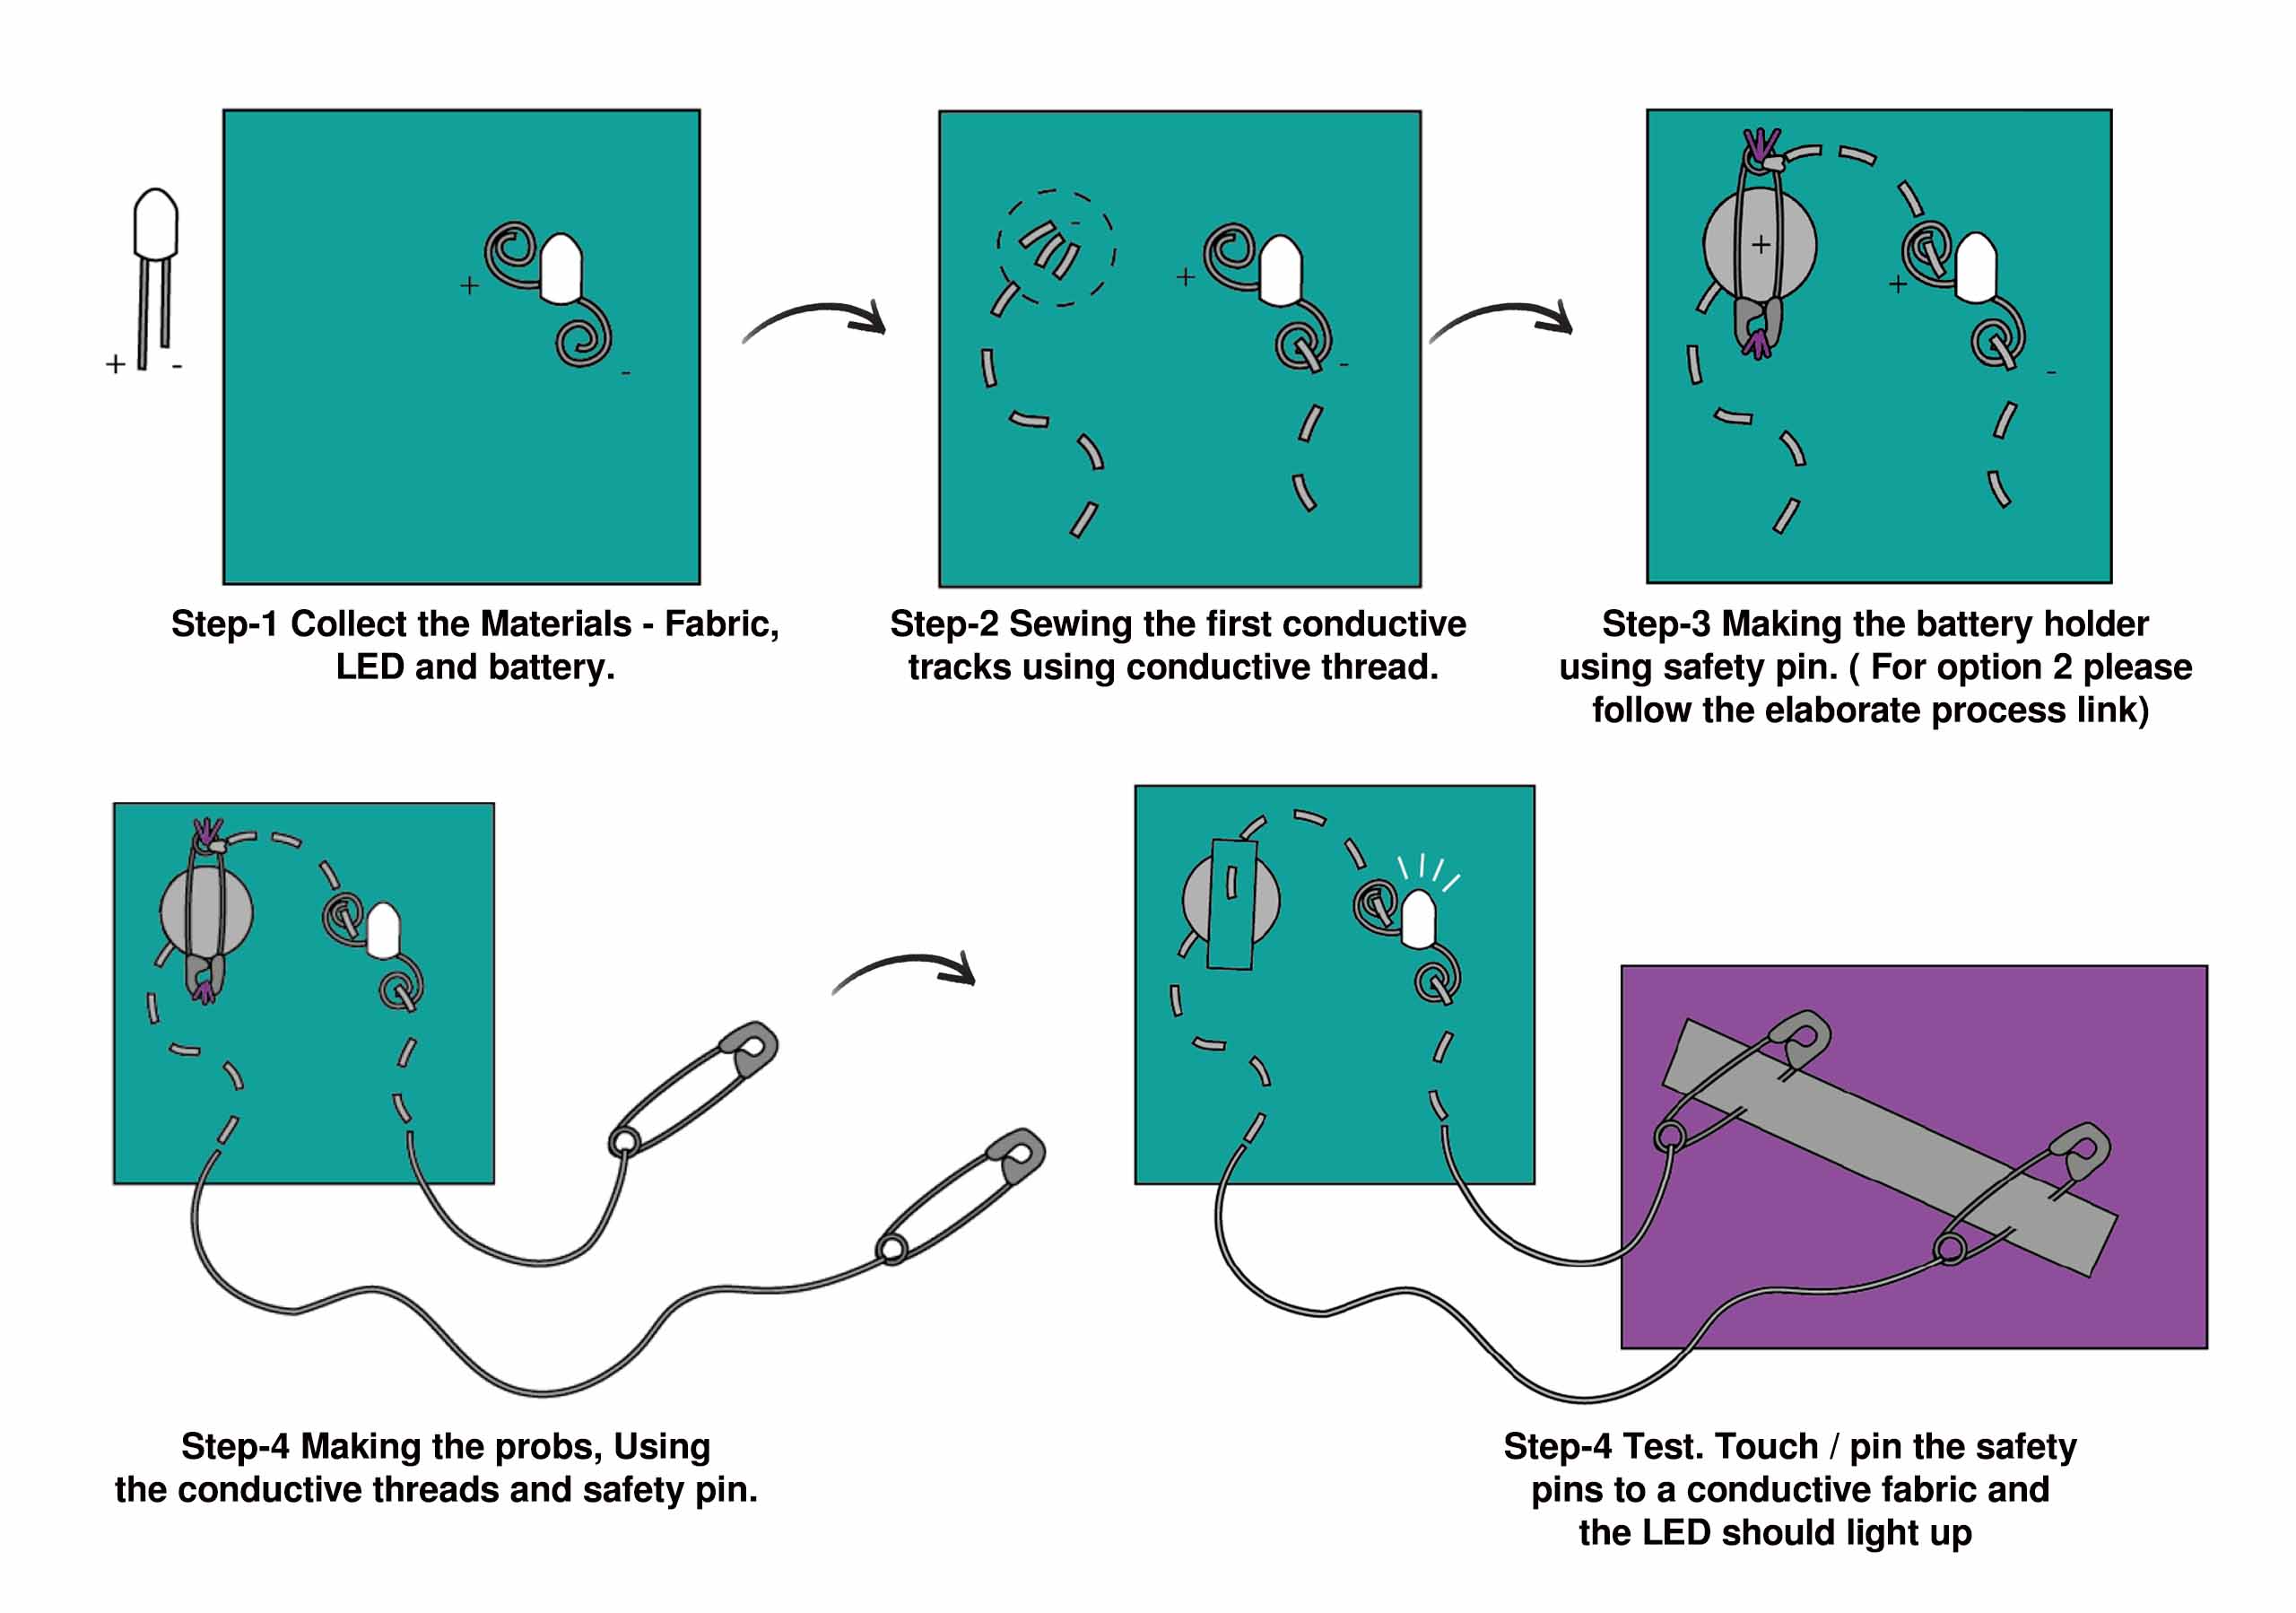
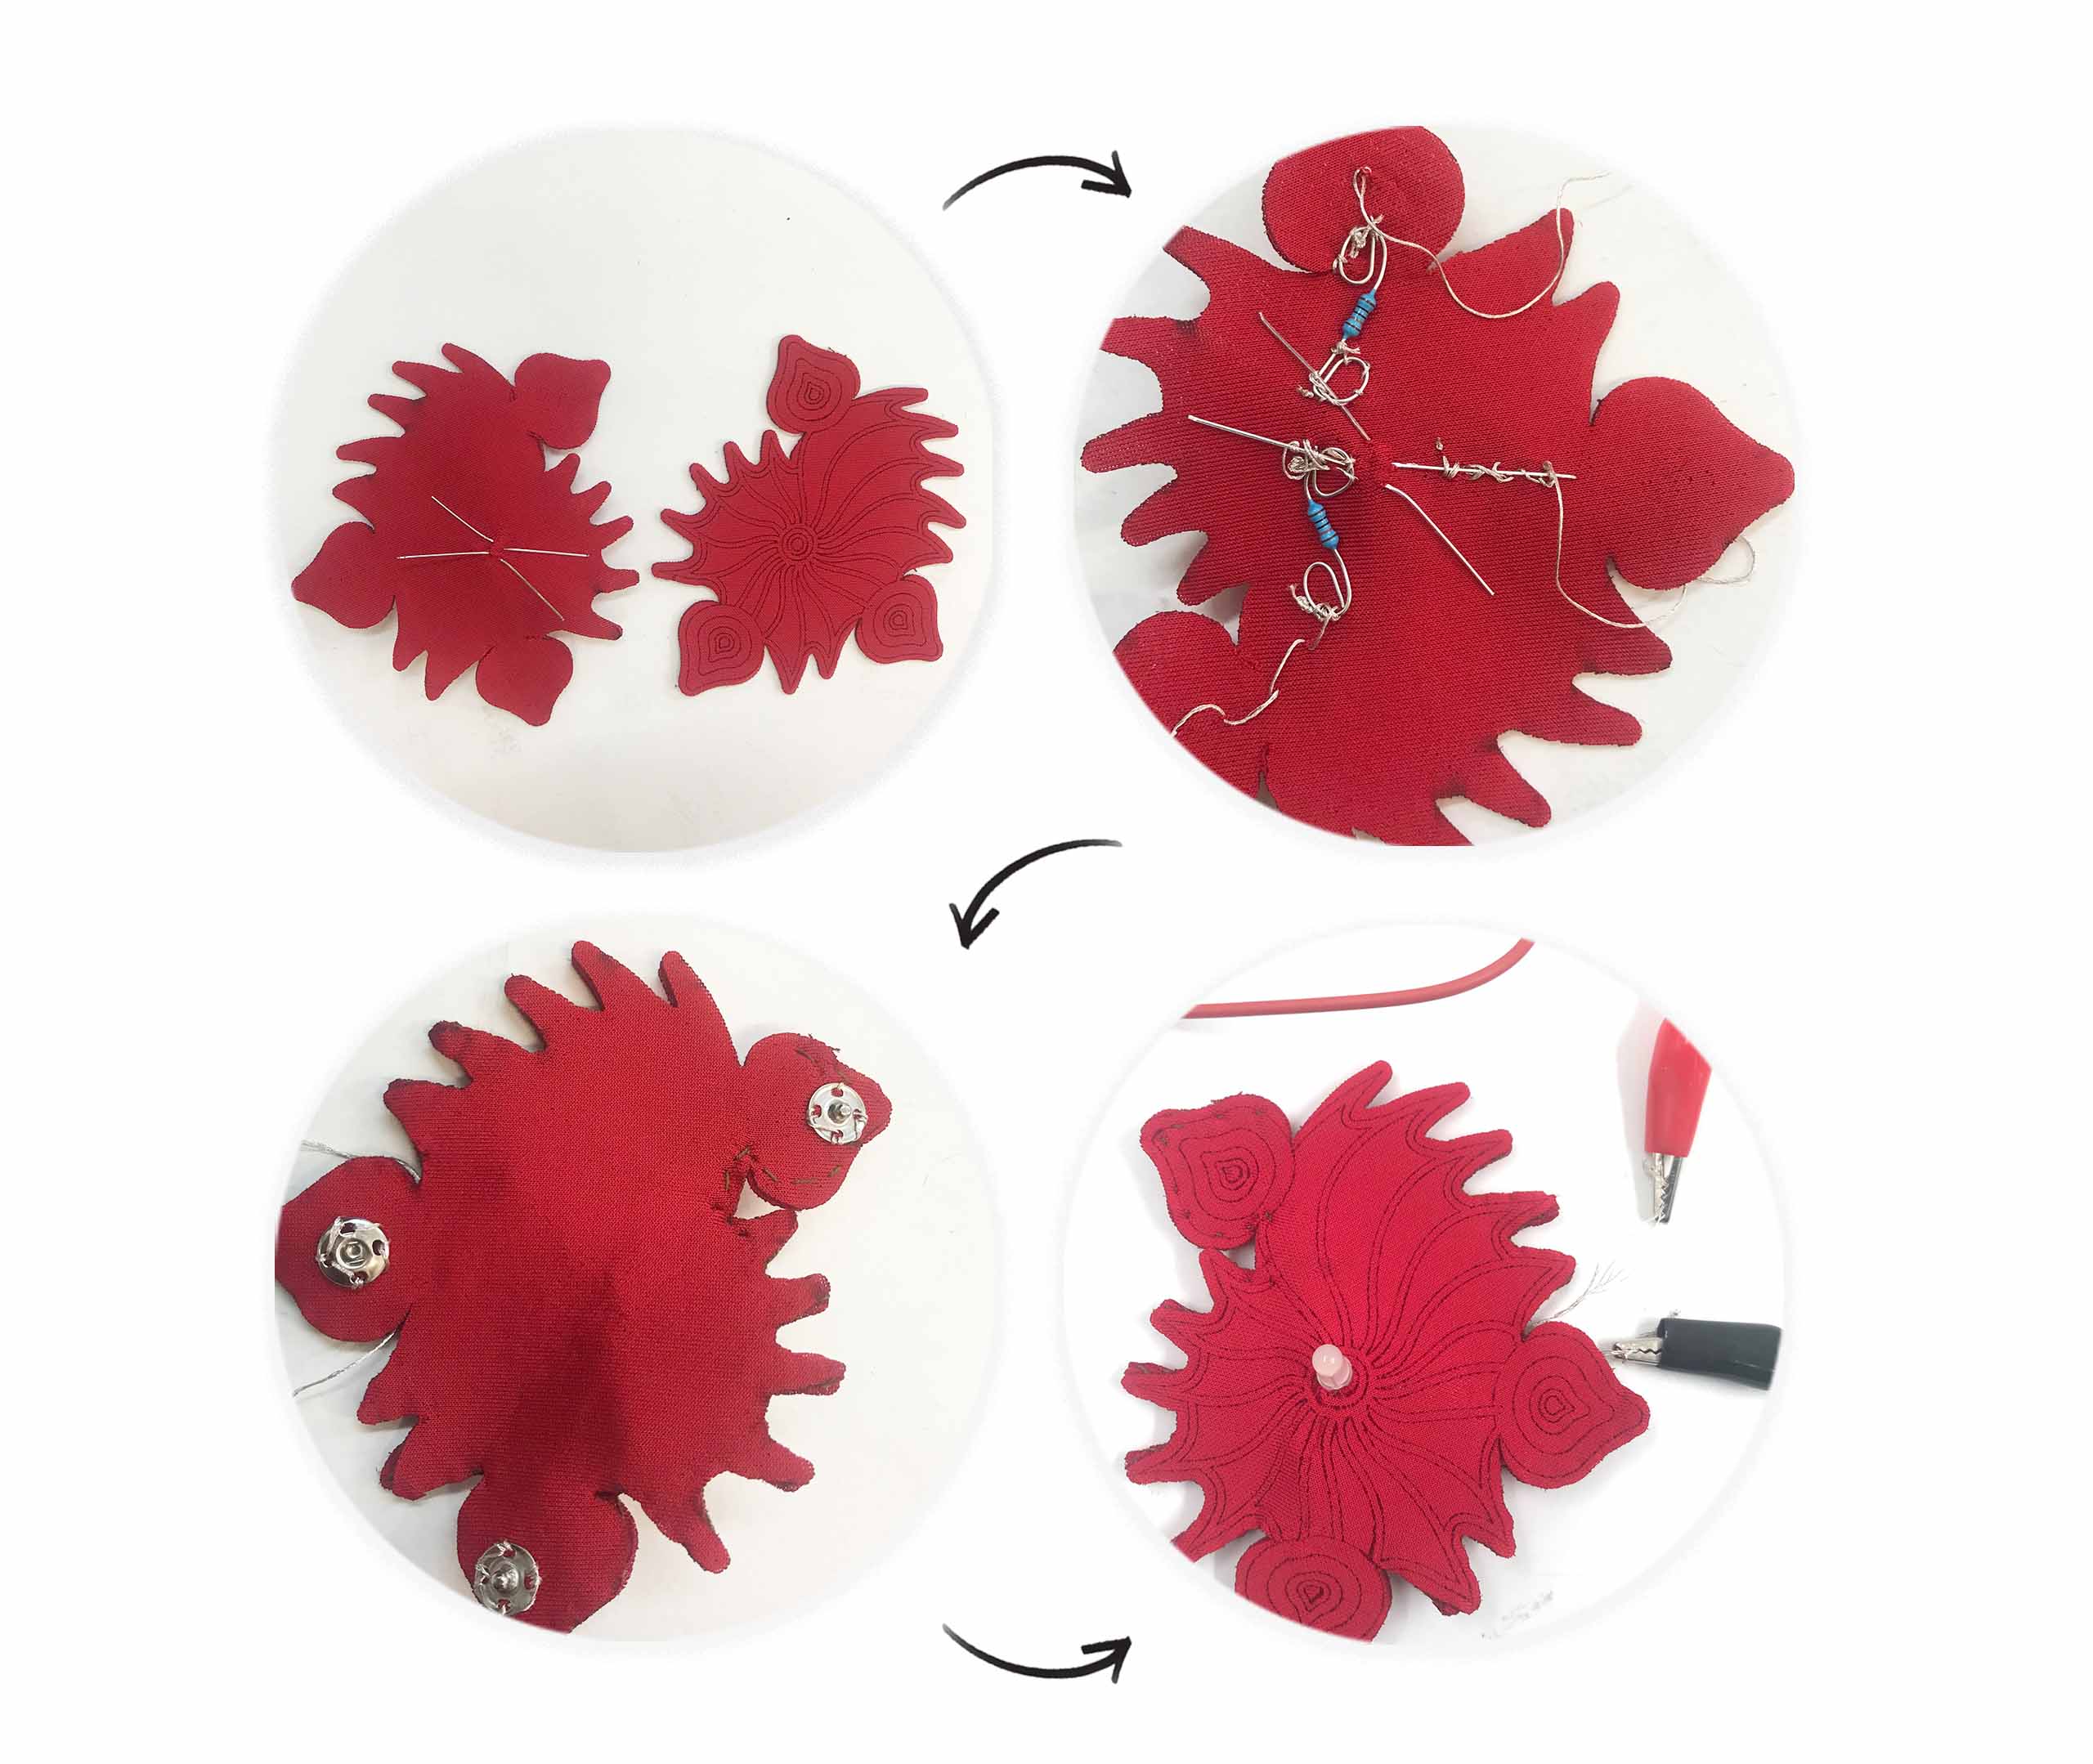
We made a simple circuit using a battery, LED, safety pin, and conductive thread and fabrics to pass power.
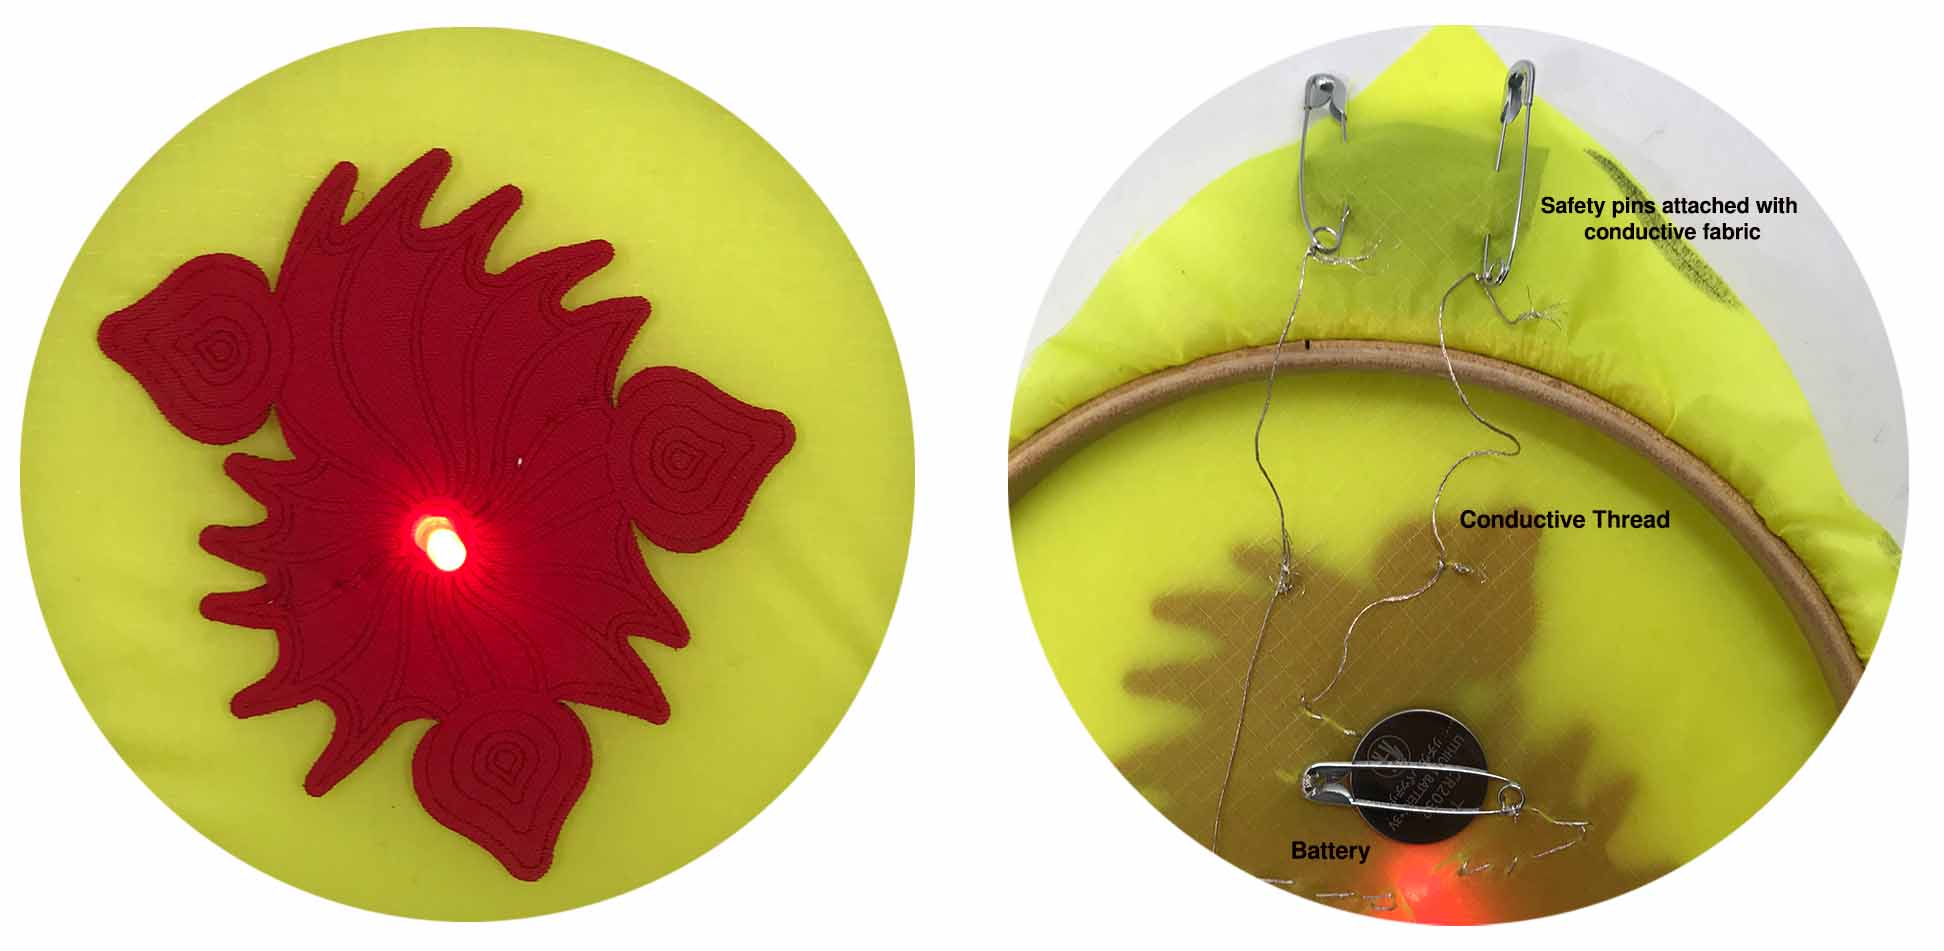
Below is the option that I have used form the Day 3 workshop tutorial document
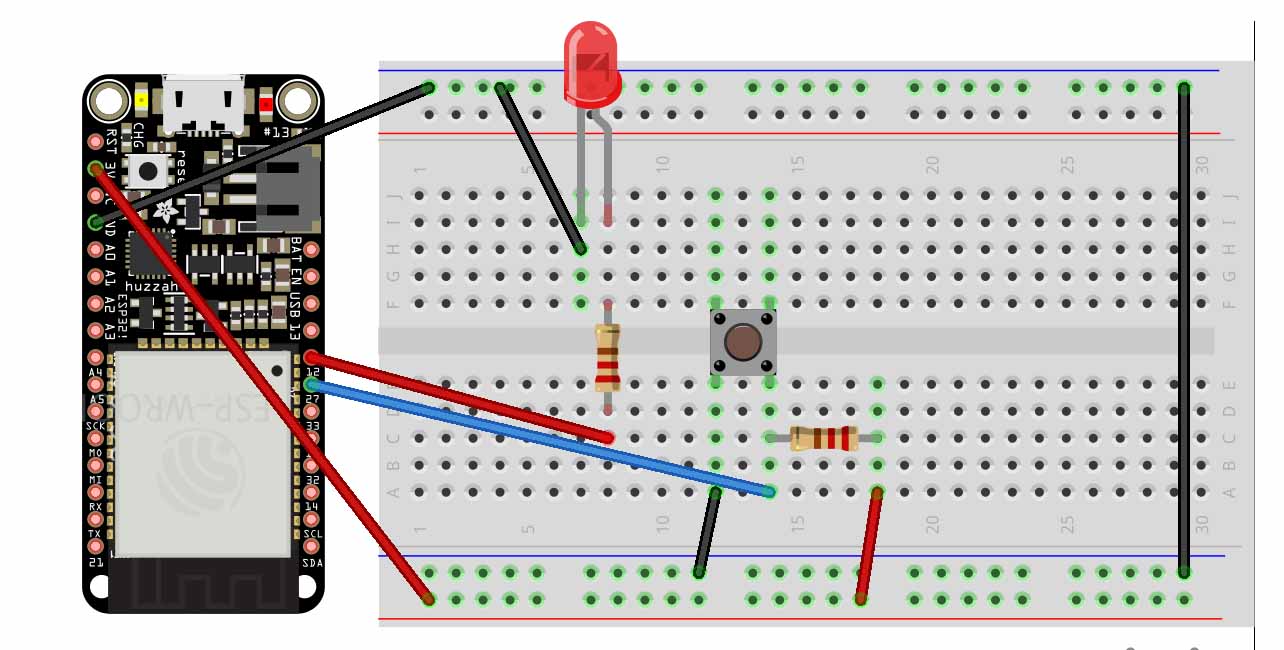
Switch Sensor
Button sensor working
Digital Sensor
Sensor testing and readings
#include <analogWrite.h>

int Sensor = A5;
int LED = 12 ;

void setup() {
  // put your setup code here, to run once:
  pinMode (Sensor, INPUT);
  pinMode (LED , OUTPUT) ;
  Serial.begin (9600) ;

}

void loop() {

  int SensorReading = analogRead (Sensor) ;
  Serial.println (SensorReading);
Future Project Visualisation
I have used the final look from Circular fashion week, You can find the process Here
As I didnt get enough time to create over all look I have put up a visualition of how it could look as a final piece using Photoshop software.
As you can see in the first image, I have visualized the Lights throughout the look. I have shown the blink in the second image.
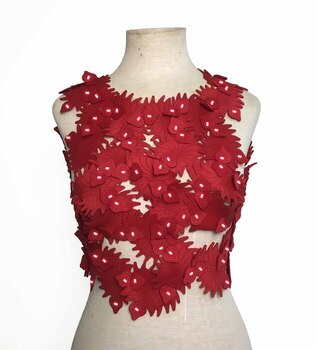
The third example shows the lights changing from light to dark as they move. My fourth example shows the Touch sensor which detects and brightens the light in a particular area when an object comes closer to the body.