13. Skin Electronics
How time flies, it's the last week of Skin Electronics. As part of this week's wearables work, we'll be working on skin electronics.
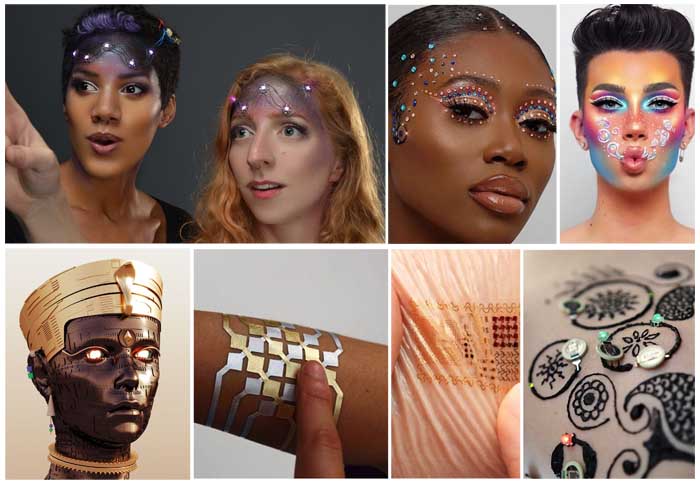
Below are some of my Inspirations for skin electronics week.
Inspiration & Research
Design Process
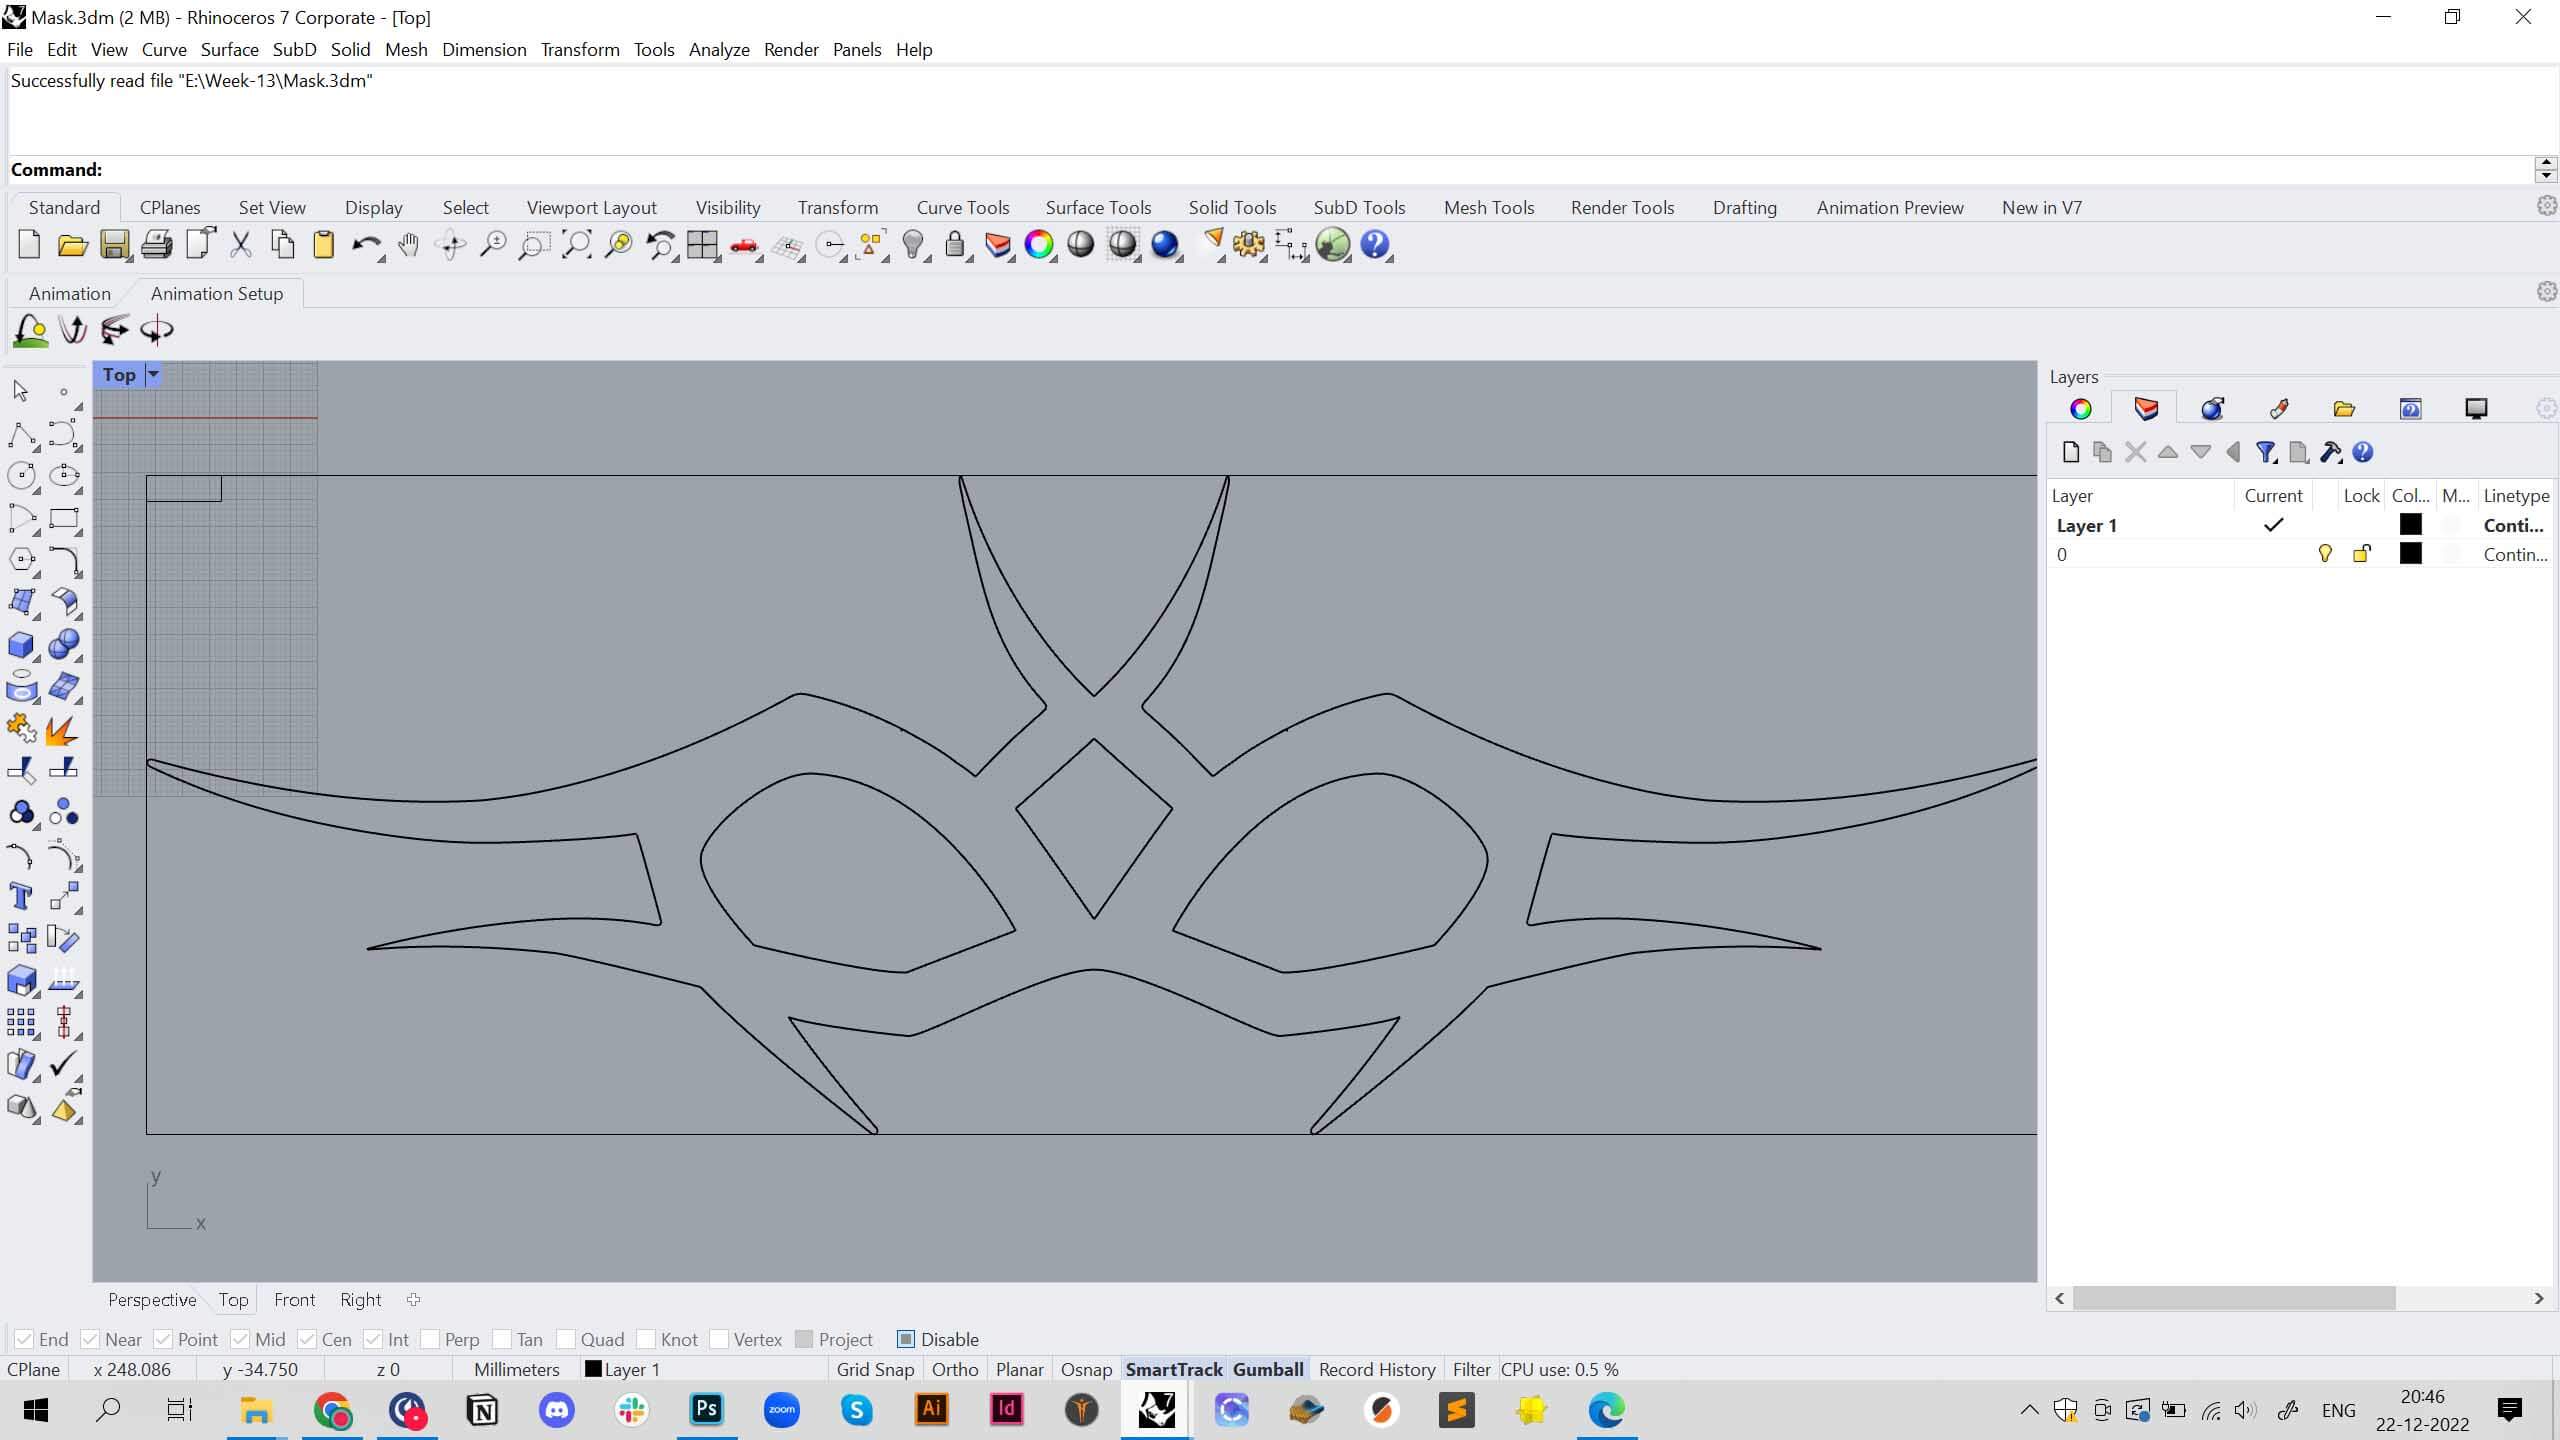
My original intention was to create a tattoo, but then I realized I could make it more fun by making it a wearable product. I decided to build a mask (marquis) using neopixels.
Designing mask in Rhino.
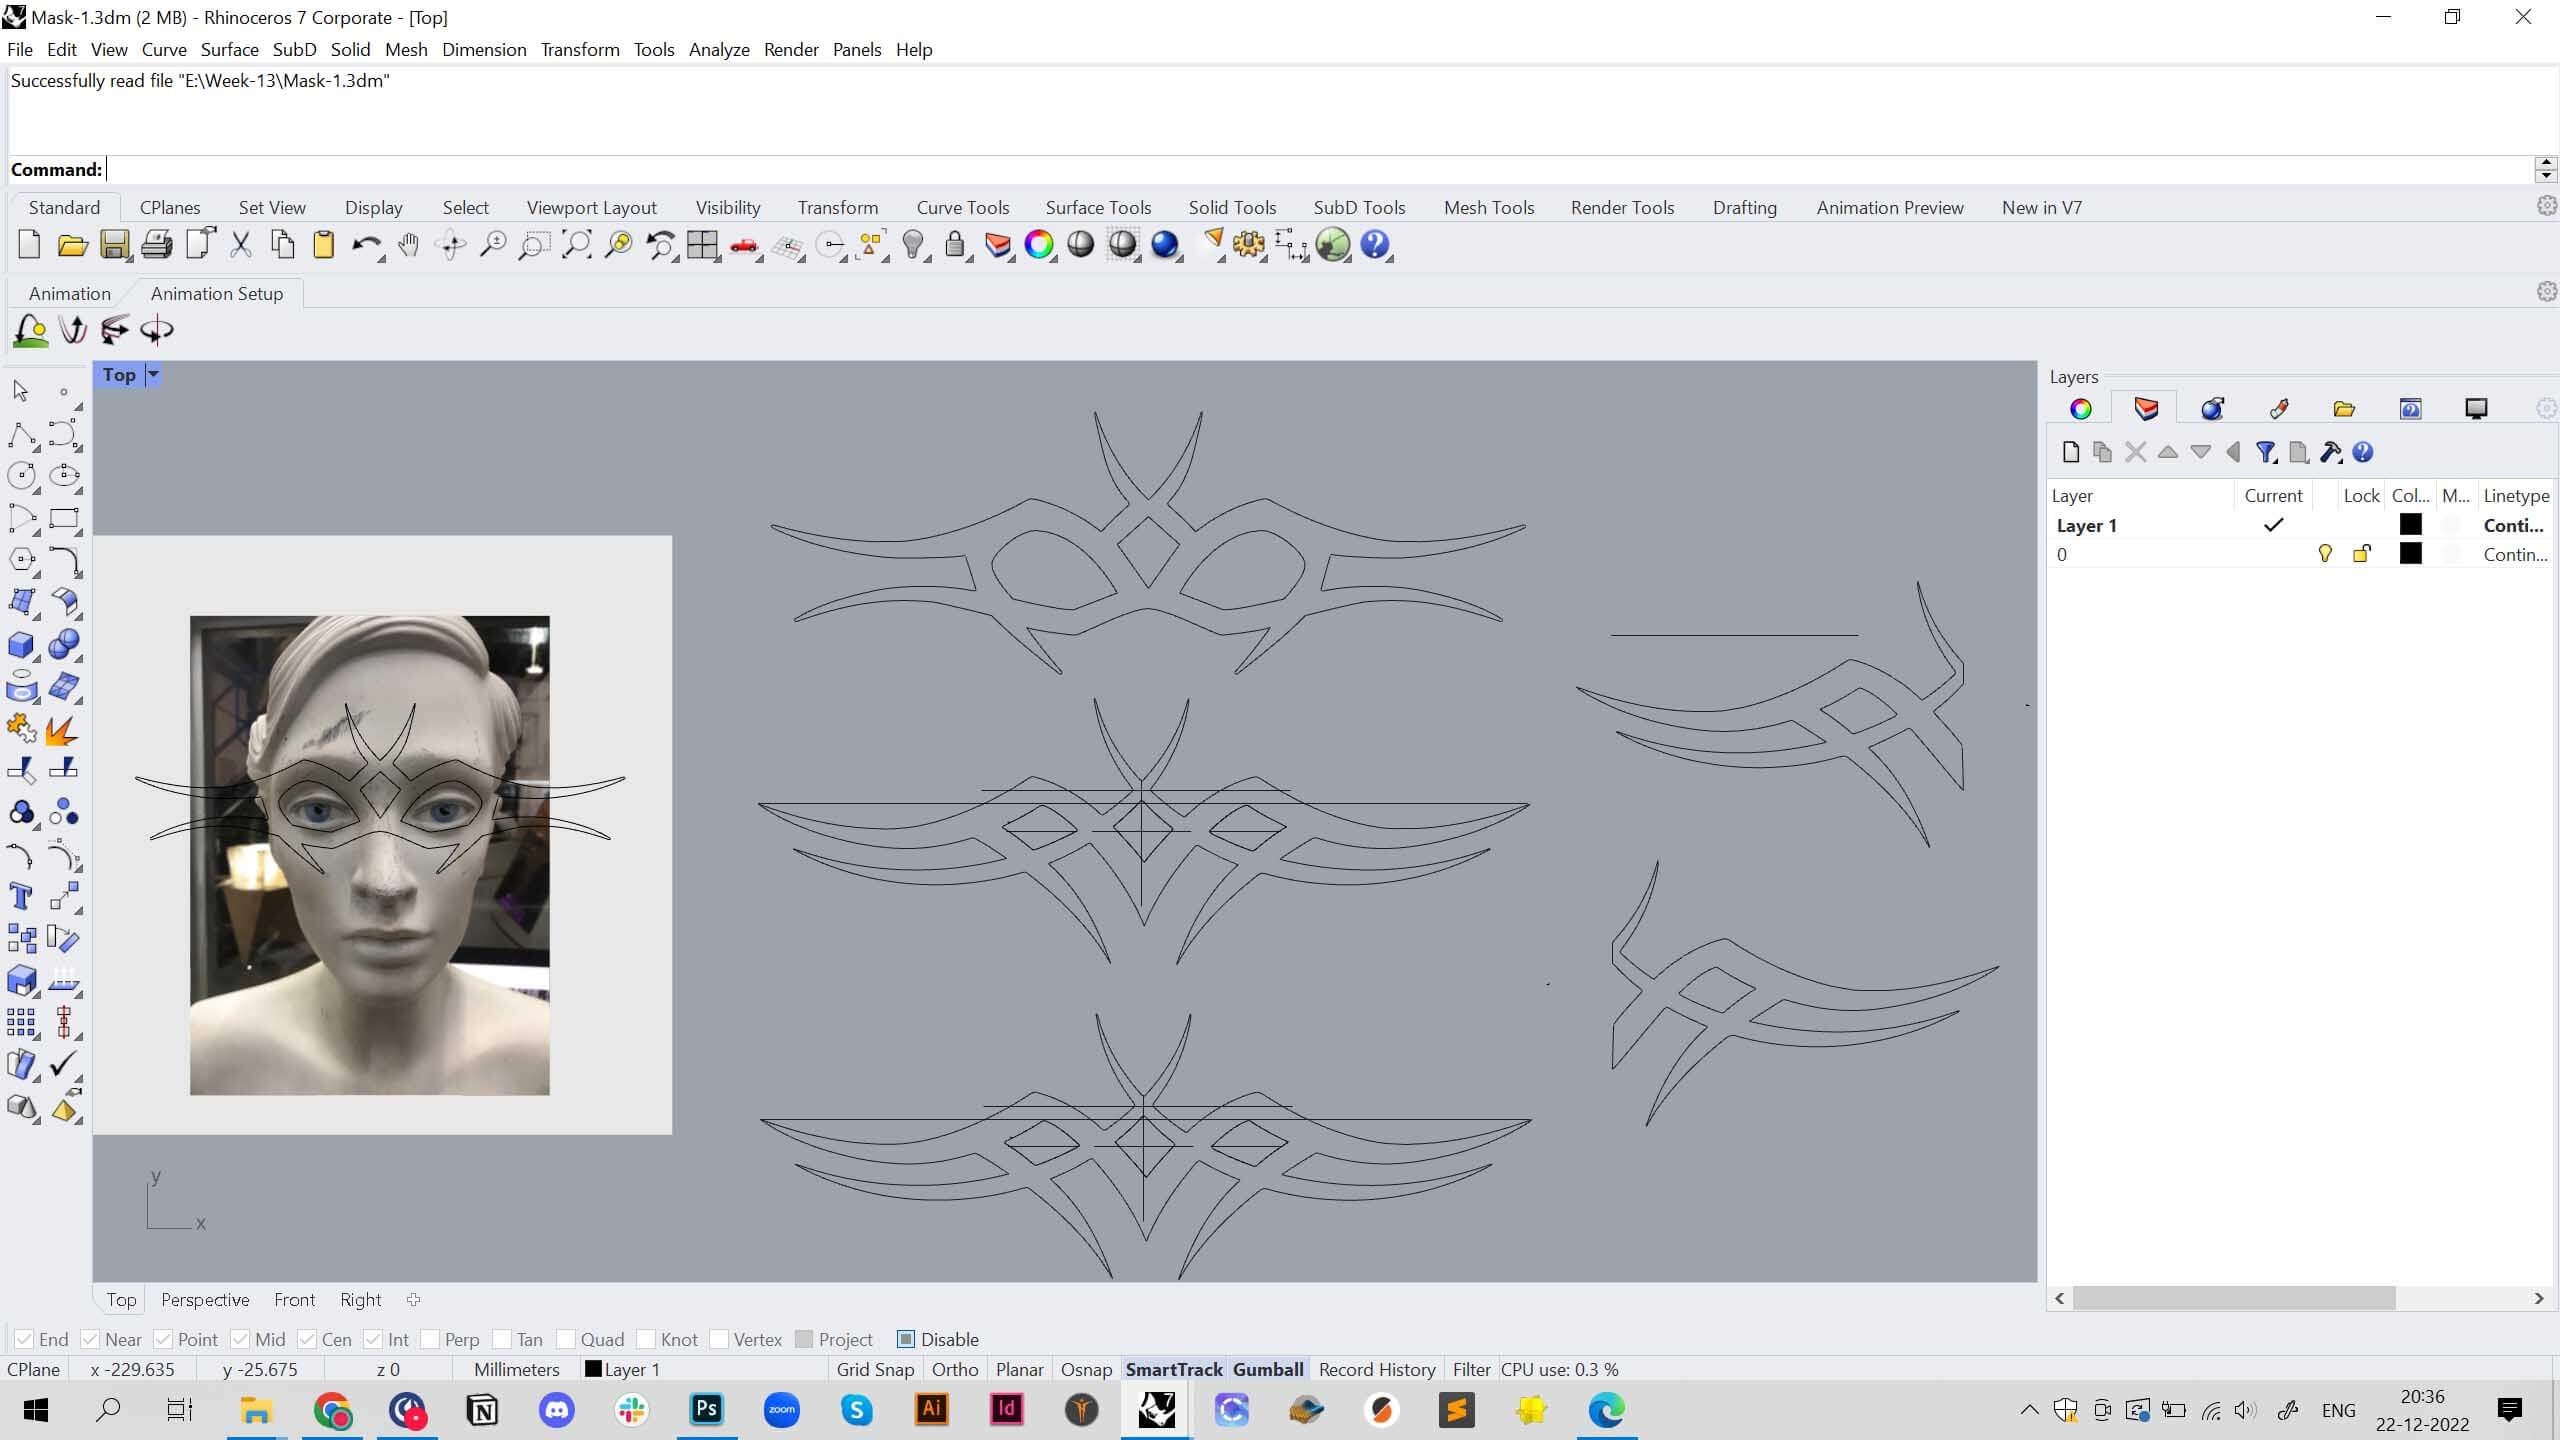
I decided to add a gap at the back to hold the neopixel, and It actually worked. Though when was trying to mould the printed mask, It slightly changed the shapes.
3D Printing settings & Process
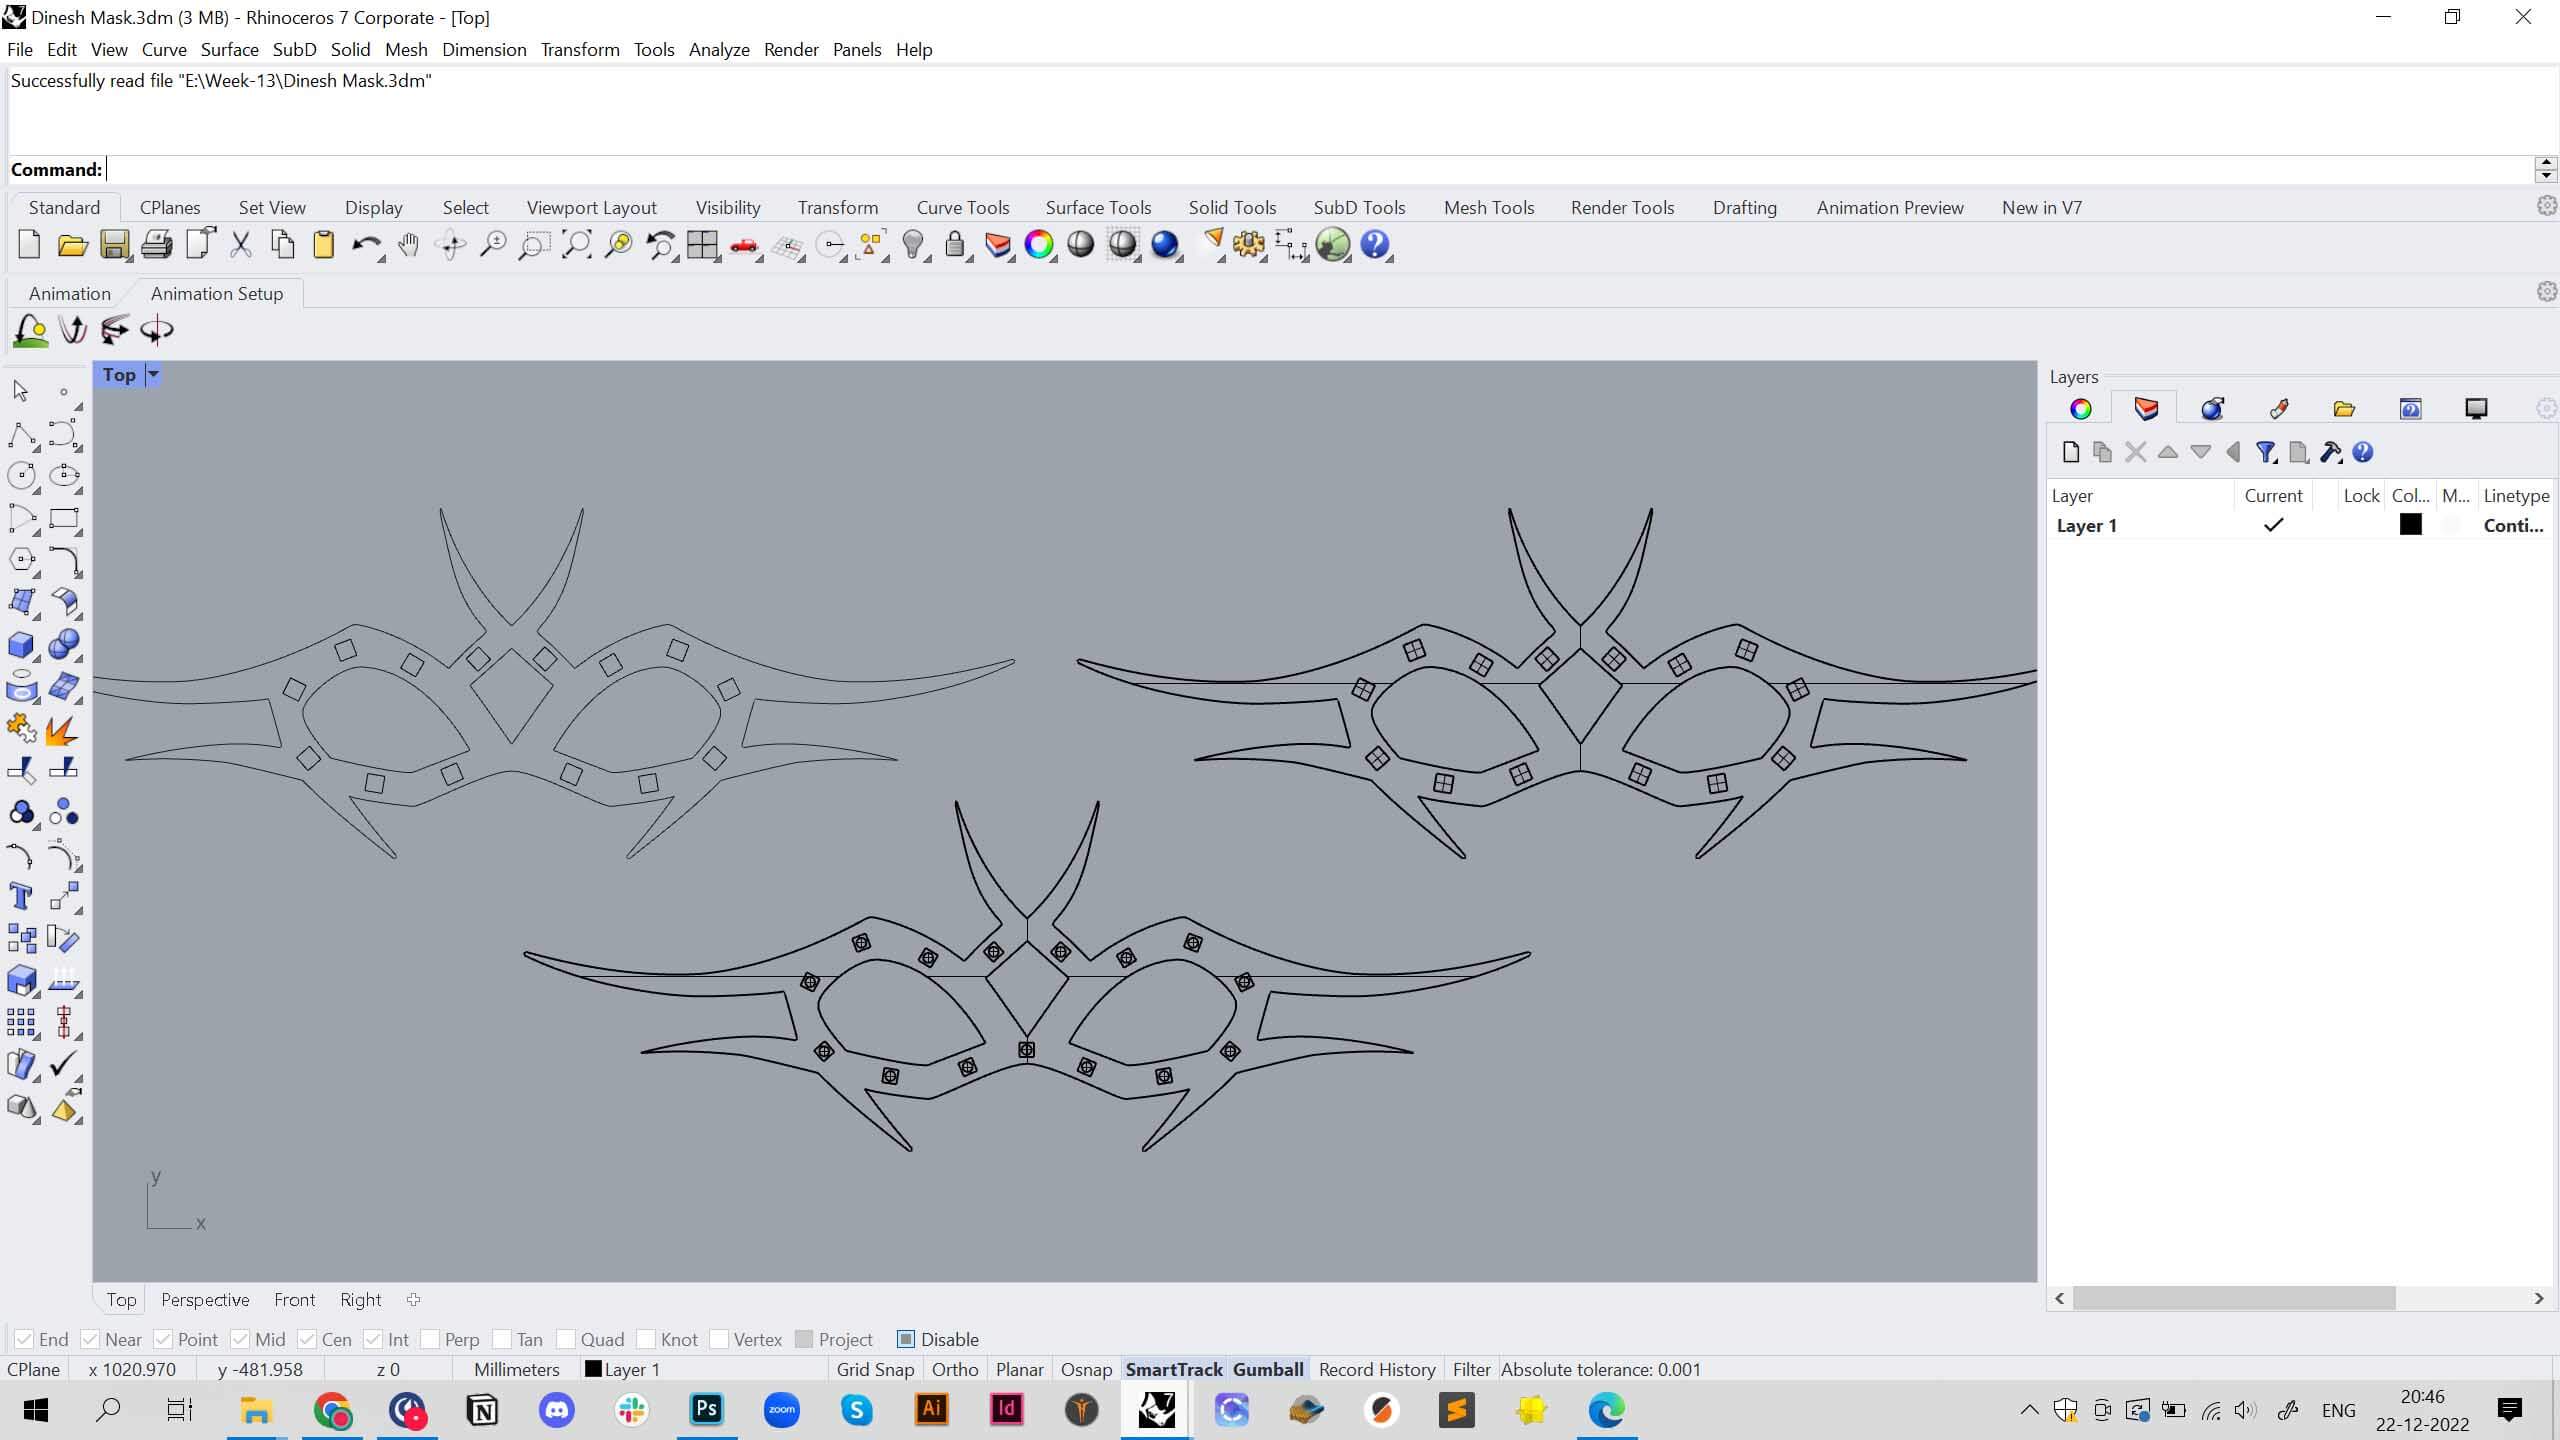
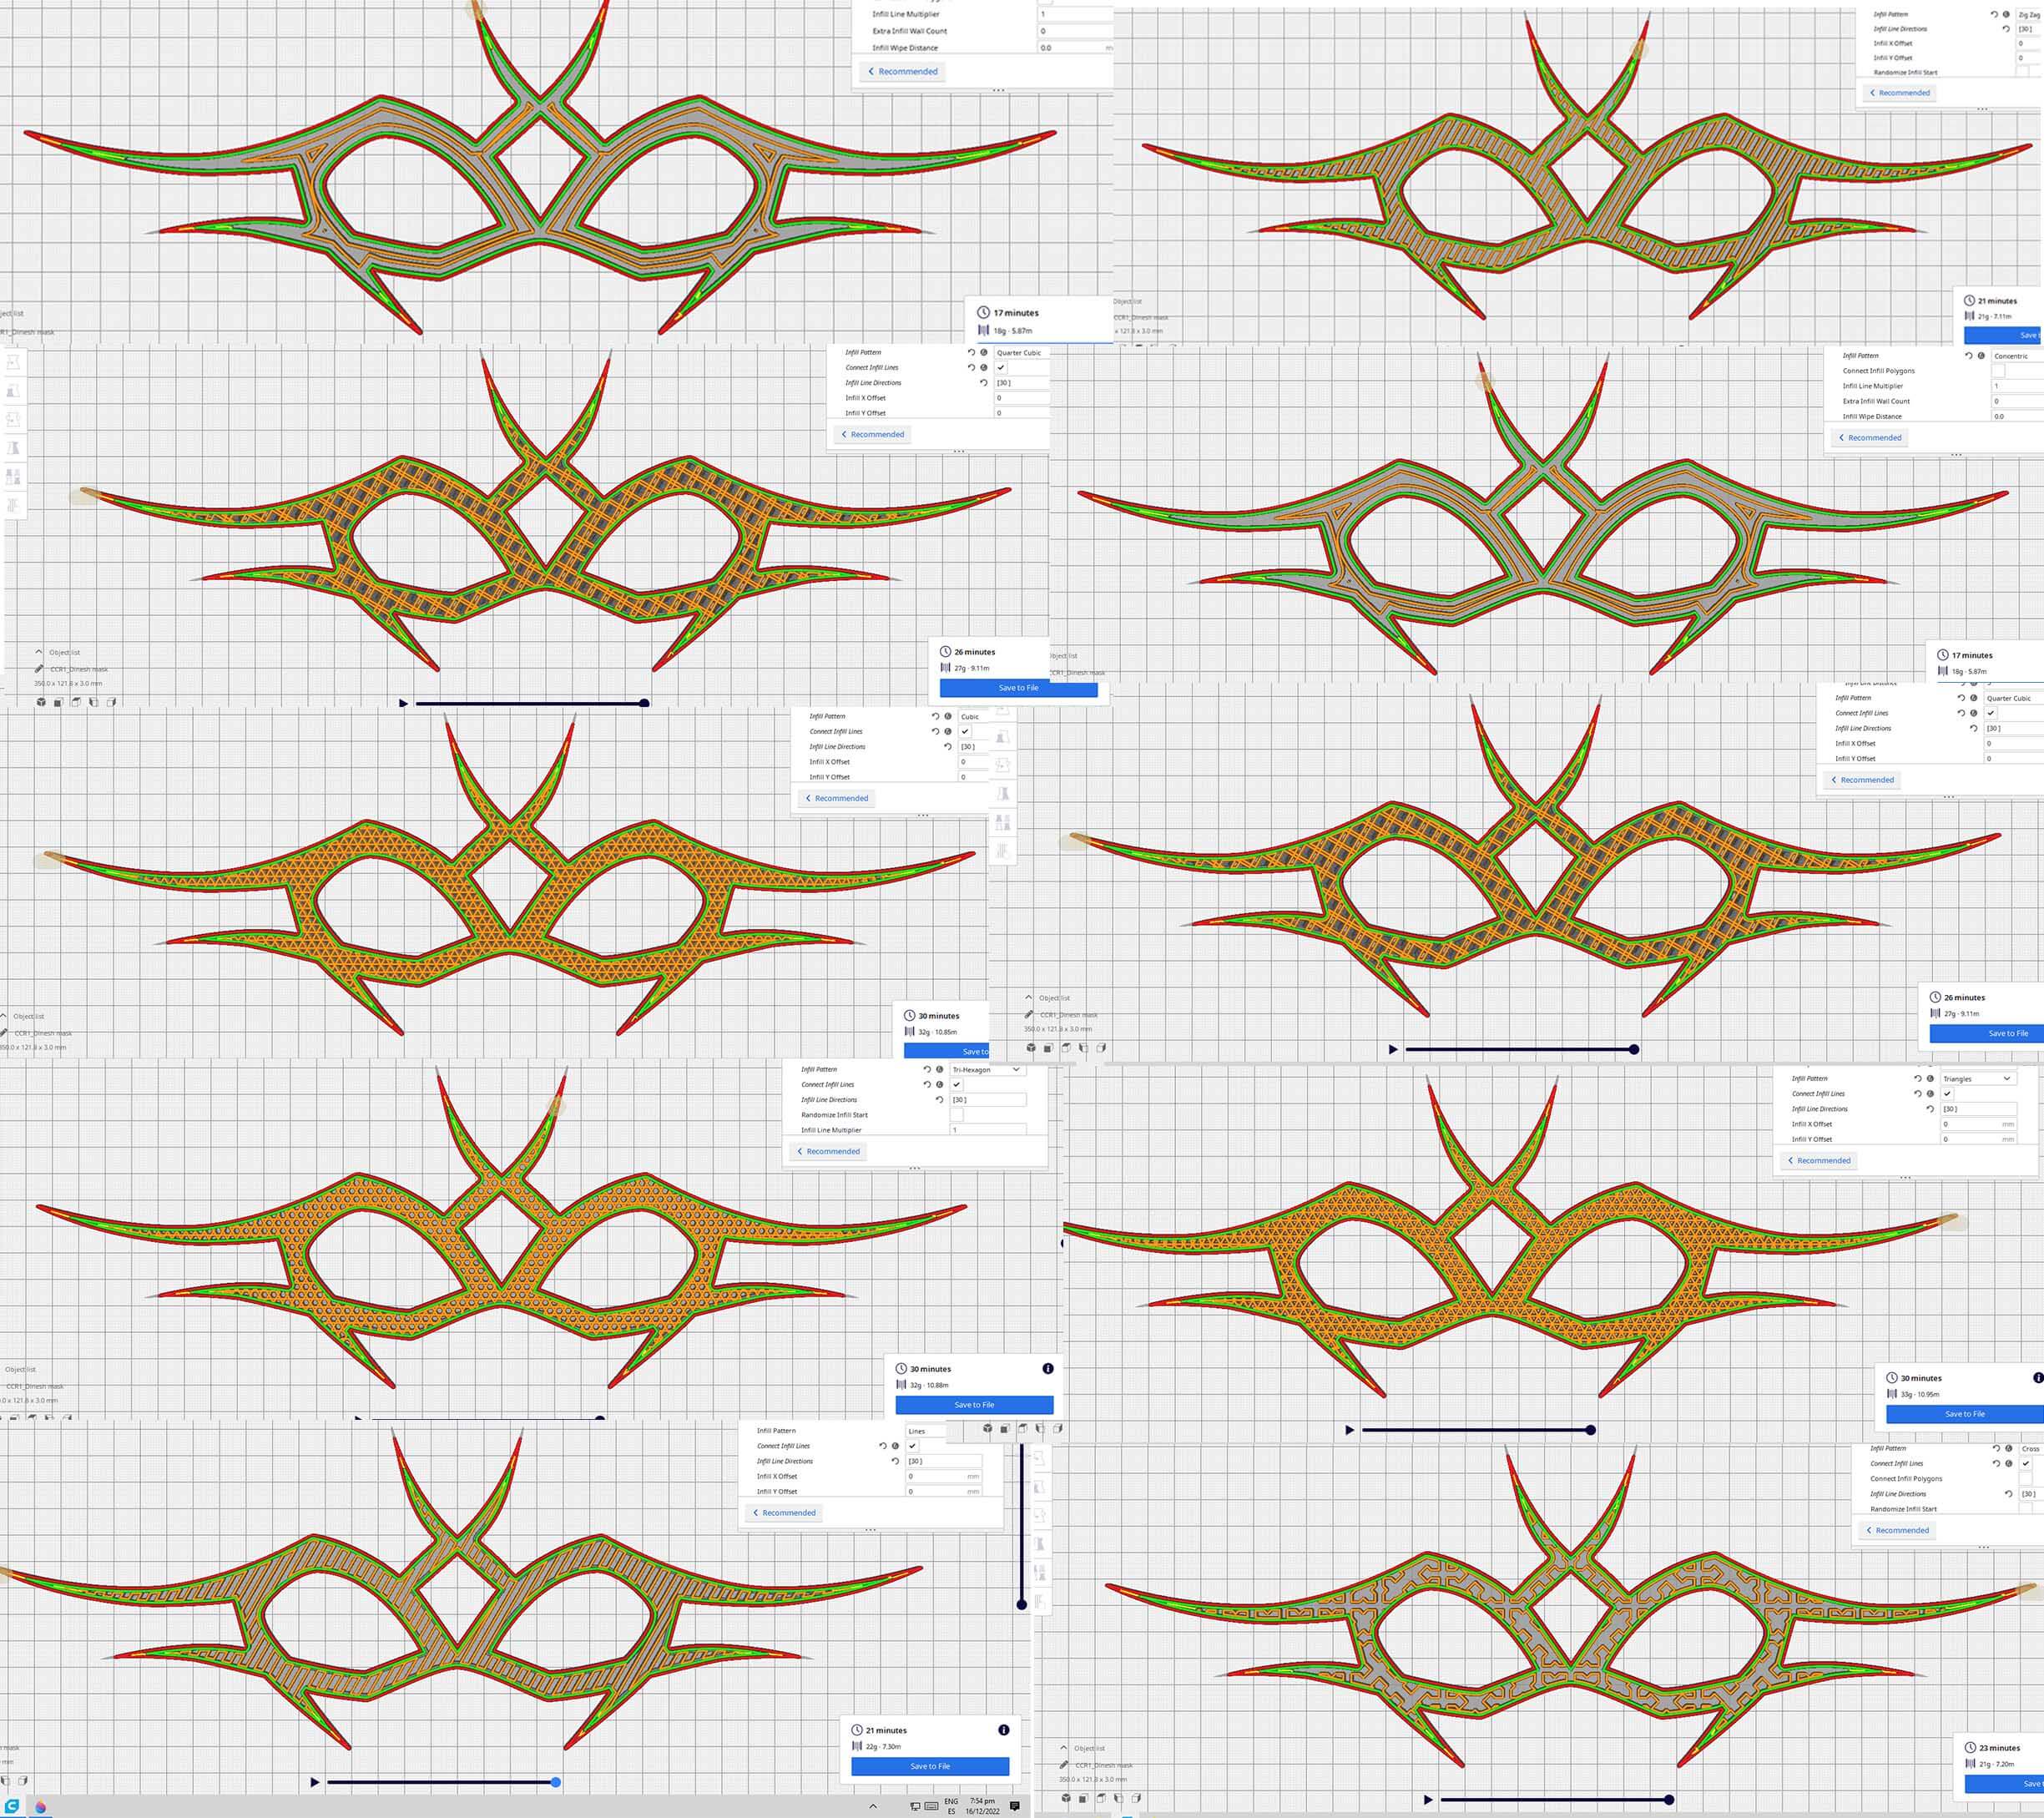
I decided to avoid solid-filled top and bottom surfaces in order to make the neopixels visible in the mask.
Slicer explorations of infill are shown below.
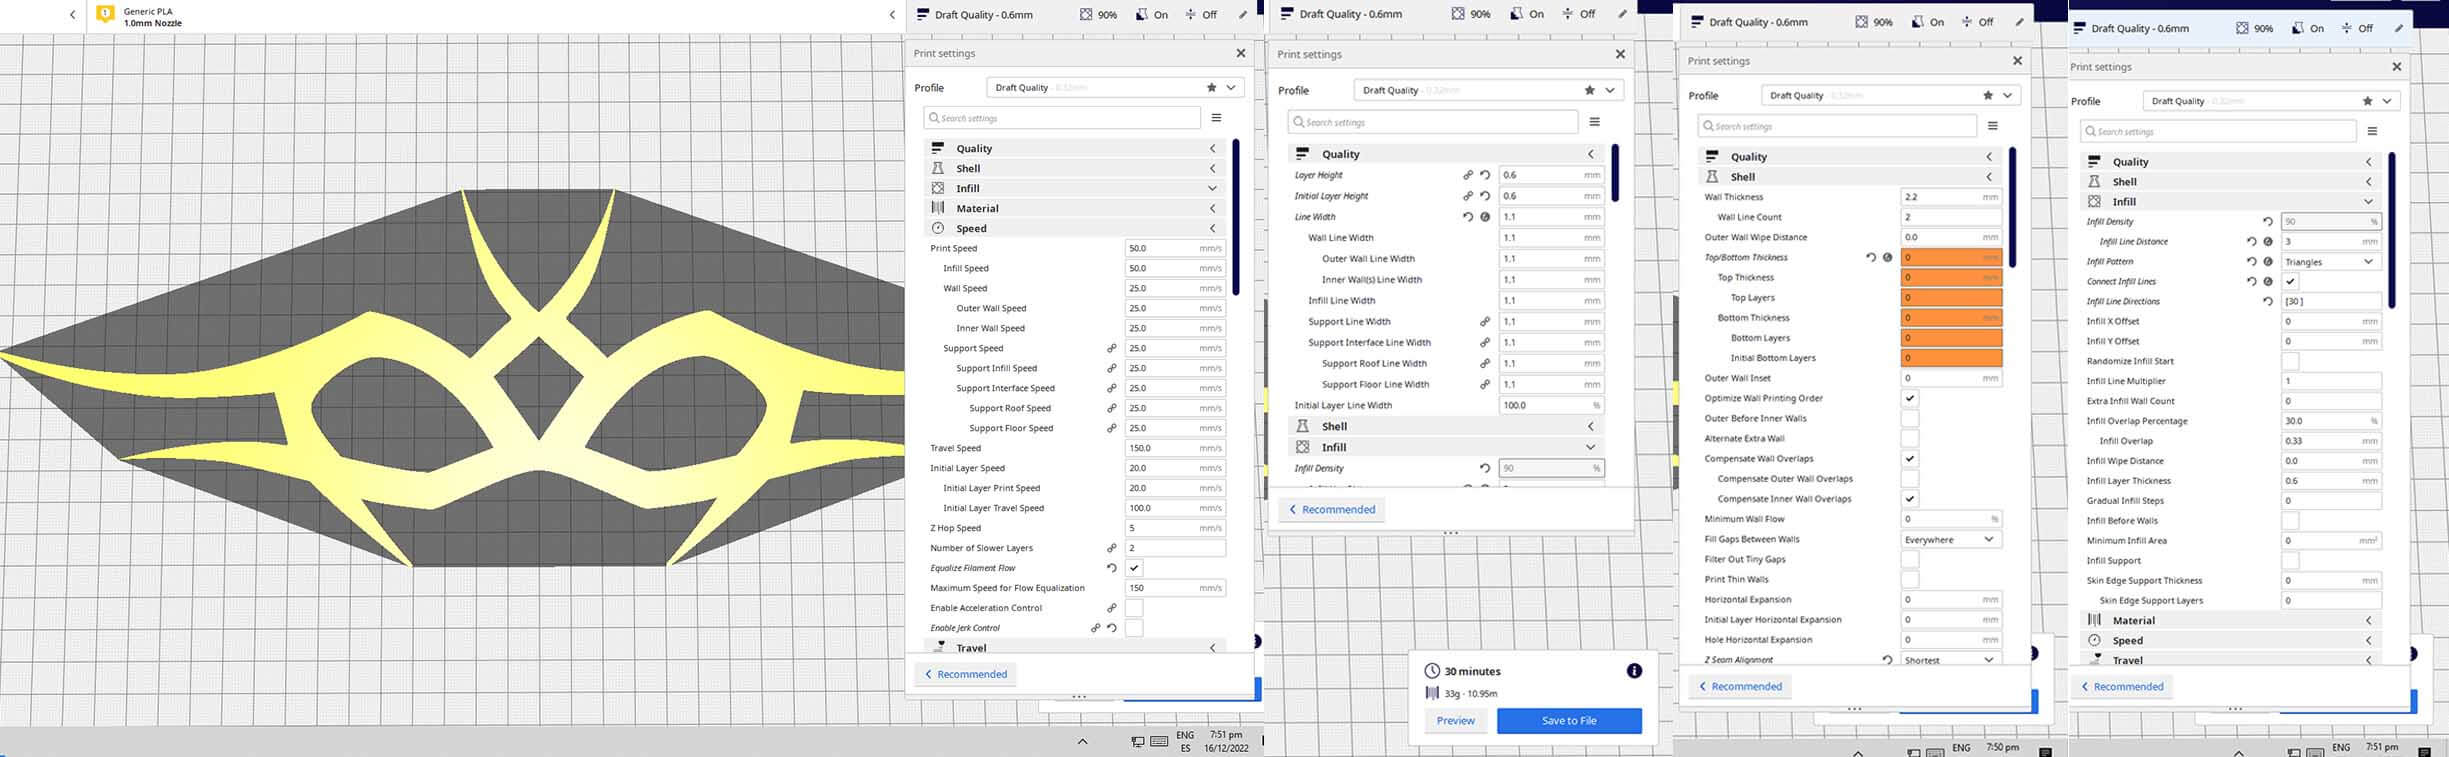
Below are the 3d printing settings to print the mask in flat position with PLA materials.
3D Printing
Design by Dinesh kumar
Molding Process
Therefore, instead of printing the mask in 3D form, I have decided to print it flat and then use hot water/a blow gun to shape it into a mannequin shape.
Here are some pictures of using hot water and pouring it slowly on the mannequin with a mask on, and slowly pushing and moulding the shape by hand using silicon gloves.
Design by Dinesh kumar
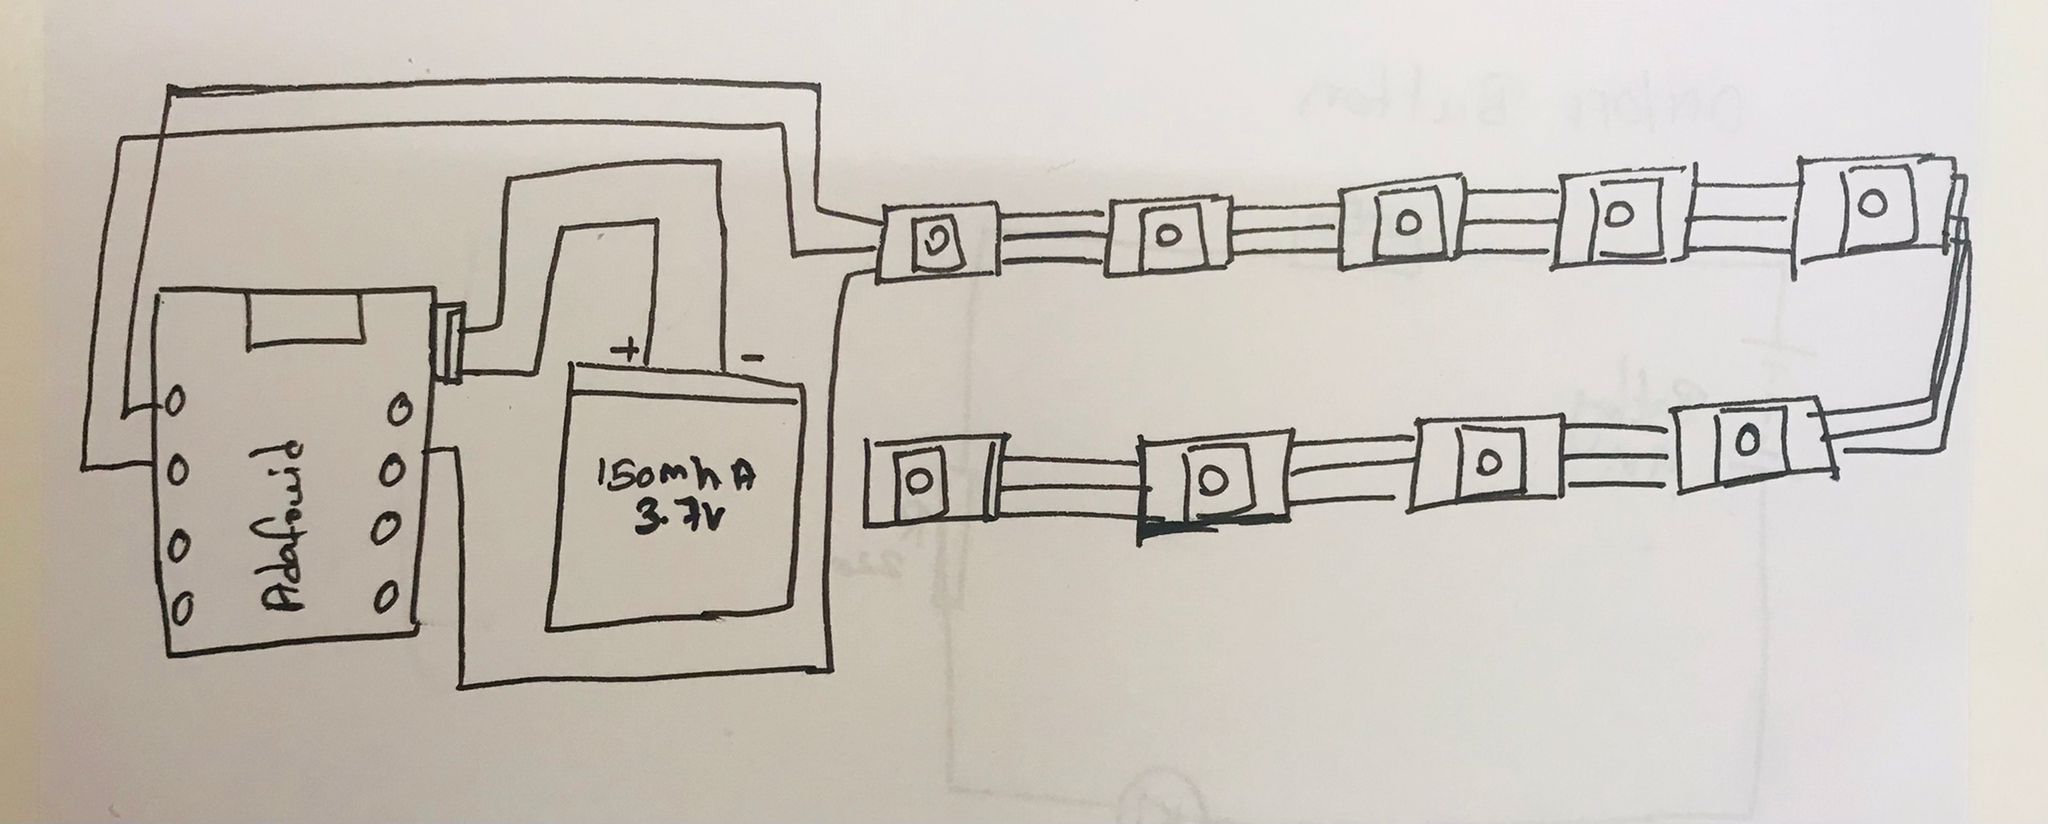
Animation Code and Soldering Process
Below are the simple Adafruit Neopixel wheel animation code.
#include <Adafruit_NeoPixel.h>
#ifdef __AVR__
  #include <avr/power.h>
#endif

#define PIN 21

void setup() {
  #if defined (__AVR_ATtiny85__)
    if (F_CPU == 16000000) clock_prescale_set(clock_div_1);
  #endif

  strip.begin();
  strip.setBrightness(50);
  strip.show();
}

void loop() {
  colorWipe(strip.Color(255, 0, 0), 50); // Red
  colorWipe(strip.Color(0, 255, 0), 50); // Green
  colorWipe(strip.Color(0, 0, 255), 50); // Blue
  theaterChase(strip.Color(127, 127, 127), 50); // White
  theaterChase(strip.Color(127, 0, 0), 50); // Red
  theaterChase(strip.Color(0, 0, 127), 50); // Blue

  rainbow(20);
  rainbowCycle(20);
  theaterChaseRainbow(50);
}

void colorWipe(uint32_t c, uint8_t wait) {
  for(uint16_t i=0; i<strip.numPixels(); i++) {
    strip.setPixelColor(i, c);
    strip.show();
    delay(wait);
  }
}

void rainbow(uint8_t wait) {
  uint16_t i, j;

  for(j=0; j<256; j++) {
    for(i=0; i<strip.numPixels(); i++) {
      strip.setPixelColor(i, Wheel((i+j) & 255));
    }
    strip.show();
    delay(wait);
  }
}
void rainbowCycle(uint8_t wait) {
  uint16_t i, j;

  for(j=0; j<256*5; j++) { // 5 cycles of all colors on wheel
    for(i=0; i< strip.numPixels(); i++) {
      strip.setPixelColor(i, Wheel(((i * 256 / strip.numPixels()) + j) & 255));
    }
    strip.show();
    delay(wait);
  }
}
void theaterChase(uint32_t c, uint8_t wait) {
  for (int j=0; j<10; j++) {  //do 10 cycles of chasing
    for (int q=0; q < 3; q++) {
      for (uint16_t i=0; i < strip.numPixels(); i=i+3) {
        strip.setPixelColor(i+q, c);    //turn every third pixel on
      }
      strip.show();

      delay(wait);

      for (uint16_t i=0; i < strip.numPixels(); i=i+3) {
        strip.setPixelColor(i+q, 0);        //turn every third pixel off
      }
    }
  }
}
void theaterChaseRainbow(uint8_t wait) {
  for (int j=0; j < 256; j++) {     // cycle all 256 colors in the wheel
    for (int q=0; q < 3; q++) {
      for (uint16_t i=0; i < strip.numPixels(); i=i+3) {
        strip.setPixelColor(i+q, Wheel( (i+j) % 255));    //turn every third pixel on
      }
      strip.show();

      delay(wait);

      for (uint16_t i=0; i < strip.numPixels(); i=i+3) {
        strip.setPixelColor(i+q, 0);        //turn every third pixel off
      }
    }
  }
}

uint32_t Wheel(byte WheelPos) {
  WheelPos = 255 - WheelPos;
  if(WheelPos < 85) {
    return strip.Color(255 - WheelPos * 3, 0, WheelPos * 3);
  }
  if(WheelPos < 170) {
    WheelPos -= 85;
    return strip.Color(0, WheelPos * 3, 255 - WheelPos * 3);
  }
  WheelPos -= 170;
  return strip.Color(WheelPos * 3, 255 - WheelPos * 3, 0);
}
The below image shows the soldering process at the back side of the mask.
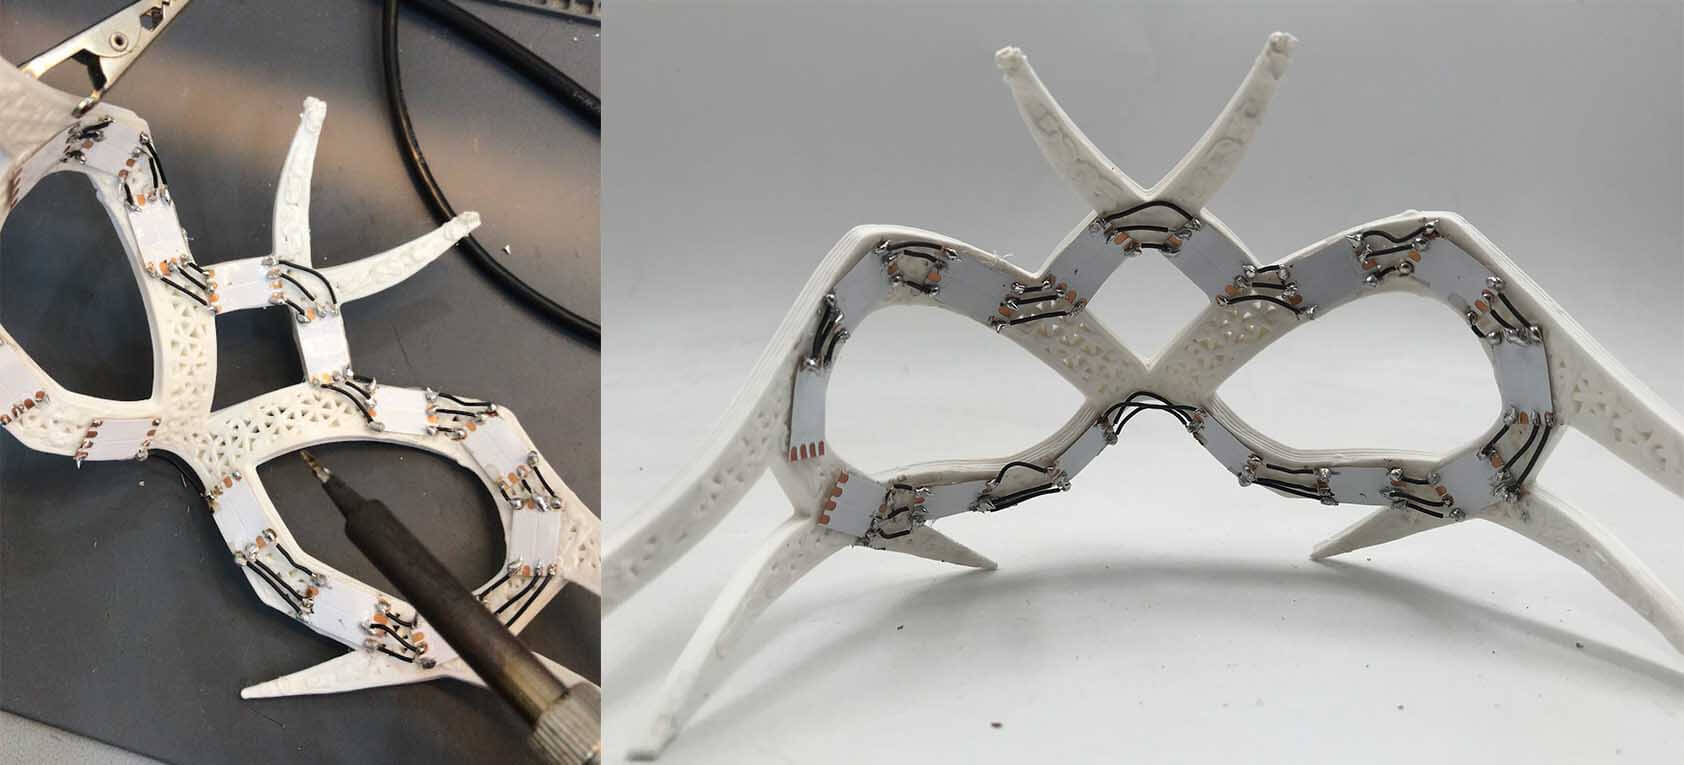
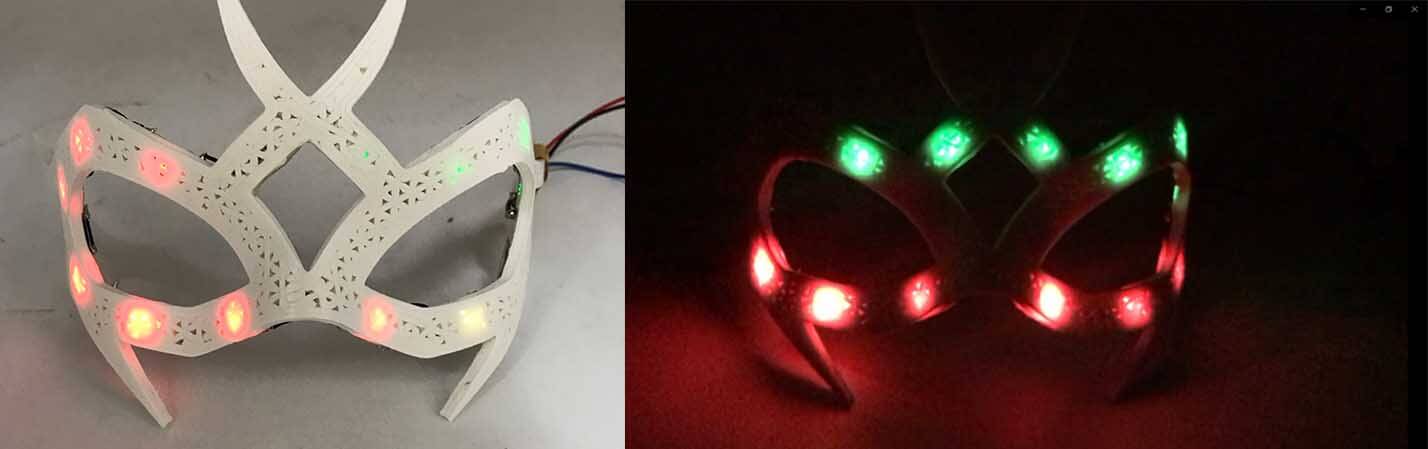
Final Look
Final look after soldering is done.
Design by Dinesh kumar
Thank you