8. Wearables
Hello!!
Here we are in another week of Wearables. We will be working on advanced topics related to e-textiles.
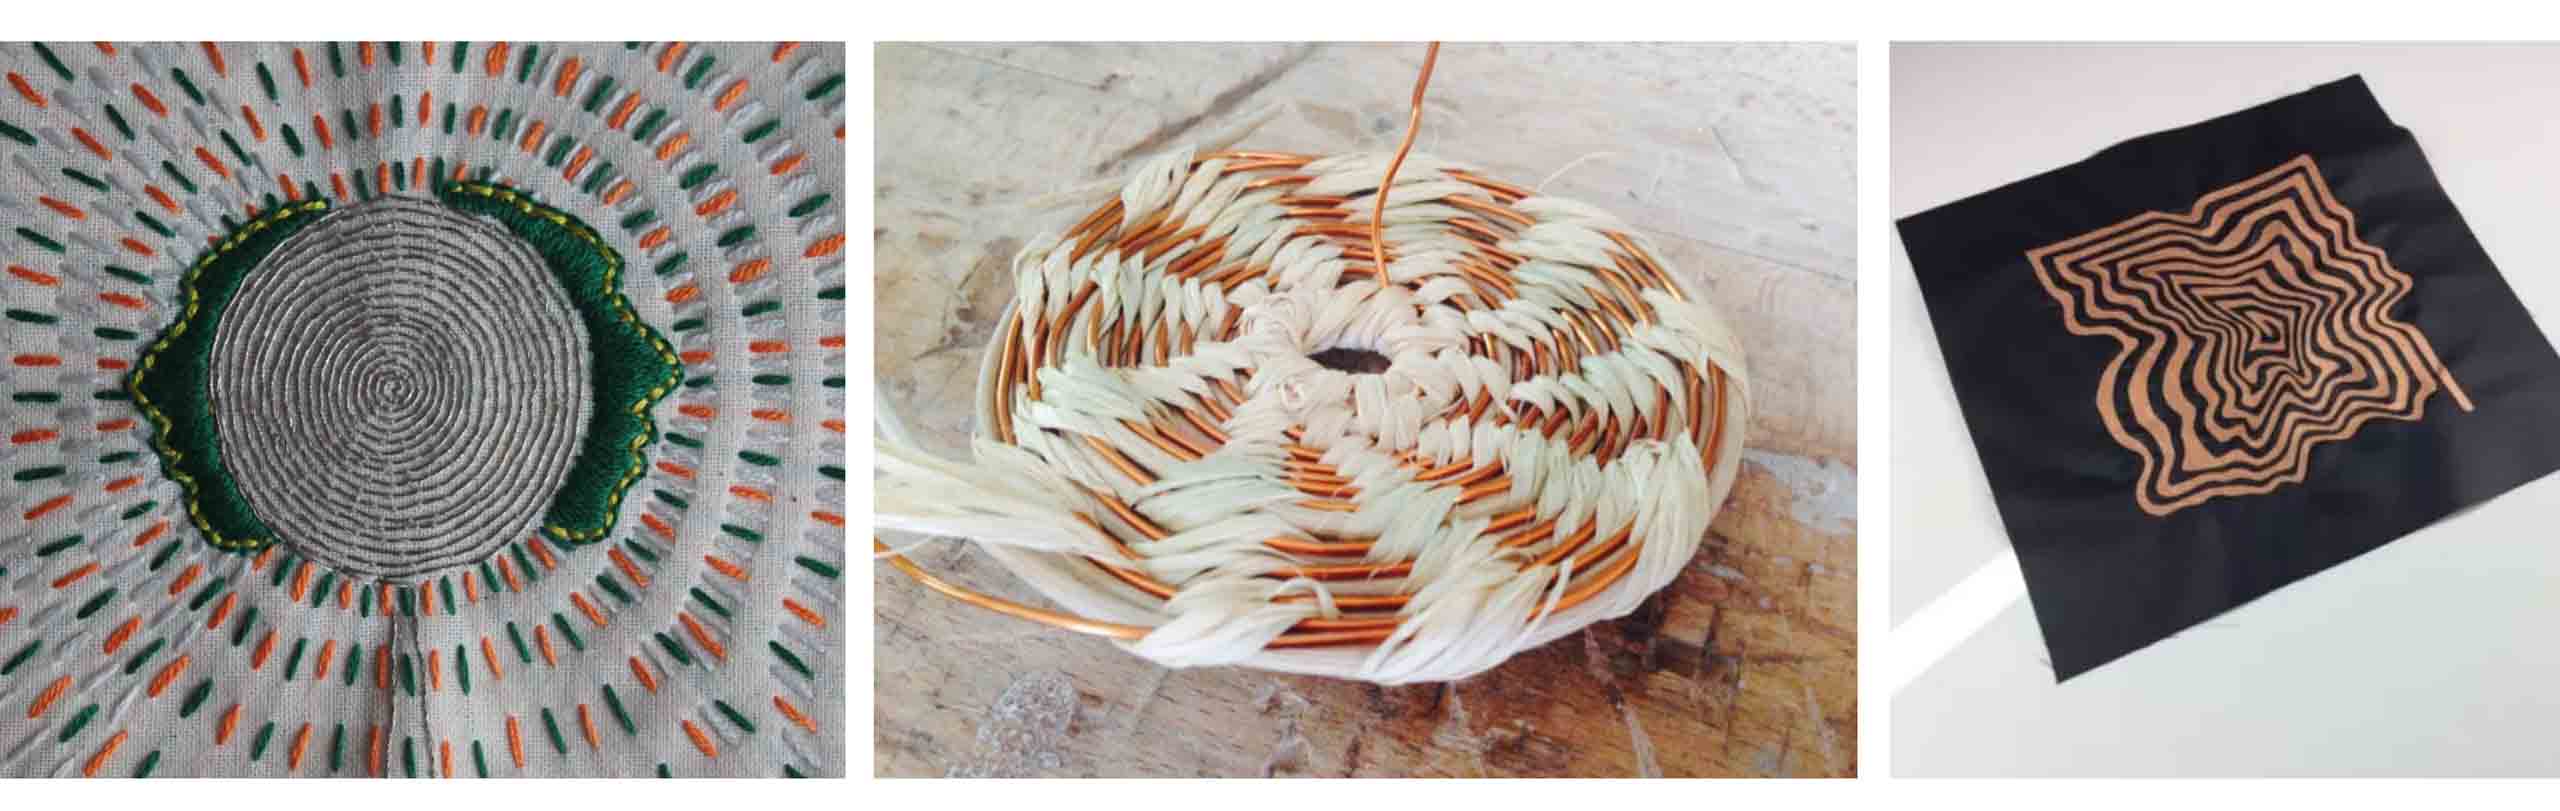
Inspiration
These artists and designers worked on wearables, which inspired me to work on wearables this week.

I have also included some videos I found on Instagram that will be very helpful and inspire me to continue working on the wearables. Take a look at the following link to get a more detailed look at the work.


Behnaz Farahi, Iris Van Herpen, Ying Gao, Malou Beemer
How to make it Wearable?
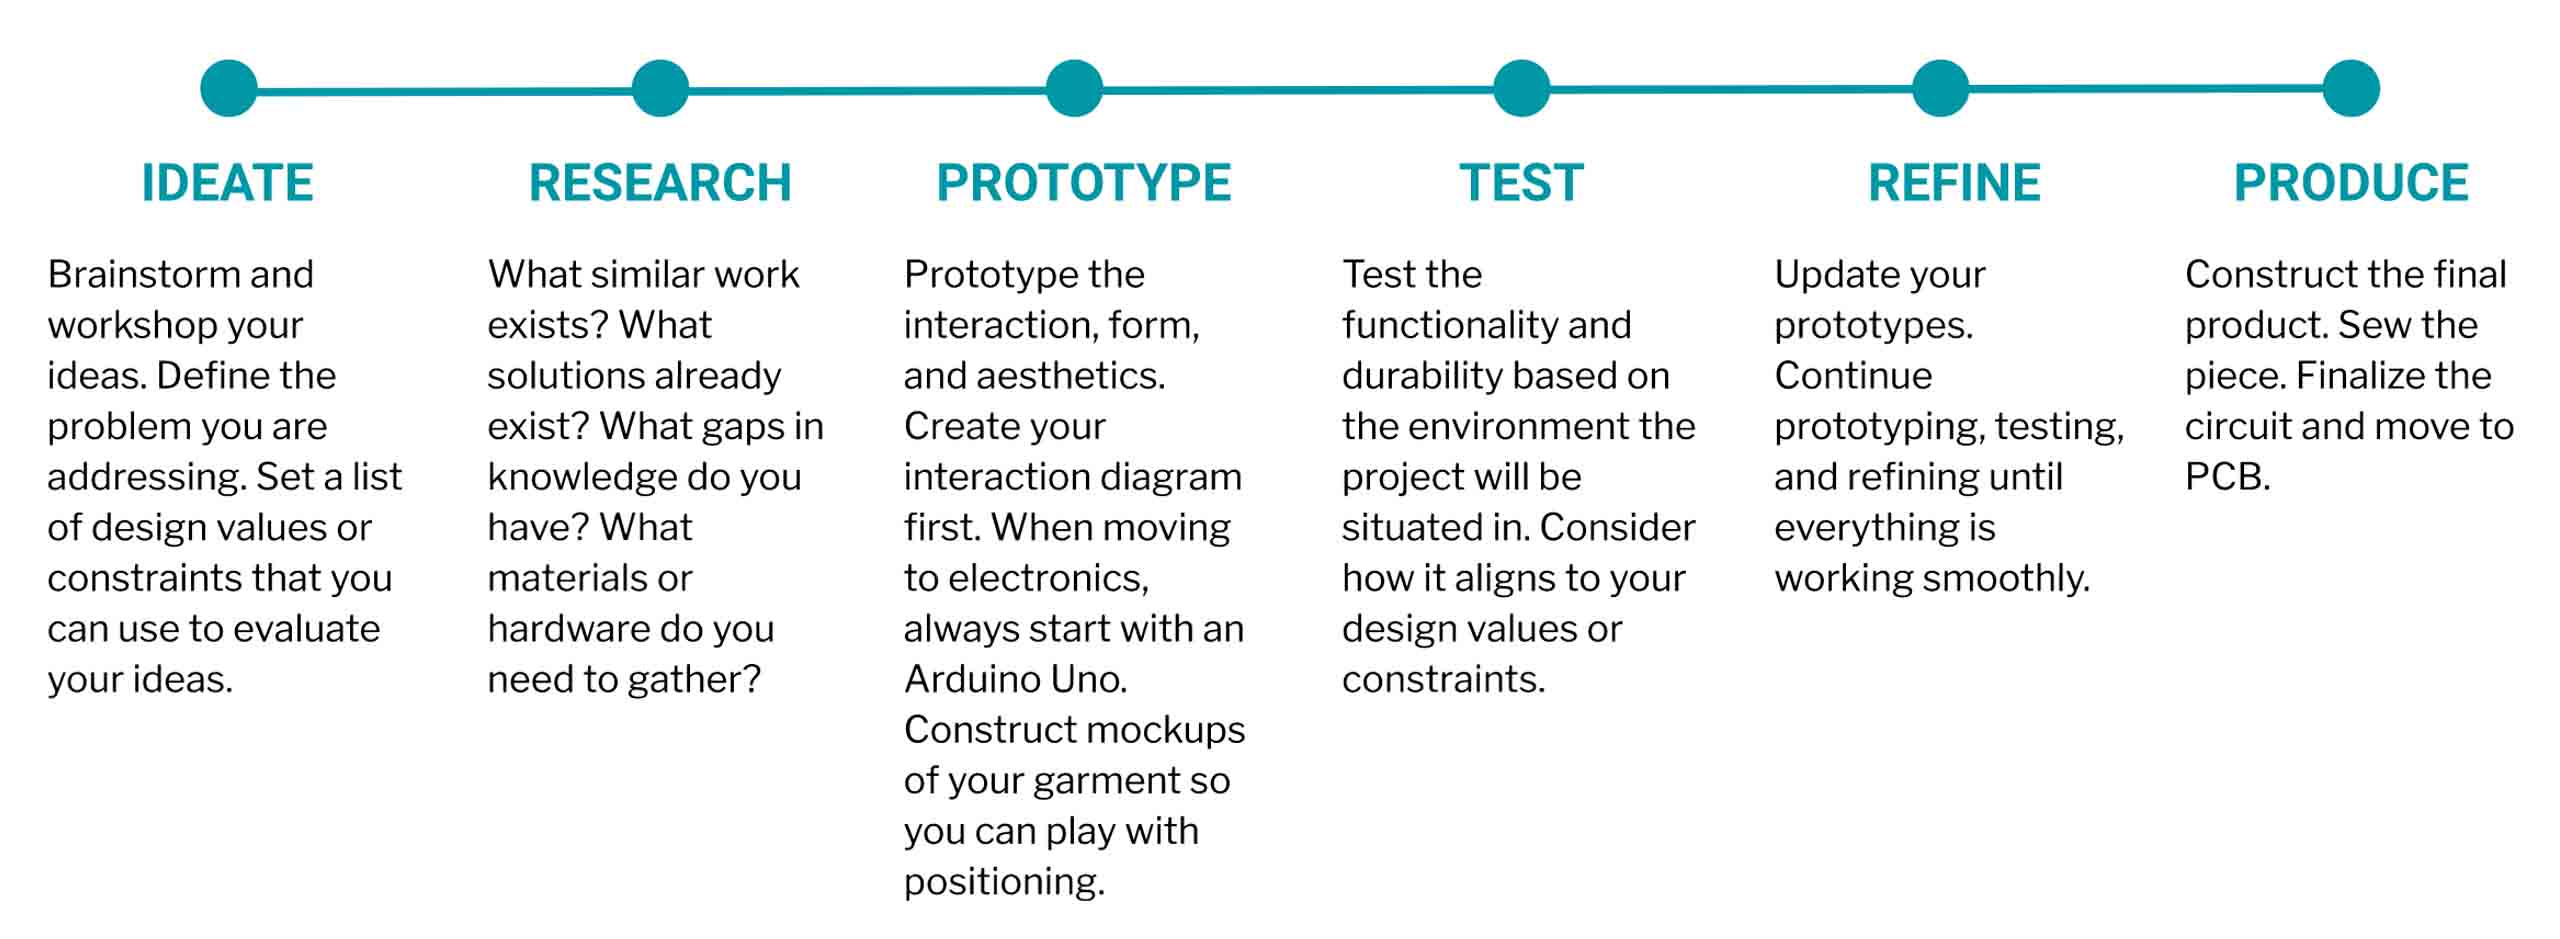
Design Process
When working on wearables, it is important to follow the following steps. As a result, errors and confusion can be avoided and work can be done in an organized manner.
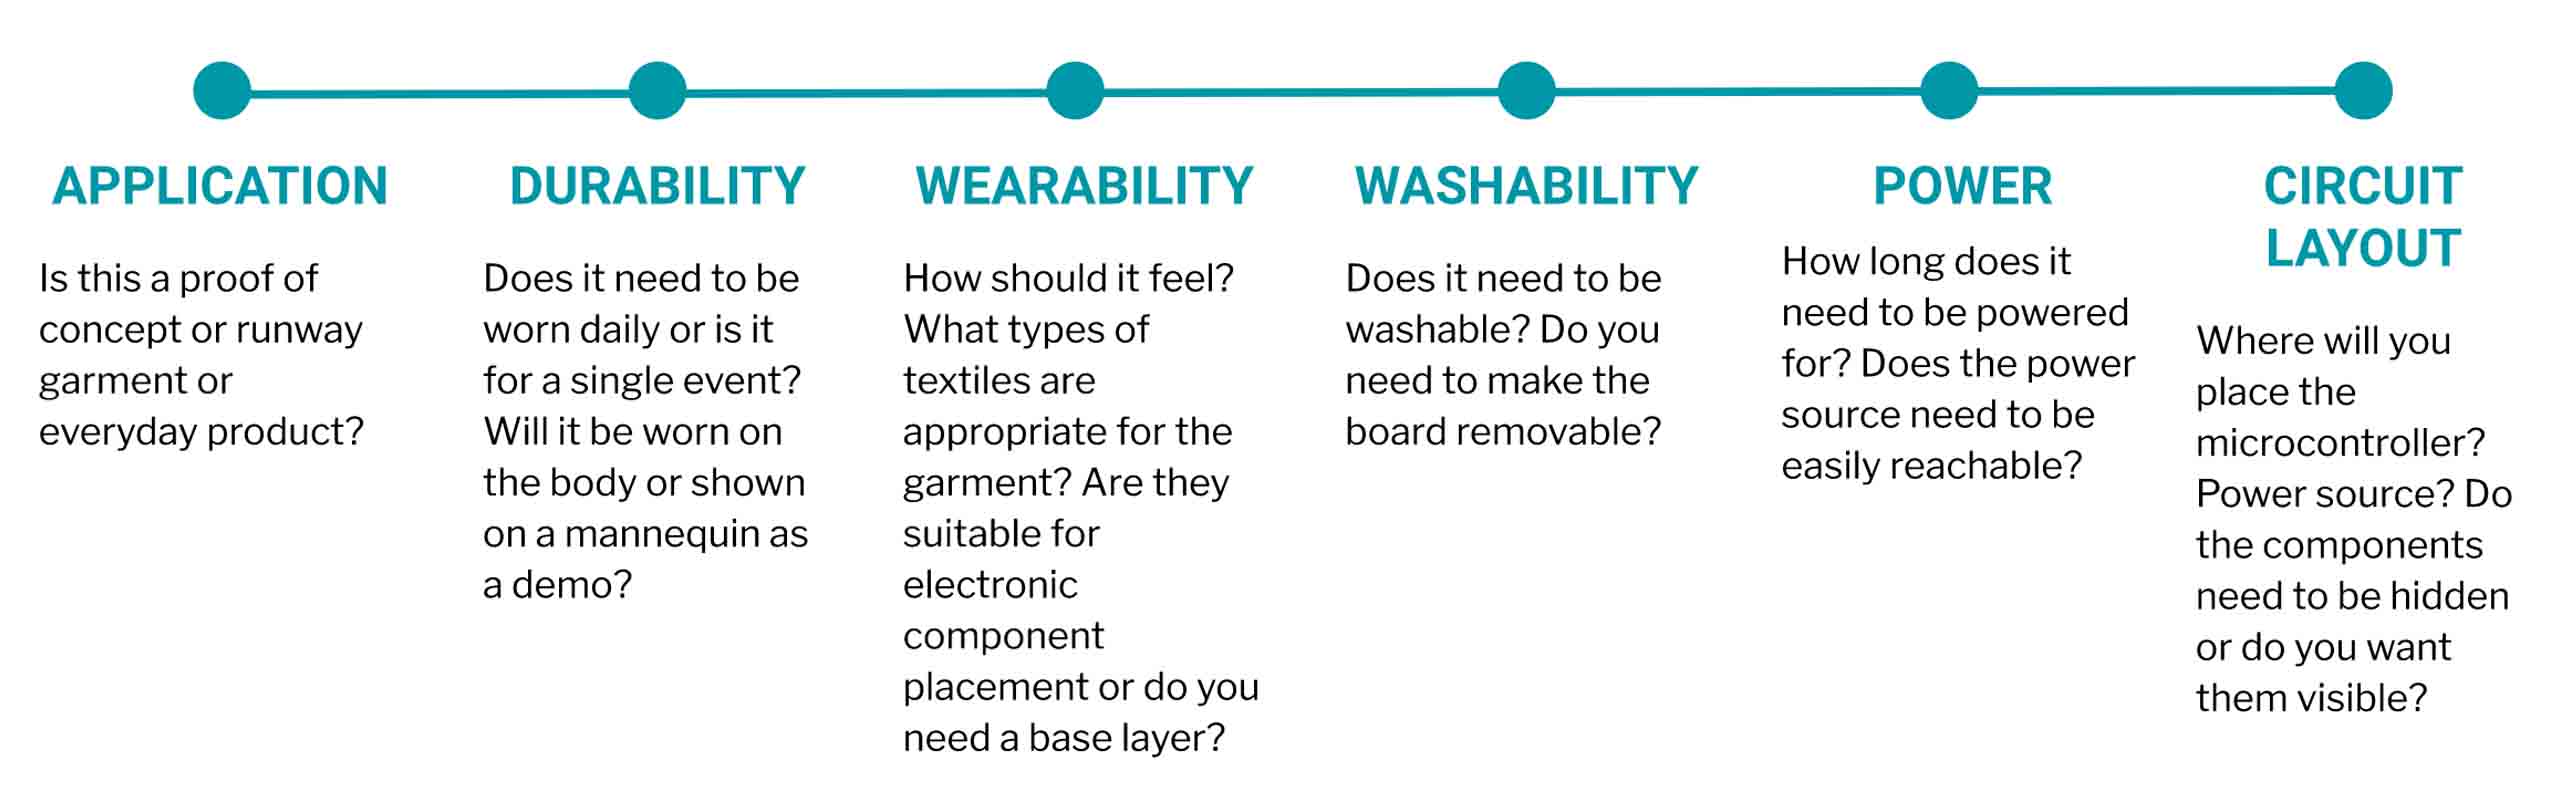
Functional Considerations
Below are the points to make the Wearable garement functional.
Human Consideration
The most important thing is to keep the end user in mind since the end user is the customer who will wear the garment.

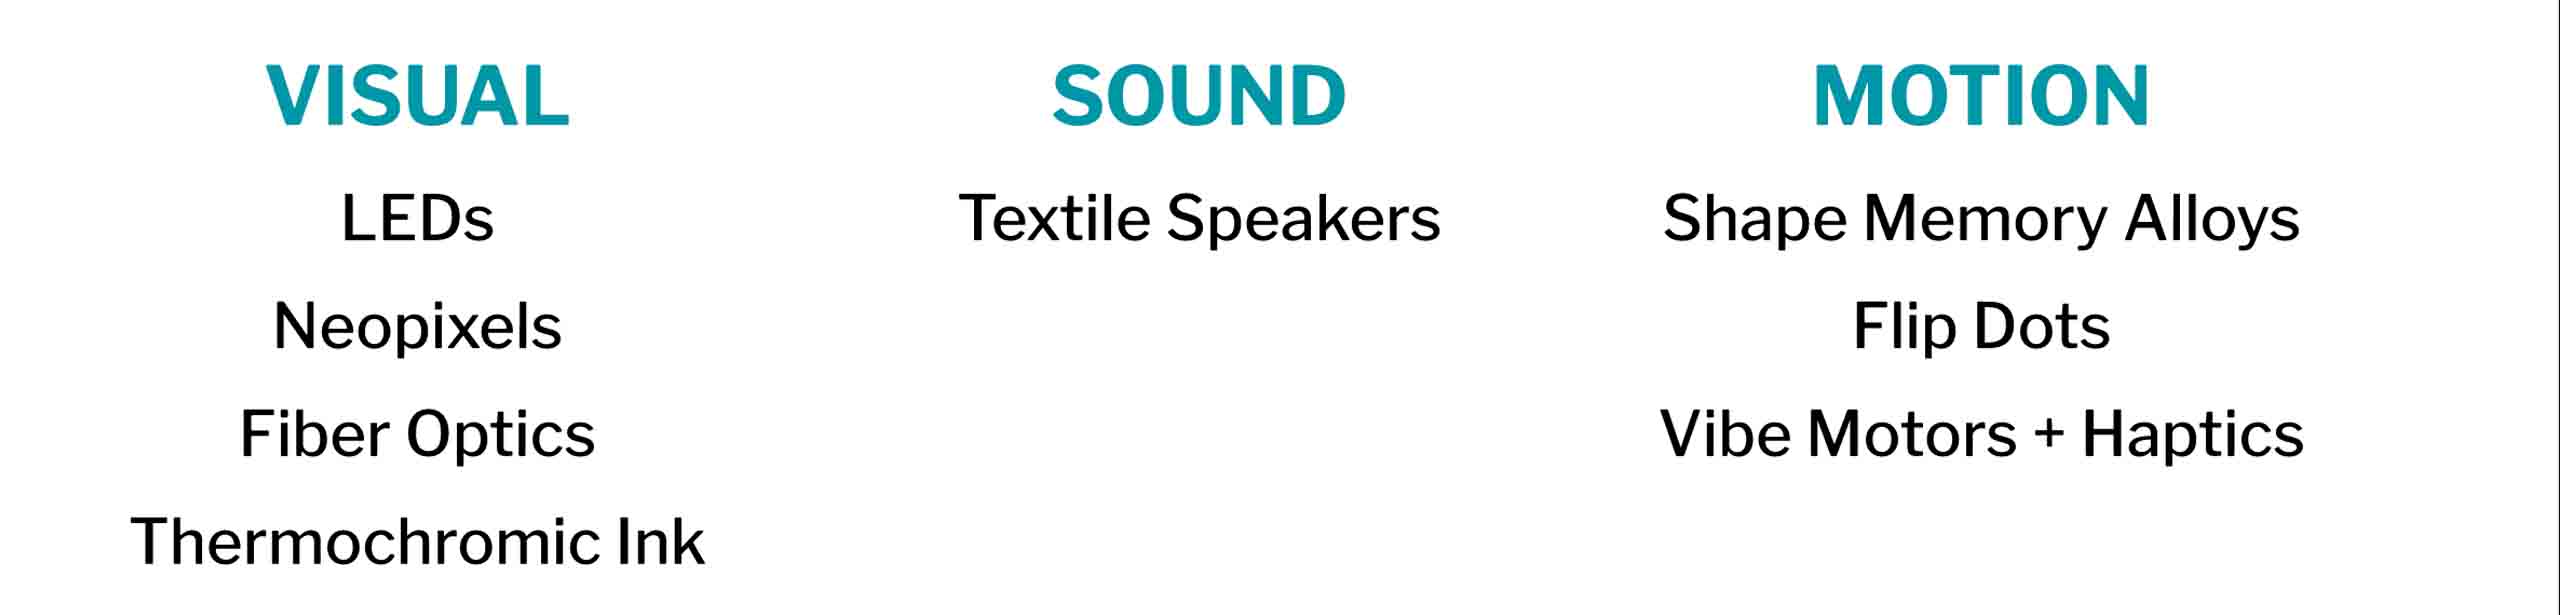
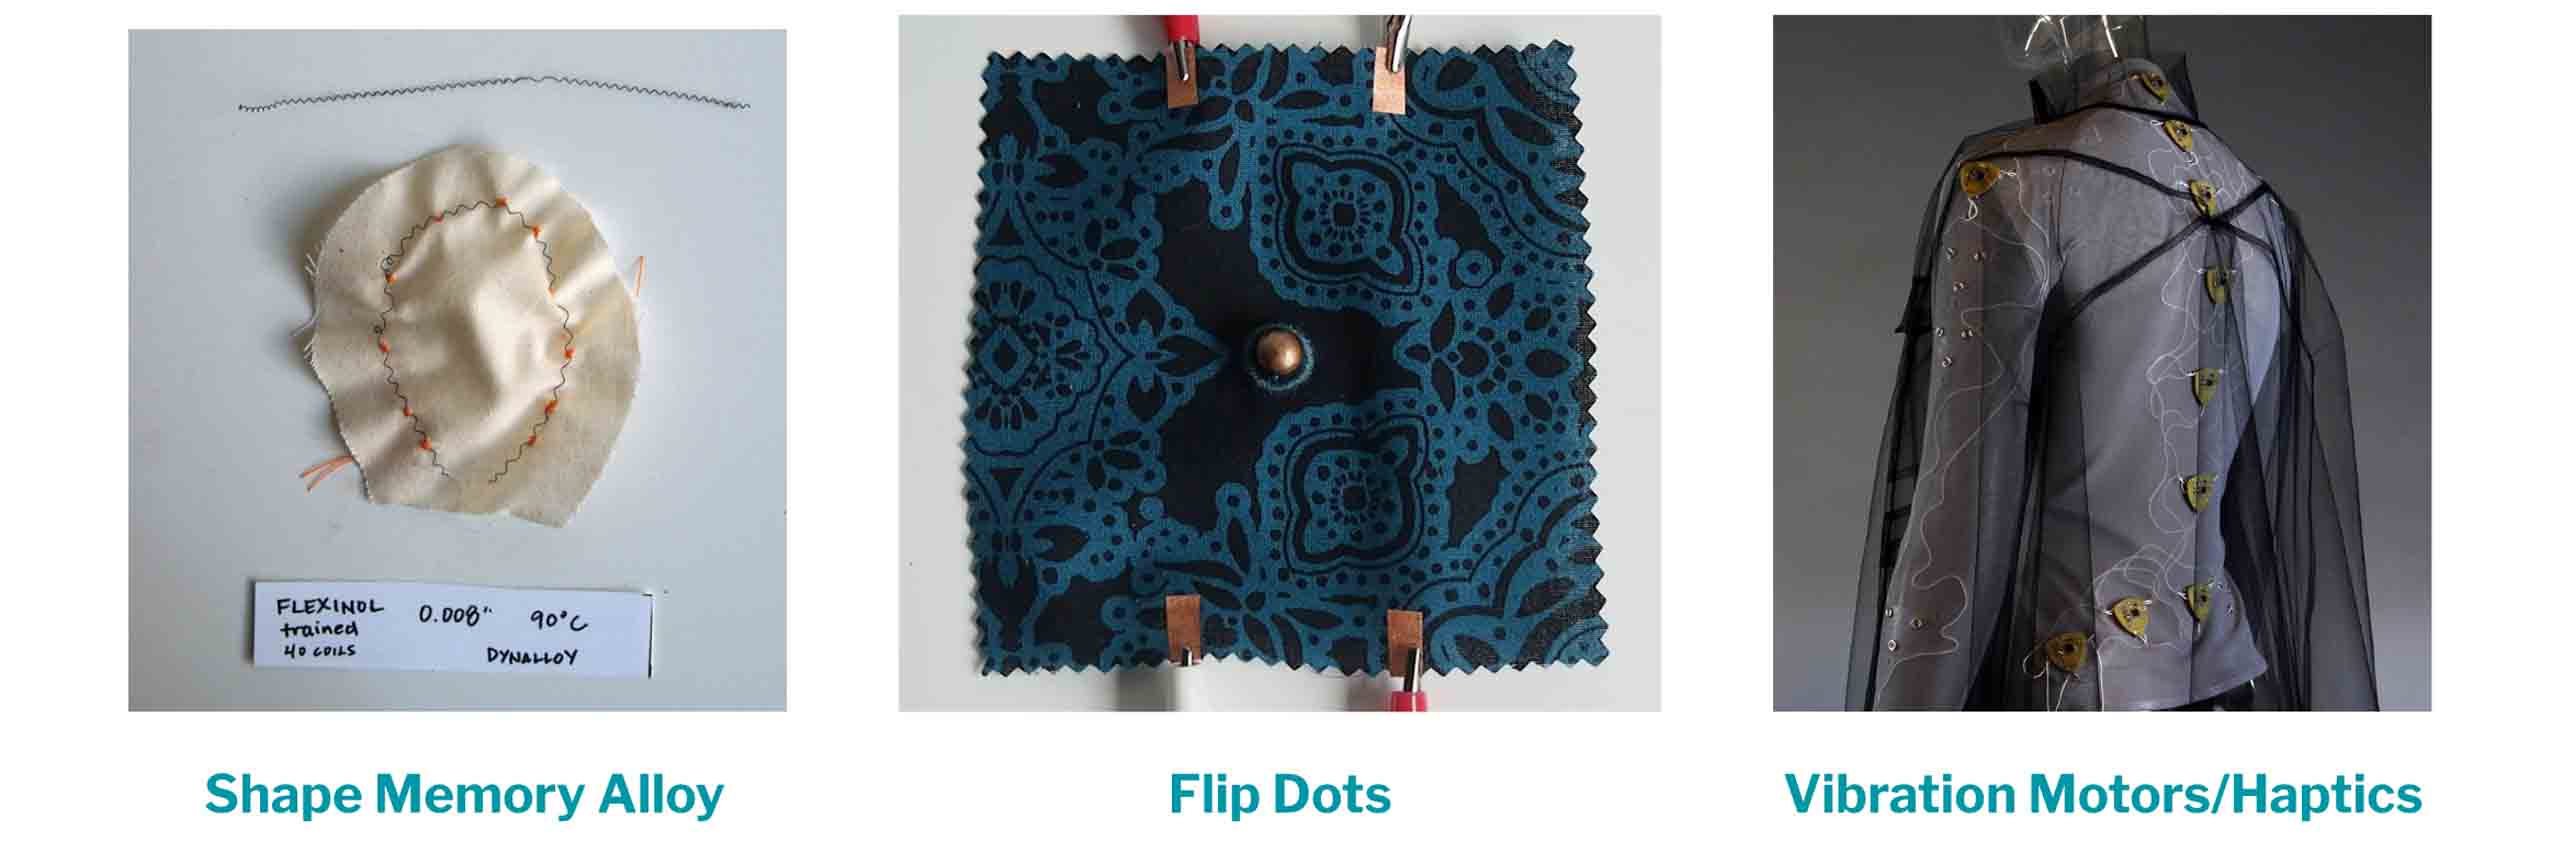
Actuator
An Actuator is a component of a circuit that moves or controls another part based on input.
The state of changing Actuators are Visual, Sound, Motion.
Understanding Actuators
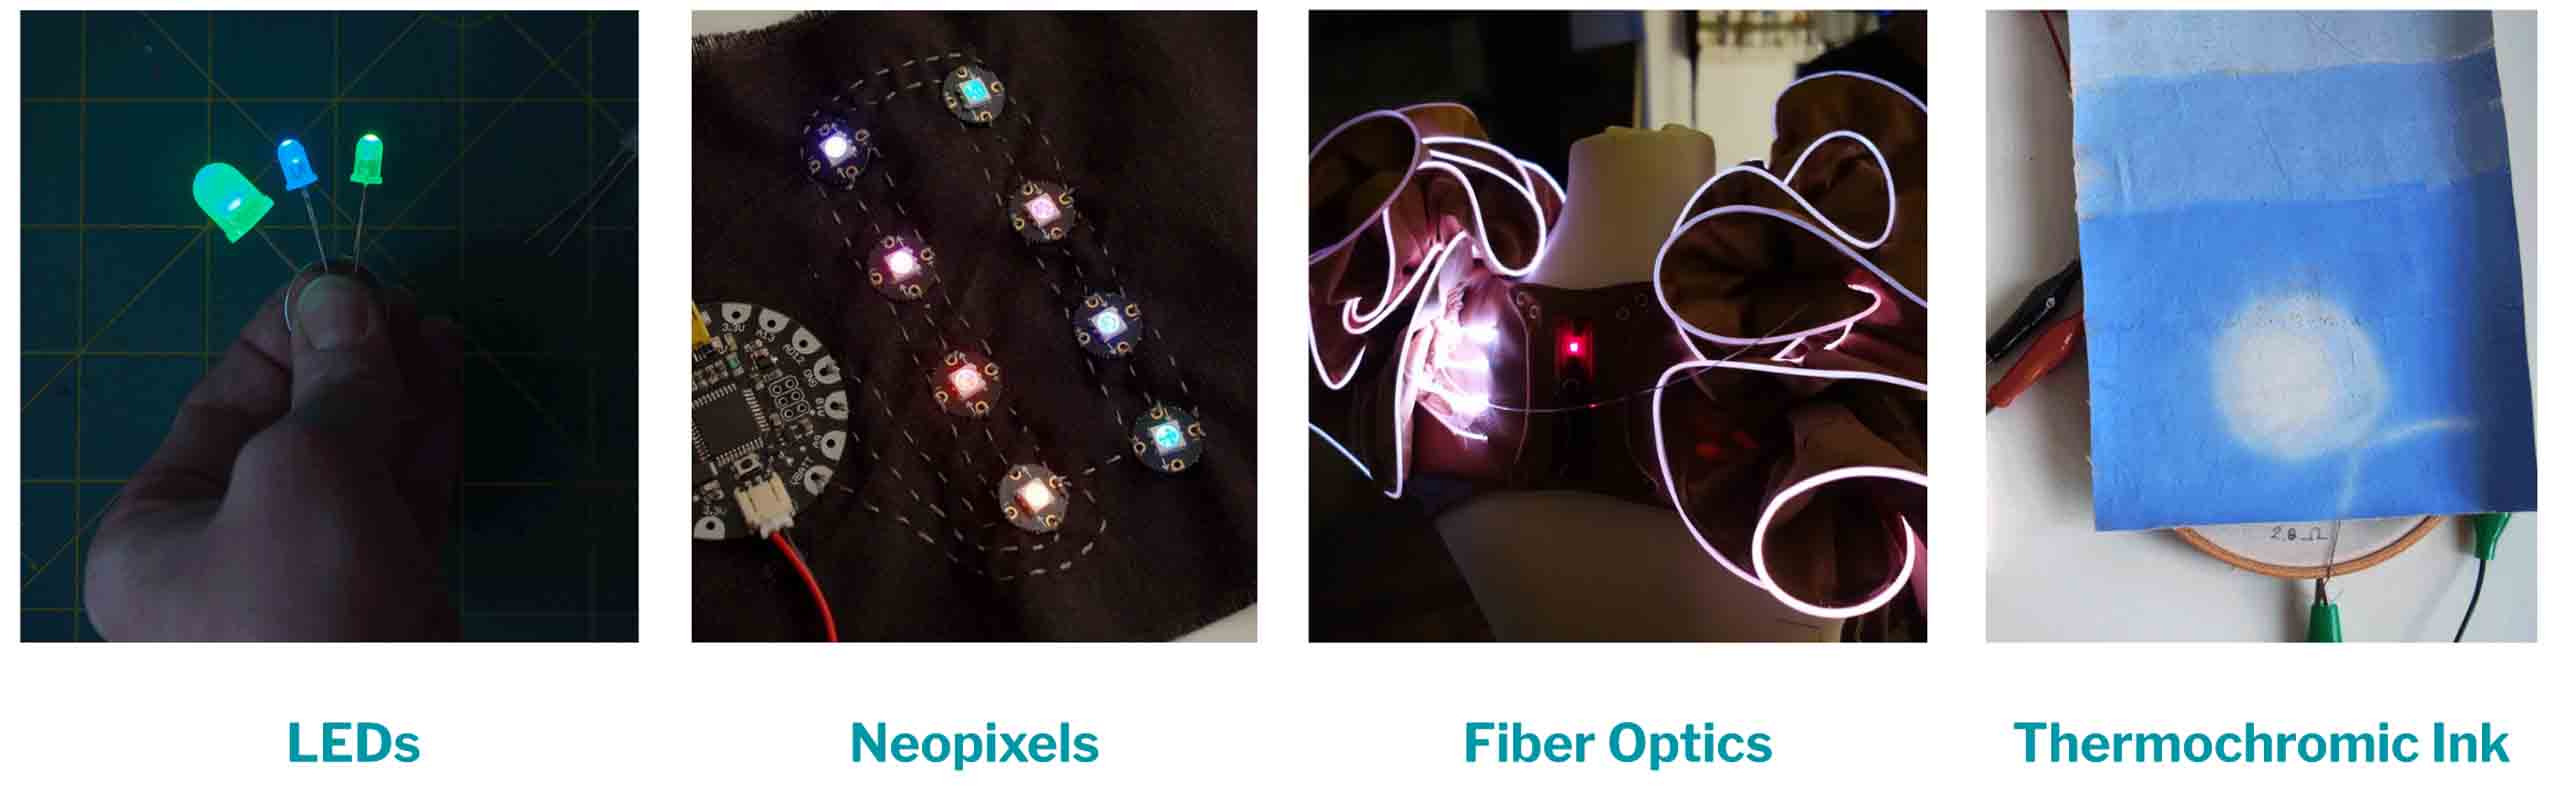
Visual
Sound
Motion
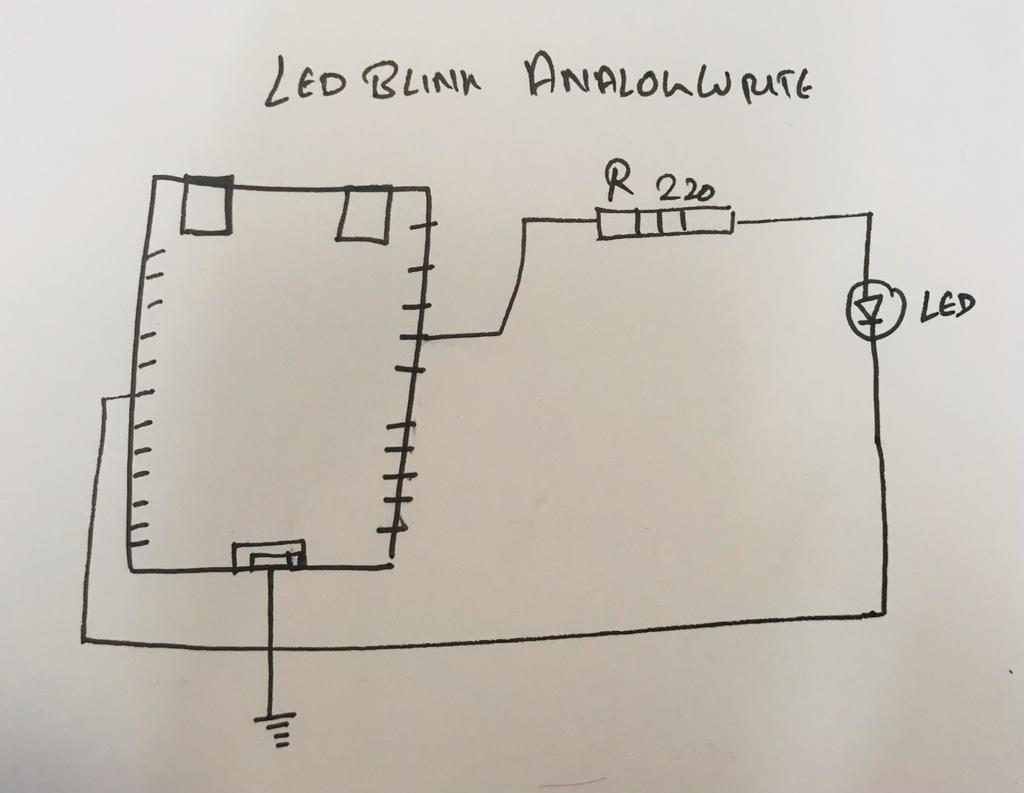
Blink Led AnalogWrite
 #include <Arduino.h>
 #include <analogWrite.h>

int led_pin = 13; //define the pin where the Led is connected

void setup() {

  pinMode(led_pin, OUTPUT); //define pin of the Led as an output

}

void loop() {

  //analogWrite(pin, 0/255);
  analogWrite(led_pin, 255); //set max intensity
  delay(1000);                 //wait 100millisecond
  analogWrite(led_pin, 190);
  delay(1000);                 //wait 100millisecond
  analogWrite(led_pin, 127); //set half intensity
  delay(1000);                 //wait 100millisecond
  analogWrite(led_pin, 70);
  delay(1000);                 //wait 100millisecond
  analogWrite(led_pin, 0); //set min intensity
  delay(1000);                 //wait 100millisecond

}
Button Led ON/OFF
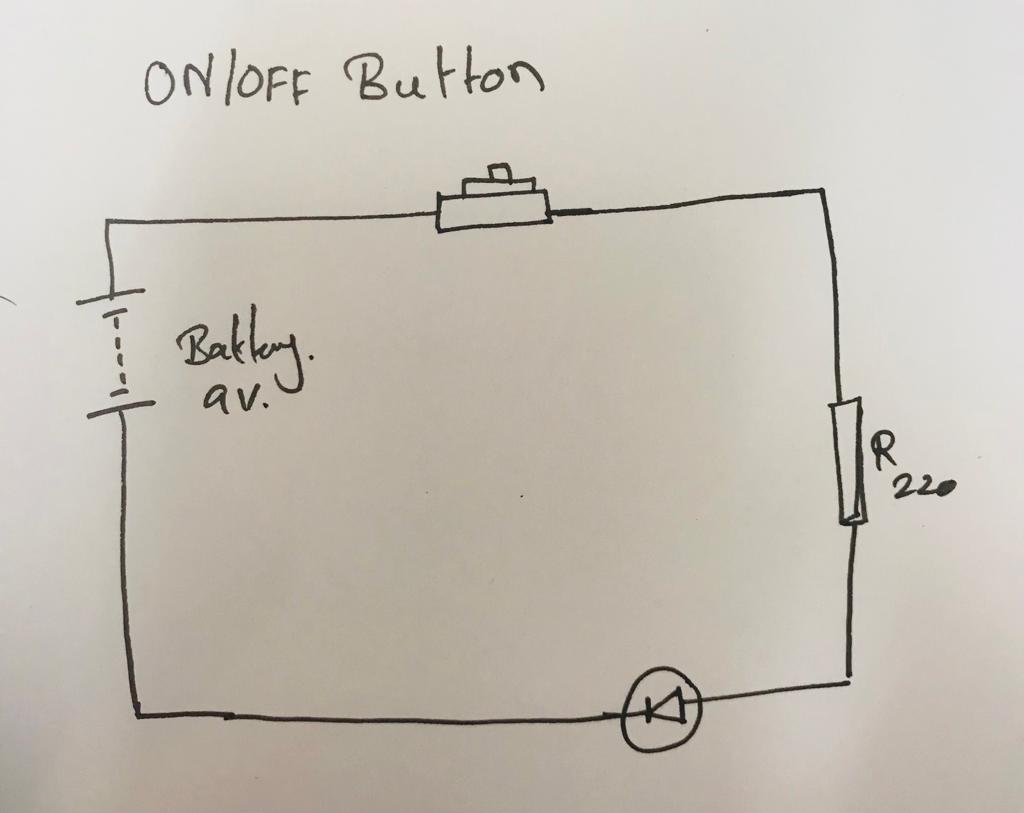
int digital_sensor_pin = 4;     //change the pin, where the sensor is connected?
int digital_sensor_value = 0;   //variable in which we save the sensor voltage
int led_pin = 13; //change the pin of the Led

void setup() {
  // put your setup code here, to run once:
  pinMode(digital_sensor_pin, INPUT_PULLUP);  //initialize the sensor pin
  pinMode(led_pin, OUTPUT);   //initialize led pin
  Serial.begin(9600);

}

void loop() {
  digital_sensor_value = digitalRead(digital_sensor_pin); //read the Voltage at pin sensor

  //if the sw is pressed, then the led turns on
  //otherwise (else) (the sw in not pressed), then the led turns off

  //status 1 (HIGH) ==> 5V (switch is not pressed)
  //status 0 (LOW) ==> 0V (switch is pressed)

  // check if the pushbutton is pressed.
  if(digital_sensor_value == LOW){    //If it is pressed

      digitalWrite(led_pin, HIGH);     // turn the LED on

  } else {                             //If it is NOT pressed

      digitalWrite(led_pin, LOW);    // turn the LED on by setting the voltage to 5V

  }

}
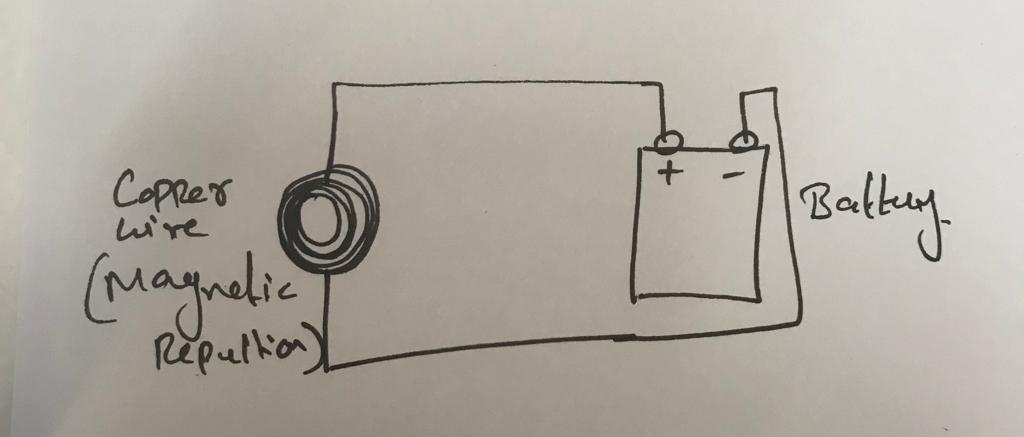
ElectroMagnet Text
I have tested Electromagnet field using copper wind and 9v battery.
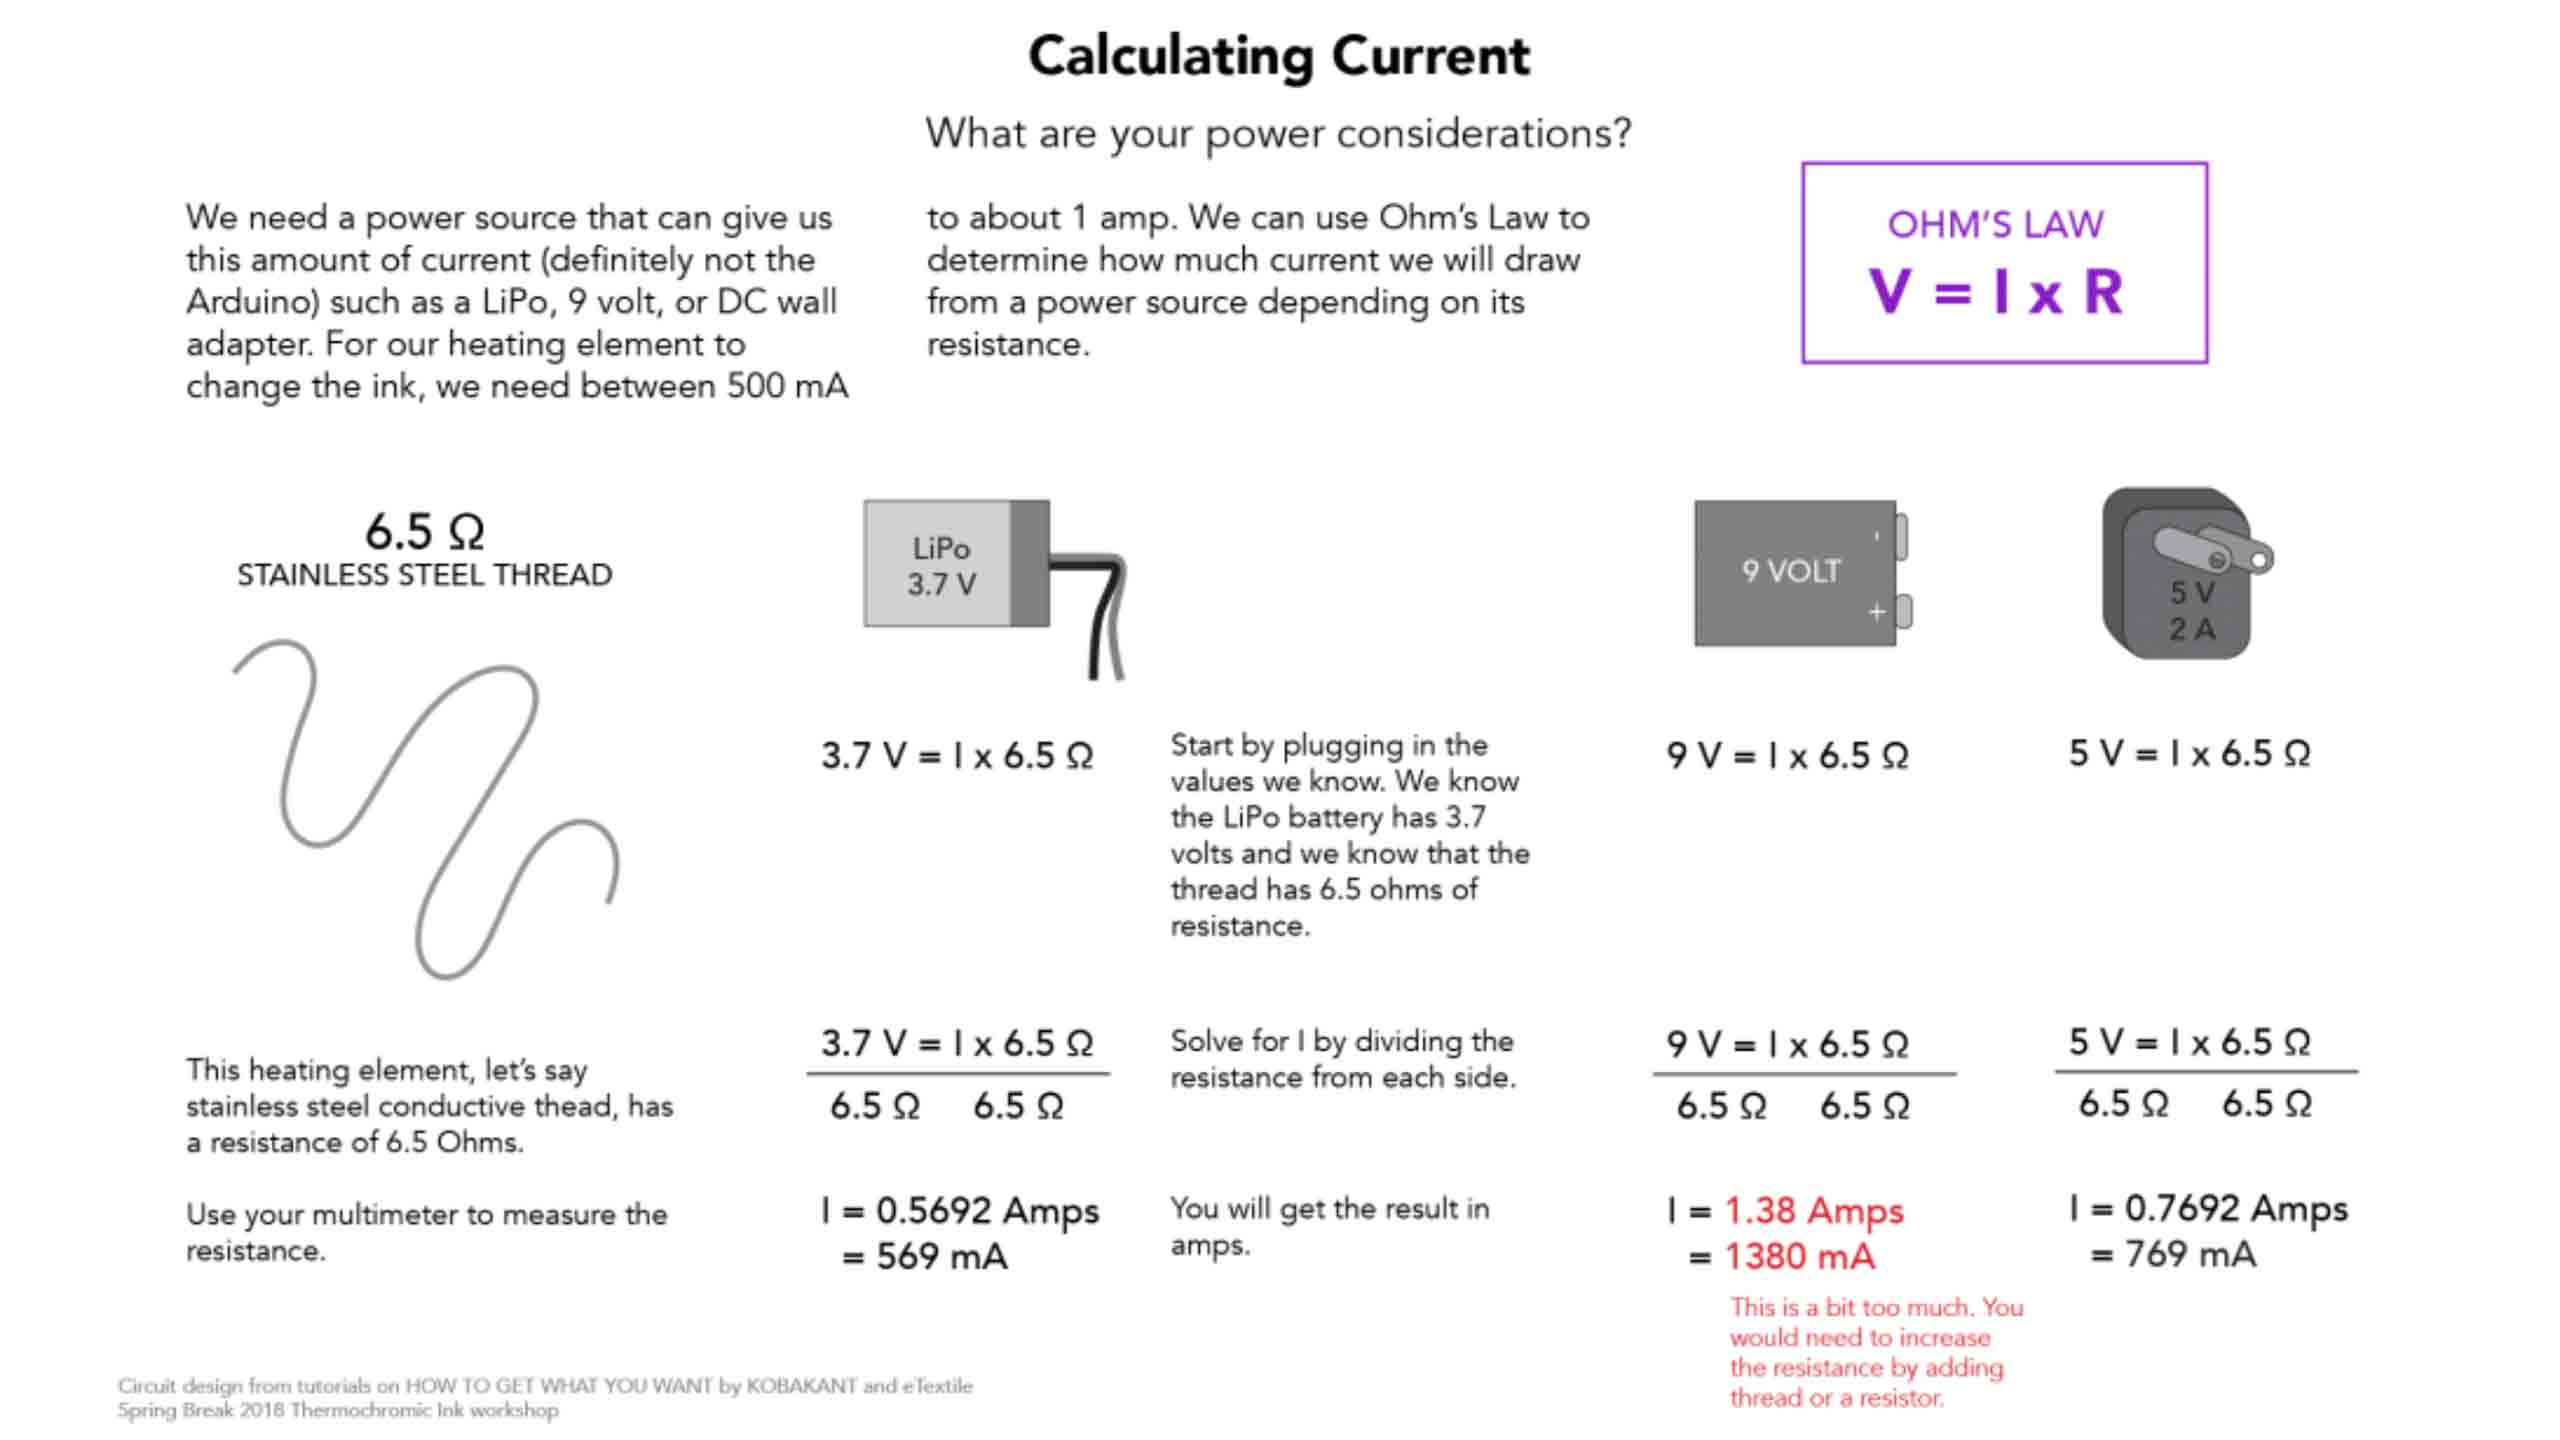
Thermochromic Ink
Thermochromic ink can change state in the presence of heat.
when they reach temperature it becomes colourless.
Variables
How to calculate current
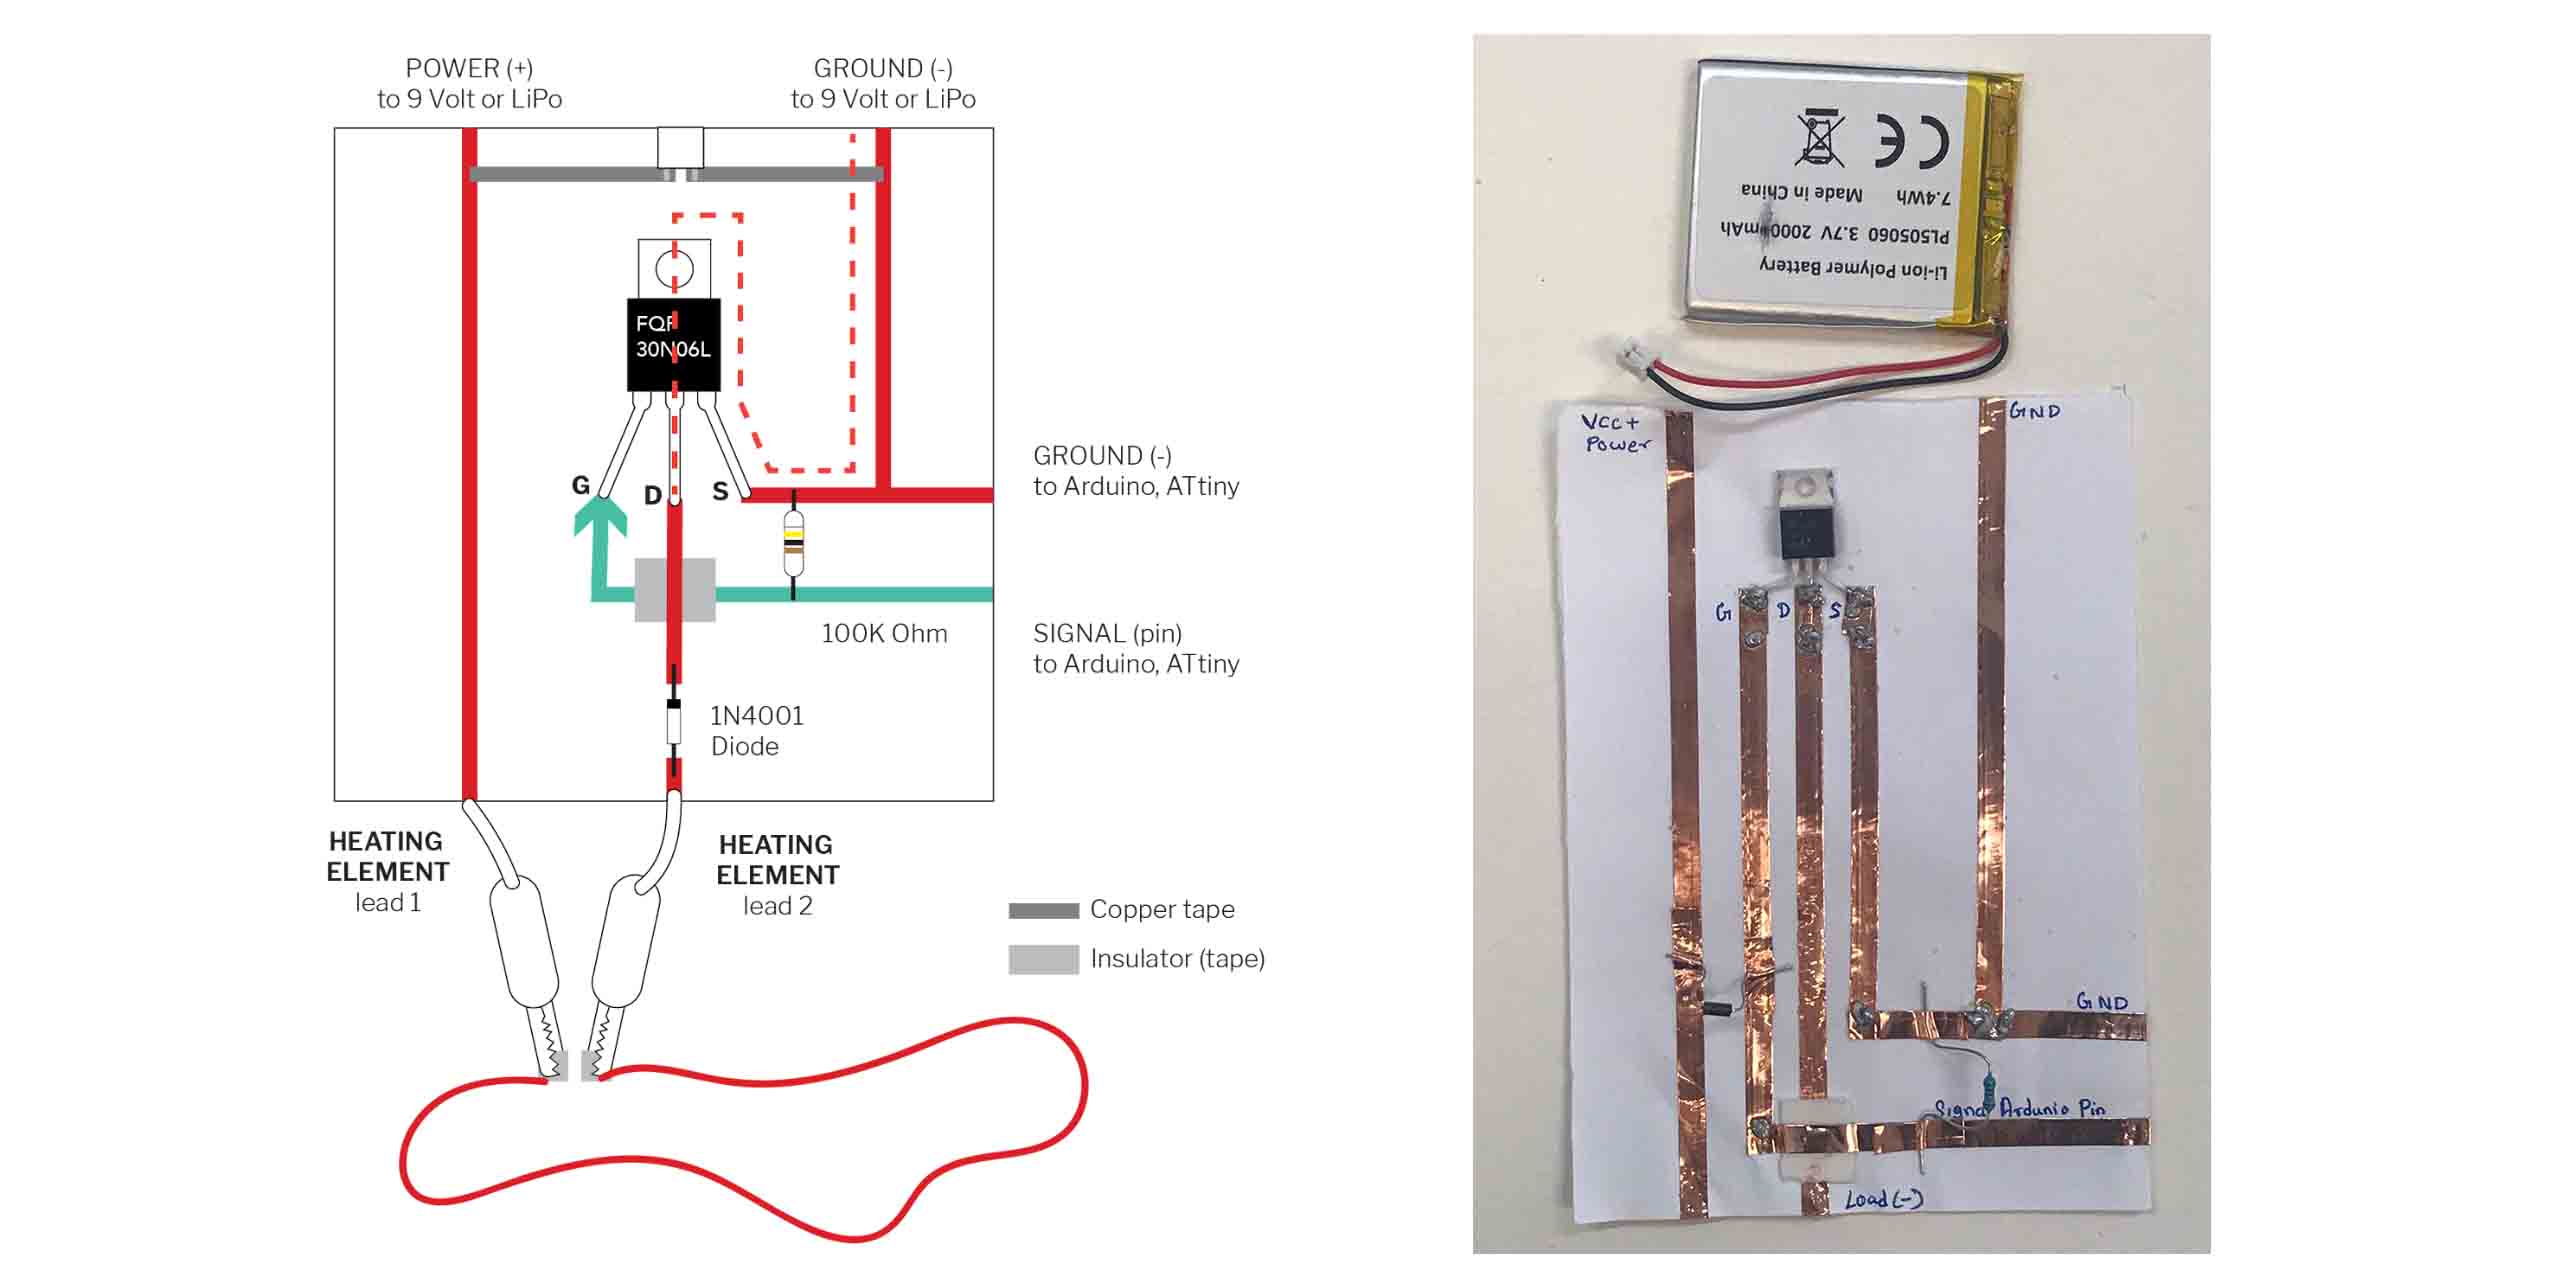
Circuit
In switch mode, a transistor can be used to control the flow of electrical current. When used as a switch, the transistor operates in one of two modes: cutoff or saturation.
To turn a transistor on, a small voltage is applied to the gate, which is connected to the base of the transistor. This voltage creates an electrical field that allows current to flow between the drain and the source of the transistor. Conversely, when the voltage at the gate is zero, the transistor is turned off and no current flows through the circuit.
Using an Arduino, a microcontroller board, it is possible to control the voltage at the gate of the transistor, thus controlling the flow of current through the circuit. This can be used in various applications, such as in motor control or in the regulation of voltage or current.
Overall, the transistor's ability to act as an electrical switch is essential in many electronic devices, and controlling it through a microcontroller board like the Arduino provides a means of easily and precisely regulating electrical current flow.
Digital file for Stencil
Illustrator File
For the screen printing stencil, I created the artwork in Illustrator.

Print Settings
I saved the Illustrator file as a svg and opened it in Silhouette Studio to vinyl cut the stencil.
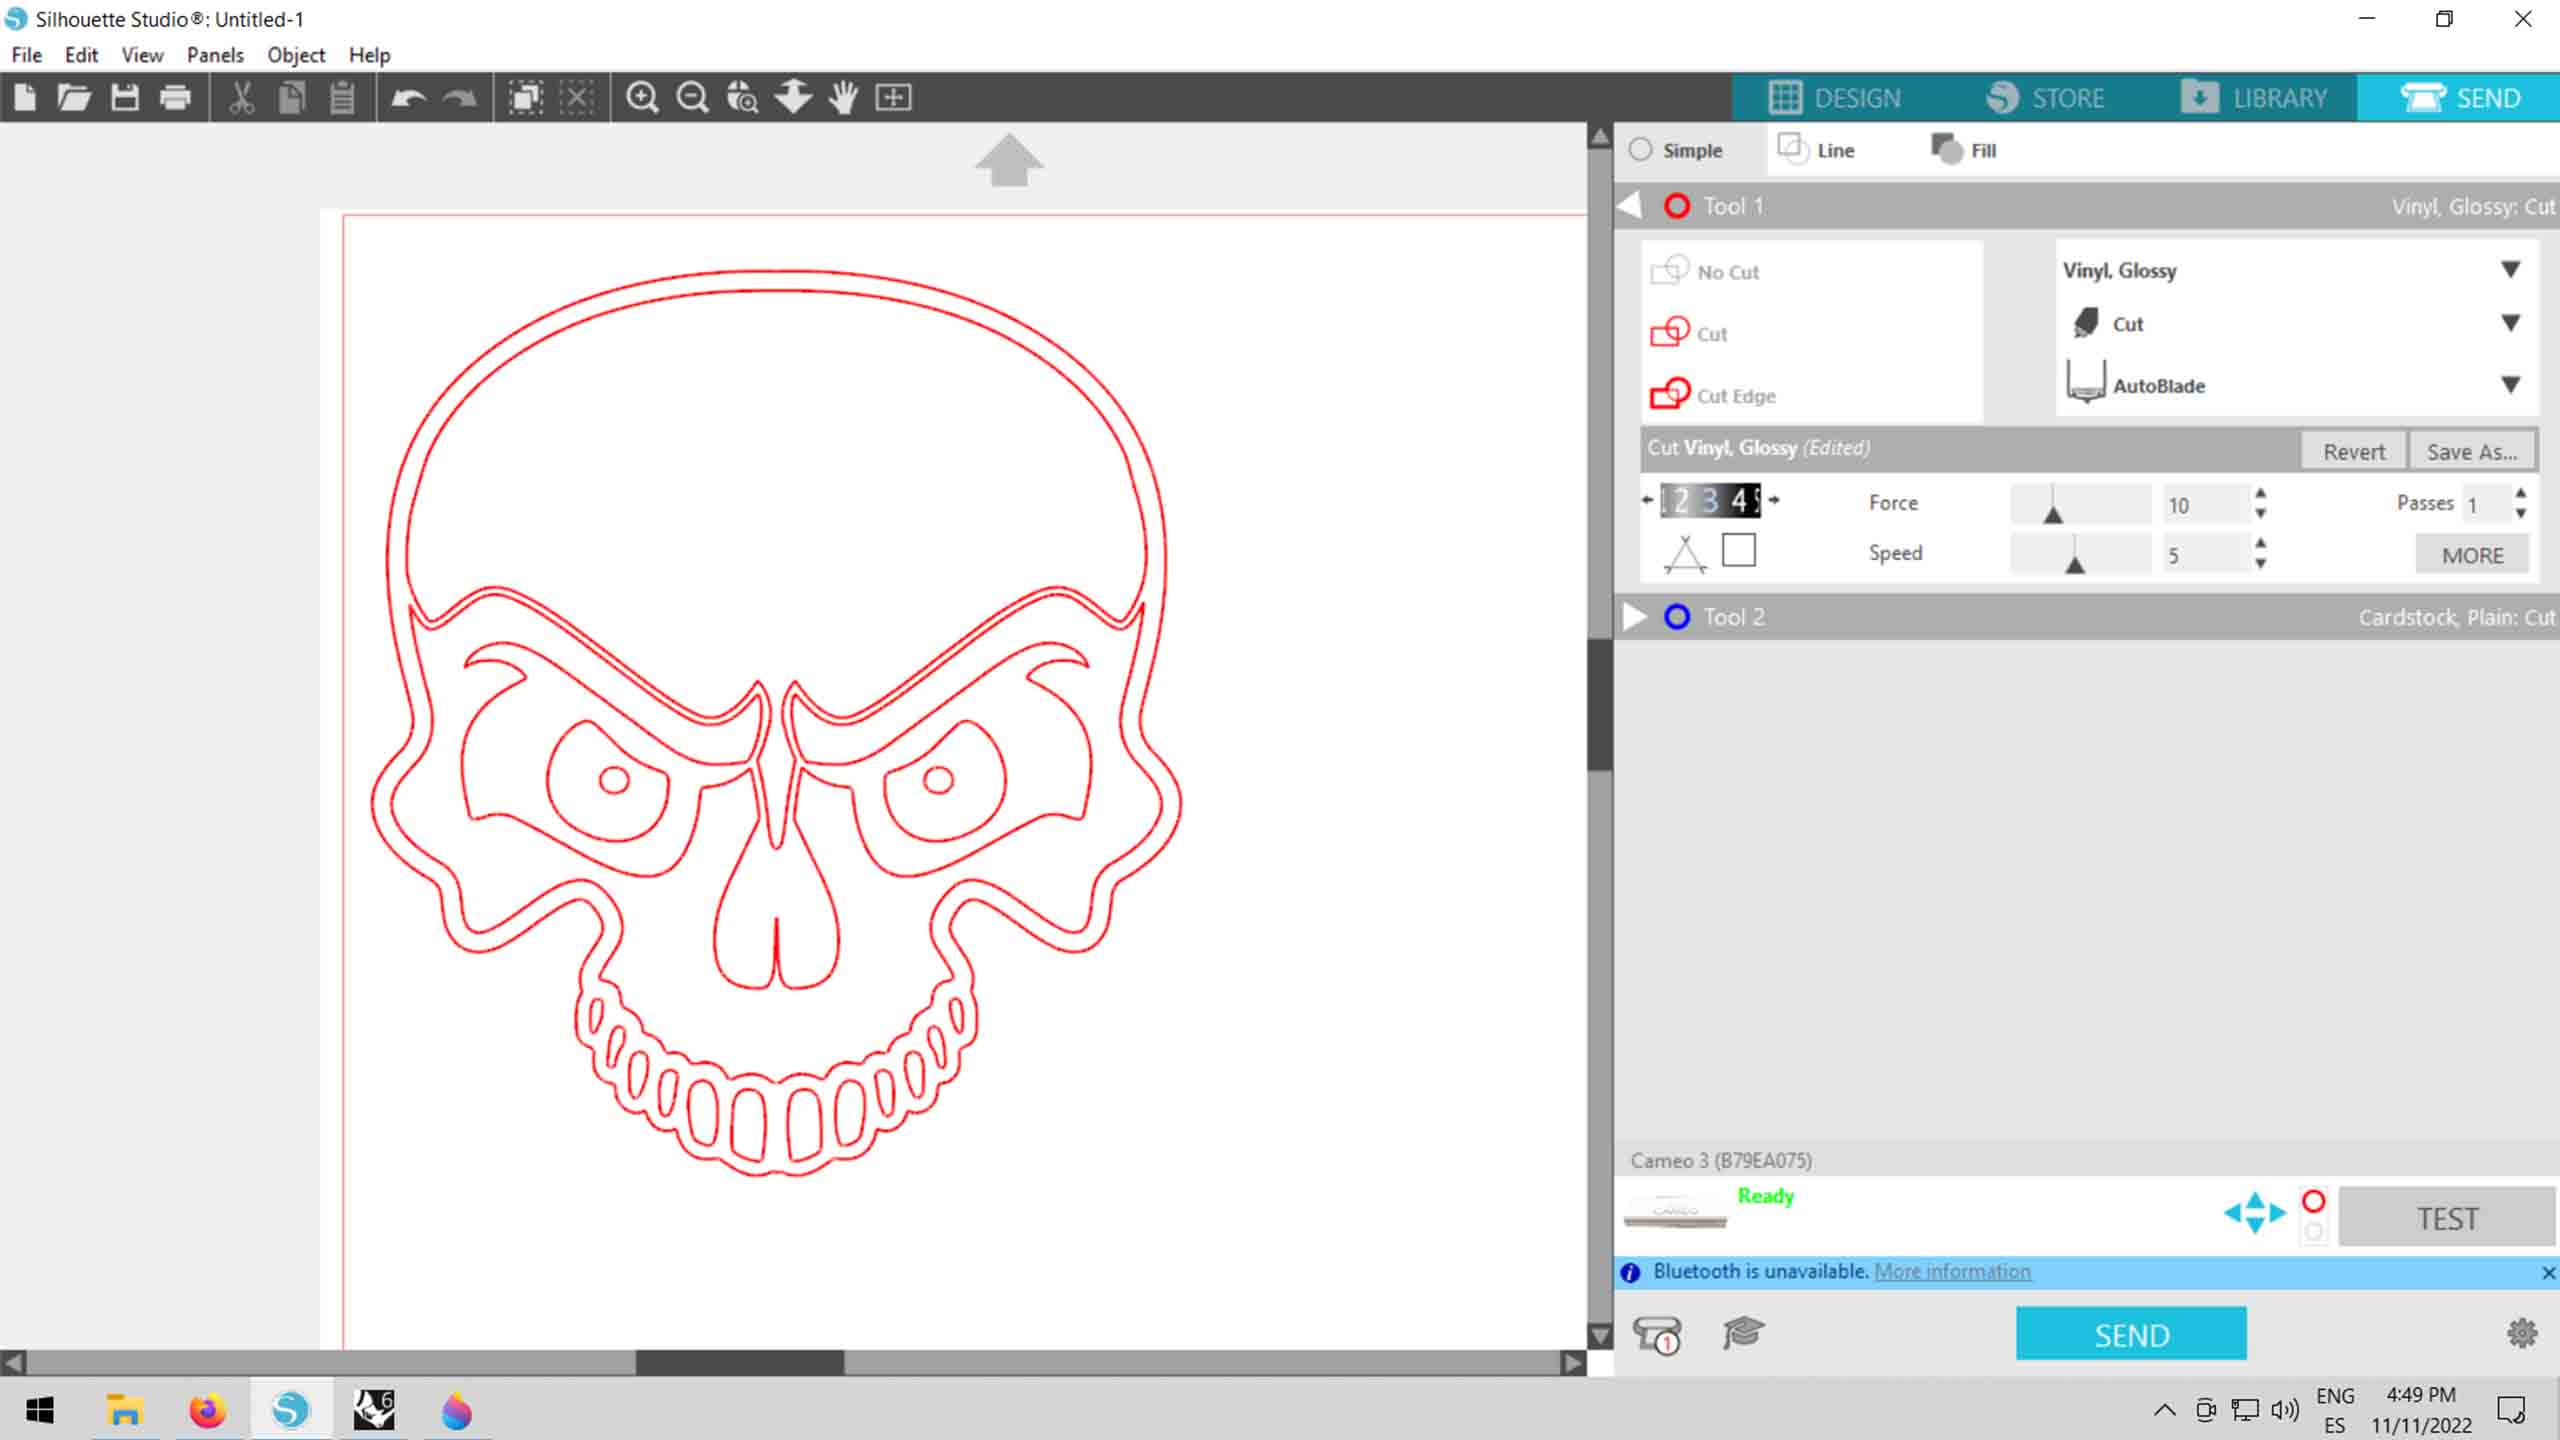
Vinyl Cutter
For screen printing, I used the vinyl cutter to cut the stencil.
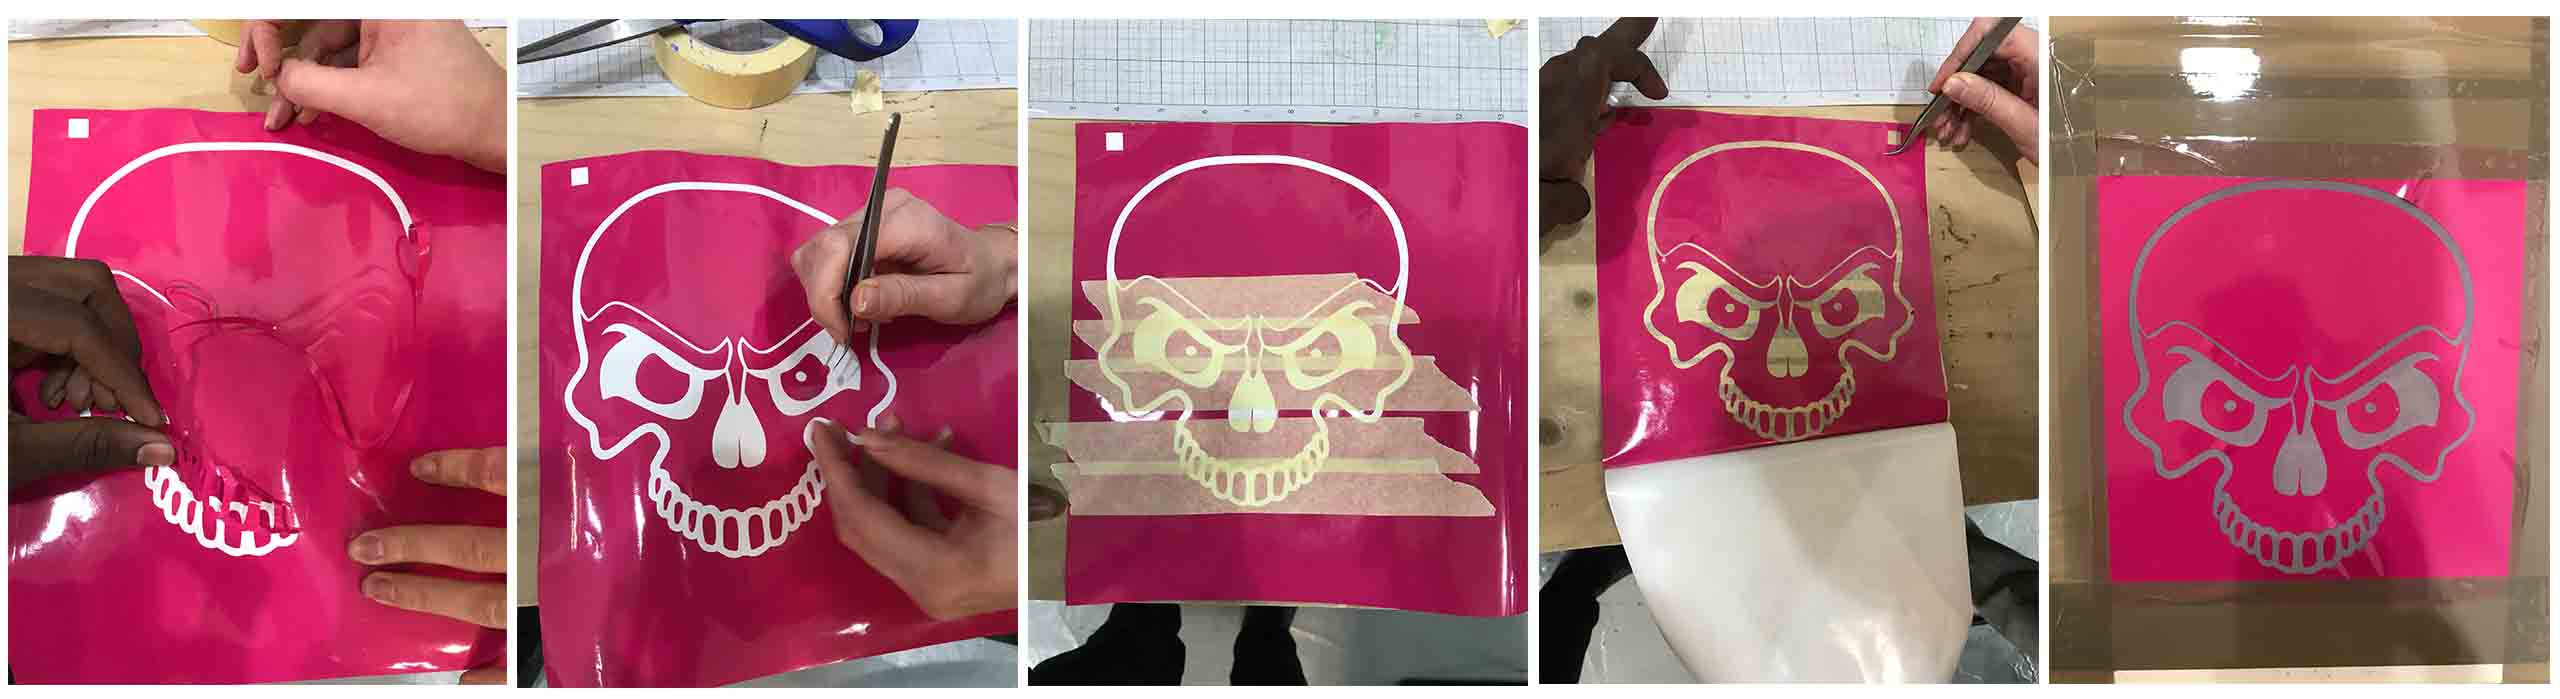
The following visuals show the stencil making process step by step.
Stencil Process
Screen Printing Process
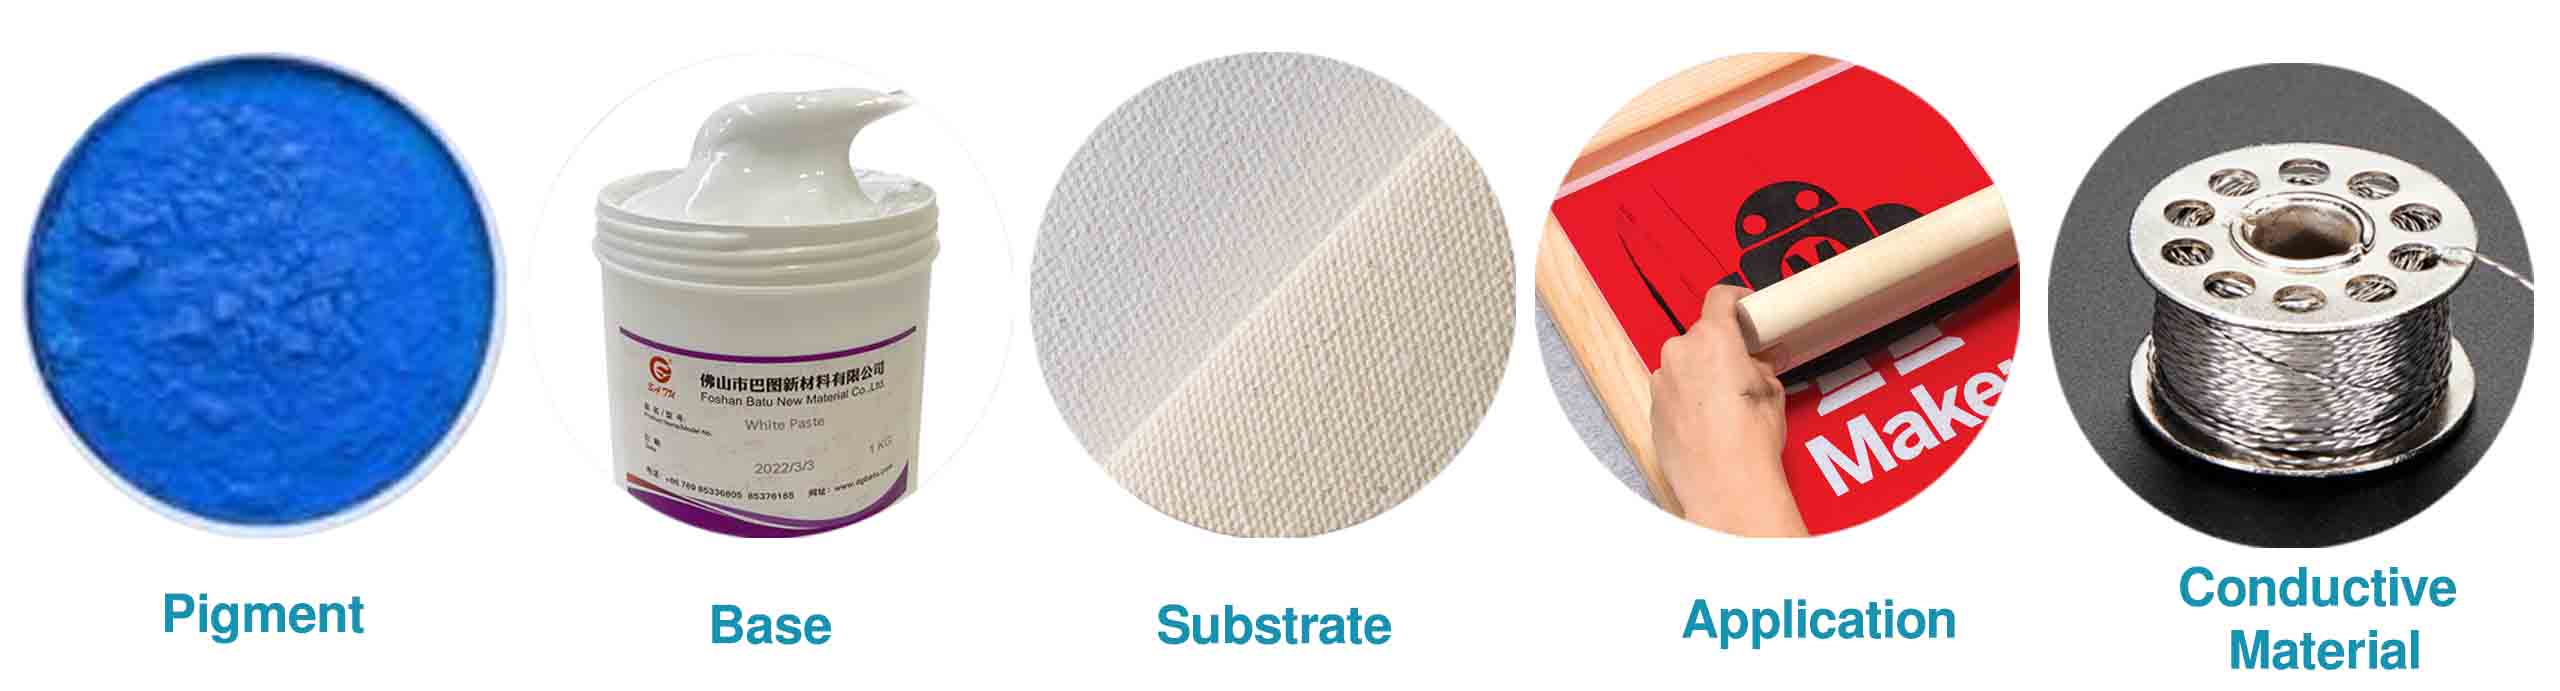
Required Materials
The following materials are required for screen printing.
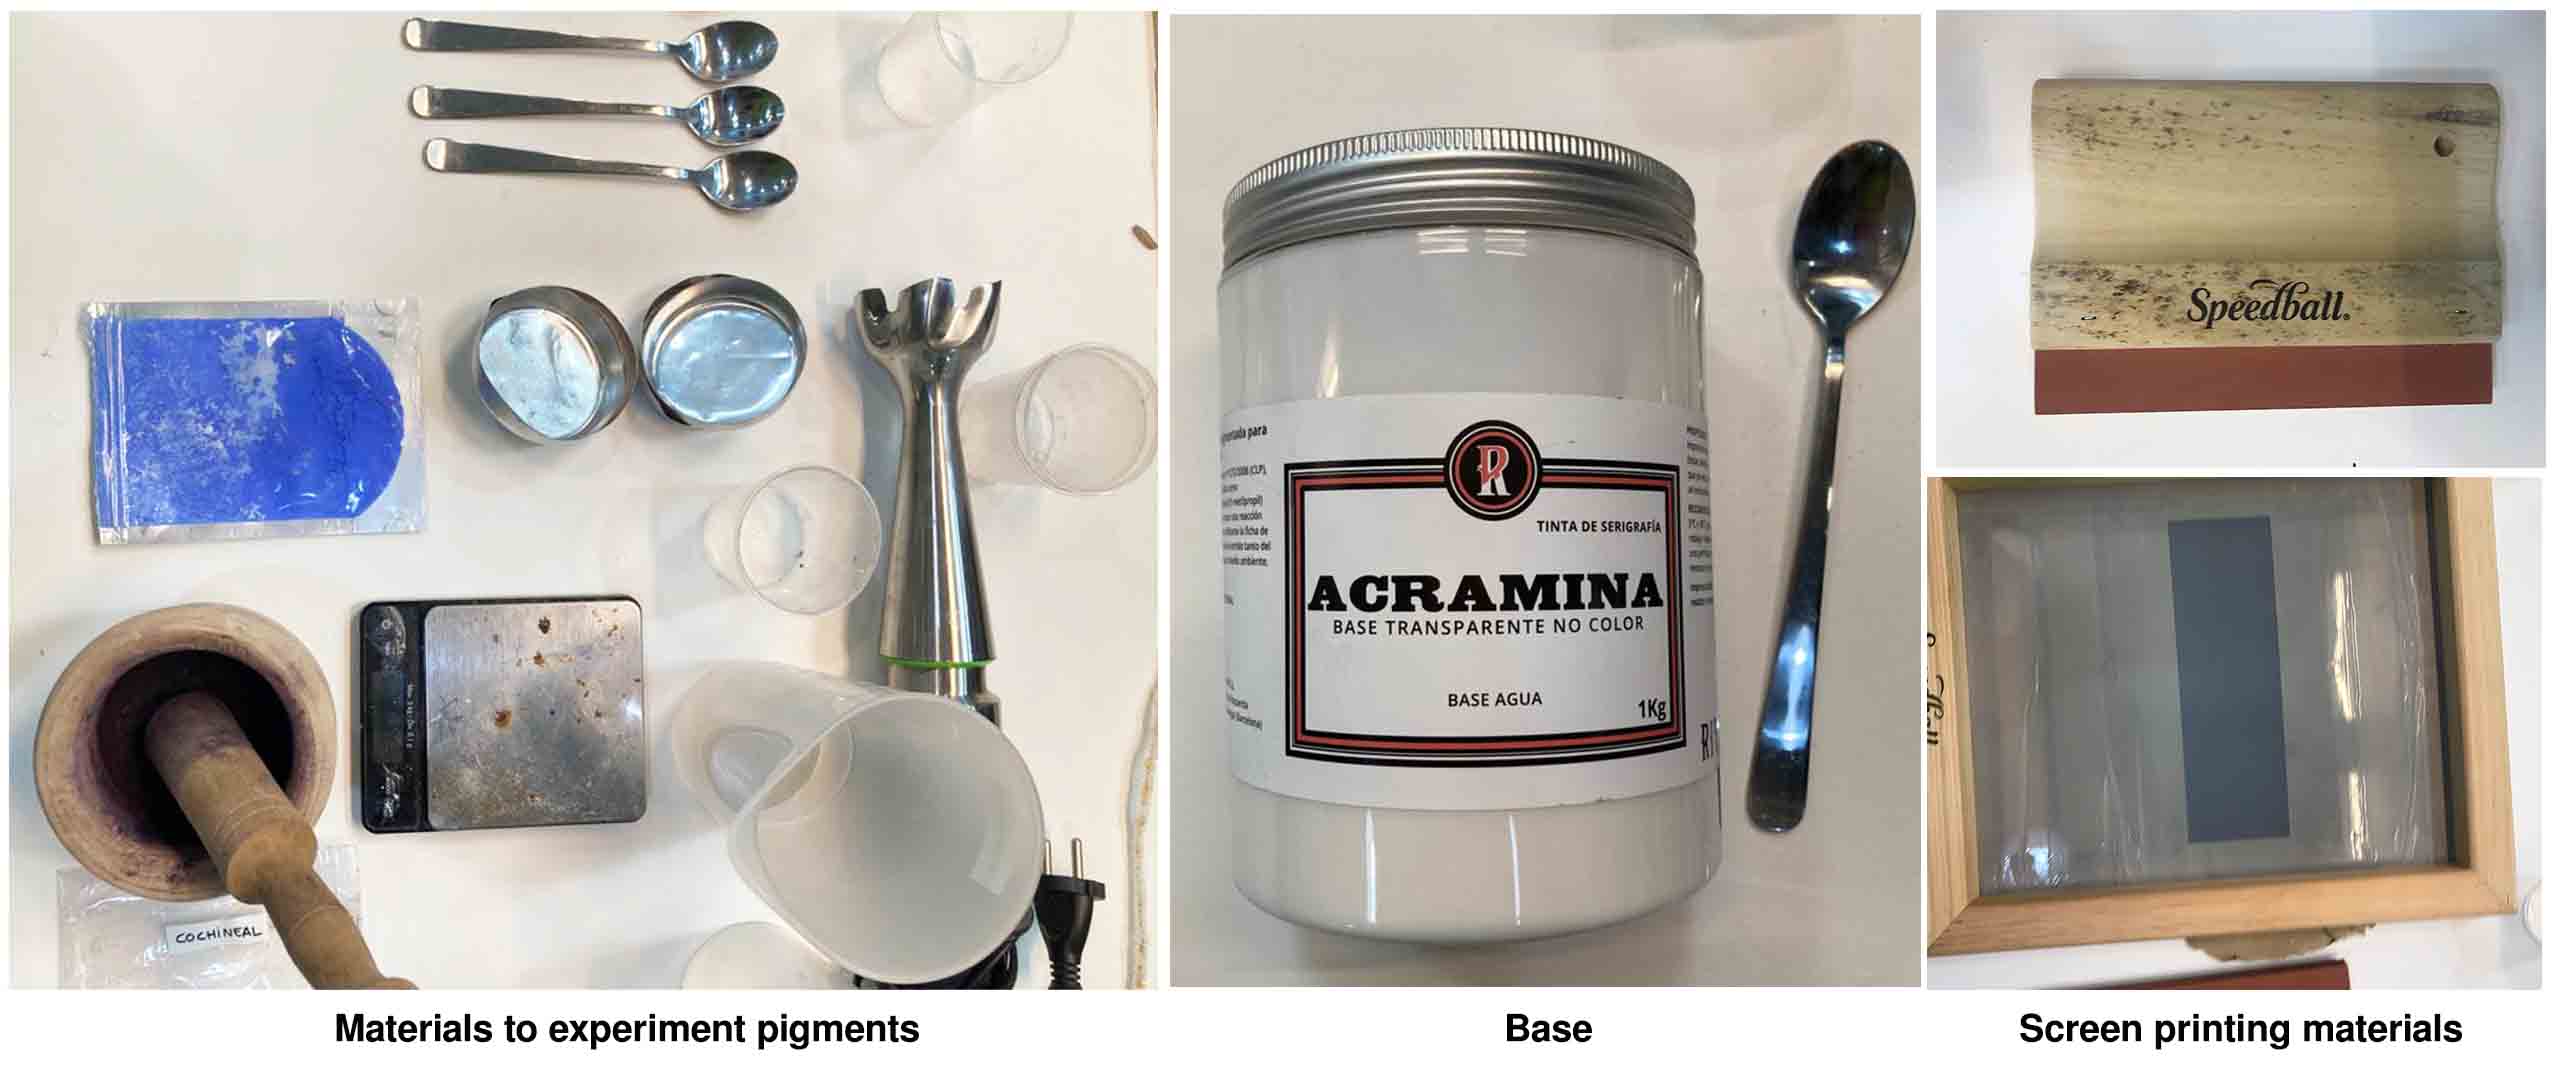
Process
I mixed blue thermochromic ink with the base to print using the screen printing process below.
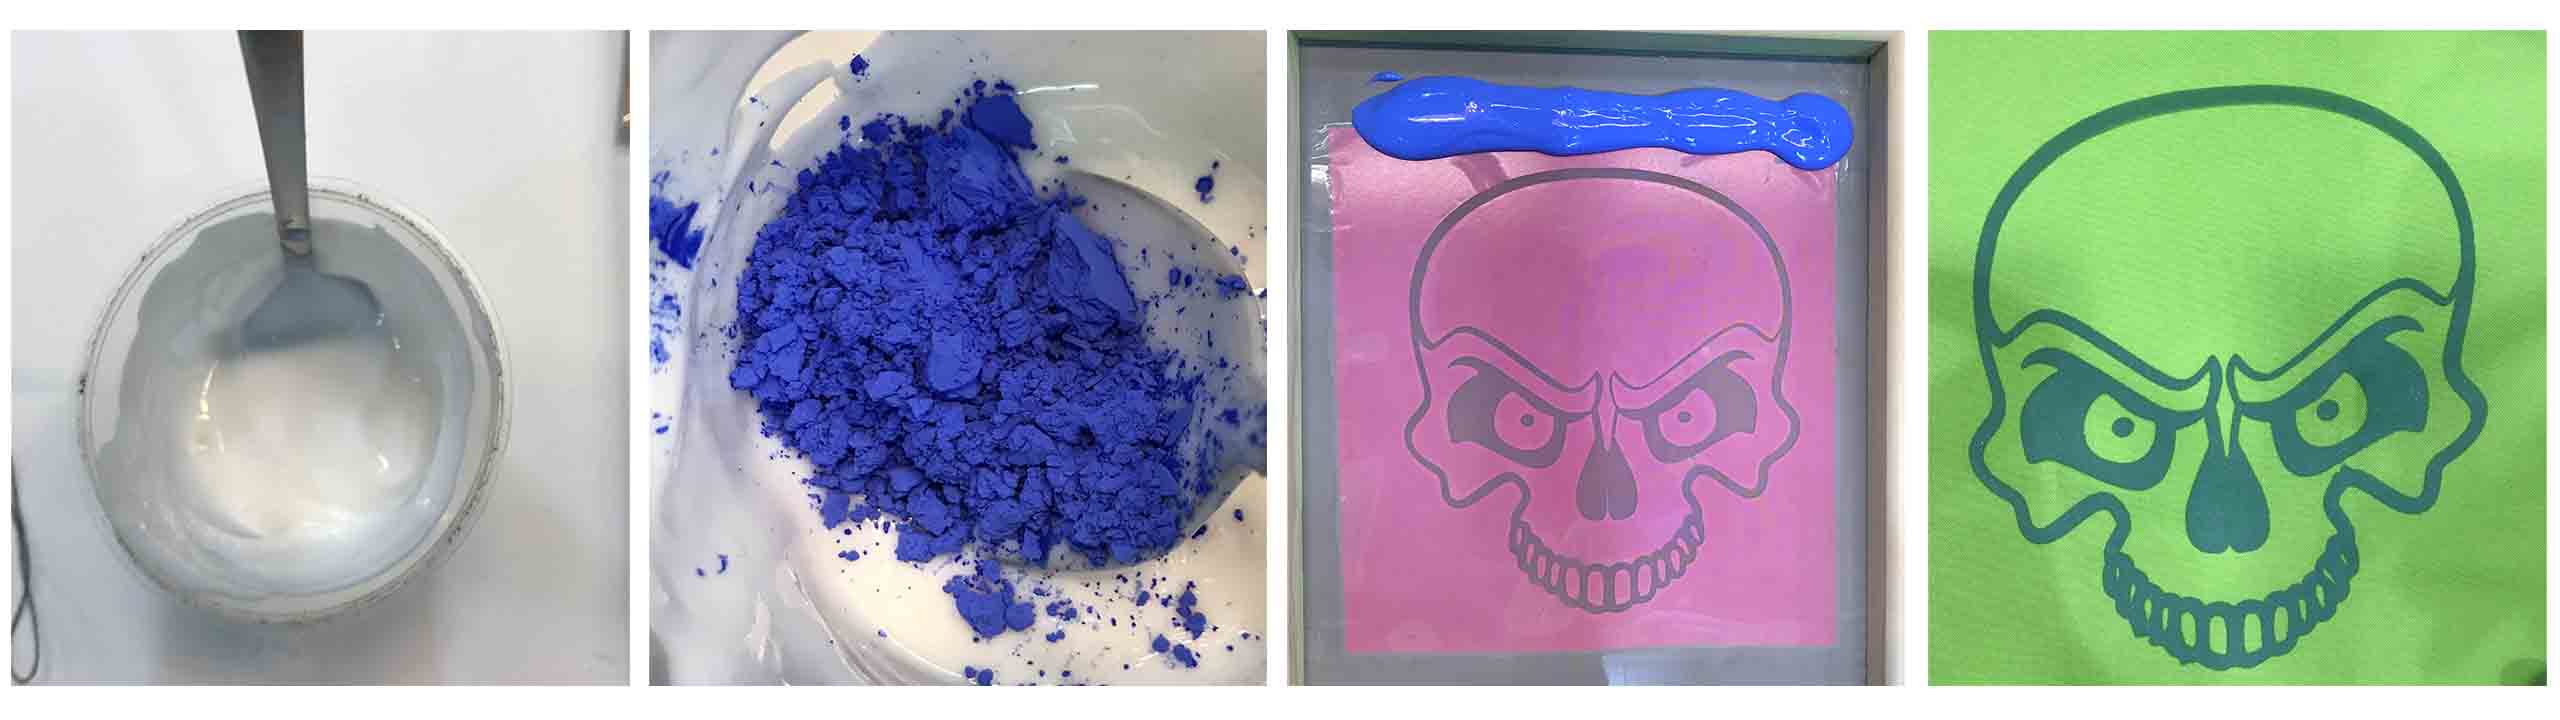
Final Printed Samples
To experiment with the heating process, I used three different fabrics.

Conductive material
One of the printed samples was not working, so I used it as a base to stitch conductive materials. Then I stitched the other material on top.
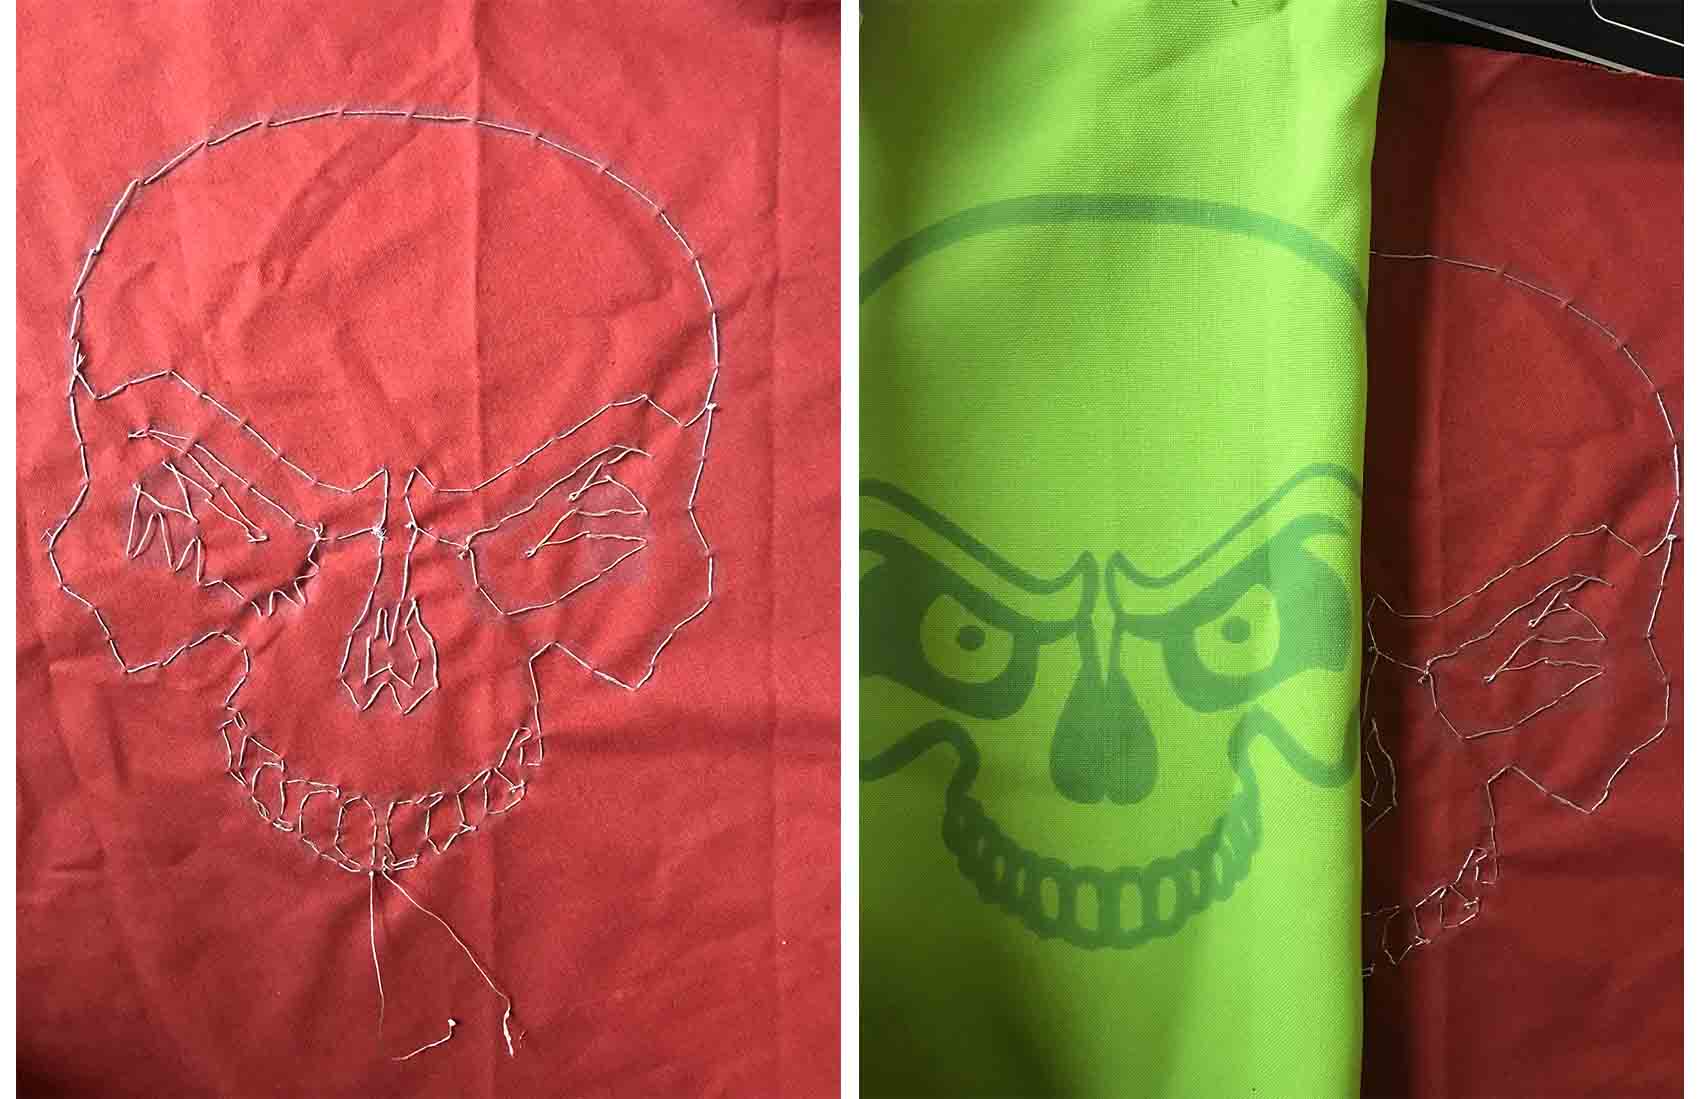
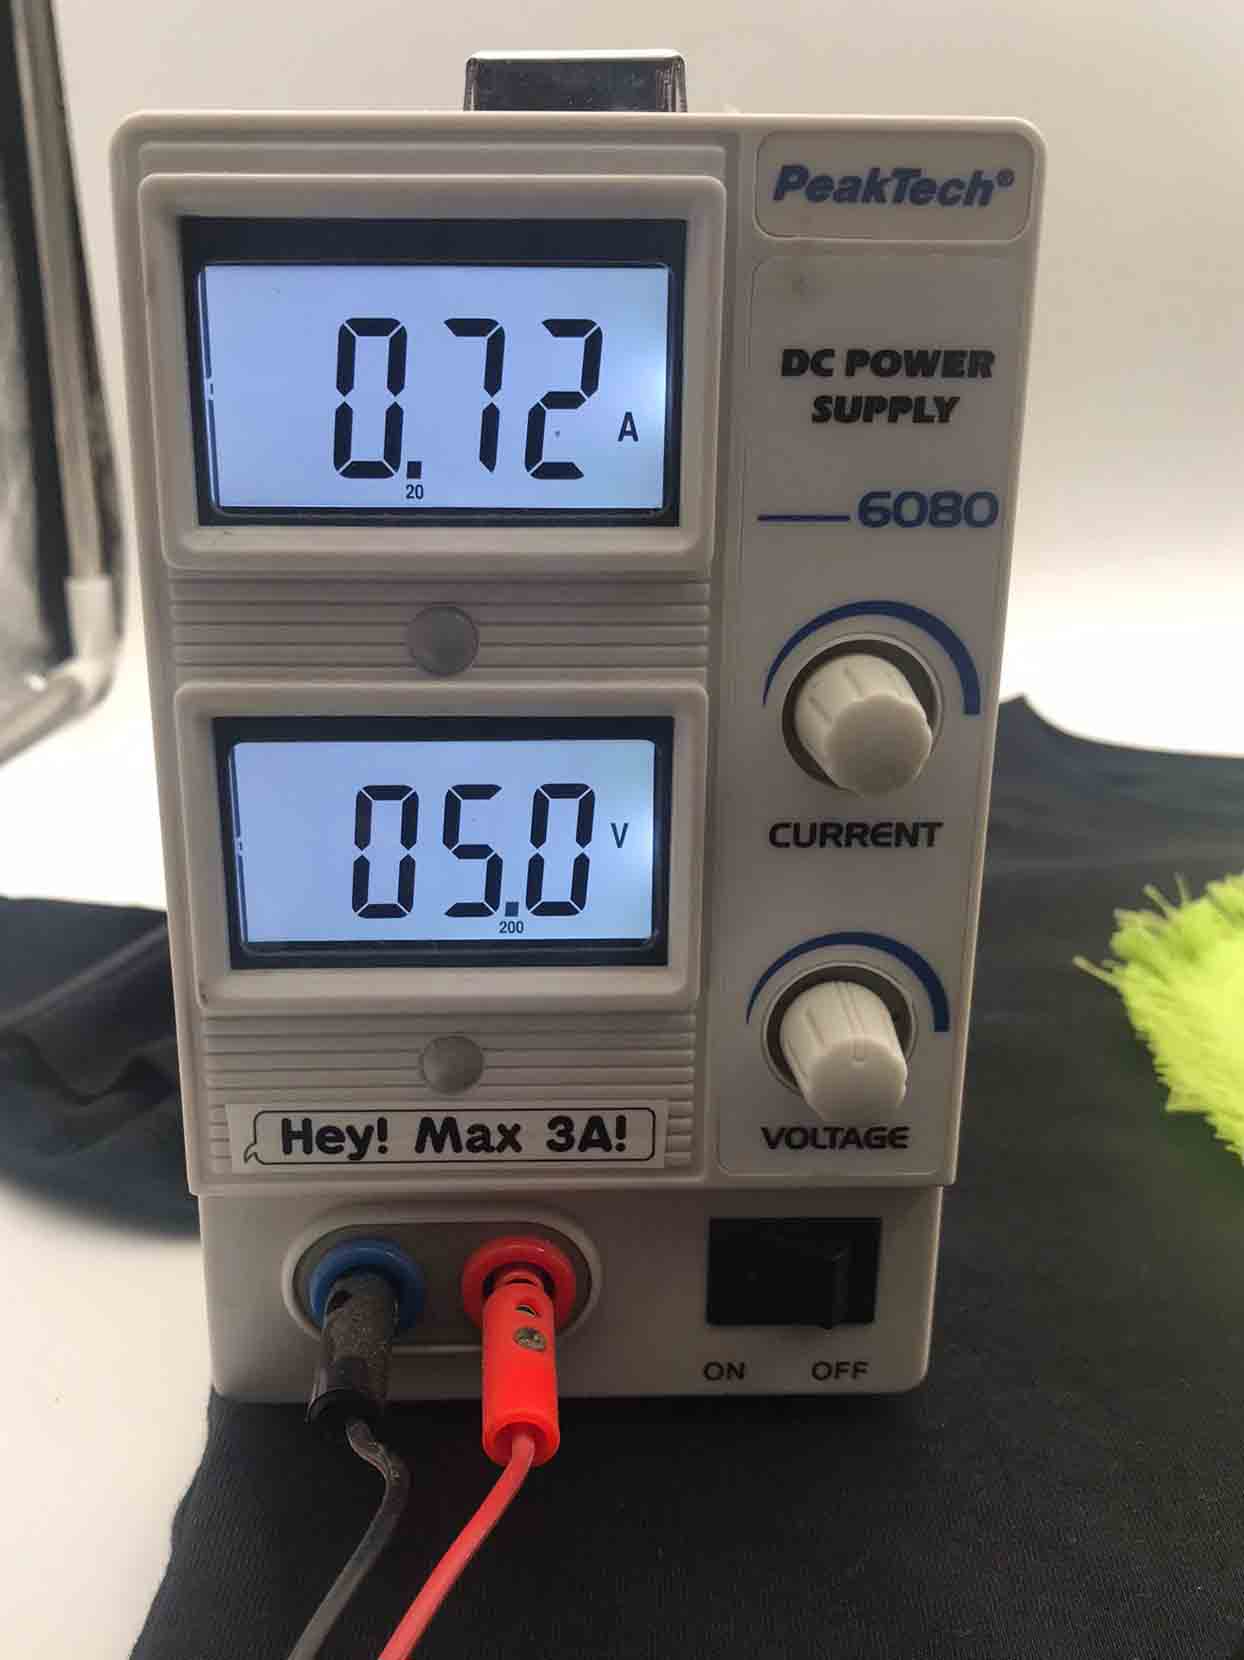
Thermocromic Test
Below is a gif showing the color changing and the amps and volts I used to pass the heat.

#include <analogWrite.h>

int led_pin = 13;

void setup() {
  // put your setup code here, to run once:
  pinMode(13, OUTPUT);
  Serial.begin(9600);

}
void loop() {
  // put your main code here, to run repeatedly:
  analogWrite(led_pin,150);
  Serial.println("ON");
 //delay to keep heat on longer
  delay(2000);

  //To turn off
  analogWrite(led_pin, 0);
  Serial.println("OFF");

  delay(5000);
}
Final Look
To make it more wearable, I screen printed it and added fringe to make it cooler.

You can find the other look done by Olivia Cueva here

Thank you.