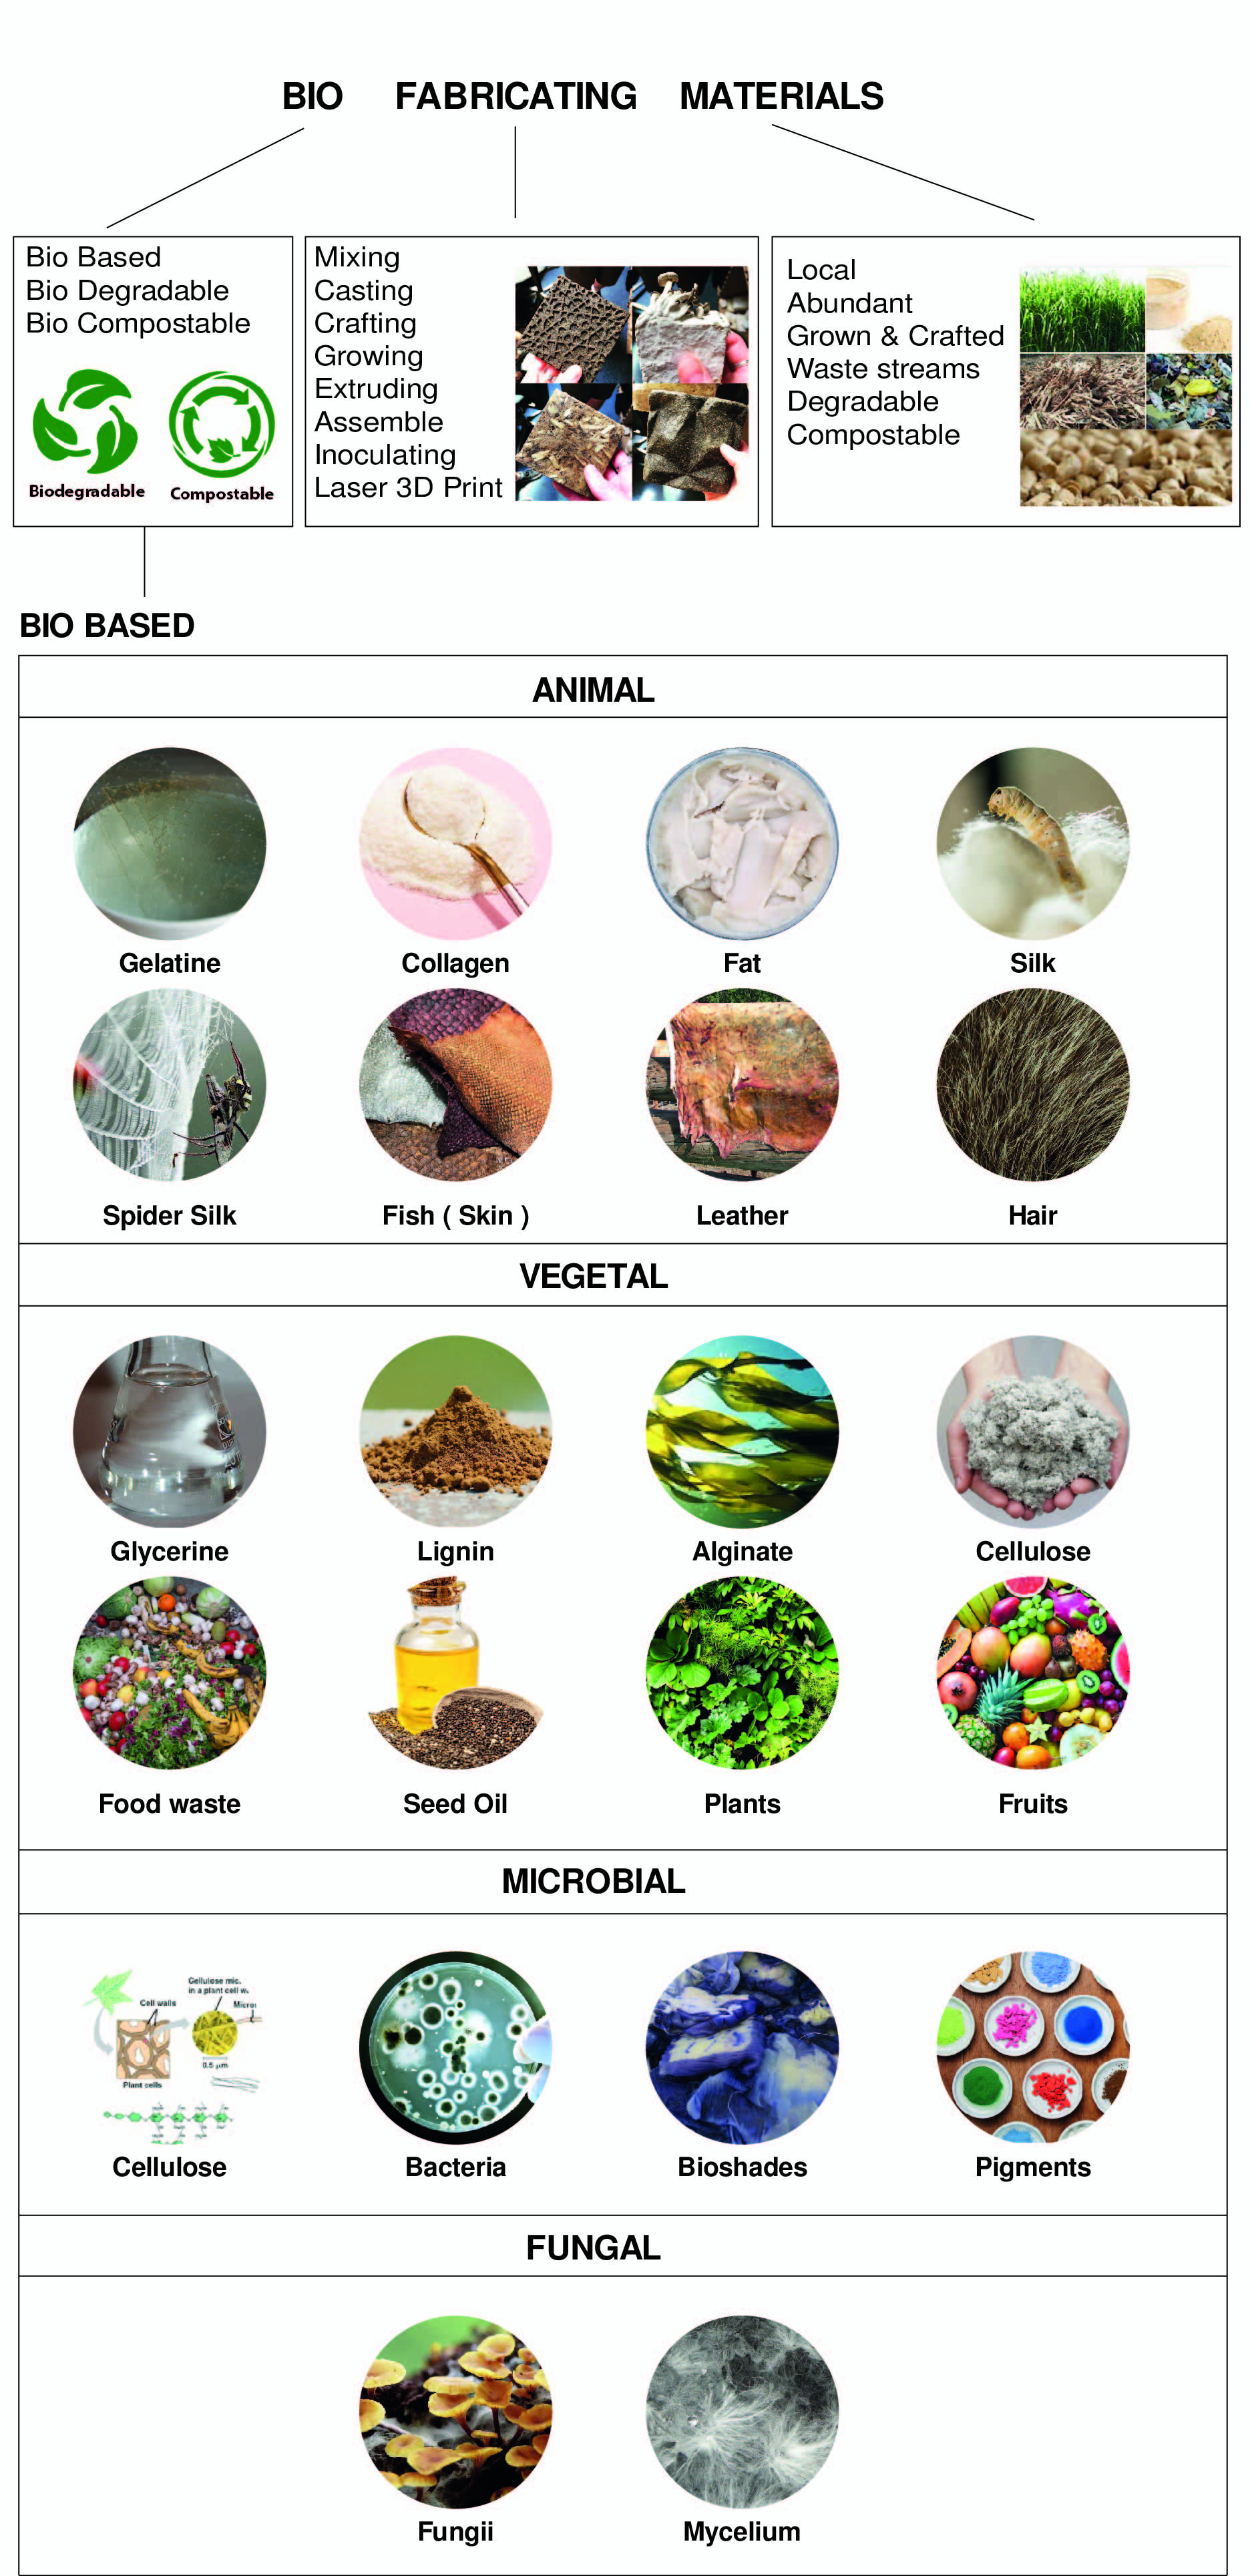
6. BioFabricating Materials
I'm amazed! Another exciting week has begun. It just feels like such eagerness and excitement to feel wanted forever. isn't it?
Inspiration
I have compiled some of the designers and artists whose work inspires and motivates me to work with Bio Fabricating materials.
1- Youyang Song 2- Suzanne Lee 3- Scarlett Yang 4- Eduardov Loreto 5- Skill Patara 6- Agnes Van Dijk
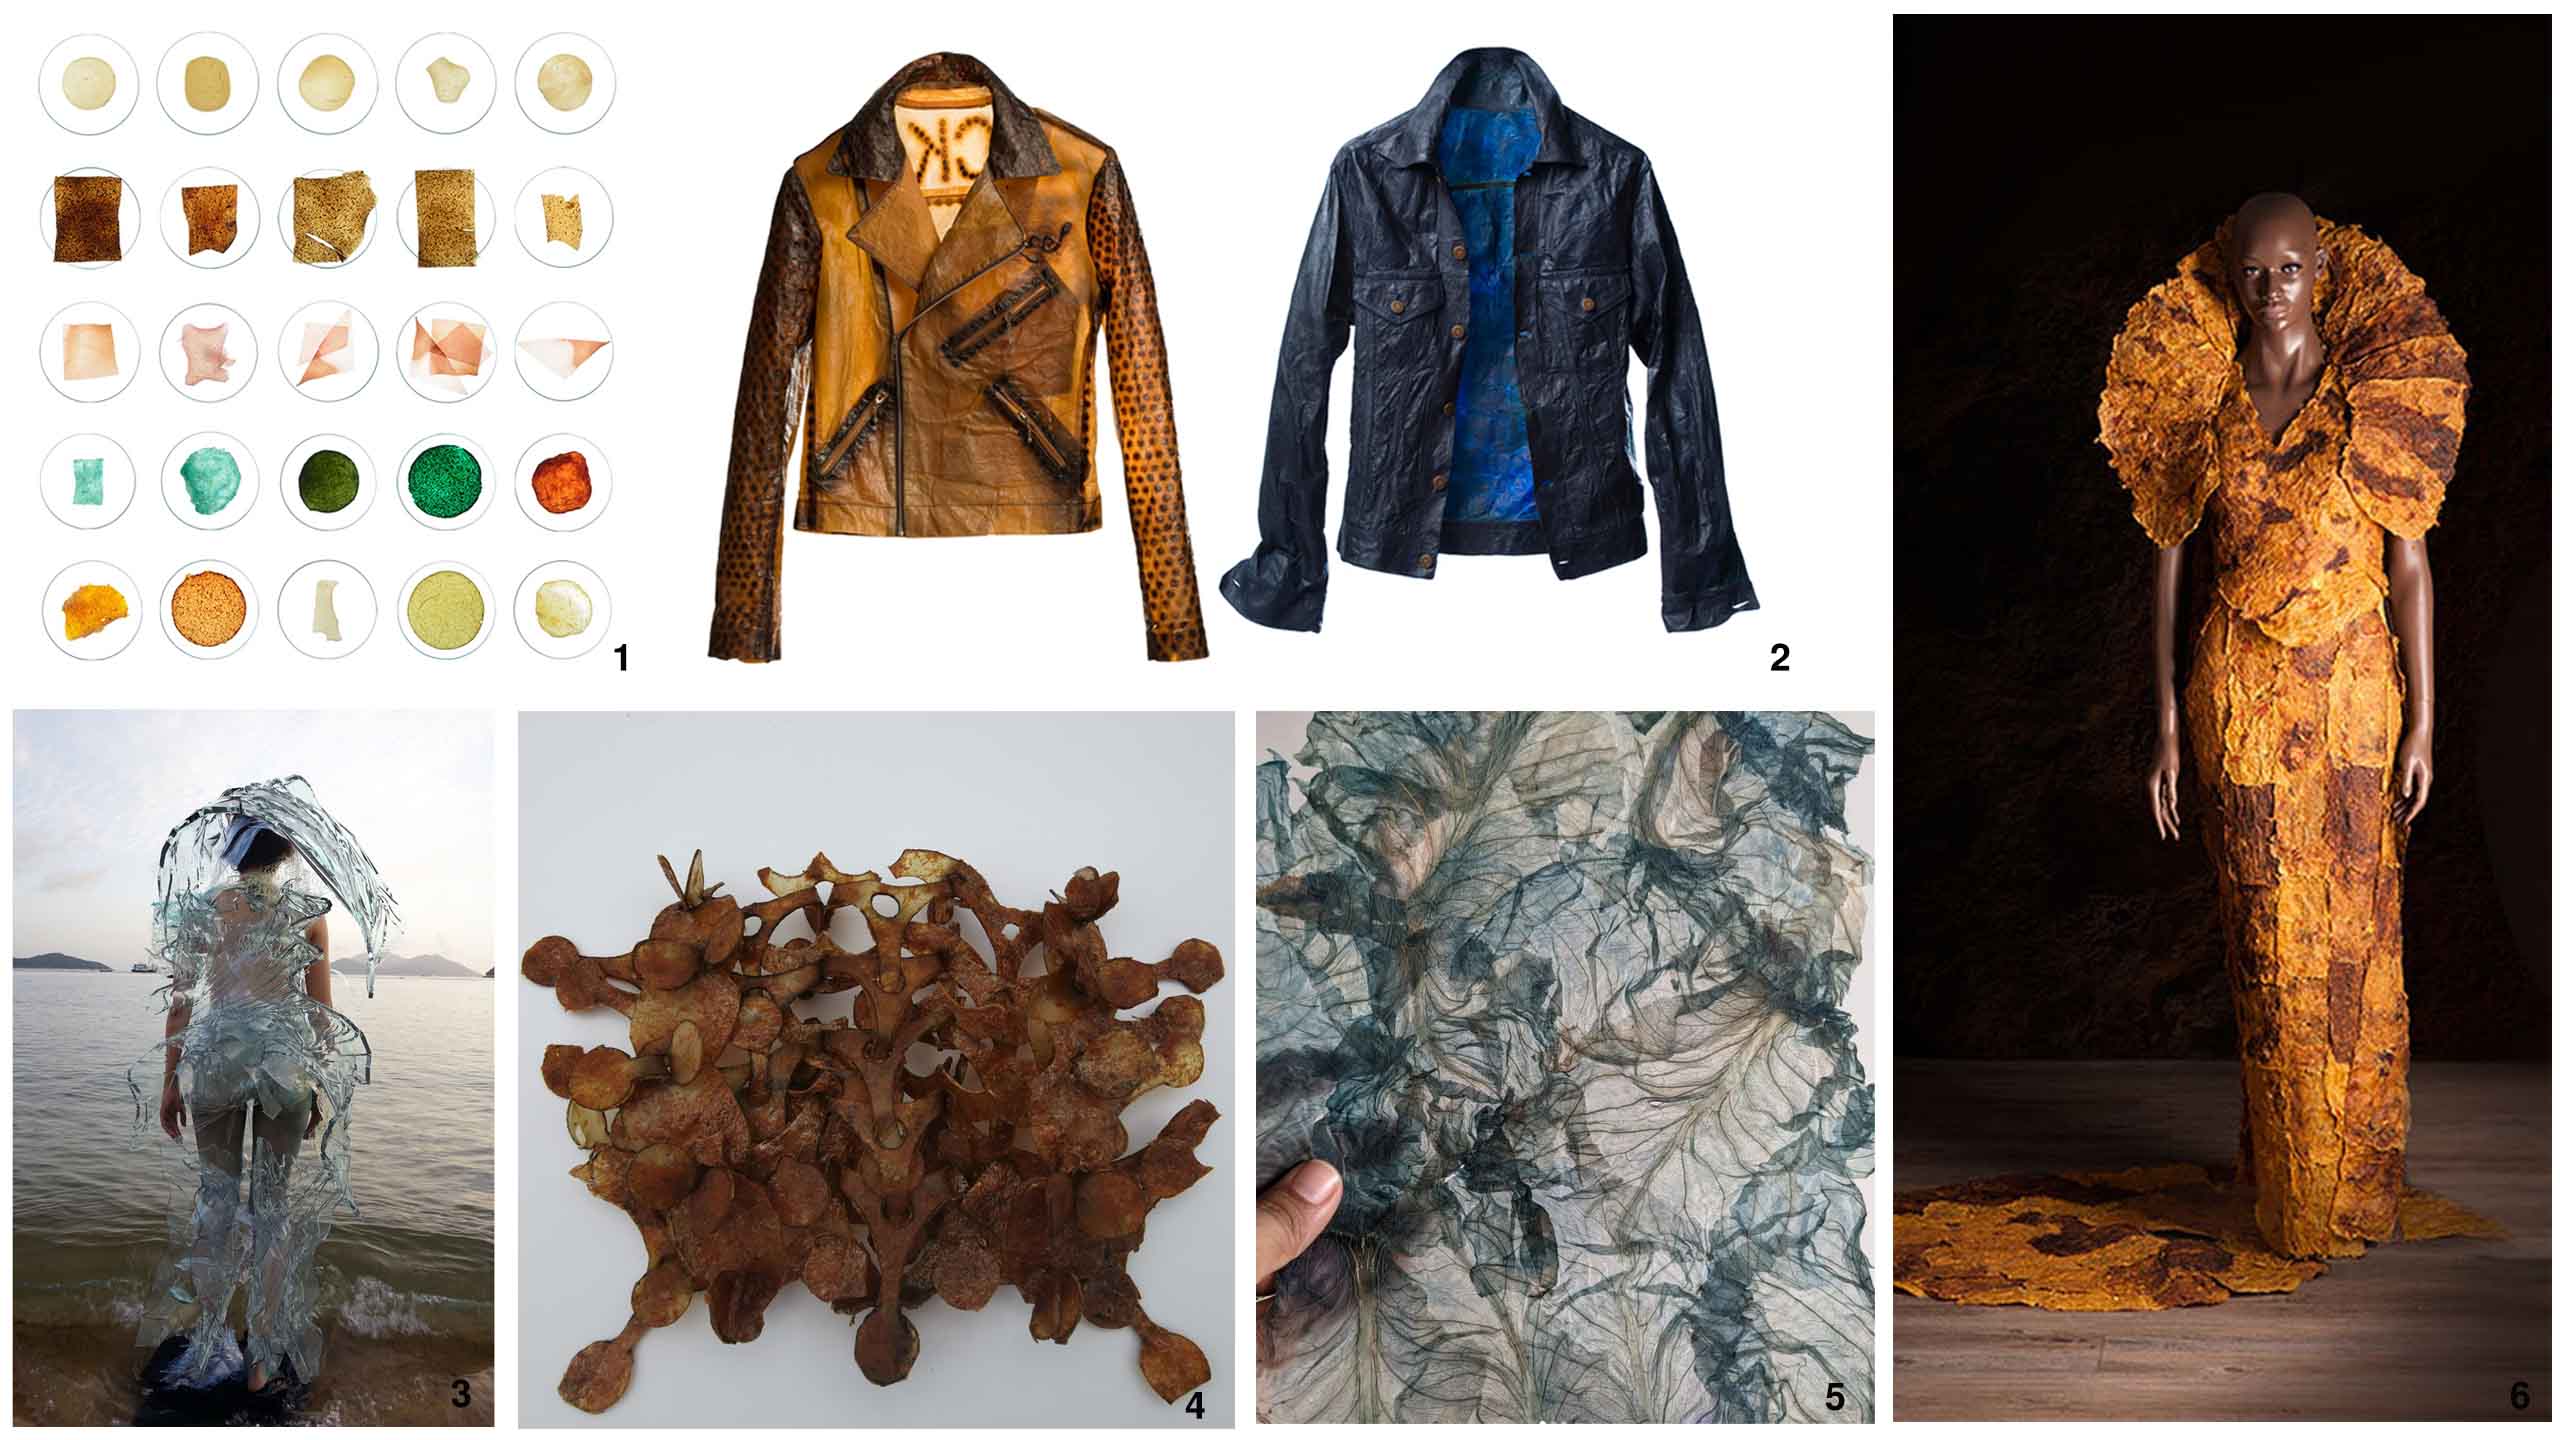
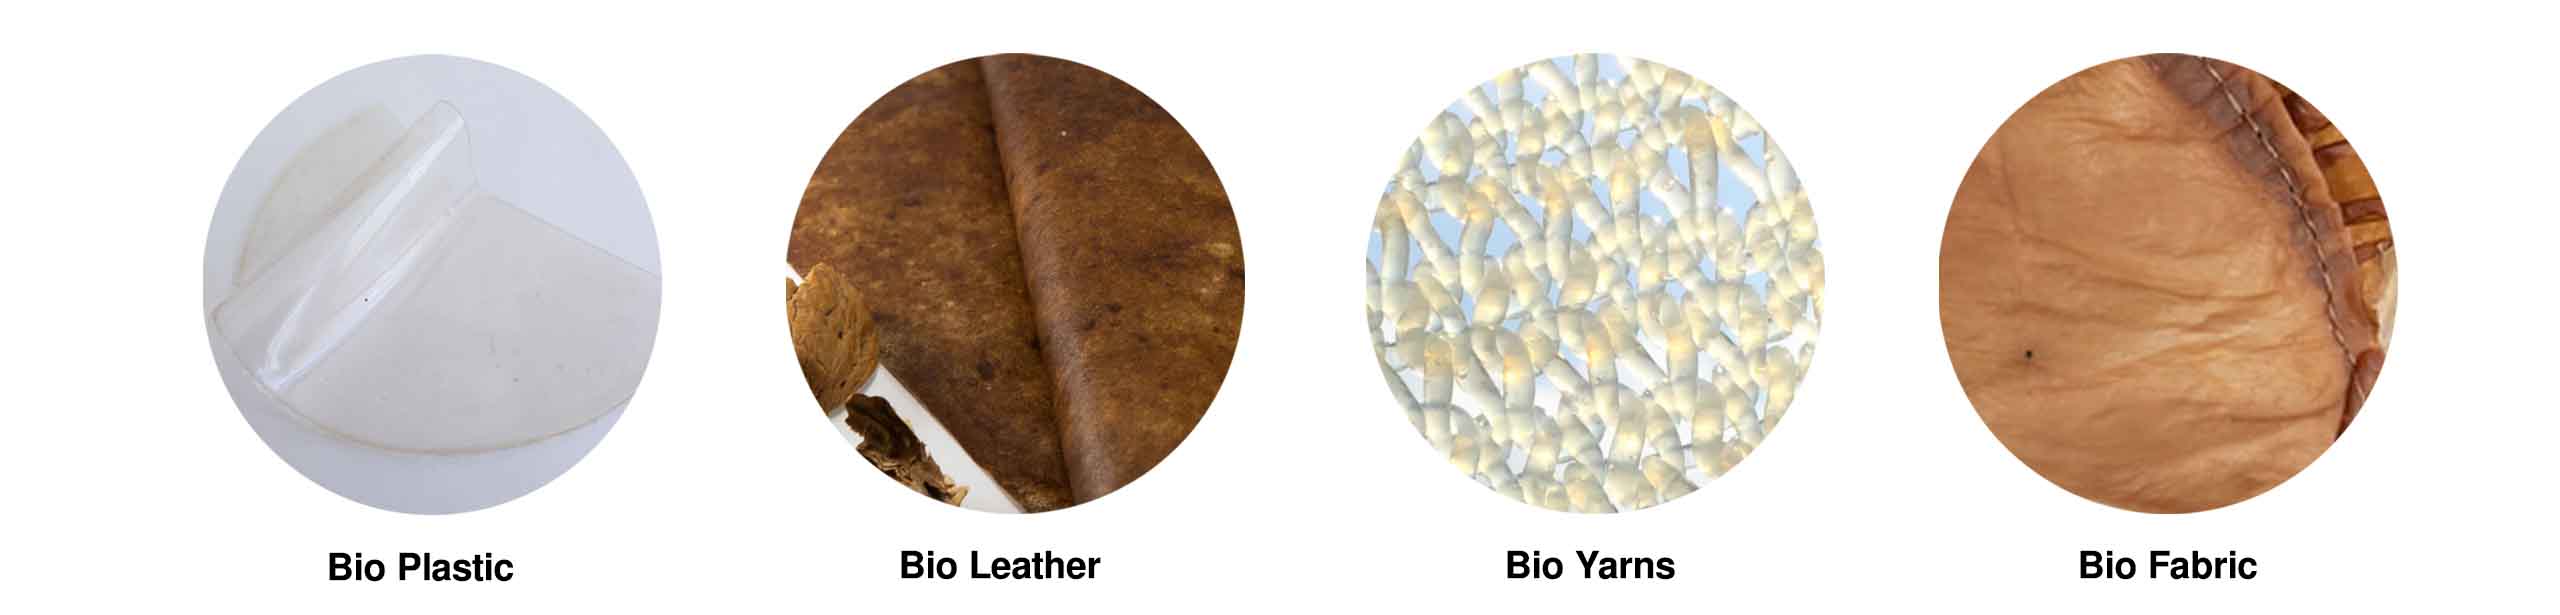
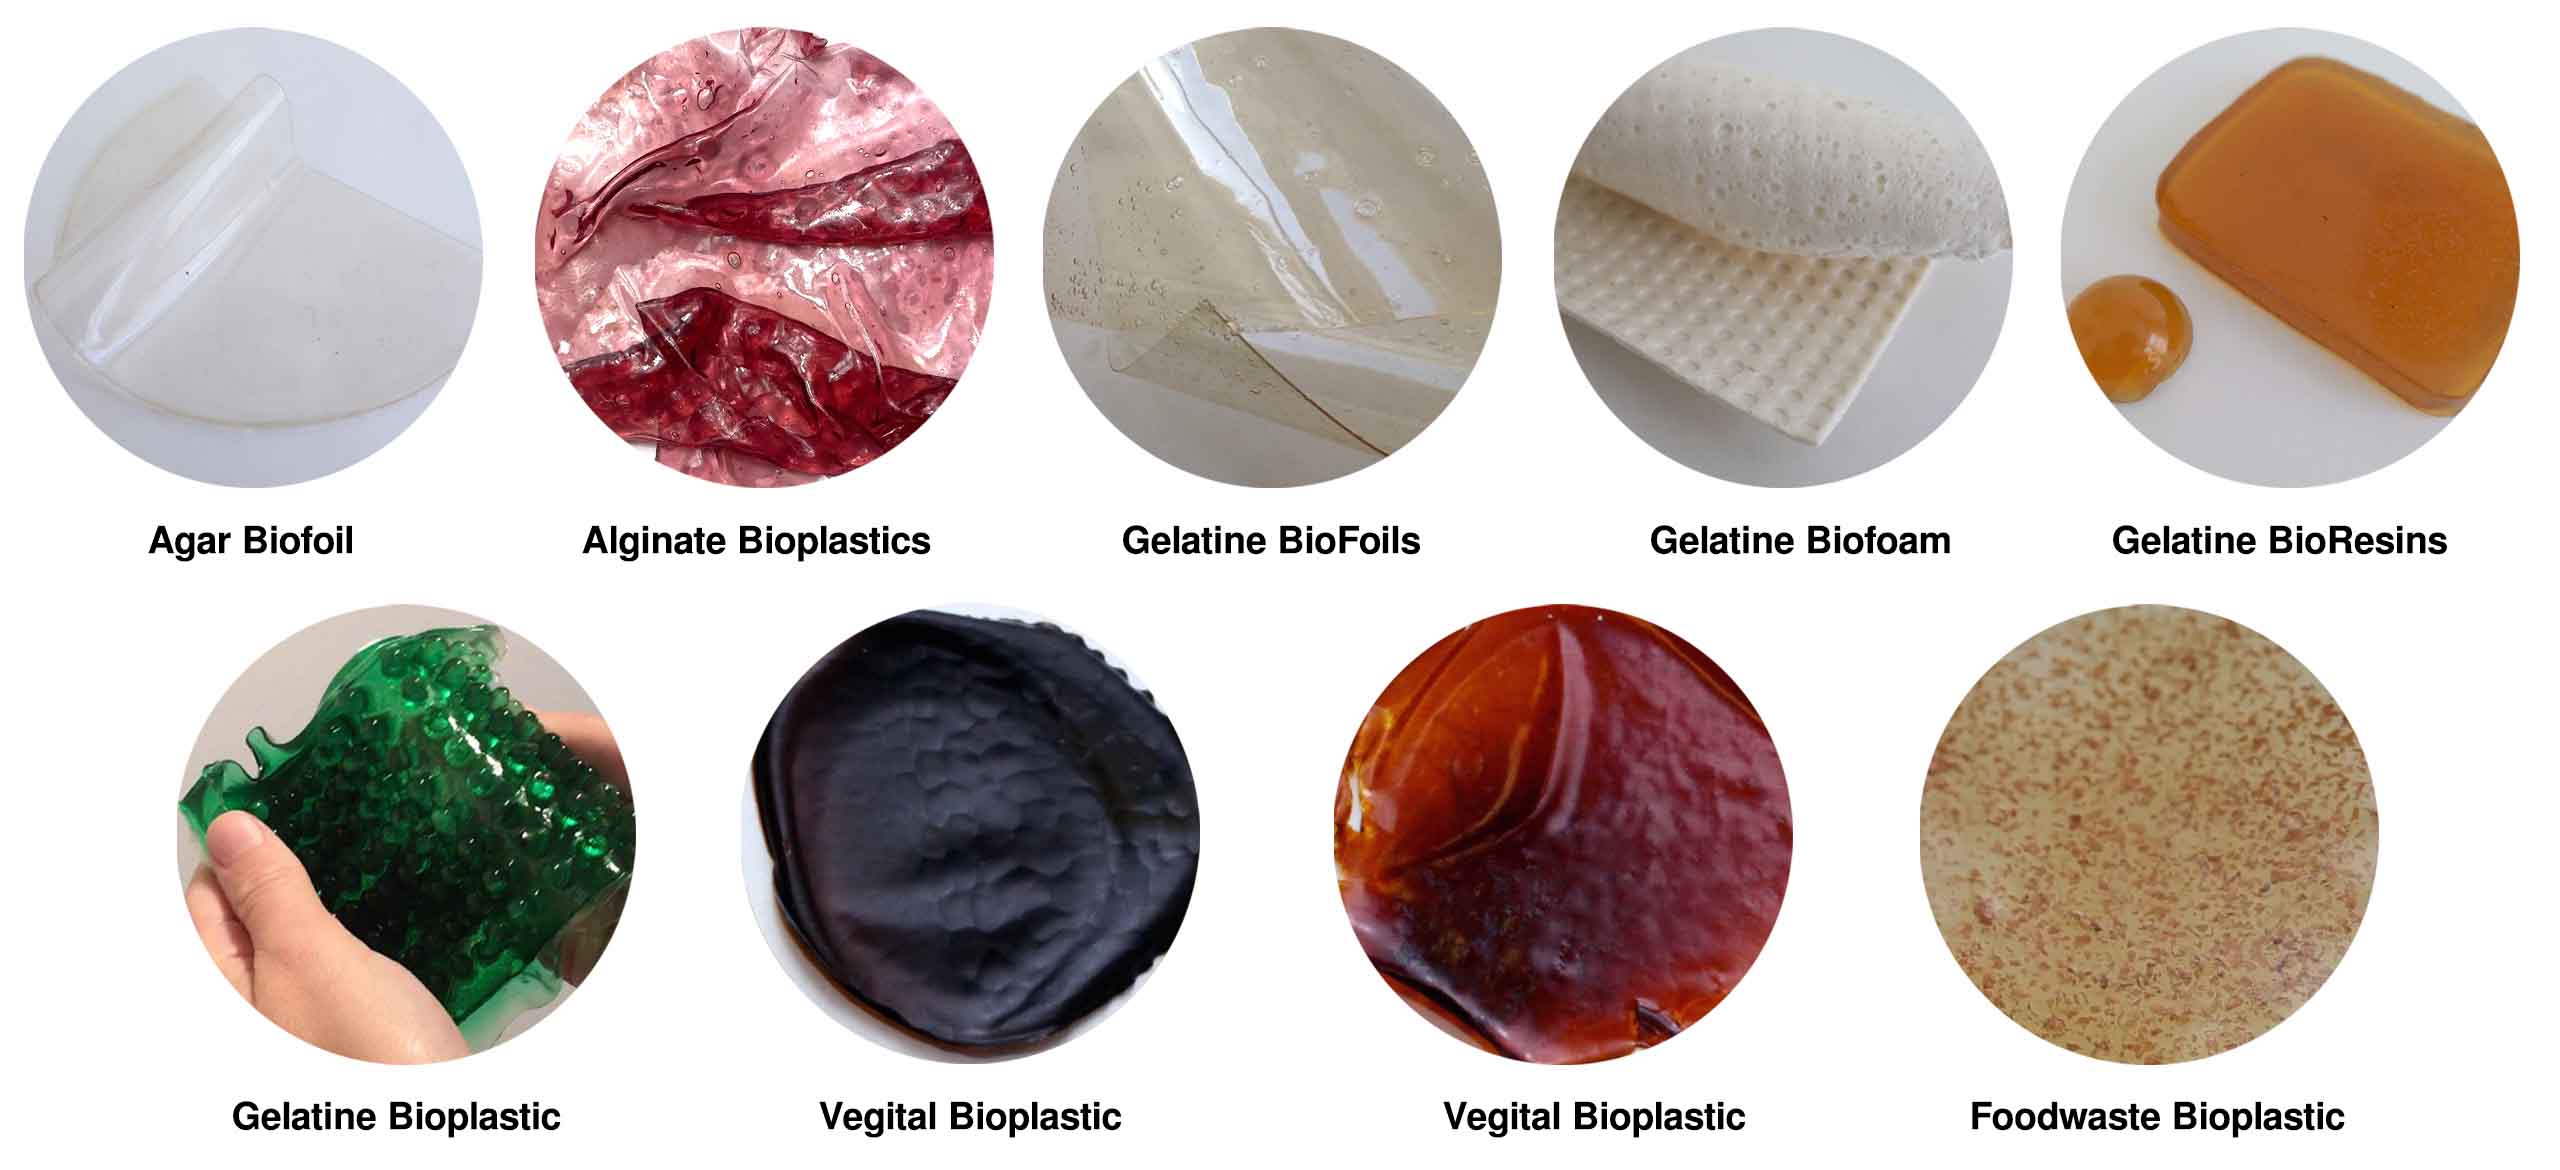
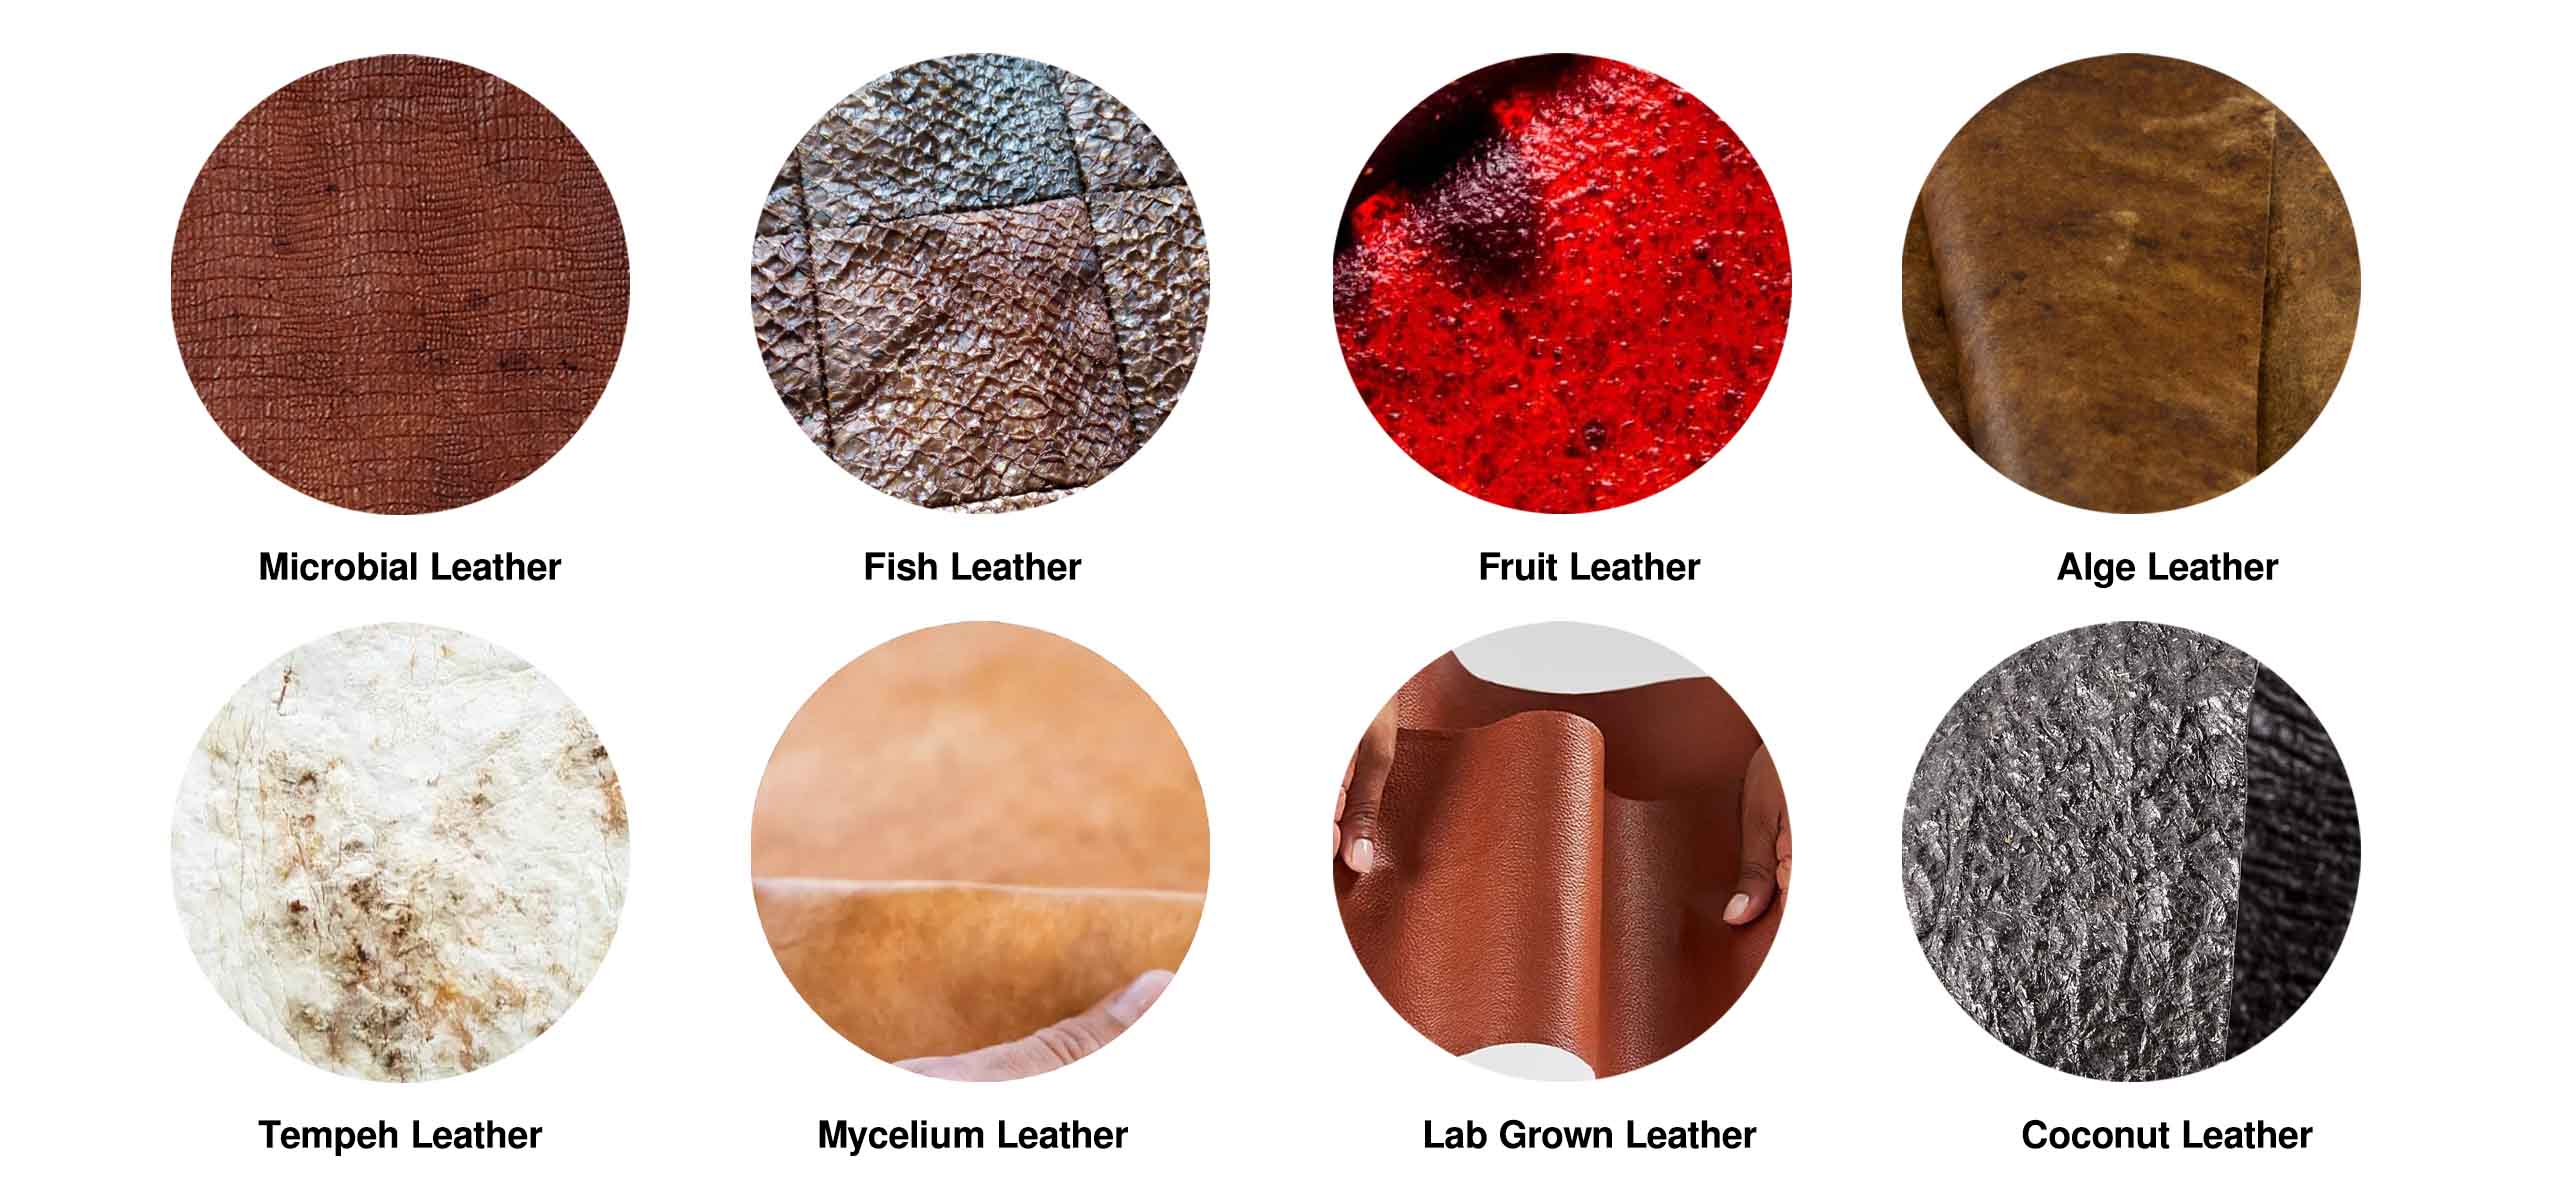
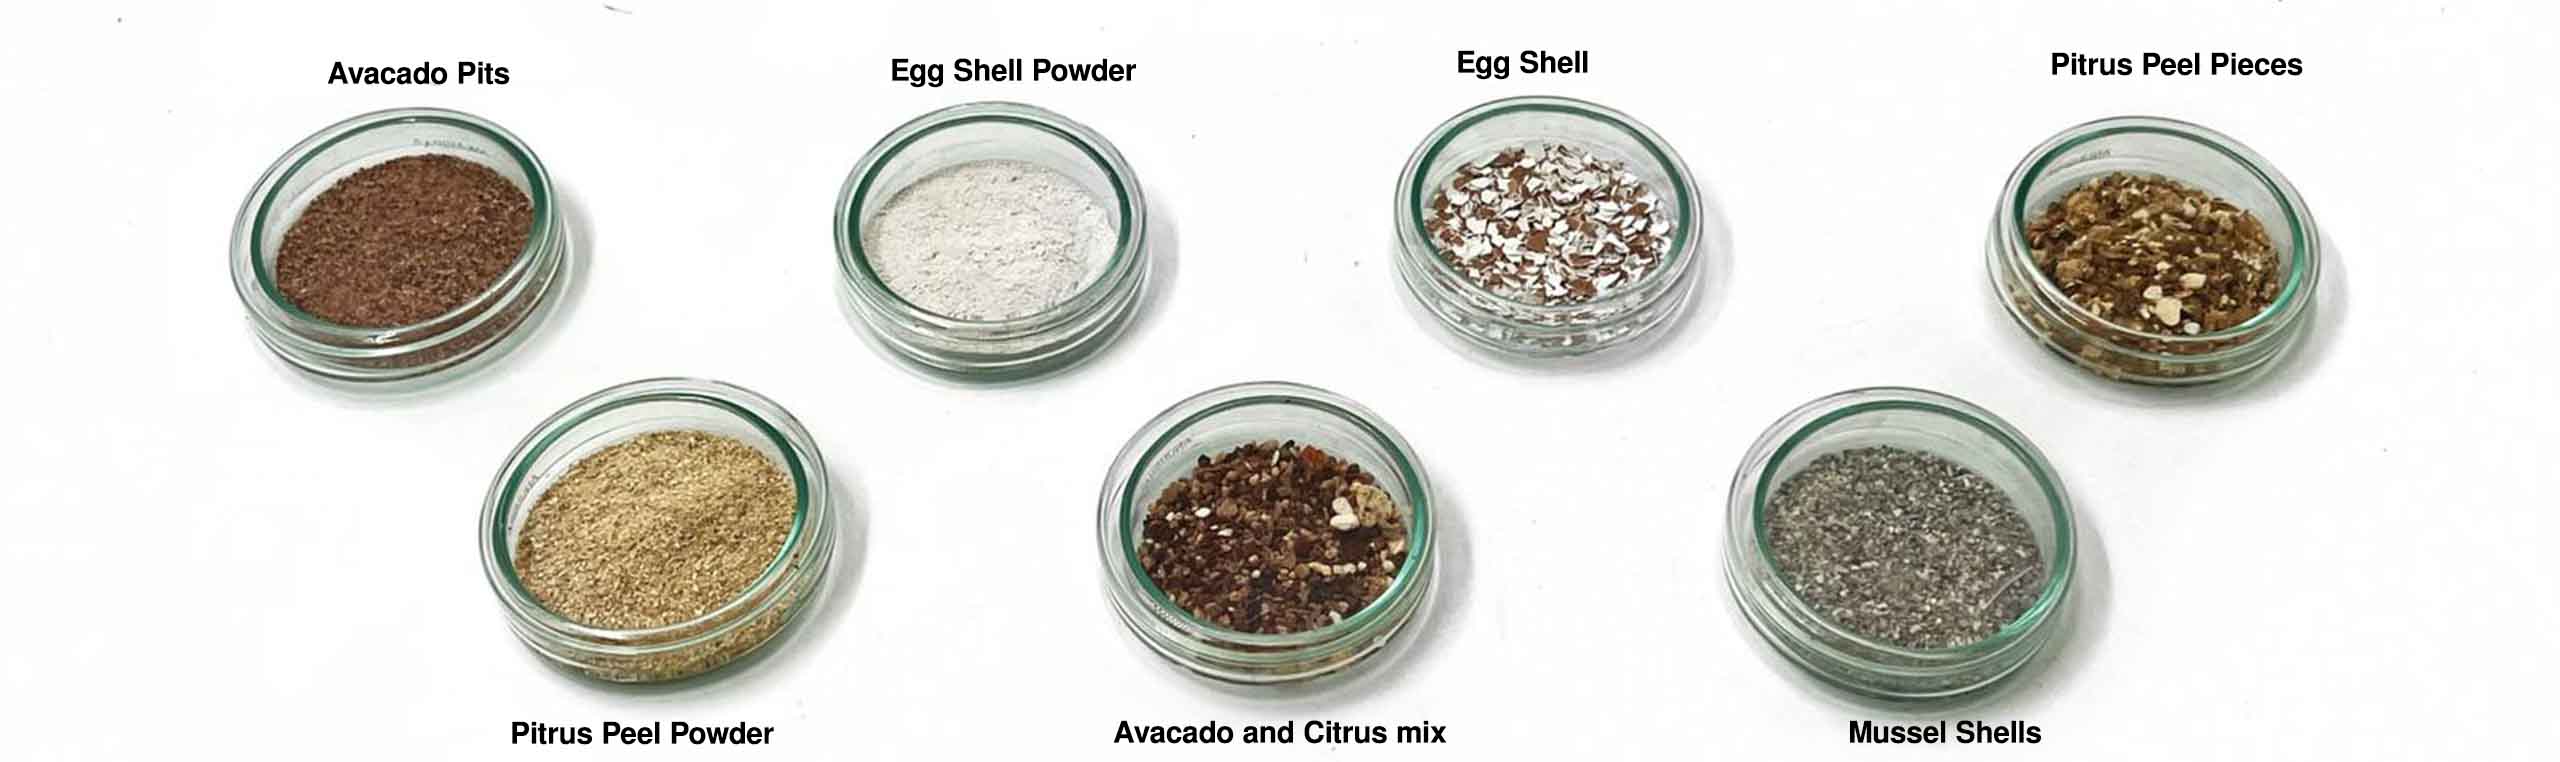
Bio Fabricating Materials
In order to better understand the materials, I have used visuals.
Bio Fabricating Agenda
Bio Plastics
Here are some of my earlier connections with the plastics that I would like to share with you.
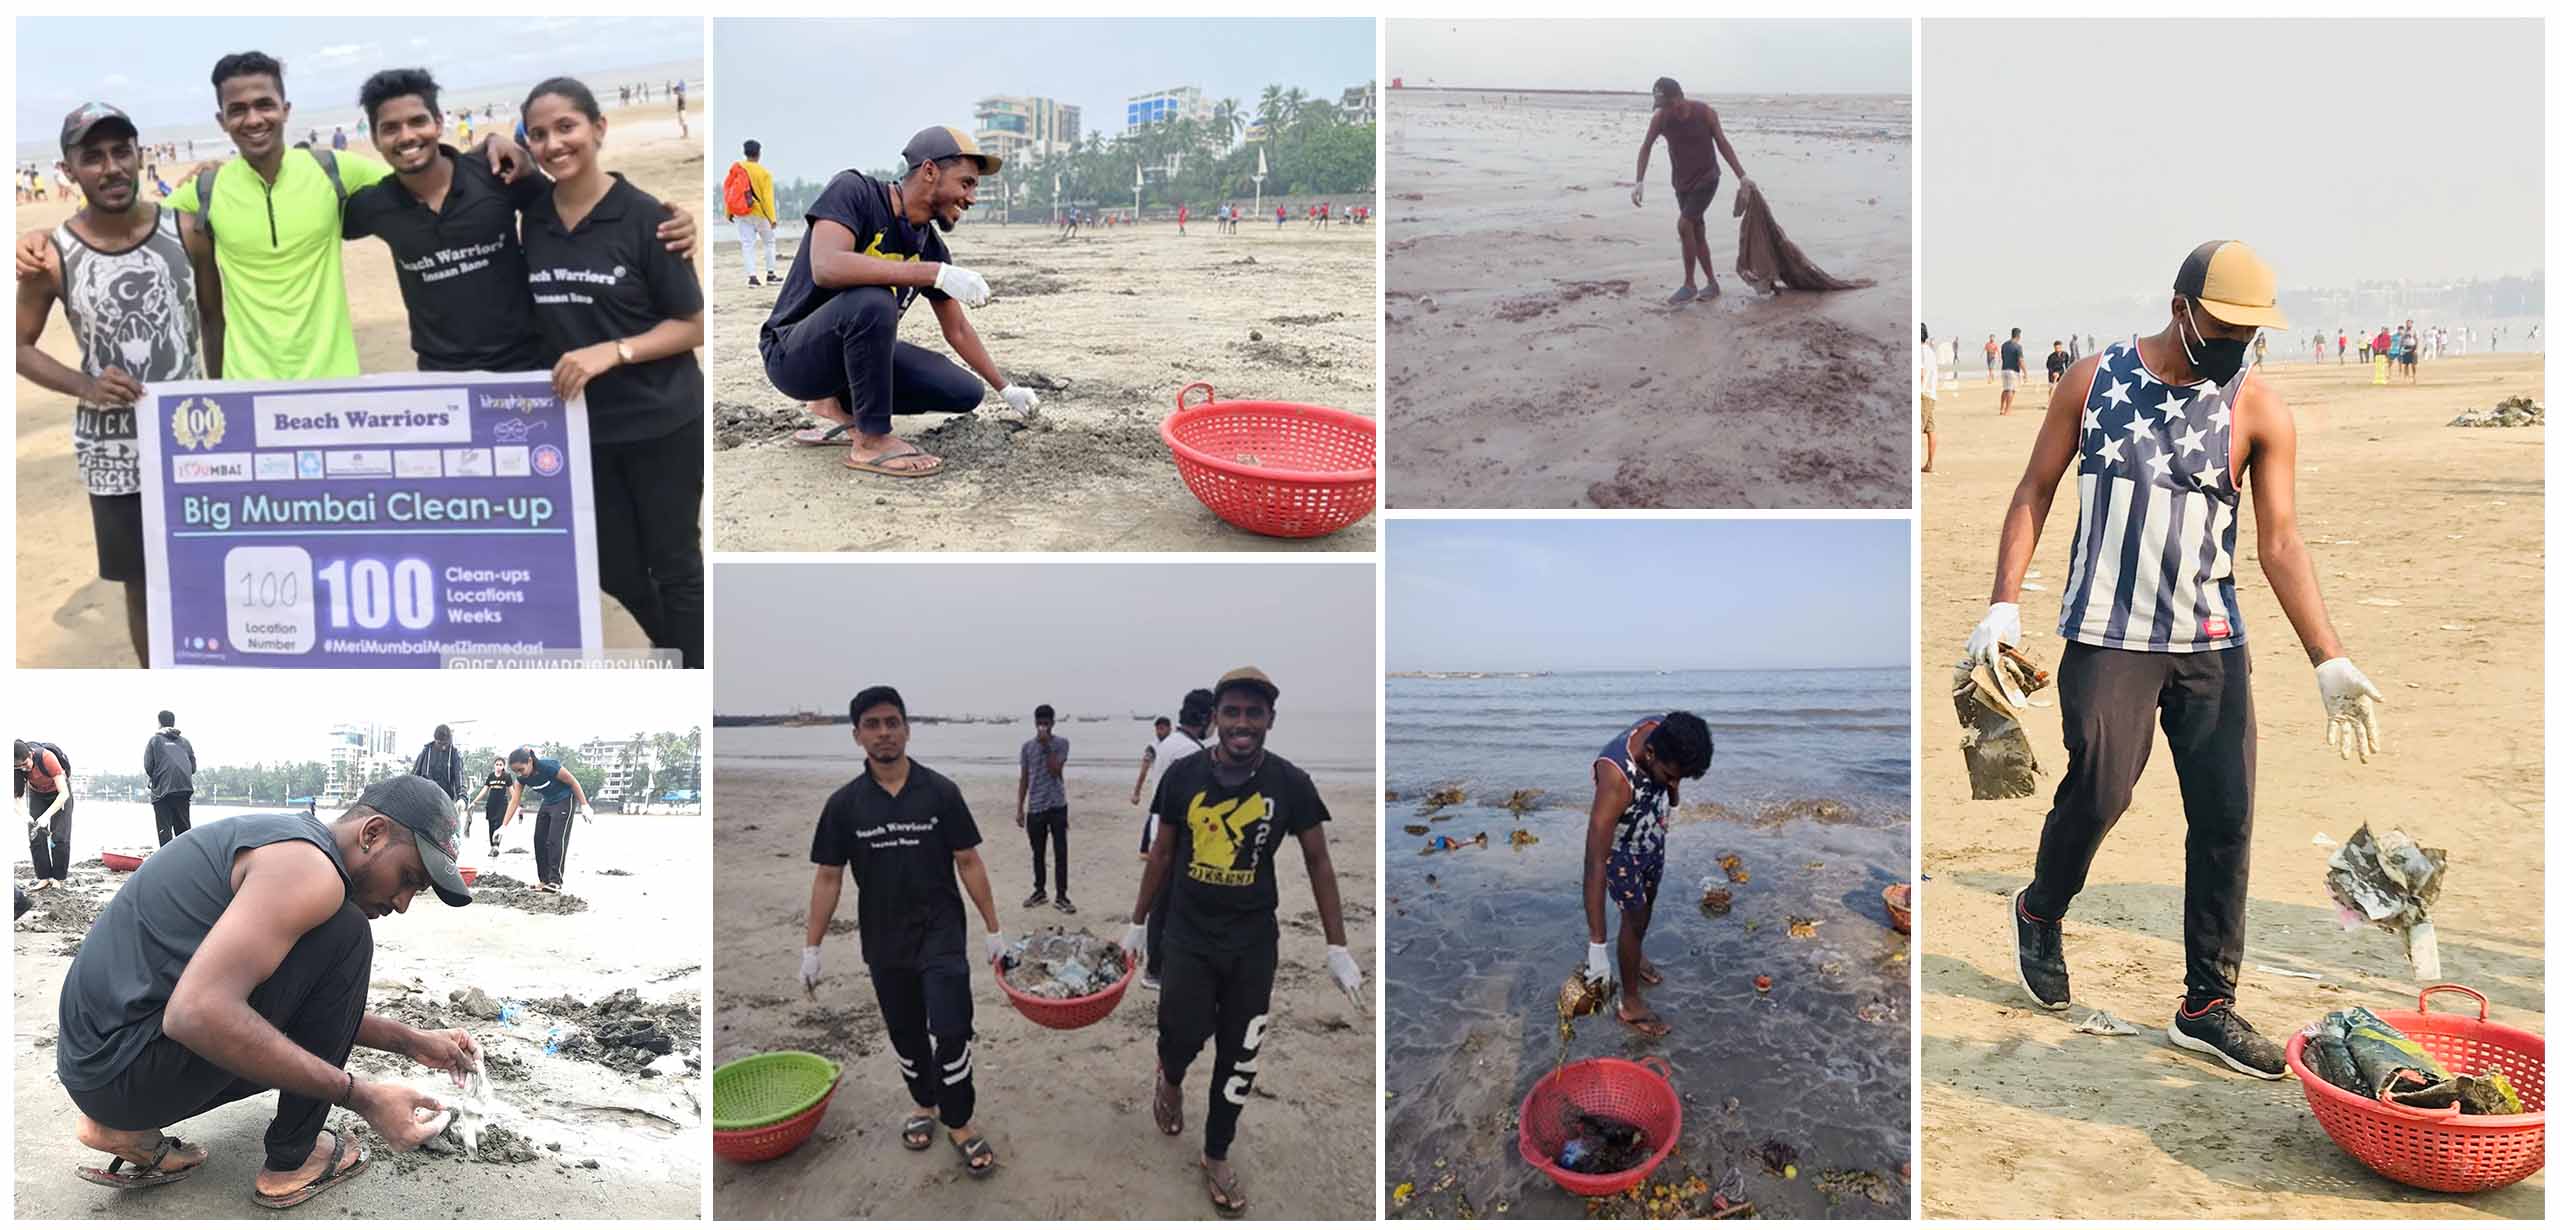
It would be impossible for us to live without plastics, wouldn't it? Our toothbrushes, cutlery, office devices, vehicles, and food are all made of plastic. In this day and age, everything is carried in plastic. Doesn't that seem like overloading a necessity, which could end up killing us and the planet? Despite the fact that we know plastics can't be completely eliminated. By reusing them and supporting alternatives that reduce single-use plastic production, we can live with them. The problem of plastic pollution has become one of the most pressing environmental concerns. 40% of all plastic materials are single-use plastics, such as plastic bags and food packaging. Natural habitats are damaged, wildlife is endangered, and communities are polluted.

In Mumbai, India, I had been doing beach clean-ups with Beach Warriors since 2018, and I was appalled to see plastics and dead fish on the beaches. BMC (Brihanmumbai Municipality Corporation) workers assist us in collecting waste and sending it to the factory for separation and recycling. The alternatives I am learning in Fabricaidemy could be most effective in controlling plastic pollution, and reducing single-use plastics is the best way to start.
Bio Plastics Can be crafted from,
Bio Leathers Can be crafted from,
Let's begin the Bio fabrication explorations
We worked as a group initially, then explored individual experiments to achieve the desired results.
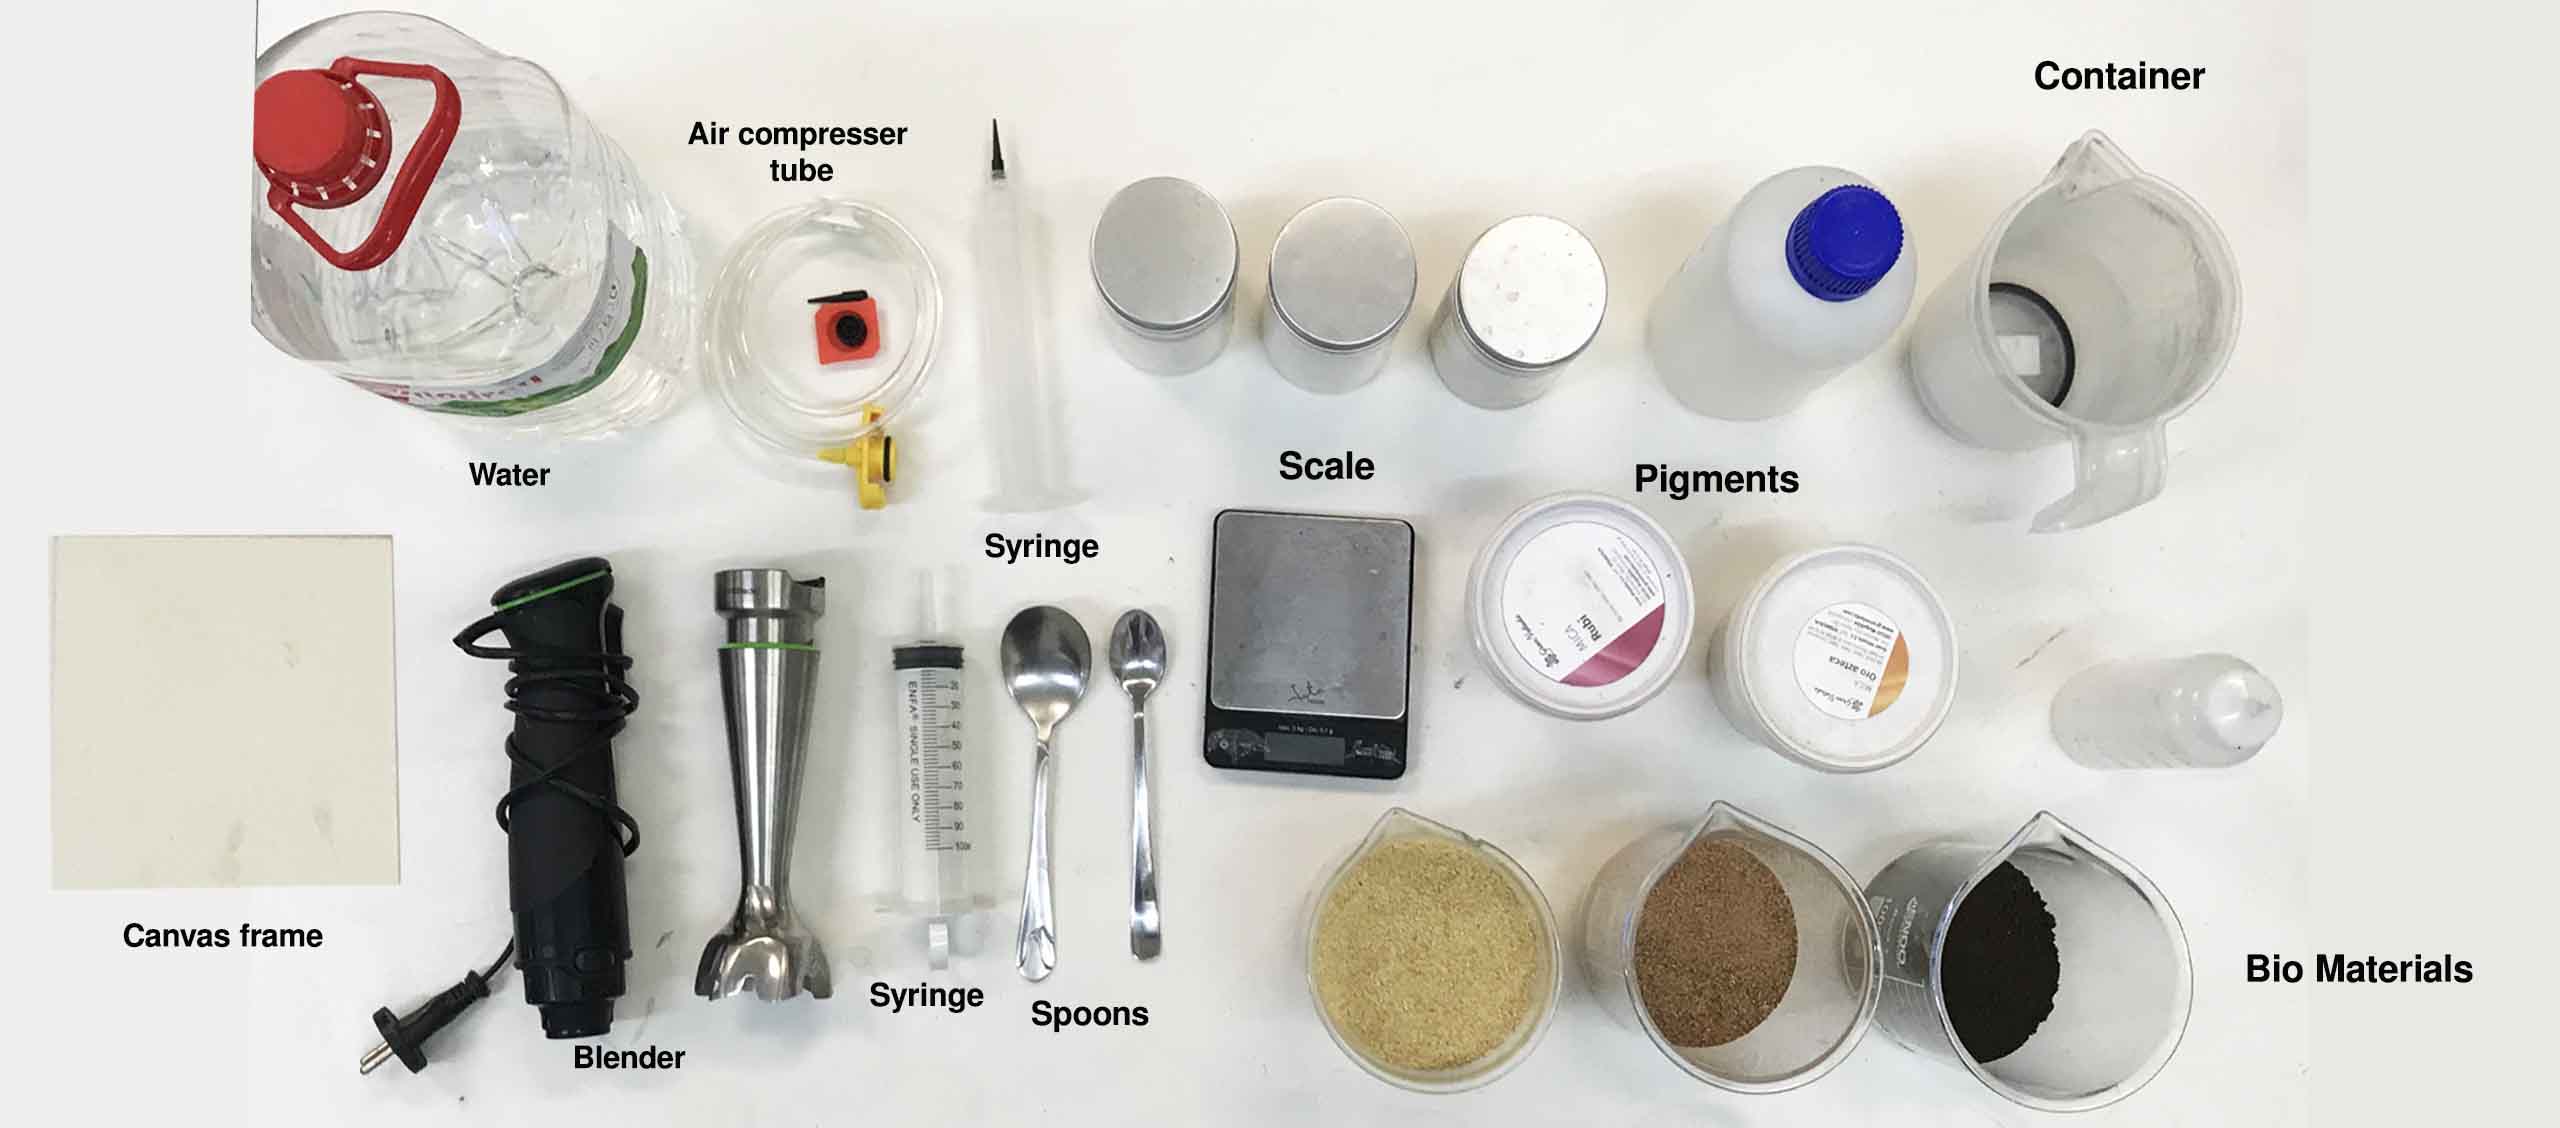
Printing Bio Materials
Below are the available materials
Required Tools and materials
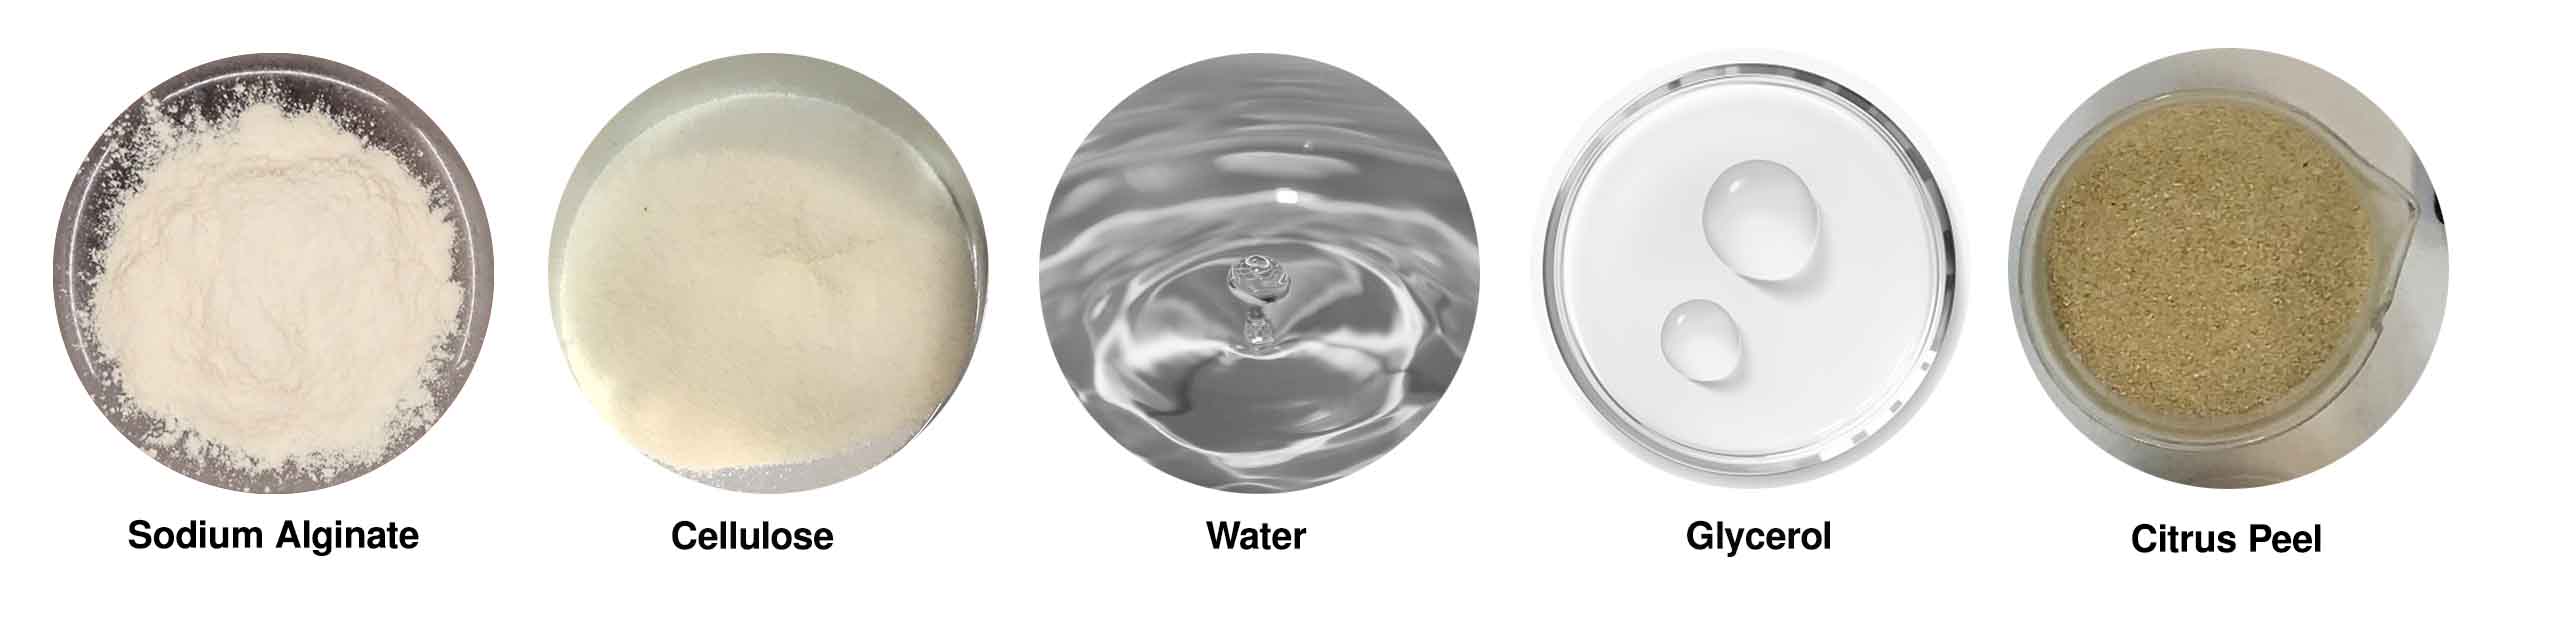
Sodium Alginate & Cellulose with Citrus Peel
Materials
Recipe
Sodium Alginate & Cellulose Recipe
Material name       amount g / ml
Sodium alginate       4 g
CMC                   5 g
Water                 200 ml
Glycerol              1 tbsp
Citrus Peel           5 spoons

Tools
Hand blender
Measuring cup
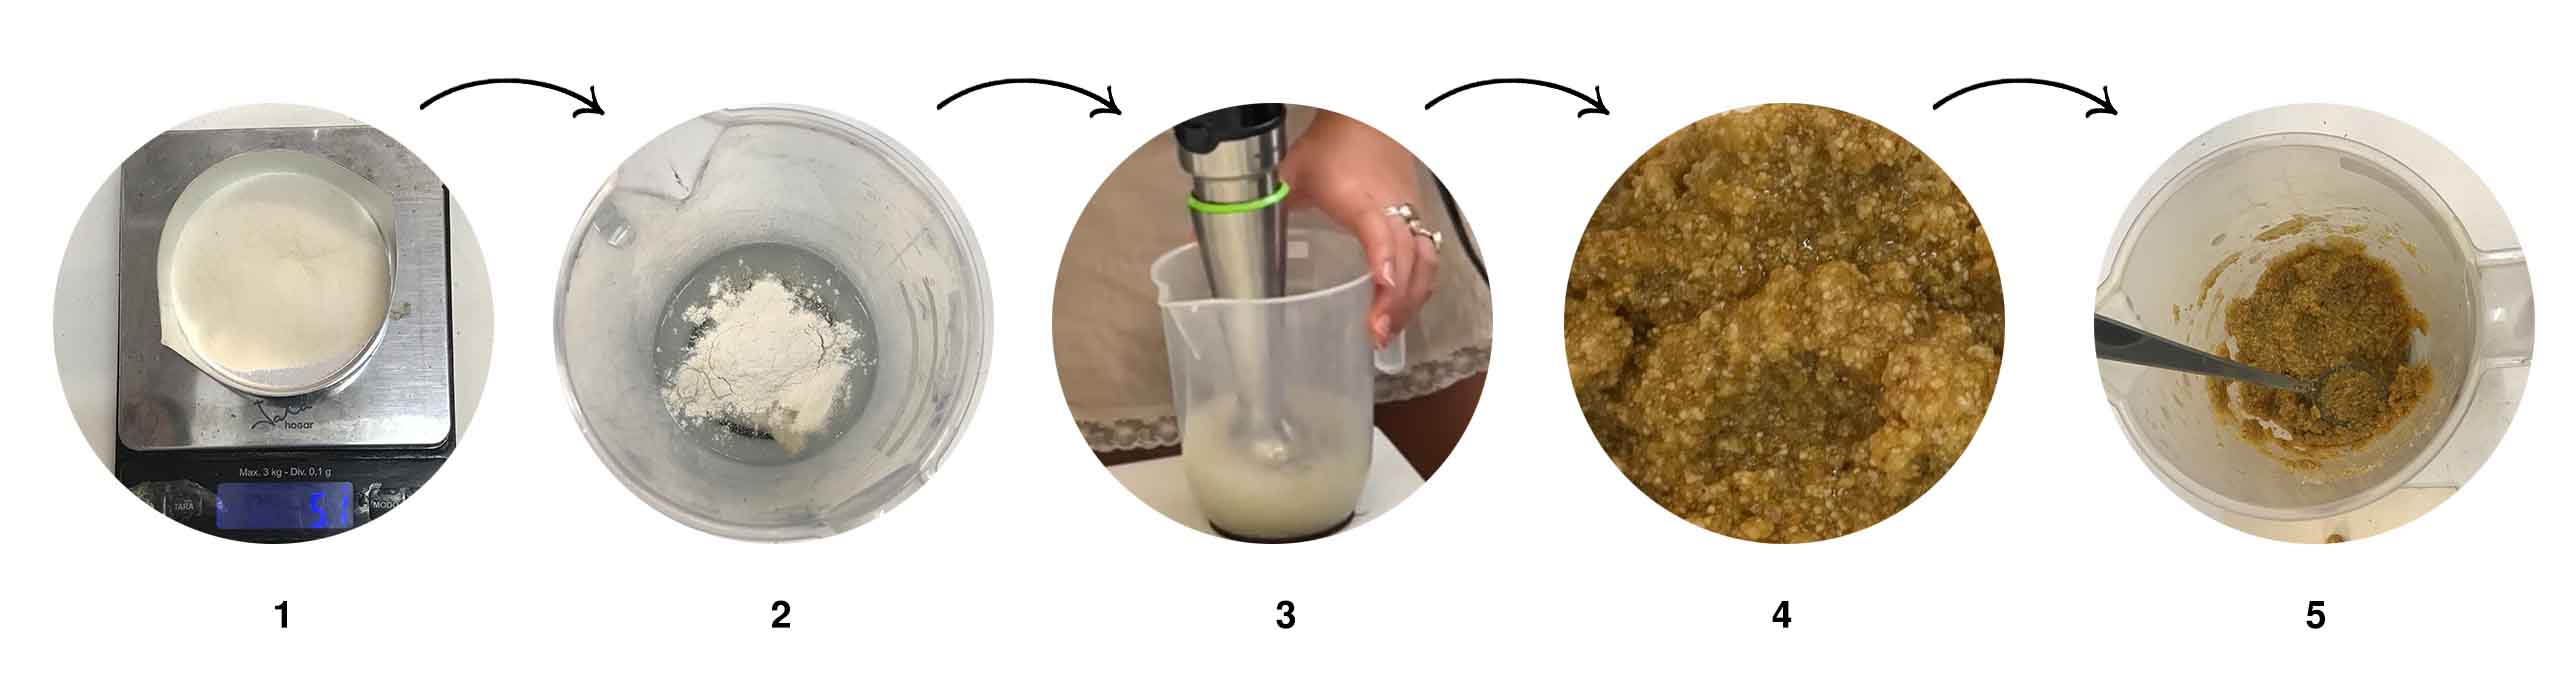
* Measure out ingredients
* Mix the CMC and sodium alginate together in a cup with the mixer
* Add the filler and adjust amount to create a printable viscosity
* Put the paste in a syringe or whatever device you are using to print
* Tap on the table to avoid air bubbles
* Press out the paste into whatever geometry you want
* Leave to dry

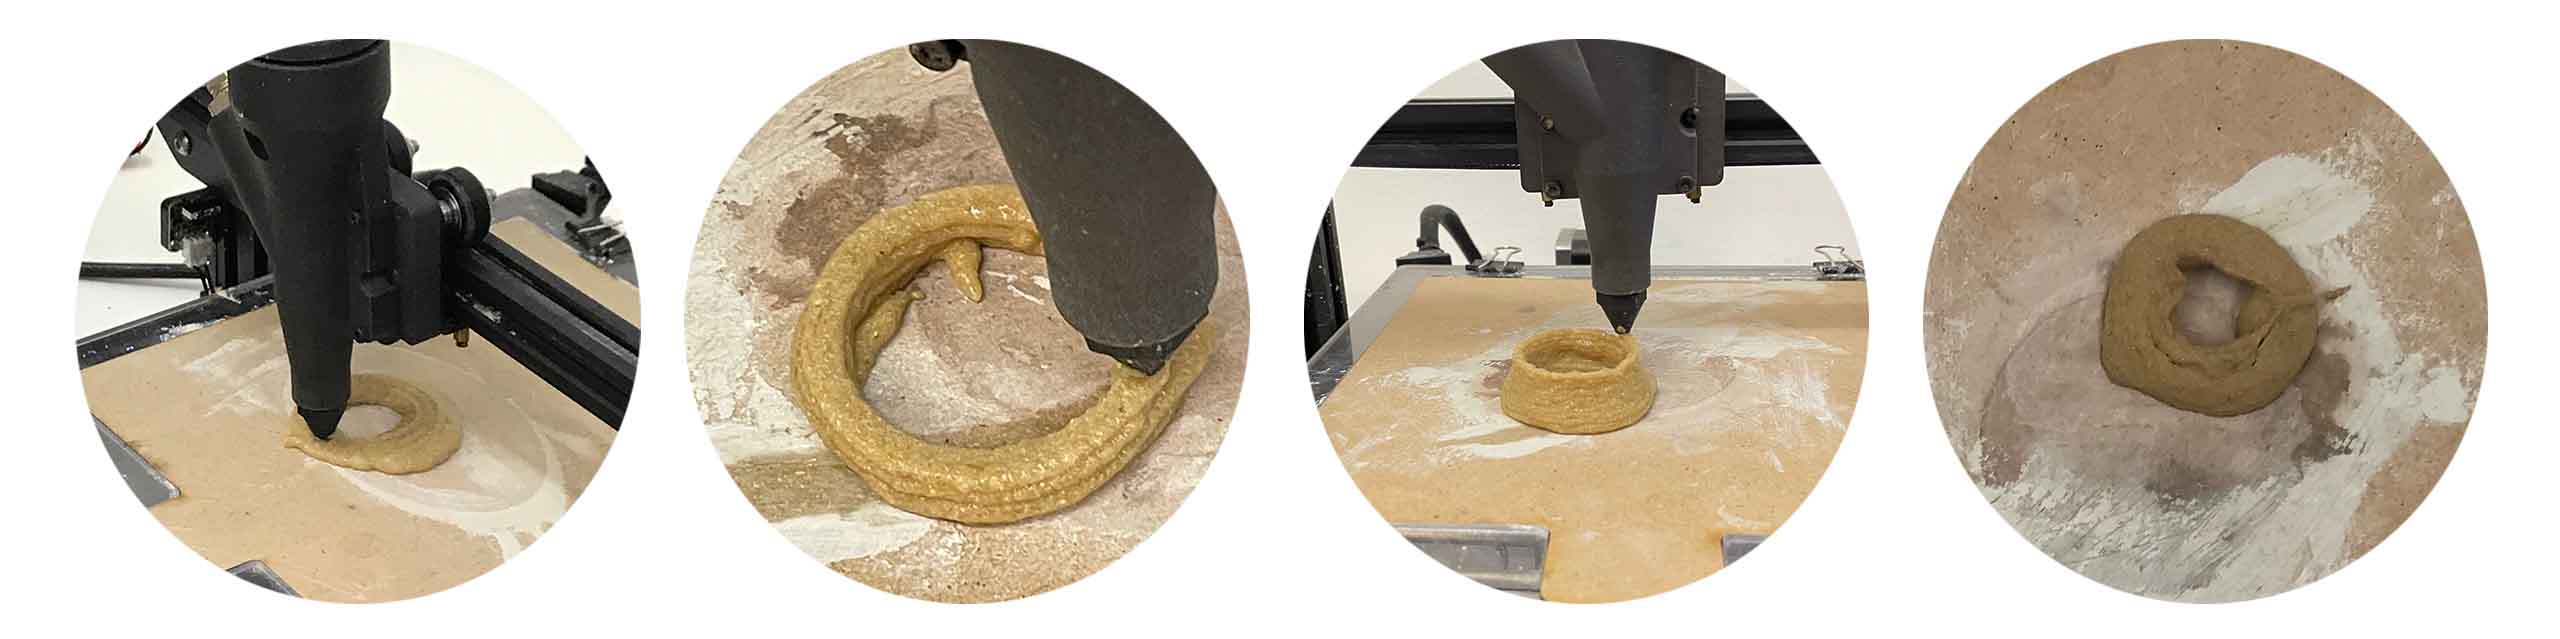
Results By Hand
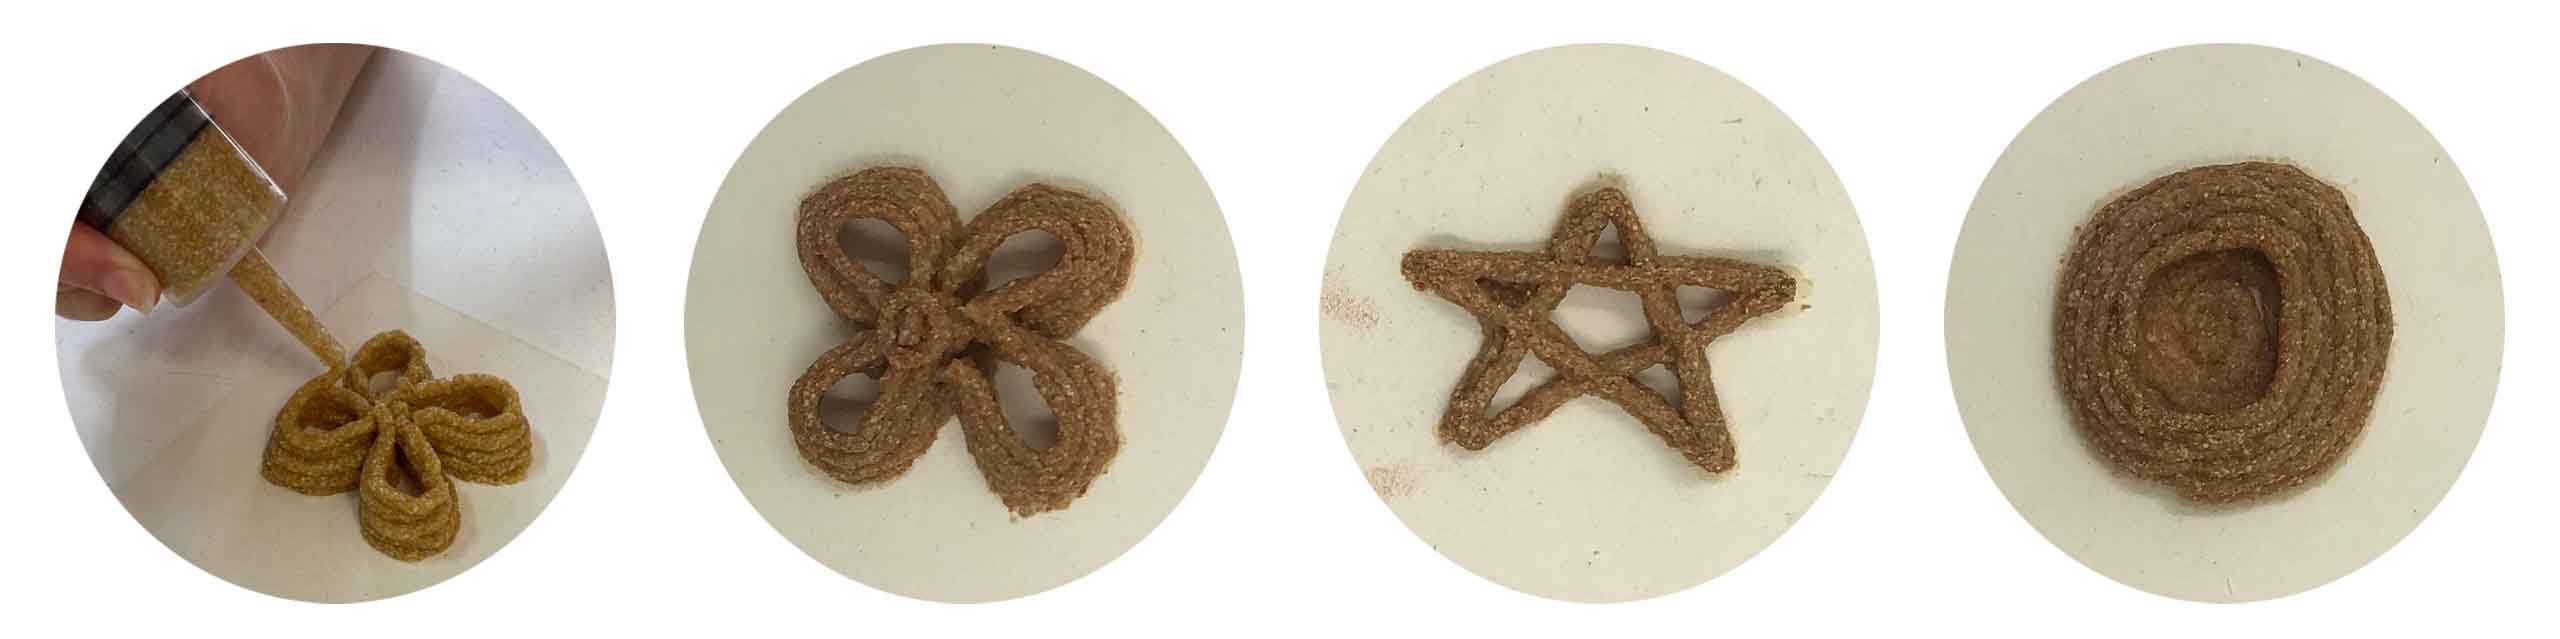
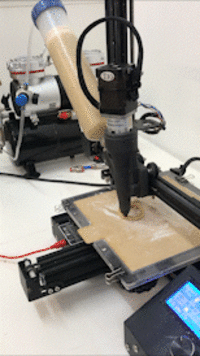
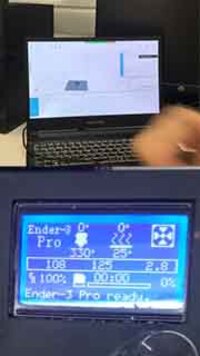
3D Printer
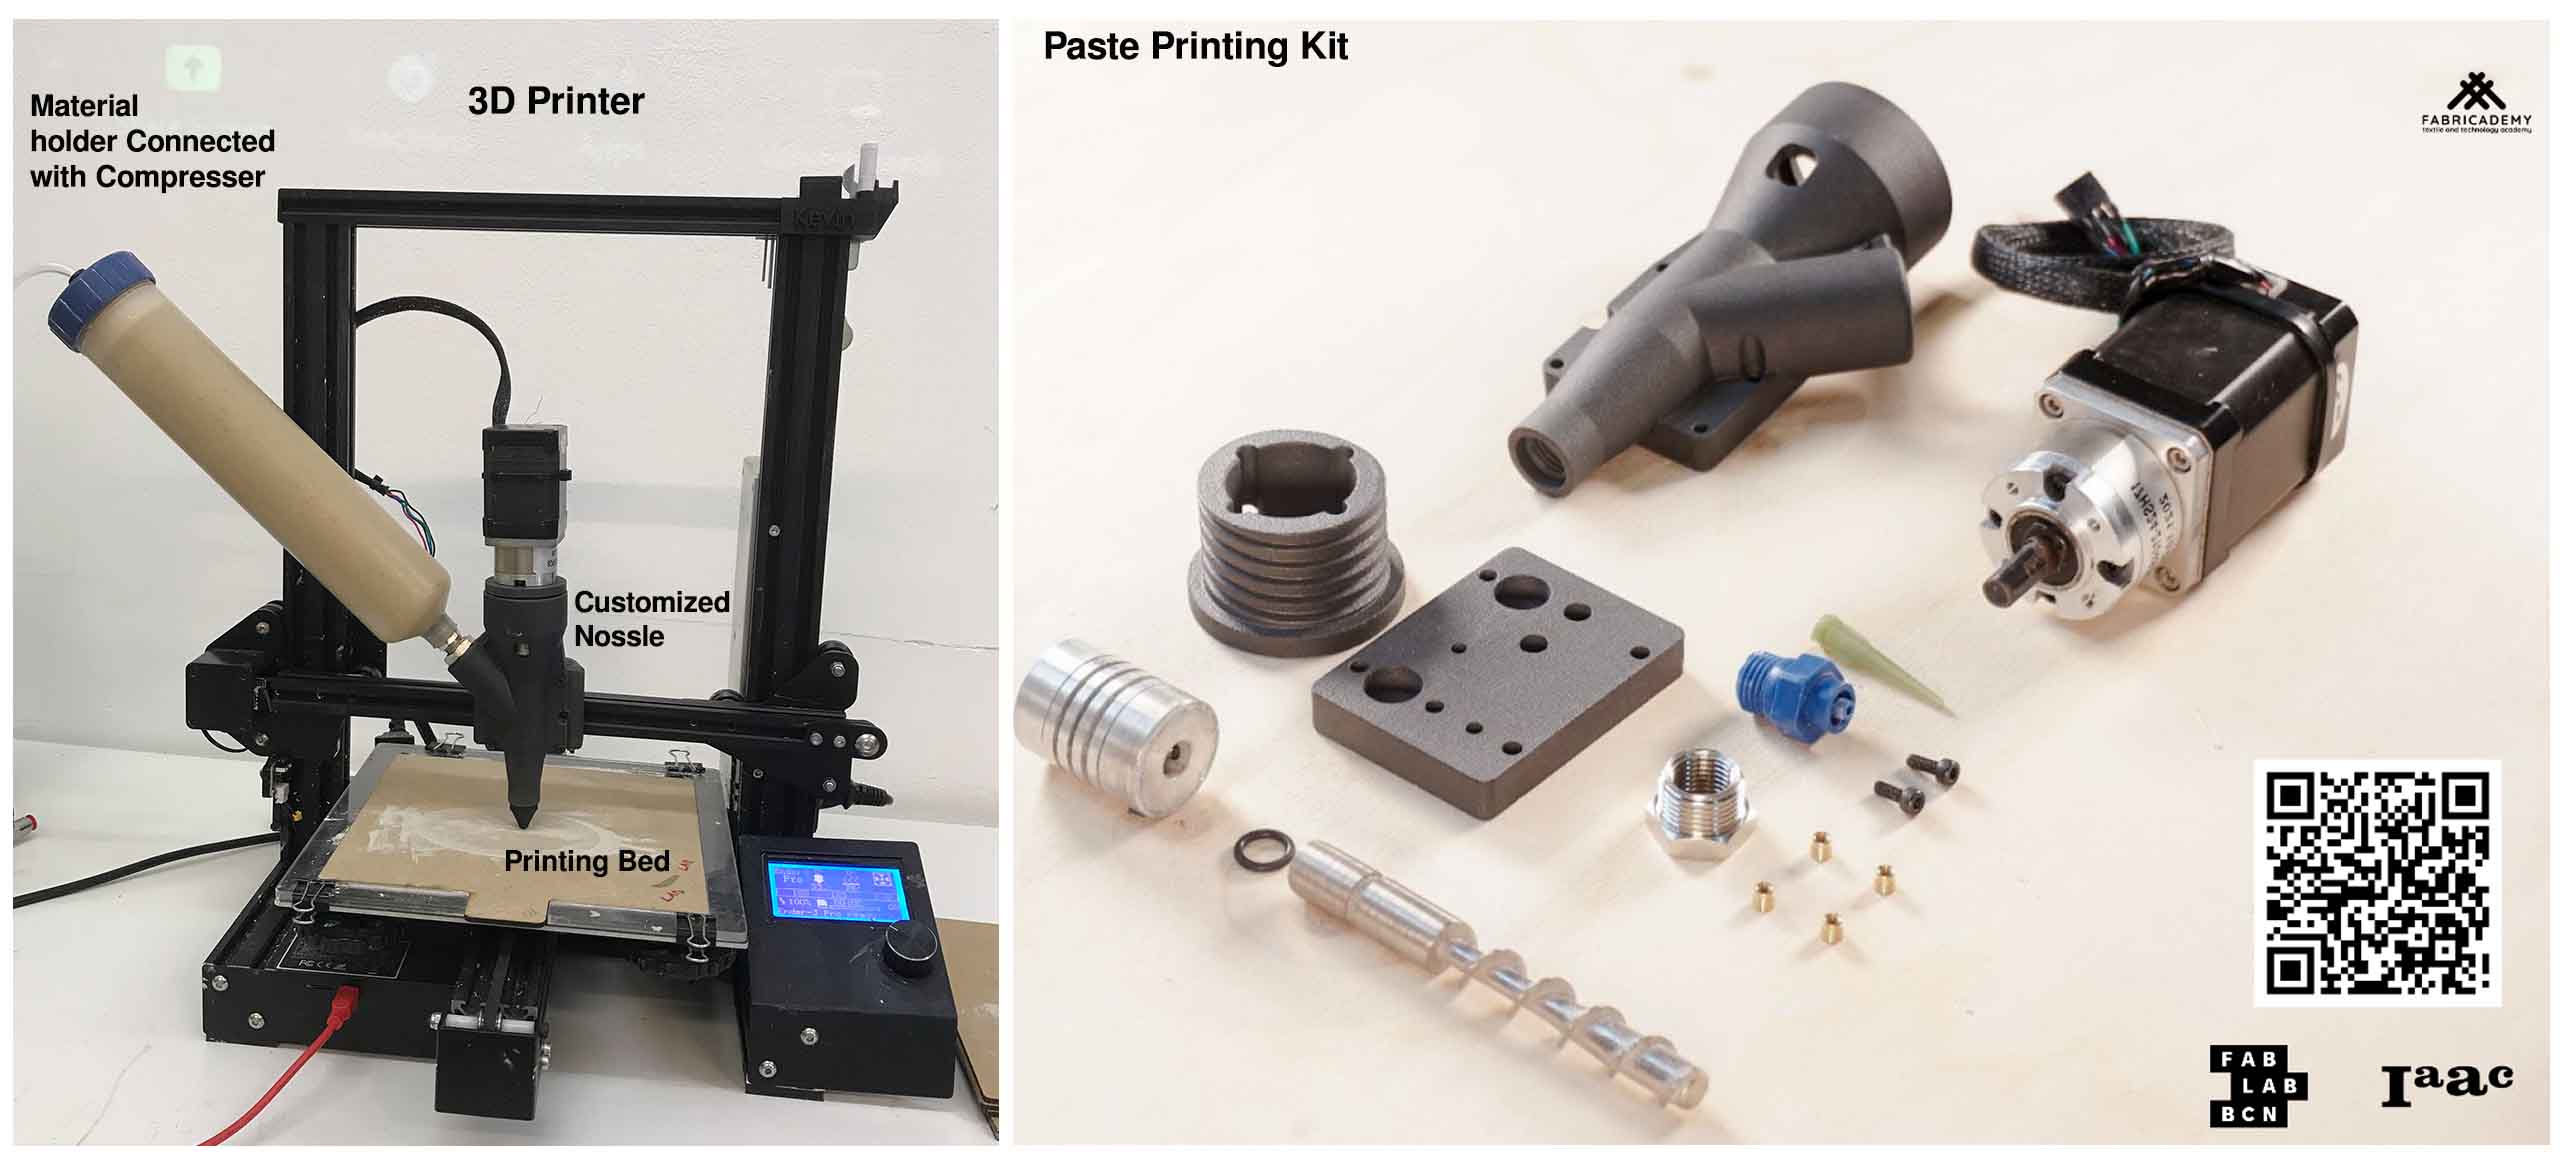
You Can also find the 3D printing Paste kit and more eloborate details Here
Process
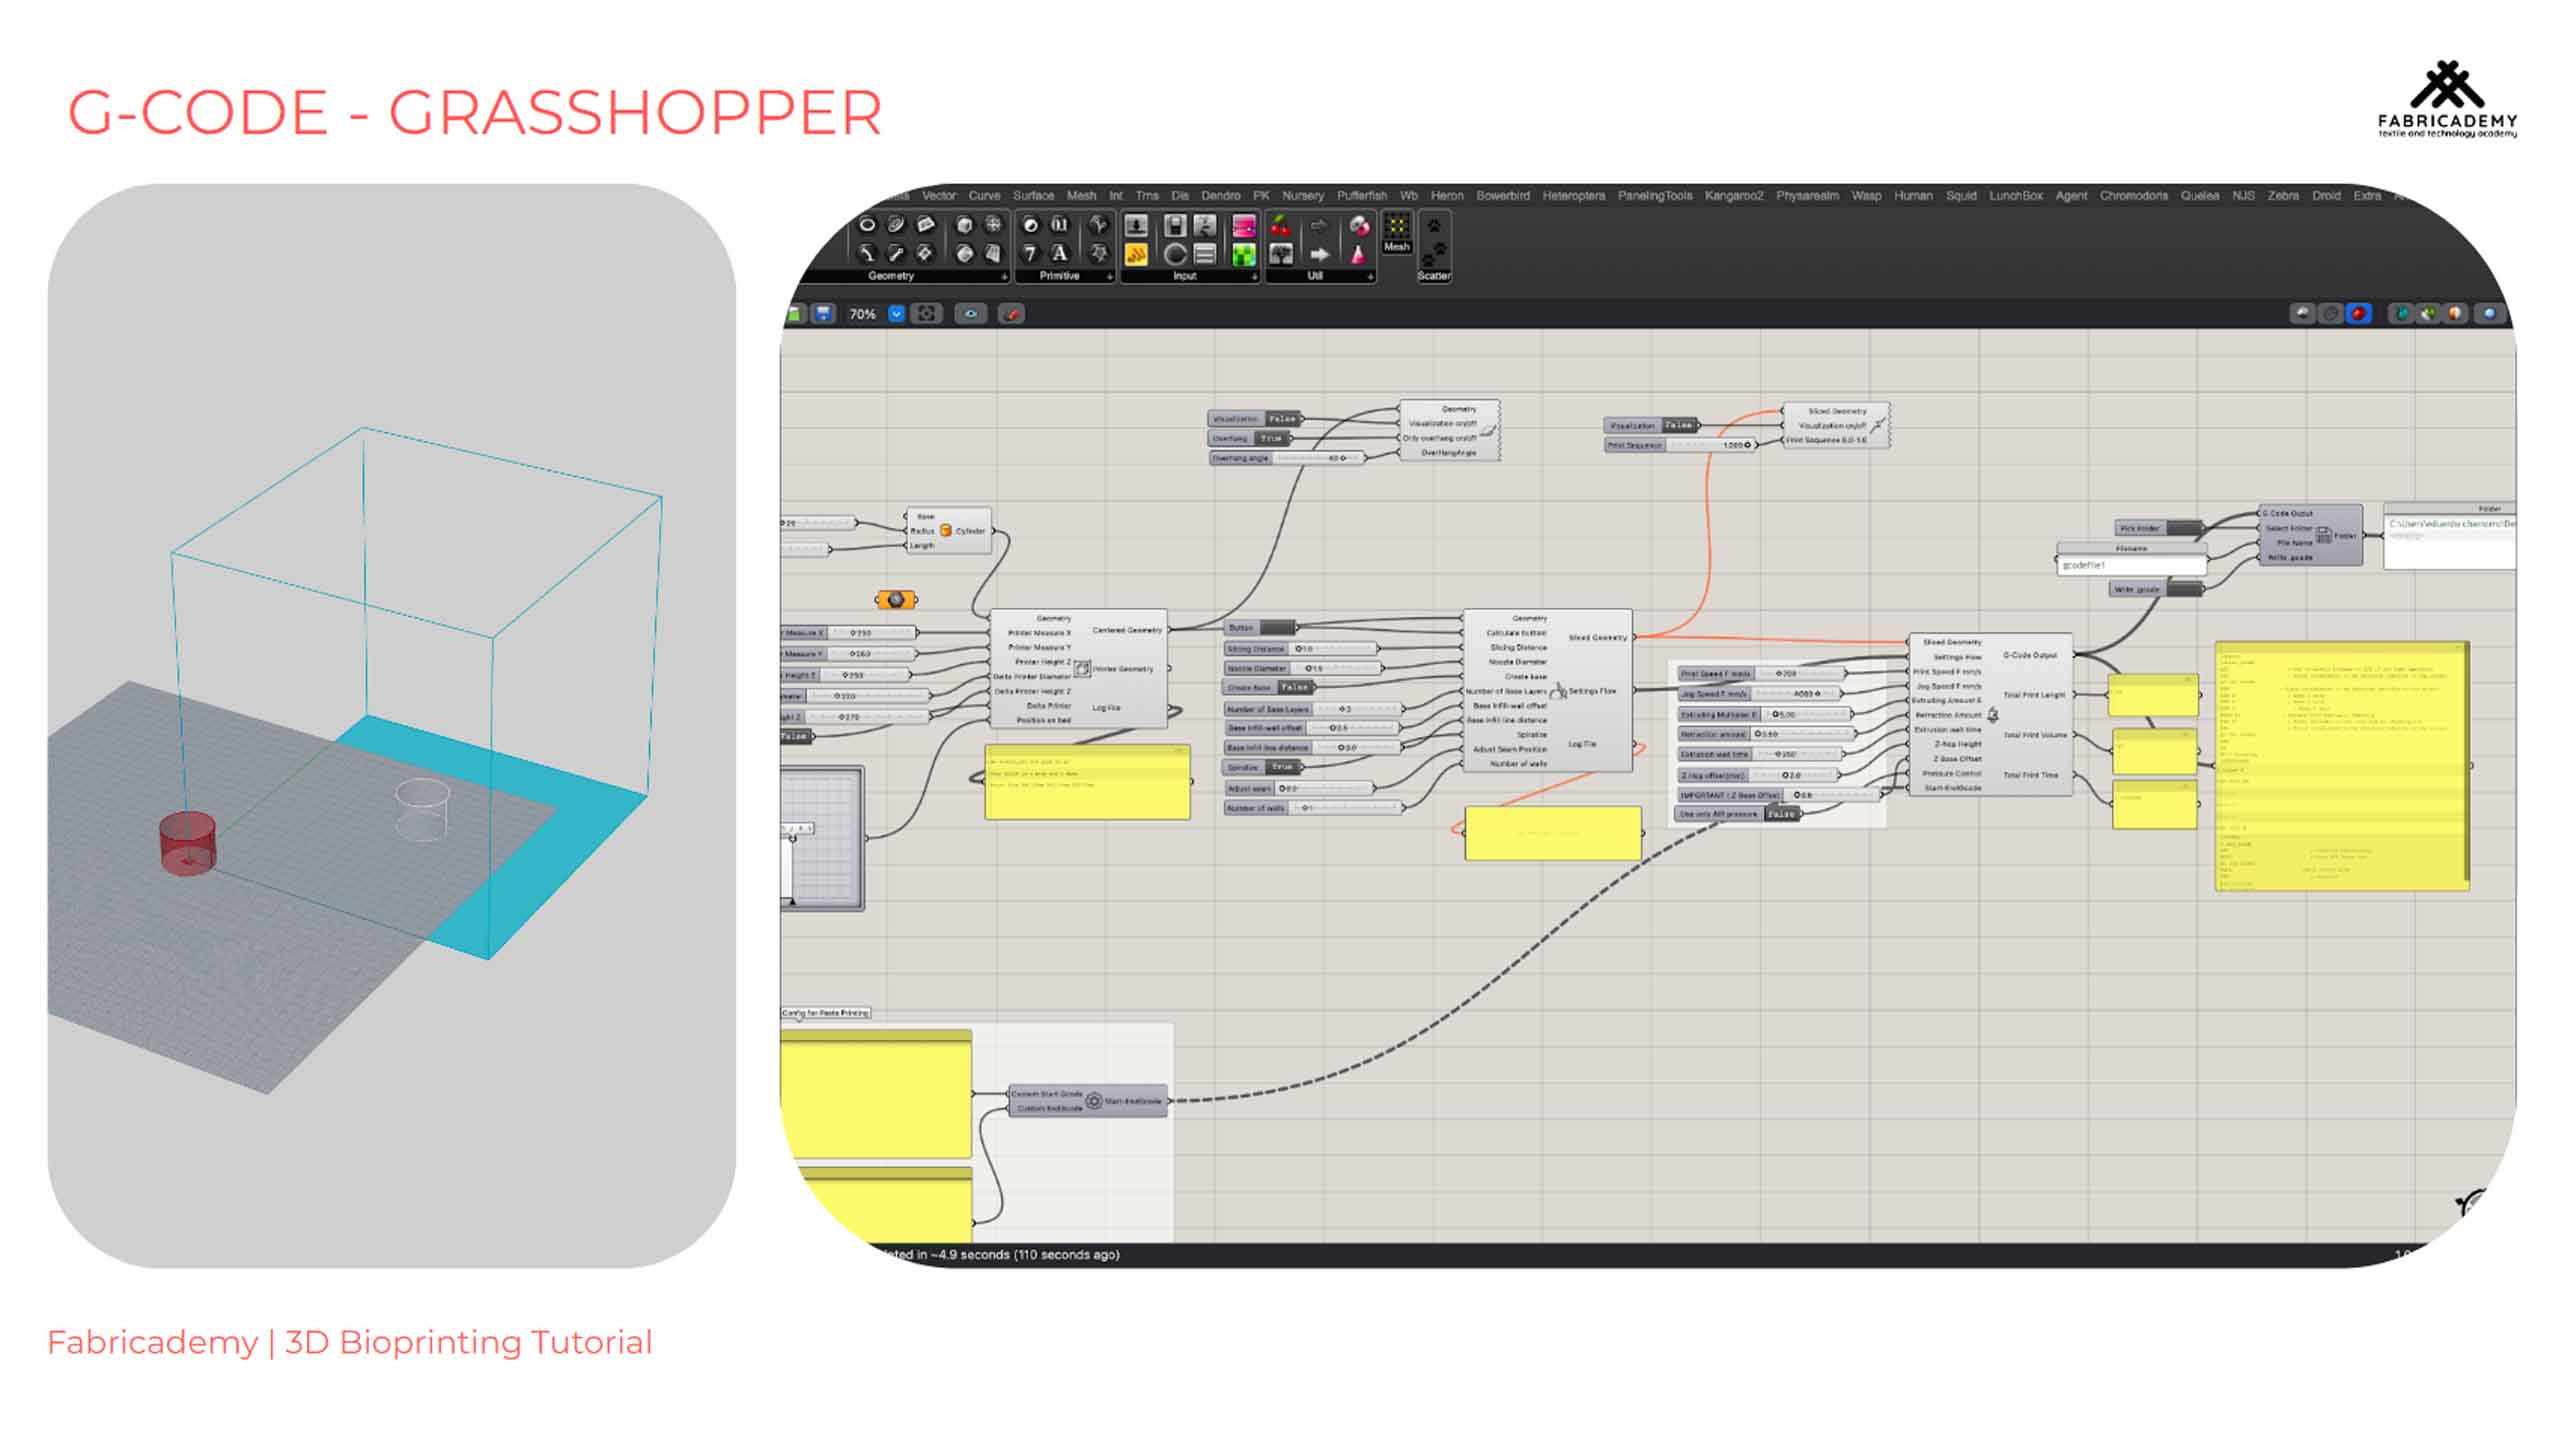
Grasshopper script here

Results
Guar Gum with Avacado Pits
Materials
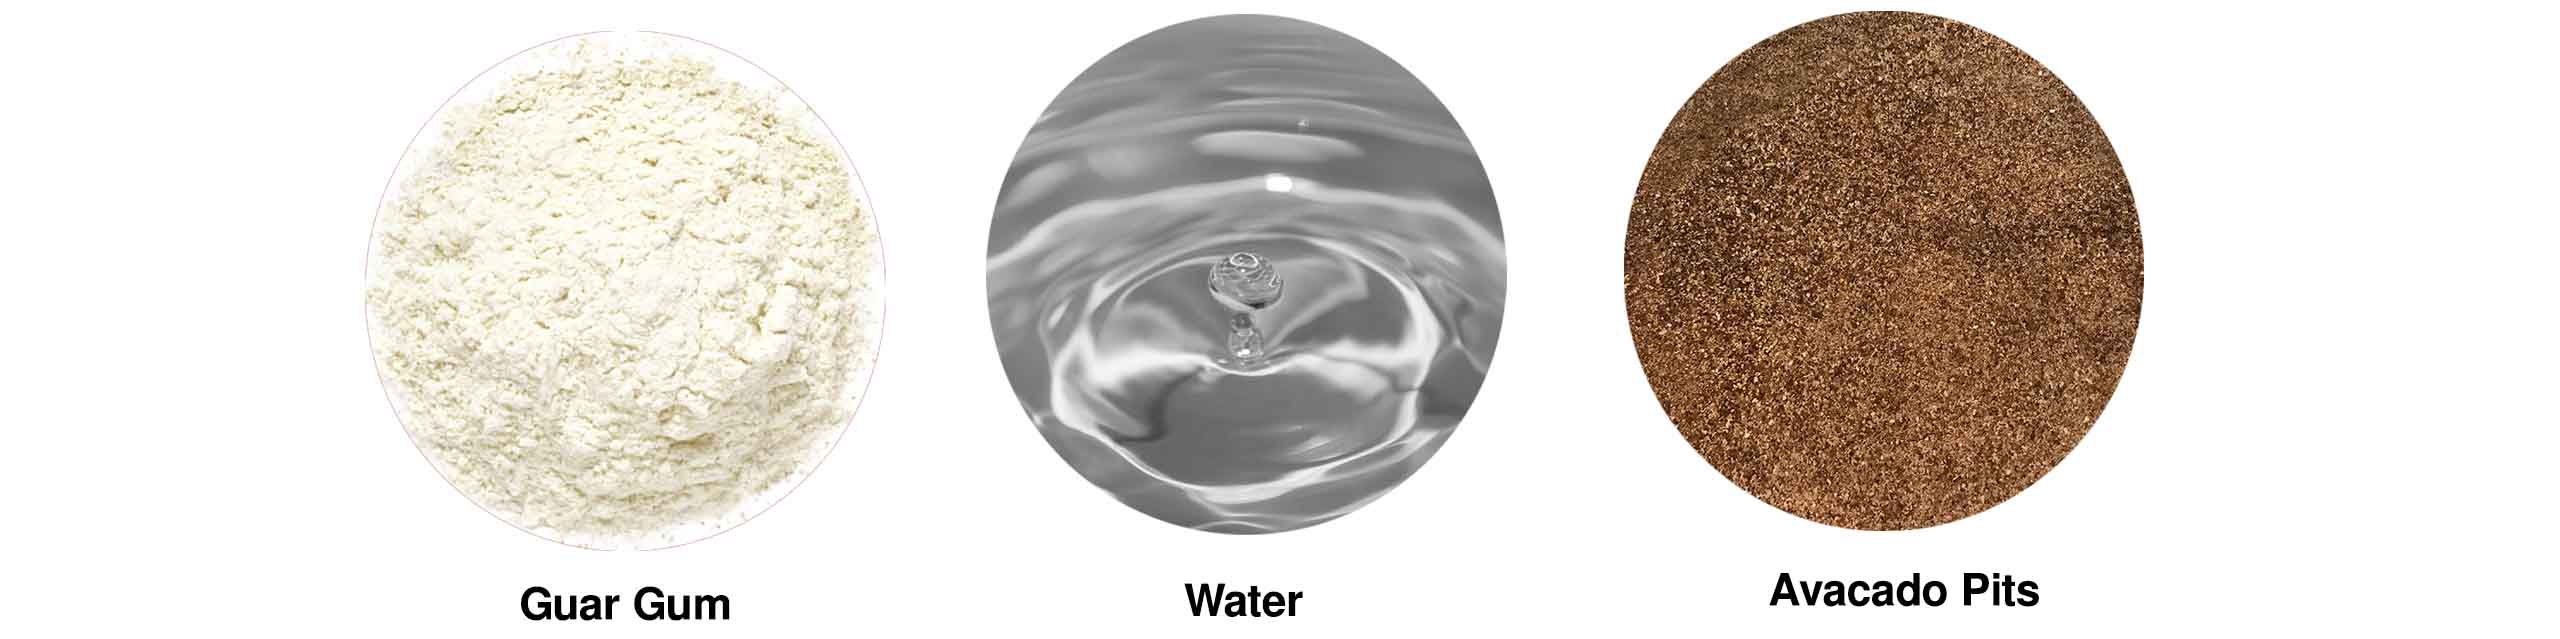
Recipe
Guar Gum with Avacado Pits Recipe
Material name       amount g / ml
Guar gum              8 g
Water                 200 ml
Avacado               7 spoons

Tools
Hand blender
Digital scale
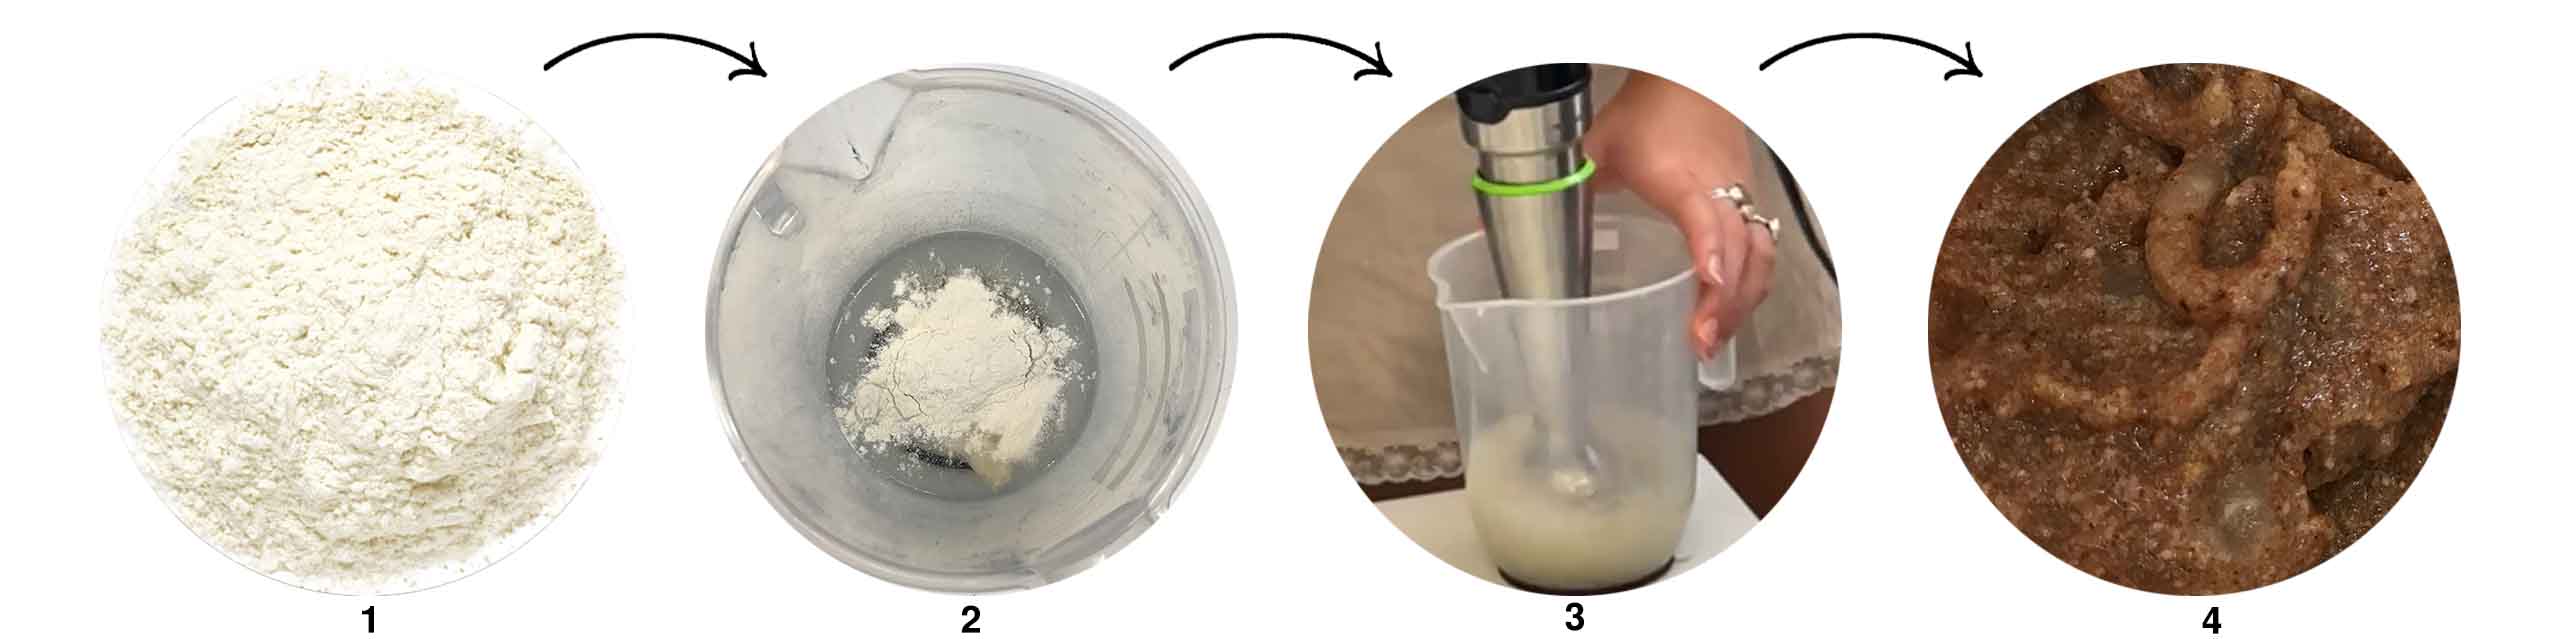
* Measure out ingredients
* Sift the quar gum into the water to avoid clumps and mix this together
* Add the filler and adjust amount to create a printable viscosity
* Put the paste in a syringe or whatever device you are using to print
* Tap on the table to avoid air bubbles
* Press out the paste into whatever geometry you want
* Leave to dry

Mycelium
Required Materials
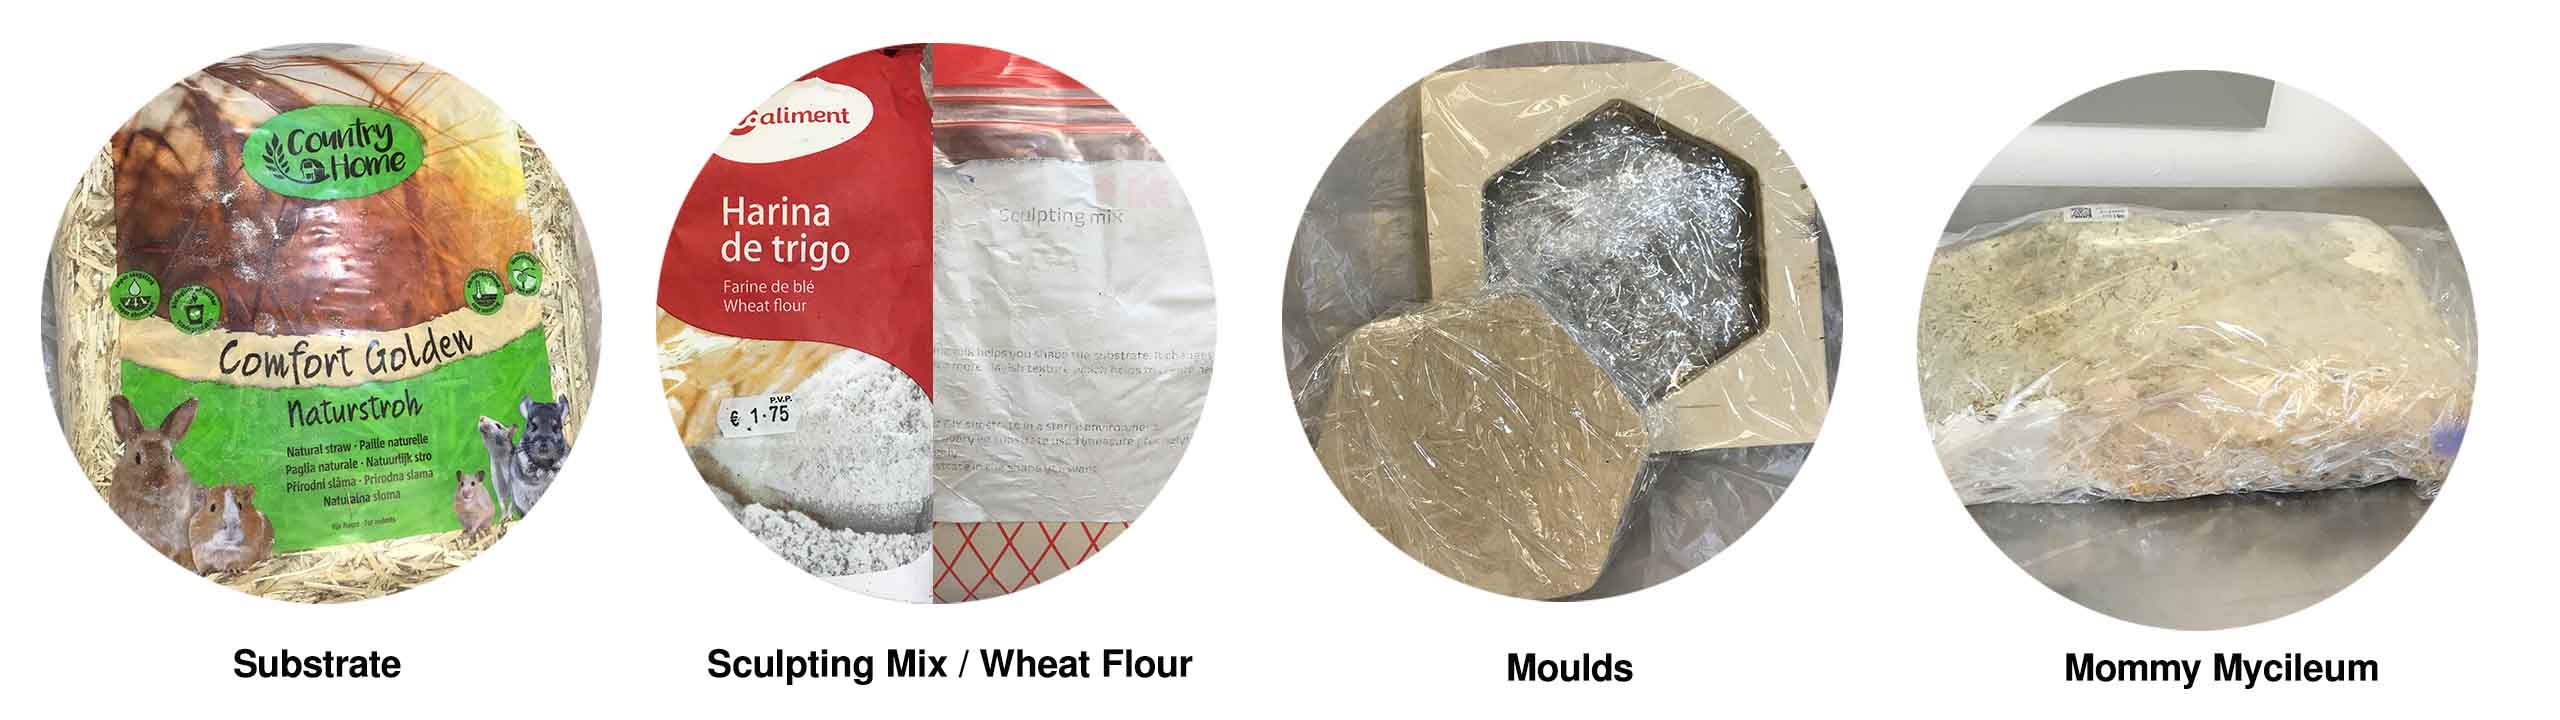
Mycelium Recipe
Material name       amount g / ml
Substrate             Mould size
Water                 amount to thicken the mix
Sculpting Mix         60% weight of substrate
Mommy Mycelium        Little amount of love to grow

Tools
Container to mix
Scissor
Cling sheet
Needle
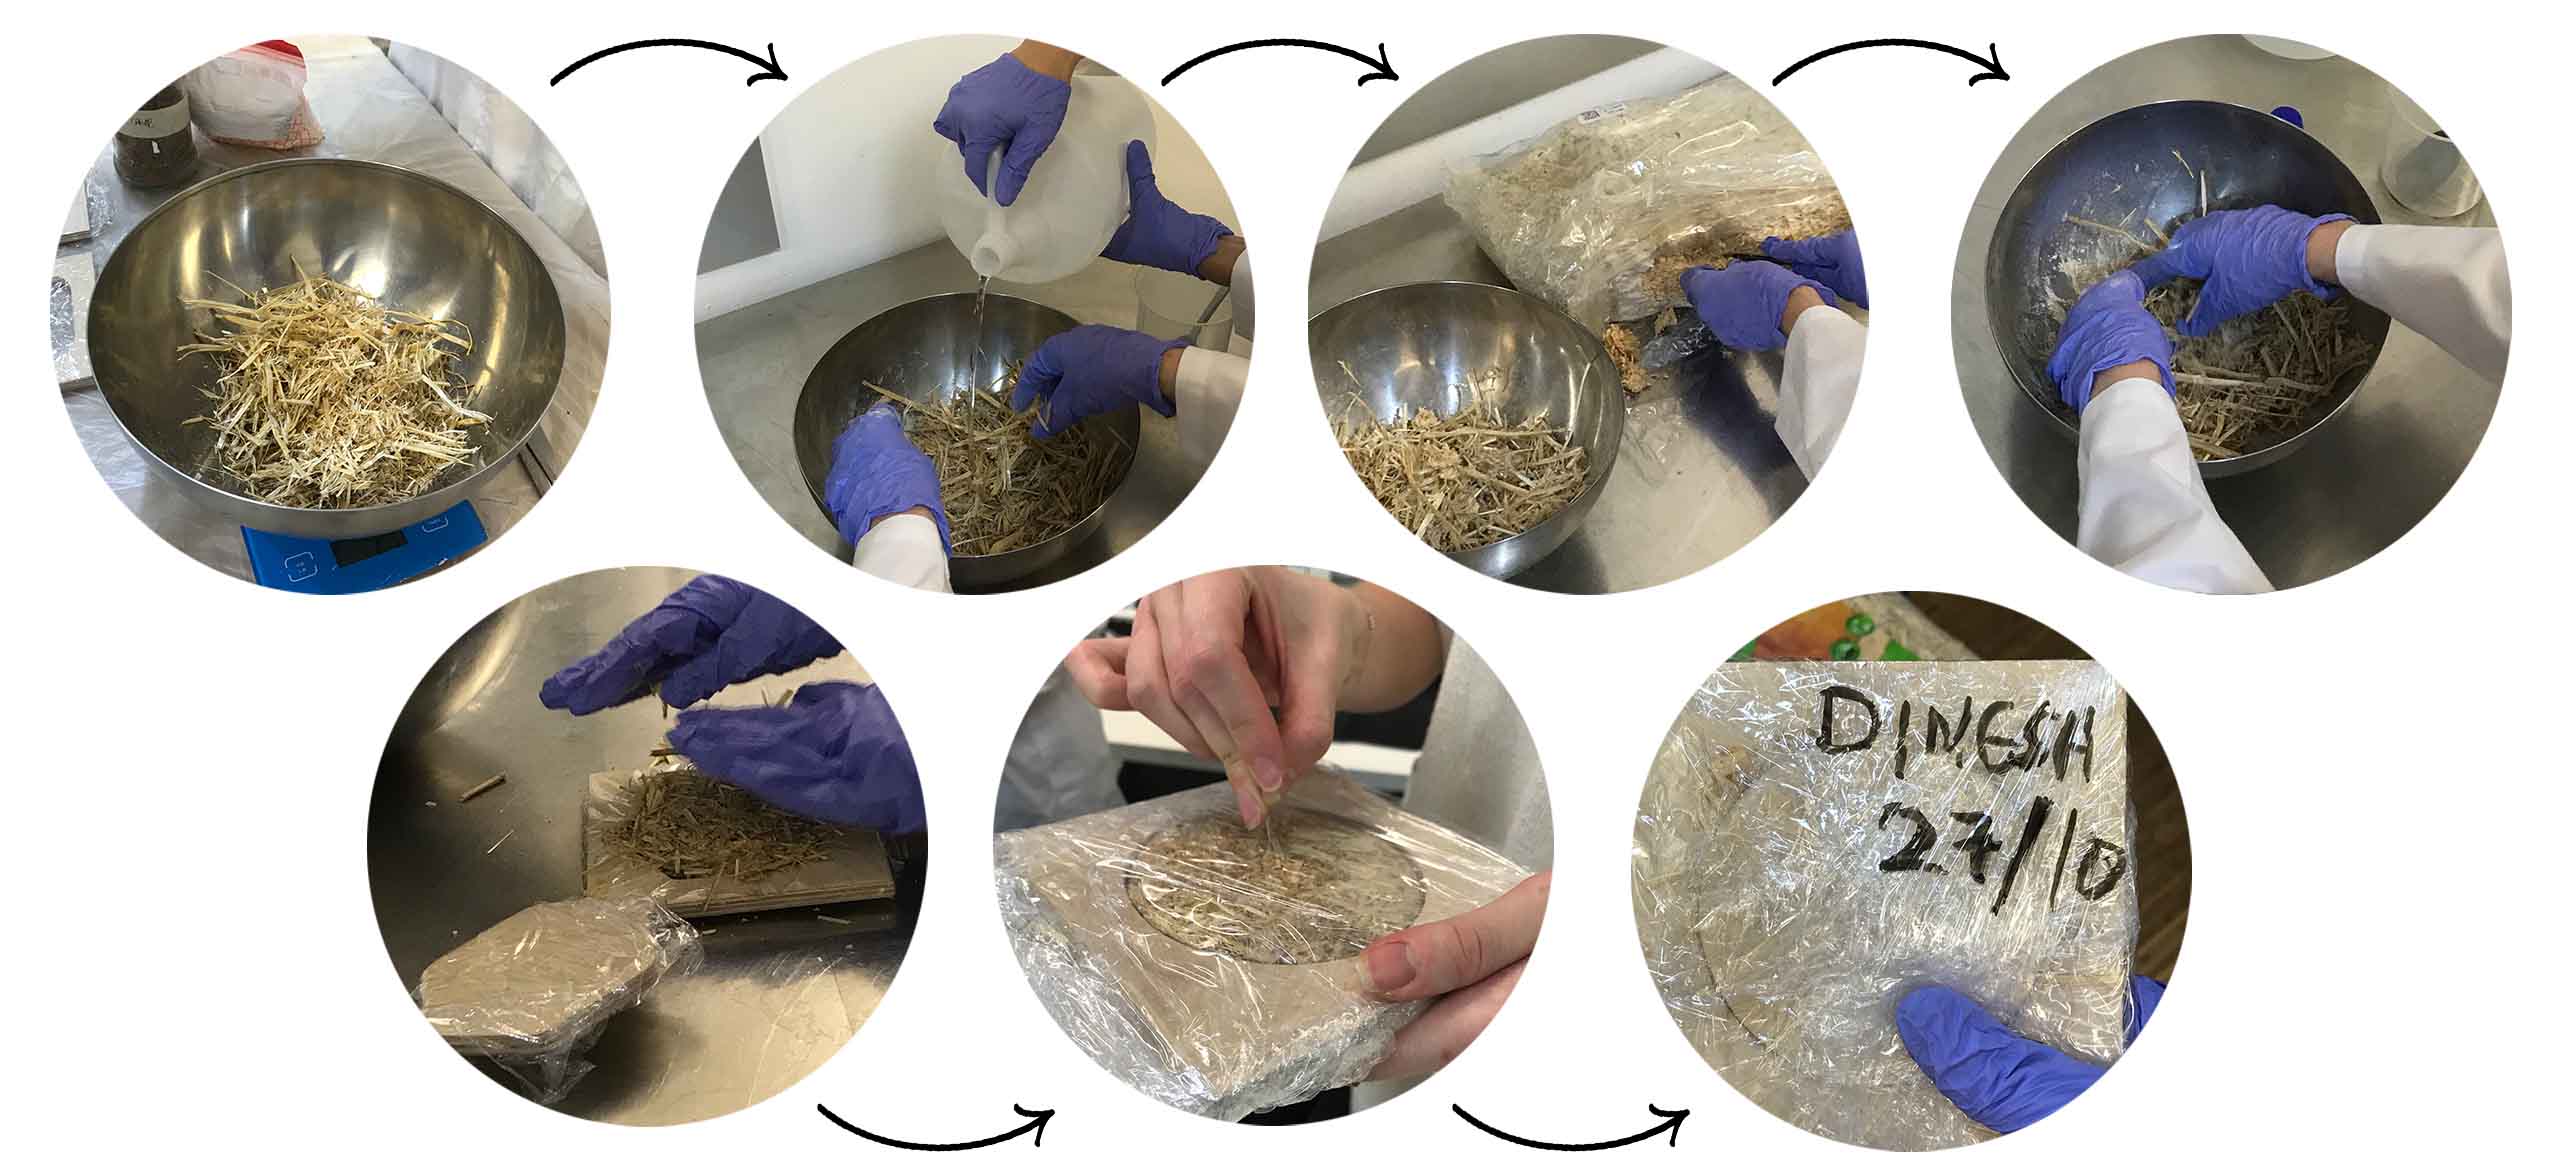
* Measure out your substrate in grams - measure 60% of that amount of sculpting mix
* Add those two toegther with some water and mix untl it is chunky and pasty
* In a sterile environment, take a piece from your "mother" mycelium block and add it to the mix
* Prep your mold by covering it in sterile plastic wrap or sterilizing it well
* Press your mix into the mold and cover the entire thing with plastic wrap
* Poke some holes with a needle to allow some air flow
* Leave it in a clean place and wait for it to grow
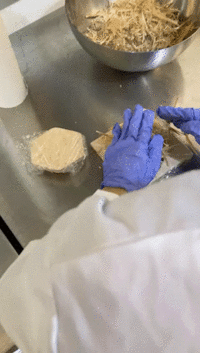
Results
In Process.....Coming Soon
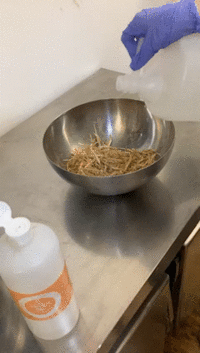
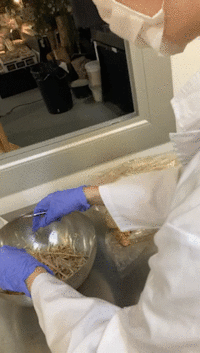
Kombucha Leather
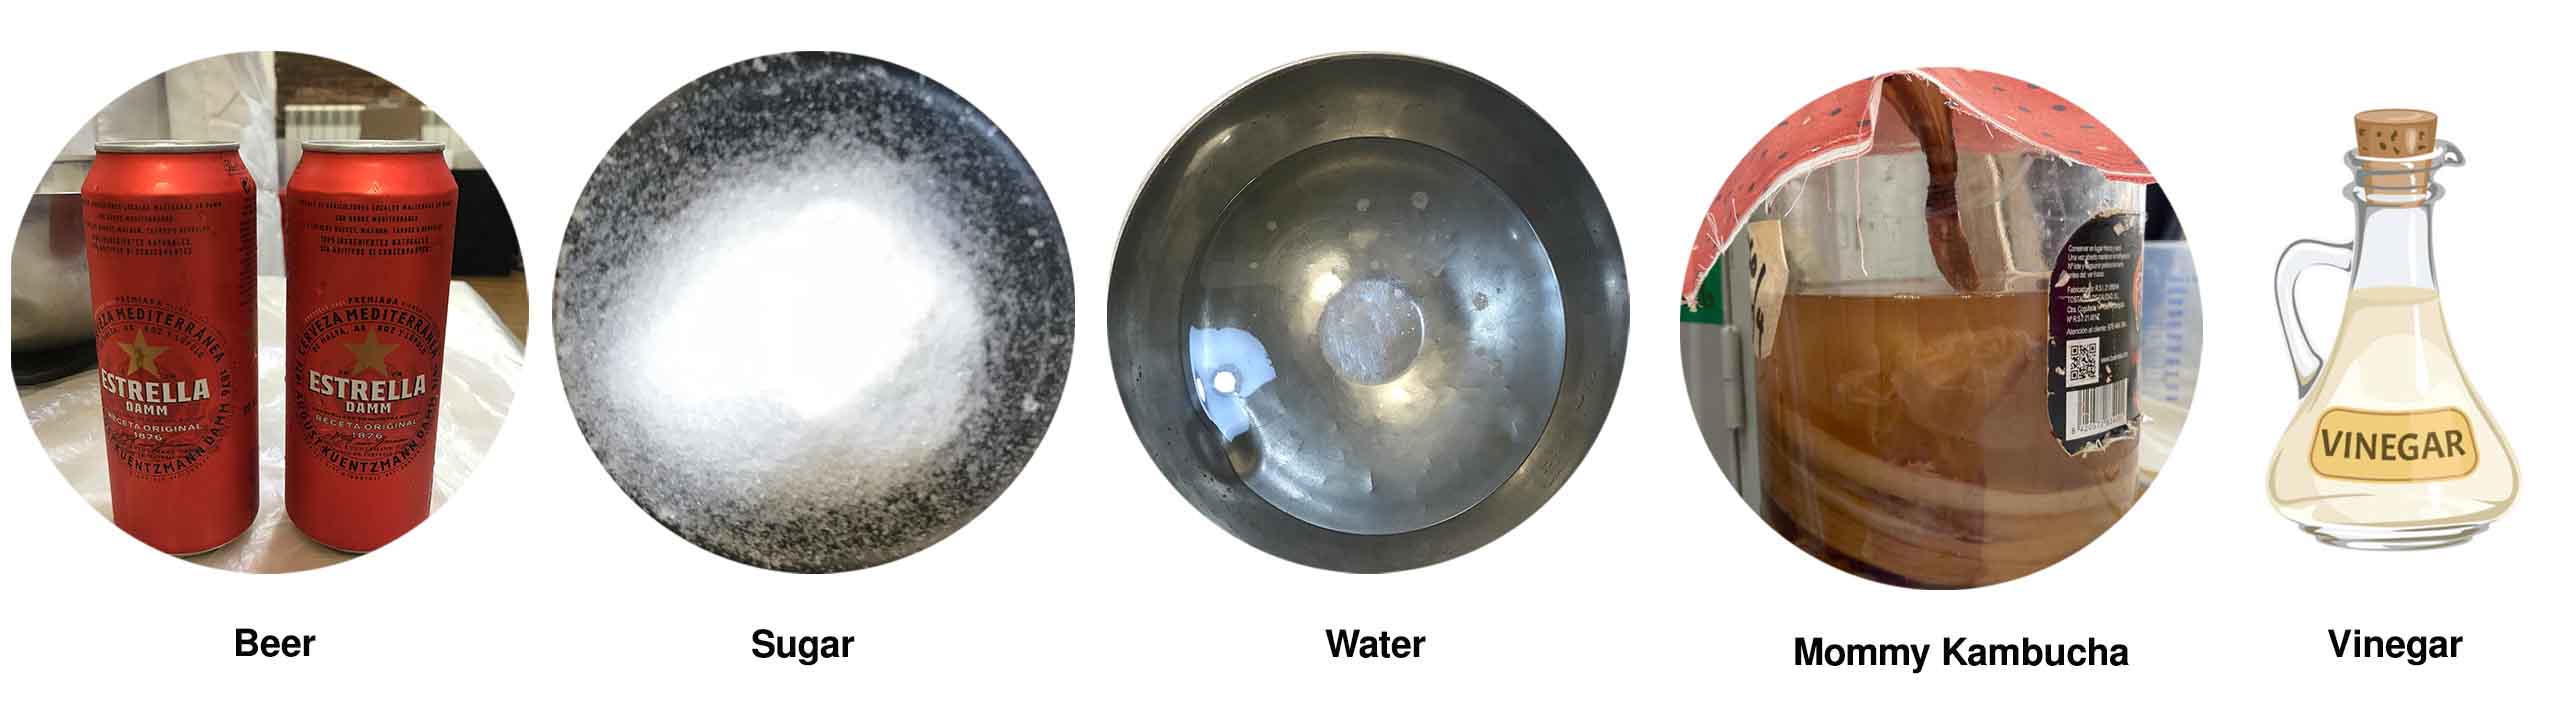
Kombucha Recipe with Beer
Material name       amount g / ml
Beer                300ml
Water               300ml
Sugar               60g
Vinegar             60g
Mother Kombucha     Small piece to grow

Tools
Container to mix
Scissor
scale
breathable fabric
Induction
* Bring your water and beer to heat
* Dissolve the sugar in it
* Let the liquid cool
* Prepare your contaner by sanitizing with alcohol
* Pour the liquid into container
* wearing gloves, add a piece of the mother scoby into the bath
* cover the container with fabric and wait for it to grow!
* remove scoby when ready and clean with soap
* lay on a mat to dry and choose a post treatment if you want
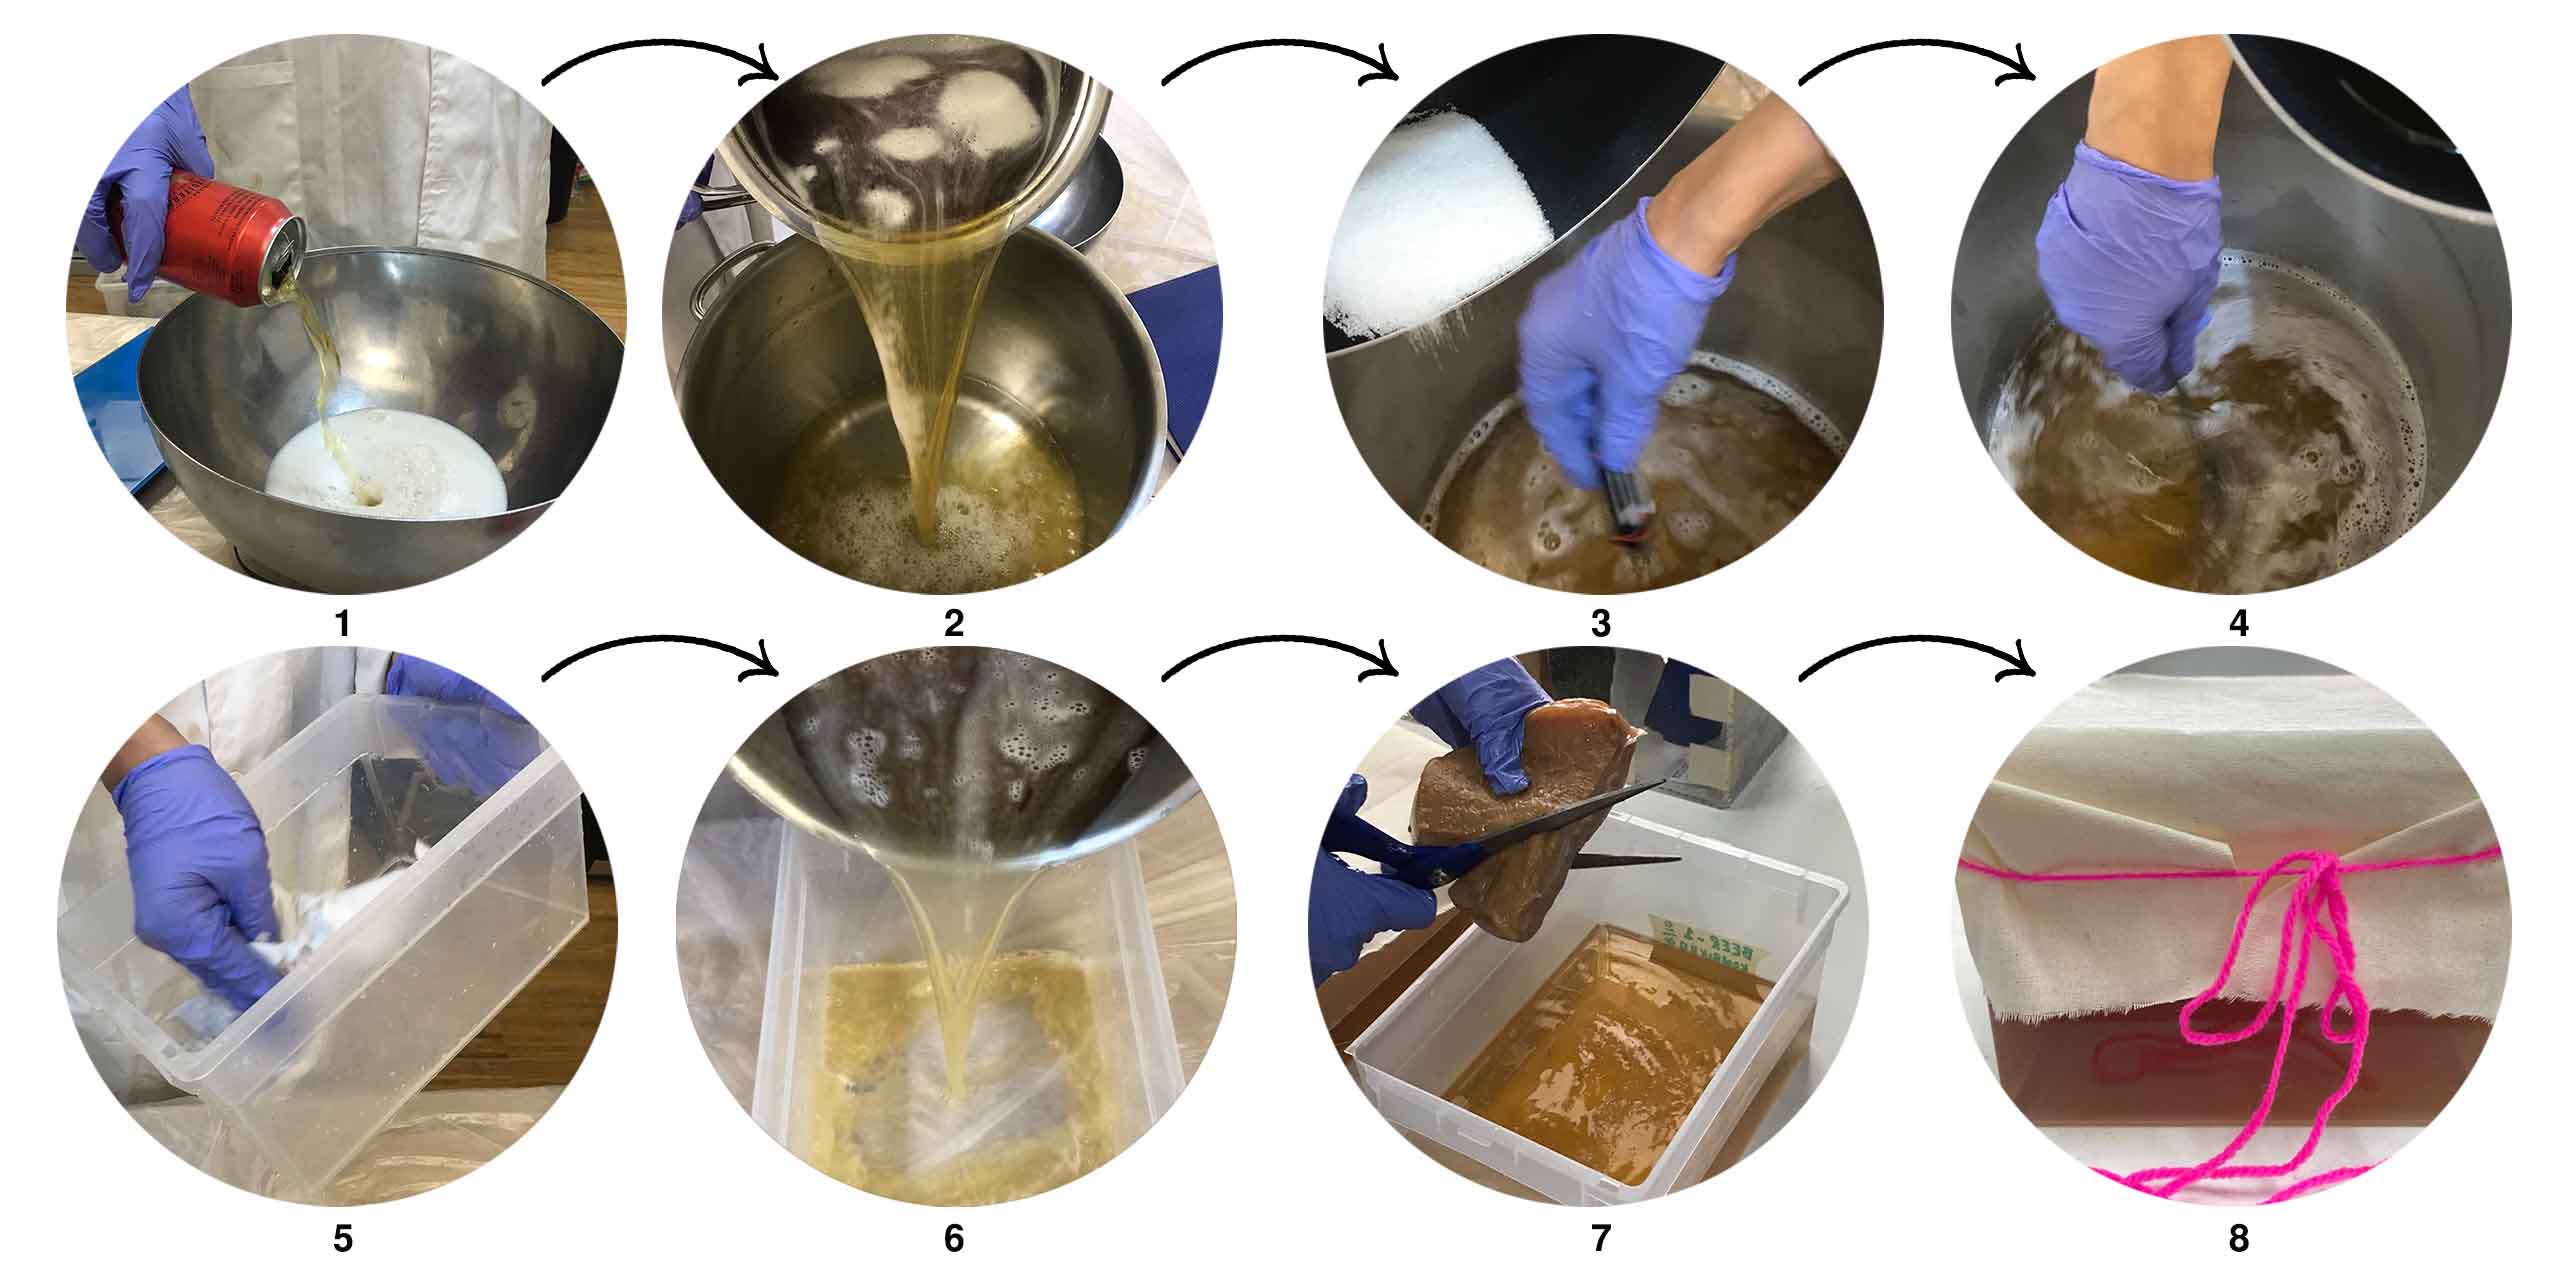
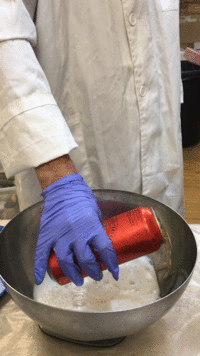
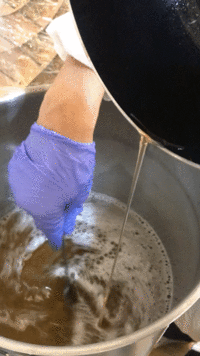
Results
Bio Plastics
Gelatine Base
Required Materials
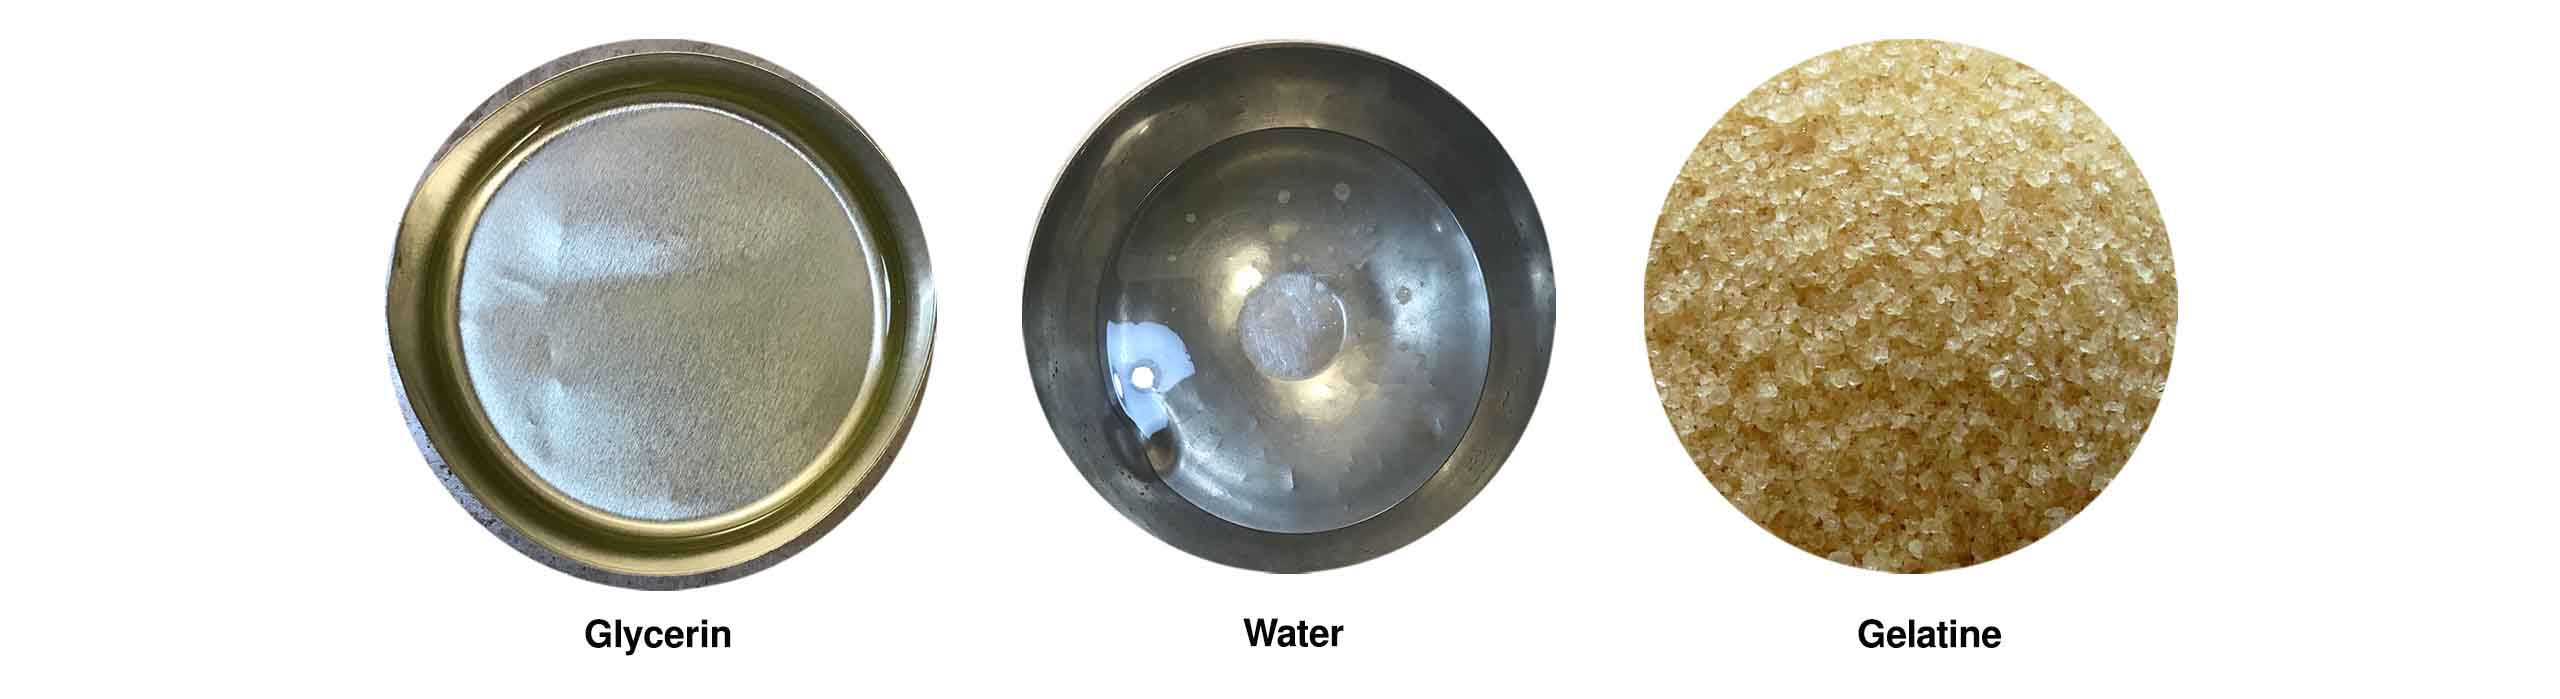
Gelatine Base
Material name       amount g / ml
48g Gelatine        48g
240ml water         240ml
Glycerin            0g, 24g, 48g
(depending on rigidity/flexibility)

Tools
Molds (embroidery hoops, textured paper, 3D printed molds)
Pots and stovetop
Mixing tools
Spatula or squeegee
Process
* Measure out your ingredients
* Add the water and gelatin together in the pot and mix well
* Add the glycerin and heat mixture until it starts bubbling, stirring constantly
* Pour mixture into a mold (let it cool for a bit if the mold is not heat resistant)
* Let the material dry in the mold for a few days
Results
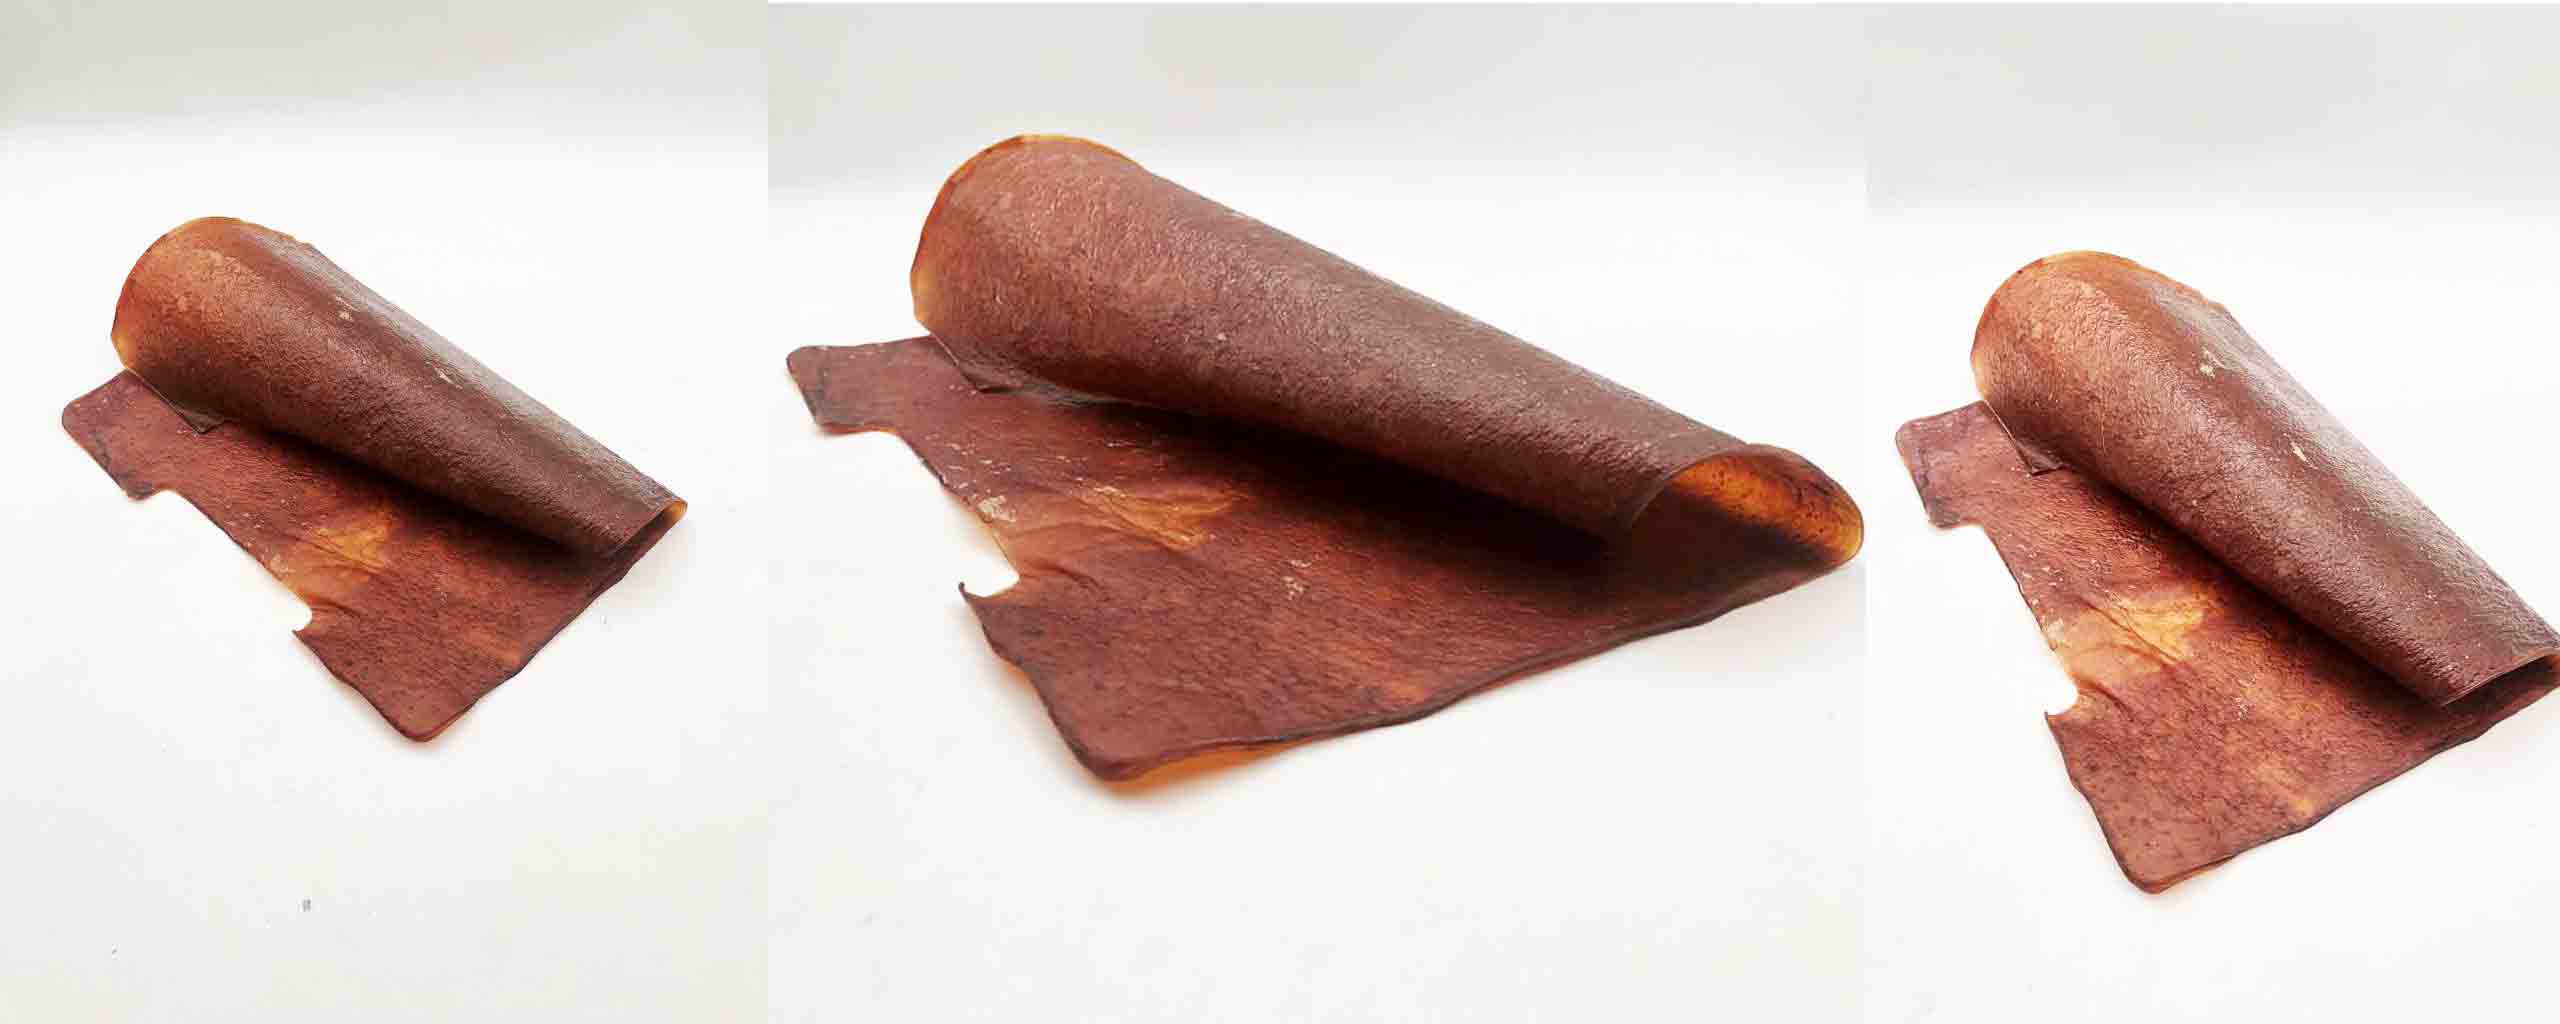
Final Gelatine base Results Here Please have a look.
Agar Base
Required Materials
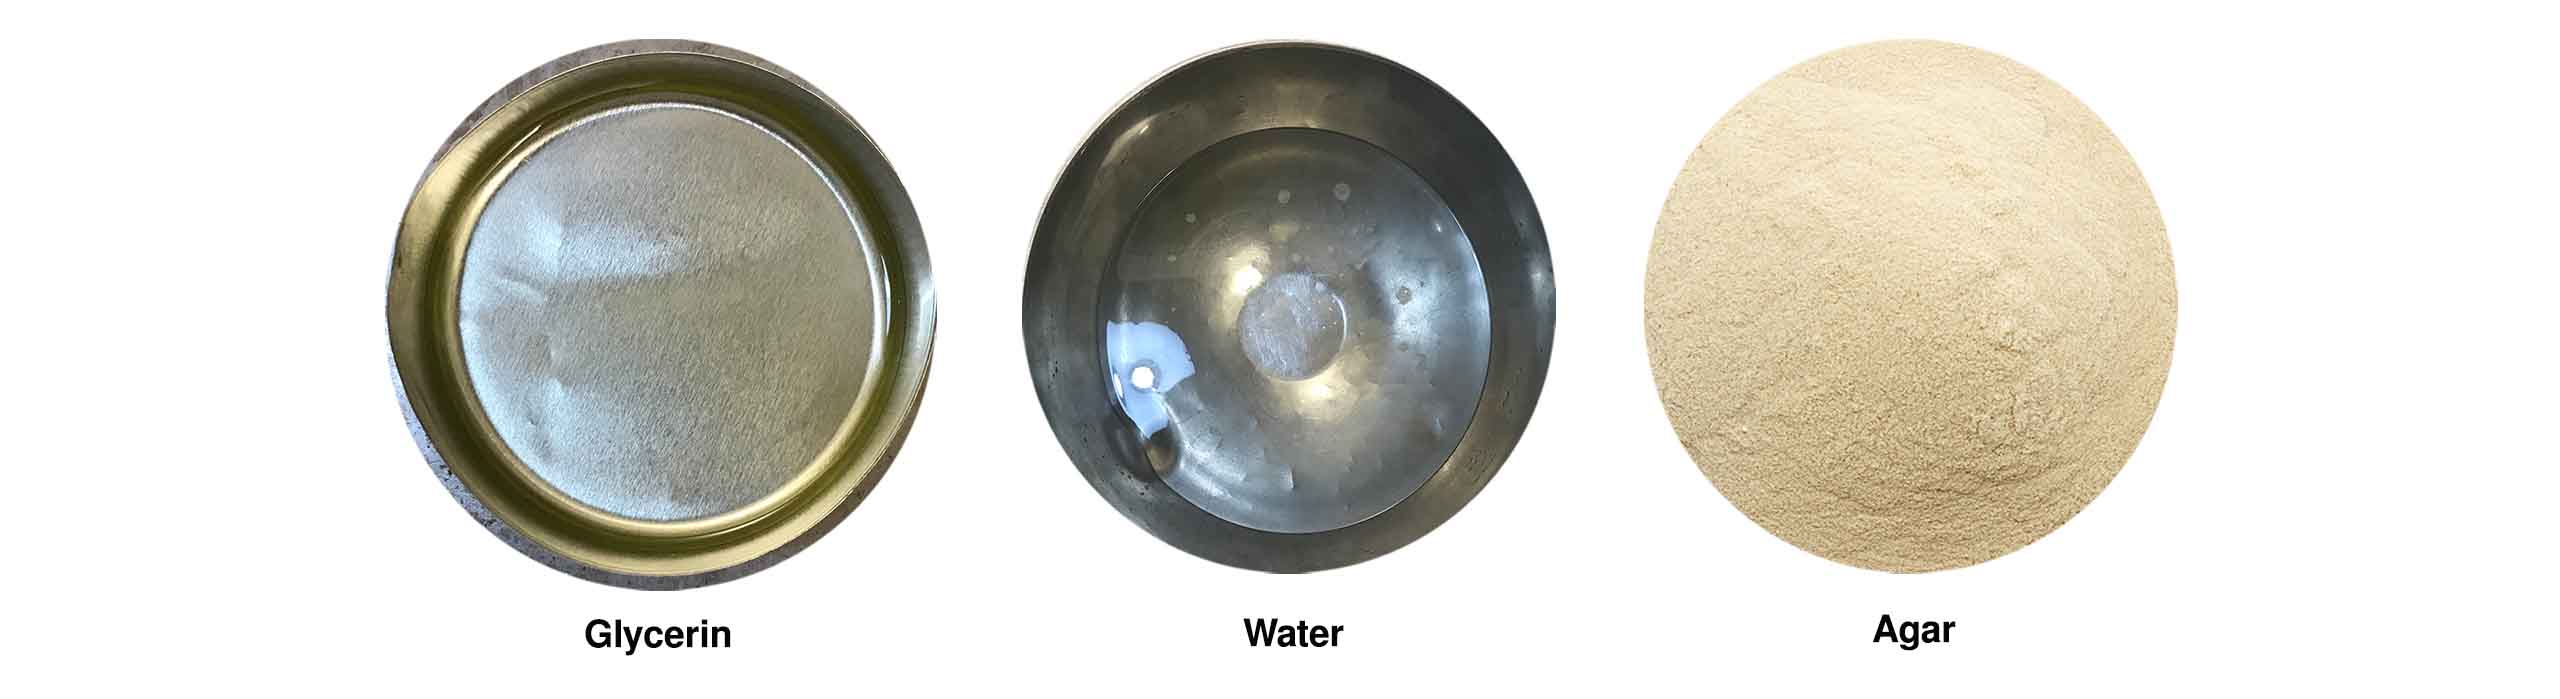
Agar Base
Material name       amount g / ml
agar                10g
water               300ml
glycerin            4g, 16g, 32g
(depending on rigidity/flexibility))

Tools
* Molds (embroidery hoops, textured paper, 3D printed molds)
* Pots and stovetop
* Mixing tools
* Spatula or squeegee
Process
* Measure out your ingredients
* Add all in a pot and mix well
* Heat mixture until it starts bubbling, stirring constantly
* Pour mixture into a mold (let it cool for a bit if the mold is not heat resistant)
* Let the material dry in the mold for a few days
Final Agar base Results Here Please have a look.
Sodium Alginate Casting
Required Materials
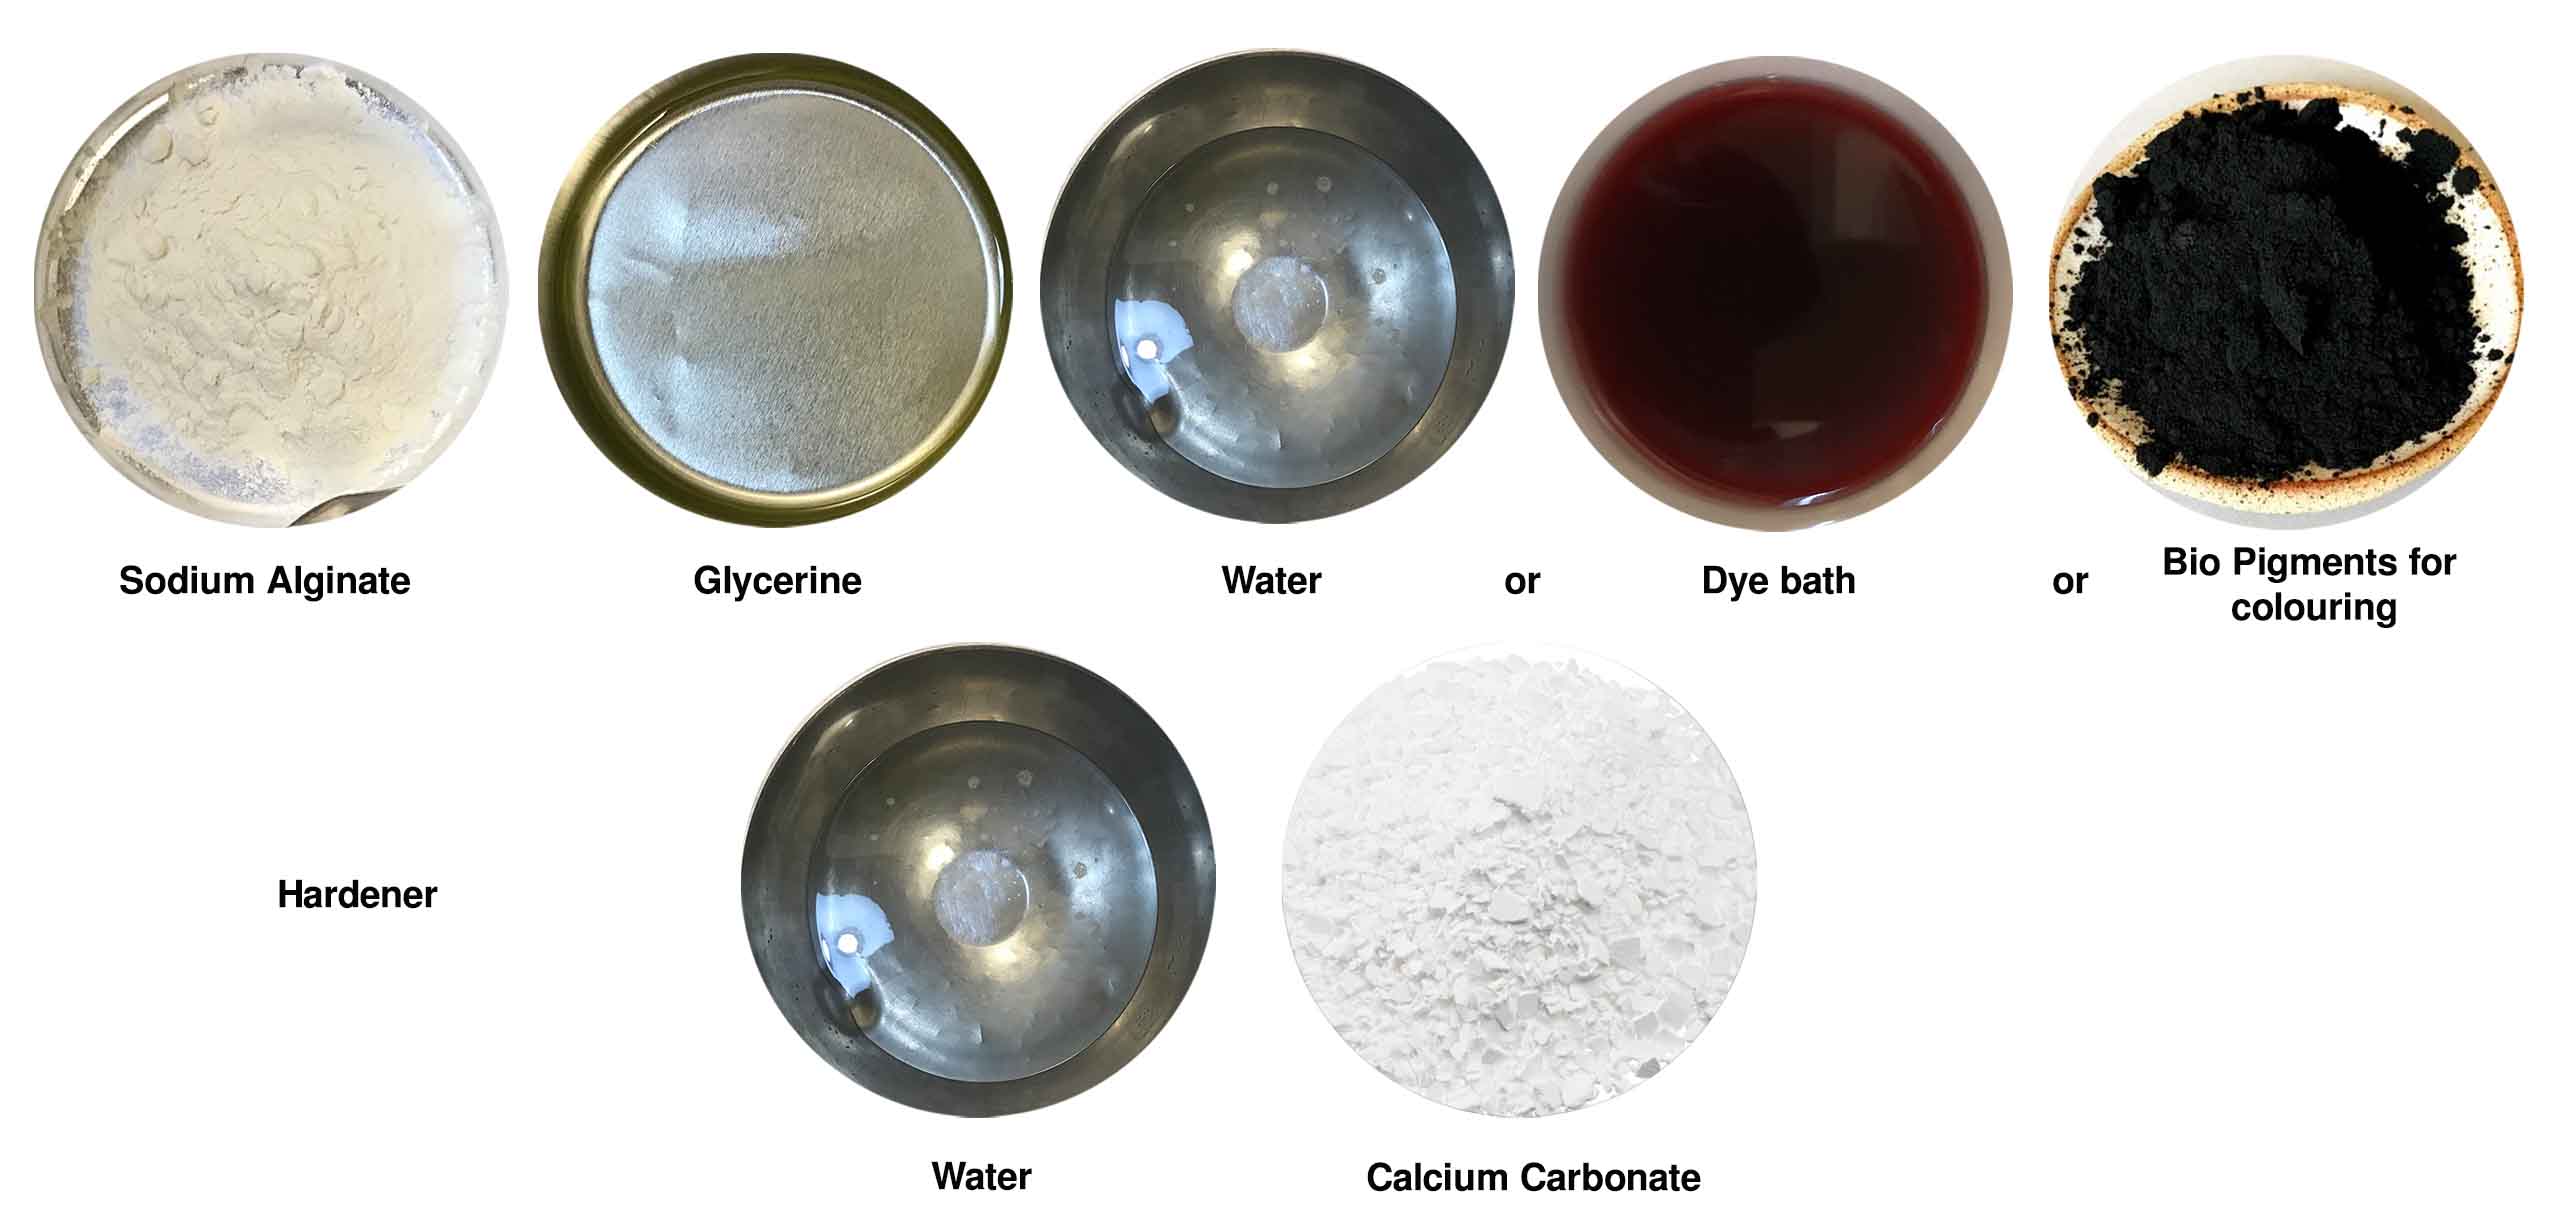
Sodium Alginate Base
Material name       amount g / ml
Sodium alginate     4g
Water               200ml
glycerin            10g - 30g
(depending on rigidity/flexibility)
Calcium chloride    30g
water               300ml

Tools
* Mold that is breathable (wood, fabric, etc.)
* Syringe, spoon, etc.
* Cups
* Mixing tools
Process
* Measure the Sodium alginate and water and mix
* Measure the Calcium chloride and water and mix and put in a spray bottle
* Put the Sodium alginate into your mold and press into the shape you desire
* Spray with CaCl2 solution and wait for it to dry
* After a day, flip and spray the other side, repeat this process until it hardens
Final Sodium Alginate Results Here Please have a look.
Bio yarn
Required Materials
Sodium Alginate Extrusions
Material name       amount g / ml
Sodium alginate     4g
Water               200ml
glycerin            10-30g
(depending on rigidity/flexibility)
Calcium chloride    30g
water               300ml
Another container of water

Tools
Syringe, spoon, etc.
Cups
Mixing tools
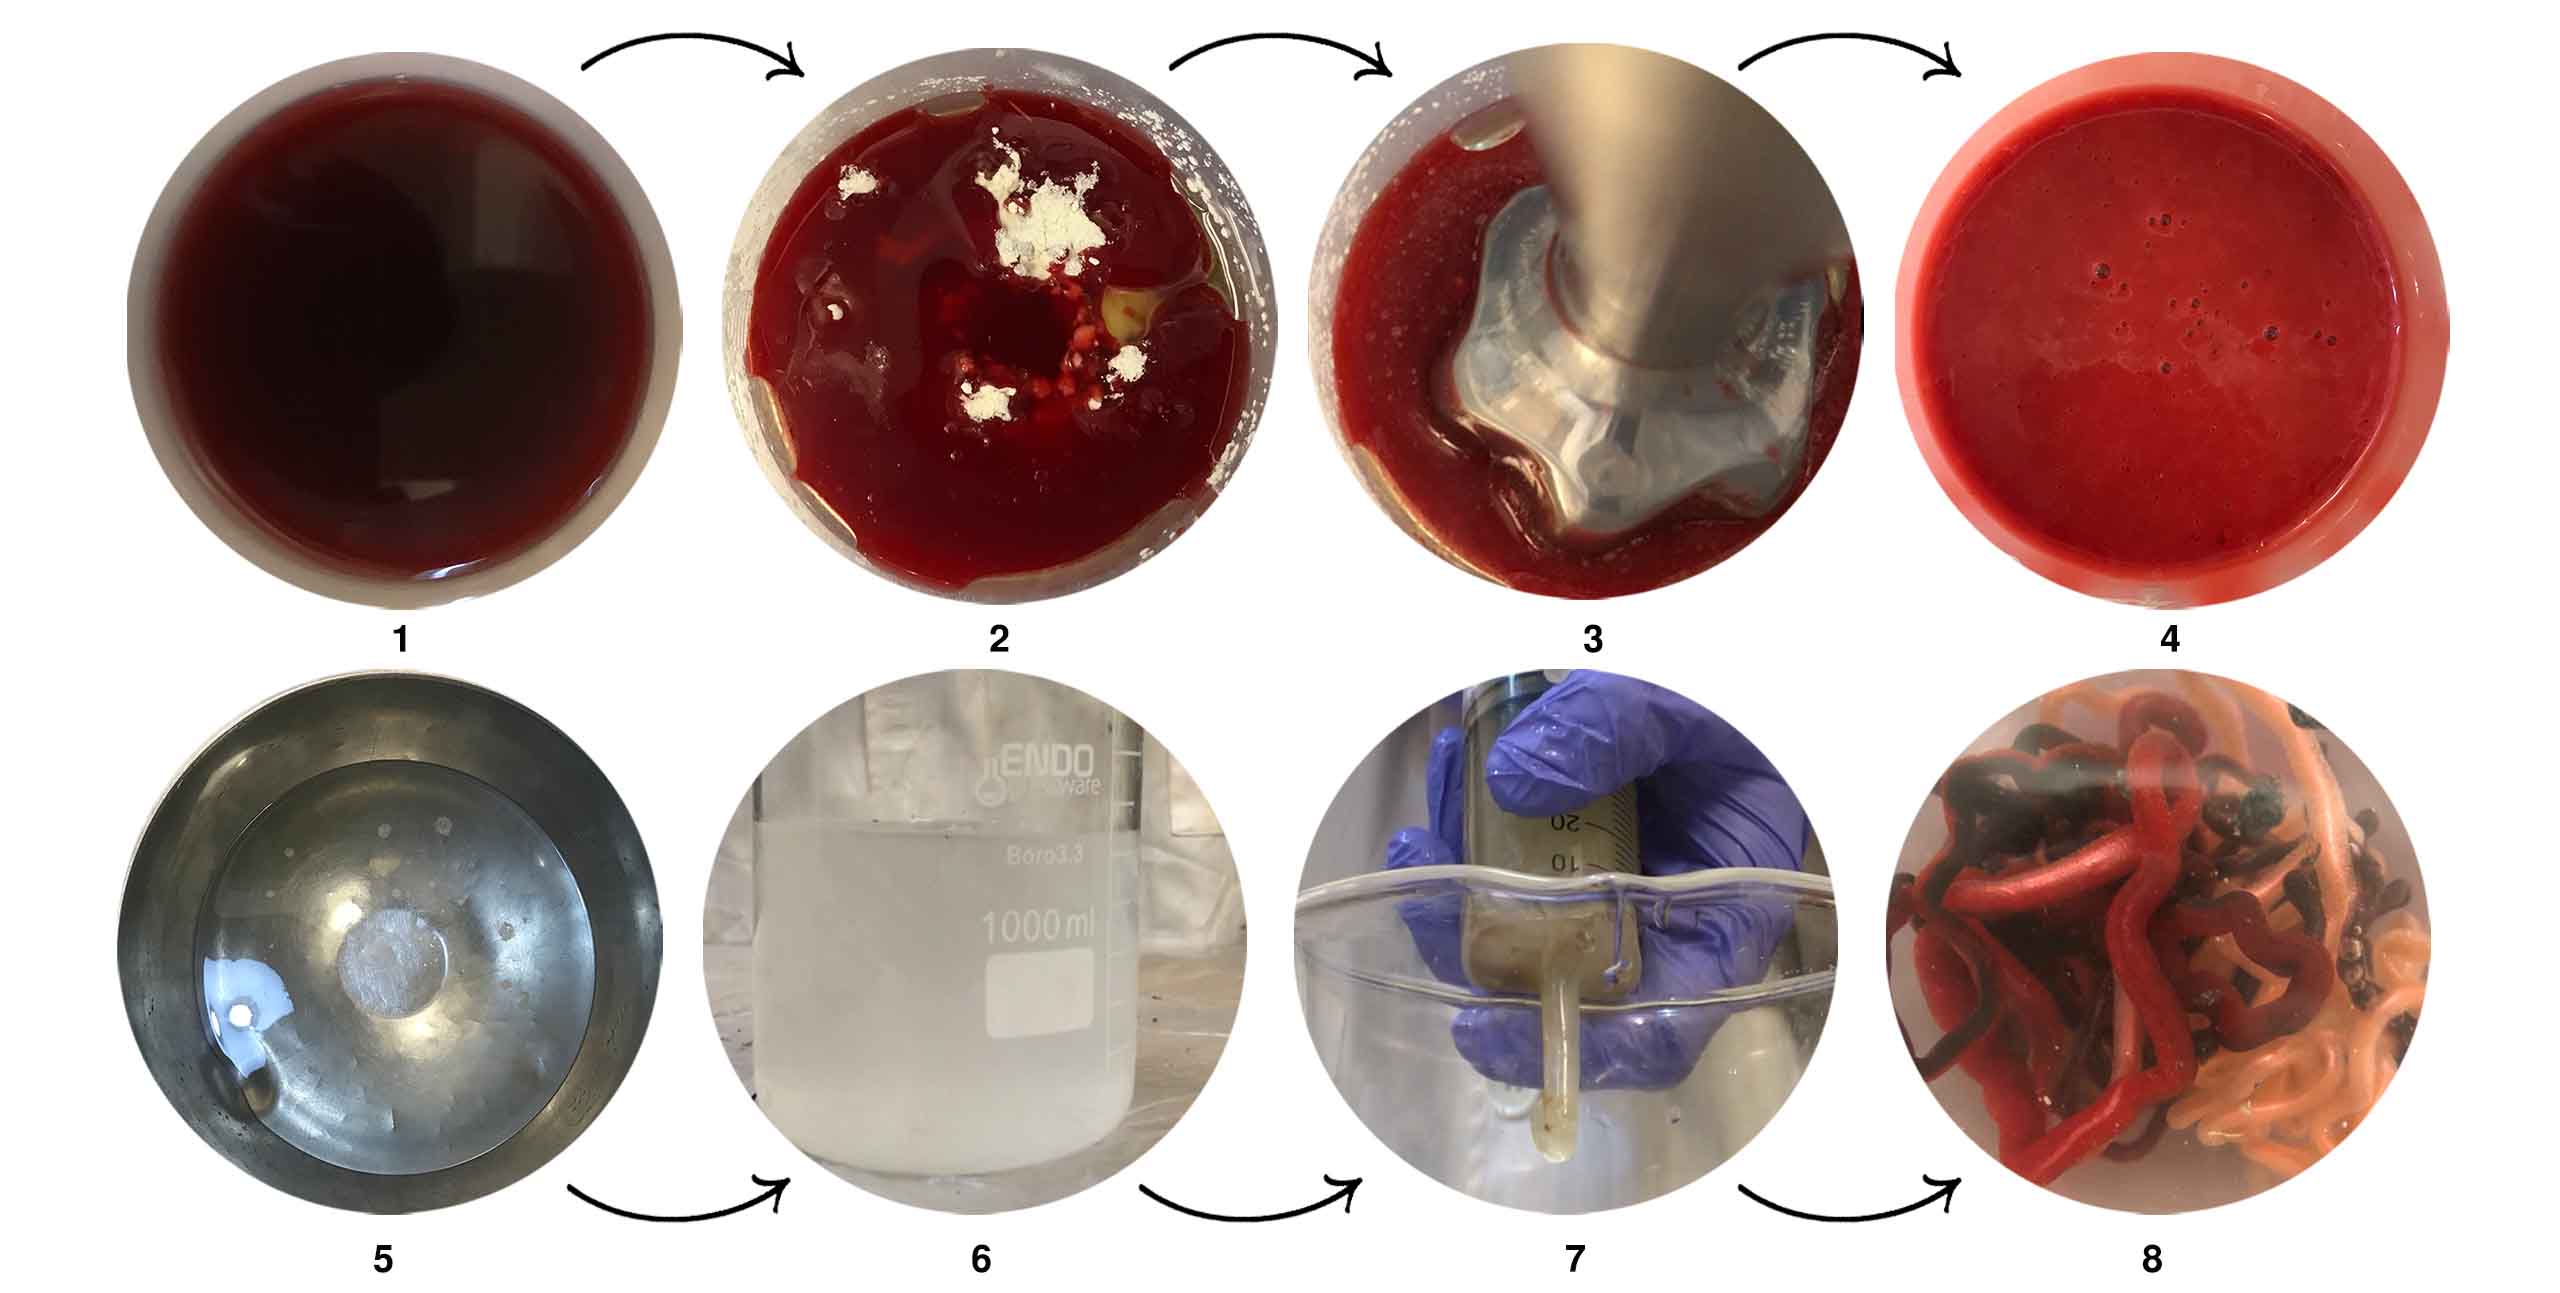
* Measure the Sodium alginate and water and mix
* Measure the Calcium chloride and water and mix
* Pour water into a cup
* Put the Sodium alginate mix into a syringe or another extruding tool
* Press it into the Calcium chloride solution and then move it into the cup of water to rinse
* Dry in a way that it touches the most air as possible, like hanging
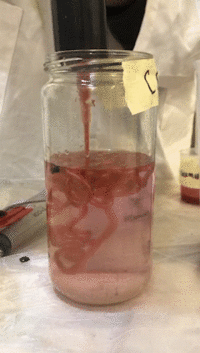
Sodium Alginate Extrusion exploration with differnt materials
Recipes and Final Results collated by Alve

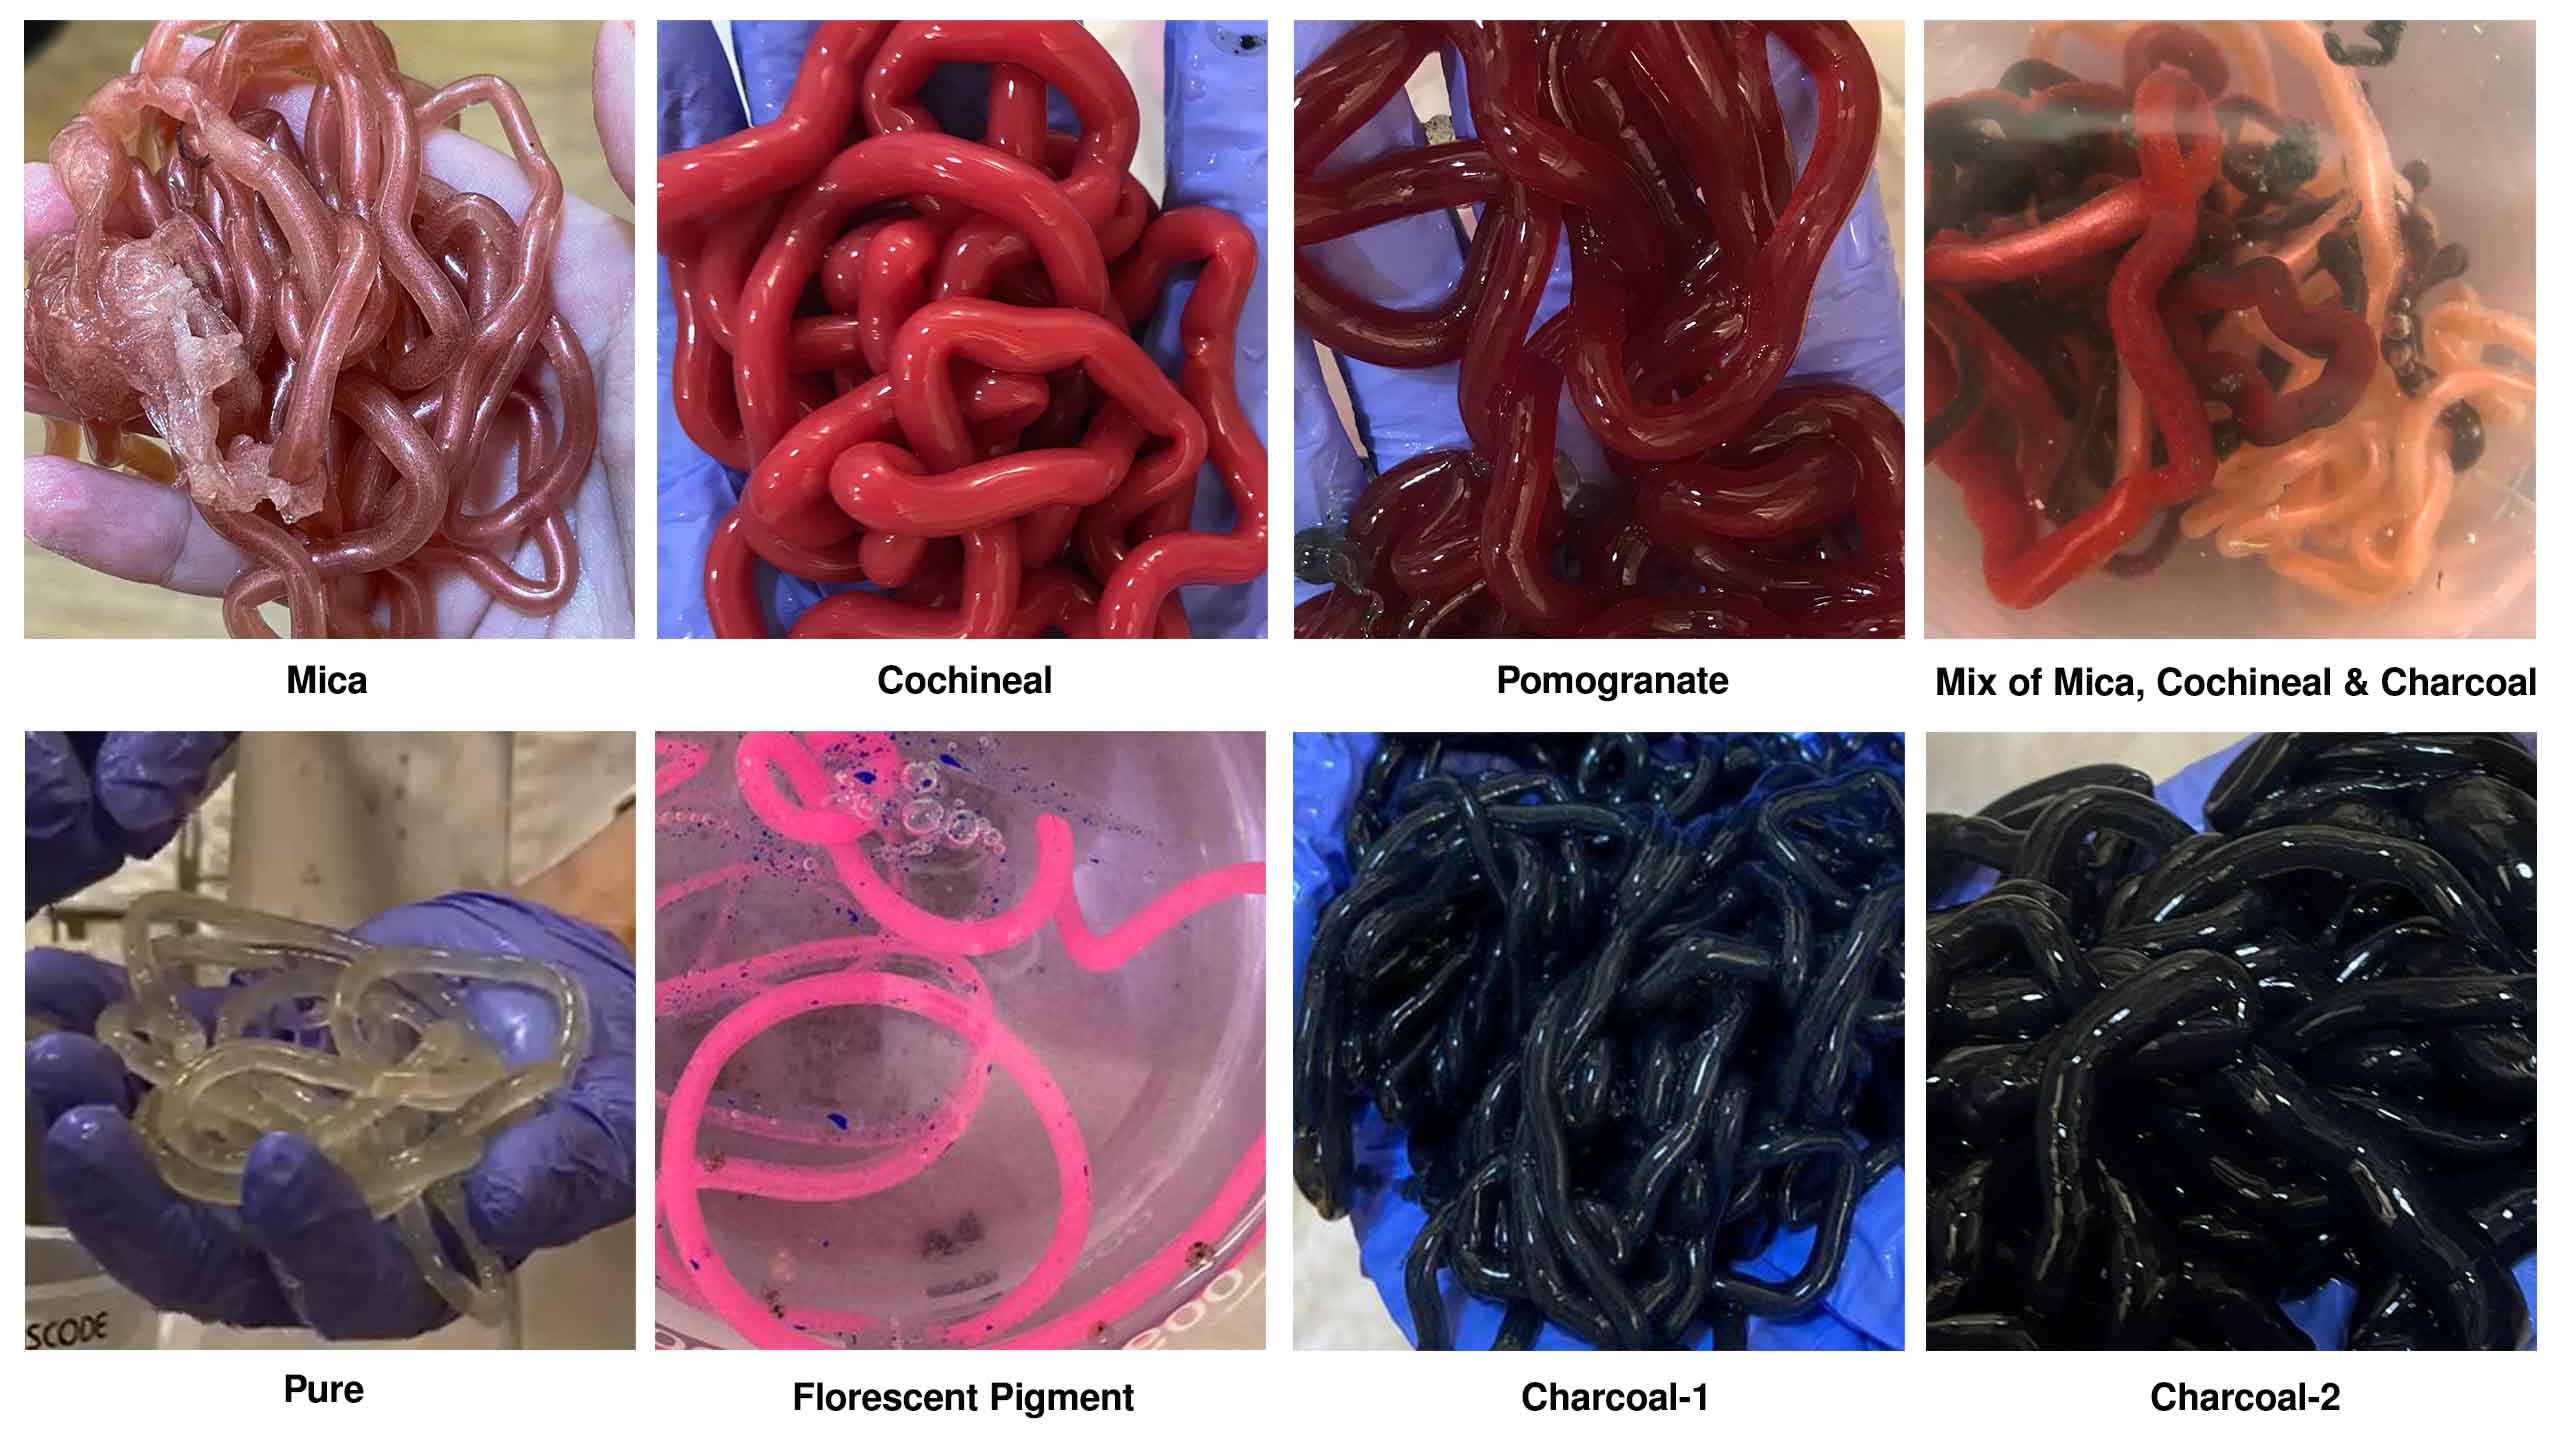
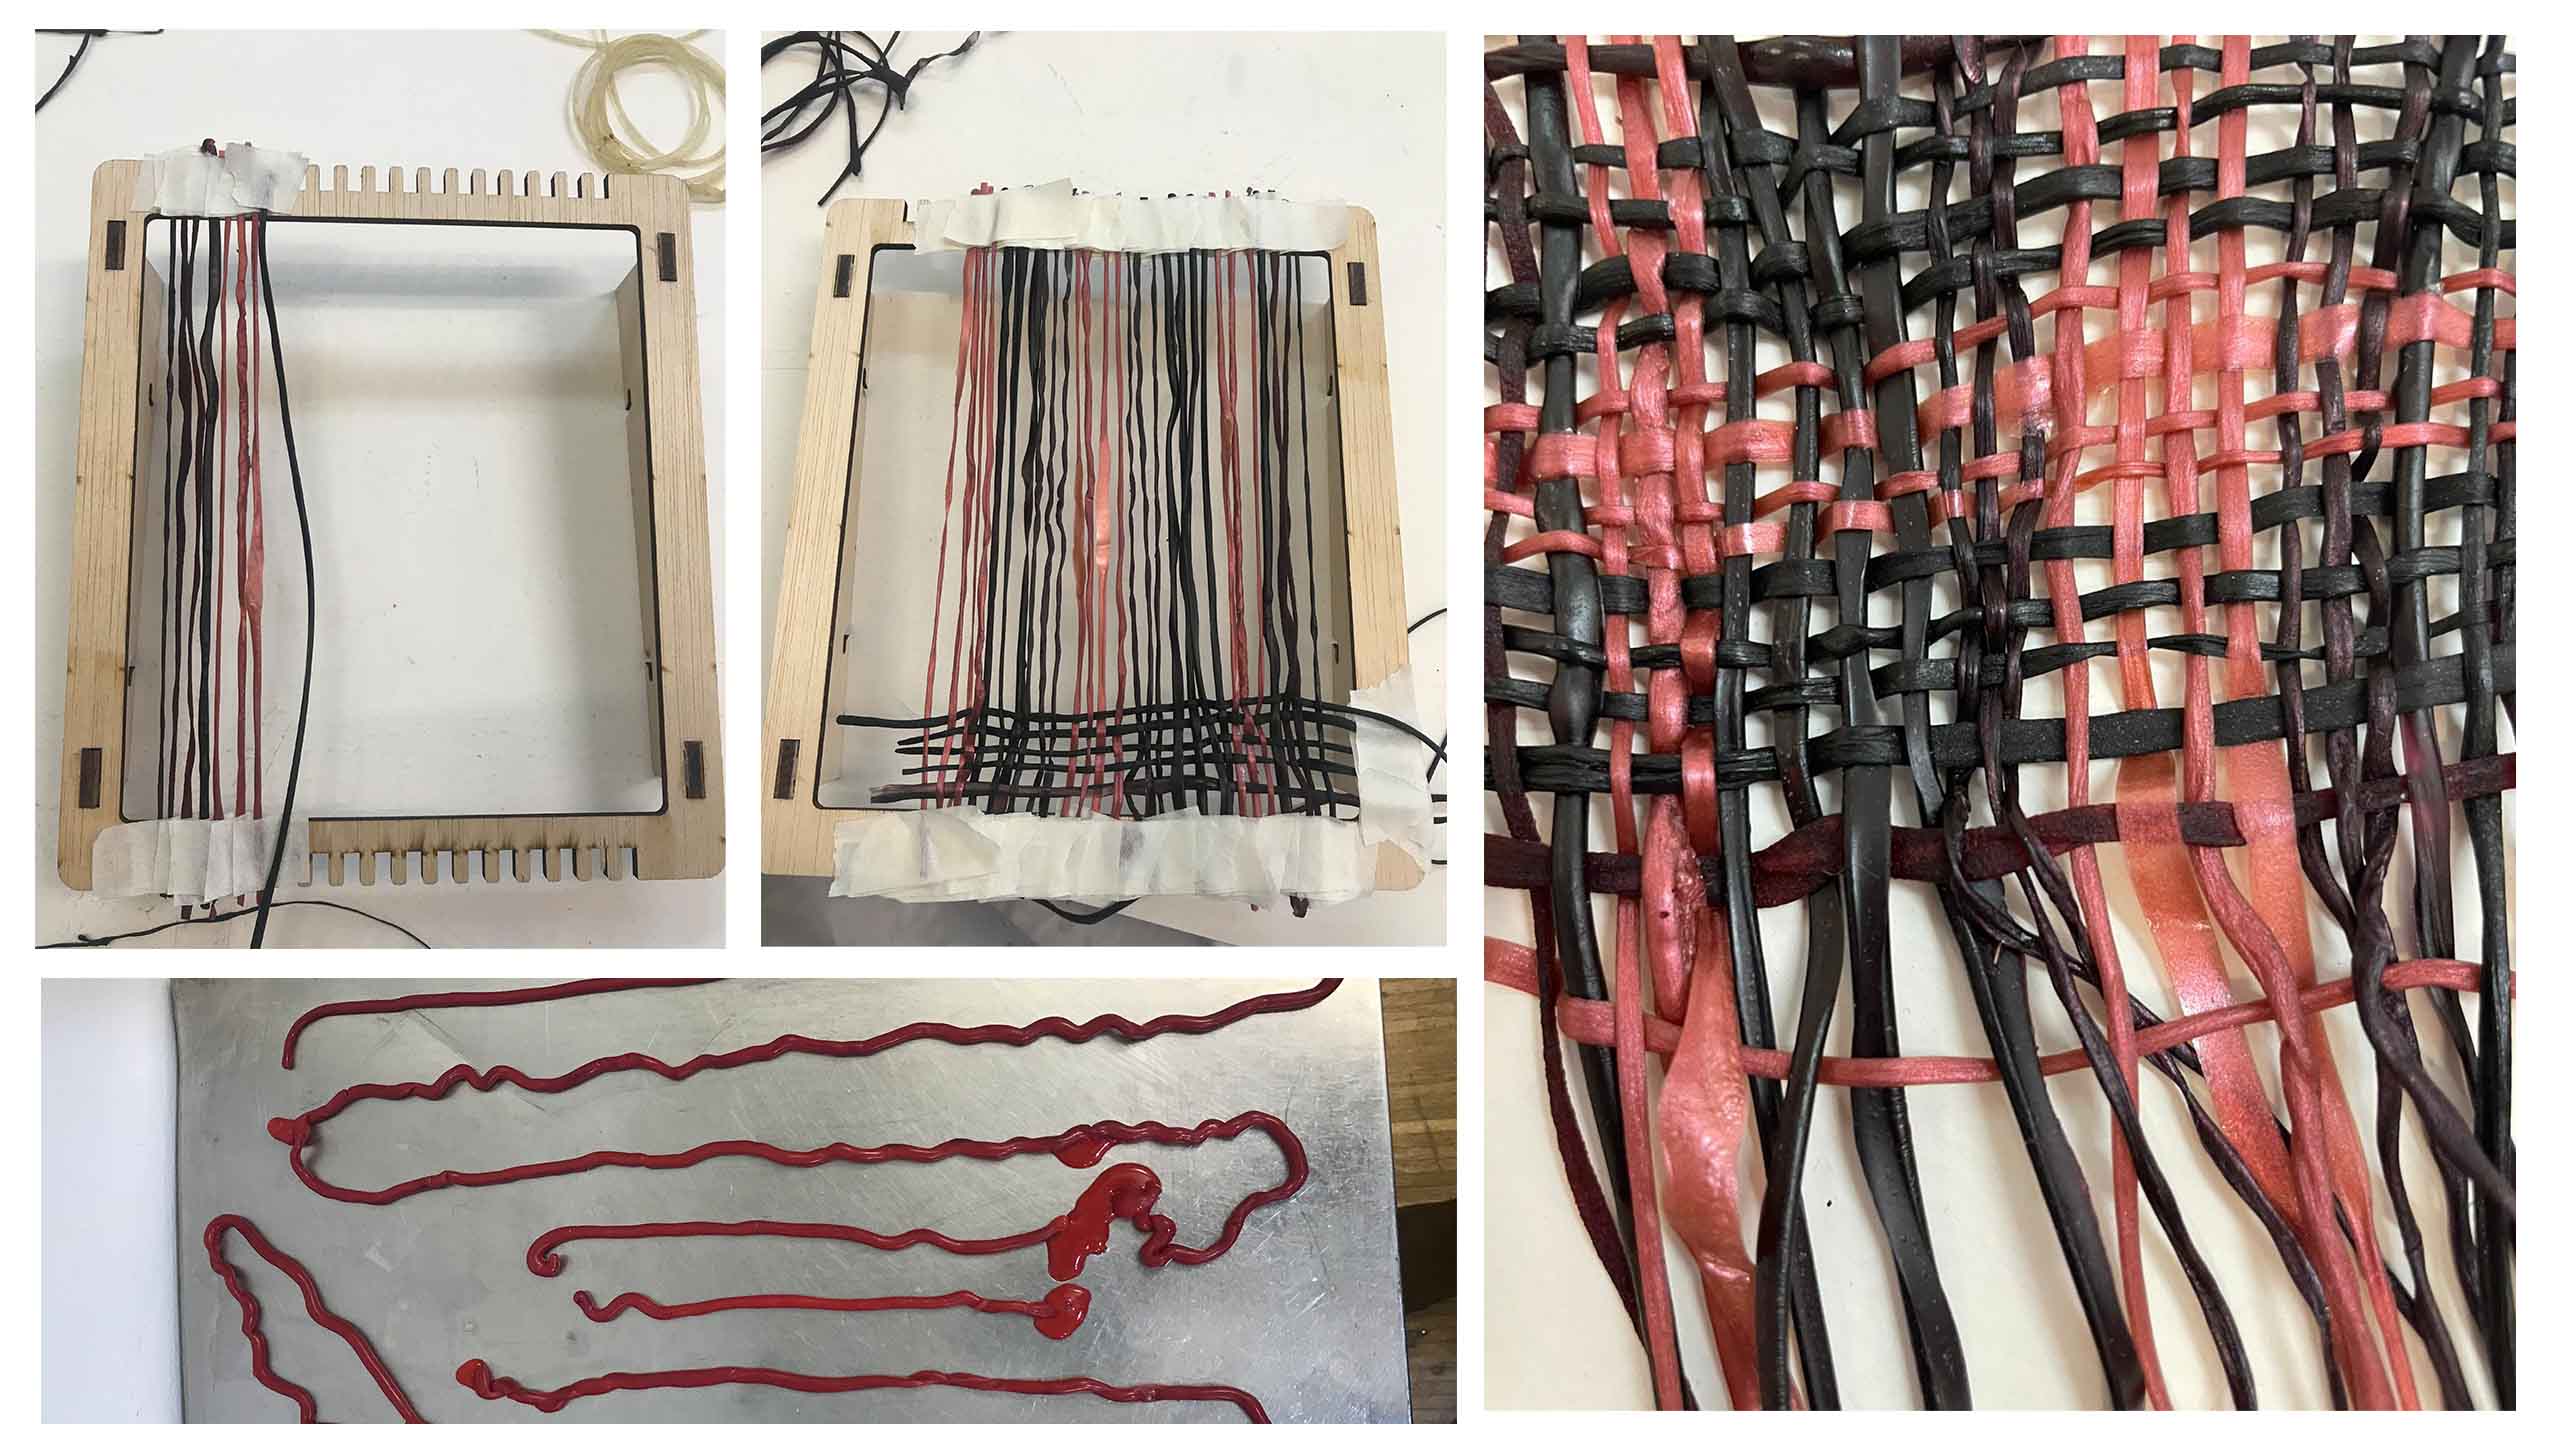
Bio Yarn Woven Results
shrinkage:
The strings will shrink a lot when drying (approximately 2/3 its original size, it is possible to lessen the shrinkage:
Sample D: the oil will reduce the shrinkage substantial
Sample A: By reducing the amount of water in the recipe you will naturally also reduce shrinkage
finishing: Different filler will give different properties to the material
Sample e: Chitosan will give an interesting dry touch to the material
Sample B: is very similar to “normal” paper threads
Sample D: slightly oily finishing
strengh: No proper strengh tests was conducted however at first glance it seemed that Sample E ( because of Chitosan) and sample A twisted with 6 ply was the strongest strings
Sample F: was also strong due to its stretchiness however due to thickness of material it was only extruded with the thicker syringe and therefore hard to compare.
Bio Resin
Required Materials
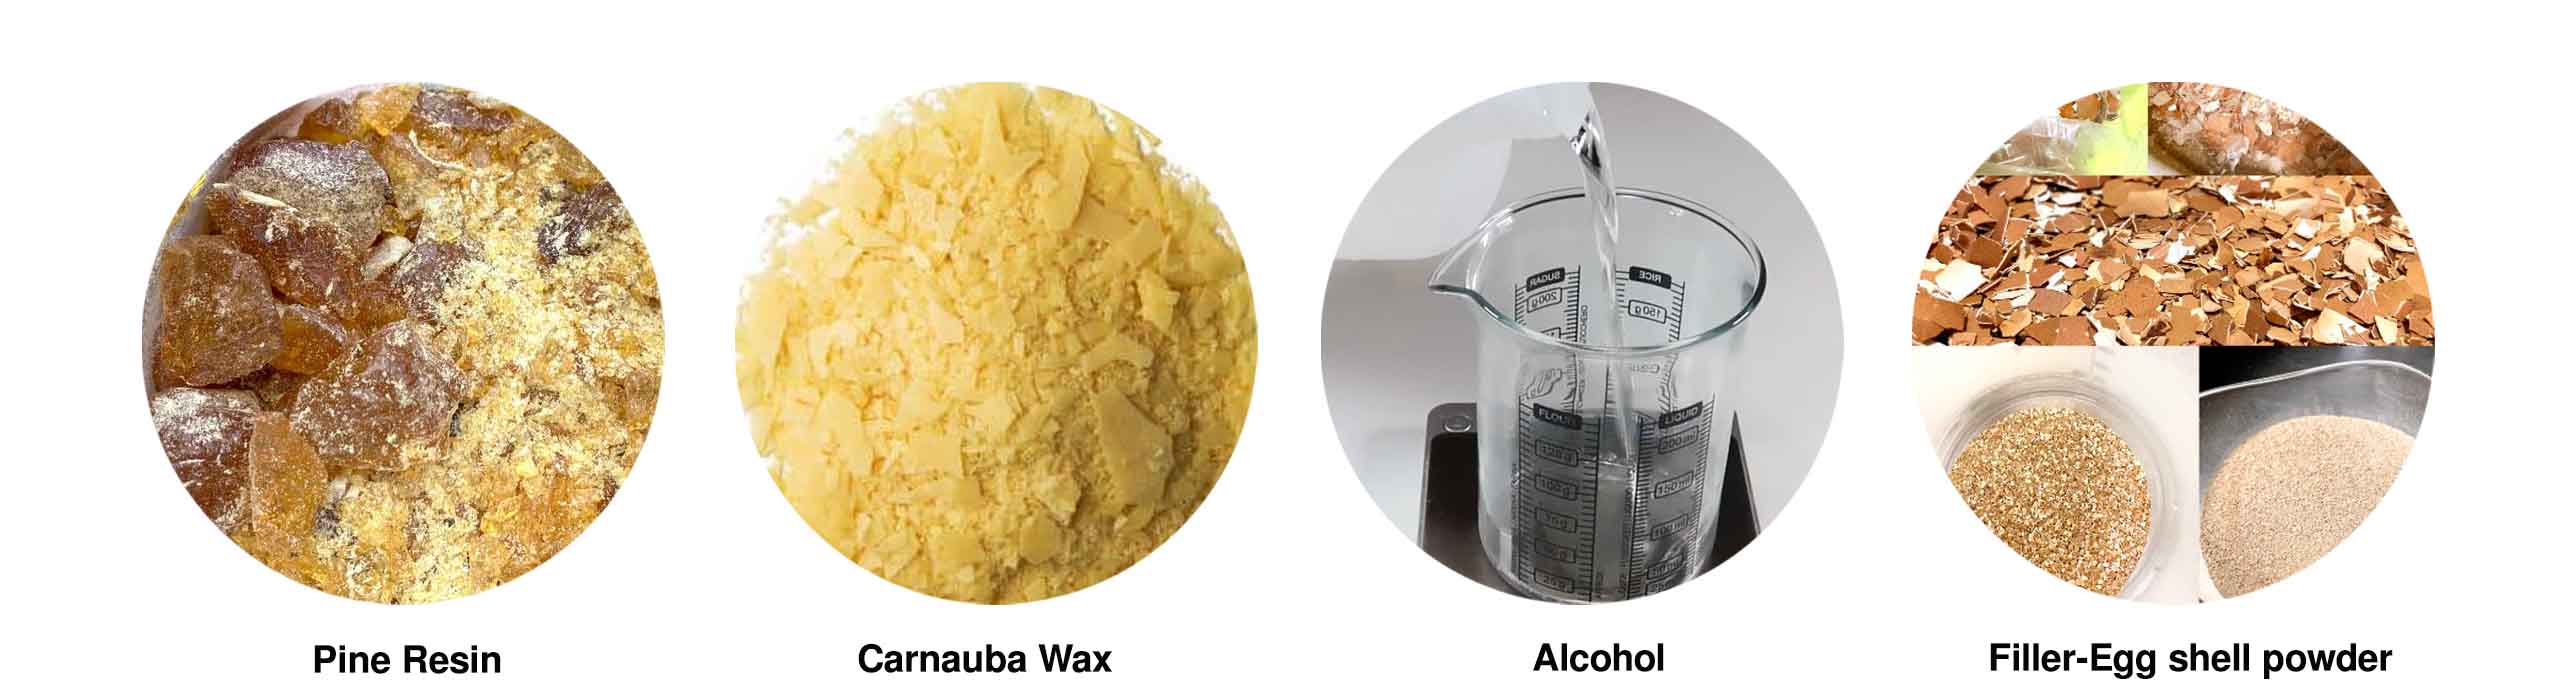
Bio Resin with Egg shell powder
Material name       amount g / ml
Pine resin          45g
Carnauba wax        5g
Alcochol            20ml
40g Filler (Eggs shells)  40g

Tools
 Digital scale
 Electric stove
 Pot/Vessel
 Wood mold
 Spoon
 Silicon spatulas
 Scale
 Backing paper
 Towel to pick up hot pots
 Lab coat
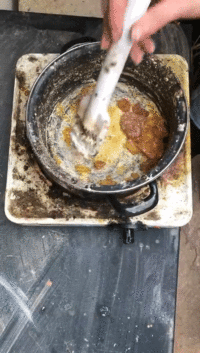
1- Prepepare the materials and ingredients
2- Place baking paper on the buttom part of the mold. Press with the top part to fit the shape. Reserve a piece of baking paper for the top.
3- Melt the pine resin.
4- When the pine resie are melted, mix with the Carnauba wax. Melt them.
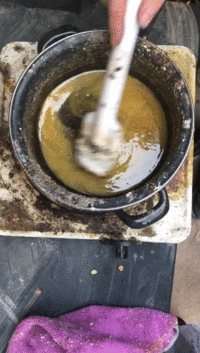
5- Add the alchocol and mix. Do not breathe the vapours.
6- Add the filler (waste material) and mixed.
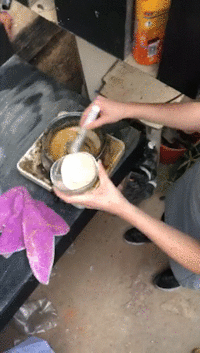
7- Take the mix and pour **quickly** into the molf using the spatula.
8- Cover the top with the baking paper.
9- Press with your hands to distribute the mix. Then with the top mold. Compact down.
10- Let the mix cold down. Aprox. 15'.
11- Remove the baking paper and the mold.
Results

Final Sample collection Here Please have a look.
Thank you! See you in another week... la la laaaaaaaaaaaa