06 Fabrication Explorations
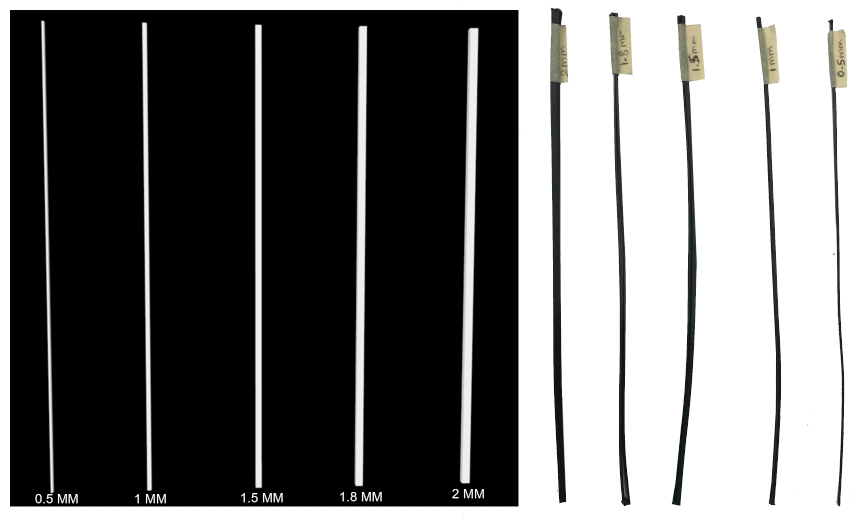
Line Thickness test
| Machine | Filament | Layer Height | Initial Layer Height | Line width | Infill |
|---|---|---|---|---|---|
| Anycubic Chiron | Flex ( 2.85 mm ) | 0.3mm | 0.3mm | 1.00mm | - |
| Wall Thickness | Wall line Count | Speed | Retraction Time | Printing Time | Textile |
| 0.8mm | 1 | 50mm/sec | - | 16.62 | - |
Comments / Notes To understand the Line thickness, I have just drawn the line with different thickness and printed it to explore the thickness in the samples.
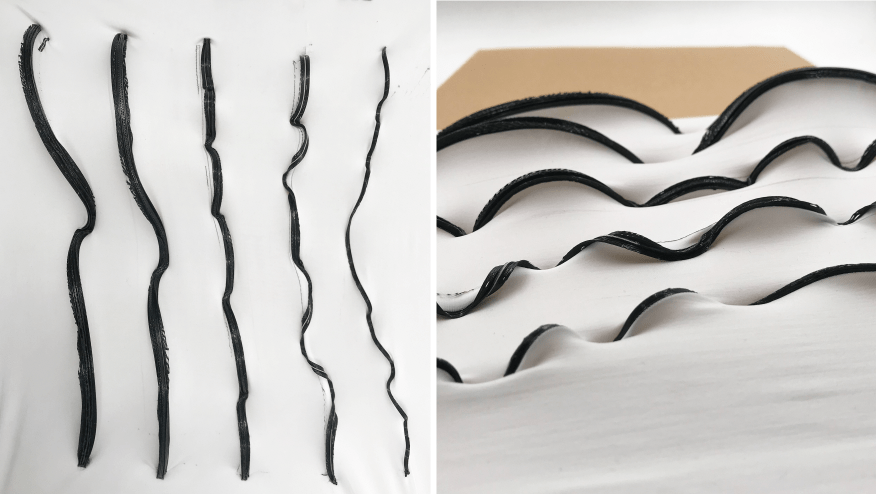
Line Thickness test on textile
| Machine | Filament | Layer Height | Initial Layer Height | Line width | Infill |
|---|---|---|---|---|---|
| Anycubic Chiron | Flex ( 2.85 mm ) | 0.2mm | 0.3mm | 1.00mm | - |
| Wall Thickness | Wall line Count | Speed | Retraction Time | Printing Time | Textile |
| 2mm | 1 | 50mm/sec | 3 | 10.18 | Lycra-White |
Comments / Notes Through the lines explorations I was trying to identify the how much line thickness required to mould the elastic textile surface as i could see Gabe fields have used thicker lines that gives a good 3d forms. I have used line thickness from 0.5 to 2mm to find the elastic textile contraction.
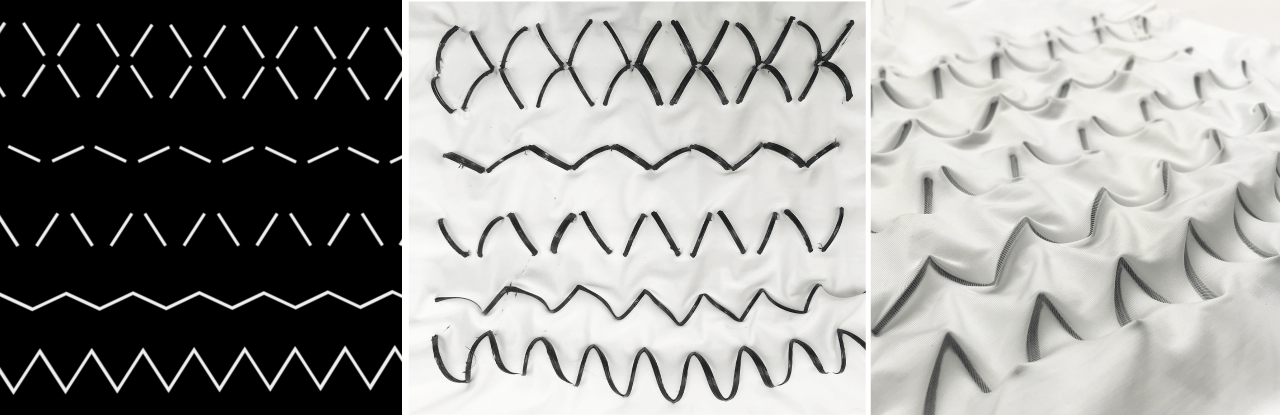
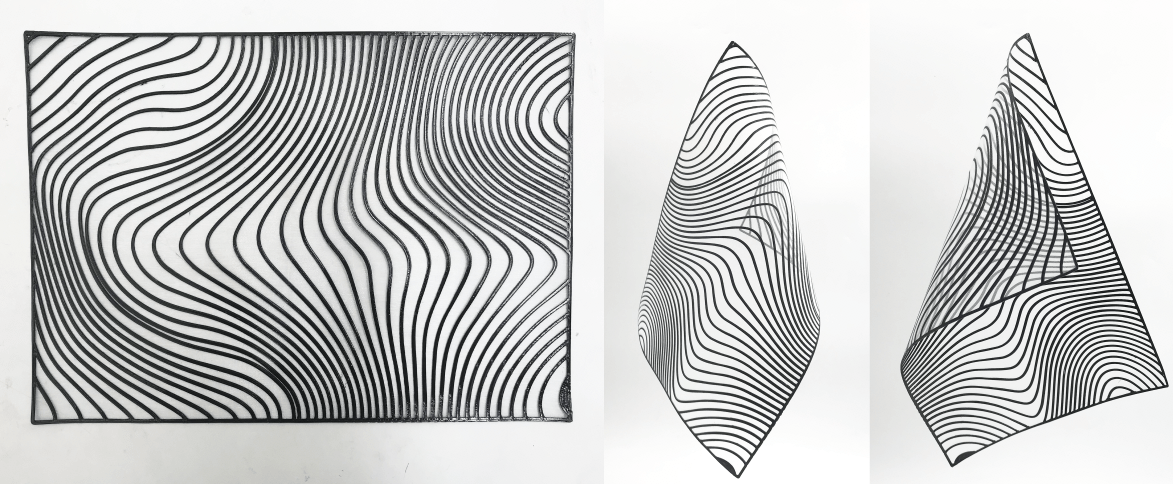
Line Variations Test
| Machine | Filament | Layer Height | Initial Layer Height | Line width | Infill |
|---|---|---|---|---|---|
| Anycubic Chiron | Flex ( 2.85 mm ) | 0.3mm | 0.3mm | 1.00mm | 30 |
| Wall Thickness | Wall line Count | Speed | Retraction Time | Printing Time | Textile |
| 2mm | 1 | 50mm/sec | 3 | 10:18 | Lycra-White |
Comments / Notes I explored variation lines to understand what happens when elastic fabric contracts in a different direction. In the same manner as origami folds, the geometric lines created a mountain and valley effect. This made me think it would be very interesting to use geometric lines to create patterns.
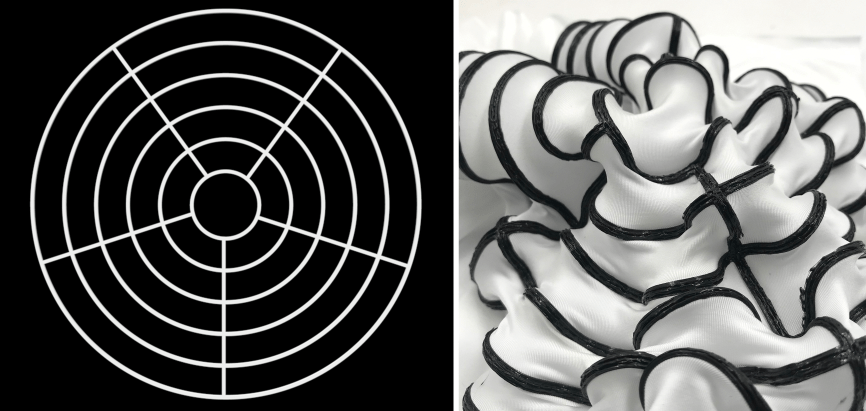
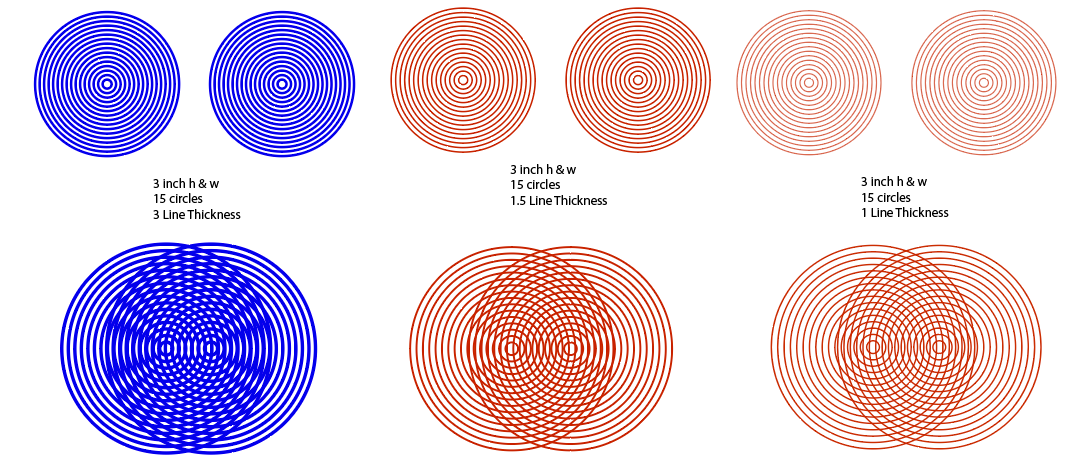
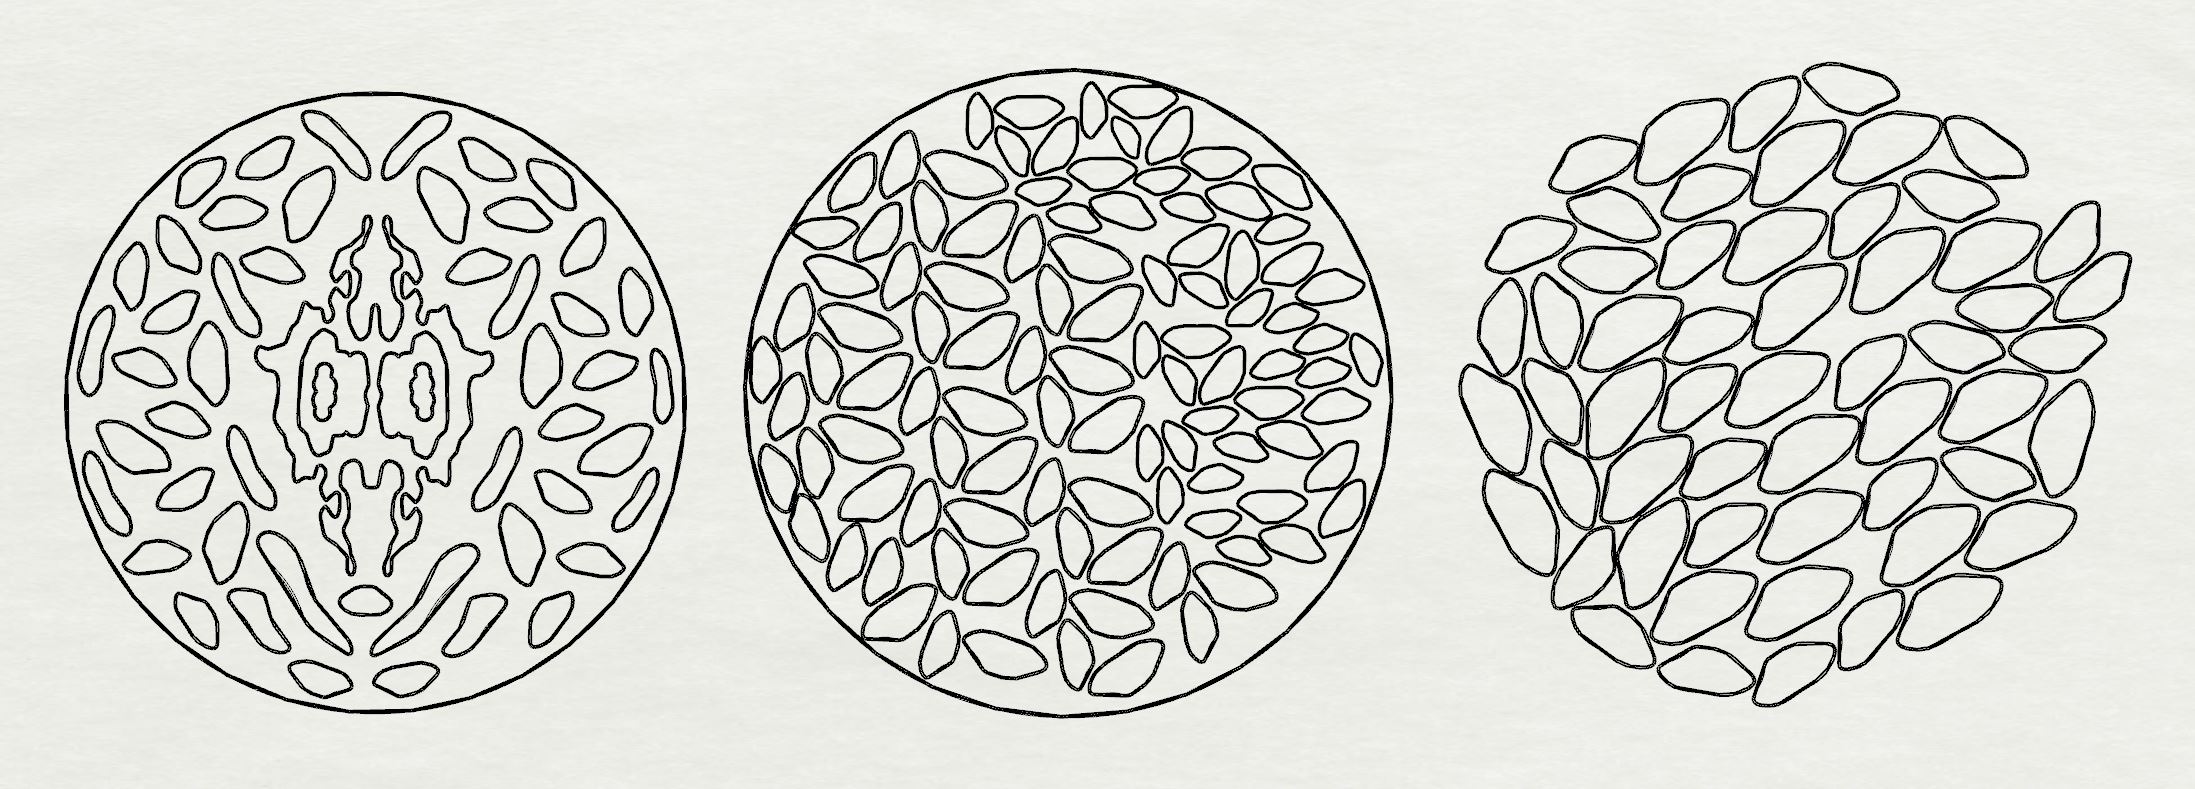
Concentric circle and lines test
| Machine | Filament | Layer Height | Initial Layer Height | Line width | Infill |
|---|---|---|---|---|---|
| Anycubic Chiron | Flex ( 2.85 mm ) | 0.3mm | 0.3mm | 1.00mm | - |
| Wall Thickness | Wall line Count | Speed | Retraction Time | Printing Time | Textile |
| 1 mm | 1 | 50mm/sec | 4 | 20:11 | Lycra-White |
Comments / Notes A circular test is used to identify the curves that a circle creates with the lines in order to lift the stretch. In this example, the lines passing through the circle of points lift and highlight the curves more than just the curves themselves.
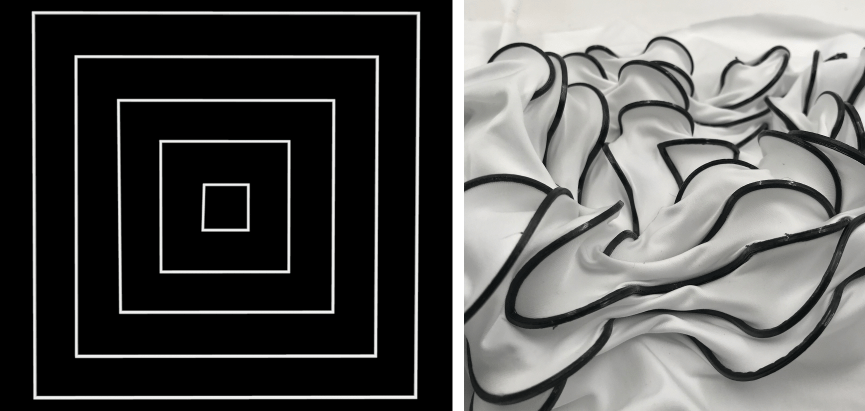
Concentric Squares
| Machine | Filament | Layer Height | Initial Layer Height | Line width | Infill |
|---|---|---|---|---|---|
| Anycubic Chiron | Flex ( 2.85 mm ) | 0.3mm | 0.3mm | 1.00mm | - |
| Wall Thickness | Wall line Count | Speed | Retraction Time | Printing Time | Textile |
| 1 mm | 1 | 50mm/sec | 4 | 19:43 | Lycra-White |
Comments / Notes From the straight line It was clear to achieve the curves so I wanted to try the concentric squares like circles and see how it reacts. Interestingly it creates more curves than circles.
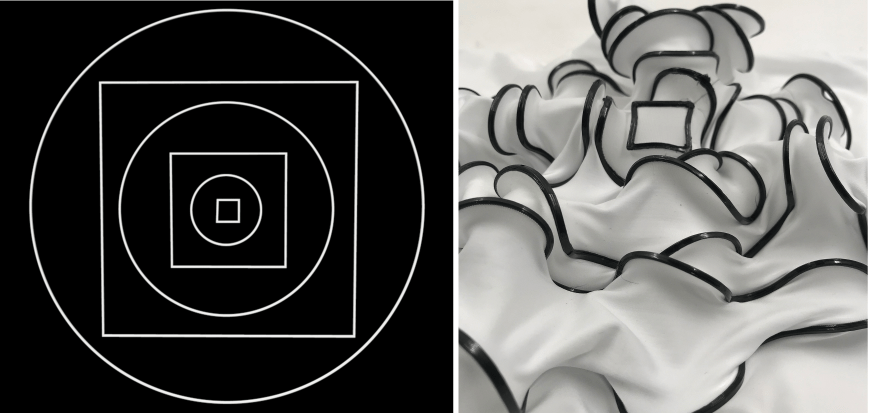
Concentric Squares & circles 
| Machine | Filament | Layer Height | Initial Layer Height | Line width | Infill |
|---|---|---|---|---|---|
| Anycubic Chiron | Flex ( 2.85 mm ) | 0.3mm | 0.3mm | 1.00mm | - |
| Wall Thickness | Wall line Count | Speed | Retraction Time | Printing Time | Textile |
| 1 mm | 1 | 50mm/sec | 4 | 14:35 | Lycra-White |
Comments / Notes Hmm... why not combine squares and circles. It has quite interesting and prominent curves all over.
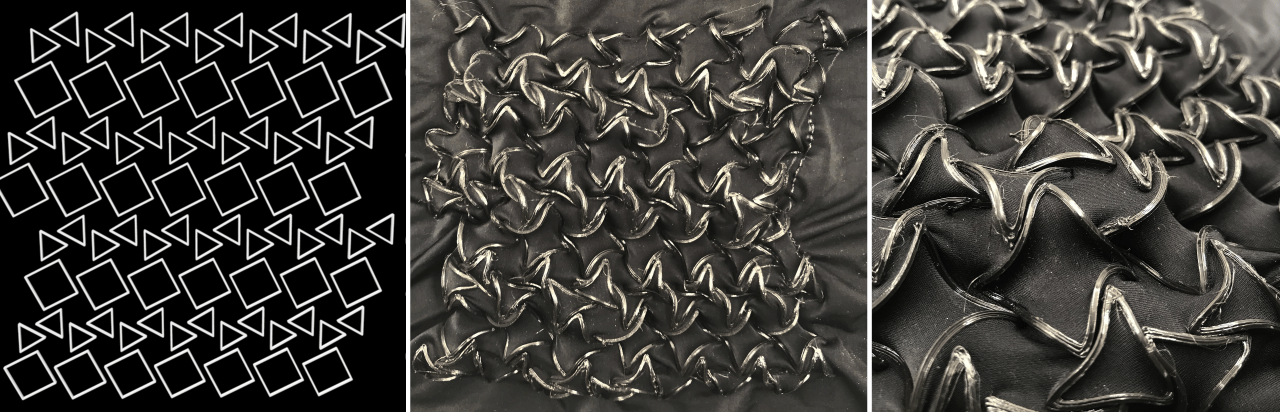
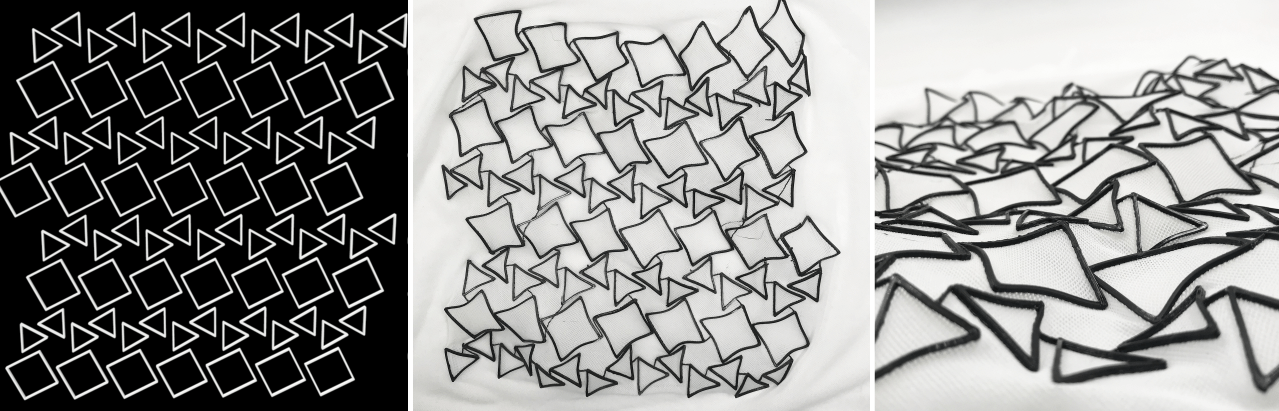
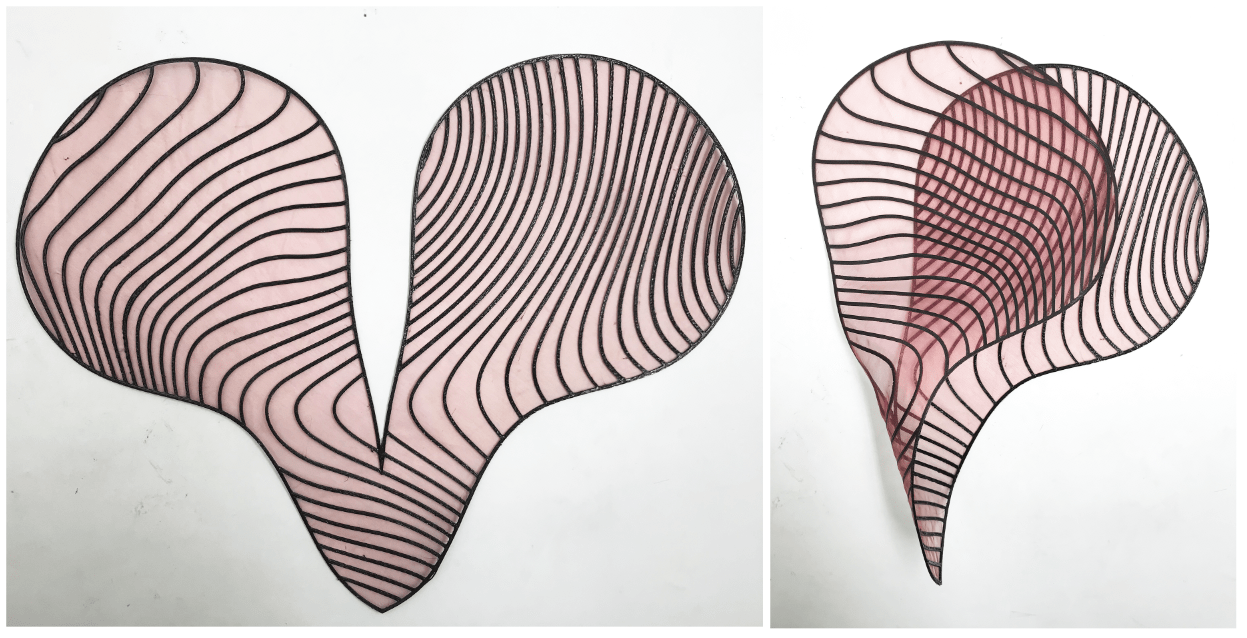
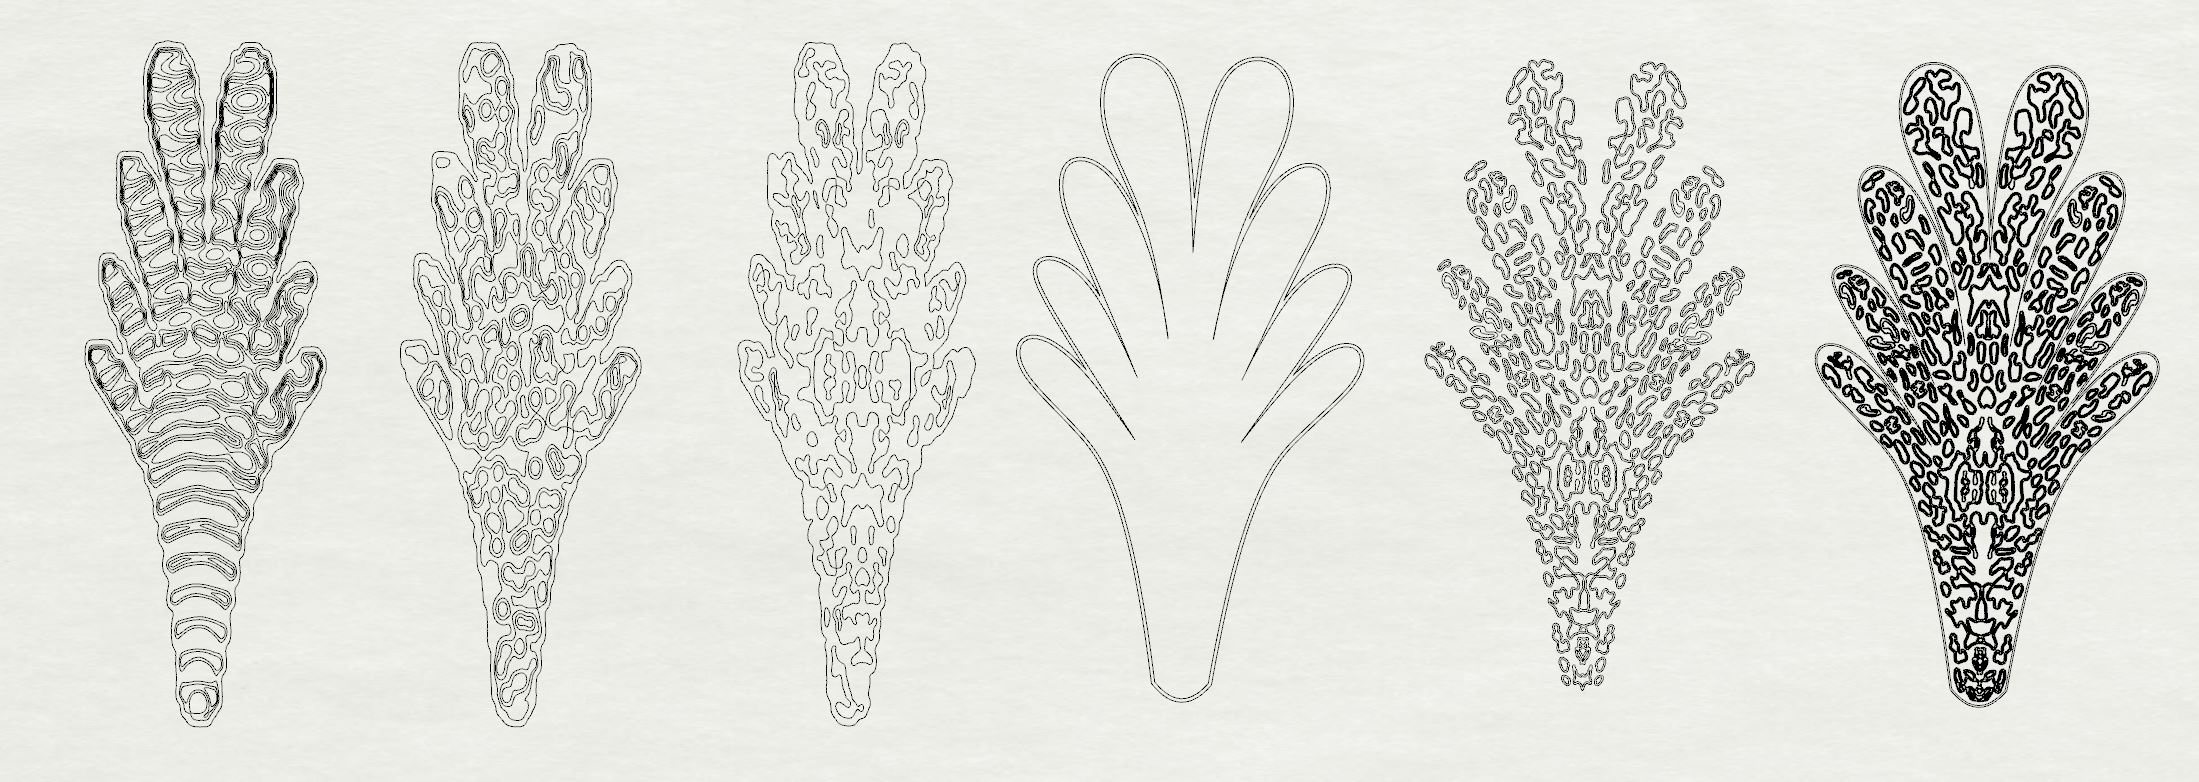
Pattern-1
| Machine | Filament | Layer Height | Initial Layer Height | Line width | Infill |
|---|---|---|---|---|---|
| Anycubic Chiron | Flex ( 2.85 mm ) | 0.3mm | 0.3mm | 1.00mm | 0 |
| Wall Thickness | Wall line Count | Speed | Retraction Time | Printing Time | Textile |
| 1.5 mm | 1 | 50mm/sec | 3 | 16:65 | Lycra-Black |
| Machine | Filament | Layer Height | Initial Layer Height | Line width | Infill |
|---|---|---|---|---|---|
| Anycubic Chiron | Flex ( 2.85 mm ) | 0.3mm | 0.3mm | 1.00mm | 0 |
| Wall Thickness | Wall line Count | Speed | Retraction Time | Printing Time | Textile |
| 1.5 mm | 1 | 50mm/sec | 3 | 16:65 | Power Mesh-White |
Comments / Notes In pattern 1, I have tried with 2 different fabrics with the same pattern, as you can see there is a vast difference due to high stretchability in lycra it gives good contraction patterns compared to the mesh. Mesh fabric is with less stretchability and so it doesn't shrink back the elasticity.
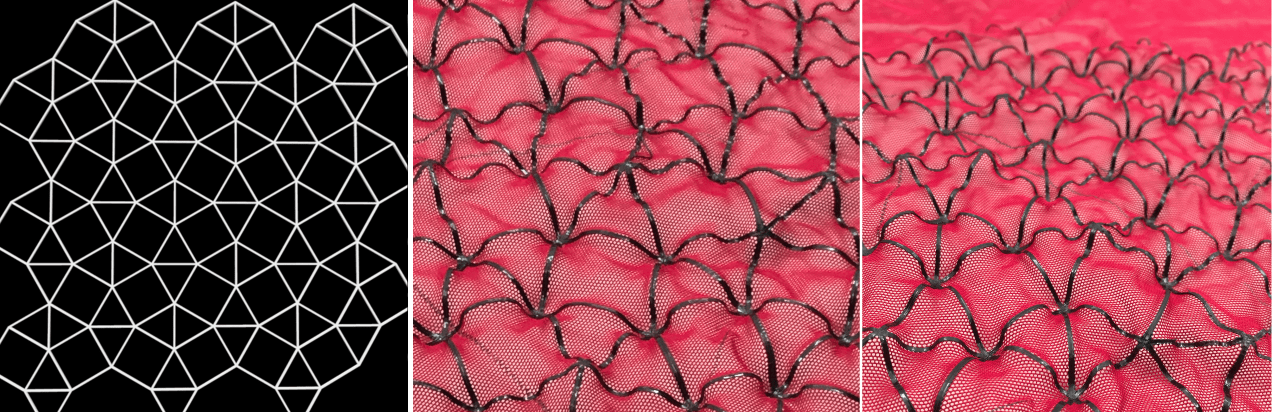
Pattern-2
| Machine | Filament | Layer Height | Initial Layer Height | Line width | Infill |
|---|---|---|---|---|---|
| Anycubic Chiron | Flex ( 2.85 mm ) | 0.3mm | 0.3mm | 1.00mm | 0 |
| Wall Thickness | Wall line Count | Speed | Retraction Time | Printing Time | Textile |
| 1.5 mm | 1 | 50mm/sec | 3 | 07:60 | Mesh-Red |
| Machine | Filament | Layer Height | Initial Layer Height | Line width | Infill |
|---|---|---|---|---|---|
| Creality | TPU ( 1.75 mm ) | 0.3mm | 0.3mm | 1.00mm | 0 |
| Wall Thickness | Wall line Count | Speed | Retraction Time | Printing Time | Textile |
| 1.5 mm | 1 | 50mm/sec | 3 | 07:60 | Lycra-Black |
Comments / Notes In pattern 2, I have tried with different mesh and lycra fabric with the same pattern.The mesh fabric holds the shape less as compared to the lycra as it have high stretchability properties.
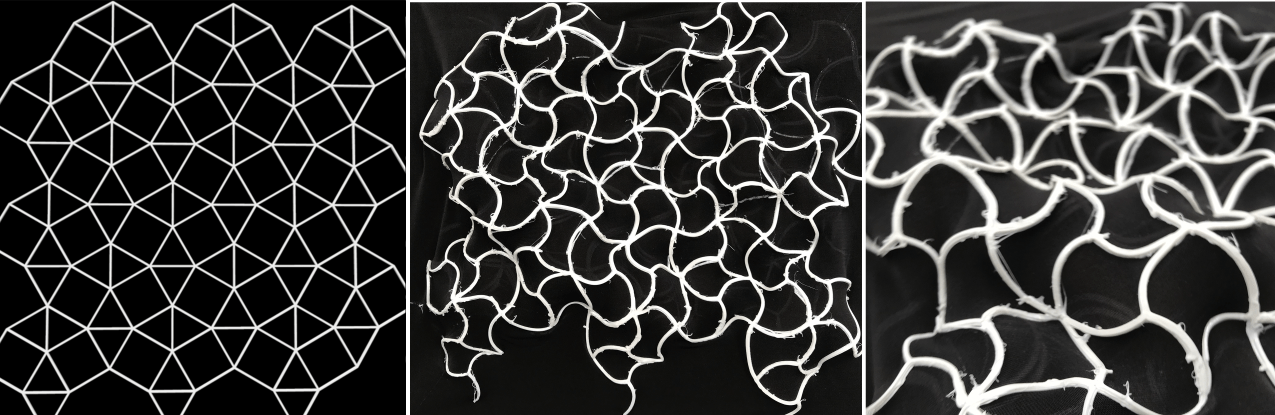
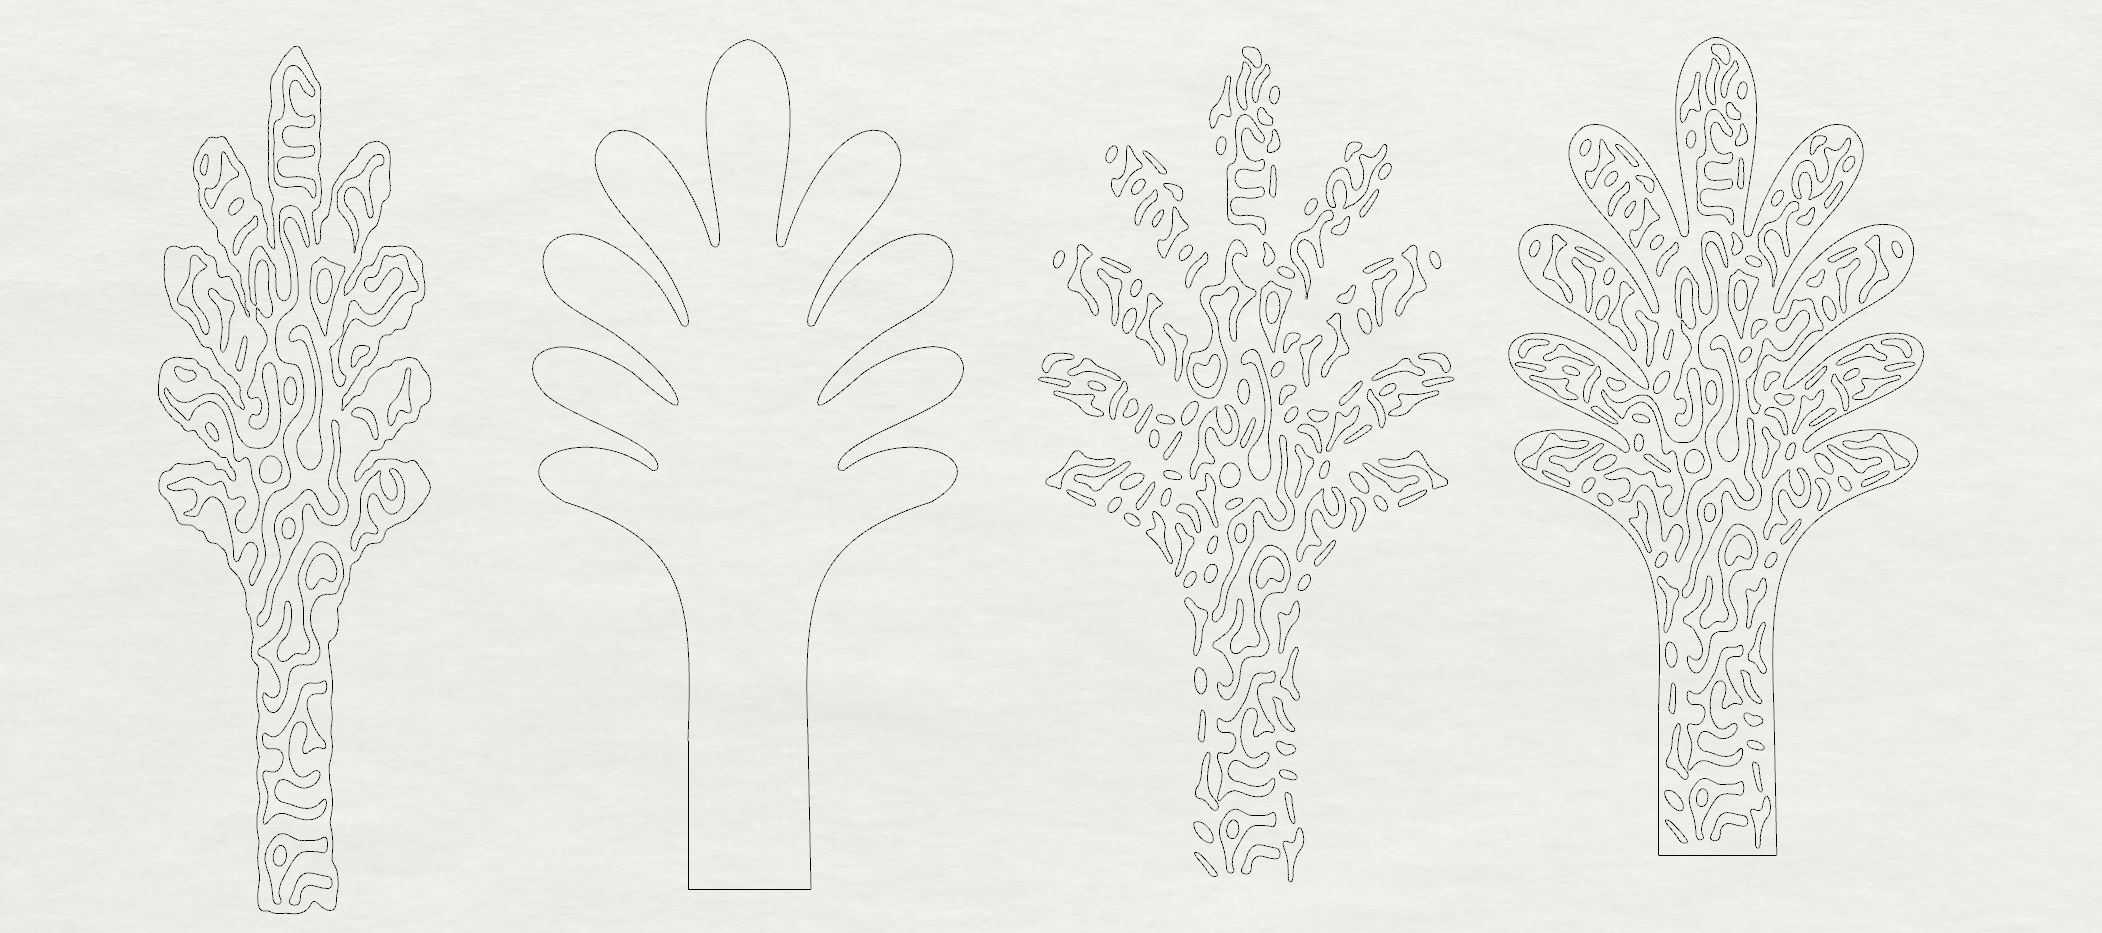
Pattern-3
| Machine | Filament | Layer Height | Initial Layer Height | Line width | Infill |
|---|---|---|---|---|---|
| Creality | TPU ( 1.75 mm ) | 0.3mm | 0.3mm | 1.00mm | 0 |
| Wall Thickness | Wall line Count | Speed | Retraction Time | Printing Time | Textile |
| 1.5 mm | 1 | 50mm/sec | 3 | 15:60 | Lycra-Black |
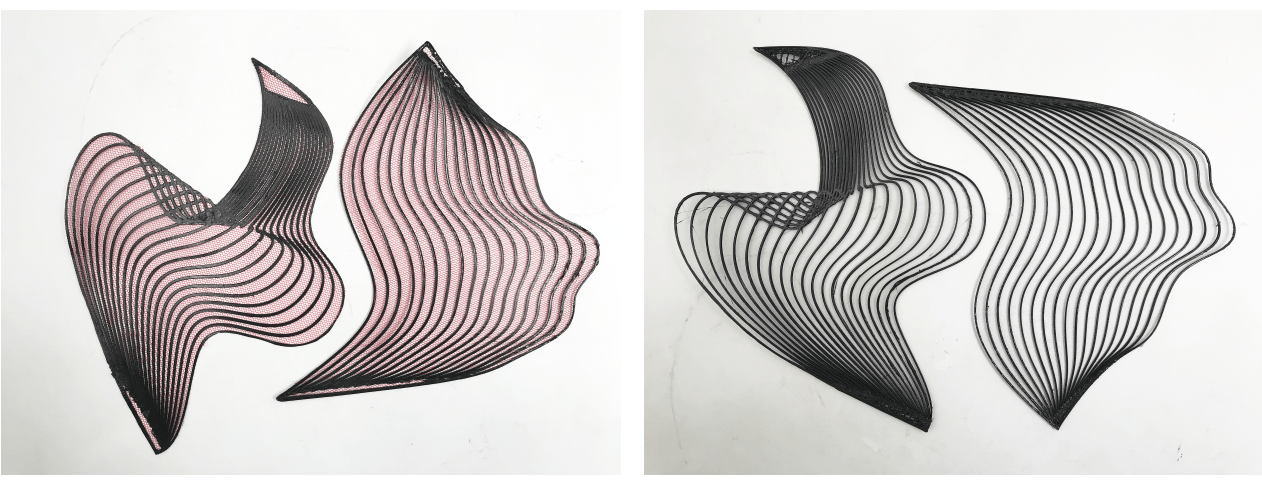
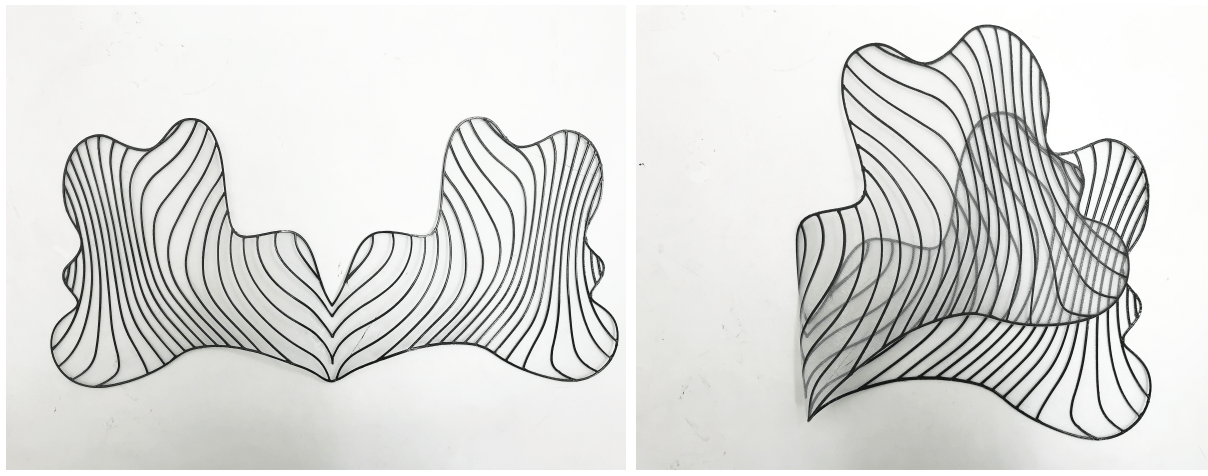
Comments / Notes In the pattern 3, As you can see the structure is really interesting as it is lifted up and sort of gives an egg trey shape and the print quality is not great due to printer issue.
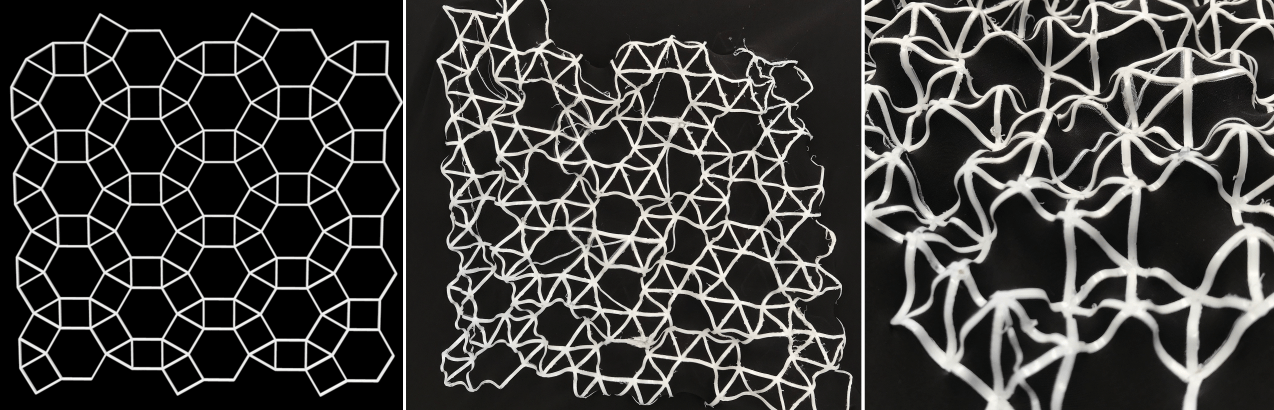
Pattern-4
| Machine | Filament | Layer Height | Initial Layer Height | Line width | Infill |
|---|---|---|---|---|---|
| Creality | TPU ( 1.75 mm ) | 0.3mm | 0.3mm | 1.00mm | 0 |
| Wall Thickness | Wall line Count | Speed | Retraction Time | Printing Time | Textile |
| 1.5 mm | 1 | 50mm/sec | 3 | 15:60 | Lycra-Black |
Comments / Notes In the pattern 4, As you can see the structure is not really great and lifted up like others. Due to fabric grain direction and the curve passes through all the directions in the fabric, it adapts the stretchability.
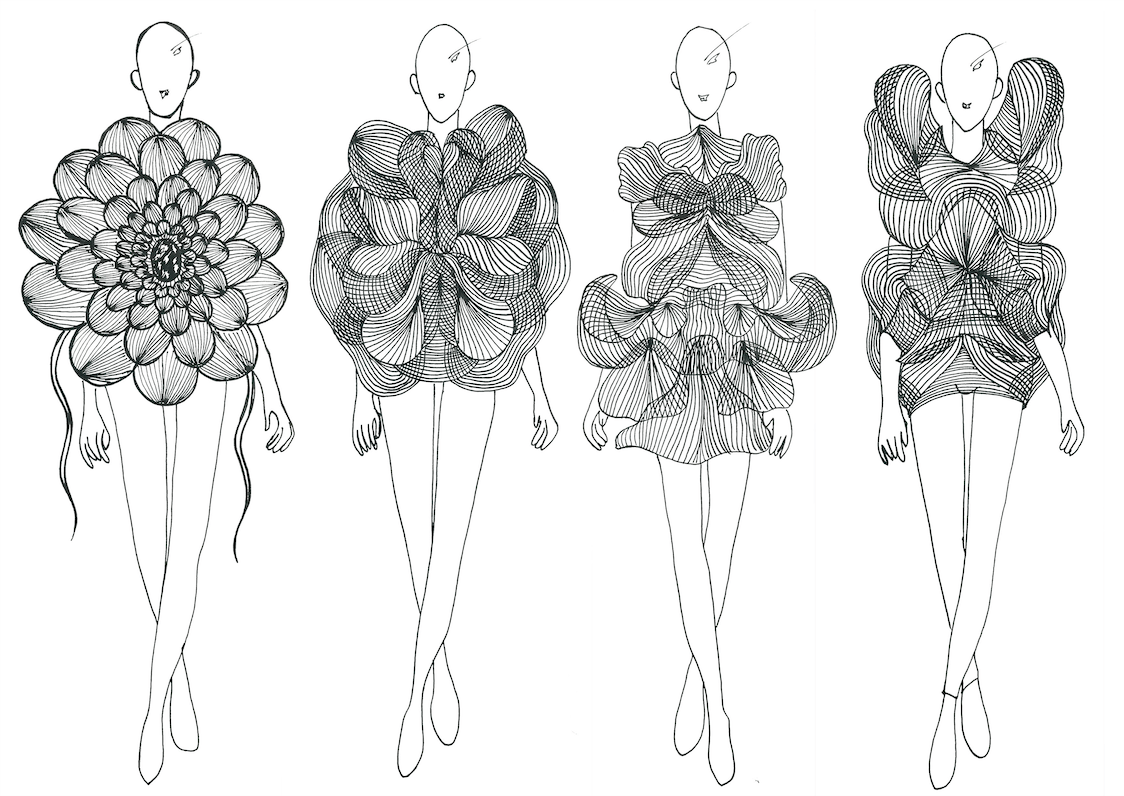
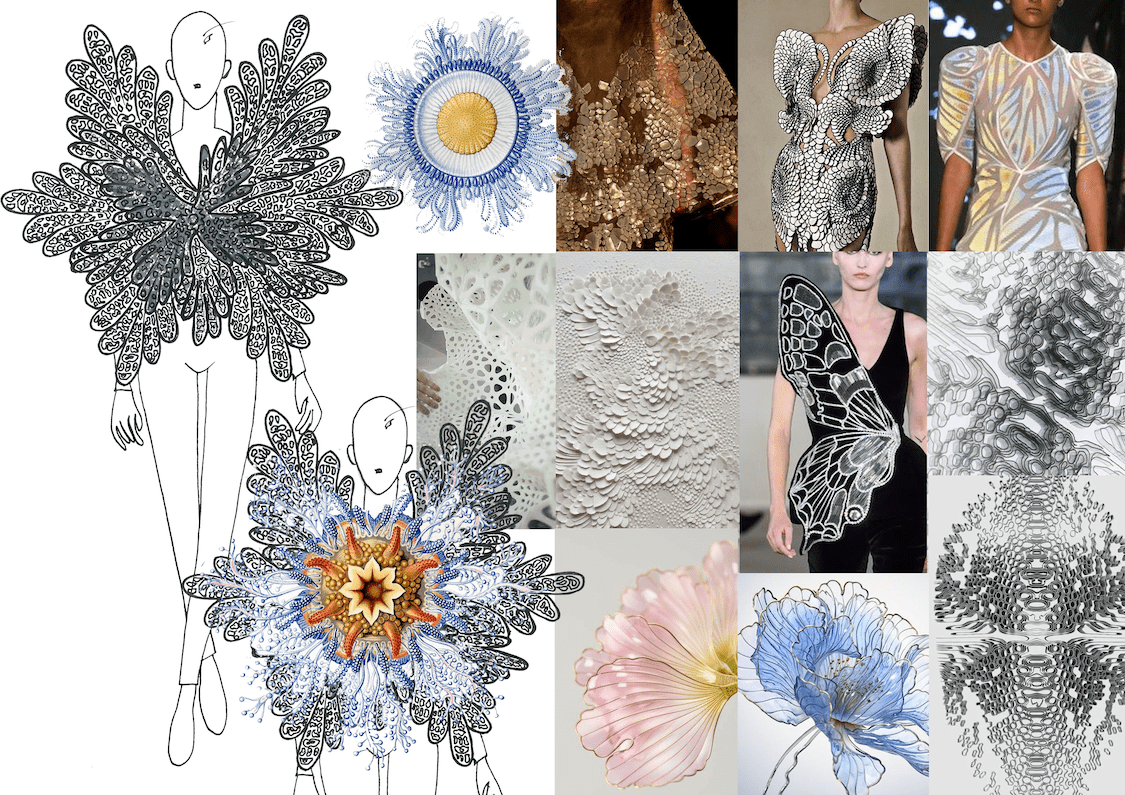
Look-1
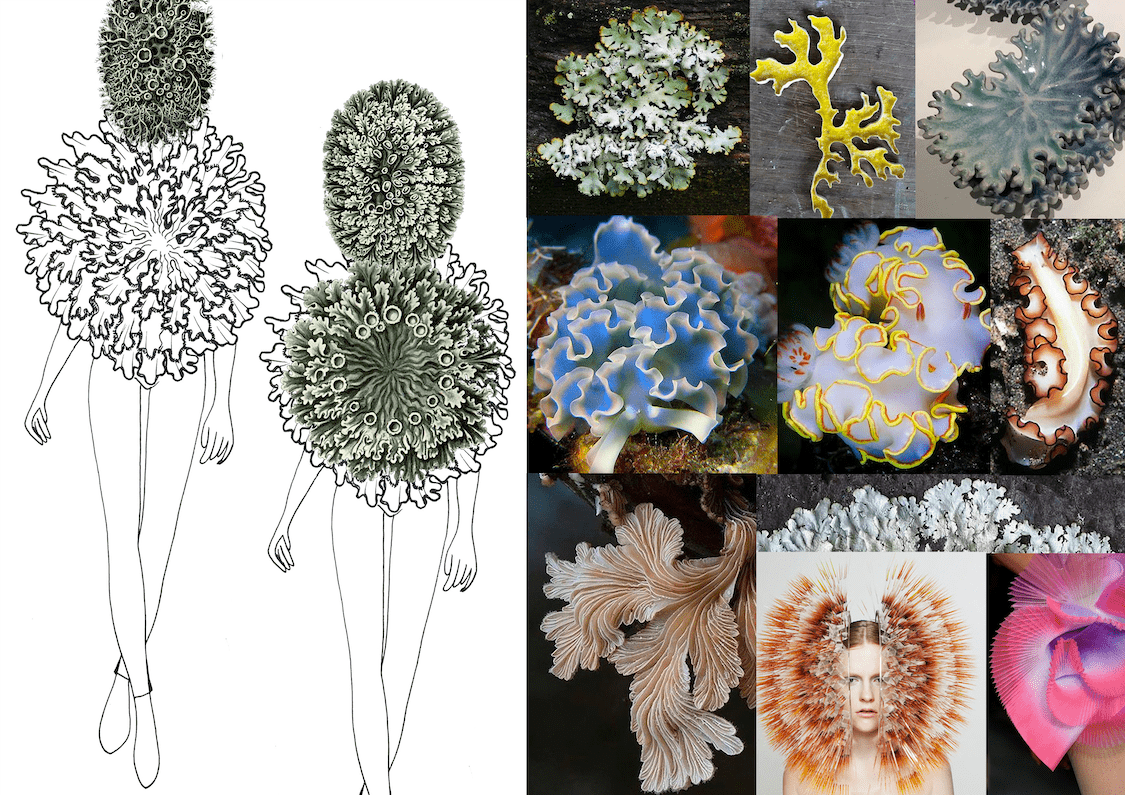
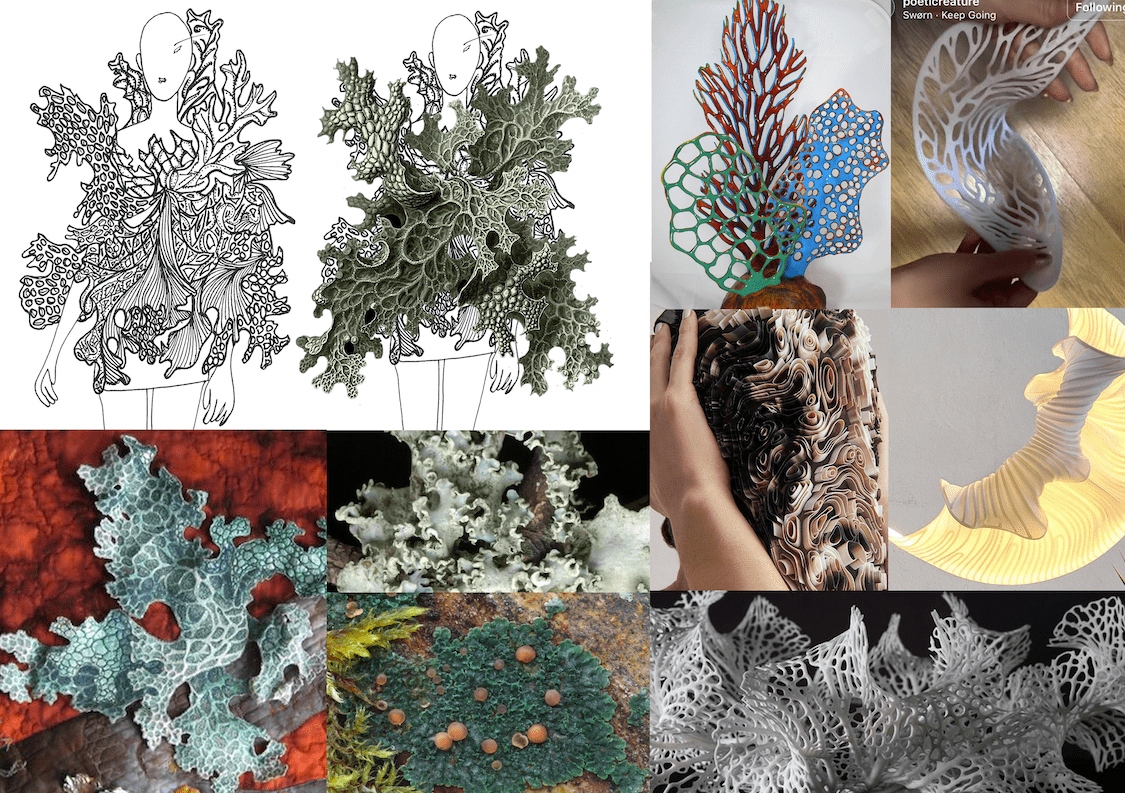
Sketches & References
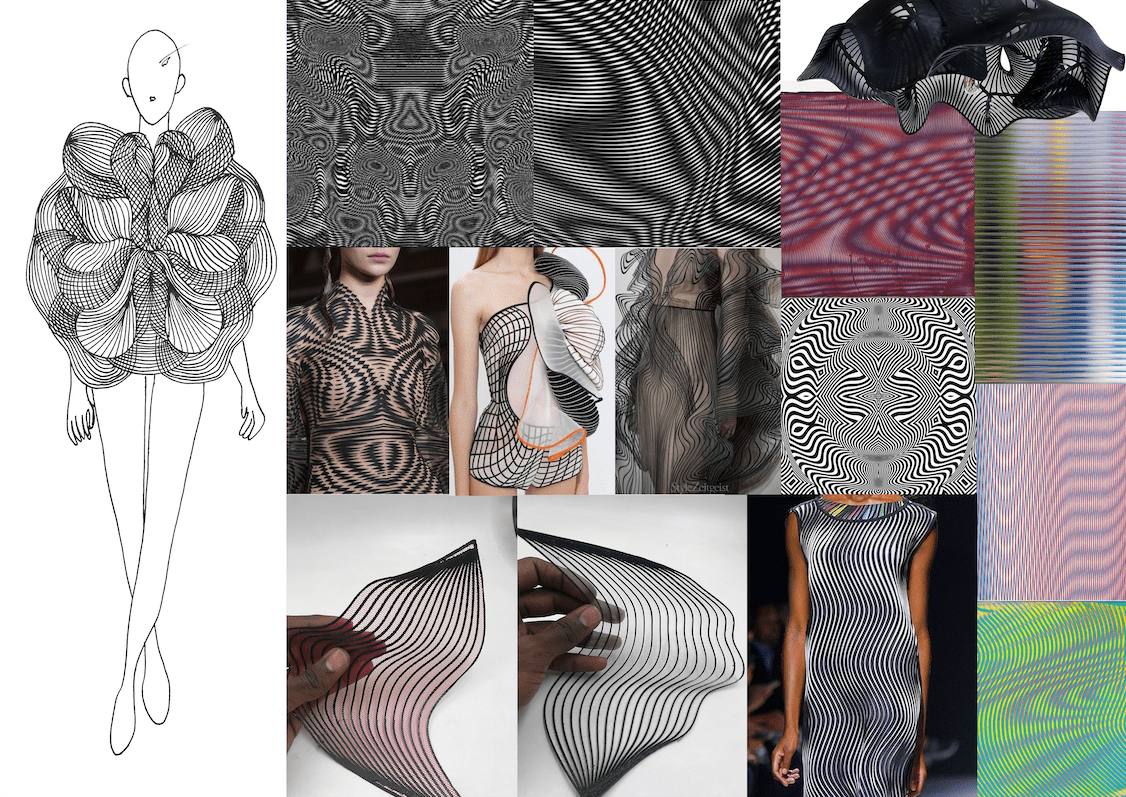
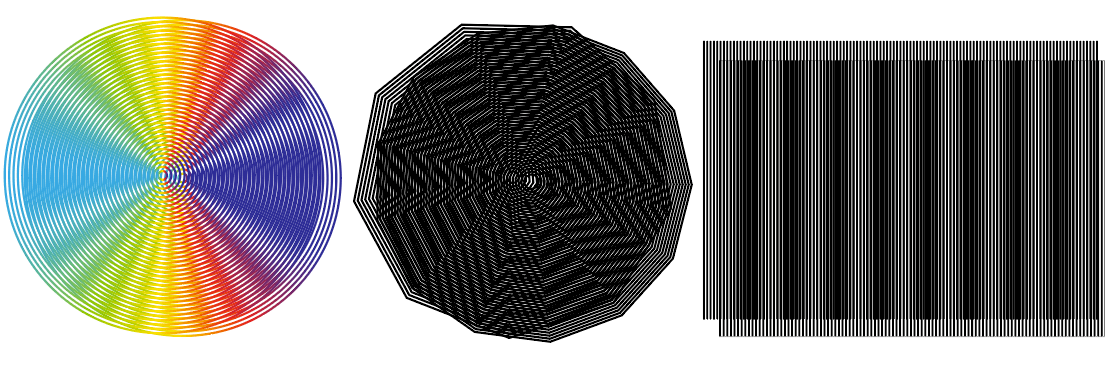
Moire Effects explorations
From the concept of human body art and by reflecting the lines in the body,To make it more artistic way i hava used the technique called moire pattern, that creates the interference patterns due to the slight displacement.
Moiré pattern revealing comples shapes, or sequences of symbols embedded in one of the layers. Moiré patterns or fringes are produce patterns whenan opaque ruled pattern with transperent gaps is overlaid on another similar pattern. For patterns to occure, the two patterns must not be completely identical, but rather displaced rotated or slighely have a different pitch.
I have created the lines to find the moire effects in two different ways using Photoshop & Illustrator and Rhino grasshopper.
Line Thickness Test
add

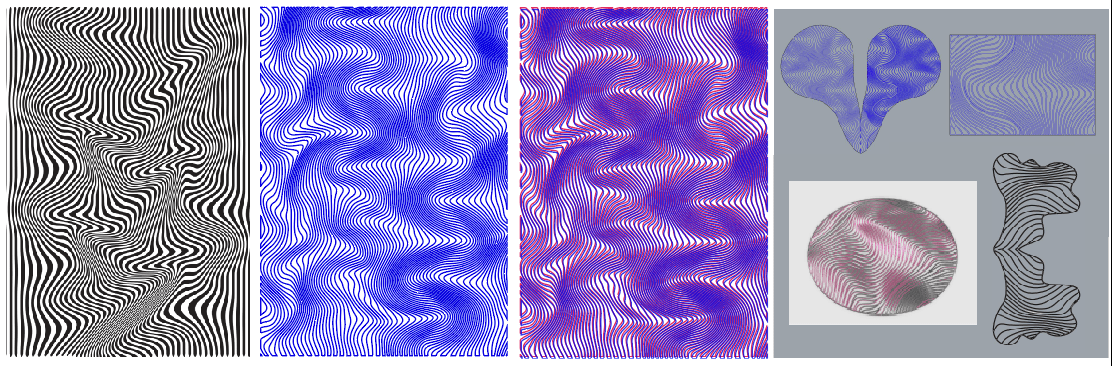
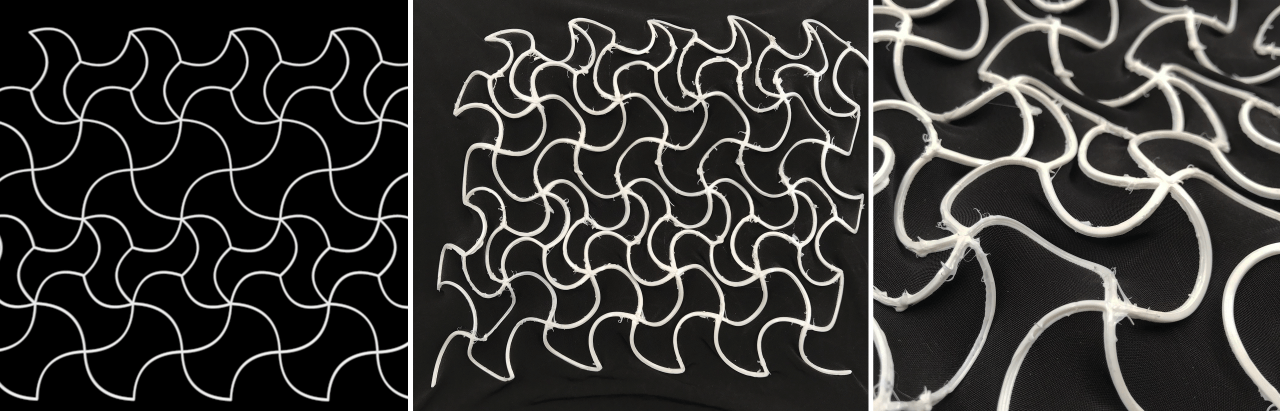
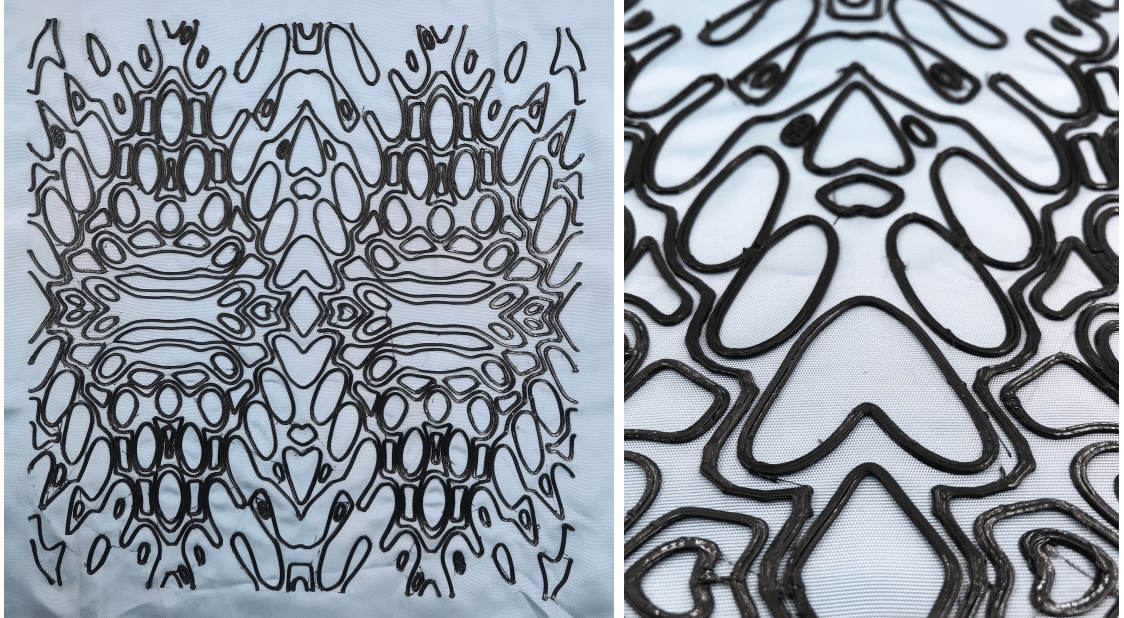
Lines Fabrication tests
| Machine | Filament | Layer Height | Initial Layer Height | Line width | Infill |
|---|---|---|---|---|---|
| Anycubic Chiron | Flex ( 2.85 mm ) | 0.3mm | 0.3mm | 1.00mm | 30 |
| Wall Thickness | Wall line Count | Speed | Retraction Time | Printing Time | Textile |
| 1.5 mm | 1 | 50mm/sec | 4 | 33:83 | Orgnza |
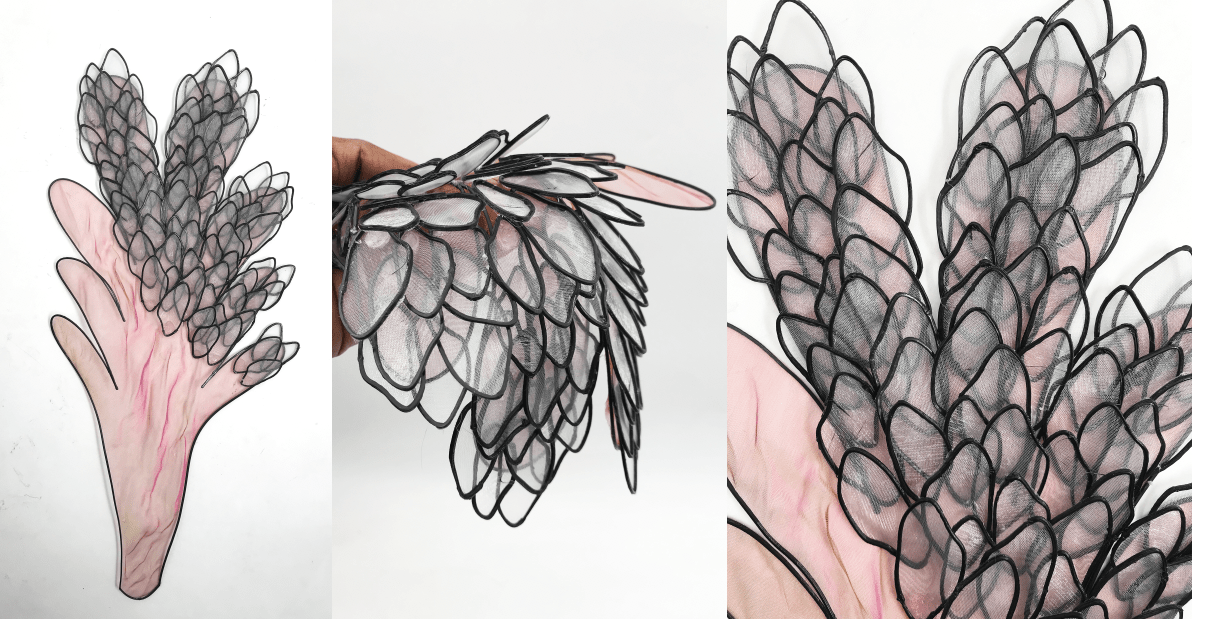
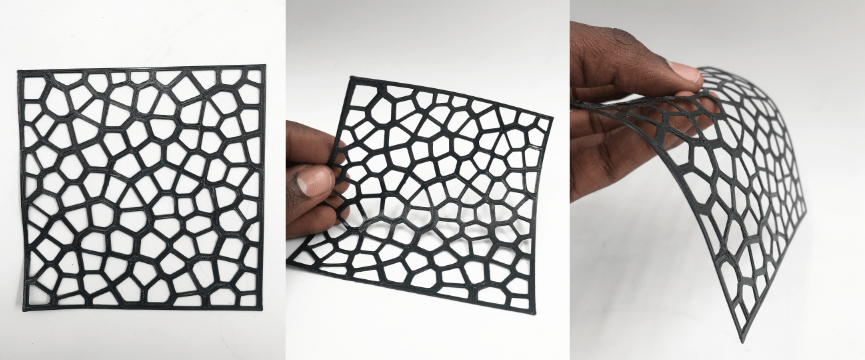
Comments / Notes You acn find detailed discription for the mesh sample from the computational couture week here. The pattern it creates when I merge 2 different samples has inspired me to explore further with the lines pattern. Having tried the organza fabric, I liked the effect more than the mesh. The mesh has the breathability of mesh, the sheer appearance, and the stiffness, and, more importantly, it is synthetic and can be 3D printed. I would like to explore further possibilities of working on the organza fabric.
| Machine | Filament | Layer Height | Initial Layer Height | Line width | Infill |
|---|---|---|---|---|---|
| Anycubic Chiron | Flex ( 2.85 mm ) | 0.2mm | 0.3mm | 1.00mm | 0 |
| Wall Thickness | Wall line Count | Speed | Retraction Time | Printing Time | Textile |
| 2.0 mm | 2 | 50mm/sec | 3 | 28:00 | Organza |
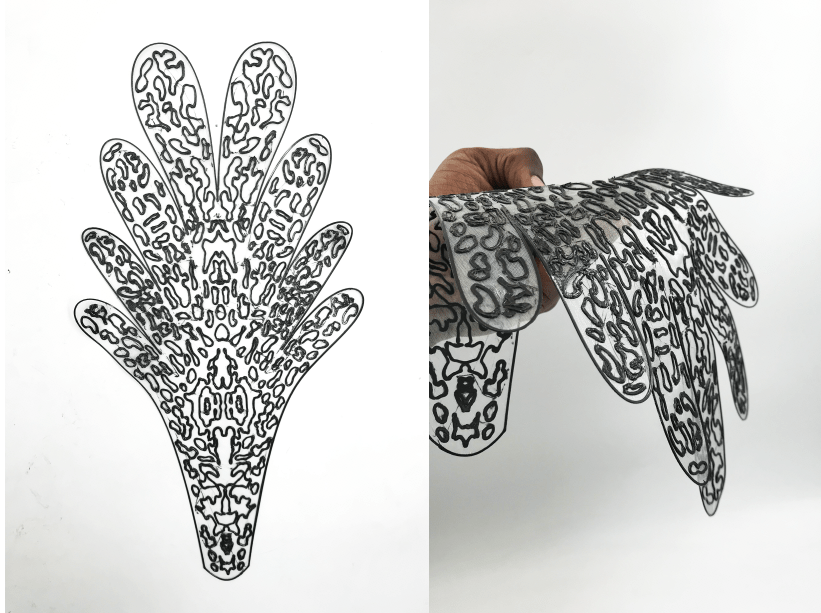
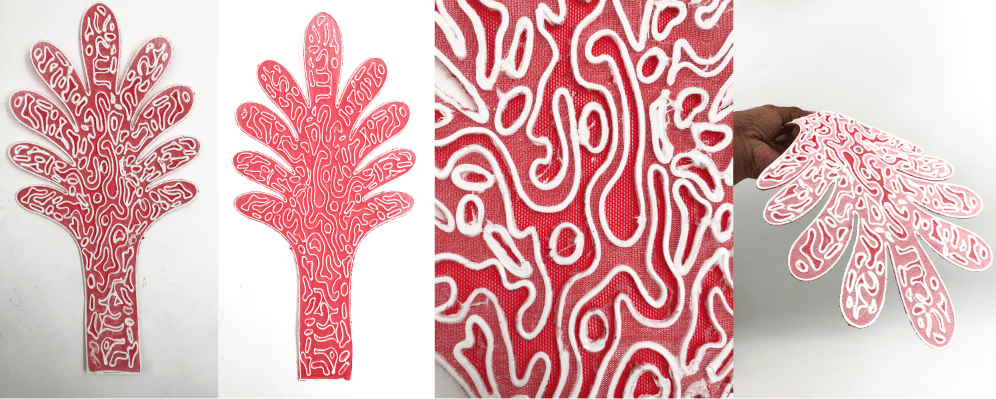
Comments / Notes In this pattern, I generated the lines within the boundaries using the organic shapes from the sketch. It is sloppy and does not hold on to the body since the line thickness is too thin and the distance between the lines is too large. I can try thicker and closer lines.
| Machine | Filament | Layer Height | Initial Layer Height | Line width | Infill |
|---|---|---|---|---|---|
| Anycubic Chiron | Flex ( 2.85 mm ) | 0.3mm | 0.3mm | 1.00mm | 0 |
| Wall Thickness | Wall line Count | Speed | Retraction Time | Printing Time | Textile |
| 2 mm | 1 | 50mm/sec | 3 | 16:65 | Power Mesh-White |
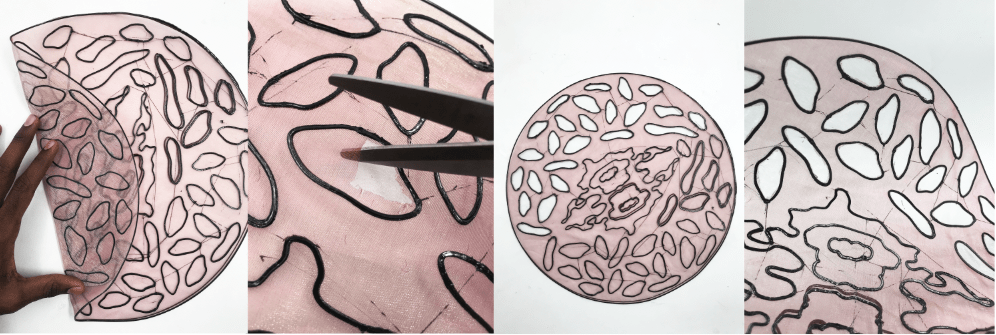
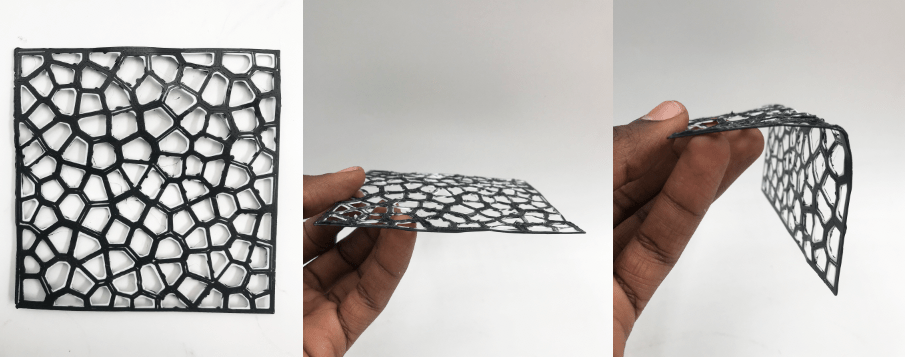
Comments / Notes In the 3rd test, I have tried using closer lines. It holds better and the lines moire effects creates better than the other samples.
| Machine | Filament | Layer Height | Initial Layer Height | Line width | Infill |
|---|---|---|---|---|---|
| Anycubic Chiron | Flex ( 2.85 mm ) | 0.3mm | 0.3mm | 0.6mm | 30 |
| Wall Thickness | Wall line Count | Speed | Retraction Time | Printing Time | Textile |
| 0.8 mm | 1 | 50mm/sec | 3 | 16:65 | Power Mesh-White |
Comments / Notes I have tried to deduce the shapes from the sketch and then grew the lines to test the print with thicker lines. I figured the thicker the / closer the lines the more solid they hold on the body, and using the draping technique, I can experiment with shapes in different angles.
Look-2
Sketches & References
Perametric design explorations
Script
Fabrications
Look-3
Sketches & References
Fabrications
Look-4