4. BioChromes
Here we are again, with another interesting week of working on BioChromes.
A little bit about my interest
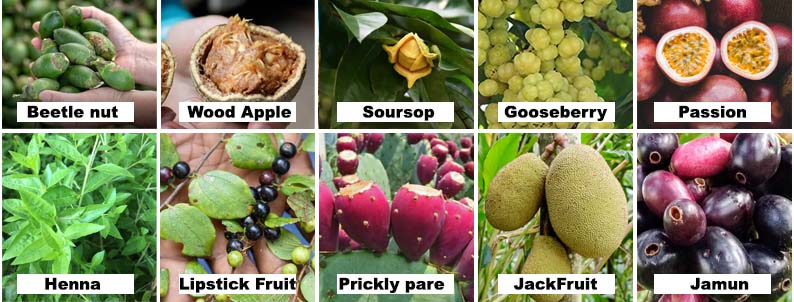
Having been raised by the farmers and working on the farm whenever I am at grandparents place, I have always felt very connected to nature. We have a banana farm, a Beetal nut that gives really good colour, not just beetle. I struggle to clean the residue on the banana stem liquid, and we have plants and trees like henna, wood apple, jack fruit, Chiku, mango, guava, coconut, gooseberries, peanut butter fruit, coca fruit, water apple, star fruit, and sour soup. Hahaha Sorry, I just gave you a list of plants I planted on my farm. It's interesting to know that some of them would make excellent natural dyes.
I am looking forward to experimenting with them when I return home. As a result, I am sure my parents will be very happy and surprised. Here are some visuals that I already have on my farm or in a nearby frame that I plan to use. A bit more research is needed on the materials. Wow! Thank you fabricademy for a wonderful week.
Useful link For some of the materials availabe in my farm:
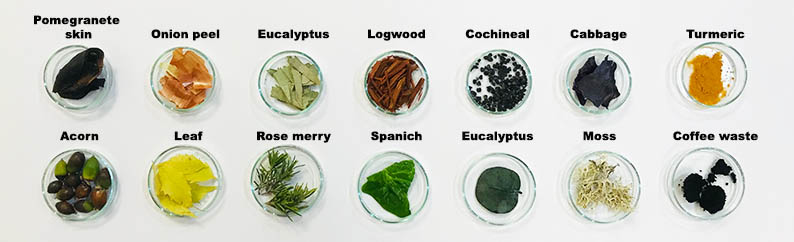
( Turmeric, Rosemary, Osage Orange, Weld, Pomegranate Skin, Brown Onion Skins:, Soursop (oxalis), Dandelions) - Link
( Gooseberry bark & Sapphire Berrier) - Link
( Passion Fruit ) - Link
( Thappaattikalli in Tamil / the ‘lipstick fruit’. ) - Link
Unfortunately, I was not able to bring materials from India that I missed very much. However, I was able to explore materials that are available in our lab and in Barbelona.
As a group, we worked on the following materials.
Introduction on BioChromes
Biochromes are any pigment produced by a living Organism. ( Bio - Living / Chromes - Colours )
Biochromes are a sustainable process that is Locally positive - That is locally grown, and the opportunity to explore local materials. Bio-based and Compostable that are not harmful, but are organic and compostable and natural. 0 waste is that we use natural materials without wasting and recycling the dyes and mordants.
Bio-based fibres are Plant-based like Cotton and linen. Animal-based like Silk, and wool. Man-made fibres like Viscose.
Biochromes can be sourced from animals, Bacteria, seeds, fruits, leaves, flowers, bark, wood, and roots.
Bio chromes colouring forms are Ink, Dye, Pigment
INK is a dense liquid - Soible / dispersed - Into & onto the material
DYE is a liquid bath - soluble in water - Into the material
PIGMENT Powder - Insoluble in water - Onto the material
0-waste process
I used the below chart from the presentation which is very helpful to understand the process.

Dyeing Process
Weight of Fibers ( WOF ) - Scouring - Tanning - Mordanting - Dye Bath
Fibre Preparation
Plant Fiber Process
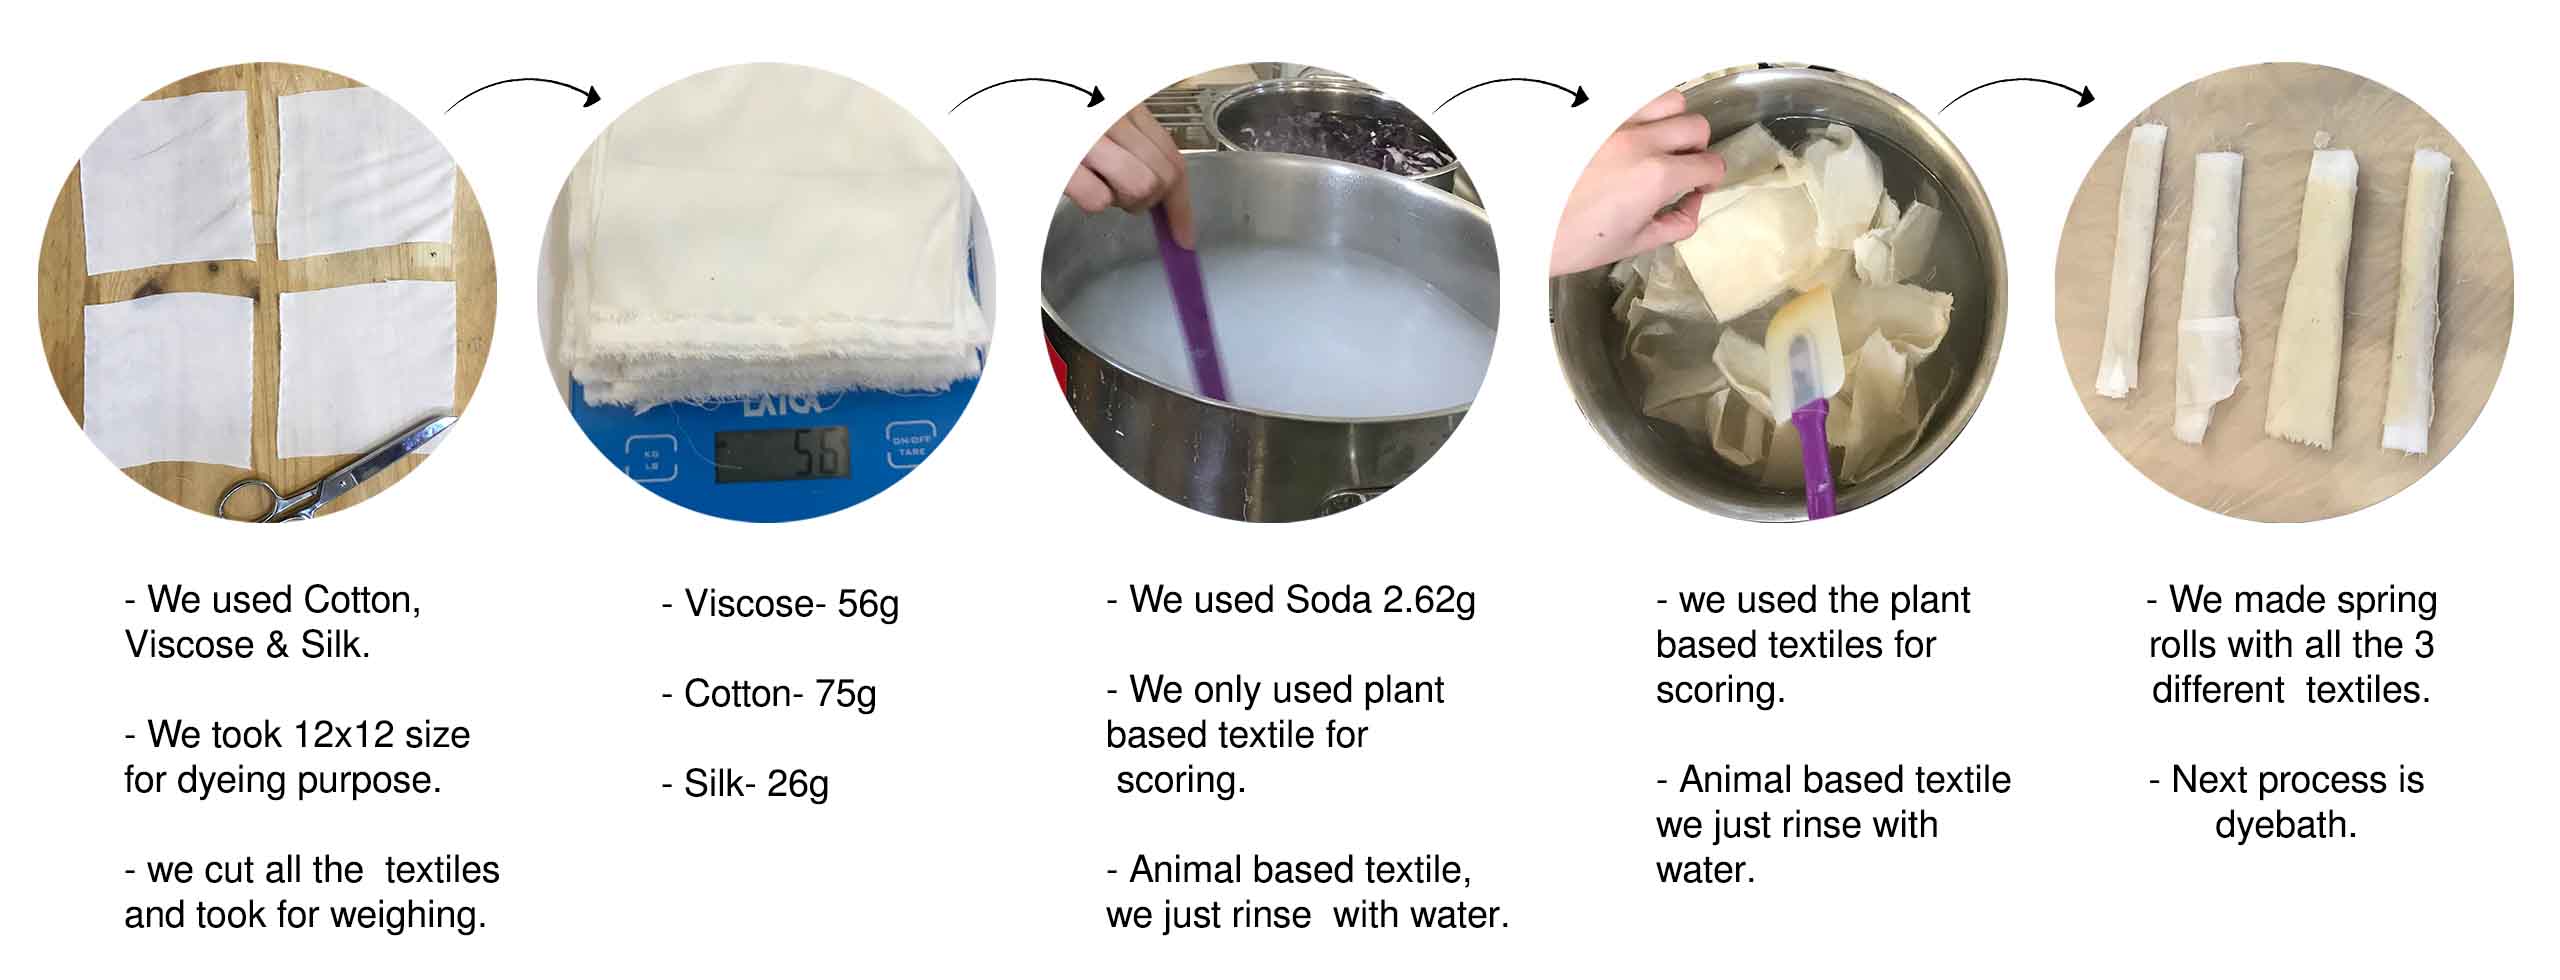
As this is a group project, we started cutting the cotton, Viscose & silk fabrics of 12x12 cms cuttings.
Step-1 Scouring - Sock the textile materials in the water with Sodium carbonate and boil for 1 hour.
Why Sodium Carbonate? - Soda ash works by raising the Ph level of the dye bath. It makes the solution less acidic, The increased Ph level activates the molecules of the fabric so that they can better absorb the dye. This results in brighter and long-lasting colours
Ster-2 Tannins
Step-3 Modrant - It is a substance to enhance the fastening process of the dye onto organic fibres, to enhance the light and wash fastness.
Mordants we used are Alum, Iron, Copper.
( How to Mordant) - Link
Step-4 Rinse and strain the materials and separate them for the dyeing process.
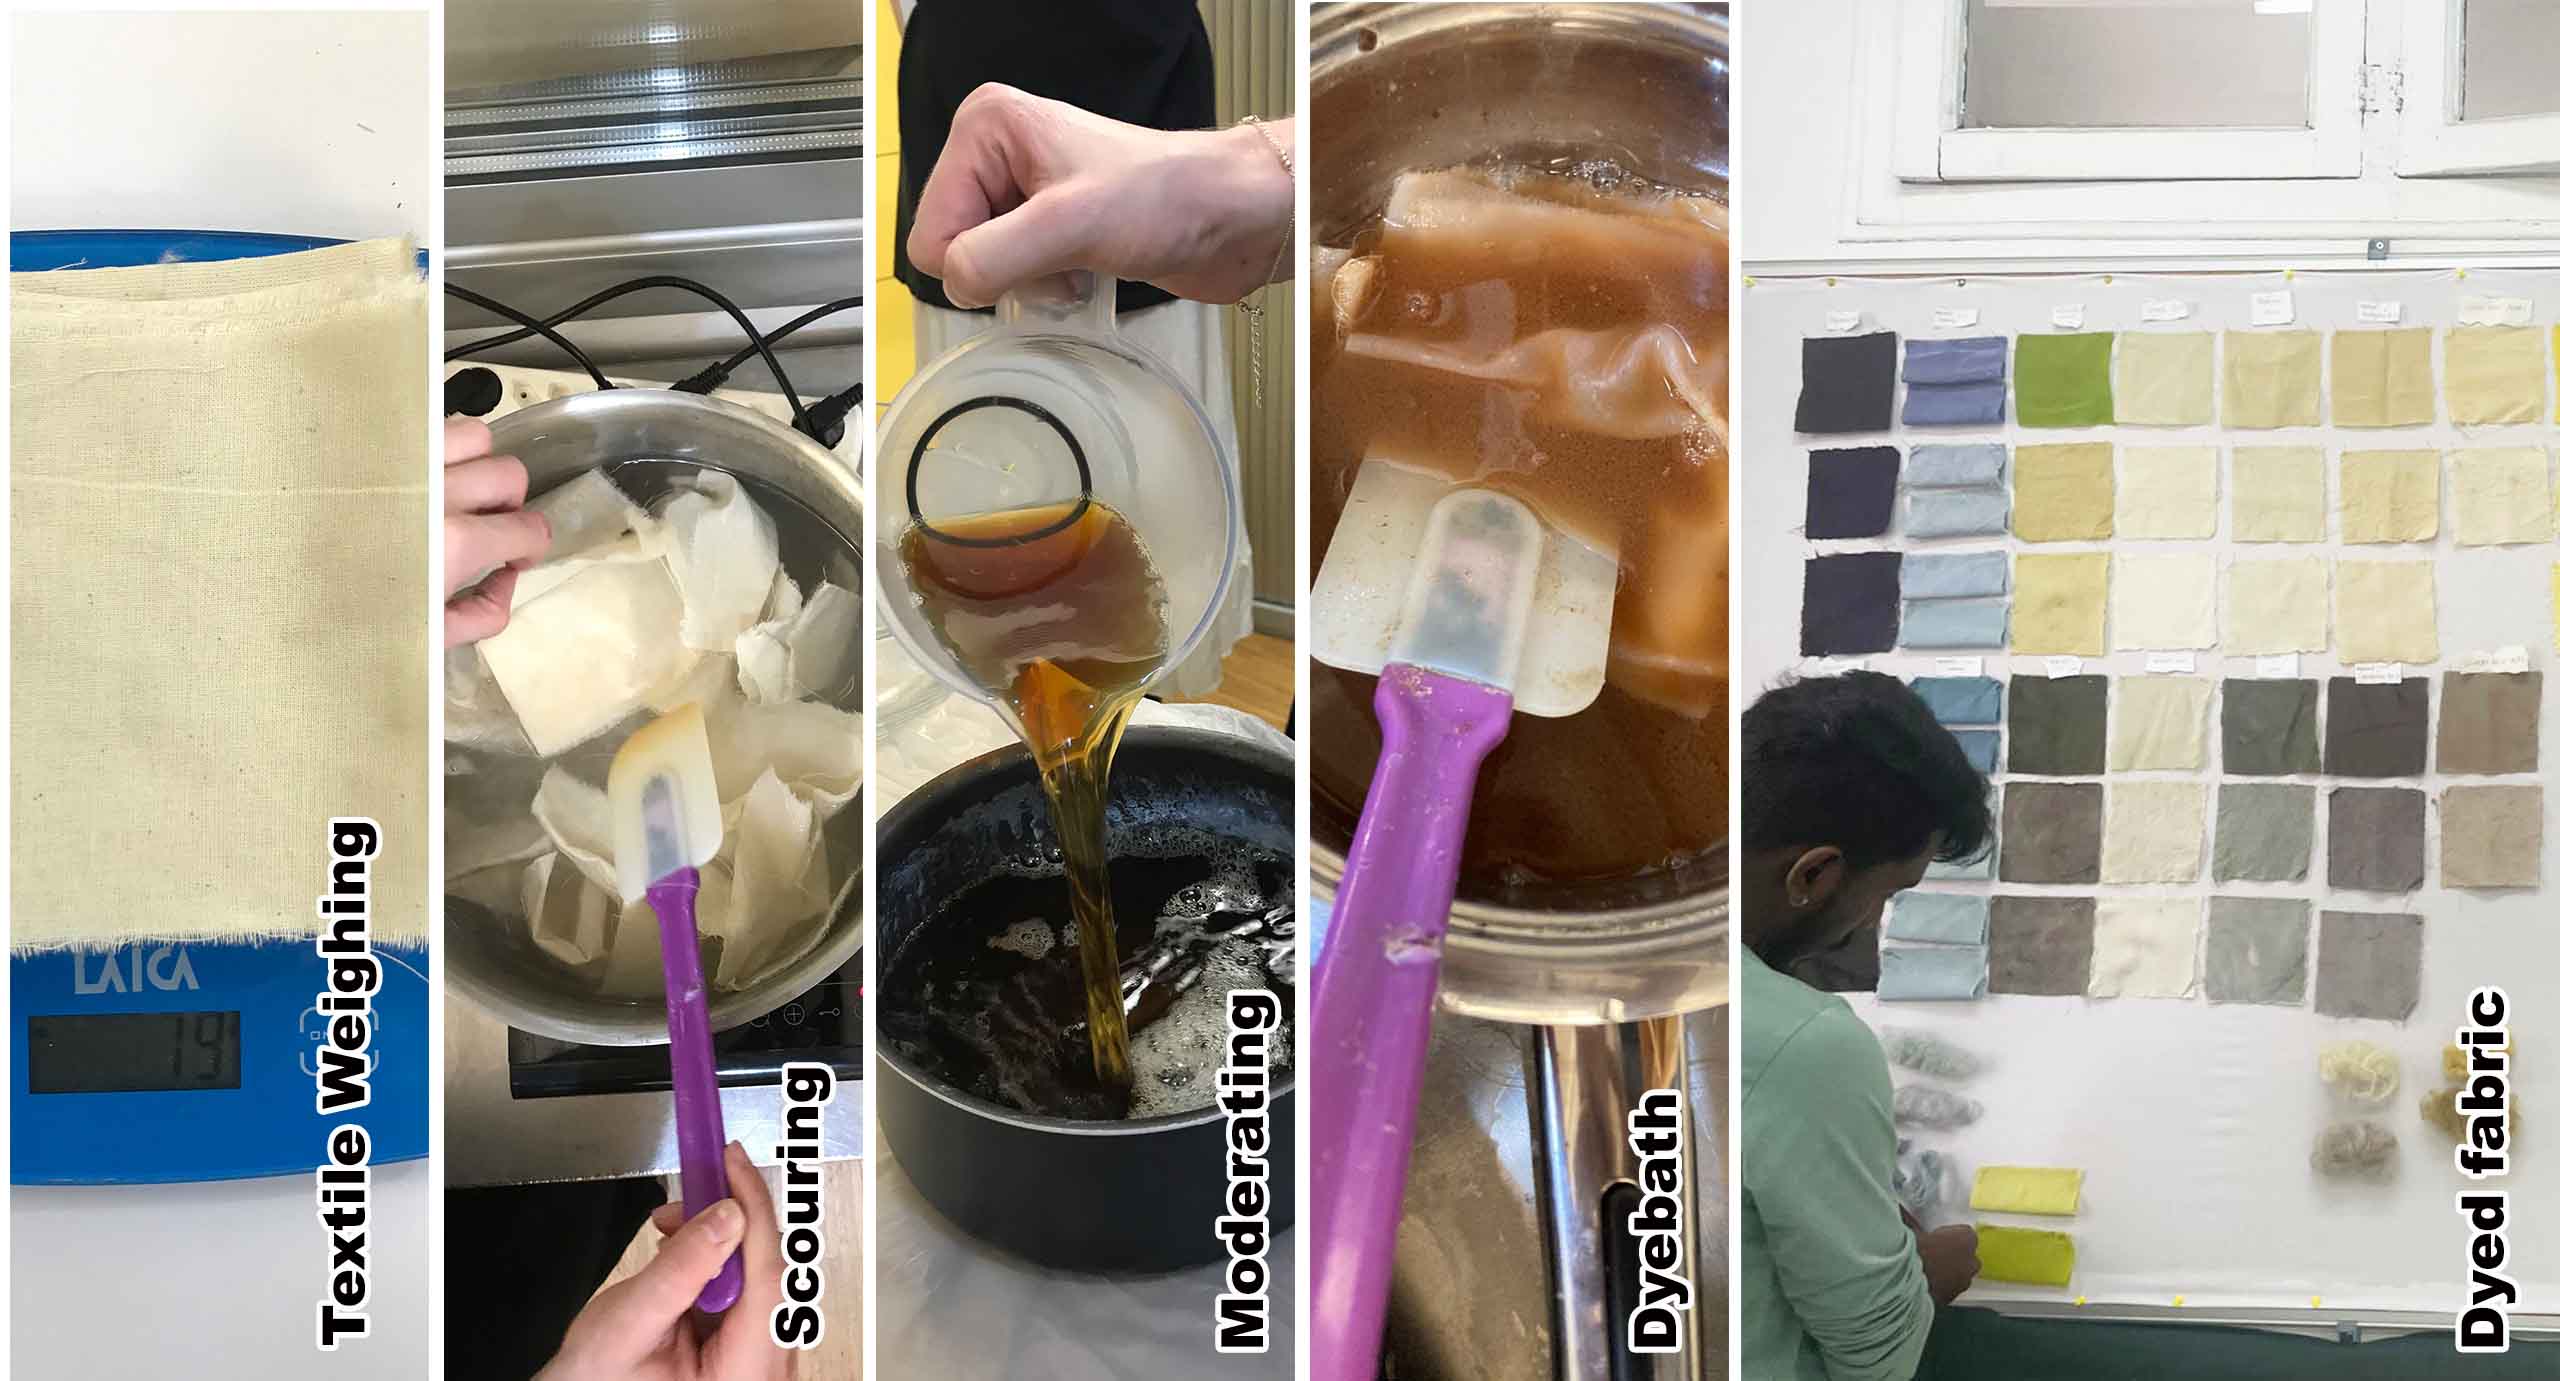
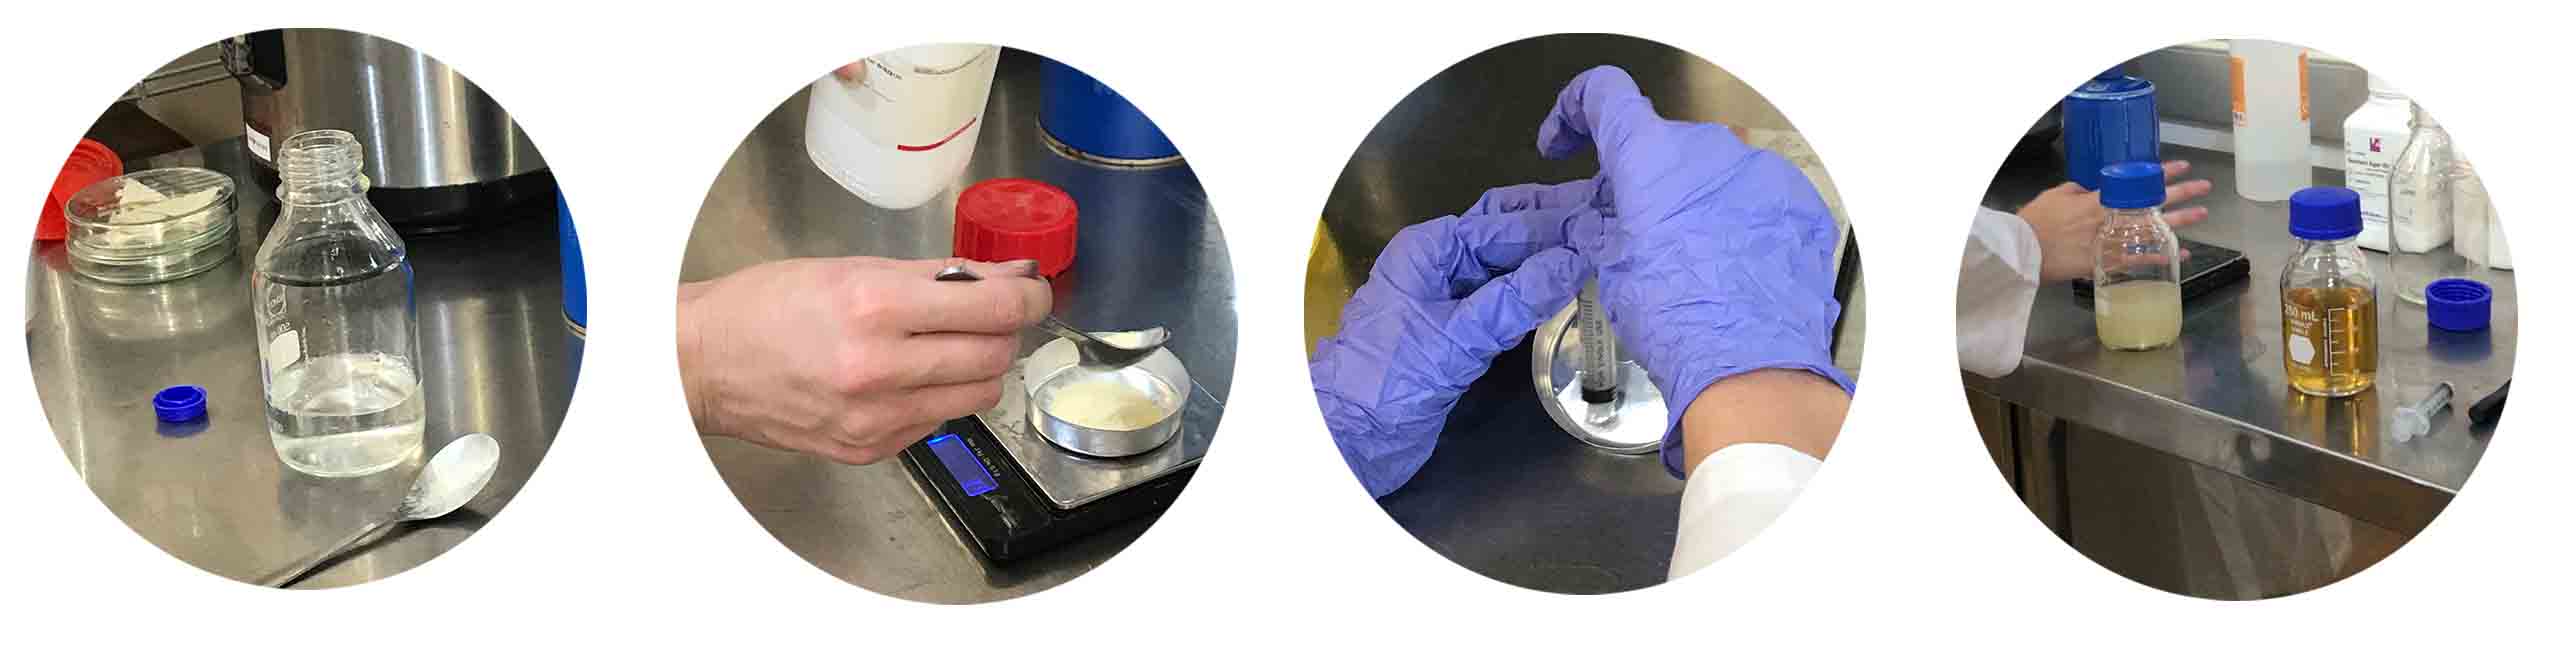
Dyestuff preparation
Preparation for dyeing begins with weighing the materials collected. The materials were soaked in normal water for an hour and then light boiled for an hour and simmered for 2-3 hours depending on the material. You can leave the materials overnight socked. You will have a coloured liquid the next morning when you drain the liquid.
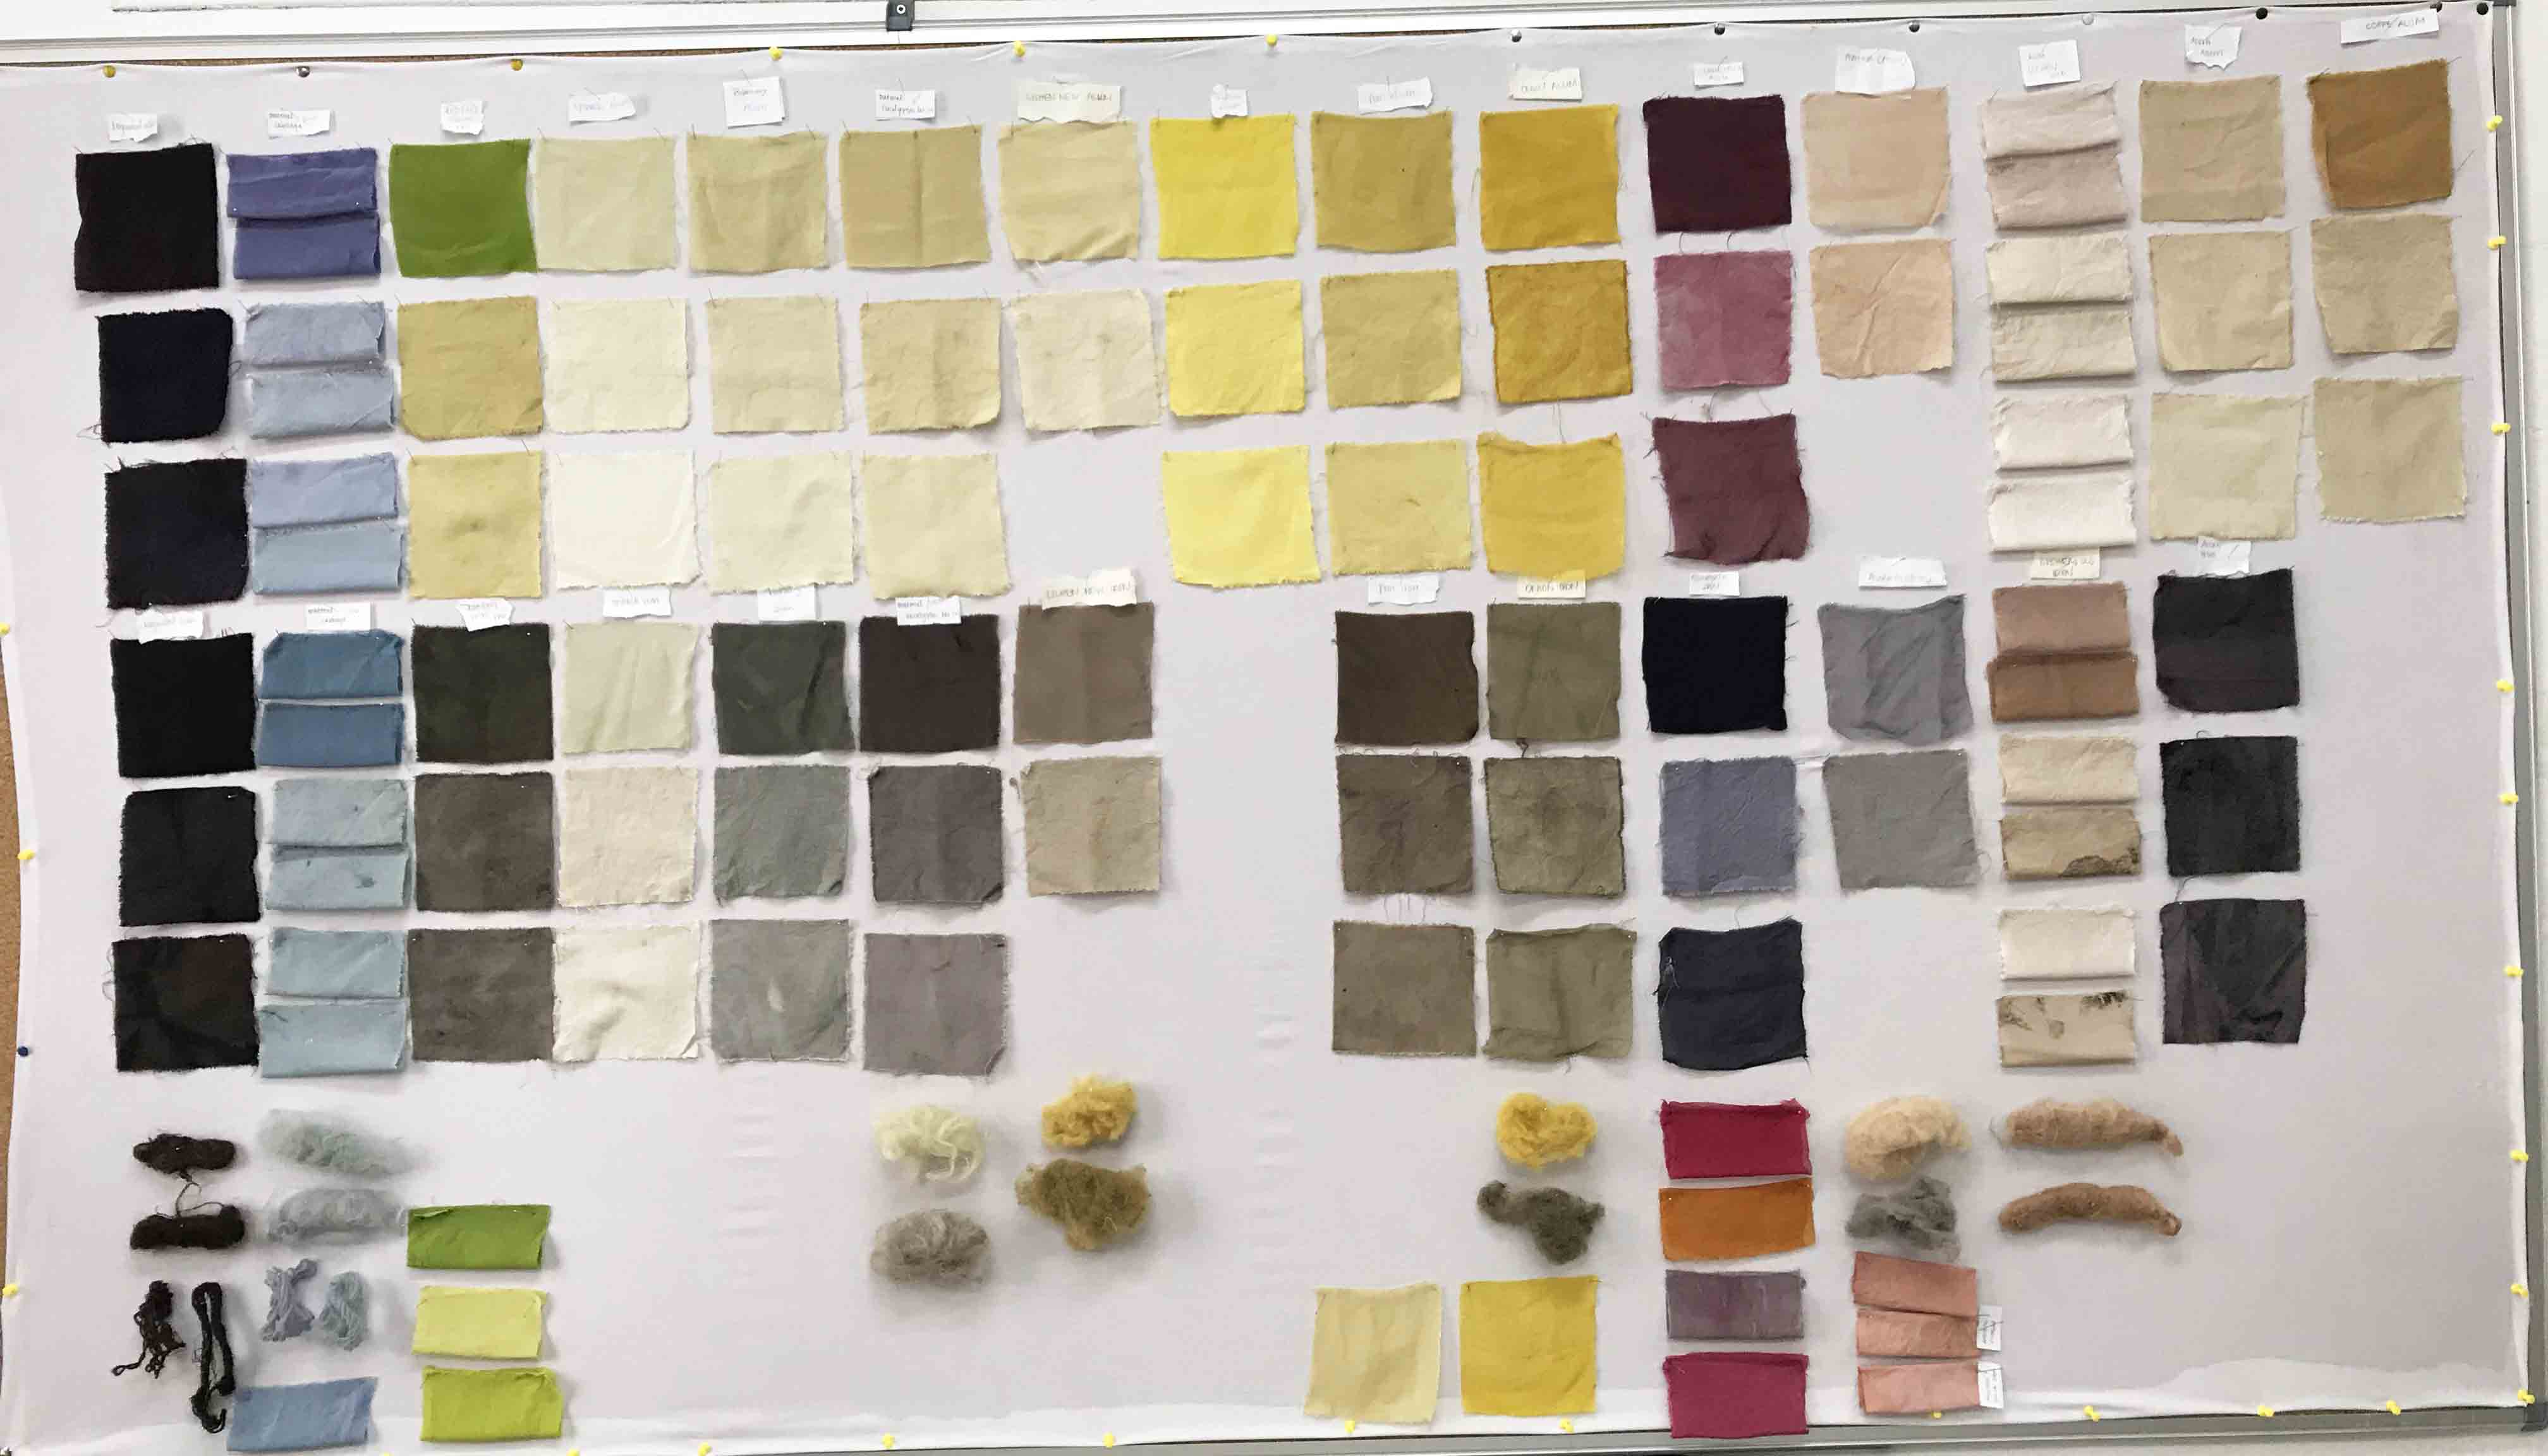
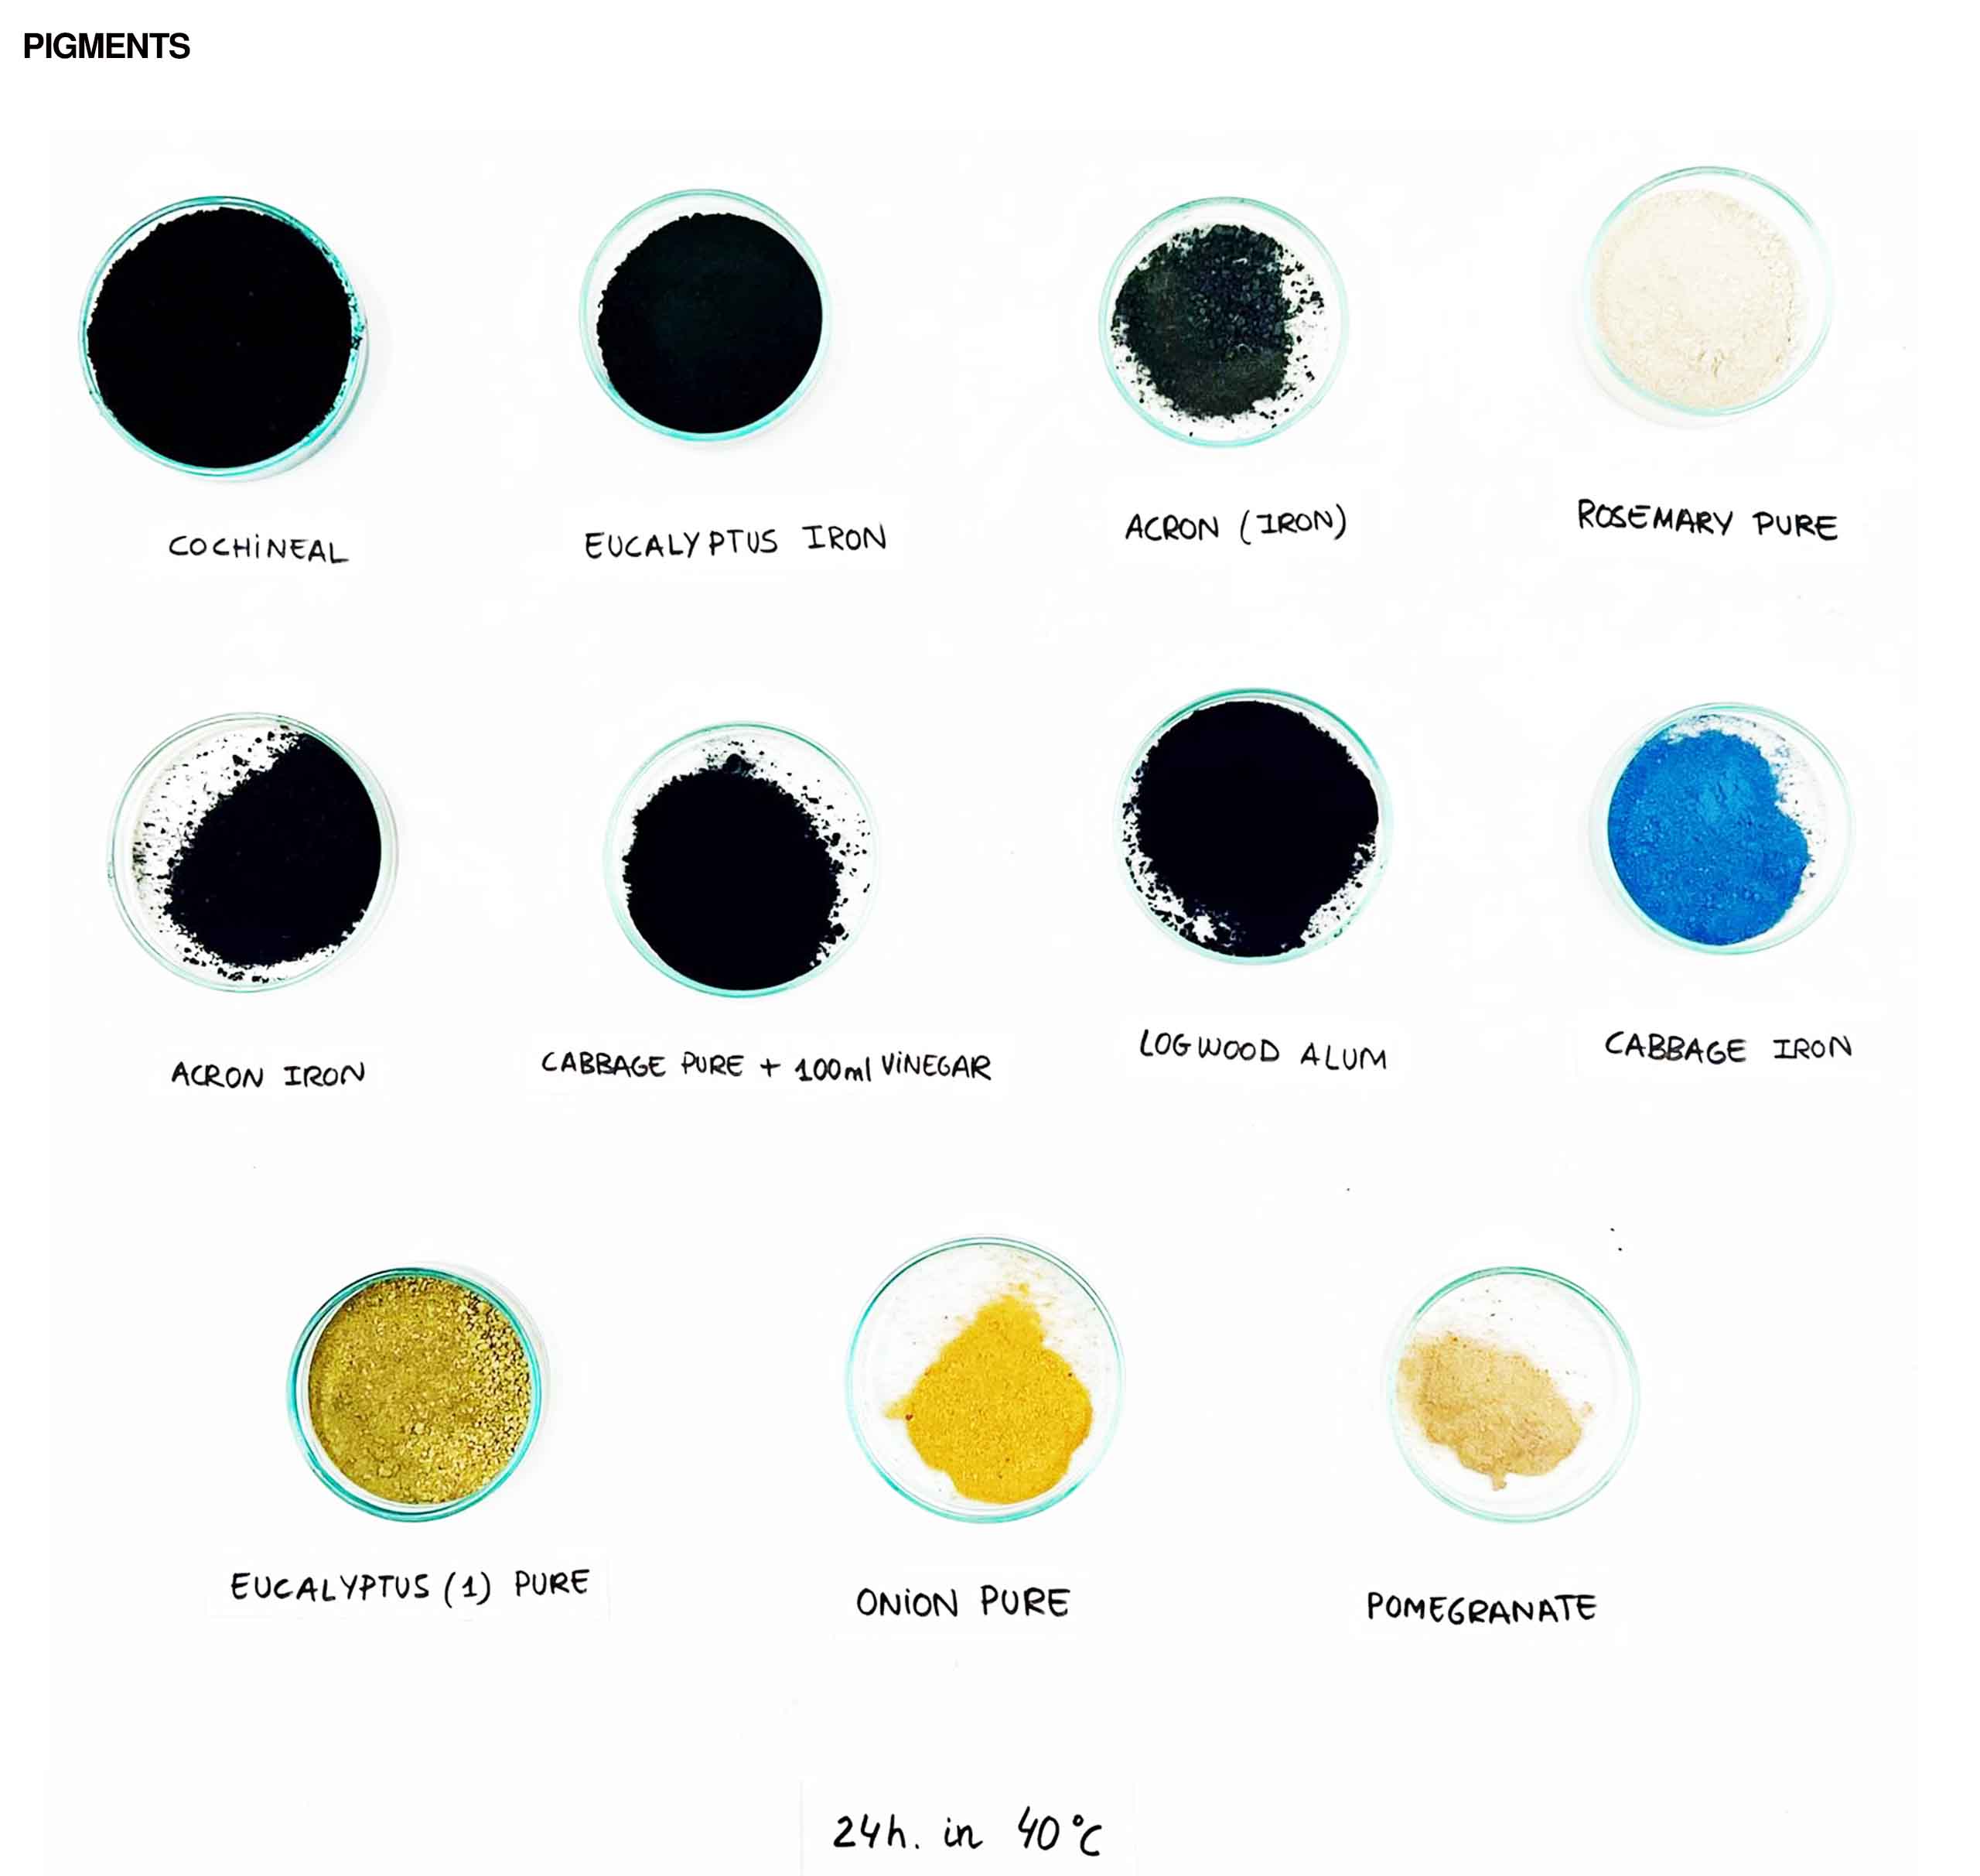
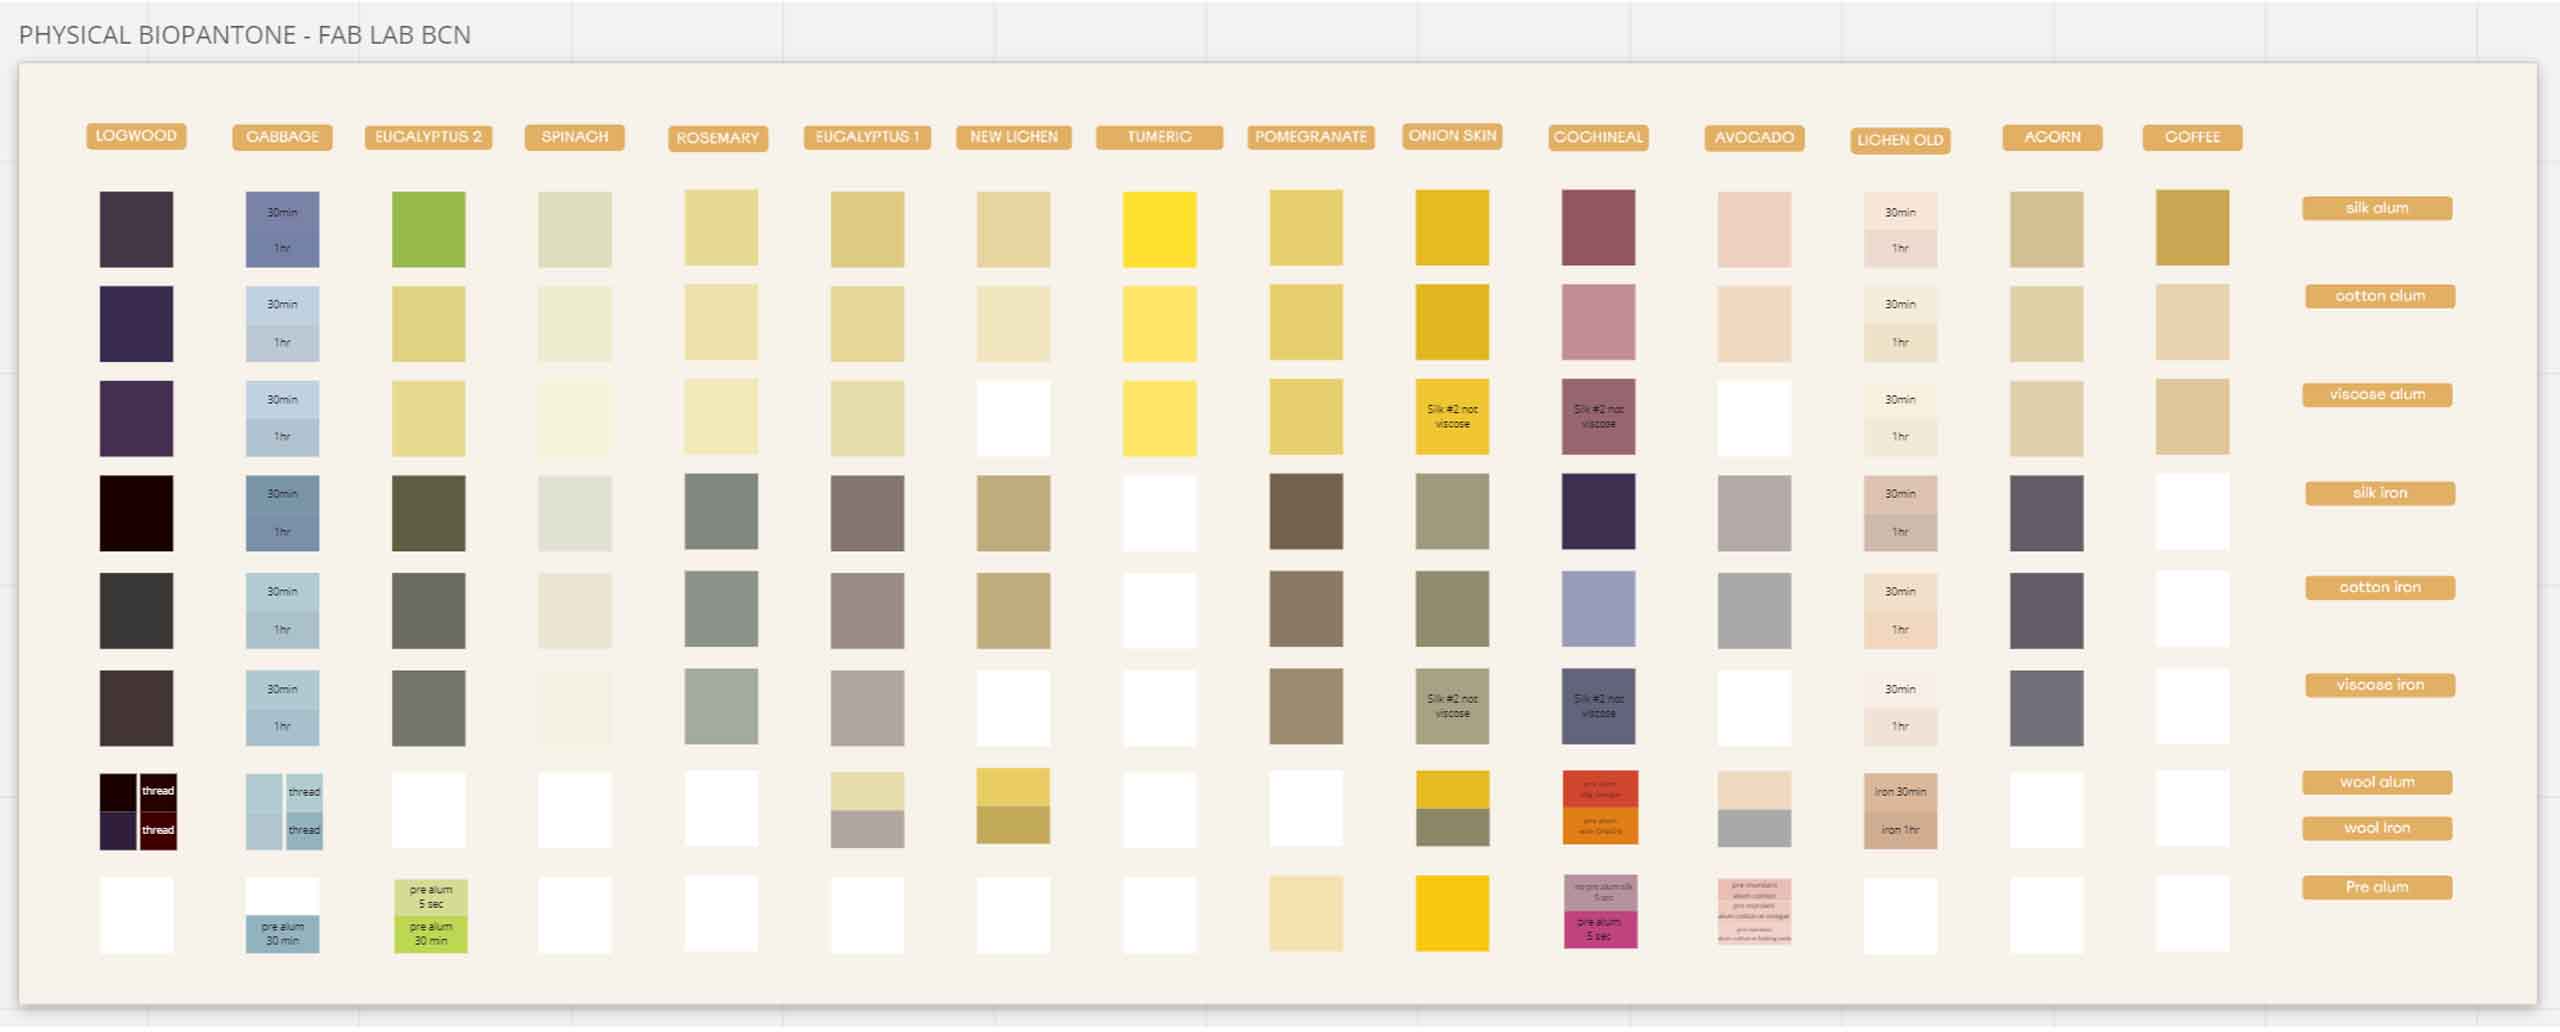
We used two moderates for all materials, Iron and Alum, then spring-rolled fabrics from the previous fibre preparation, and dipped the three different textiles into the dye simultaneously. Afterwards, the dye and textile are brought to a boil and simmered for an hour. The following is the amount of alum and iron mentioned, as well as the weight of the fabrics and materials used, along with the final results for each.
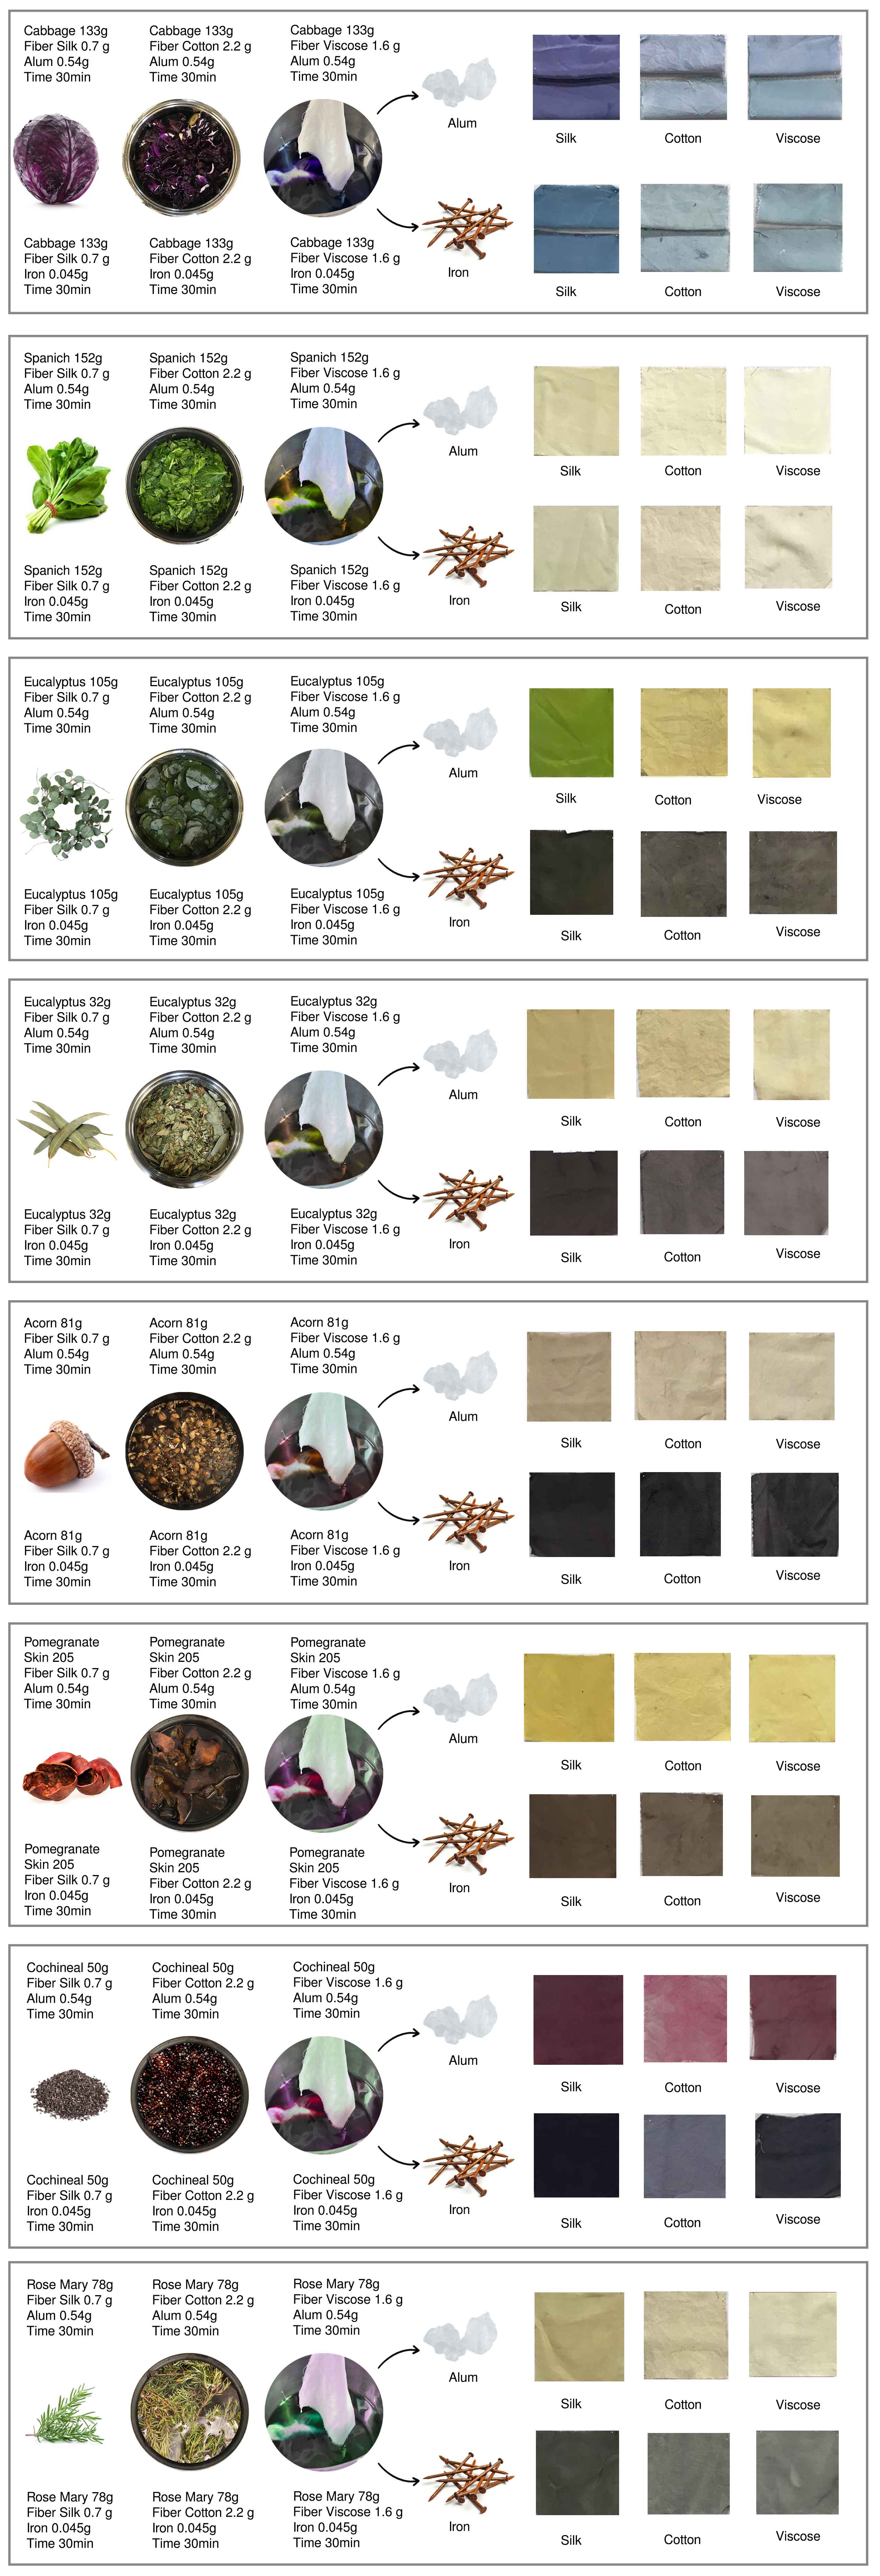
Cabbage explorations
Process of Recycling the Dye Bath we used
Step 1 Take the leftover dye bath in a container.
Step 2 Measure the required amount of Alum - 18g
Step 3 Measure the required amount of Baking Soda - 6g
Step 4 Take the hot water and add measured alum into it and stir well until it dissolves.
Step 5 Now slowly add the alum with hot water to the soda dye bath slowly while stirring
Step 6 Now you can see the pigment's precipitation, keep it aside for some time to settle the pigments
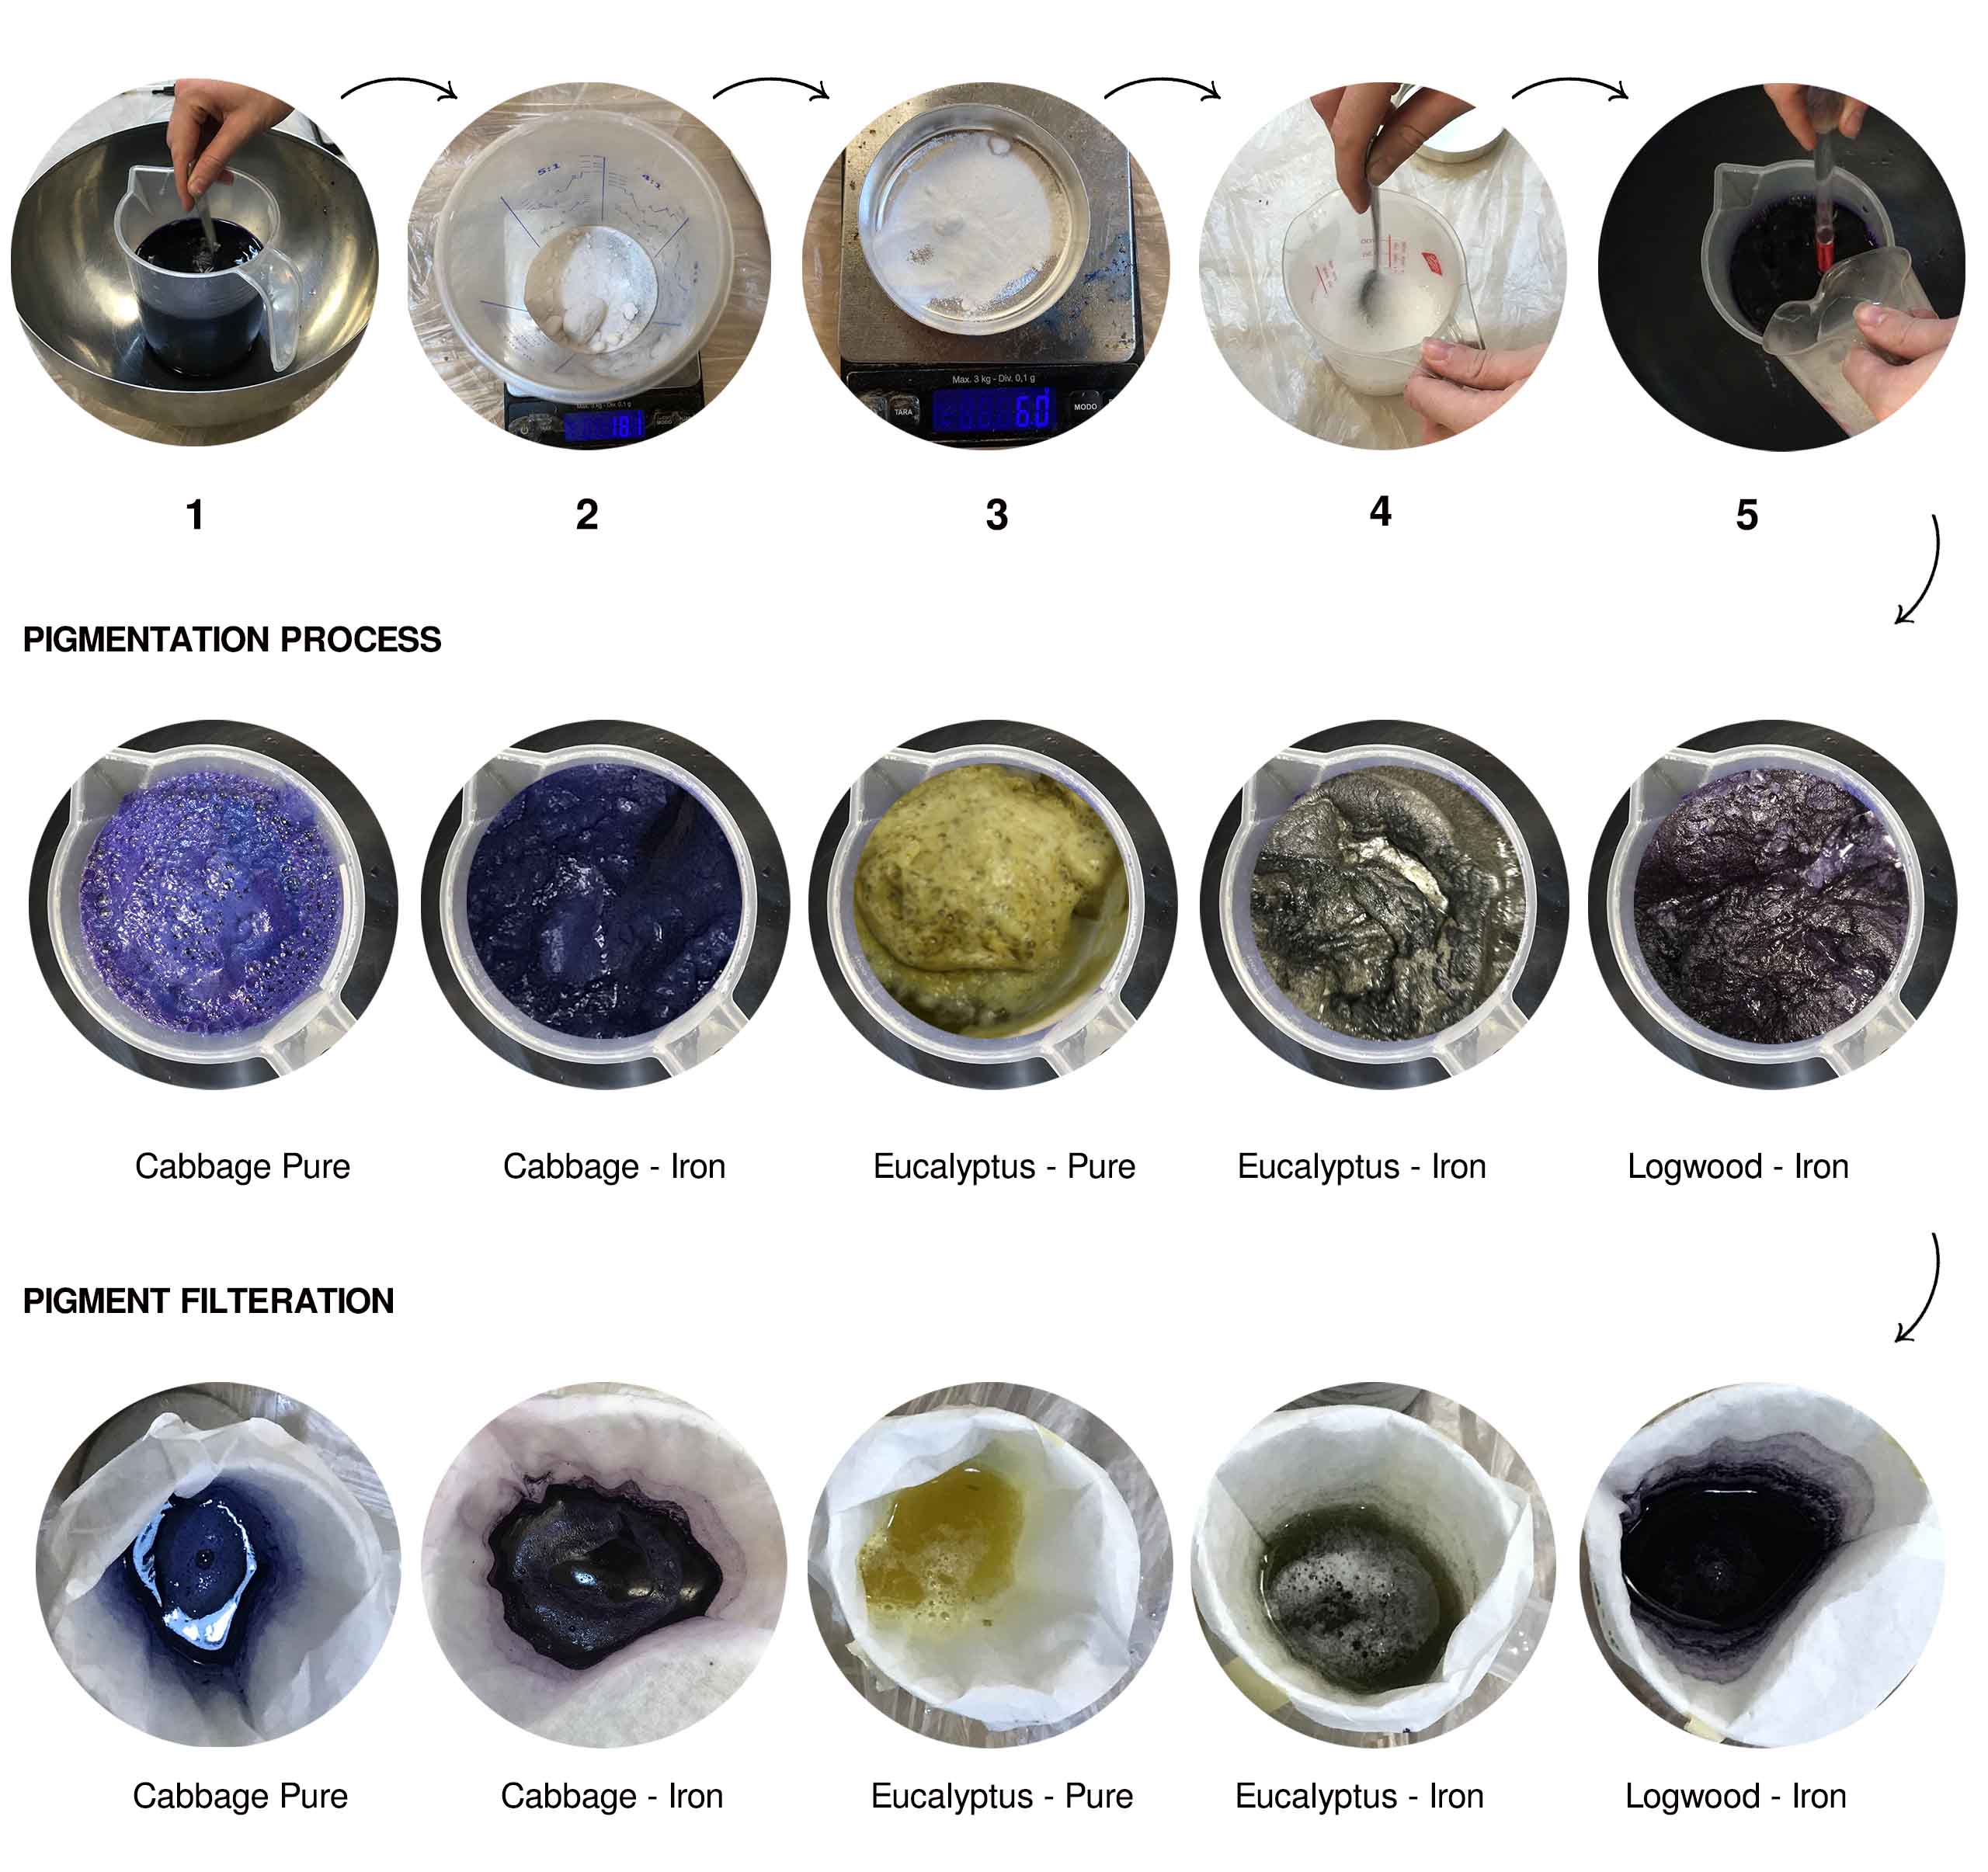
Step 7 After the pigment particles settle in the container, take a new container with a coffee filter and begin filtering the pigments.
Step 8 Allow the pigments to filter for some time, then either dry them with a filter or in a petri dish.
Step 9 Let the pigment dry overnight in the filter.
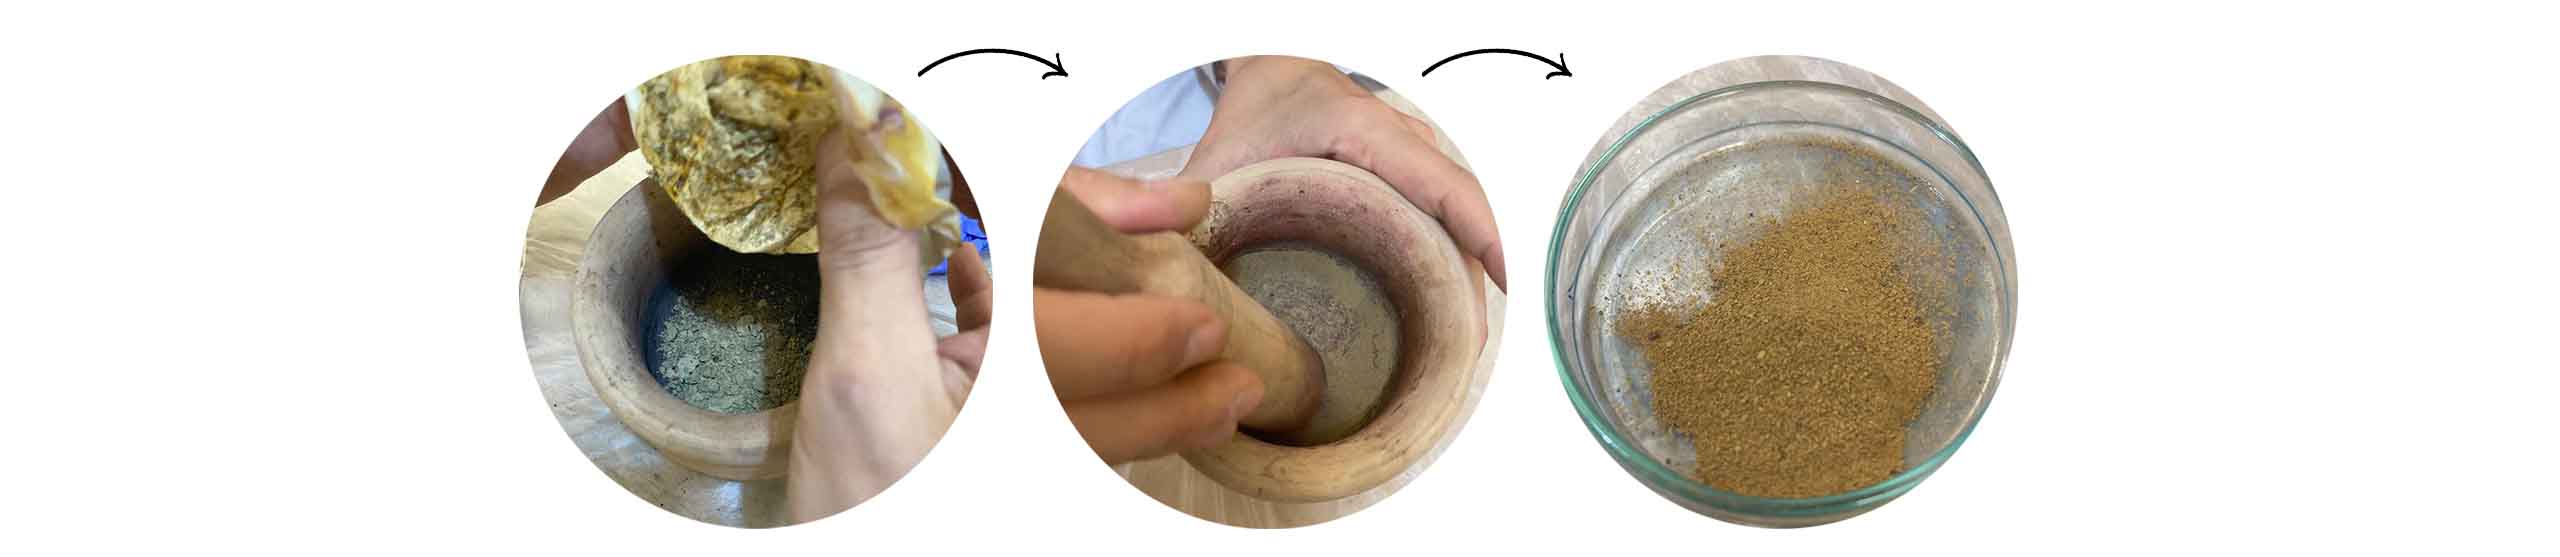
Step 10 Grind the pigments to make them powder after removing them from the filter or petri dish.
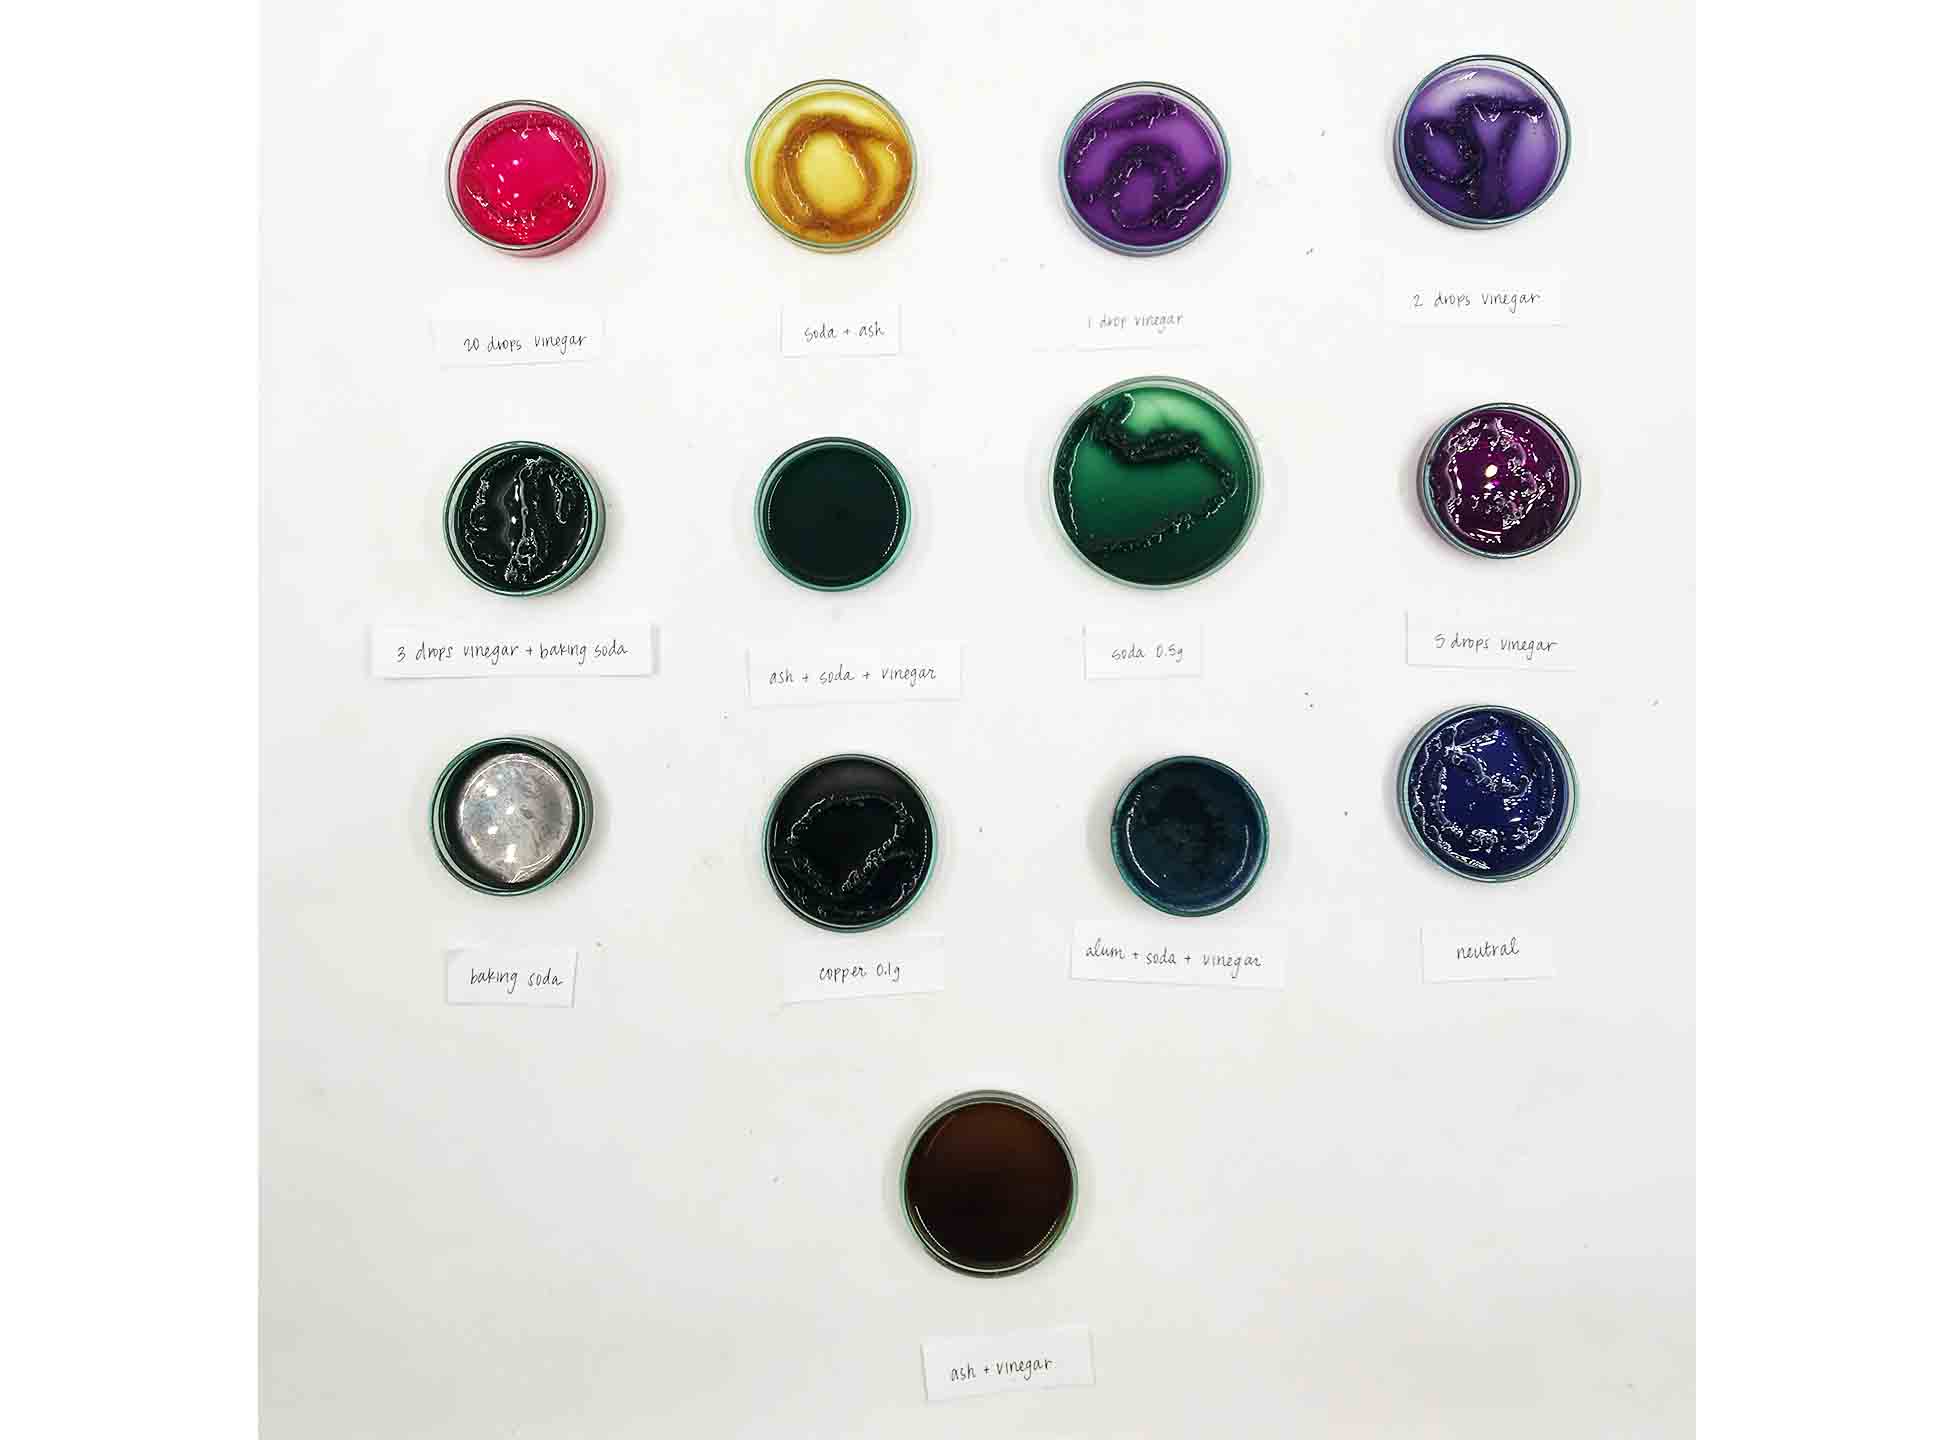
Biochromes Ink
The Ink compositions are Vehicle, Blender and Additive
Vehicle - Can be water, Ethanol, Oil, or Gel. The liquid in which pigment is suspended.
Blender- Gum. The substance act like glue between dyestuff and glue.
Additive- Salt, Vinegar Metals. It helps stabilise, intensify, modify, preserve or thicken the ink.
( I have redirected to my team mates page for the INK documentation ) - Link
Biochromes Bacterial Dyes
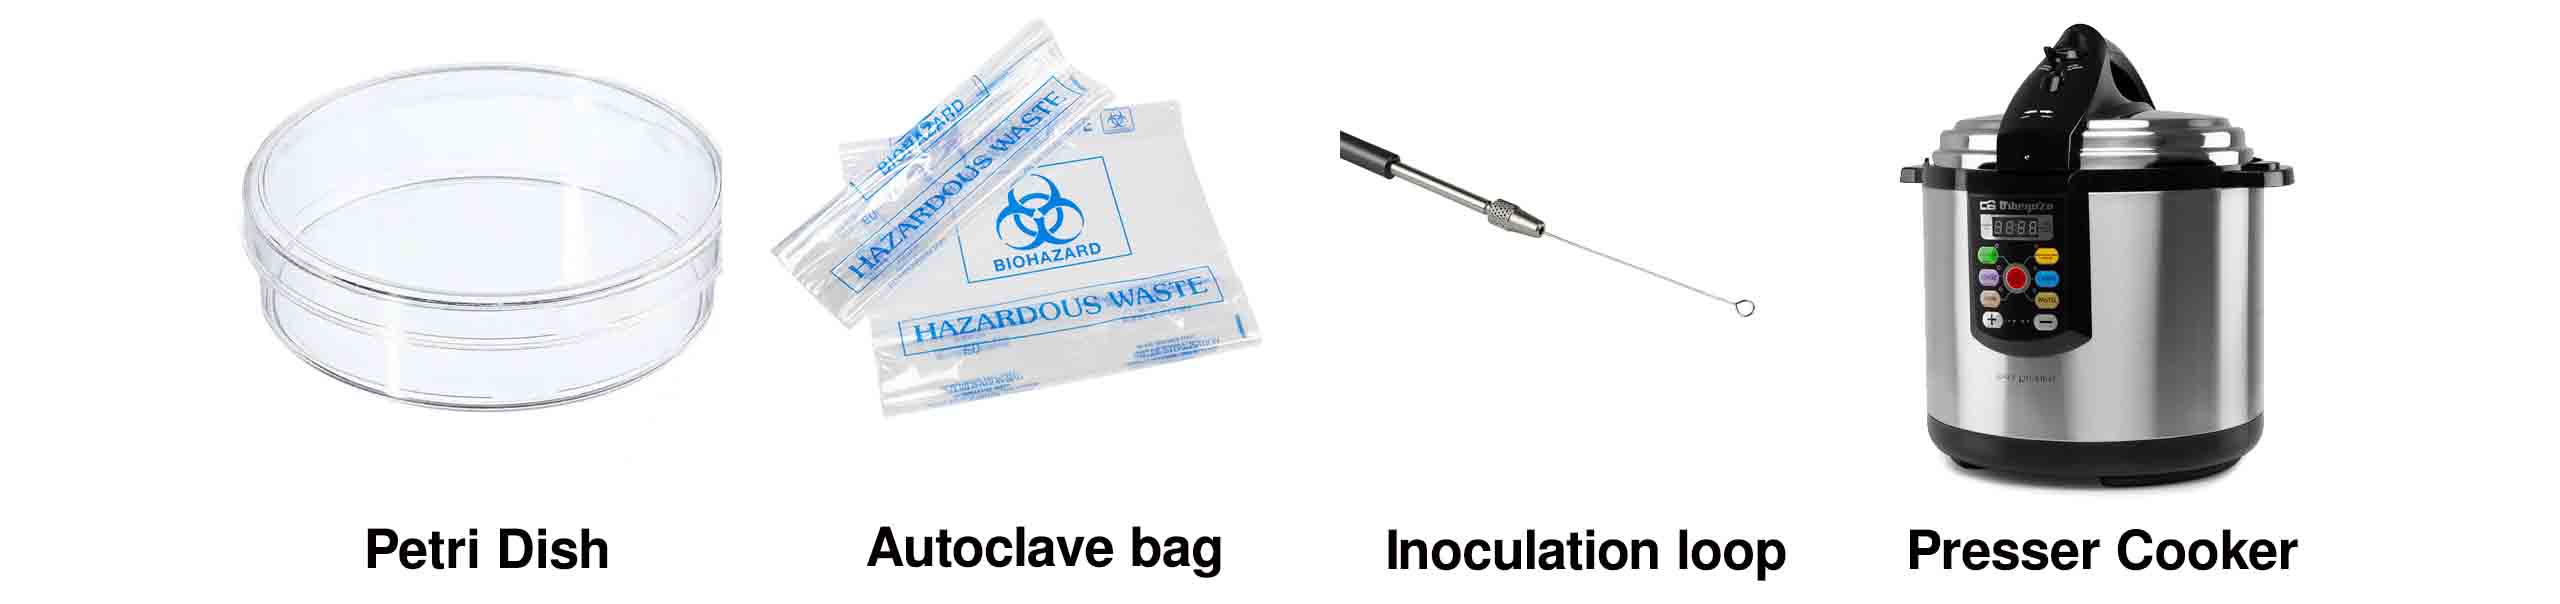
Required Tools
- Petri dish
- Camping Gas
- Gloves, Mask, Labcoat
- Innoculation Loop
- Presser Cooker
- Incubator
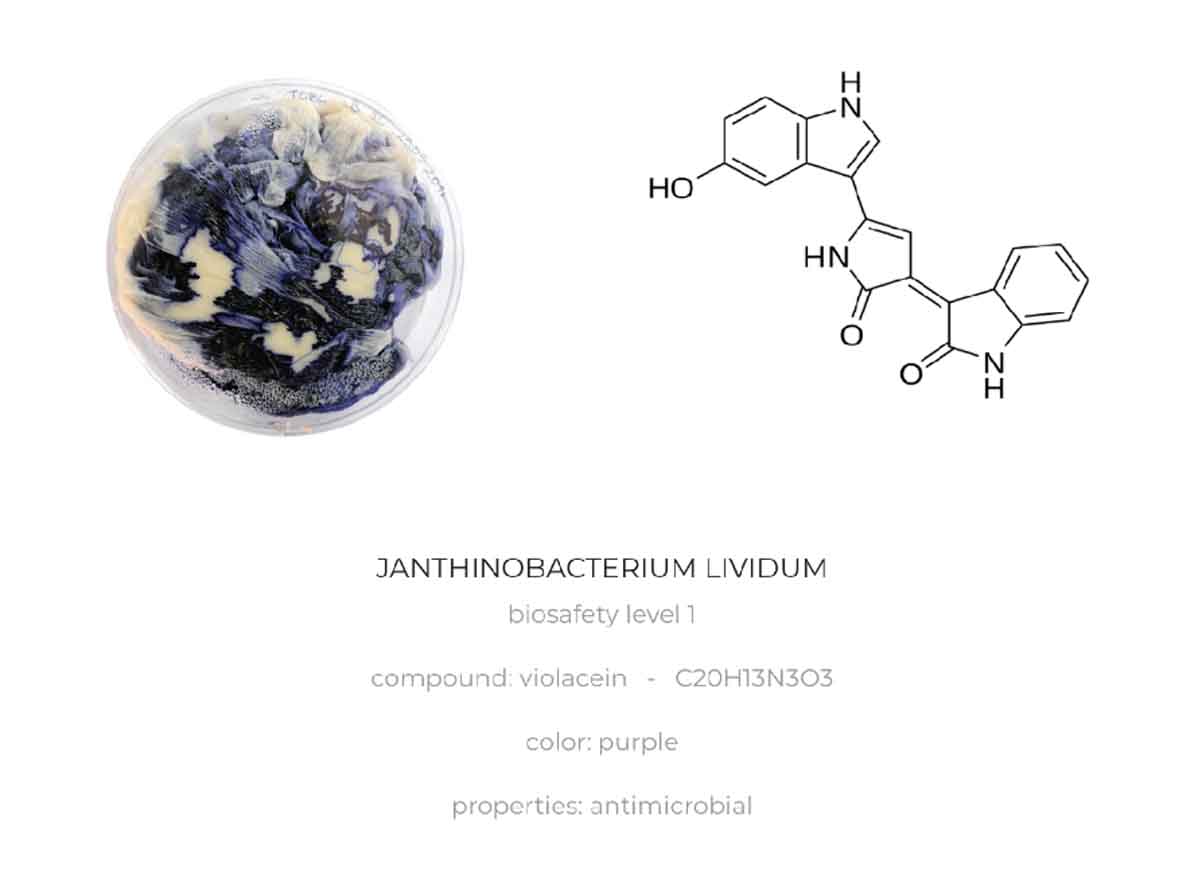
Bacteria
Bacteria is a single-celled organism that could find in everywhere on earth.
The Bacteria that we used for dyeing is calle Janthinobacterium Lividum.
Step 1
- The first step is to prepare the materials required for purification. That is a Petri dish with washes textiles, and Food for bacteria to grow that is Bacteria Nutrient Agar / Bacteria LB Broth autoclave bag and cooker.
Step 2 Prepare yourself first
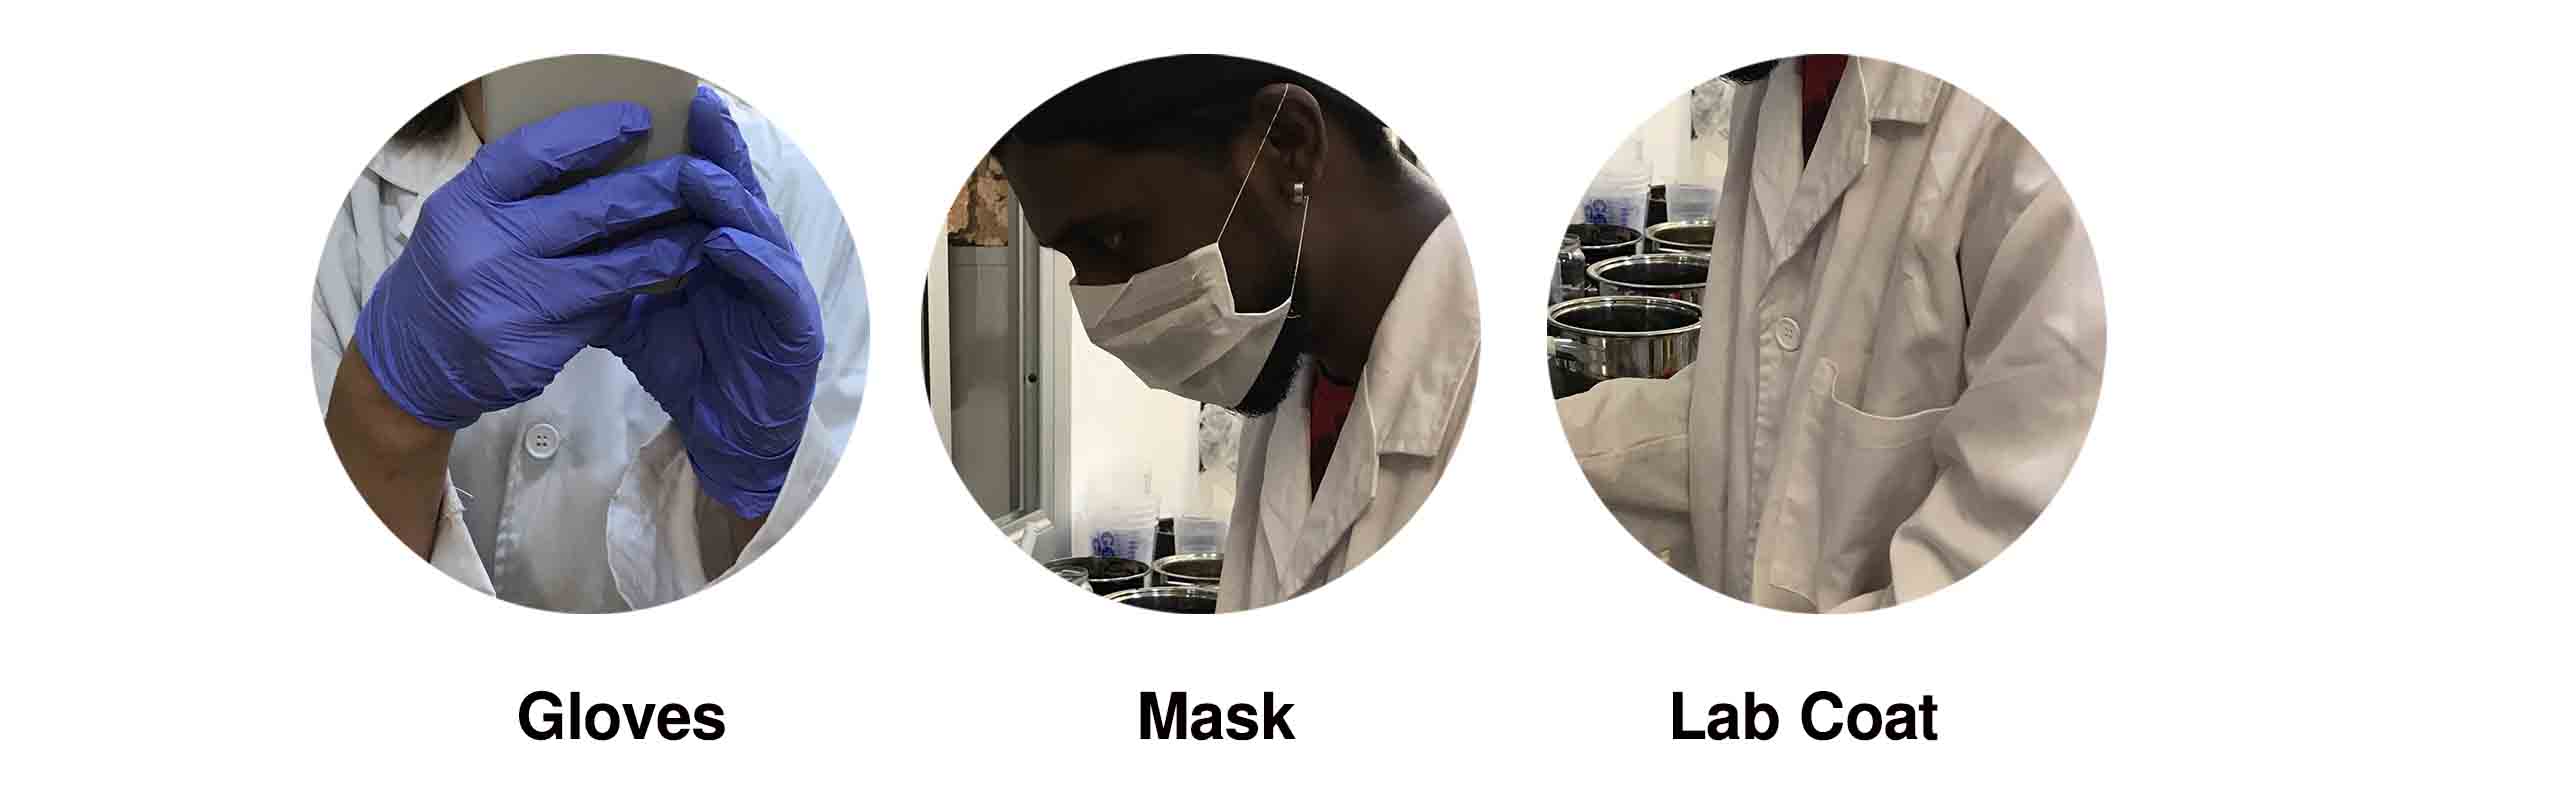
- Wear a lab coat, mask and gloves to avoid direct contact with bacteria, which is safe for both bacteria and us.
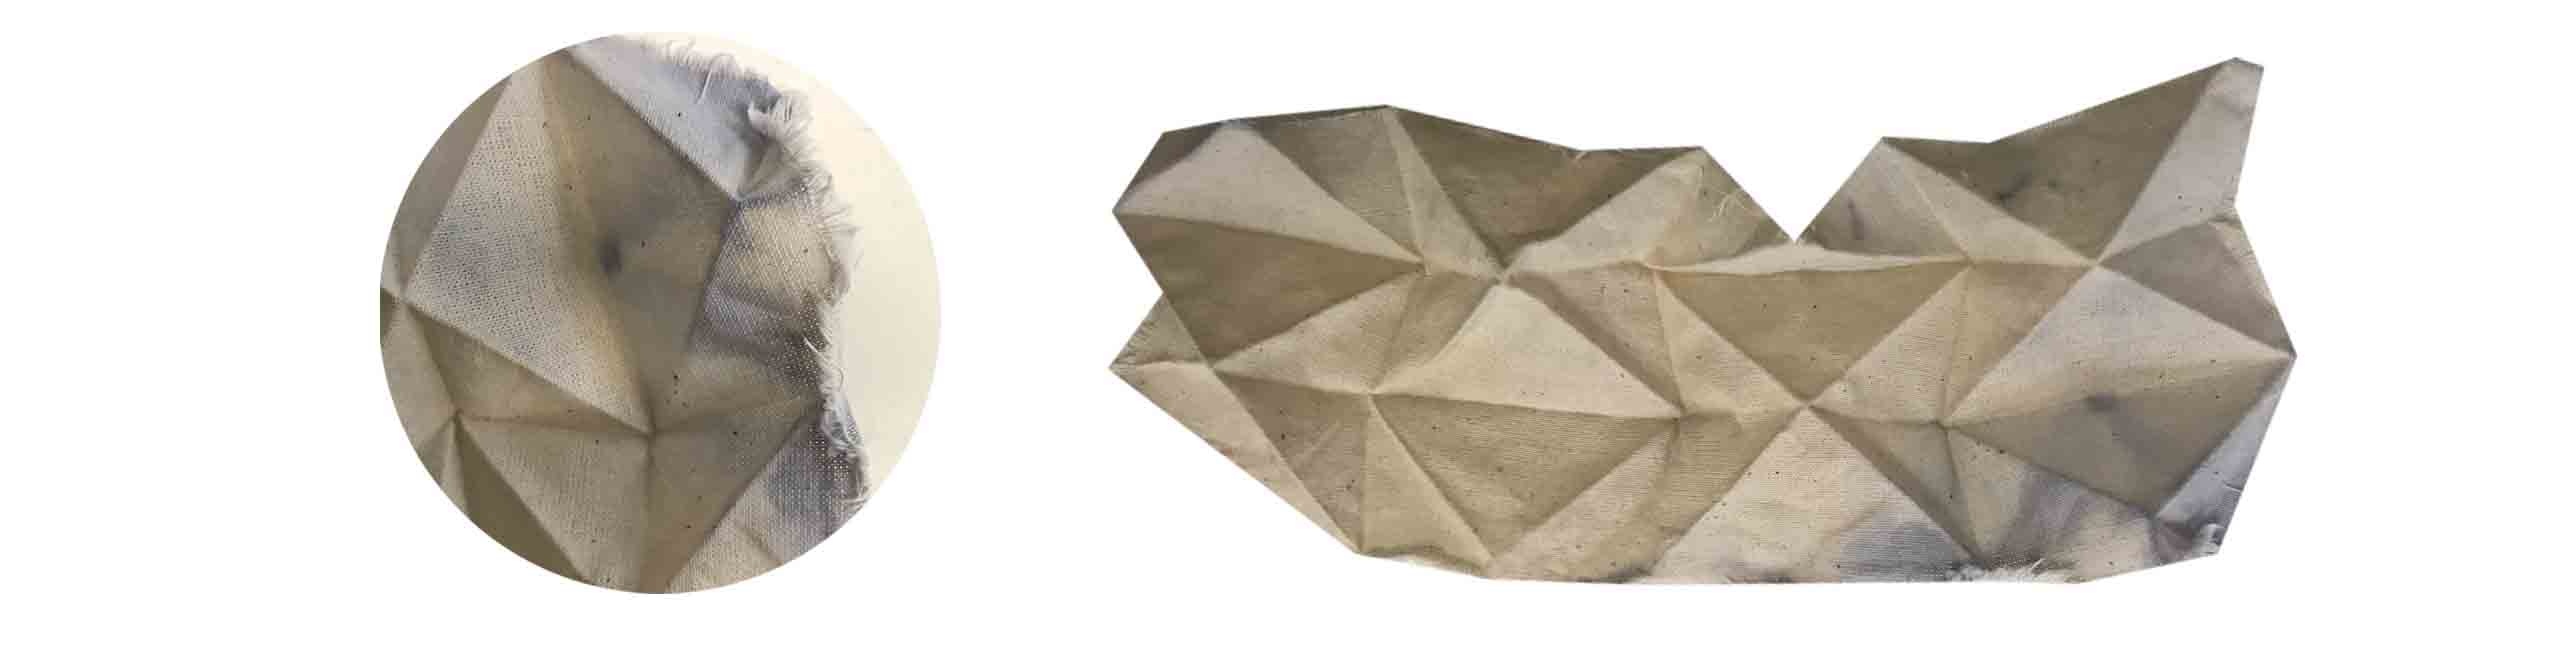
Step 3 Textile preparation

( I would like to share the documentations on how to work on origami ) - Link
-
Textiles made from plant-based fibre can be scoured with soda ash for an hour, simmered for an hour, and then scoured again for an hour.
-
We can simply rinse animal fibres like silk with water if we use them.
Step 4 Food preparation for bacteria
-
Prepare the LB Broth in the glass in a 500ml bottle of water, Nutrients and Glycerine.
-
To be able to grow the bacteria we would require a liquid medium which is LB Broth.
-
To reproduce the bacteria on several plates we require Medium agar that is Agar Agar
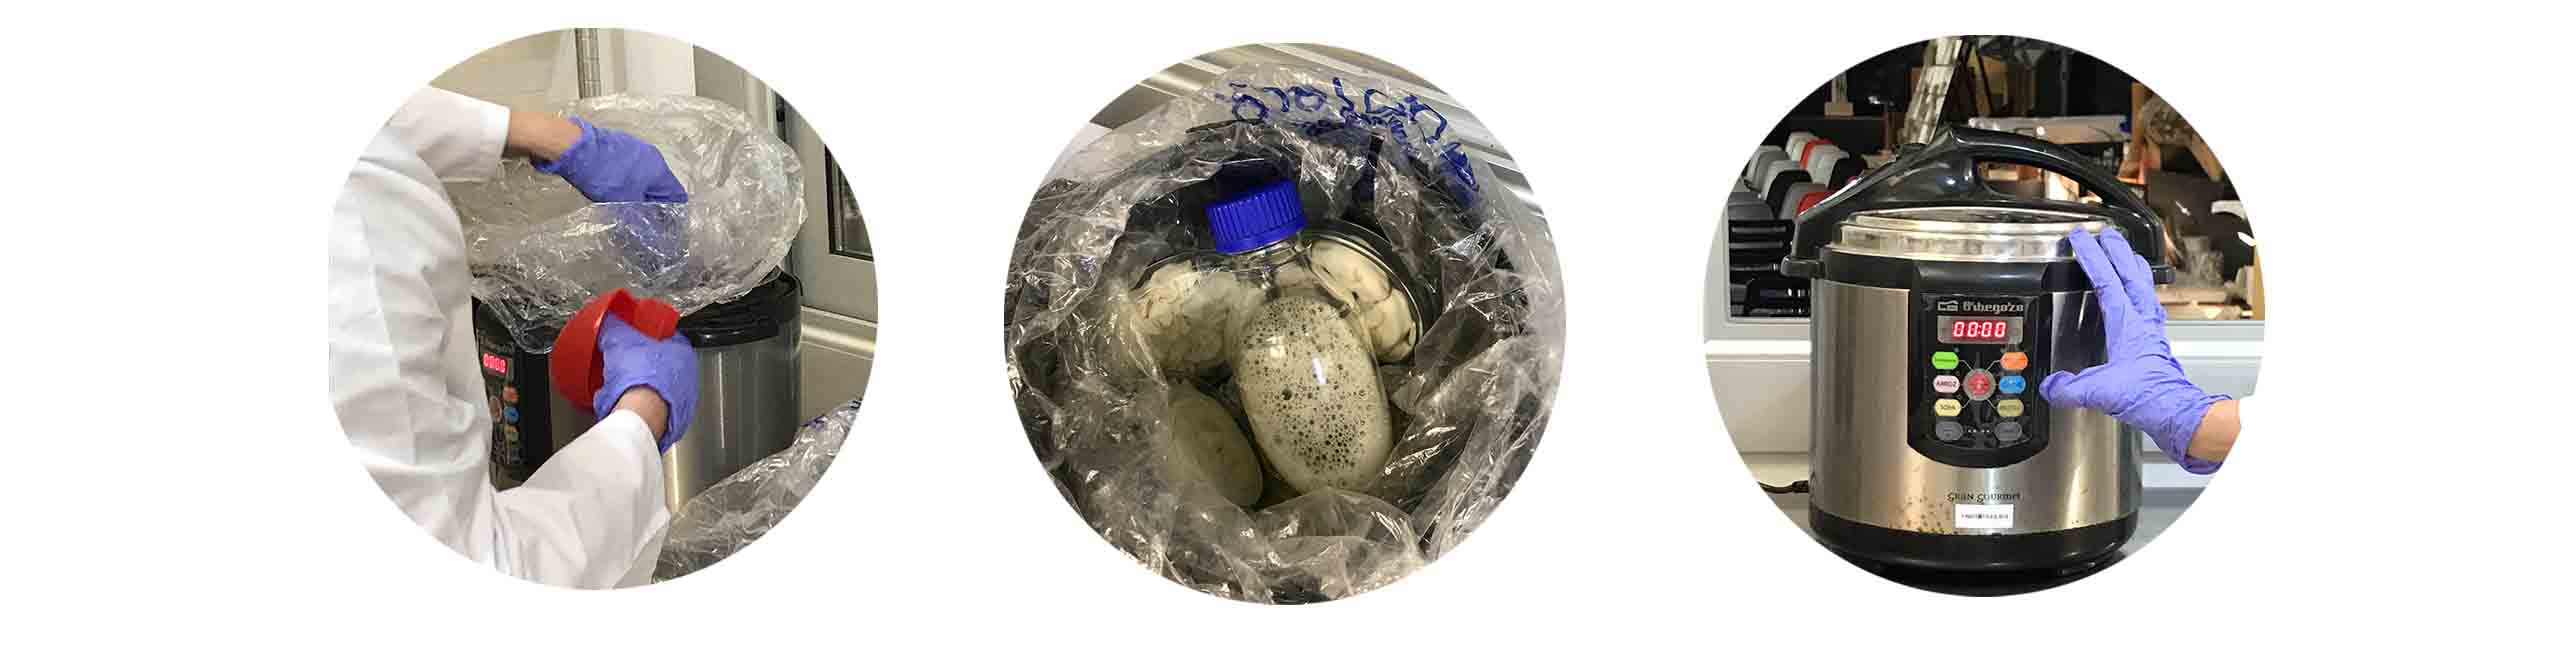
Step 5 Use a presser cooker to sterilize the textile and bacteria food prepared to avoid any type of contamination
-
Make sure to have the water in the pressure cooker for steaming and to avoid melting the plastic back.
-
Place an autoclave bag inside the presser cooker and add a petri dish with textiles and bacteria food, loosen the bottle cap otherwise, the glass bottle may burst inside under pressure, so airflow should pass through.
-
Once it is sterilized with the cooker, let it cool down and then remove the materials gently to start the bacteria dyeing process.
Step 6 Workplace Preparation

-
Use ethanol to clean the workspace first and place the stove.
-
Pour the alcohol around the stove again and light it, which will create a bubble around the workspace that will prevent any contamination.
-
Now keep all your materials and food closer to the stove for dyeing within the bubble.
Step 7 Bacterial Dyeing

-
In one hand take the glass of LB Broth and open it closely towards to the fire.
-
On the other hand, open the petri dish slightly and not fully, then pour the broth on the textile materials to spread all over the place.
-
Process needs to be very quick to avoid the risk of contamination
-
Now take the Inoculation loop and hold it under the fire till it gets hot red.
After that, use the inoculation loop to cool down the loop, and then apply the bacteria by spreading it gently on the textiles after taking them from the petri dish. do the part twice or thrice quickly.
- After the bacteria are transferred onto the fabric make sure to heat the loop to kill the bacteria that are present on the loop.
Step 8 Incubator to preserve bacterial growth
- Now keep the petri dish inside the Incubator and close it properly.
- Leave it for 2 days minimum for the bacteria to grow properly
Step 9 Killing the bacteria
- After 2 days we can remove the petri dish from the incubator and boil it again to kill the bacteria.
- Can repeat the process again to get different results.
my final sample didn't turn out well, there could be 2 reasons.
Reason 1- I haven't done the scouring process.
Reason-2 Bacteria could be weak to grow on the cotton surface.
I would like to continuous this process with the corrections to see the results.
Biopantone Fab Lab Bcn
( Mirror board ) - Link

Thank you!