2. Digital bodies
I started this project at the end of week 3 since I arrived in Bilbao late. Through my own personal research I can say that in our age a digital body is also a medical body and vise versa. Sophisticated imaging techniques for visualising the body have rendered the body visible and transparent giving us multiple perspectives and ways of "seeing" but also digitally dissecting and exploring the body. What inspires me are the representations of the human body but in the intersection of disciplines such as visual art, science and technology. In our times there are many ways of seeing the body through digitally dissecting and reconstructing the human body through minimally invasive techniques and instruments.
This week's assignment:
-Include some inspiration: research on artists or projects that work with the human body
-Document the use of 3D scanner and softwares to acquire a 3D model
-Document the process of repairing and/or manipulating a 3D mesh and slicing it.
-Create my ready to cut file for laser cutting, learn how to use the laser cutter and document the workflow and upload your 3D and 2D files
-Learn about the fab lab processes, booking system, usage, machine demos, tools and safety rules
-Build and/or assemble my mannequin, create a stop motion assembling it or stepped process
-EXTRA POINT Send one picture (HIGH RES) of my mannequin to enter the competition for the annual exhibition
Research and Inspiration
Being inspired by medical imaging such as MRI and CT scans and the cross sectional anatomies of the human body, I have been looking into artists that use medical imaging techniques in their work to convey a different representation of the human body- the medical body. In my Medical Bodies class I talk about this in more detail. Different technologies produce different perspectives of the medical body, however this week I am focusing on cross sectional anatomies.
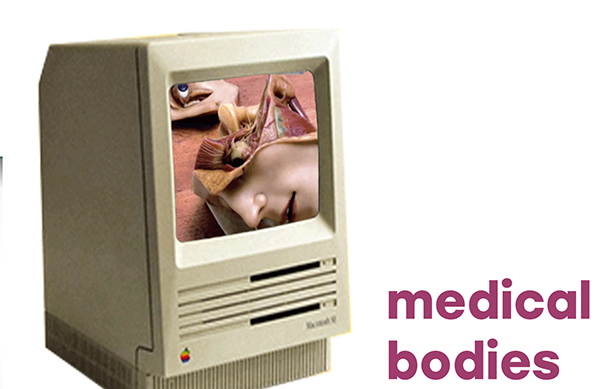
Image from School Of Machines, Making and Make-Believe zine
This is a gif I made a few years ago by reconstructing CT data from biological databases. I used InVesalius, a free software for reconstruction of computed tomography and magnetic ressonance images. The software is mainly used for rapid prototyping, teaching, forensics, and in the medical field. If you are interested, check it our here.
Scanning a real human skull
As a part of my residency I scanned a real human skull that belongs in my family. I know, weird, right? My mother is a dentist and this skull was given to her by her godfather as a gift, so she passed it down to me.
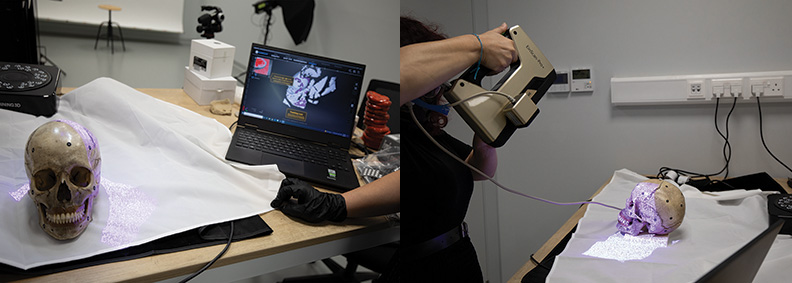
I edited the model on meshlab and turned it into a Voronoi skull which was then 3D printed with Growlay filament. Above you can see the 3D model I uploaded on Sketchfab.
The Visible Human project
I talk about virtual dissection a lot in my classes or my writings and one of the projects that is important mentioning as a medical artist is the Visible Human project.
The NLM Visible Human Project has created publicly-available complete, anatomically detailed, three-dimensional representations of a human male body and a human female body. Specifically, the VHP provides a public-domain library of cross-sectional cryosection, CT, and MRI images obtained from one male cadaver and one female cadaver. The Visible Man data set was publicly released in 1994 and the Visible Woman in 1995. The data sets were designed to serve as (1) a reference for the study of human anatomy, (2) public-domain data for testing medical imaging algorithms, and (3) a test bed and model for the construction of network-accessible image libraries. The VHP data sets have been applied to a wide range of educational, diagnostic, treatment planning, virtual reality, artistic, mathematical, and industrial uses. About 4,000 licensees from 66 countries were authorized to access the datasets. As of 2019, a license is no longer required to access the VHP datasets.

Screenshots from here
Rebecca D. Harris Symbiosis embroidery

Rebecca Harris, Symbiosis, 2015, 160H x 60W x 1cm, cotton and thread
According to the artist, this piece took many months to create, starting first on the computer with MRI scans to assist in drawing the contour lines, this was printed as a template before stitching the lines using a sewing machine, before the final part of hand sewing the thousands of the hand stitched French knots.
Symbiosis is a textile wall hanging commissioned by the Eden Project and Wellcome Trust for permanent public display as part of Eden Projects human microbiome exhibition. Our bodies are an enormous microbial community with a need to be kept in a healthy balance and we are therefore referred to as an eco-system. Using this analogy of the body being like a geographical area, the two-dimensional figure is brought to life by drawing her landscape similar to the contour lines found on a map. Upon this terrain are the chartered areas of the trillions of microbes represented as hand embroidered French knots. The colours represent the major groups of microbes present on the skin, and give a sense of the diversity, proportions and distributions of the communities that make our bodies their home. The bright, seductive and tactile surface is embellished rather than blemished, a means to focusing on the positive aspects of our human microbiome. The foetus is microbe free and quietly awaits it journey into the world for its first seeding of microbes.
You can find this artwork here.
Gunther Von Hagens Plastinated Human tissue - Human Slices and Braunes cross sectional anatomy
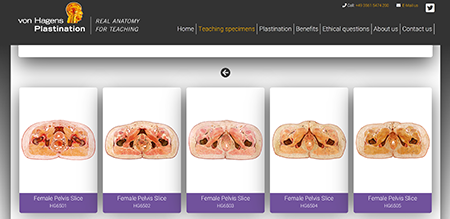
Here, you can find another example of the representation of the human body in the form of plastinated sheets from real human bodies and in comparison with CT and MRT scans these slices illustrate the anatomical structures in colour and in a transparent form. These slices can be studied on a microscopic level too
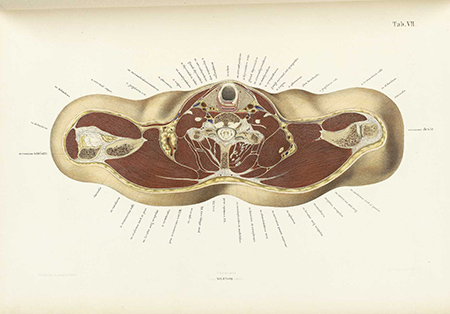
Here, this color lithograph is a part of an atlas from Braune, Wilhelm (1867-1872). The atlas consist illustrations of frozen cross sections of human anatomy. After sections were cut, thin paper was placed over them and tracings were made of the anatomical features
Digital Bodies- From the physical to the digital to physical again- the process
1. 3D Scanning- Handyscan 3D scanner
So since I arrived in Bilbao on the 3rd week of the classes, my classmates warned me that the Anet HandySense 3D scanner we have here in Bilbao, and 3D scanners in general still do not like hair! I noticed how all of them have scanned heads and I decided to scan an arm/hand mannequin we had in the lab. Here are some more specifications of the scanner in English!
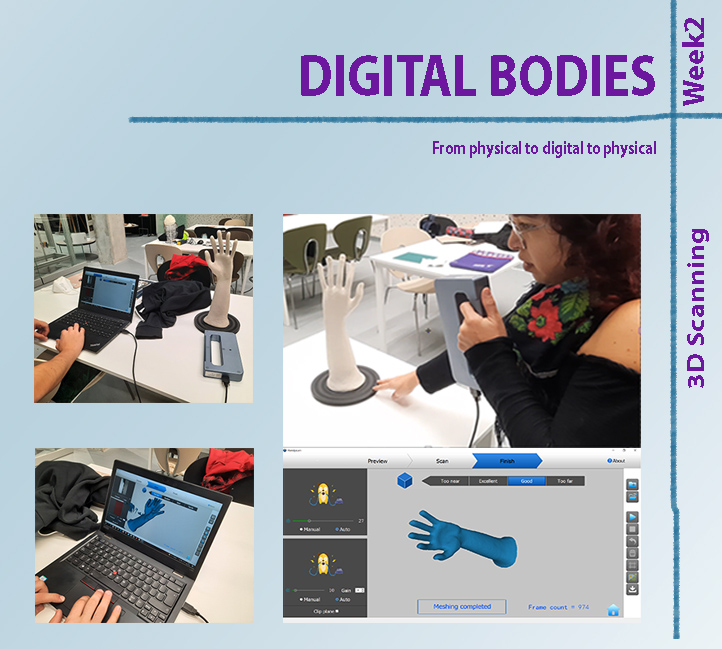
Some notes and instructrions on using the 3D scanner
These are the steps you need to follow to 3D scan an object:
1. Open the HandyScan software on your computer.
2. Specify what type of object you'll be scanning.
3. Make sure that you press the "AUTO FUNCTION".
4. Press "Start" on the screen.
5. Press "Play" in the scanner and scan your object carefully.
6. Move around your object until you get the complete shape.
7. Once you finished, the HandyScan automatically fills the hole of your design if you choose that option.
8. Wait untill the program fills the hole and you see the "Meshing completed" message.
9. Then you need to export the model into an ".obj" file.
It was fairly easy to scan the arm but I had to keep moving the base very slowly so the scanner does not loose track. You can scan in a variety of ways, freehand around the object, use a spinning base to place the object and be free hand or put the scanner on a special stand!!!On the 1st time of the scan, I did not get the space between the fingers right so I had to go at it again.
2. Editing the meshes- Rhinoceros
I edited the meshes on Rhinoceros and I trimmed the base of the arm by adding a line at the point where I wanted to trim and then capped (Cap command) the base to make sure the model was watertight. I put a line on the base to mark where I wanted the trim to take place. Then, I used the command Trim3Dmesh because we are having to do with 3D meshes and not flat 2D surfaces, therefore the command Trim would not work on 3D meshes.
Then I started playing with the Project command in order to create my own slices in Rhino just to see how the Slicer would look. Anastasia showed us a couple of ways to create slices on Rhino.
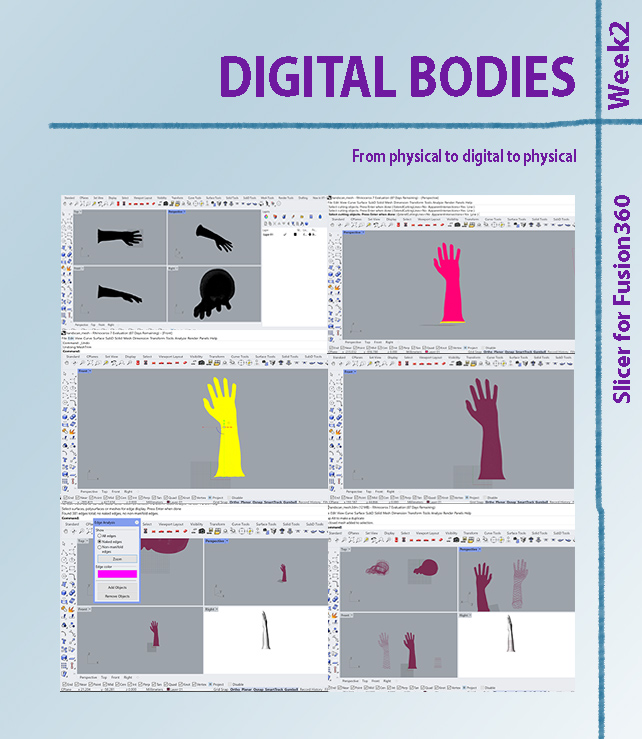
3. Making slices- Slicer for Fusion360
Once you get your 3D model on Slicer for Fusion 360 you have to Set it up to its original scale, then add the settings of your lasercutter, and choose the Construction techniques and then the material of your physical model.
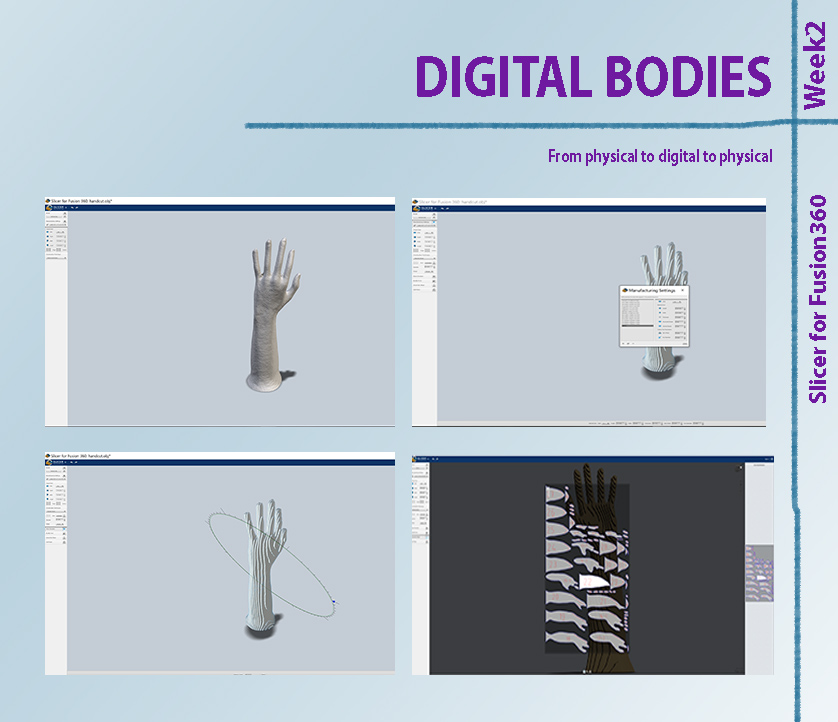
Gif video of the final model and lasercut slices on Slicer for Fusion360
4. Lasercutting
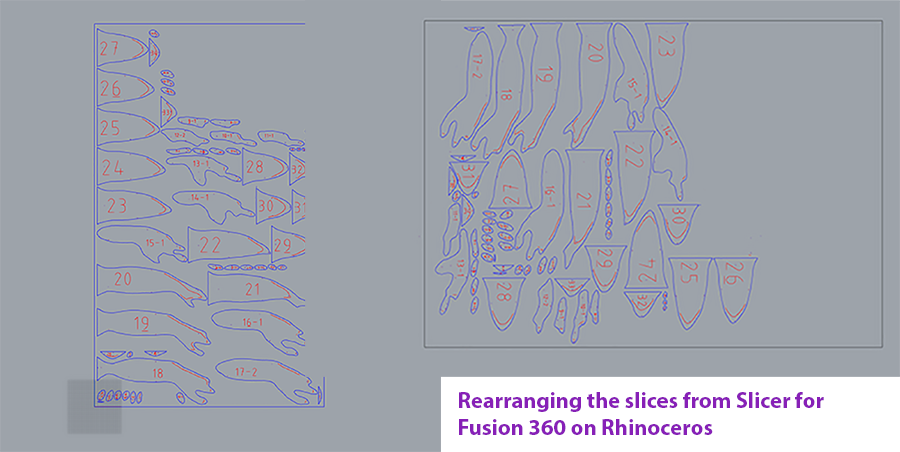
Our lasercutter, Martha, is a FRAMUN FL1409. I decided to use 3mm cardboard for making my arm model. I started this assignment in week 3 so my initial interaction with the lasercutter was for the next project for Open Source Circular fashion for week 3. After I got the slice assembly plan drawing from Slicer for Fusion for 360, I opened it on Rhinoceros in order to rearrange the slices in a better way in order to save space. My coursemate Arantza has used up a part of a cardboard sheet so I adjusted my sliced to fit that cardboard slice in order to minimize waste! :)
Here is a photo of how I arranged the pieces to save space and also considering that I had to use the piece that was previously used too so I optimised the drawing.
More on the nesting process and how to work with different settings and layers for lasercutting here.
As you can see we have two layers on the drawing, a blue one and a red. Follow the notes below to see what they mean. The pieces are numbered, and engraved where the other piece needs to sit on! I loved the Slicer for Fusion 360!

-Lasercutter (Framun FL1409) settings for cardboard

-Material: Cardboard

-Thinkness: 3 mm

-Cut layer (Blue): This is the general outline of the slice so it should be put first in the list on top of all the other layer(s).

Speed- 35

Min. power- 68

Max. power- 72

-Engaving Layer (Red): This layer is for the red outline which in this case is for engraving and numbering the slices.

Speed- 800

Min. power- 25

Max. power- 35
The laser has a small screen on the side that shows you the settings and at what stage the laser cutting process is at
5. Assembling the hand model and final turntable animation
Gif Video of the assembly steps simulation in Slicer for Fusion360
Gif video of assemblying the arm model
Turntable gif animation of the finished mannequin which I decided to use for displaying my silver jewellery creations
Here is a googledrive link with the 3Dmodel of the arm, the .dxf file of the slices and the 3Dmodel from the Slicer360 for Fusion!