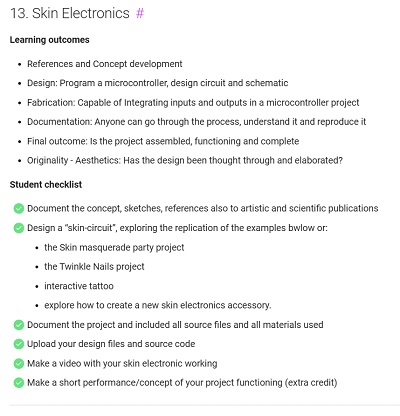
13. Skin Electronics
Wow. The end is here.
Still trying to catch my breath after the whirlwind course. Looking forward to some time to think and work on the assignments I have gotten behind on. What a great journey it has been. I want to make sure that all of my assignment work meets a level of quality that I am satisfied with.
This week...Skin Electronics...an appropriate final session. We started with questioning the idea of The Body. Then the subsequent series of classes explored the many fascets of modern garment production...from materials to colors to electronic enhancements. My see the conceptual content of this last session to be the closure of the circle of that is the content of the entire Fabricademy program. The garment evaporates...leaving only the skin...the ultimate bio-material, the ultimate wearable and expression of who we are...filter free. We are challenged to apply electronic intelligence and enhancements directly to our bodies...to eliminate the 'Wearable' and replace it with the 'Applique' or the 'Embedded'.
Research
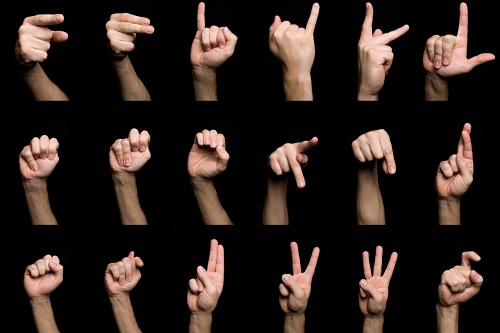
For the hearing impaired, communication occurs with the hands. Visually distinctive gestures are used to communicate...to signal intent and meaning.
The Hand is one of the most expressive aspect of the body...capable of a myriad of motions and shapes. The Hand also implies tactility and extreme sensory perception. The other senses...sight, hearing, smell...do not require direct contact to perceive. Touch requires us to put our hands...our fingers...our finger tips onto the object of our curiosity.
(insert research...the hand's sensory capabilitiesS)
Assignment
Assignment Work
An project option for this week includes 'Party Nails'. As I am interested in working with a project for the hand...I chose to option as my starting point.
For my Skin Electronics project, I decided to work on an applique for the hand, inspired by sign language...call Signals.
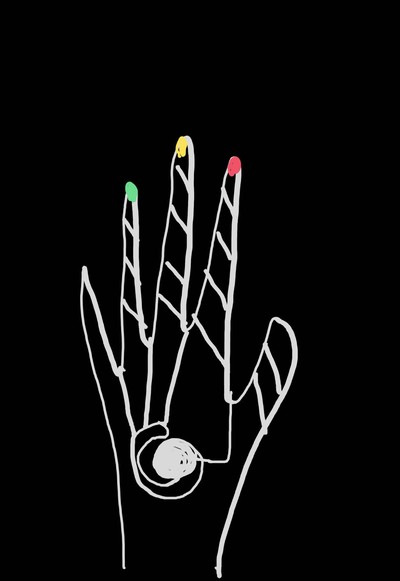
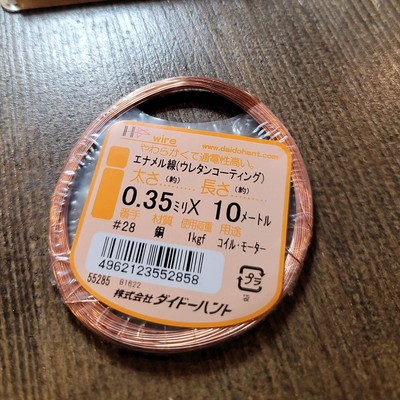
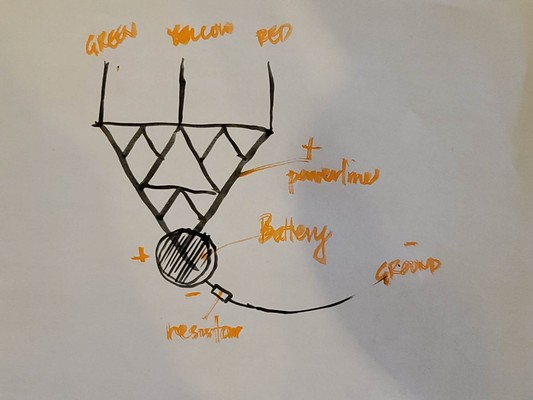
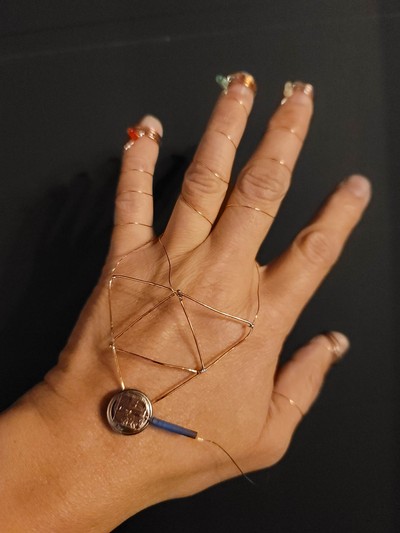
LEDs...of different colors...are installed on 3 fingernails...their positive legs are connected to a 6V battery's positive terminal by means of a thin 0.35mm enameled copper wire (the current to each controlled by a 100ohm resistor). The negative legs of the LEDs are connected to a conductive pad that wraps around the fingertips. Another conductive pad is wrapped around the tip of the thumb and wired to the negative terminal of the battery.
Signals works by bringing the conductive pad of the thumb in contact with one (or more) of the conductive pads of the other fingers (closing a circuit like a switch)...selectively lighting up different colored LEDs...their patterned combinations generating a message to the observer. RED-RED-YELLOW = "Hello". GREEN-YELLOW-GREEN = 'What is your name?".
Here is a a demonstration of how Signals works.
Assembly Process - Signals
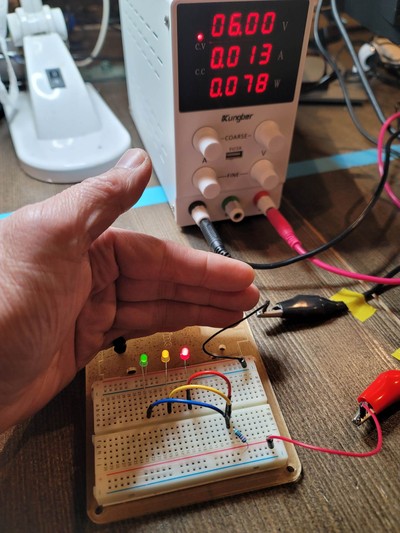
The work began with prototyping the system on a breadboard...
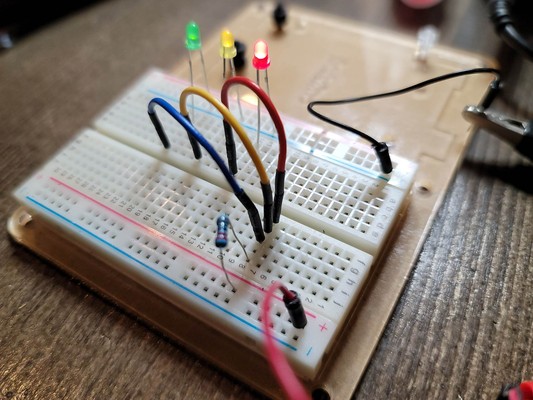
The Power Assembly
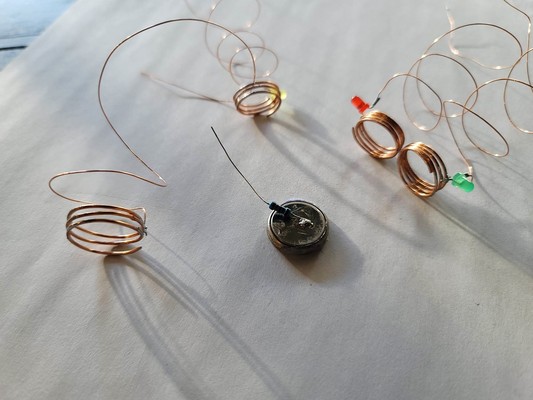
Because I wanted the possibility of turning on all 3 LEDs simultaneously, I chose a 6V battery made up of 2x CR1620 button batteries stacked on top of one another. I tried supergluing and hotgluing the batteries together...worried that the superglue or hotglue would flow in between the batteries and negatively affect the electrical connection between them...or worse, conduct between the batteries in an unintended way. Superglue was messy and didn't work very well. A bit more patience and care might produce good results...but I abandoned it to use hot glue instead. As I just wanted the batteries to have casual contact...a few dabs of hot glue along the edges did the trick.
Attaching positive and negative wires to the positive and negative terminals of the battery proved difficult. Soldering was unsuccessful. I could not get the surface of the battery hot enough to have solder melt and adhere to it. Leaving the soldering iron tip on the battery ended up killing the batteries (voltage no longer outputted when measured with a multimeter). With time running out, I just resorted to using adhesive copper tape to (poorly) adhere the positive ad negative wires to the respective terminals of the 6V battery.
To reduce the current from the battery...and protect the LEDs, I needed to determine what resistor is required. The calculation is as follows...
R = V/I
Resistor = Vbattery - Vled/LED max current
R = (6V - 2V)/0.02A
R = 200 ohms
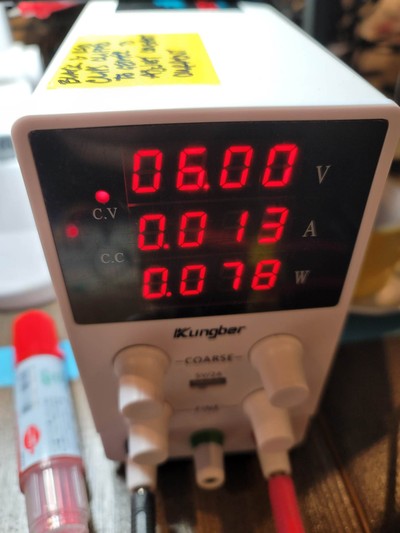
Note that I ended up using a 100 ohm resistor because I discovered that the 200 ohm resistor didn't work. I think a combination of the resistance of the wires and batteries...and the fact that the batteries only actually outputted 5.75V when measured with a multimeter (not 6V as advertised)...meant a lower resistor value was needed to allow enough current to flow to the LEDs. This debugging process ate up a few hours of my life. Ugh.
The Conductive Switches
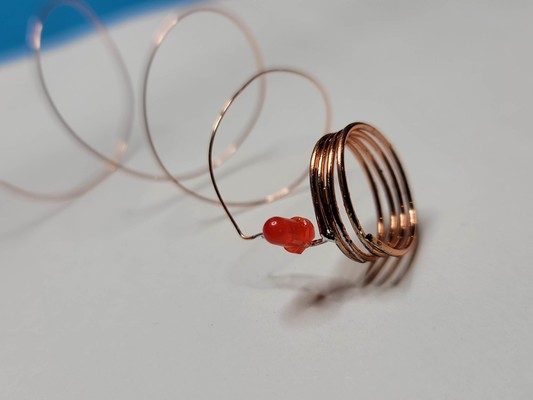
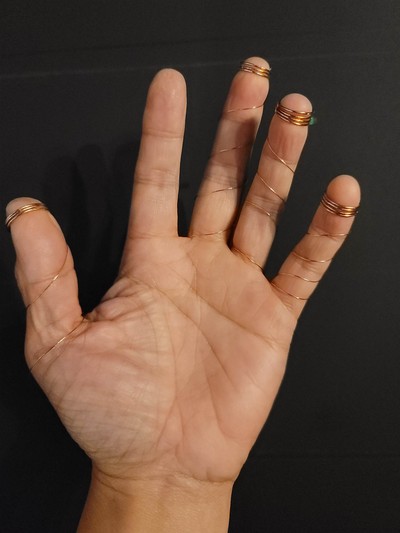
The Power Assembly finished, I built the fingertip conductive pad and LED element...coiling 0.8mm enameled copper wire into fingertip hoops. The area on the hoops where the negative LED legs were to be soldered and where they would make contact with another hoop were sanded down to remove the enamel and expose the copper below.
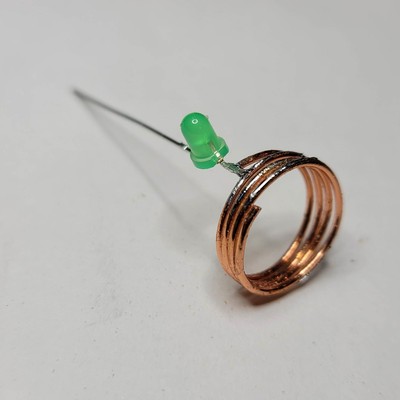
To the fingertip hoops, I soldered coiled, 0.3mm enamel wire to it. Coiling allows the wire to hug the finger and flex if fingers flexes.
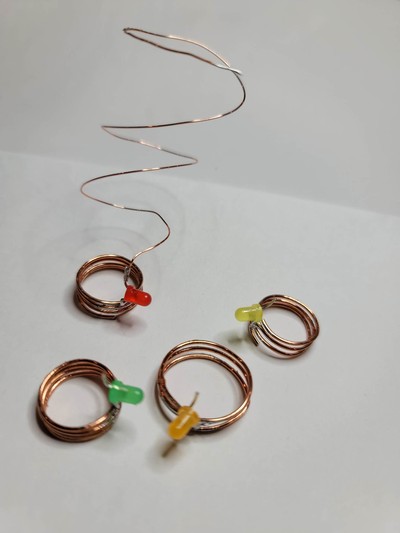
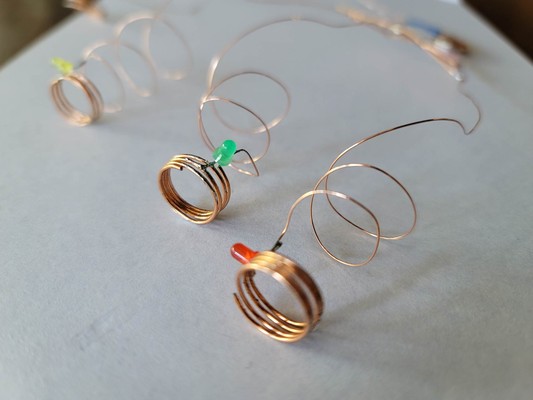
I repeated this process until the pads for all 4 fingers are completed...
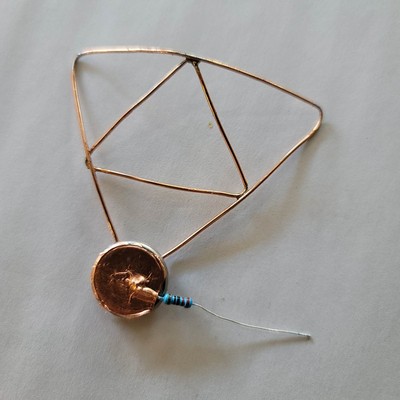
Lastly, I made a decorative 'consolidator' for the finger wires...reducing 3 finger wires into one connection point at which the 6V battery is attached...
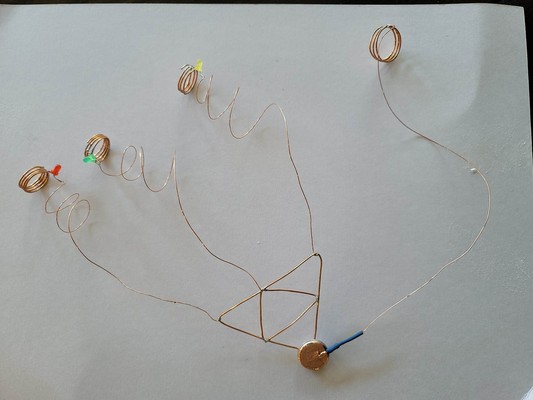
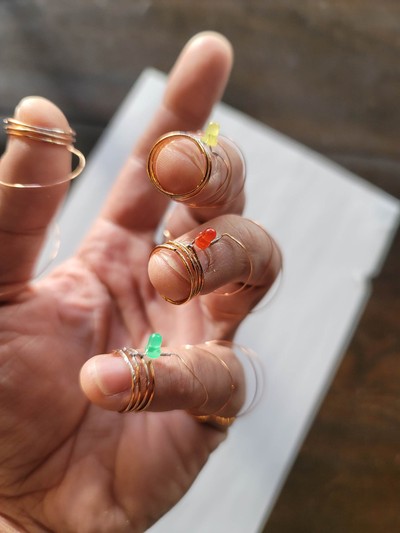
The completed Signals electronics system as installed on the hand...
Lots of room for improvement... While I hoped that the Signals skin electronics device as I made it would be adequate to fulfill the weekly assignment requirement...the finished assembly is far from elegant or functional perfection. For one, if I am honest, Signals is a wearable...not a skin electronics device...as it is not adhered to the hand. Also, I don't love the bulkiness or finicky nature of the conductive finger hoops. As mentioned earlier, the battery assembly is rather fragile...how the 2 batteries are attached to one another as well as how the circuit wires are attached to its terminals.
Some ideas for an improved second version
- Better conductive switching at and wiring to the fingertips > I would like to replace wires with conductive or foil that can be adhered to the skin and nail
- Better connection of wires at the battery > is spot welding the solution?
- Generally a more attractive and elegant design...not the rough proof of concept aesthetic of the current version
Fabrication files
Appendix
Class Notes
Katia Vega
- gestures to create interface
skin - envelope - sensor surface - mirror of emotions - reflection of time - protection
Conductive Makeup - eyelash as switch - metallized makeup - fingertips?
Hair - as tool - unconscious auto-contact behavior - metallize hair extensions connected to MCU - change capacitance can be input to output device
Nail Polish - electronic devices lacquered to nails
camouflage electronic and concealed interactions with electronics
cindy kao duoskin gold leaf tattoo
gestures
skinterface
assignment 3 options - sense temperature/; thermo chromic ink - embed electronics in beauty product - sense bio fluids
hide electronics for skin interface option
tools
vinyl cutter
thin enamel wires 0.5mm
smd components
attiny
small leds