06 iot
IoT
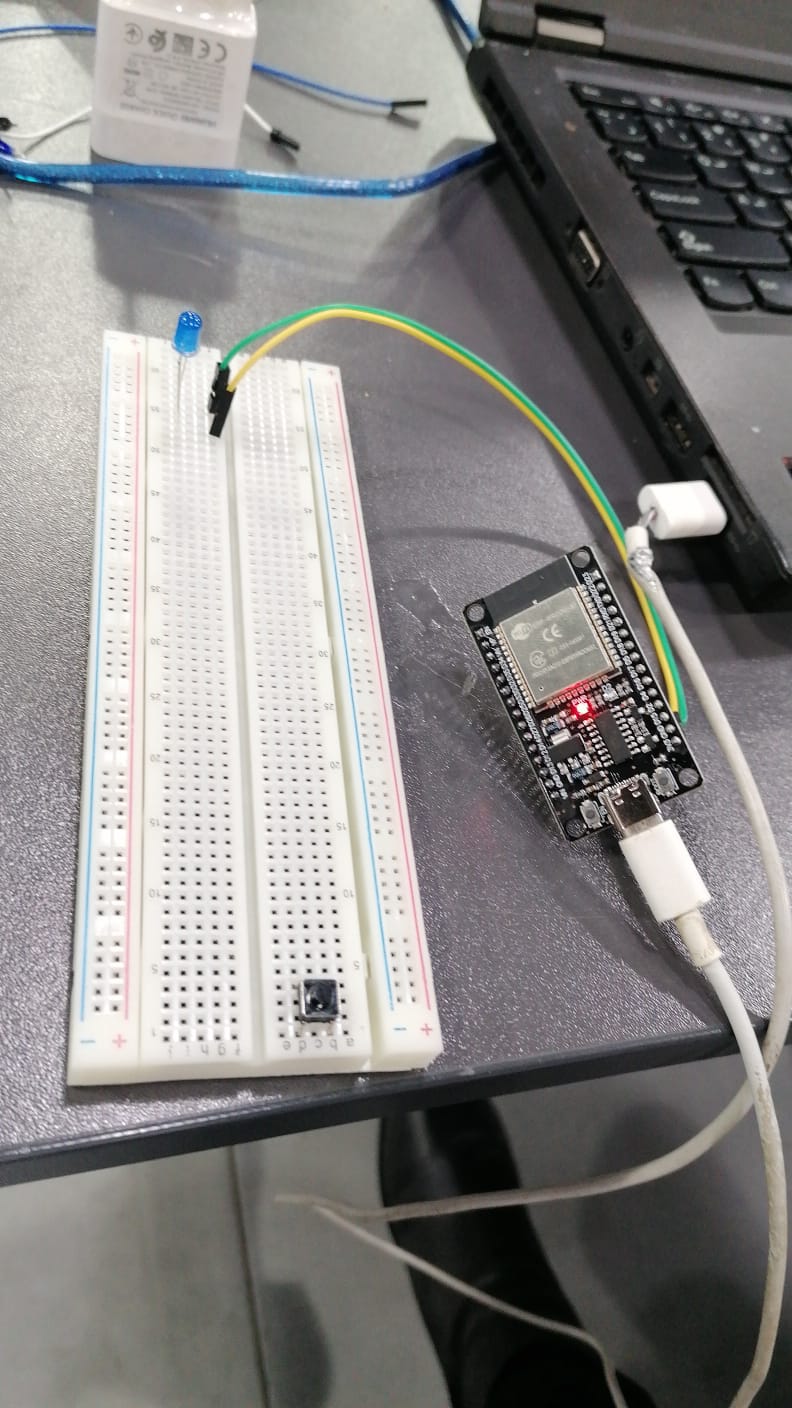
Tesing the WIFI Module :
picture of Wifi Module
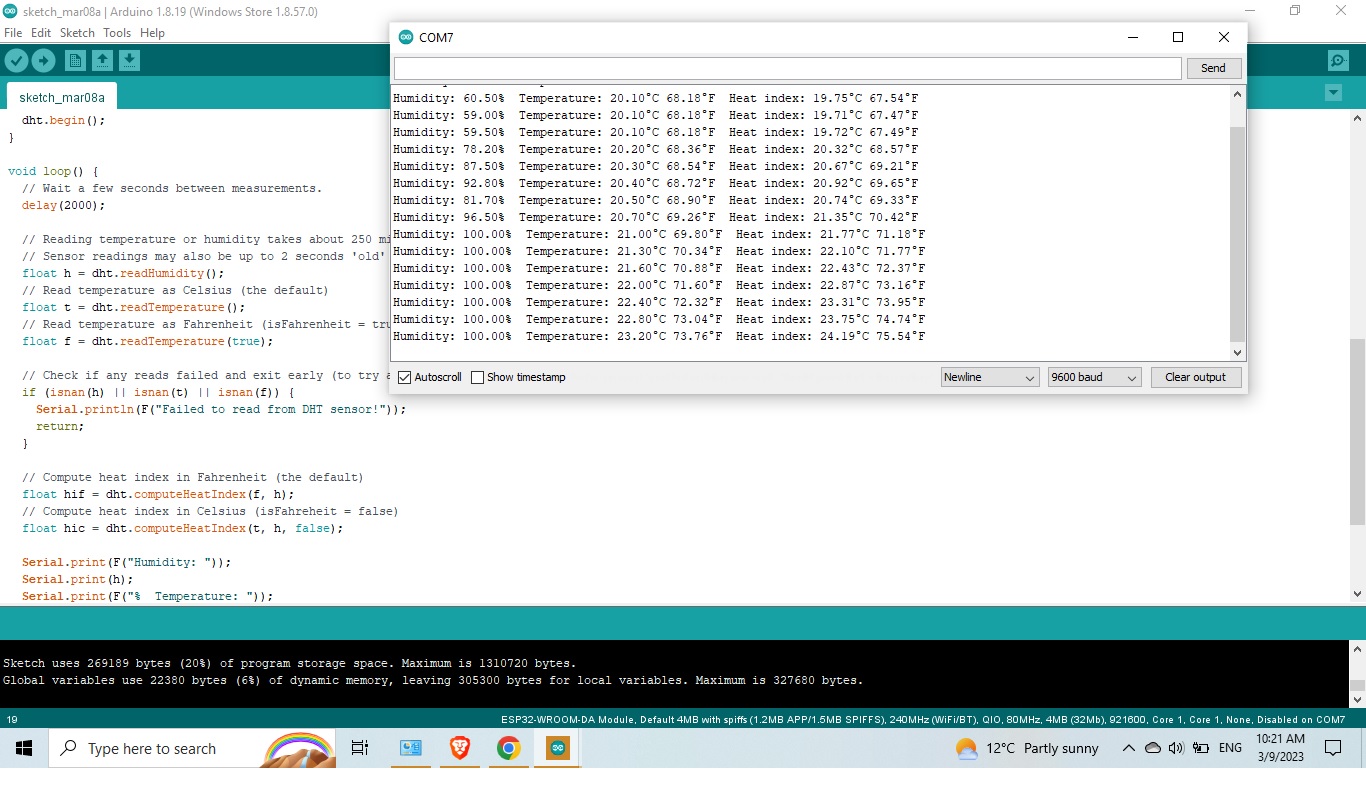
Code
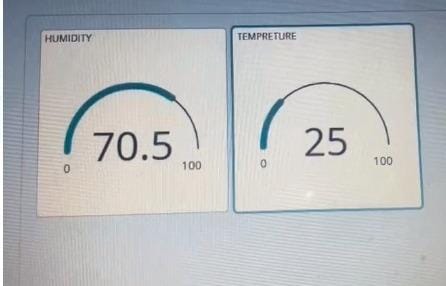
Live monitoring:
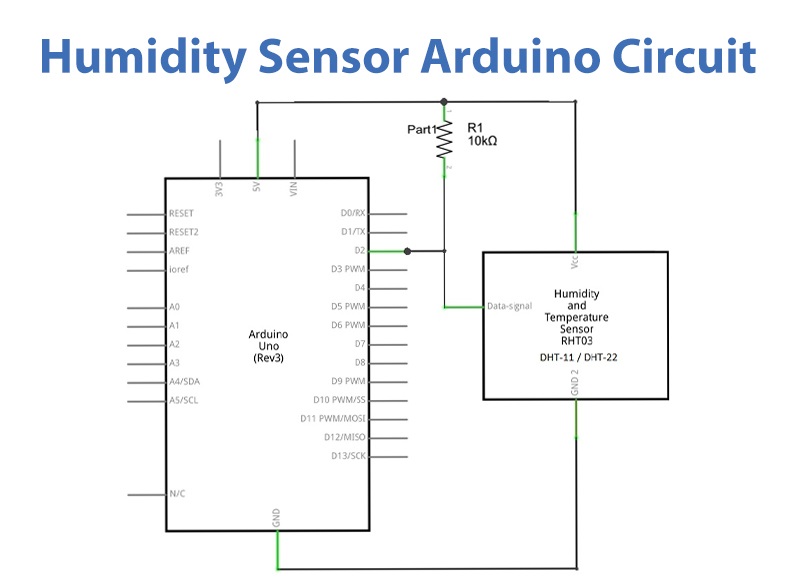
- Arduino schematic to work with humidity sensor:
- How to track and control temperature inside incubator:
In order to maintain constant temperature level inside incubator ,the main function is to check temp every second once the temperature reach 37 C the heater will switch off ,once the temperature reach 32 C the heater will turn on . in this case the bacteria cellulose will stay in warm condition .
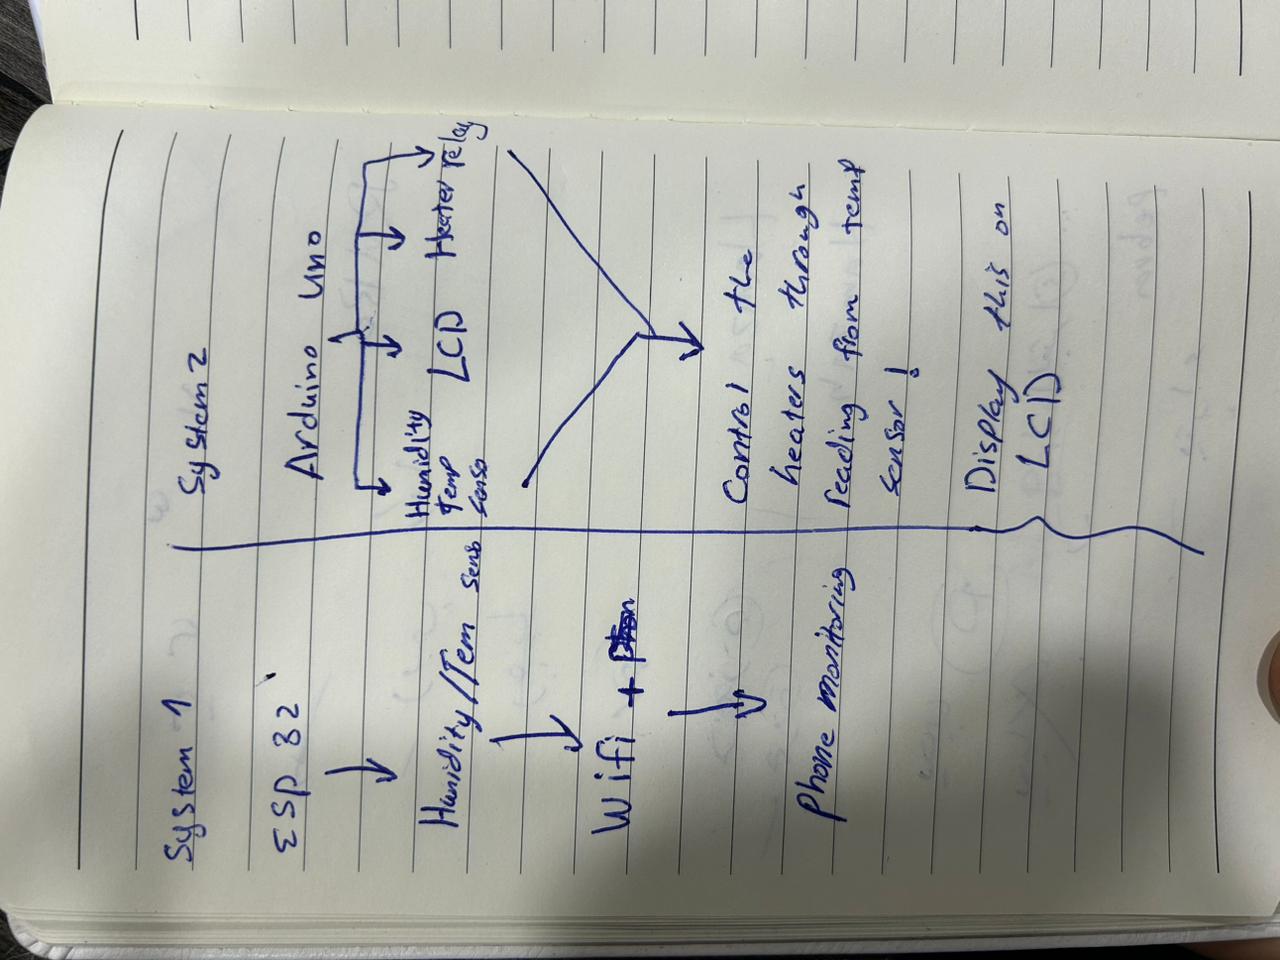
- How to integrate electronics in my design
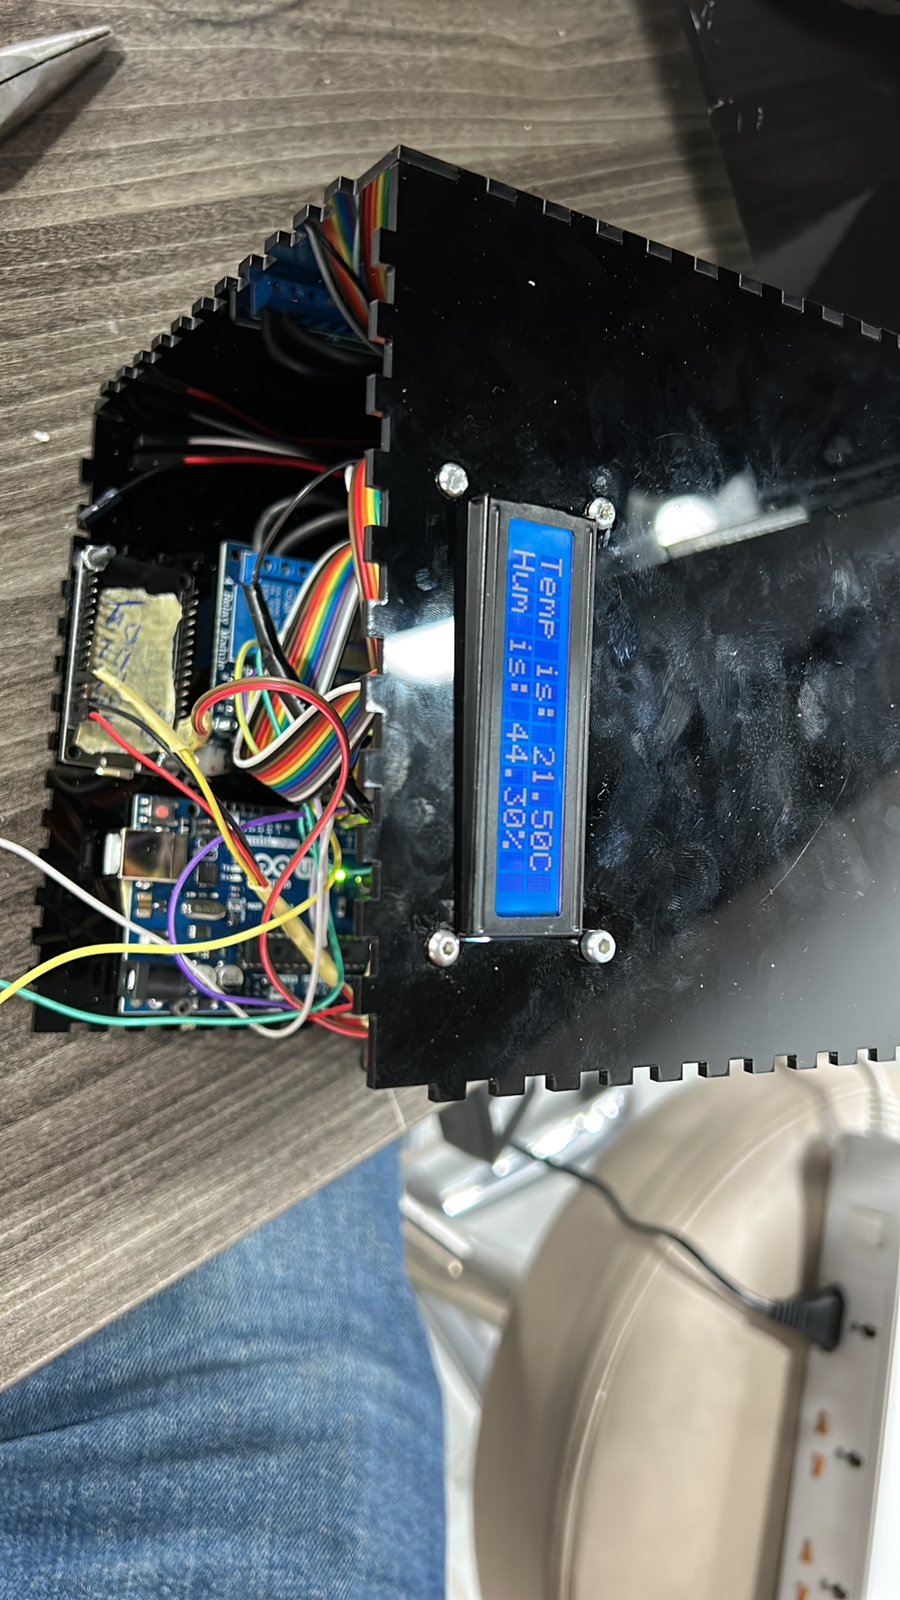
in order to make a complete design I used one system of Arduino Uno one to connect DH22 sensor directly to it ,also i connect to it an the LCD screen to show the reading output .
As the other system that i connect DC Fan to a relay maintaining a good airflow ventilation inside the incubator .
Below is the connection of Arduino schematic to work with temperature & humidity sensor "DHT22"
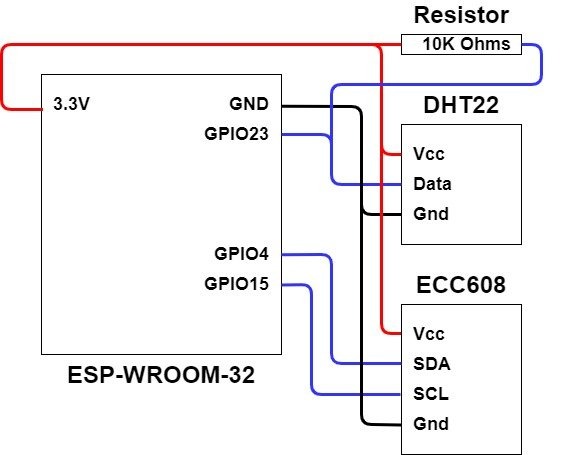
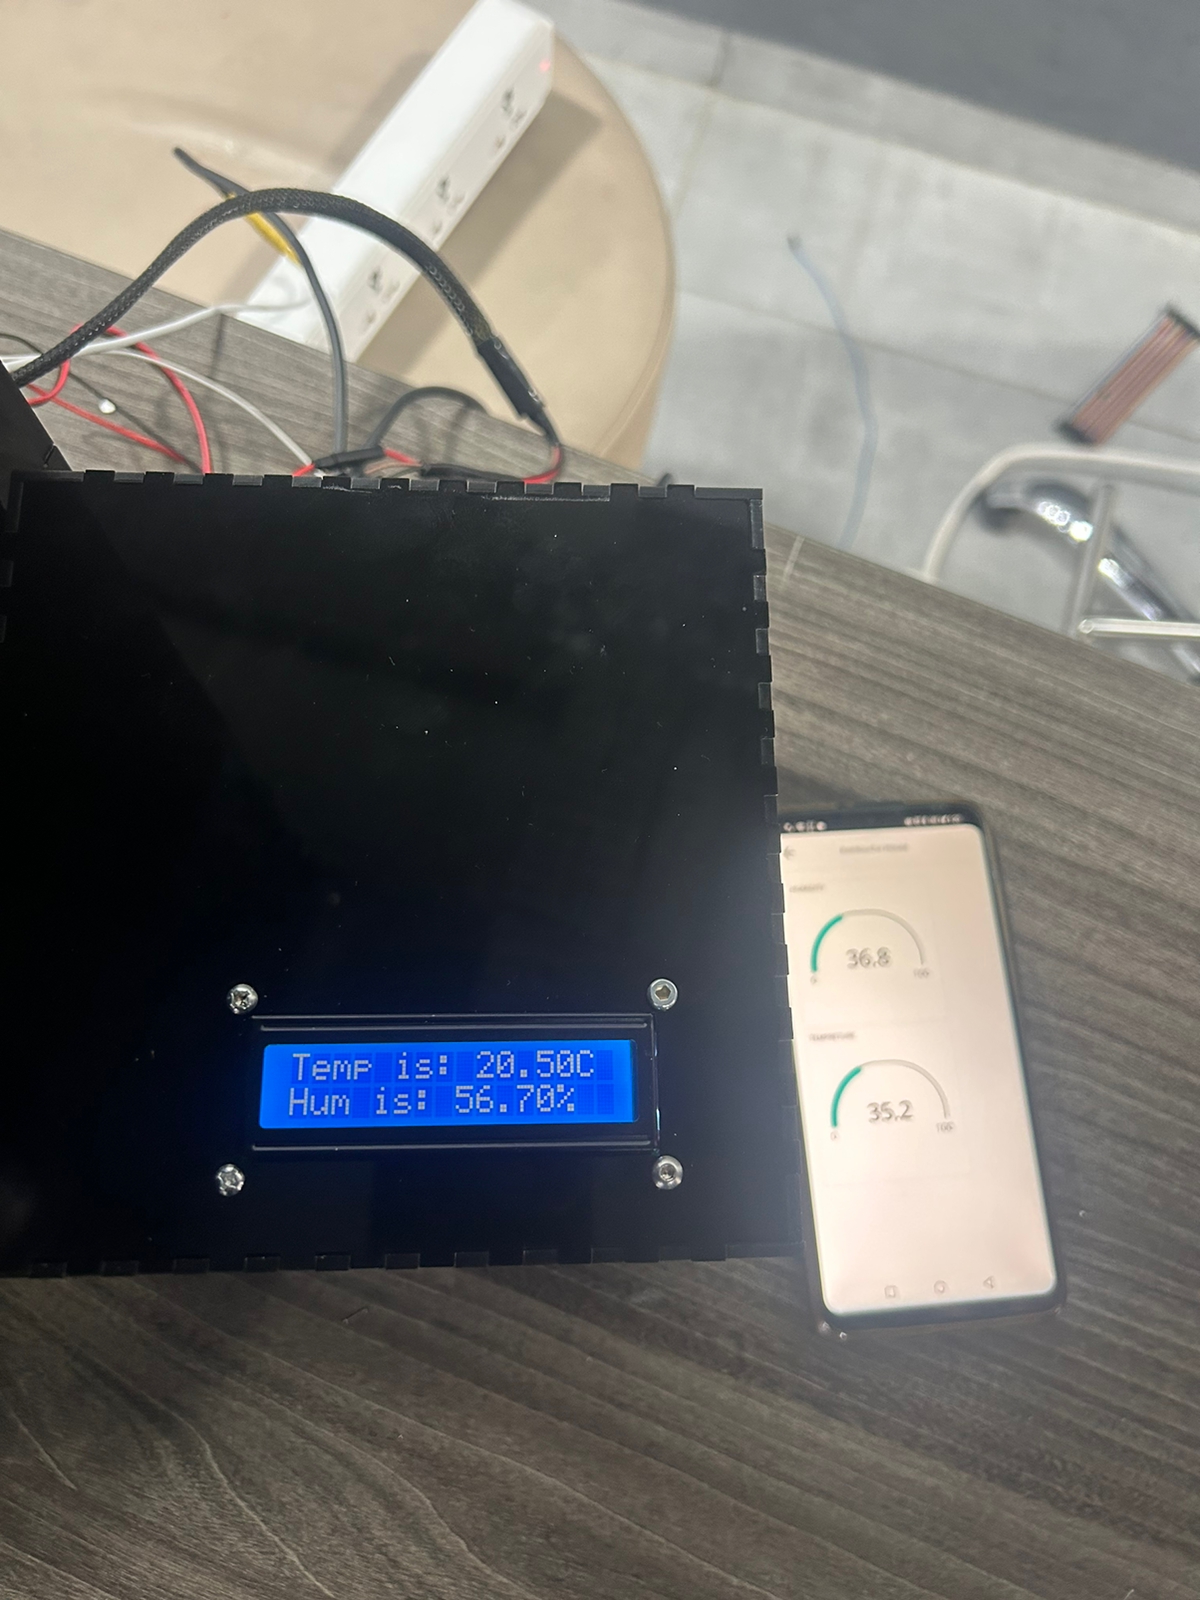
in order to connect to IOT Application I added another DH32 sensor Which is connected to separated ESP32 WIFI module that will send result directly to IOT Arduino application in the mobile phone thus well help to keep tracking the result from any place and able us to compare both result from LCD screen and IOT Application in the mobile at the same time .
- How to track and share data among people
As result is store in the Arduino cloud we can keep tracking & monitor any incubator which also can help to get and send feedback about best practices in a website or blog . we can have more feedback in hot area climate as there will not be a need to turn heater on as it will have warm temperature by itself ,it will help us to get feedback about the effectiveness of the hot weather in generating bacteria cellulose and able to make a standard sheet and share it with others.
WIP with Arduino Cloud
Arduino Cloud : is a online platform that makes it easy for you to create, deploy and monitor IoT projects. Which will help the user to track and view humidity & temperature sensor.

Setup the Board
after make an account in Arduino cloud , - [1] Create new think - [2] Create variable for humidity and temp sensor , - [3] Configure the network of the WIFI in the Arduino - [4] Download the agent in order to communicate with the Arduino started to the cloud. - [5] Go to dashboard and create and link the variable with gadget. - [6] Compile and run the code.
Useful links Tutorial:
- electronics sensors
- IOT Arduino
- Random nerd tutorials
- How to Send DHT Data from NodeMCU/ESP8266 to Arduino IoT Cloud
Code - Temperature & Humidity DHT22
/*
 * Created by ArduinoGetStarted.com
 *
 * This example code is in the public domain
 *
 * Tutorial page: https://arduinogetstarted.com/tutorials/arduino-temperature-humidity-sensor
 */

#include "DHT.h"
#define DHTPIN 2
#define DHTTYPE DHT22

DHT dht(DHTPIN, DHTTYPE);

void setup() {
  Serial.begin(9600);
  dht.begin(); // initialize the sensor
}

void loop() {
  // wait a few seconds between measurements.
  delay(2000);

  // read humidity
  float humi  = dht.readHumidity();
  // read temperature as Celsius
  float tempC = dht.readTemperature();
  // read temperature as Fahrenheit
  float tempF = dht.readTemperature(true);

  // check if any reads failed
  if (isnan(humi) || isnan(tempC) || isnan(tempF)) {
    Serial.println("Failed to read from DHT sensor!");
  } else {
    Serial.print("Humidity: ");
    Serial.print(humi);
    Serial.print("%");

    Serial.print("  |  ");

    Serial.print("Temperature: ");
    Serial.print(tempC);
    Serial.print("°C ~ ");
    Serial.print(tempF);
    Serial.println("°F");
  }
}
Code - LCD Screen Code
You can find all LCD Screen Code details in the in electronics tab under tesing the display.
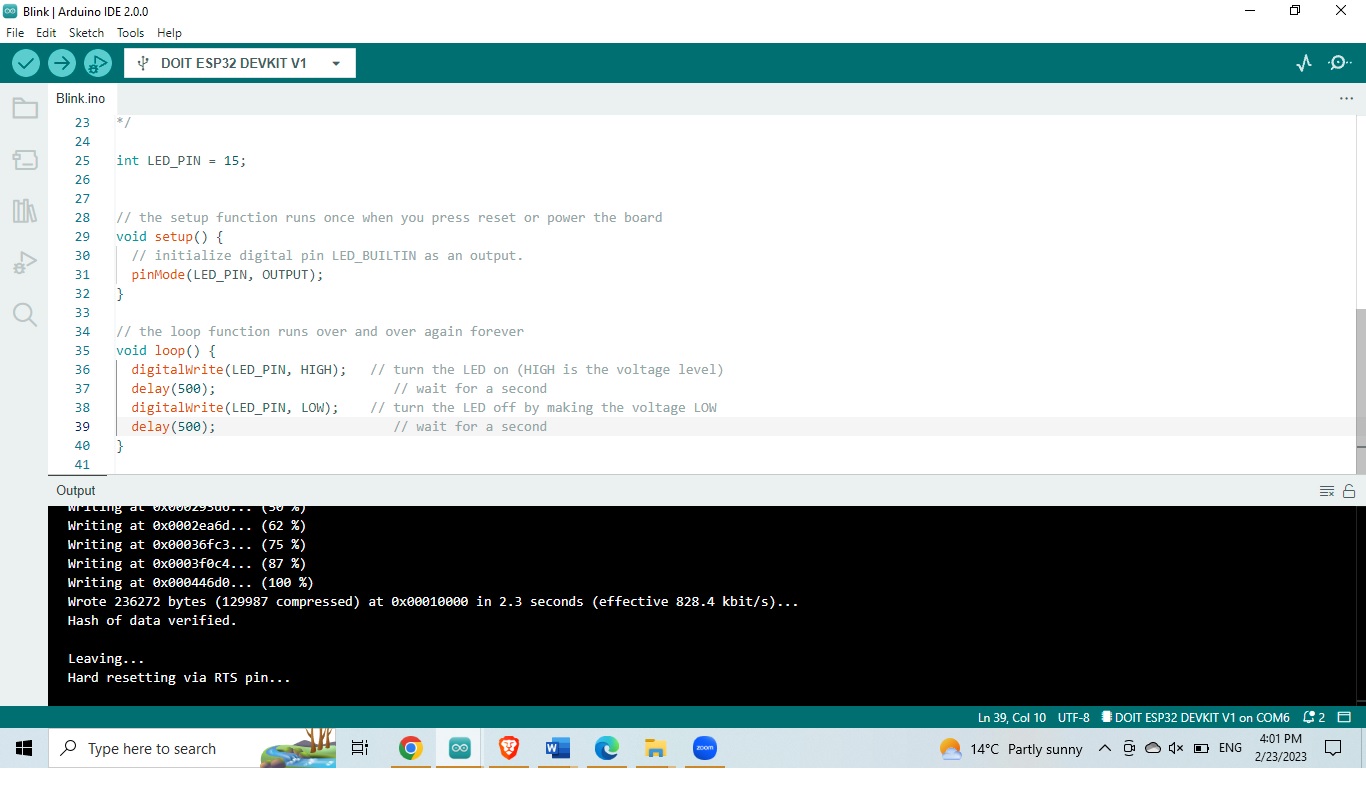
Code - ESP32
You can find all details code for ESP32 in the in electronics tab under Tesing the WIFI Module.
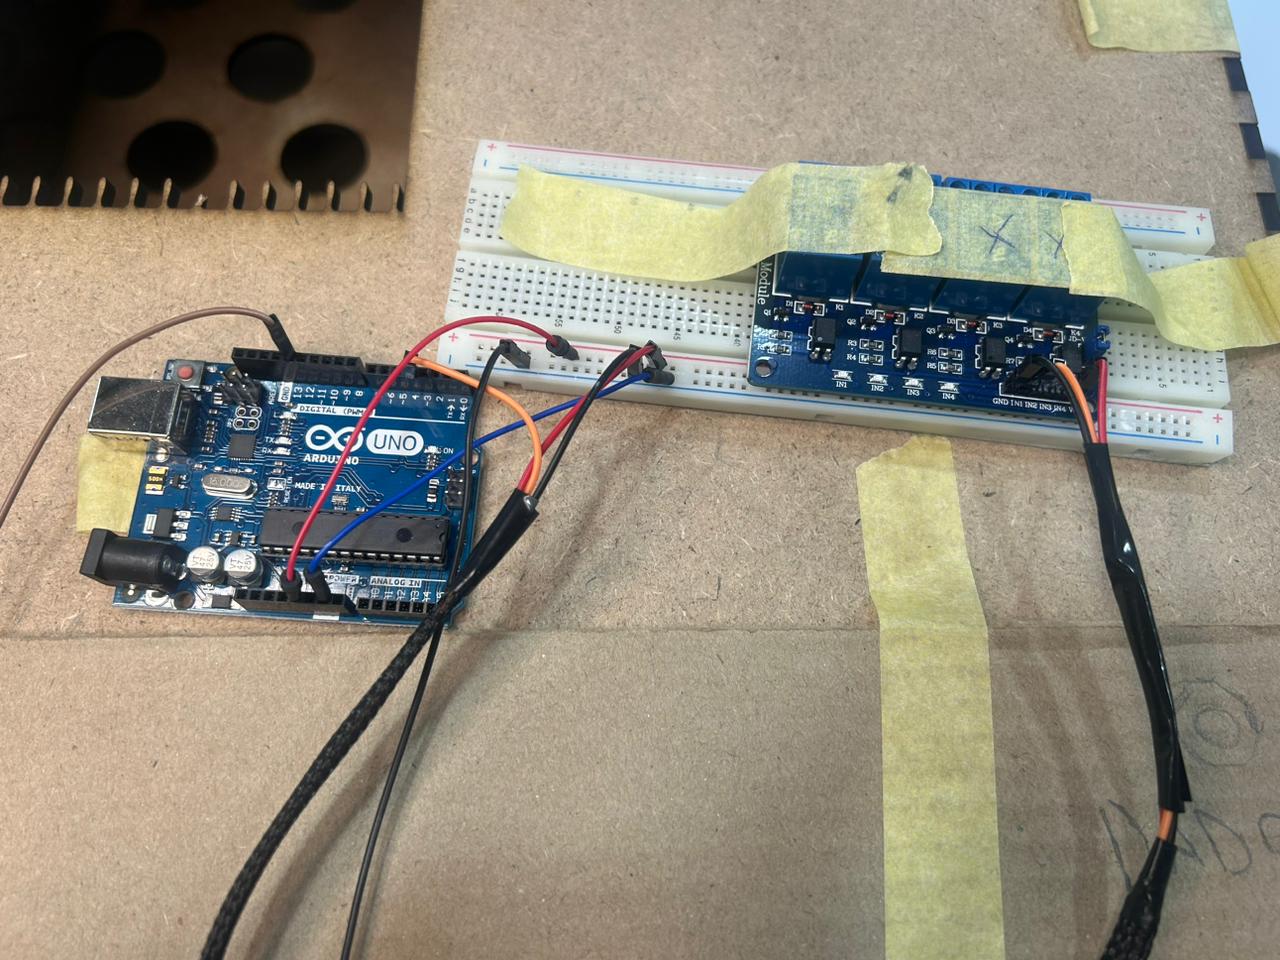
As the end all the electronics part has been assembled inside seperated black case box as below picture and had been tested after that to make sure it work well.