10. Open Source Hardware
This week we were asked to work together as a team to build a machine using digital fabrication and open source platforms, and we decided to build a printing press machine, because we thought it can have many different applications, on the biochromes week we tried to give our fabrics some prints manually and it was very difficult so we thought this can help, plus printmaking is fun so we can experiment curving materials and print them
Printing Press Machine

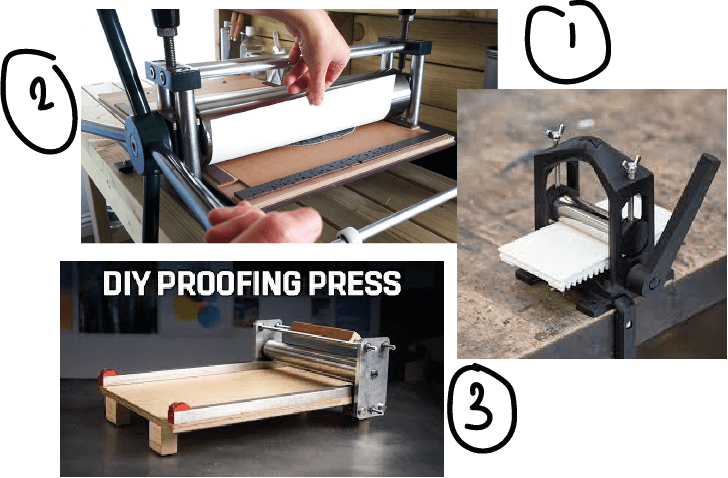
References & Inspiration
Credits:
Research
A printing press is basically a sandwich of the medium you want to print or emboss and a stamp that gets pressed between a roller and a flat surface. We looked into different presses to understand how the machine works and what to consider when designing one.
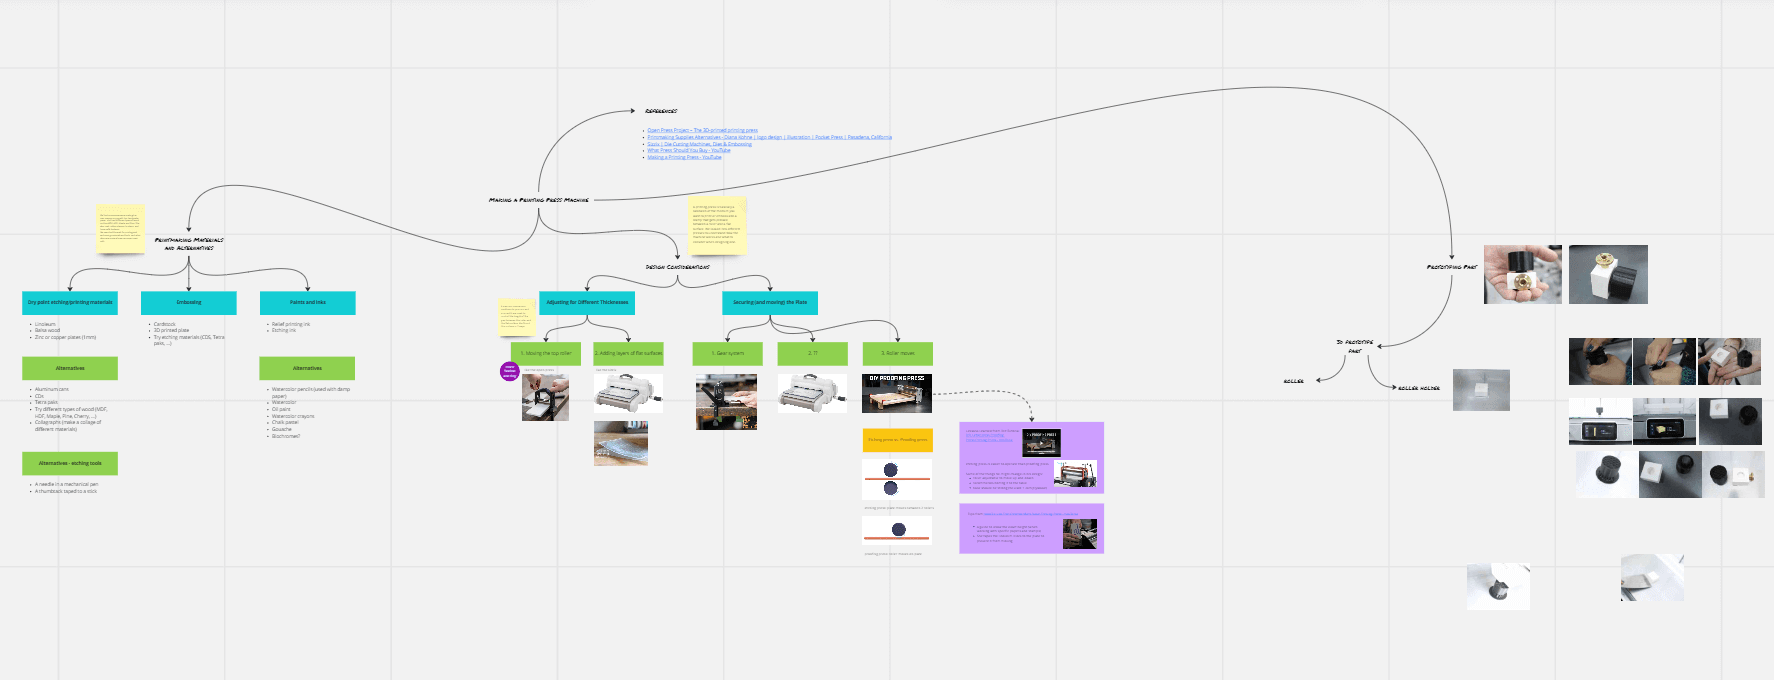
Mind Mapping
We used a shared Miro board to put our ideas together so each one of us can edit, add or change anything
Design Considerations
In order to make a new design you need to think the design before starting, the mechanism, tools, and features. and this is what we did here we did not start from scratch we used some open source platformers to help us start, we watched videos, read some studies and saw some designs to be able to build our own machine they are all linked in the end of the documentation

Etching VS. Proofing
We had two options for the mechanism:
- proofing press: roller moves on plate
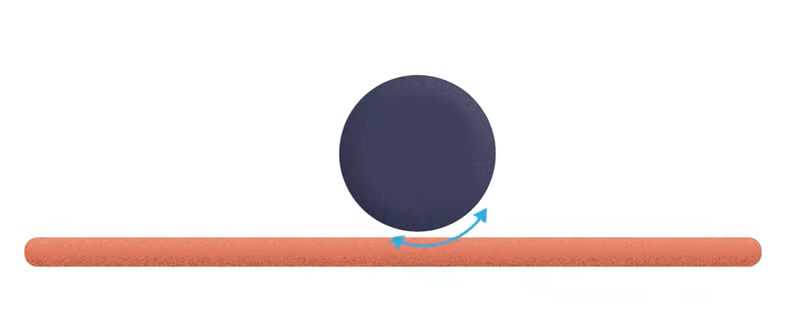
- etching press: plate moves between 2 rollers
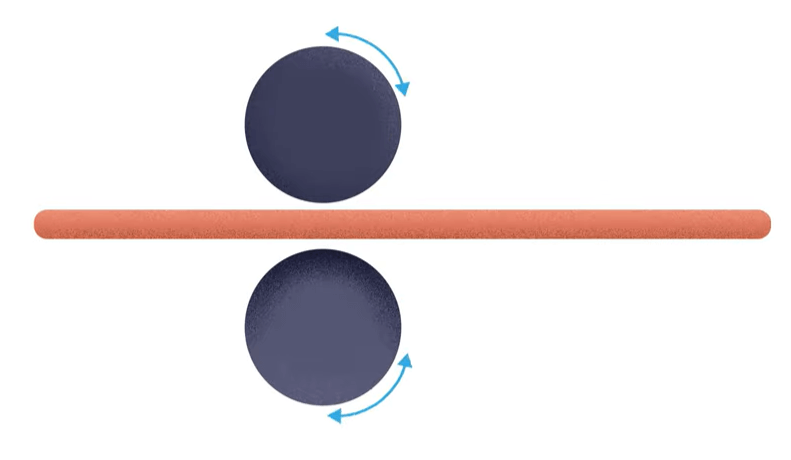
We decided on Etching press because etching press is easier to operate than proofing press
Why Is Our Design Special
- It is adjustable
- Easy to assemble
- Portable
- Affordable
- minimal
- customizable
- open source
Print Making Materials and Alternatives
As we can use various mediums to print on and print with
Dry point etching/printing materials
- Linoleum
- Balsa wood
- Zinc or copper plates (1mm)
Alternatives
- Aluminum cans
- CDs
- Tetra packs
- Try different types of wood (MDF, HDF, Maple, Pine, Cherry, ...)
- Collagraphs (make a collage of different materials)
Embossing
- Cardstock
- 3D printed plate
- Try etching materials (CDS, Tetra packs, ...)
Alternatives - etching tools
- A needle in a mechanical pen
- A thumbtack taped to a stick
Paints and inks
- Relief printing ink
- Etching ink
Alternatives
- Watercolor pencils (used with damp paper)
- Watercolor
- Oil paint
- Watercolor crayons
- Chalk pastel
- Gouache
- Biochromes
Ink Making
We used Charcoal to make a printing ink
Recipe
-
Dye stuff: charcoal
-
Solvent: 2 Cups Water
-
Arabic gum: I Cup
Tools
* Glass Jar
* Wooden Stick
* Roller brush
* Scale
* Coffee Filters
* Acrylic board
* Dye Stuff
* Pipettes / Syringes
* Test tubes
* Petri dishes
* paper cups
* Solvents ( water / Alcohol )
* Paper
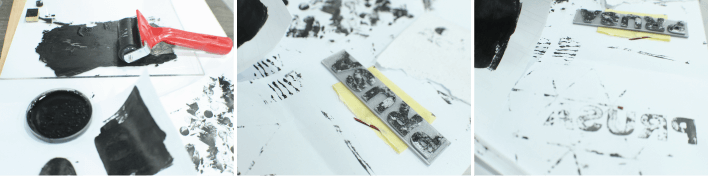
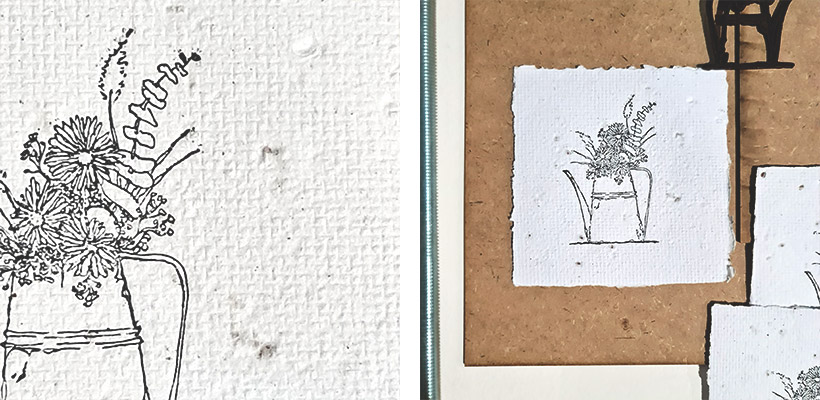
Some Prints We Made
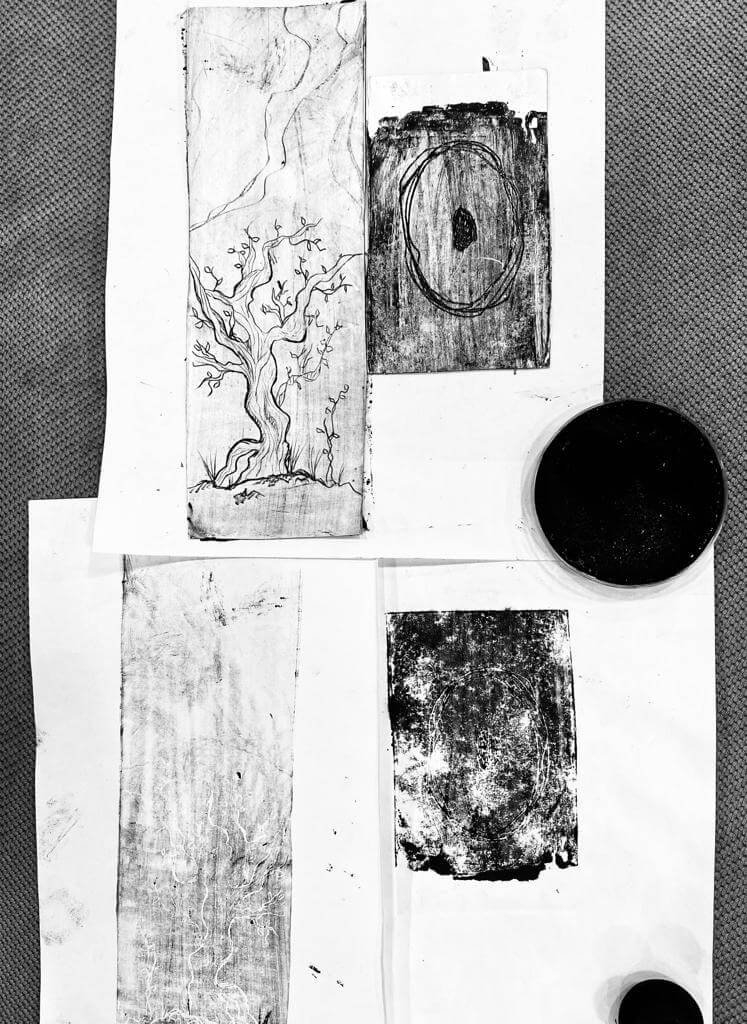
Experiments
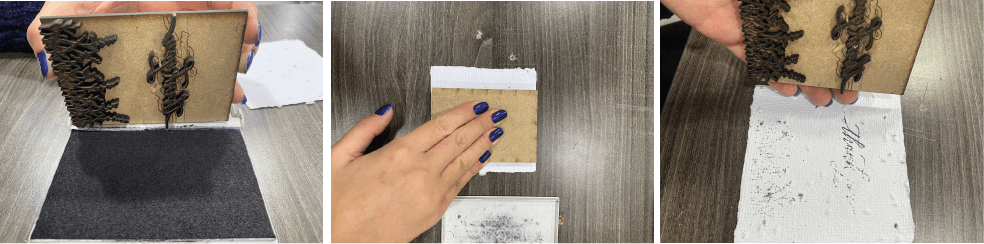
We stared by experimenting the very traditional wat of printing, putting a stamp in ink and use your hand to put pressure on it to be printed on a piece of paper, and it works perfectly if you put enough pressure but it takes a lot of effort and time
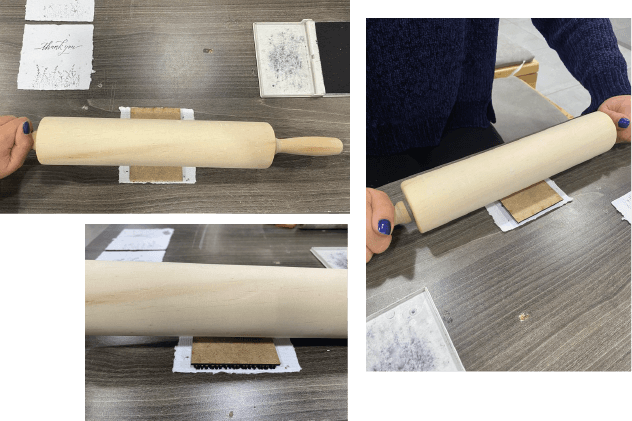
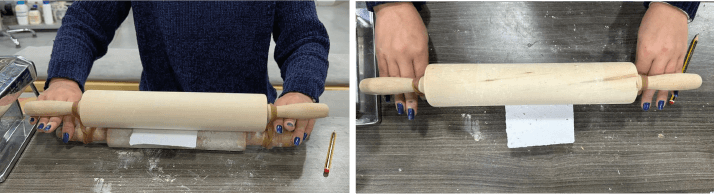
Then we tried another way to print using a rolling pin it makes the process a bit easier in terms of pressure but still needs a lot of time and have a larg error margins
To understand the mechanism better we used the pasta making machine to print on a paper using a stamp and it worked perfectly, so we started building our first low fidelity prototype

(Low - Fidelity) Prototypes
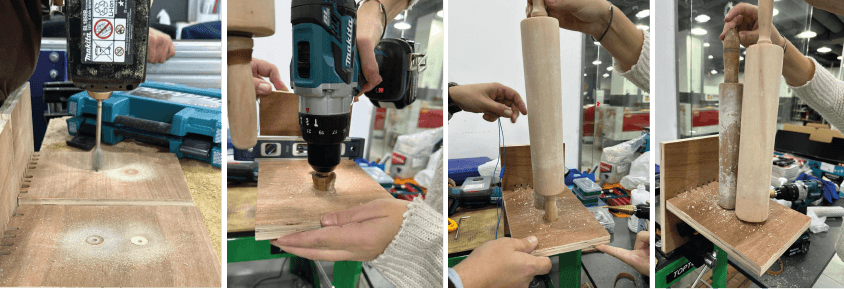
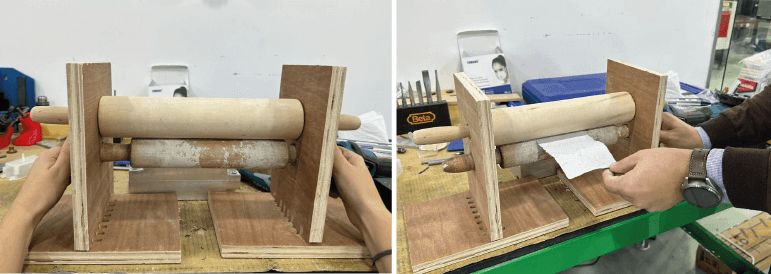
Following the pasta making machine we built this prototype using to rolling pins and two bands
When we made sure it is working we upgraded the prototype to this, we laser cut the sides and the bottom, made holes according to the size of the rolling pin handles using drill
Fabrication Process
Designs
1) 2 Rollers
We used TPU Filament to print the roller because it is smoother and leaves no marks on the papers we are printing and is a bit flexible and can take more pressure than PLA
- Upper Roller

- Bottom Roller Bottom roller has the same design but a different connections
2) Roller Holders
The holders were 3D printed using PLA filament
- Upper Roller Holders

- Bottom Roller Holders
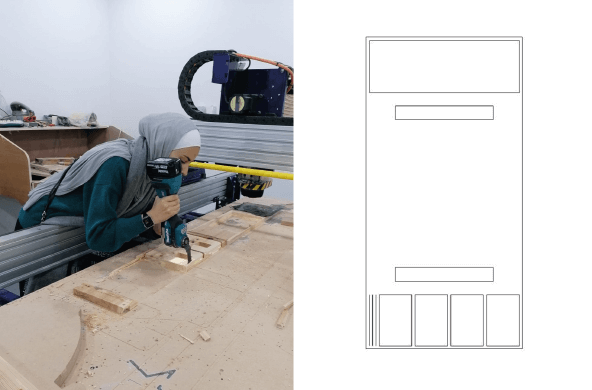
3) Side Walls
We used the CNC Milling machine to cut the side walls, that are made out of 22mm plywood
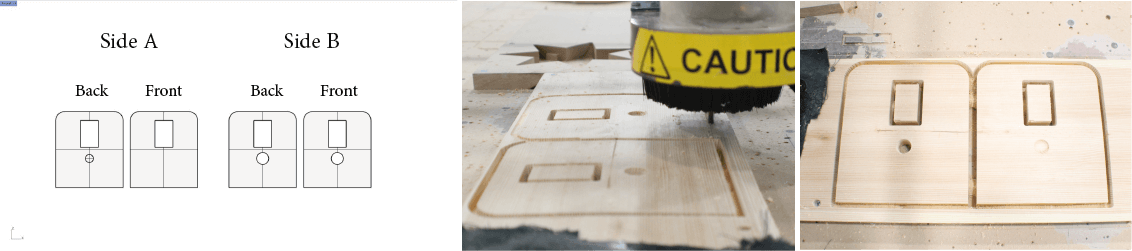
4) Bed
The bed as well was cut using the CNC milling machine using 22mm Plywood
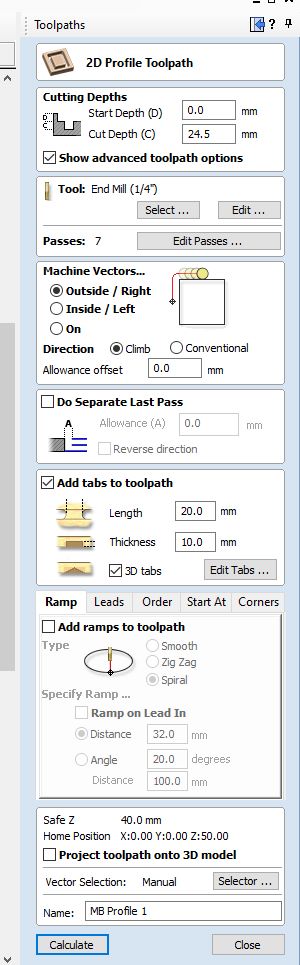
Below picture is the setting for CNC machine :

5) Handle
This handle and it's holders were 3D printed using PLA Filament

6) The lead screw
This 8mm * 100mm Lead screw was cut using a Metal cutting saw

Assembly
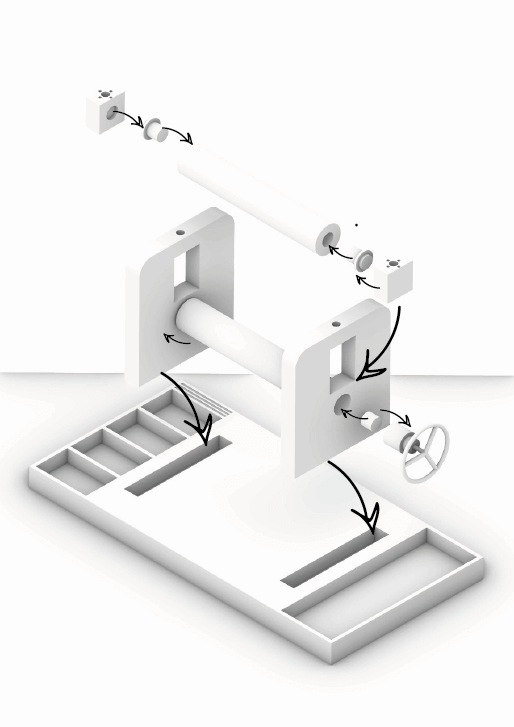

Final
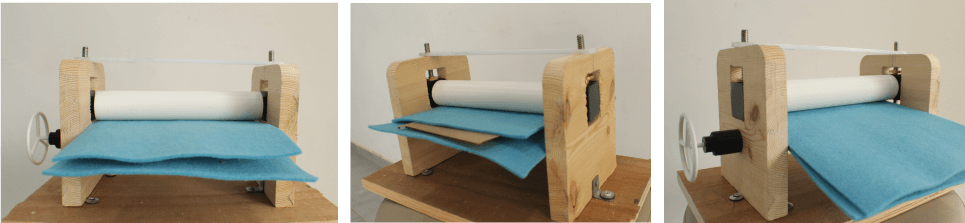
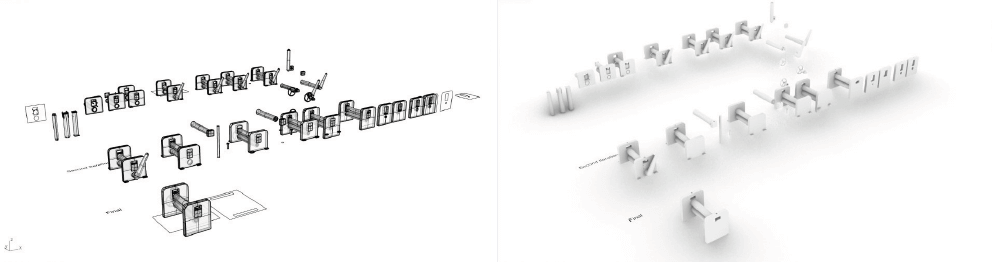
3D Model
Video :
Below is the final video for printing press machine ,special thank you to Ala Janbek our team leader for this assignment.
Picture of the result after using the machine:
Machine Anatomy
| Parts | Quantity | Technology | Files | Notes |
|---|---|---|---|---|
| Body ( Structure ) | 2 | CNC Plywood Profiles | You can use any other material | |
| Feet ( Body Holders ) | 4 | 3D Printed PLA/ABS | - | |
| Roller Press | 2 | 3D Printed TPU | - | |
| Roller Holder | 4 | 3D Printed PLA\ABS | - | |
| Handel | 1 | 3D Printed PLA\ABS | - |
Equipment needed to replicate the machine
MACHINES
- 3D PRINTER FDM
- LASER CUTTER
- CNC MILLING MACHINE
TOOLS
- HAND DRILL
- CALIPER
- METER
- PENCIL / MARKER
Materials To Buy For The Low Fidelity Prototype
| Qty | Description | Price | Link | Notes |
|---|---|---|---|---|
| 1 | Print Making Ink | 17.00 $ | Link | You can find alternatives |
| 1 | Rolling pins | 19.50 $ | Link | - |
| 1 | plywood Board | 47.00 $ | Link | We Used plywood waste |
Materials To Buy For The Final Machine
| Qty | Description | Price | Link | Notes |
|---|---|---|---|---|
| 1 | Print Making Ink | 17.00 $ | Link | You can find alternatives |
| 2 | Lead Screws\ Nuts | 14.99 $ | Link | - |
| 1 | PLA \ TPU Filaments | 15.99 $ - 27.99 $ | Link - Link | - |
Fabrication files:
Brackets:
CNC Machine Brackets Files:
Machine Roller Holder file:
Printing Press Machine file:
References & Tools
-
File PrintingPressMachine ↩
-
File Machine Brackets-2. ↩