2. Digital bodies
( All images are mine unless marked with a hyperlink )
![]()
Research & Ideation
Things i'm interested in
*Intentional glitches, pixelation
*Chimeras, combined bodies, clones
*Anonymity, obstruction of idenity

- Glitched Image
- Combined bodies
- Human glitch Massanetto
- Monica Piloni
- Jordan Hemmingway
- Image by Valentin Herfray
- Image via tumblr
- Glitched texture
- Faces
Software
Modeling
I have some rhino expirience but mostly for flat patterns for the laser cutter and have not done too much 3D modeling. I ran into some issues at the start of the week because I had already used up my 90 day free trial. I tried making new accounts but had no sucess. I'm waiting to get approved for a student account but until then I decided to try out blender.
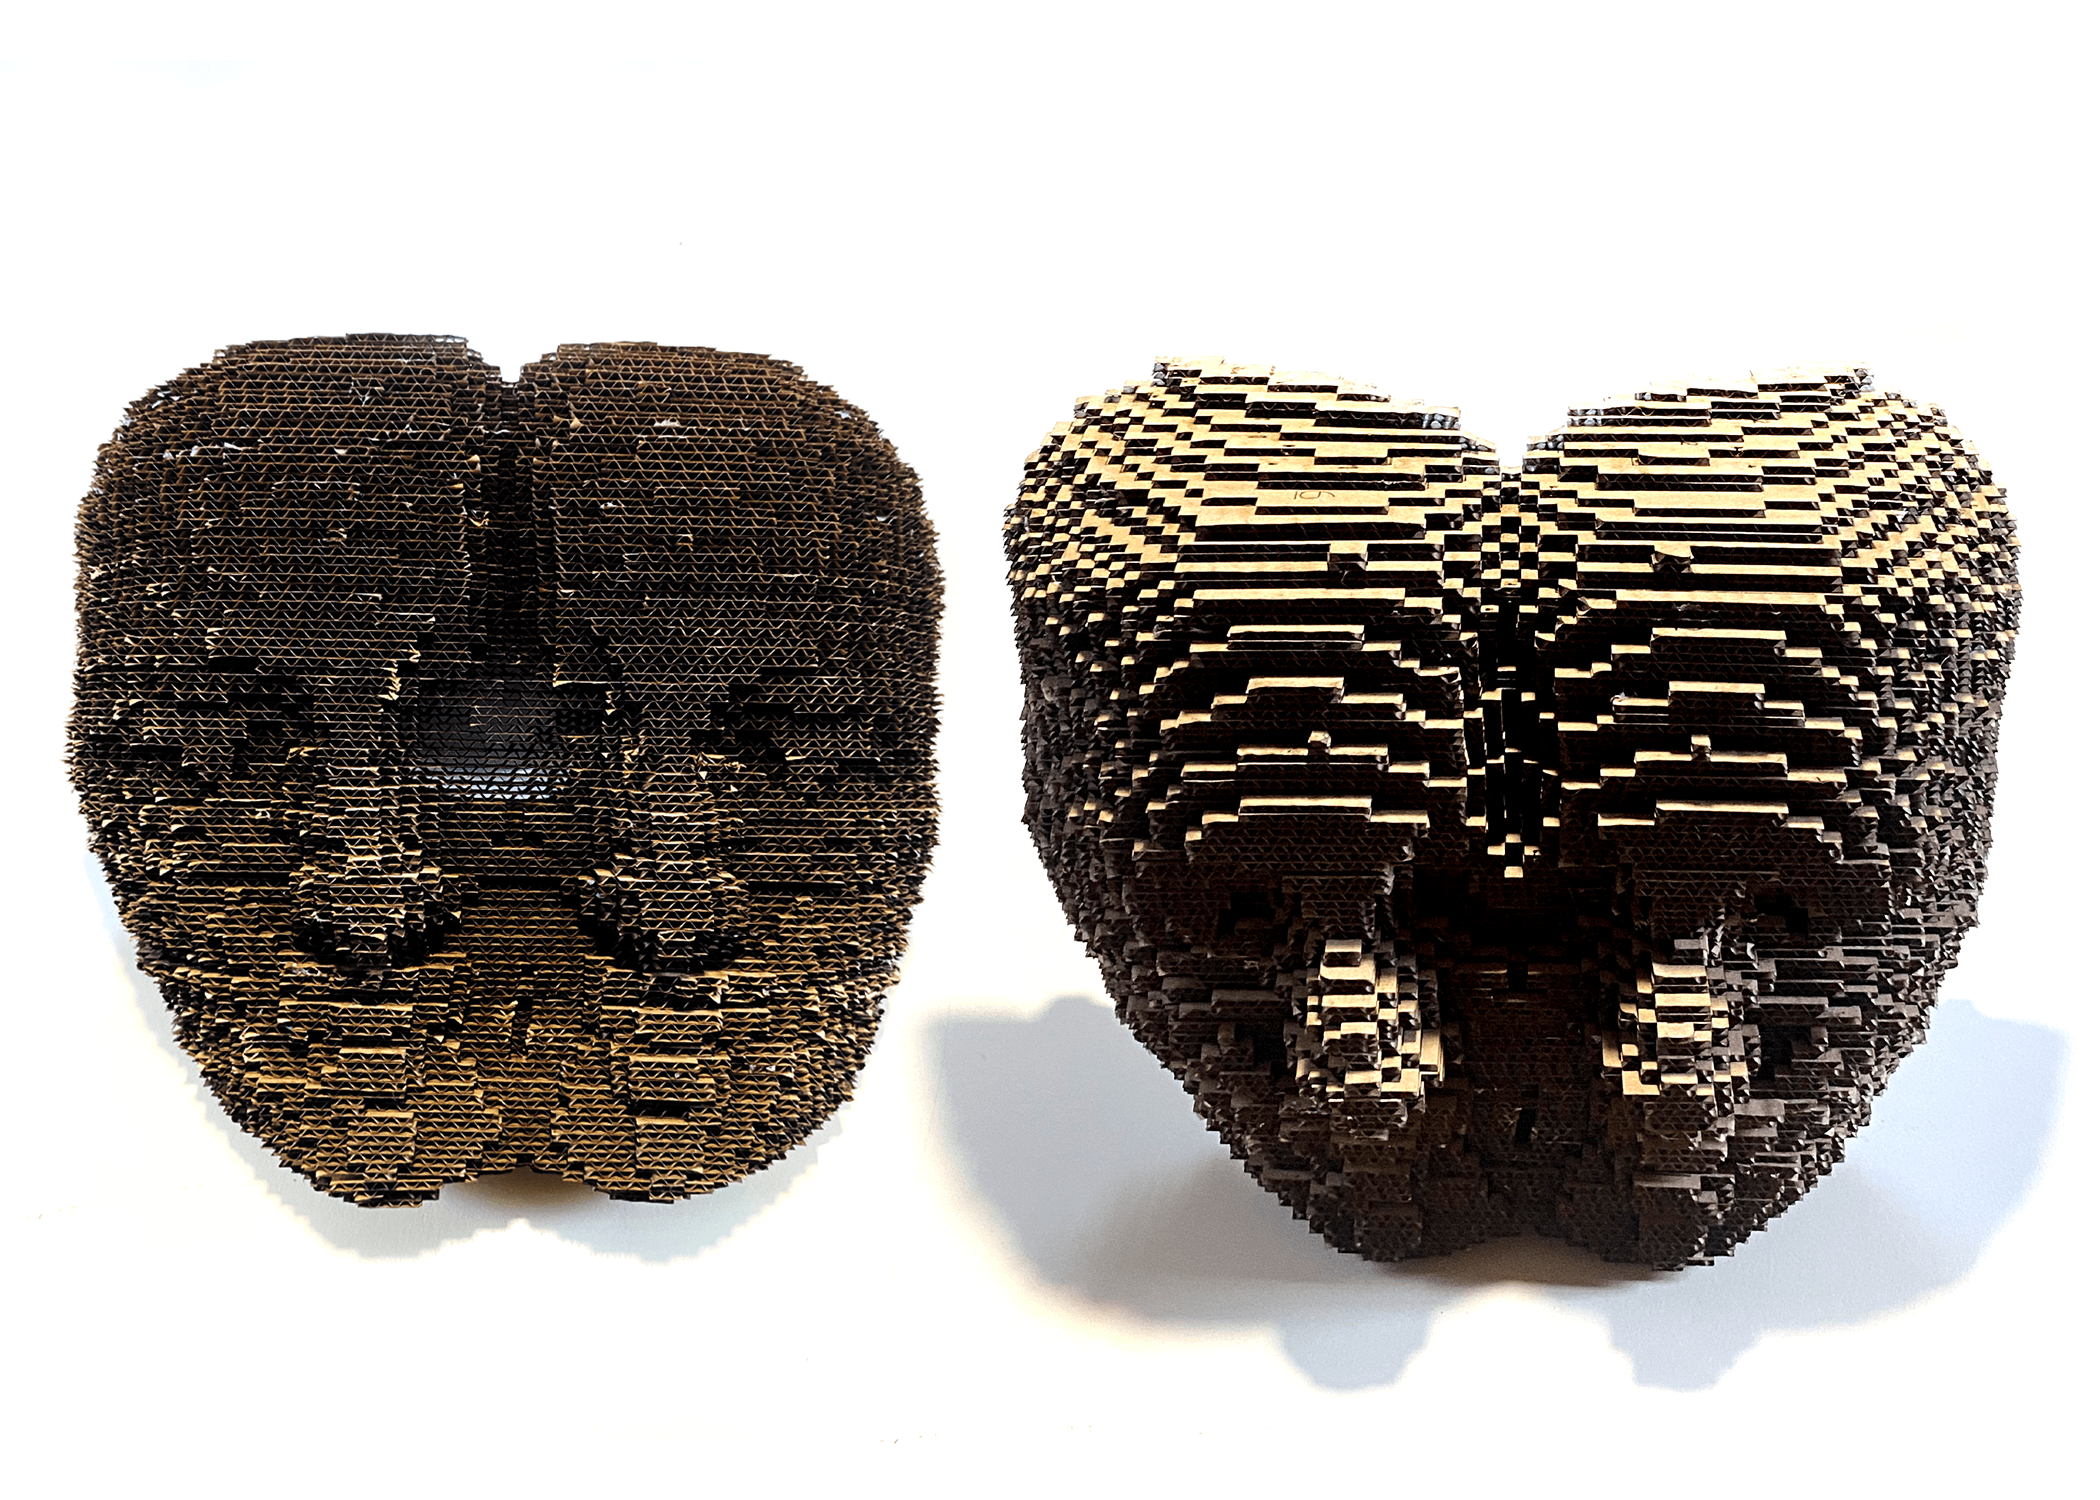
I was intersted in leaning into the digital nature of 3D modeling and trying to intentionally pixelate/glitch objects. I originally planned on trying to use a grasshopper plug in for rhino but after I switched to blender I discovered it is an availible effect as well.
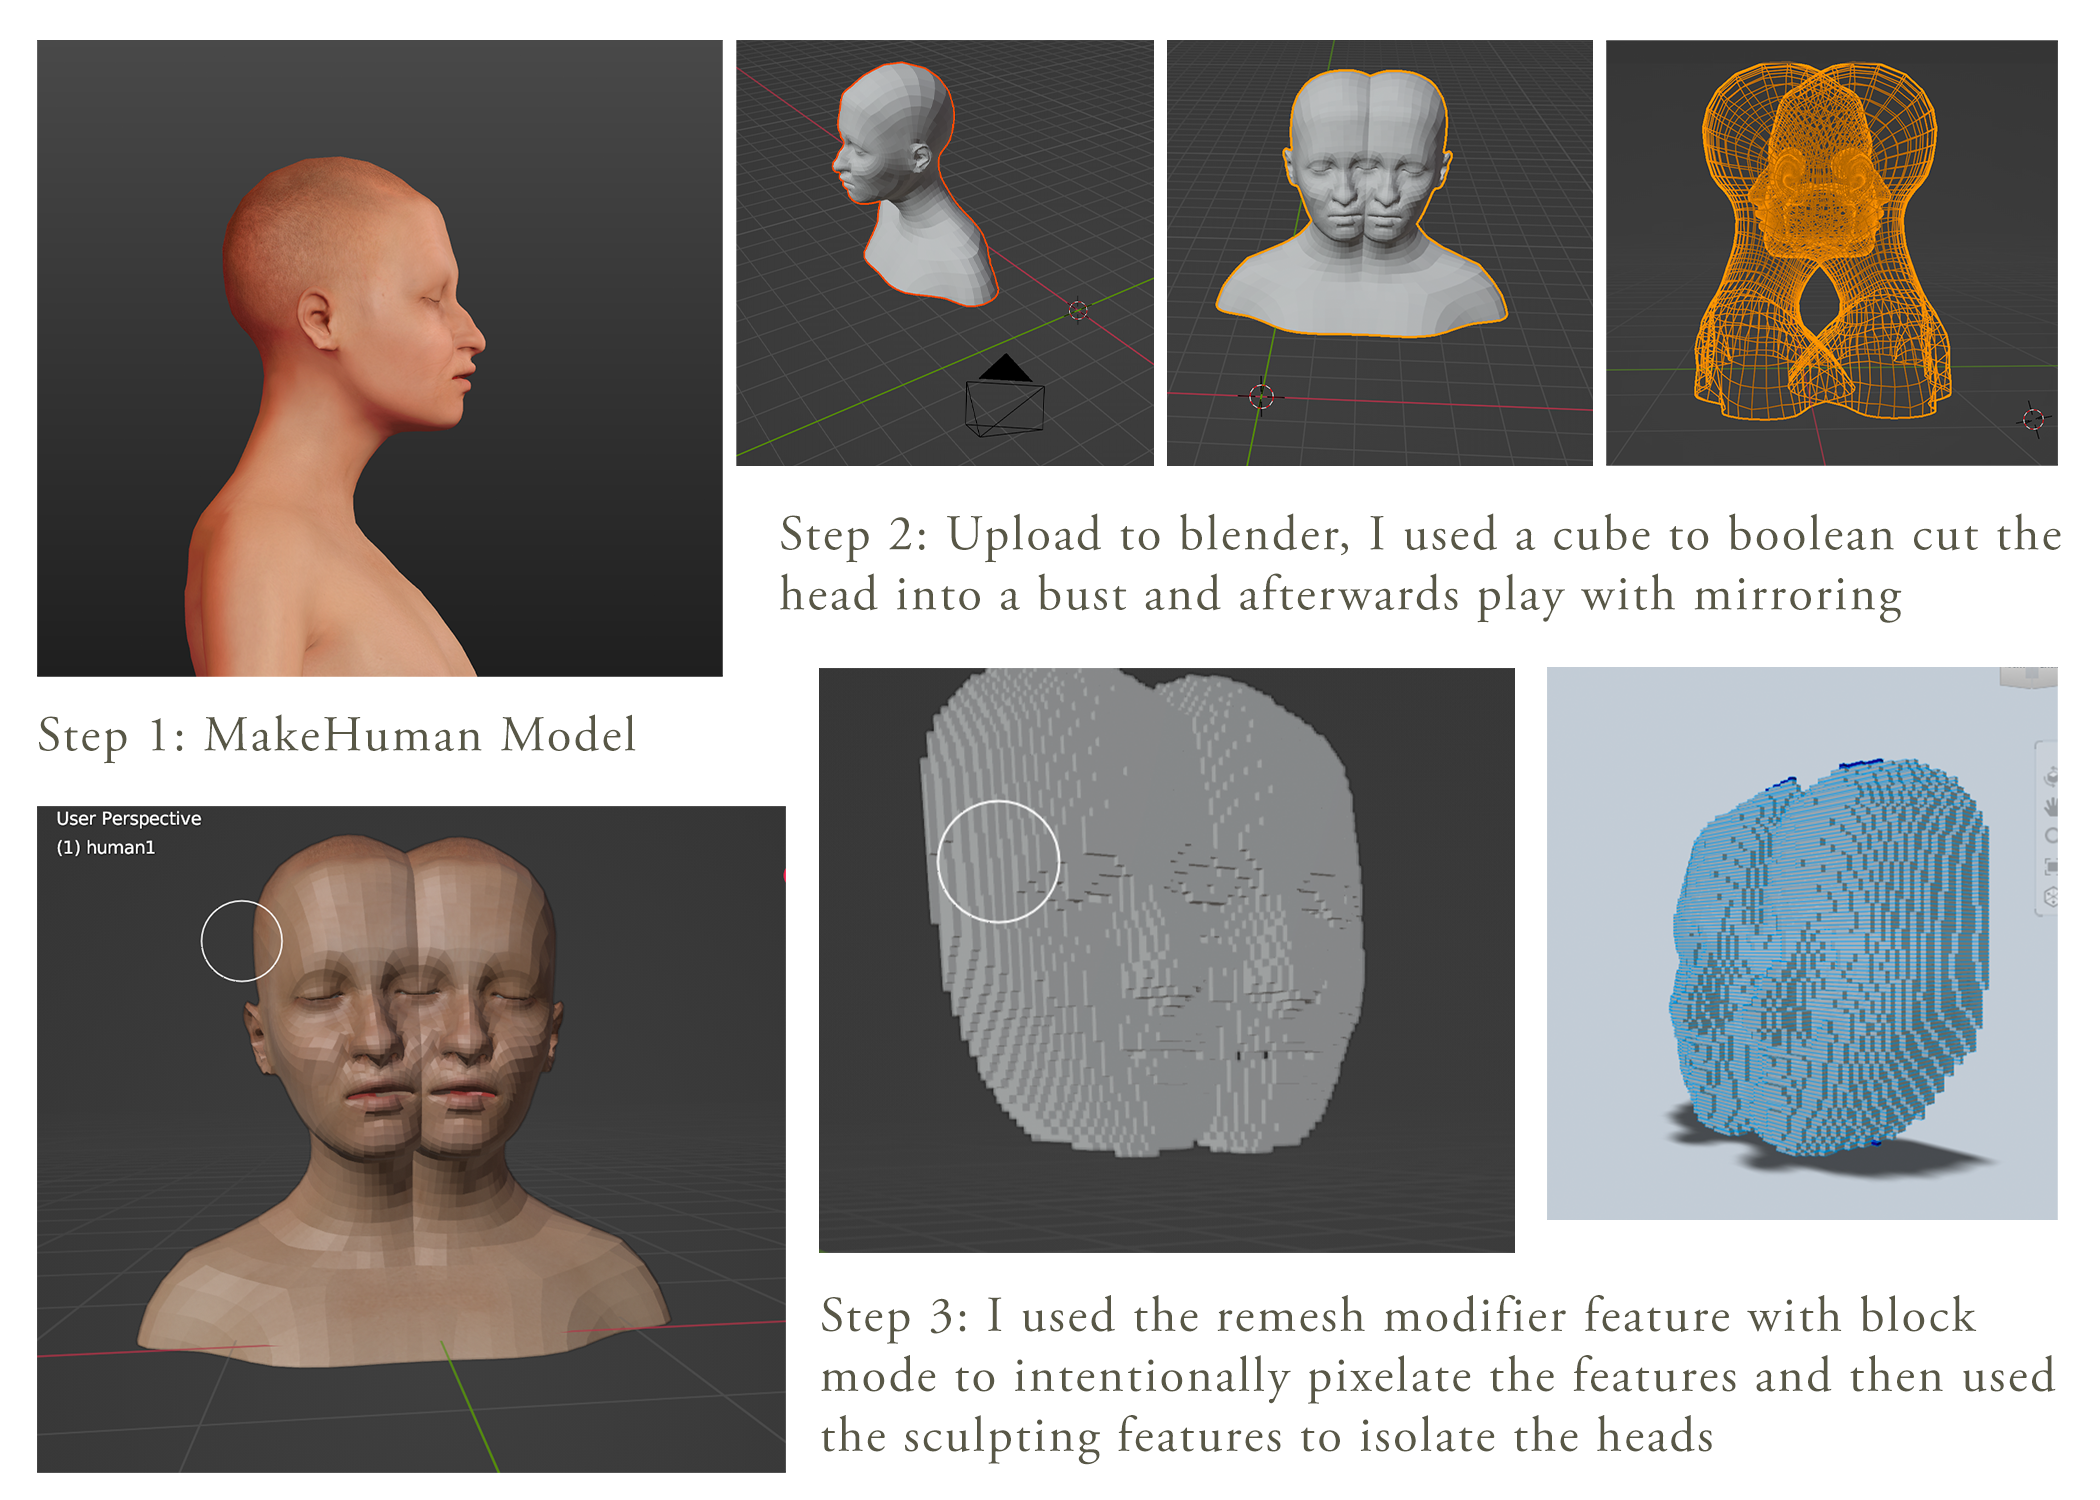
This video was really helpful in achieving the pixelation effect
Laser Cutting Process
This is the site where you can find a walkthrough of lightburn
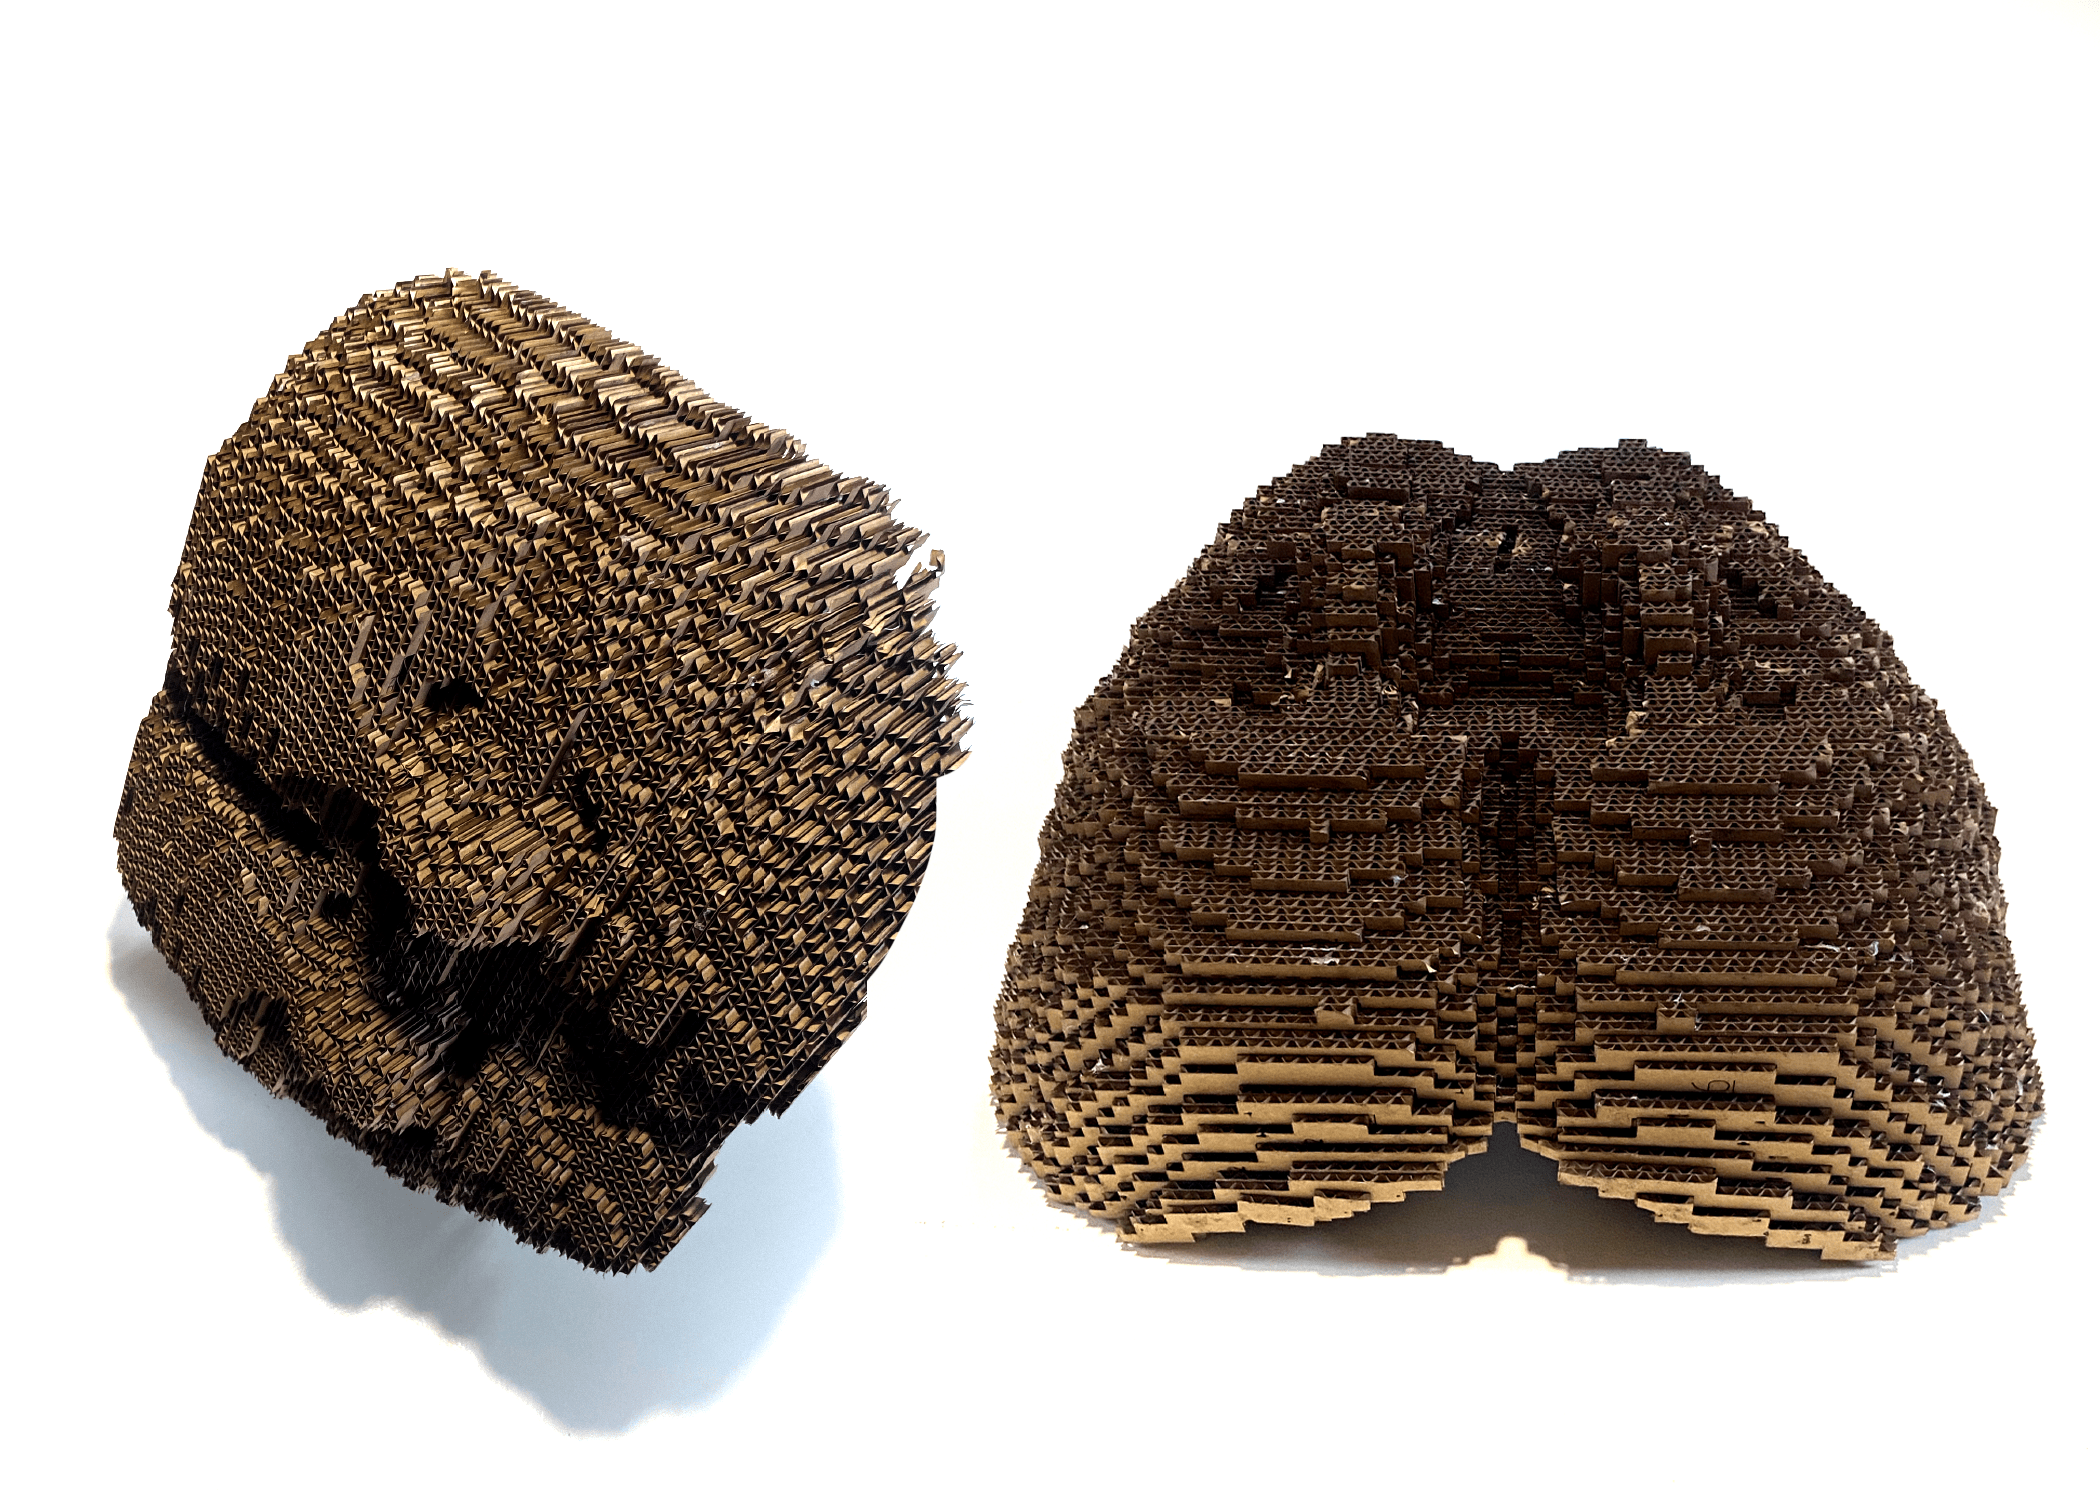
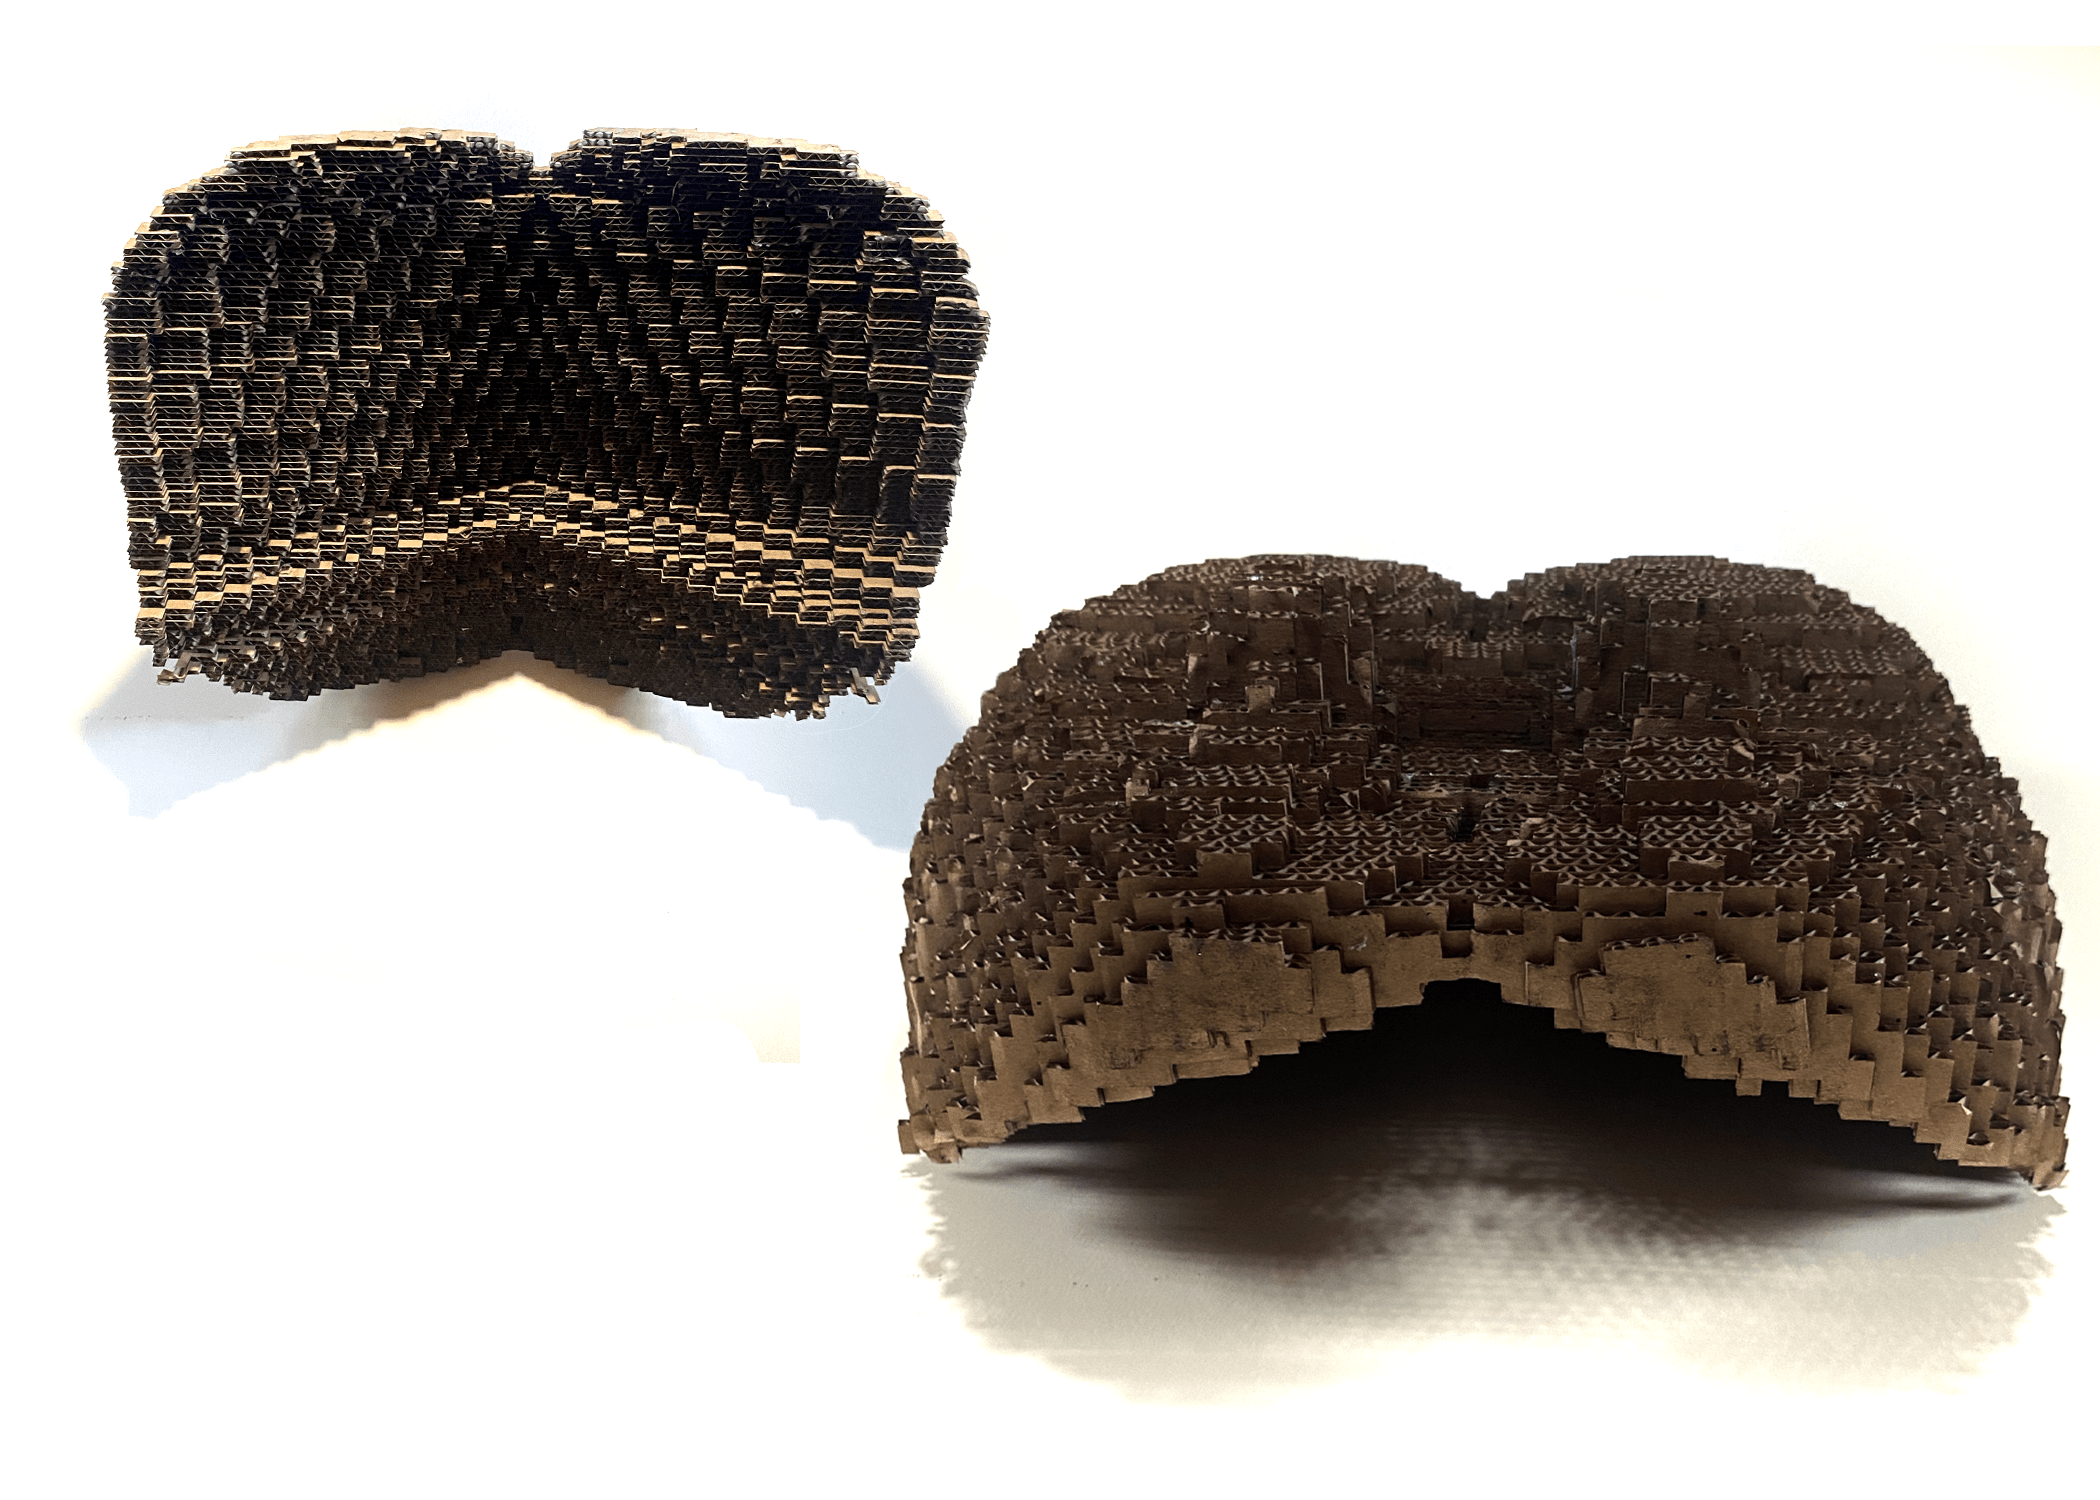
After I was finished modeling, I uploaded the file into Slicer. I played with the sizing to make sure the plans could fit on to three sheets of cardboard in the laser bed. I used the stacked slice mode for construction.

Bit of the construction process
Setting up the Laser Cutter

This image is from The WAAG Futurelab has a docuemtation page walking through the use of the laser cutter availible in the lab. You can find this here
-
Import your files into lightburn as a dxf or svg file
-
Go to edit in the top menu bar and select "delete duplicates". This gets rid of any duplicate lines so the laser doesn't try to repeat any cuts.
-
Based on the color of layers, you can change machine settings for different lines/shapes.
-
Make sure to turn on the Output, otherwise lines will not be cut.
The settings we used for 3mm thick corrugated cardboard
Machine settings :
Layer 1: Cut = Speed 30.0 / Power 45.0
Layer 2: Inscribe = Speed 50.0 / Power 20.0
Running the laser cutter
-
Focus the laser based on the height of the material. Our lab uses a wooden jig to place on top of the desired material. The laser is focused by making sure the head is touching the top of the jig.
-
Turn the laser cutter on and make sure the laser moves to the 0,0 axis
-
Turn ventilation on!!
-
Now you can press play to run the cut in liightburn
-
Watch the machine carefully to make sure there are no fires or other issues
-
After the file has run, leave the top closed with ventilation on for several minutes before opening
Final Product