8. Wearables
(All images are mine unless marked with a hyperlink)
References & Inspiration
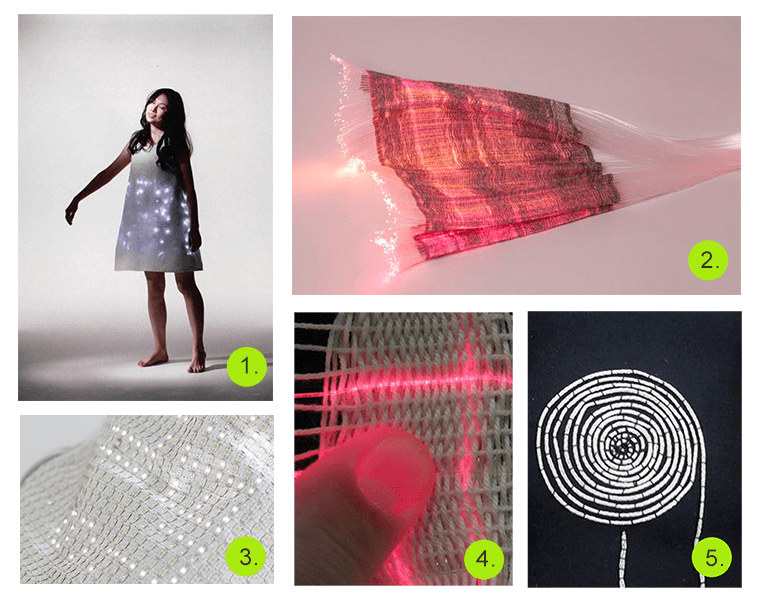
- LED wearables as data visualization
- Woven fiber optics
- Textile LED matrix
- Light sensitive textiles
- Spiral textile speakers
Textile Speakers
This week I made two different swatches to test out textiles as a speaker. Before making my swatches, as a class we each used a Mono class d amp board to connect our sound input to our speakers.
We followed this tutorial by Liza Stark
Kobakant also has great textile speaker examples
Tools
- Mono class d amp board by adafruit
- Saudering iron
- Sauder
- Alligator clips
- Audio Jack
- Wires
- Shrink tubing
- Copper wire
- fabric/yarn/thread
This allows you to connect your speakers to an audio input
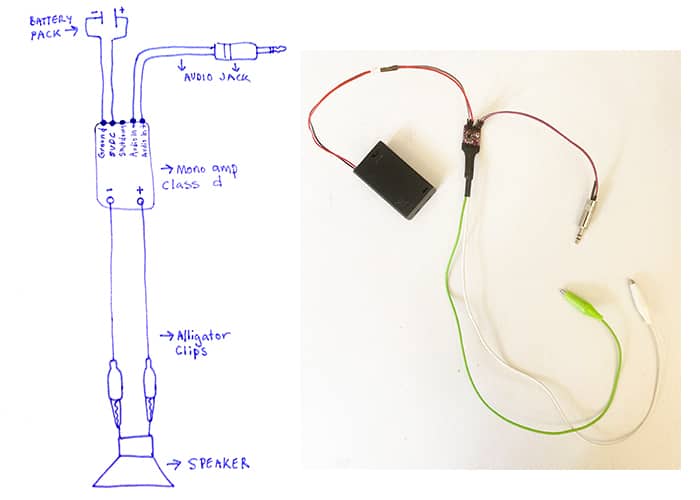
All Sauder connections were secured with shrink tubing
Testing with a buzzer
Testing using a loose copper coil
** Don't forget to burn the ends of your copper wire if it's coated **
Embriodered Spiral Speaker
Now that we had constructed an audio input device I decided to start with an embroidered spiral speaker inspired by this Kobakant tutorial
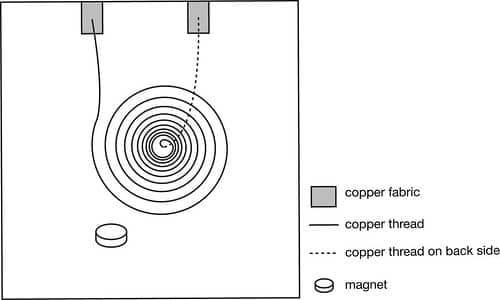
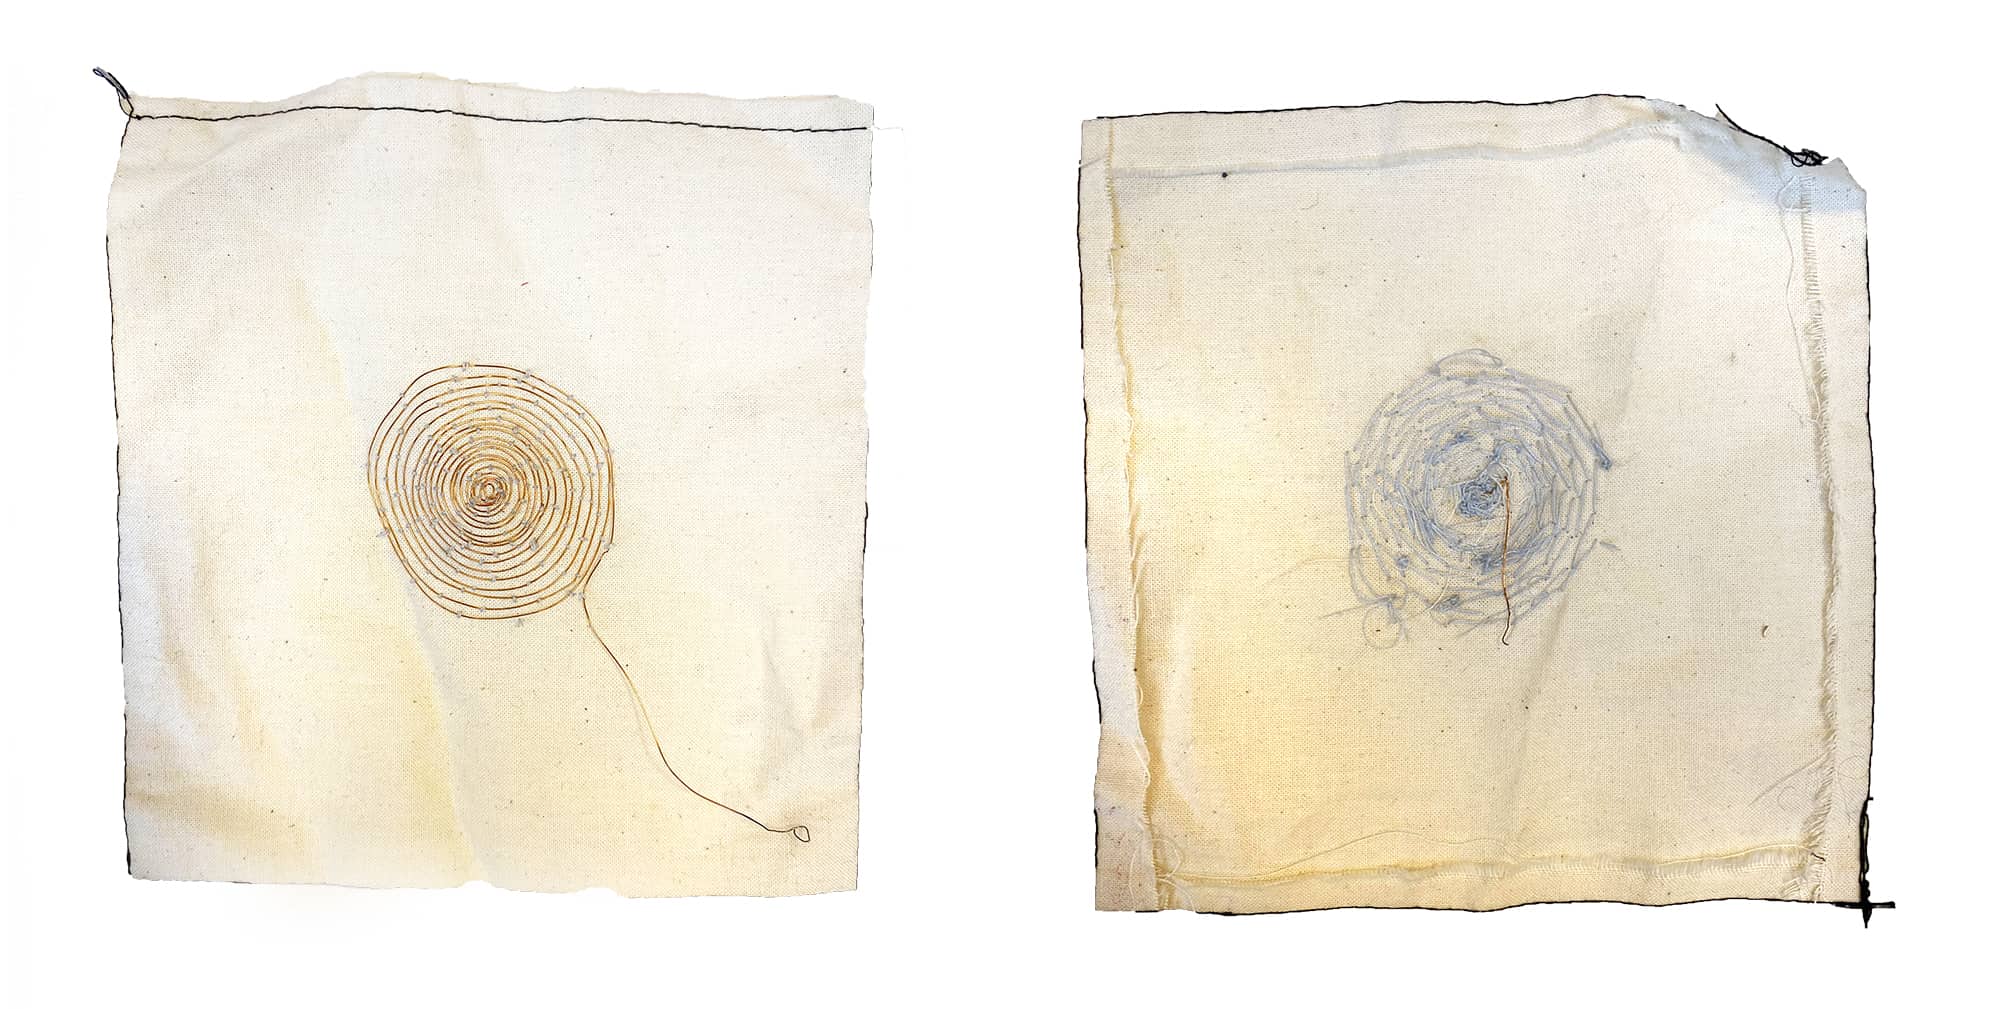
I sewed stiches over a copper spiral to secure it. I left two loose ends that I burned to connect to the alligator clips.
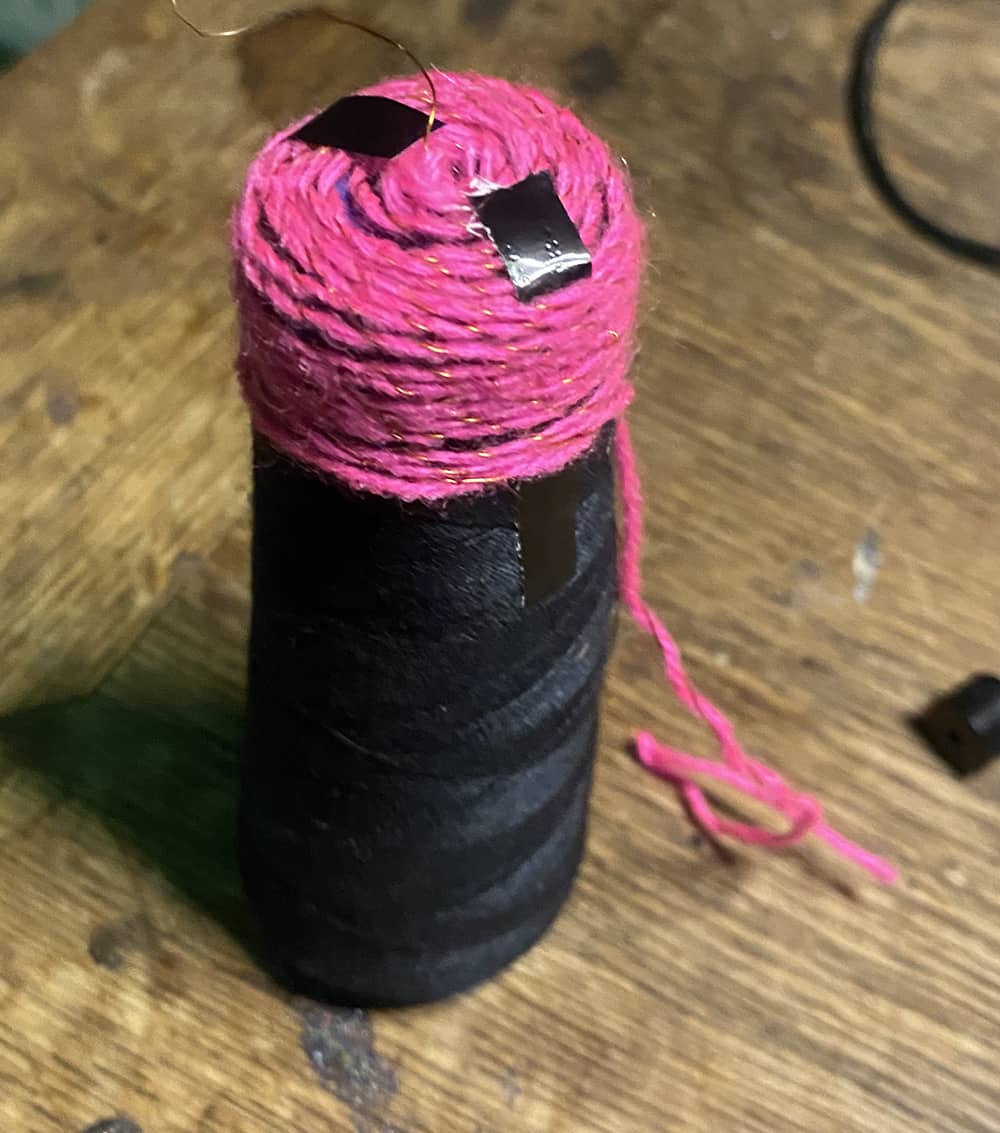
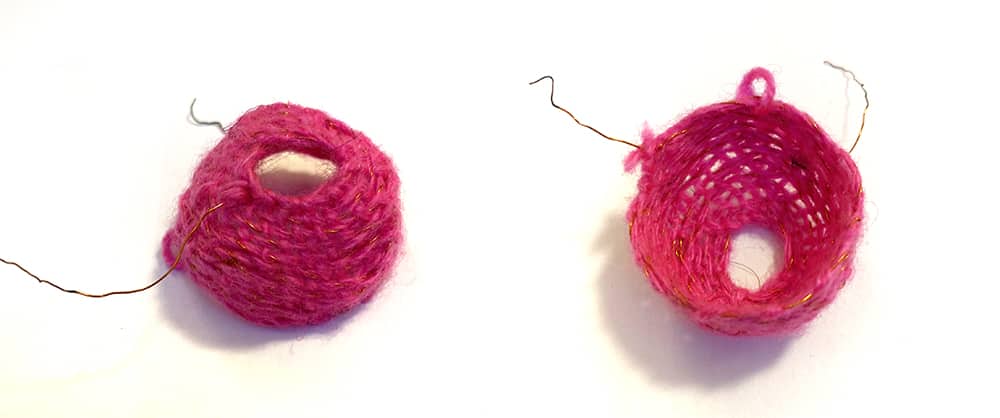
Basket Speaker
I taped yarn and copper wire to a drill bit and spun it to create yarn twined with copper. I then spiraled the copper yarn around a a spool of thread form to create a shape. I used some tape to hold it in shape while I wove yarn in and out of the spiral. This created a tiny conductive basket I popped of the spool once it was done.
Neopixels, Gemma and Attiny
Thursday was a lot of trouble shooting trying to get started with arduino. I was going crazy trying to connect a Gemma board to my computer. Nothing I tried would upload to the board but it turns out I was just using cords that did not work.
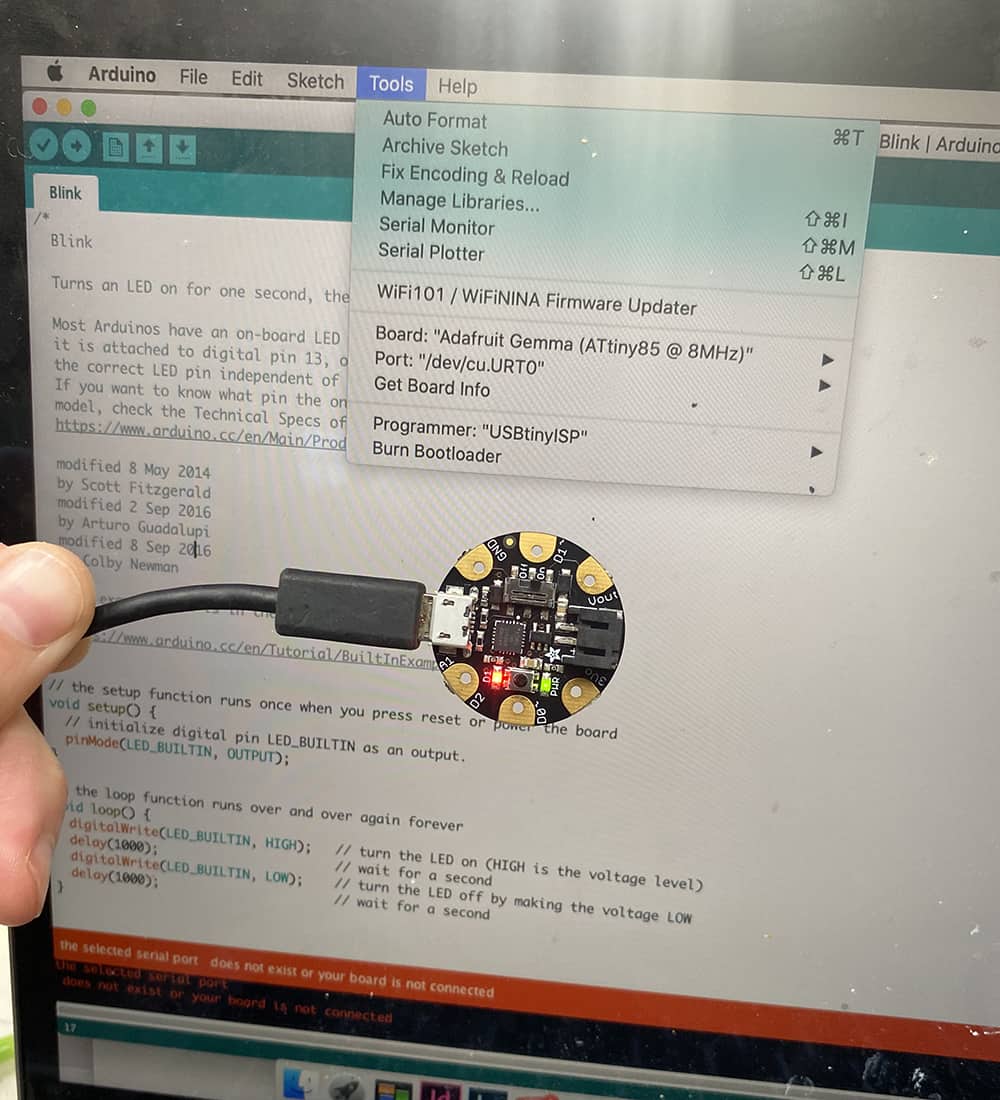
I probably spent 2-3 hours tring to connect it to the wrong type of cords u_u whoops. Once I had the right kind of cord it was super easy to upload to the board.
Adafruit has a really nice, clear tutorial for setting up your gemma
Tools
- Adafruit Gemma
- Neopixels
- Copper fabric
- Heat n bond
- Saudering Iron
- Sauder
- Wire
- Resistor
- Coincell battery pack
- Fabric
Circuit trial 1
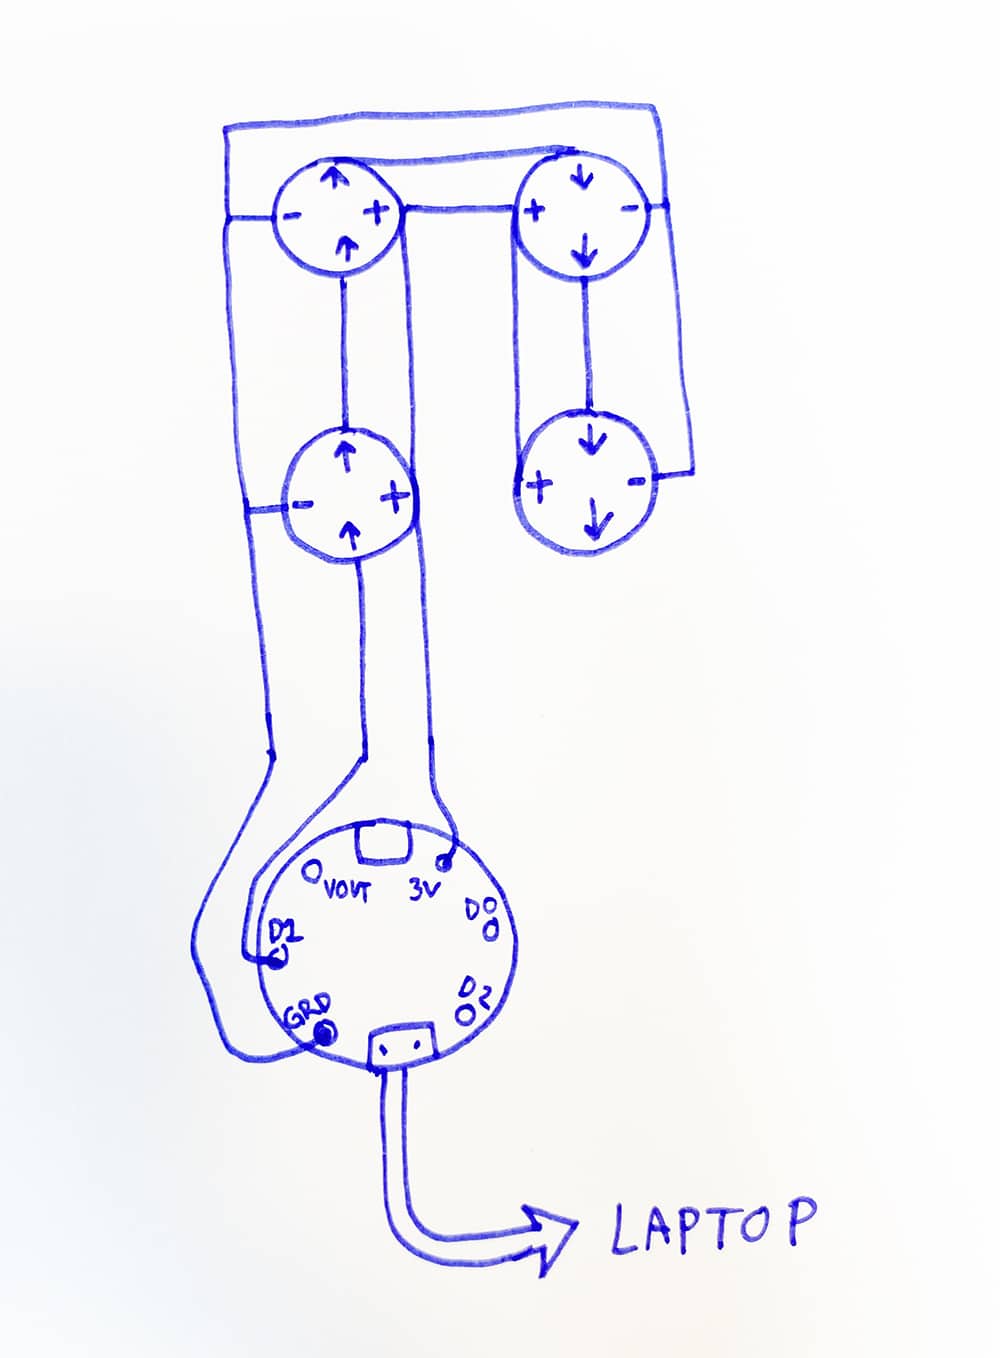
I wanted to connect 4 neopixels following this schematic for prototyping with a gemma. Adafruit also has a great overview of neopixels o their website I based my schematic on the information I found here.
** Later I added a resistor to the D0 pin to neopixel connection **
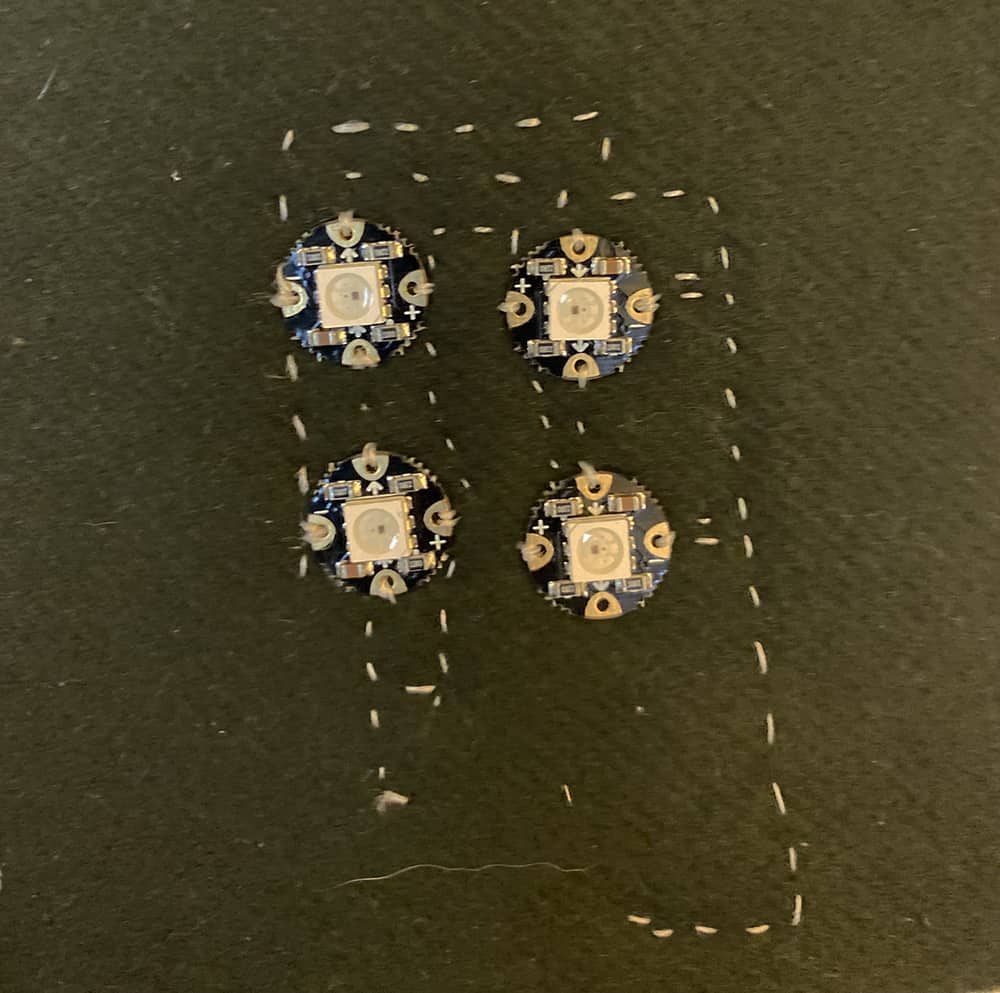
My first trial I was using a steel thread that was not conductive enough so it ended up not working to power the lights. So I scrapped it ans tried again
Circuit trial 2
I tried again with a different, more conductive type of thread. This worked but the connections we not very stable and would only light up some neopixels. The thread eas wrapped in copper and the connection broke in some areas and did not connect solidly to all the pins on the neopixels.
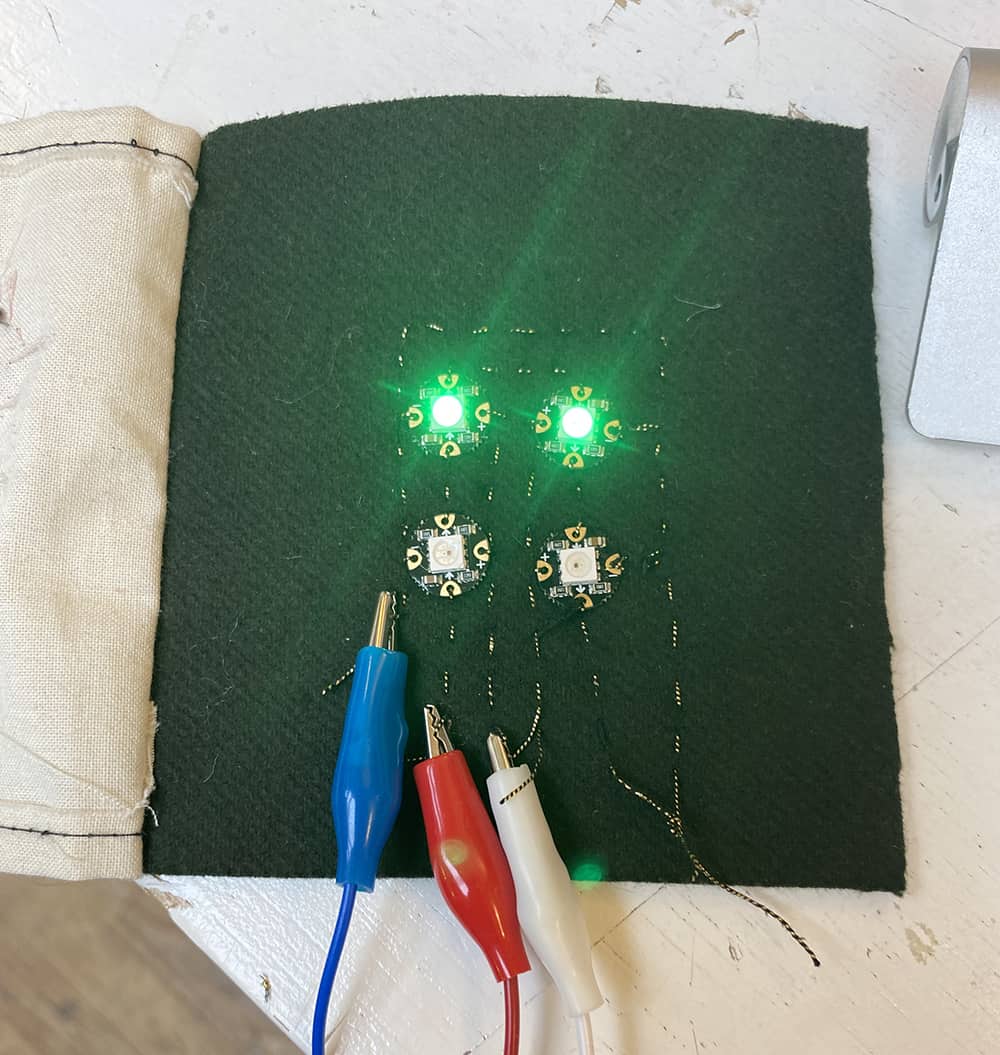
So I scrapped it and tried again!
Circuit trial 3
This time I used copper fabric and saudered the neopixels directly on to the copper traces. However the connection was still not that great. I think because the pins are holes meant to be sewed, they didn't have a really solid connection to the copper fabric. I had to add more and more sauder hoping to create bridges to form better connections and eventually it started melting though the copper traces.
** Also this when I added a 10k Ohms which is recommended for neopixels **
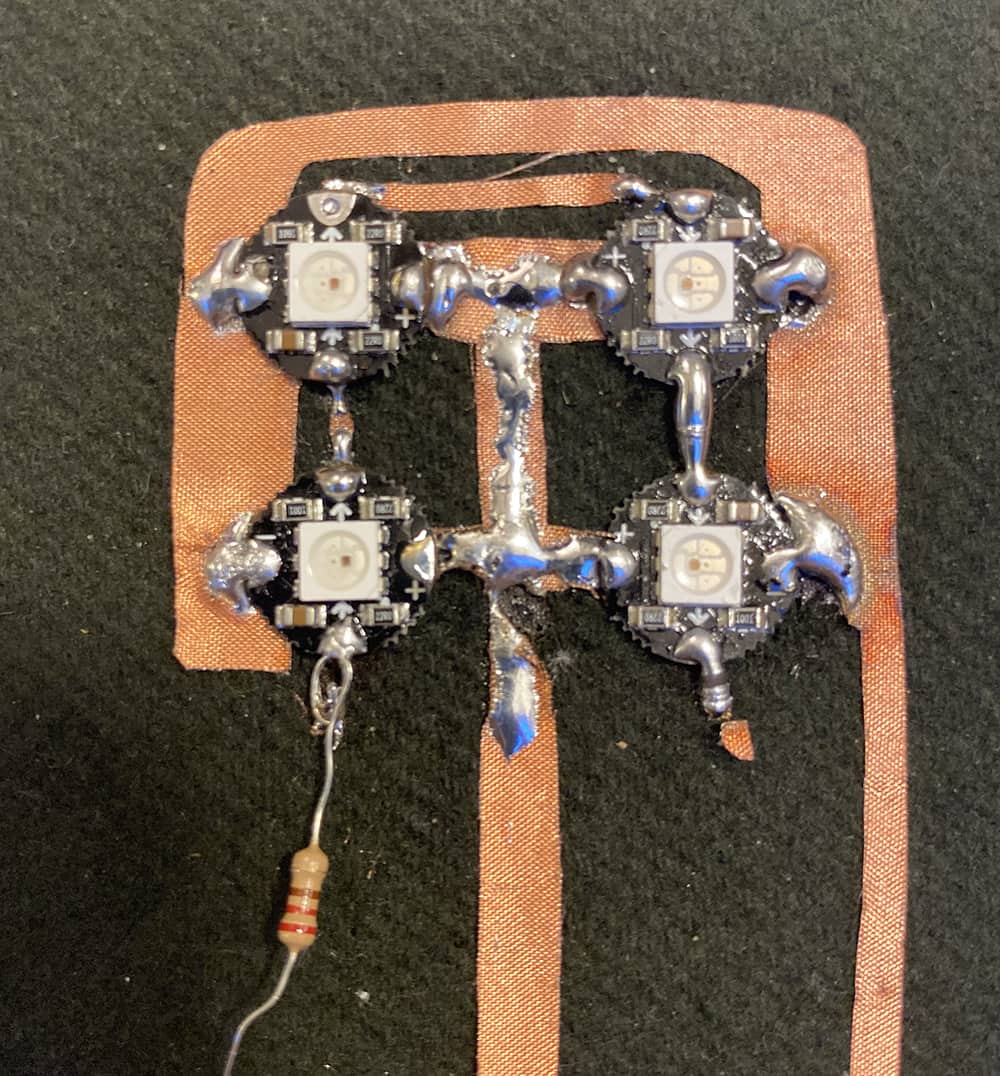
Sooooo... once again I decided to scrap it and try yet again.
Circuit trial 4
This time I added wires directly saudered to the neopixels to make bridges connecting to the copper fabric traces. This so far created the best, stable connections and lit all four neopixels. Yayyyy!! finally !!!
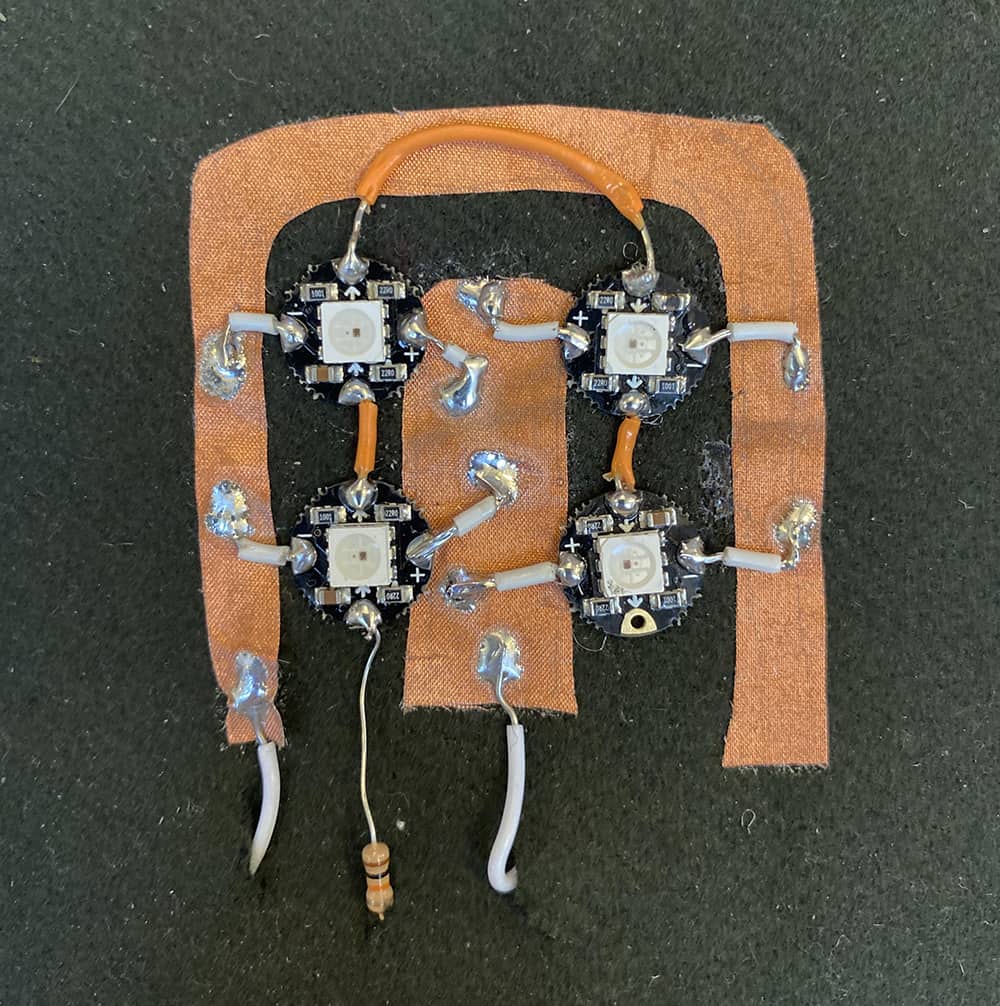
I wanted the neopixels to be hidden and disperse the light through fabric so it was a bit less harsh. I used one of my TPU printed samples from last week on cotton fabric to cover the circuit. I only sewed down one side, making the swatch like a book so I could still open it up to work on the circuit.

Code Example
This is the code I uploaded to my Gemma. I used a code from here It's a pretty simple pulse code for neopixels. The code uses blue so I replaced it with values to create a pink color which I found here. I also disabled the serial begin portion of the code to get ir to run on the Gemma.
#include <Adafruit_NeoPixel.h>

// LED connected to digital pin 6
int dataPin = PIN0;
#define NUMPIXELS          4
#define MAXIMUM_BRIGHTNESS 255
#define MEDIUM_BRIGHTNESS  130
#define LOW_BRIGHTNESS     100

int maxBrightness = 255;
int minBrightness = 80;
boolean isPulsing = true;

Adafruit_NeoPixel pixel = Adafruit_NeoPixel(NUMPIXELS, dataPin);

void setup() {
  //Serial.begin(115200);

  pixel.begin(); // This initializes the NeoPixel library.
  setLightsToColor(242, 90, 255);
  // turn off neopixel
  turnOffLights();
}

void loop() {
  if (isPulsing) {
    pulse();
  }
}

void pulse() {
  // fade in
  for (int x = minBrightness; x < MAXIMUM_BRIGHTNESS; x++) {
    setLightsToBrightness(x);
  }
  // fade out
  for (int x = MAXIMUM_BRIGHTNESS; x >= minBrightness; x--) {
    setLightsToBrightness(x);
  }
}

void solid() {
  setLightsToBrightness(maxBrightness);
}

void turnOffLights() {
  setLightsToBrightness(0);
}

void setLightsToColor(int red, int green, int blue) {
  for (uint8_t i = 0; i < NUMPIXELS; i++) {
    pixel.setPixelColor(i, pixel.Color(red, green, blue));
  }
}

void setLightsToBrightness(int brightness) {
  pixel.setBrightness(brightness);
  setLightsToColor(242, 90, 255);
  pixel.show();
}
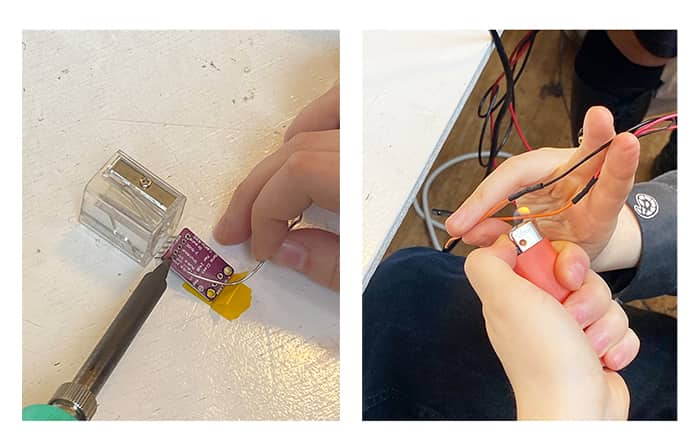
Programming the Attiny
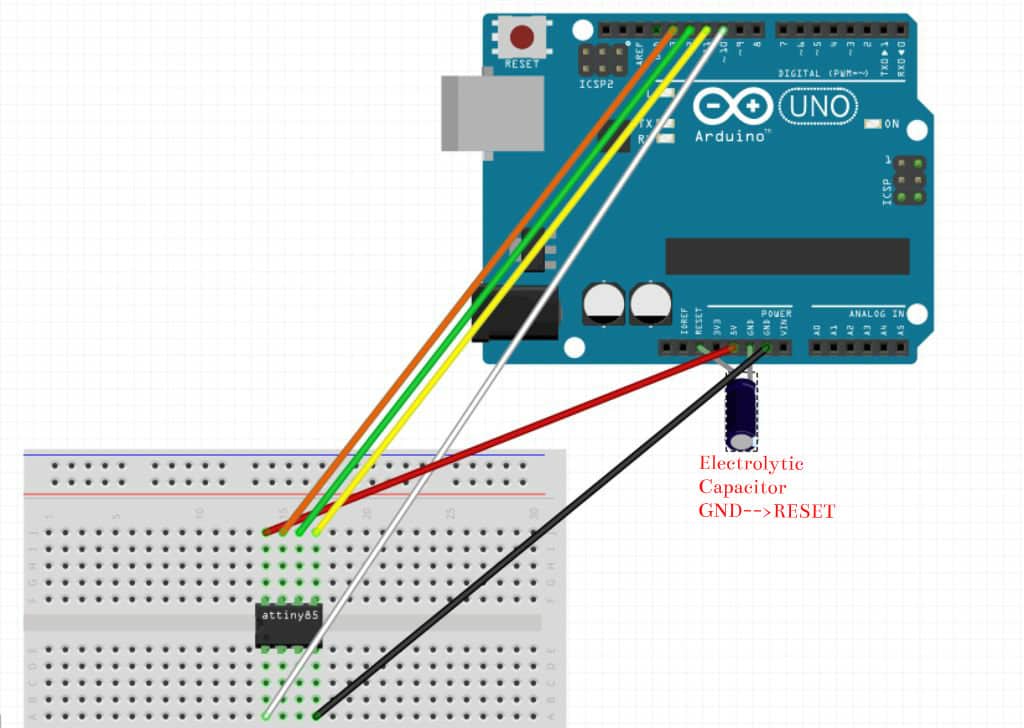
Now that I had my circuit working and a protype I liked, I wanted to try using the Attiny instead of the Gemma. To do this I first had to prepare an Arduino Uno to become a programmer for the Attiny.
This tutorial was really helpful in setting this up. The image below is from this tutorial.
Tools
- Arduino Uno
- Attiny
- Electrolytic Capacitor
- LED
- wires
- breadboard
Steps
-
Open up preferneces in Arduino and copy this URL
https://raw.githubusercontent.com/damellis/attiny/ide-1.6.x-boards-manager/package_damellis_attiny_index.json
into additonal boards and URLS -
Install ATtiny in boards manager
-
Restart Arduino IDE
-
Select board Attiny 85
-
Open up the example sketch "Arduino ad ISP" and upload to your Uno
-
Now using the image above, use your breadboard to connect your attiny to your Arduino Uno
-
In tools select ATtiny 85 as your board, 8 MHz (internal) as your processor and Arduino as ISP as the programmer
-
Burn boatloader
-
Now you can upload sketches to your attiny! I started with a basic blink example sketch to make sure everything is working.
Now that my Attiny was programable, I uploaded the pink pulsing neopixel code so that I could light the neopixels with just a Attiny and a power source.
Jada Greene's fabicadmey page was really helpful in setting up the Attiny with neopixels
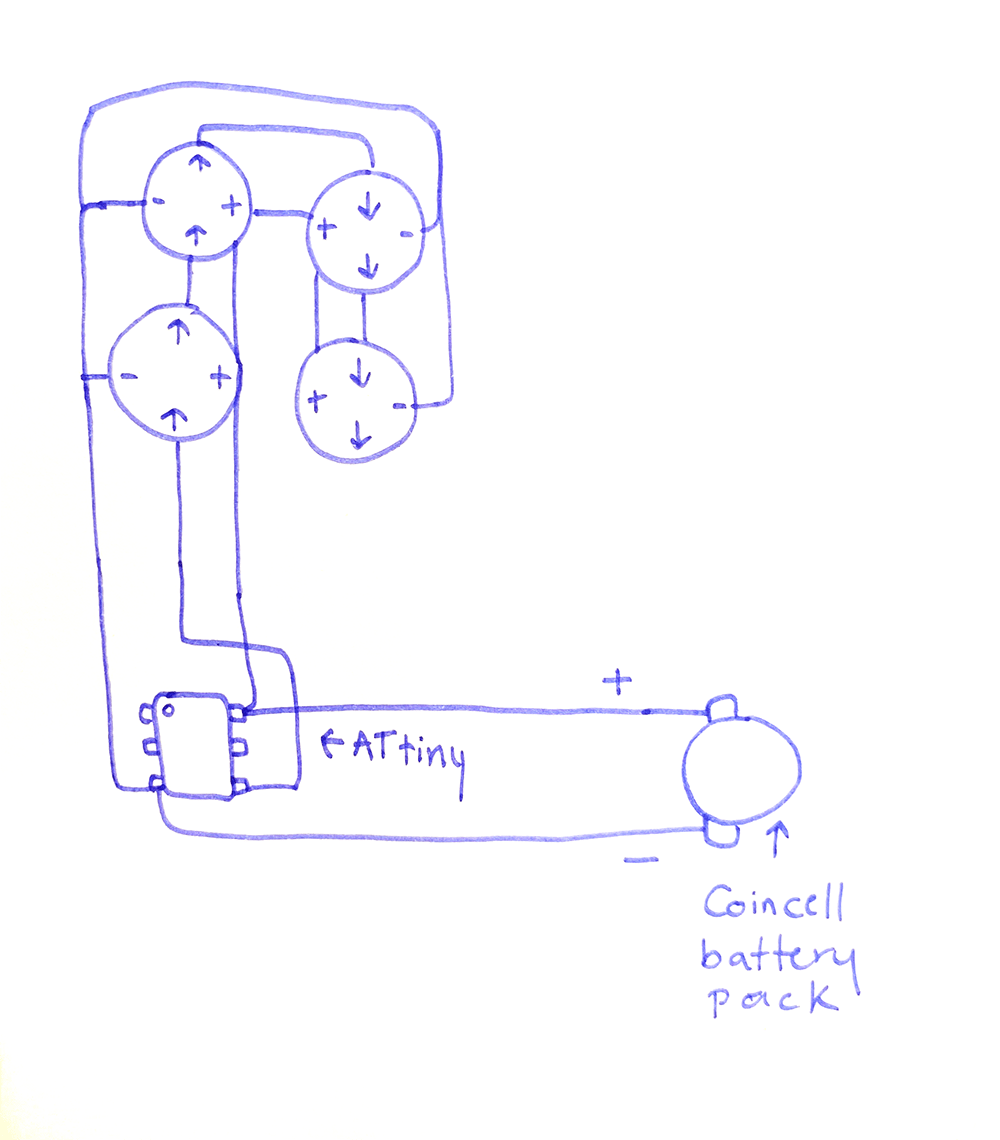
I'm not sure why, maybe my battery pack is low but the neopixels are much more red than pink? But the code works powered by the Attiny
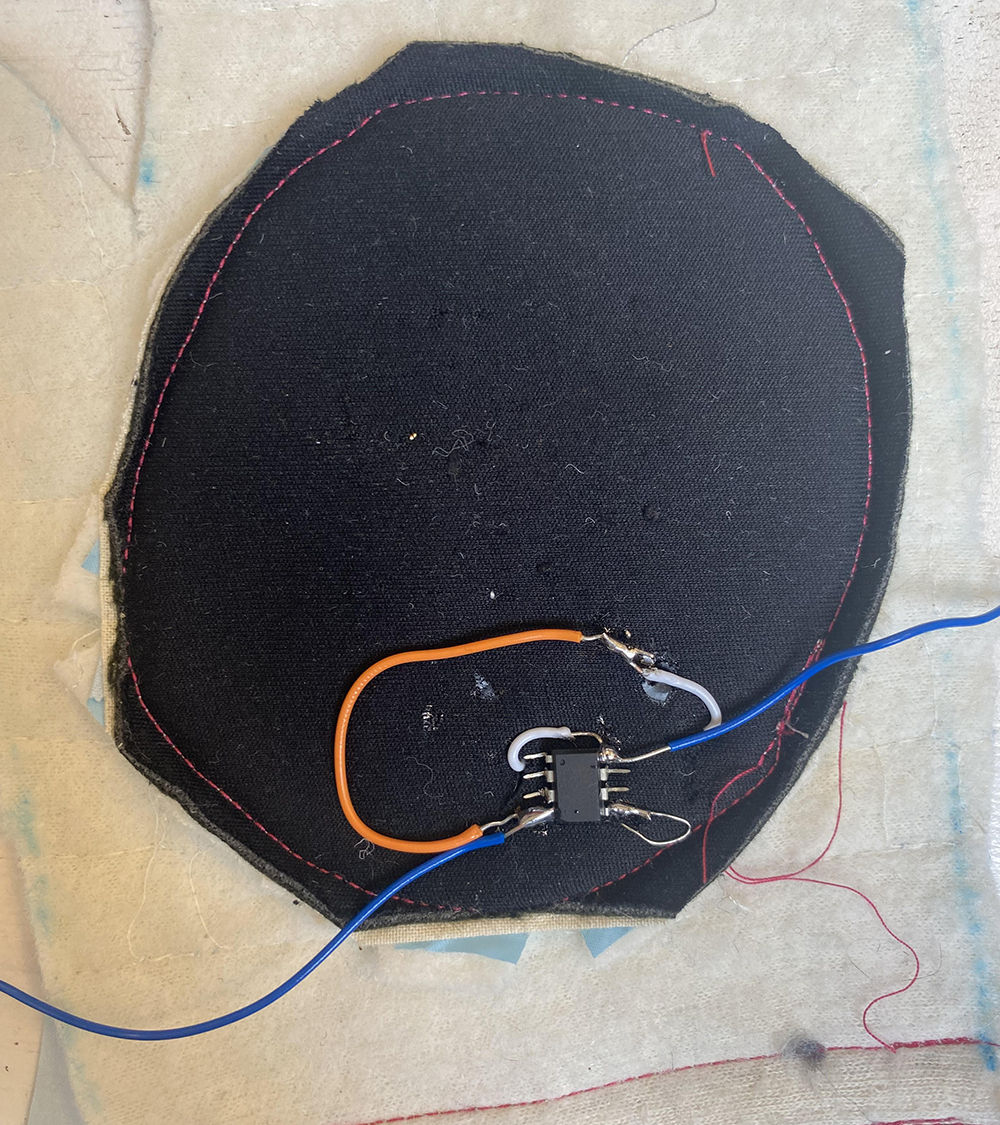
This is the very messy but functional back of the circuit where the Attiny is
Gloves for a future of hand holding
I wanted to build off of my hug dress I was trying to make during the first electronics week. I decided to make gloves because it is a lot more doable and easy to hide electronics inside. It's also so cold here already and I wanted some weird tabi shoe inspired gloves for my bike rides.
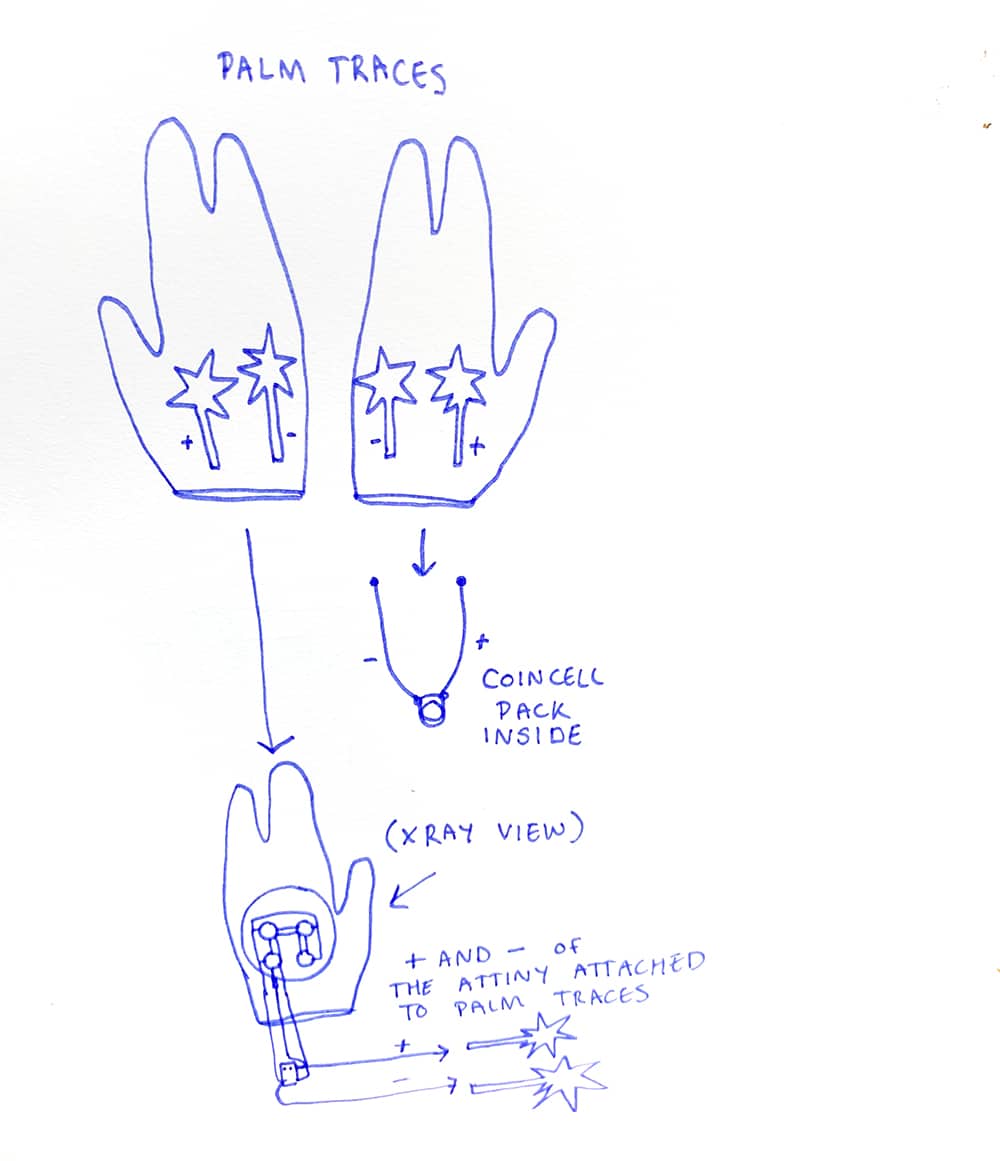
I imbeded my led swatch into the top of one of the gloves and the other hand has a battery pack. I made iron on copper traces on the palms that close the switch when you place the palms together to light up the neopixels.

I always seem to do this but I accidentally burned the fabric while ironing on the copper traces oops! so theres two weird white marks on one of the palms but overall seem to work well!