5. E-textiles
( All images are mine unless marked with a hyperlink )
References & Inspiration
I'm very excited for this week. I'm really interested in sensors that have some sort of interactive, performance element. These are some projects I've encountered that are inspiring me this week.
Jesse Seay's conductive knitting with LEDs
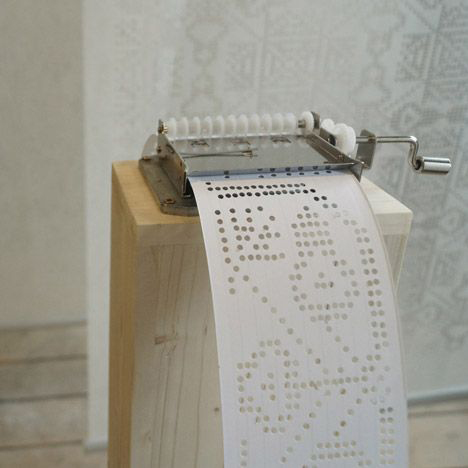

Zsanett Szirmay's textile inspired music
Iga Węglińska's "Emotional Clothing" with biometric sensors responding to body changes
Swatch 1, (Tilt switch)
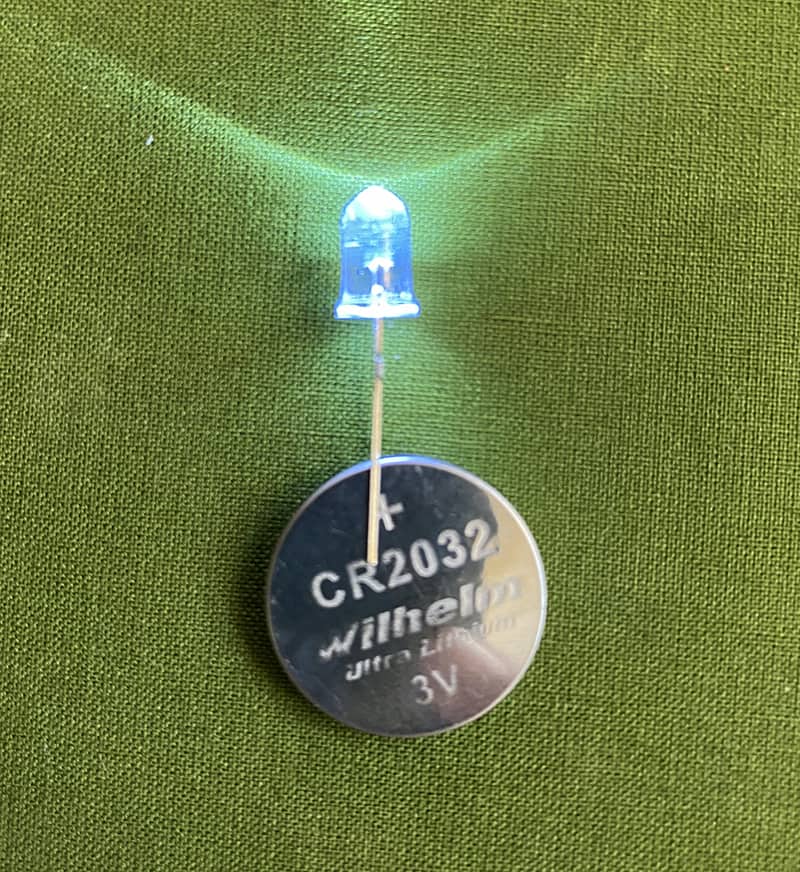
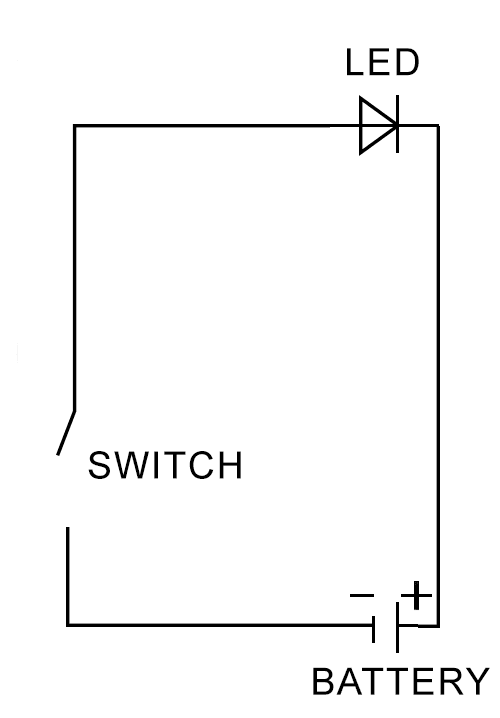
I know I wanted to first try a circuit using an LED because this is an easy way to know if a connection is good and working well. I started off following a simple circuit diagram I drew using a switch to turn the light on and off.
Tools
- Heat n Bond
- Fabric (I used Neoprene and felt)
- Conductive thread
- Copper fabric
- Metal beads, snaps or buttons
- Coincell battery
- LED
- Multimeter
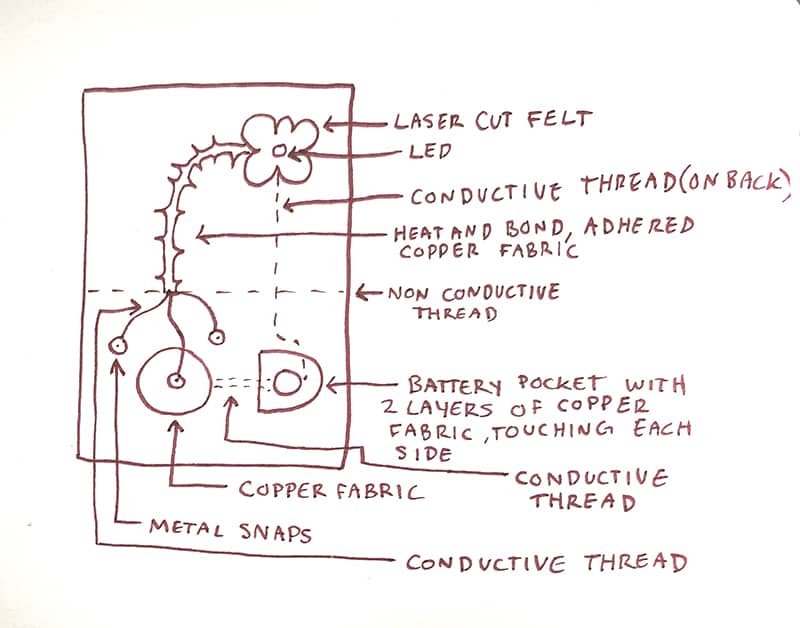
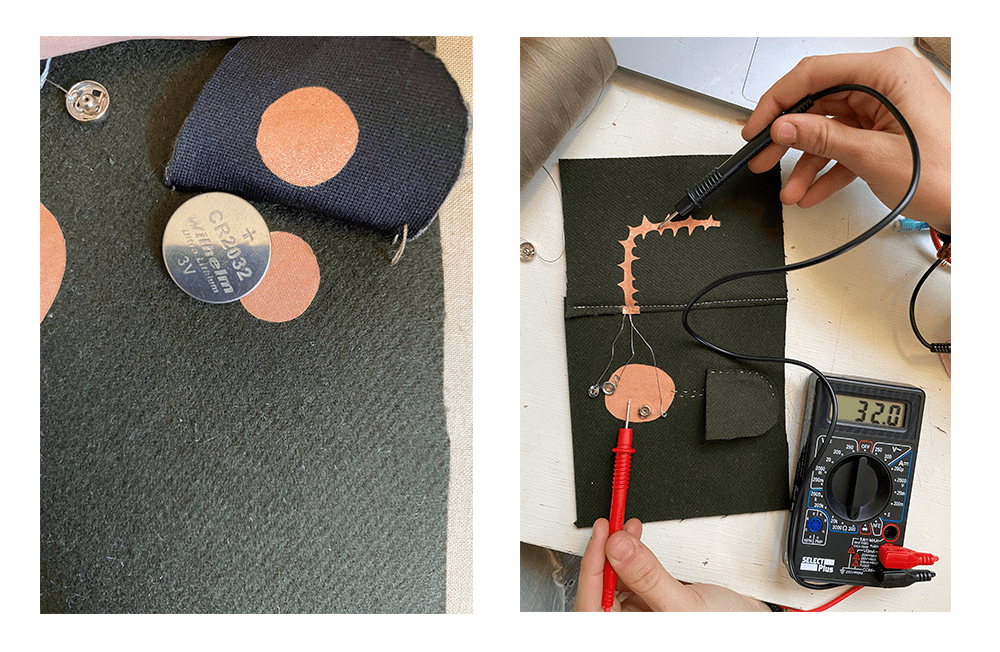
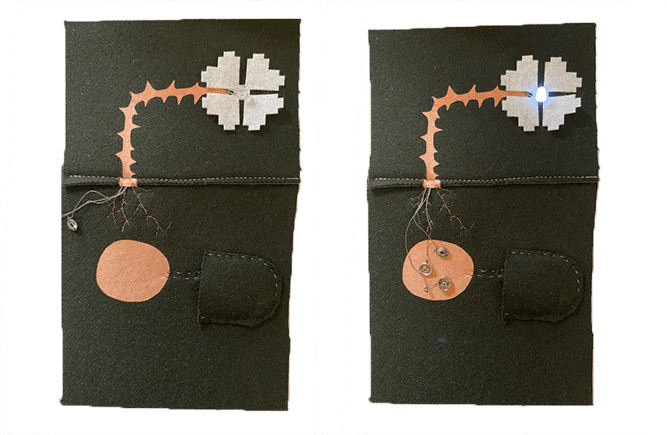
I wanted to design an LED flower with roots that act as the switch. I started with some leftover neoprene scraps from week 3. I added copper fabric that I fused to the fabric with heat n bond. I added an led on one end which I attached using conductive string to ensure a connection to the copper fabric. On the other end are conductive threads with metalic snaps at the end (these could be beads but I used the snaps because they were availible). The switch turns on when the conductive tassles attach to another conductive copper patch connected to the negative end of a battery. The batter is in a pocket with conductive patches on either side with conductive thread running one way to the conductive circle patch and another line running to the LED.
Notes and Improvments
- Now that I understand current better I might add a resistor to this circuit
- I also would like to swap the snaps for metal beads in the future because I think it would look nicer
- However, if you want a more concrete connection, another snap could be added to attach a dangling snap to as the switch
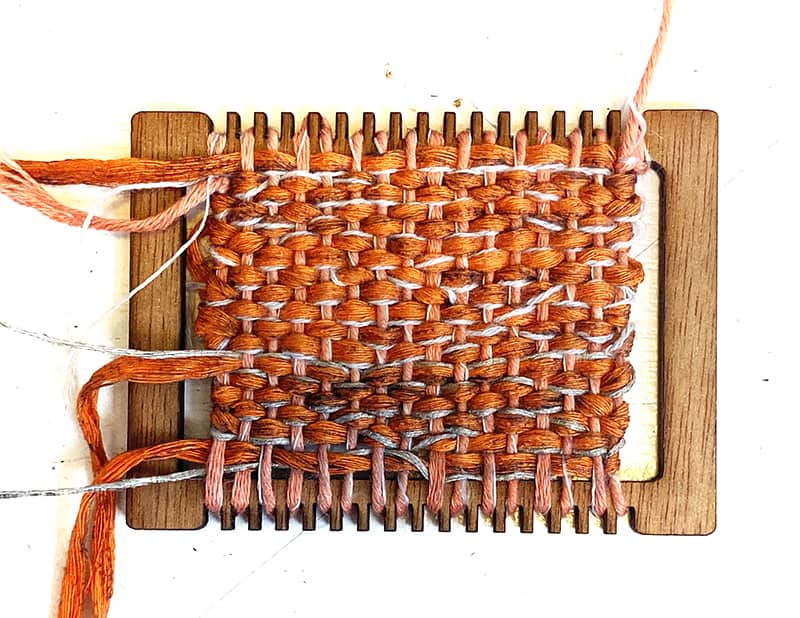
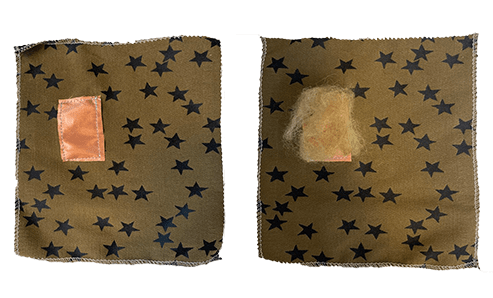
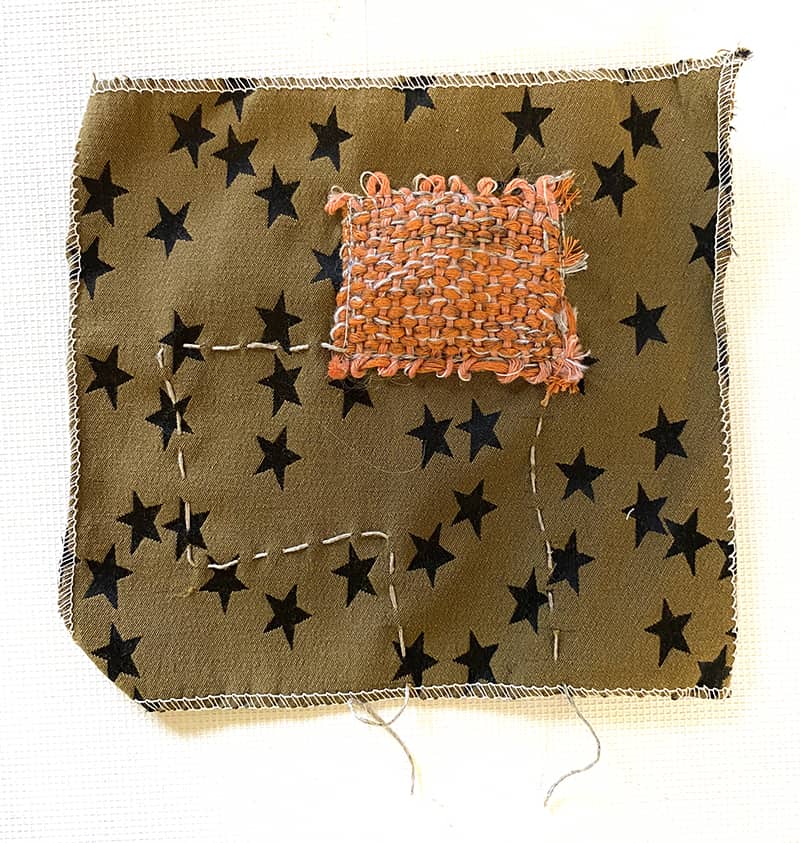
Swatch 2 (Woven Button)
For my second swatch, I wanted to make a button that would increase in conductivity the harder you pressed. I started by weaving on a mini laser cut loom woth some regular yarn combined with conductive yarn. I then added copper fabric with heat n bond to a piece of scrap fabric. On top of the copper patch I added some non conductive wool, before sewing the weaving over top. The idea was that the connection would be better the harder you pressed, allowing the conductive weaving to get better contact with the copper on the other side. I also sewed two lines, one attached to the copper and one attached to the weaving to measure their connection.
Tools
- Scrap fabric
- Open source laser cut loom/cardboard loom
- Conductive yarn
- Non conductive yarn
- Wool
- Copper Fabric
- Heat n Bond (you can also jusy sew)
- Conductive thread
- Multimeter
- Arduino Uno
- Alligator clips


The code I used is the basic serial read funcion availible in arduino
Code
// *
  AnalogReadSerial

  Reads an analog input on pin 0, prints the result to the Serial Monitor.
  Graphical representation is available using Serial Plotter (Tools > Serial Plotter menu).
  Attach the center pin of a potentiometer to pin A0, and the outside pins to +5V and ground.

  This example code is in the public domain.

  https://www.arduino.cc/en/Tutorial/BuiltInExamples/AnalogReadSerial
*/

// the setup routine runs once when you press reset:
void setup() {
  // initialize serial communication at 9600 bits per second:
  Serial.begin(9600);
}

// the loop routine runs over and over again forever:
void loop() {
  // read the input on analog pin 0:
  int sensorValue = analogRead(A0);
  // print out the value you read:
  Serial.println(sensorValue);
  delay(1);        // delay in between reads for stability
}
Notes
- The button has a resting state of 371 and jumps to around 515 when squeezed. I think this could be a more dramatic difference if I used more conductive yarn in the weaving

- Thw yarn I used was only 8% steel so the conductivity is likley pretty low
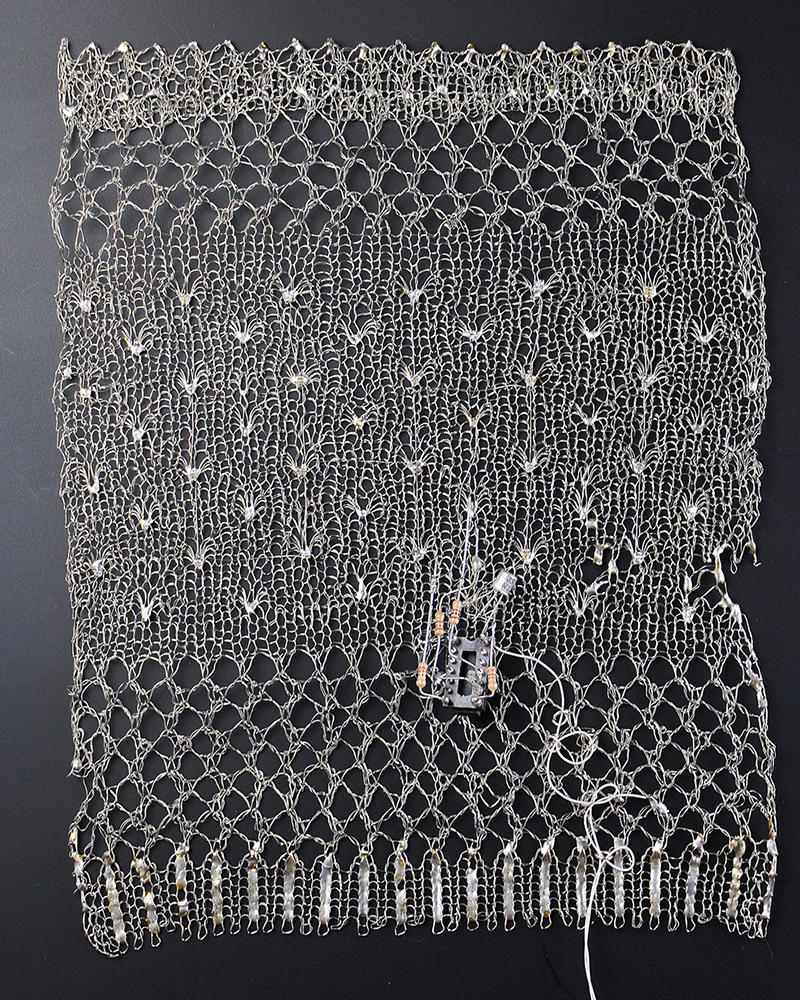
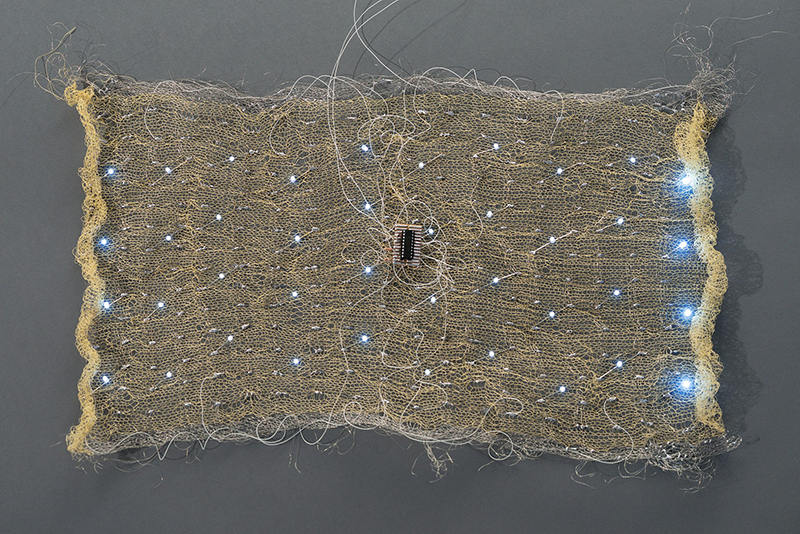
Knitting Machine
This week we also learned how to use the knitting machine. You can incorporate conductive yarns to make stretch sensors!
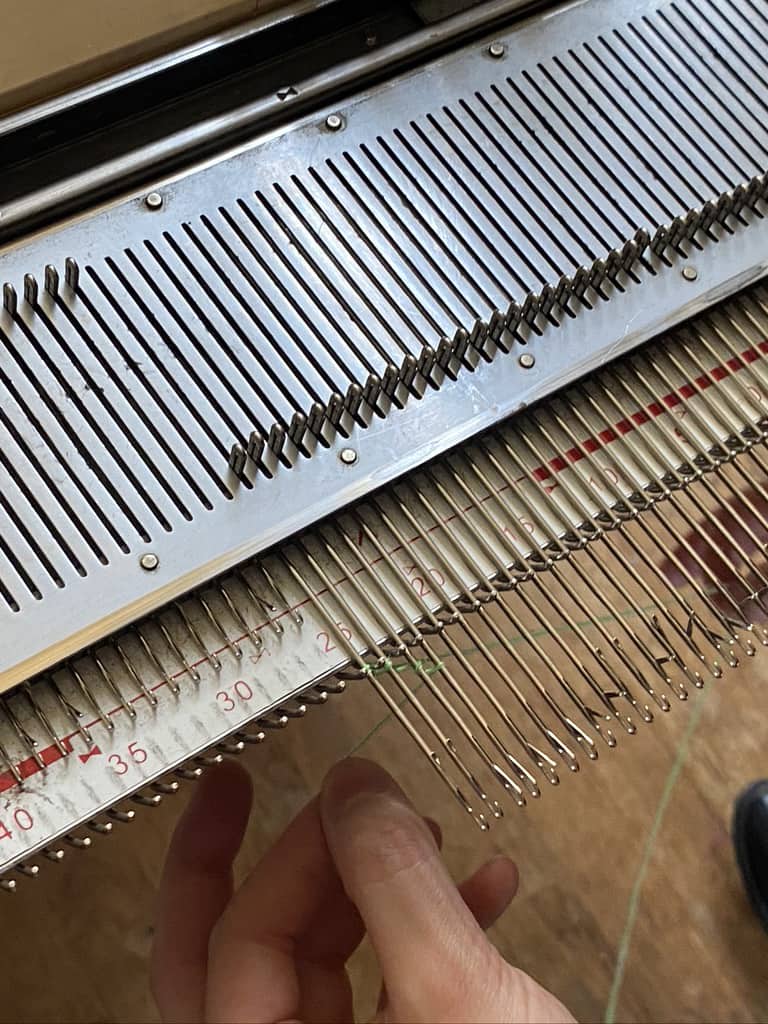
First the machine is threaded through a counter clockwise looping motion, starting from 0 and adding however many hooks you wish.
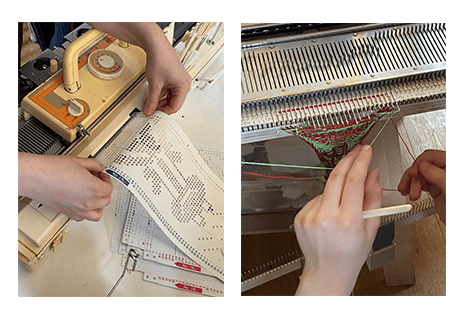
Then you can add in a binary pattern which tells and you are able to switch between two colors to create an image
Then knit away :-)
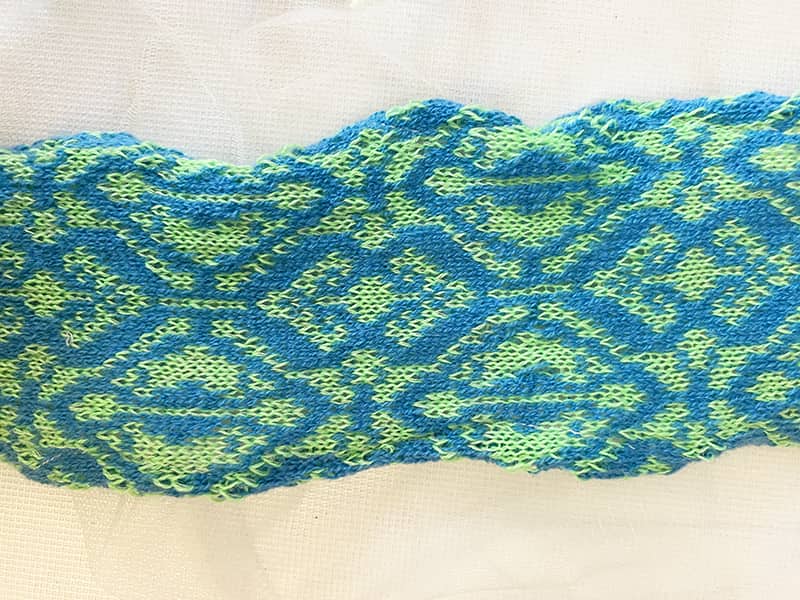
This is a sample Jiawen and Ray and I made!
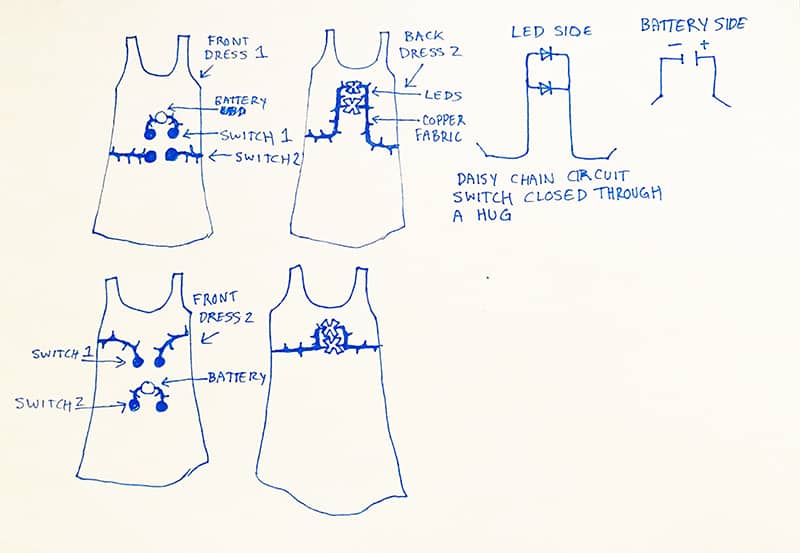
Hug Dress
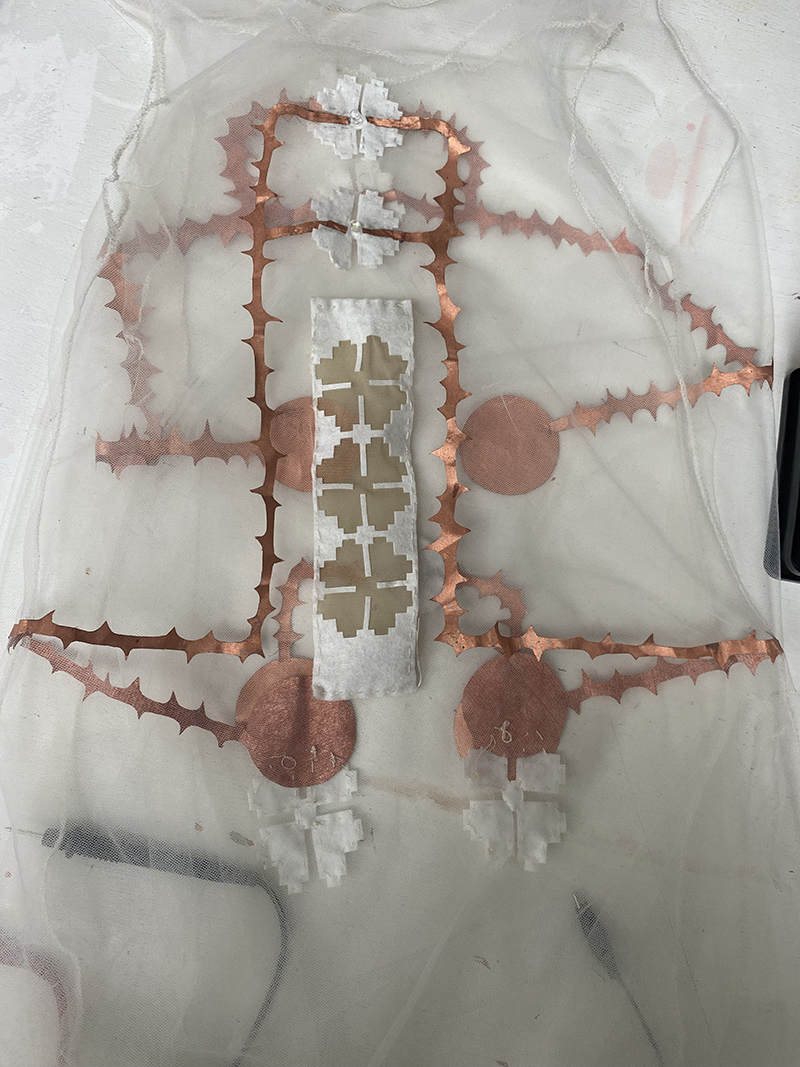
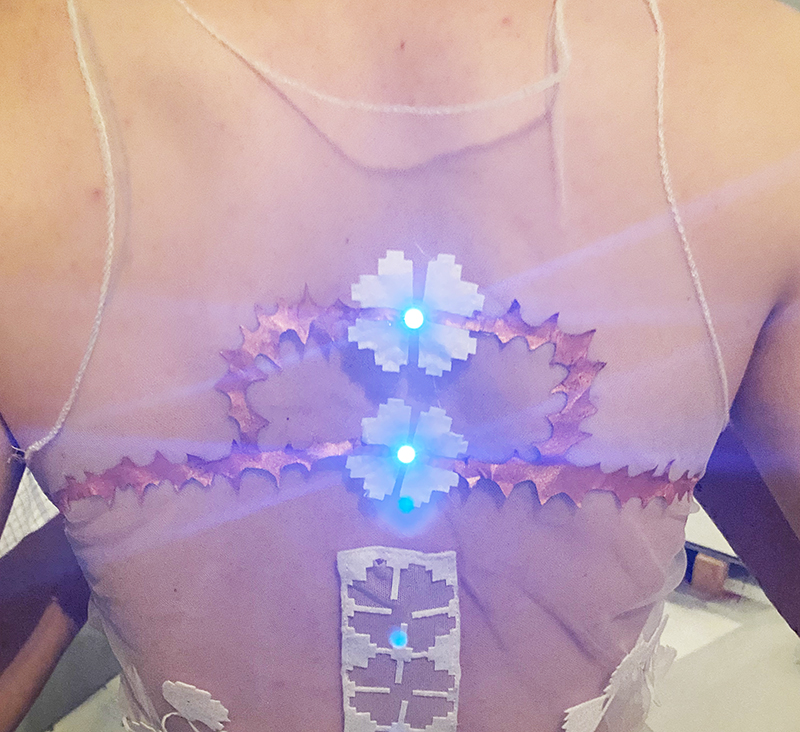
I wanted to scale up my first switch design to make an interactive garment. I wanted to make something for two people to wear that closes a switch through touch. I also really loved the idea of "diasychain" circuits so I wanted to incorporate this into the design connecting two flower leds together from one power source.
I started by sewing a really simple two piece dress pattern. I surged the hemlines on a thin mesh fabric. I've never really made a garment before and found this fabric really difficult to work with for a first time.
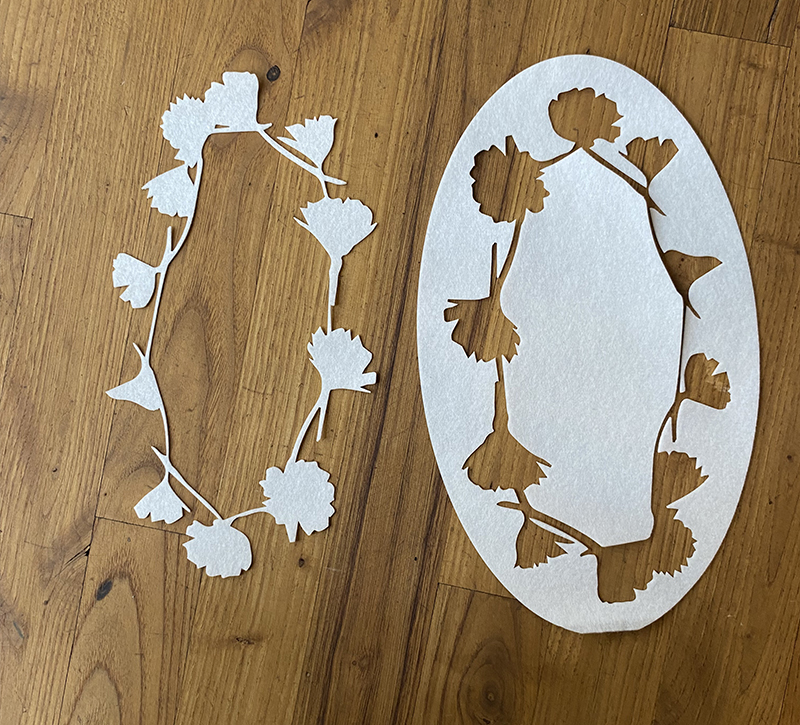
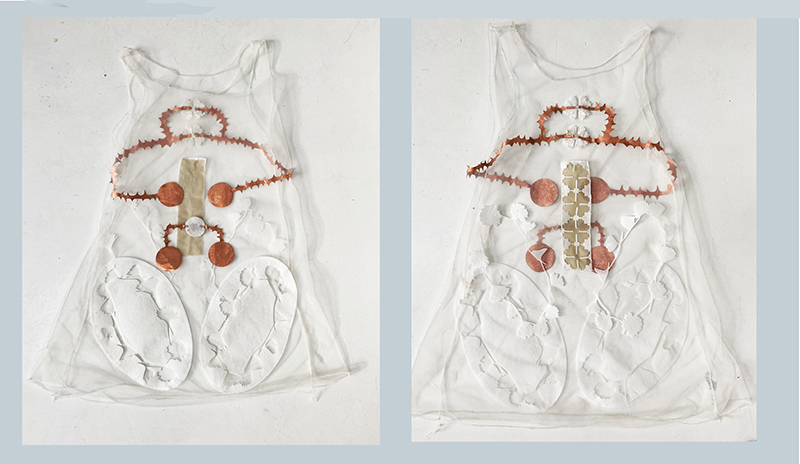
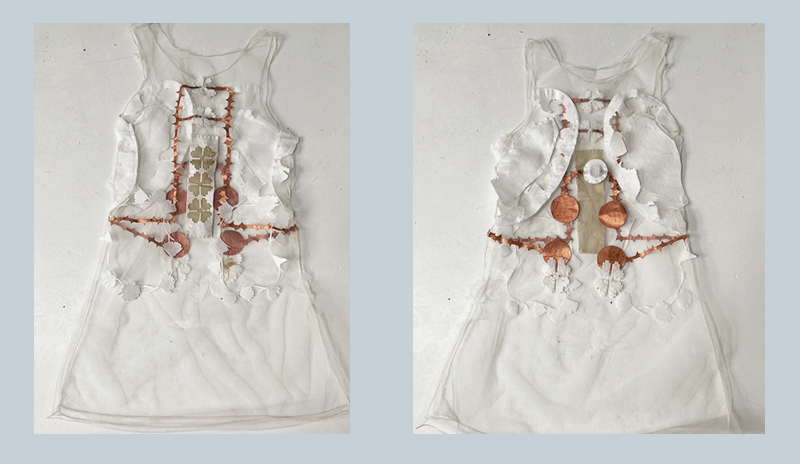
I also am addicted to heat n bond. I used my left over laser cuts from week 3 as embellishments for the garments. I used both the positive and negative to try to cut down on waste.
-The settings I used for felt with an adhesive backing are Speed-40 Power-25 MinPower-12
-I cut the copper fabric by hand after ironing on the backing

Tools
- Mesh, Felt
- Copper Fabric
- Heat n Bond
- Conductive thread
- Multimeter
- LEDS
- Thread
- Coilcell Bettery
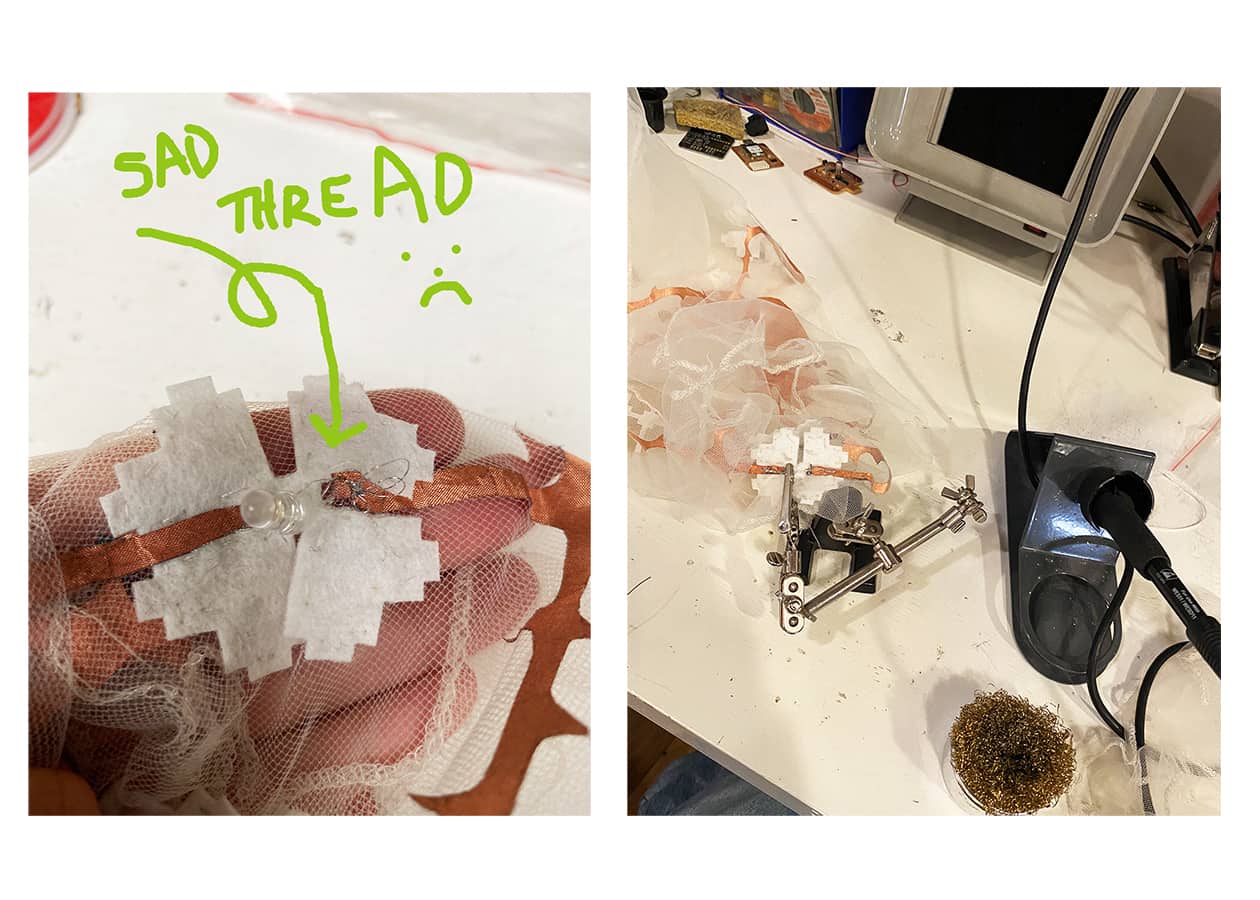
Trouble Shooting
- I'm having a hard time maintaining good connections, when I transport the garment to bring home, I keep accidentally loosening the led to cooper connections.

- I've been using conductive thread around the bent legs but yesterday decided to sauder direcently onto the copper fabric which seems to be working a bit better

- I also melted through the mesh while ironing on the felt yesterday (whoops!) so won't be making that mistake again

- The felt also made the garments much less stretchy so it became much more difficult to take on and off. In the future I think I will use a much thinner fabric for the decorative elements

- I also need to do and sew down many of the things I ironed on with heat n bond because after being worn/transported theyve started to loose the stickiness