PROCESS
This page functions as a blog documenting the protyping stage of this project. This will not be a very linear, step by step guide to build this loom and has lots of fails and dead ends. If you are looking for clear, finalized instructions to build this loom, I suggest you skip to the "How to" page :-)
This page focuses mainly on the protoypes for the mechanism relating to the punch cards. This is what is unique about this loom so I was designing from scratch. The other parts of the loom, such as the front and back beams required less protyping because there are other existing open source loom projects with similar parts, such as Asli's loom. I will talk more about the other portions of the loom and the weaving process on my deliverables/how to page.

Lots of fails!
SKETCHBOOK
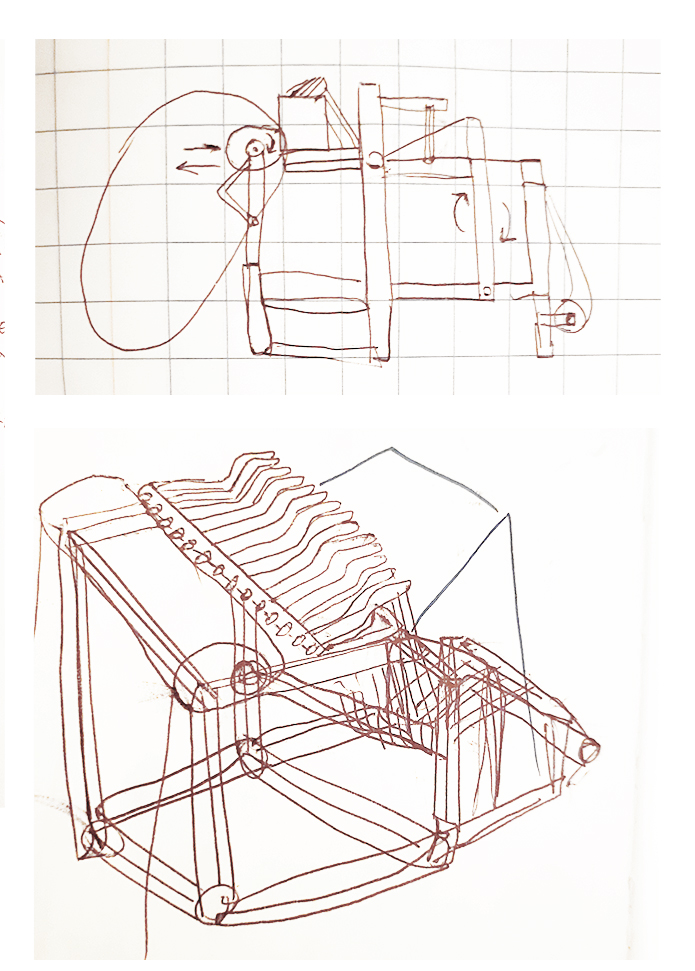
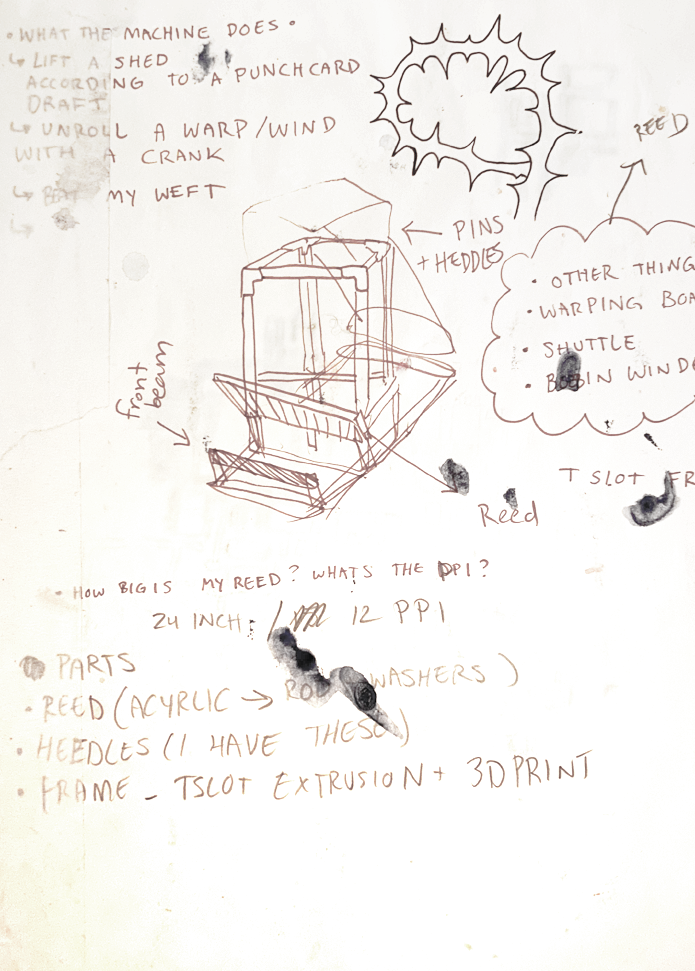
Lots of models and sketches trying to wrap my head around a design

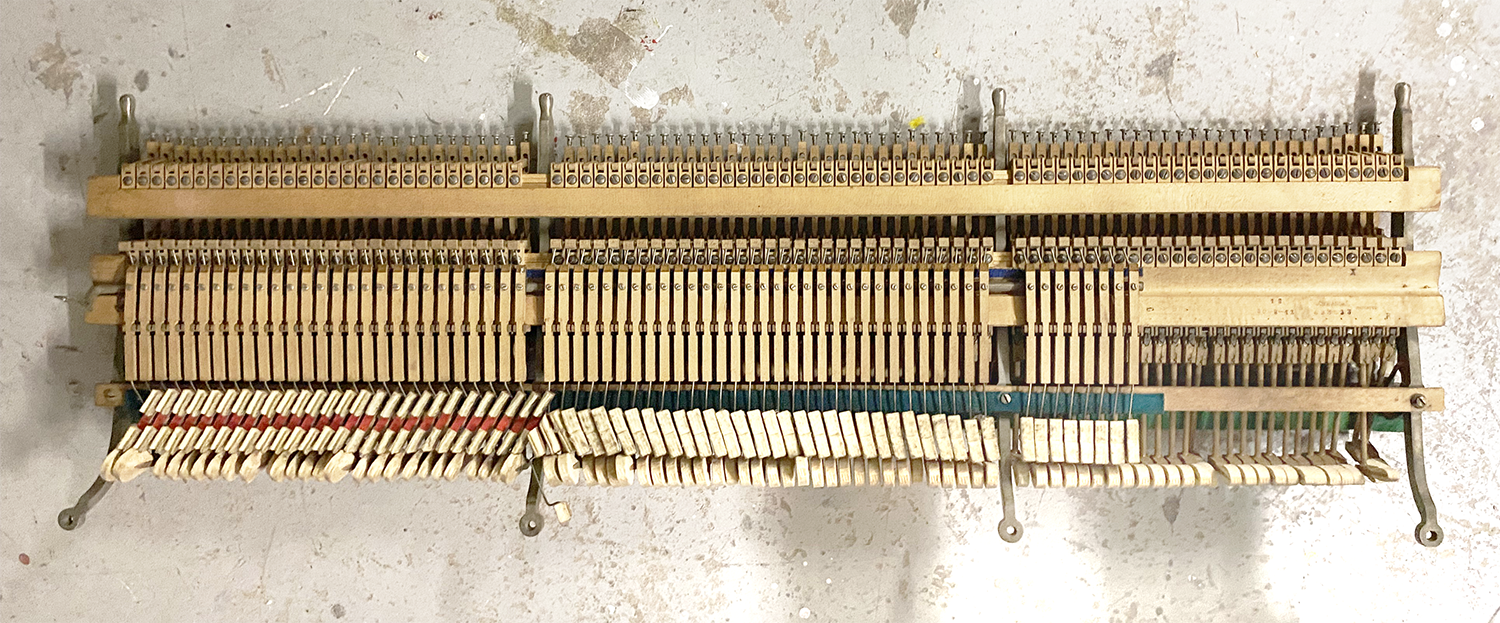
Also I found the interior mechanism of a piano by the trash recently. I started to take it apart and it helped me start to understand what might would to individually lift strings. For a bit I was thinking of using this as my internal lifting system but overall it is too bulky.
Prototype 1
I decided to base my initial design off of Chris Fenton's punchg card reader design. Instead og these pins I want to use heddles.
Heddle Lifting/Lowering Mechanism
I started by making a quick cardboard version of the dropping mechanism
- Notes- this servo is moving from 0 to 180 and back. I will probably need to change this to 60 or so because the movement is too big. I also think I might need to upgrade eventually to some higher torque servos when I use material other than cardboard. Or I will use two small servos moving together.
I also added a button. I would like the weaver to be able to press this to control the lifting and lowering of the heddles.

Code
#include <Servo.h>

// Define servo and button pins
const int servoPin = 9;
const int buttonPin = 2;

Servo myServo;

#include <Servo.h>

// Define servo and button pins
const int servoPin1 = 9; // Pin for first servo
const int servoPin2 = 10; // Pin for second servo
const int buttonPin = 2;

Servo myServo1;
Servo myServo2;

// Variables to track servo position and button state
int servoPosition1 = 0;       // Initial position for first servo
int servoPosition2 = 0;       // Initial position for second servo
int buttonState = 0;         // Variable to store the button state
int lastButtonState = 0;     // Variable to store the previous button state
bool servoDirection = true;  // True: move from 0 to 90, False: move from 90 to 0

void setup() {
  // Attach servos to the corresponding pins
  myServo1.attach(servoPin1);
  myServo2.attach(servoPin2);

  // Set button pin as input
  pinMode(buttonPin, INPUT);
}

void loop() {
  // Read the state of the button
  buttonState = digitalRead(buttonPin);

  // Check if the button is pressed and the previous state was not pressed
  if (buttonState == HIGH && lastButtonState == LOW) {
    // Change the servo direction
    servoDirection = !servoDirection;

    // Move the servos based on the direction
    if (servoDirection) {
      // Move from 0 to 90 degrees for both servos
      for (int pos = 0; pos <= 90; pos += 1) {
        myServo1.write(pos);
        myServo2.write(pos);
        delay(15);
      }
    } else {
      // Move from 90 to 0 degrees for both servos
      for (int pos = 90; pos >= 0; pos -= 1) {
        myServo1.write(pos);
        myServo2.write(pos);
        delay(15);
      }
    }
  }

  // Update the last button state
  lastButtonState = buttonState;
}
Trial 2
The first prototype using a sweeping motion was a bit too intense and didn't drop the heddles at a nice angle. I decided to instead try printing a linear actuator to attach to my servo motors.
Had lots of printer struggles this week so it ended up taking a long time and many failed prints later I ended up with a working lifitng/lowering system. The gear doesn't fit great but it still lifts. I got my files from Pontentprinciples on thingiverse
Punch Card Wheel
I needed full rotation with control so I learned this week how to set up stepper motors. This ended up being so much more difficult than steppers which I was not anticipating. I had to use a seperate driver/motor and use AC current.

This is my wonky circuit diagram. This was the tutorial I followed to get it running. I used chat gbt to make a code for two with a pushbutton to control forward movement anf backward movement.
Code
// *
#include <AccelStepper.h>

#define FULLSTEP 4


AccelStepper stepper1(FULLSTEP, 8, 10, 9, 11);
AccelStepper stepper2(FULLSTEP, 4, 6, 5, 7);

#define BUTTON_FORWARD_PIN 2  // Pin for the forward button
#define BUTTON_BACKWARD_PIN 3 // Pin for the backward button

int forwardButtonState = 0;
int lastForwardButtonState = 0;
int backwardButtonState = 0;
int lastBackwardButtonState = 0;

void setup() {
  stepper1.setMaxSpeed(1000.0);
  stepper1.setAcceleration(50.0);
  stepper1.setSpeed(200);

  stepper2.setMaxSpeed(1000.0);
  stepper2.setAcceleration(50.0);
  stepper2.setSpeed(200);

  pinMode(BUTTON_FORWARD_PIN, INPUT_PULLUP);
  pinMode(BUTTON_BACKWARD_PIN, INPUT_PULLUP);
}

void loop() {
  forwardButtonState = digitalRead(BUTTON_FORWARD_PIN);
  backwardButtonState = digitalRead(BUTTON_BACKWARD_PIN);

  if (forwardButtonState == LOW && lastForwardButtonState == HIGH) {
    // Move both motors forward by 2038 steps (adjust as needed)
    stepper1.moveTo(stepper1.currentPosition() + 509.5);
    stepper2.moveTo(stepper2.currentPosition() + 509.5);
  }

  if (backwardButtonState == LOW && lastBackwardButtonState == HIGH) {
    // Move both motors backward by 2038 steps (adjust as needed)
    stepper1.moveTo(stepper1.currentPosition() - 509.5);
    stepper2.moveTo(stepper2.currentPosition() - 509.5);
  }

  lastForwardButtonState = forwardButtonState;
  lastBackwardButtonState = backwardButtonState;

  stepper1.run();
  stepper2.run();
}
Working Test (sort of)
I combined the rotating belt and heddle lifting system to make a small card board monster protoype. Things are starting to work! however I need my heddles to lift higher because they still don't lift highenough to allow the punch cards to advance.
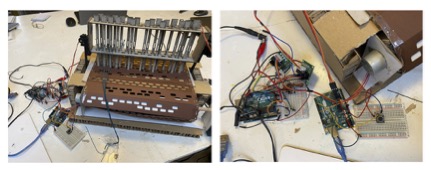
Also it is able to lift under a good amount of tension from the strings that it will need to lift.
Heddle upgrade
I only had two rows of heddles in the last design which would mean I would not be able to have many threads in my warp. My goal is to have a warp that includes at least 100 threads to allow for more complex designs.
Trial 1
My first idea was to try to use some heddles from my own floor loom. These are very thin and made of metal wire so I wouls be able to fit much more in a small space.
I tried a few different mock up models but overall they bent and moved far too much to fall into a punch card in a reliable way.

Trial 2
Next I designed a version using laser cut acrylic which fit much more heddles into a small space. I was able to get four rows to fit without interupting warp threads.

With this design I now have 100 heddles! without having an excessive, wide loom design or too much weight
Material Upgrade
The new heddles were heavier so I decided it was time to upgrade from the card board to some laser cut wood. I will upload more about this design on my deliverables page as this is will become my finalized prototype

The punch cards in this image are just to show where they will be inserted, this is not yet a finished part of the design
Final Prototype
At this point in the process my deadline was starting to get closer and I was feeling confident on the heddle lifting mechanism but the wheel to advance the punch cards was still giving me some issues. The stepper motors worked fine but I was having a hard time getting the punch cards to advance under the heddles without jamming. However I think in the end it doesn't change the project too much to manually move the punch cards instead of with a belt system. In the final design the weaver must align the punch cards themselves but doesn't add on too much time or effort to the weaving process.
I feel like I was getting close to figuring out a motorized belt system but need more time to finalize it. I will update this page if I do revisit it in the future!
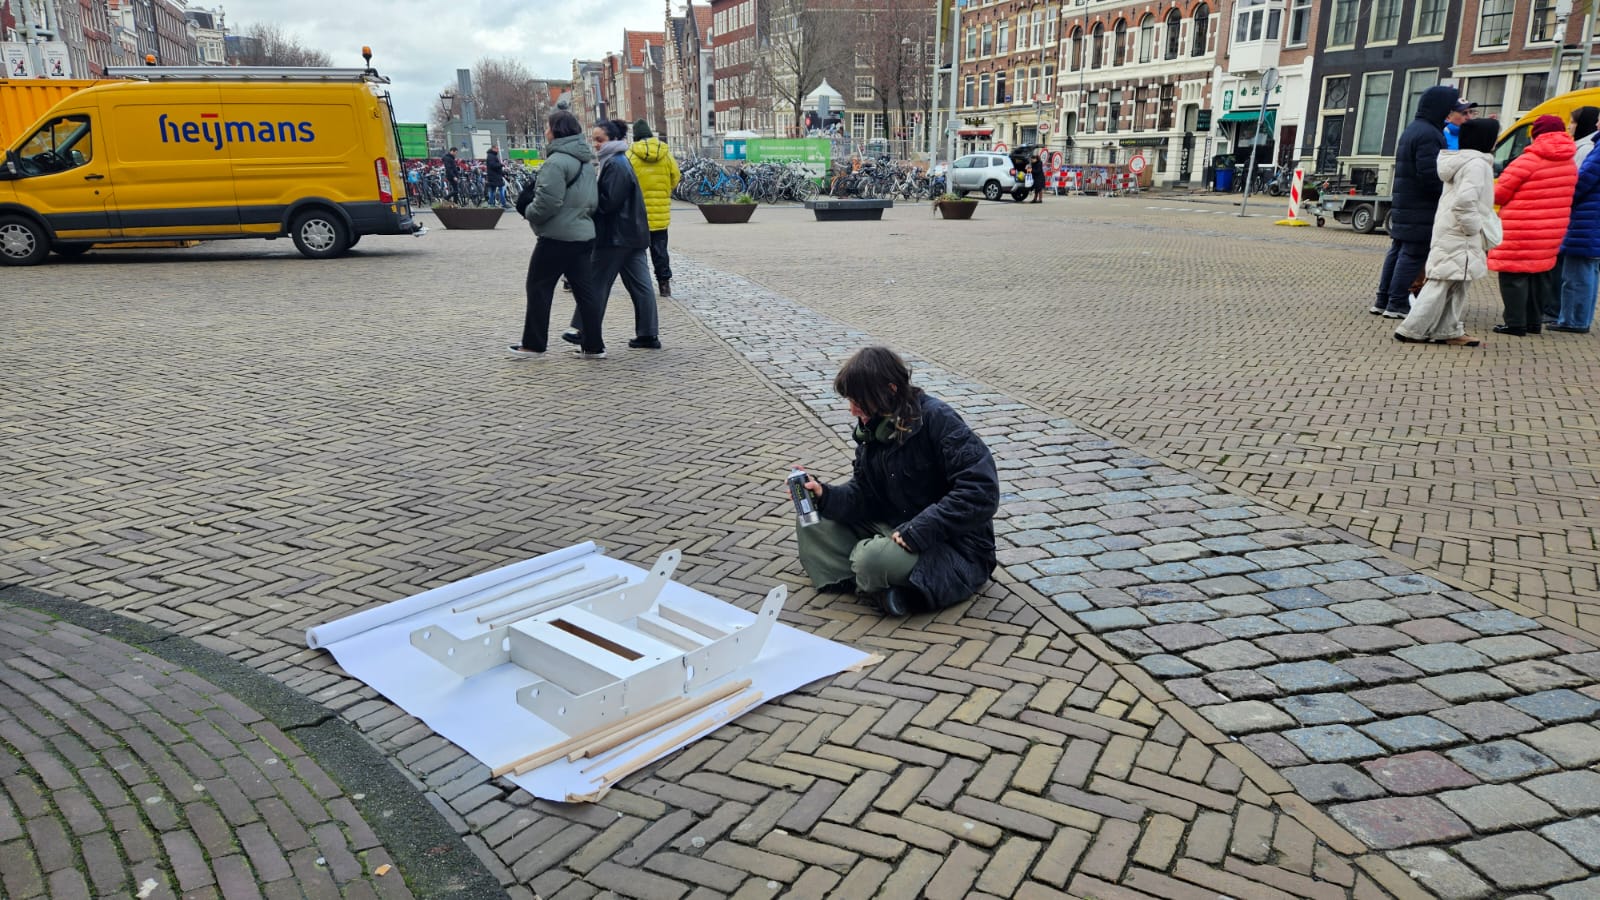
Here I am painting my final protype in the middle of Amsterdam
To continue on this journey and find a how to guide on the contruction of the final prototype please go to the deliverables/how to page ...