5. E - T E X T I L E S
E- Textiles = hybrid discipline that considers textiles and electronis equally.
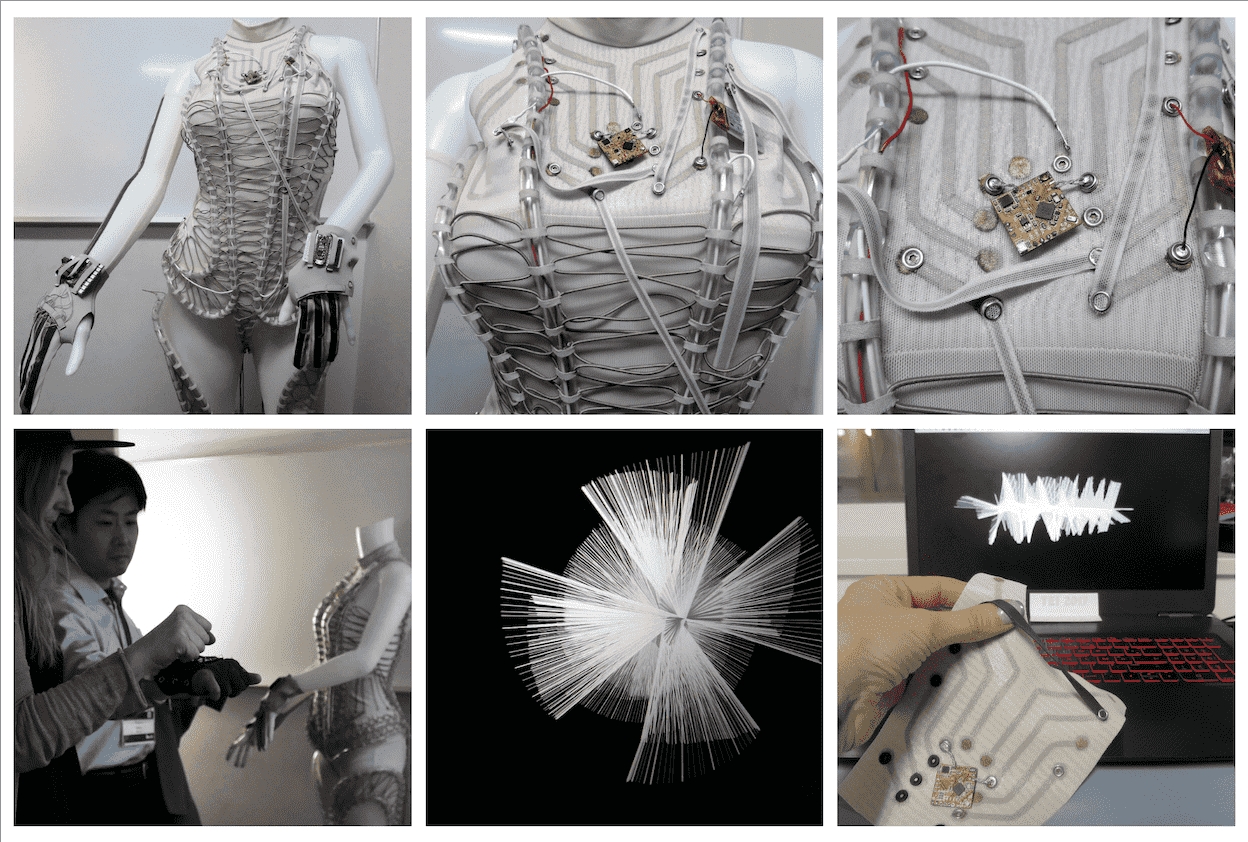
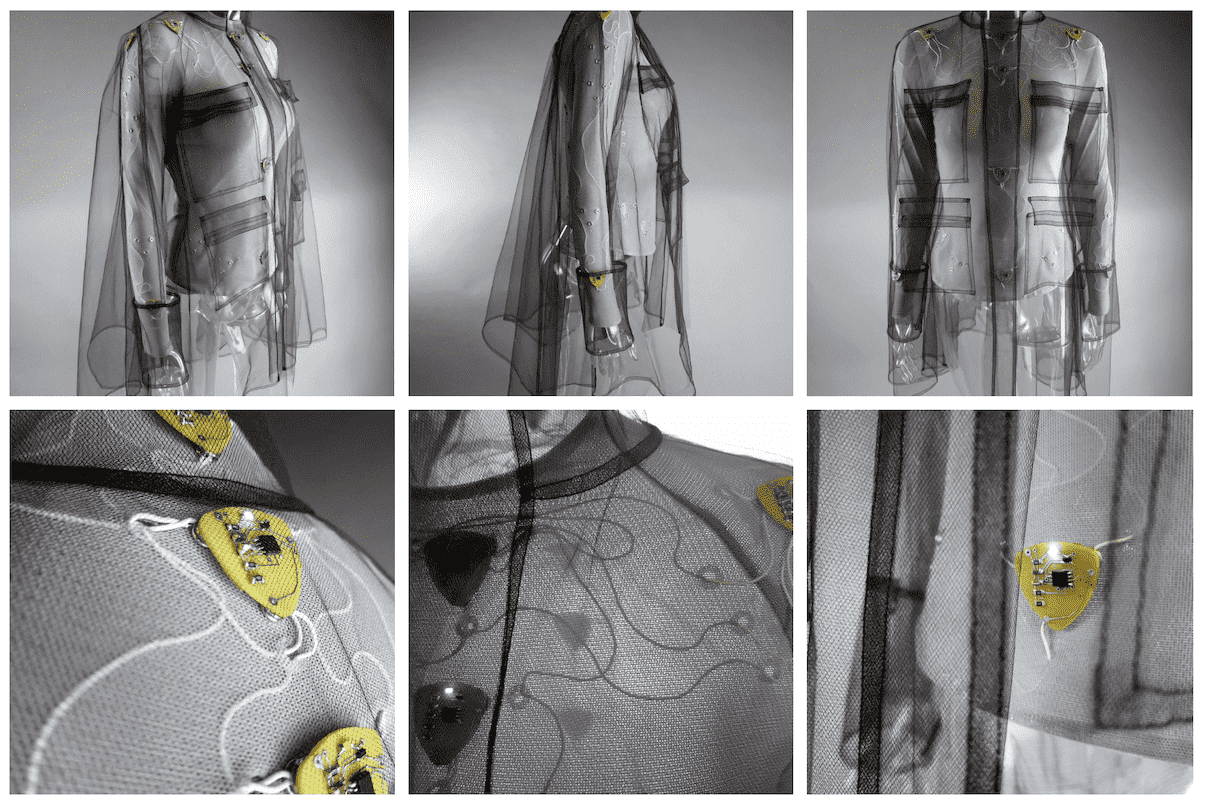
I N S P I R A T I O N

London based artist and designer working in fashion, costume and garment technology.
She is currently fascinated with the reality of combining fabrics and circuits to create functional garments for the future.
She is the textile designer of mi.mu gloves, a gestural interface to compose and perform music with your hands.
Her work is designed to tell stories, or to inspire them.
Aphra Shemza is a multimedia light artist creating interactive sculptures and installations.
She specialises in combining electronis with traditional sculpting techniques.
She has also developed her own way of making material by heating and joining waste plastic and transforming it into beautiful sheets.
Aphra Shemza has made a seies of artworks that visualise the rising sea levels due to global warming, highlighting the interconnectivity between these different systems.
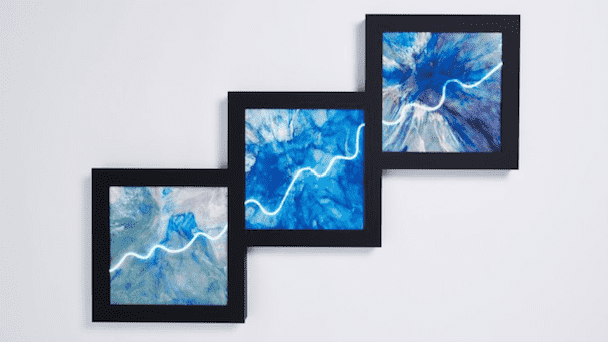
Ocean Rise V, 2022, Aphra Shemza. Recycled plastic, electronics and FSC certified wooden frame
R E S E A R C H
Electronics : Basics
Circuit = path for electricity to flow. Electricity travels from power (+) side of battery to the positive LED to the (-)
Voltage = electrical pressure or force between two points. Volts (V)
Current = parallel (voltage splits) or series (voltage carries). Typically work in parallel.
Measured in Amperes (A) "Amps" or milliAmpere (mA)
Resistace = measure of the opposition to current flow in an electrical circuit. Ohms (Ω)
Traces = physical path of conductive material in which electricity moves along in a circuit.
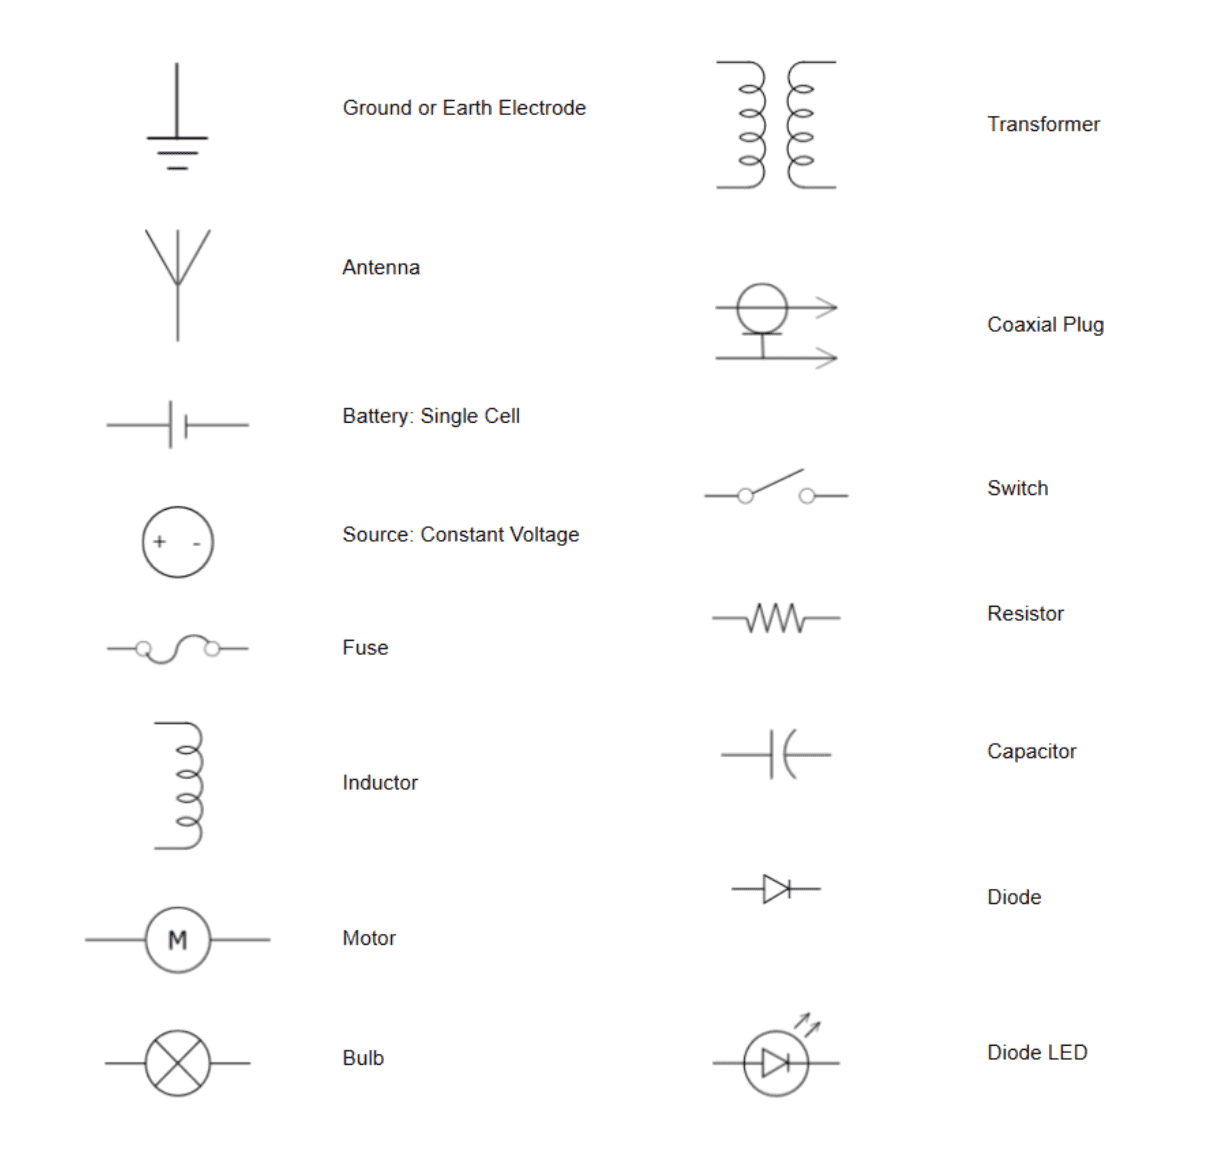
Basic Electronics Symbols
M A T E R I A L S

Examples of materials
Conductive Materials
Conductors = Silver, Gold, Copper, Steel, Seawater
Conductive Materials = Conductive Threads / Yarns, fabric, wool, tapes, inks
Each material has different properties and should have it's own data sheet.
Like choosing any material, it is best to consider different factors and decide what works best for what you want to create.
When choosing material consider:
-
Resistance - (lower the resistance = higher the conductivity // higher the resistance = lower the conductivity)
-
Connective - compatibility (is it solderable? Can you easily sew with it? Is it stable?)
-
Feel - (if worn on the body, how does it feel on skin? Comfortable?)
-
Stretch - (how much expansion does it allow/ not allow?)
-
Thickness - (how thick/thin? e.g. thread/yarn)
-
Substrate - & productive process
Conductive Thread: Applications:
- Machine Sew: Put in bobbin of machine
- Hand Sew (decorative e.g. chain stitch)
- Can combine with classic thread (e.g for strength/desgn. Good for knitting machine)
T O O L S
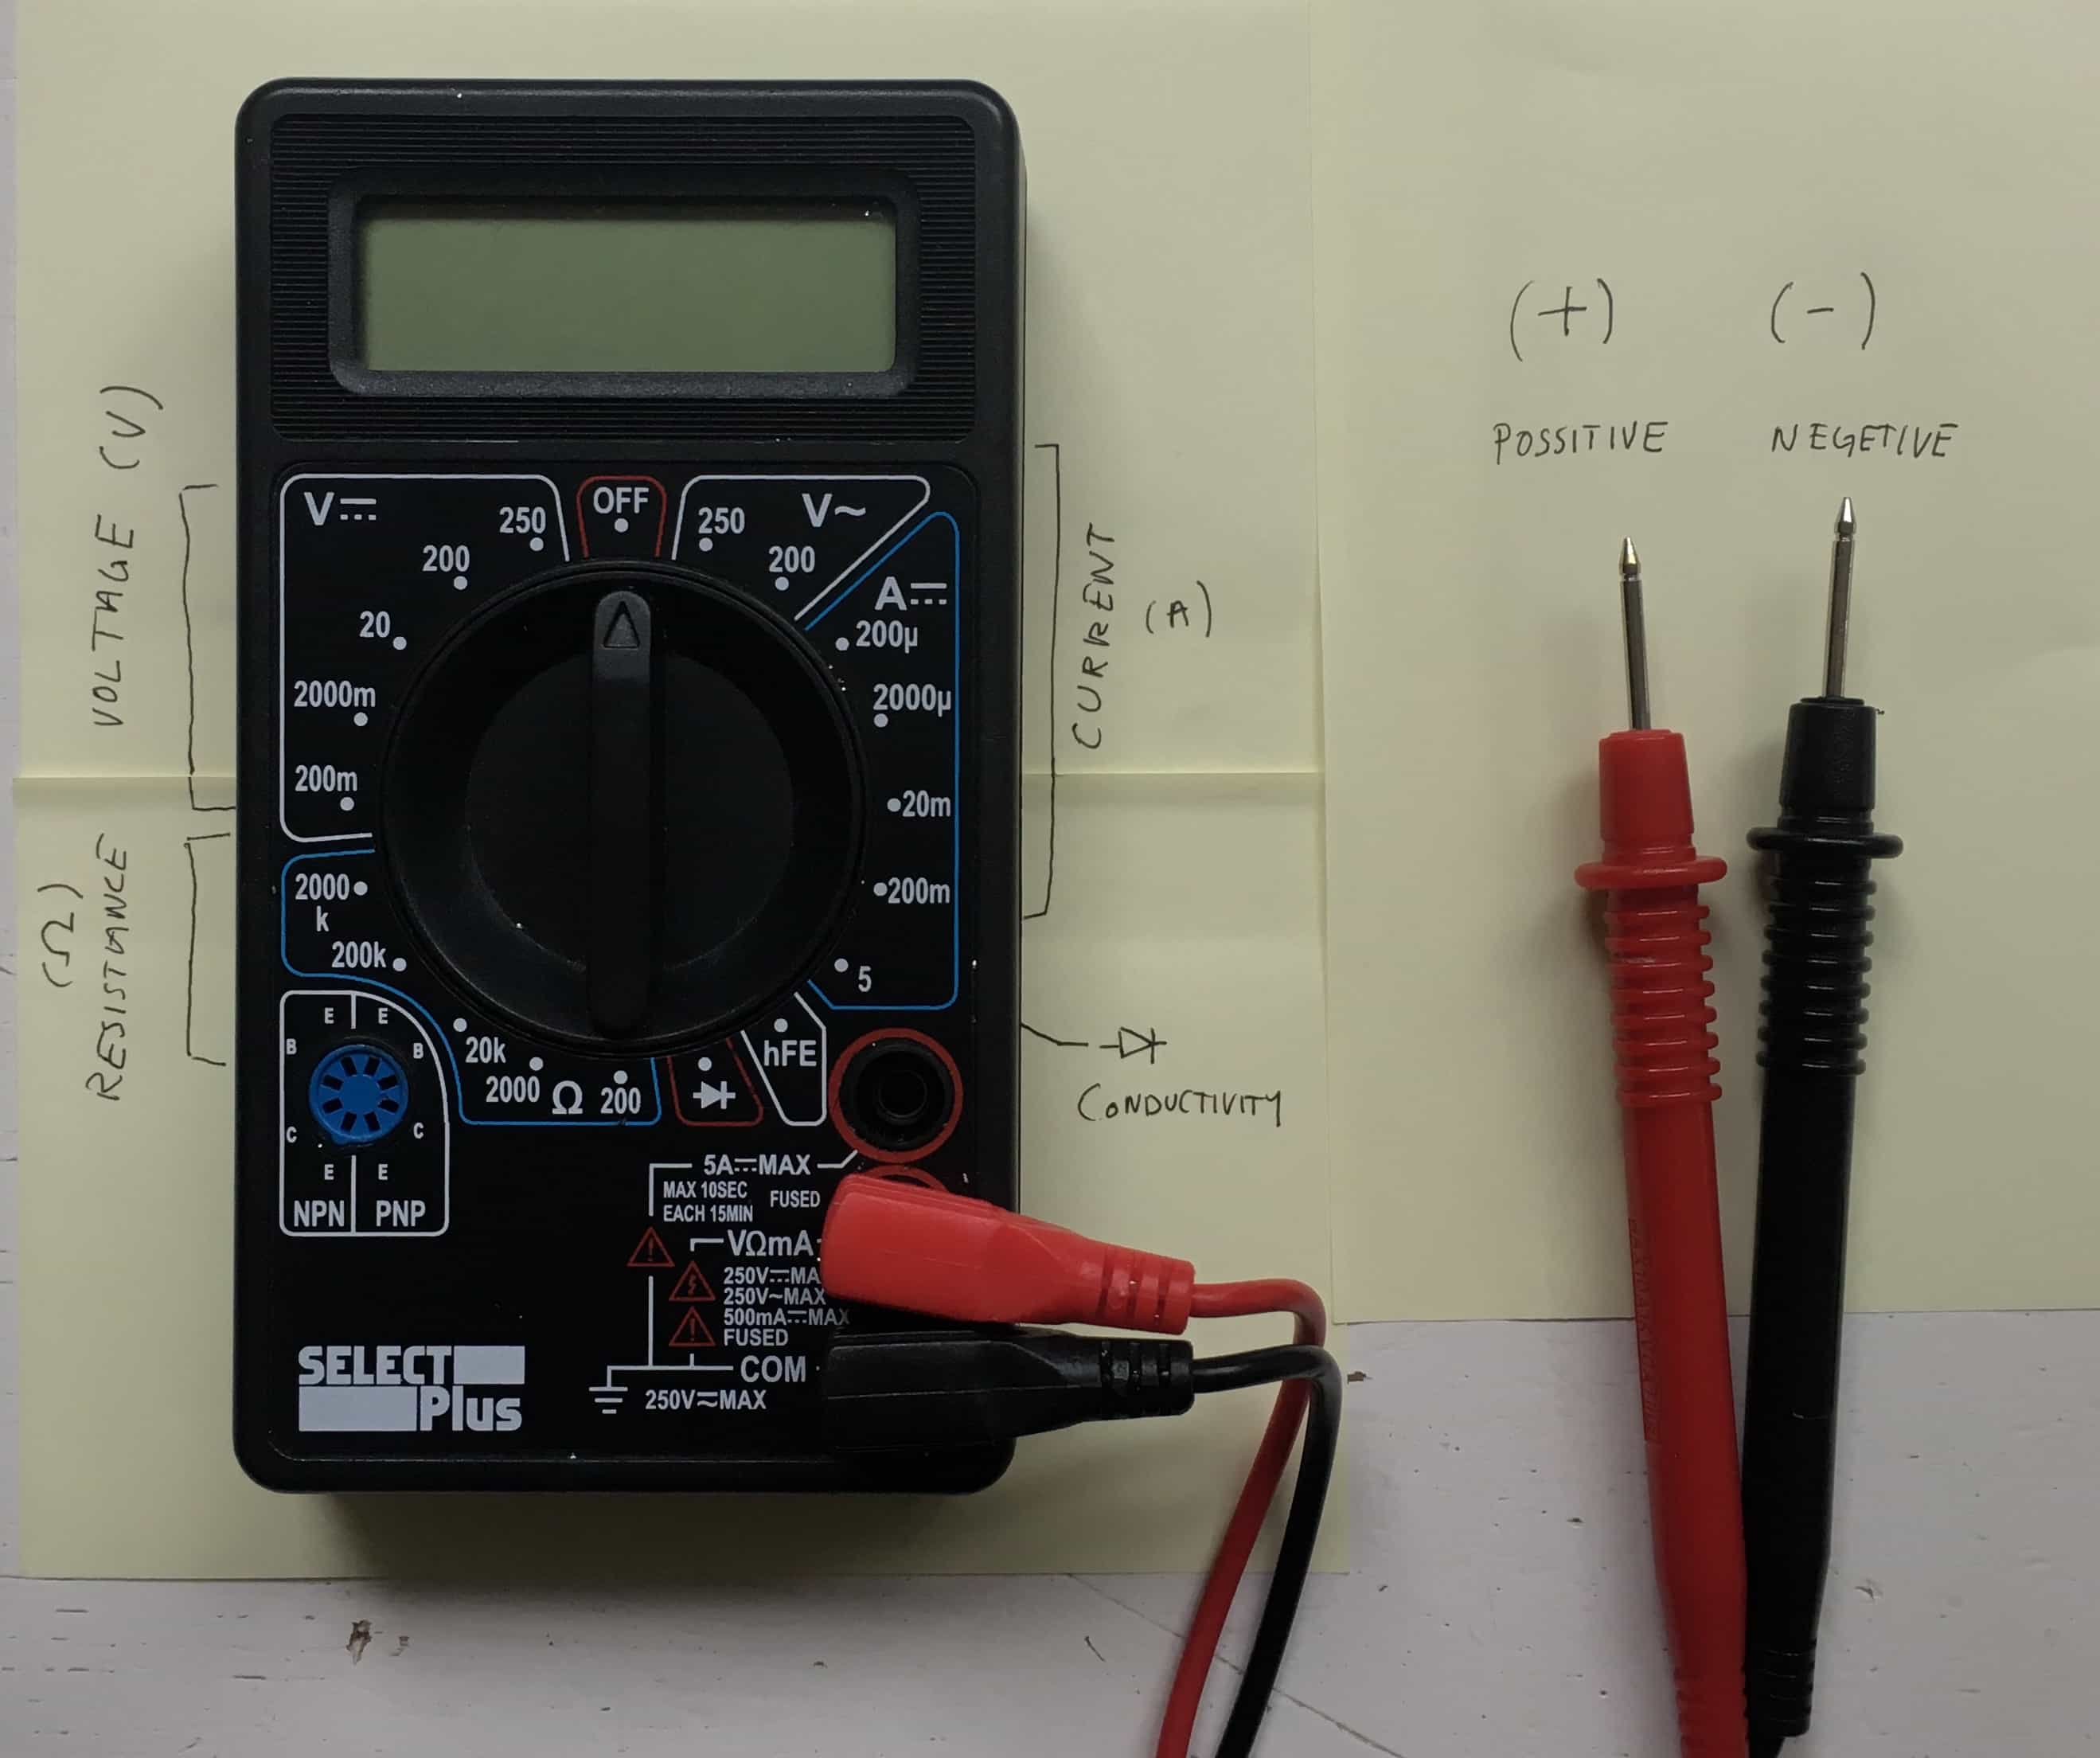
Multimeter = best friend
Multimeter
- Test if you have shorts in circuit, test conductivity of material
- Red probe = positive terminal, black probe = negative terminal
- Sometimes have to change range (e.g. OL = overload)
Measures:
- Resisitance (Ω)
- Voltage (V)
- Current (A) or (mA)
- Conductivity (sound setting) -|>|
LED
- Long leg (+) possitive (Anode)
- Short leg (-) negative (Cathode)
- Current must flow in one dirrection (possitive to negative)
- Must have right current (e.g min 5 mA (0,005 A) max 20 mA (0,02 A))
- Use Ohm's law to calculate Resistor
Hand tools
- Baby pliers.
- Sharp scissors.
- Beeswax (for thread).
- Snap press.
- Sewing needles
- Hand loom.
- Crochet hook.
- Embroidery hoop
Electronic Tools
- multimeter
- soldering iron
- aligator clips
Machines
- Laser Cutter.
- Embroidery machines.
- Knitting machines.
C I R C U I T S
Circuit = closed path for electricity to flow.
Always avoid short circuit

Traces = physical path of conductive material in which electricity moves along in a circuit.

Inputs = information that enters system e.g. press button.

Digital :  On/Off, 011011110110.
Analog : Sensors, range of values, 0123

Switches = break in circuit.

- Momentary (push button = stays on as long as you push it).
- Toggle (will stay and only change when changed).
- Stroke (can be interactive, big/small = close the circuit by pressing conductive materials into contact).
- Tilt (bead or pompom fabric tilt sensor).

Sensors = relationship with Current + Resistence

Resistace = Lower the resistance = more current flows (LED brighter)
Can change resistance by:
- Distance (Resistance increases over distance, no matter the material)
- Contact (some materials = pressure sensitive; will decrease resistance when pressure applied)
- Surface Area (Increasing size of area for electricity to flow = will decrease the resistance.)
Consider aesthetics:
- Flexibility.
- Material choices.
- Fabrication / Making Technique.
- Join (can hand-sew, machine-sew or bondaweb).
D I G I T A L
Digital Sensor = device that only has two possible status: ON or OFF
- Have 2 terminals that can be connected or not.
- Physical connection that can be in the form of: momentary switch, tilt switch, toggle switch, stroke switch.
| Electronics | Description | Example |
|---|---|---|
| Power source | Source of electrons | Battery coin (3V) |
| Traces | Allow electrons flow | Conductive Thread |
| Output device | Avoid short circuit | LED light |
| Input device | Opens/Closes the loop | Digital Sensor |
Digital Sensor by Stephanie Johnson
 _ 1. Hand drawn design to visualise
__ 2. Schematic diagram
___ 3. Digital Sensor Swatch
I S S U E S
When I first made this circuit it did not work :( If gone wrong, good to isolate each bit + find problem:
There were various issues:
-
Stable connection = the connection between the connective thread and LED was not strong enough
-
Teeth connection = must get the teeth of the zip in a strong connection to the circuit + still able to zip up + down.
-
Battery pocket = the original pocket that I made for the battery was touching both the possitive and negative side with conductive fabric
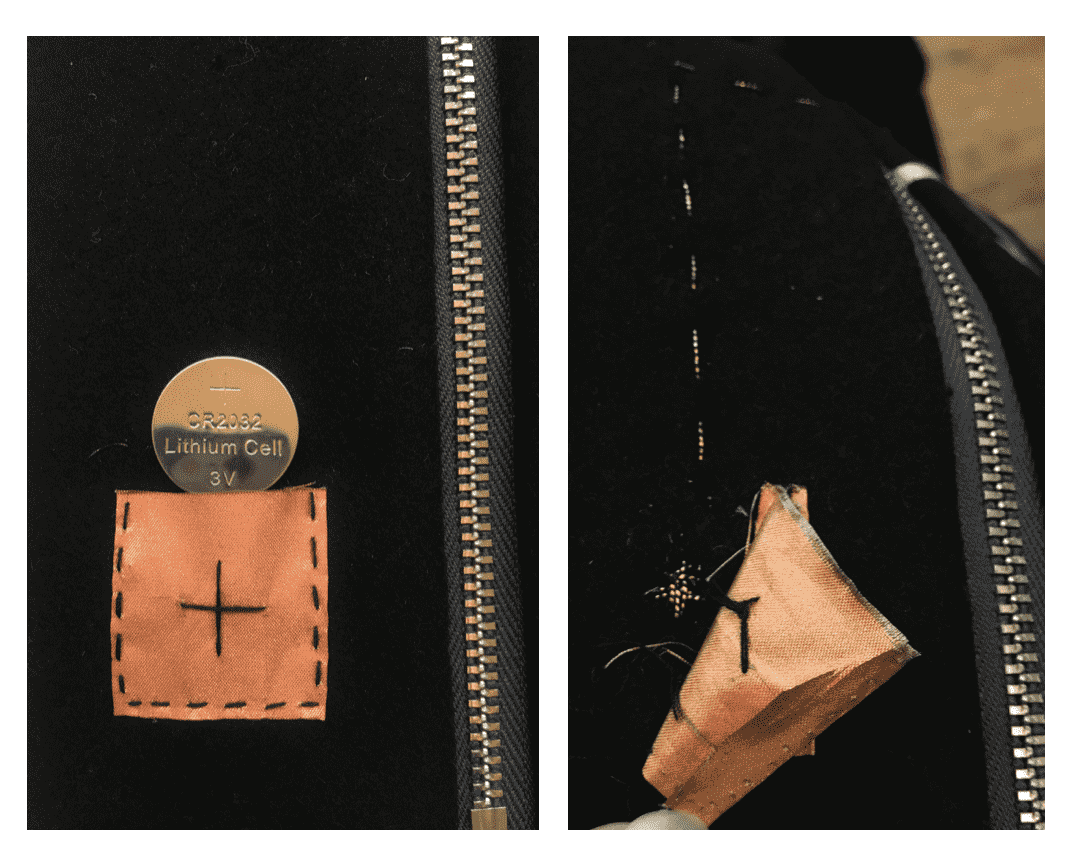
After establishing and assessing these issues, stronger connections were made and it worked!
R E S U L T
A N A L O G
Analog Sensor = variable resistor (not fixed)
- A circuit with a resistant compent that impacts the flow of the current.
- Interacting with the sensor, you can change the resistance, so you change the current.
- All values between the minimum and maximum.
- They have two terminals.
- E.g. Pressure Sensor, stretch sensor
| Electronics | Description | Example |
|---|---|---|
| Power source | Source of electrons | Battery coin (3V) |
| Traces | Allow electrons flow | Conductive Thread |
| Output device | Avoid short circuit | LED light |
| Input device | Changes the current | Analog Sensor |
- Capacitance = property of a conductor to store electric charge
Velostat is a piezoresistive material = less resistance when pressured.
When between two conductive layers = great range for making pressure and bend sensors
Using my laser cut eye module from week 3.
I designed an analog circuit, with the idea to light the iris up and control the brightness of the LED with the 'eyelashes' using velostat inbetween conductive materials.
Analog Sensor by Stephanie Johnson
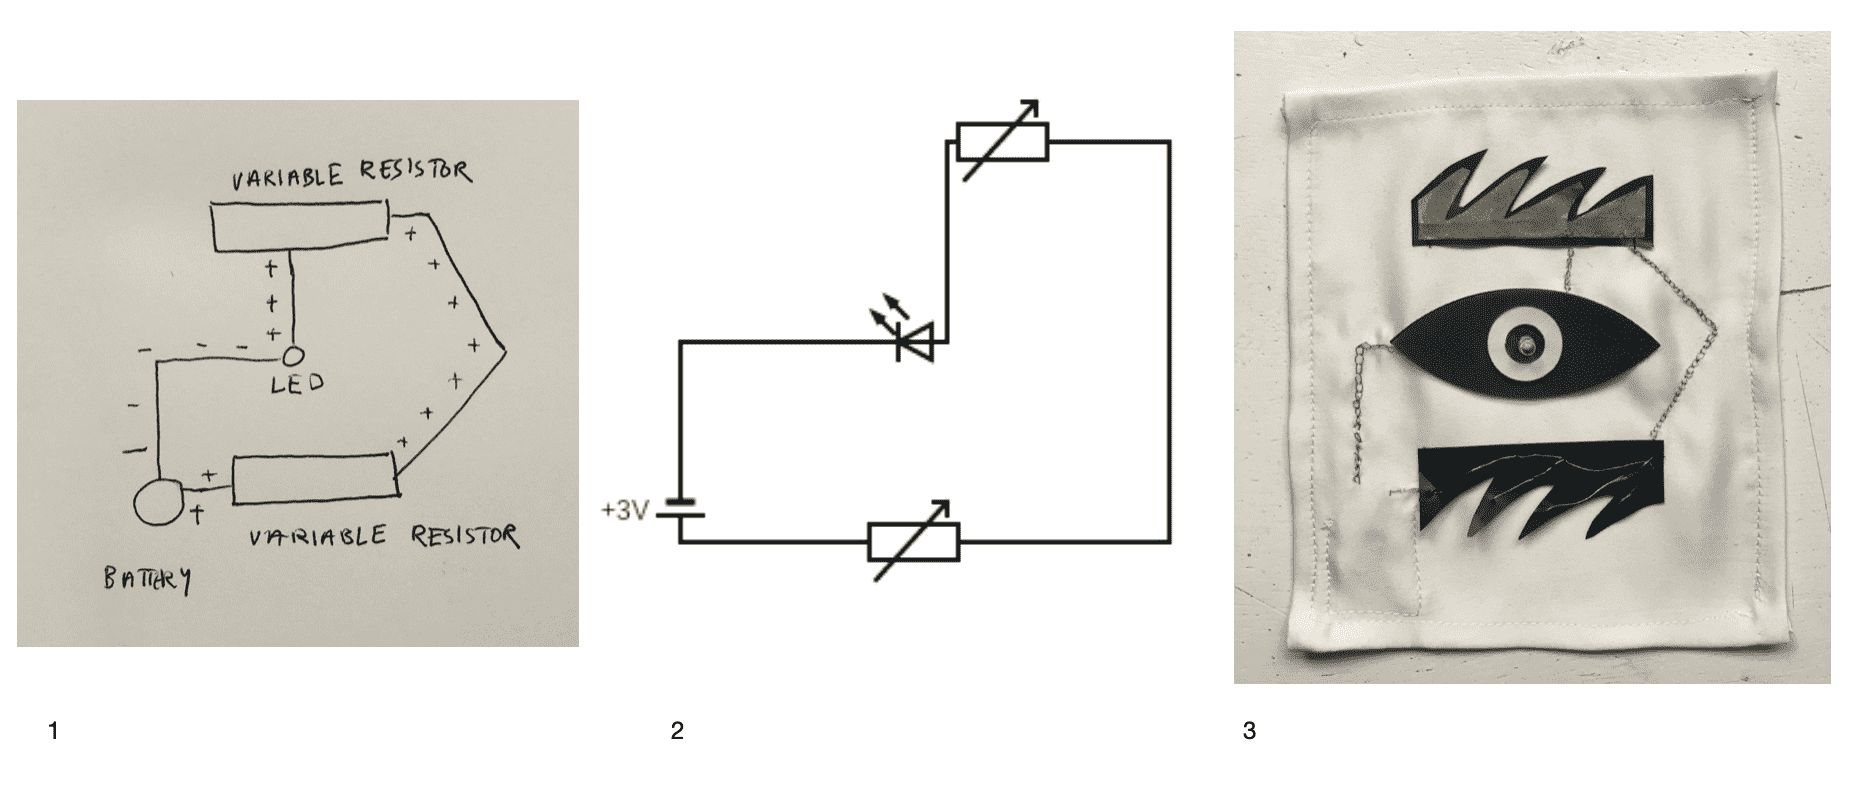 _ 1. Hand drawn design to visualise
__ 2. Schematic diagram
___ 3. Digital Sensor Swatch
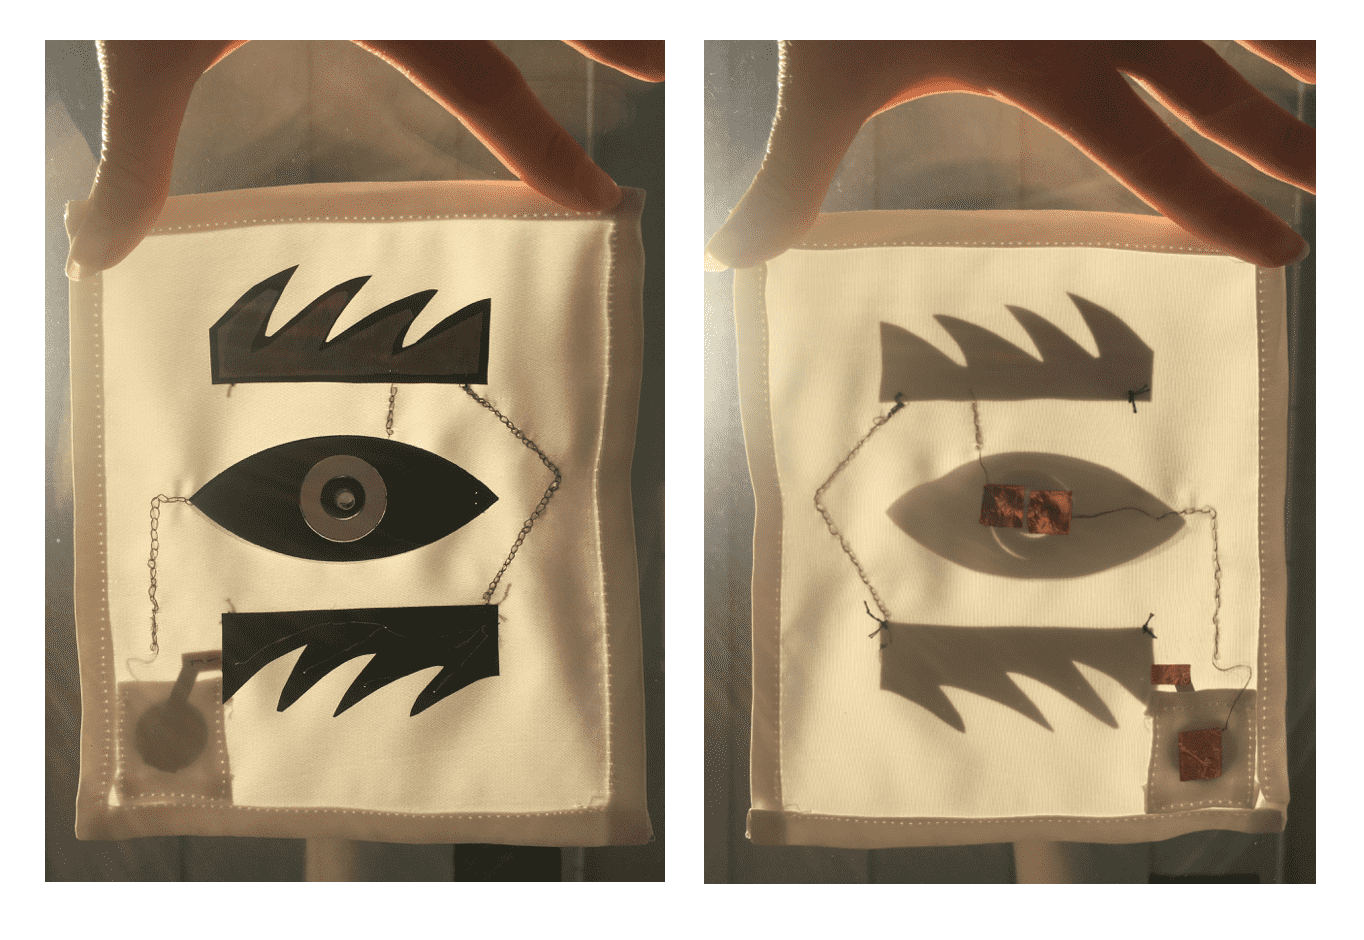
With this circuit, I used conductive thread as the traces.
The stitching technique I used was chain stitch.
Tutorial for chain stitch here.
I found the connection / conductivity was stable using chain stitch and highly conductivitive thread.
However, it was tricky to sew and would easily get tangled! - Patience required!

A R D U I N O
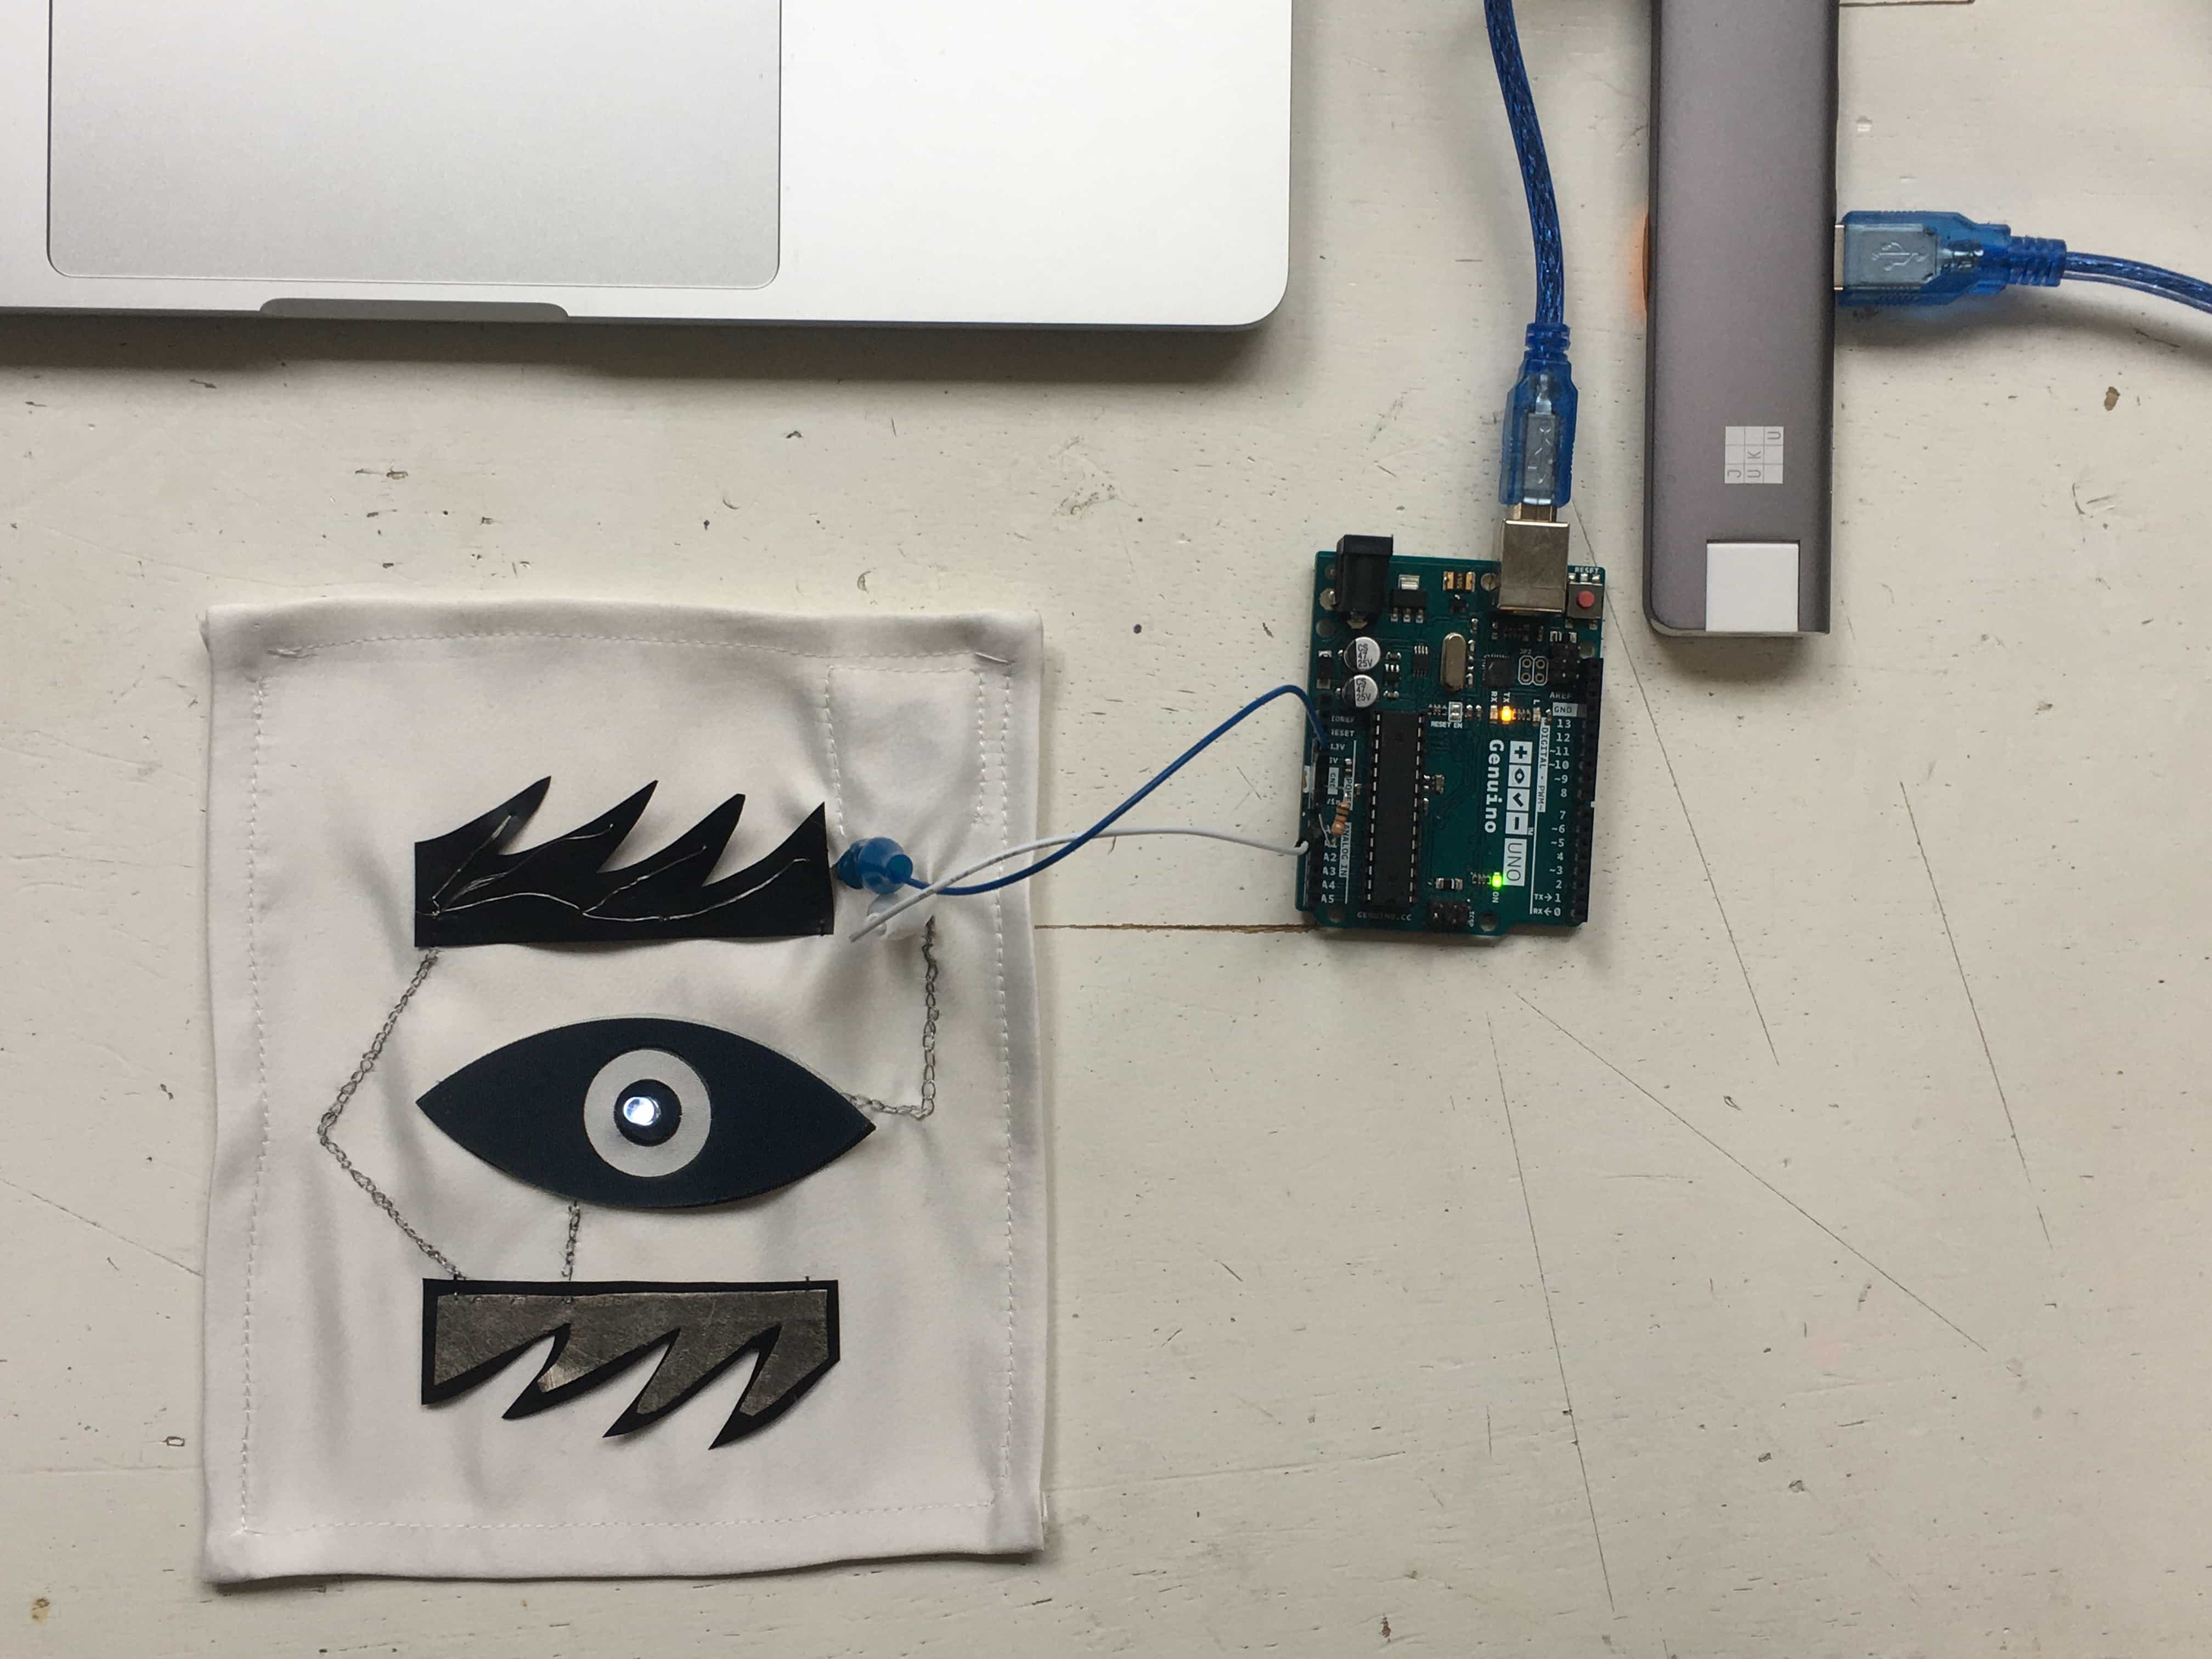
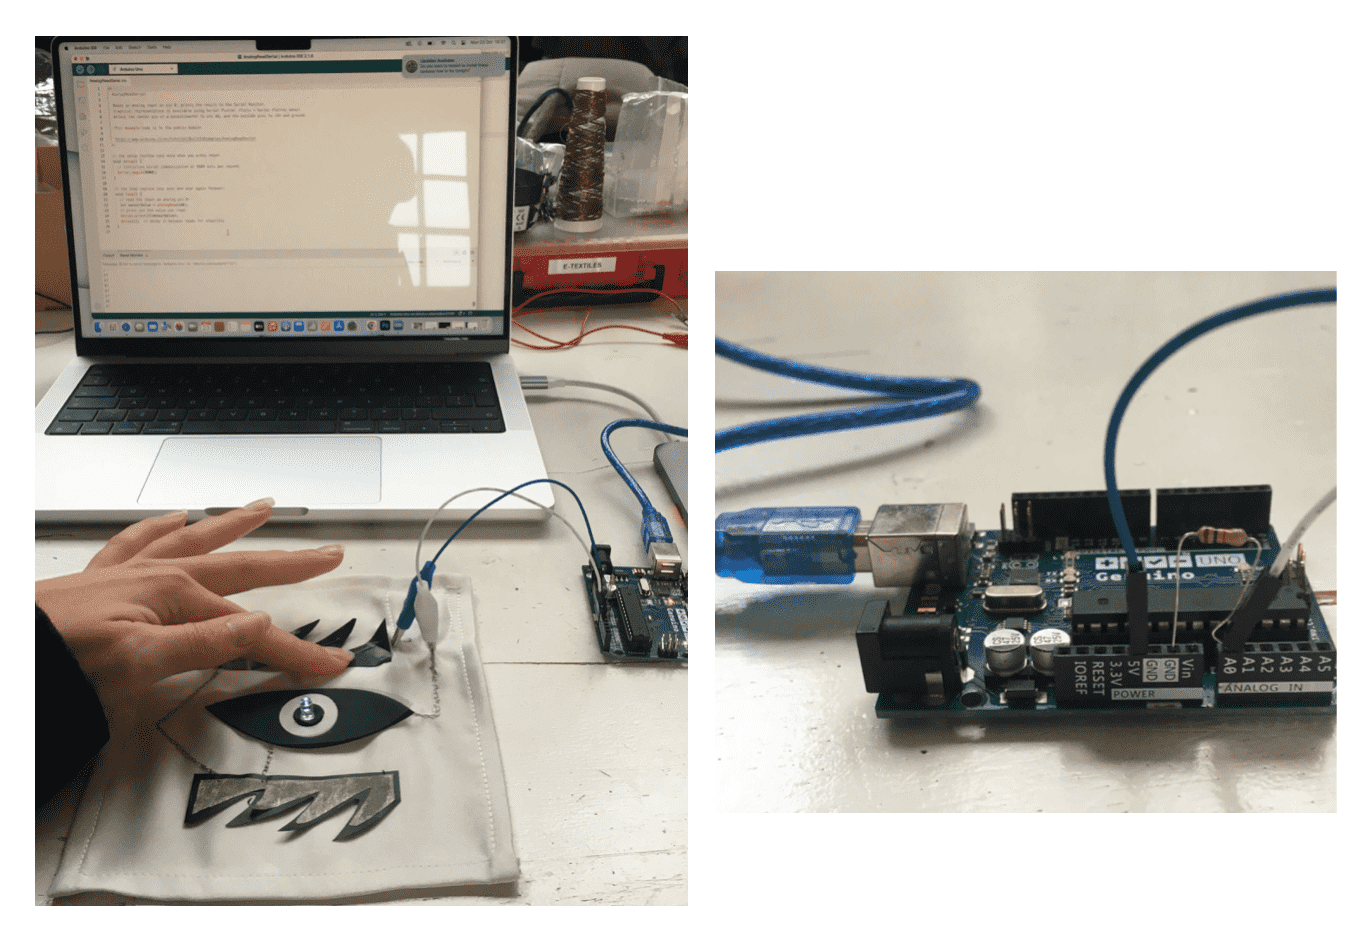
Code Example
// the setup routine runs once when you press reset:
void setup() {
  // initialize serial communication at 9600 bits per second:
  Serial.begin(9600);
}

// the loop routine runs over and over again forever:
void loop() {
  // read the input on analog pin 0:
  int sensorValue = analogRead(A0);
  // print out the value you read:
  Serial.println(sensorValue);
  delay(100);  // delay in between reads for stability
}
This code reads the input (analog sensor) and displays the value.
Value is lower normally and then higher when 'eyelashes' are pushed down.
Shown in action below:
L O V E L Y _ L I N K S
Tutorials
Electronics and Sensors E-Textile slides for Fabricademy by Emma Pareschi 2023.
How to Get What you Want various examples and tutorials
Collins Lab Youtube Tutorials
Into to Ardunio Slides for Fabricademy by Emma Pareschi 2021.
Ardunio Built-in Examples Collection of tutorials to learn the basics of Arduino. All code examples are available.
Materials
Bart & Francis For all kinds of Conductive Yarn.
Measuring
Arduino Resistance Measurement
Other Software
F U T U R E
- Using E-Textiles and incorporating into wearble garments
- Make movement
- Interative pieces
- Explore Magnets
- LED strips, program to change colour, illuminate beads?