M U S C L E S
F R O N T
D E S I G N
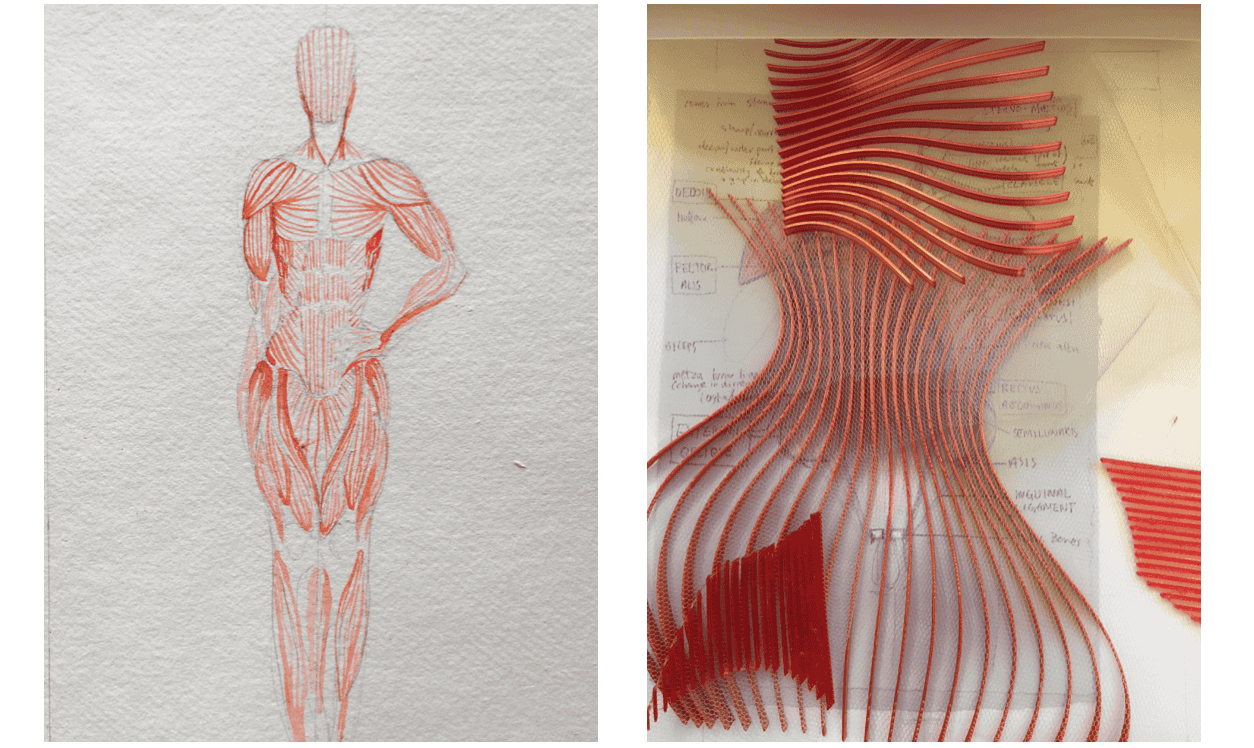
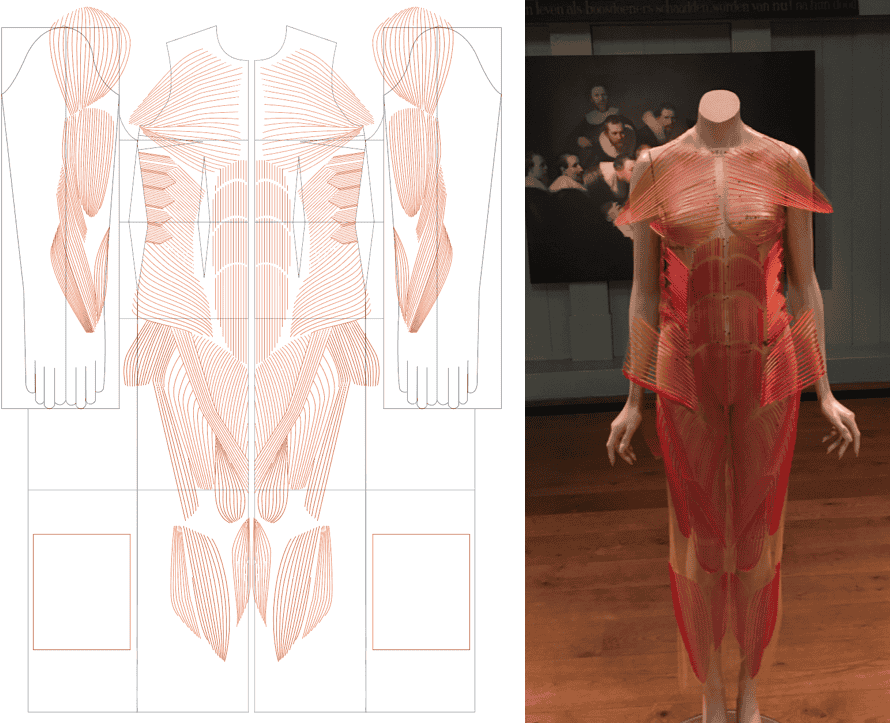
Invisible dress with 3D printed muscles with lenticular duel colour Material : PLA filament with Prusa 3D printer Colour : 2 tone red / gold Movement : Effortless elegance, slow and silky colour/ shape change Incorporating Computational Couture
R E S E A R C H
I N S P I R A T I O N
3 D _ P R I N T I N G
F I L A M E N T
I was happy with my original PLA two-tone filament, however I decided to try a TPU filament Eryone TPU Transparent Red / Transparent Red Filament to see if it was worth using instead as it is more flexible.
Prusa Slicer did not have any ‘Eryone Standard TPU’ Presets. Since the filament I got was similar to the FlexFill 98A, I selected this and then edited the temperature in the filament settings to 220 degrees C (for the first layer and other layers) and then disabled the Retraction in the Filament Overrides settings.
After testing the results I decided that I wanted to stick with the two tone PLA
Eryone Silk PLA Dual-Color Red & Gold / Red & Gold Filament prints
P R O C E S S
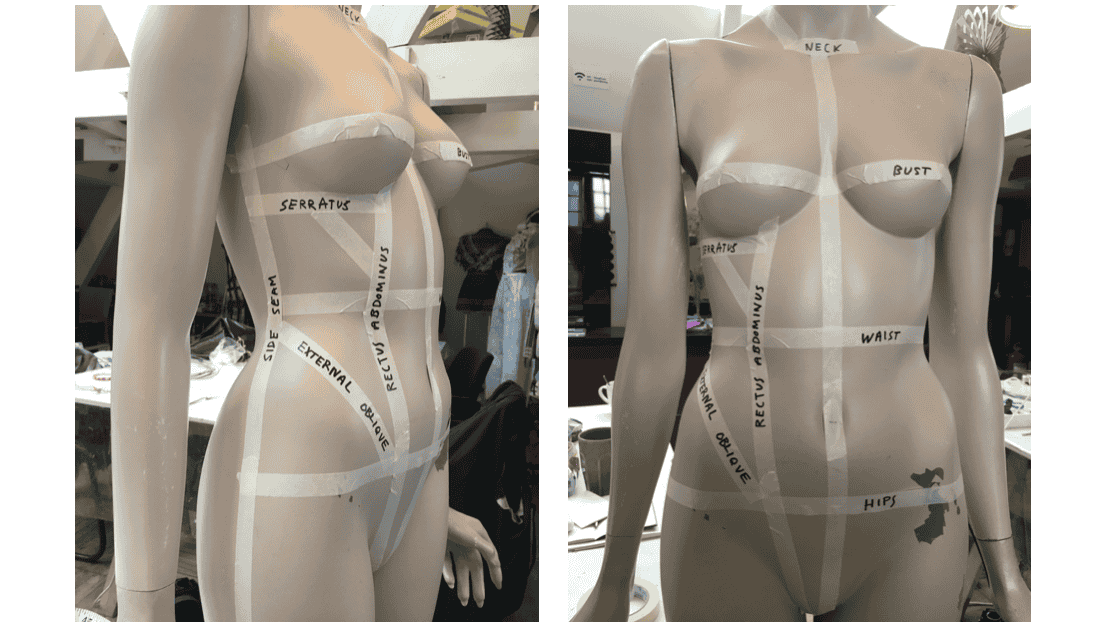
M U S C L E _ M A P P I N G
When constructing the muscles in relation to a basic block pattern, I found that I began thinking more and more about the history of garment patterns, how were they created and questioning if the body anatomy had come into practice?
F I L E
I decided to make the 3D files by bringing the basic block pattern into Adobe Illustrator and mapping the muscles into postion. I then drew the dirrection of the muscle fibers
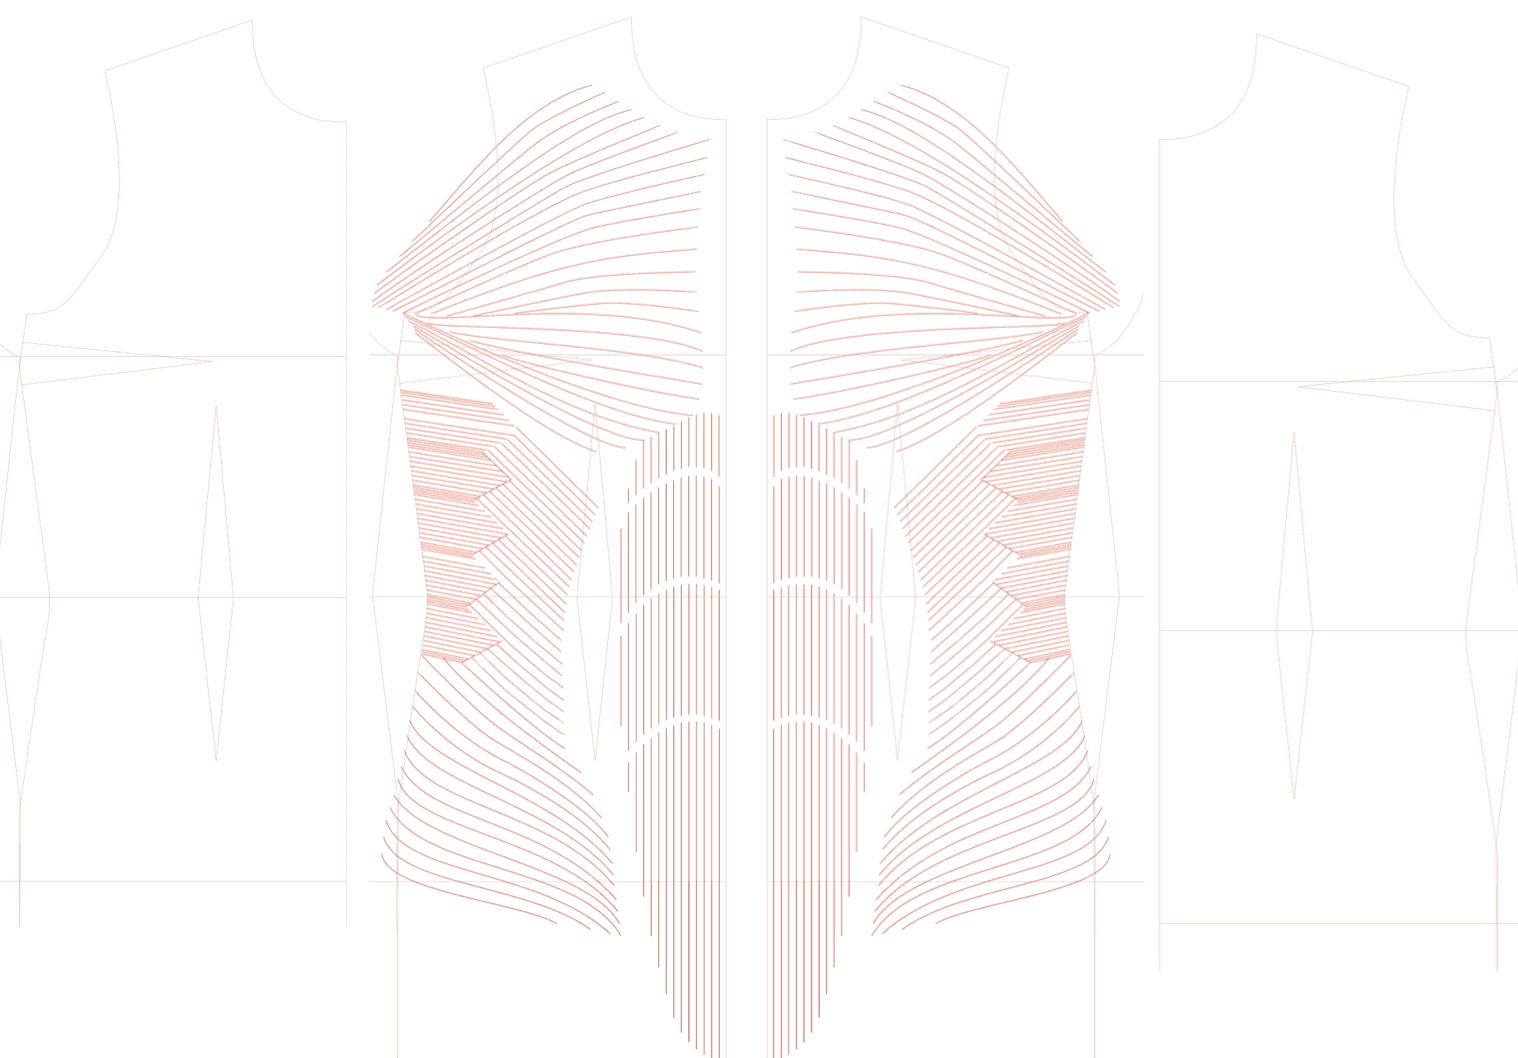
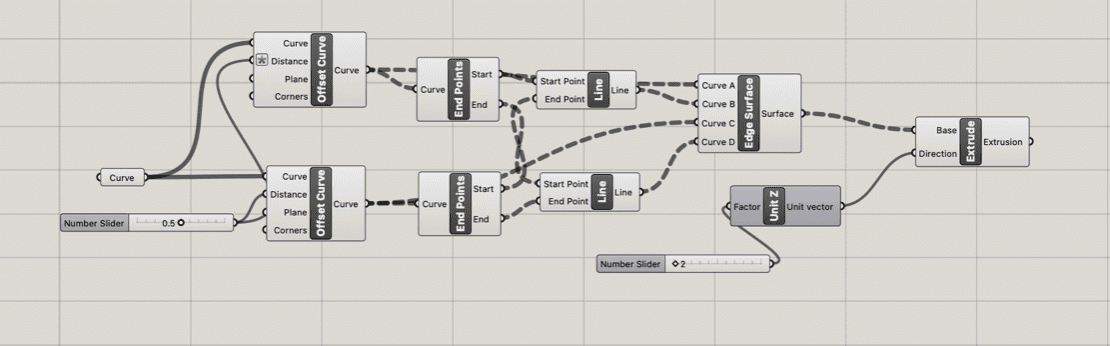
Using grasshopper file to offset the lines and to also give them a height which can both be altered.
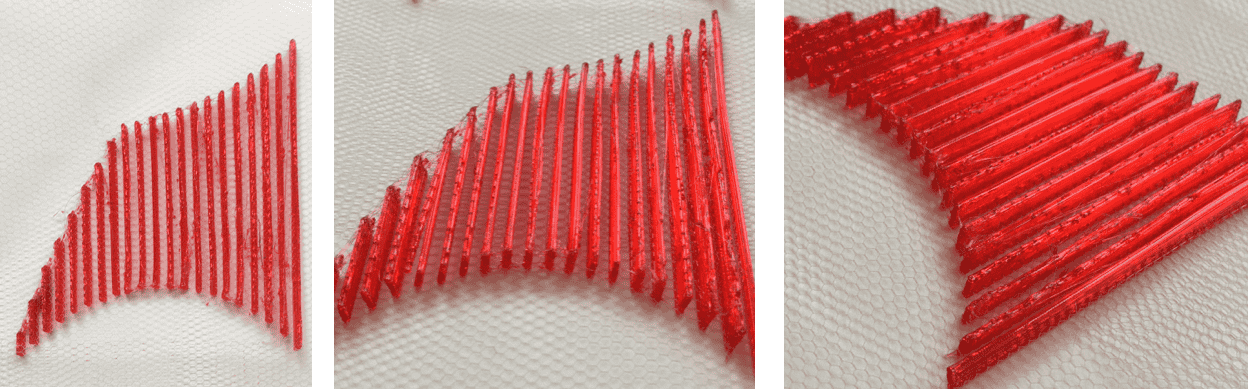
P R I N T
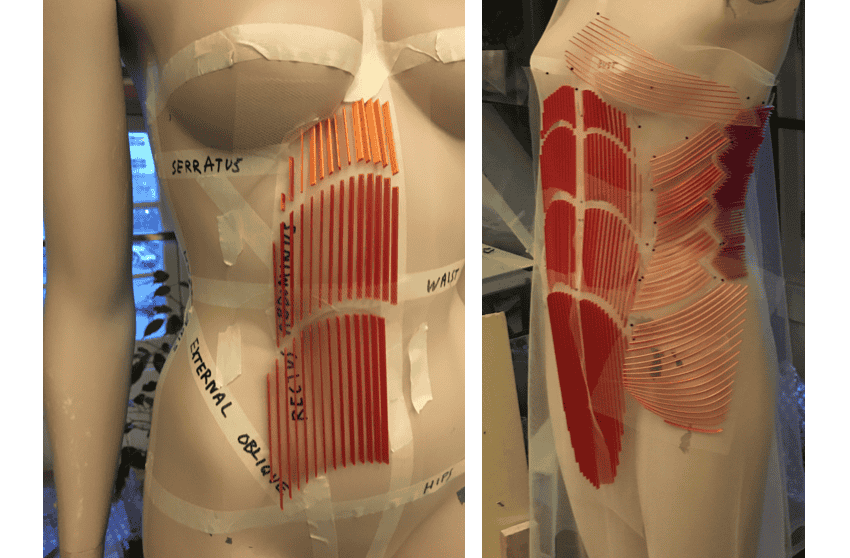
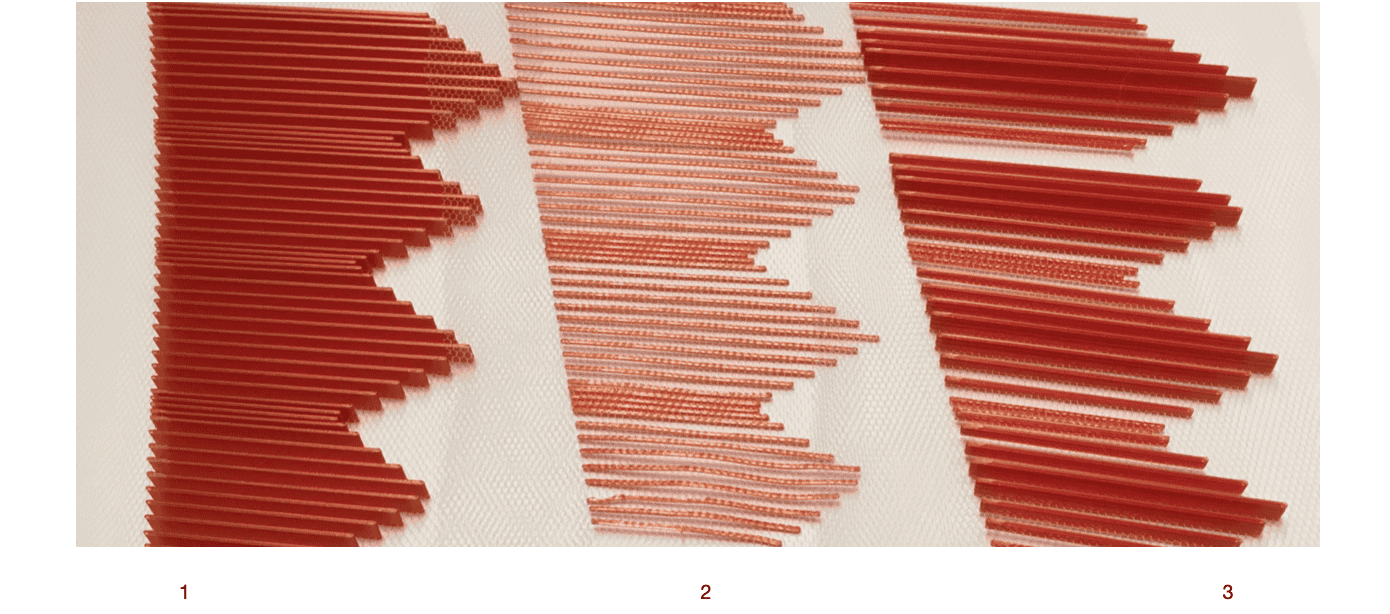
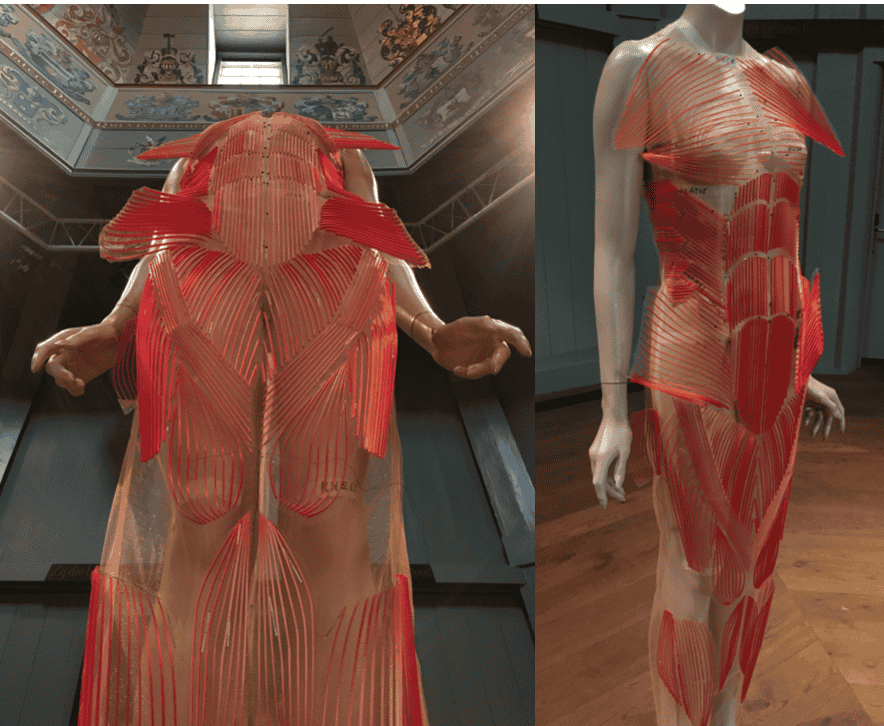
Testing the muscles on the mannequin
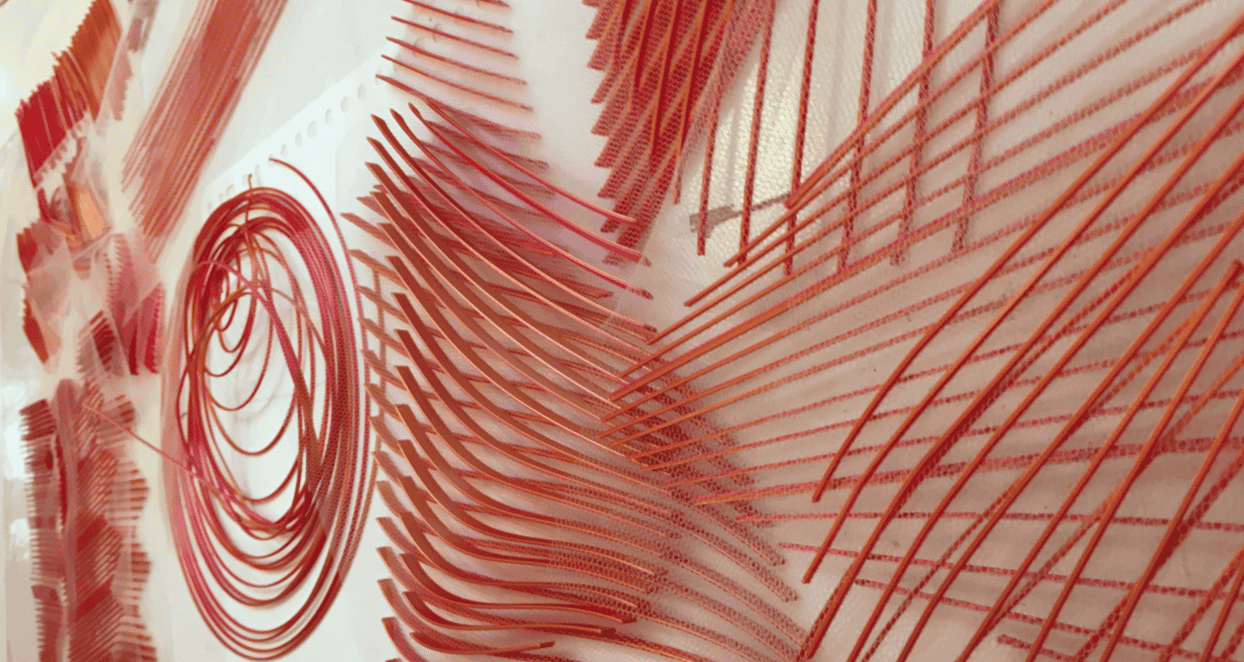
Array of muscles and tests
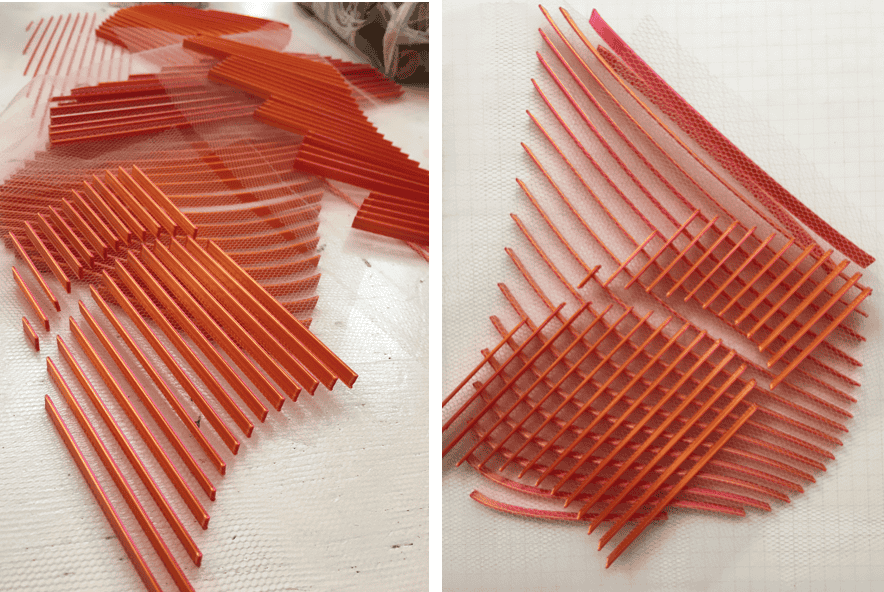
I S S U E S
Issues that may occur with the 3D prints as tests vs full design worn on the body
-
Flexibility - In some places the pieces are more rigid and in other places the pieces will need to move and bend over the natural curves of the body.
-
Colour - Since I am using a two-tone PLA, it is essential to pay attention to the dirrection of the filament and the orientation of the file and well as the difference in sides to ensure an all over colour change.
-
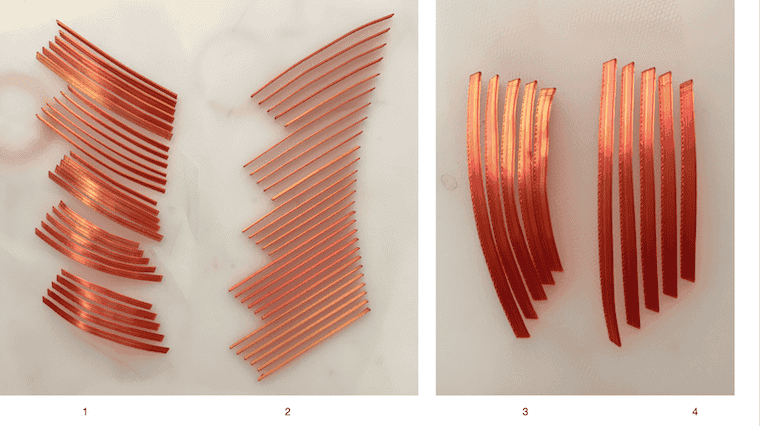
Shape - Once I printed a few of the tests and I began putting them together, I realised that they looked a little bit flat and lifeless. This is the not look that I am going for.
S O L U T I O N S
M O U L D I N G
-
Heat - Using heat = heatgun, bake, boil
-
File - Changing some of the files to make the muscles thinner in places, which has more flexability then when the lines are very thick
-
Incision - Making cuts at intervals of some of the lines will allow for more movement, however I think this will not look as good.
H E A T _ G U N
Works well, however must:
-
Work Quick - Both in heating (do not overheat + ensure even heat distribution) and in moulding (short time that the PLA is malleable)
-
Use Low Temperature - As PLA moulds at a low temperature (goes out of shape if it's too high) and melts the tulle that it is fixed to.
H O T _ W A T E R
Simmer pot of hot water and dip 3D print in for a few seconds.
Works very well!!!
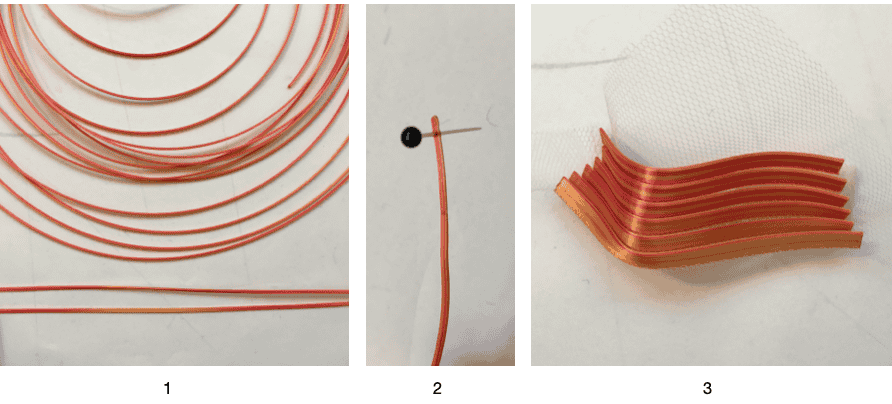
_ 1 Spiral test to see if i can make 'thread'. Hot water worked well to reshape spiral into straight lines
__ 2 Test to see if a pin will make a hole in which to sew
___ 3 Hot water test on print worked very well!
NOTE
When pieces put into hot water they will turn back into their original shape, which is very handy! Hot water is much for forgiving then using a heat gun
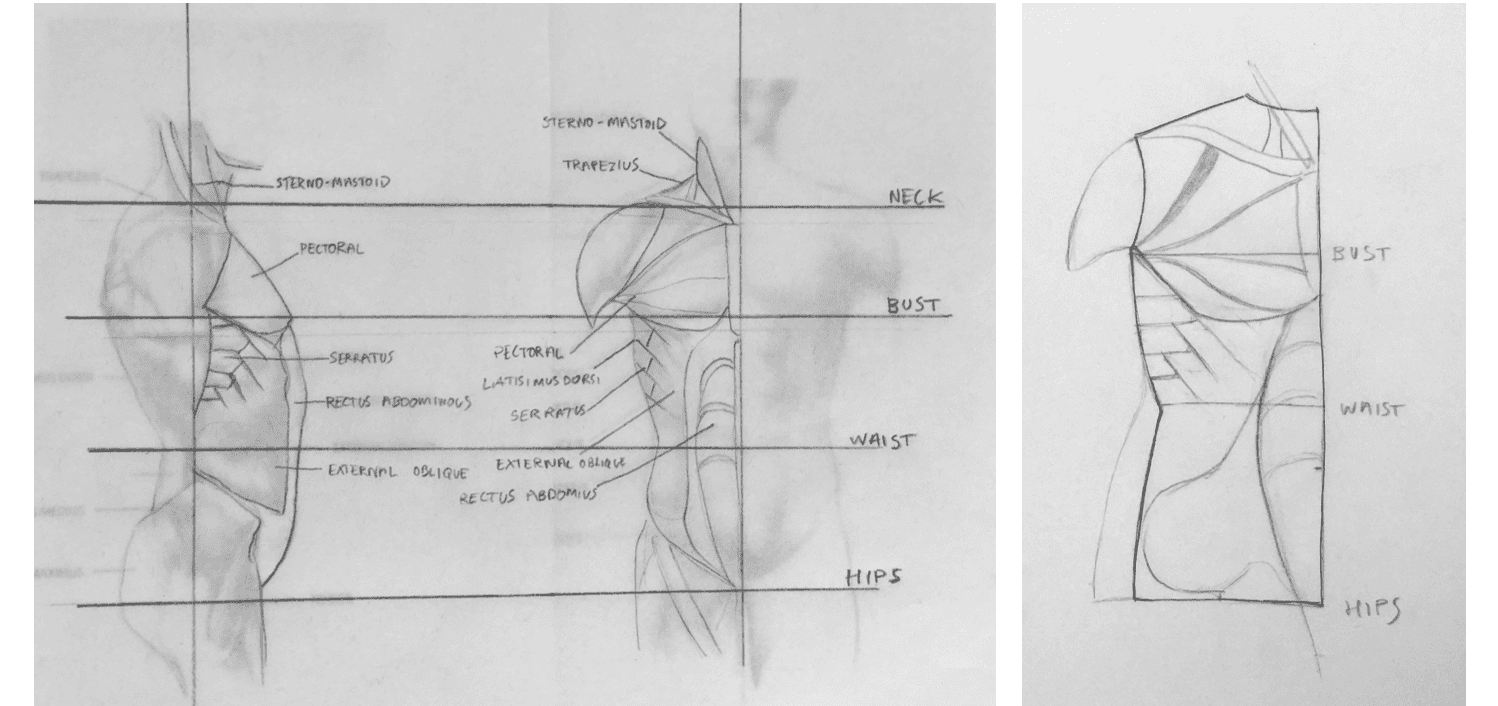
P A T T E R N
Since I want the dress to be quite tight fitting I made a basic dress pattern that was in harmony with my mannequin and model.
M E A S U R E M E N T
BUST   -  91  cm
WAIST  -  69  cm
HIPS   -  94  cm
HEIGHT -  142 cm
I then cut the pattern out of a fine but very stretchy tulle, and marked the darts and measurement lines with black thread.
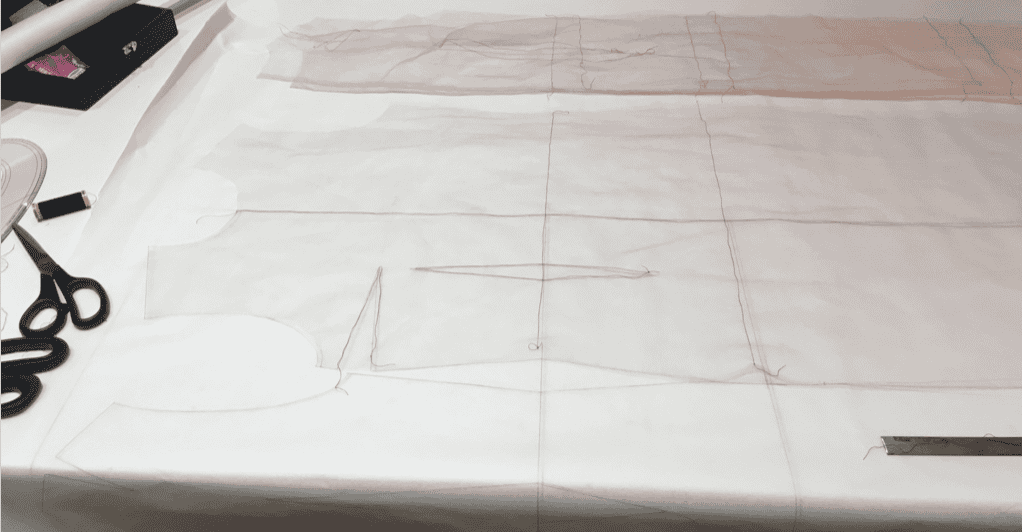
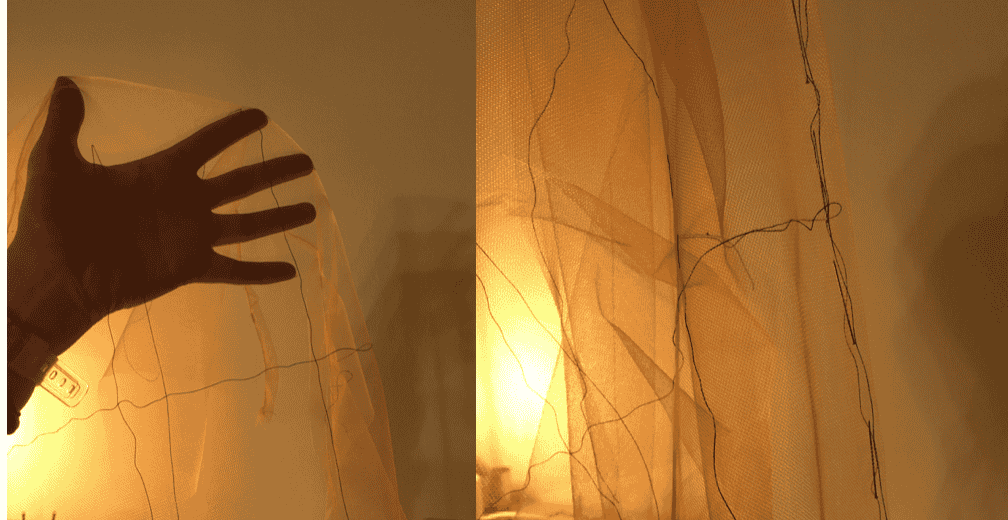
I then sewed the dress together (very tricky to sew invisable dress!!!)
F I L E S
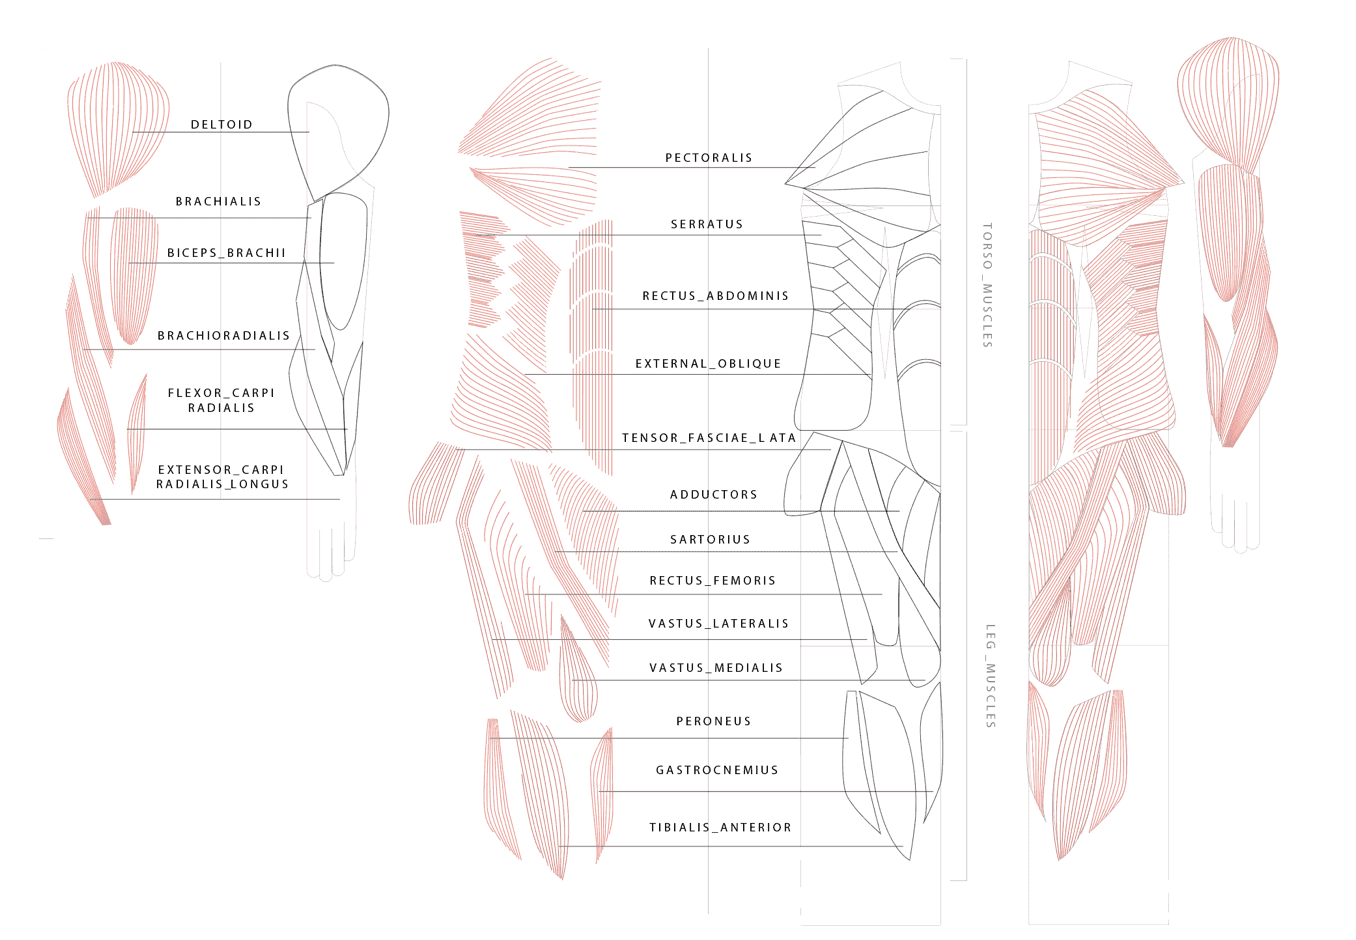
Illustration showing each muscle on the front and the name.
A S S E M B L E
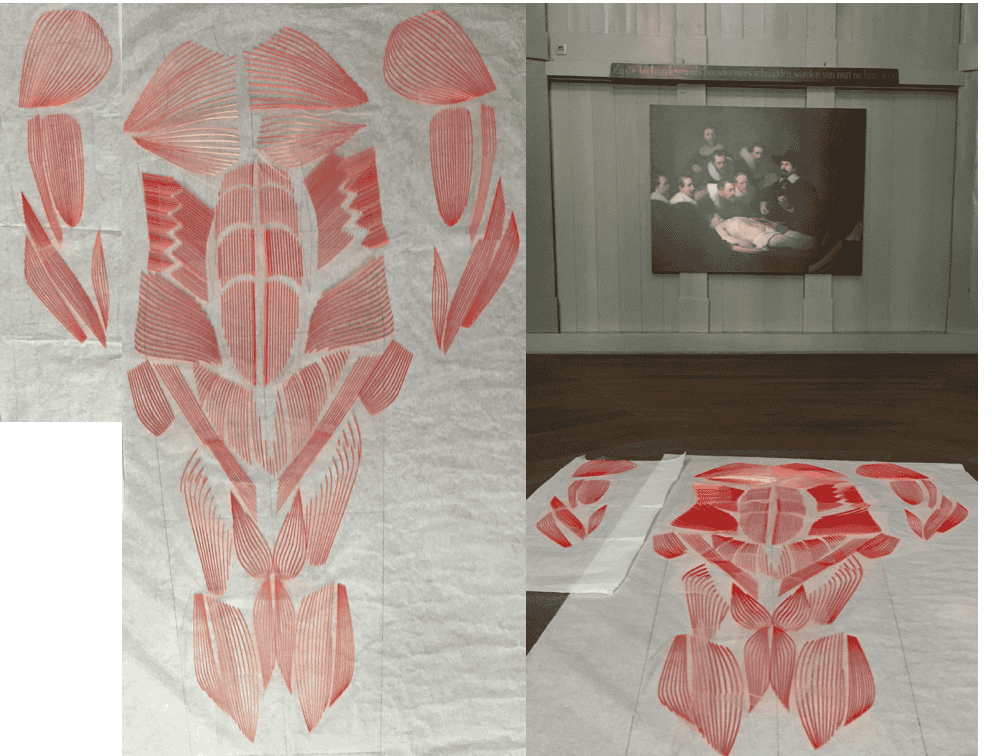
Muscles laid out
B A C K
D E S I G N
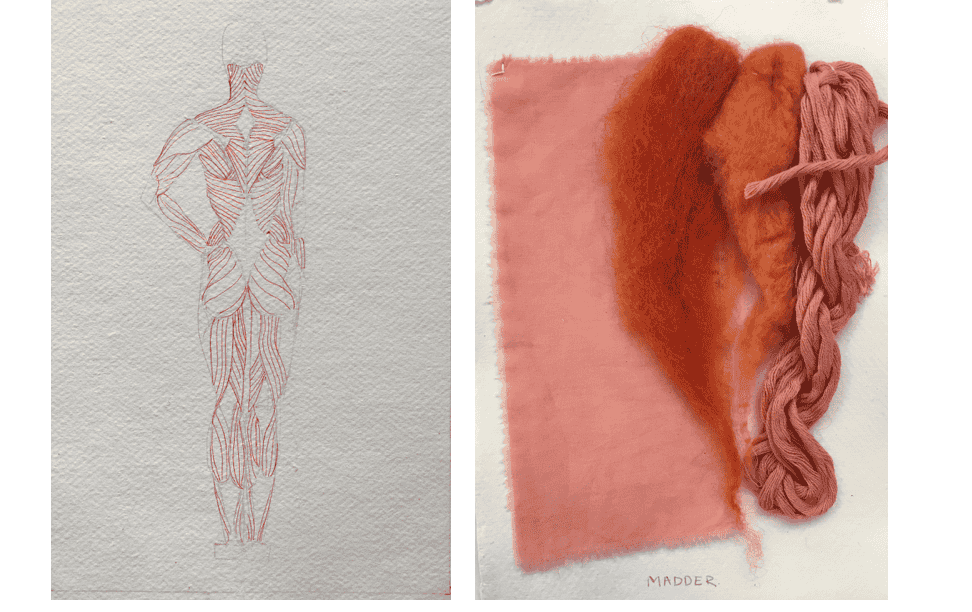
D Y E I N G
From my experiments made during Week 4 Biochromes, I decided I wanted to dye yarn using Madder to give it a fleshy & fibrous appearnce.
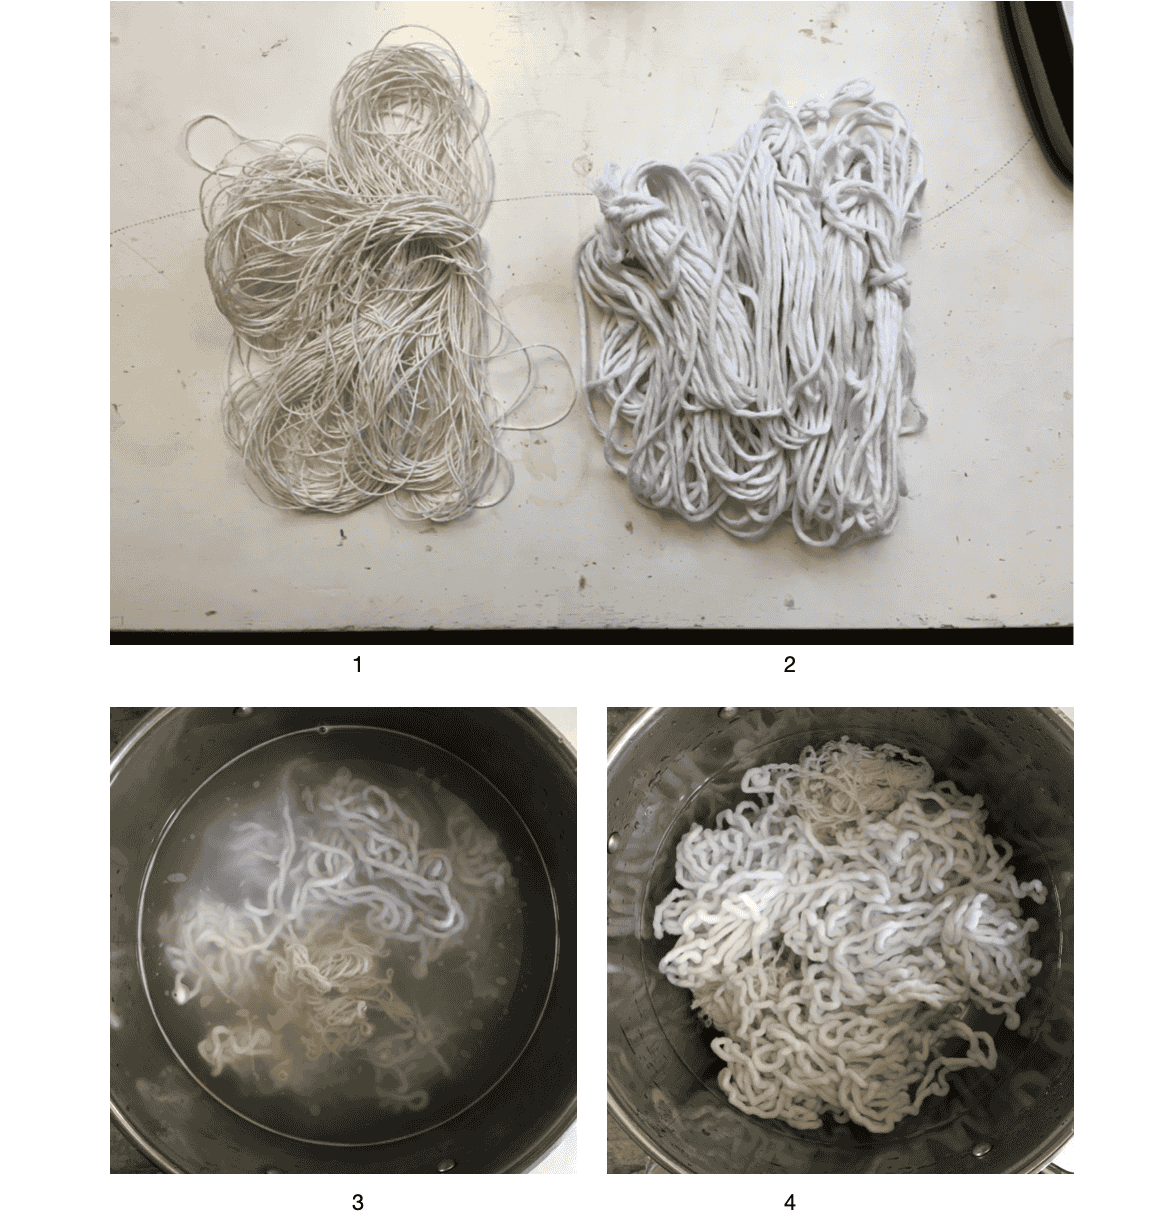
M A T E R I A L S
_ 1 Hemp Ropeby Hemptiqu - White - 1mm (62.5 meter). Available here
__ 2 Macramé Cotton Cord White 3 mm - Single Strand (150 meter). Available here
___ 3 S C O U R
____ 4 R I N S E
P R O C E S S
-
Weigh - Materials while dry (WoF) = 250 grams
-
Scour - Add Soda (Sodium Carbomate) 10 % WoF to pot of hot water = 25 grams. Simmer 45 mins + Rinse.
-
Mordant - Add Alum 15 % WoF to pot of hot water (plant fibers) = 38 grams. Simmer 1 hour + Rinse.
-
Dye - 100 % WoF Madder = 250 grams. (Do not boil!)
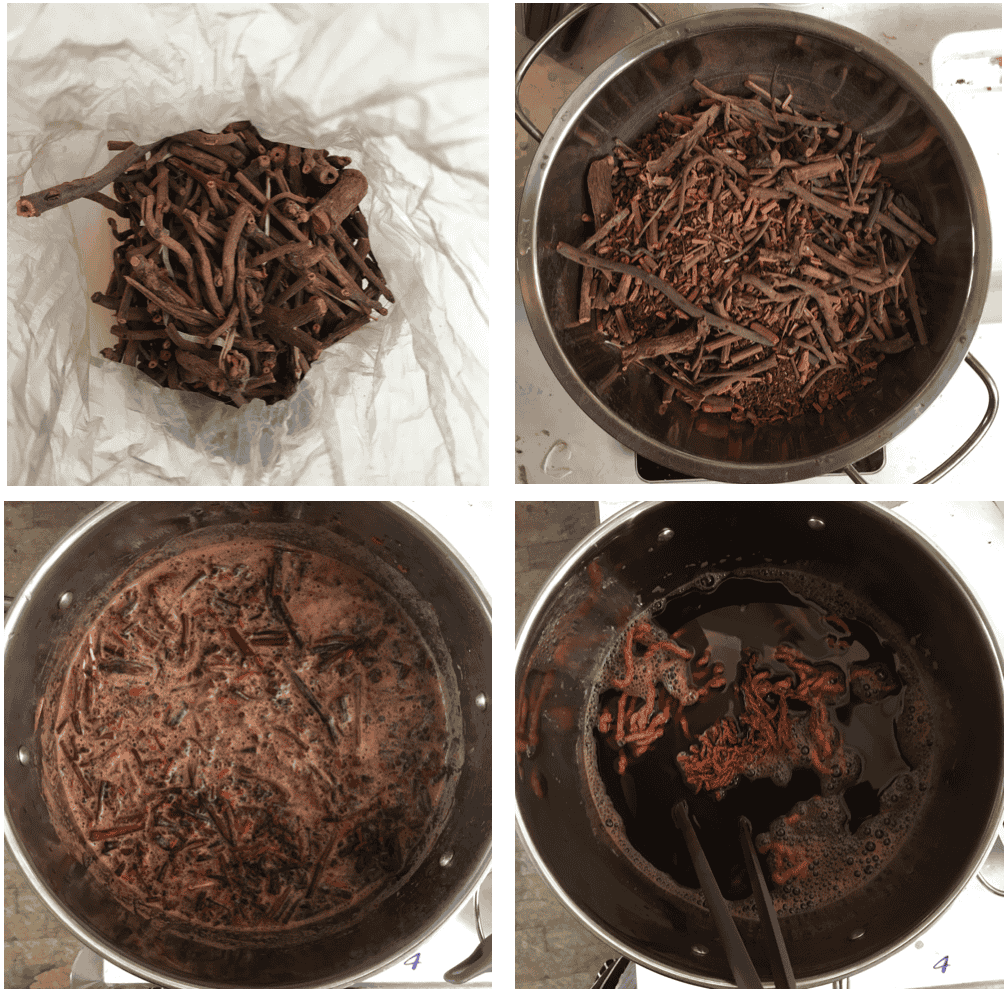
Madder matters: I bought the madder in Jordan at a market in May and brought back to Ireland and then to Amsterdam!
I took the madder out of the dye bath after 45 minutes and proceeded to dye the yarn. After rinsinsing and drying the colour was much lighter.
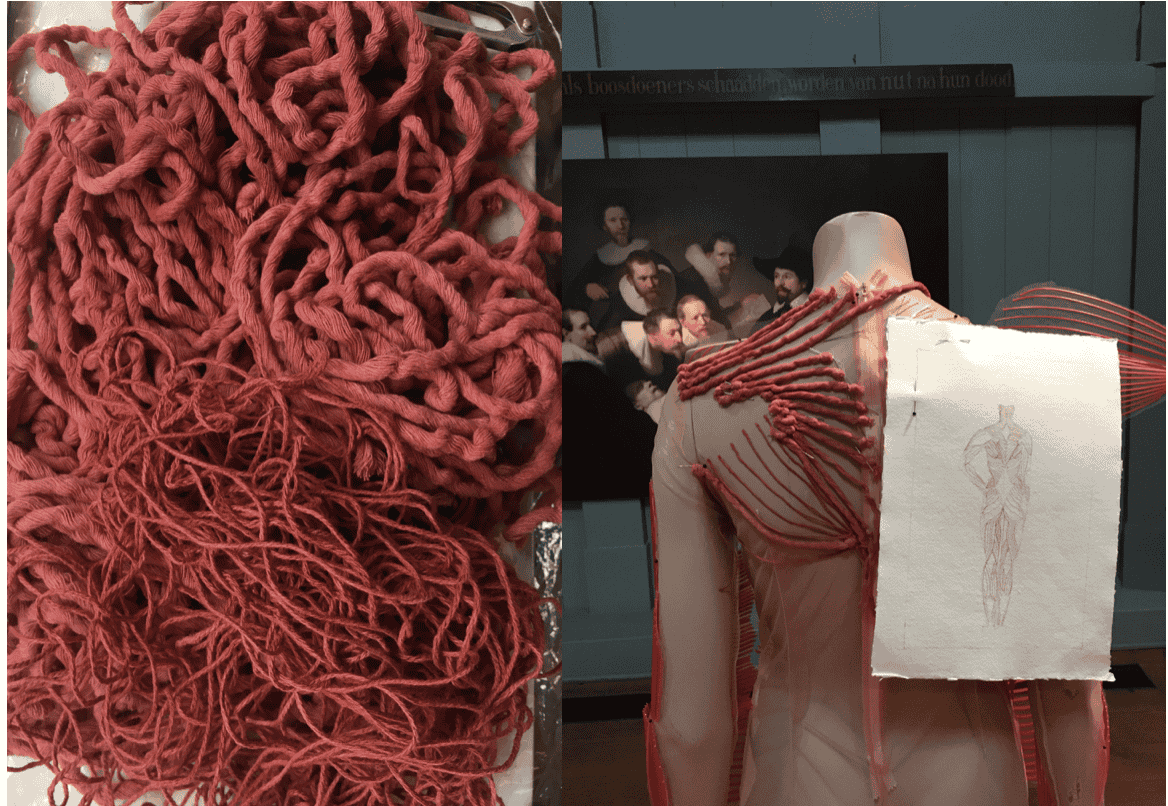
Using my illustration as a guide, I pinned the fibers in dirrection and areas of the muscle fibres. I then sewed each onto the base dress using a needle and thread. I mixed the yarns to create a bit of depth and diversity.
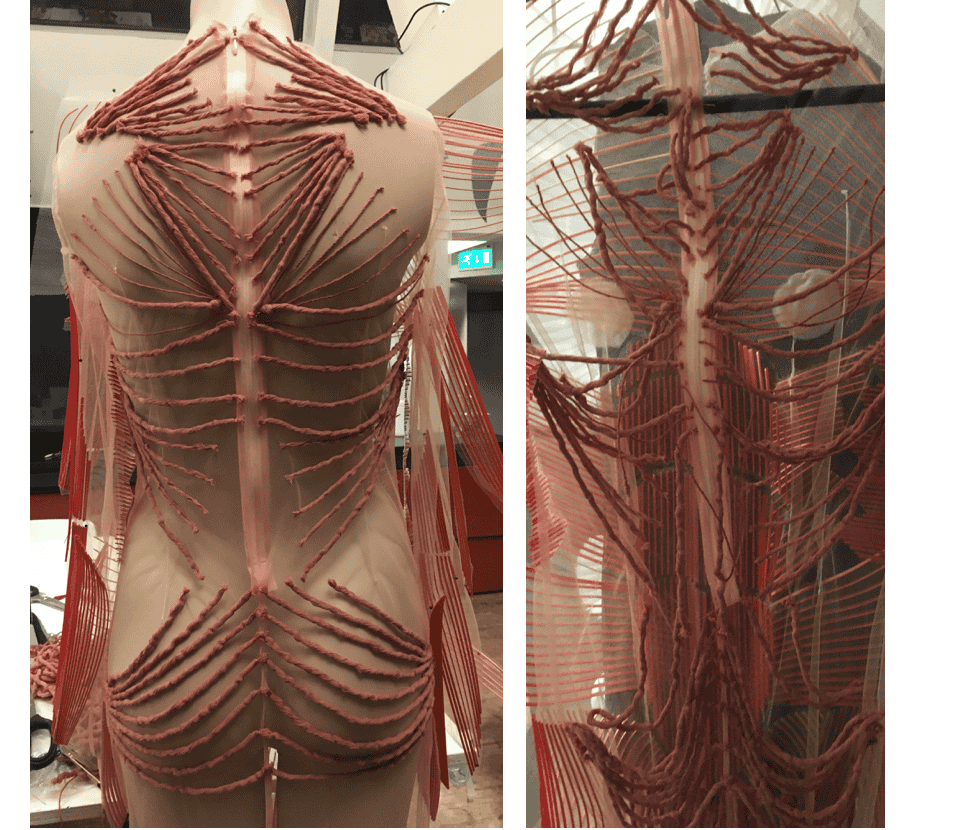
Result of sewing in place (viewed on a mannequin and the transparent base dress.)