P R O C E S S
I D E A T I O N
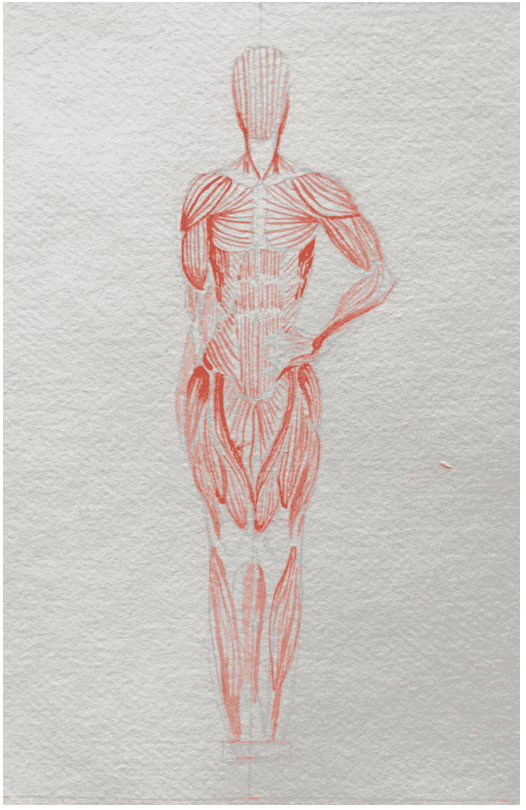
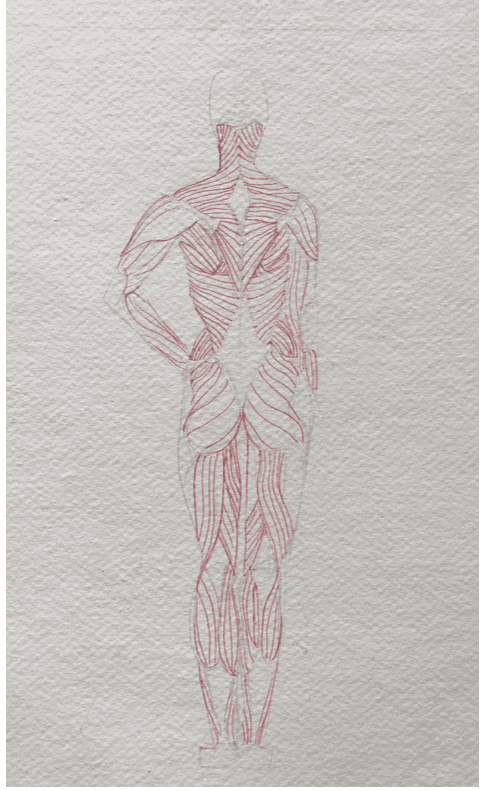
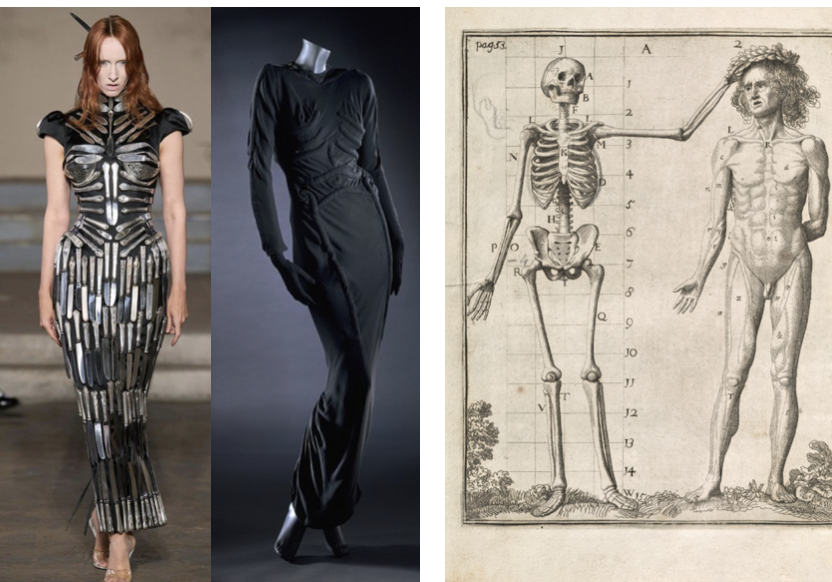
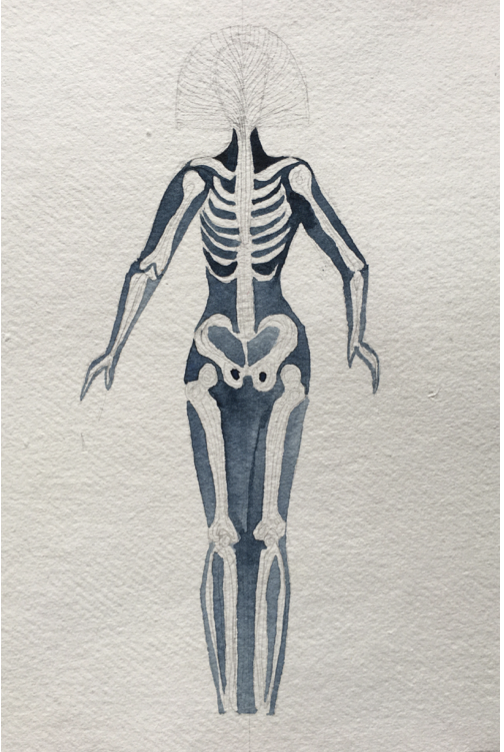
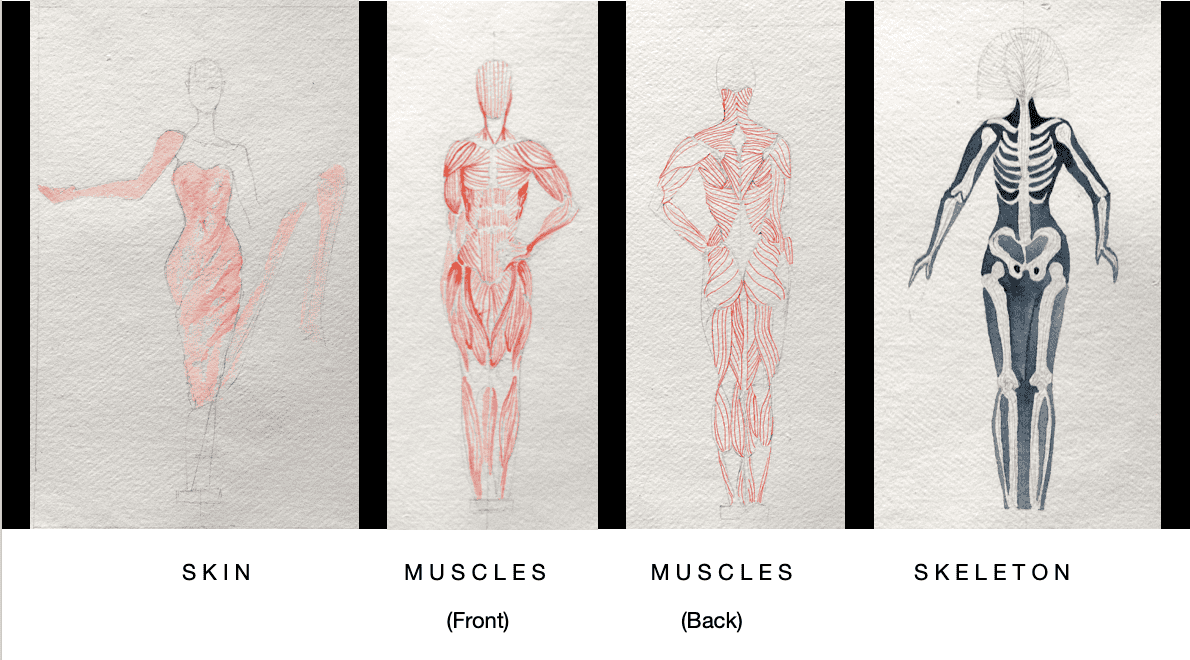
Show the layers of a body in the form of a transformative dance
- S K I N
- M U S C L E S
- S K E L E T O N
Mapping out and deciding on ideas
I L L U S T R A T I O N
IDEA 1 -
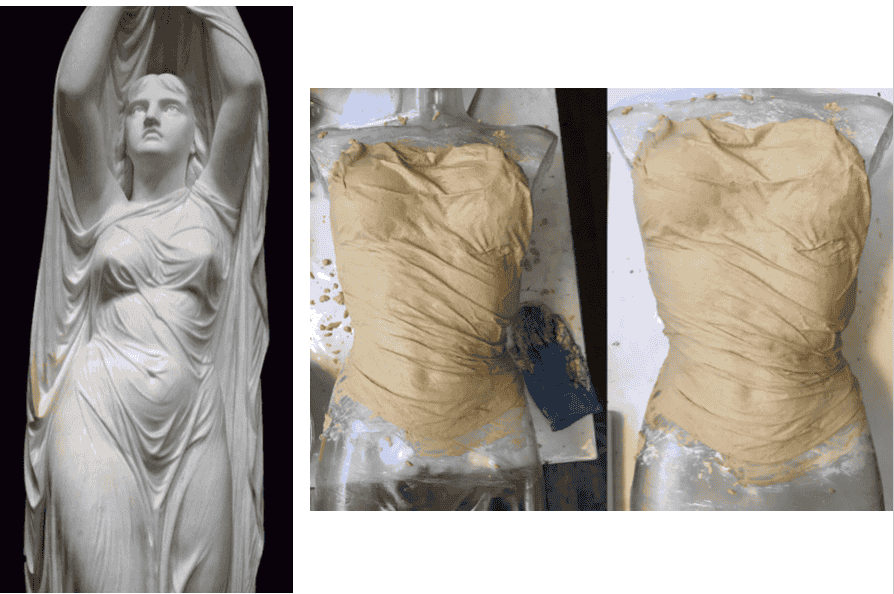
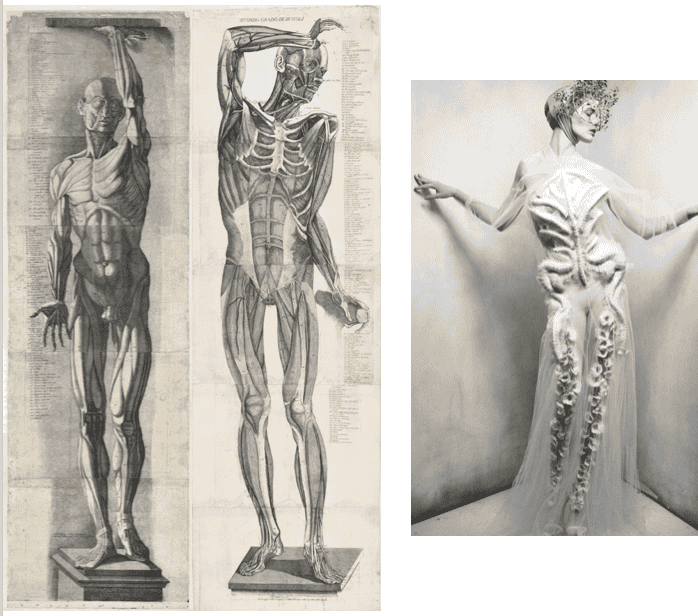
Left - Undine Rising from the Waters by Chauncey Bradley Ives (1810–1894)
Right - My trial with cotton and plaster to create a sculted torso
Inspired by Textile Scaffold week I wish to revisit my observation of Wet Drapery a technique used in sculpture in the Classical and Hellenistic periods.
Inspired DIY Plaster Art and Avoid Cracking with 3D painting
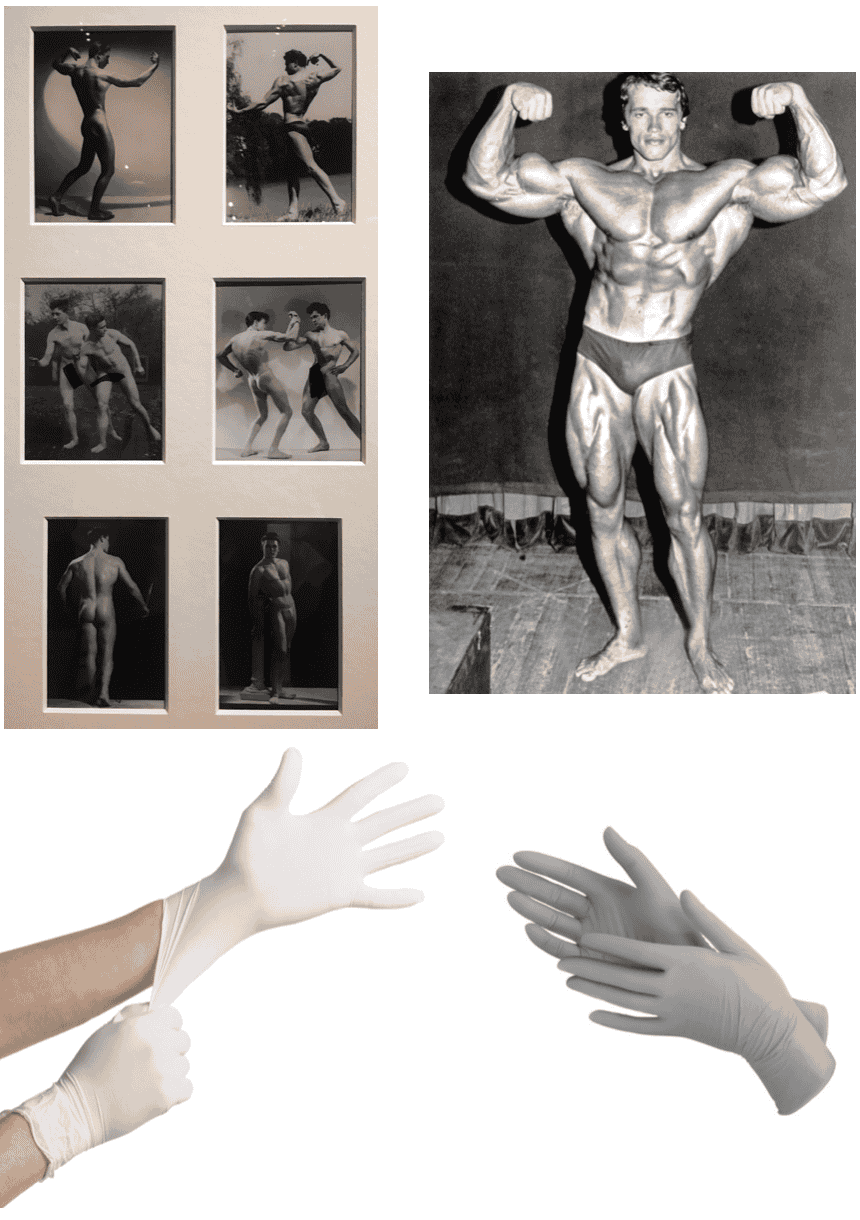
Inspired by extreme muscles in the form of body builders e.g. Arnold Schwarzenegger and questioning what is skin ? in the form of latex gloves
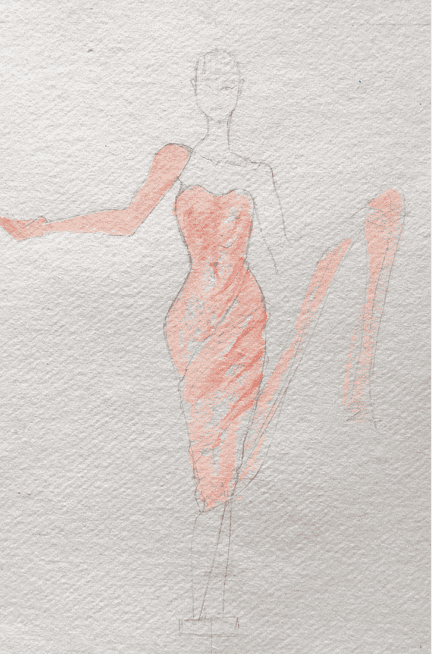
Sculped bodice with draped fabric and inflatable glove
- Material : latex / fabric and plaster, pump (hand squeeze or blow valve)
- Colour : Pure white (clinical, plaster sculpture)
- Movement : Ethereal and opposite
- Soft Robotics + Textile Scaffold weeks
- Body builder + surgeon + sculpted goddess = satire on body 'ideals'
- Glove inflates muscles (clumsy / hint of comical)
- Unwraps from draped fabric = revealing / skin taking off

Song snippet - Delibes: Lakmé (Flower Duet) 1883
Inspiration
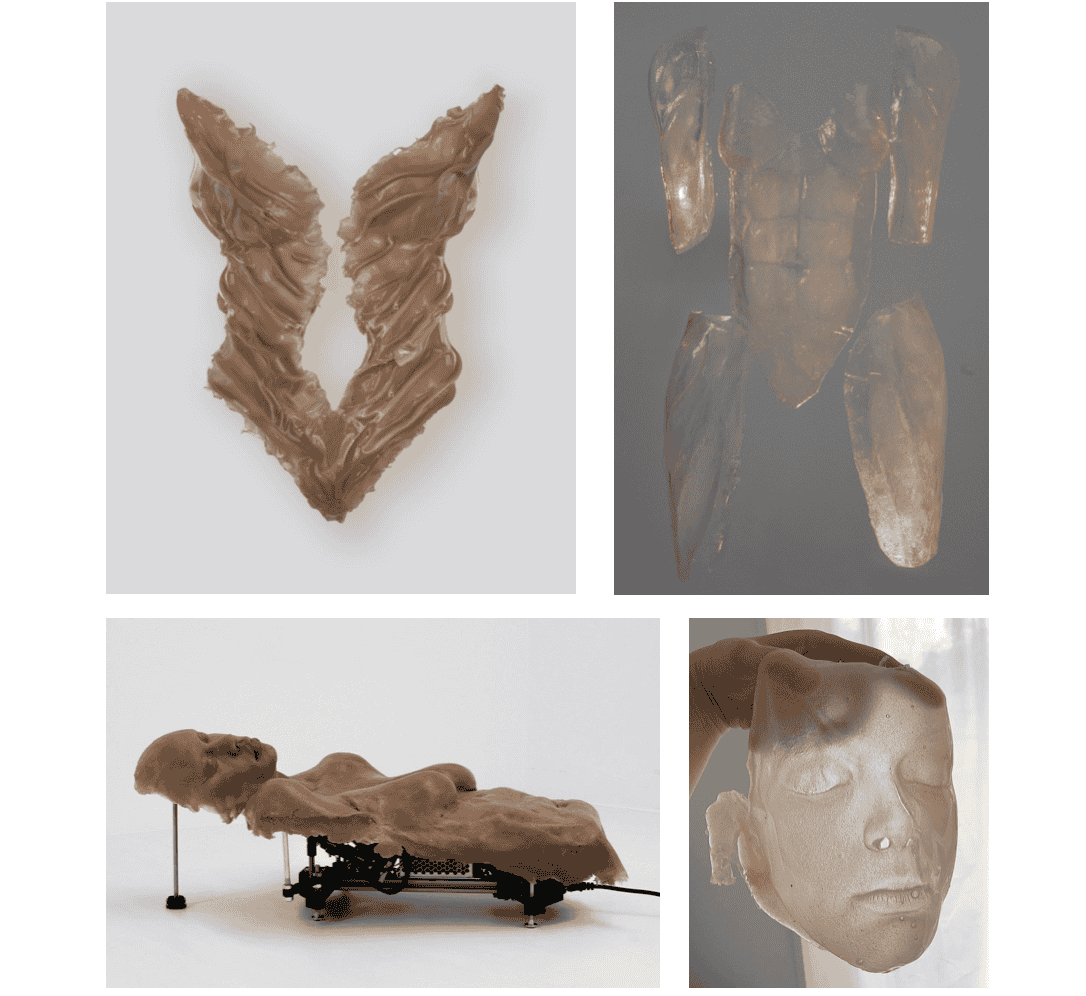
Esmay Wagemans Amsterdam based sculpture artist. Wagemans started creating sculptures as a conductor for creating futuristic fragments/scenes and modern allegories, her artworks’ storylines’ only existing through her process. Lifecasting, mold making and 3D printing techniques are at the forefront of Wagemans’ work, sculpting unusual materials into wearable sculptures, accessories (and props). @esmaywagemans
IDEA 2 -

- Material - PLA with Prusa 3D printer
- Colour - 2 tone red / gold
- Movement - Effortless elegance, slow and silky colour/ shape change
- Computational Couture + Circular Open Source
Material test - 2 tone PLA with Prusa 3D printer
Song snippet - Maurice Ravel - Bolero 1928
IDEA 3 -

- Material - Dyed cotton yarn, thread, electronics? Optic Fiber switch
- Colour - Madder reds
- Movement - More raw, fluid movement, showing stretch, tention and flex
-
Raw fibers = in action, showing movement, streching, push a pull
- Optic fibers = switch showing actuation e.g. bending arm = lights up
Song Snippet - Body Rockers - I like the way you move
Inspiration
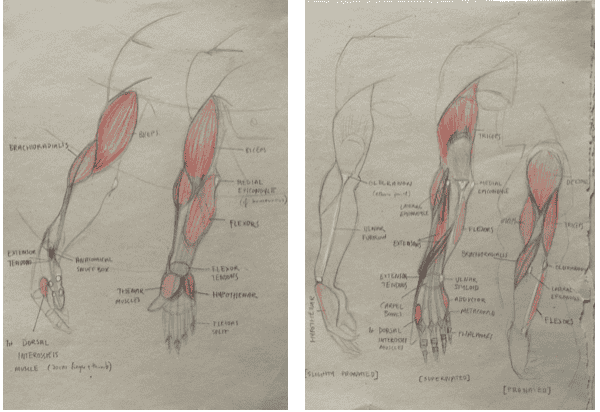
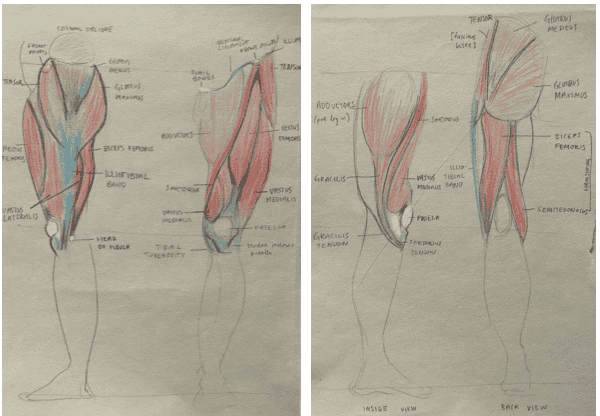
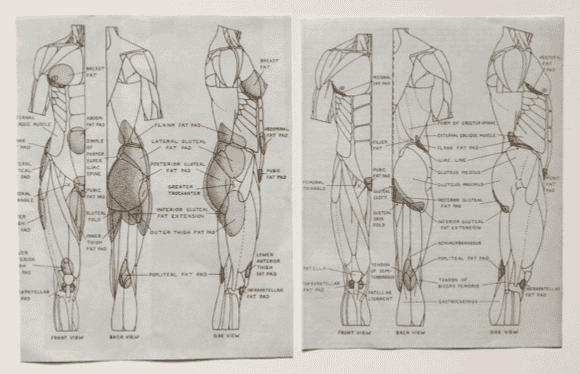
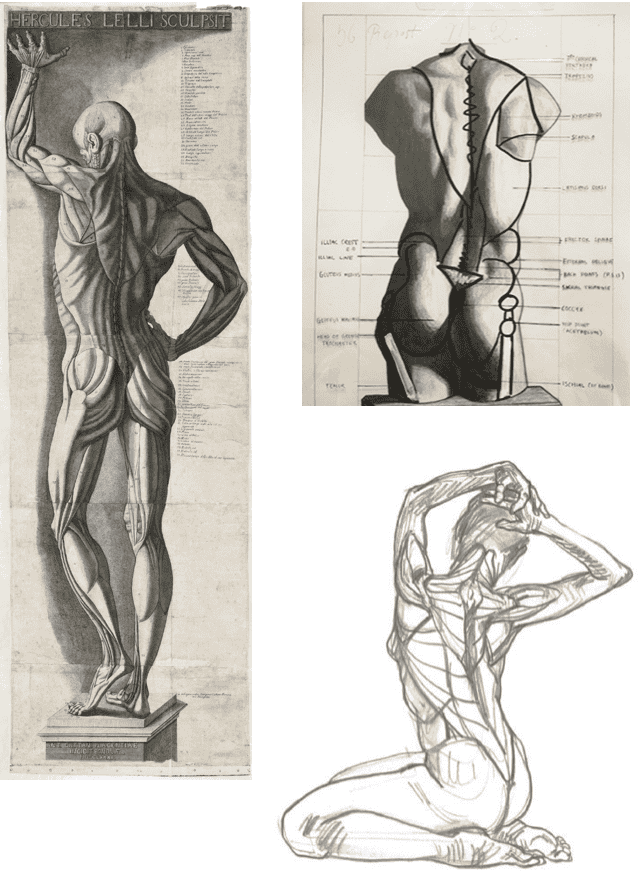
Videos explaining anatomy
Skeletal muscle anatomy introduction
Full Virtual 3D Human Body Anatomy
Anatomy and Physiology of Muscular System
IDEA 4 -
- Material - Dark body suit, pleated organza, neopixels
- Colour - Dark body suit, white organza, programmed neopixels
- Movement - slow, dynamic
- Wearables
- Lights go off and neopixels turn on, light is dispersed through pleated organza
Song Snippest - From Dusk Till Dawn - After Dark - Tito & Tarantula
X - R A Y S
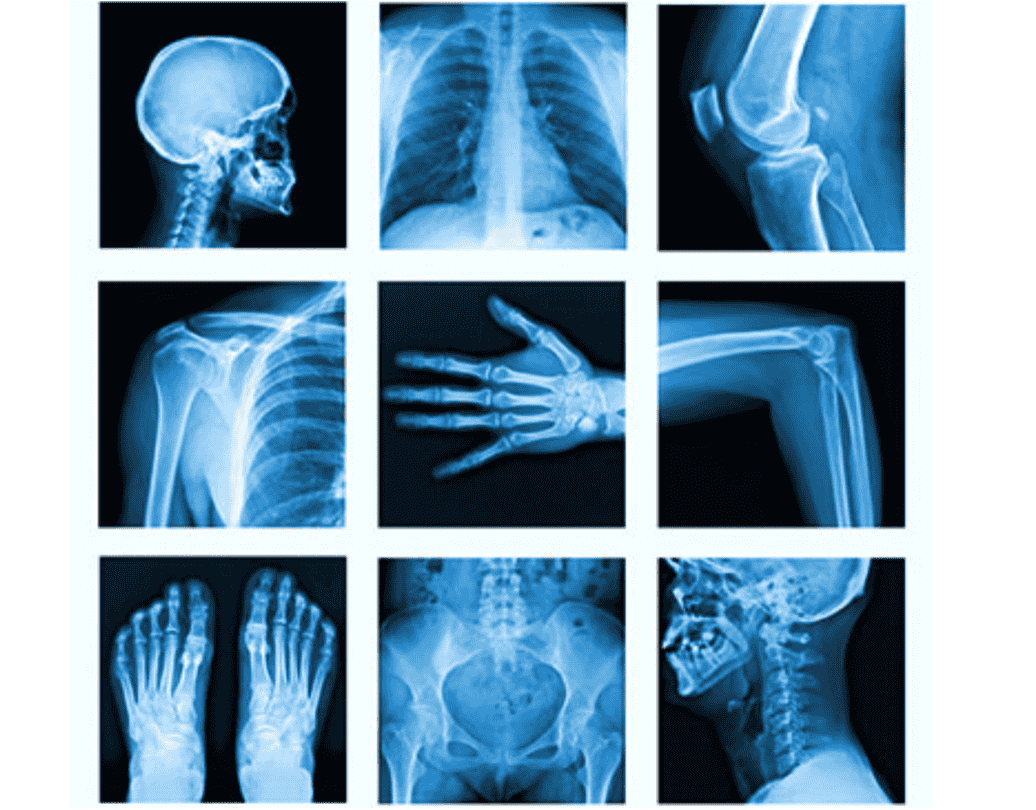
X-ray machines pass x-ray beams (a form of ionizing radiation) through a part of the body to produce images of the tissue, organs, bones, or teeth inside.
Ionizing radiation is a form of energy that acts by removing electrons from atoms and molecules of materials that include air, water, and living tissue. Ionizing radiation can travel unseen and pass through these materials.
More information about The Electromagnetic Spectrum: Ionizing Radiation
Image and information from Radiation in Healthcare: X-Rays
Light is a form of electromagnetic radiation. At some wavelengths it appears as visible light, at others it takes the form of radiation that we cannot see, such as ultra violet, infrafred and X-Rays. X-rays have very short wavelengths that, unlike visible light, are able to pass right through most tissues of the human body. Since bones contain calcium, a denser material than most other tissues, they are able to stop some of the X-Rays and can thus form a ‘shadow’.X-Rays directed at the body produce ‘shadows’ on the opposite side that can be registered on film, or on a digital sensor, so that bones are clearly visible, while soft tissues, such as muscle, are shadowy. Information from video How Do X-rays Work?
X-Ray Documentary By William D Coolidge (1940)
How do these magic eyes work?
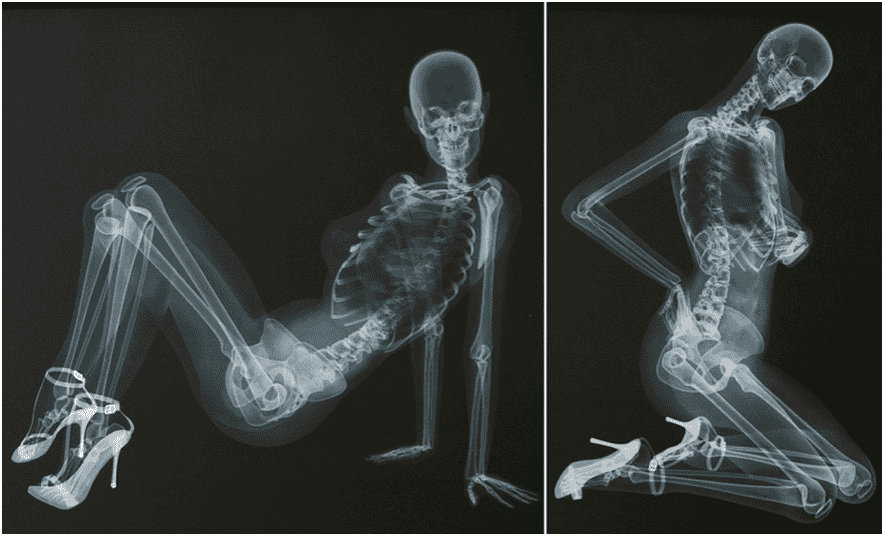
Images from X-Ray Human Skeleton
Further Information about X-Rays and their history available here
D E S I G N
Line Up
T E S T S
Material / Fabric Samples
3 D _ P R I N T
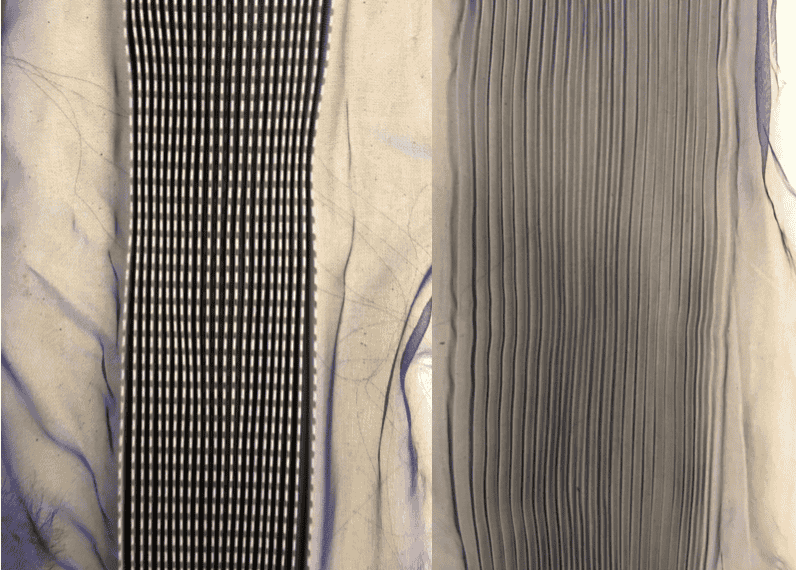
TEST 01 - Red / Gold PLA + Tulle
I used the same file W A V E S & L I N E S that I made for C O M P U T A T I O N A L _ C O U T U R E week
This test was similar, yet slightly different, testing a different material and colour to see how it worked.
| Design | Filament (thickness) | 3D printer | Material | Slicer | Dimensions |
|---|---|---|---|---|---|
| Waves | magicPLA (1.75mm) red / gold | Prusa | Nude Tulle (stiff) | Prusa Slicer | 200 x 200 mm |
1. Print first three layers + pause
2. Place organza flat on top (using masking tape)
3. Resume print untill finished
M O D I F I C A T I O N
-
I used a stronger and stiffer tulle, which has larger holes then the organza that I previously used = to see if layers would attach more successfully & give transparent quality
-
I paused the printer after 3 layers of the print = to see if it would adhere better
-
I tried a different coloured filament = to test if it works with my projects aesthetics
NOTE - Change Filament settings
Prusament PLA (modified) First layer 225 degrees C
R E S U L T S
-
Layers fused well to fabric (tulle did what I wanted)
-
I am very happy with the colour change on the WAVES file, however the colour in LINES is less two tone and more mixed.
Why this is, I am not yet sure (orientation is the same for both) - Possibily filament moved around ?
O B S E R V A T I O N
-
Tulle will make it easy to join and attach to garment and blend in seamlessly
-
Fabric / lines only move in one dirrection - be aware of design and how it needs to move / shape around the body
-
Will have to lay flat on body. If there is a shape that it needs to curve around, it will have to be either need to be heated and moulded or else segments cut into design to give bend.
Final files for Basic Dress Block 1 and Muscle Mapping 2 can be found at end of page
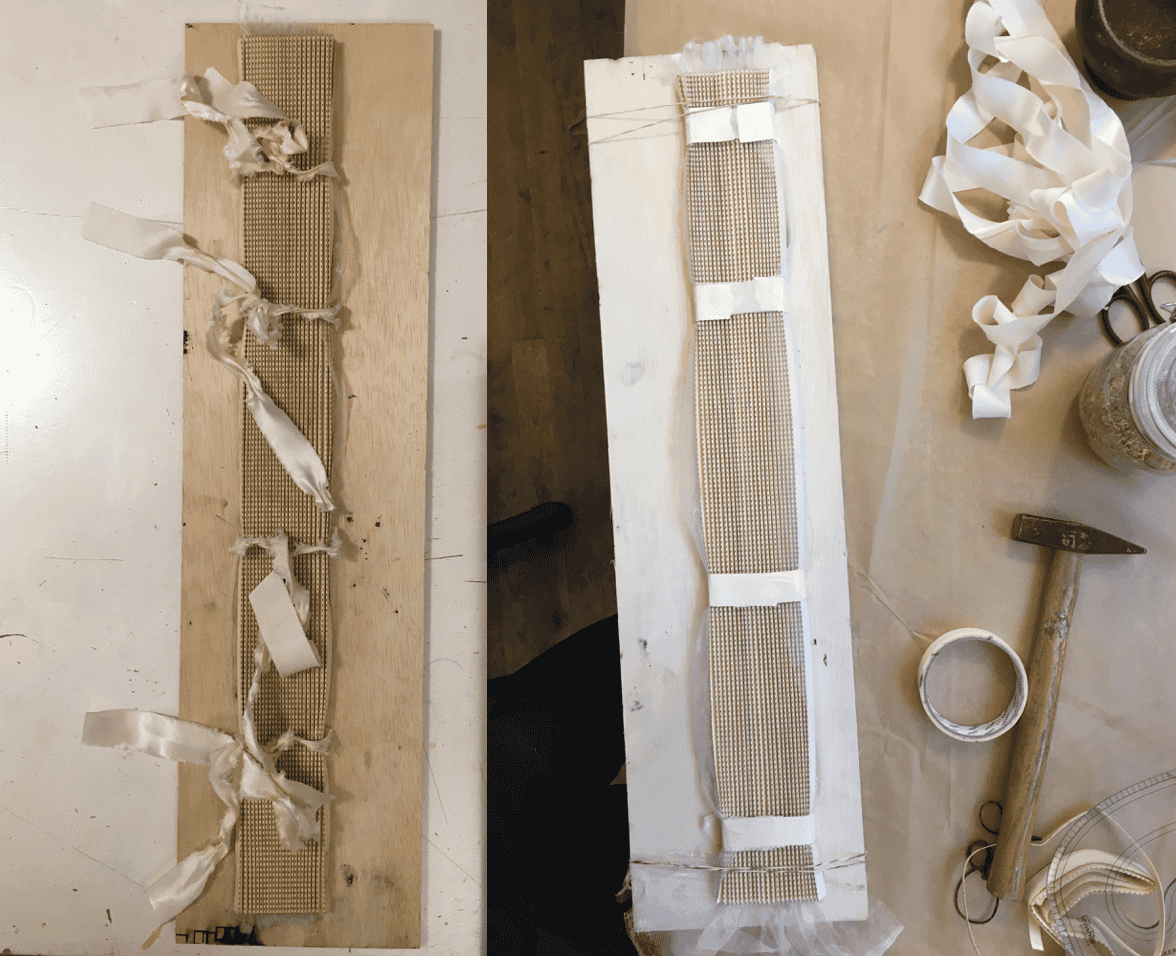
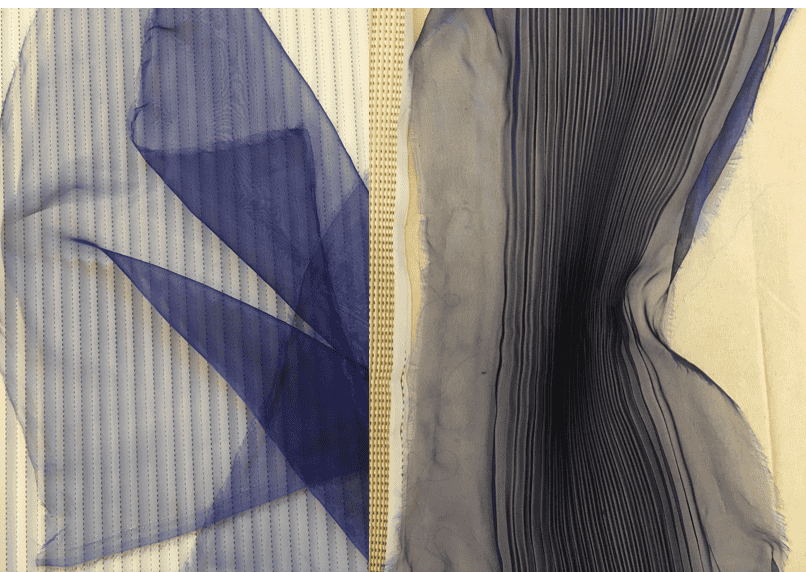
P L E A T I N G
Developing on a previous technique that I have used over the years to create pleates, which consists of creating 2 accordion moulds, placing a piece of fabric in the middle and treating it with heat.
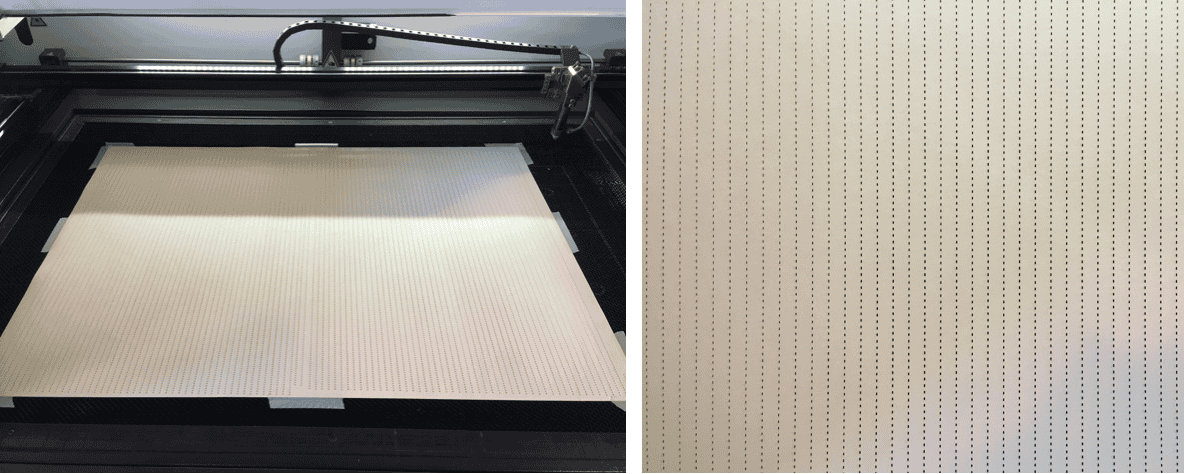
PAPER MOULD TEST
Paper tested - VEL SIMILI JAPON 48X64 225GR - HM KARTON HEL.WIT 70X100 300GR
S E T T I N G S
I used the preset cut settings in LightBurn for Paper 300.00 (grams) as the paper was 300 gsm
Speed 35.00
Max Power 25.00
Min Power 25.00

Select Perforation Mode
1.50 Cut
2.50 Skip
Giving a dashed line that makes it possible to bend the paper and it holds it’s shape
Preparing & Using Laser Cutter
- Import DXF file into LightBurn (ensure sizing is correct)
- Select material and select presets settings
- Place down material (note, putting another piece of paper under will stop burn marks)
- Turn on laser cutter and use jig to make sure laser head is at correct distance
- Test the cutting area to ensure laser will remain only on material
R E S U L T / O B S E R V A T I O N
- 300 gsm Paper was a bit too thick - 200 gsm is better
- Placing paper underneath laser bed will stop any burn marks and look cleaner
- The 'tieing up is the most difficult part
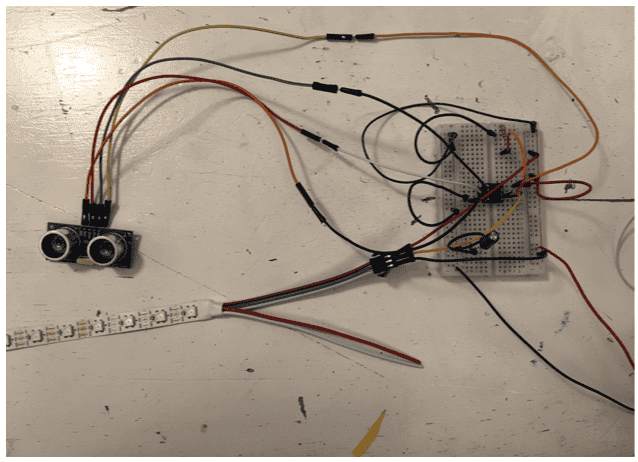
E L E C T R O N I C S
I want to use NeoPixels and HY-SRF05 Ultrasonic Distance Sensor
Adafruit NeoPixel Überguide Data Sheet
HY-SRF05 Precision Ultrasonic Sensor Data Sheet
How it Works?
A sensor like the HC-SR04 works similarly to a bat’s sonar: by sending out an ultrasonic pulse that bounces when it encounters a barrier, like a wall, a person, or an object. After it bounces, the pulse returns to the sensor, which computes the distance to the barrier based on the time it took for the pulse to return.
The HC-SR04 uses two specialized pins to accomplish this, in addition to its power and ground pins: a “trigger pin,” which sends out the signal, and an “echo pin,” which receives the returning signal after it bounces.
Tutorial / References
Use an Ultrasonic Sensor to Control Neopixels With Arduino.This was a helpful tutorial to get an idea where to put everything. However the code did not work for me so I had to find my own solution and write new code.
Arduino controlling Neopixel with Sensor
Ultrasonic sensor motion sensing by Michelle Vossen
Detecting movement direction with two ultrasonic distance sensors
Intro to ATTiny Fabricademy 2022-23
TTiny and Touch sensors part 2 Fabricademy 2022-23
D E S I G N
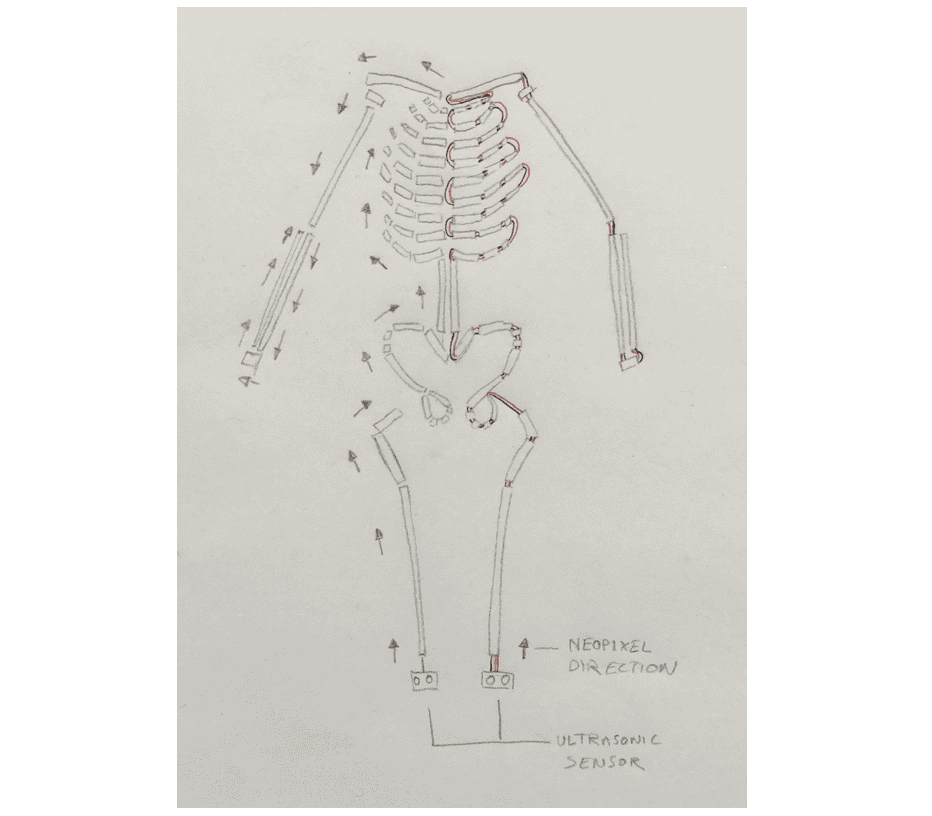
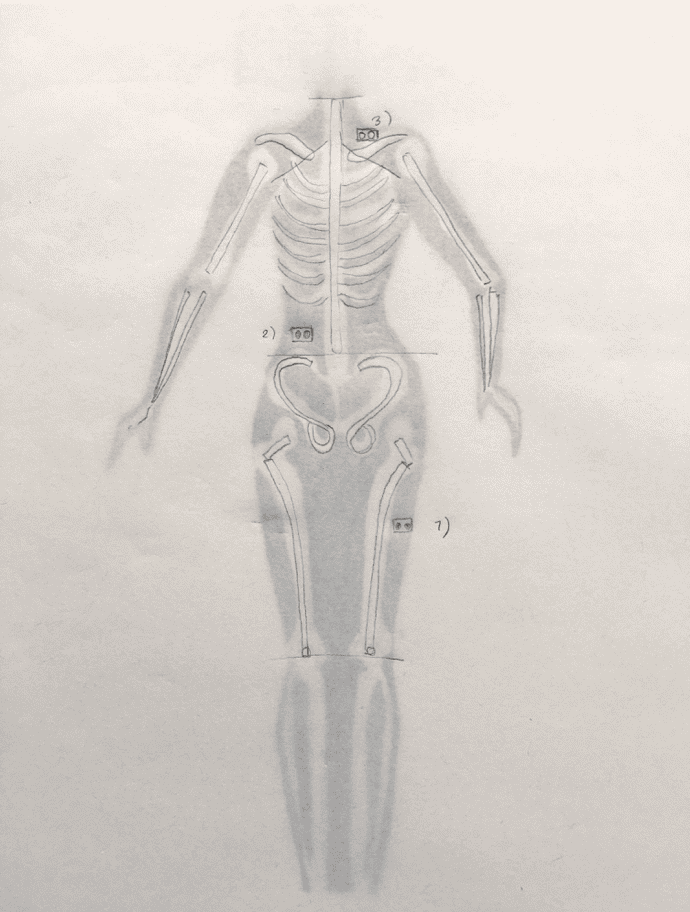
My design for the circuit. It is in two parts, the right side is one circuit and the left is a mirrored version.
The idea is to have the sensors at the knees and the circuit as one continuous strip.
I S S U E S
NOTE: posible issues that could arrise
- Focus on direction and ensure NEOPIXELS IN CORRECT DIRECTION!
- Connections must be SECURE!
- Neopixels arranged in series, if one connection is lost, it will interrupt the others
As I plan to have many joins, it will be impotant to have well soldered and secure connections
Soldering Strips has some tips and tricks on soldering neopixel strips and wires.
Tips and Tricks on How to Solder
Aslı Aydın Aksan has some information on soldering tips for PCB Assembly
I started to solder NeoPixels trying to make very stable connections
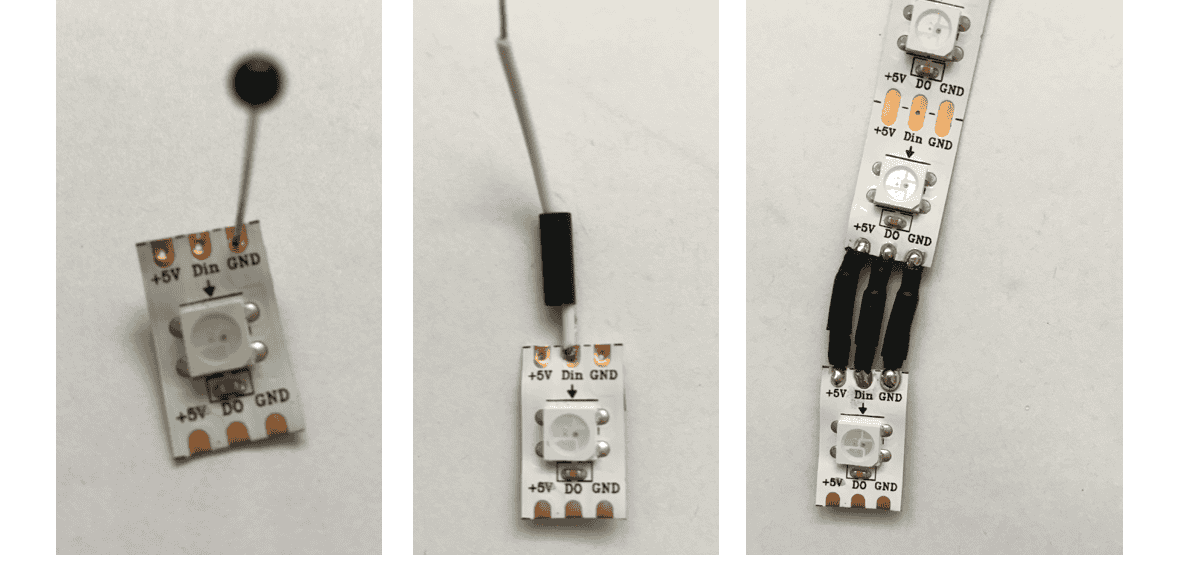
M E T H O D
- Using pin, poke hole in each connecction.
- Strip a bit of wire and place through hole.
- Cut piece of small shrink tube and place over wire.
- Using soldering iron heat up wire/connection for 2/3 seconds, then melt solder into connection
- Place shrink tube over connection, heat and tighten to form strong bond.
P R O C E S S
![]()
Using a semi opaque tube to disperse the light of the Neopixels
C O D E
Code to make the Neopixels work with the Ultrasonic Sensor
#include <NewPing.h>
#include <Adafruit_NeoPixel.h>

const byte triggerPin = 12;
const byte echoPin = 11;
NewPing distanceSensor(triggerPin, echoPin);

#define PIN        6 // pin on the Arduino connected to the NeoPixels
#define NUMPIXELS 8 // number of NeoPixels

Adafruit_NeoPixel pixels(NUMPIXELS, PIN, NEO_GRB + NEO_KHZ800);

#define DELAYVAL 500 // Time (in milliseconds) to pause between pixels

bool lightsOn = false;

void setup() {
    Serial.begin(9600);
    delay(1000);
    pixels.begin();
}

void loop() {
    // Every 500 milliseconds, do a measurement using the sensor and print the distance in centimeters.
    unsigned int distance = distanceSensor.ping_cm();
    Serial.print("Distance: ");
    Serial.print(distance);
    Serial.println(" cm");

    // Check if the distance is 3cm or less
    if (distance <= 3) {
        // Toggle the lights on or off based on the current state
        if (lightsOn) {
            // Turn off NeoPixels gradually
            for (int i = NUMPIXELS - 1; i >= 0; i--) {
                pixels.setPixelColor(i, pixels.Color(0, 0, 0)); // Turn off pixel
                pixels.show();
                delay(50); // Adjust the delay to control the speed of turning off
            }
            lightsOn = false;
        } else {
            // Turn on NeoPixels gradually
            for (int i = 0; i < NUMPIXELS; i++) {
                pixels.setPixelColor(i, pixels.Color(0, 50, 50)); // Green color
                pixels.show();
                delay(50); // Adjust the delay to control the speed of turning on
            }
            lightsOn = true;
        }
    }

    delay(DELAYVAL);
}
Code to use Neopixels, Ultrasonic sensor and AtTiny
NOTE: I had to delete any code with "Serial" to get it to work
#include <NewPing.h>
#include <Adafruit_NeoPixel.h>

const byte triggerPin = 3;
const byte echoPin = 4;
NewPing distanceSensor(triggerPin, echoPin);

#define PIN        1 // pin on the Arduino connected to the NeoPixels
#define NUMPIXELS 8 // number of NeoPixels

Adafruit_NeoPixel pixels(NUMPIXELS, PIN, NEO_GRB + NEO_KHZ800);

#define DELAYVAL 500 // Time (in milliseconds) to pause between pixels

bool lightsOn = false;

void setup() {
    delay(1000);
    pixels.begin();
}

void loop() {
    // Every 500 milliseconds, do a measurement using the sensor and print the distance in centimeters.
    unsigned int distance = distanceSensor.ping_cm();


    // Check if the distance is 3cm or less
    if (distance <= 3) {
        // Toggle the lights on or off based on the current state
        if (lightsOn) {
            // Turn off NeoPixels gradually
            for (int i = NUMPIXELS - 1; i >= 0; i--) {
                pixels.setPixelColor(i, pixels.Color(0, 0, 0)); // Turn off pixel
                pixels.show();
                delay(50); // Adjust the delay to control the speed of turning off
            }
            lightsOn = false;
        } else {
            // Turn on NeoPixels gradually
            for (int i = 0; i < NUMPIXELS; i++) {
                pixels.setPixelColor(i, pixels.Color(0, 50, 50)); // Green color
                pixels.show();
                delay(50); // Adjust the delay to control the speed of turning on
            }
            lightsOn = true;
        }
    }

    delay(DELAYVAL);
}
Working out the sensor placement
N O T E S
Mentoring notes
Response from Initial Project Pitch
13 - 12 - 2023
- Inspired by a lot of weeks, but these fall into categories: Digital, Aesthetic, Electronics
- Stick with signature style
- Documentation = Educational: break into 4 sections for different audiences
- Old School Approach (way of looking to make sense)
- Layers folding out + revealing e.g. German medical encyclopedia
- Making the invisable = visable
- Living Body is inspiration - dead (don't see how certain things function)
- Morphogenisis and reaction diffusion pattern
- Choose language - e.g. Function or Aesthetics : what is leading what
- Limitation can be inspiration
- Try to keep explaining project - refine + remind why I want to make this - Explore & Define
- Multiple plans and outcomes to allow for possible issues e.g. Ideal plan A, plan B etc
- Reflexology - stimuli that acuates something e.g someone doing something to you.
- Connection visable: what is the connection between two parts.
- Kaleidoscope of opportunites
- Electronics = detachable?
19 - 12 - 2023
- I think it will be important to make sense of the actuation - bridge back an actual movement with how to body parts connect, or a reson, such as reflexology or connection between diffrent body parts
14/12/2023
01/02/2024
In realation to skelton circuit
- To secure Neopixel connection better: poke hole through strip and put wire through and solder to secure connection
- Roughly measure out / estimate amount of neopixels that I will need, and try out circuit.
Research what power, resistance and capacitor that it might need.
- Decide on who is going to wear this, so can understand the size/ placement
- Decide on fabric of garment
- Assess the amount of stretch the fabric / wire will need. Map out which places will need more stretch / movement
- Think about how to connect electronics to garment, where to have power etc.
15/12/2023
**Anast
The Wearable Fashion Orchestra
Oscar Tomico
- Trial experimentation process - Start as soon as possible
- Like the video output: shows performance the way you want it shown (point of view etc)
- Look at the idea of surgery techniques and fashion.
References
maybe it is nice to make a contemporary version of the triadisch ballet, as nowadays there is a great comeback to the bauhaus. i loved the skeleton striptease. i believe that your proposal also has a lot to do with the digital bodies, and maybe see how you can distort the form, or augment it would be nice
Mentoring Group
Diane Wakim
"How many fingerprints it takes to make something" : love the idea, reminds me of Surzhana's Traces project : the paper fabric keeps all the traces of the making (and the wearing) https://class.textile-academy.org/2022/surzhana-radnaeva/Final%20project%20TRACES/ I really like your idea of showing the mechanics of the living body as an educational (and beautiful) tool. And I think it's great that you already have an idea of the final piece, can't wait to see more :)
9/01/2024
Petra Garajova
9/01/2023
Emma
Other possibilities to activate the lights instead of a UltraSonic Sensor could be capacitive touch, for example Capacitive Touch Sensor and Kobakant Capacitive Fabric Touch Sensor
Notes to Self
-
Nobebooks inspired by German pull-out Anatomical References
-
Play with shape?
S O U N D
Fabrication Files
-
Muscle Map Muscle Pattern ↩