11. T E X T I L E _ S C A F F O L D
H A R D + S O F T
Make soft materials hard & hard materials soft
F A B R I C S - > 3 D
How to make fabrics / materials three dimensional
I N S P I R A T I O N
S C U L P T E D _ F A S H I O N

Grace Jones wearing
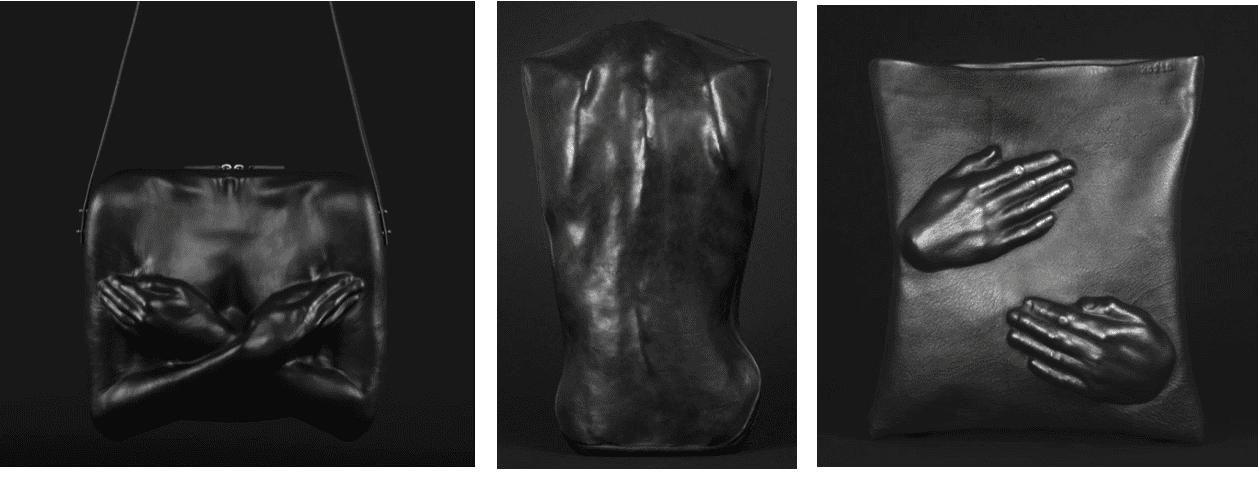
Kofta blends futuristic techniques such as 3D-modeling/printing/cutting with traditional leather craft methods like molding, drying, straining, hand painting etc. See more at Kofta
Daisy Collingridge crafts body suits or ‘Squishies’ which are an exploration of fabric, form and flesh.
"Fabric offers skin like qualities that traditional sculpting materials do not have".
See more at Daisy Collingridge. Note: Pieces have amazing movement element
R E S E A R C H
L E A T H E R
How to Stiffen Leather Like a Pro Contents include: Understanding leather, Water-based techniques, oven-based techniques, compression molding, resin coating, care for stiffened leathers and F&Q
T R U C H E T
Multi-scale Truchet Patterns Christopher Carlson experimenting with scale within truchet patterns
Truchet images Ned Batchelder generates images
3D Truchet Tiles with GrasshopperReplicating a stepped truchet pattern
O R I G A M I
Oribotics Fabric Folding Process
Origami Tessellation Herringbone
M A T E R I A L S
Crystallization
Distilled Water, Allum, selection of 'hairy' fabrics, tall jar with lid, thread, stove, pot,
Heat Treat
Fabric (synthetic works better), stove, pot, water, thread
Mould Making
CNC, foam, vasoline, cling film, materials to cast, composites, bio materials (gelatine, gylcerine), liquid latex, PVA glue
Leather Moulding
Leather (faux and real), mould, baking soda, water, stove
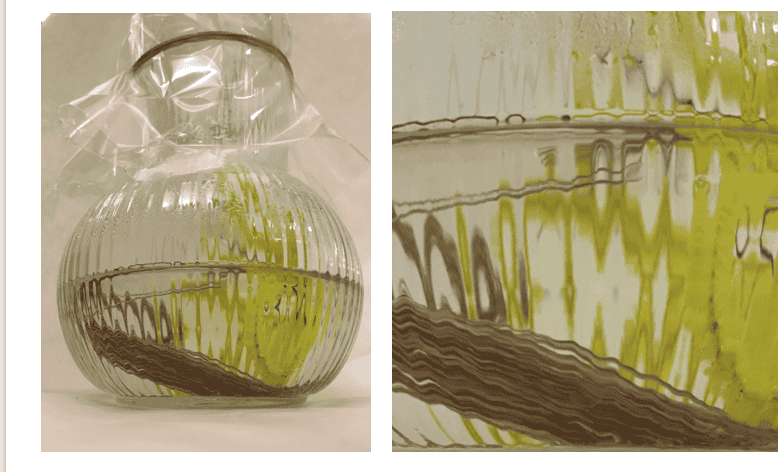
C R Y S T A L L I Z A T I O N
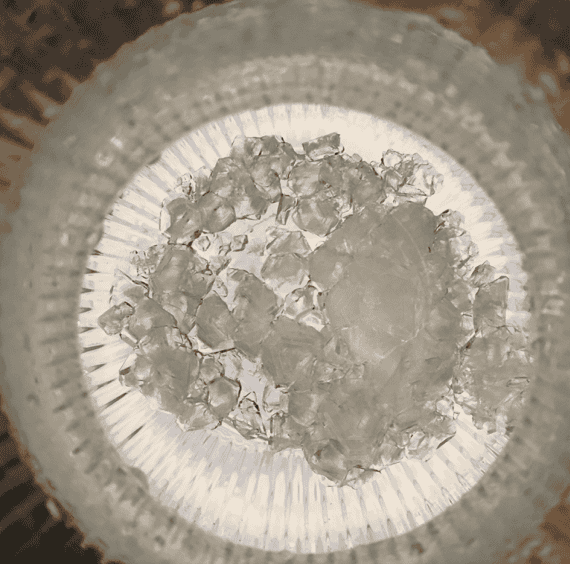
P R E P A R E
Prepare fabrics
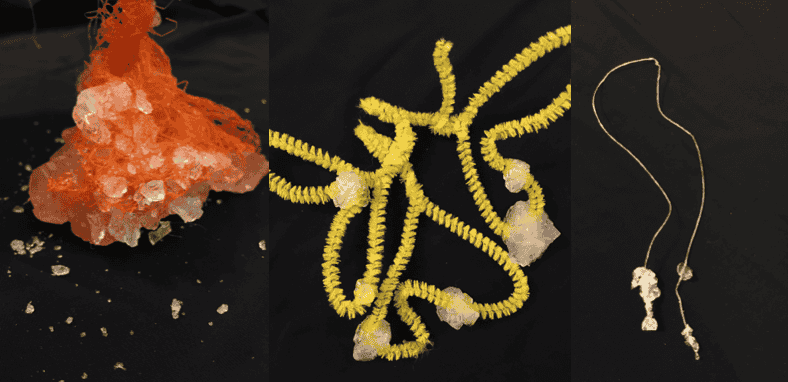
Fabrics I used were = Jute, synthetic organza, pipe cleaner and mandarin package
I frayed some to add 'hairy' quality to encourage crystals to grow
R E C I P E
1 litre of distilled water
400 grams of Alum

- Heat distilled water to boil
- Add alum to water + stir until completely dissolved
Orignally made mixture with half the recommended amount of alum = results in little to no crystal growth.
Re-made mixture with additional alum and serious crystal growth!
Note = sometimes it's worth following the recipe
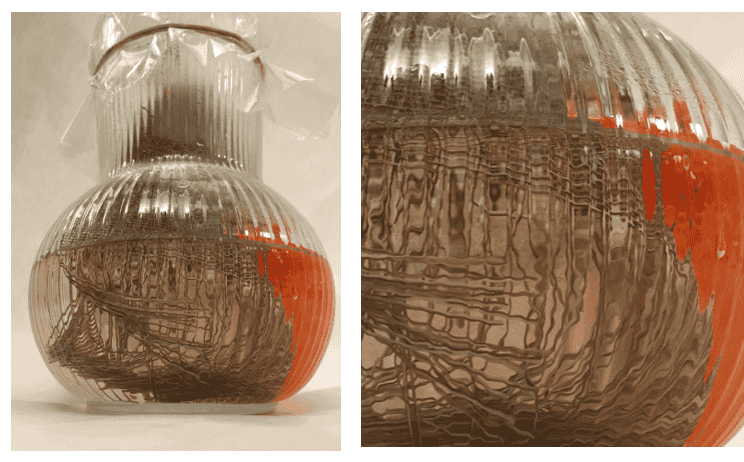
R E S U L T S
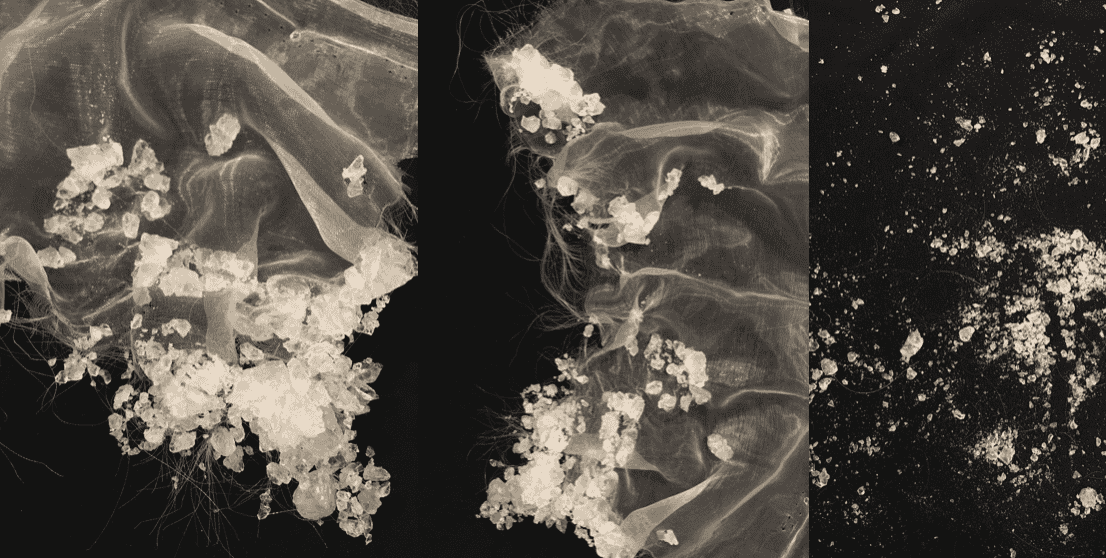
In some cases the crystal growth was a bit overdone.
This might be avoided in the future either by:
-
Adding slightly less Alum
-
Taking them out earlier (I left mine about 24 hours)
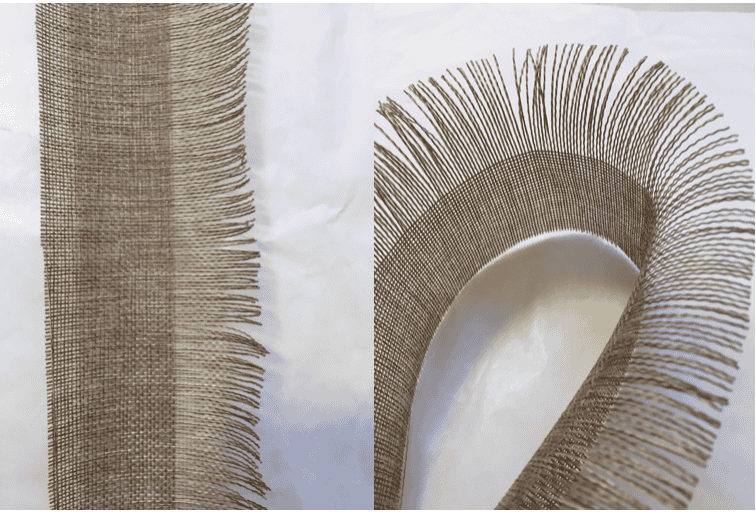
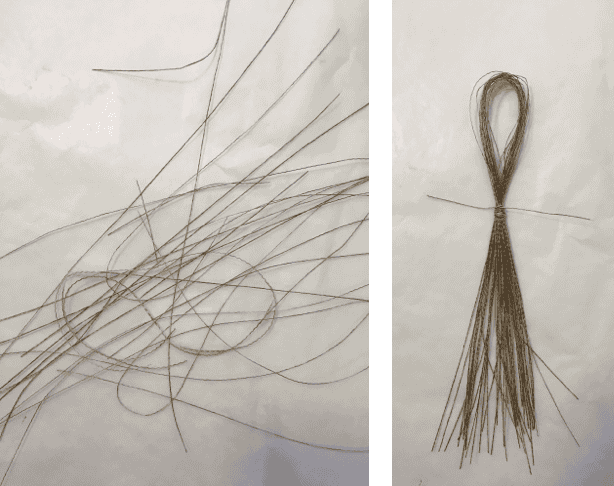
H E A T _ T R E A T
Heat Treatment Technique
After heating (boiling, steaming or oven) for 20 minutes, the fabric should keep shape
Synthetic fibres work better for this meathod
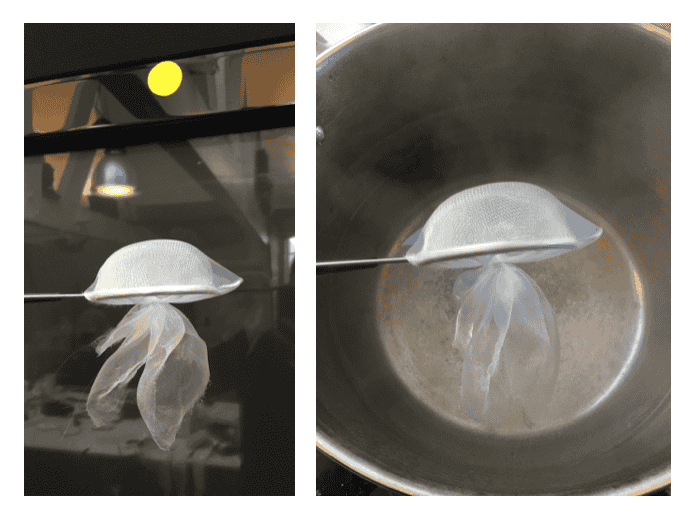
Using synthetic organza shaped tightly around surface (similar to shibori)
Cooked in medium heated water for 20 minutes

M O U L D _ M A K I N G
D E S I G N
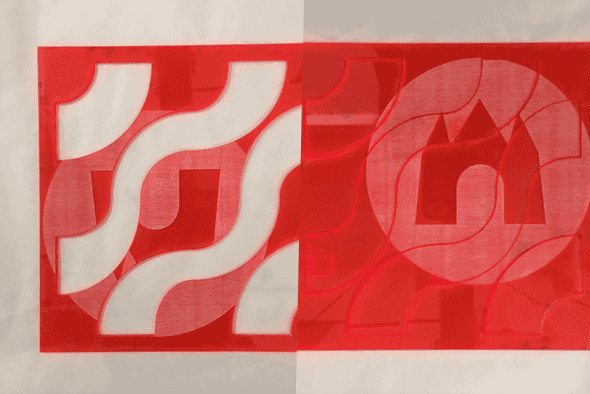
Inspired by Truchet Tiles
“Truchet tiles” originate with a treatise by Sebastien Truchet published in 1704, Mémoir sur les Combinaisons, in which Truchet investigates the kinds of patterns that can be made using a simple square tile divided diagonally, white on one side and black on the other.
When that tile is used in various orientations, the curves join to form connections that can be colored alternately, producing an infinity of patterns.
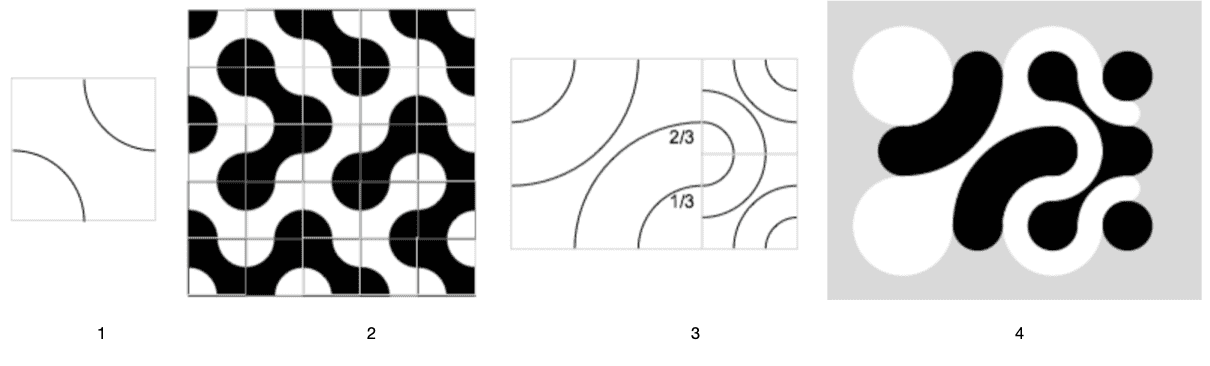
Images from Christopher Carlson Multi scale truchet patterns
_ 1 Truchet Tile = sublimely simple
__ 2 Multiple tiles in various orientations connecting to make pattern
___ 3 Replace two arcs with four arcs that connect with the sides at 1/3 and 2/3 = reminds me of the Golden ratio
____ 4 Coloured in connections
Multiple possibilities of Truchet Tile design + pattern
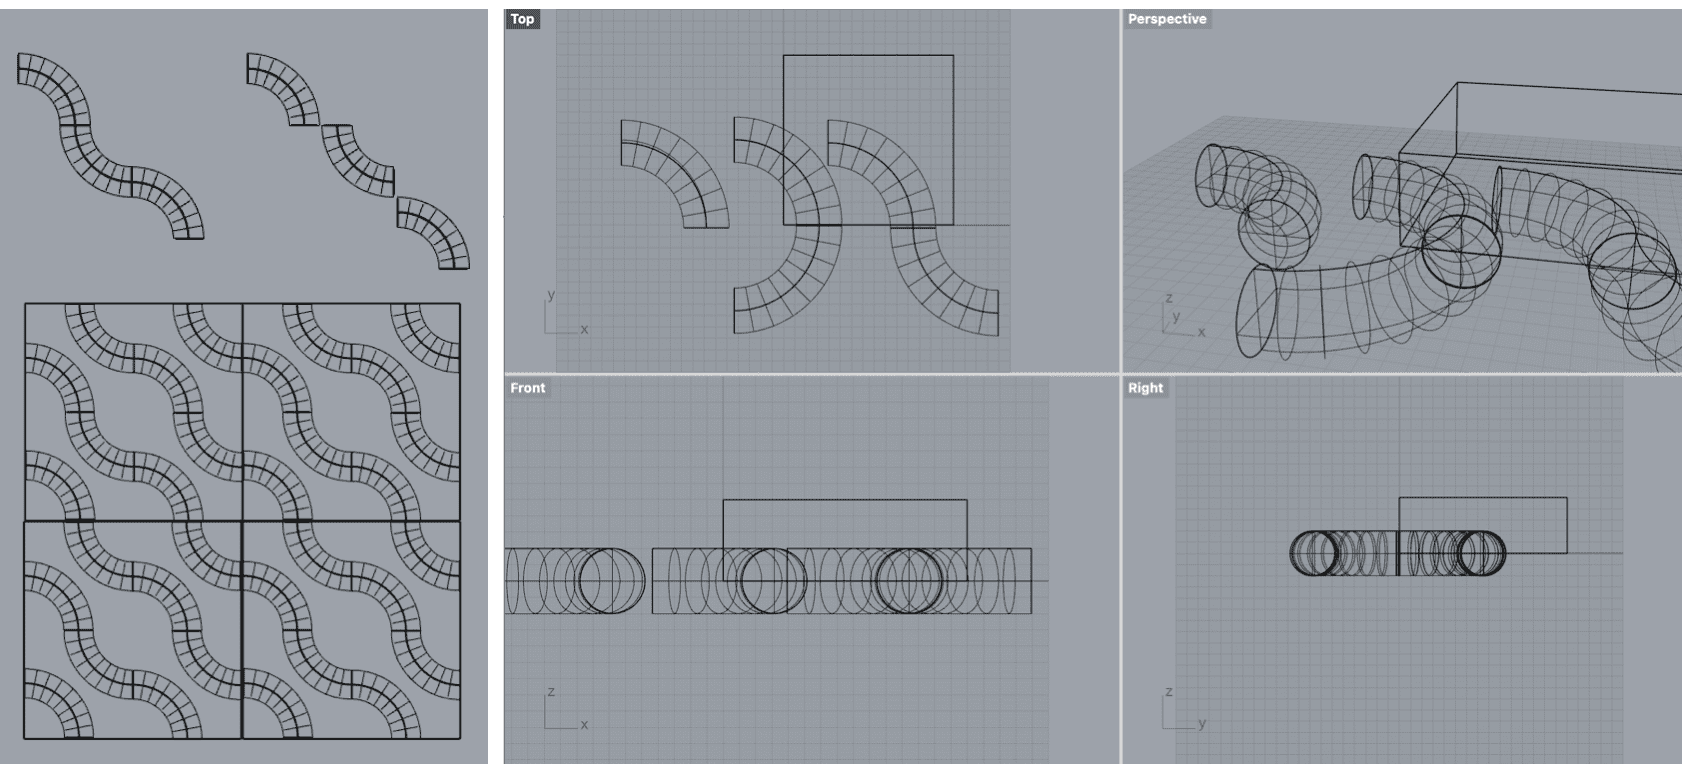
Own design inspired by Truchet tiles & accentuate curves
1 Finalised design made in Rhino with mould partner Aslı Aydın Aksan
C N C _ M I L L I N G
Using the CNC Shopbot to mill materials in 3D
Tutorial with Henk on how to use the Shopbot milling both wood & foam
N O T E S
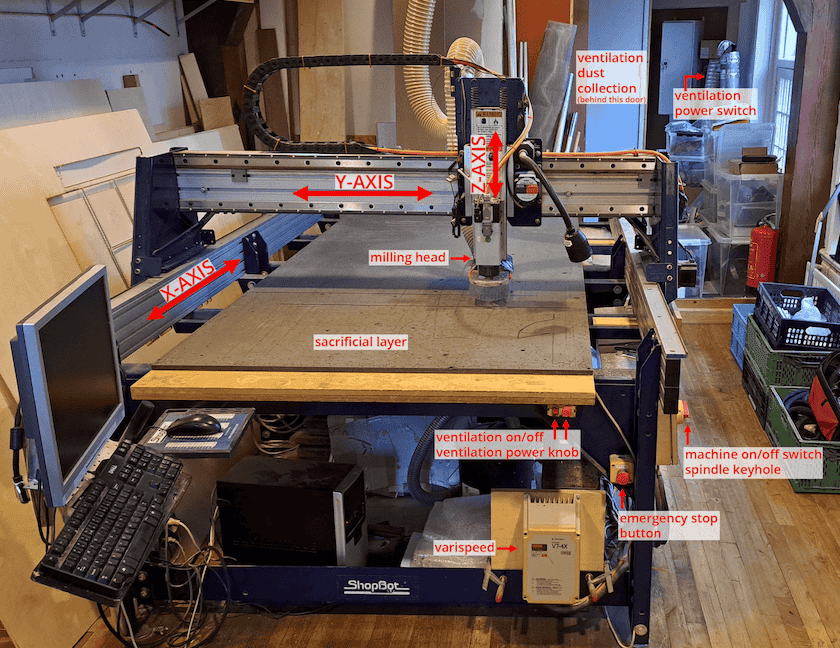 Image indicating parts of the machine (from Aslı Aydın Aksan)
M E T H O D
- Mill 3D design into foam
F I L E
- Prepare file + settings in VCarve Pro
- Save file to desktop with name
B E D
- Prepare bed - Ensure clean, smooth surface (no screws!)
- Attach foam to sacrificial layer - Stick down using double sided sticky tape (ensure perfectly perpendicular)
- Secure foam - Drill in wood at all sides to secure (ensure screws are deep inside)
M A C H I N E
-
Open ShopBot Console
-
Home Machine (X + Y axis) using XY button with arrows (0,0 -> zero X + Y axis)
-
Move drill head along X + Y axis using keyboard (press K key) = keyboard Arrow keys = move drill head ^ (Y-axis) > (X-axis)
-
Move Z axis closer to plate using K (keybord key) Page UP = Z up (higher) Page DOWN = Z down (lower)
-
Place plate on sacrificial layer (test circuit = light up on screen when plate touches drill bit)
-
Zero Z axis (button with up and down arrow)
-
Job Home Move spindle to the start point of material (top right hand corner)
-
Take note of X + Y coordinates (incase something happens, can go back and refer to start point)
-
Zero X + Y -> Zero button -> Zero (X + Y) = (0,0)
-
Open File -> File -> Part File Load -> Select file
-
Turn on machine + extractor fan (green button in yellow box)
-
Turn on spindle (key in + turn) ensure settings right
-
Start - Key hand on pause (space bar) and keep in mind where it should start + direction (anything wrong - ready to stop)
N O T E
- Select Roughing file first and then Finishing file (no need to change start coordinates)
C N C _ S E A L _ O F _ A P P R O V A L
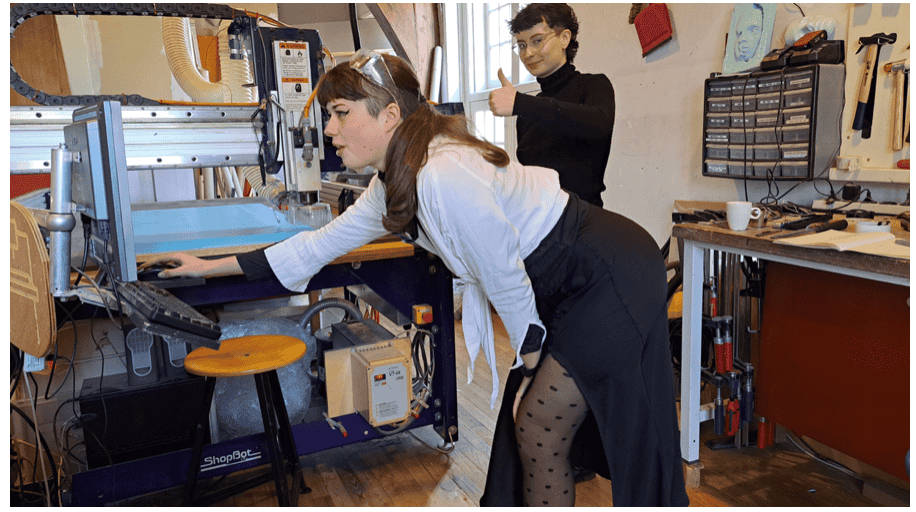
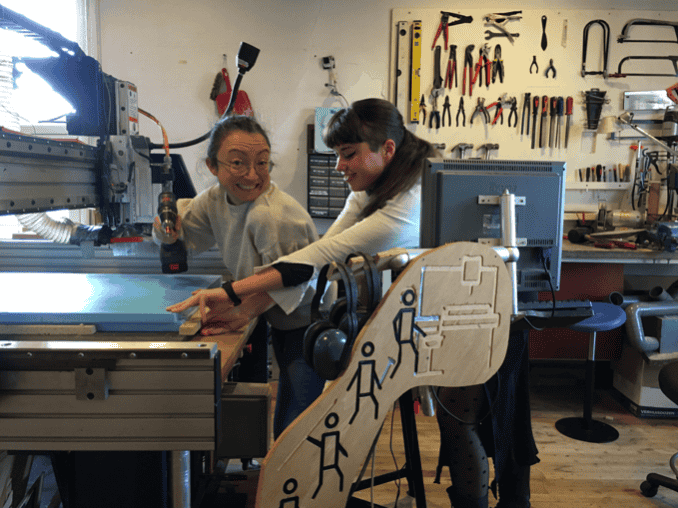
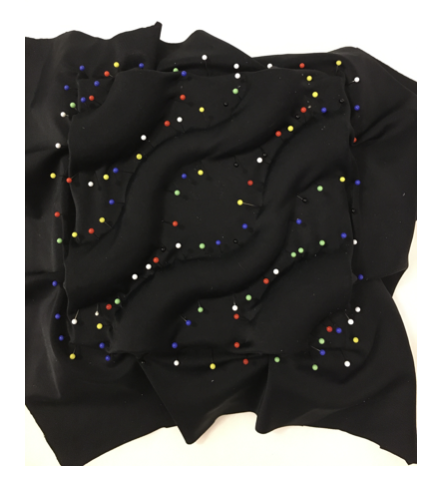
Myself & Aslı Aydın Aksan partnered up make the mould together in order to save time.
Here we are ensuring that the foam is firmly secured to the bed

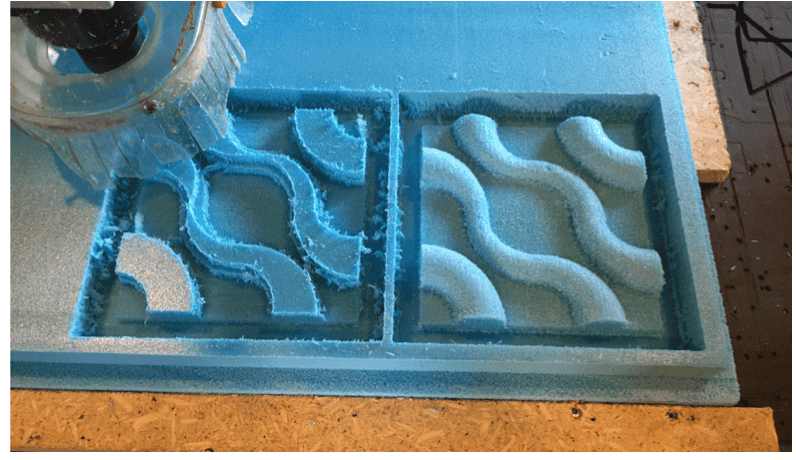
Process picture showing the Rough cut and the Finished cut
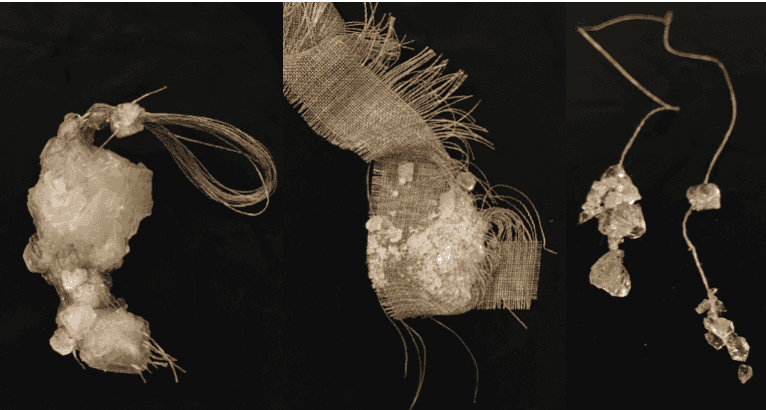
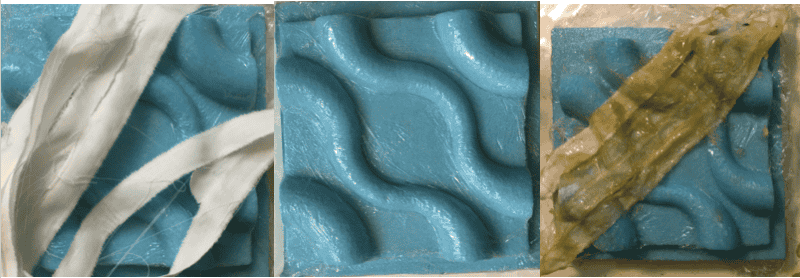
C A S T I N G
P R E P A R E _ M O U L D
Allows for smooth casting and non stick
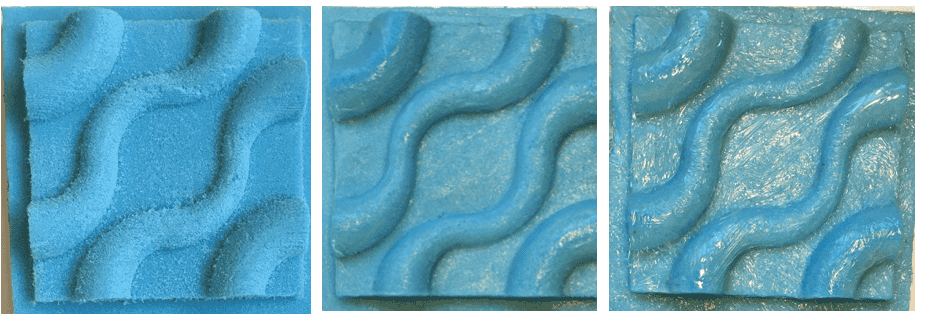
_ 1 Brush away any residue foam __ 2 Smooth surface using vasoline ___ 3 Stick layer of cling film on top
T E S T S
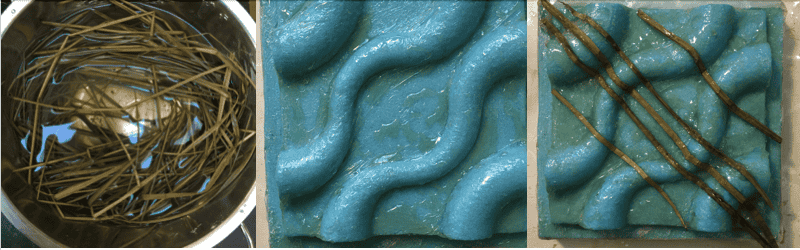
Composite Test 1 = Gelatine bio material & Bamboo stems
Composite Test 2 = Gelatine bio material & strips of Cotton fabric
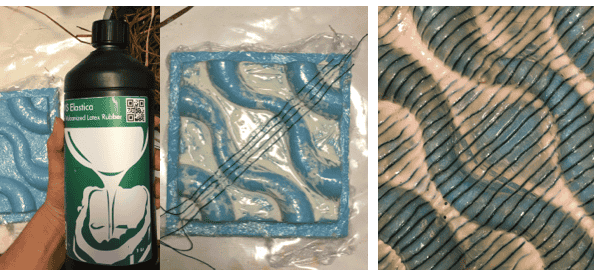
Gelatine bio material Recipe
(Inbetween Resin + Silicone)

- 96 grams Gelatine
- 48 grams Glycerine
- 480 ml Water
For more Bio Material Recipes see Bio Materials Week 06
Result = Exasperation
I found the gelatine mixture extremely sticky and almost impossible to work with in this way and had to eventually abandon it.
Composite Test 3 = Liquid Latex & thread

Back + Front
Very pleased with the results of liquid latex which worked well, holds shape and is flexible!
Aslı Aydın Aksan resurrected & rekindled my feelings for gelatine bio material
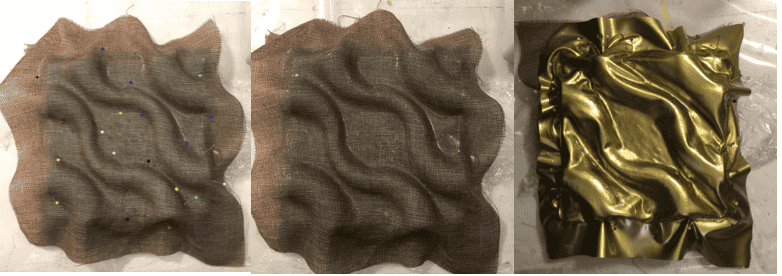
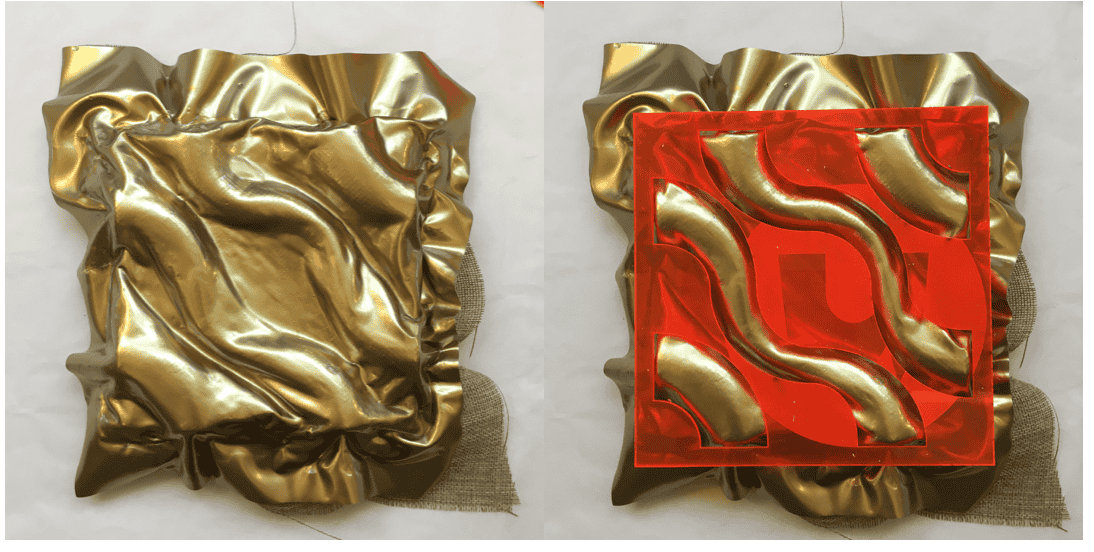
Composite Test 4 = Gelatine bio material 2 & Jute and gold PVC material
Gelatine bio material 2 Recipe
(More watery)

- 48 grams Gelatine
- 10 grams Glycerine
- 400 ml Water
-
Paint gelatine mixture onto jute + mould + pin into place
-
Paint a few layers of the gelatine mixture + remove pins + paint more layers
-
Apply gold PVC on top and mould + apply more layers on gelatine mixture
The jute took the shape of the mould well as it is a woven material having the ability to shape and stretch.
The PVC did not shape well as it does not possess these qualities. It also did not harden with the gelatine as I had hoped.
My intention for this sample was to mould the PVC into shape so that it turned hard, keeping the shine and uses the jute backing as reinforcement.
Alas, I was not pleased at this result
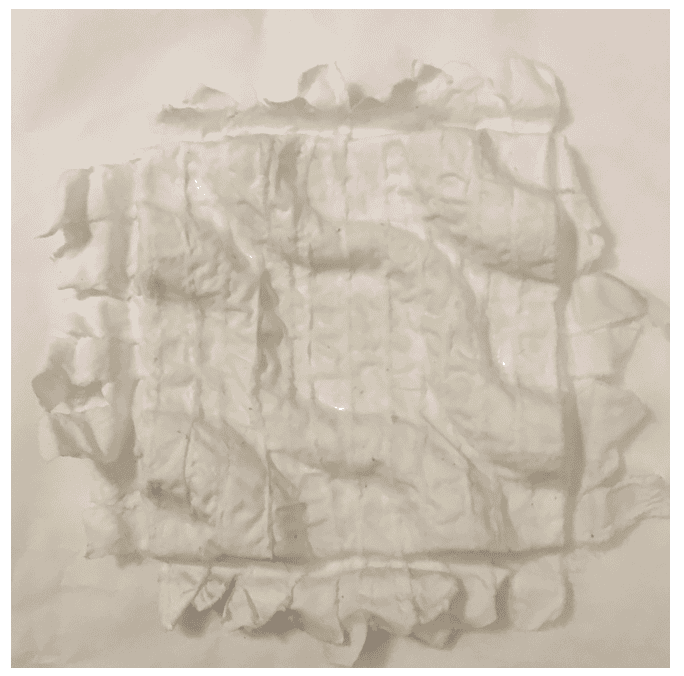
Composite Test 5 = PVA glue mixture & strips of Cotton fabric
Composite Test 6 = Gelatine bio material 2 & Lycra
Laser cut acyrlic sheet for mould (press down)
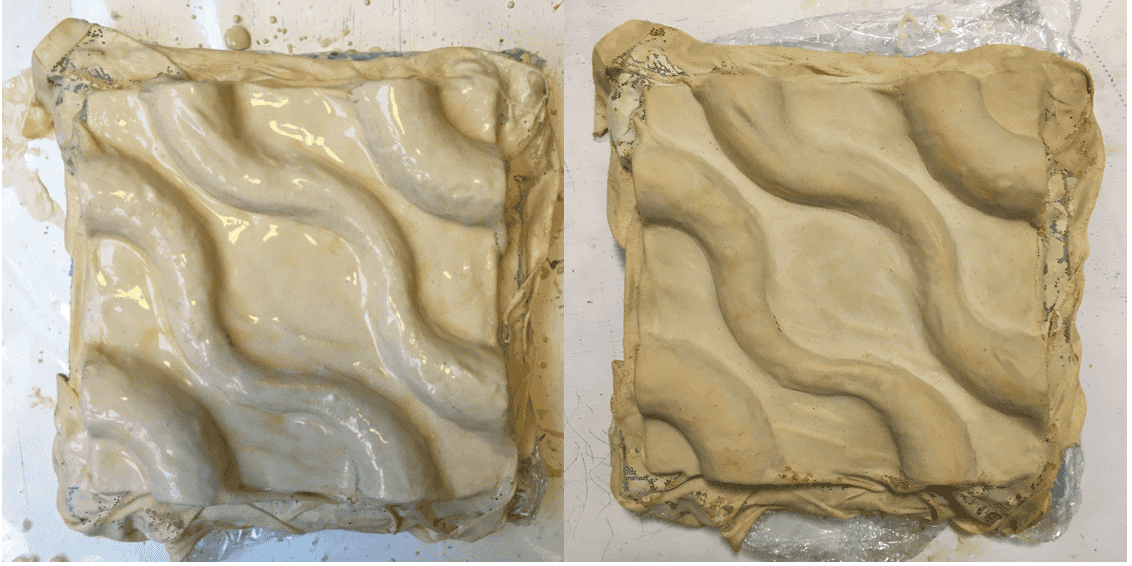
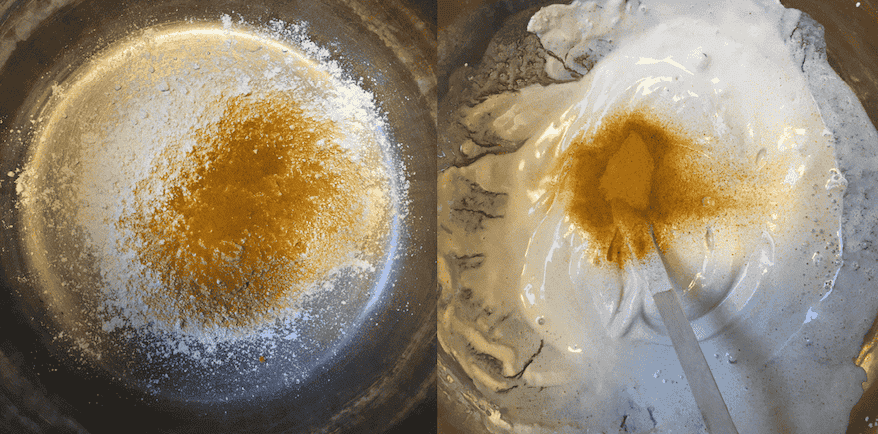
Composite Test 7 = Plaster (with tumeric and orange food colouring) & White tulle
Composite Composition
L E A T H E R _ M O U L D I N G
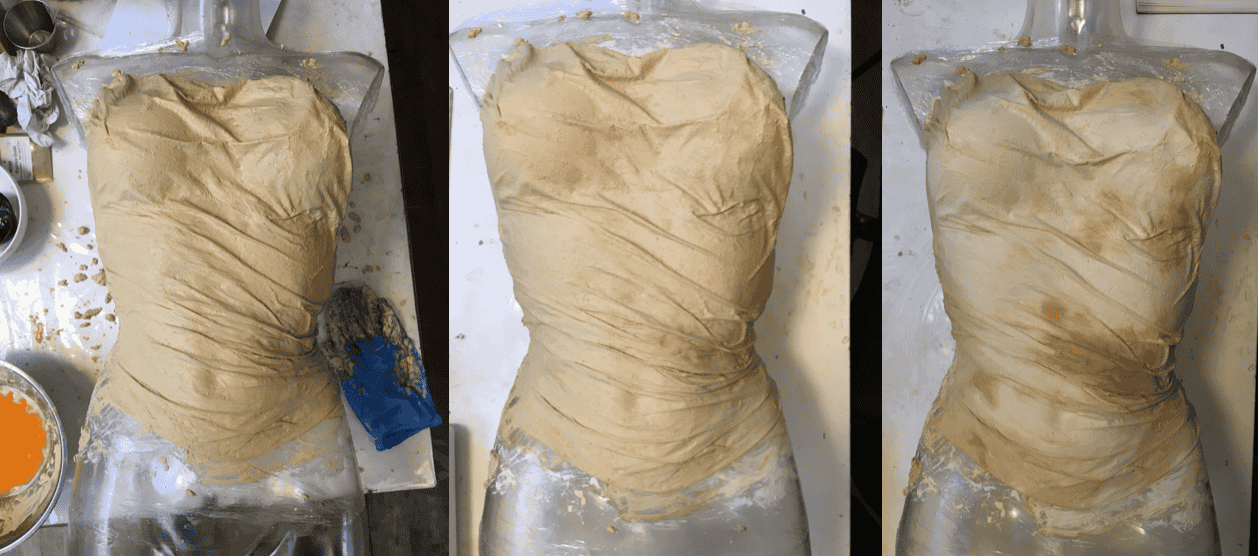
P L E A T H E R
Leather Moulding Recipe

- Pour boilding water into bowl + cool down to 85 degrees C
- Mix 5 tablespoons of Baking Soda + stir till dissolved
- Put leather in water and leave for 30 minutes (until soft, time varies between thickness and types)
- Take leather out and shake off water
- Place leather on surface / mould and press down, stretch it, nail it, massage etc until it takes shape.
- Once dry, cover inside with PVA glue or Polycell Deep Gap Polyfilla to harden more

Note:
- Sharp edges can be formed with the blunt side of a table knife
- Use a blow dryer to make the leather shrink in and solidify over the object
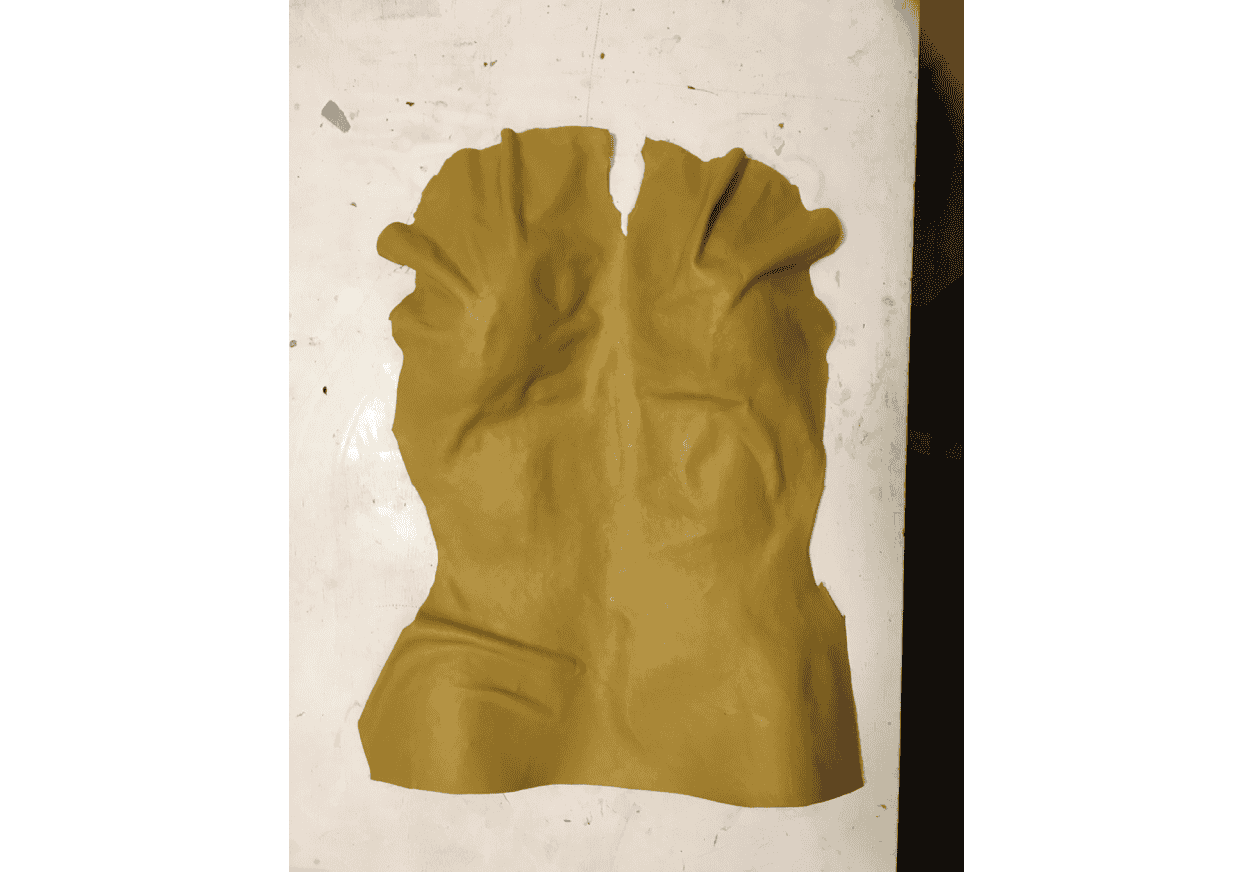
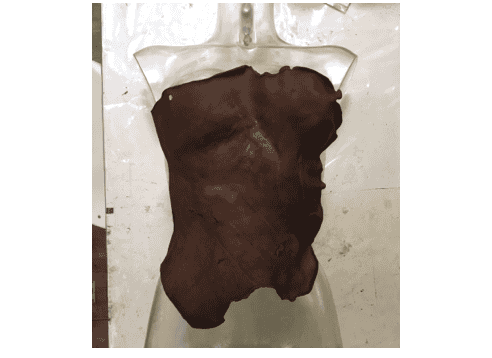
Test 1 = Pleather & Leather Moulding
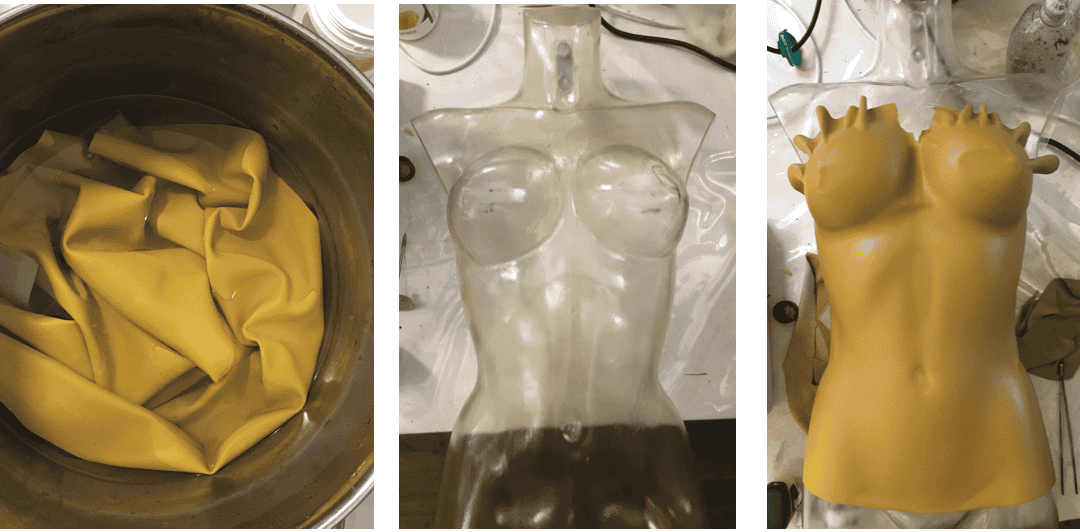
Result = Pleather moulded well with the technique, however sadly, it did not keep the shape.
Test 2 = Pleather & PVA, Tapioca Starch mixture
Wet drapery a technique used in sculpture in the Classical and Hellenistic periods.
It consists of the material to appear to cling to the body like a wet cloth.
The folds articulate the human figure in a sinuous and rhythmical way, which results in a decorative effect.
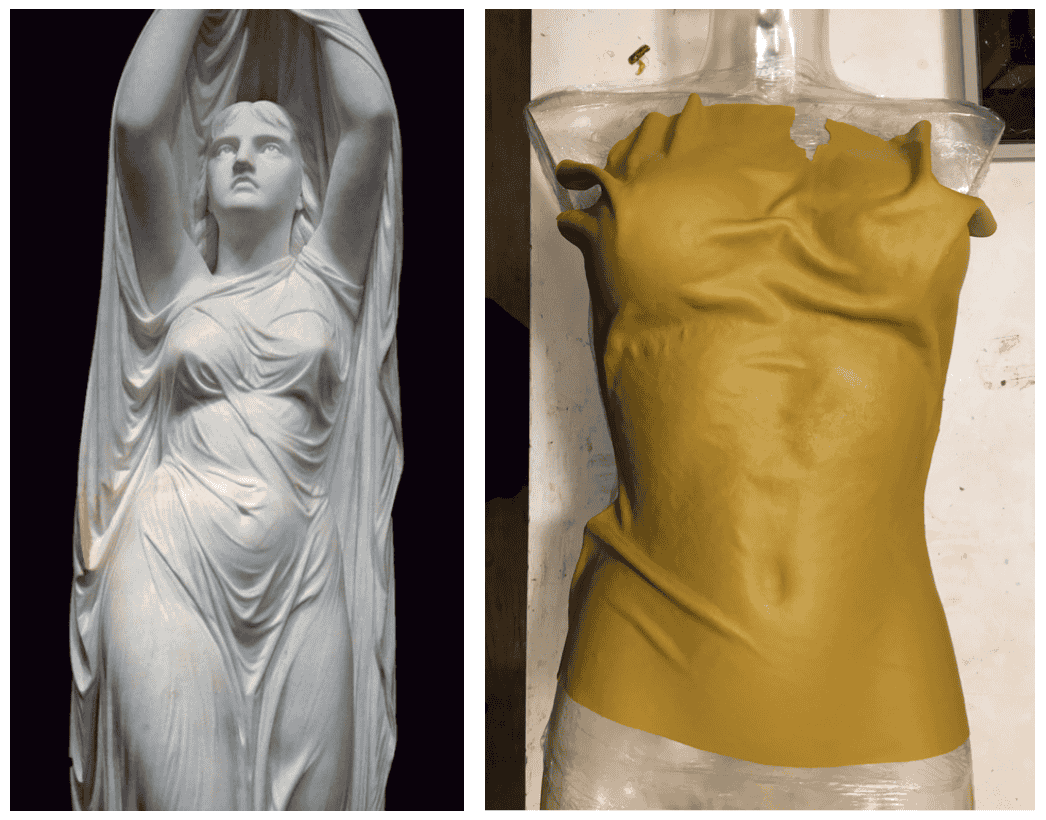
1 _ Undine Rising from the Waters by Chauncey Bradley Ives (1810–1894)
2 __ My interpretation using faux leather
Result = More stiff then the previous test, however still not keeping shape as well as I want
P L A S T E R
Using plaster mix with water small bit at a time until it is a right consistency (still working out the ratio)
L E A T H E R
Finally I got some real leather to test the difference from Leatherlands
After some research I found that Vegetable-Tanned Leather was the best to mould
Vegetable-Tanned Leather "The darling of the leather world. It's receptive to both water and heat but can darken when exposed to these elements" Leather Stiffen Guide
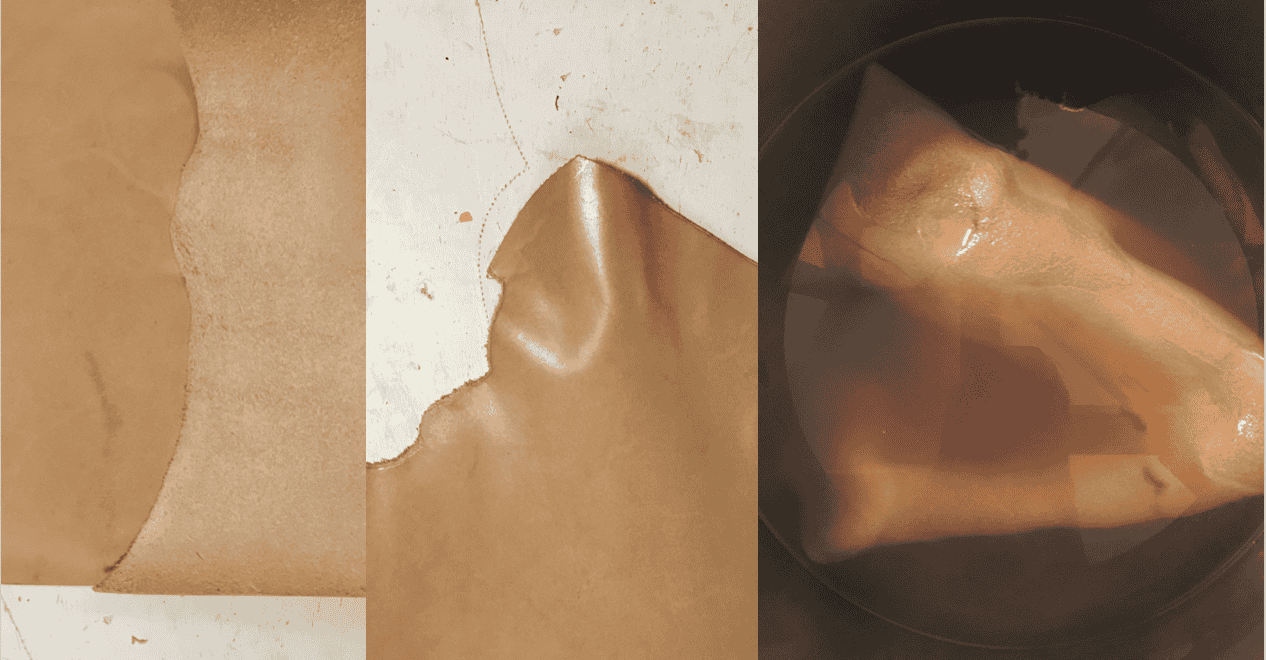
Vegetable-Tanned Leather originally and in water bath.
P R O C E S S
Once I took the leather out of the bath, it had gotten very brittle, hard and not as malleable as I thought.
It had also shrunk quite a lot + darkened in colour.
Hot water soaking = "brief rendezvous with the hot water. Gently submerge the leather piece, ensuring it's fully immersed. Let it soak for a short duration of 30 seconds to a minute"
Leather says no
C O N C L U S I O N
This week I found the aspect of shaping the material onto the moulds challenging.
What I learnt:
RESPECT THE MATERIAL!
I have always been a fan of pushing materials to the limit and past their boundary, however sometimes materials will not always do what you want.
Sometimes it is best to listen to the material & utilise its strengths, not weaknesses.
Nearly all of the time, the material behaved differently to what I thought it would do
With this, it is good to make many initial tests / experiments
F U T U R E
I would like to further look at more possibilities to make a Sculpted Corset
Some potenial material trials could be
-
Resin coating on fabric (faux leather?)
-
Further explore Bio Materials (something stiff yet flexible)
-
Leather again (cooler temperature)
I would also like to further explore Heat with moulds
-
Heating and shaping fabric using heat (e.g. heatgun)
-
Origami moulds with fabric in the oven at 160 - 200 degrees for 15 - 20 minutes
-
Wood moulds (hats blocks?) - absorbs more
F A B R I C A T I O N _ F I L E S
-
3D Truchet Tile Available to download ↩