7. C O M P _ C O U T U R E
C O M P U T A T I O N A L _ C O U T U R E
I N S P I R A T I O N
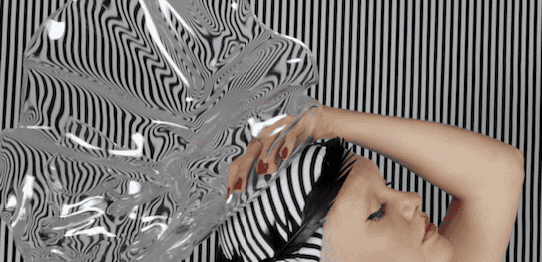
I find the combinatation of organic lines and geometric shapes very inspiring.
I have used this in some way in my work throughout the years
The Seduction of Curves: The Lines of Beauty that Connect Mathematics, Art, and the Nude
Book by Allan McRobie

Sometimes one is subconsciously inspired:
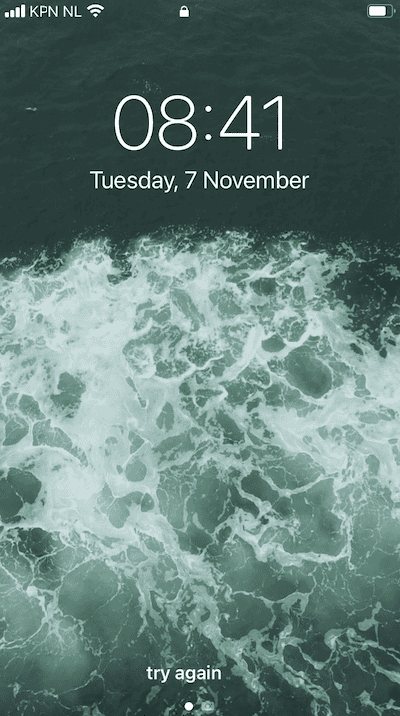
The screensaver on my phone, which is an aerial view of the waves moving in the sea
R E S E A R C H
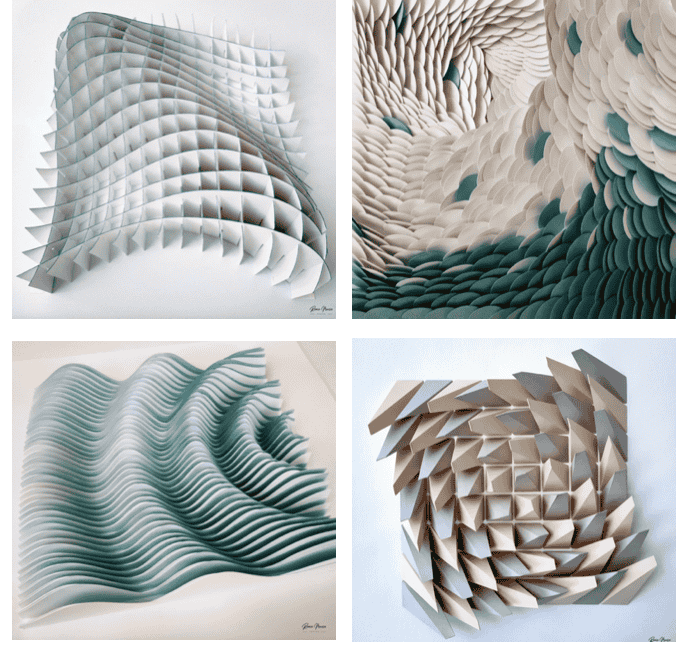
Rania Mousa a designer creating paper artwork by repeating patterns. Inspired by geometry, origami and parametric design, she transforms sheets of paper into handmade three-dimensional framed installations.
P A R A M E T R I C
“Parametric” comes from the input parameters, which constrain the design. The basic idea is that an adjustment of one of the design constraints or conditions, leads to an instantaneous change in the building model. This is what industry-leading software can accomplish at the moment, a building plan which instantly refreshes and re-designs when a parameter (such as building height) is adjusted.
Definition comes from omart website
Design can become parametric by changing
-
Bounding Object (e.g rectangular prisim changes shape; changes accordingly)
-
Density
Pseudo Code:
What is the shape?
How will it change?
What the relations could be?
Change accordinly to material.
Change something = all changes together
P R E V I O U S _ W O R K
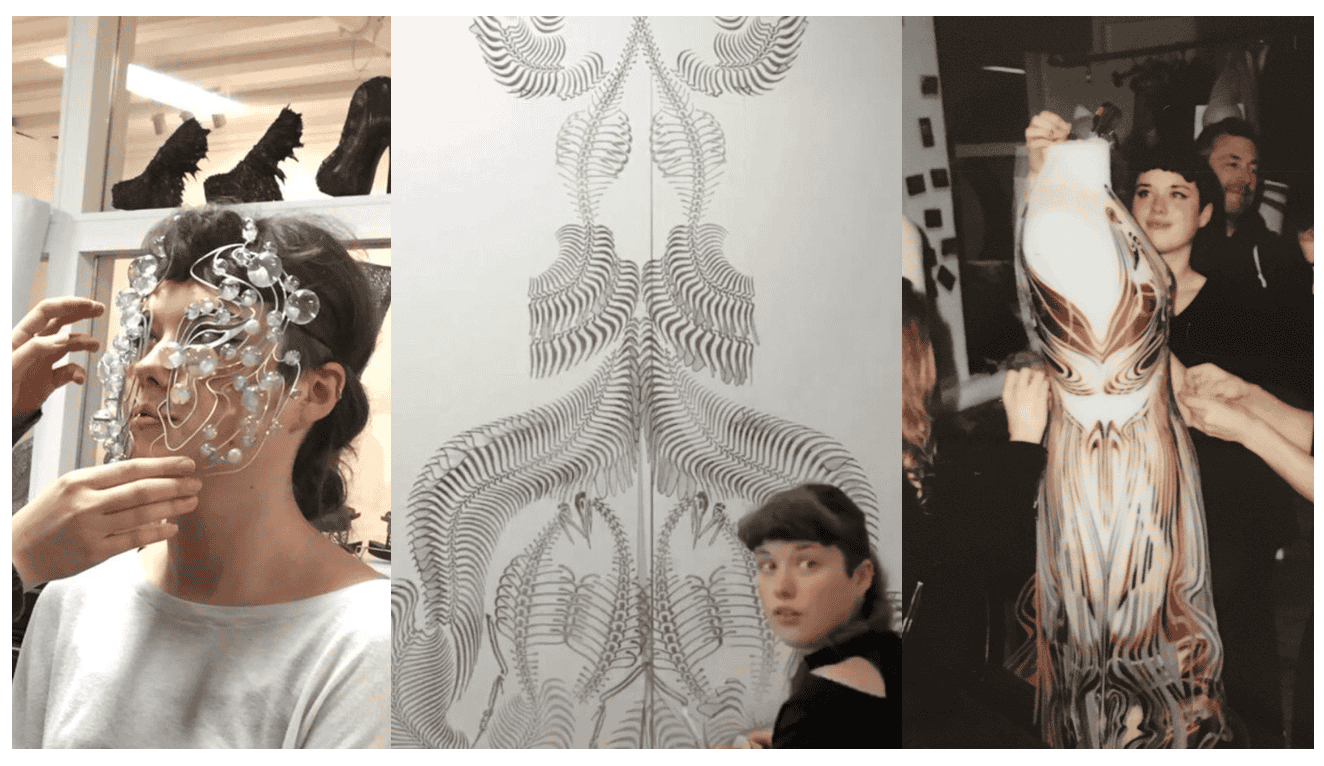
IRIS VAN HERPEN
Atelier Intern 2019-2020
Dazzle & Deceive, 2018
Perspex hat shaped with heatgun to interact with background and change it
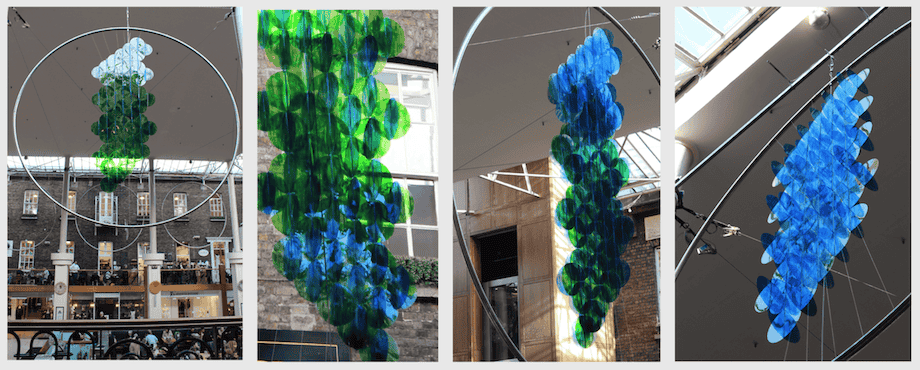
POWERSCOURT EXHIBITION
Perspex and window paint 4 meter installation
Exhibited in Powerscourt Shopping centre, Dublin, 2016
Observe colour change: straight on it looks green and from the side blue
I D E A S
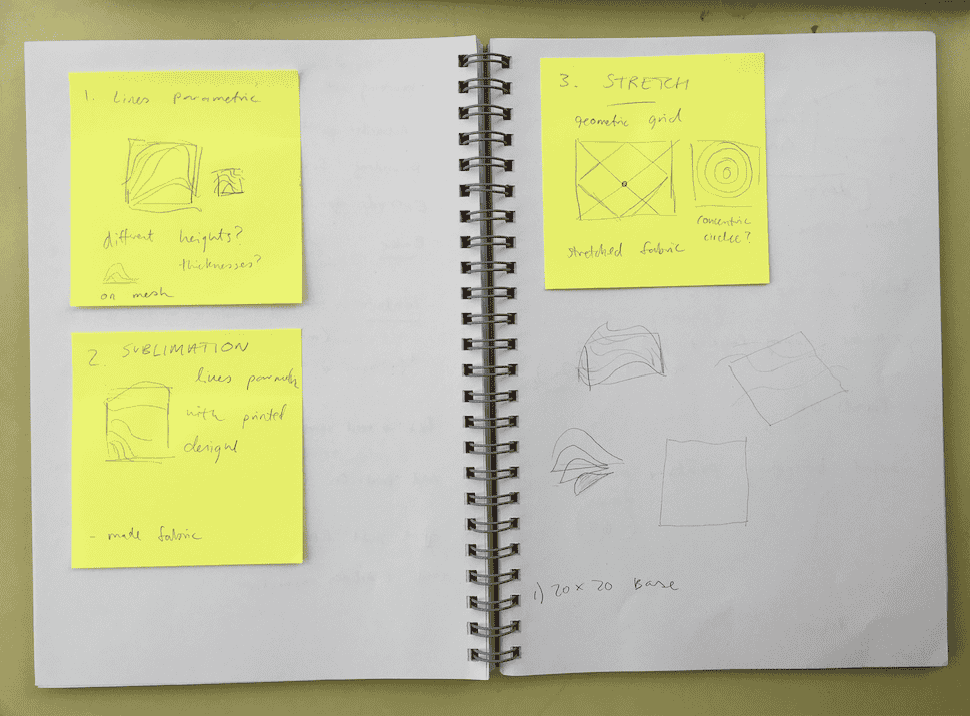
Initial ideas and interests
-
Lines Parametric design (two curved lines initially and filling the gap with more lines).
Can change the amount of lines? Different heights + thickness?
Printed on mesh fabric.
Lenticular, change colour/tone? -
Sublimation (paper, so that filament on bed can pick up design)
-
Stretch (3d printing onto stretched fabric) Geometric grid, concentric circle design
S O F T W A R E
3 D _ S L I C I N G _ S O F T W A R E
P L U G I N S
Food 4 Rhino Downloadable plugins / apps for Rhino
Grasshopper Docs Grasshopper Addons and Plugins
T U T O R I A L S
Rhino Learn Mini video tutorials on Rhino and Grasshopper
Grasshopper getting started Grasshopper Getting Started By David Rutten (creator of grasshopper)
E X T R A S
Thingiverse Open source 3D printable files
Waag FabLab Information on 3D printers in lab + how to use them.
Marlin G-code Index
3D Printing on Fabric Guide Design for Additive Manufacturing for 3D Printing on Fabric for Designers
M A T E R I A L S
Prusa 3D Contents: 3D printers, Materials, Parts & Accessories, Software, 3D Models, Applications, Community, Help, Academy, Blog, Company.
3D JAKE 3D Printers, Spare Parts and upgrades, Filament, Resin, Accessories.
3 D _ P R I N T E R
File Preparation for 3D printing:

1. Export 3d file as STL or OBJ

2. Import the file to your preferred slicer software

3. Choose printer by going to printer settings and selecting intended printer

4. Choose print & filament settings

5. Slice in chosen program

6. Save gcode file to the SD card
How to maintain and use:
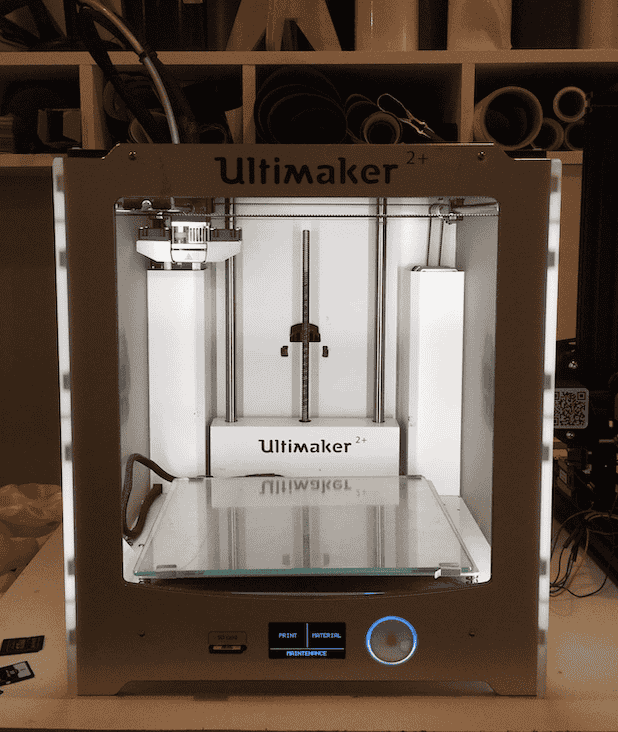
UltiMaker 2+
-
Turn on (button at back side)
-
Clean the glass bed (with glass cleaning spray and a paper towel).
-
Cut filament at 45 degree angle (using pliers)
-
Insert filament at back (keep spool in same direction). Using the white button, click forward material, then click ready once it is forwarded all the way through.
-
Select the type of material that you’re using by going to material > settings.
-
Insert the SD card with your sliced file into the slot in front of the machine, click Print then choose the file you want to print Then click ready to start.
-
When finished, unload filament and place it back in plastic bag and box
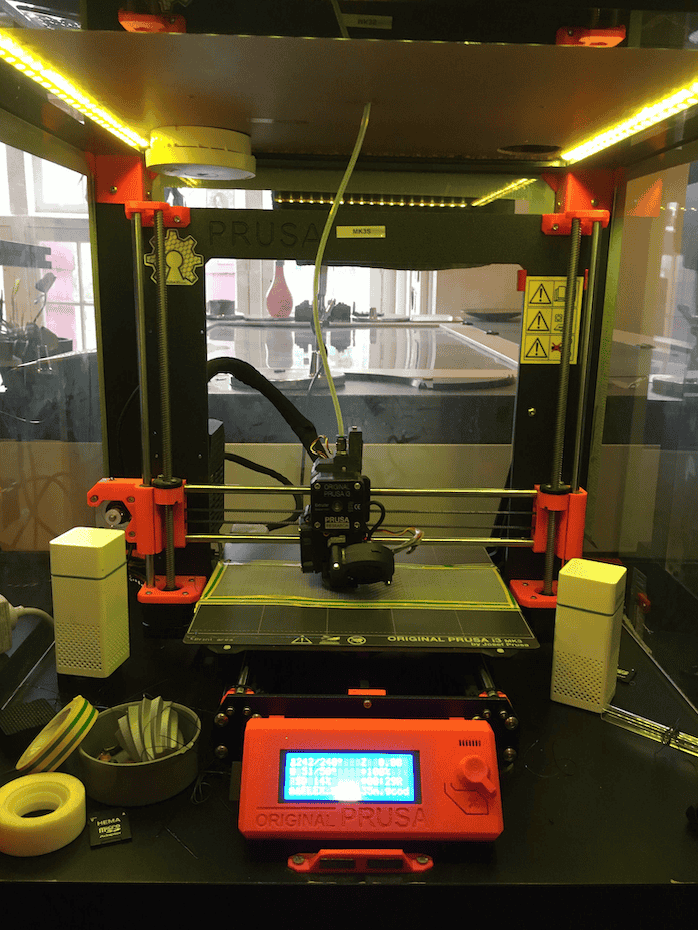
Prusa i3 MK3
-
Turn on (button at back)
-
Cut filament at 45 degree angle (using pliers)
-
Load Filament (push filament as far as it will go + keeping it veritcally straignt from spool helps load + ensure roll is placed so that it comes from above) + select type of filament
-
Select type of filament, Press “No” until the right color of filament is coming out of the nozzle. Press “Yes” when the right filament color comes out of the nozzle.
-
Clean bed (using window cleaner and paper towel) + remove old filament from the print-bed.
-
Insert SD card (goes in upside down) + select file and start printing
-
When finished, unload filament and place it back in plastic bag and box
See Prusa website
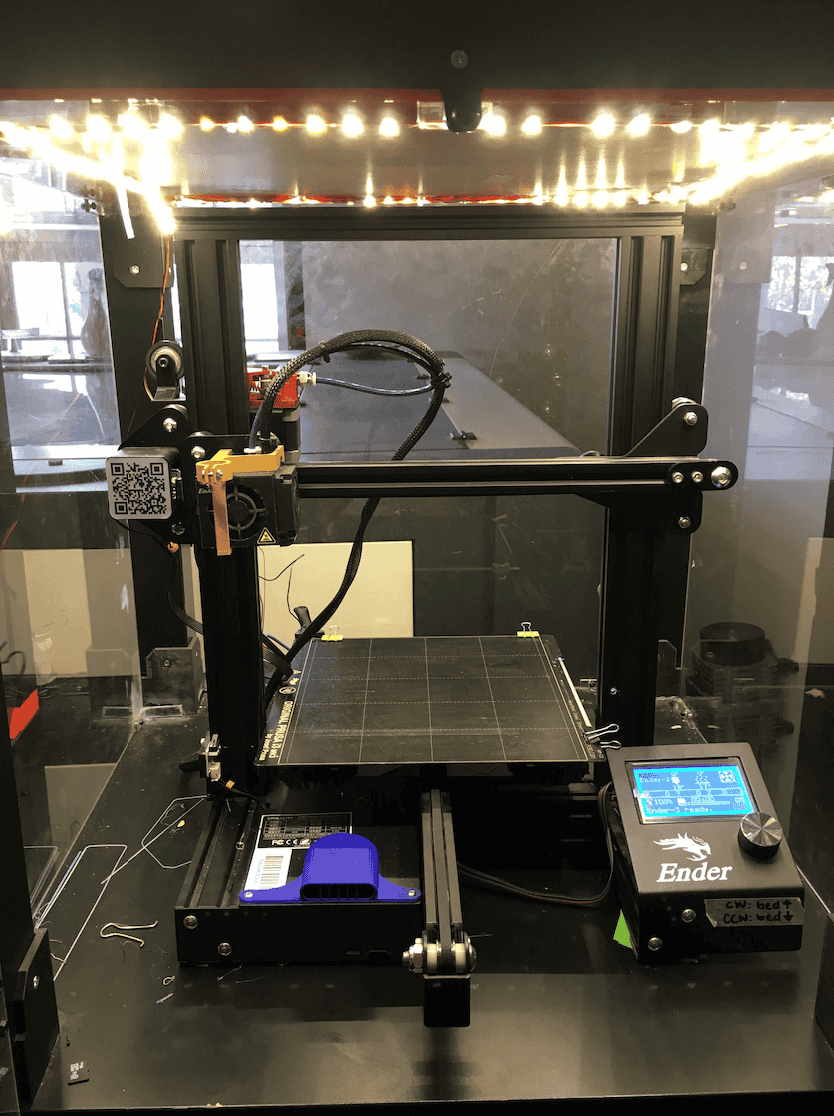
Creality Ender 3
-
Turn on the machine (button at back)
-
Insert micro SD with your file
-
Cut filament at 45 degree angle (using pliers)
-
From the menu you can change temperature, set the fan speed, load filament (extrude) and move the machine in all directions. Start by preheating for the filament that you’re going to use.
-
Load filament when at correct temperature. Easiest to first load the material manually as far as possible, and then use the menu to load the final centimeters. Pull the red lever towards the bed so you can feed the filament into the tube. The wheel in front is for better alignment with the extruder. When filament starts oozing out of the nozzle, you can continue to the next step.
-
Load your file and start printing.
-
When finished, unload filament and place it back in plastic bag and box
See further information on 3D printers at Waag/Fablab Amsterdam
E X P E R I M E N T
Class experiments to see process of FILE -> PRINT
| Design | Filament (thickness) | 3D printer | Material | Slicer |
|---|---|---|---|---|
| Infill pattern | Flexfill 98A (1.75mm) | Prusa | Tulle | Prusa Slicer |
| Design | Filament (thickness) | 3D printer | Material | Slicer |
|---|---|---|---|---|
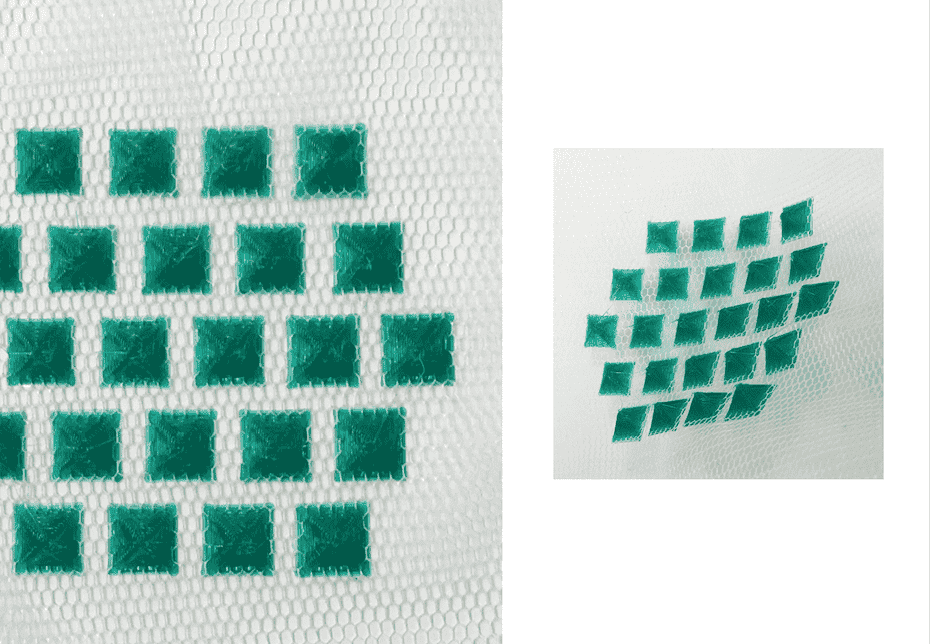
| Pyramids (thingiverse) | PLA (2.85mm) | UltiMaker | Tulle | UltiMaker Cura |
| Design | Filament (thickness) | 3D printer | Material | Slicer |
|---|---|---|---|---|
| Infill pattern | magicPLA (1.75mm) | Prusa | none | Prusa Slicer |
T E S T I N G
-
File, Slicing & procress of 3D printing
-
Filament (Flexfill 98A (1.75mm))
-
Material (leftover organza from my week03 project)
-
Holographic foil
Result & Conclusion
-
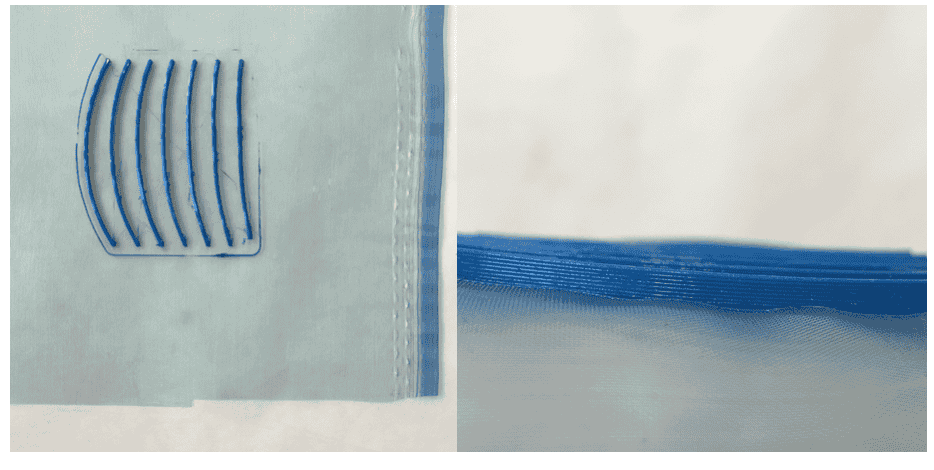
Flexfill 98A filament bonds well to fabric
-
Initially thought Holographic foil was very subtle, however I then realised I was using the wrong side
-
Eliminate skirt from design
-
Lines are about 3mm high, design could be made higher for added drama
Important notes
Pause printer after 2 layers (Tip: define early on where it finishes and starts new layer + be ready to pause printer!)
Place fabric taught but not stretched, so that it is perfectly flat on bed
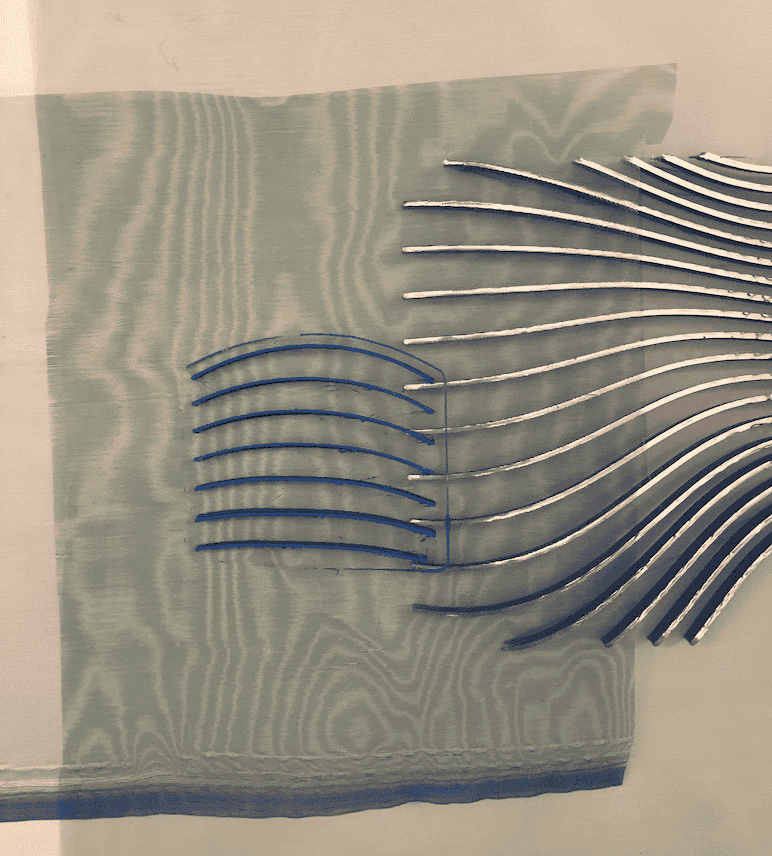
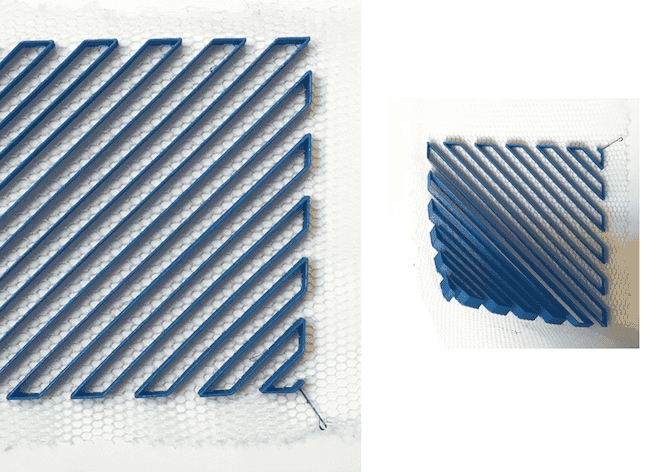
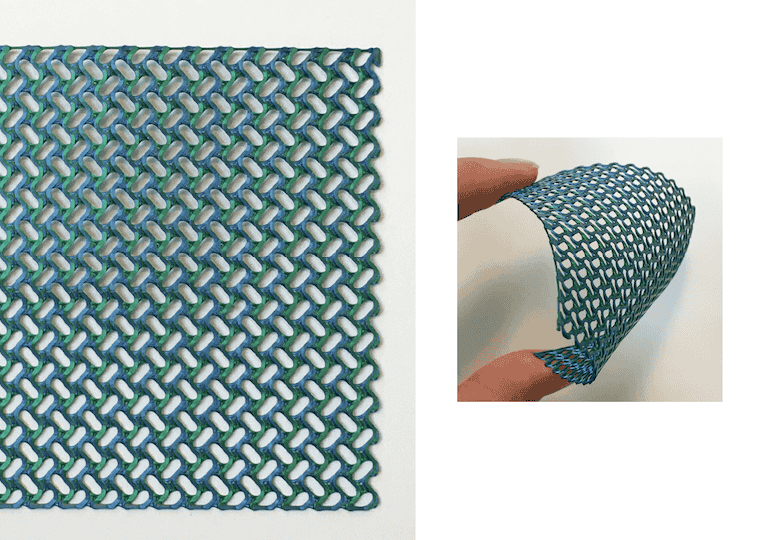
L I N E S
F I L E
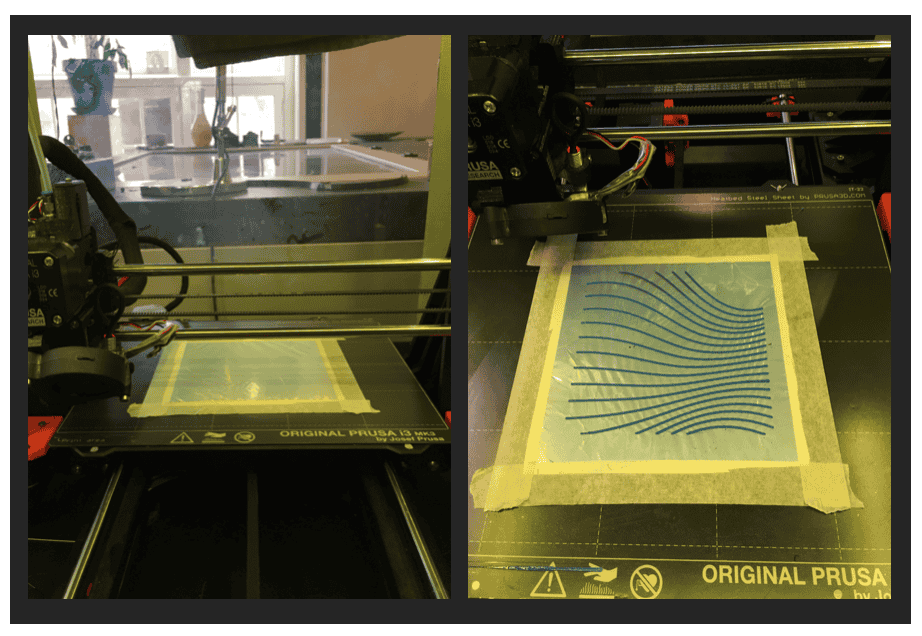
File designed in Rhino using two curved lines and then using Grasshopper to fill in curves inbetween them.
Can edit the number of lines/curves between them
To save printing time I selected a 100 x 100 mm section of the design

Original grasshopper algorithm changing the number of lines between them / thickness etc.
Later file was changed as the lines were not completely vertical, the grasshopper algorithm used is further down the page
Export STL/OBJ Rhino file
Bring in to Prusa Slicer + edit settings
Export as Gcode (.gcode) file
Put file on SD card + ready to print!
Lines STL file available to download in sketchfab link above 1
3D_ P R I N T I N G
| Design | Filament (thickness) | 3D printer | Material | Slicer | Print Time | Dimensions |
|---|---|---|---|---|---|---|
| Lines | Flexfill 98A (1.75mm) | Prusa | 2-Tone Organza + Foil | Prusa Slicer | 1 hour 36 mins | 100 x 100 mm |
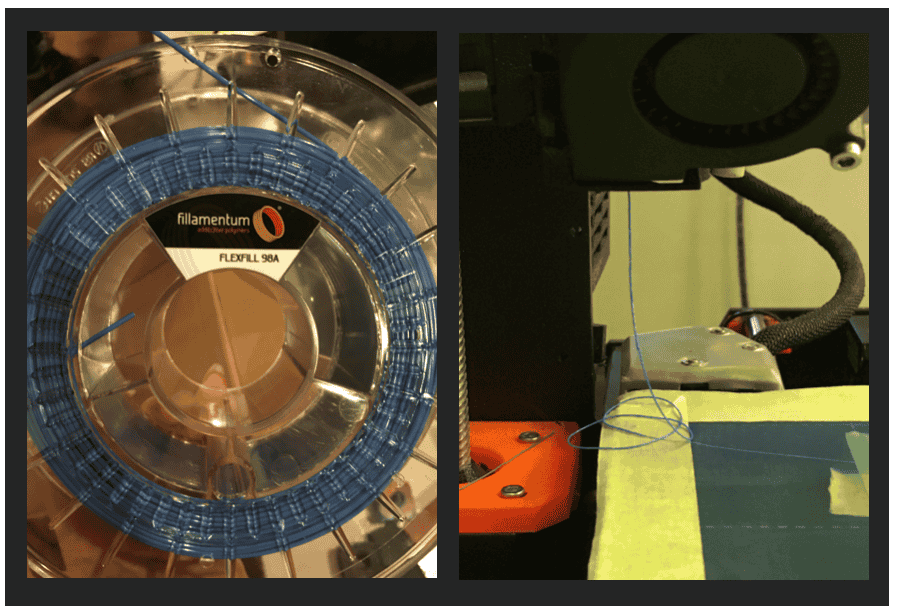
Step 1. Select filament + load

Step 2. Load until filament is extruding fully (be aware of filament oozing out at any stage)
Step 3. Place holographic foil perfectly flat on bed (using masking tape) in the area of printing

Step 4. Print first 2 layers and pause print
Step 5. Place material perfectly flat on top (using masking tape)

Step 6. Resume print
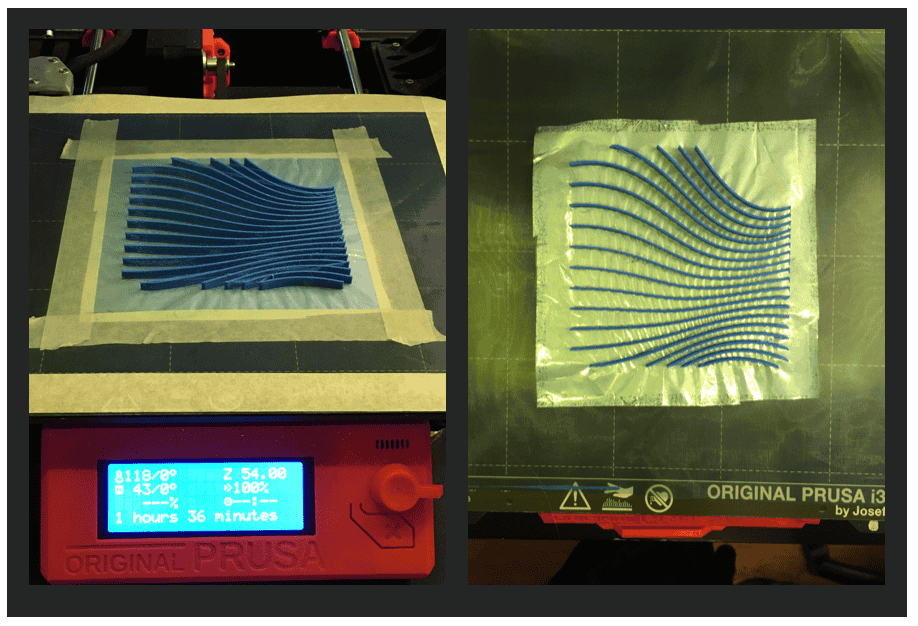
Step 7. Remove from bed
Holographic foil makes print very easy to remove from bed
R E S U L T


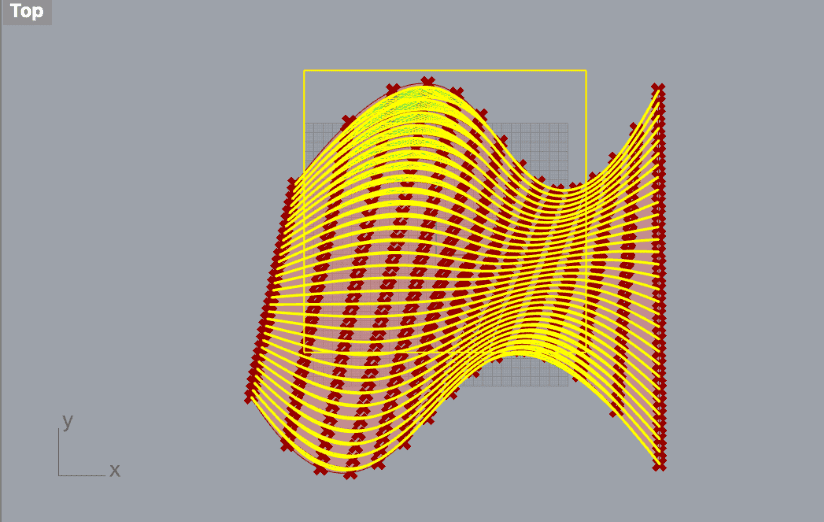
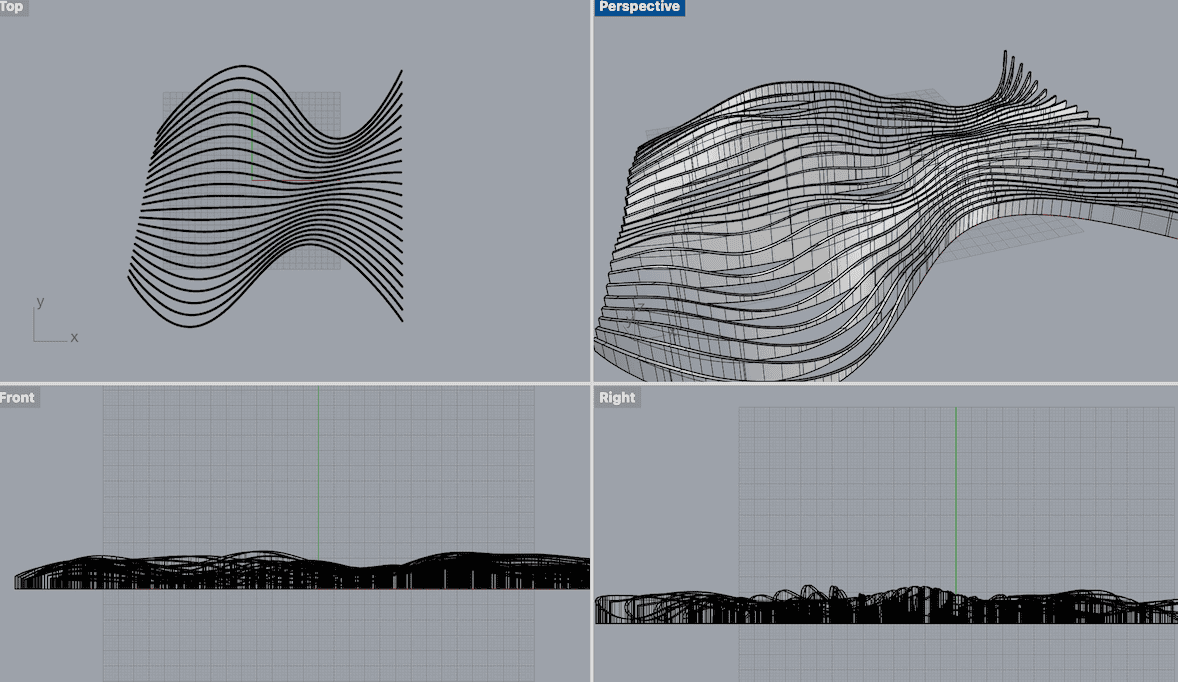
W A V E S
F I L E
Rhino + Grasshopper
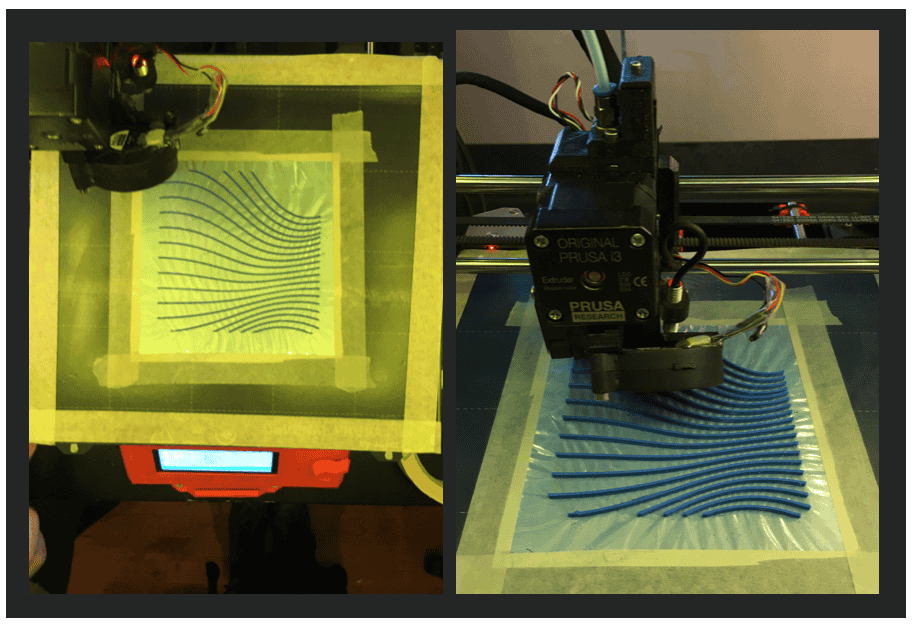
Building on previous design, I wanted something that had a varying depth to it
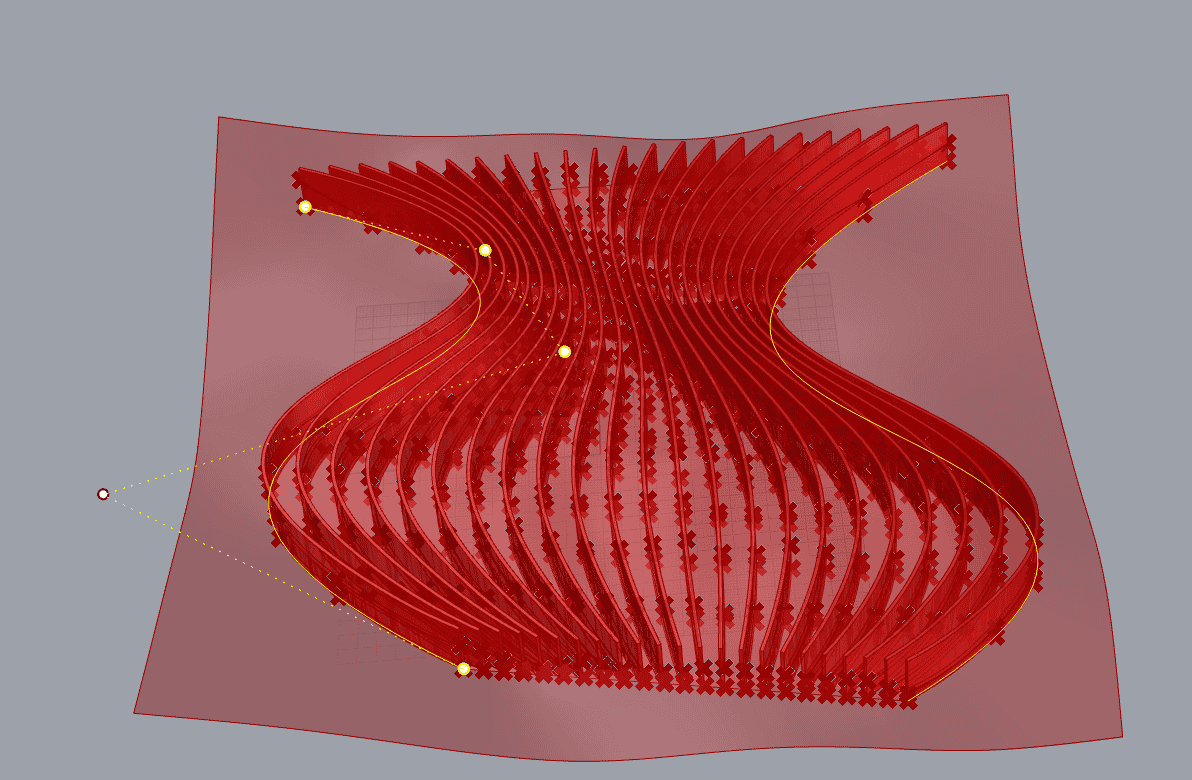
Rhino File available to download here 3
Grasshopper Algorithm
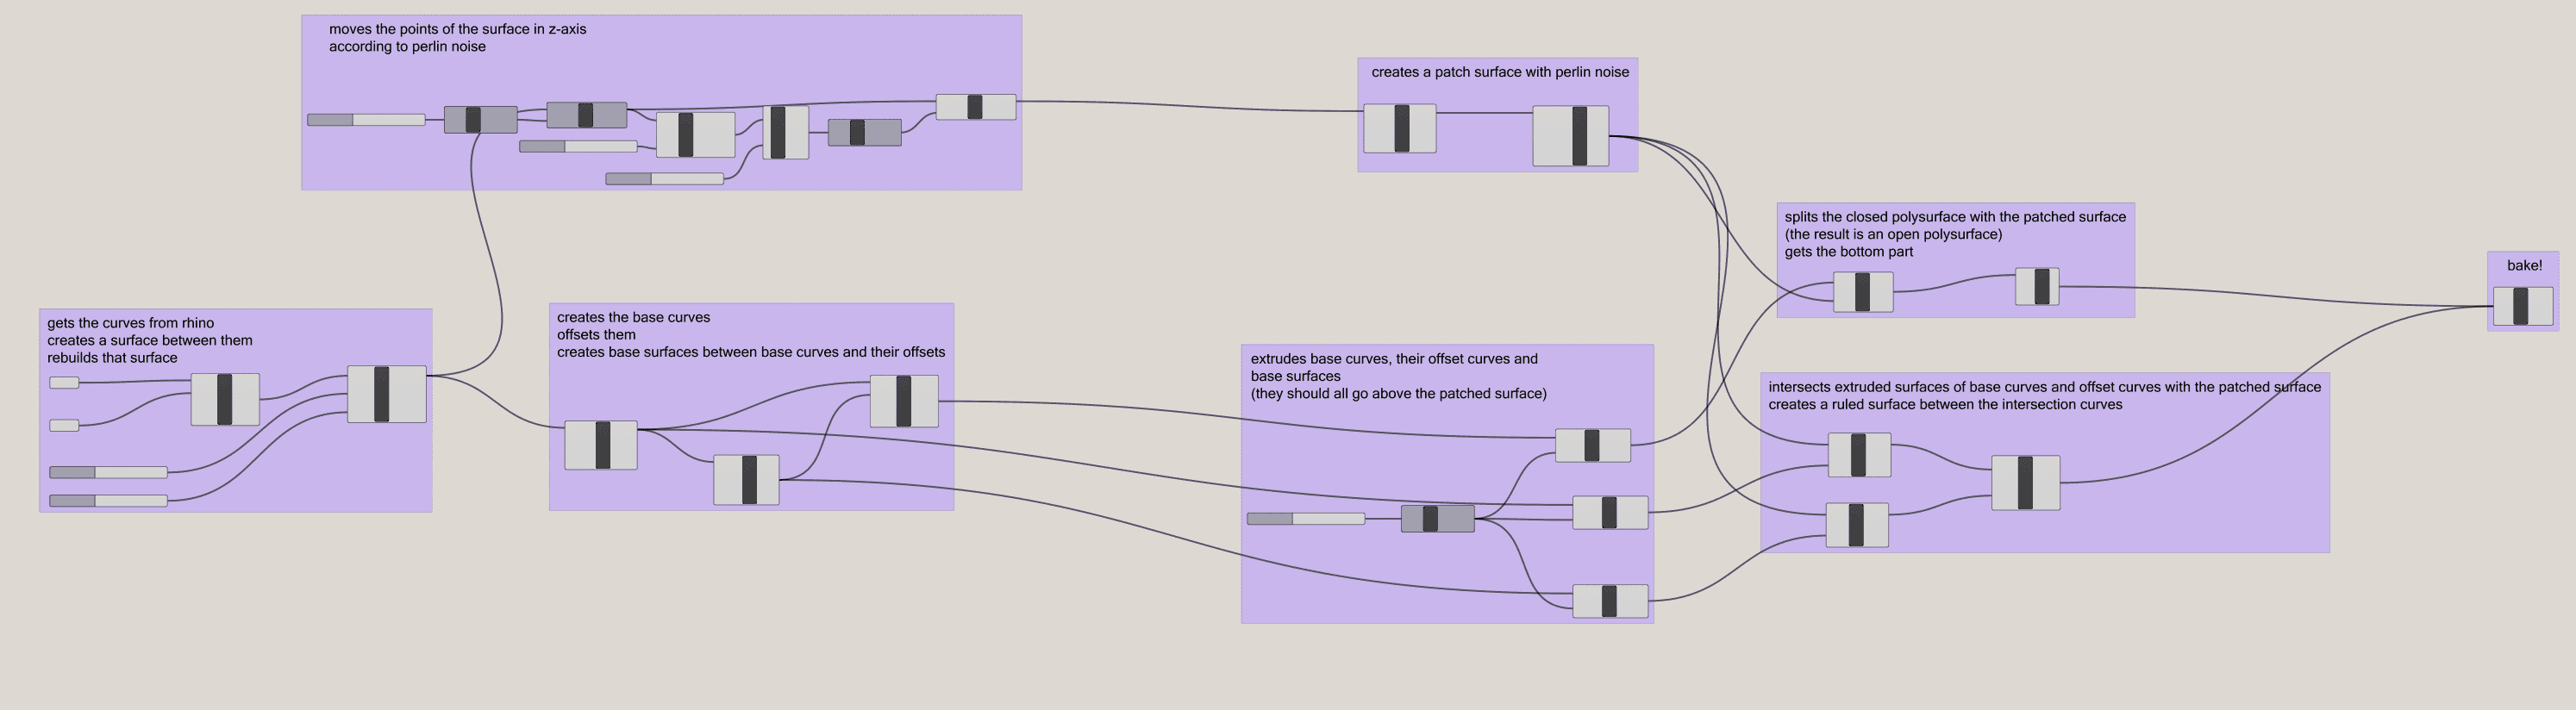
Huge thank you to Aslı Aydın Aksan for solving the various grasshopper conundrums + making most of the file!
Grasshopper File available to download here 4
Showing Grasshopper & Rhino parametric design using Remote Control Panel
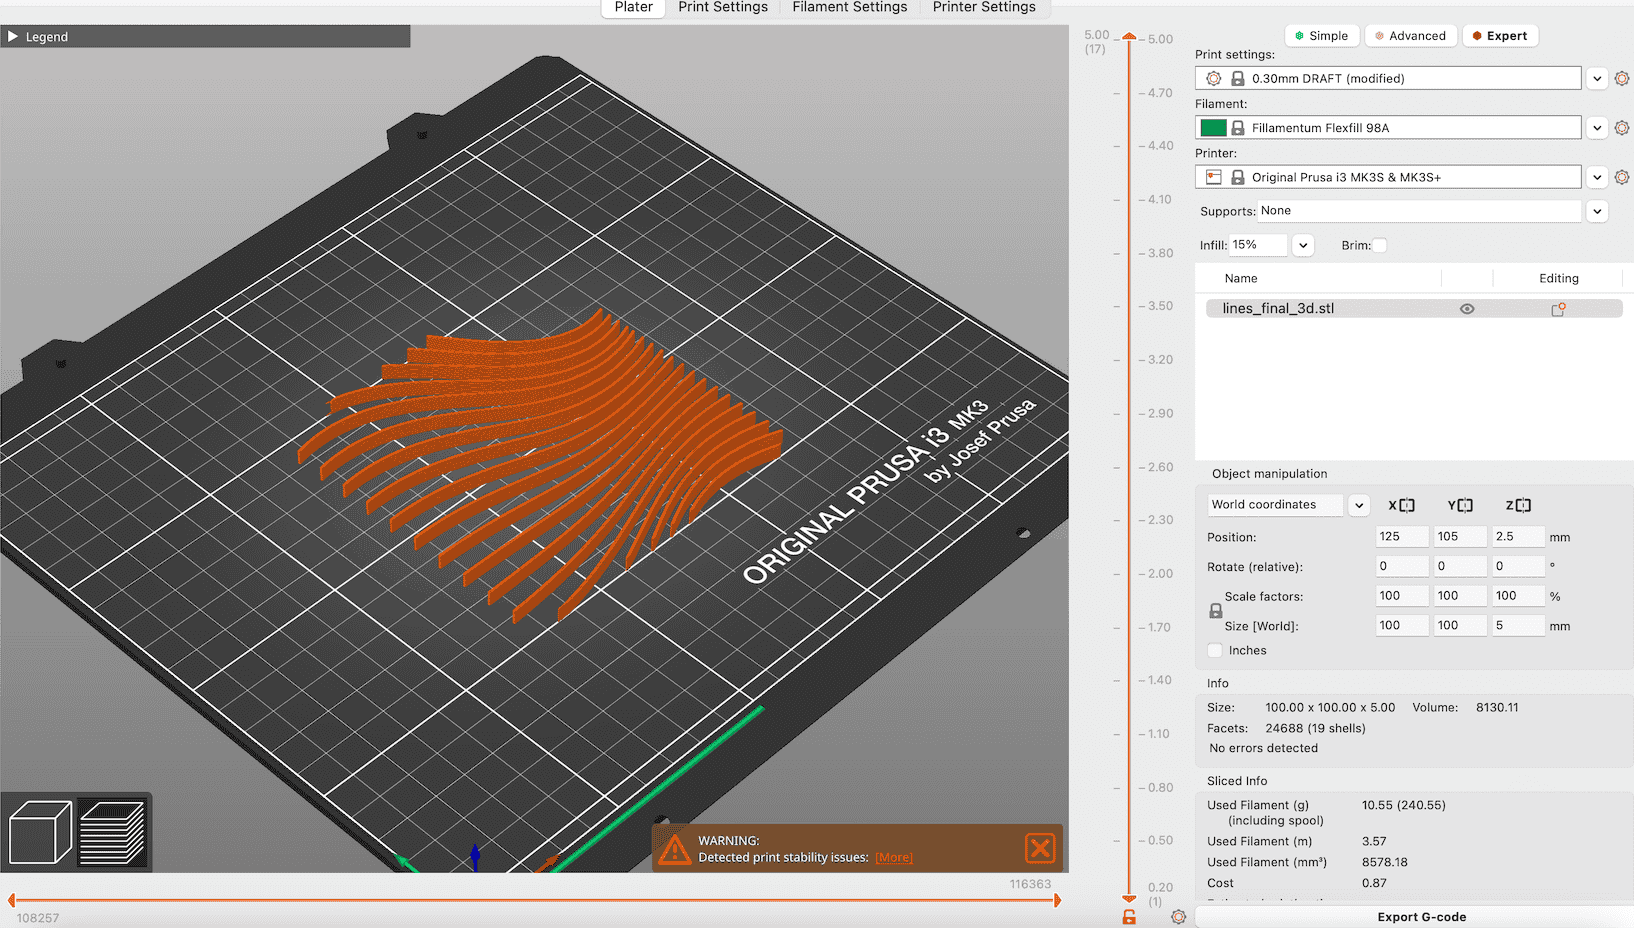
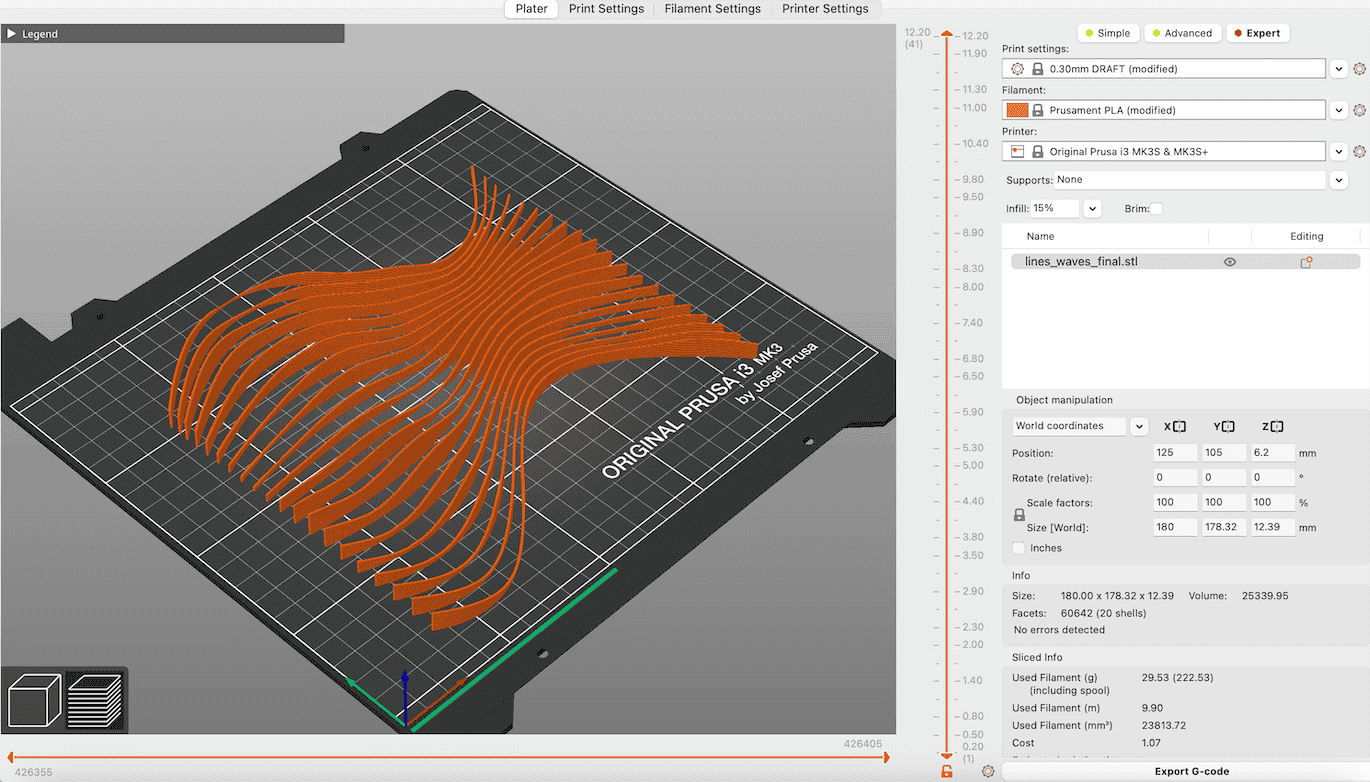
File in Prusa Slicer with settings I used (note: delete skirt layers)
Export Gcode + put on SD card + Print
Waves STL file available to download in sketchfab link above 2
3D _ P R I N T I N G
| Design | Filament (thickness) | 3D printer | Material | Slicer | Print Time | Dimensions |
|---|---|---|---|---|---|---|
| Waves | magicPLA (1.75mm) | Prusa | 2-Tone Organza | Prusa Slicer | 1 hour 43 mins | 200 x 200 mm |
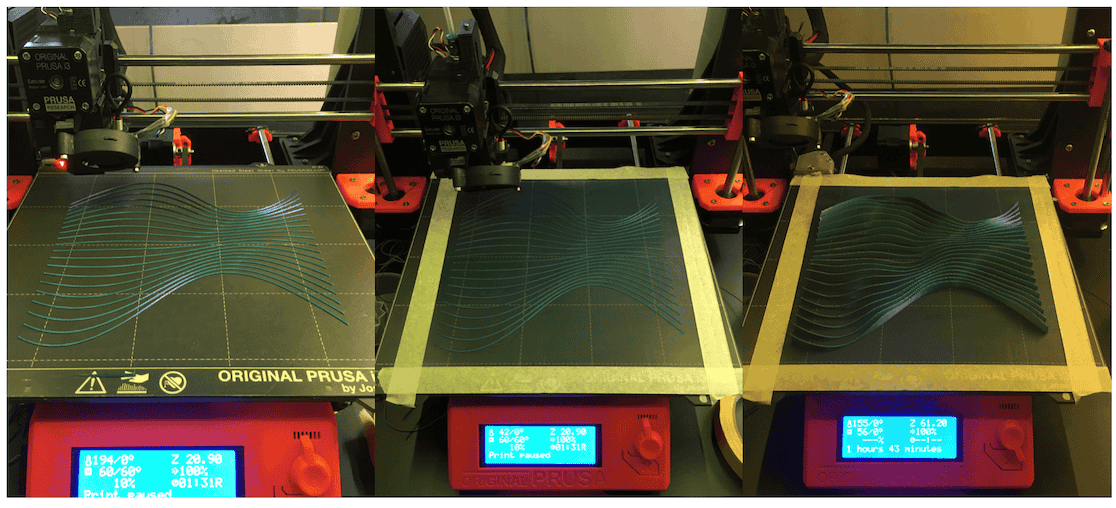
1. Print first two layers + pause
2. Place organza flat on top (using masking tape)
3. Resume print untill finished
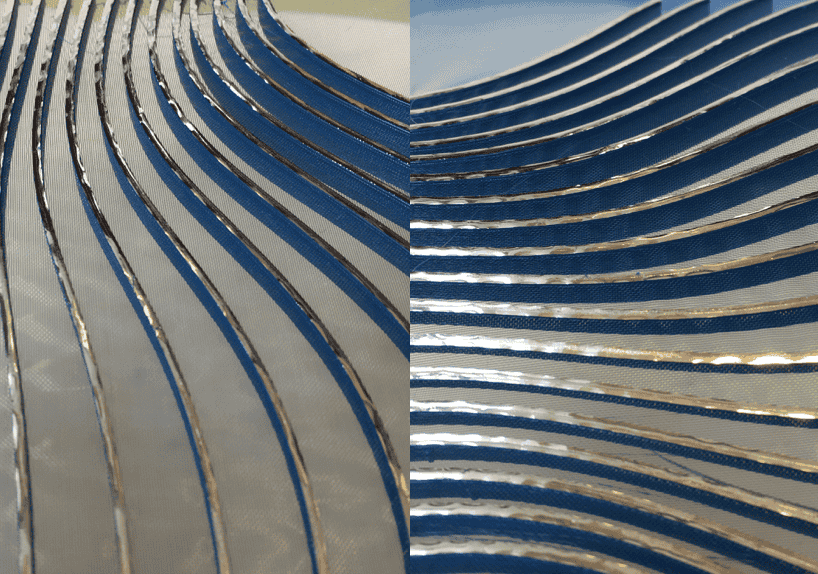
R E S U L T
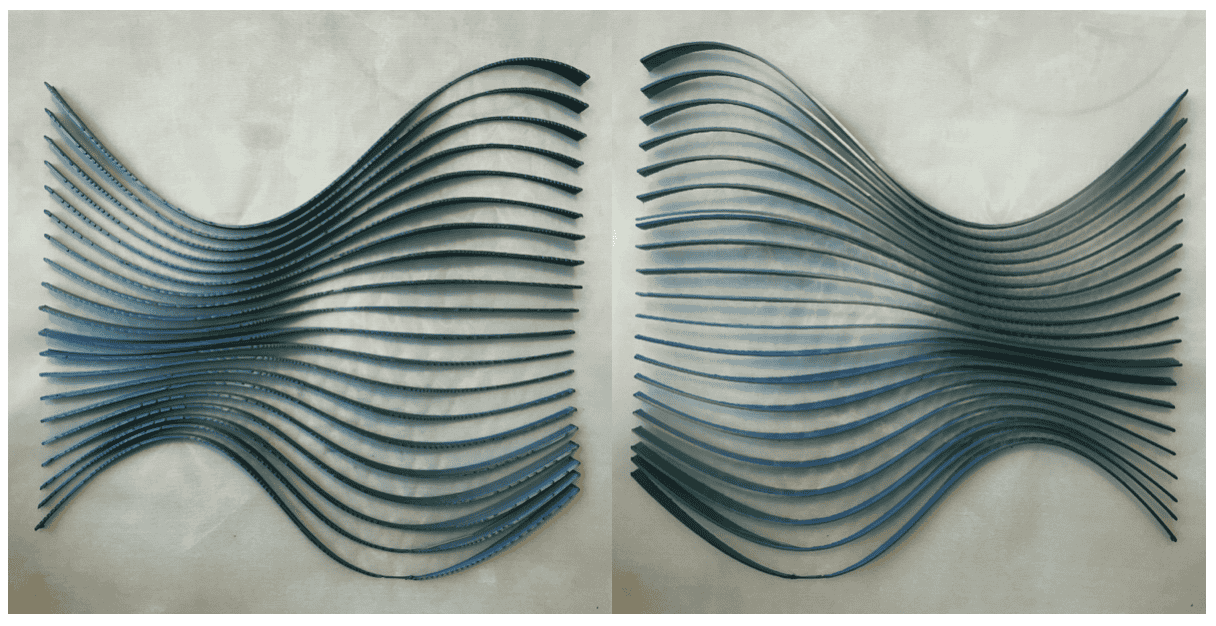
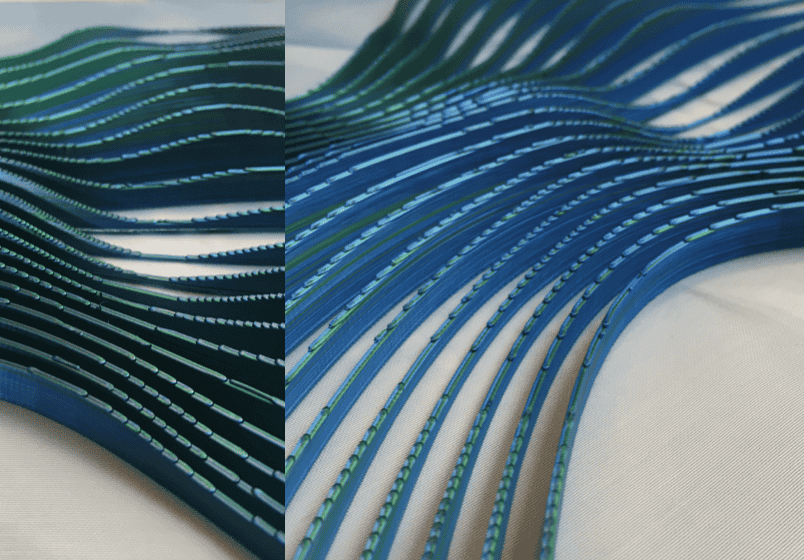
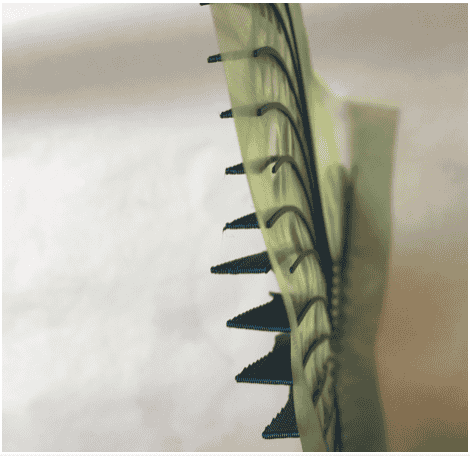
In some places the 2 back layers came apart from the front layers
Shows 2 tone of Filament
-
Step in layers giving a pixelated appearance
-
Two tone magic filament: temperature is higher then PLA so I changed settings in Slicer
-
Find stronger way to fuse back and front layers together
C O N C L U S I O N
-
I am very pleased with the result
-
Fabric moves more when the lines are more straight and less when there is a big curve
-
Foil (holographic) looks good and makes it much easier to take off the printer bed
-
Flexible filament = slower, PLA = faster
F U T U R E
-
Anatomy inspired, looking at human form
-
Layered fabirc (more layers of organza) moire pattern
-
Experiment with Sublimation paper + Transfer inks
-
Possibilities for full design