References
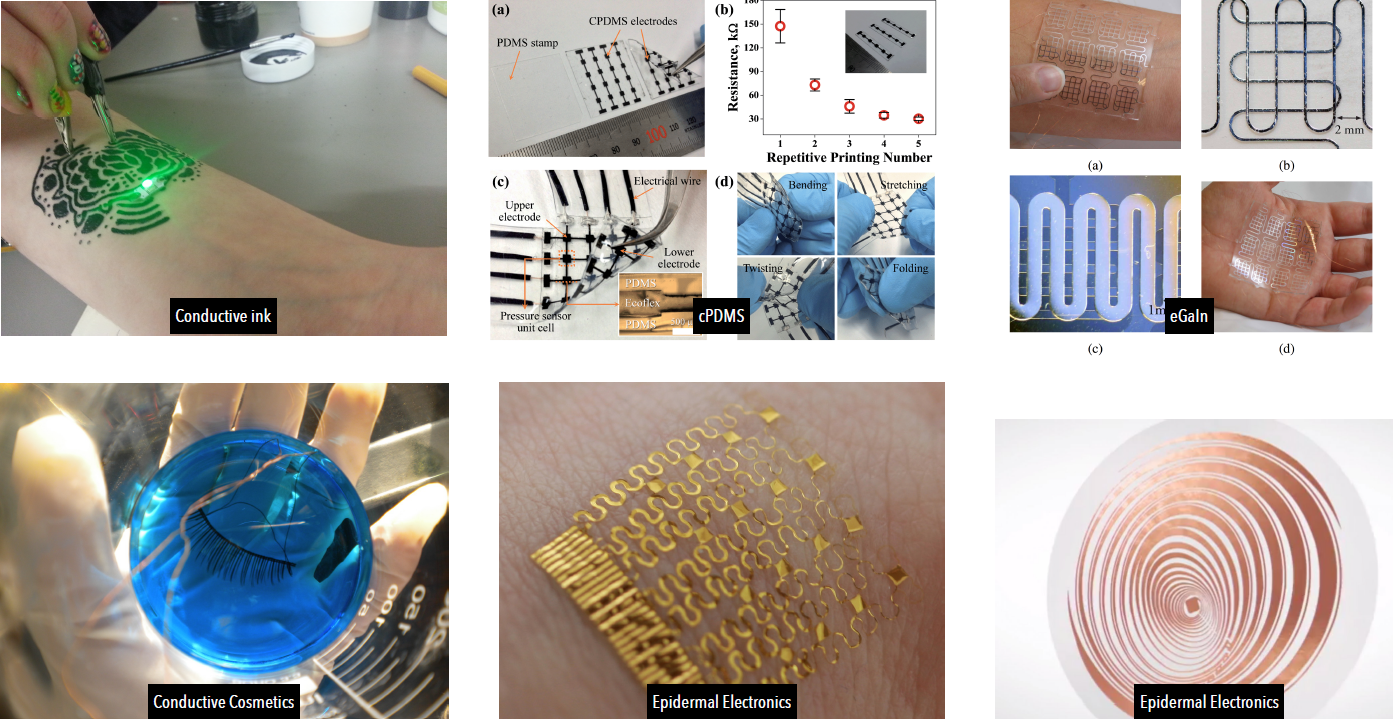
I was impressed with the quantity of projects that exist on this topic! It's still experimental, and I can imagine how hard it can be to sell this kind of design because of health and safety issues. For safety, the skin needs to be protected from the circuit. Here are some projects (among many others) that explore differents ways to make conductors close to the body. Nails, hair, skin as a display, cosmetics, tattoos, etc. can be a great way to start thinking about applications of these technologies. It is worth mentionning the wonderful work of our teacher Katia Vega with the conductive hair extentions, Hairware. That project lead to the design of the conductive eyelashes, that can control things by blinking.
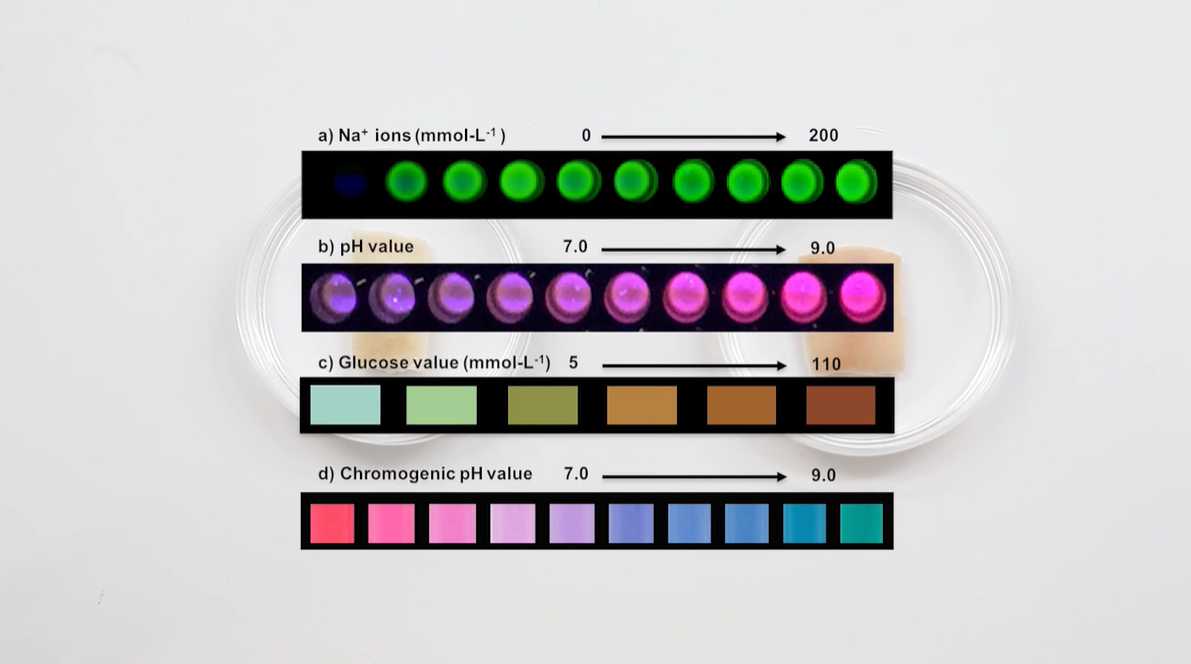
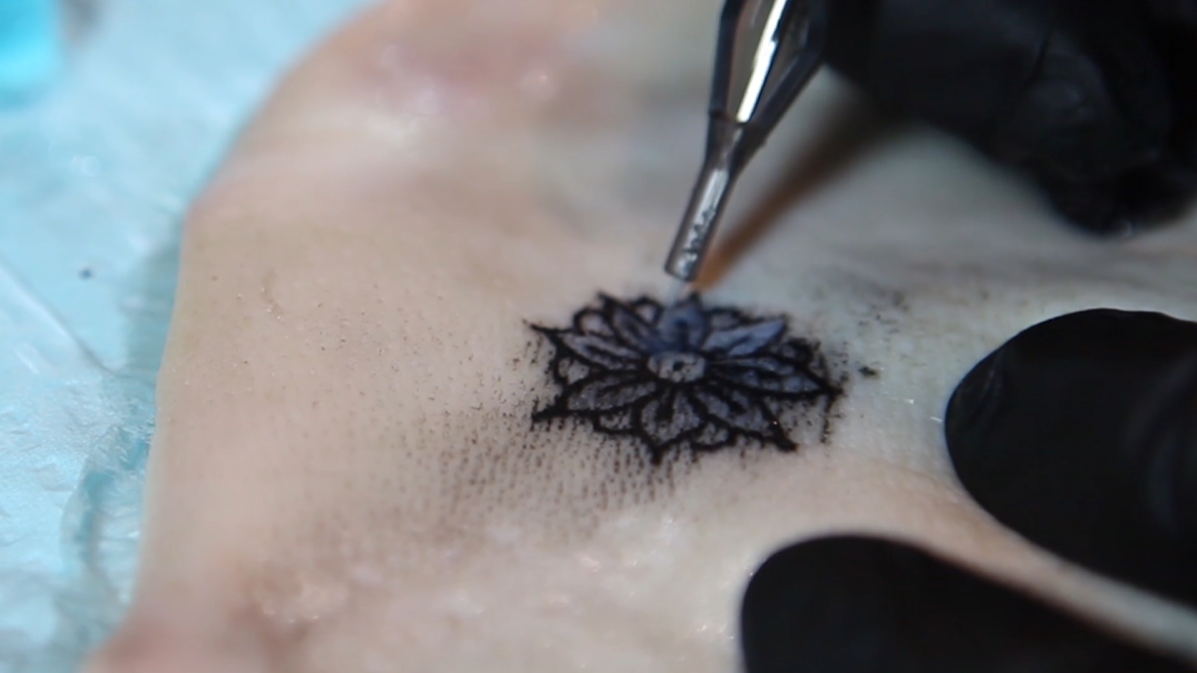
The Dermal Abyss
This project is definitely my favorite! The Dermal Abyss is actually a tattoo, designed with specific inks that can interact with the human body. Inks are made of biosensors; pH sensor, glucose sensor, and sodium sensors. The ink reacts with your body, changing color depending of what is in your blood. This can be a wonderful innovation for any diabetic person! The product is not in sale for now, The design team faced problems such as the color intensity, and toxicity of the inks.
Prototype
Paint Experiments
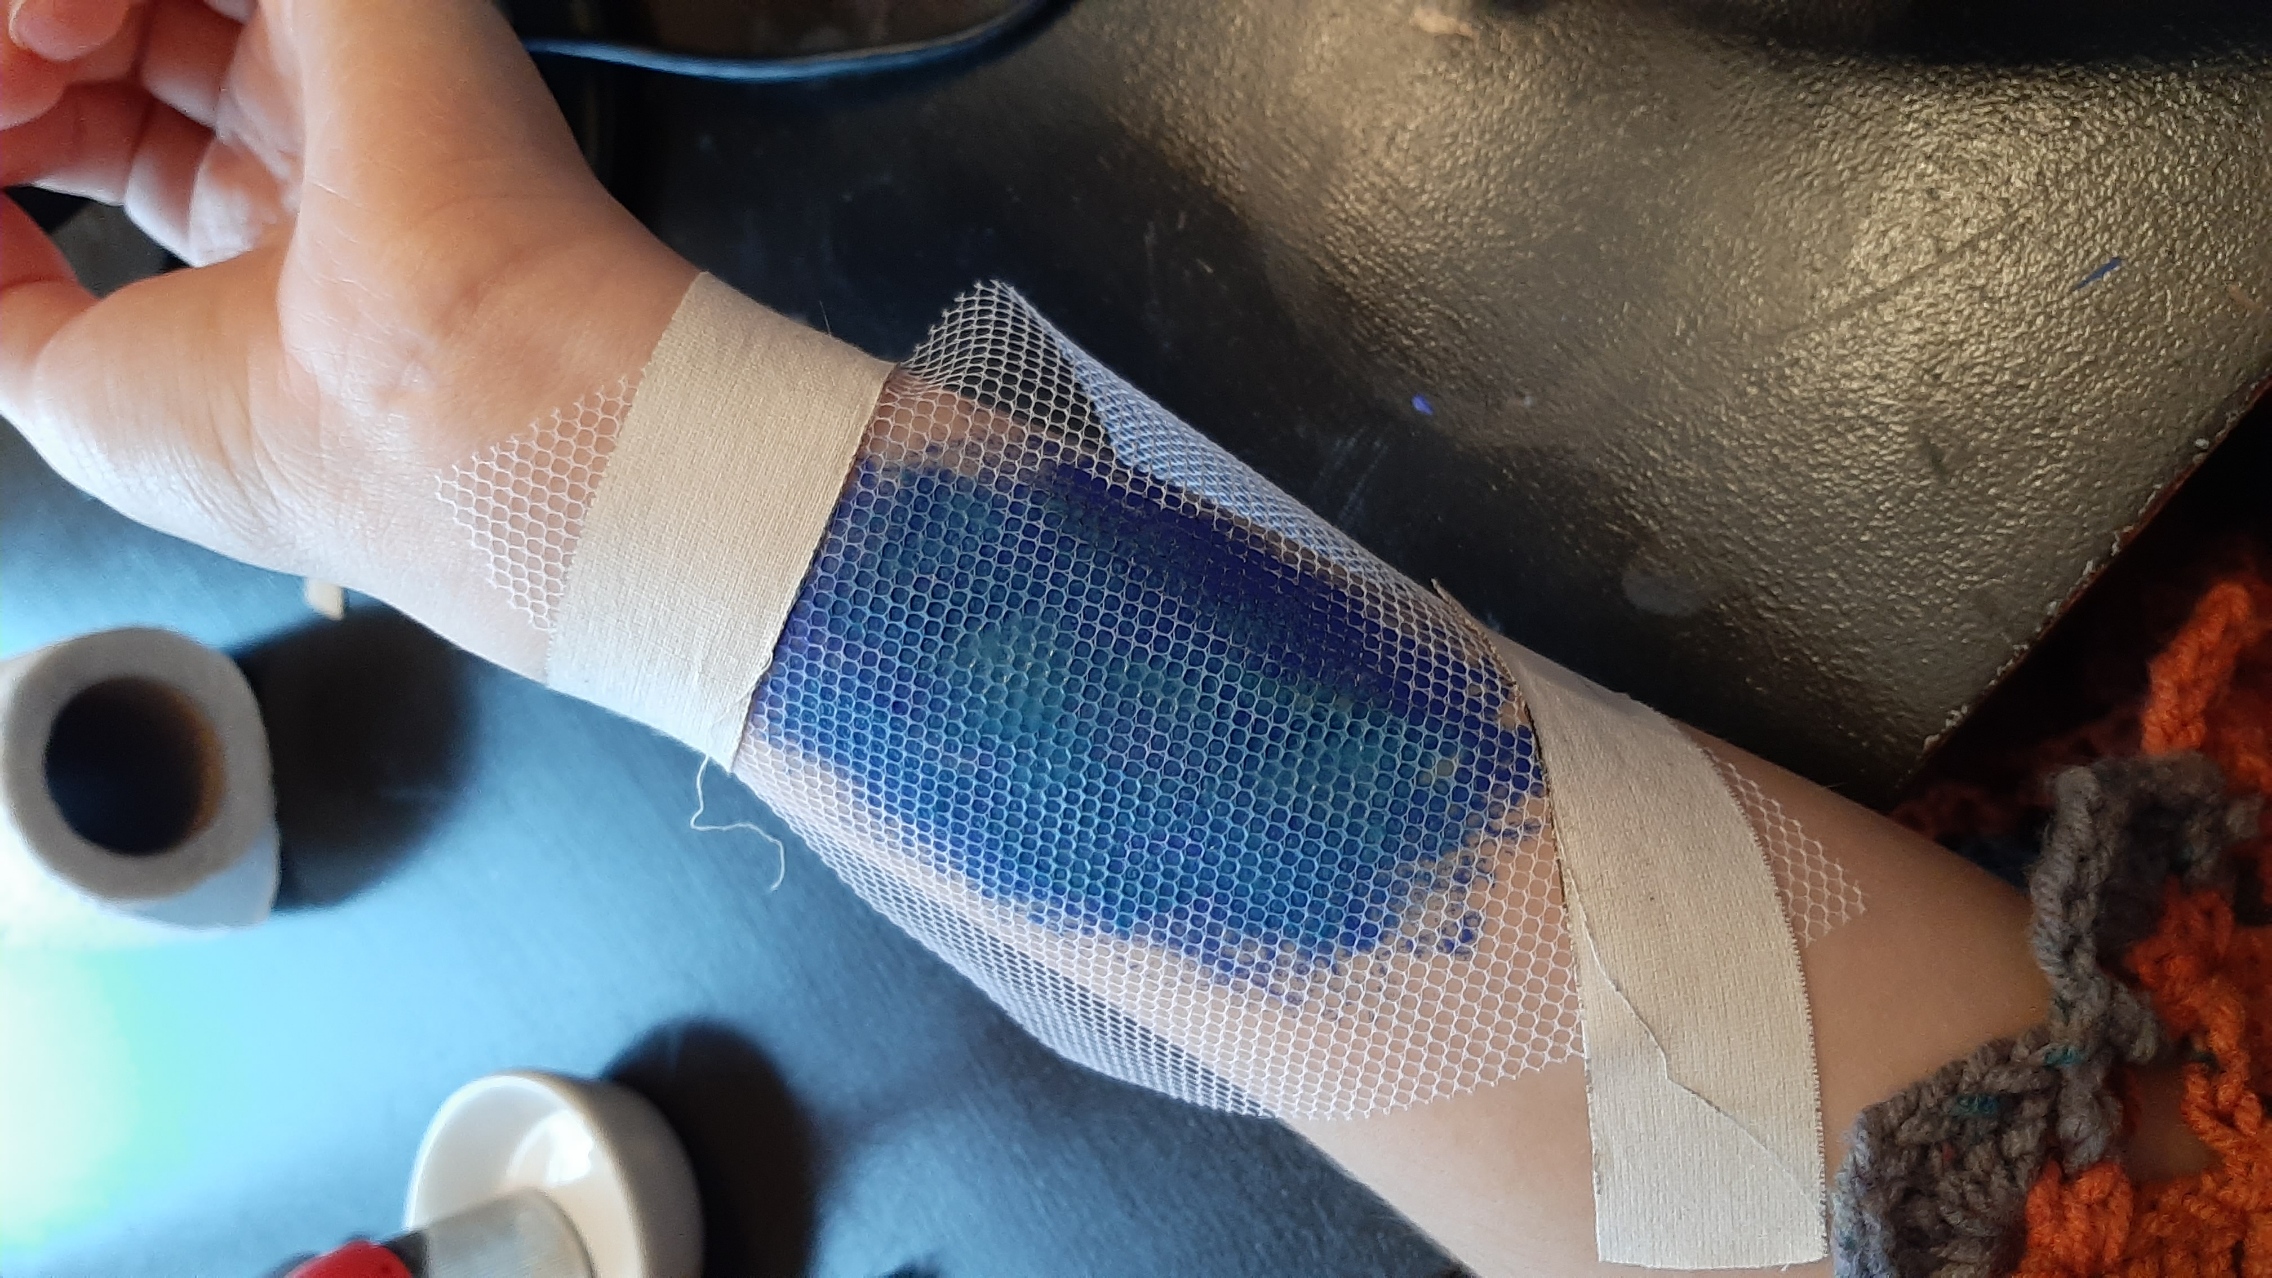
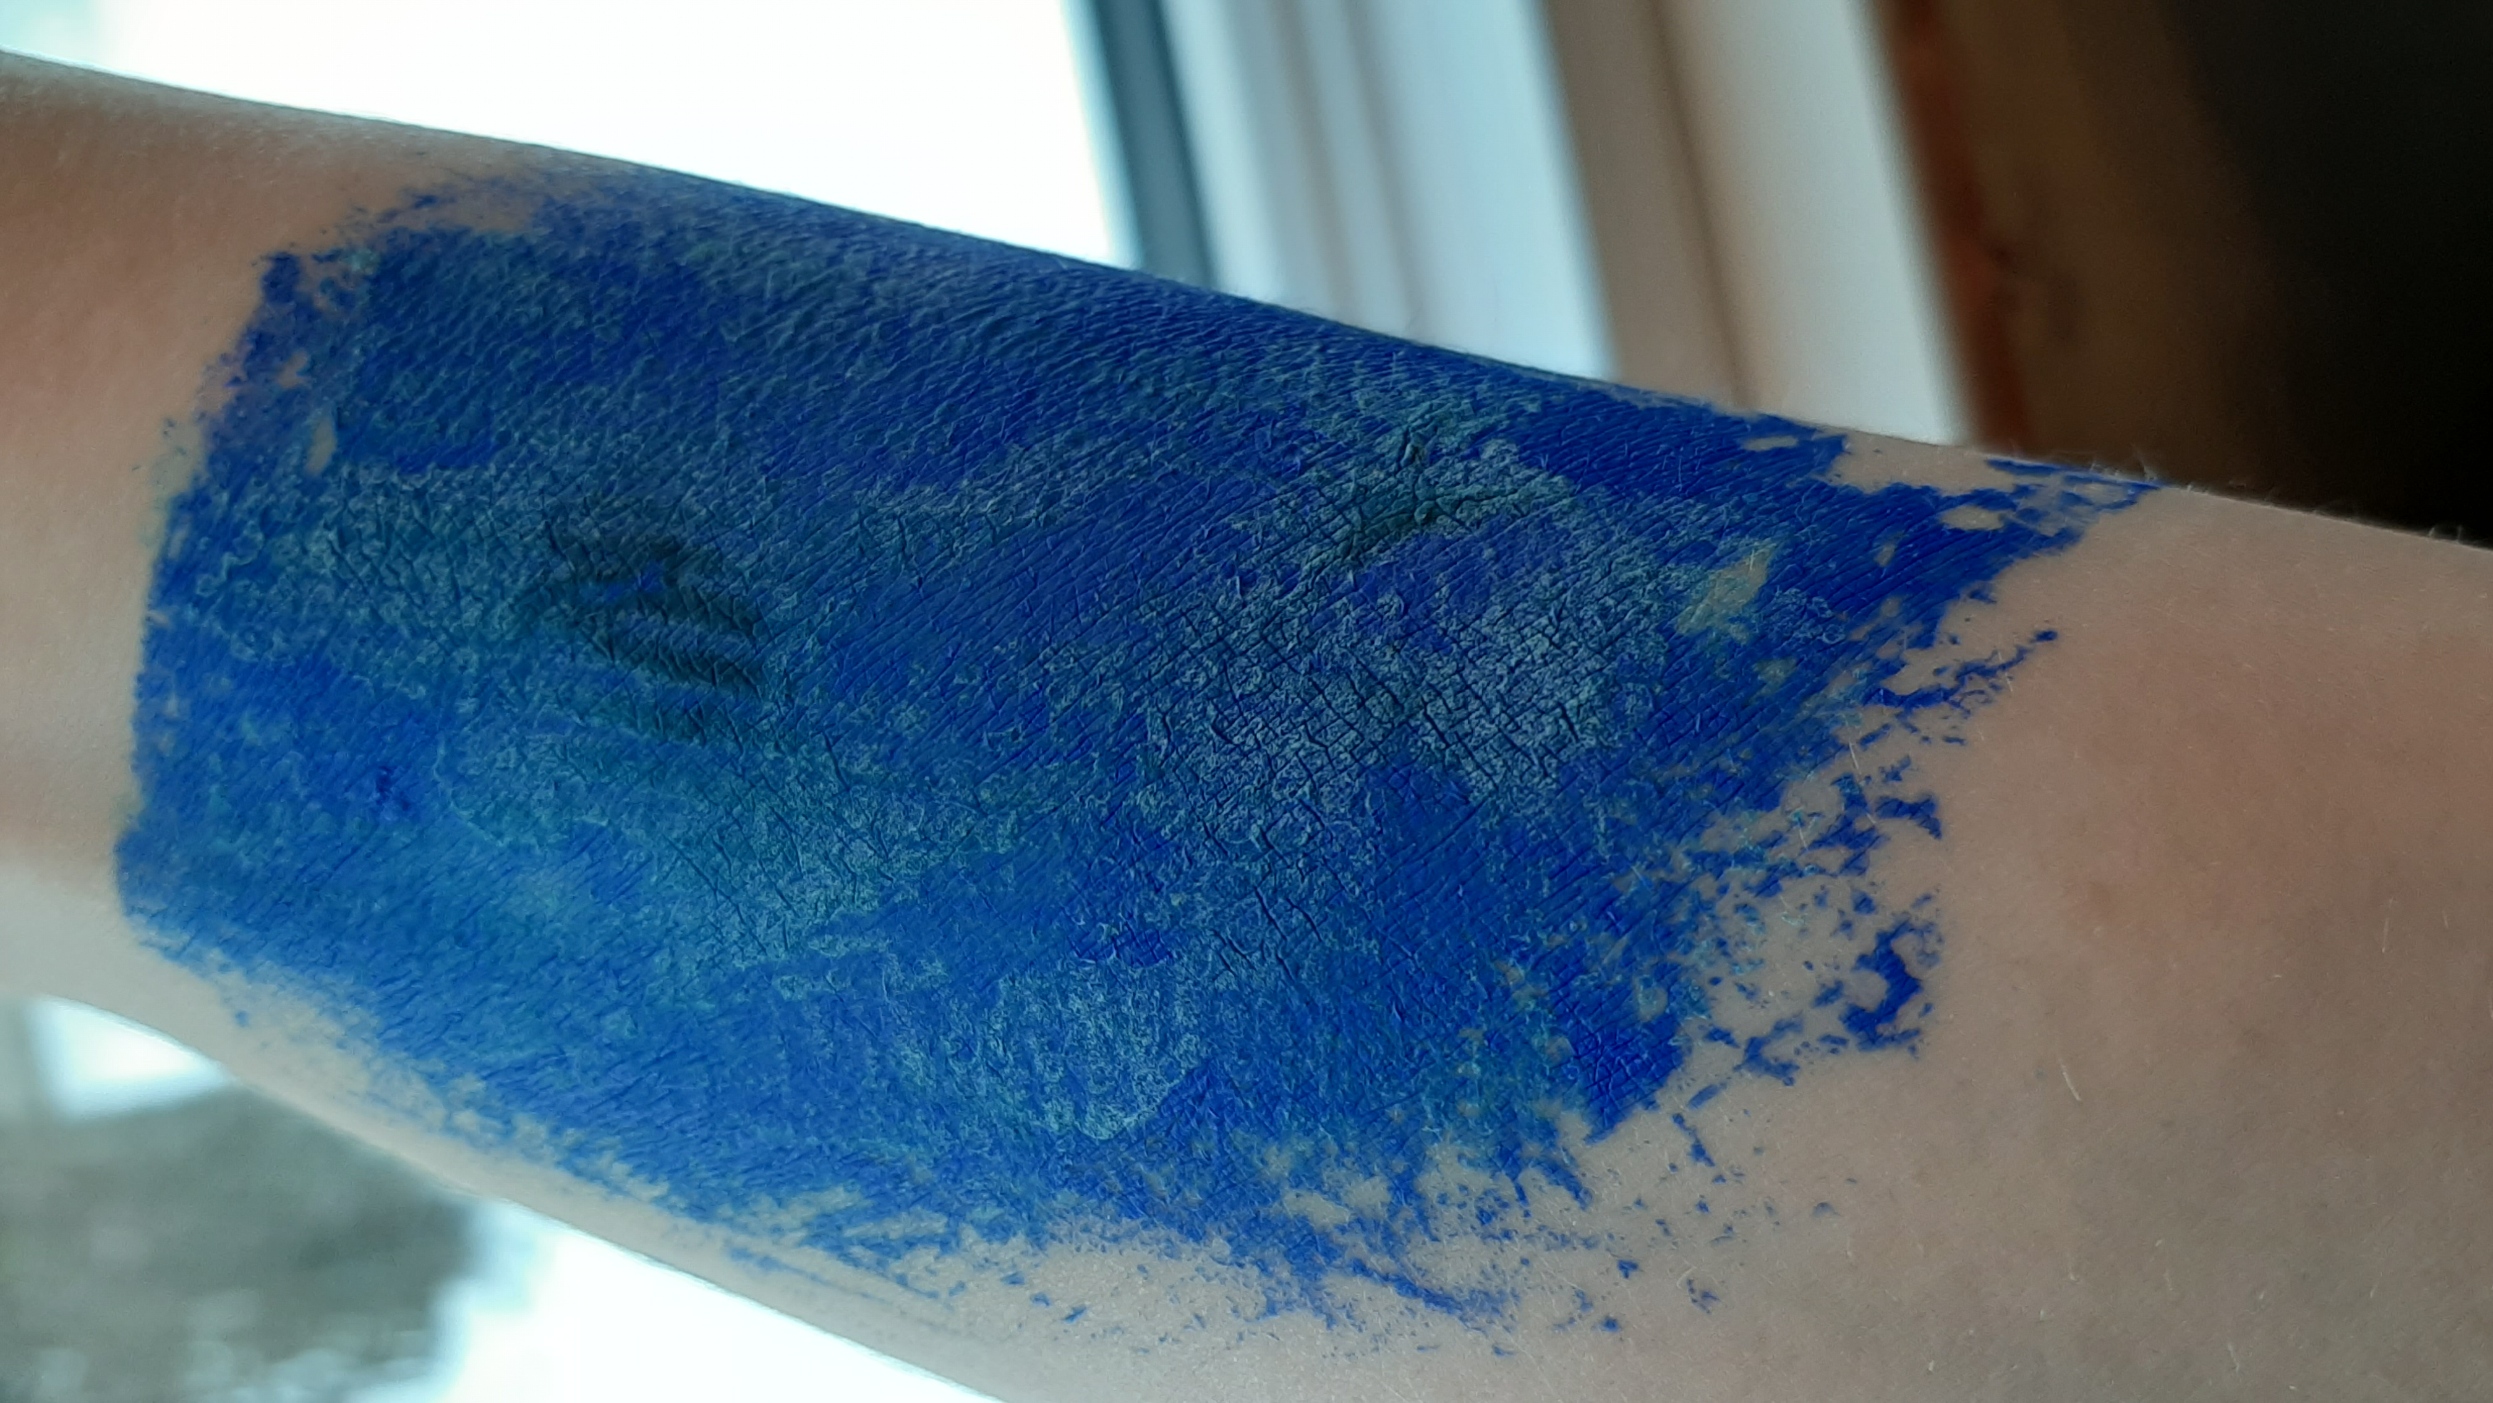
For this week I had a limited quantity of material. I wanted to do a classsic masquerade mask, and get inspired by the materials at hand. I was lucky enough, I borrowed the thermochromic fabric paint and some micro LEDs before the luckdown for covid-19. This paint is turning from black to blue at 25°C, so my skin was too hot for a proprer color change. But I tried with a small sample on my hand, and after walk in the cold of december, the color changed to black. Just the cold resulting from the paint drying was enough to get (most) of the paint blue.
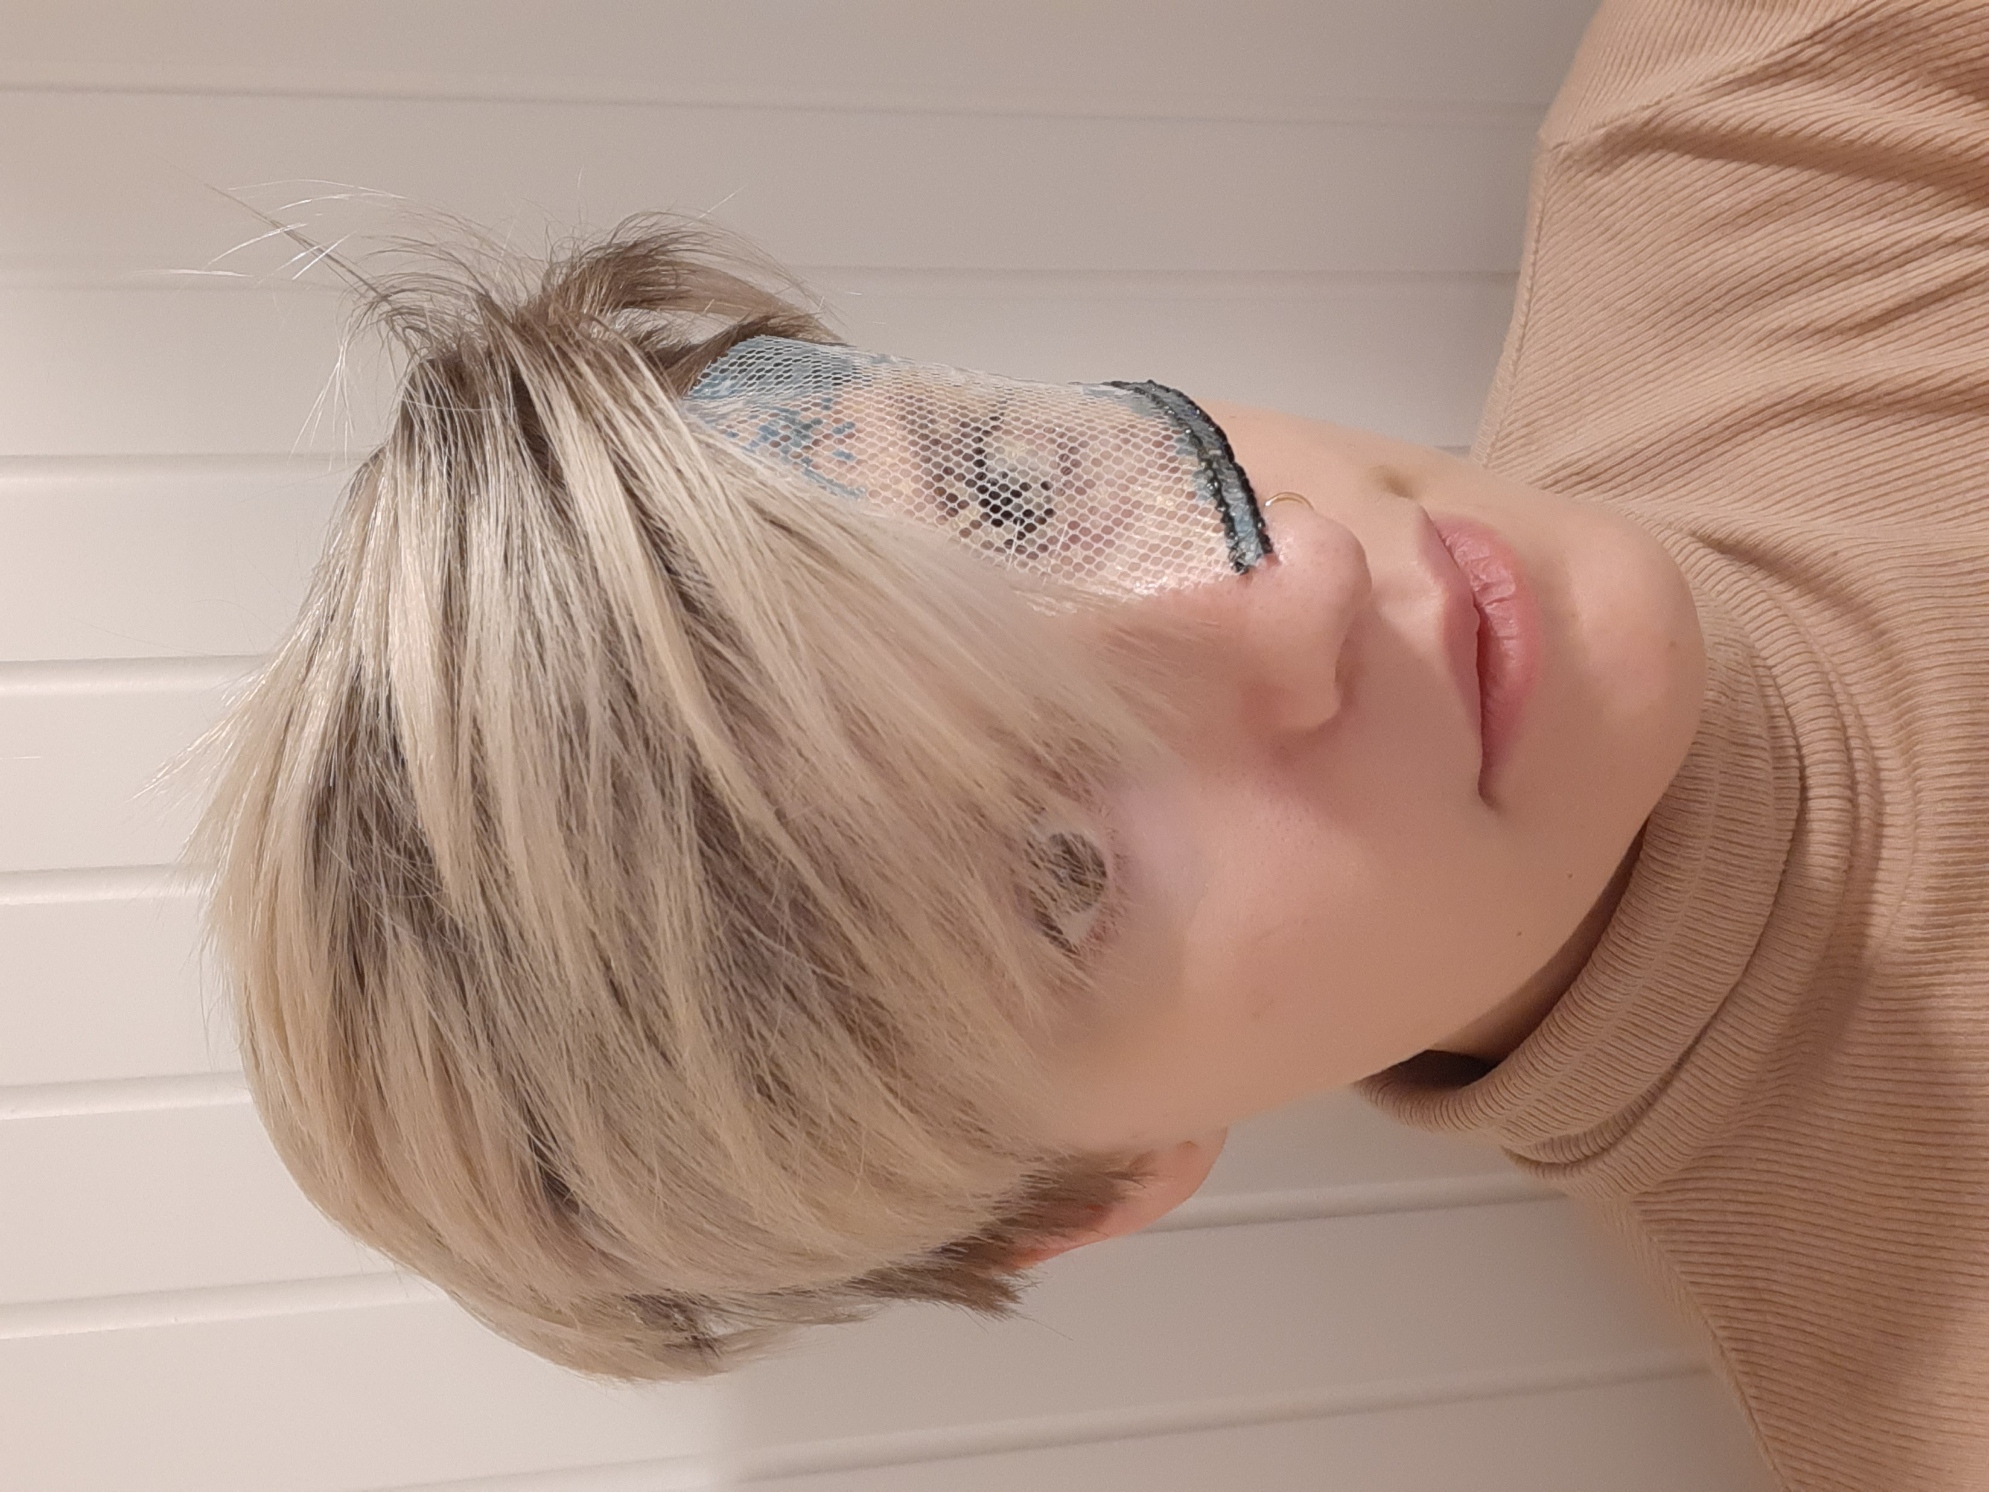
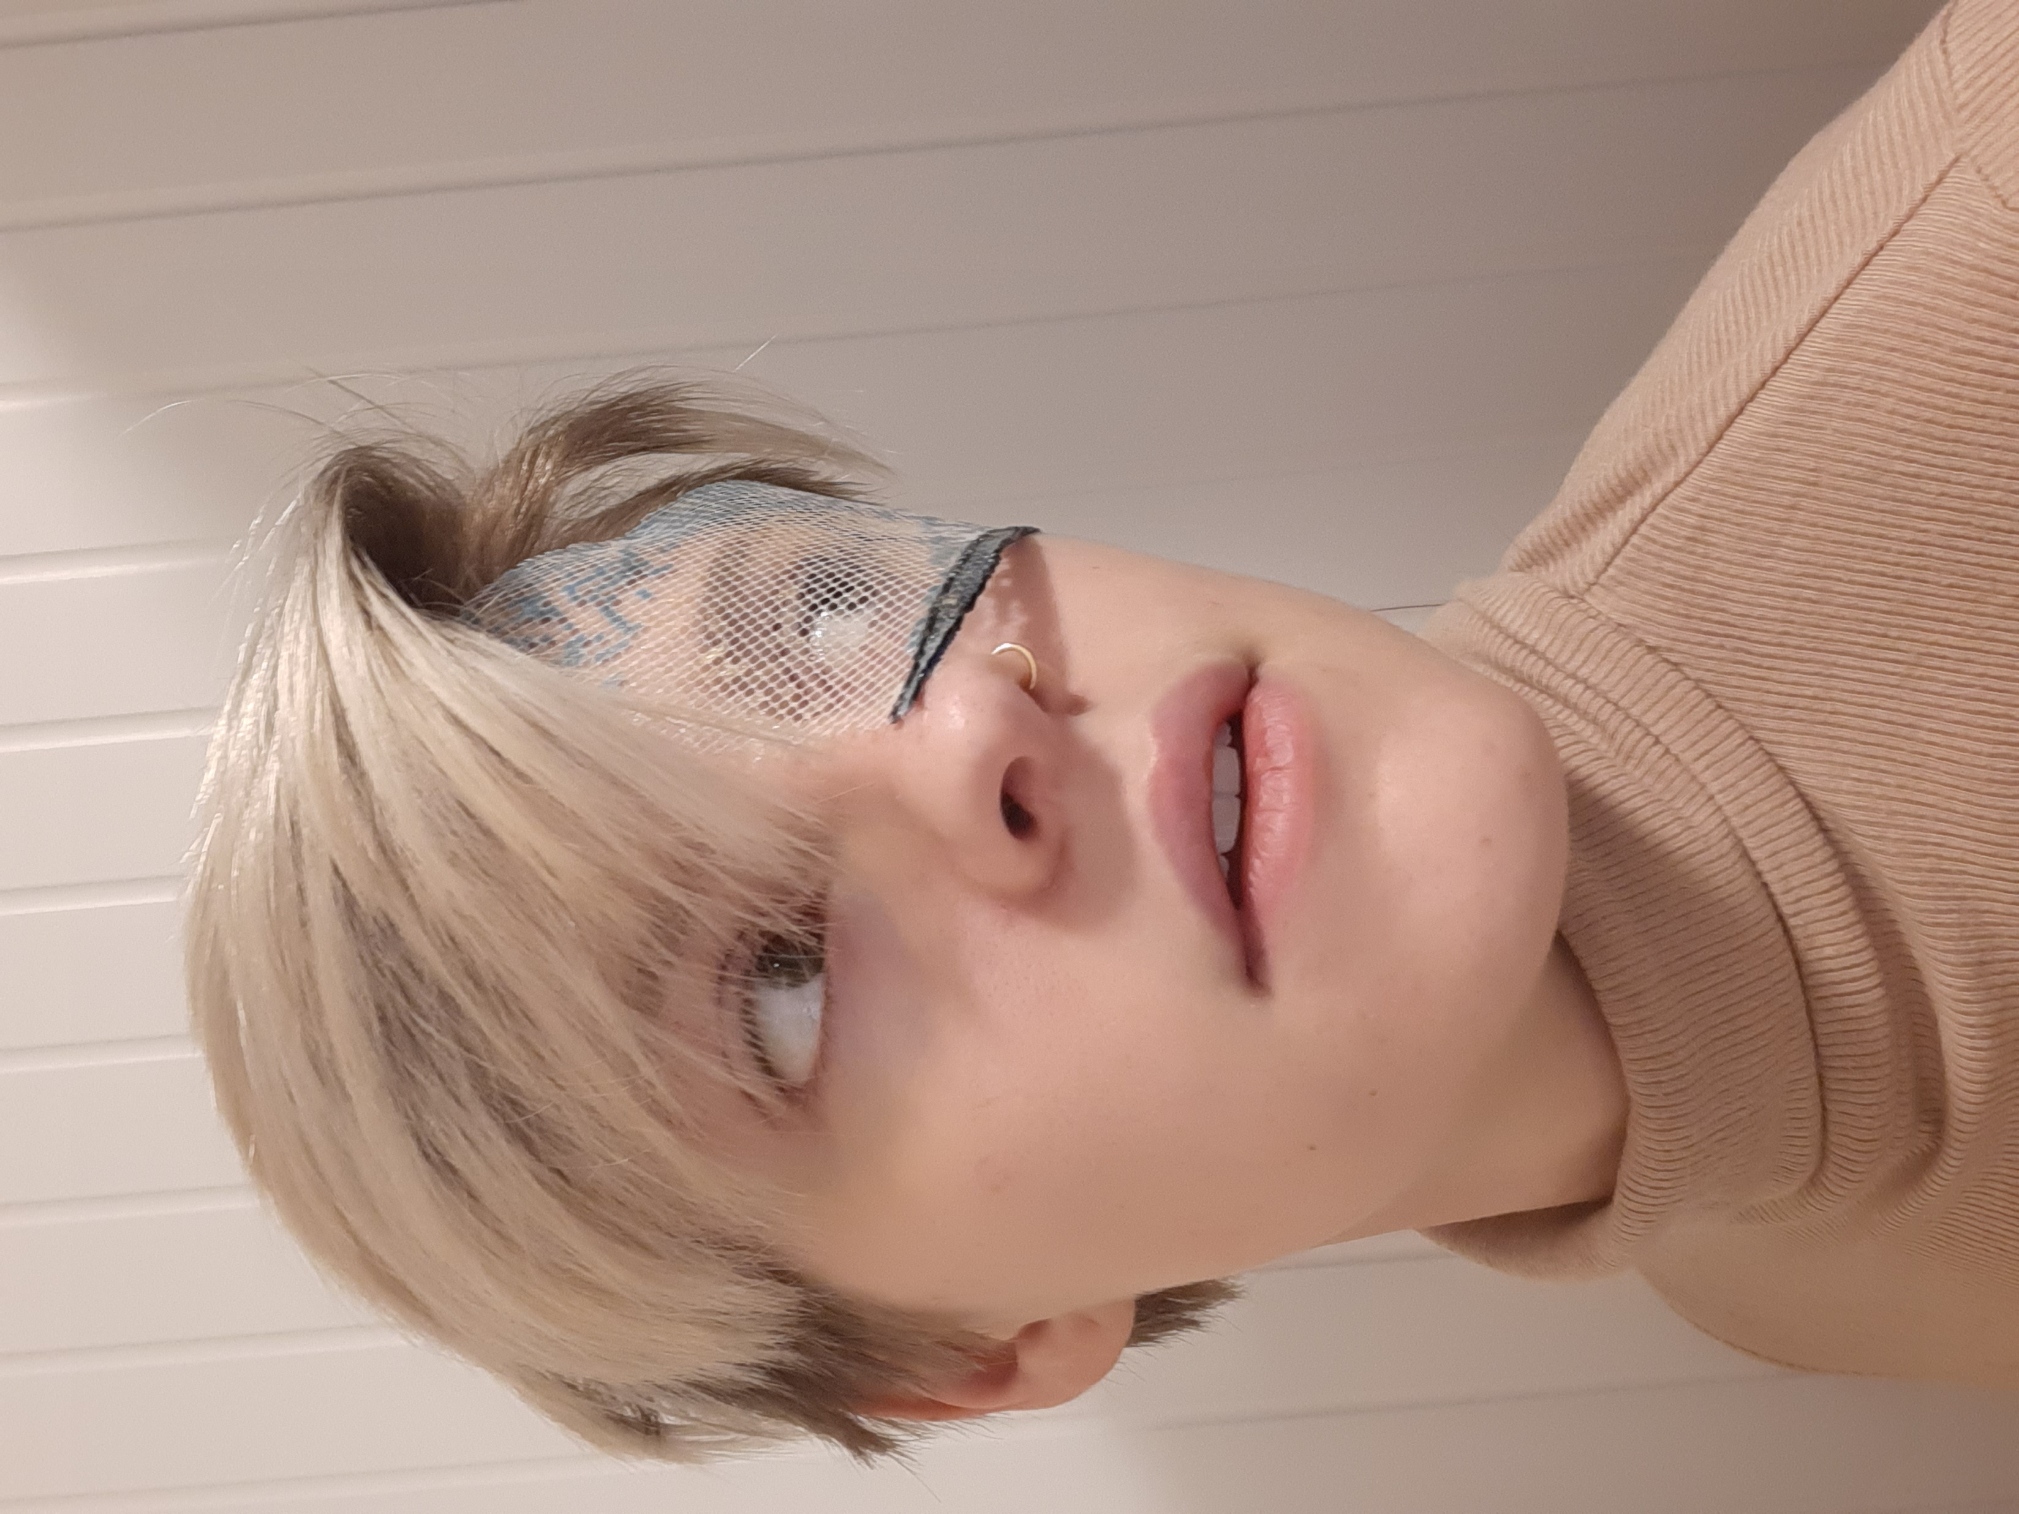
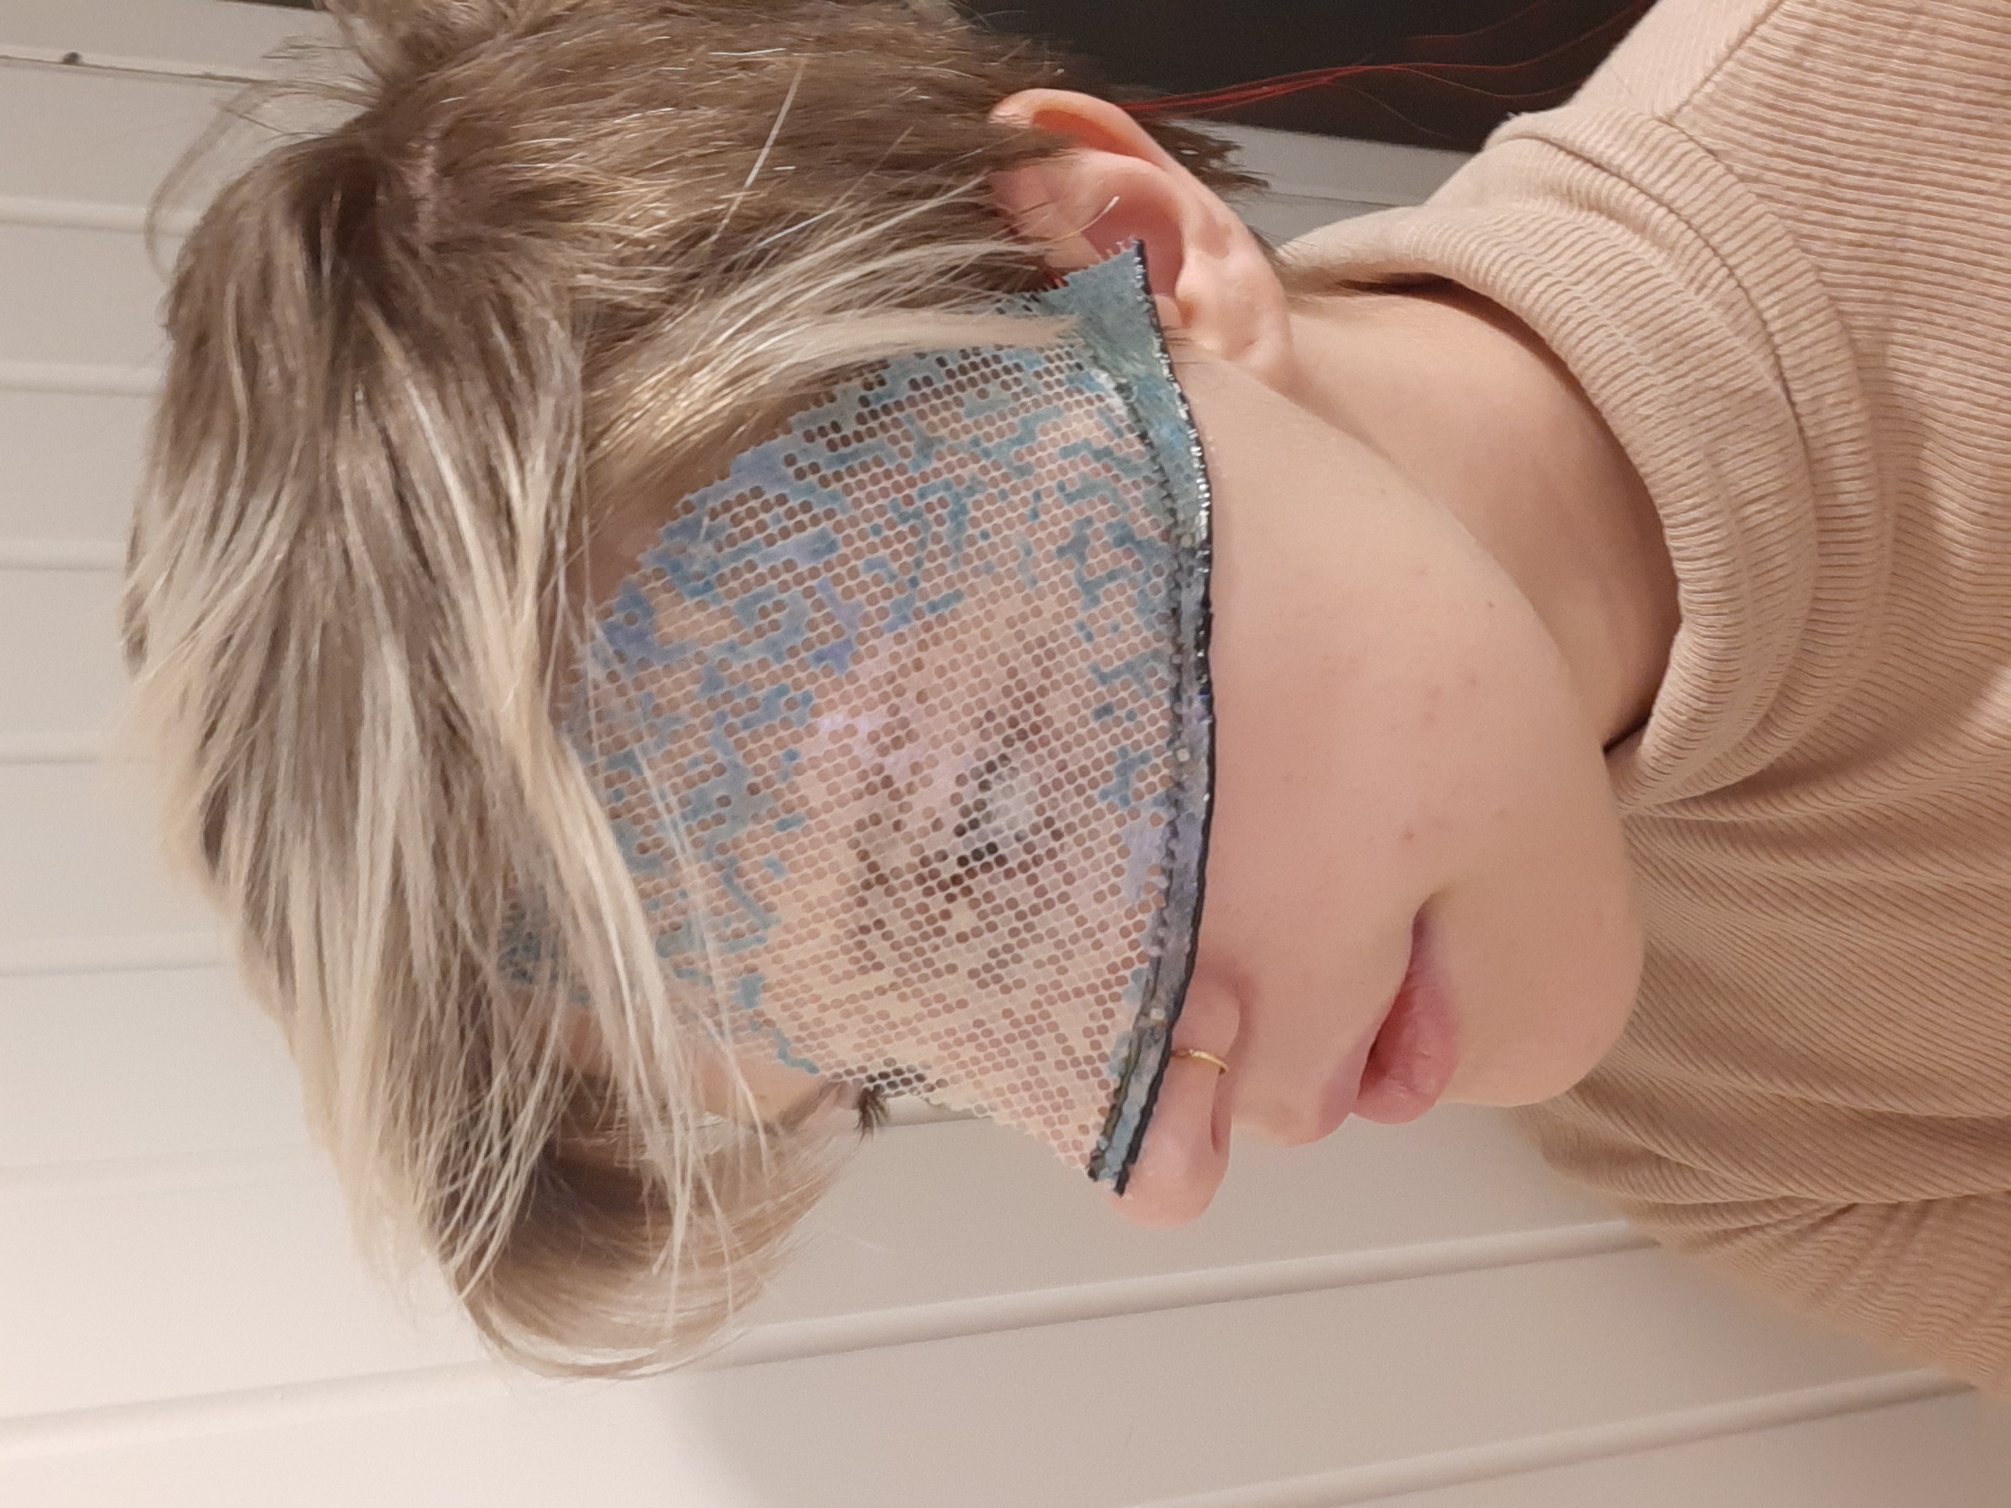
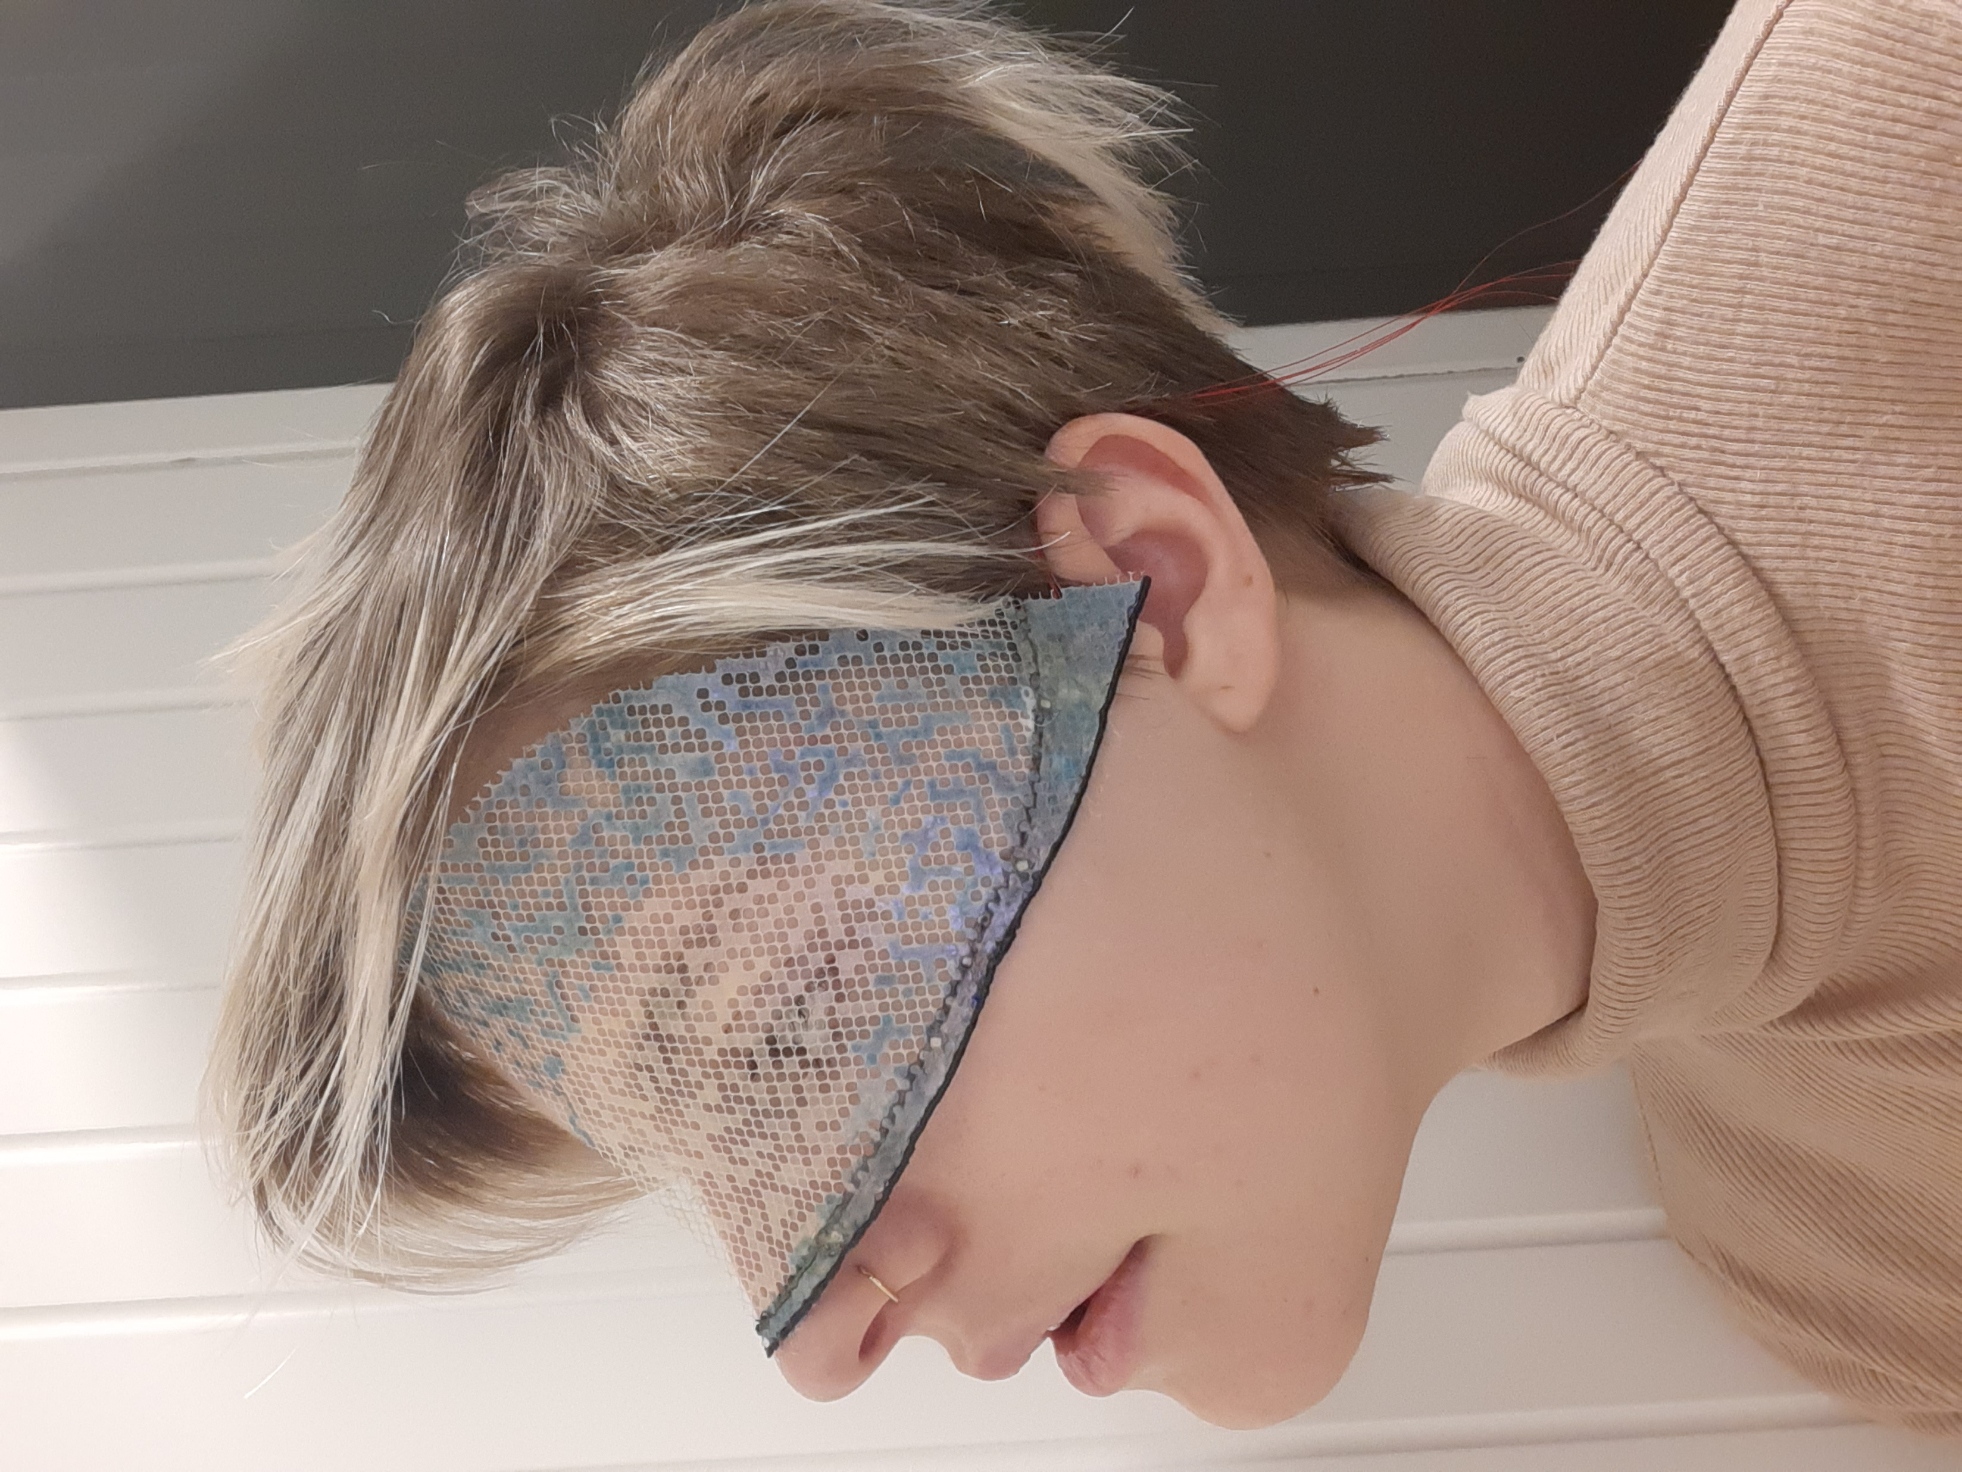
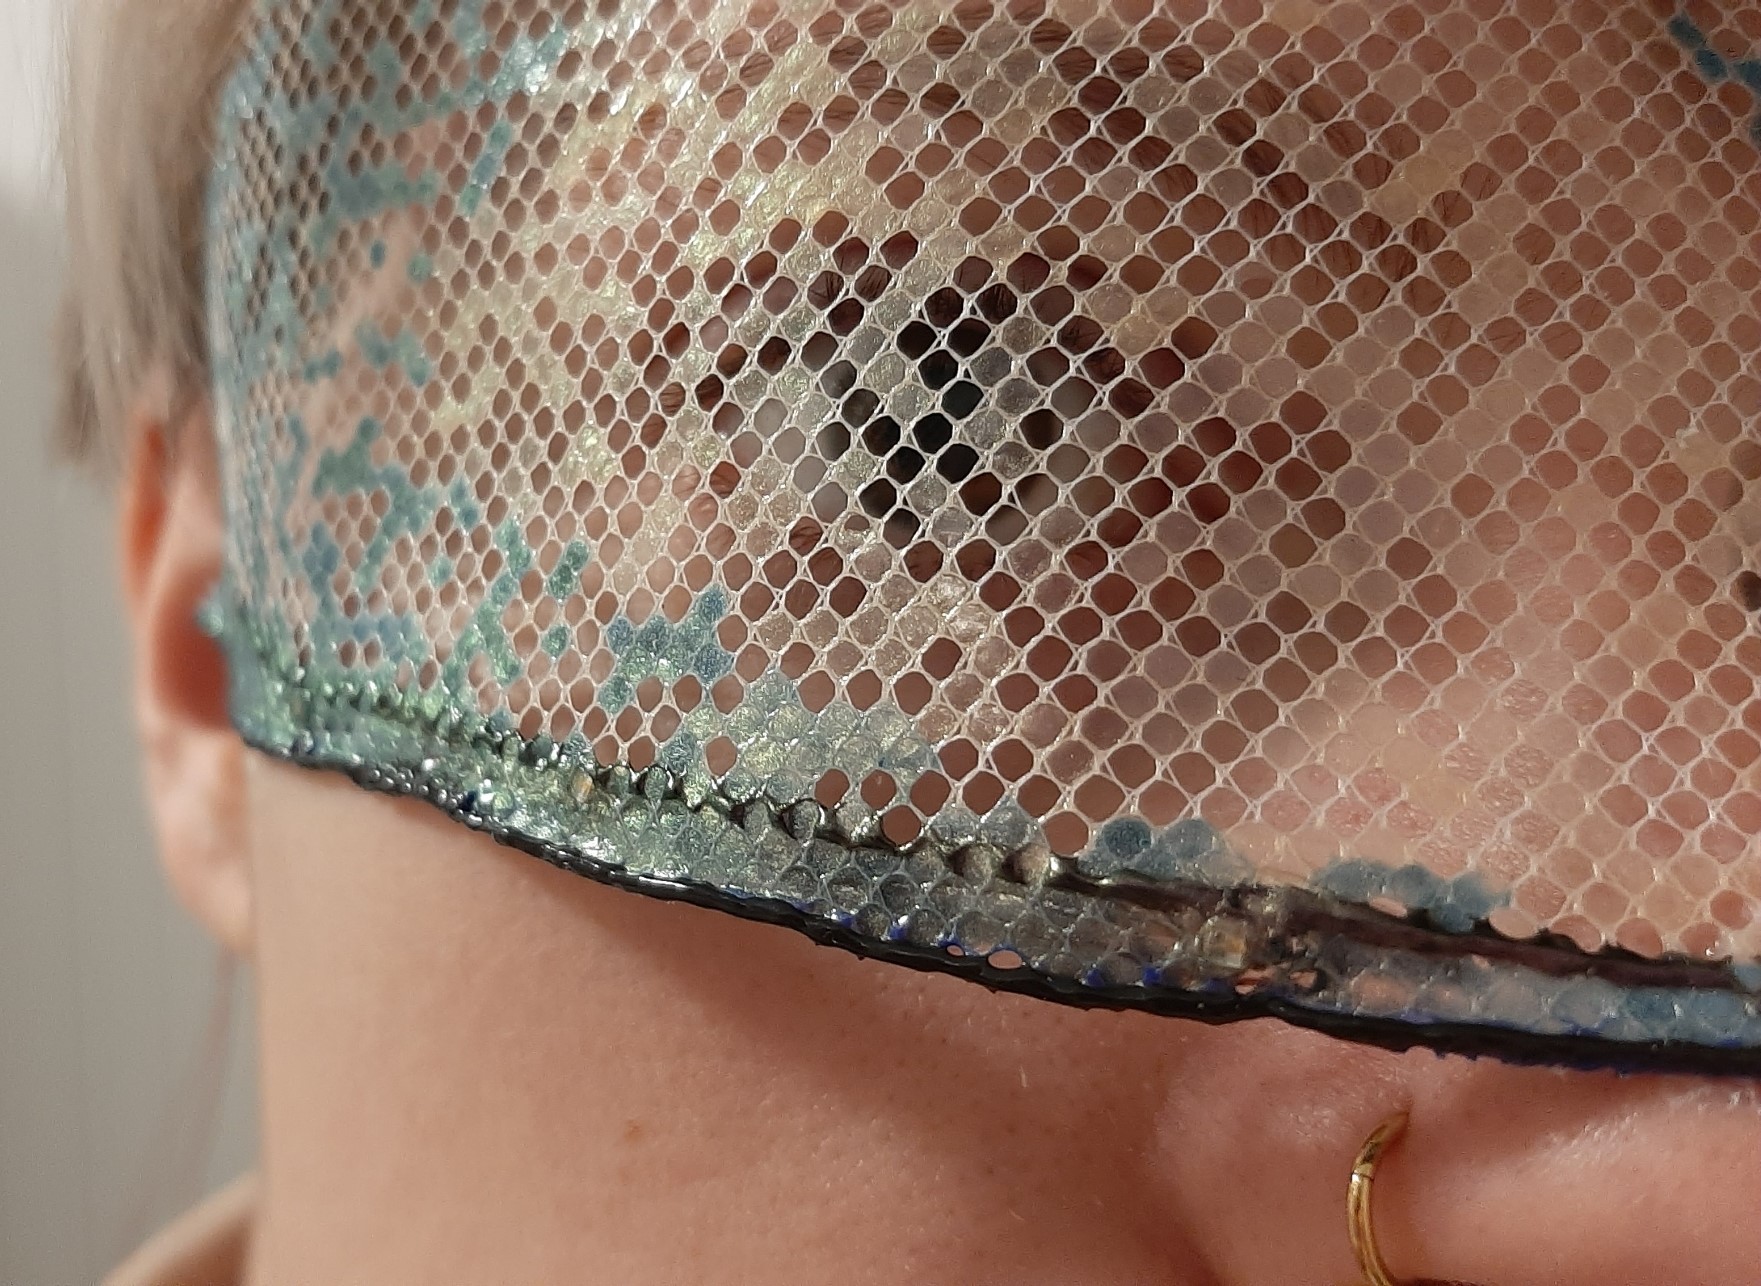
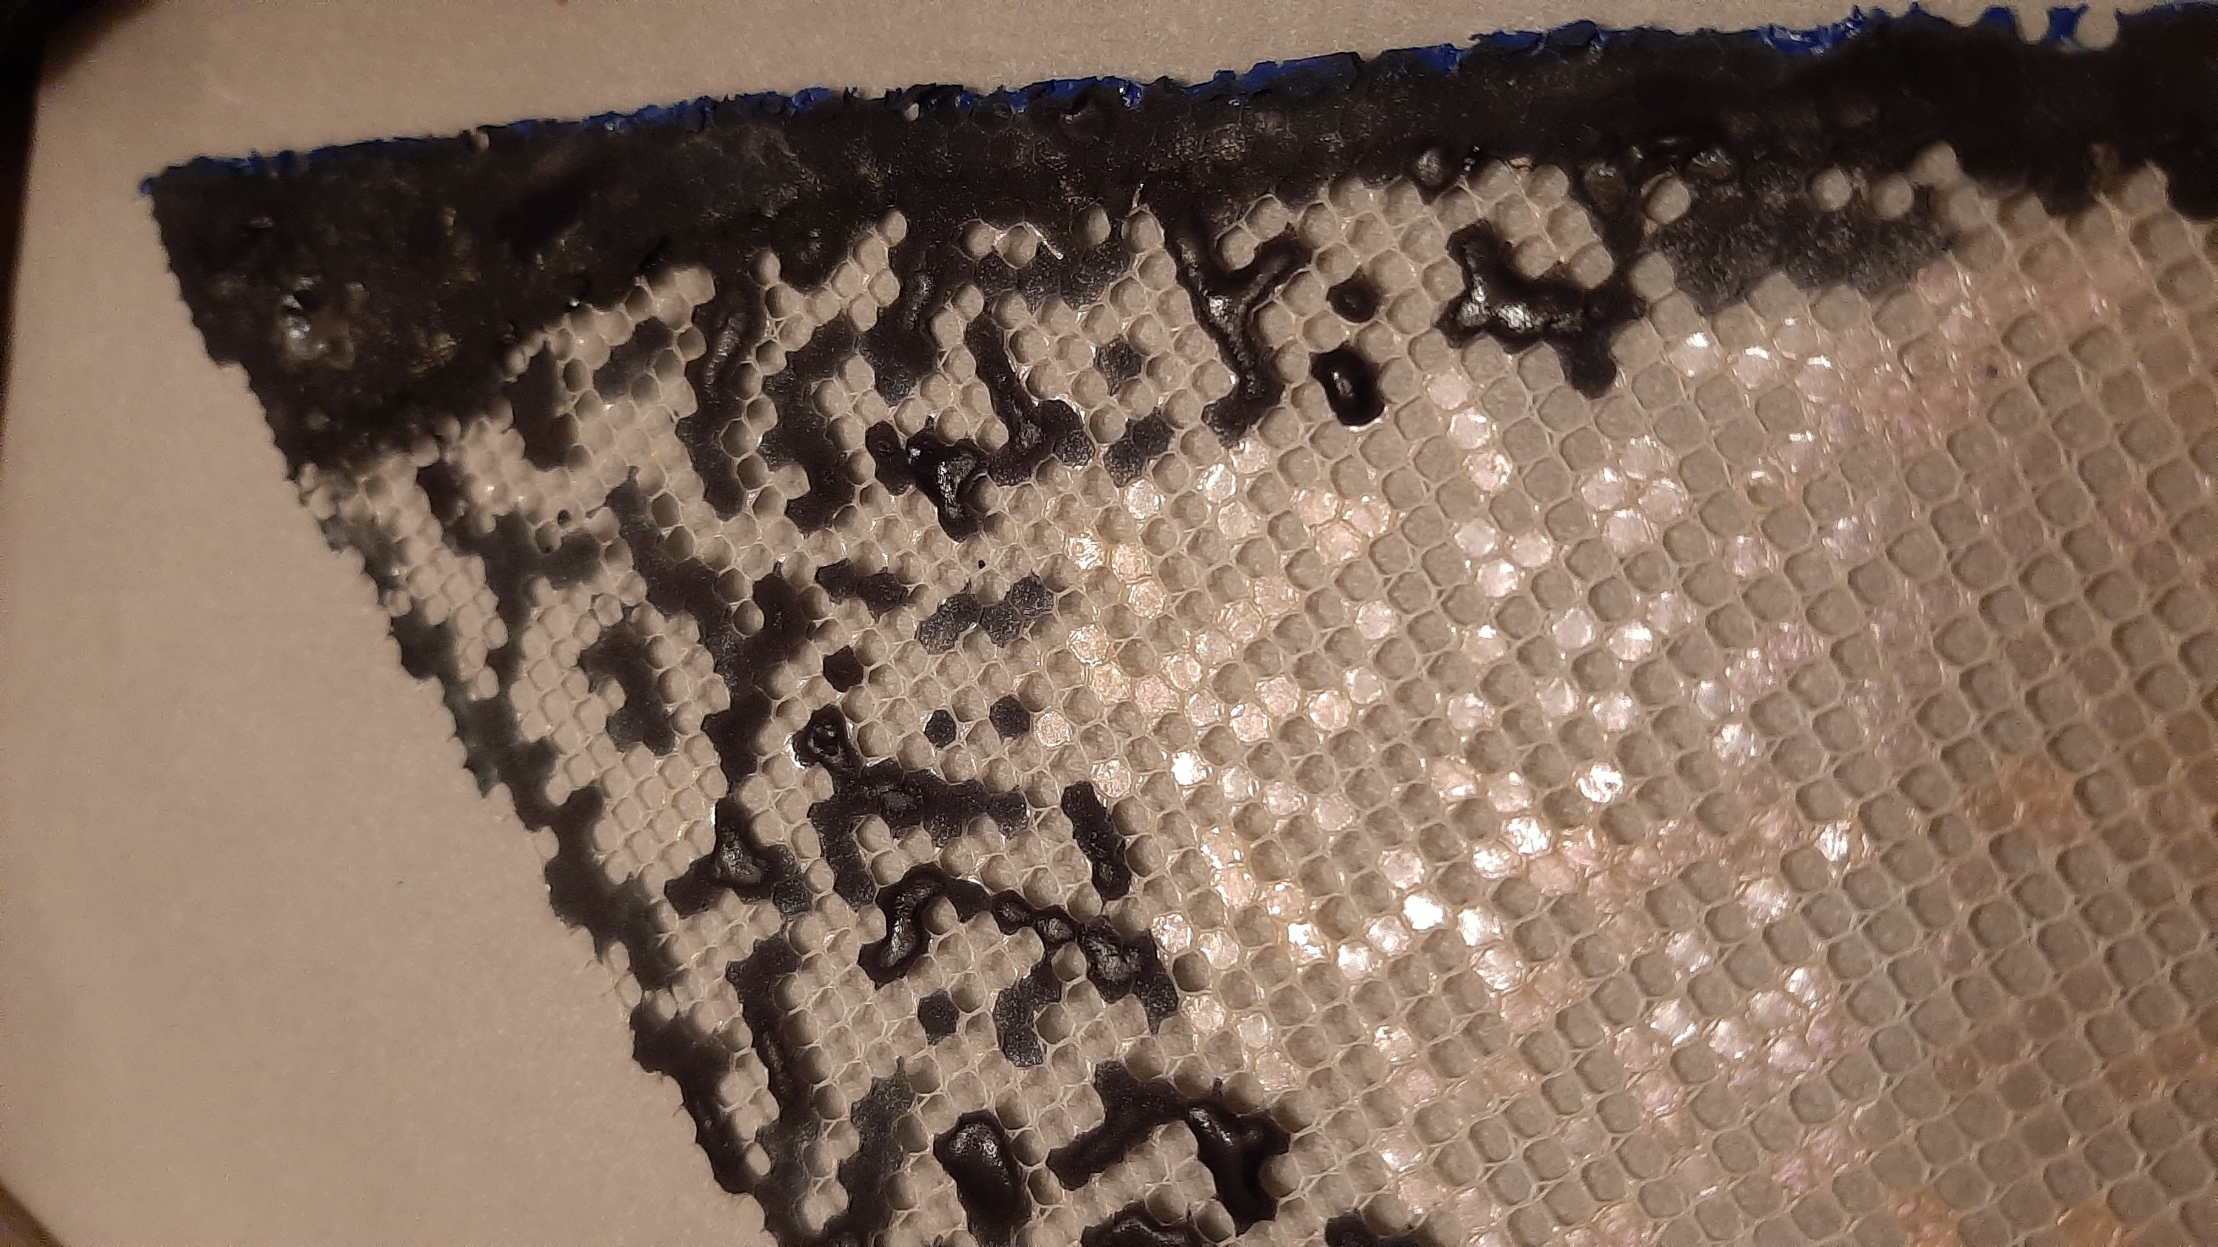
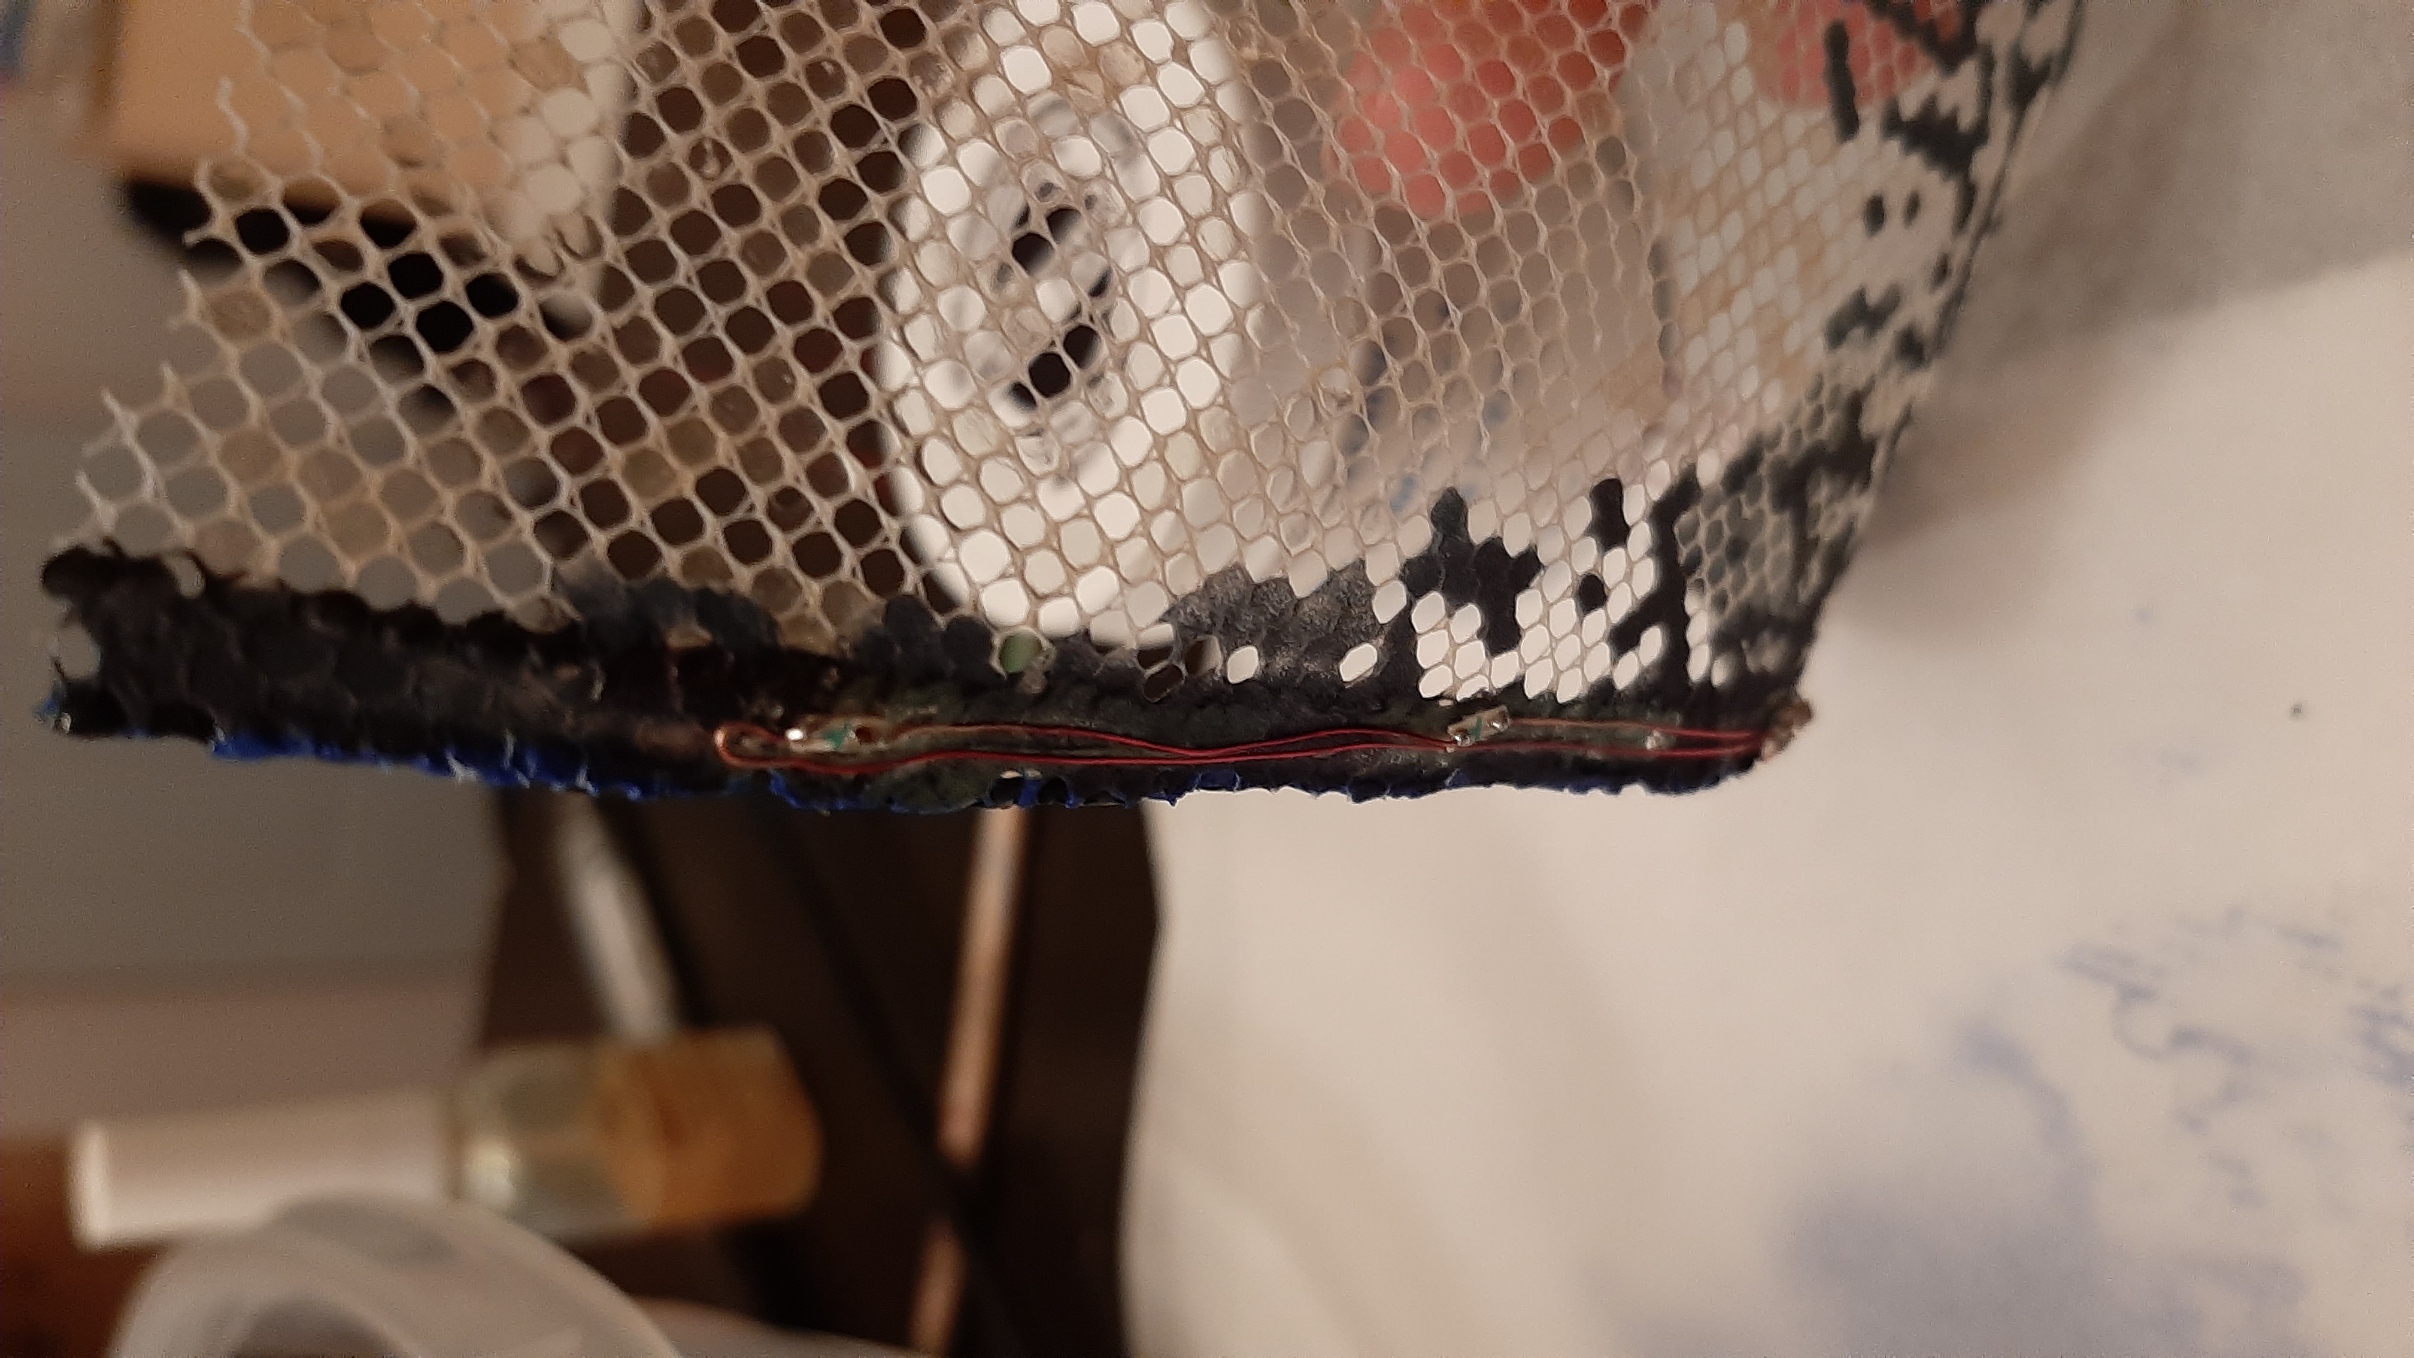
I first tried to mix two types of paint, so the color change would affect only some parts of the tattoo. I used this mesh I found to make a pattern on the paint. The results were not as fun and as impressive as I thought. In the second picture, you can see that only the places where there was a really thick layer of thermochromic paint the color was able to change to black. The lighter blue is the thermochomic paint turned blue because of the temerature of my skin.
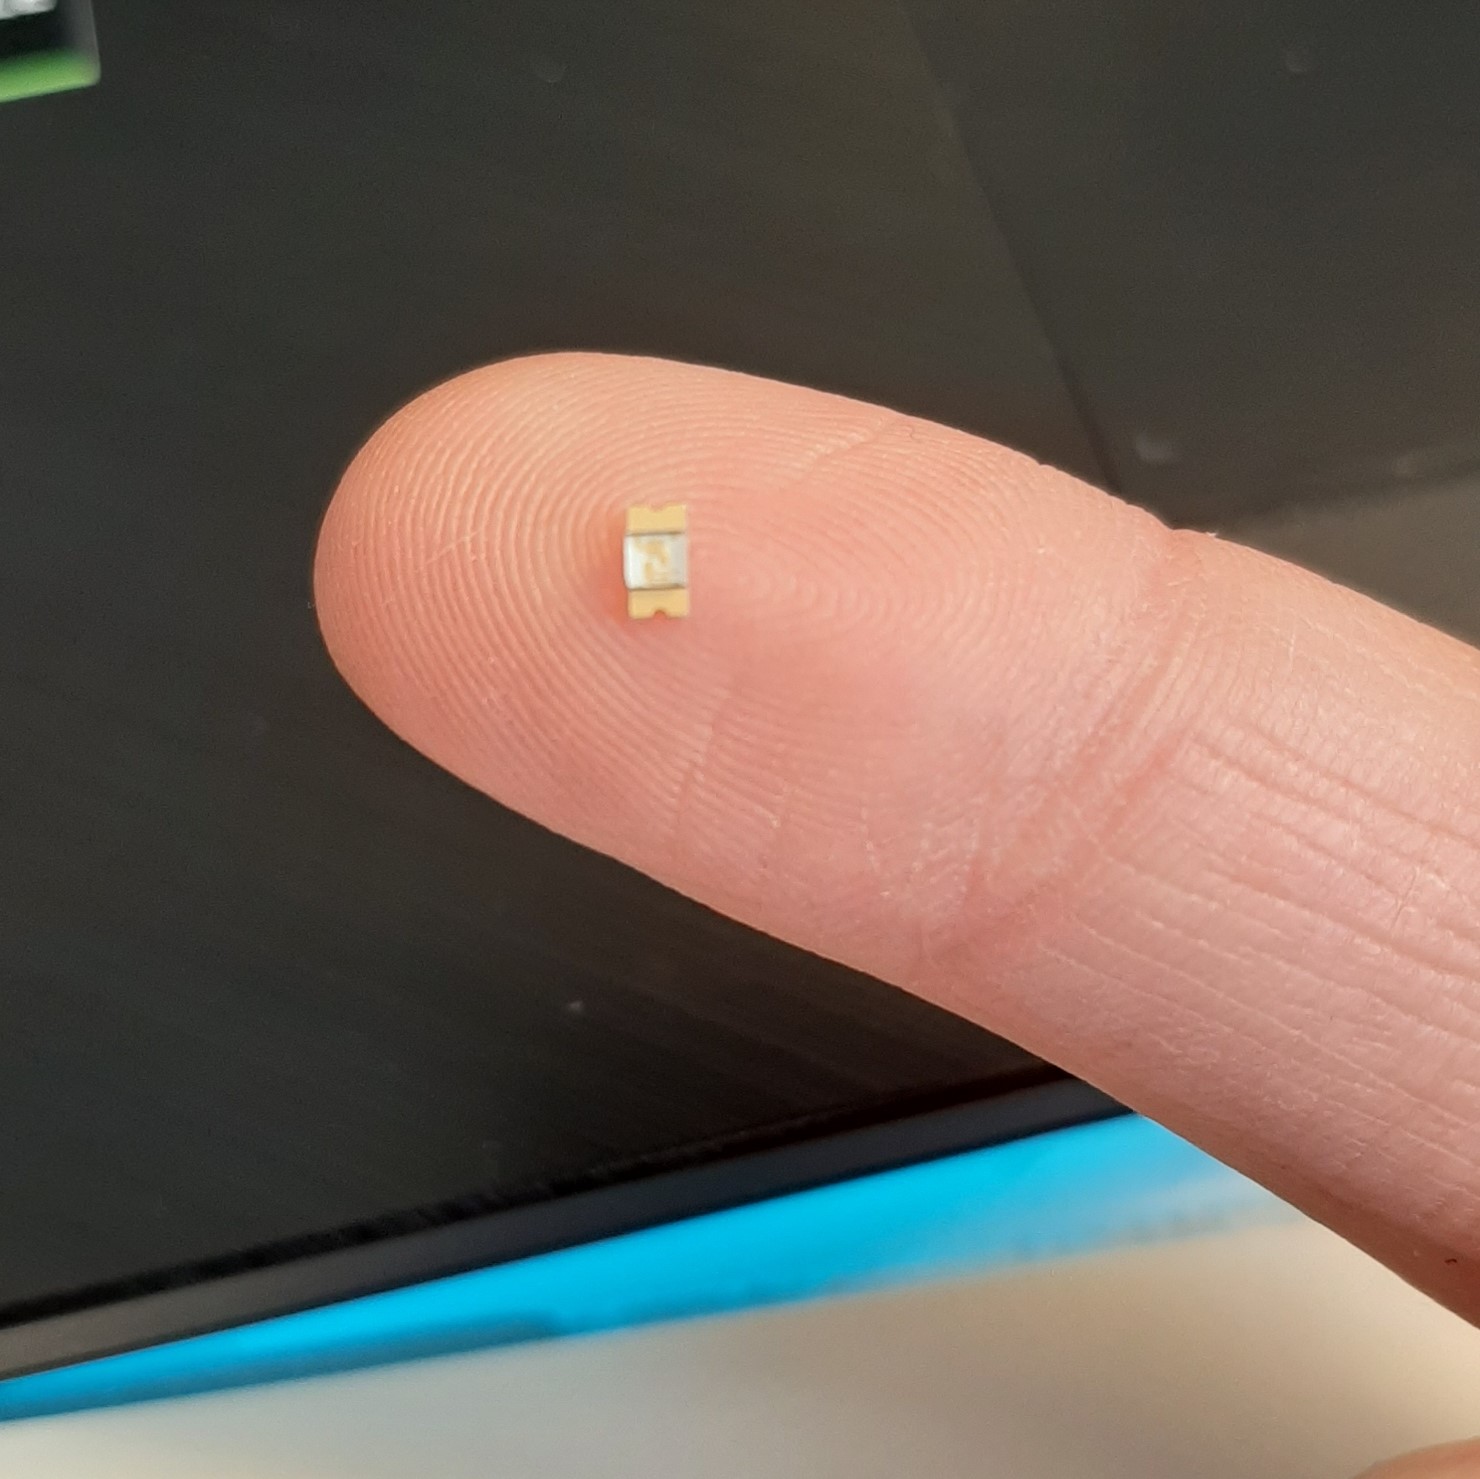
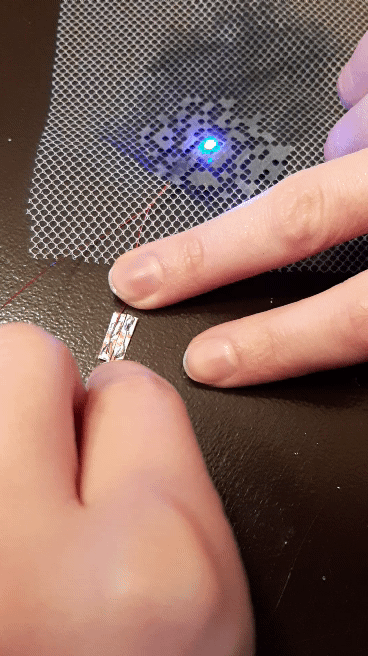
The LEDs I had were SO CUTE I had to try them! I got very lucky, the were exactly the same size as the holes in my mesh. I decided to use the mesh as a base, and I used transparent (slightly pink) nail polish to cover some holes. The nail polish was thick enough to dry in the holes and block some of them. When everything was dry, I added the LED, covered it with some nail polish, and it became practically invisible. Can you spot it in the second picture?
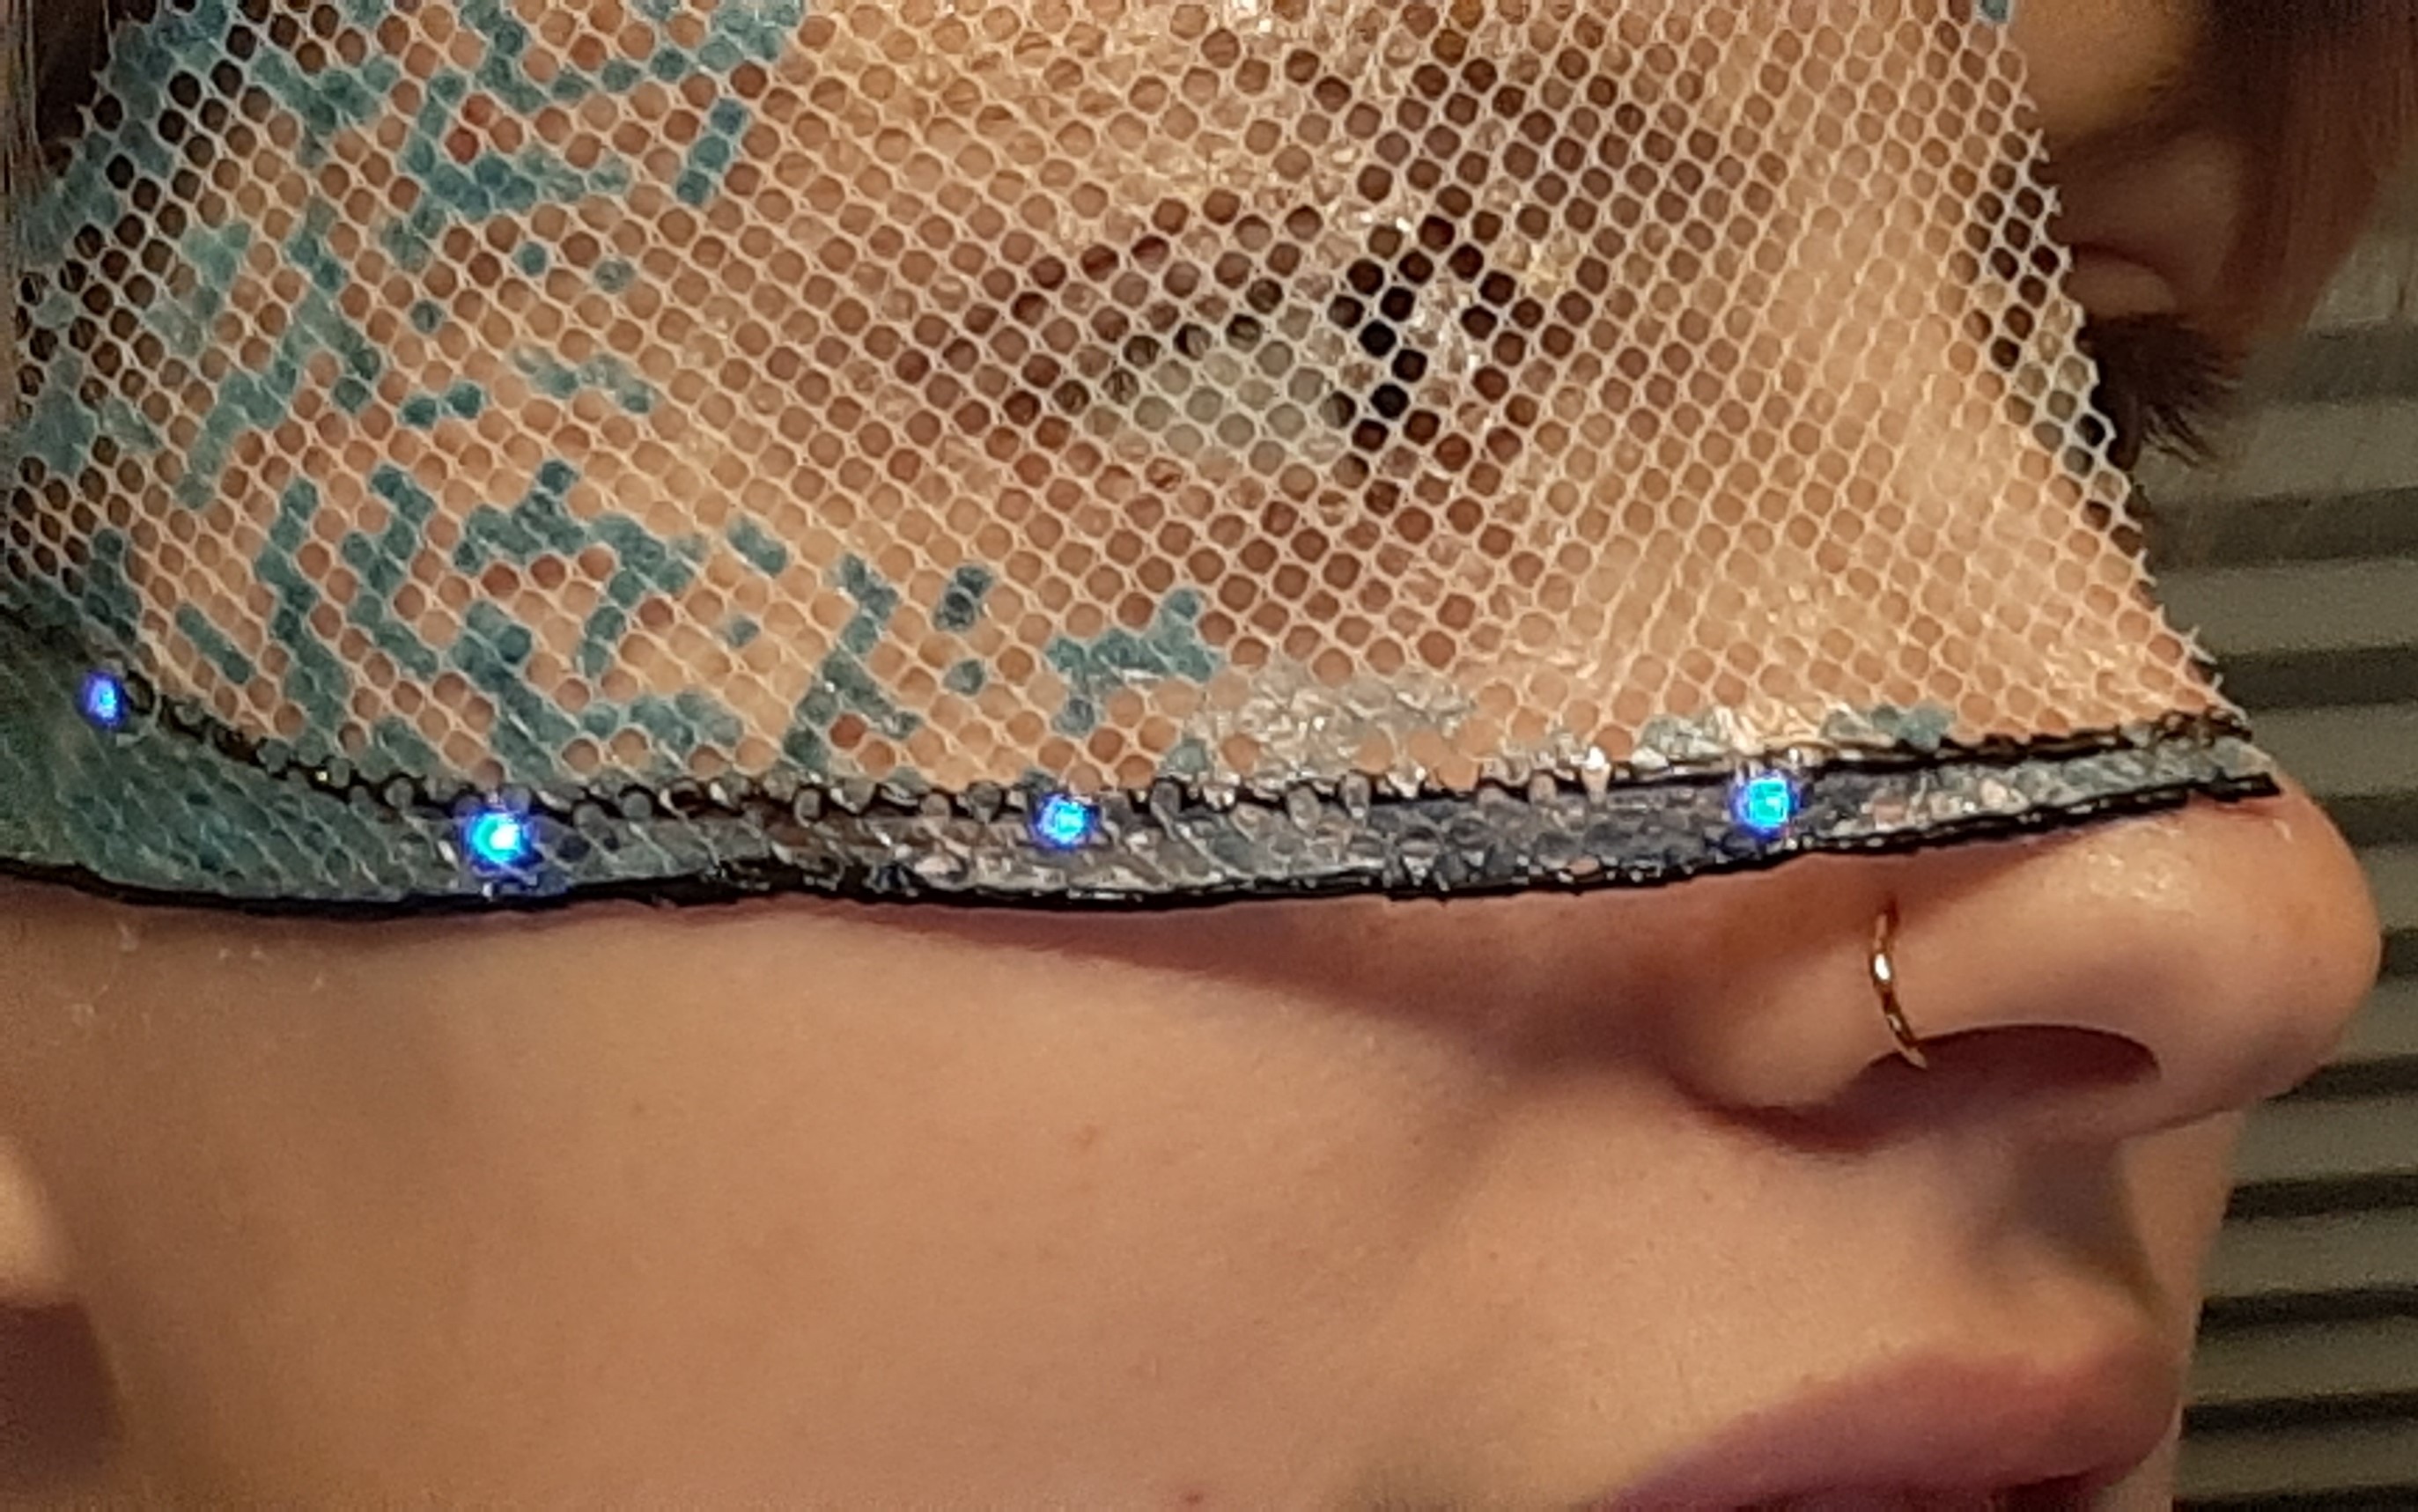
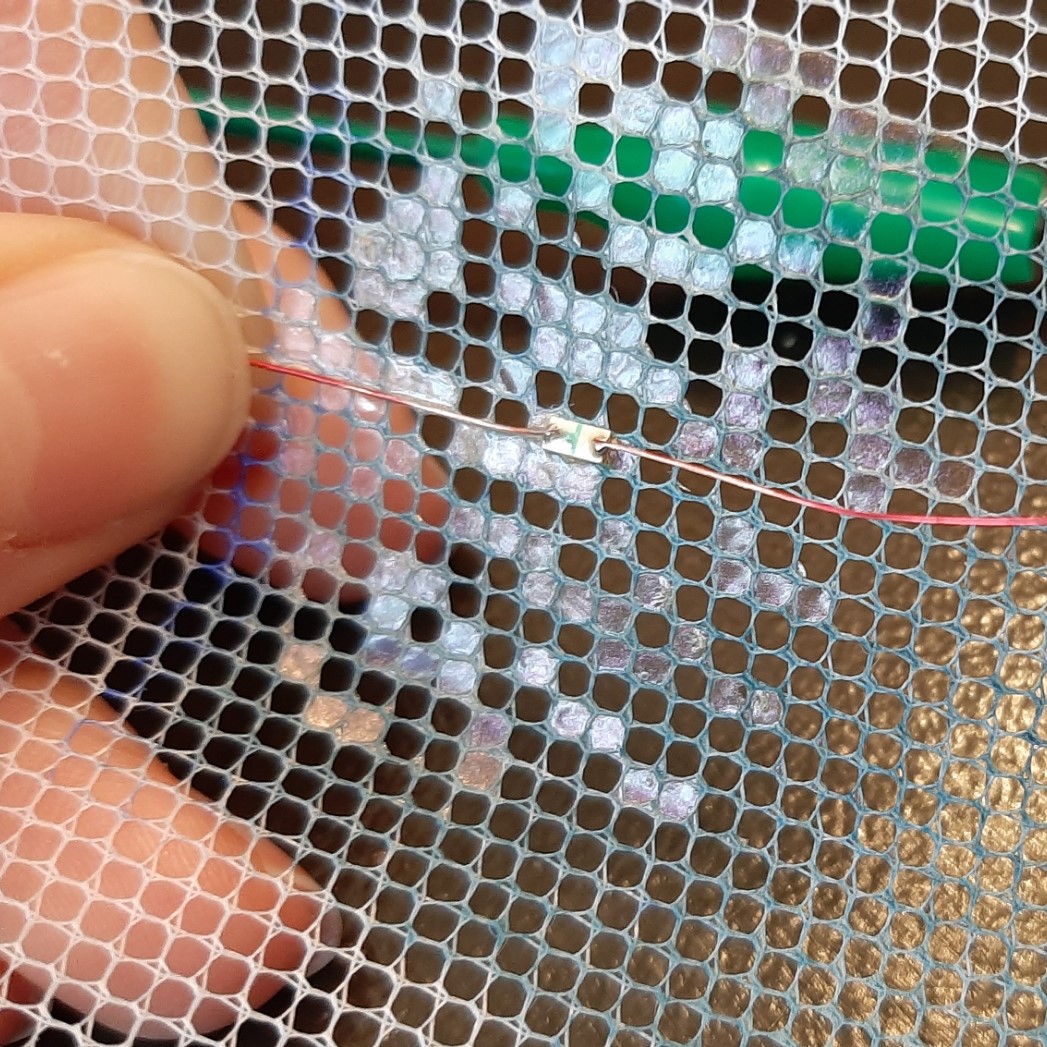
I solder the led to wires covered with paint already. I had to sand the end to make a proprer connection.
Before putting it on my skin, I added some thermochomic paint. The result was different from one side to the other; if the thermochromic ink was on top, the result was darker and mat, and with the nail polish on top, it was glossy and lighter. For this prototype, the thermochormic paint was on top, but I put the nail polish on top for my final project. Before putting it on my skin, I covered the LED's and wires end with nail polish, and cheked if everything was well covered with a multimeter. I glued it to my skin with the only no-toxic paint I had; school white glue. (Do not use this close to bodyhair!)
You can see on the video the impessive colorchange. To do this, I left an ice pack on my arm for a couple of seconds and waited for my skin to return to it's normal temperature.
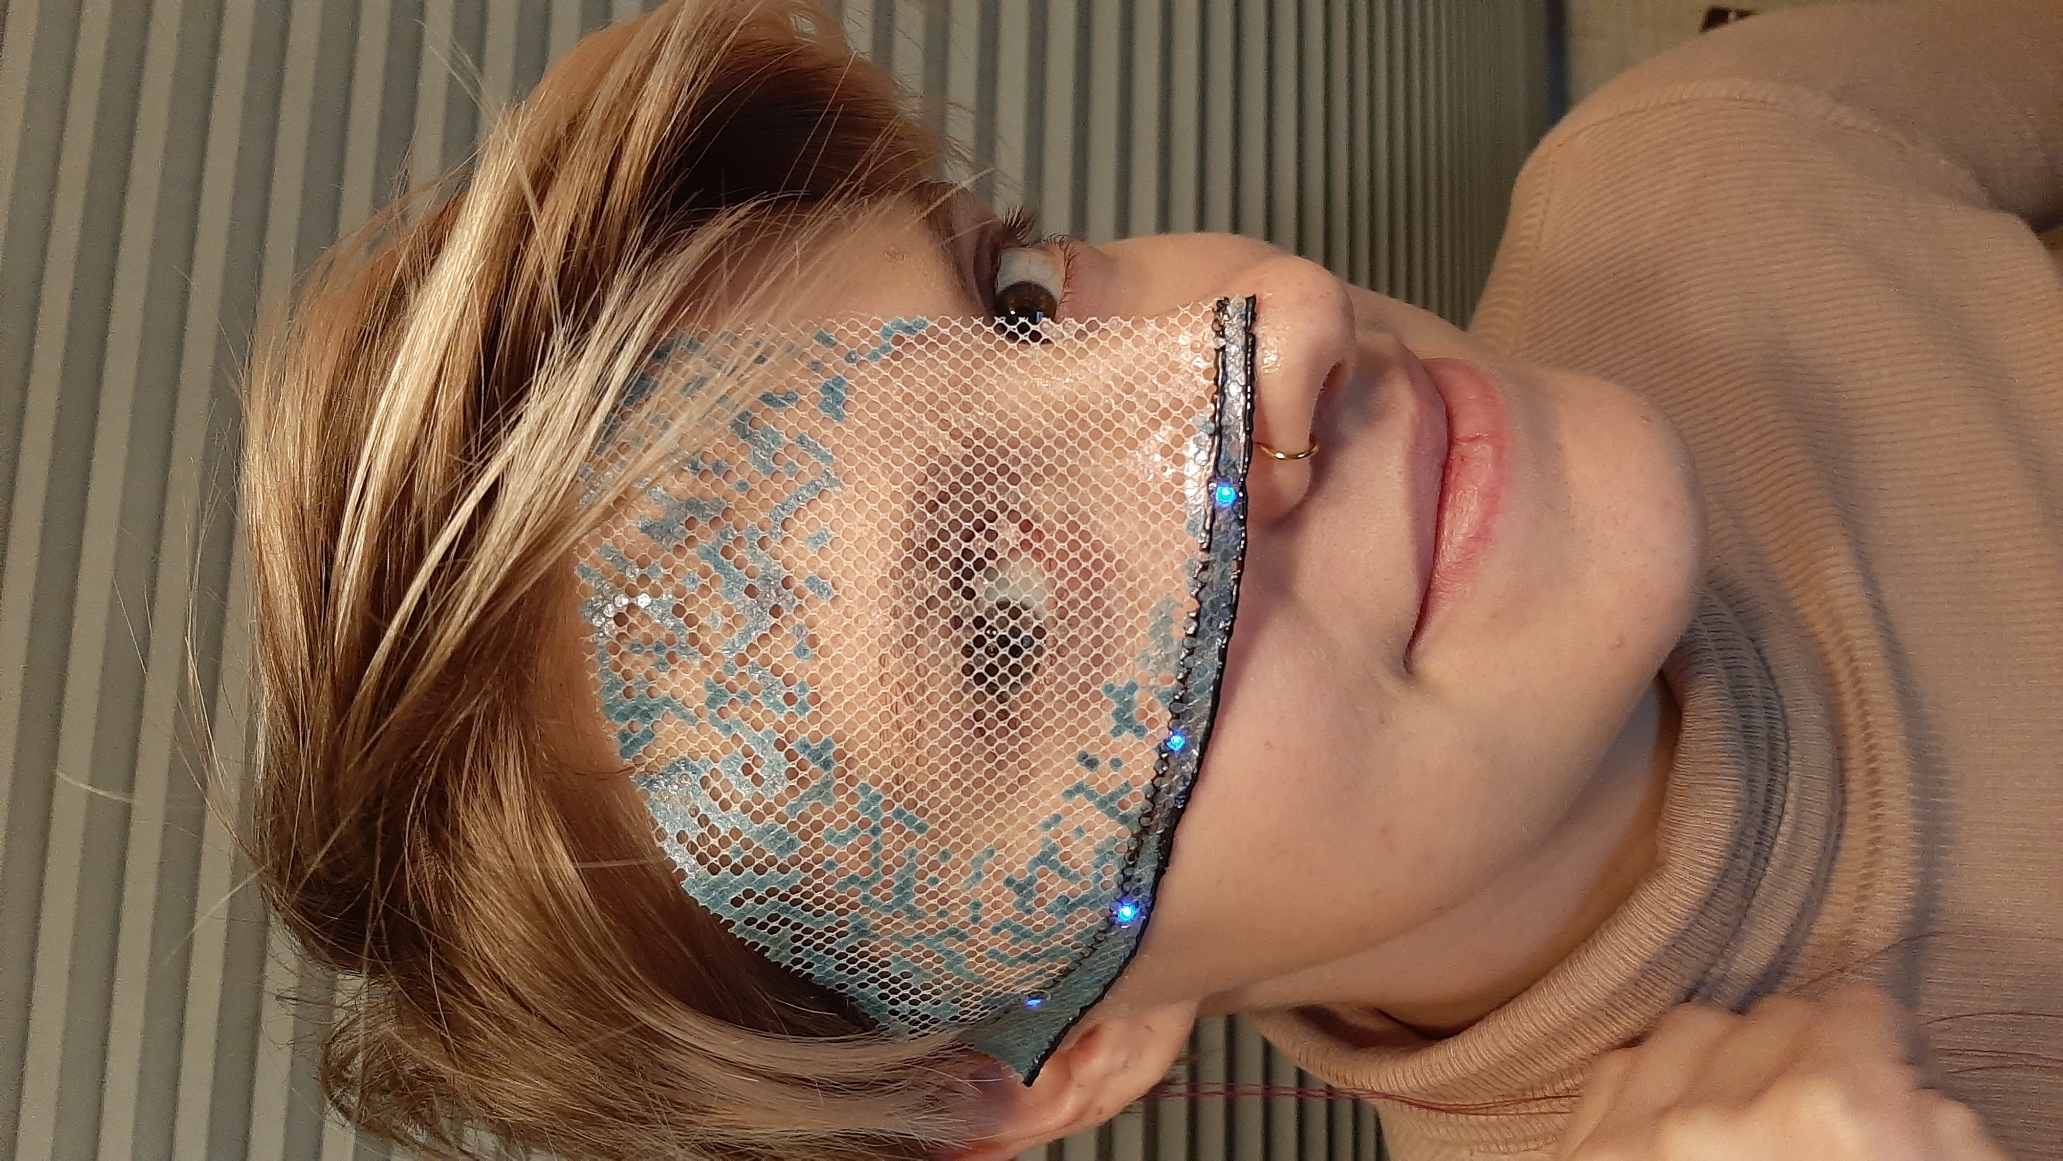
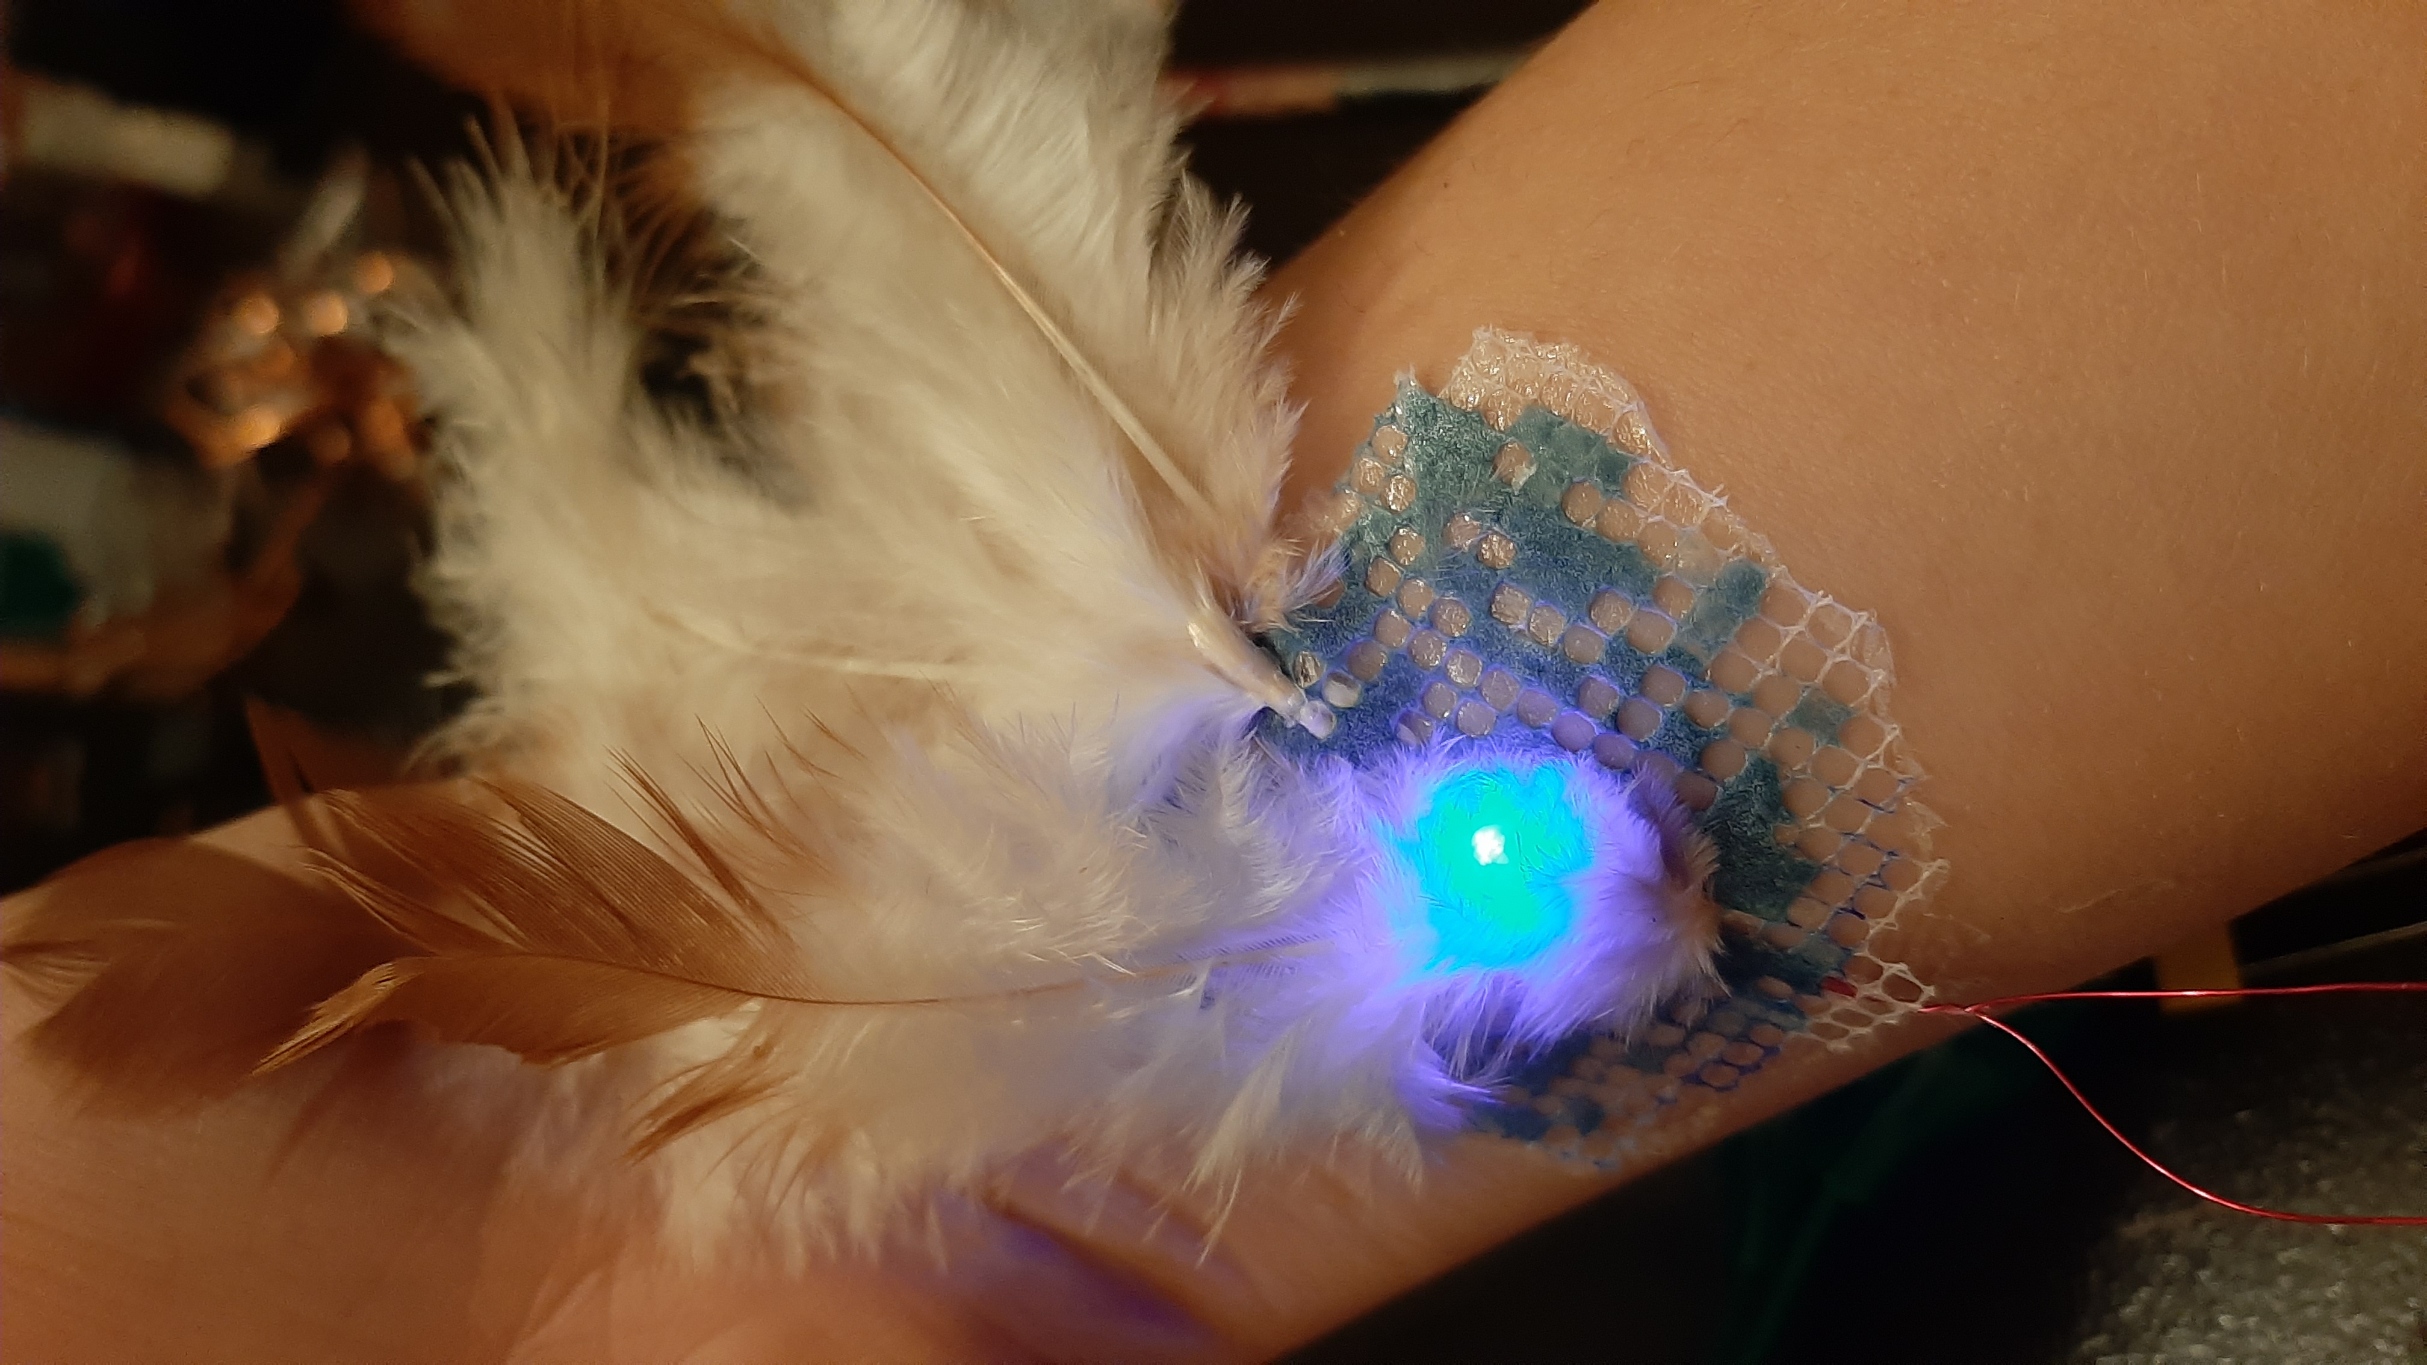
I then tried some experiments I could add. I thought I could add something to make contact, but the only thing I had was copper ribbon, and it is extremely incomfortable to wear on the skin. My second idea was to add feathers; especially because my first idea was to make some kind of maskerade mask. We can't really see it in the picture, but the light behind the feathers had a nice diffused effect. The feathers were only sipped between the mesh and the skin.
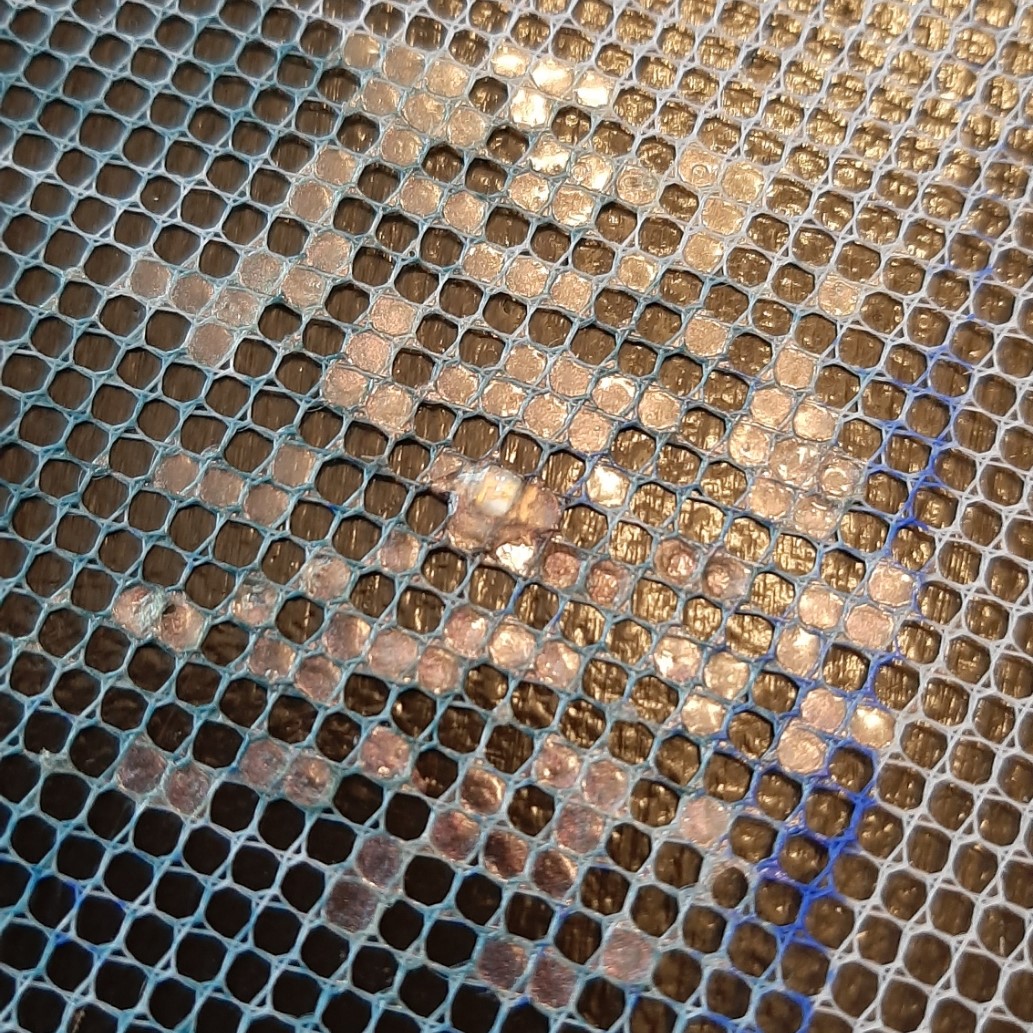
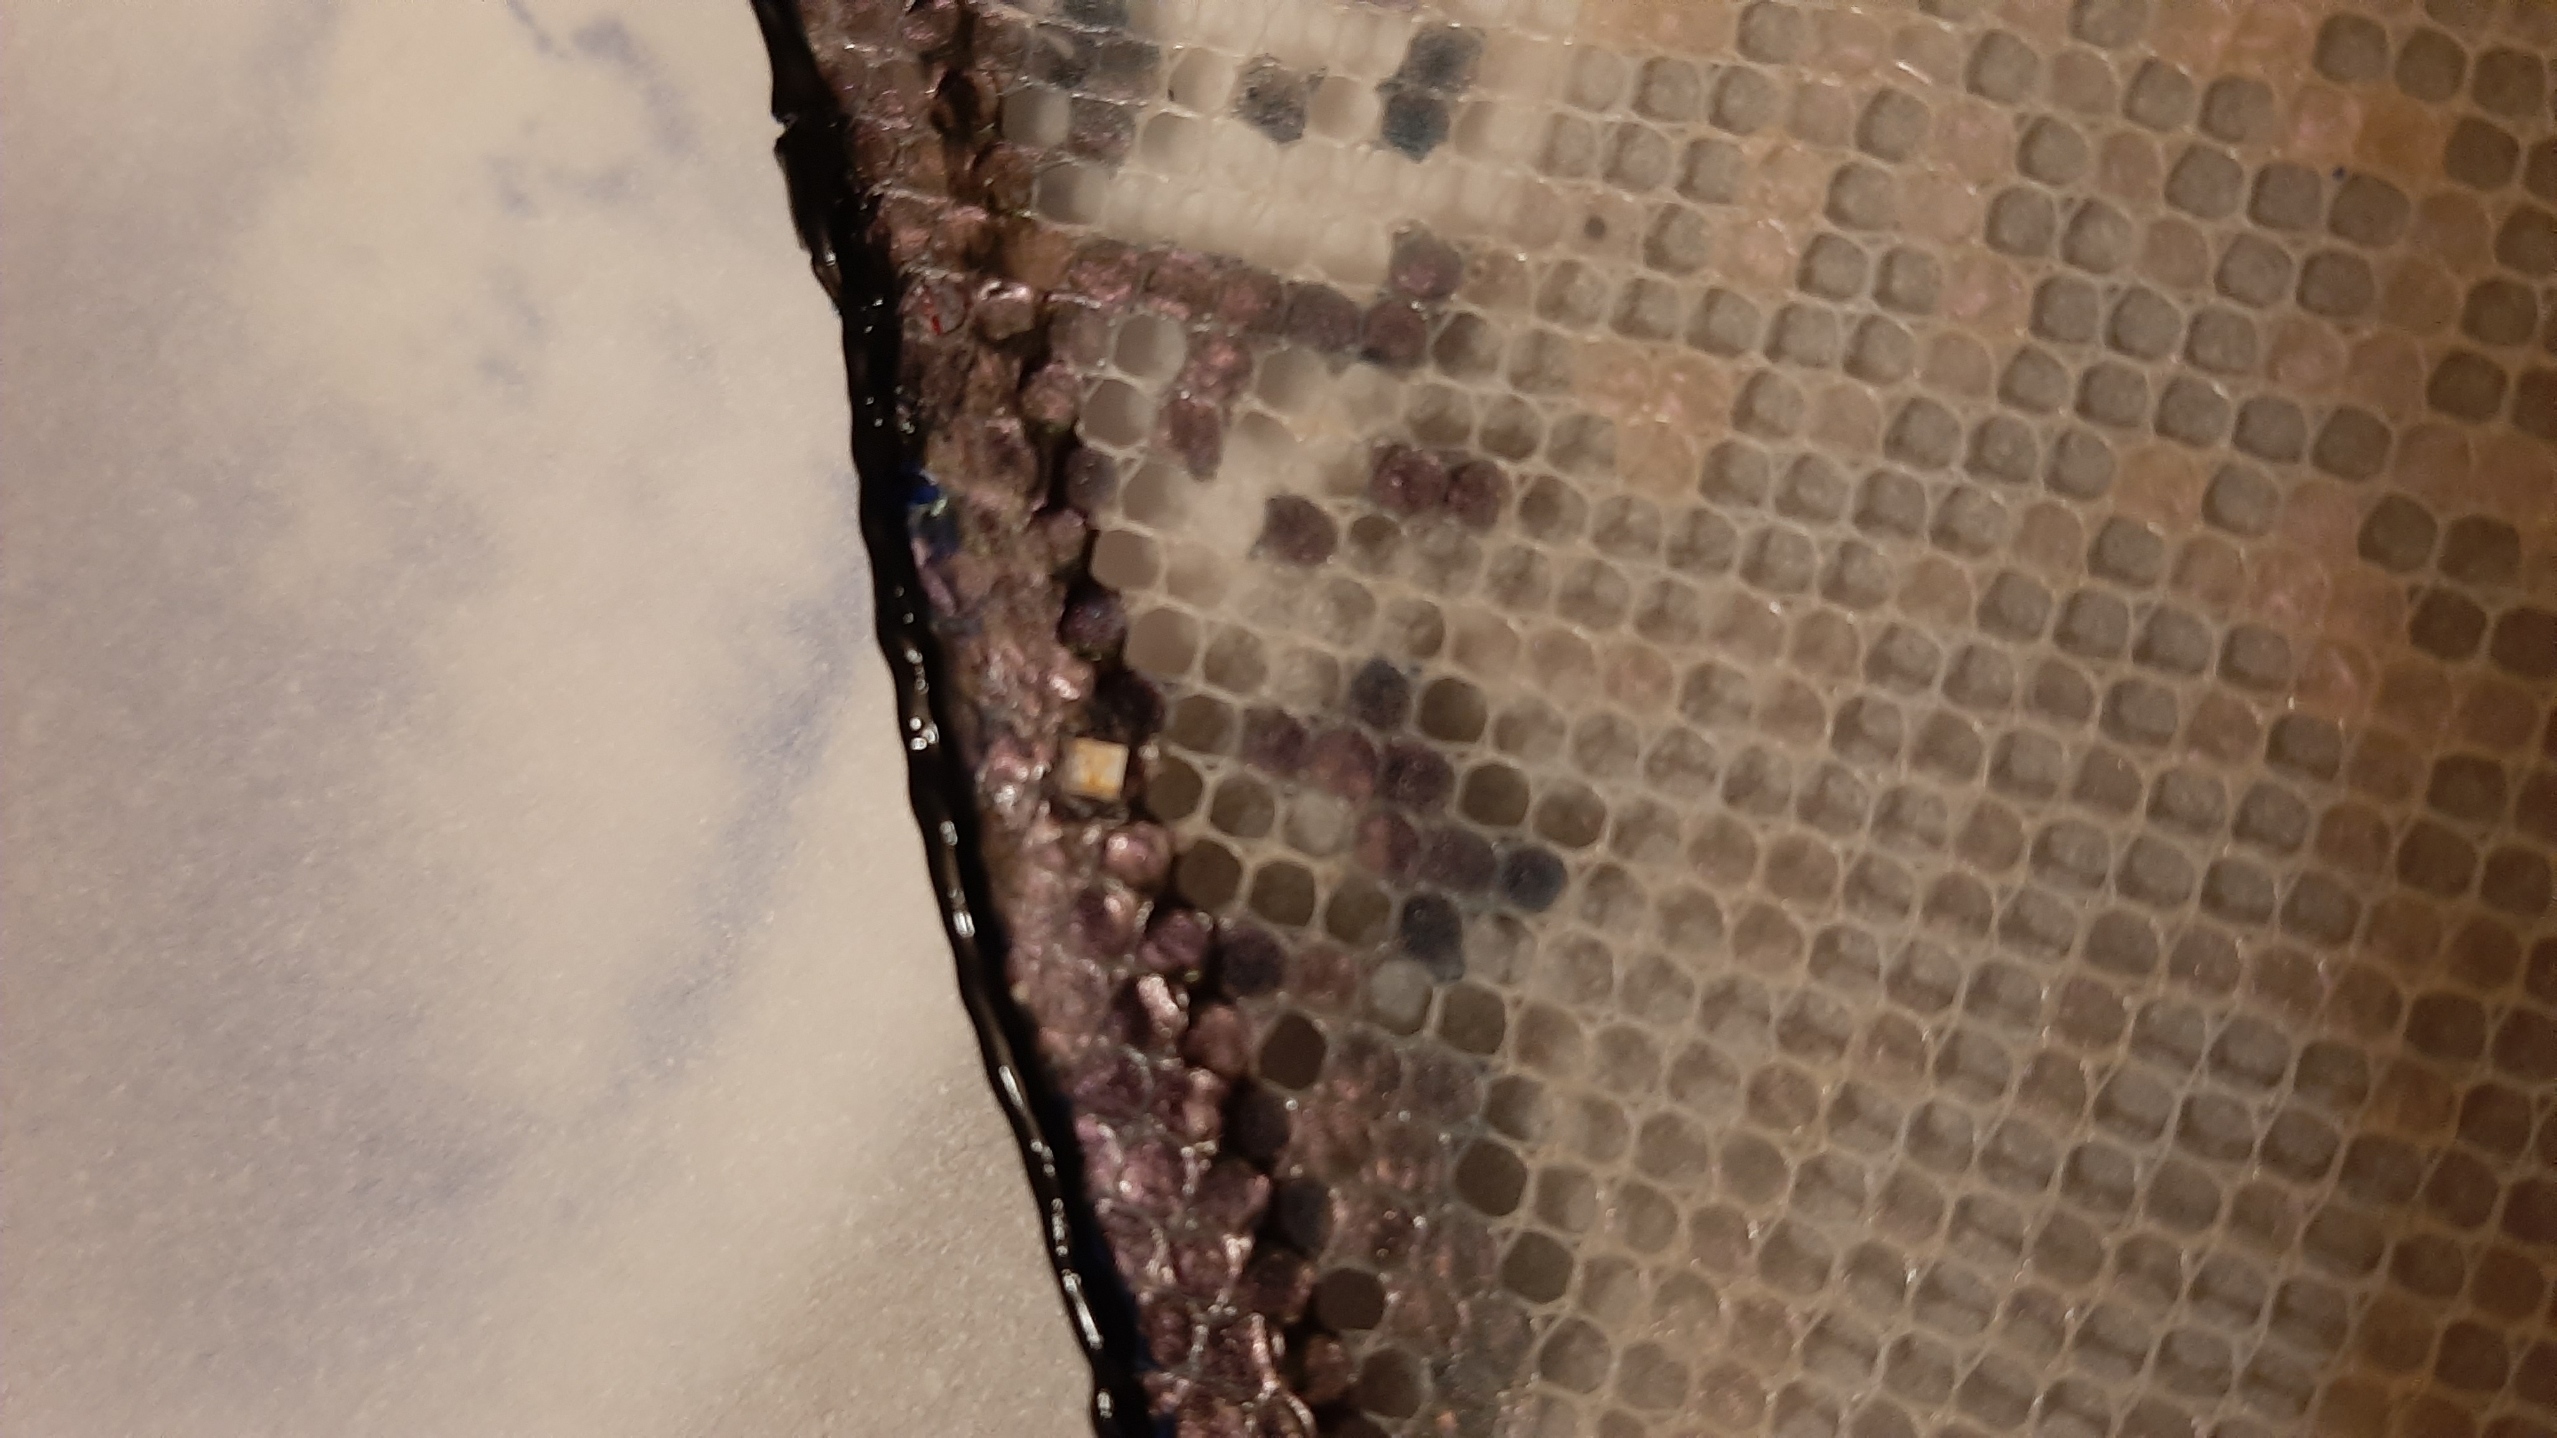
After realising that making a mask sticked to the skin might be more complicated than what I thought, I designed a simpler pattern, inpired by "voiles", a simple transparent fabric some women wore at weddings of funerals. The result is not directly on my skin, but it still looks fancy, so I went for it. I used a mirror to determine where I wanted the paint, so it wouldn't block my vision. On the first picture you can see the dried nail polish, and a layer of thermochomic ink. (on the right side of the project, we can see a bit of pink from the nail polish) I made a strong black line with "dimentional fabric paint". It keeps it's shape and stays cambered after drying. I made sure this part was opaque, so I could hide all the wires behind it. I inserted the LEDs, soldered them, and tried them.
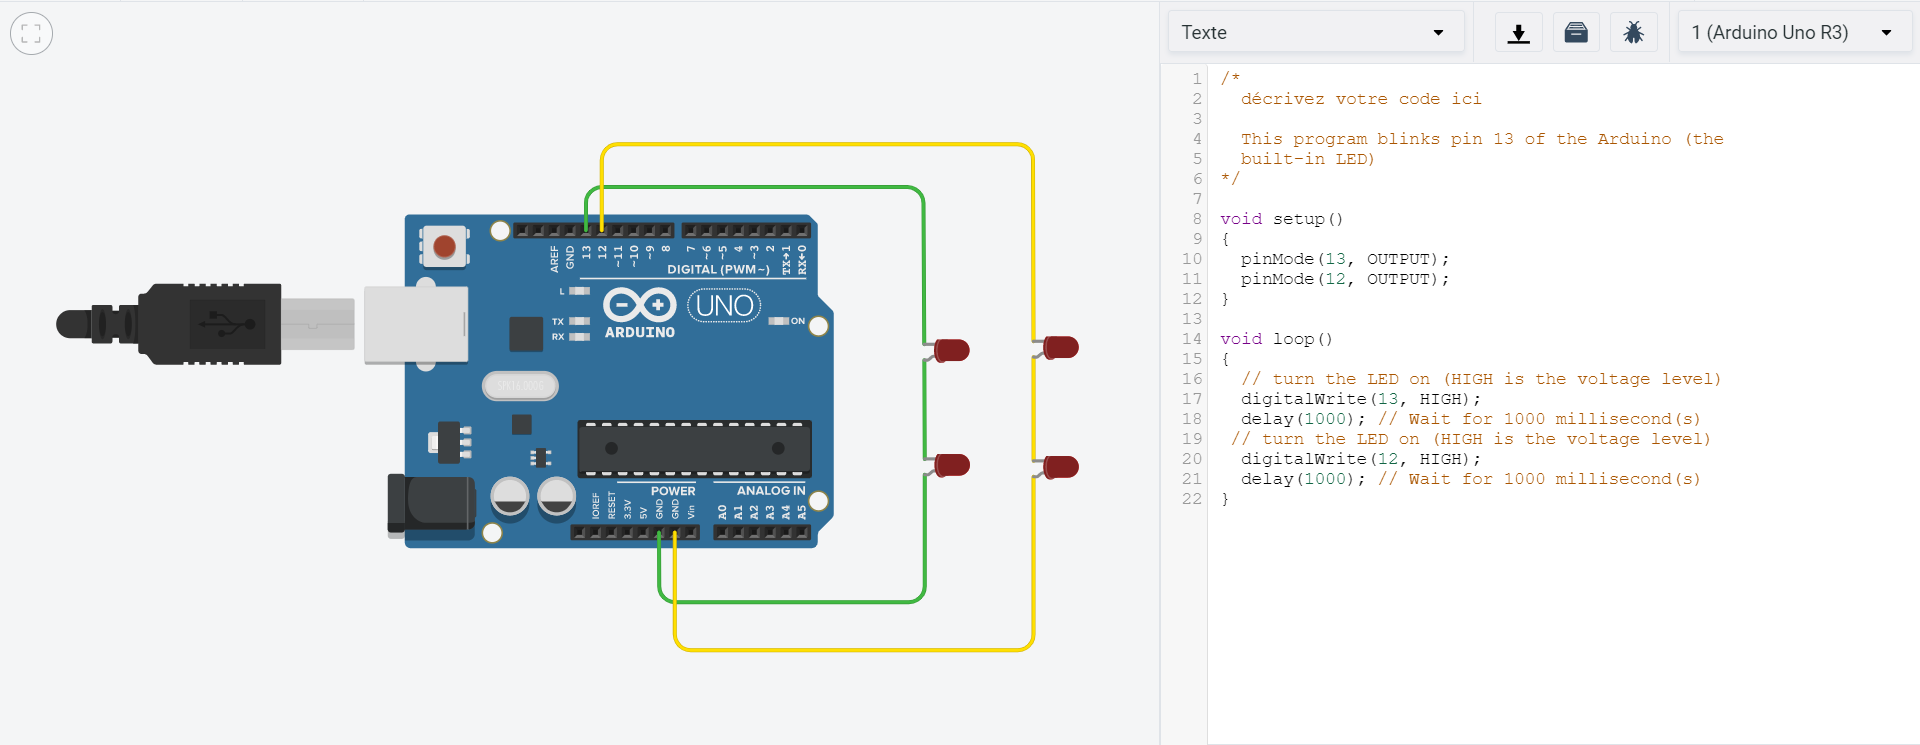
At first, it didn't work because I linked all 4 LEDs in a series circuit. This is what you get for not calculating before doing it! I mannaged to re-do my circuit and do only 2 LEDs at a time.
I chose to do it in series first to have less wires to deal with on the arduino, but mostly because I didn't want one led to bright lighter than the others. I used Ohm's law to calculate the resistance I would need. Starting with the formula V=I×R, I adapted it to my situation.
Considering that blue LEDs usually use around 3 or 3.3 volts, 5 V (power source) - 3 V (LED voltage drop) - 3 V (LED voltage drop)... What? But negative votage doesn't exist; the components will only pull the voltage they can. let's say that our LEDs each share the available voltage, and since they are in series, they share the voltage equally. 5 V - 2.5 V -2.5 V Would make more sense. Our I is the current we want flowing in our LED. In this case, we want to aim for 20 mA, as recommended.
We get 5 V - 2.5 V - 2.5 V / 20 mA = R. So, 0 V / 20 mA = 0 Ω. What?
But it makes sense! since the voltage is not enough for the led to fully light, no risk of damaging or overheating the component! I did some research on the suject, and found the recommendations of UST saying that "Keeping electrical and electronic components cool tends to insure their longevity. Slight reductions in voltage levels may permit many electronics to perform perfectly well while minimizing their temperature. Of course, the same is not true of motors." Basically, an LED that takes 3V and is given 5V will take all the 5V... but will overheat and break sooner. In my case, since I'm not pushing my components to their full capacity, they don't need resistance. Of course, there would be a power load (too much current) That could damage my components in the long term. Maybe I could use another power source for the final version.
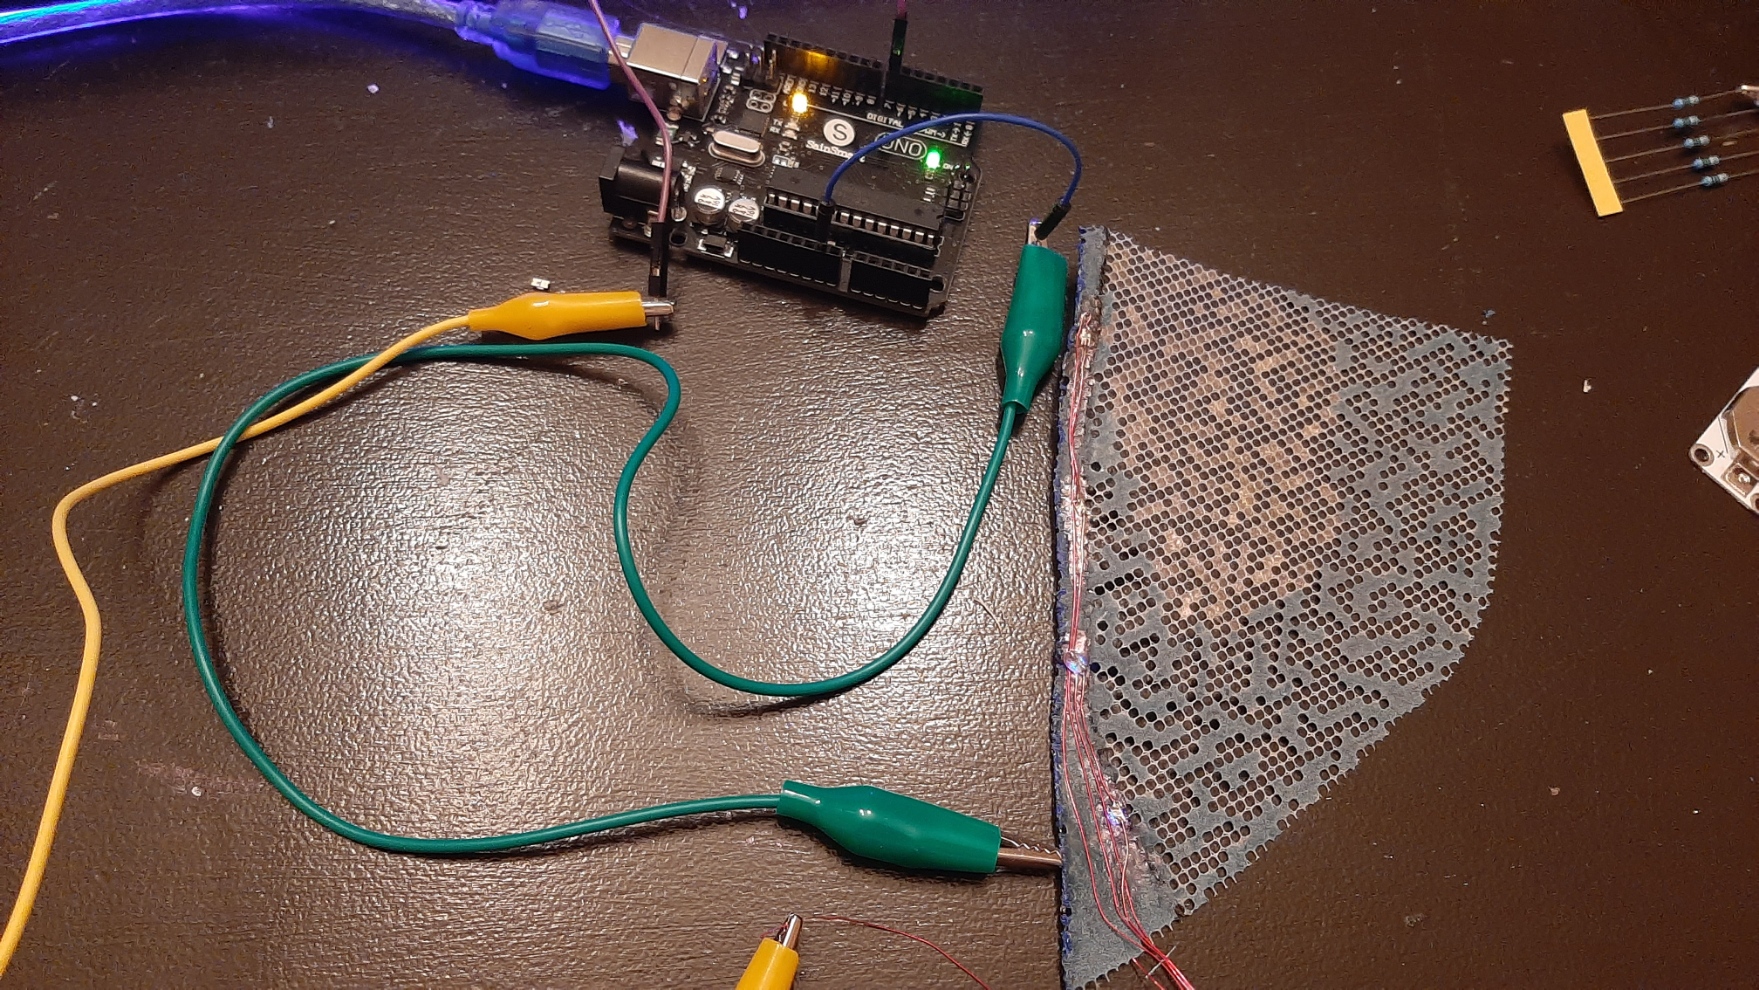
The wires of those two different cicuits went behind my ear, all the way to a arduino. The wires are not so visible, and since I don't have to move anywhere, it's perfect for my last minute project and a couple of pictures!
Christmas Party
I was able to prepare my project quickly on the morning of the christmas party. I added less glue I could, since I know this glue is not made for skin!