References
There is such an impressive variety of biomaterials that exist. The fact that it's easy to try at home, and it's also the best solution to replace plastics. Plastics are a real problem, since the earth canot digest it. We get stuck with impressive quantities of plastic garbage everywhere that we can't manage to recycle. Why do we keep using it then? The answer is simple; it's easier. Plastic is known to be easy to transform and to adapt to any particular needs: it can be flexible, hard, soft, it can stick together, can expand, can shrink, it can be colorful, then recycled. As Cecilia pointed out: "plastic is a wonderful and durable material, it's the uses we make out of it that are wrong. Why make a cup for partys or festivals out of plastic? Why design someting that will last for thousands of years for something that we'll use for maybe... an hour?" Unfortunatly for us and the planet, most biobased materials aren't really resitent to water on their own.
For those of you who are at home (and for future me), here are some wonderful recepie book. It's also important to note that a lot of these crafted materials need to dry. it sounds dumb, but the material will shrink, or the color will fade once the material is dry. since the material is more beautiful in it's "wet" state, most pictures were taken before the material was dry. Your result might not be the same than in the pictures. Materium is an open source recipe book made by community all over the world. I also put a link to a couple of interesting books on biomaterial.

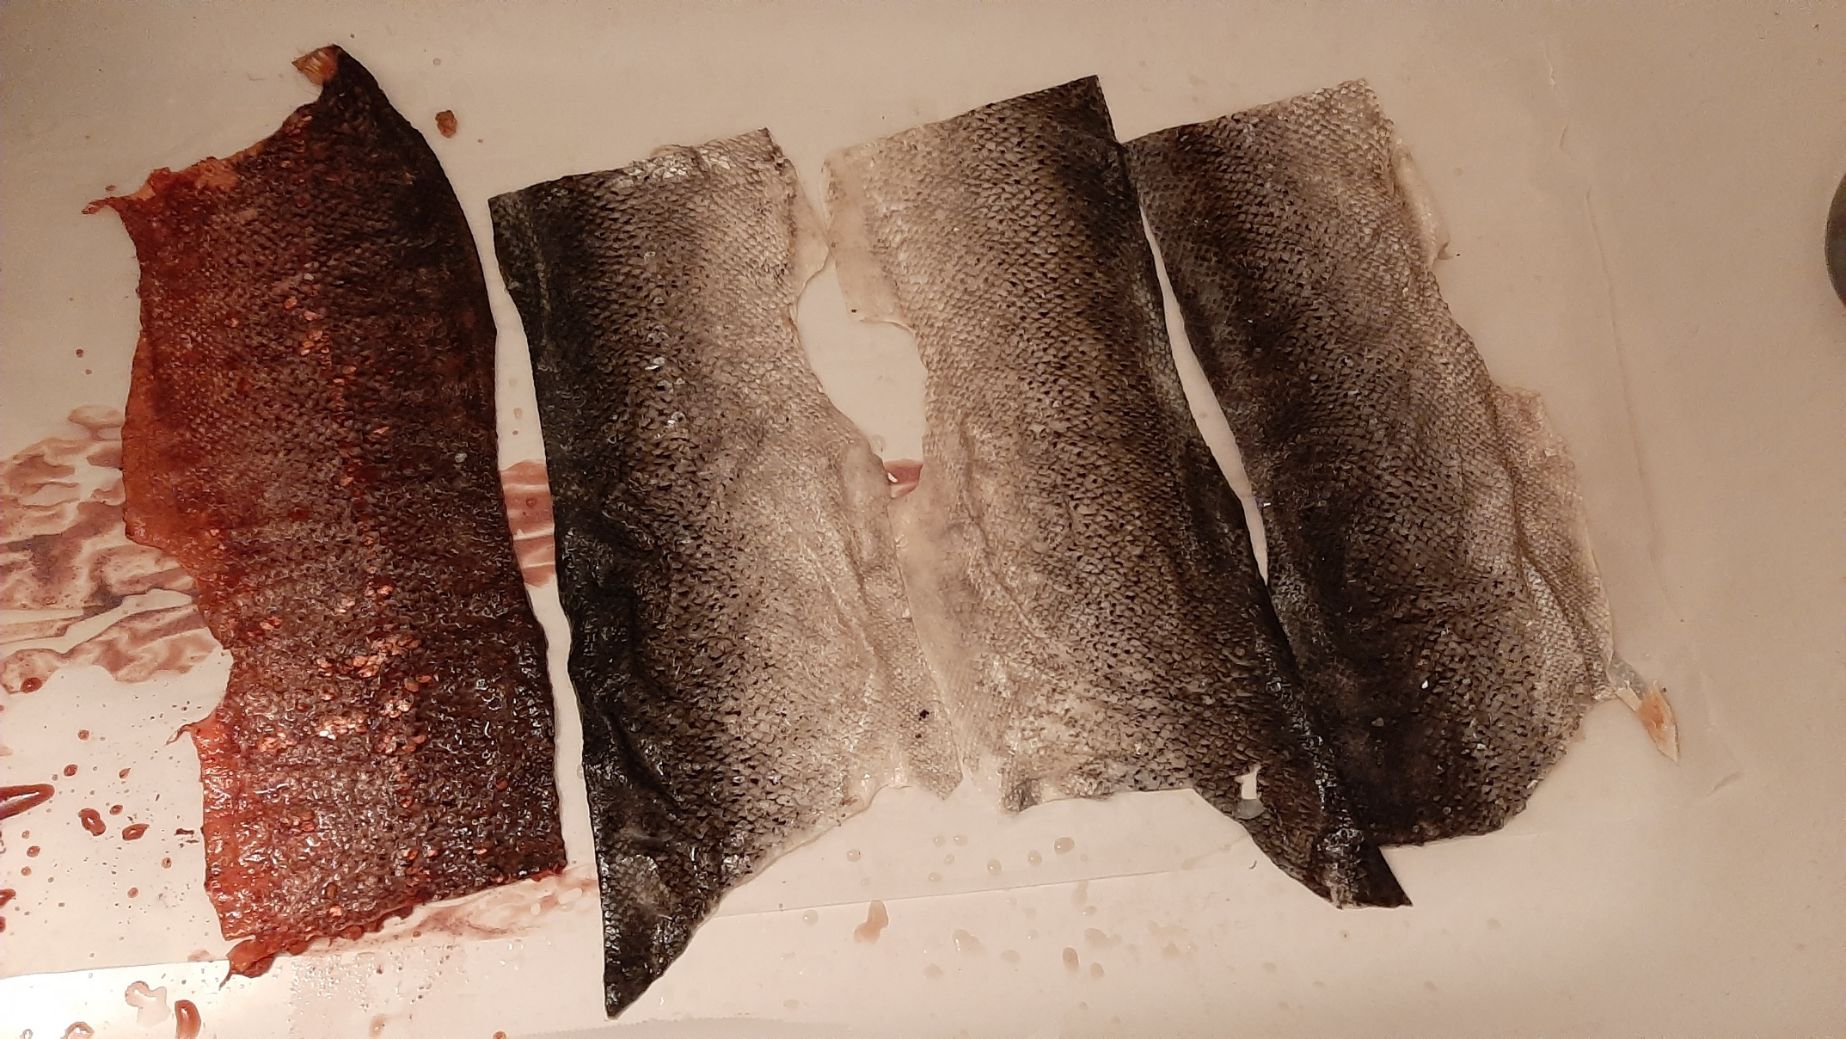
Fish Skin Leather
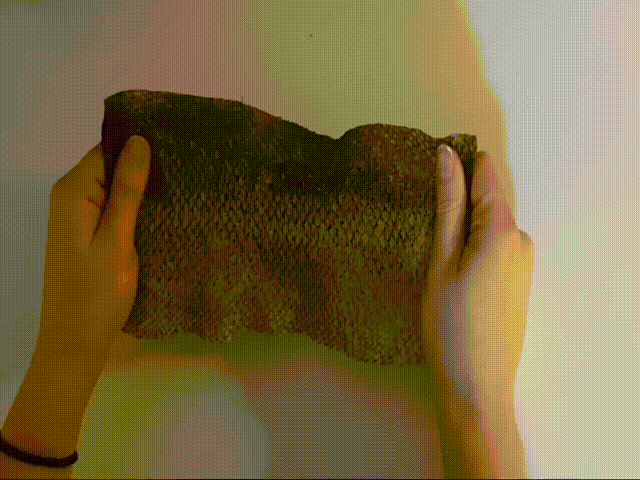
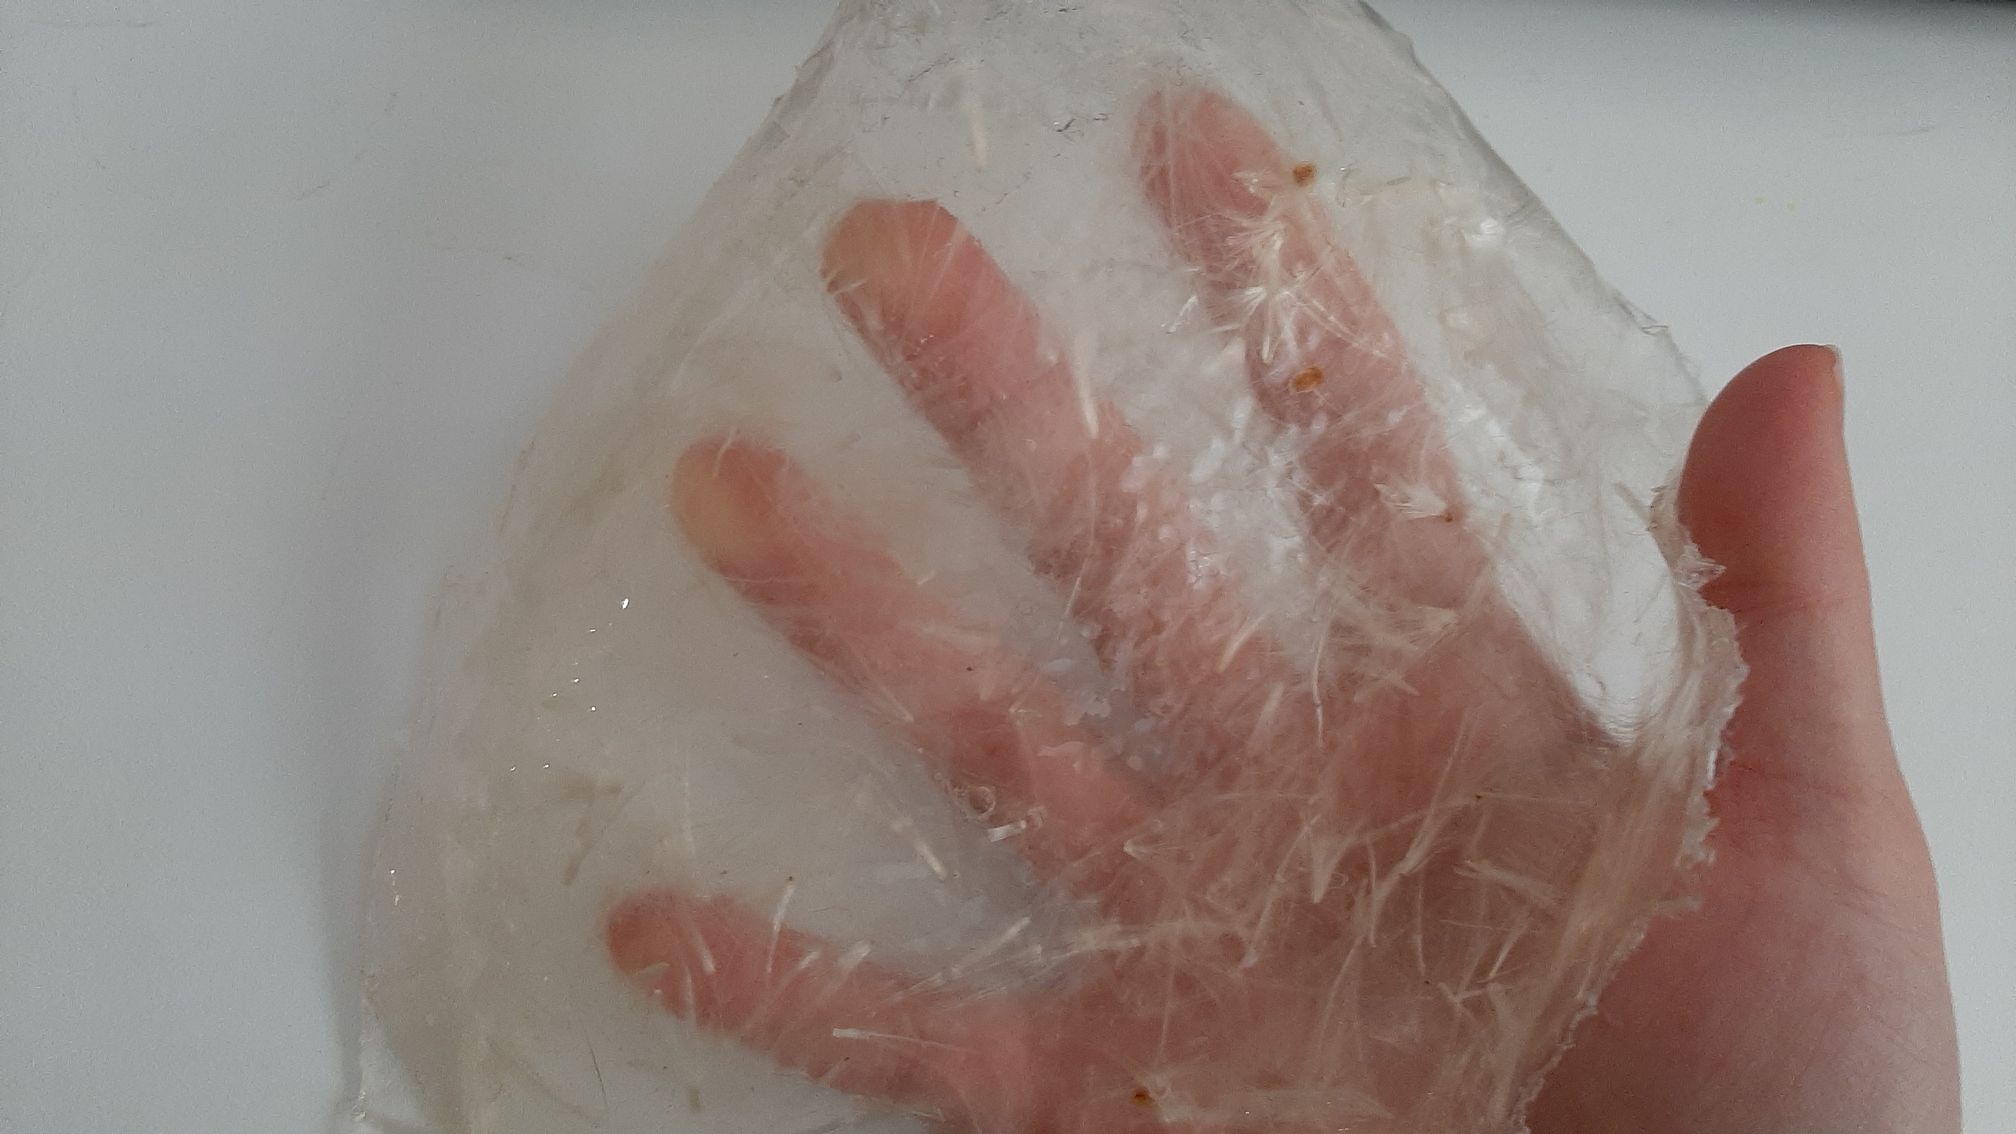
Fish Skin are easy to find, I went to a fish shop close to my house and they were happy to give me 6 wonderful salmon skins. I almost asked them to keep me more skins... but when I got outside, I was glad I didn't! It was really cold oustside, and by the time I finished my fingers were frozen!
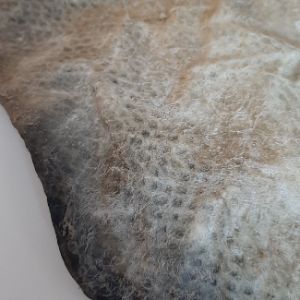
Getting the rest of the flesh off is easy. Getting the scales off is so messy! The surface of the skin is rather fragile, but the scales were hard to get off, so at some places I went too hard and damaged the wonderful pattern of the skin, and at some places there was still scales on. I still had to go pretty hard.
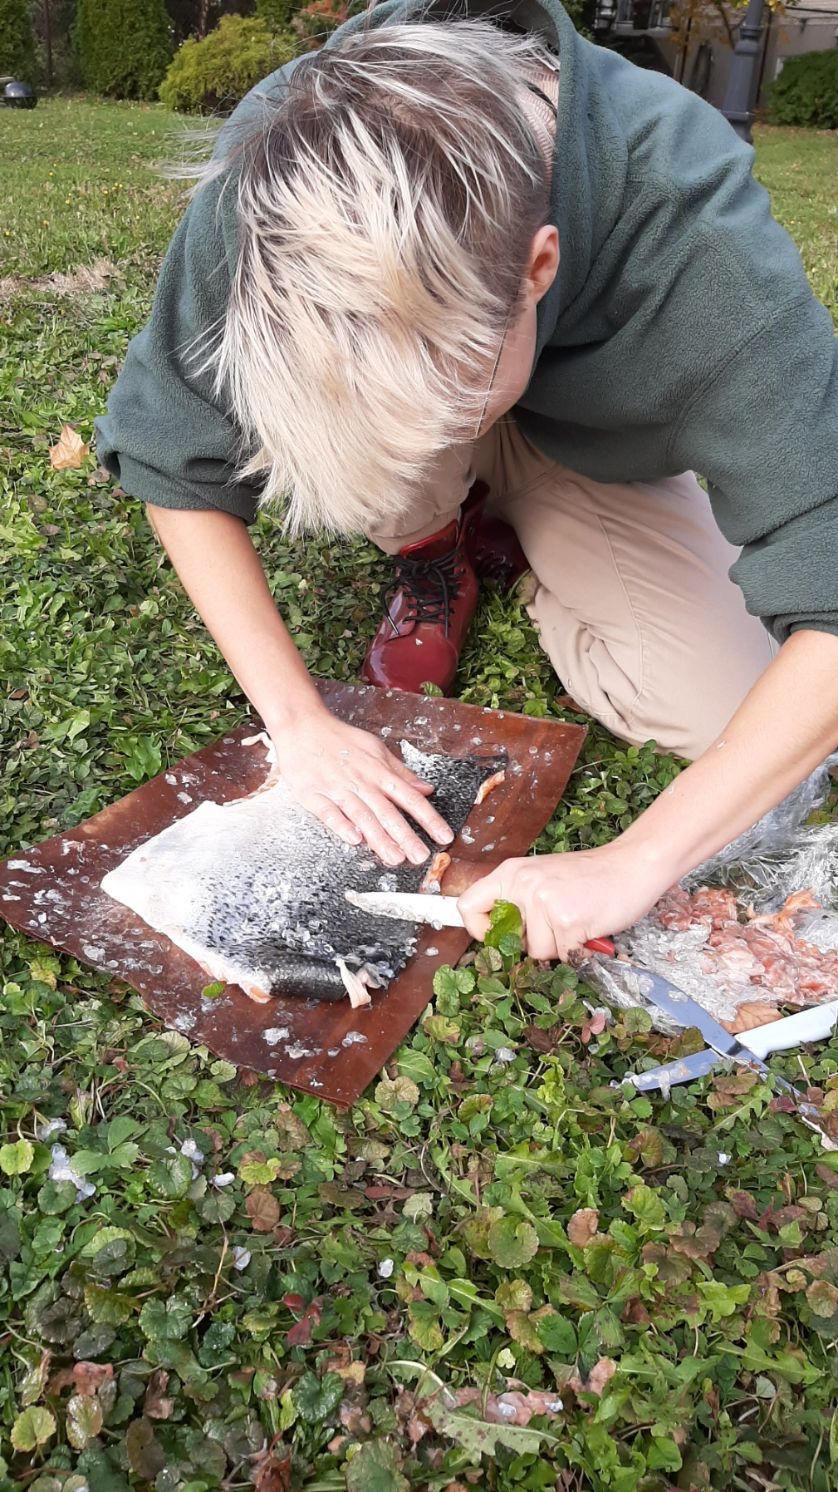

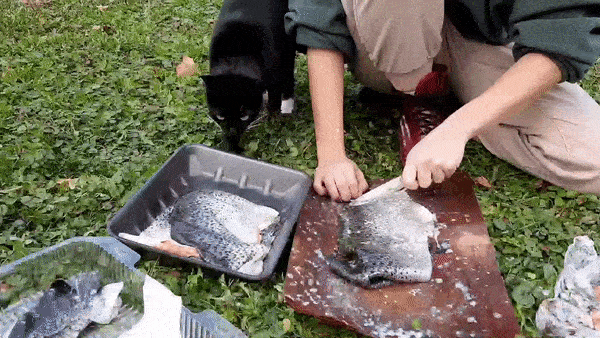
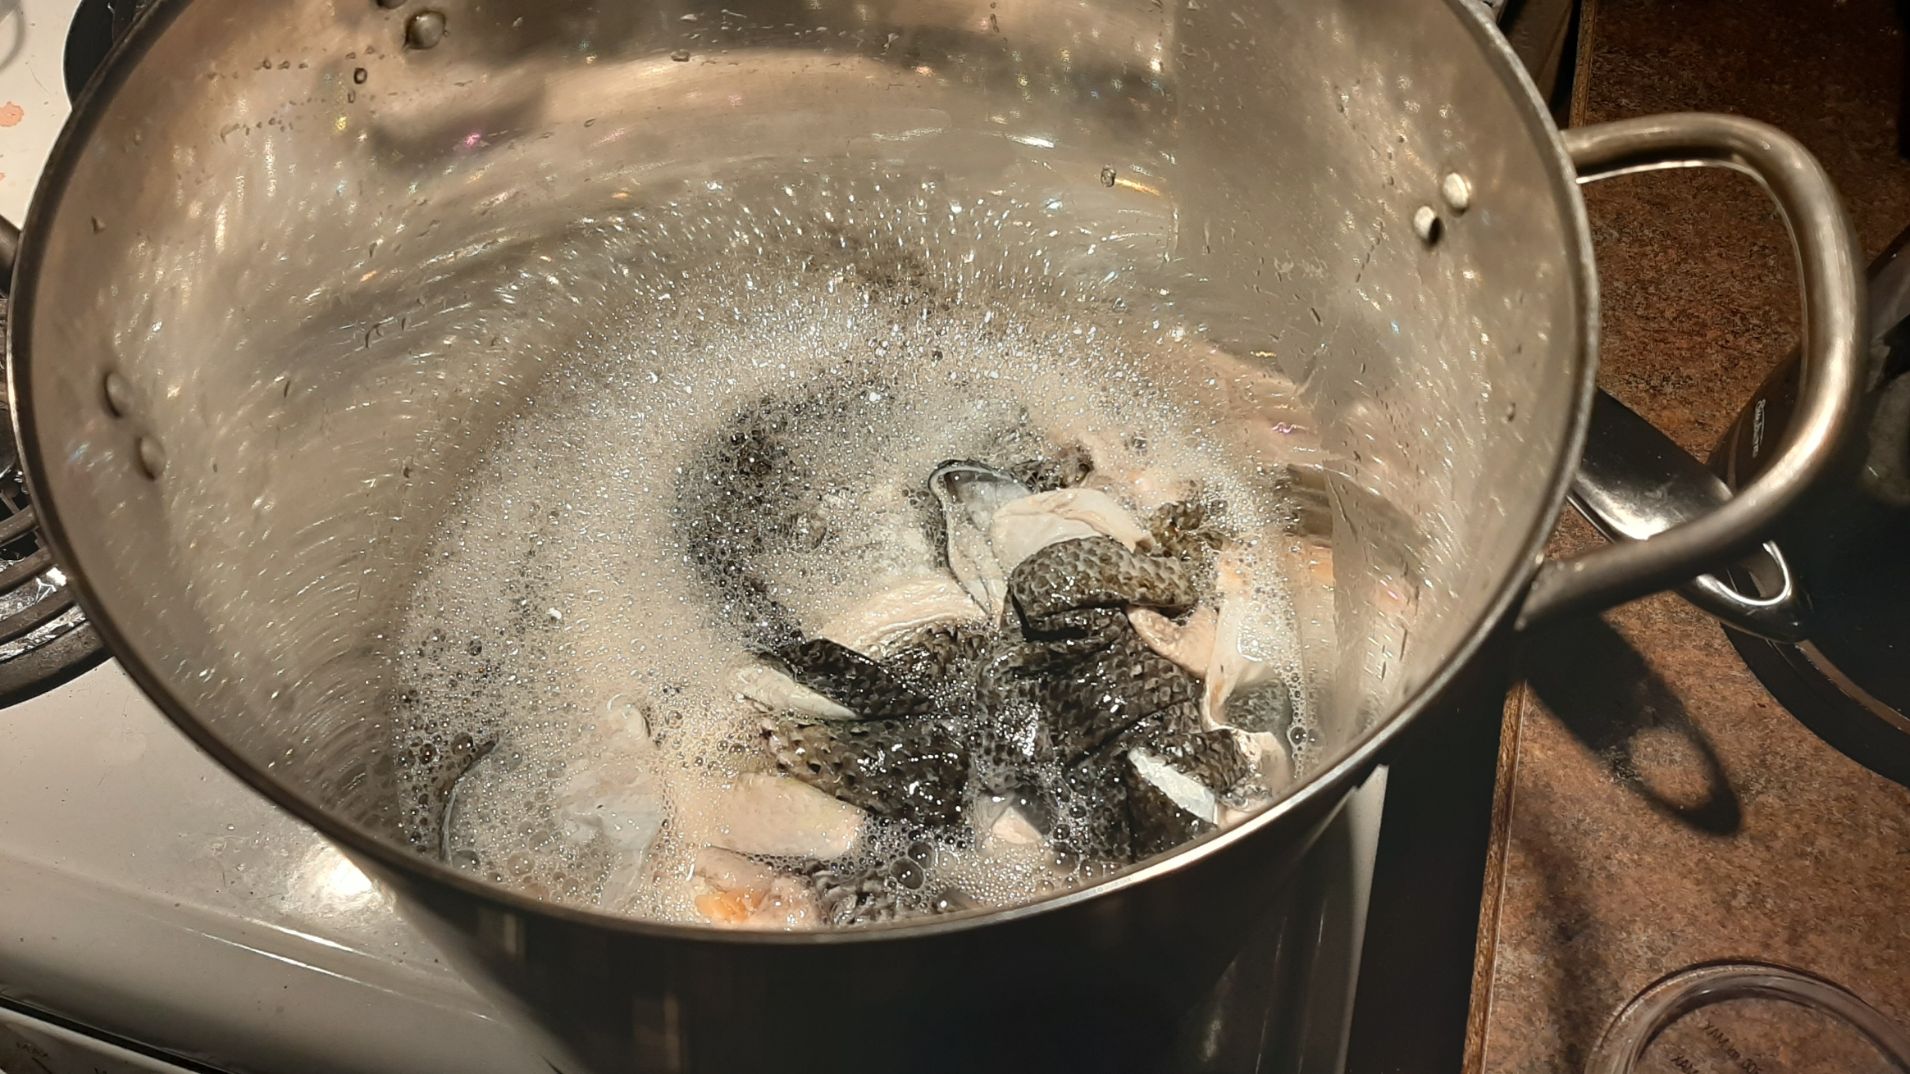
I got most of the scales off and rinced the skins. They were soft and mince and really looked like snake skin. I got inside and followed instructions I found on youtube and put every thing in a warm bath with soap.
Some scales were still on the skins, and I had the intention to get them off while the fish skins were cleaned. BUT, once warmed off, they felt so fragile! I tried to get one out of my container, but I saw a cut (probably one I made by accident while getting the scales off) and got so scared I would rip everyting apart, so I dropped everything in my solutions and hoped for the best.
-3 Salmon skins -100ml glycerine-100ml ethanol 95%
-3 Salmon skins -100ml glycerine-100ml ethanol 95%-150ml rest of madder dye
Tips
-The biggest part of the job is to get the scales off the skin. Spend more energy on this since the begginning.
-The fish skins become more fragile when in contact with warmth or with water.
 The skins felt like they never completely dried. The were beautiful, but still smelled. I made the mistake to not "massage" them right away. When I tried to do it, my hands were full of oil. I looked back at some people teaching this on youtube, and some of them massaged the skins even before they where completely dry!
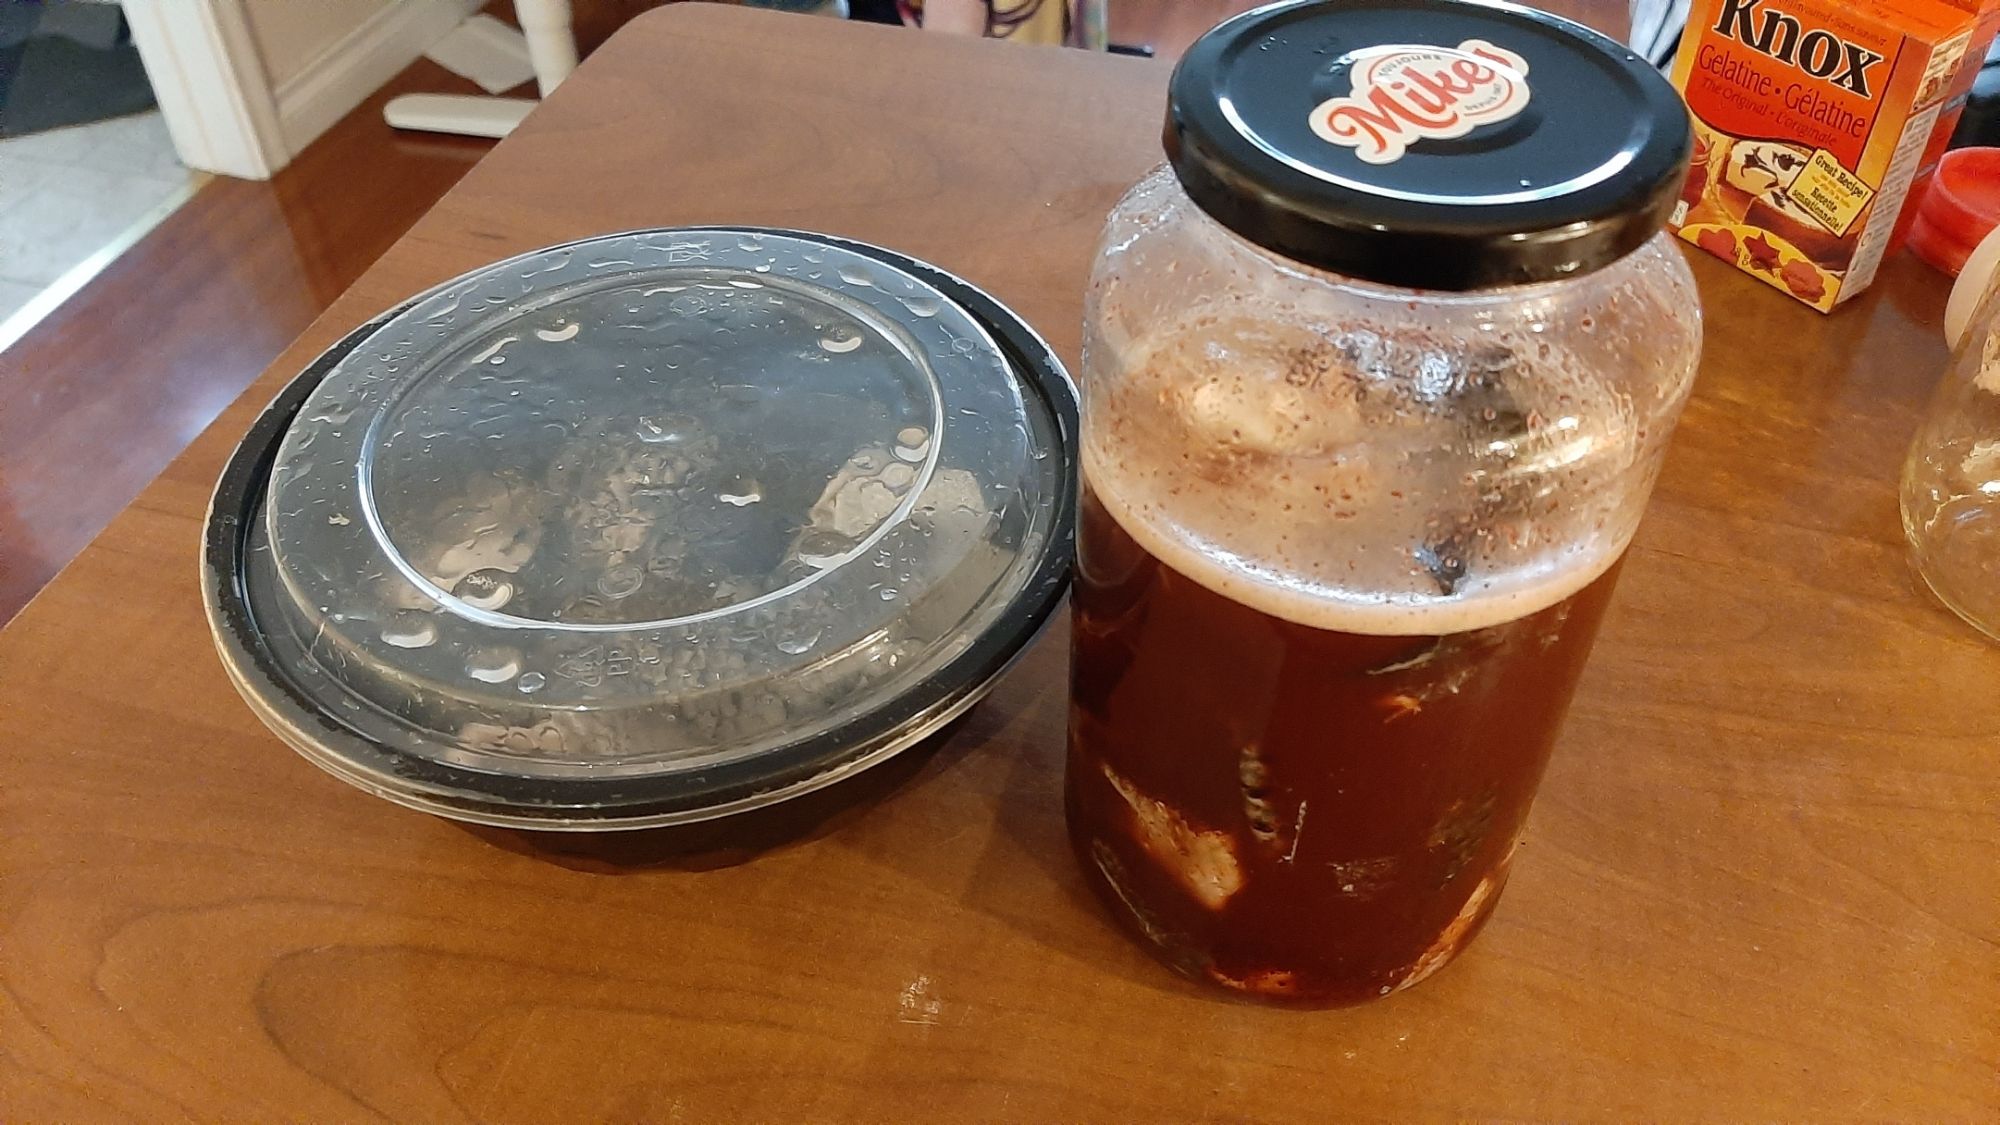
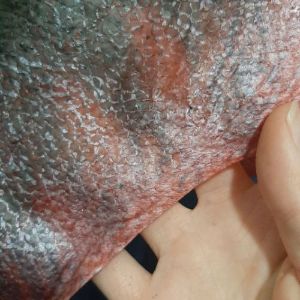
 Since they were so oily, I tought soap could remove the excess and the smell. I let 2 of the skins rest in soapy water for the night, but when they dried, they were so stiff, instead of "working" the skin, it was cracking and breaking appart. I also noticed that the skin I tured red with madder dye was a bit more fragile.
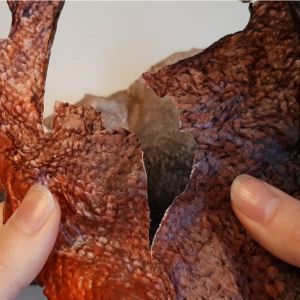
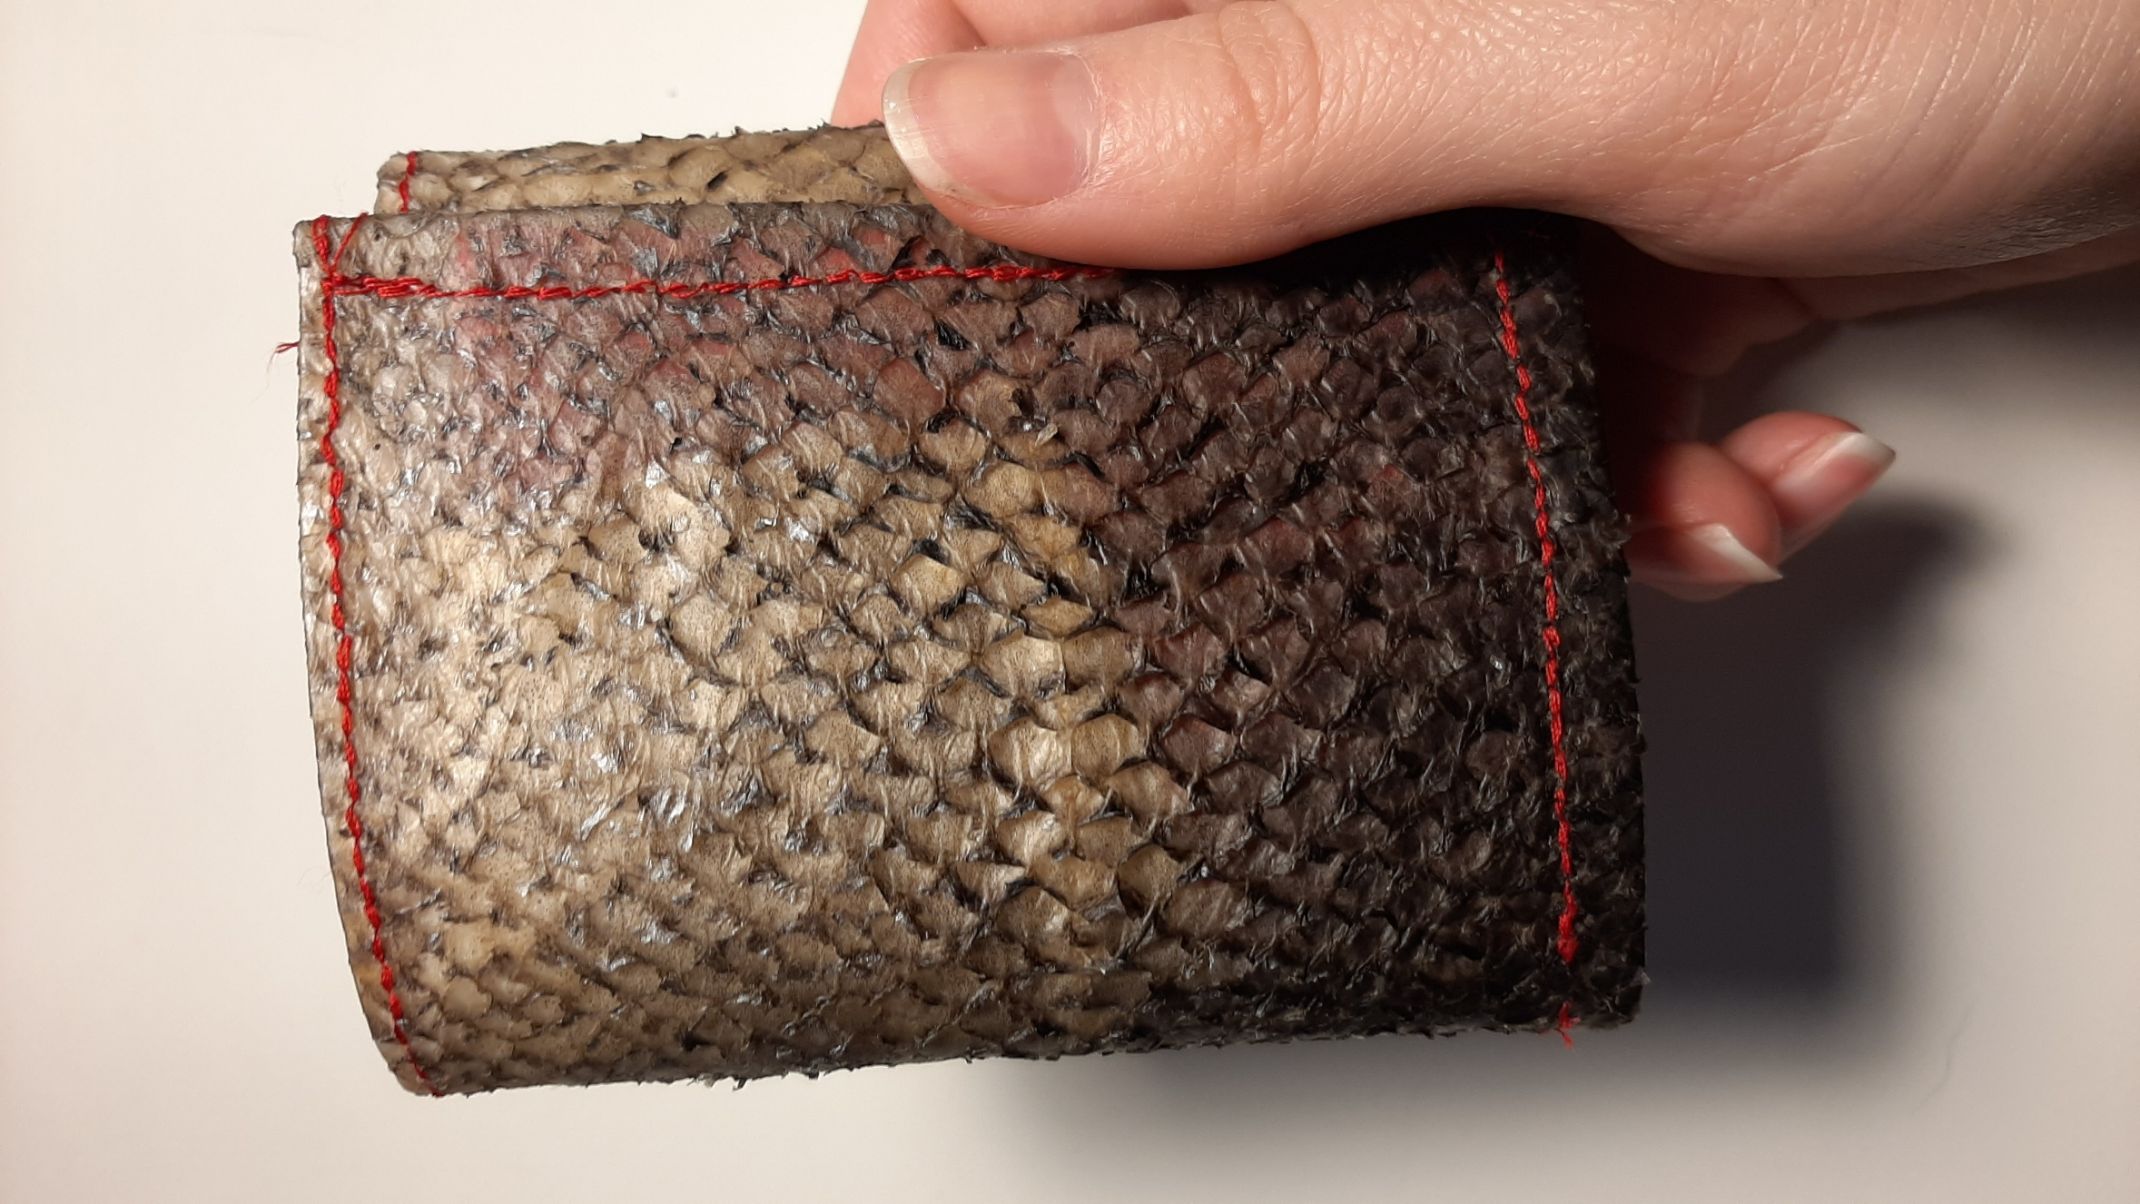
 I tried again, This time with another formula, to save the skins I already treated. Following this tutorial, I mixed together an egg yolk, 100ml of canola oil and one tablespoon of dishsoap. The skin was left in the mix for only 20 minutes, and then dried. This time, each morning for 3 days, I took the time to "work" the skin as it dryed. It made a difference! The fish skin felt a bit less oily, very strong, but still smelled a bit. The result was also impressively flexible!
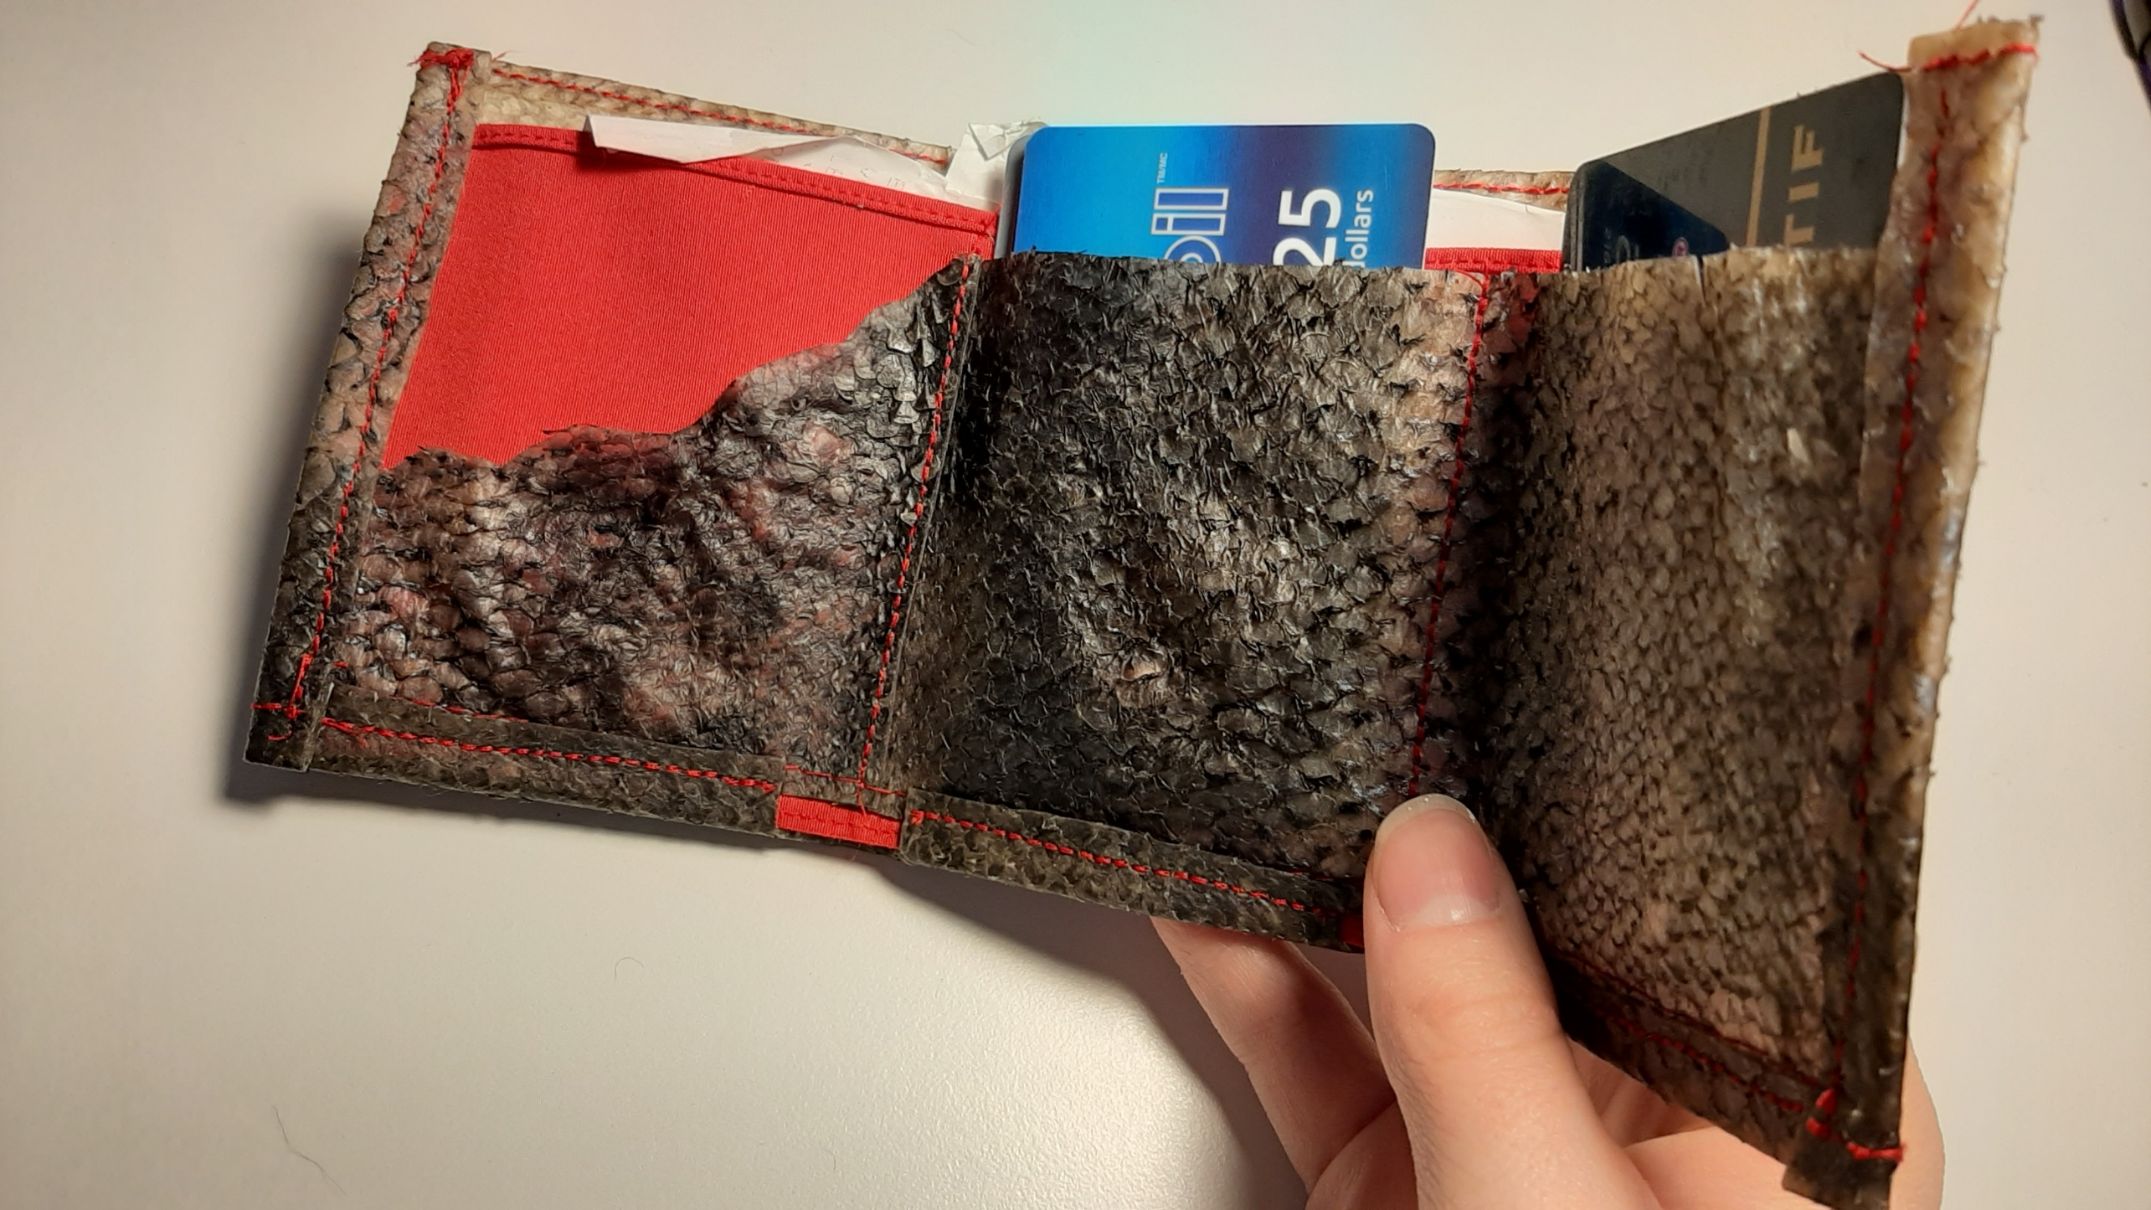
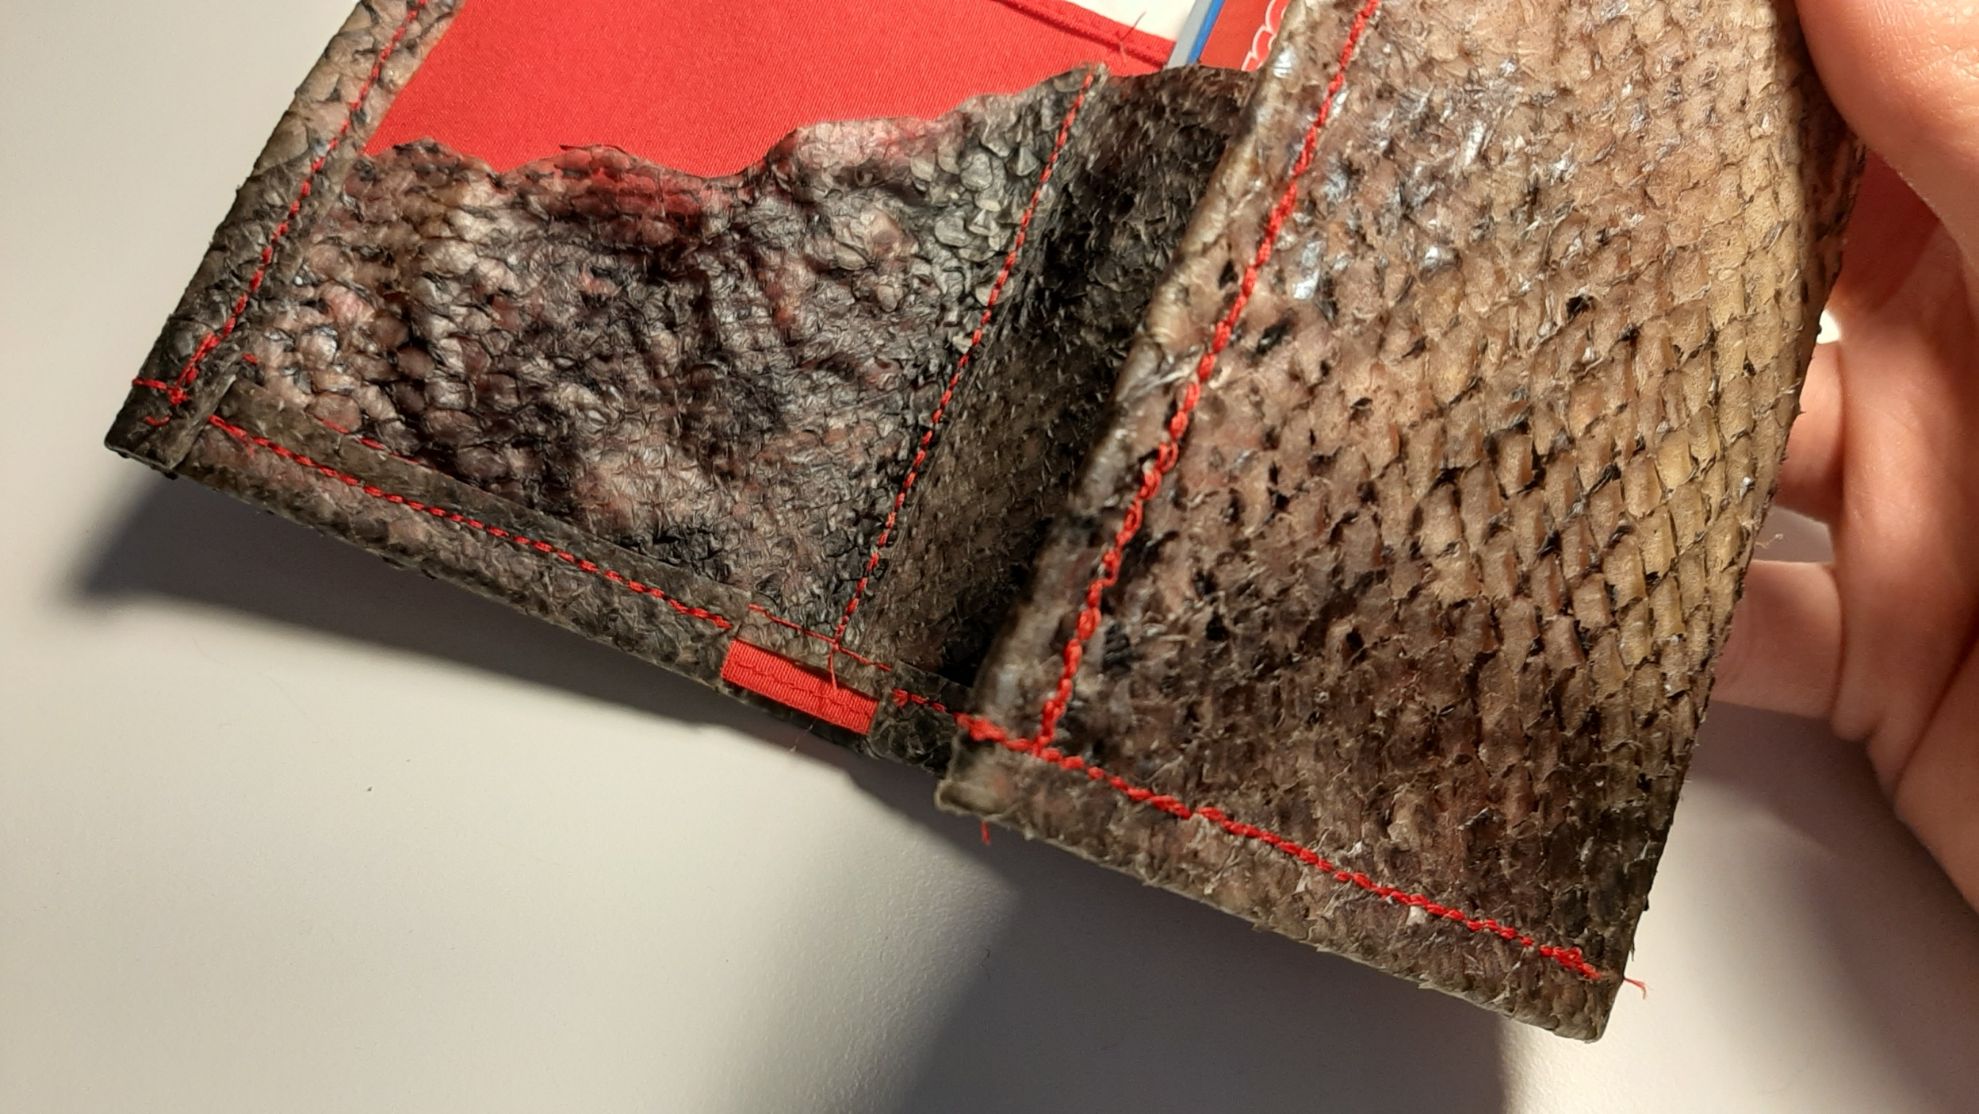
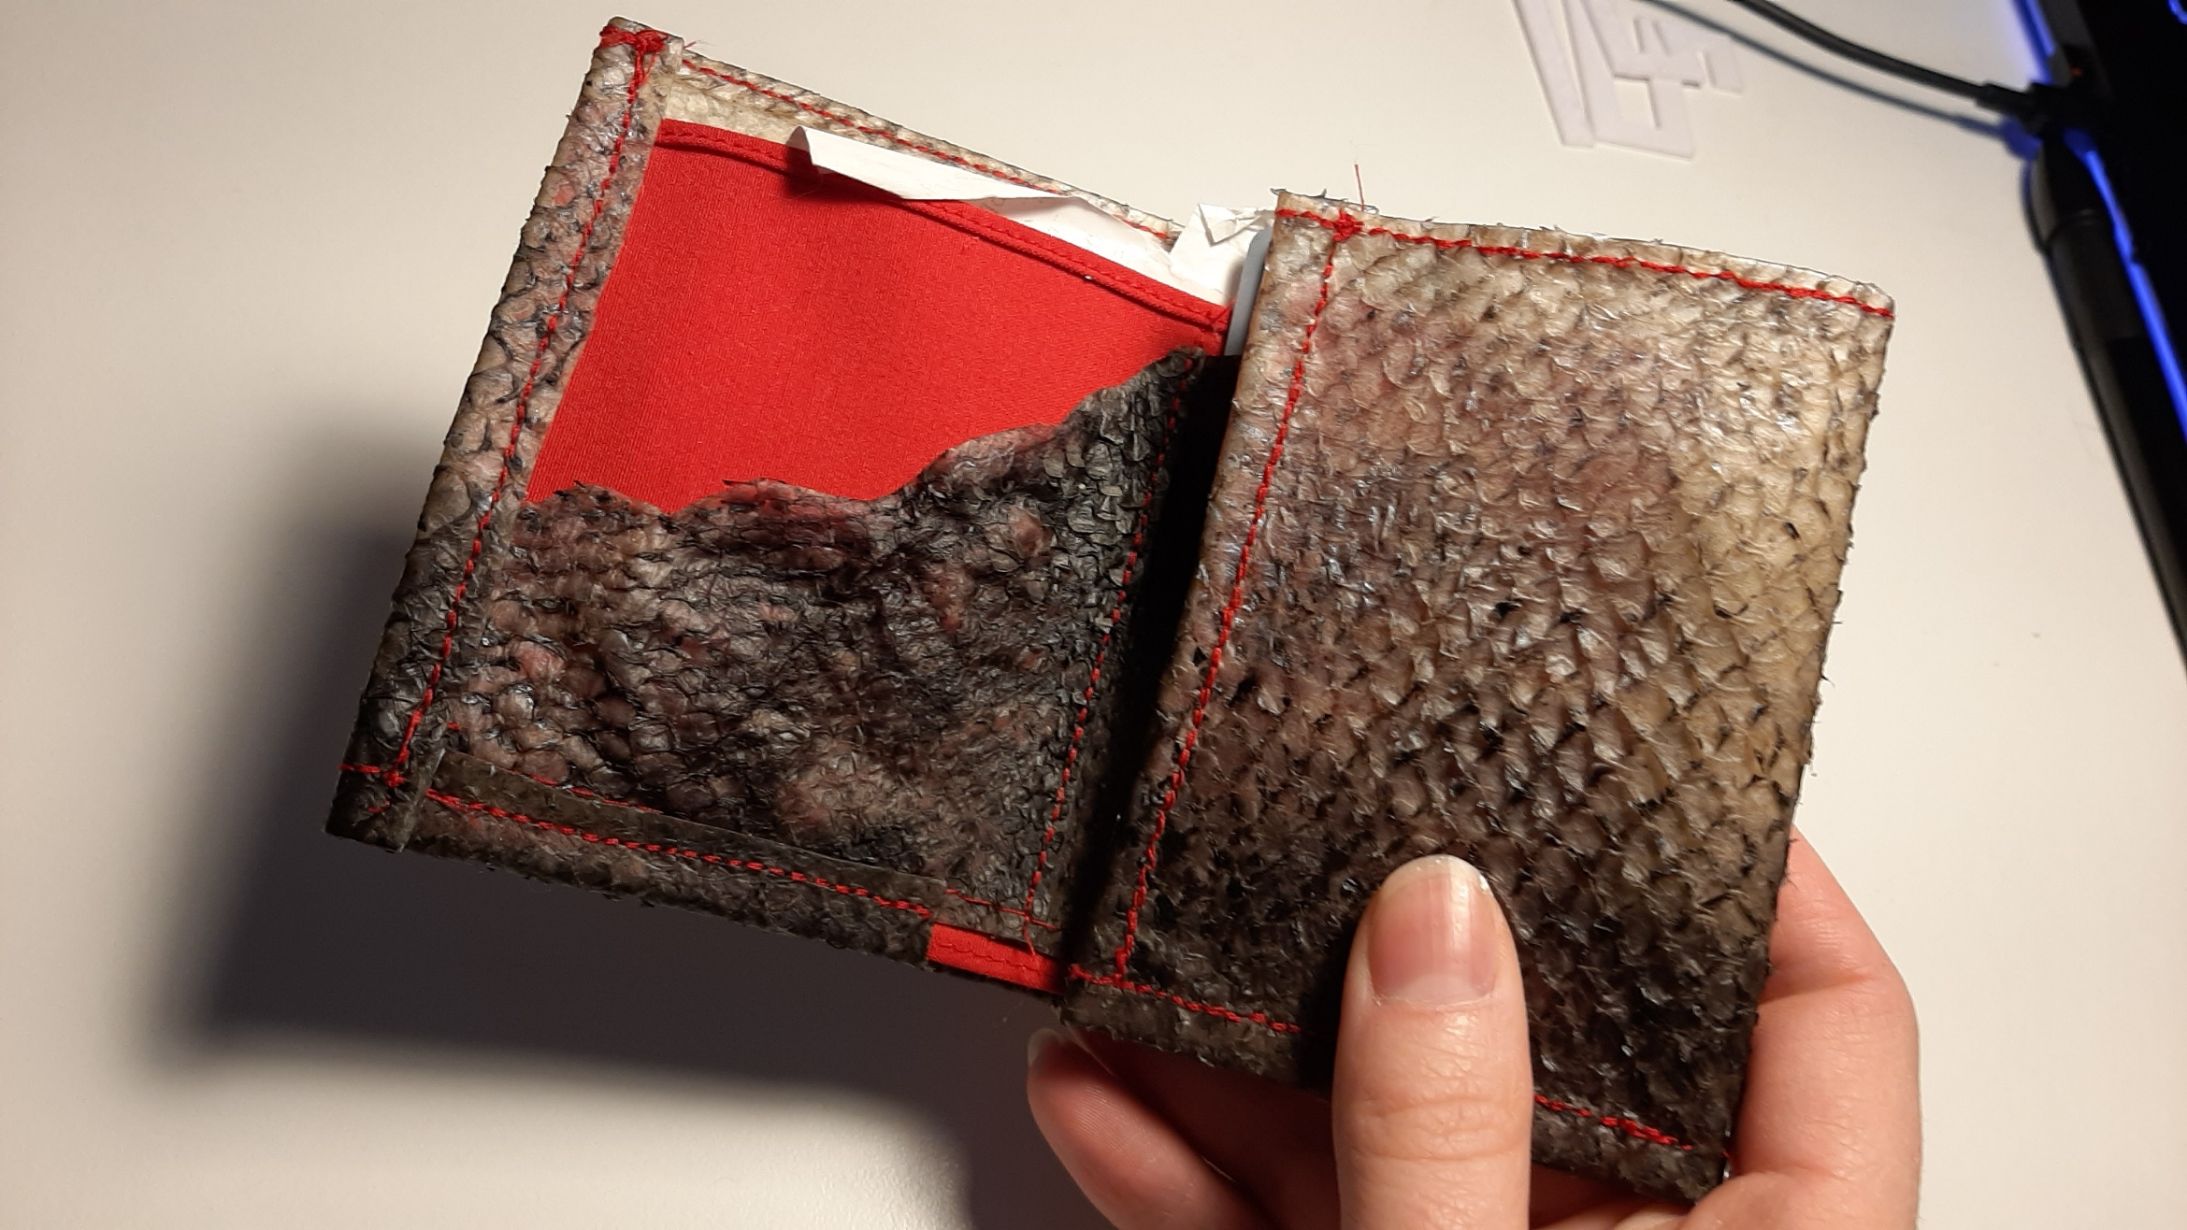
The skin was big enough for a small project, so I made something out of it. It's actually really hard to work with something so flexible, and some lines ended up beeing a bit twisted. This project was super exciting to do!

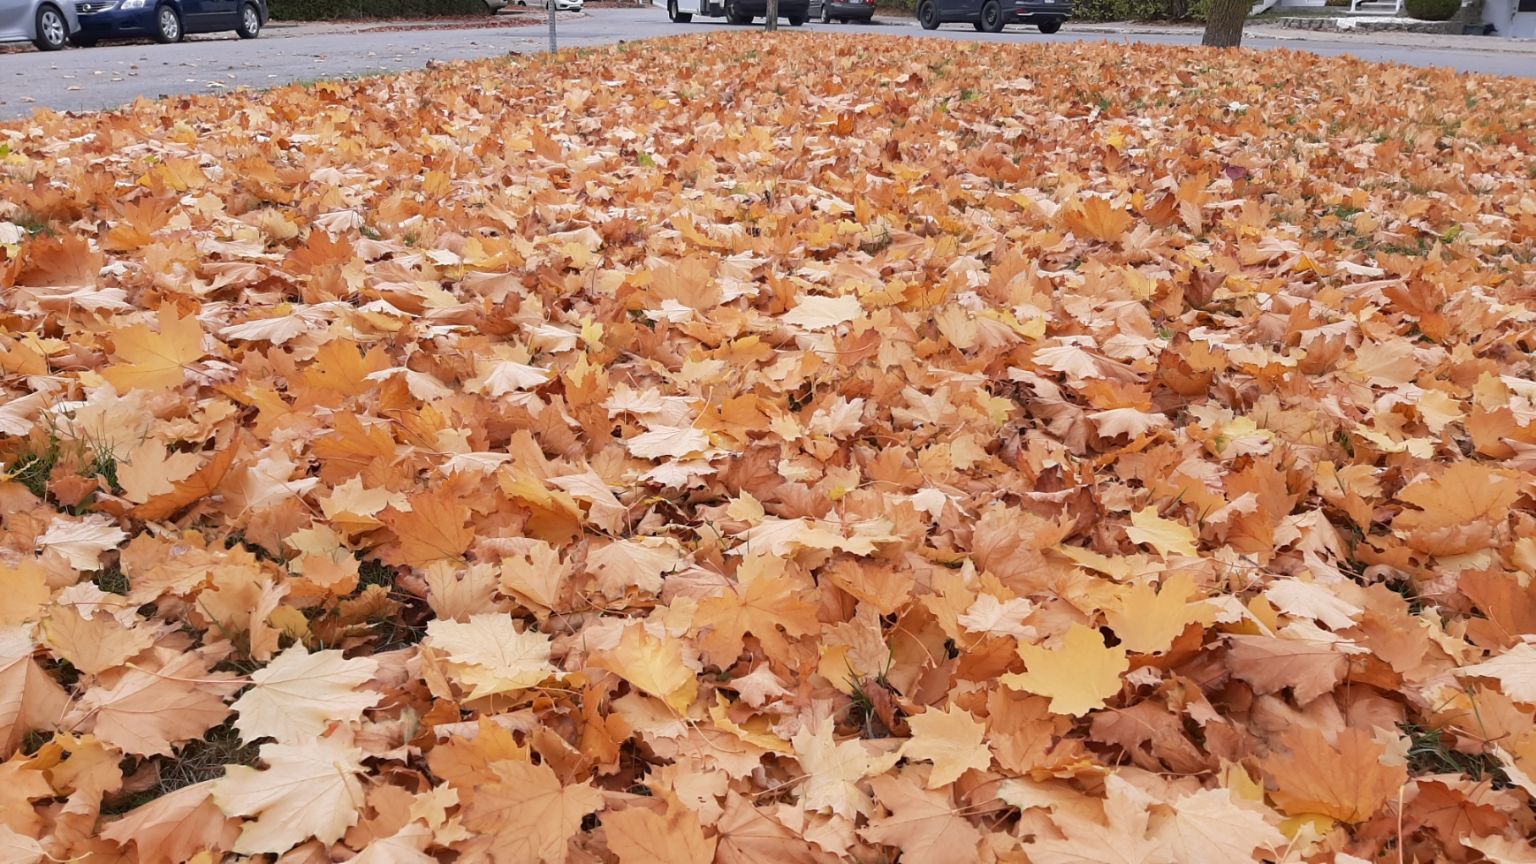
Automn Leaves Paper
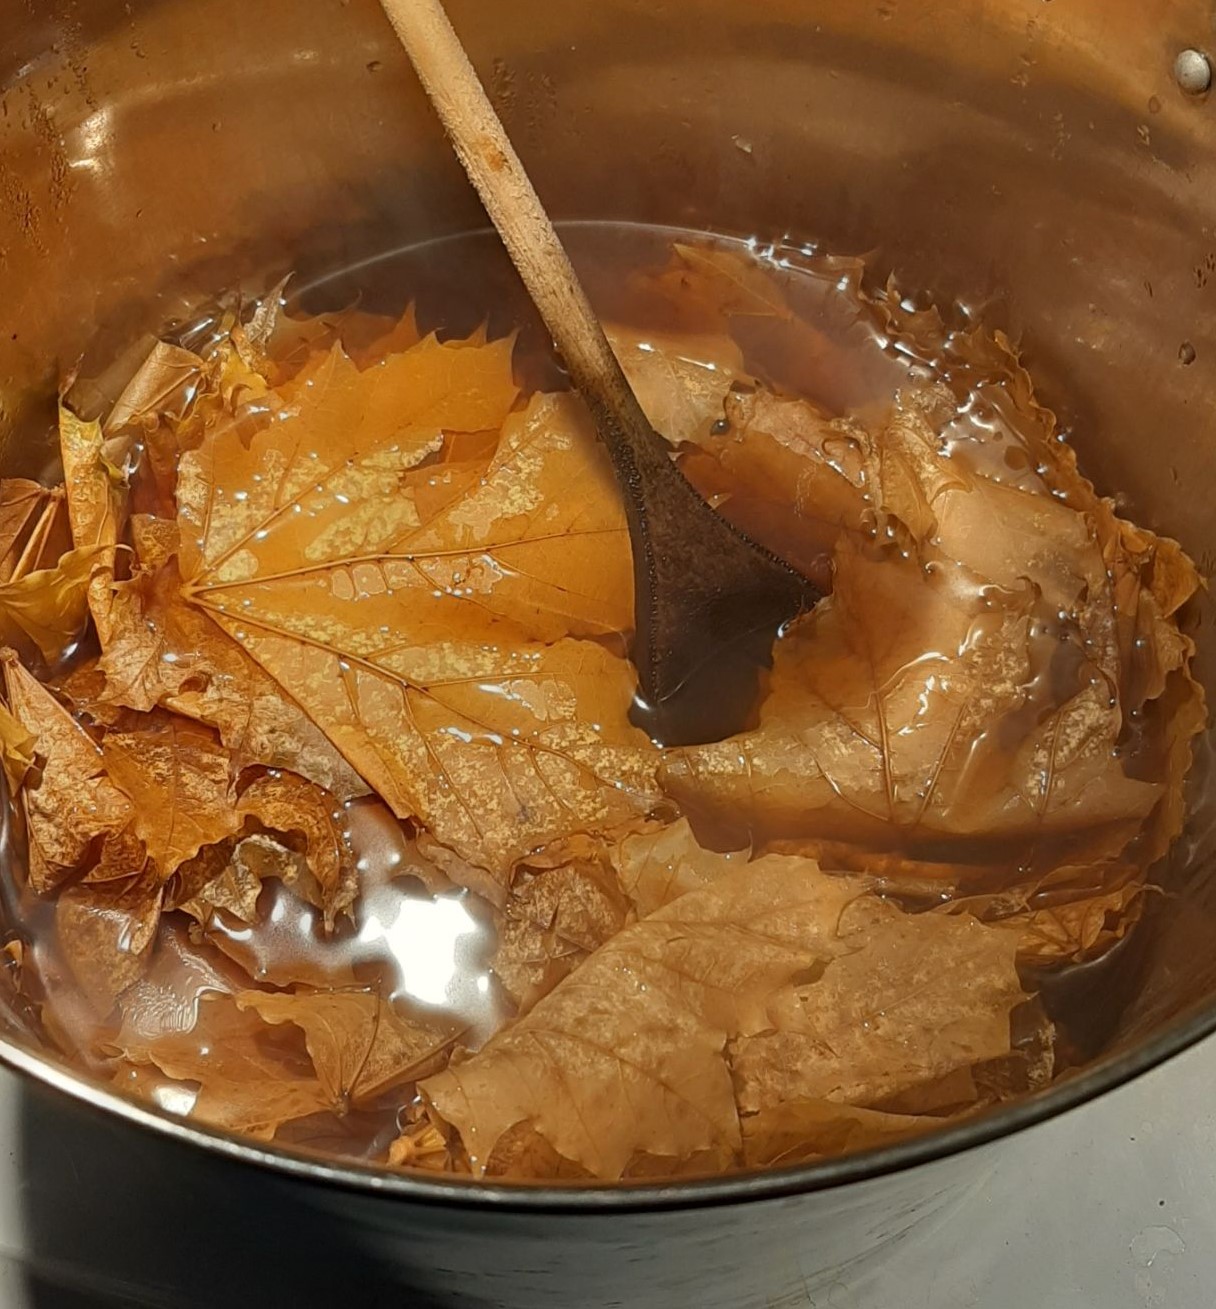
I collected maple leaves from my backyard to make paper out of it. I was also curious to see if the wonderful automn colors could be transferred to a product. I added about 4 liters of water; enough to cover the leaves and space to stir the mix. I let them rest in water for 4 hours before boiling them. After the leaves were cooked enough, they appeared a bit transparent. It took me about an hour.
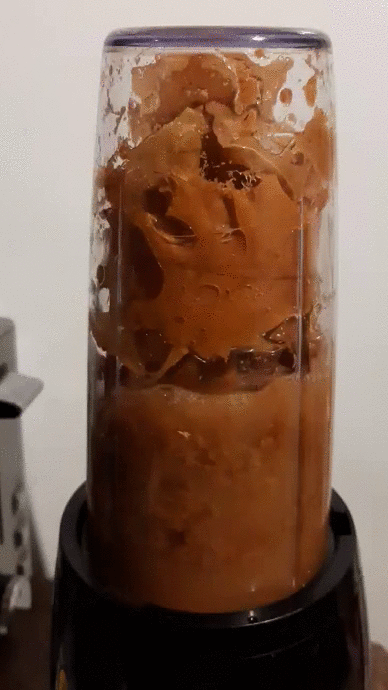
I tried Mashing the leaves with a mallet, but it didn't give me anything interesting. I decided to blend the leaves with a bit of water. It gave me a thick paste I kept in the fridge until I was ready.
It's when I got to prepare the equippement that I realized papermaking might be more complicated than I thought. I made my own frame out of old painting canevas. I fixed a tensed screen printing fabric on one frame, and the other one I left it as it was. I prepared a flat surface and some parchemin paper to separate the layers while drying.
In my mix I added; about 8 liters of water, 2 liters of leaves mixture and 100ml of school glue.

It did not gave me anything that could hold together.
Second try! this time, I Took a lot more material in my screen. Transfering the wet paper out of my frame was a complicated opperation, but belive me, waiting for it to dry on the screen did not work. The paper ripped appart as I tried to get it off.
I mannaged to get the material off the frame carefully. I sanwiched my paper between a layer of wax paper and one layer of screen printing fabric. I sponged most of the water with a towel before smoothing the whole thing with an iron. I left it to dry overnight.
Tips; -I doubt, make your paper thicker -Get a container A LOT bigger than your frame, so you have plenty of space to manipulate your tools. -Using parchemin paper for layering is not verry smart... The material makes ripples when wet, So it's impossible to make flat paper! My paper also sticked a bit on wax paper. -The best tip I can give you is to be sure you have all the material you need before trying this project.
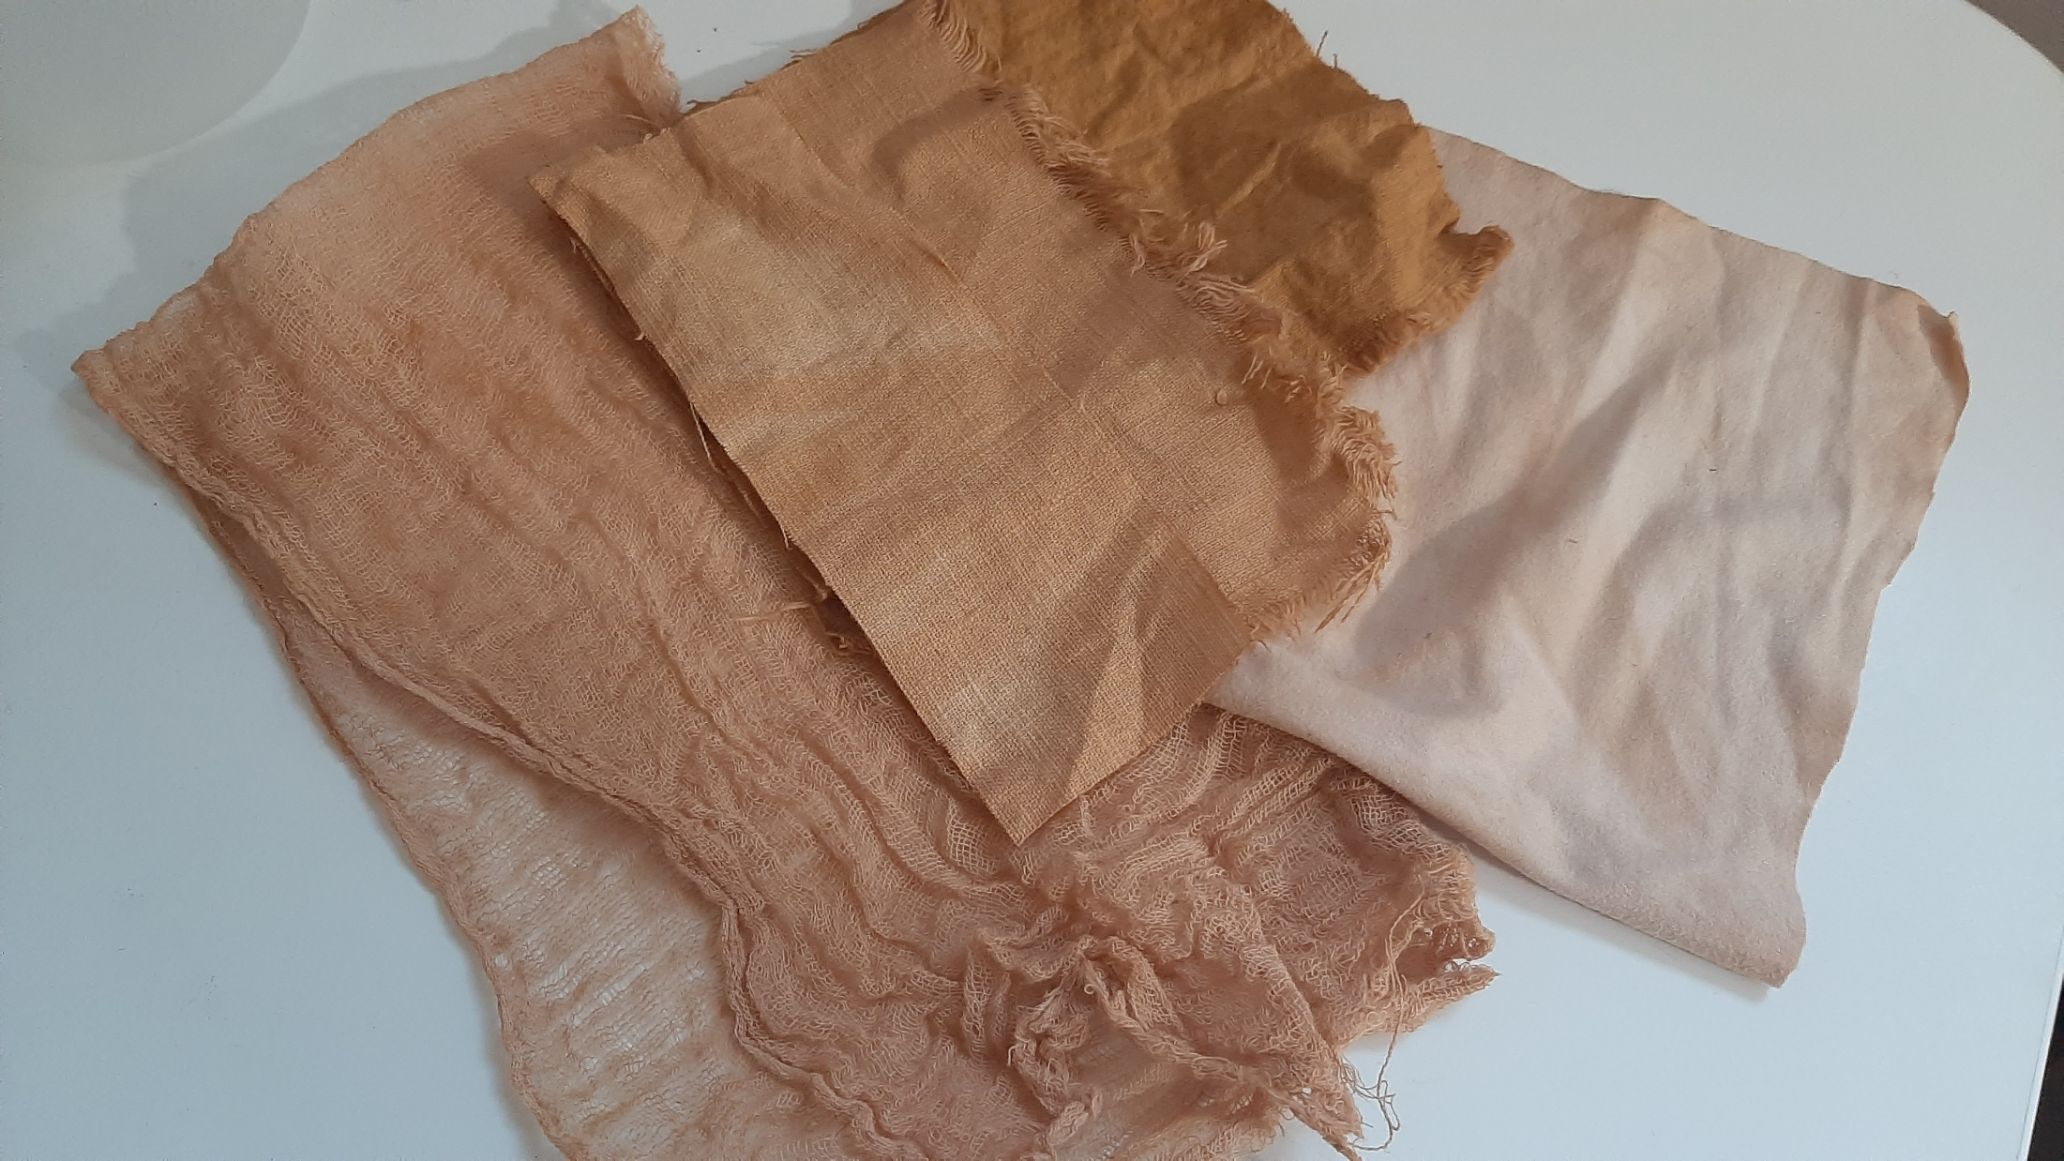
Even if this project was a bit of a mess, I discovered that fallen maple leaves can be used to dye! These are good news, since these leaves can be found easly and in big quantity. I'll have to try with bright red leaves too!
This color was achived on alum mordanted fabric, that I left in the colored water at room temperture for about 28 hours.
Gelatine
Molds
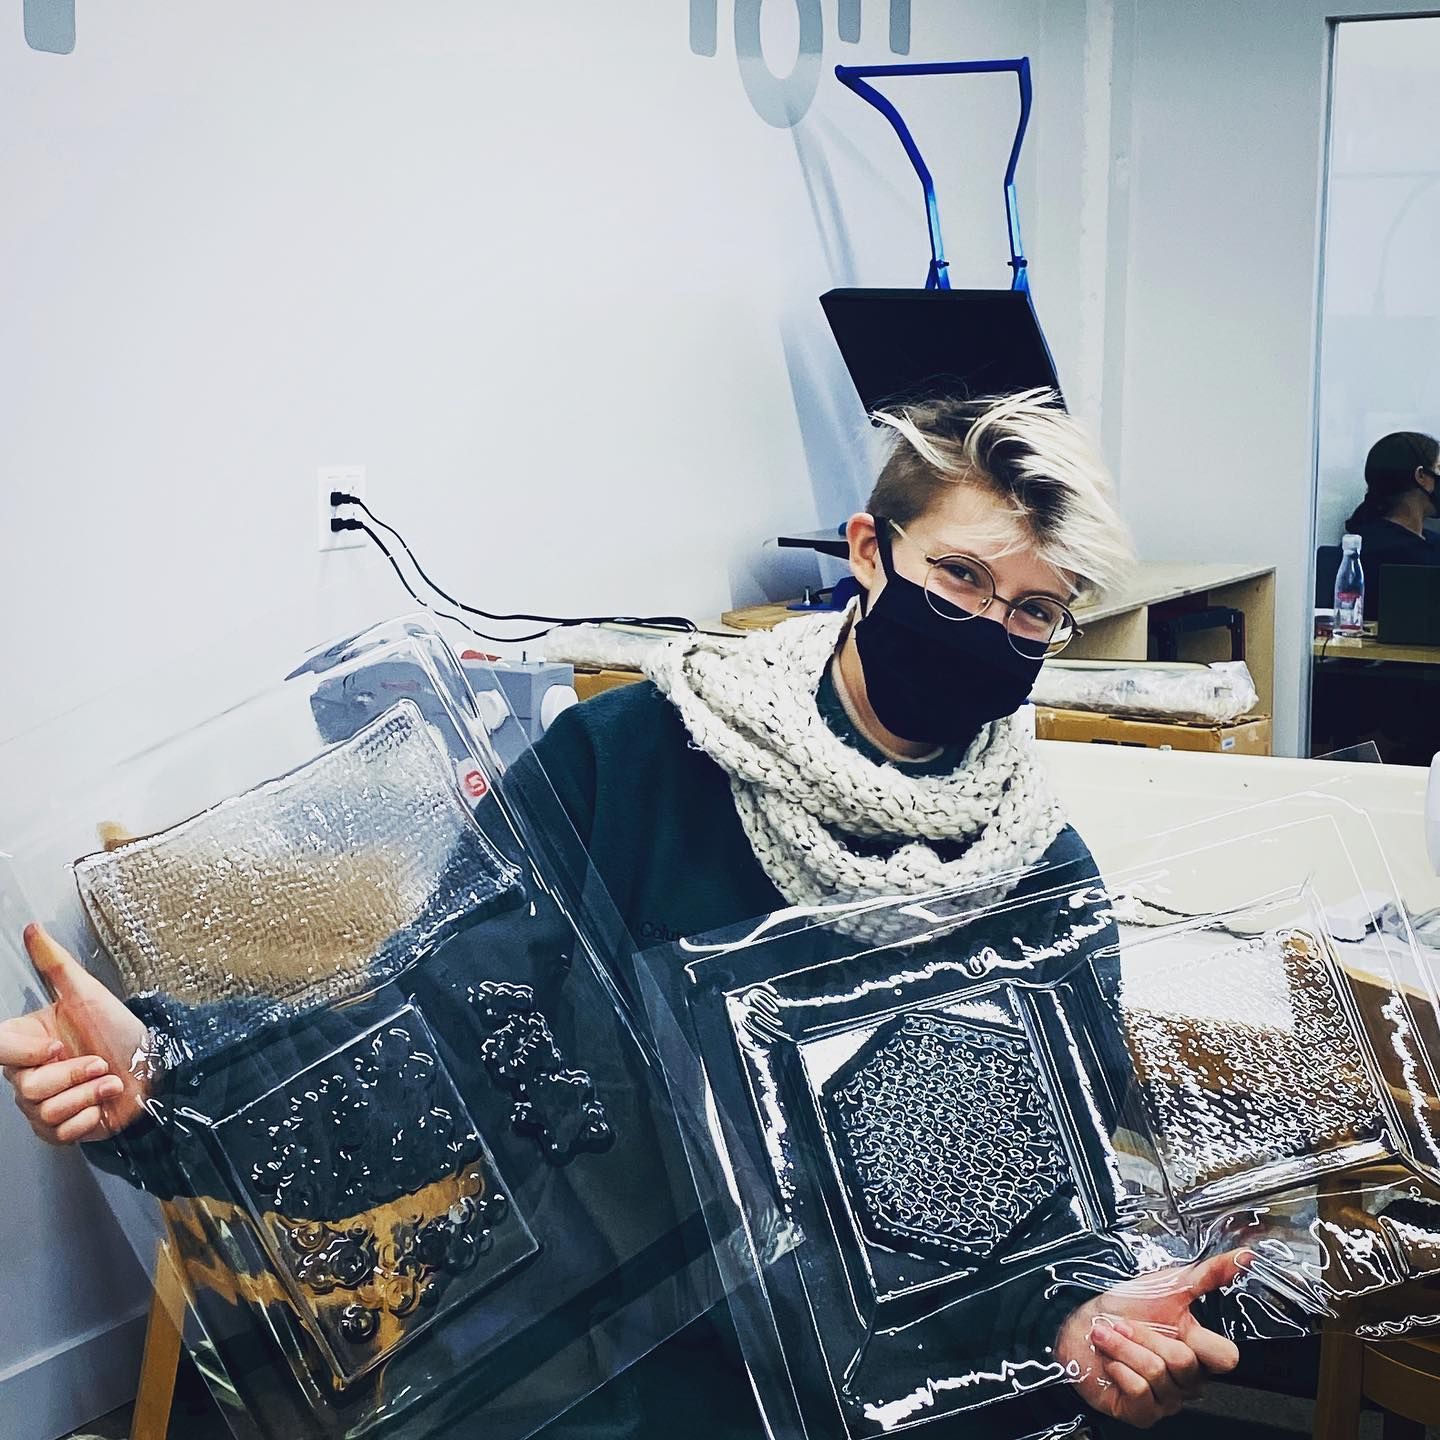
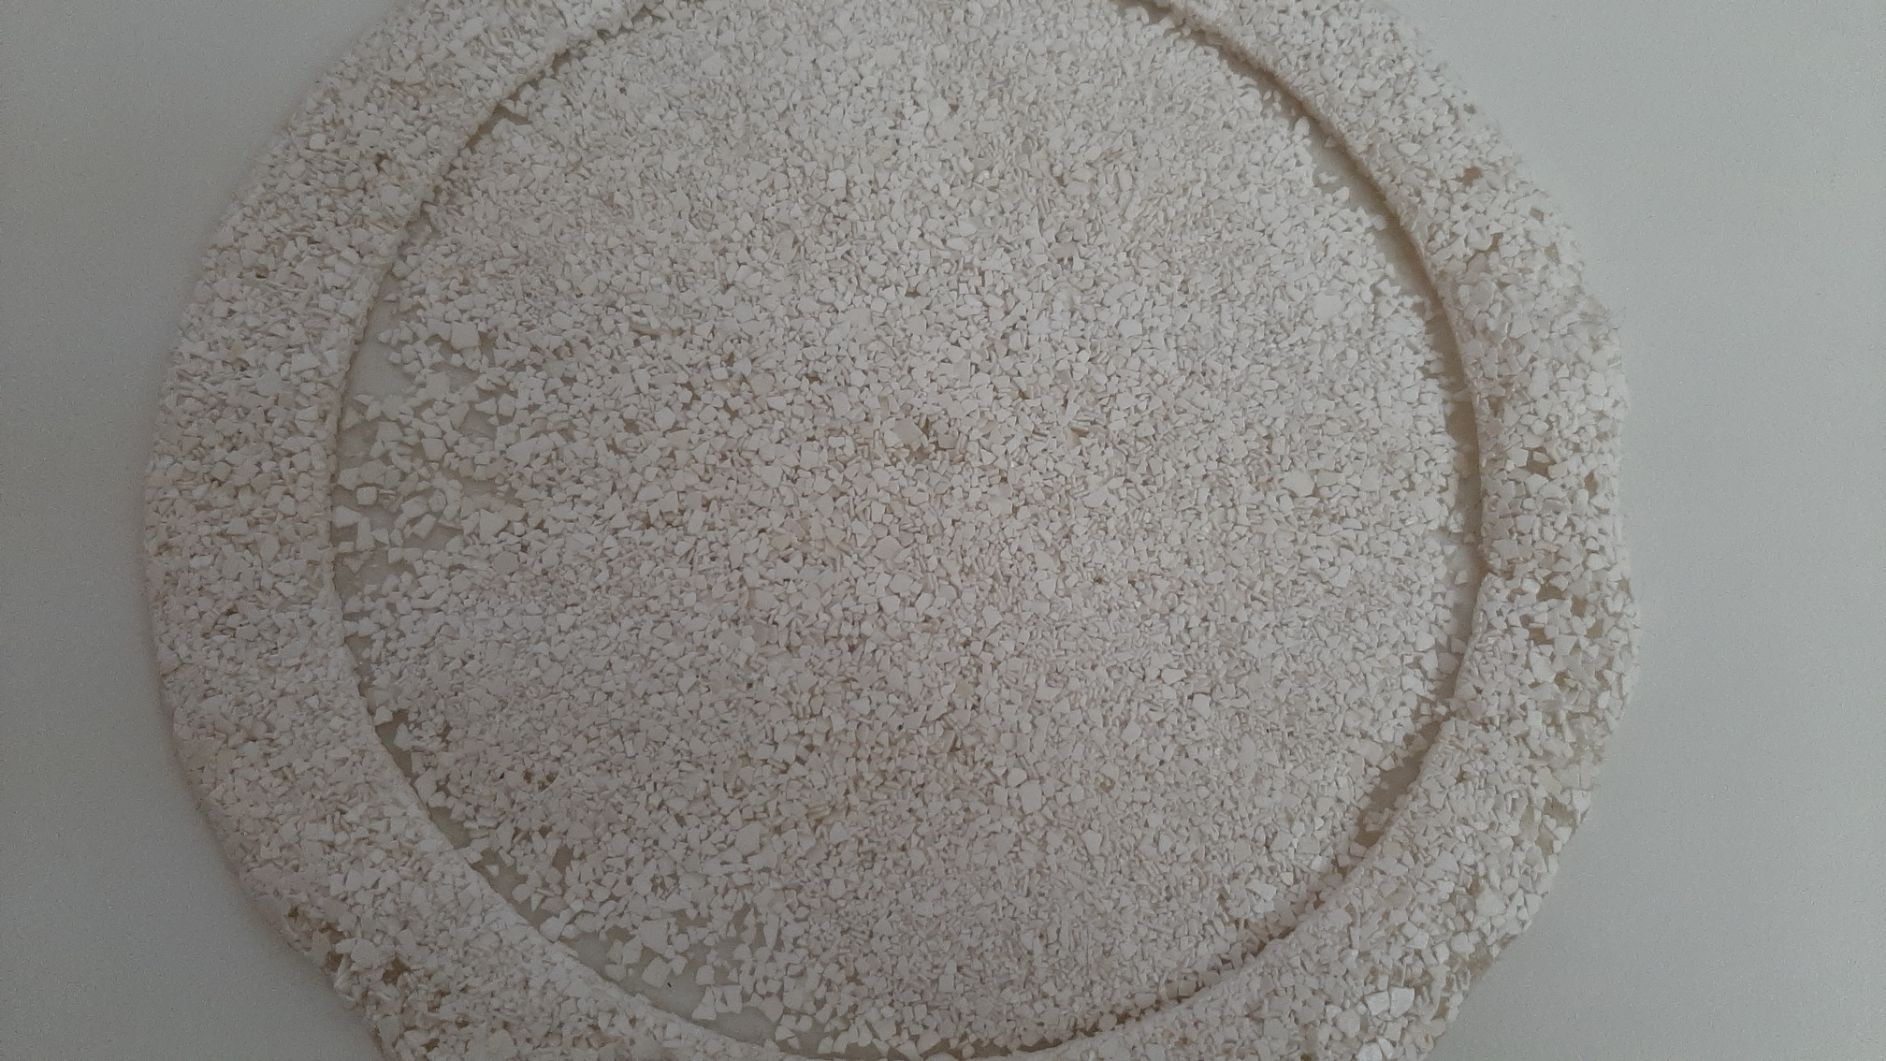
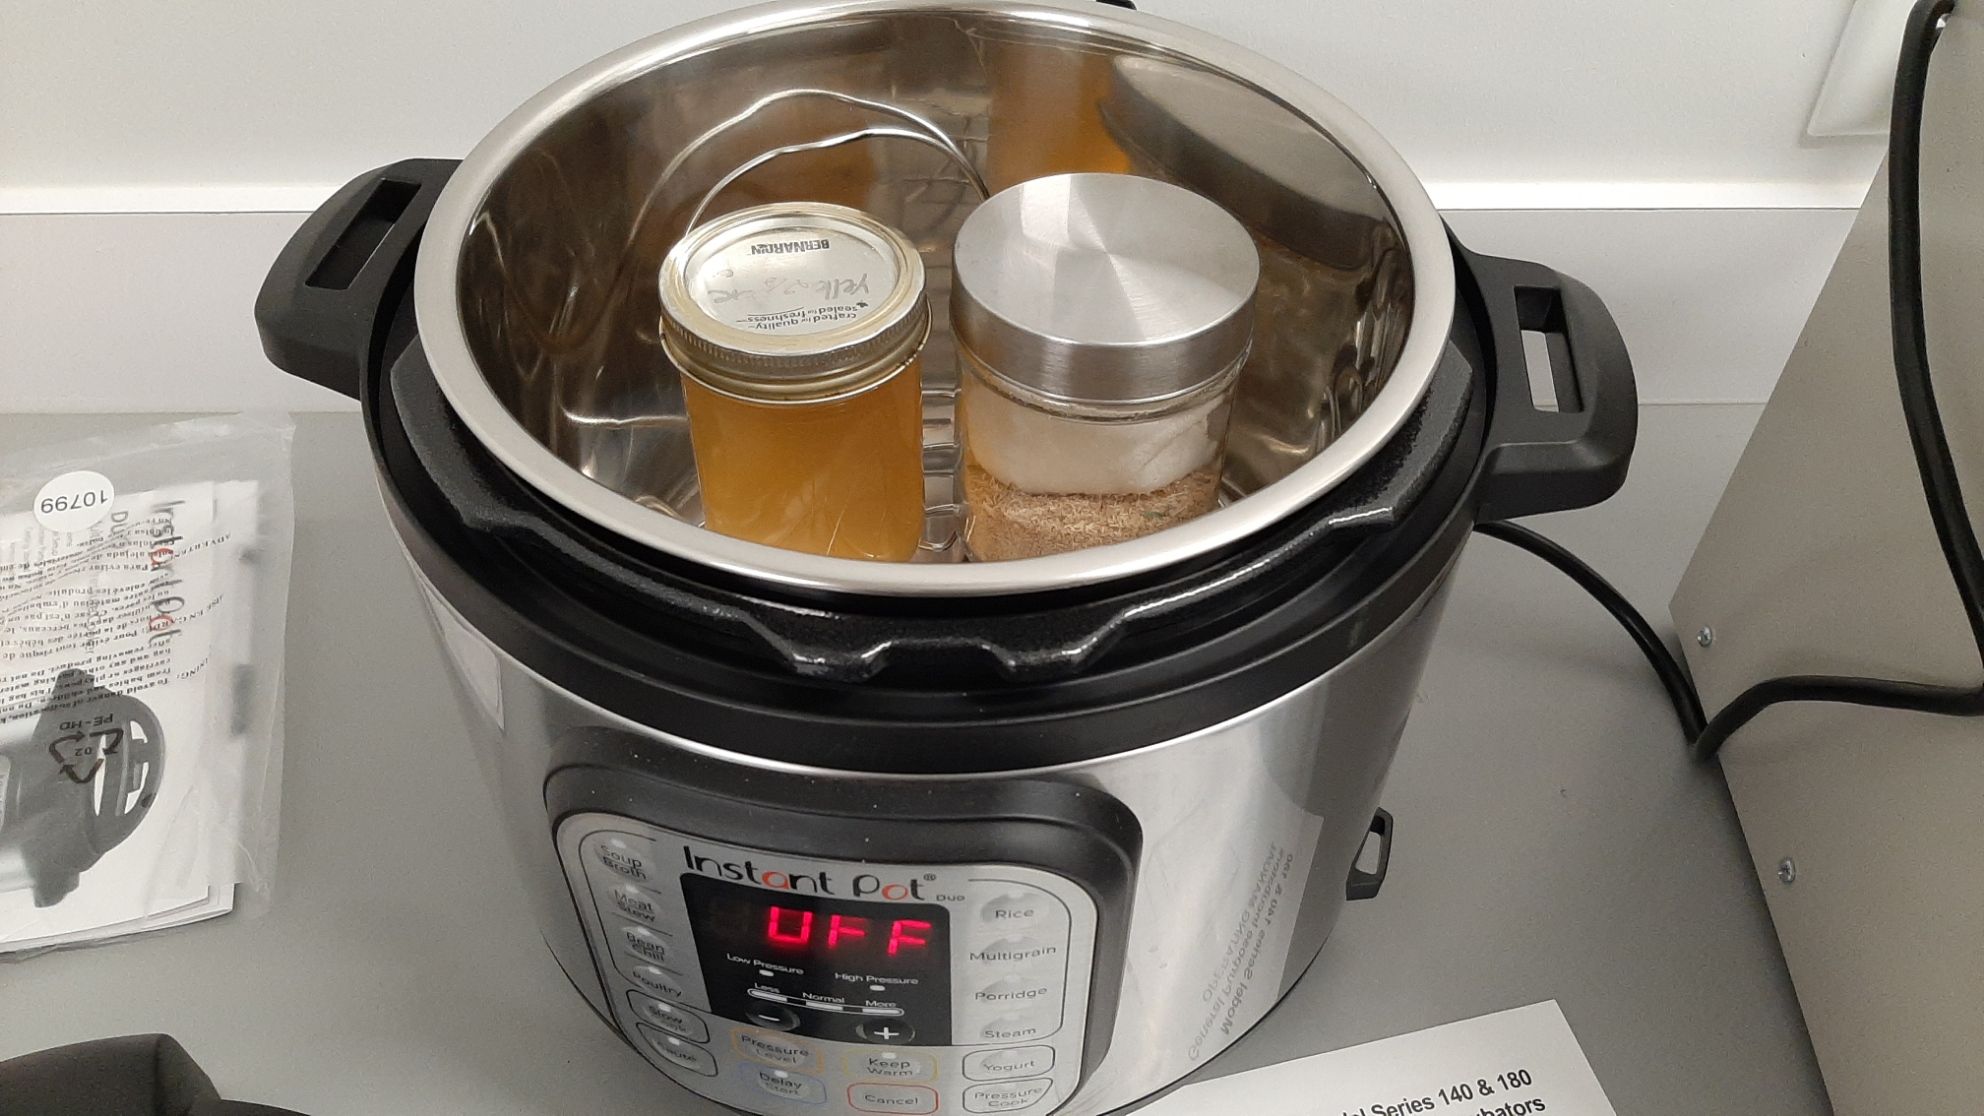
I learned to use the thermoforming machine to make some molds. This process is NOT environment friendly! But at least the molds can be used plenty of times and then recycled. I seached for anything that could give me some texture and put it into the machine.
The gelatine I got from a local grocery store was sold in powder. I had to find my own recepie. The instructions said that I had to dissolve 1 pack (about 6.75g of gelatine) in 60ml of cold water, and then add 60ml of boiling water.
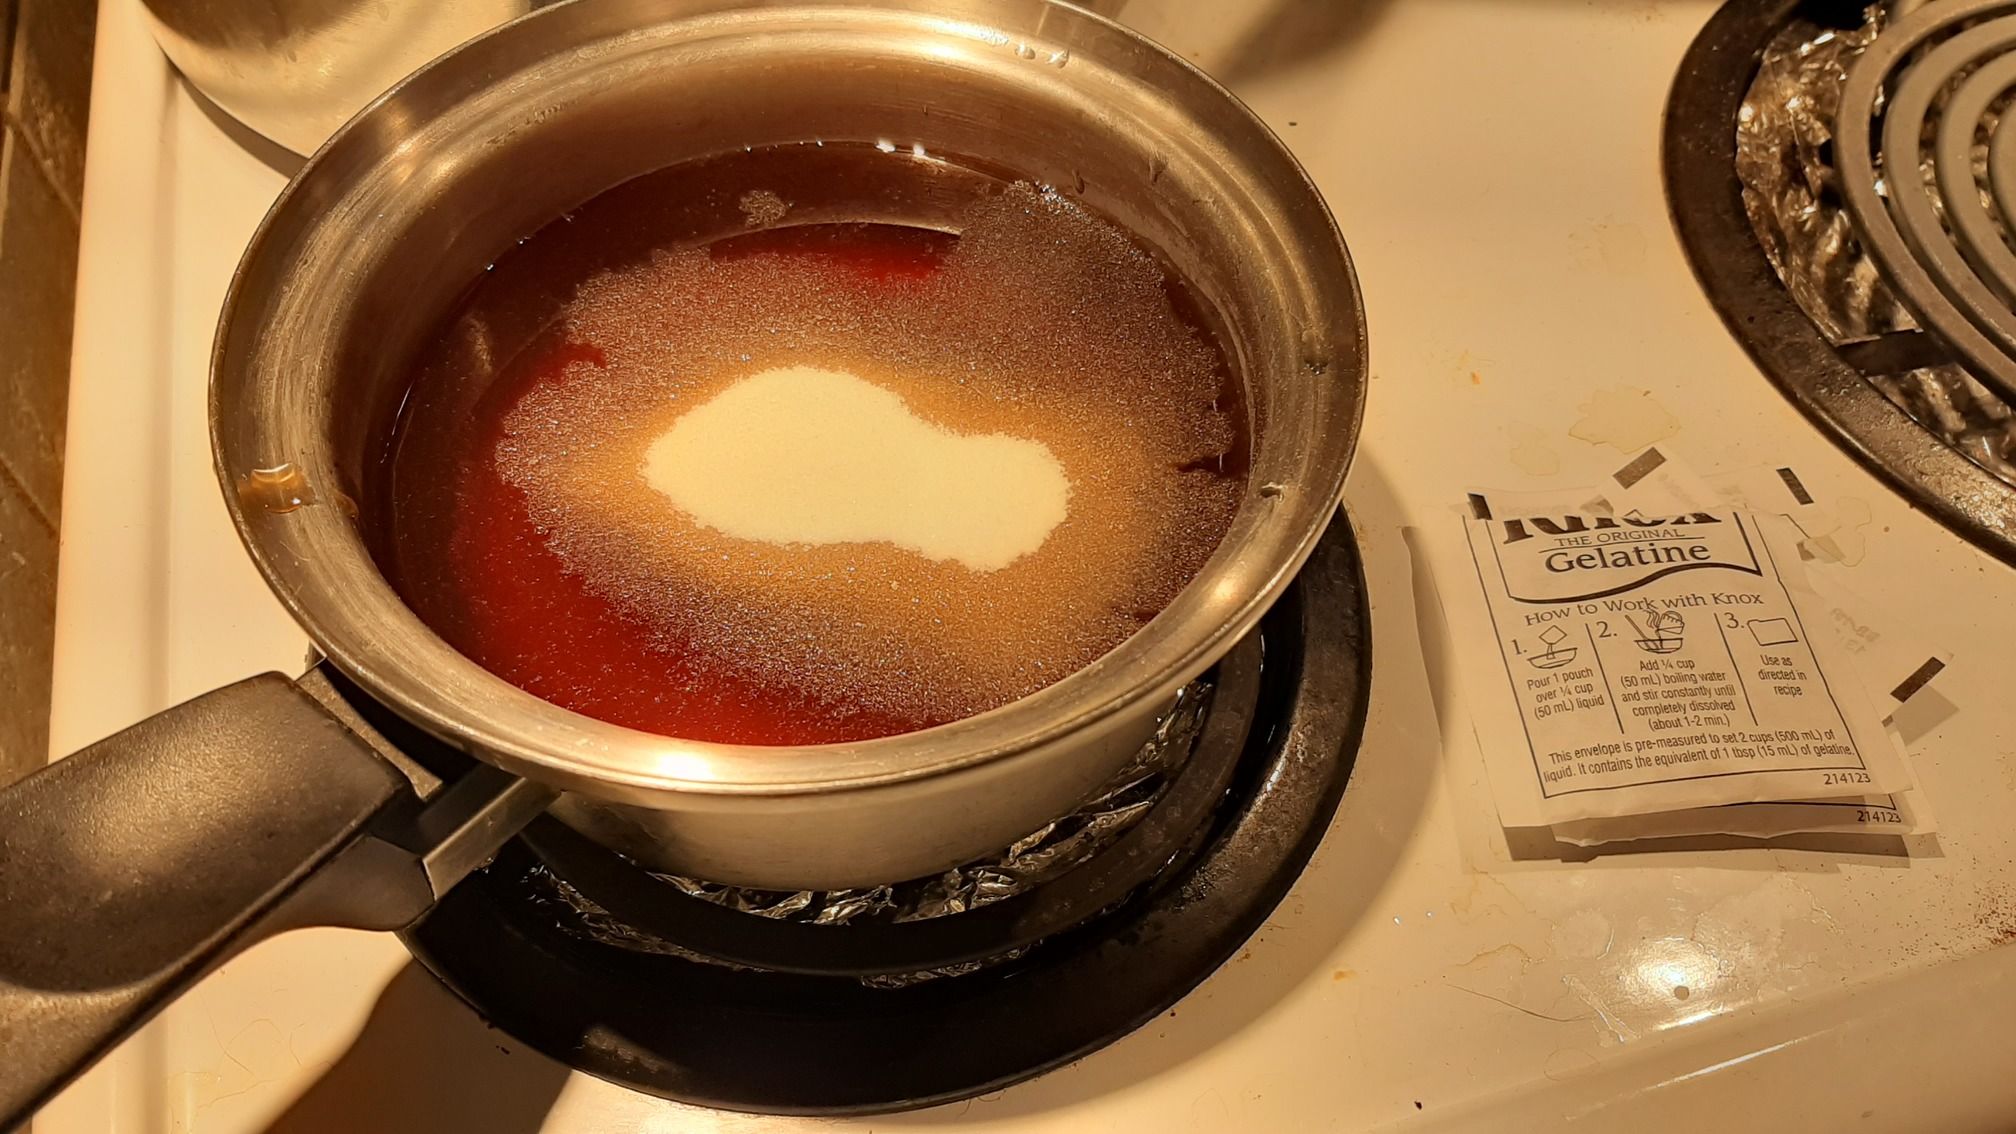
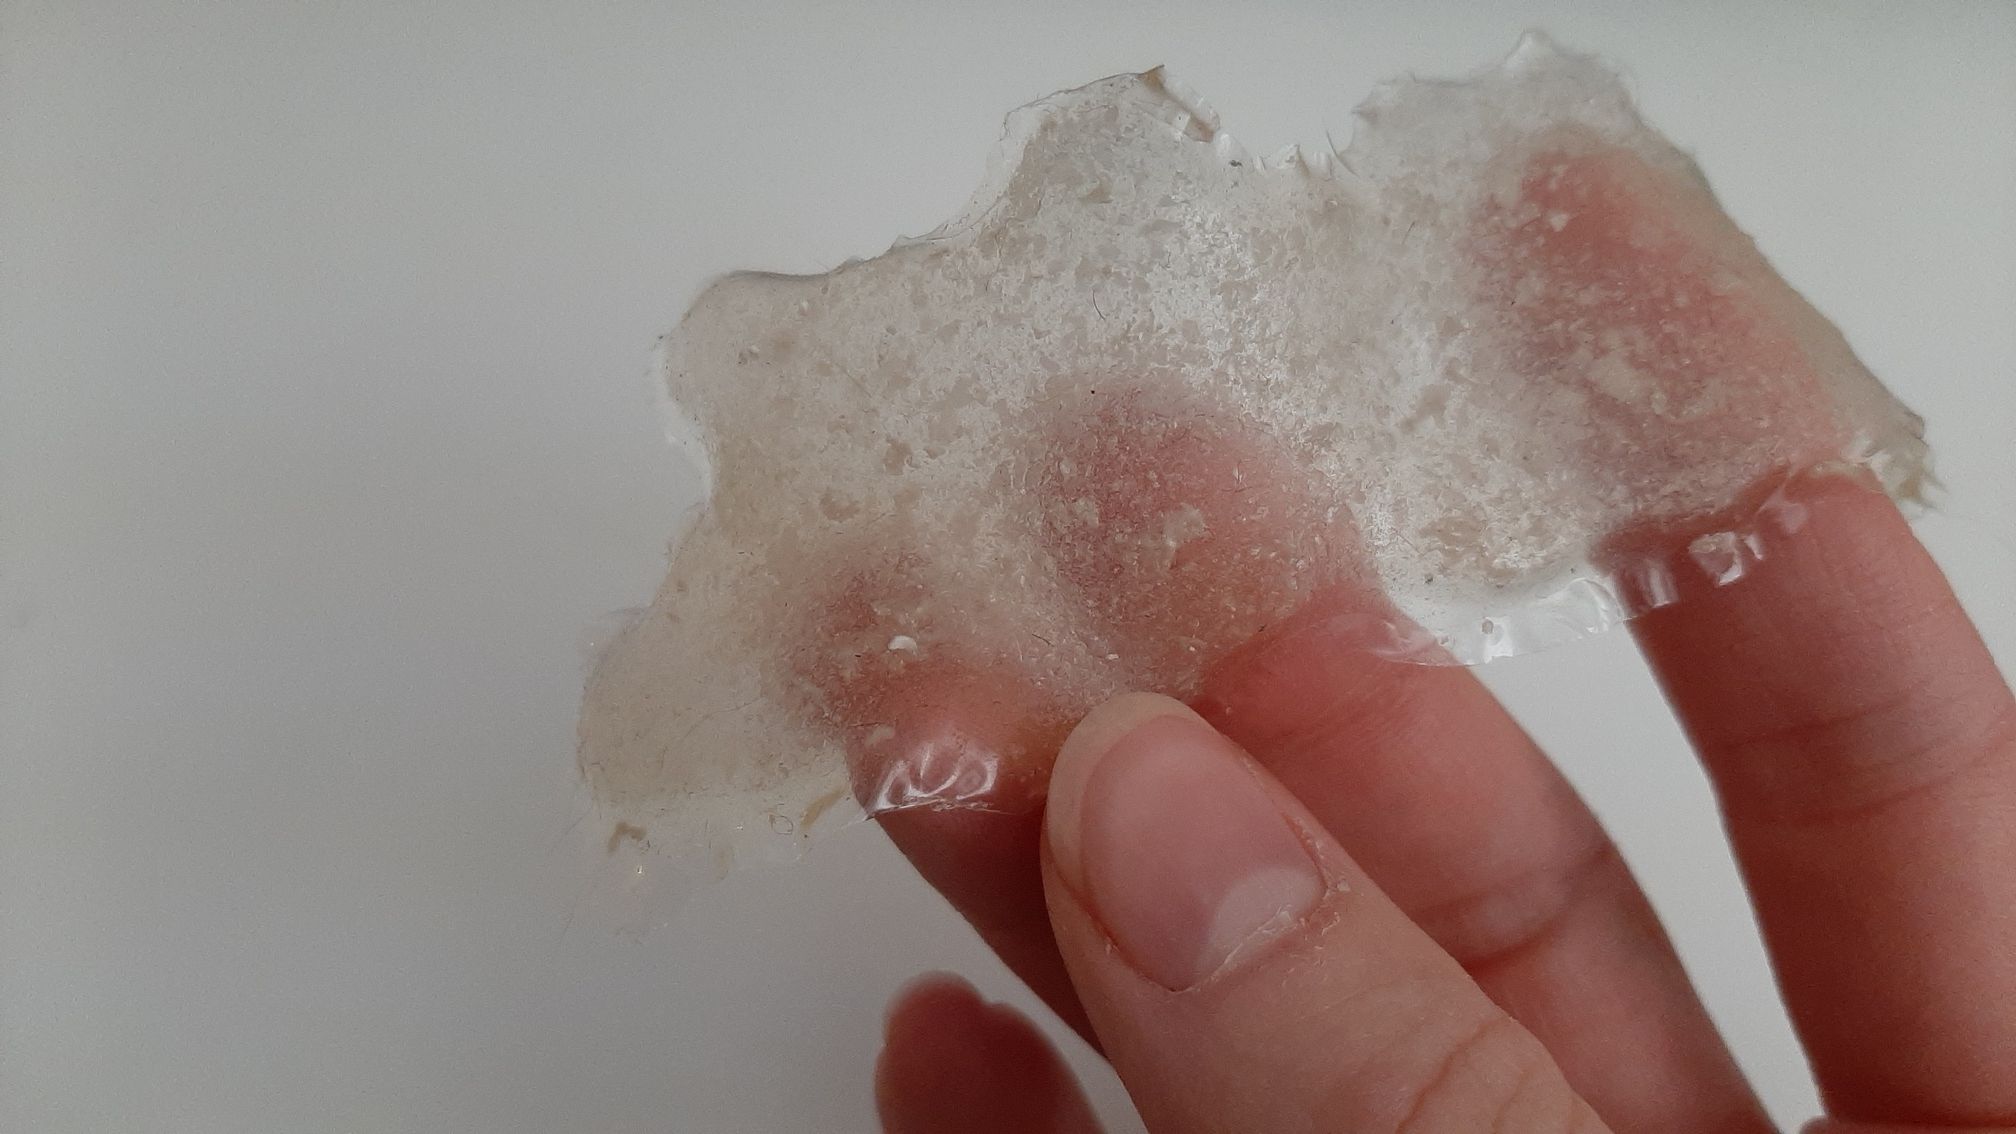
1st attempt: I did my gelatine mix on a separated bowl folowing the instructions of the pack, and took 100 ml from it. 24g of glycerine, 240ml of water, 20g of grinded egg shell and boiled everything for about 25 minutes, until a sample I put in the fridge turned out okay. The sample dried very well, and almost didn't change size.
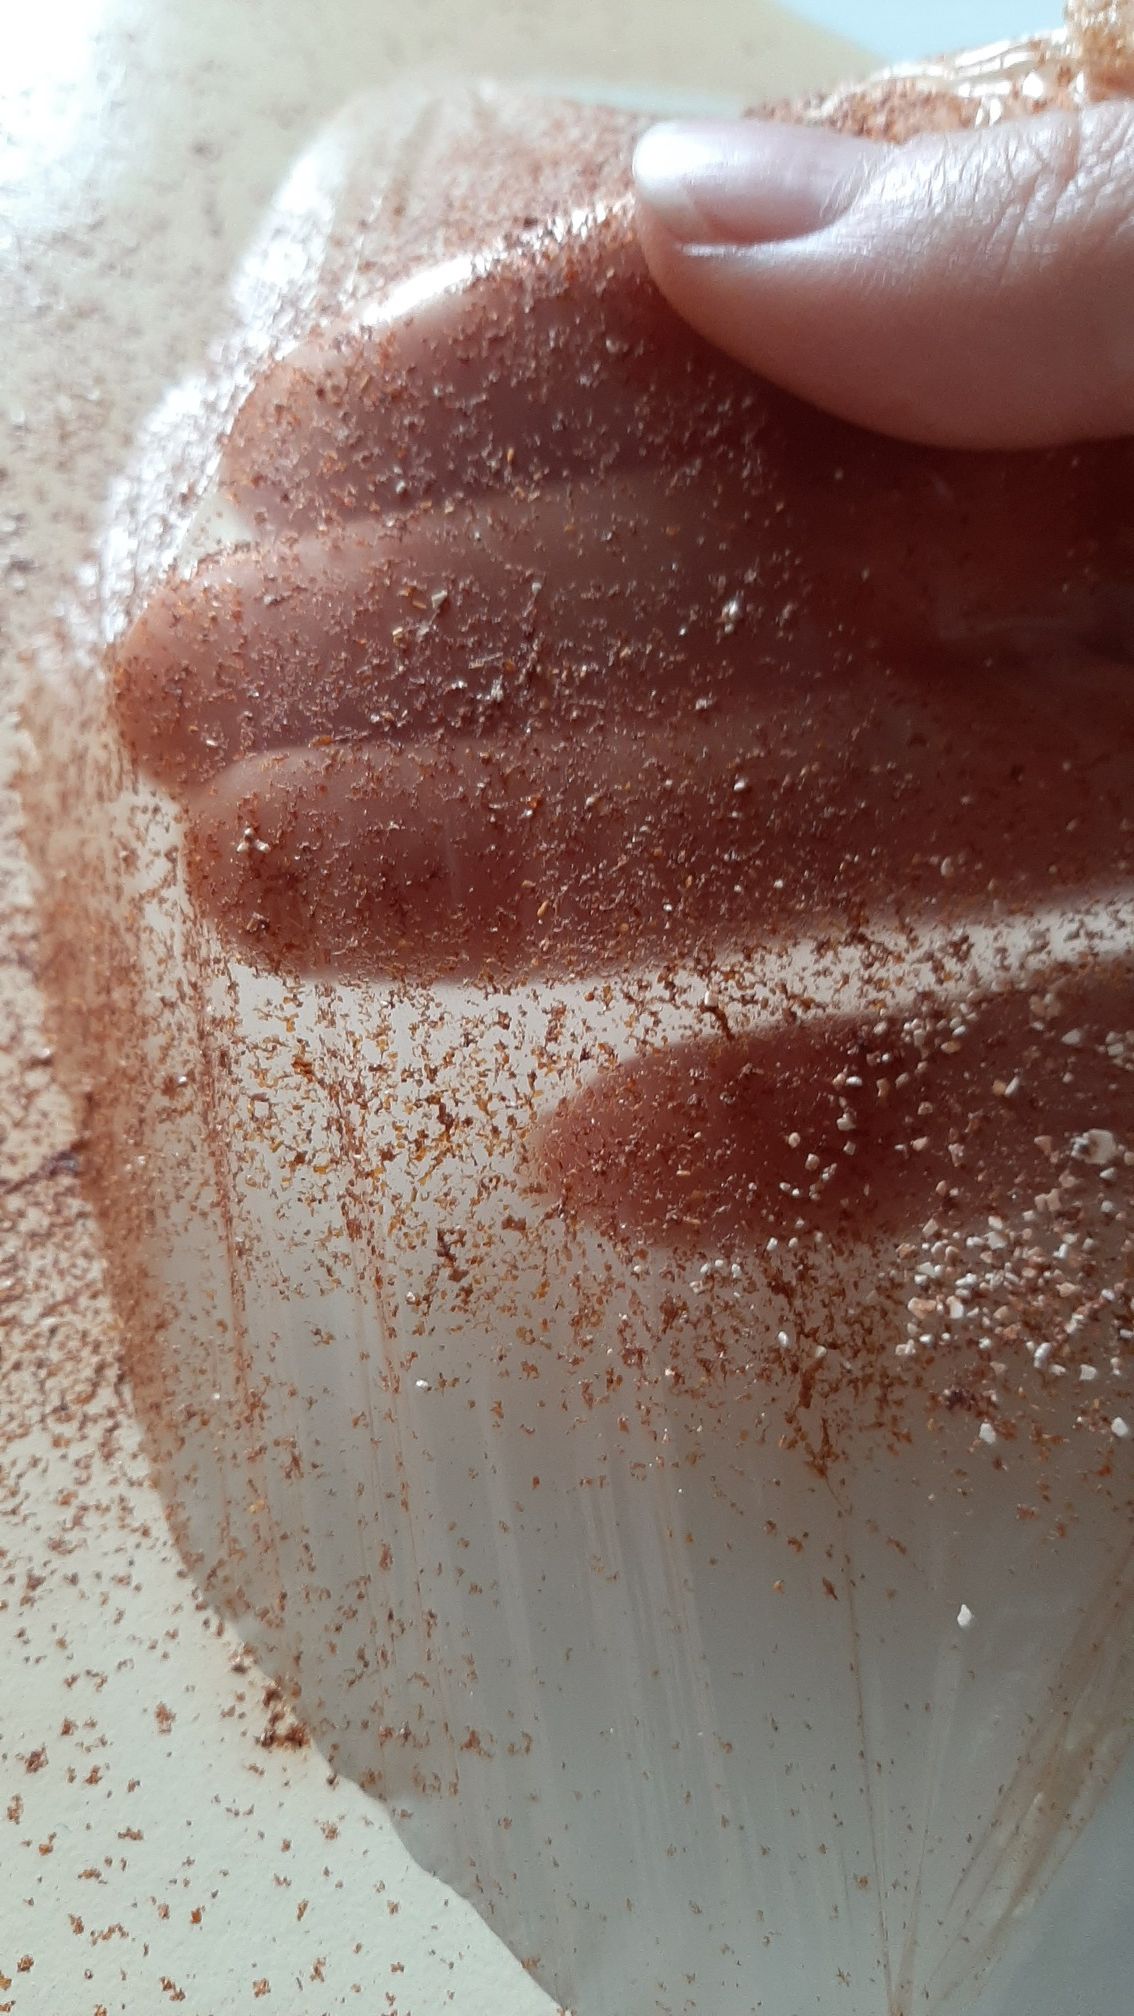
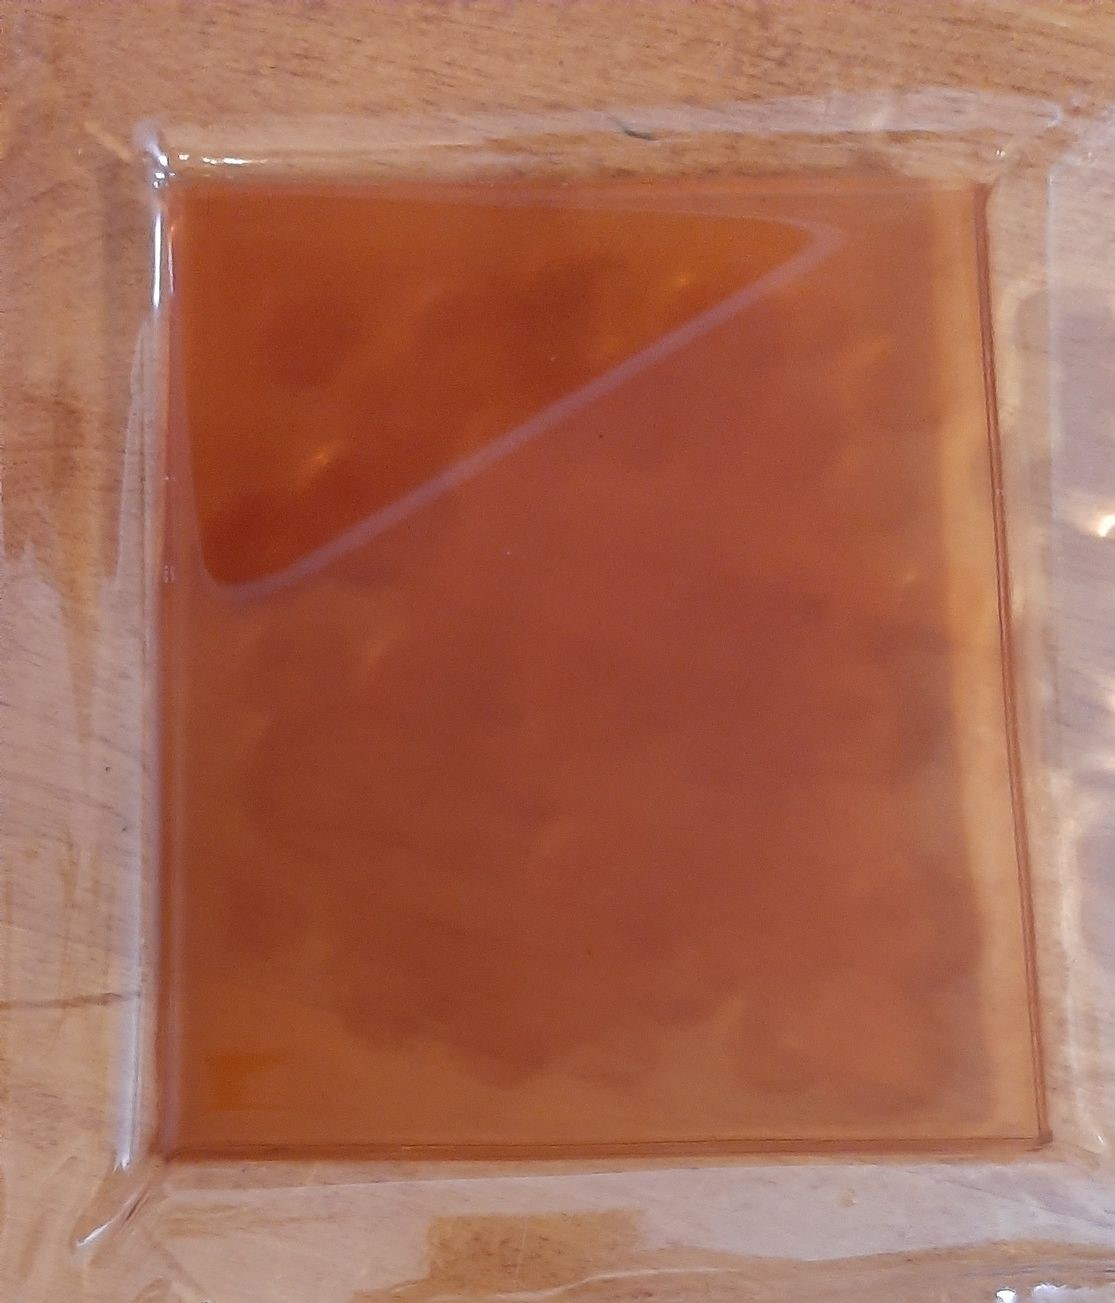
This time I added 2 packs of gelatine (13.5g) to 125ml of my cold leaves dye mix. I added 125ml of boiling dye mix, 11g of egg shell powder, 1g of paprika powder and 8g of glycerine. I boiled everything for about 6 to 8 minutes, until the gelatine got sticky between my fingers. Unfortunatly, I casted it on a big space, so it ended up being so thin and fragile!
At my third attempt I added 1 pack (6,75g) of gelatine to 125ml of cold dye mix water. I added 125ml of boiling tap water, 9g of glycerine and boiled everything for about 6 to 8 minutes, until the gelatine got sticky between my fingers. This was almost the same recepie, I did it only to compare the consitency of the material depending if I put in a lot colored water.
When I got it out of the mold
3 Weeks later
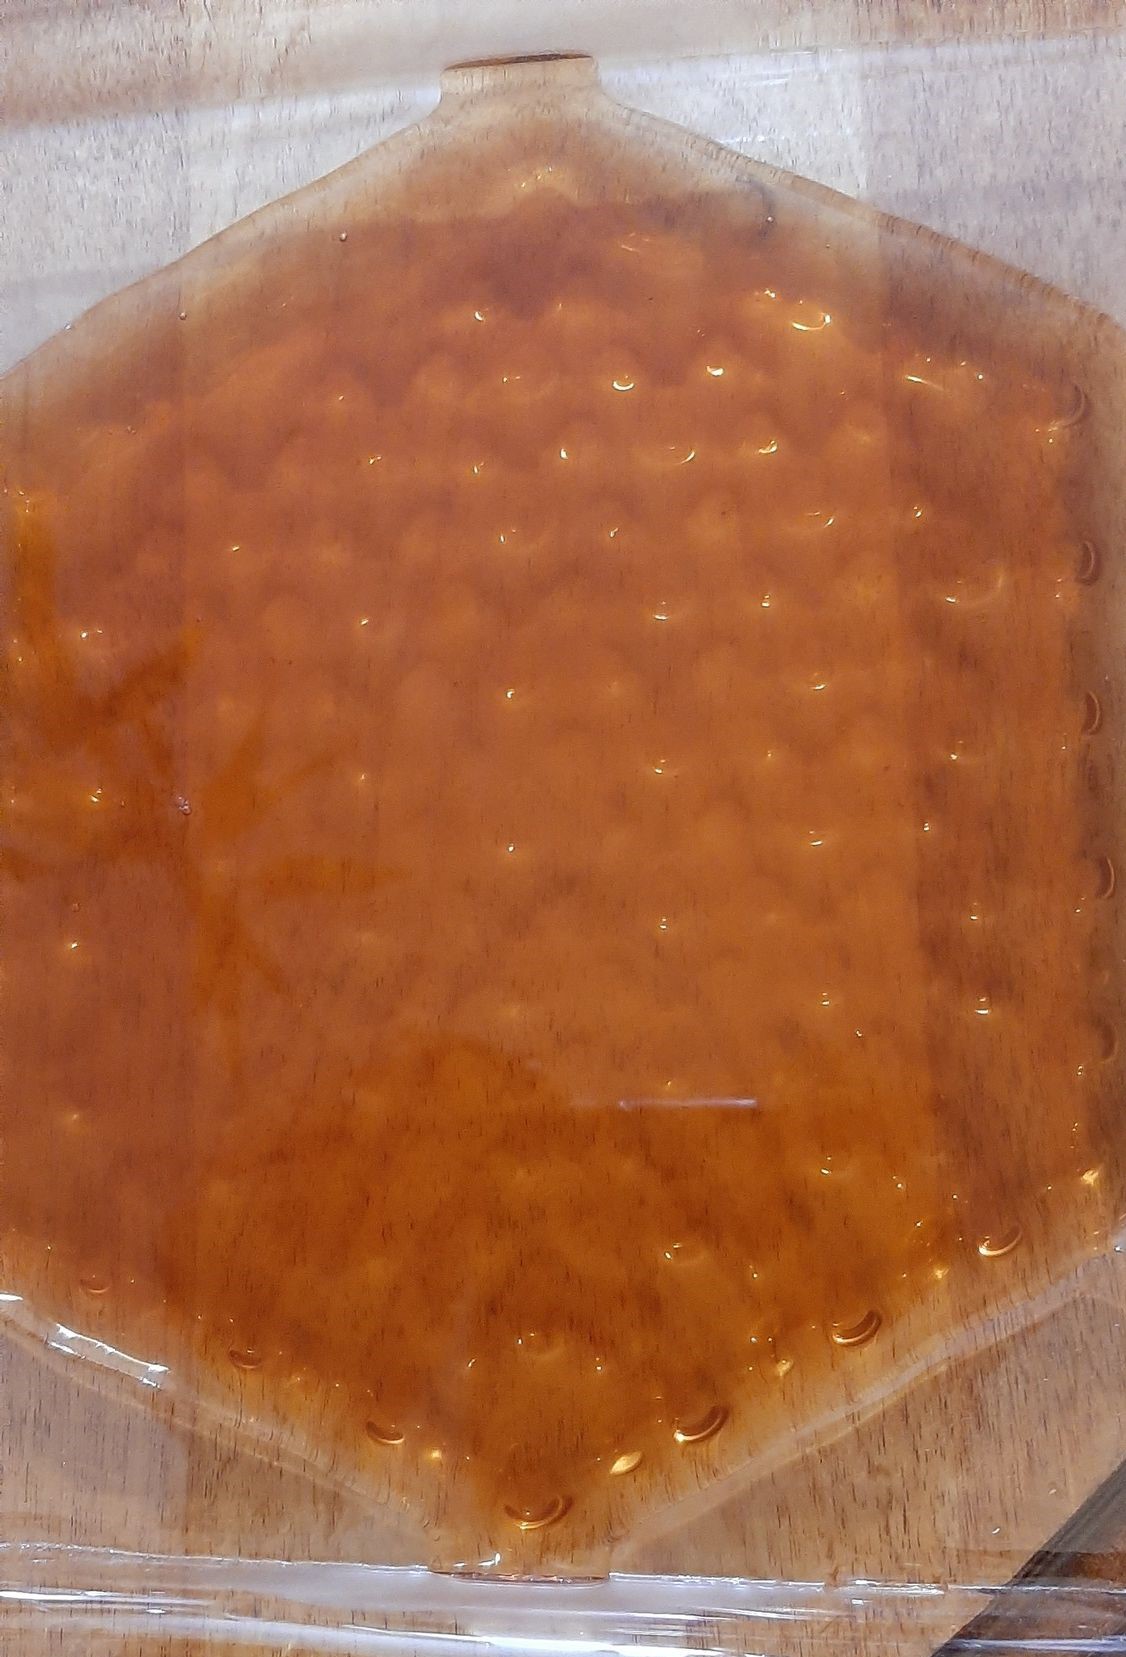
My 4th recipe had 2 packs (13.5g) of gelatine dissolved in 125ml of cold dye water. I added 125ml of boiling tap water, 9g of glycerine and boiled it for about 6-8 minutes, until the gelatine got sticky between my fingers.
When I got it out of the mold

3 Weeks later
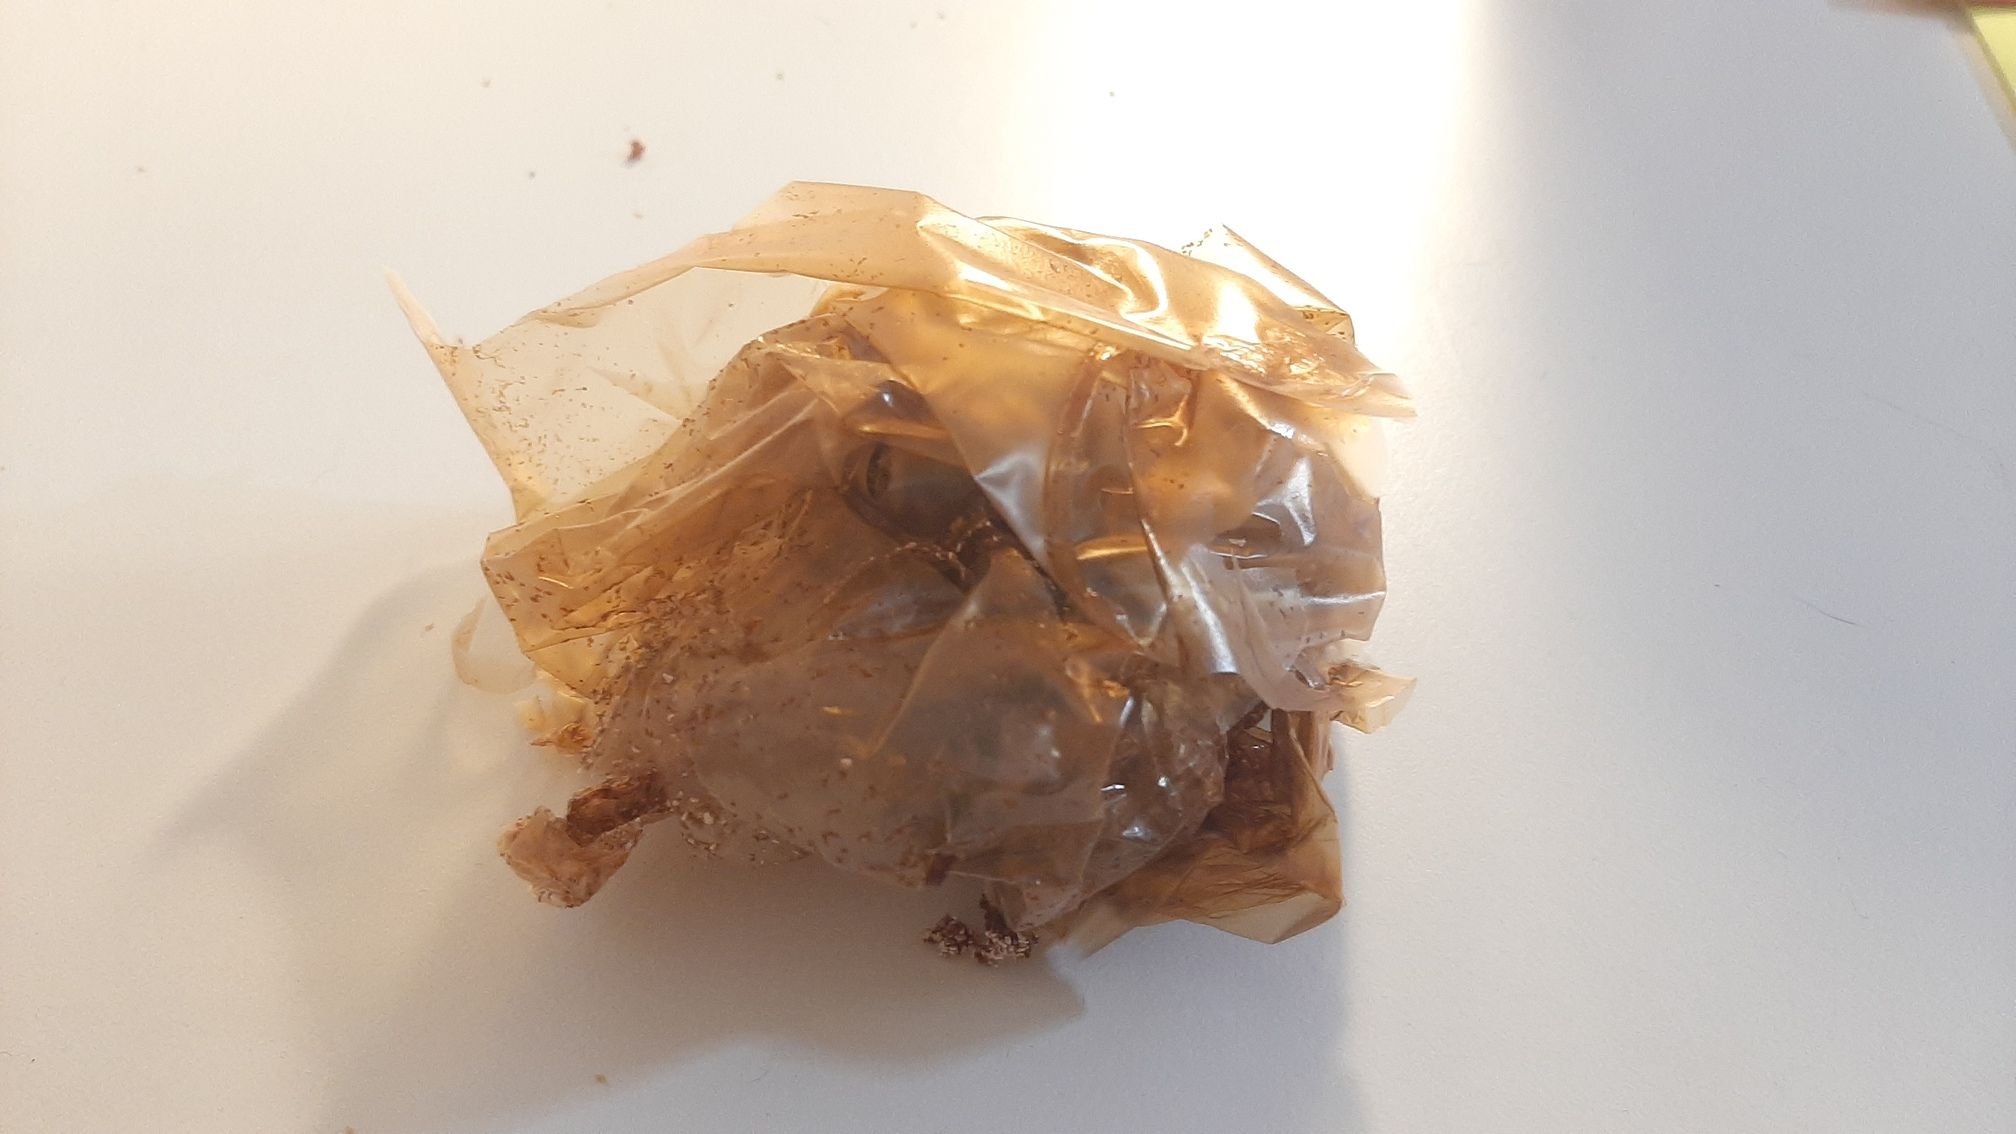
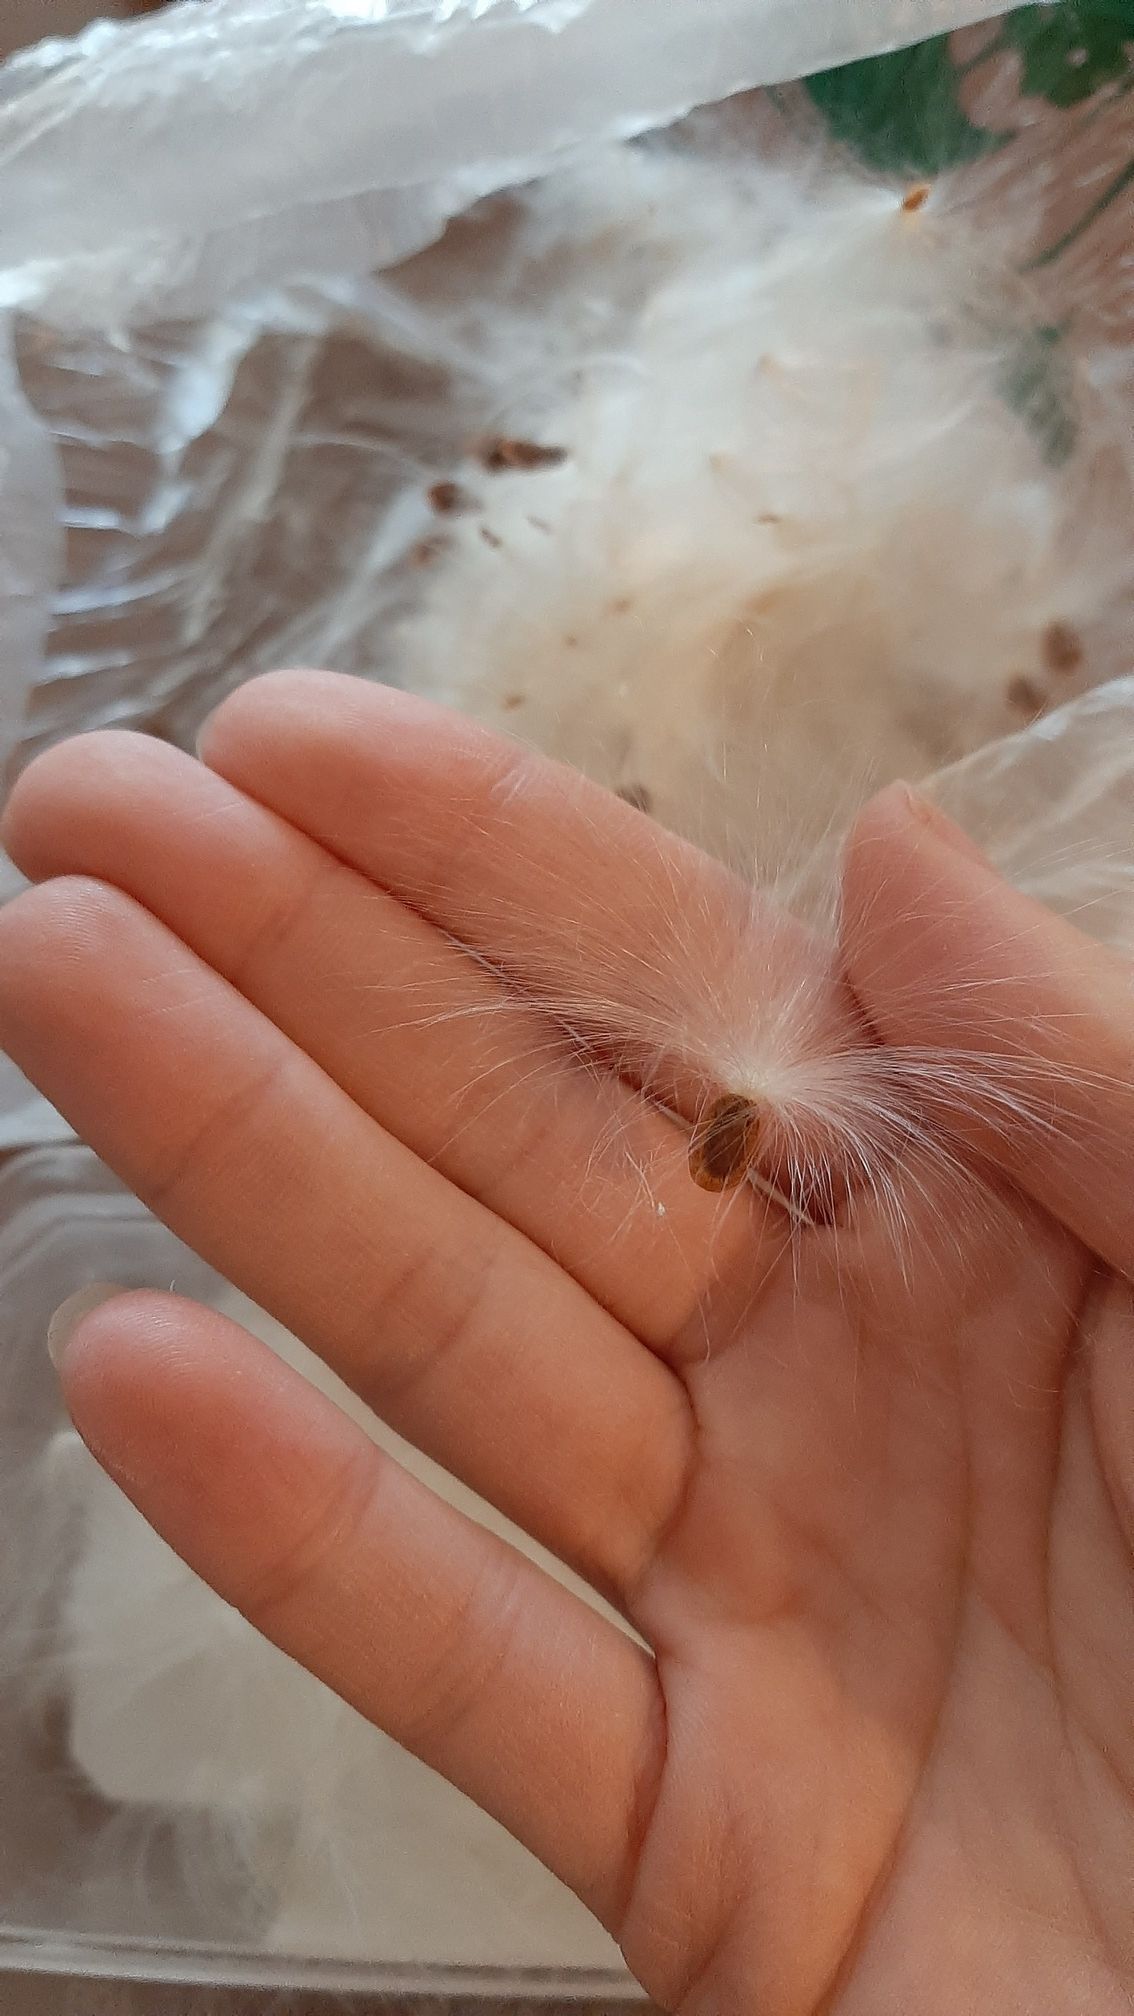
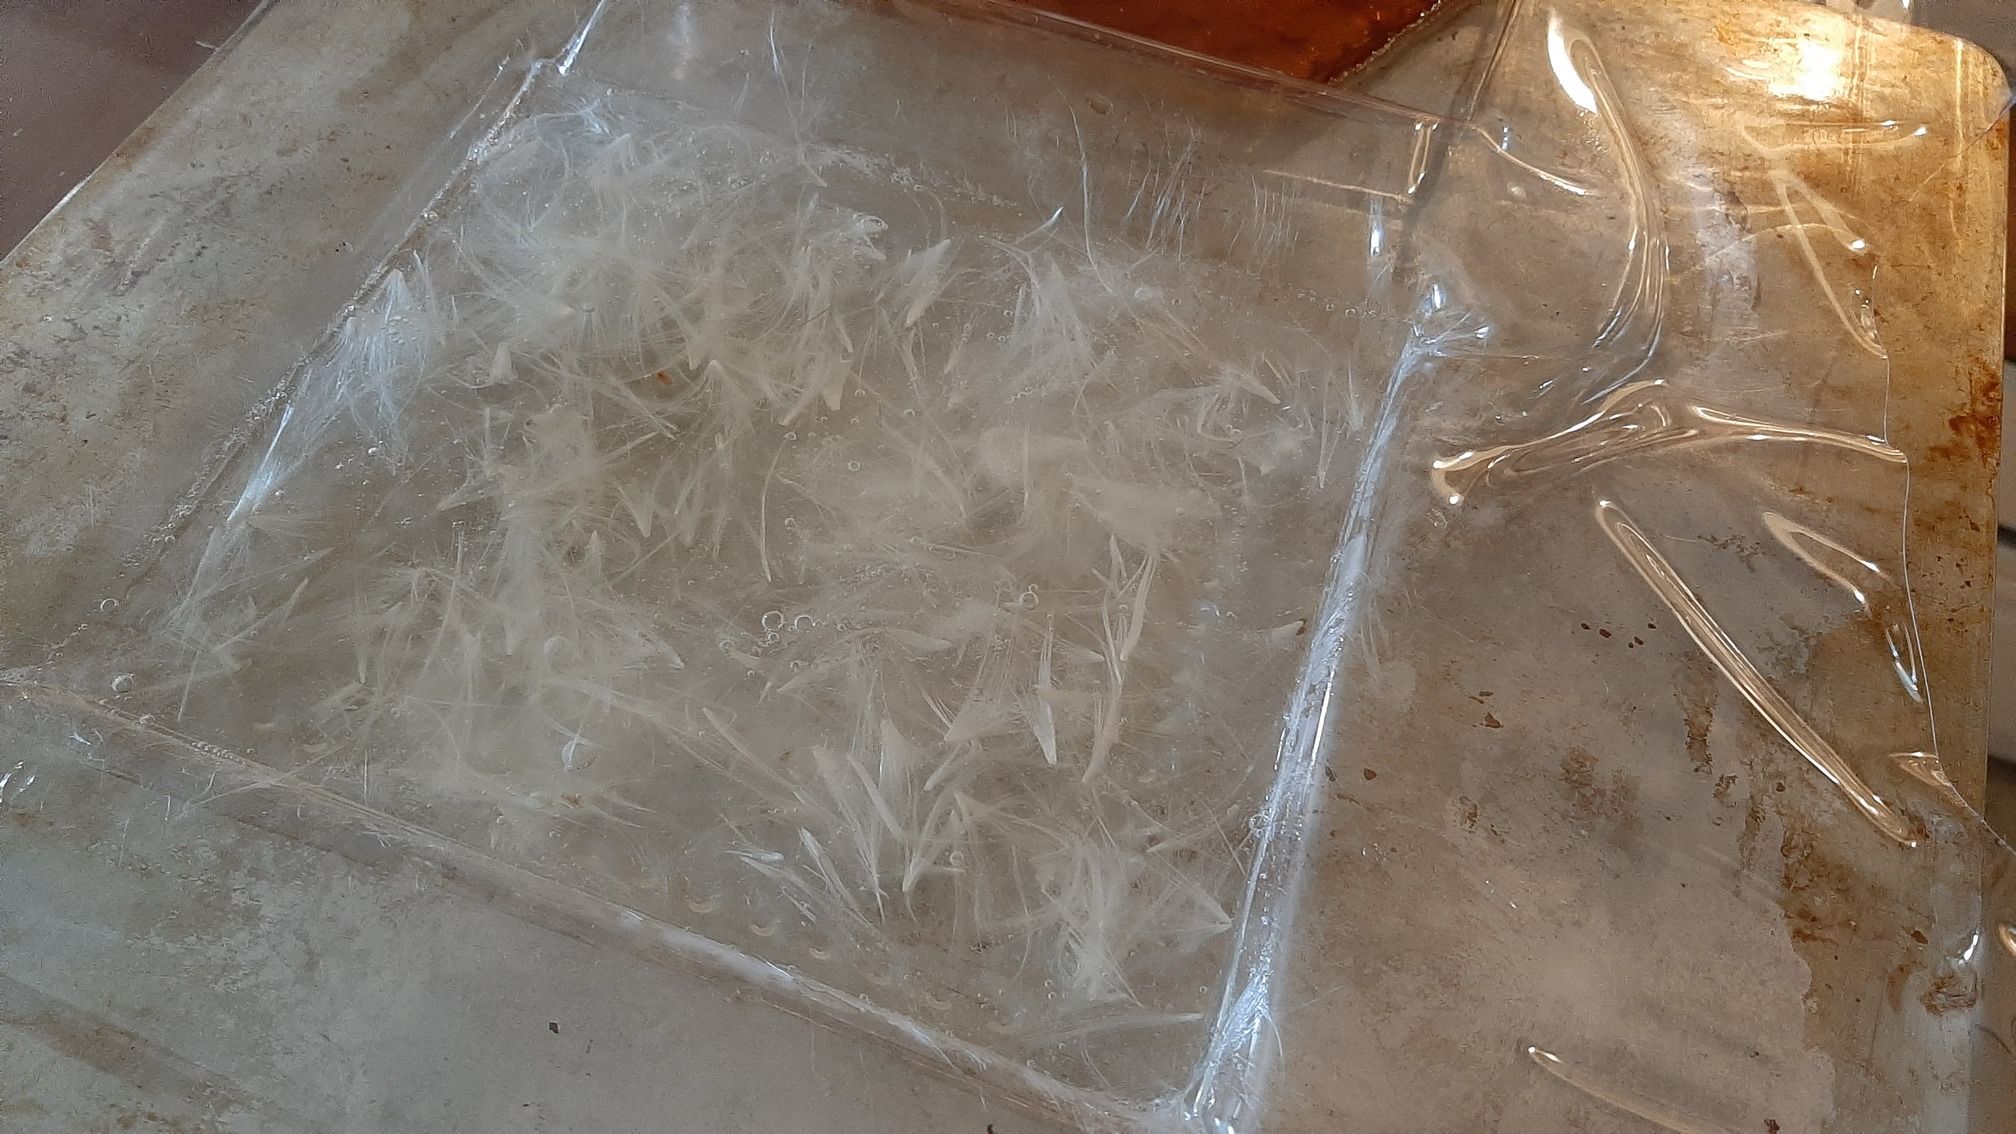
My last attempt had 1 pack (6.75g) of gelatine dissolved in 60ml of water. I kept it really simple, but added milkweed fibers on top, made a second mix of gelatine (60ml of water, 1 pack, 180ml of boiling water) to pour on top of the fibers to fix them there.
When I got it out of the mold
3 Weeks later
Most of my mixtures had problems, did not dry fast enough and remained very fragile. The first mix was the best, so I can imporve my recipes simply by boiling them longer. Luckily, most of my failures can be collected and casted again! I really regret not taking exacly the same thickness for every molds, because now I can't be certain if the problem comes from the thickness or the recipe.
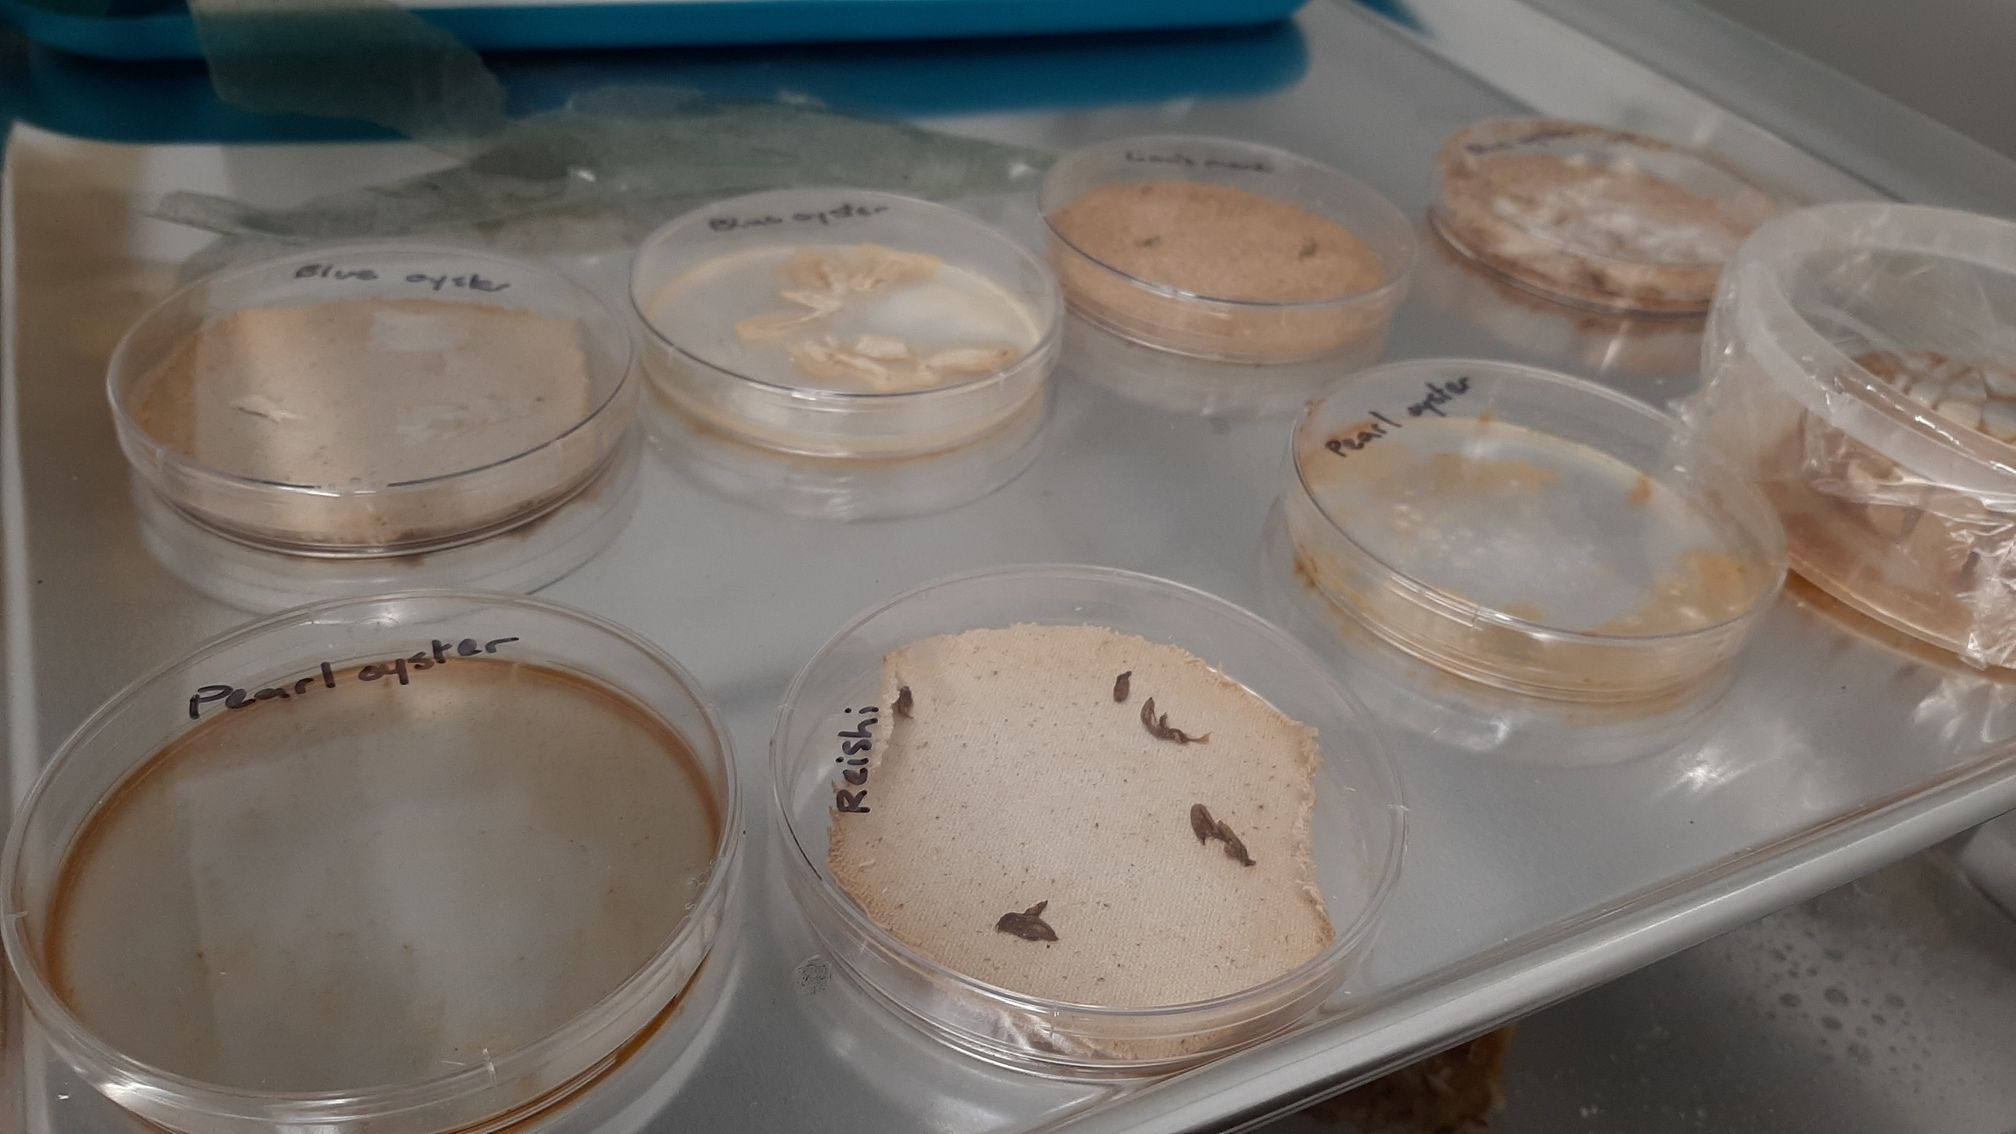
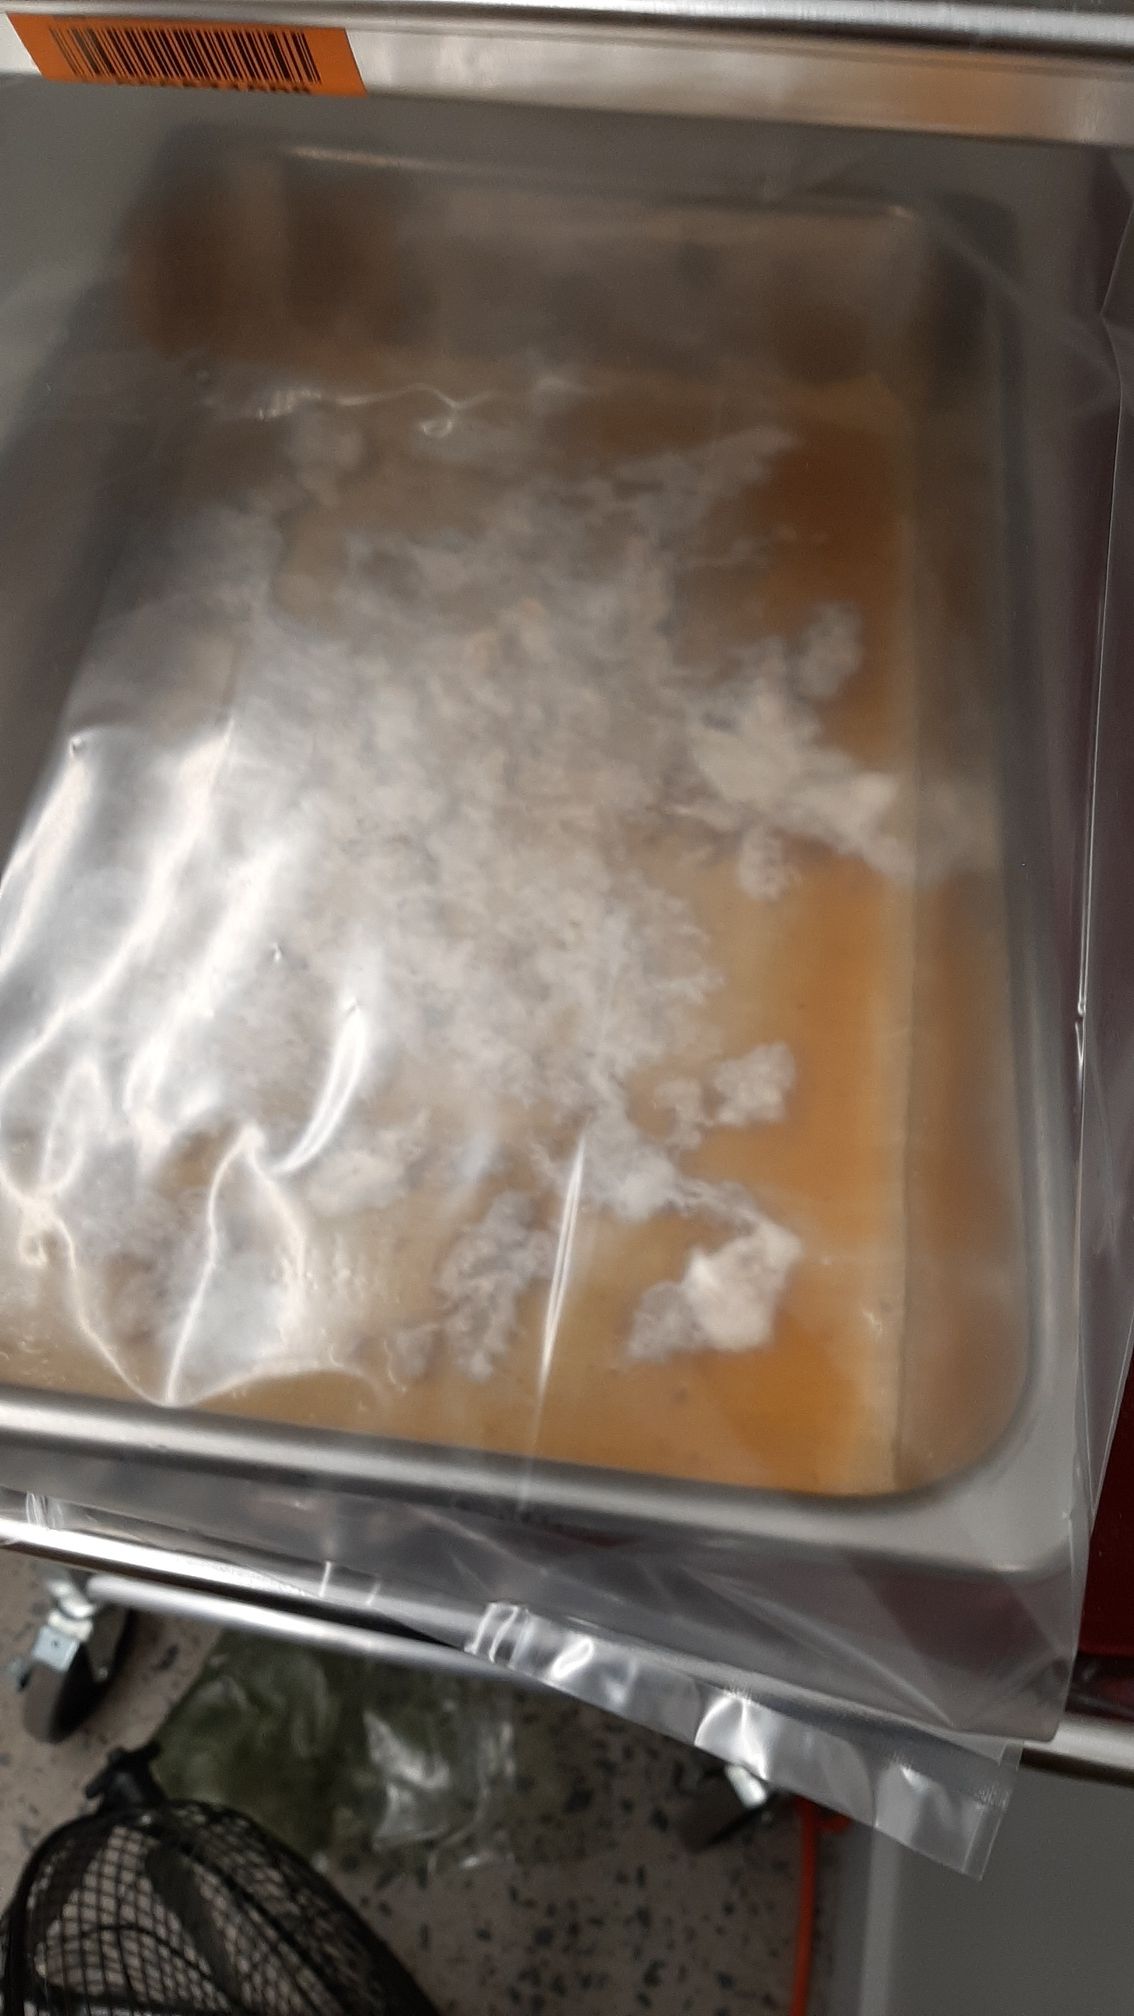
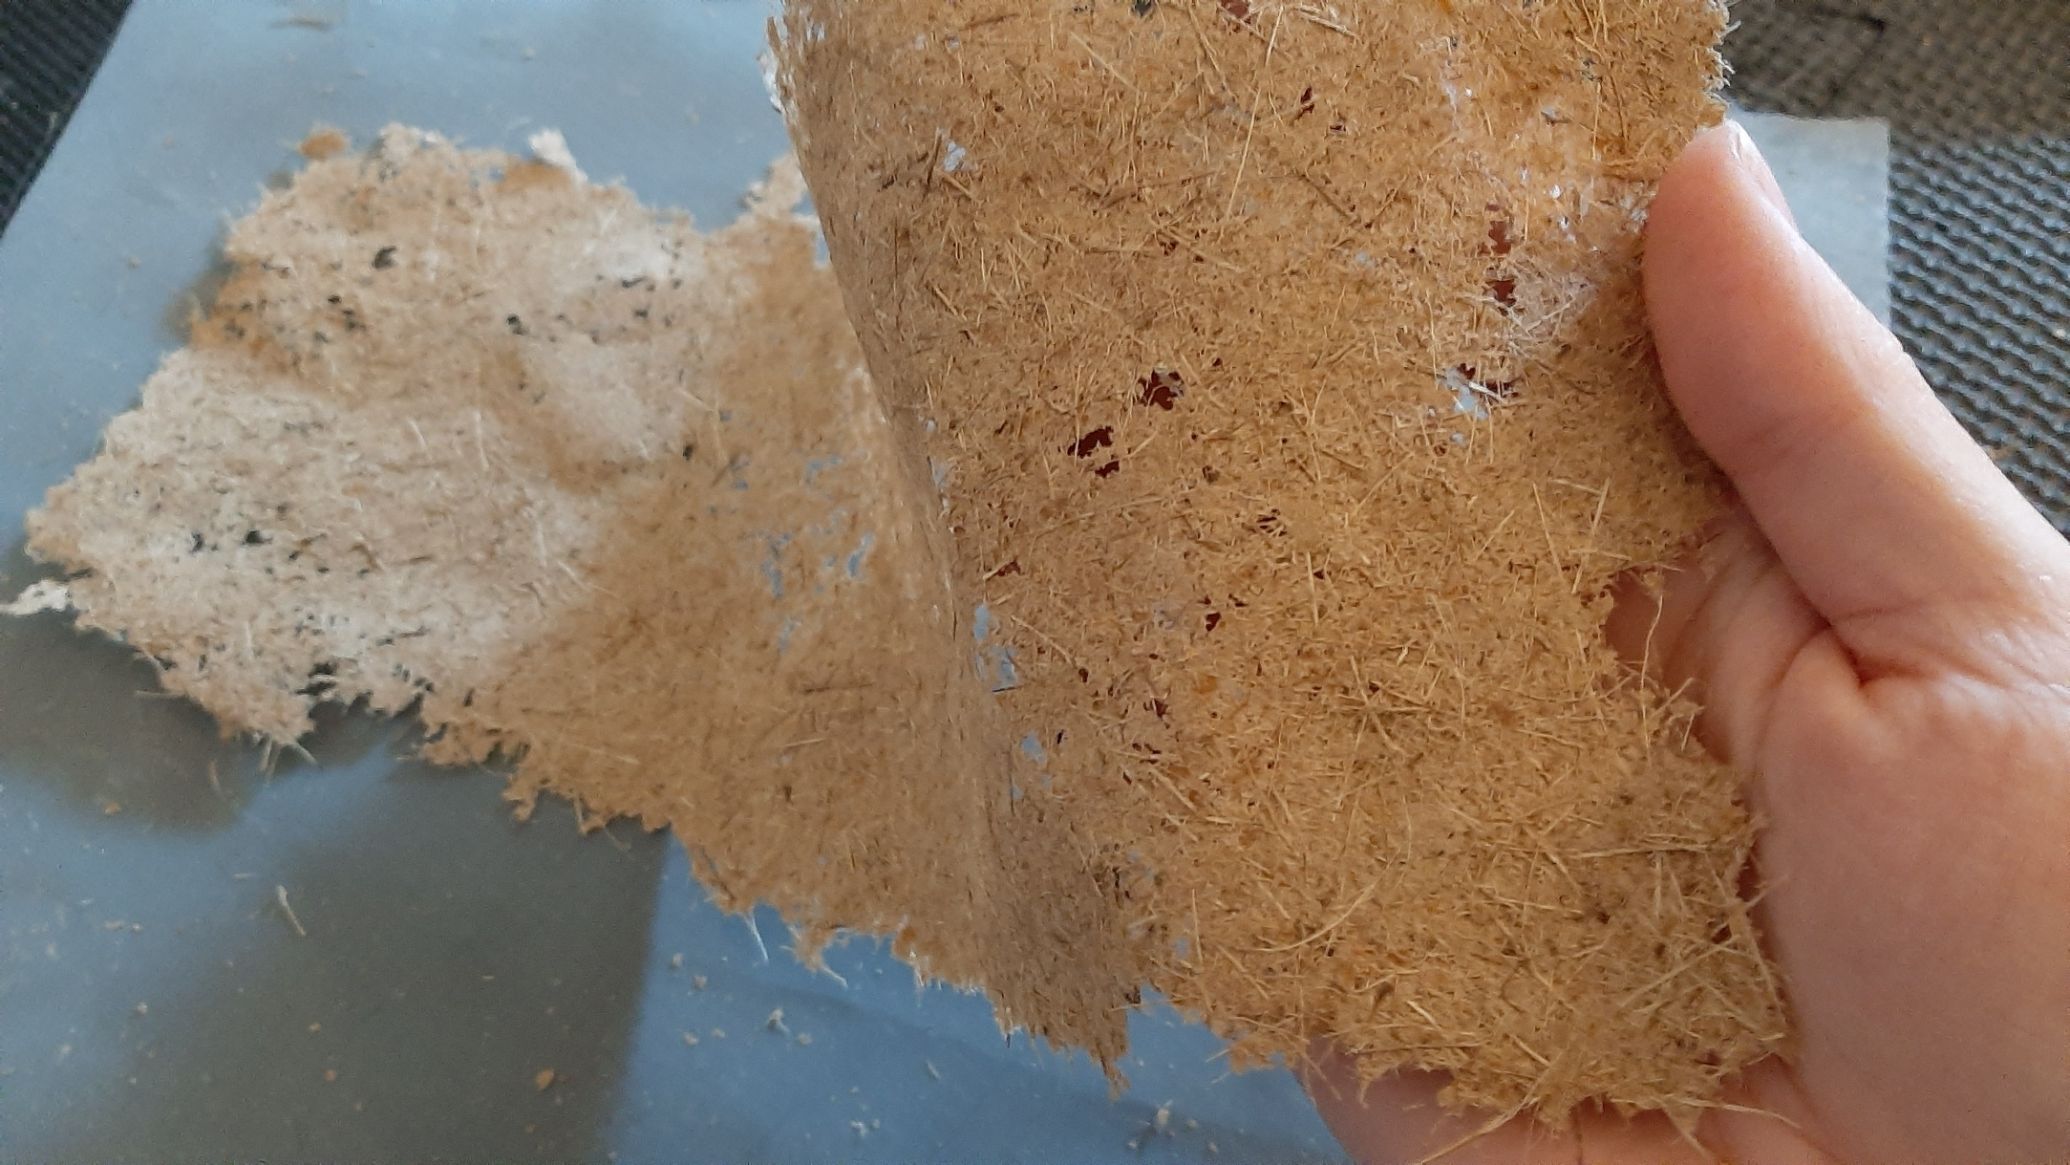
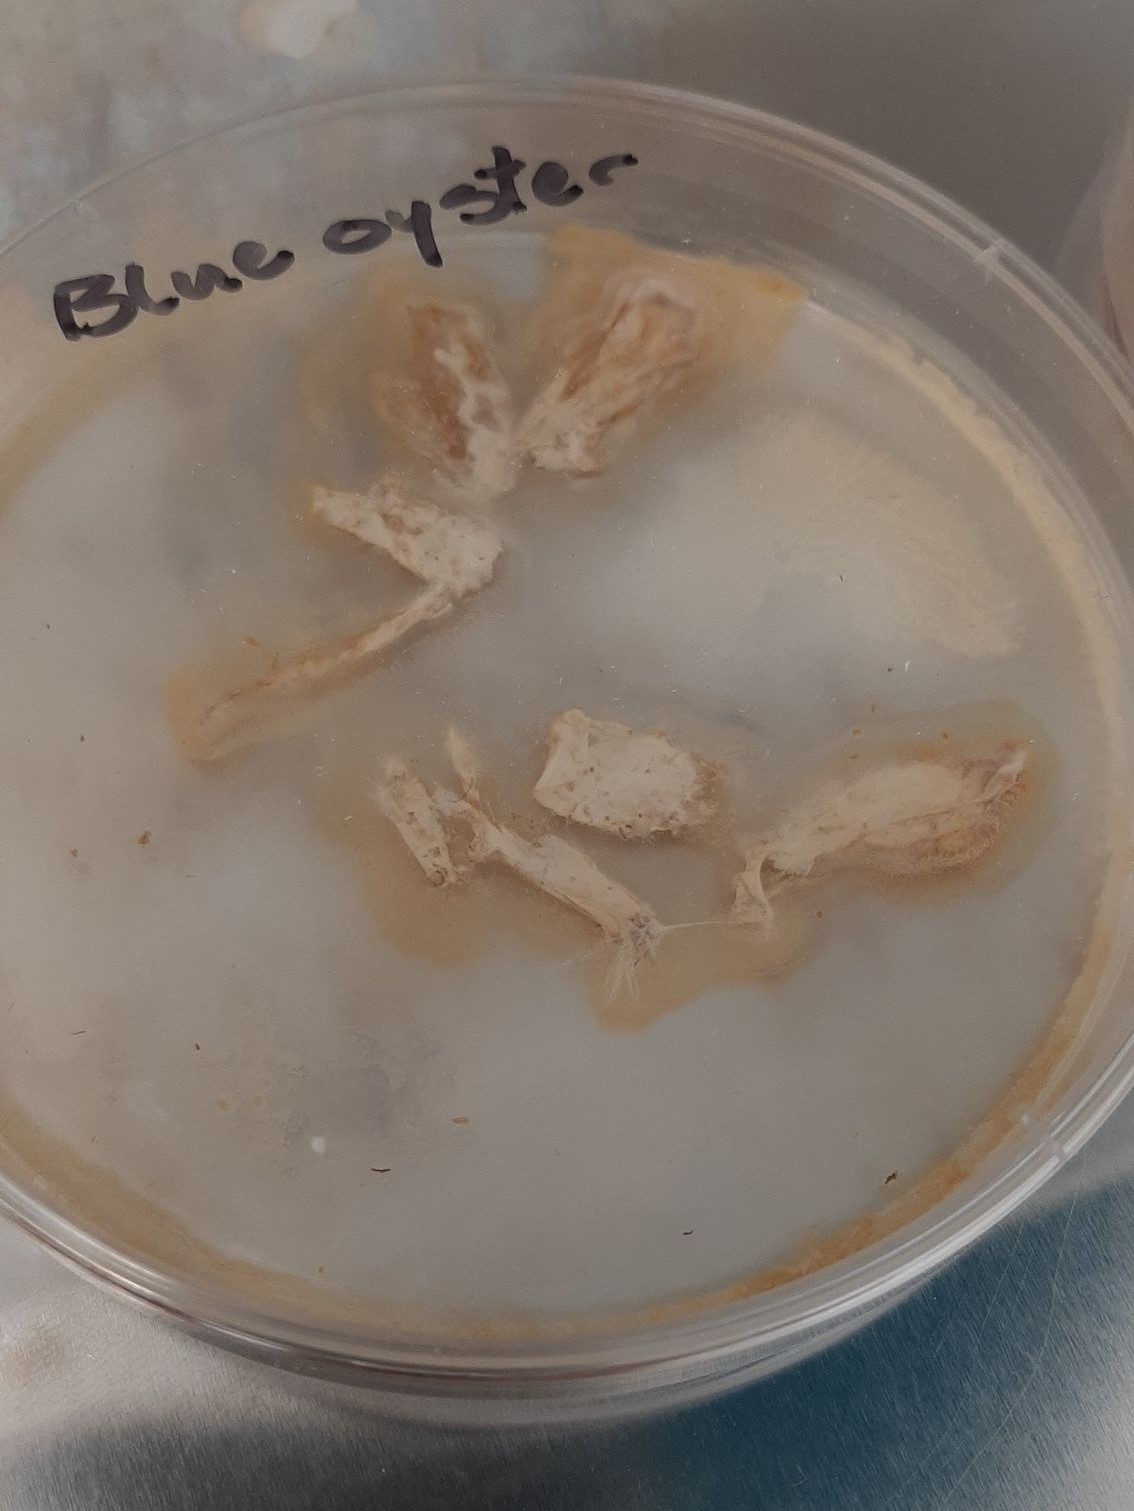
Mycelium
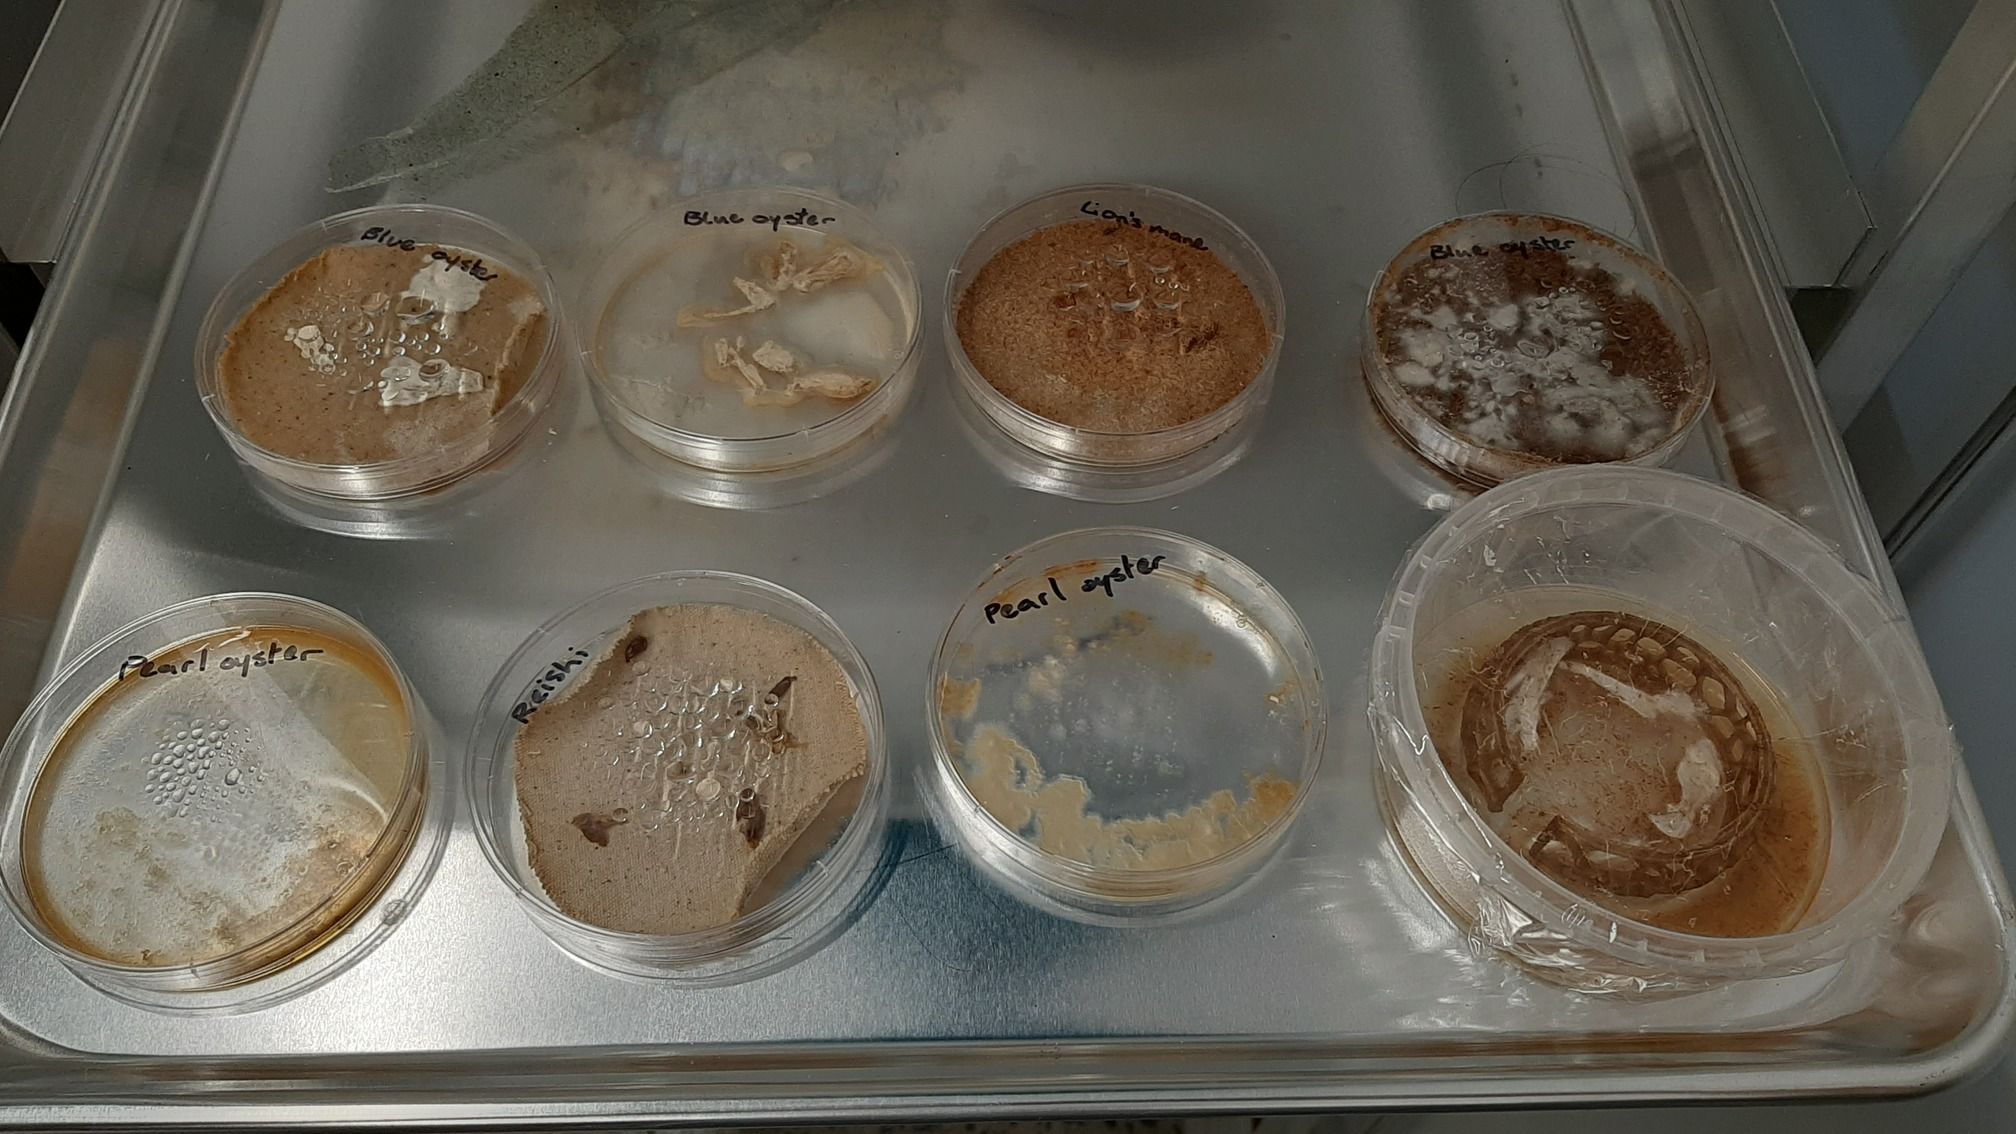
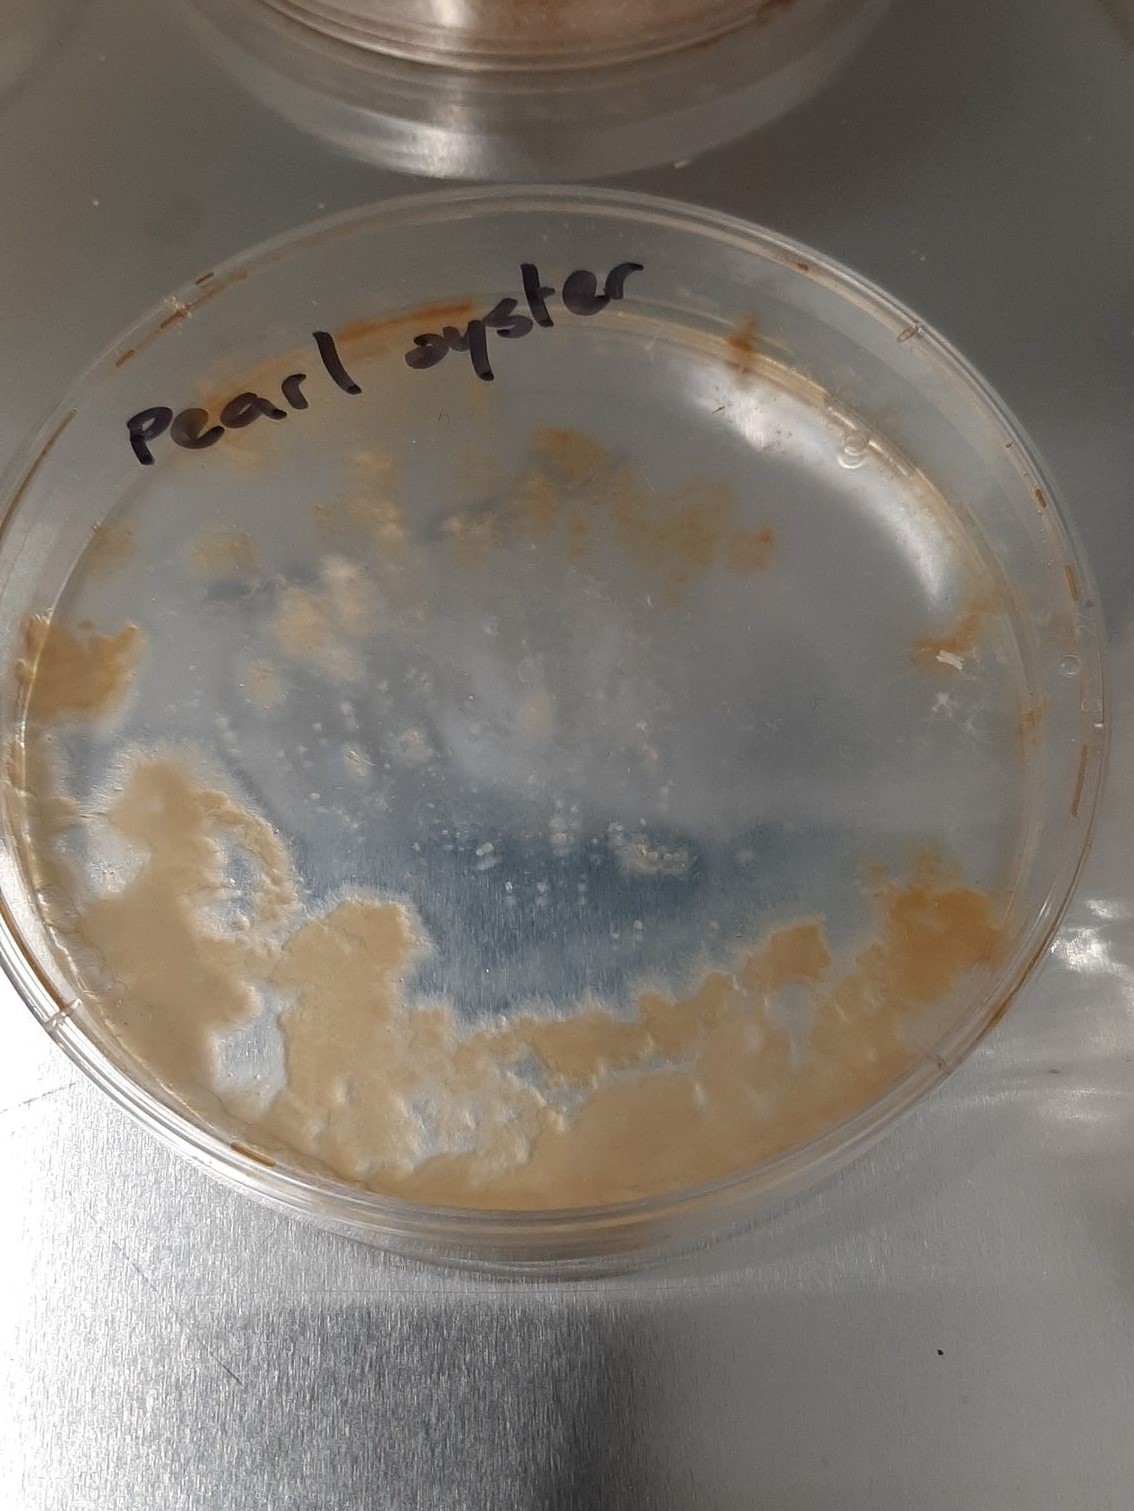
We discovered a wonderful little shop in Montréal, called Mycoboutique. They had a couple of varieties you can grow on your own, and sold them in 3 different states.
- In a syringe; This is the very firt stage of the growing. We were warned that it was the most risky one. Since the mushrooms are not grown yet, they can get attacked by different micro organisms that live all around us. This is the state where sanitation is really important.
- Growing in a wood mixture;
- Growing on wood pegs;
I prepared the nutiment mixture, some sawdust and some fabric samples and let everything in the pressure cooker for about half an hour. When I got them out, they were hot, but not as hot as I expected. This one is the machine I really didn't get how to use... I boiled again my jars to be sure. After sterilizing my tools, hands and workspace, I prepared all different samples to have all kind of different results.
The bracelet is made of hemp filament.


Most of the time, I didn't put enough wet mix for the mycelium to grow. It worked wonders with sawdust, but not with coton fabric. My 3D printed bracelet was also a failed attempt, It didn't really grow on it. The big sample of fabric had already started mycelium, a bit of sawdust and much more nutriment mix, maybe that's why it worked so well. Another thing is the humidity. My littles samples ended up super dry, but my bracelet and the big fabric sample kept their humidity. The bag I used was specialized for growing mycelium. The little white patch was there to filter: letting the air flow, but keeping the micro organisms out.
After 1 week
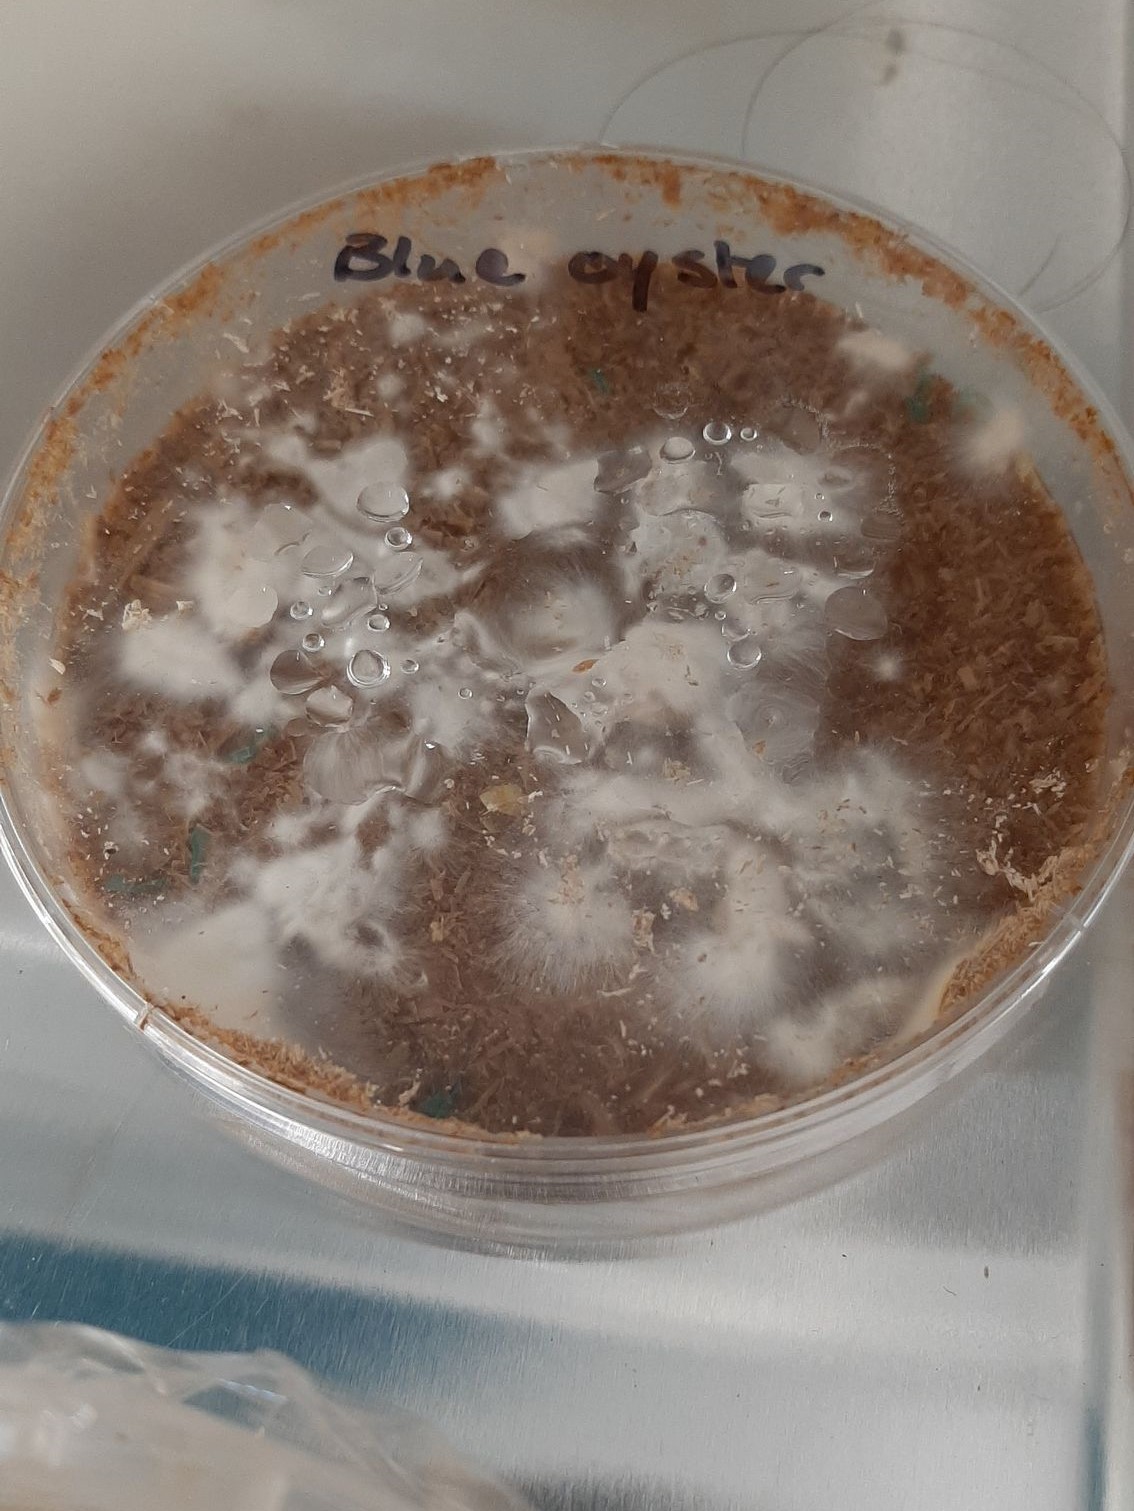
After 3 weeks