For this project, I was inspired by the classic wood mannequin, more particularly by the way artists and sculptor study anatomy by decomposing the human body in the most basic shapes. Thoses basic shapes can be rather simple, two boxes for the main part, lines for legs and arms, and spheres for the joints. They can also be extremely complex, and in those cases you can see every muscle is designed with a shape. One way or another, thoses sketches are particularly appealing to the eye, even if they're not complete. Some great artists say that a drawing could be stopped at any time and still look like a final painting. This theorie is true because one of the hardest and most important part of a painting is suggestion; letting the reader imagine the rest of the painting. By doing that, you can draw attention to the details you want.
Anatomy4Sculptors - Theories for artists
LowPoly is a more abstait kind of art, but it's still statring from the fact that the viewer will imagine the rest of the shape. This is a way to better stilize our shape, draw the attention to the general look and mood rather than details. In this case, instead of choosing the shapes, the cumputer makes it randomly. This "random" aspect is exploited in so many different ways!
aLEX tHE bECK
Dimosthenis Prodromou
Strook
Antony Gormley
The Making of my Project
MakeHuman
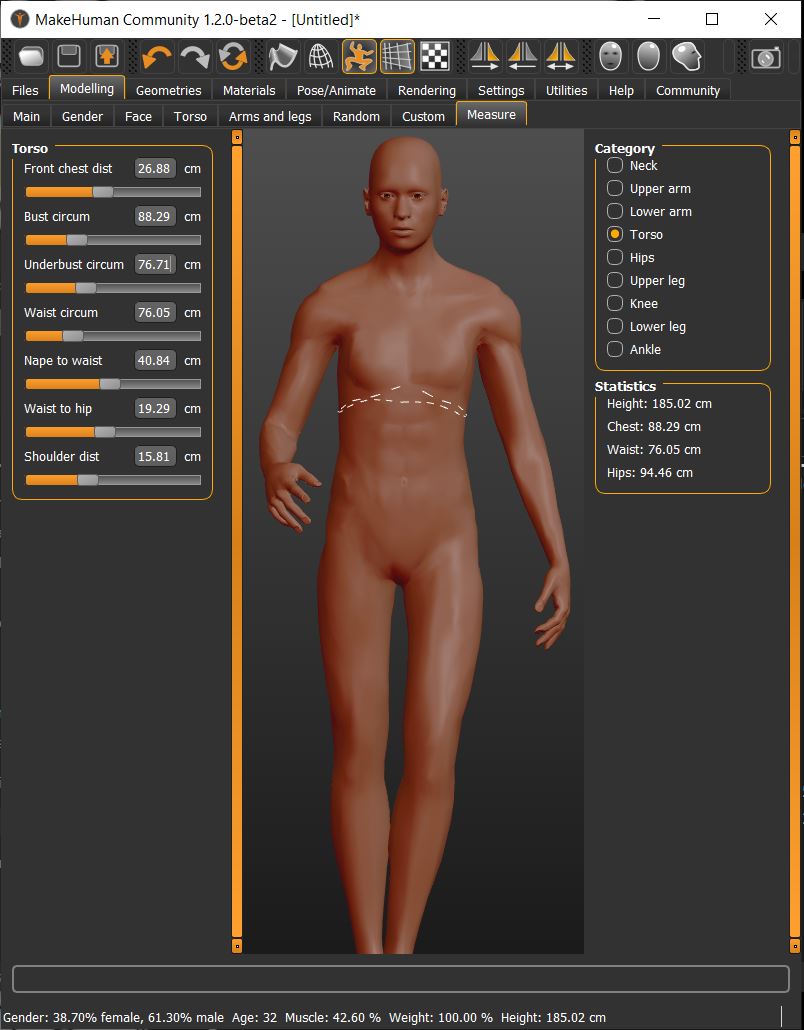
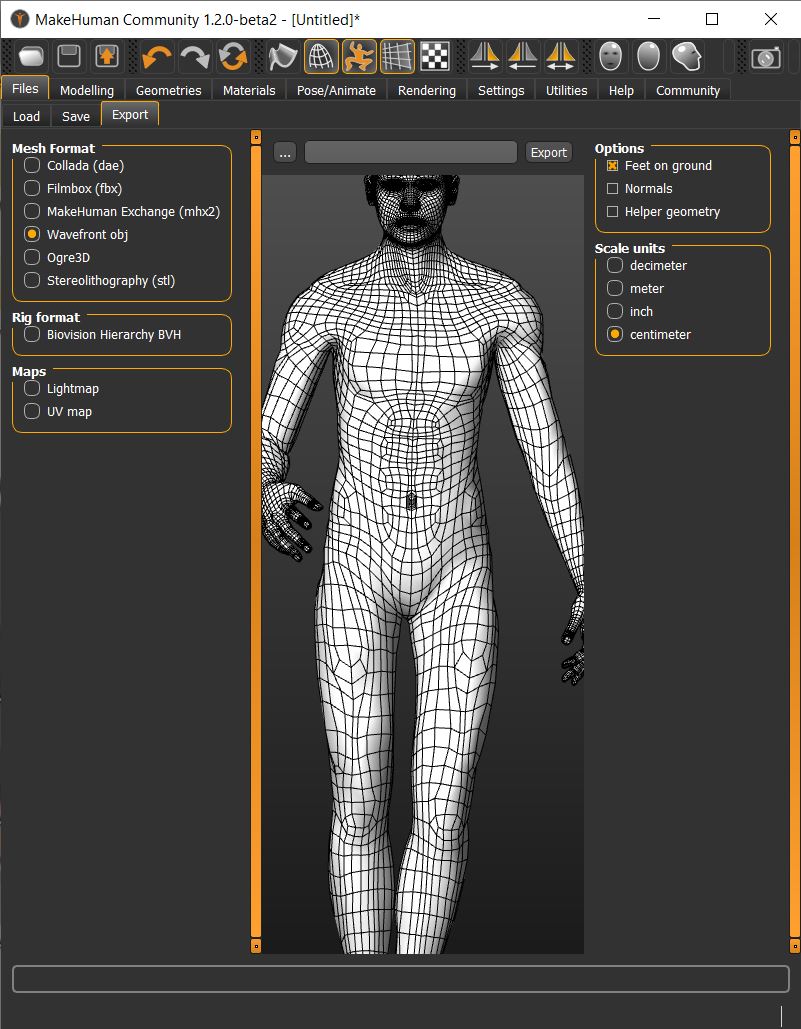
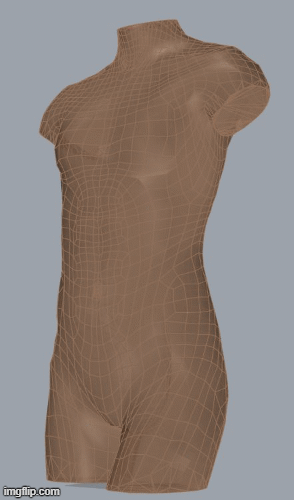
I started by making my digital body You'll see later that my 3d scan didn't go as planned). I used MakeHuman, a rather simple program to modify a human form. I didn't personalized the textures and color since I panned to make it in low poly. I went directly to the mesures options and I entered the body mesurements of my boyfriend, who was the only guy I could get less than 6 feet from. Our lab already had a female manequin, that's why I wanted to make a masculine one. The program is realy easy to use, but not perfect. Some mesurements points laked some precision, and were not necessarily adapted to a mesuring tape.
Rhino 6
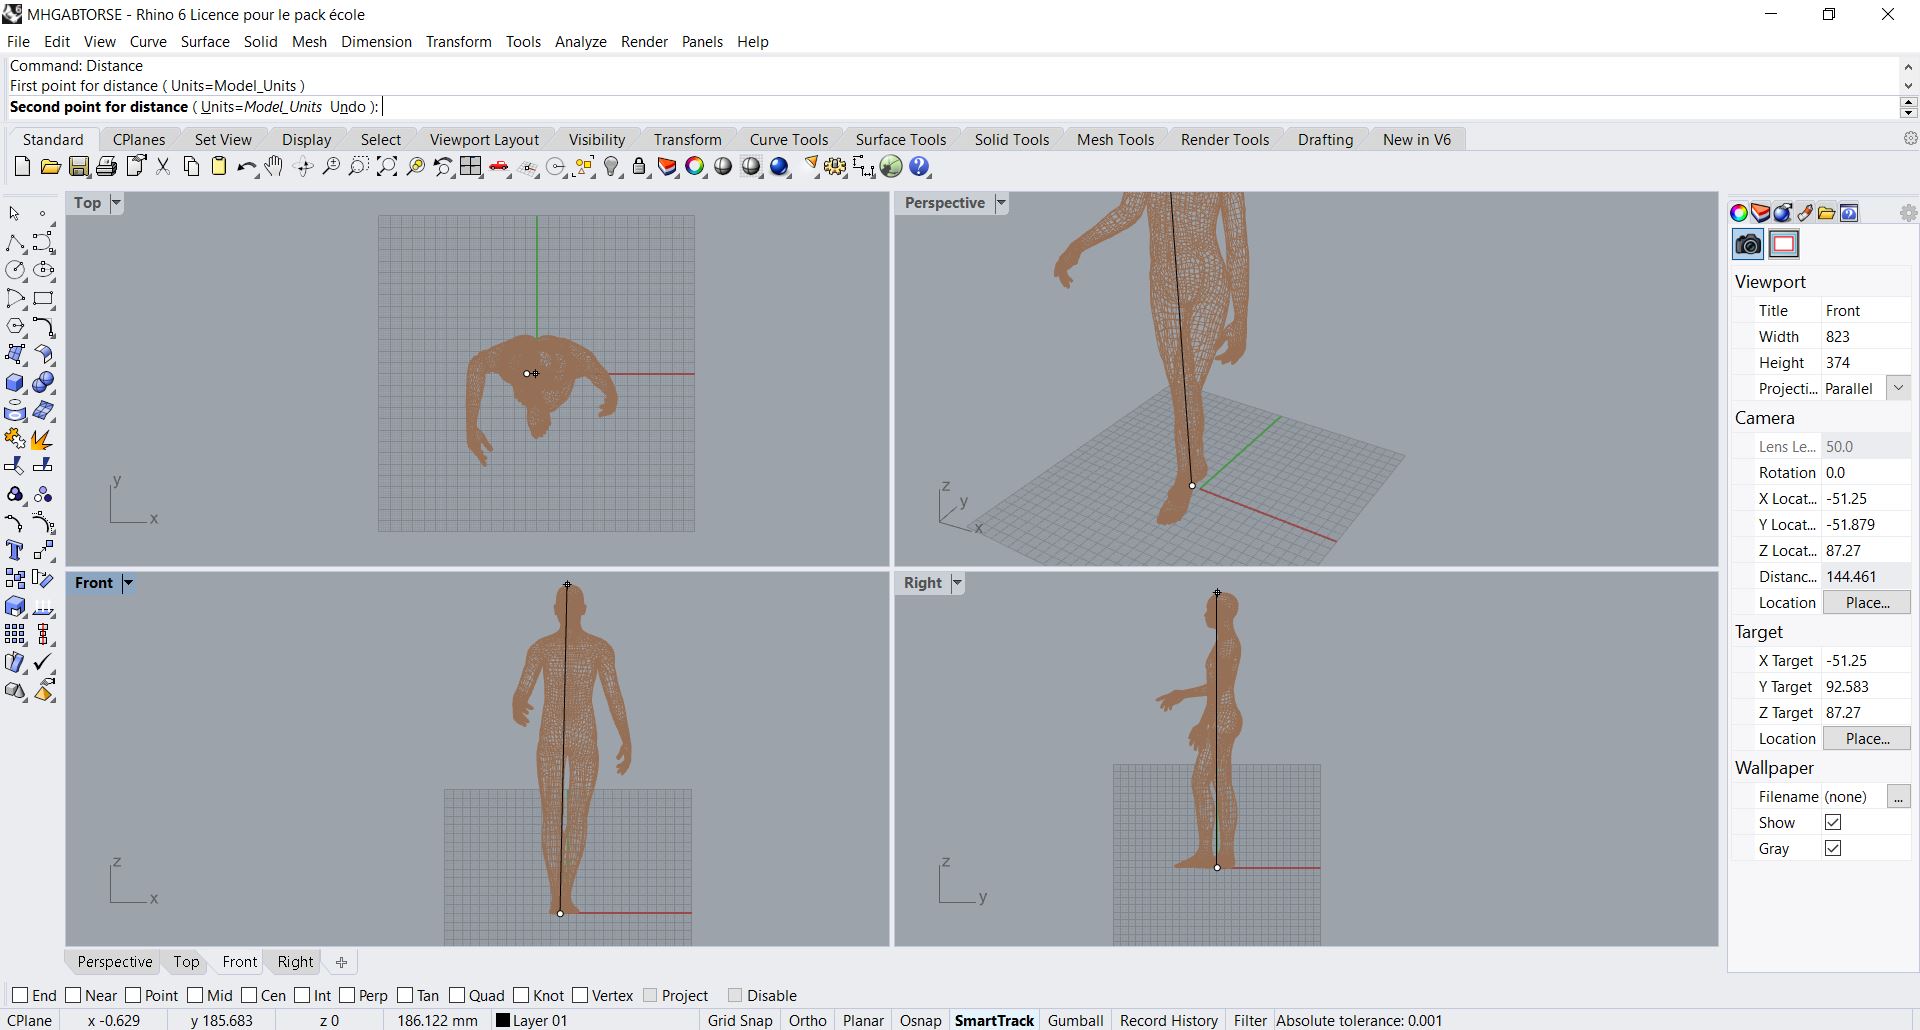
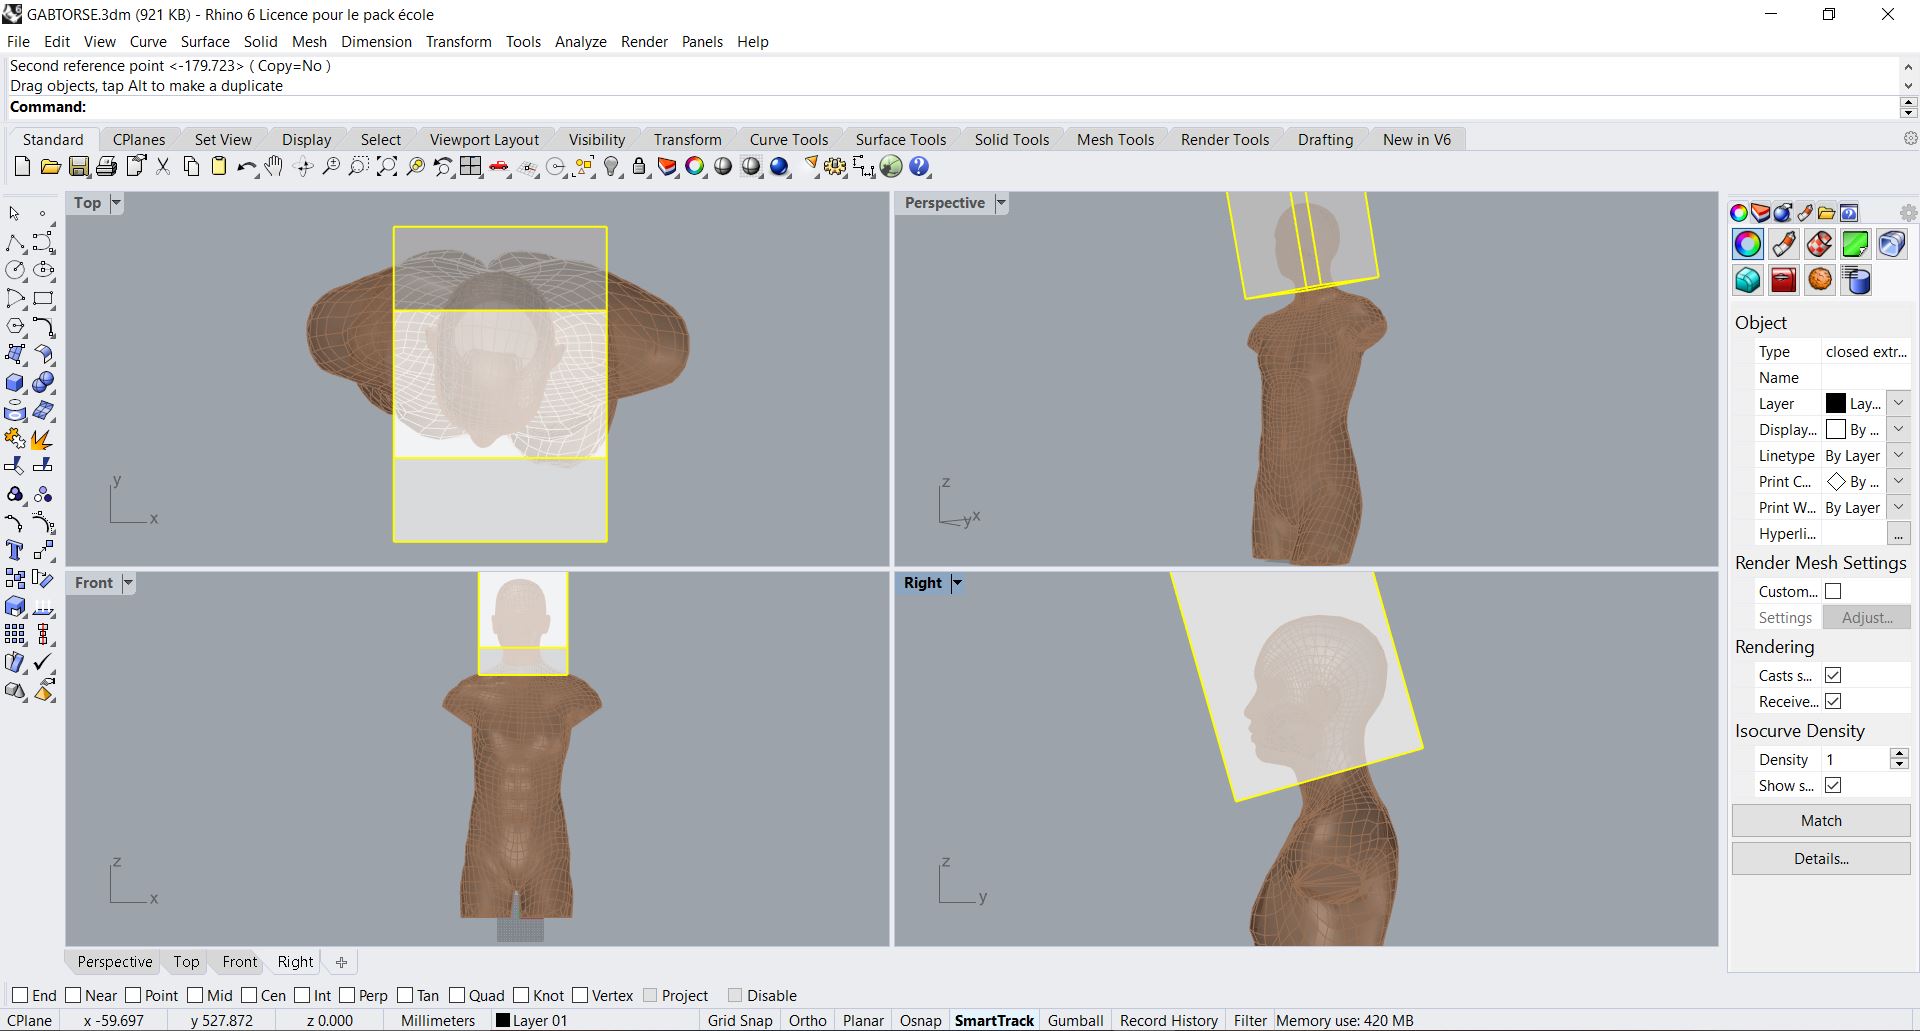
From there, I exported the file and opened it with Rhino 6. I had more trouble with this program, since it's less instinctive and more complex. Thanks to the tutorials, I ended up loving the program and I was able to do everything I needed. First, I scaled the mannequin, And rotated it so it was standing. I kept the file in mesh format, cutted (MeshBooleanSplit) out the parts I didn't need for my manequin.
Transforming Into a Pattern
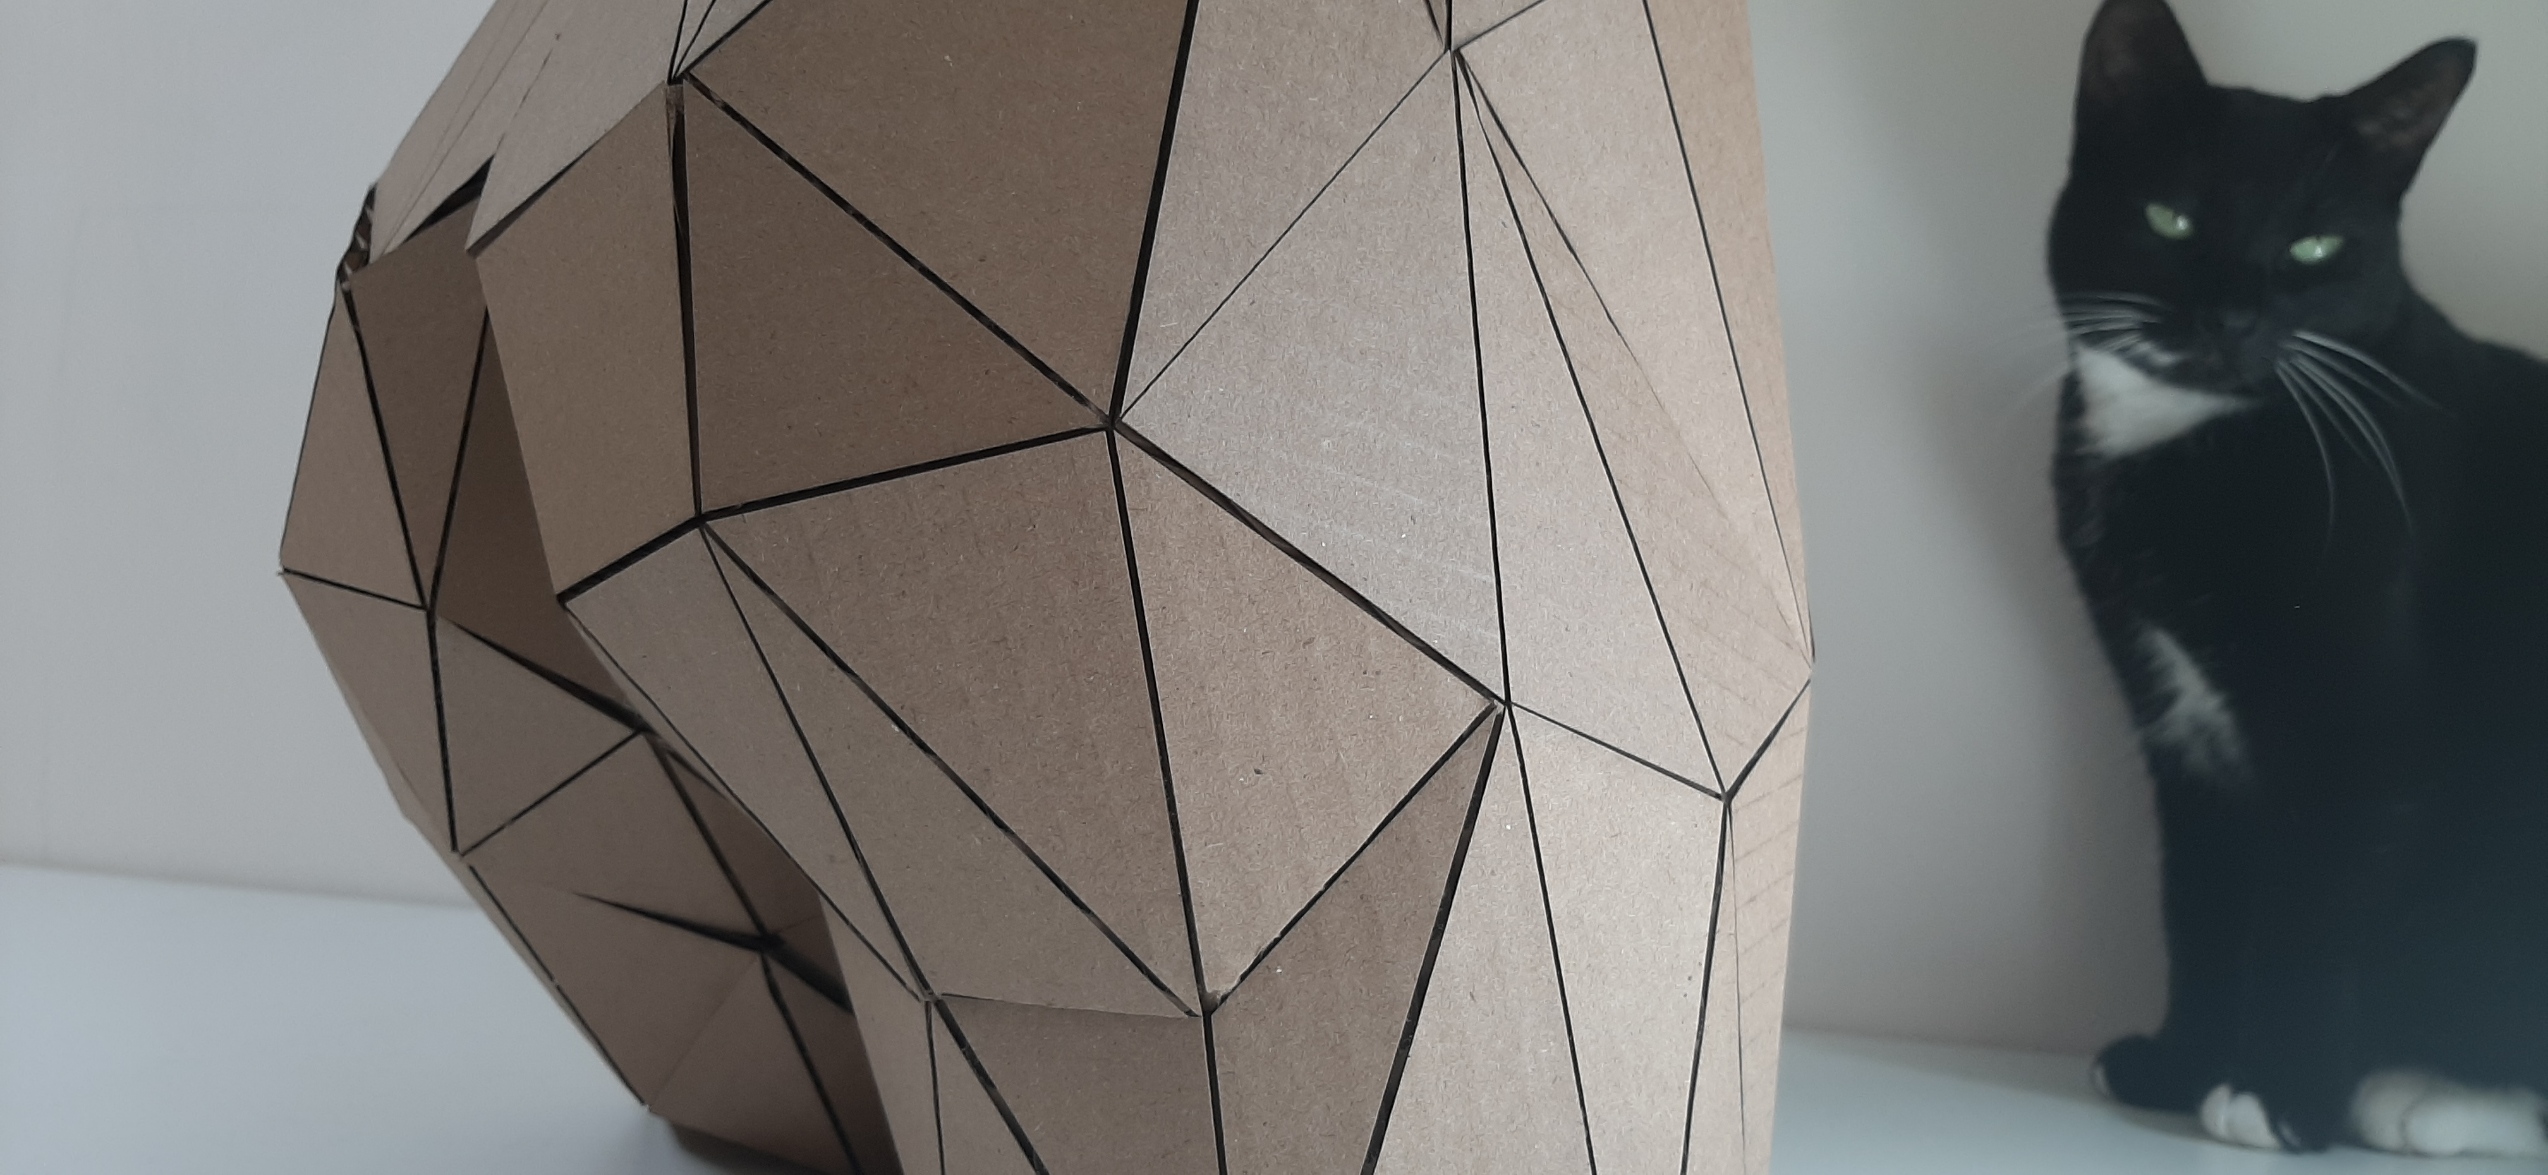
Here is some experiments I made by reducing the mesh. I ended up reducing it by 85%, and it was really fun to do since every time it gave me something different. I realise now that maybe cutting the legs after reducing the mesh would have made my mannequin more stable. The "reduce mesh" reduced everything randomly, so the edge of the legs got rounded up a bit.
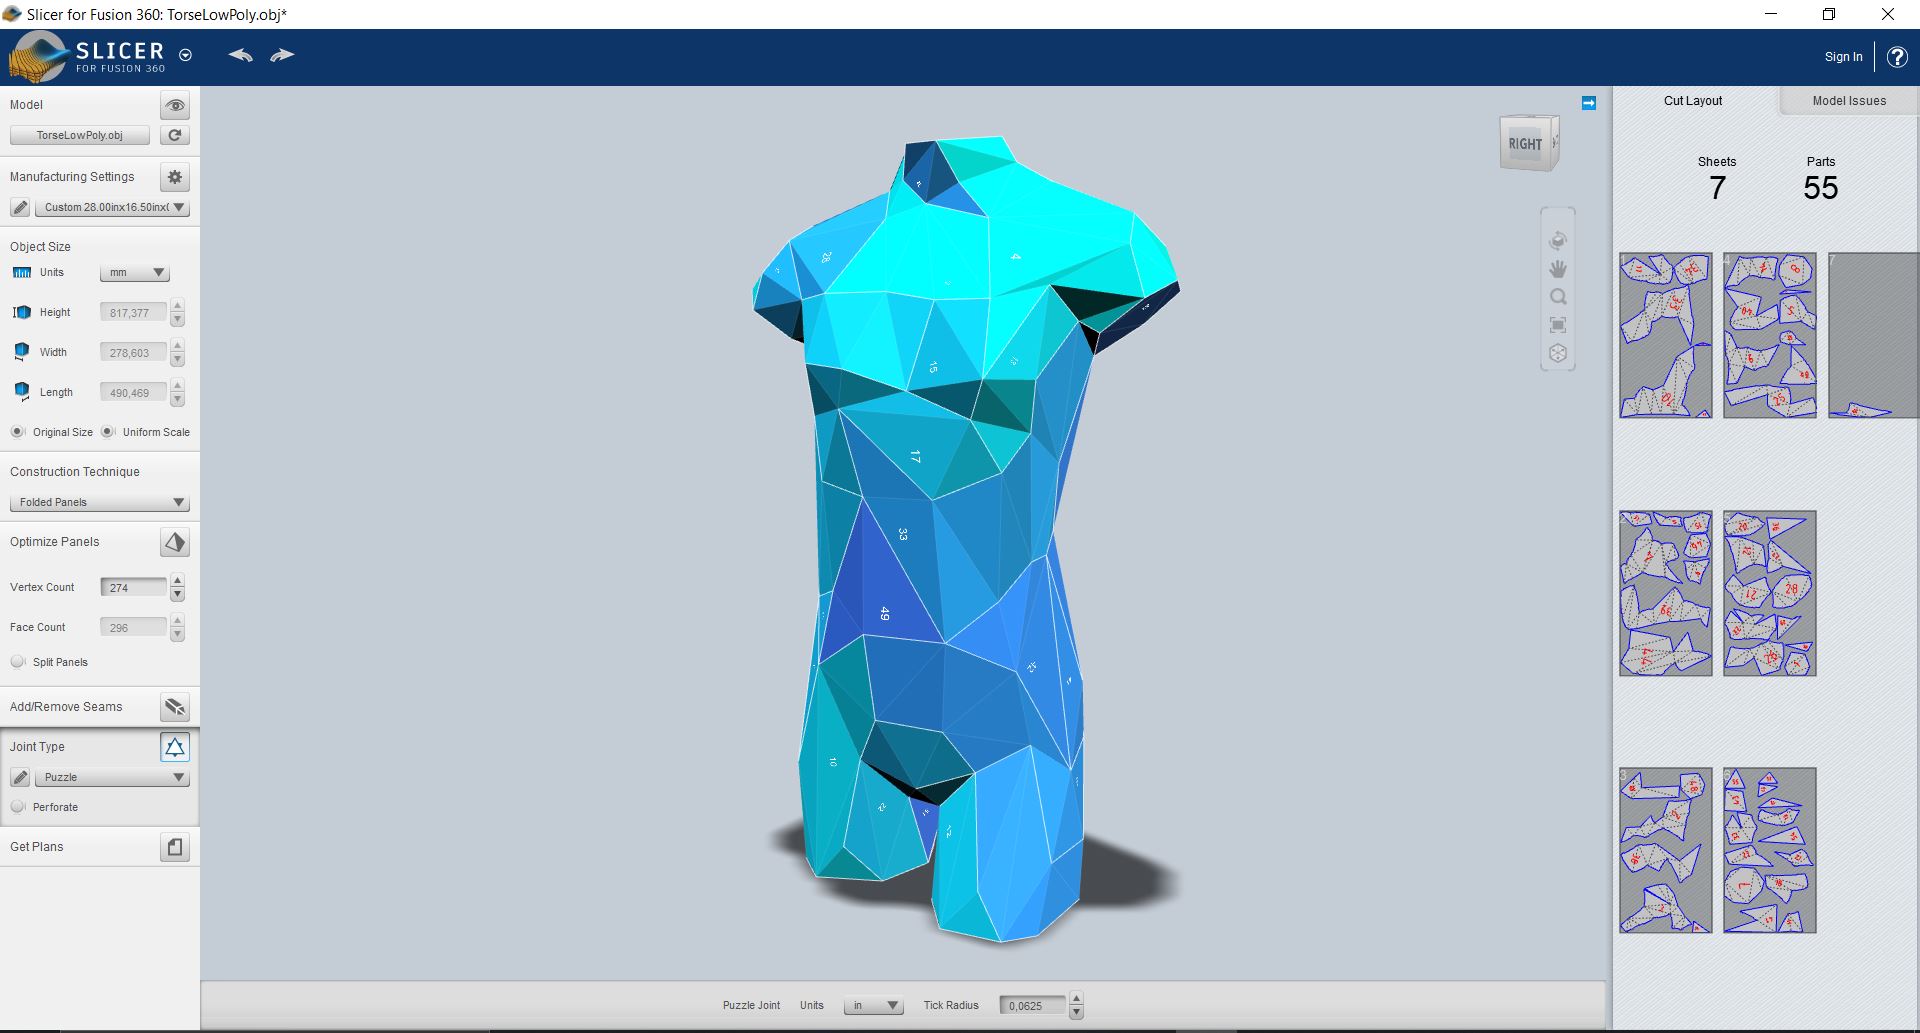
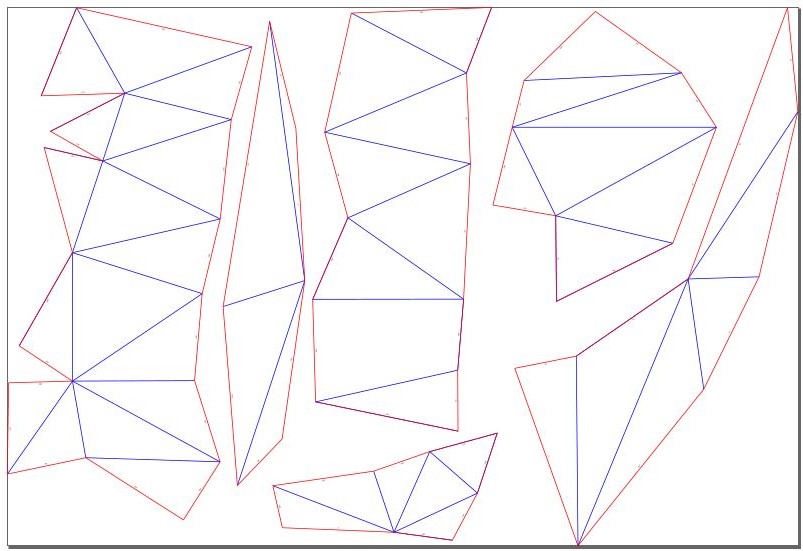
To transform my shape into a pattern, I fist opened it with Slicer, from fusion 360. It offered a lot of options, but I had some touble making the pattern the way i wanted it. The software is picky, everything has to be perfect to work. The lines of jonctions, where the pattern would be cut were customisable, but some lines were not, and you can't change the pattern from the 2d window once you unfolded it. I ended up with a lot of singles triangles that the program didn't want to join to the others. I exported my patterns, but had to place them in a better way to save some material.
Pepakura
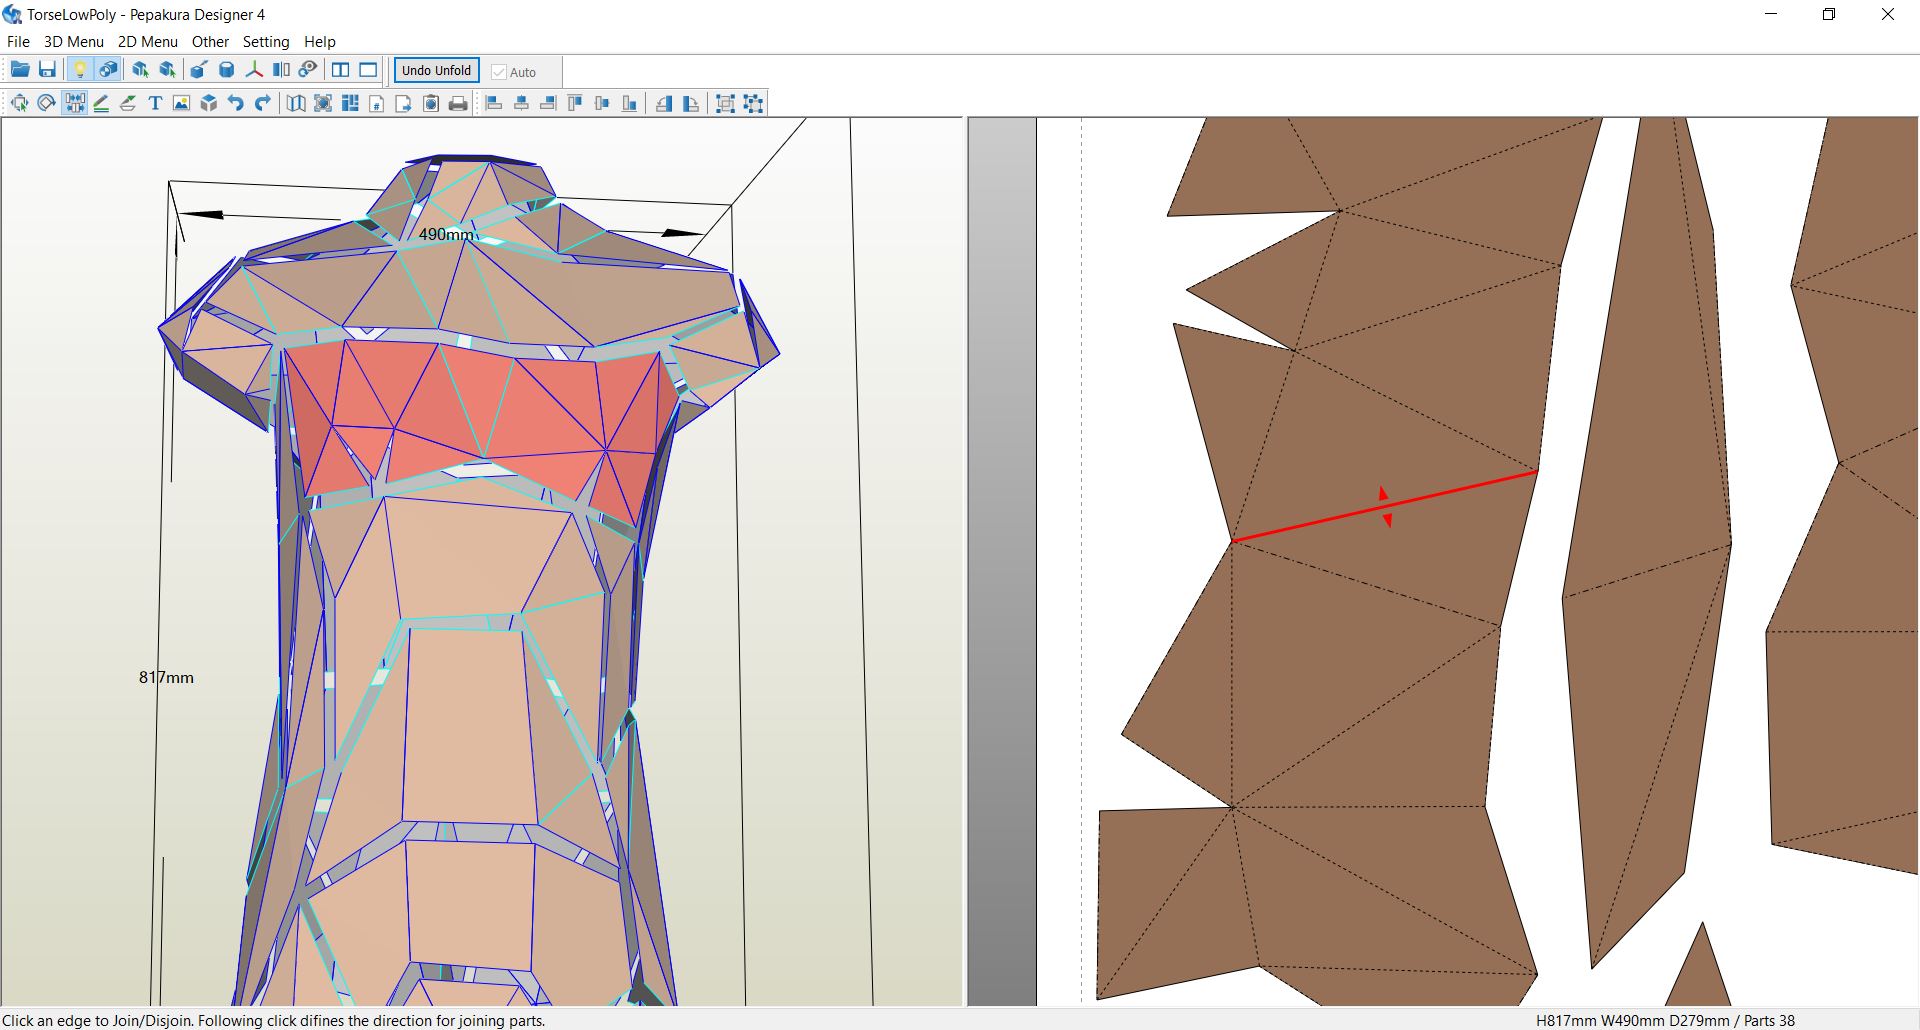
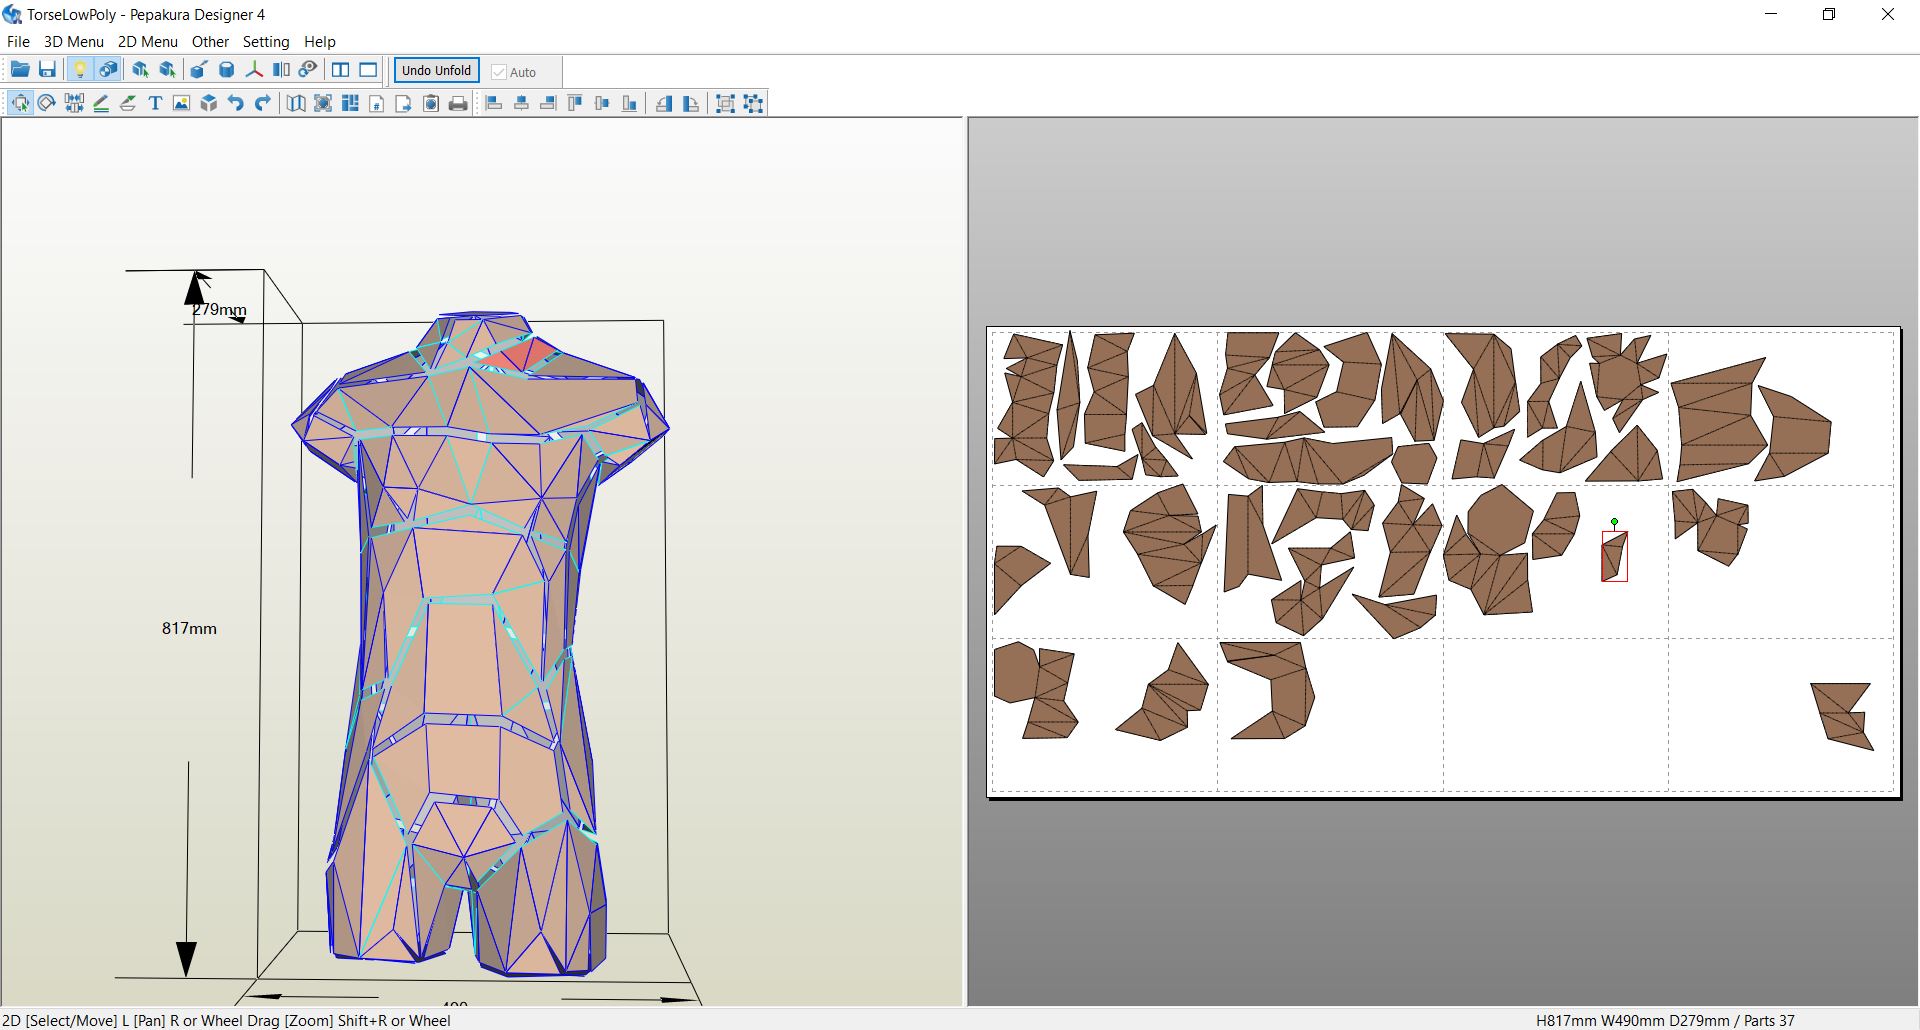
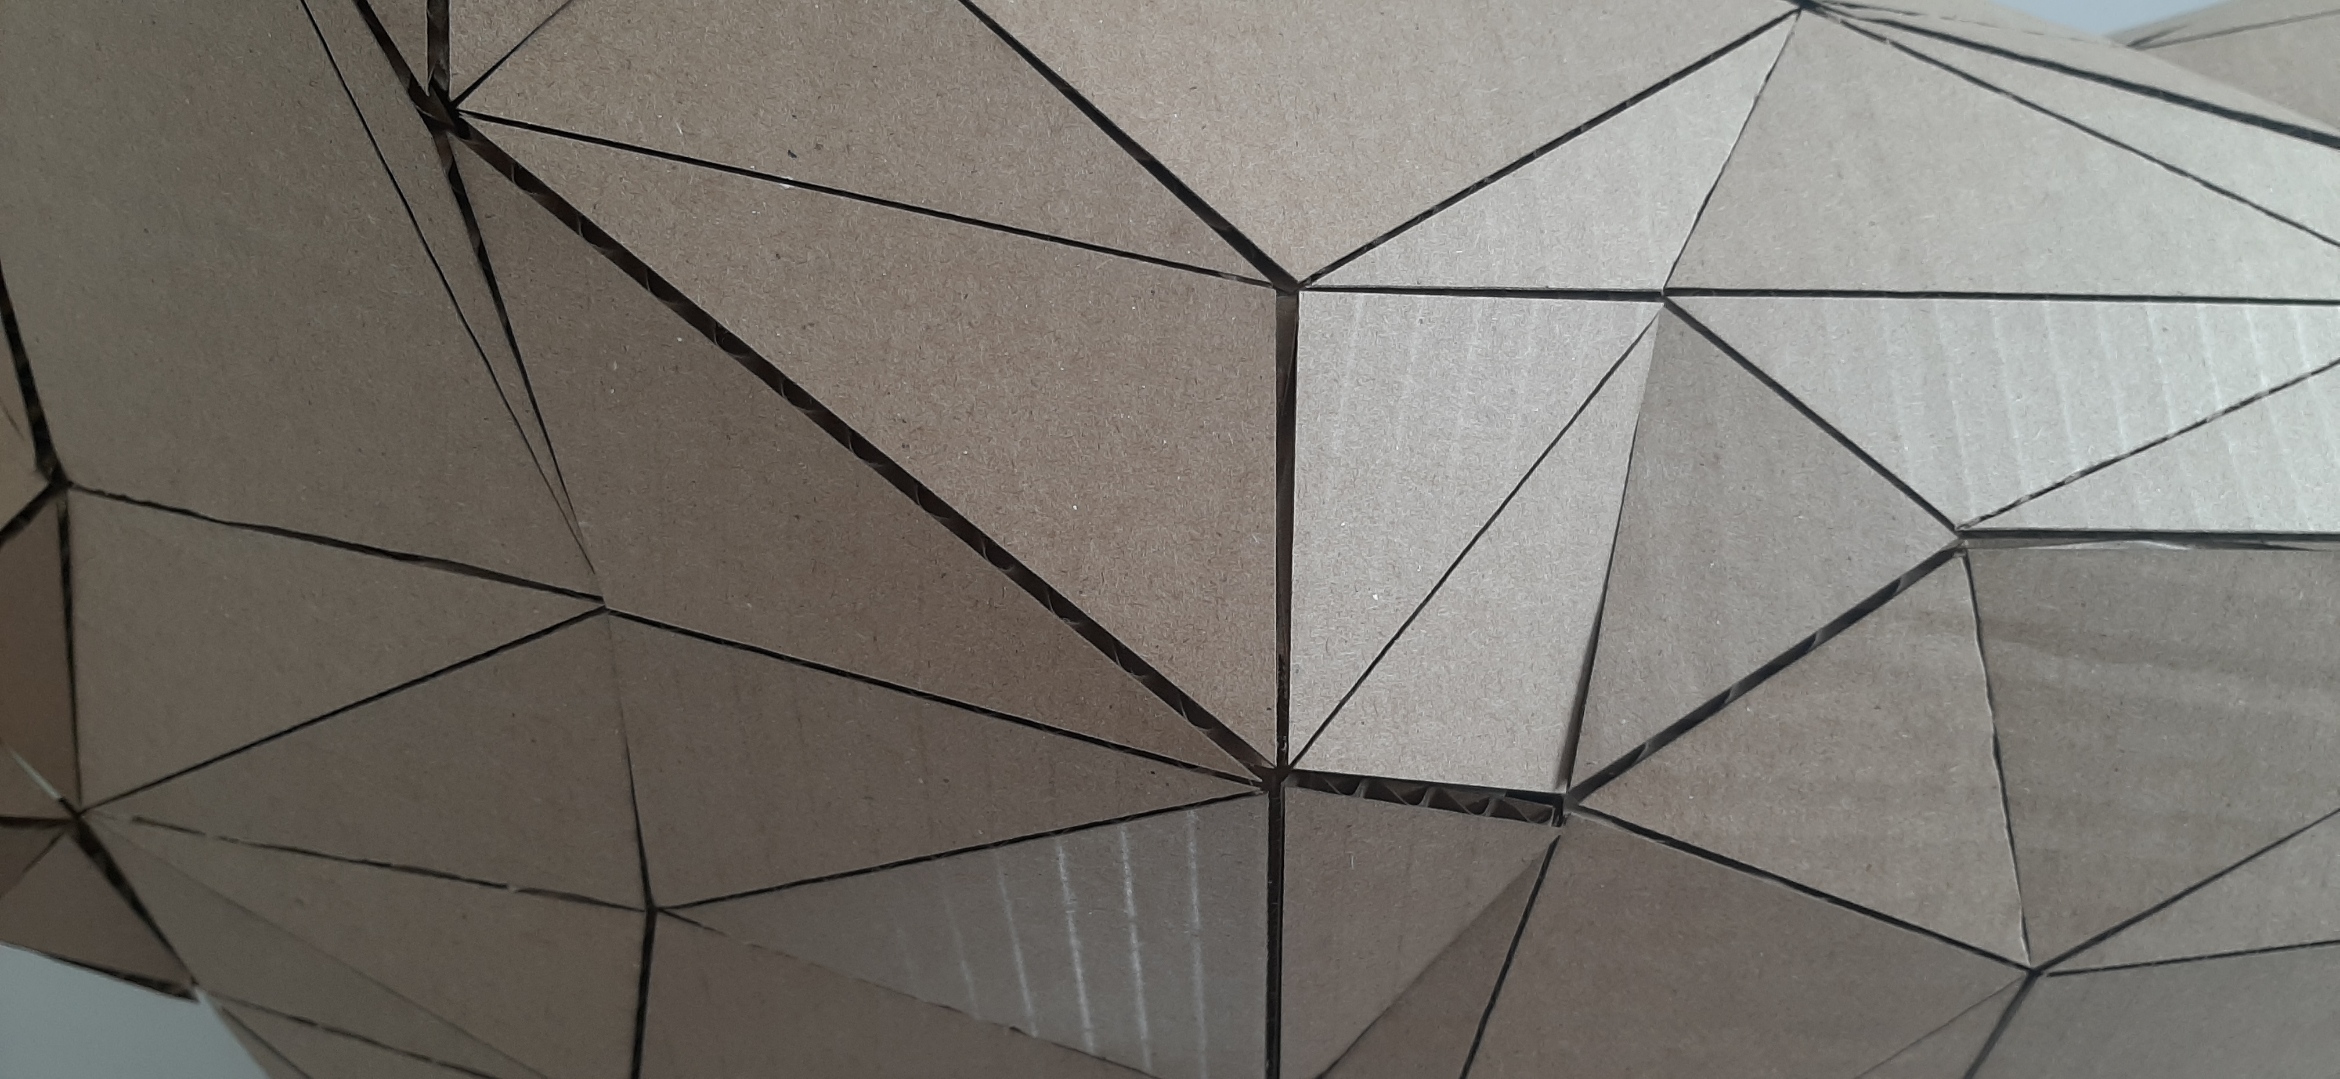
When I came at the lab, they told me they had a licence for Pepakura, a software I wanted to try for a long time, since it's commonly used in cosplay to make armor and props. It didn't include staking or waffle options, but it was very specialised in exactly what I needed. With a tutorial video of 10 minutes, I learned everything I needed to know for my project. I could choose where every sewing lines would be, and then change the result directly in the 2D window. The individuals triangles were included in a bigger piece, and the biggest pieces were splited up.
I could move the pieces directly in the program, to better fit the page. Unfortunatly, I had to manually prepare some pieces, since I had to work with different sizes of cardboard.
I discovered later that the program uses two different types of folds, one folded toward the inside of the shape, and one folded towards the outside. If I knew, I could've solved some problems I had later on, when it was time to assemble everything.
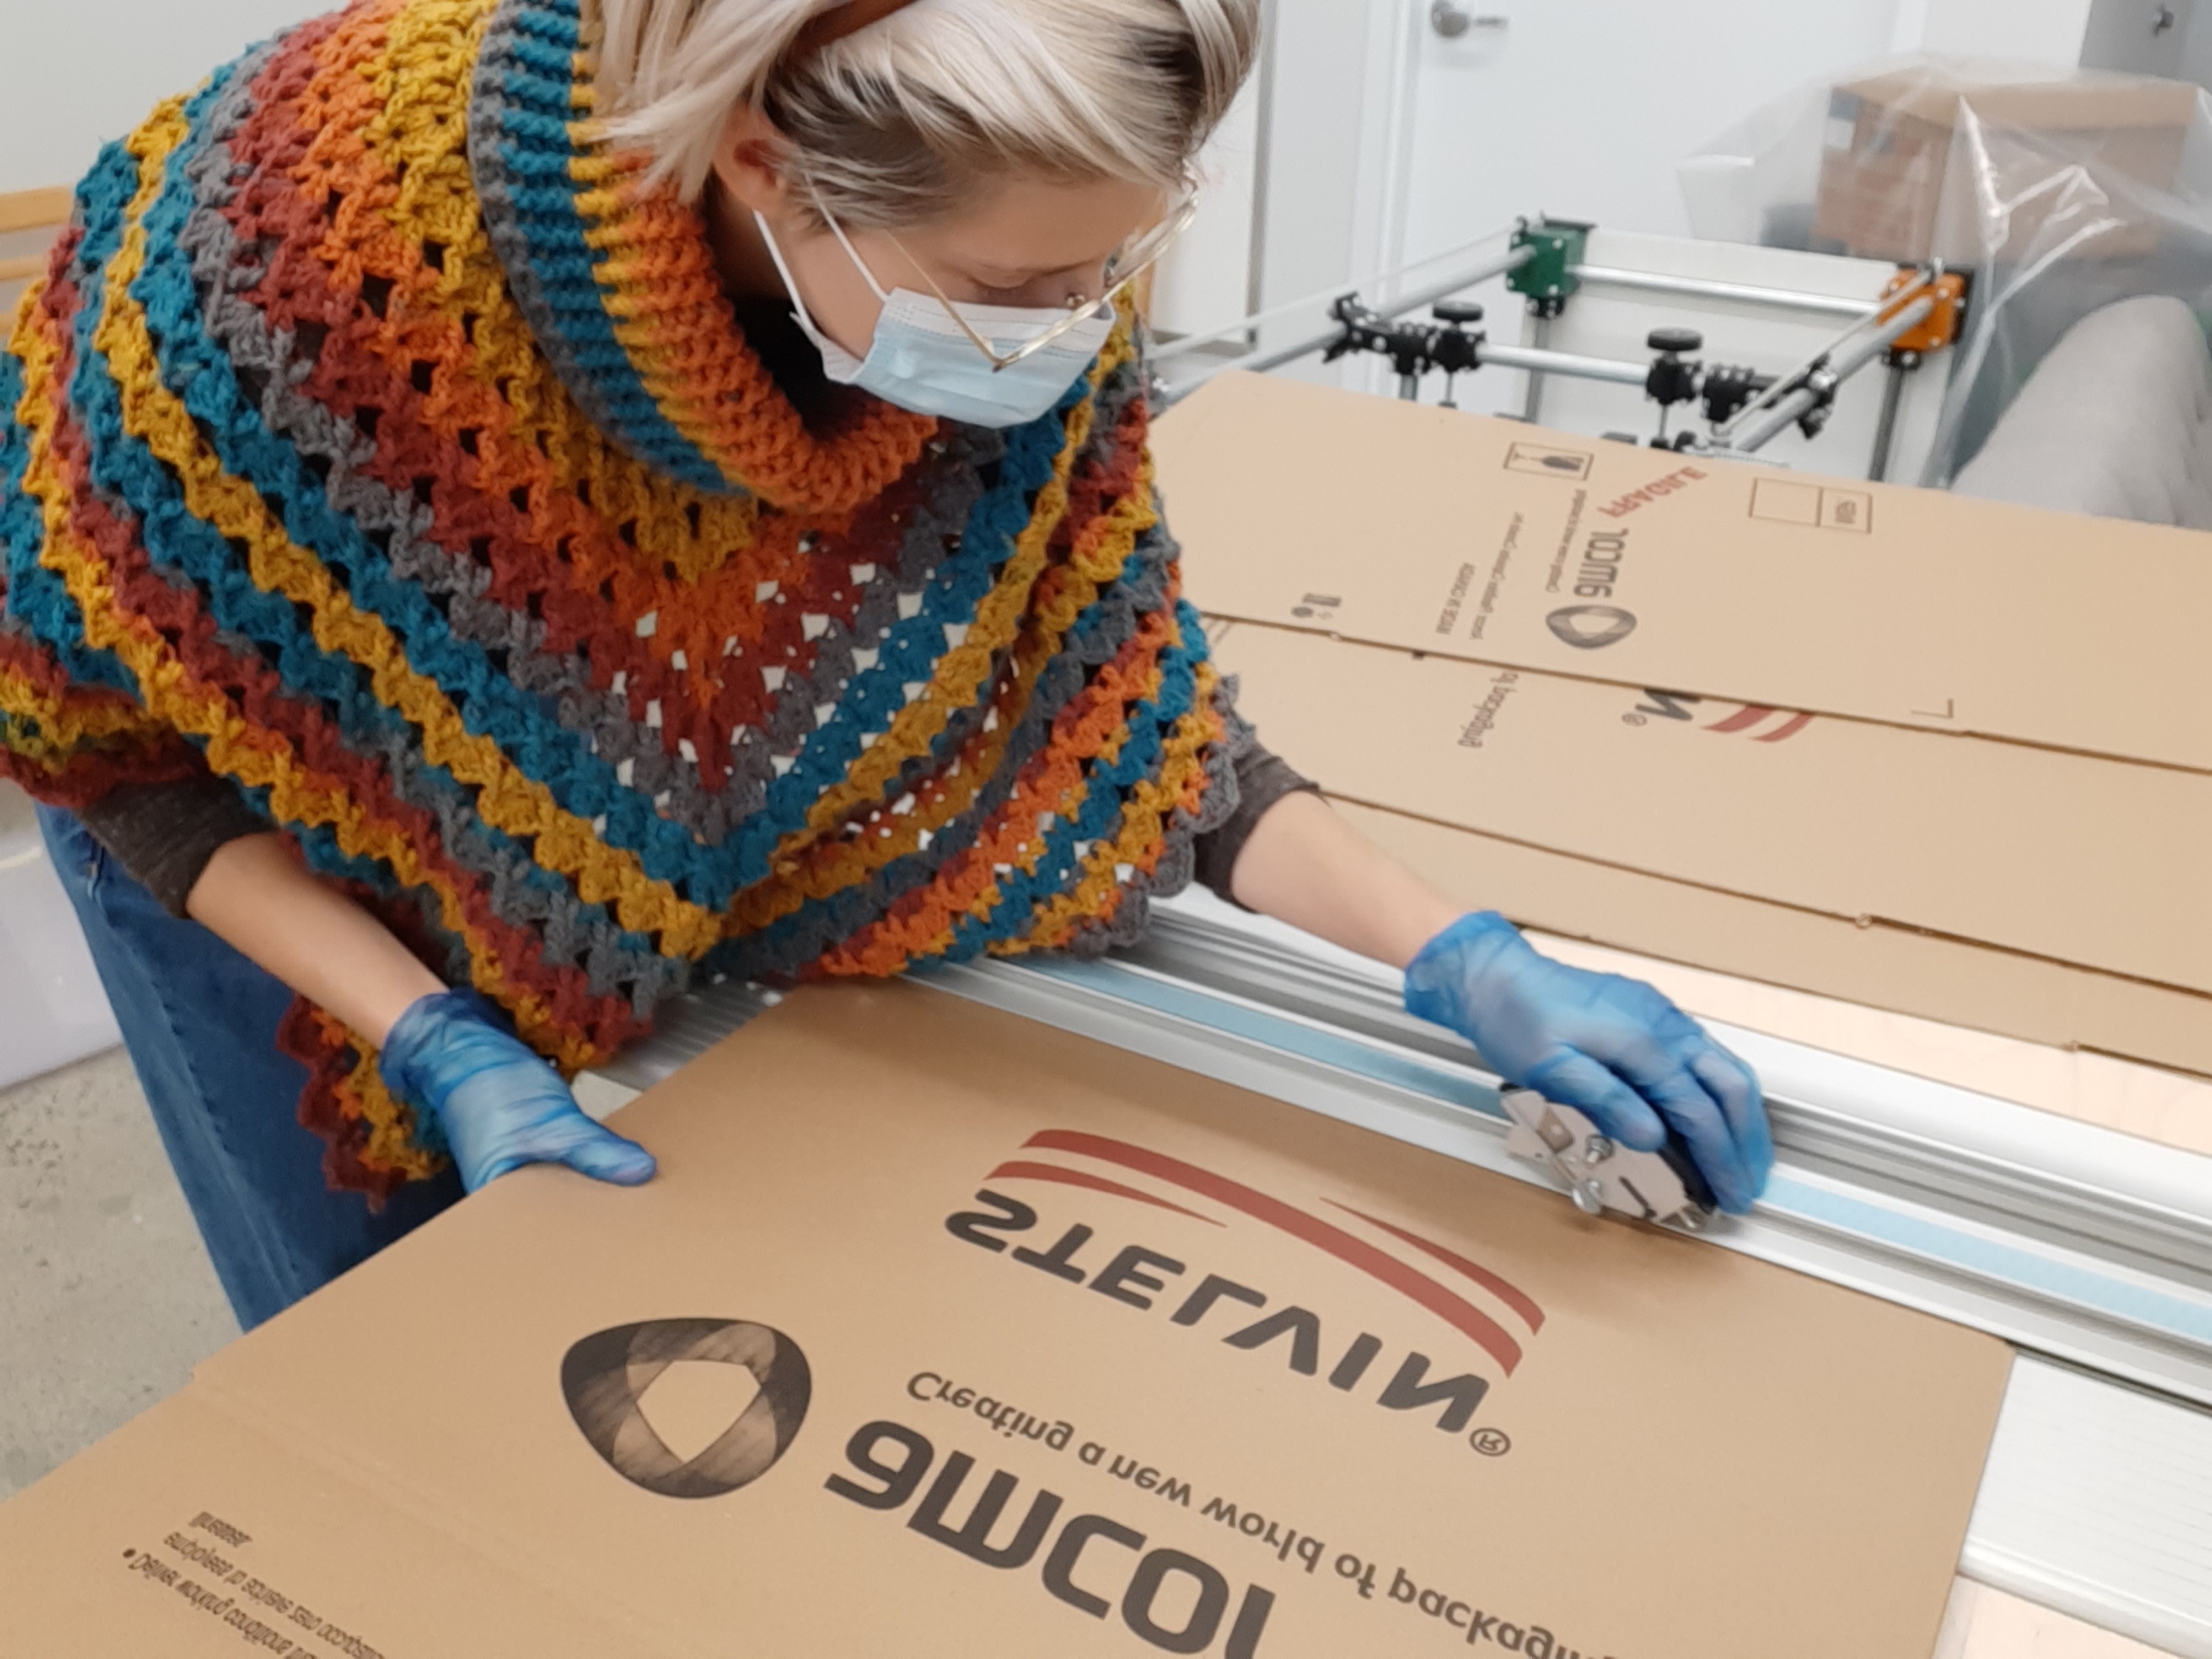
Laser Cutting!
Since the program only let me change the type of line (dotted or continuous), I had to use Inkskape to change the color of the lines manually. I prepared a document for each page, and arranged some pattern pieces to fit smaller pieces of cardboard. Now my patterns were ready for cutting! Except some minor mistakes, everything went good, and really fast.
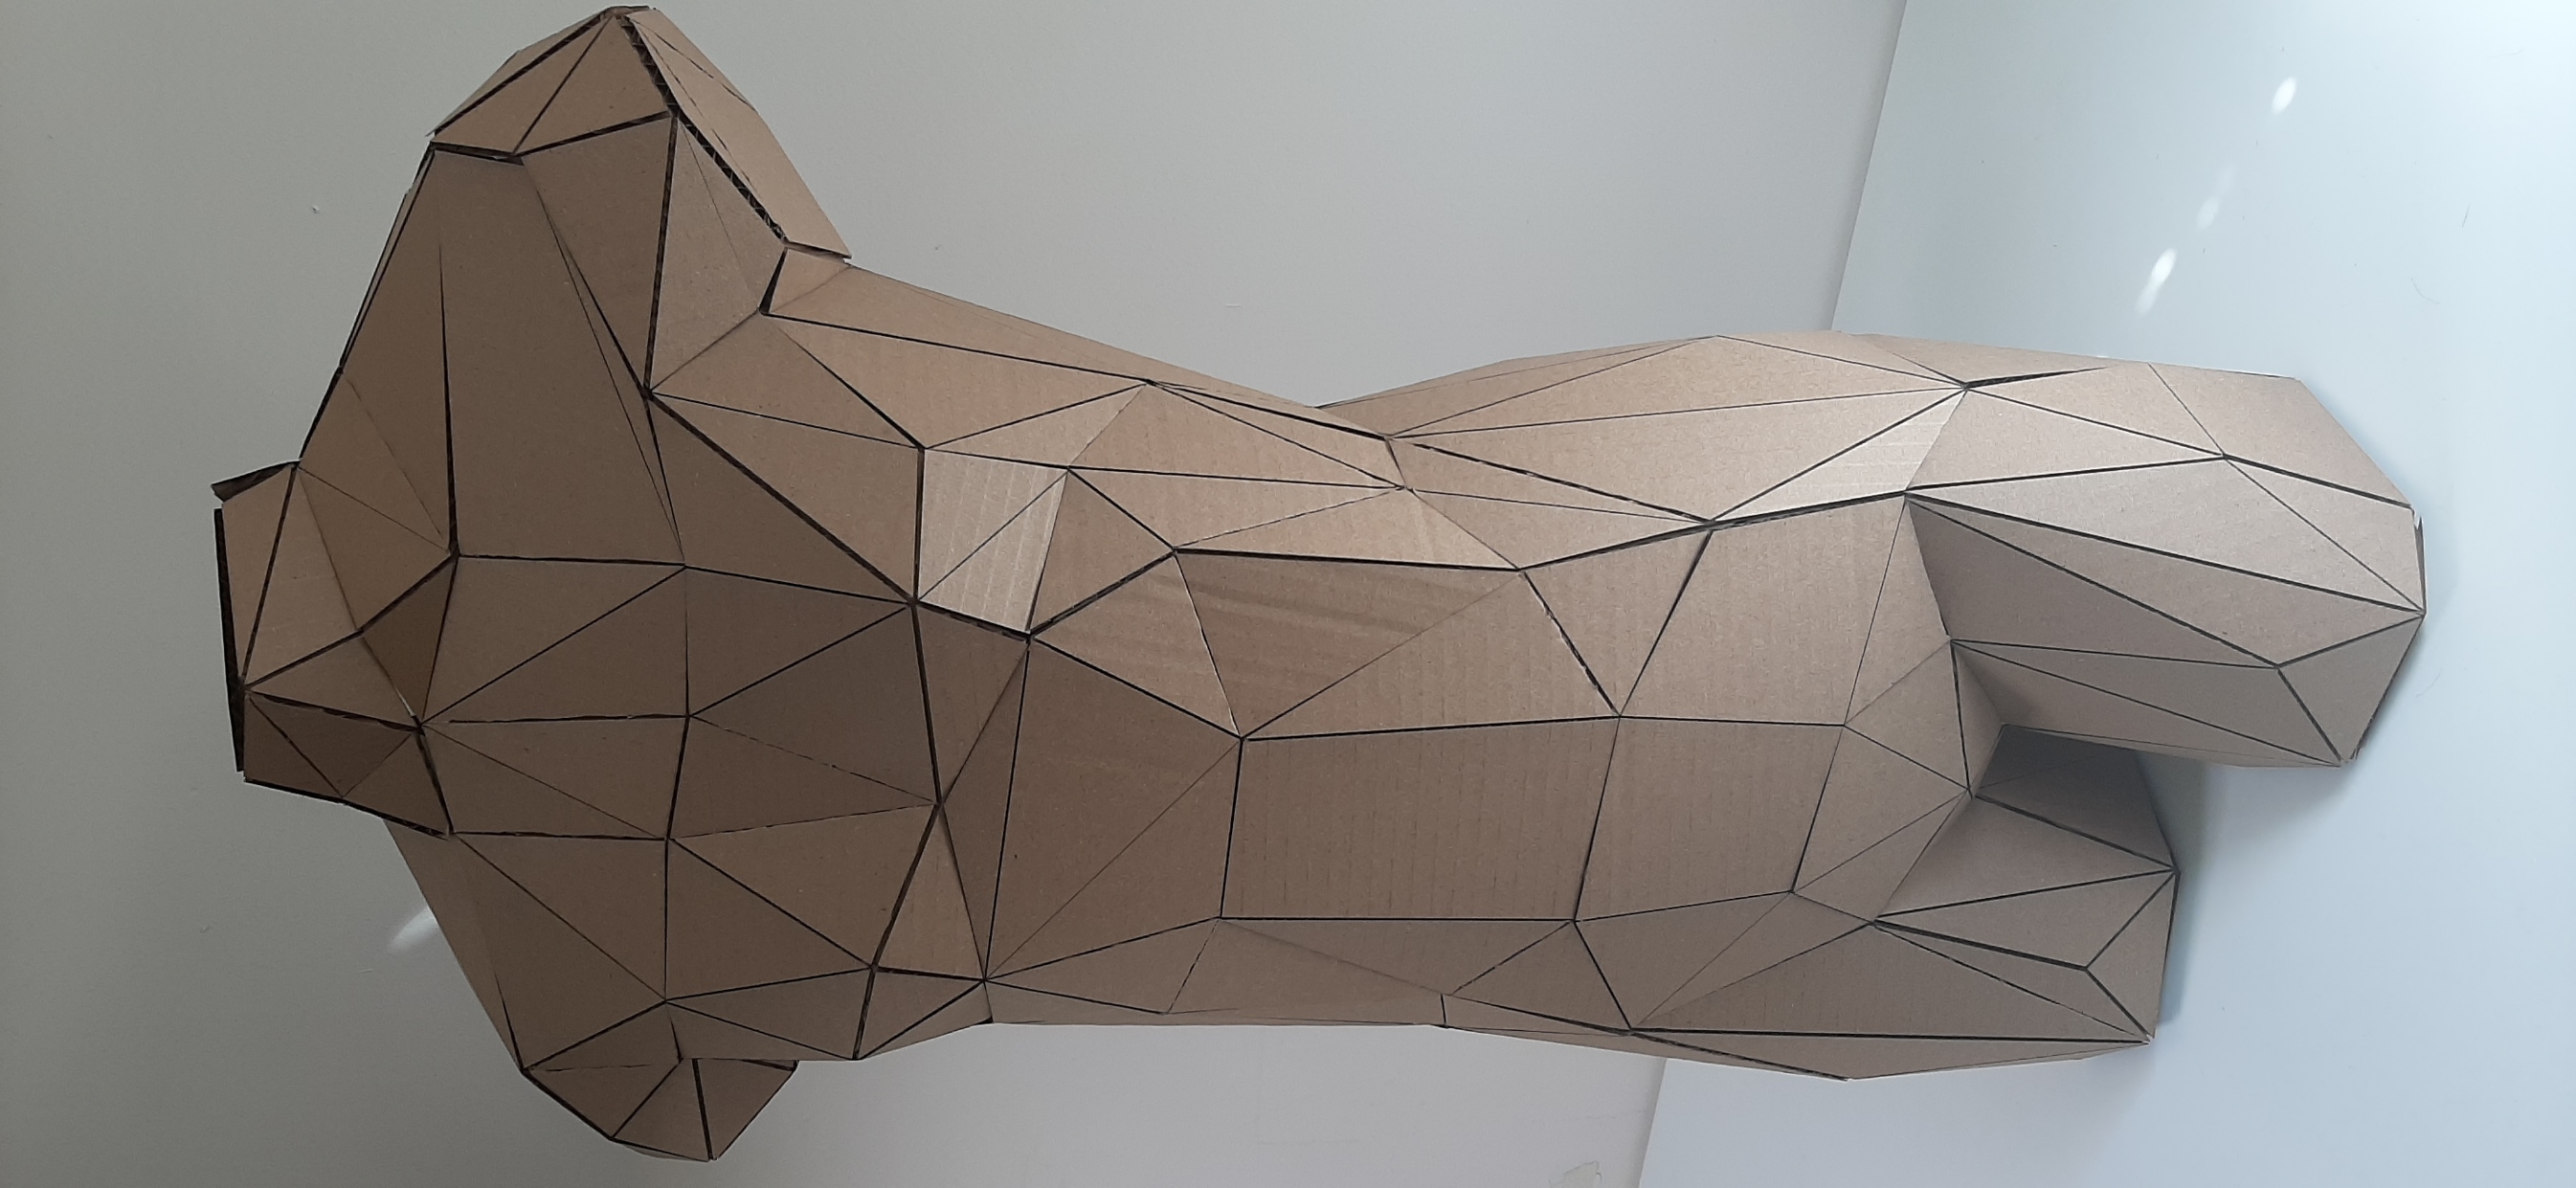
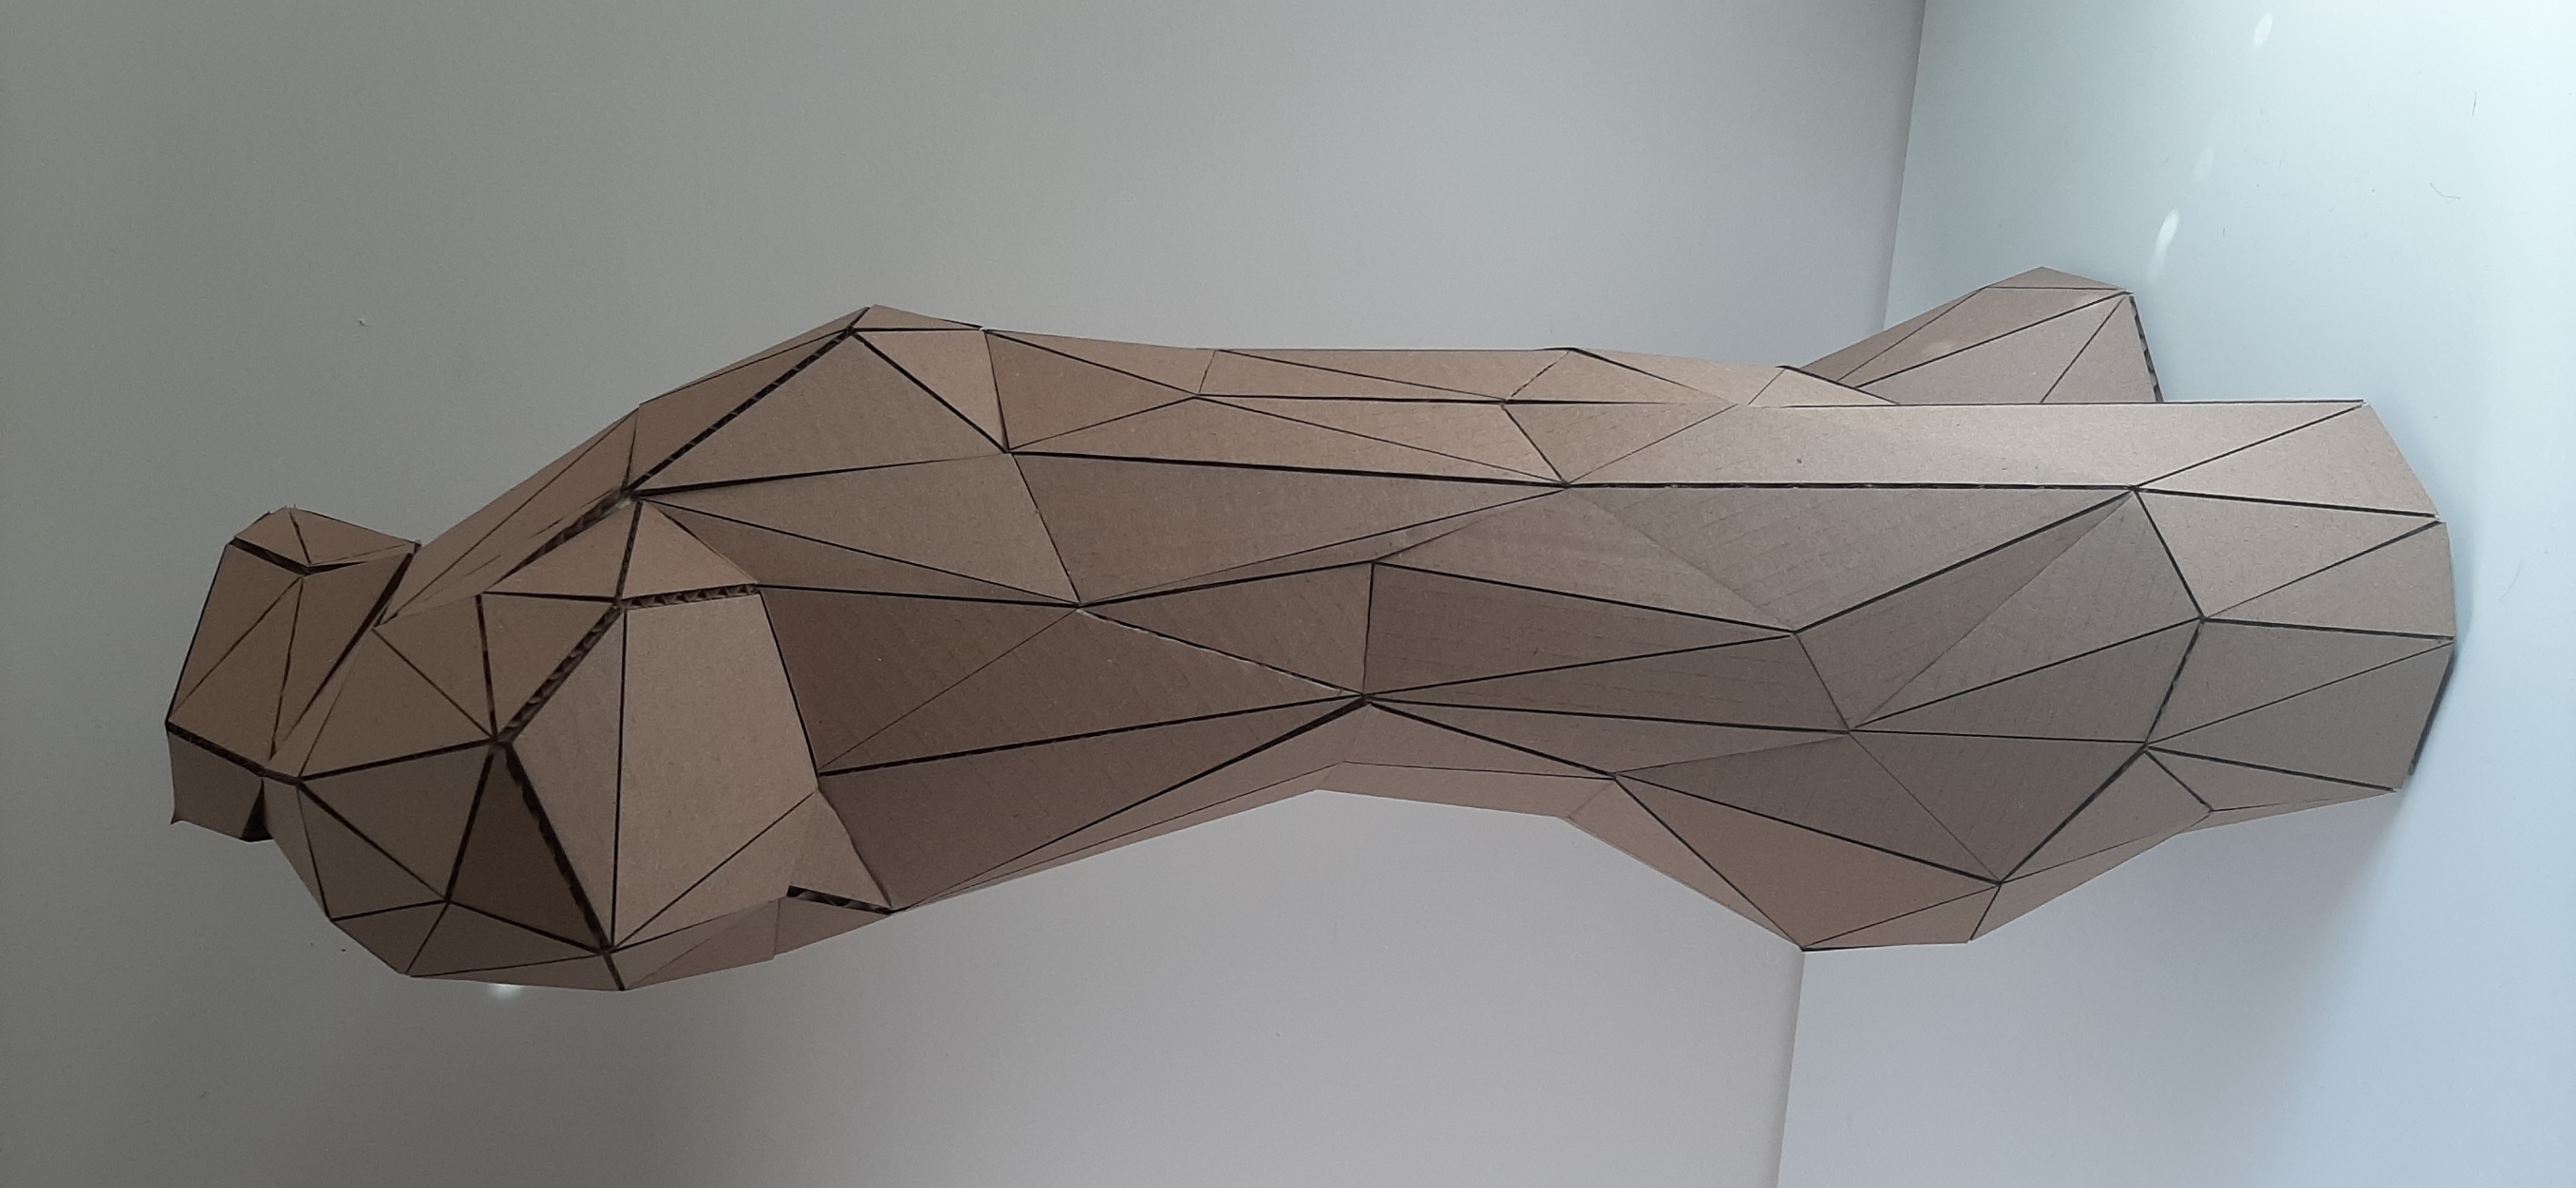
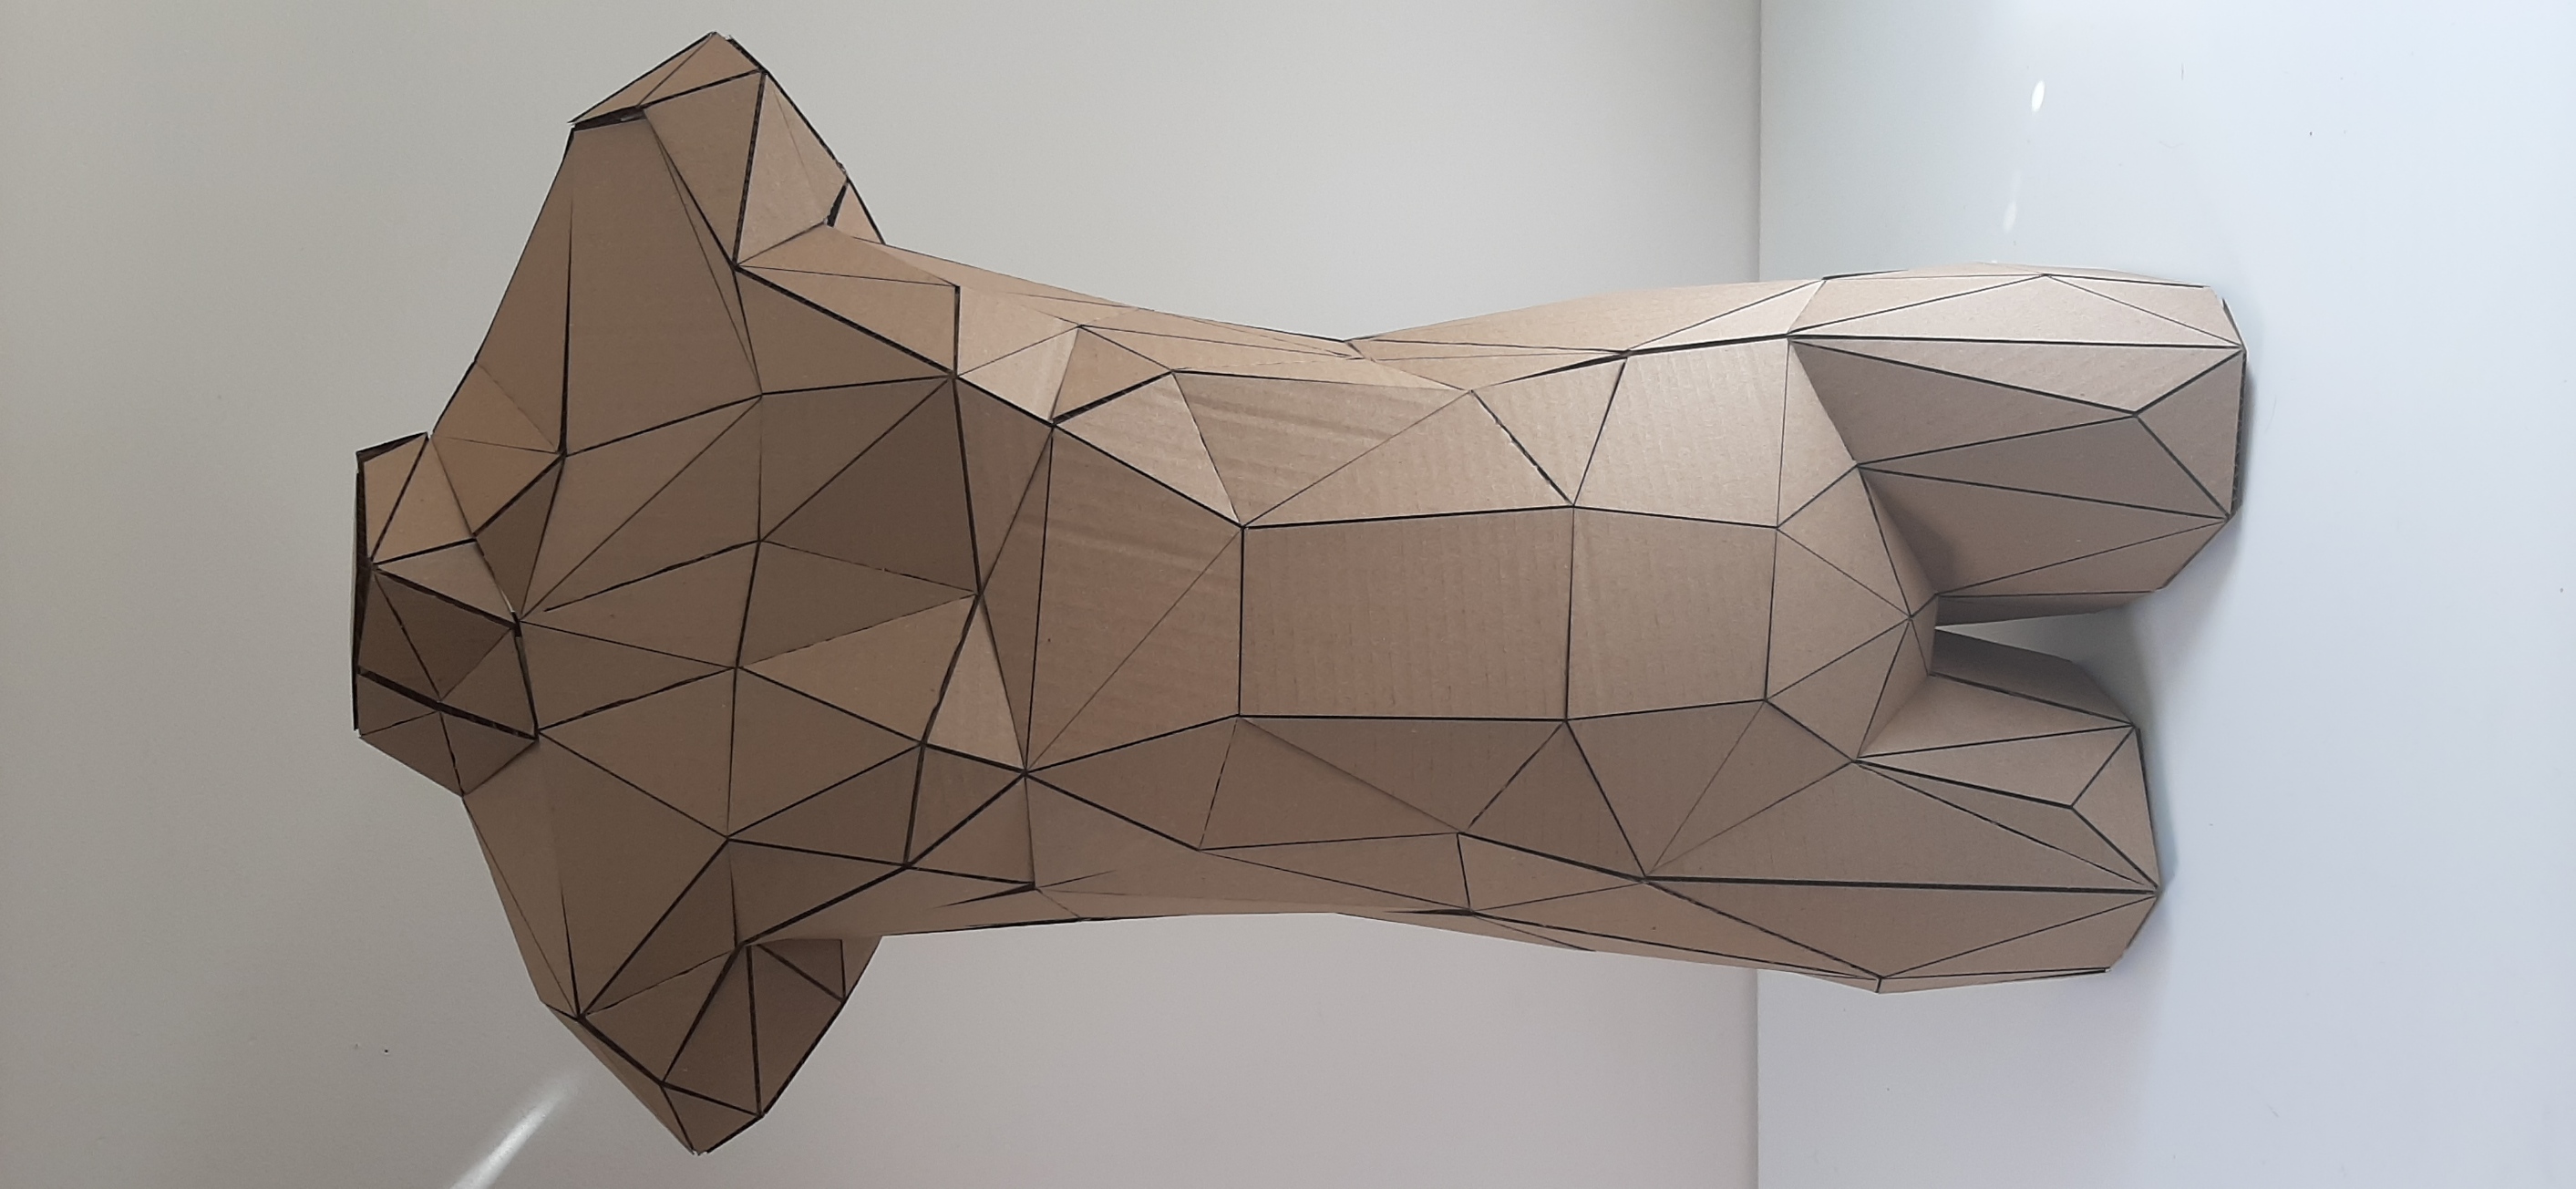
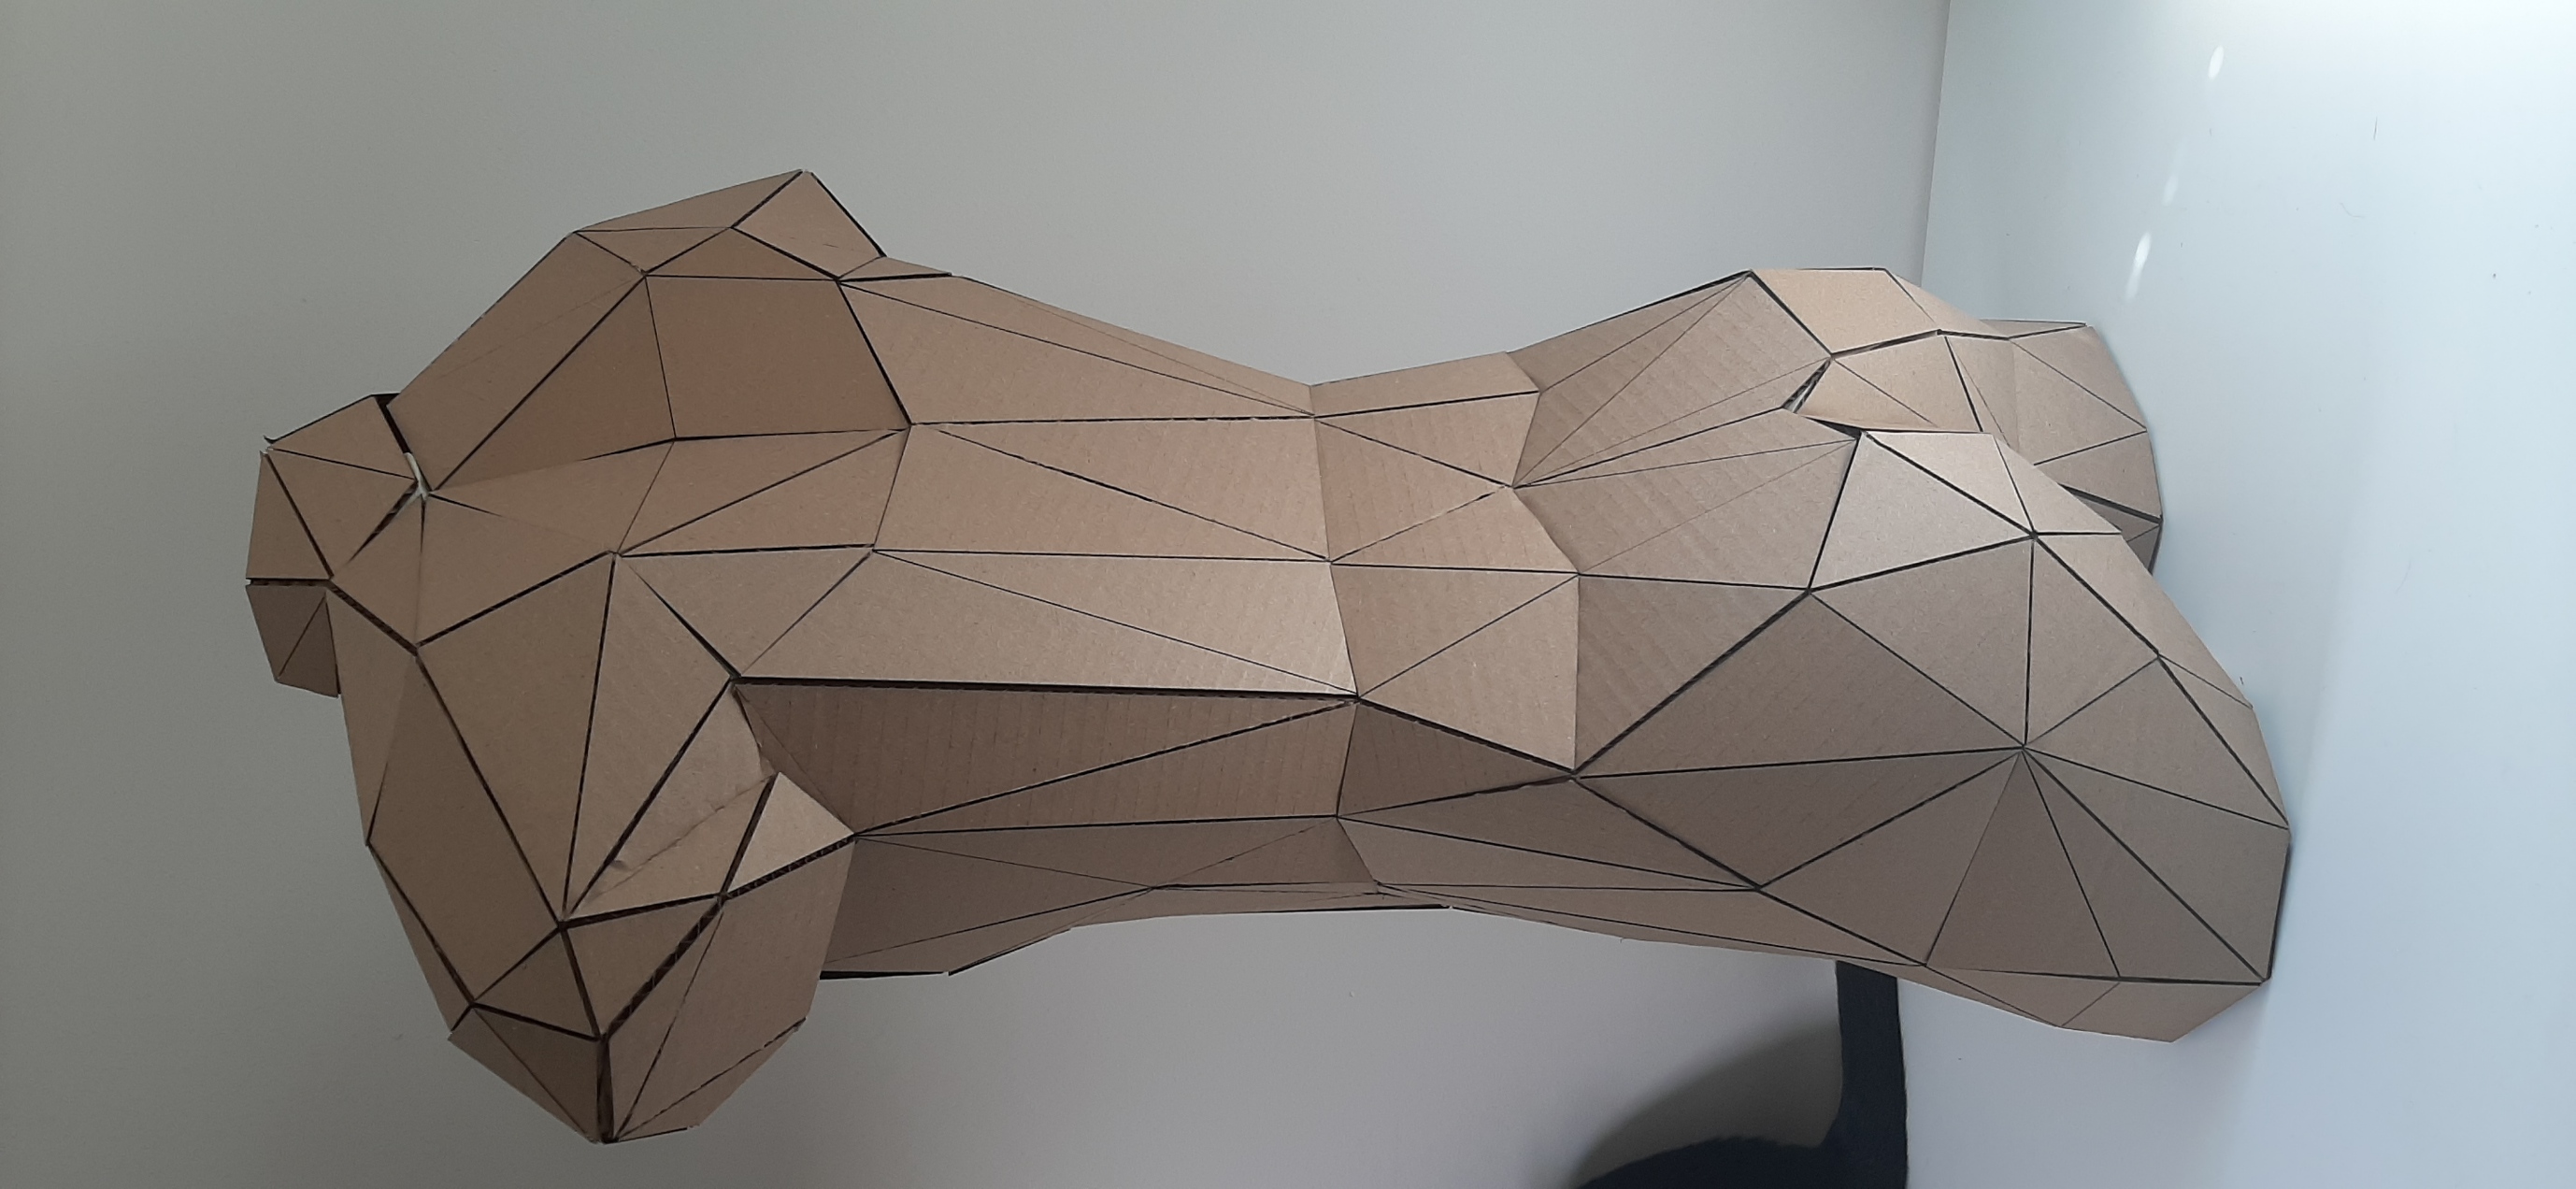
The Final Result
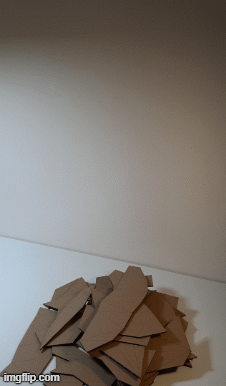
Assembling was so much fun, I didn't see the time and finished around 3 am... I used a small cutter to make an angle in the cardboard where it would fold the other way. With some better planning, this opperation could have been made digitally, since Pepakura made the difference between those two kind of folds. Overall, I'm verry exited by the results. If we continue to develop this project, we could produce a personalized mannequin in a couple of hours, from mesurments or from a 3D scan. The mannequin is not very durable, but is a great solution to send a body shape worldwide. I work with kids, I'm a project coordonator with Youth Fusion. With all the new restrictions from Covid 19, we are searching for ways to teach fashion design. The fact that some kids don't have all the sewing material at home is a big problem. If I work the pattern a bit to use less cardboard, I could share this wonderful project with them, so at least they can have a cheap (but practical) mannequin at home.
3D Scan
Annie and I started with the Sense 3D scanner. It wasn't very practical; we had to transport the laptop with us as we did the scan. All the scans were not well defined, and of pretty bad quality. We made some research about tips and tricks to get better quality scans, but ended up still having a lot of problems catching details, no matter the color, tecture or shape of the object we were trying to scan. Maybe the scan was damaged in some way? We then tried with our Iphone tablet. The results were, weirdly, better. We downloaded a couple of free applications for 3D scanning. The app we used for my 3D scan ended the scan as soon as it lost the shape. The best we could do were incomplete scans. We then used Scandy Pro for the scan of the foot of Annie, and it was our best scan. We only missed the tip of the toes, but the rest was impressive. Unfortunatly, the free version of the app only let us do one scan a day. This result is exactly what we got, before modifing and cleaning it. Pretty impressive!
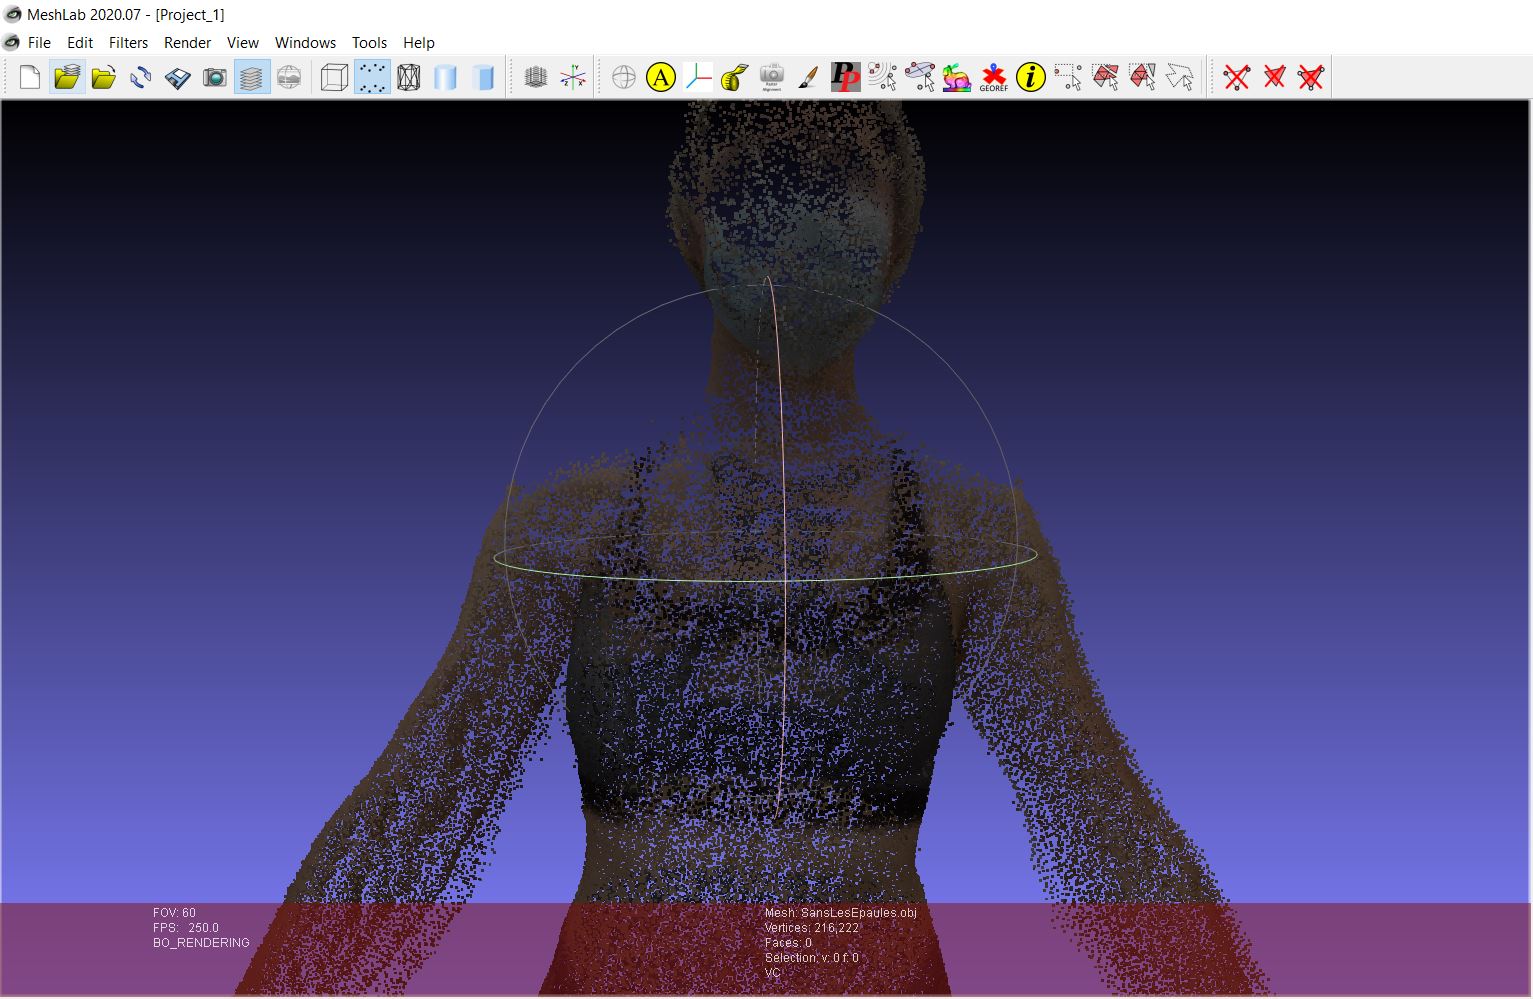
The scan of my body was a bit harder to process. Exept for Scandy pro, who gave us a .obj file scan with the shapes already in solid form, the other apps gave us a constellation of colored points called mesh. The only software I know that can open such a file is MeshLab. I learned later the those dots can be merged together... It's possible to work with incomplete scans and complete them by joining them all together, as long as the pose of the model is exacly the same for every scans. MeshLab filters helped me turn those points into a solid, closed shape. Then, I exported it as an .obj file so I could modify it. This is were I had trouble with the texture. In Meshlab, I still saw the colors and the textures of my scan, but unfortunatly, when I opened my file in any other software, the colors disappeared. I tried differents file format, and different exporting options. At a certain point, everybody at the lab helped me solve this weird problem, but we never found the solution!
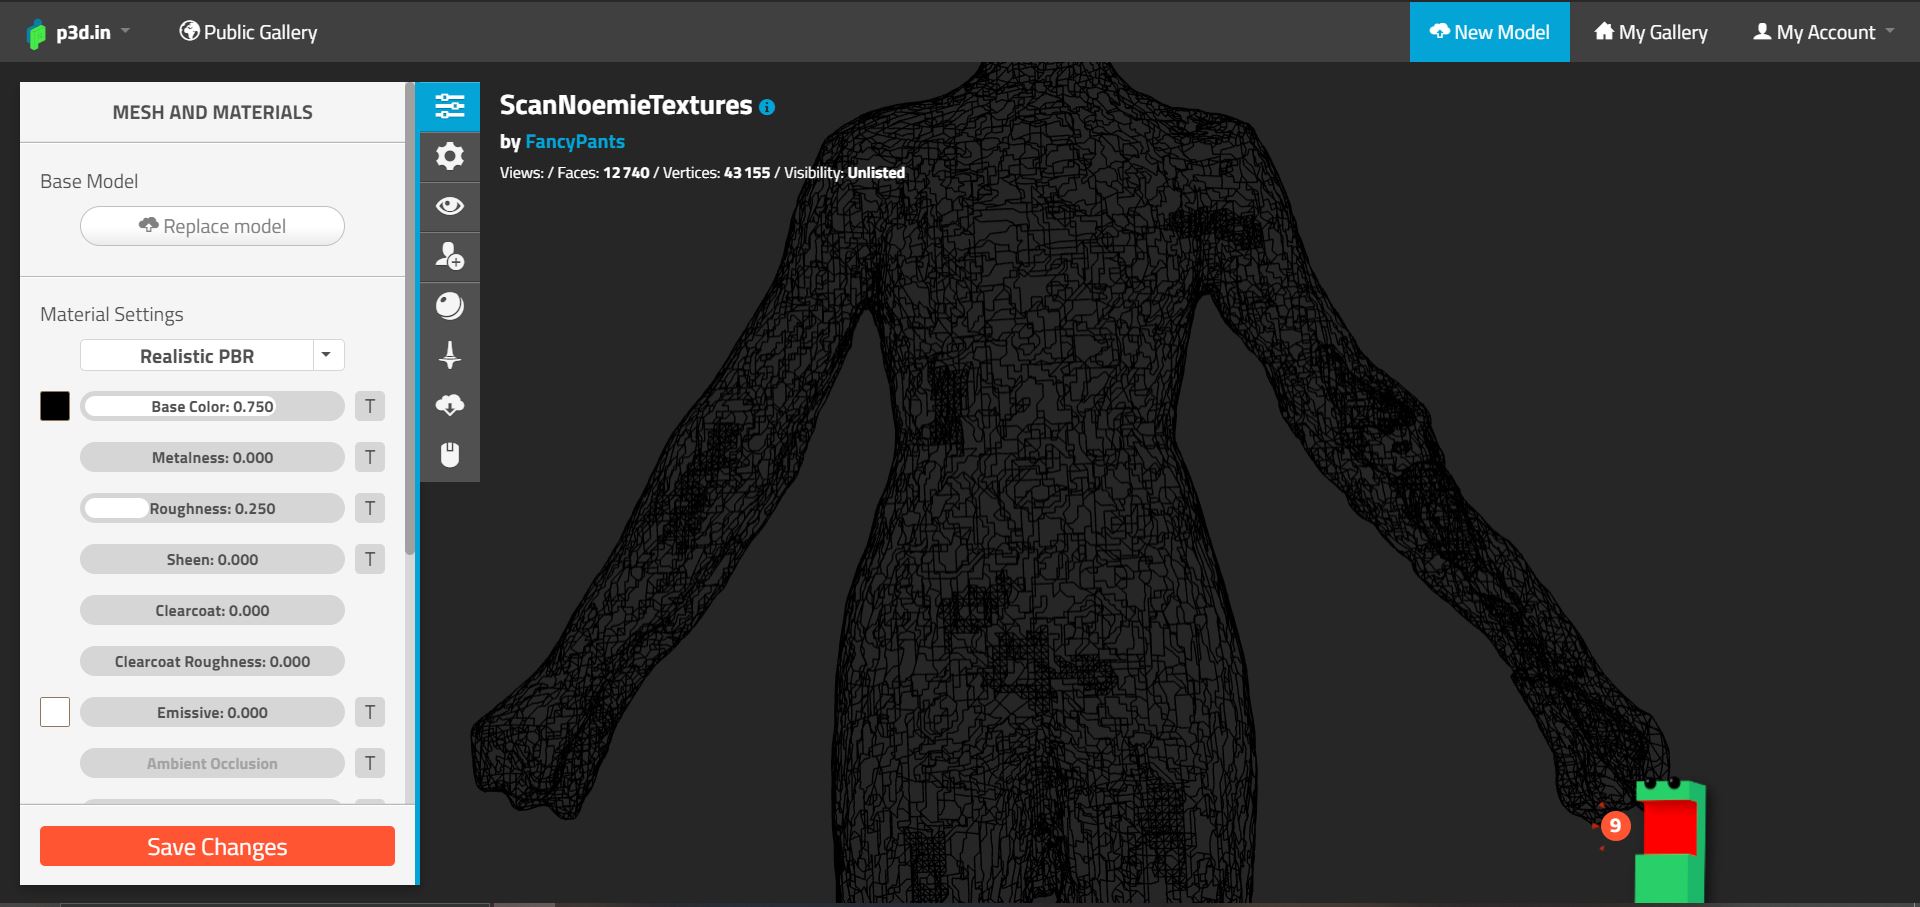
The original scan was missing the shoulders and the top of the head, I used Meshmixer, a free and instinctive software to modify my shape. Once the shape was okay, I used Rhino 6 to cut out the parts I didn't want and to scale my model, as I did before with the model from Makehuman. I could have cut the arms, but I kept them, just so you can see the problems I had with the scan. As you can see, I used P3D.in to generate a 3D shape in my website, as recomended by François. It's a wonderful website to use if you have to integrate and present a 3D shape in a website, and is free to use.
Download
This is an open source project. Feel free to use all the files you need!