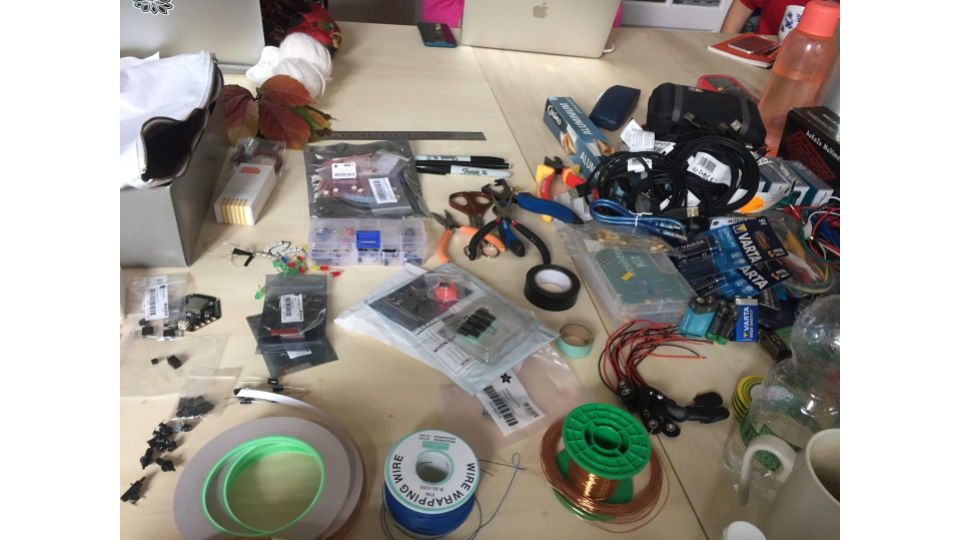
5| E-textiles
This week I worked on E-textile. Soft electric circuits, embeded in textile
Research/Inspirations
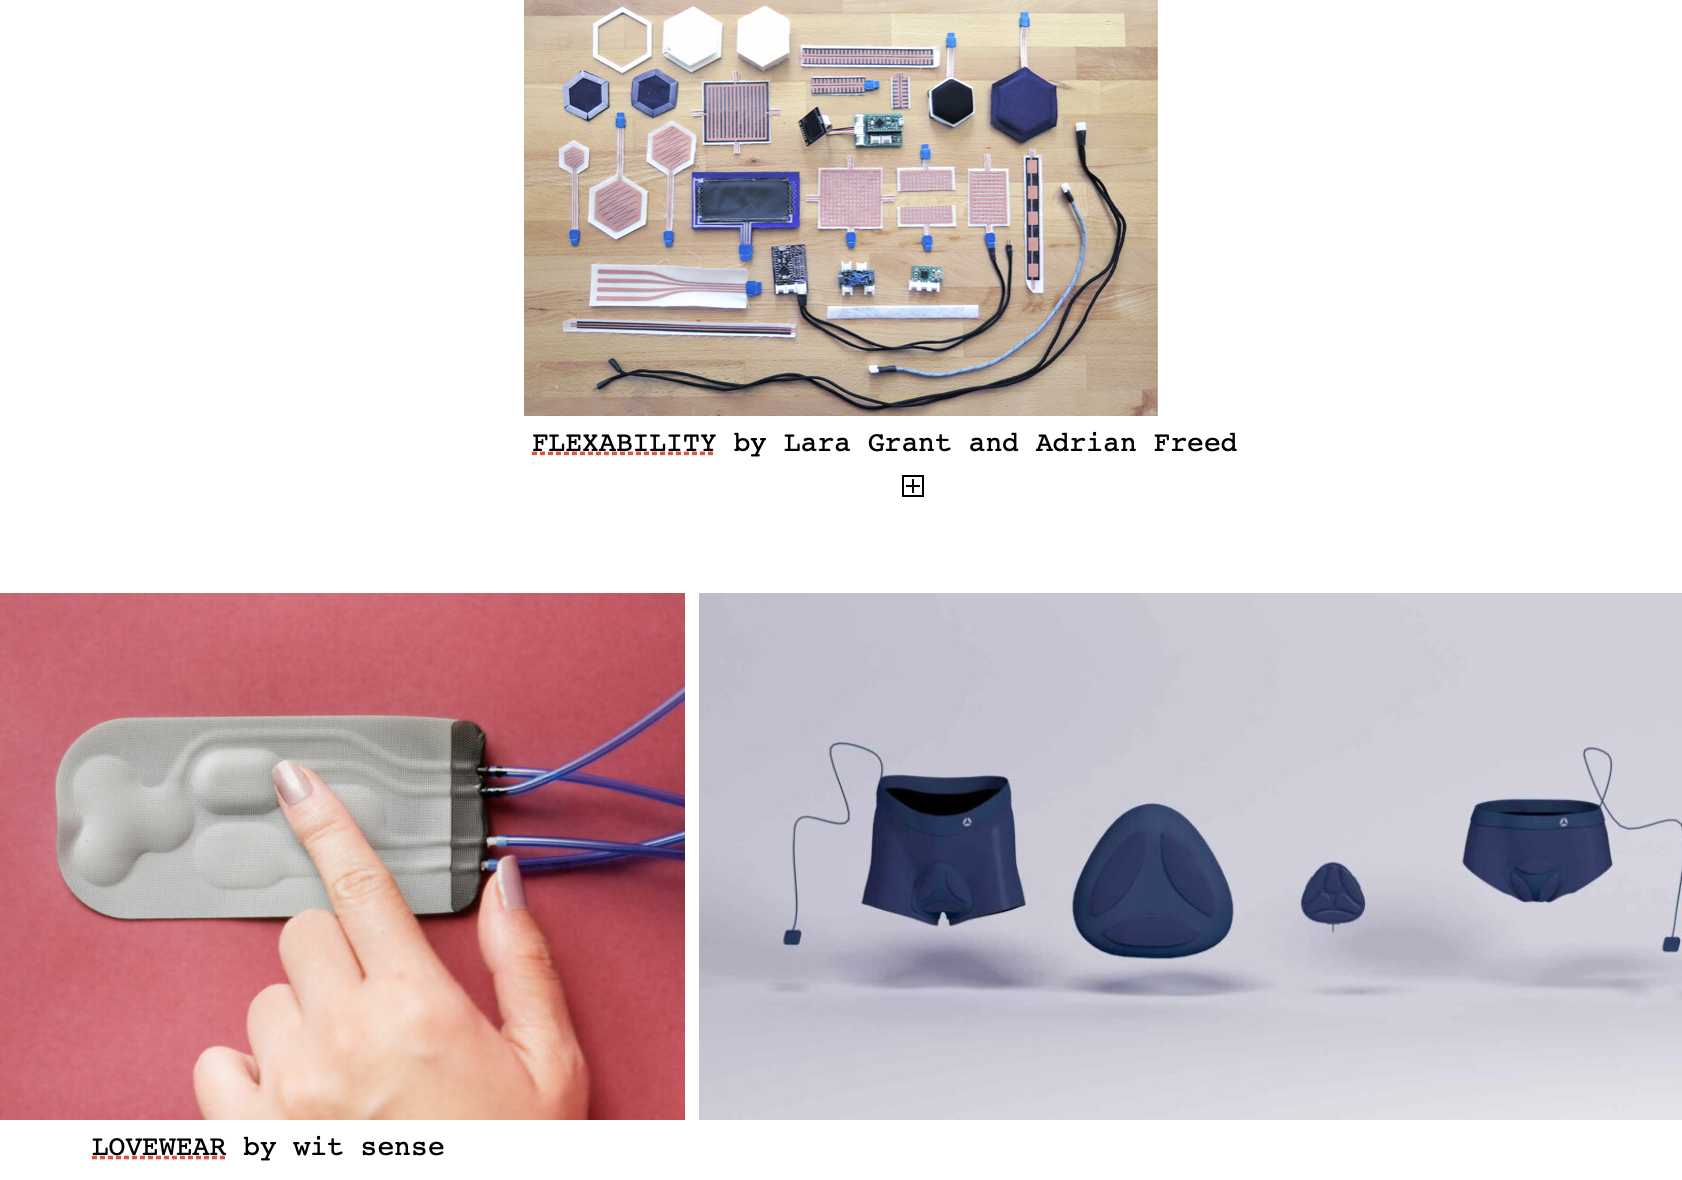
Some inspirations given by Liza Stark during her lecture
- KOBAKANT
-
Flexability by Lara Grant and Adrian Freed
But
- Also Witsense Design amazing work and recitation
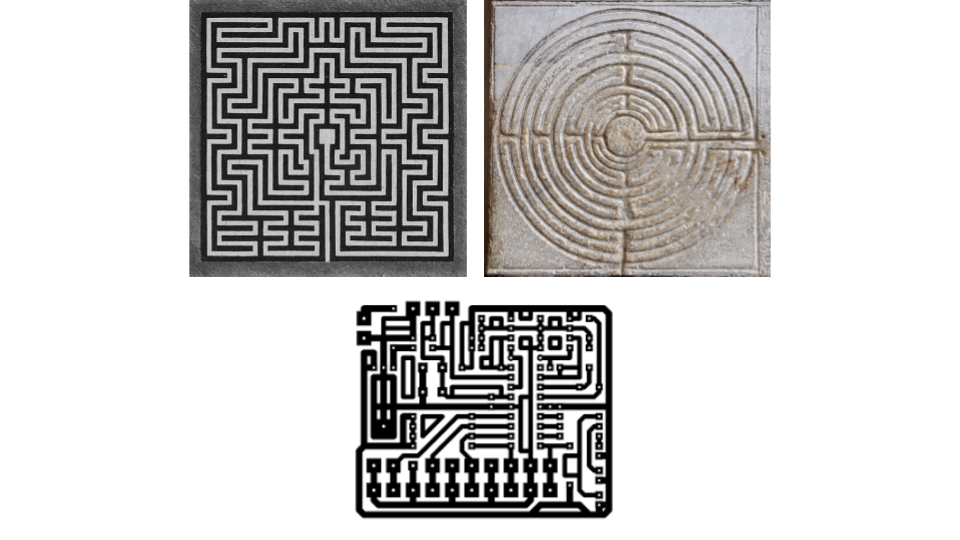
For my project on E-textile I will be interested in working with pattern (labyrinth) and flexible light (see below this week sample)
About Electricity
Electricity is a flow of electrons from one atome to another
Current is mesured in AMPERE (symbol A or Amps)
Power Supply gives the push to electrons: + Attracts electrons and - provides electrons in the battery
The capability to move the charge is called VOLTAGE (Volt V)
Use a multimeter to mesure it
circuit =closed loop
Power source (Battery) +Traces(wire)+ a load(something to avoid short circuit)
Short circuit-- do not connect the 2 terminal of the battery together without a load!!!
LOAD= to control the current/the flow of electrons - Characteristics (value/power rating/Tolerance)
RESISTOR:
- Hiher is the resistor lower is the current
- Lower is the resistor higher is the current
V=IxR=IR
IMAGE CARNET NOTES
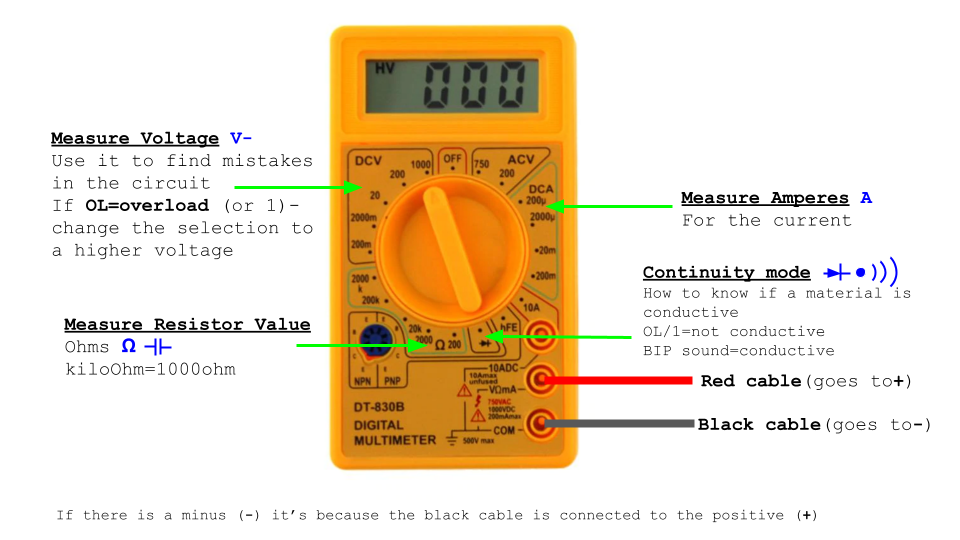
How to use the multimeter
SENSORS
Digital/Analog SWITCHES
Sensors generate an electric signal - a change of voltage
Difference between digital and analog:
Digital only 2 status possibles- binairy - electric signal: 0-1, on/off; CND-VCC - sensor/ close-open
Analog all values between min-max - electric signal: minimum-GND & maximum-VCC - sensor/ variable sensor
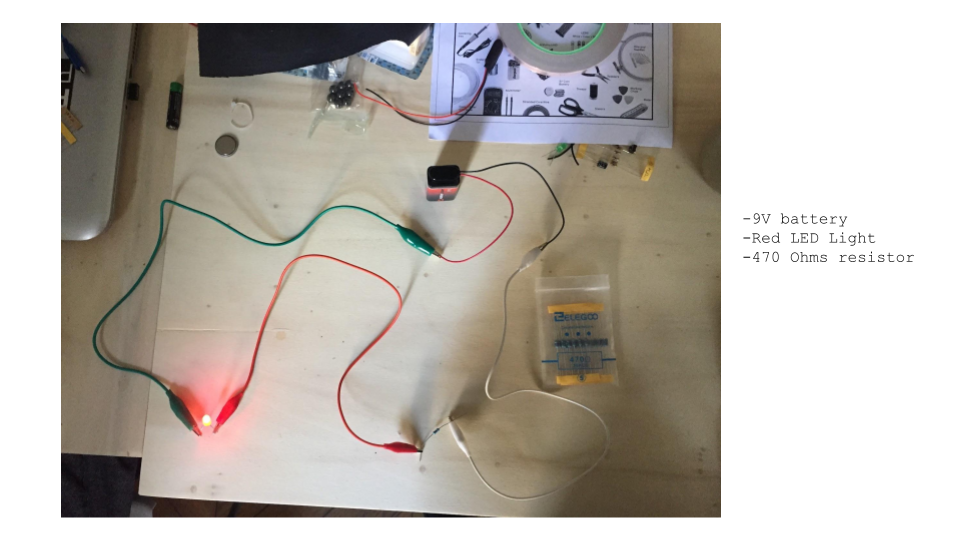
Simple circuit
DIGITAL SWITCH

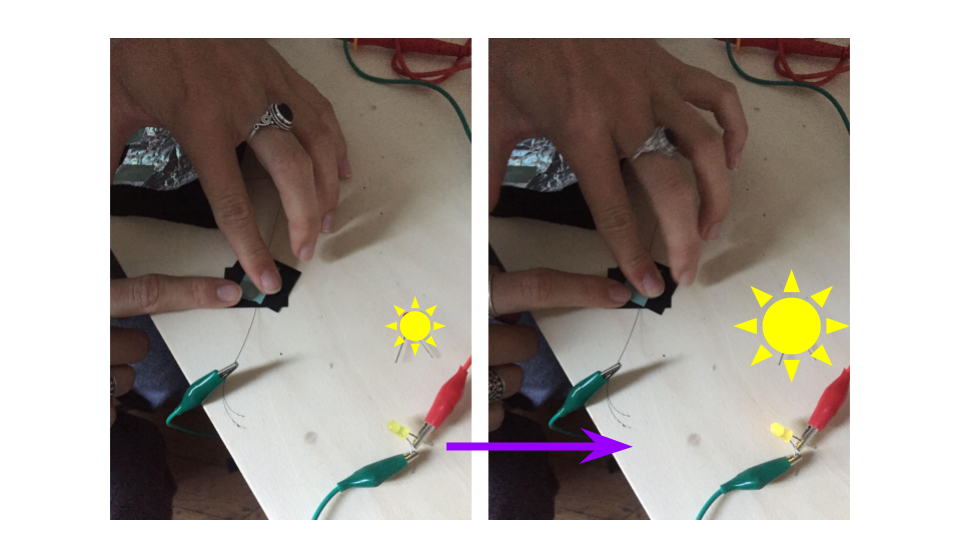
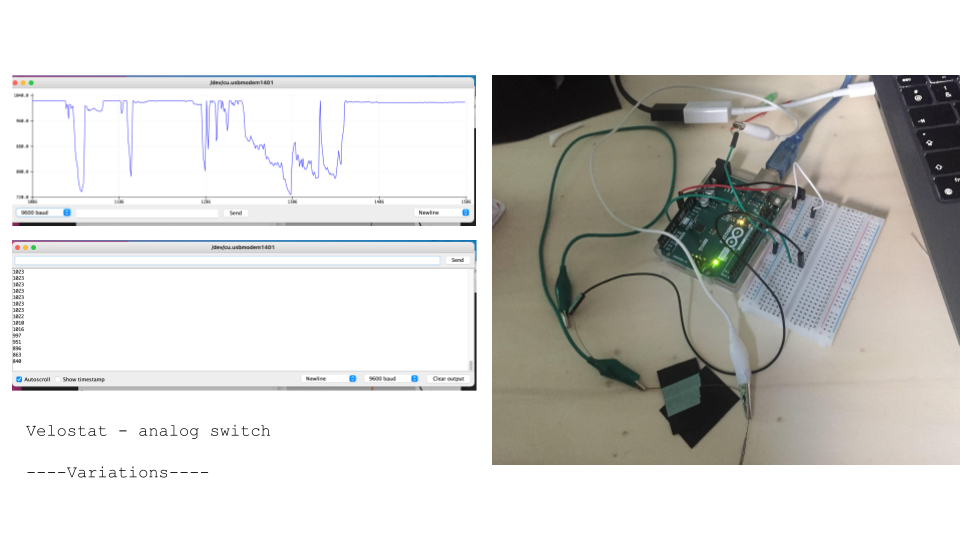
ANALOG SWITCH (velostat)
ARDUINO
Arduino is prototyping with electronics - physical computing
Hardware - Software - Community
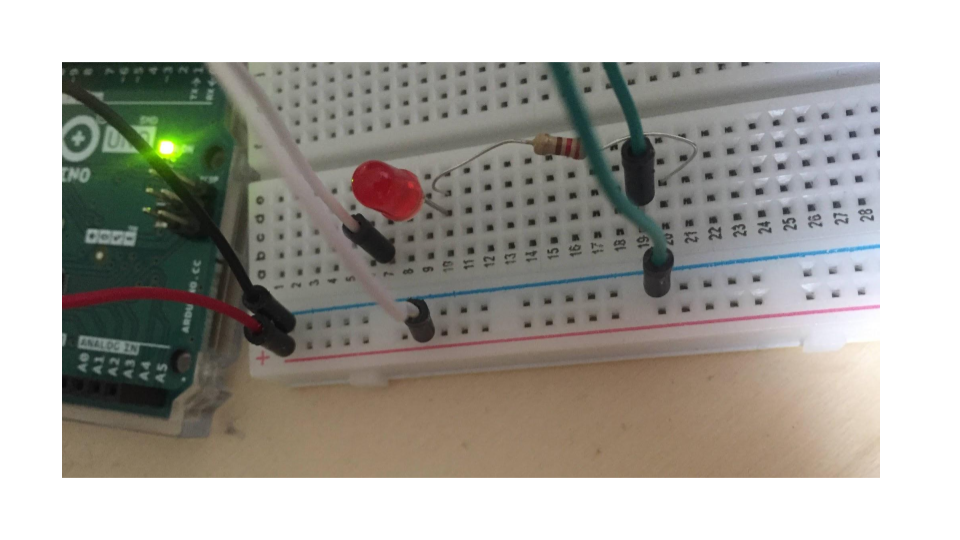
How do we use it: - control a led - read a sensor - control a led based on the intersection with a sensor
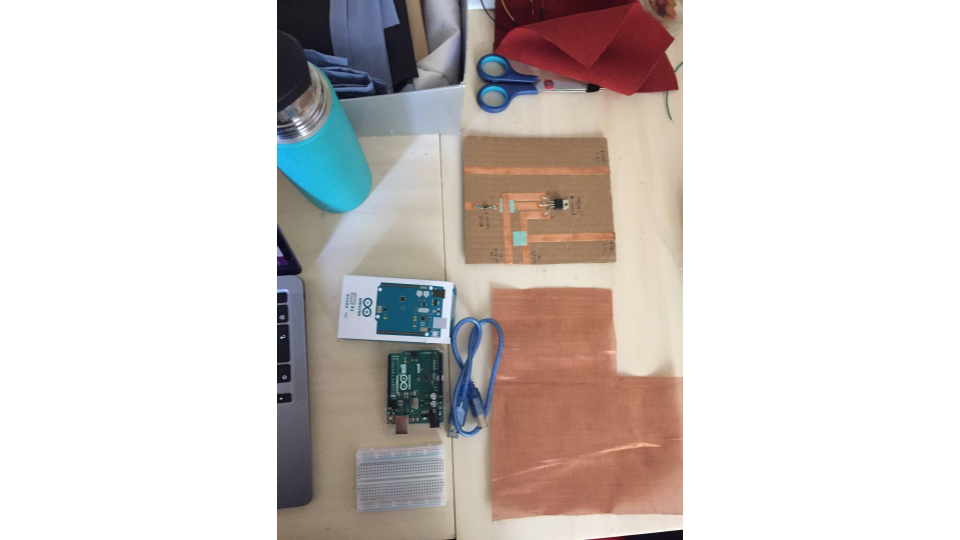
What do we need: - make a circuit
- plug Arduino
- open the software
- check the environment (for this specific test we used "blink") File > Examples > basics > blink
- Slect the board we want to program: Tools > Board > "Arduino Uno" (the board you are using)
- Select the port you are using Tool > Port > you see the one connected (arduino Uno)
- Verify sketch (V)
- Upload Sketch (arrow or Sketch>LUpload) (we are uploading the sketch to the board)
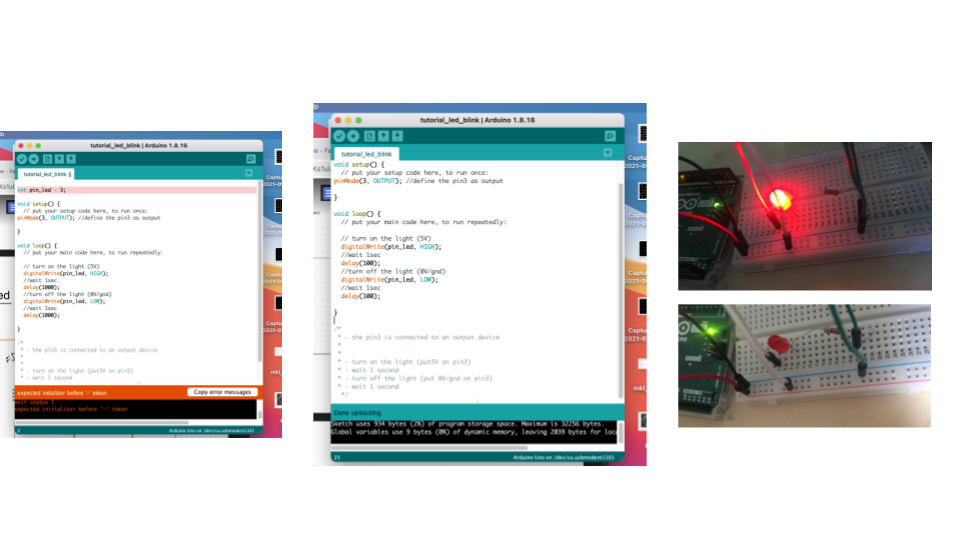
THE LIGHT SHOULD NOW BLINK!

-
Button LED with digital switch
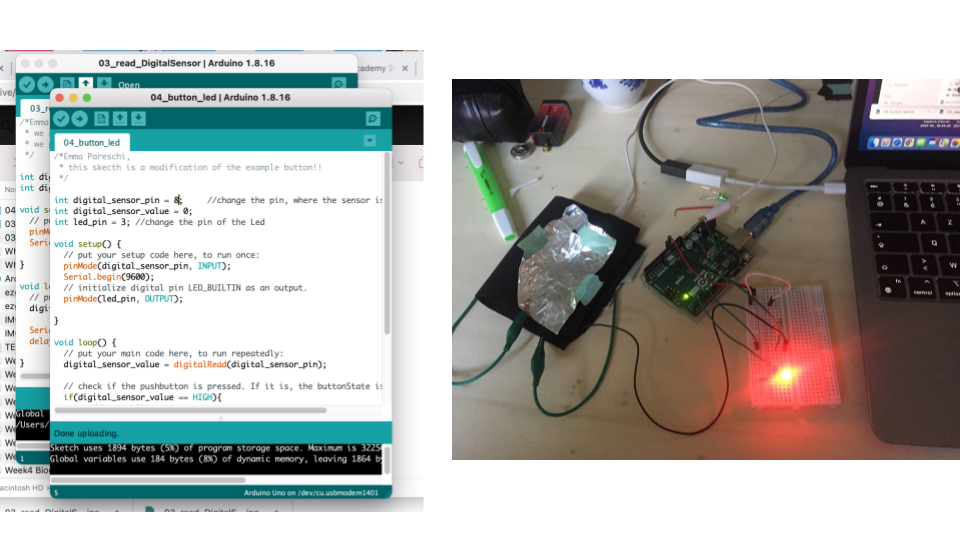
-
Velostat Analog switch:
SWITCH SAMPLES

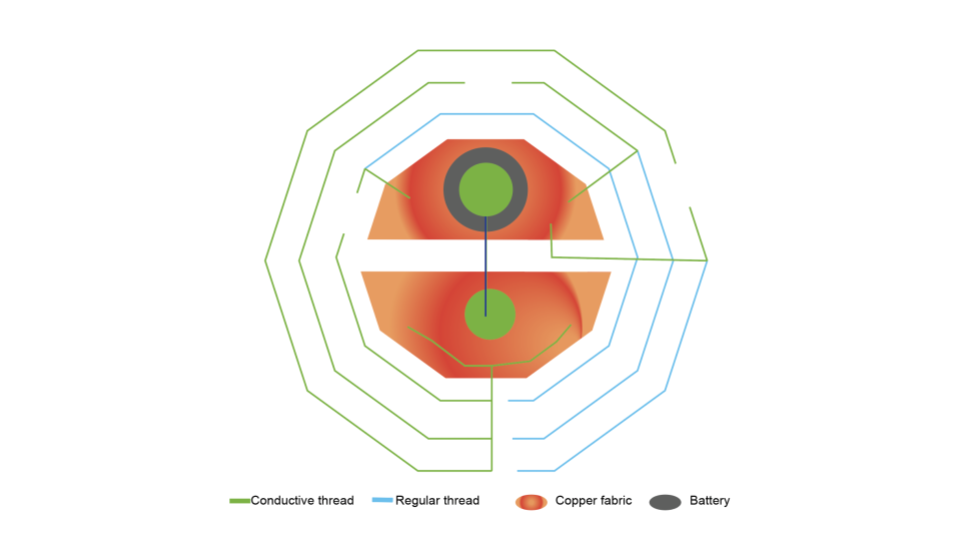
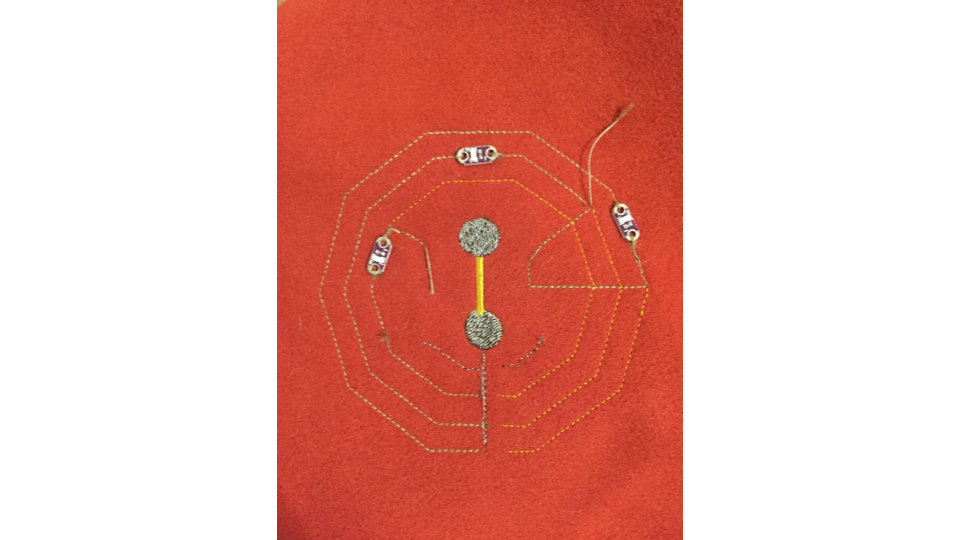
To produce a switch fabric sample, I decided to make a parrallel circuit with 3 led lights and an digital switch inspire by the one (quick and dirty) we prototyped during the tutorial.
For that I designed a circuit inspired by the form of a Labyrinth (I guess because electrical circuits can look like a labyrinth)
 For that I used electrical thread, red textile, and a copper mesh that Louise brought.
I also decided to use a 3V battery
And three LED with their own resistor integretated
- In a parallel circuit the current of 3V is enought for the 3 led, it will not be for LED in a serie circuit.
For that I used electrical thread, red textile, and a copper mesh that Louise brought.
I also decided to use a 3V battery
And three LED with their own resistor integretated
- In a parallel circuit the current of 3V is enought for the 3 led, it will not be for LED in a serie circuit.
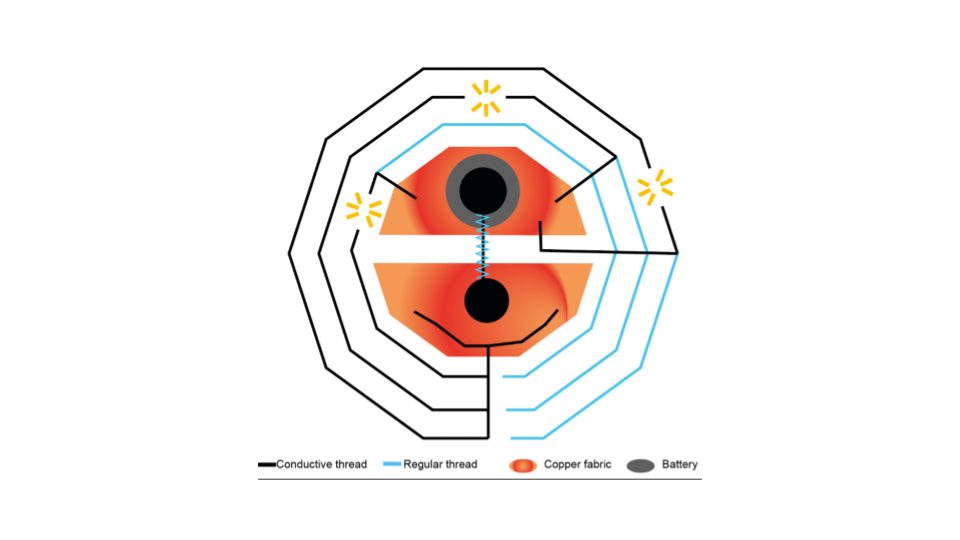
To realise the circuit I had to think of the way the current will flow and wich conductive parts of the threads will be in contact with the battery or the switch. For that the thread that goes from the + of the battery to the swith is covered by a yellow stich thread in the middle of the design to avoid short-circuits.
I also use a non conductive Gold/yellow thread to extend the externals lines of the led
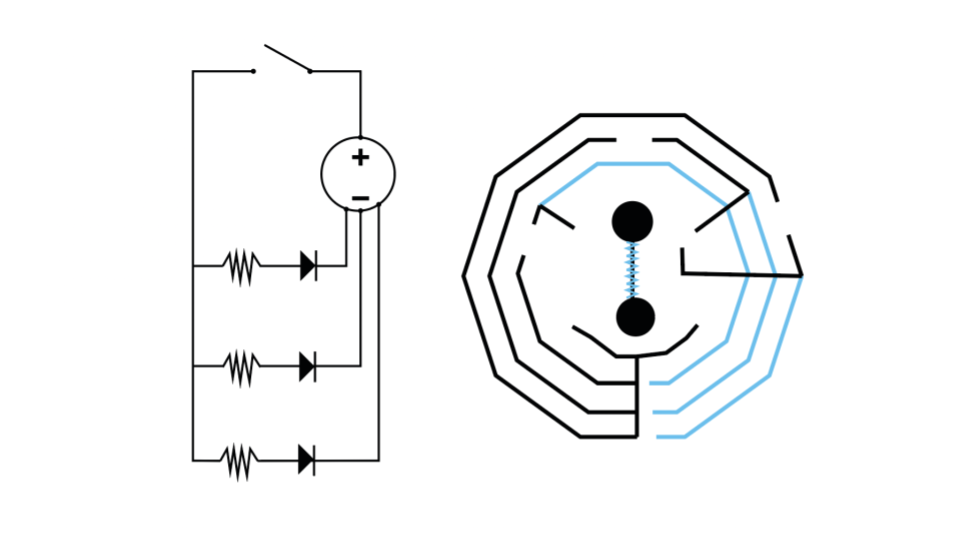
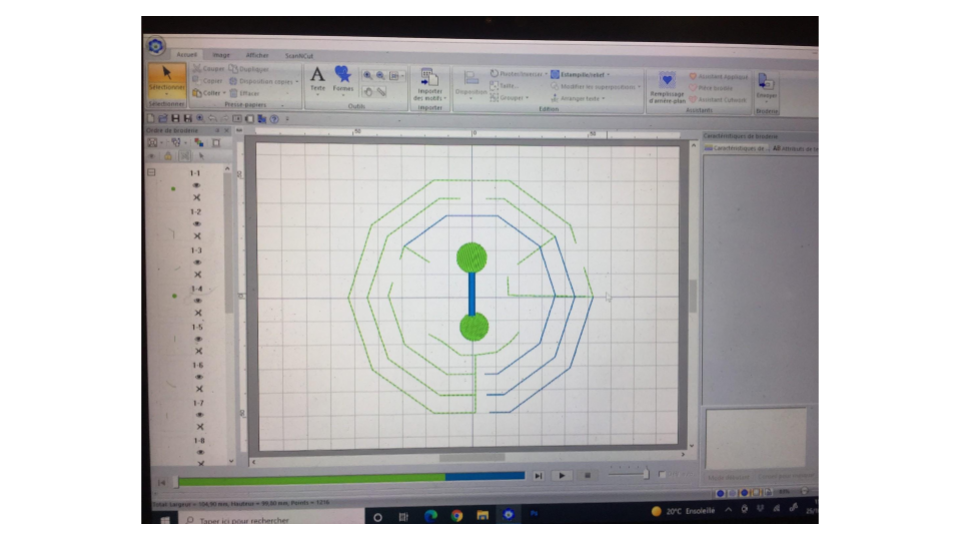
This are the sketches, and the illustrator file:
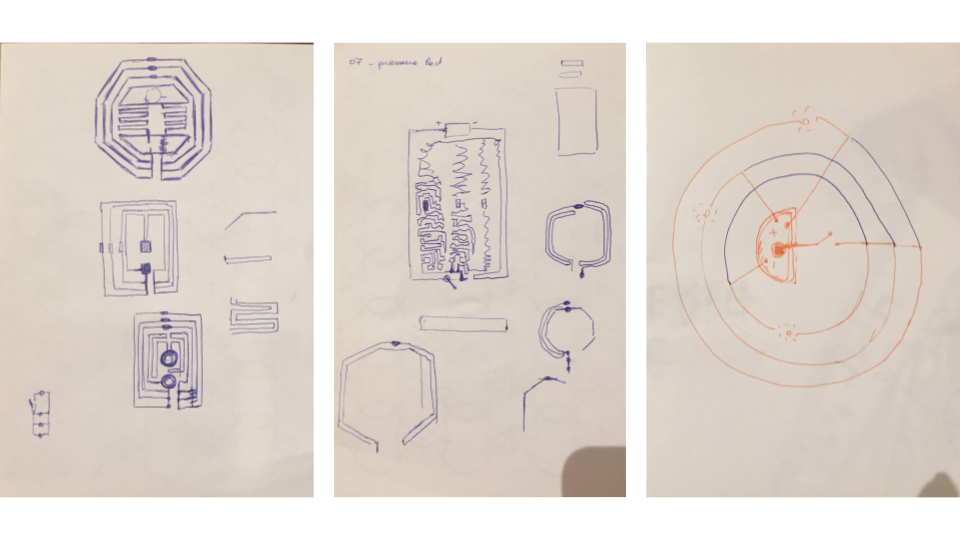
and the Electrical circuit symbolys on the left and the design for the embroidery on the right:
PE design 11 - digital embroidery
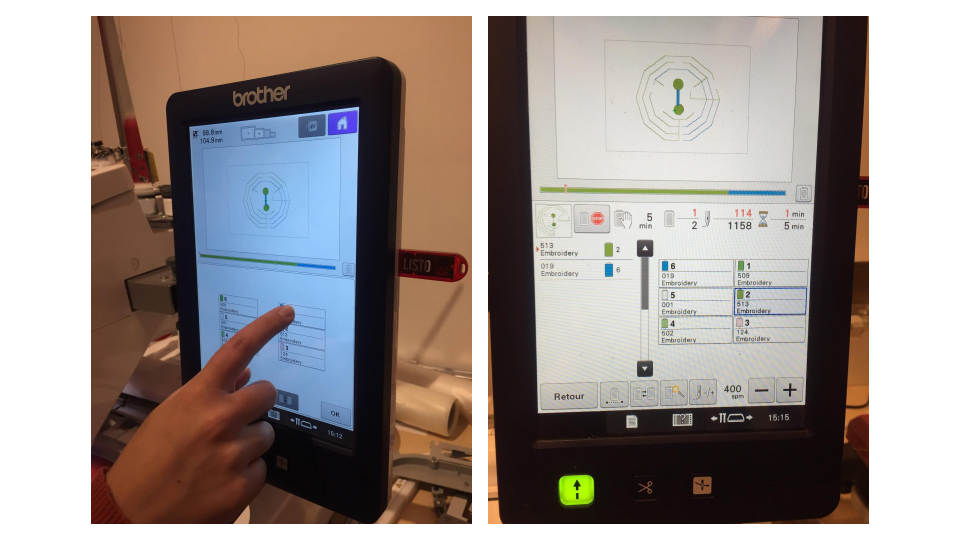
(note book the tablet at the same time as the machine)
- Choose the canvas size (different sizes available)
- change the color of the stich, the density, the spacing inbetween
- choose forms, patterns from the software library
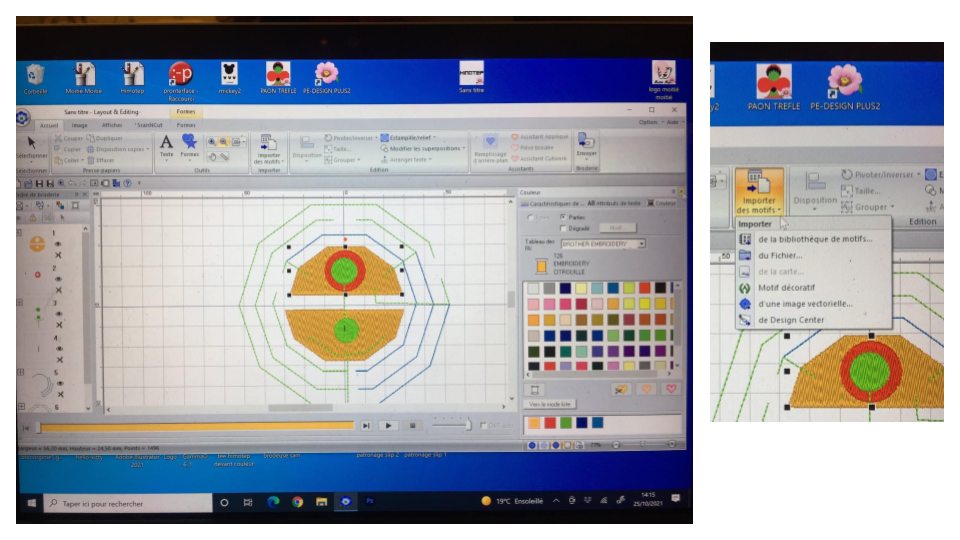
- you can also import your own design from a vector file (illustrator) with .wmf
- then ungroup important you shoul wirk with clean lines and closed shapes and not too many colors
- for letters or small shapes use the satin stich (goes from one boarder to the other) (point de plumeti)
- for large shapes you can use the feel stich(point de remplissage) (pleins de petits allers/retours)
How to on the software 1. importer un motif>depuis une image vectorielle>choisir le fichier .wmf 2. adapter le point à droite 3. enregistrer sous (icone en haut à gauche)
Cadre - Placer le tissus sur le cadre adapter - ajuster au cran avec les visse - Glisser le cadre dans la machine
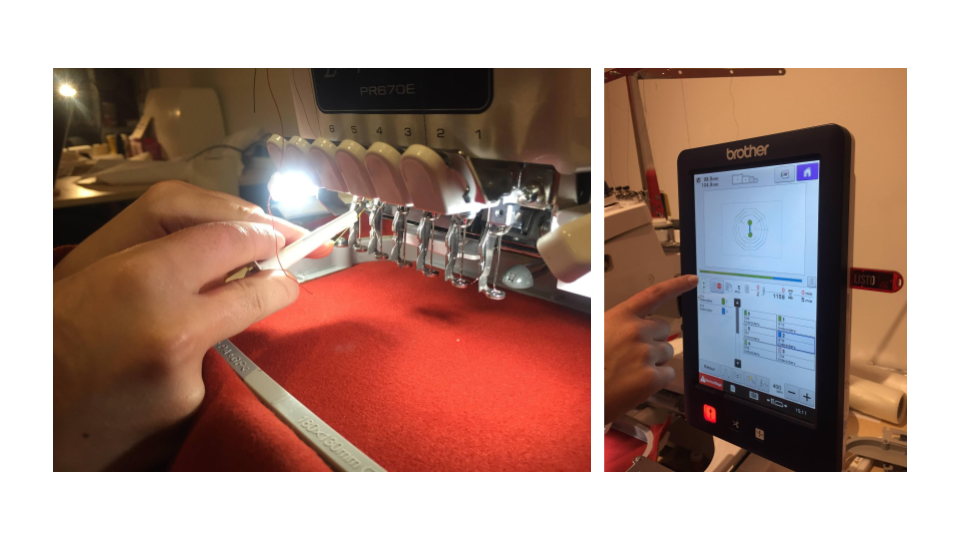
enfiler l'aiguille: - cliquer sur le bouton aiguille - Passer le fil bien en dessous - Recliquer sur le bouton aiguille - Le fil s'enfile automatiquement
Fichier: - Mettre la clé USB - choisir le fichier dans la page d'acceuil>iconeUSB>fichier> ensuite >continuer>choisir la vitesse eventuellement - puis bouton rouge puis vert
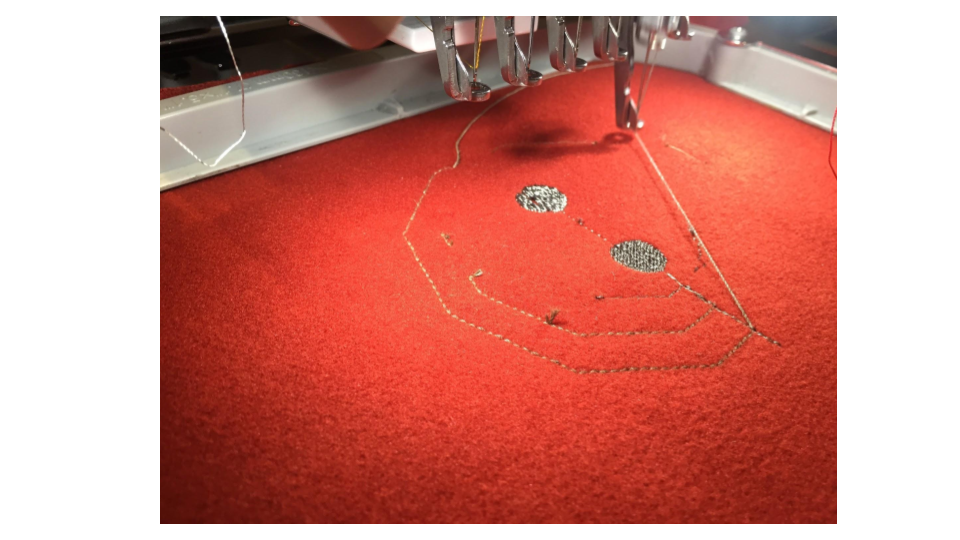
Then I had to sew the led components and check all the circuit connectivity with the multimeter
Useful links
- Lecture – E-textiles – Liza Stark
- Basic electronics Tutorial - Emma Pareschi
- Sensors electronics Tutorial - Emma Pareschi
- Intro to Arduino tutorial - Emma Pareschi
- Review of the week