10| Open Source Hardware - From Fibers to Fabric
This week has been a real challenge, really exhausting but super fun week, working with the team in Lyon building a Hilo Machine.
On this project I worked with Capucine, Marie-Charlotte and Laeticia.
INSPIRATIONS
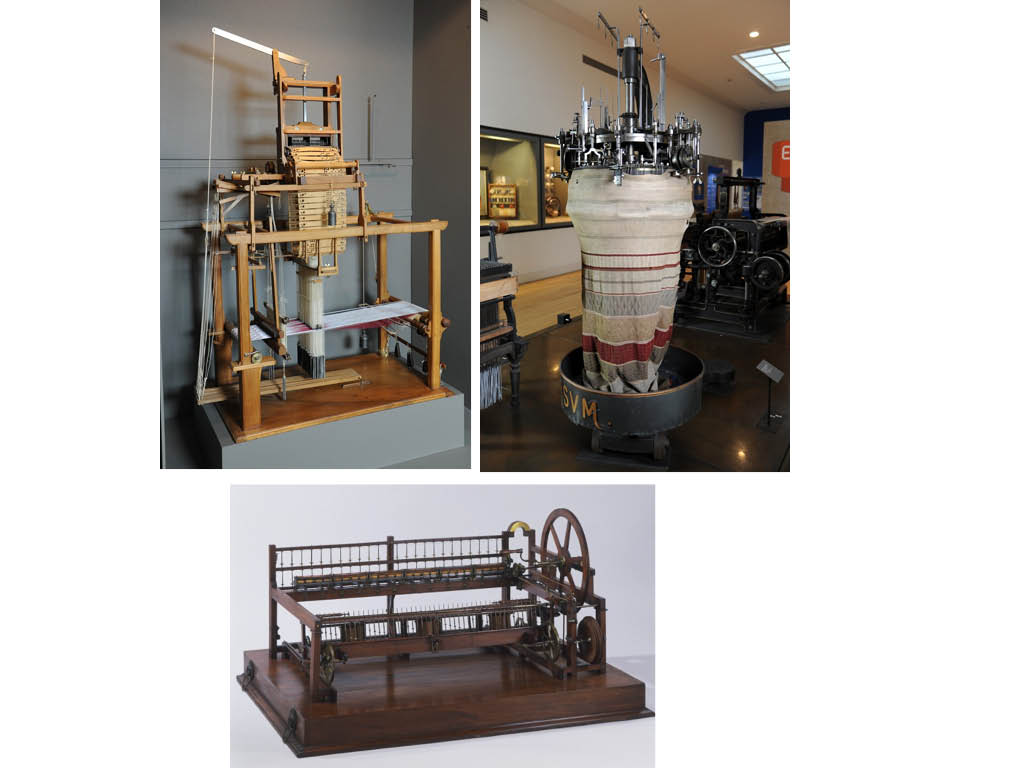
Some inspiration of open source hardware given during the lecture. First the old first machines are a huge inspiration. The Musée d'arts et métier in Paris has a collection of some beautiful machines in looms, textile weaving (jaquard) knitting, old spinners Here is the collection : Musée art et métier Paris catalog
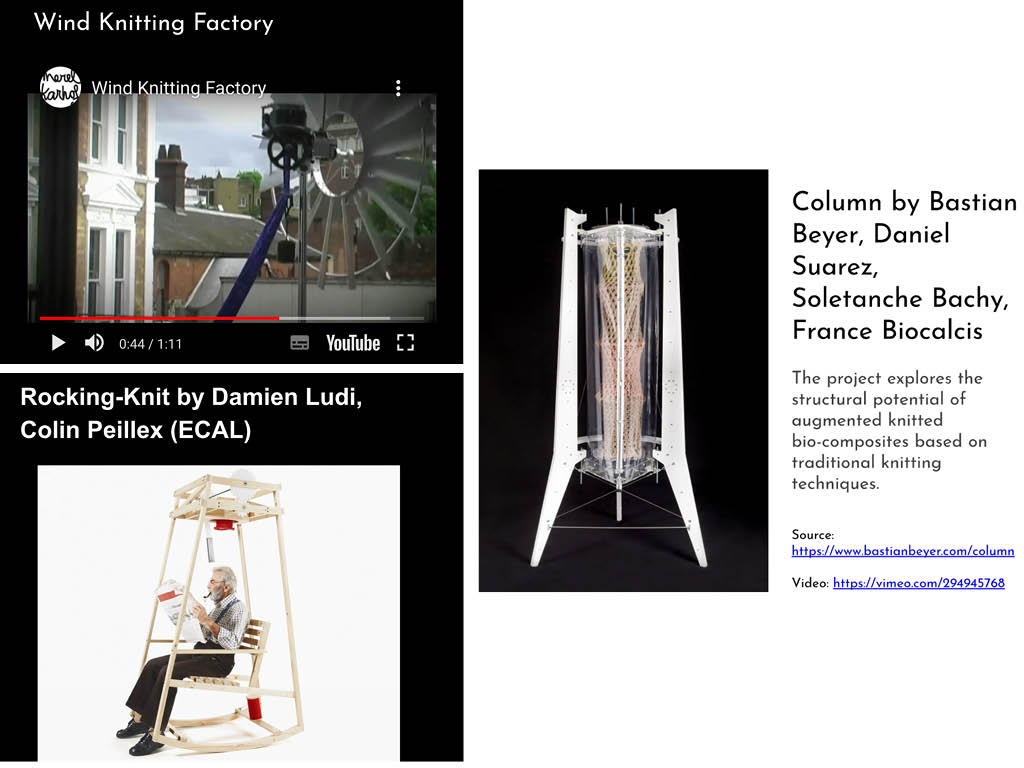
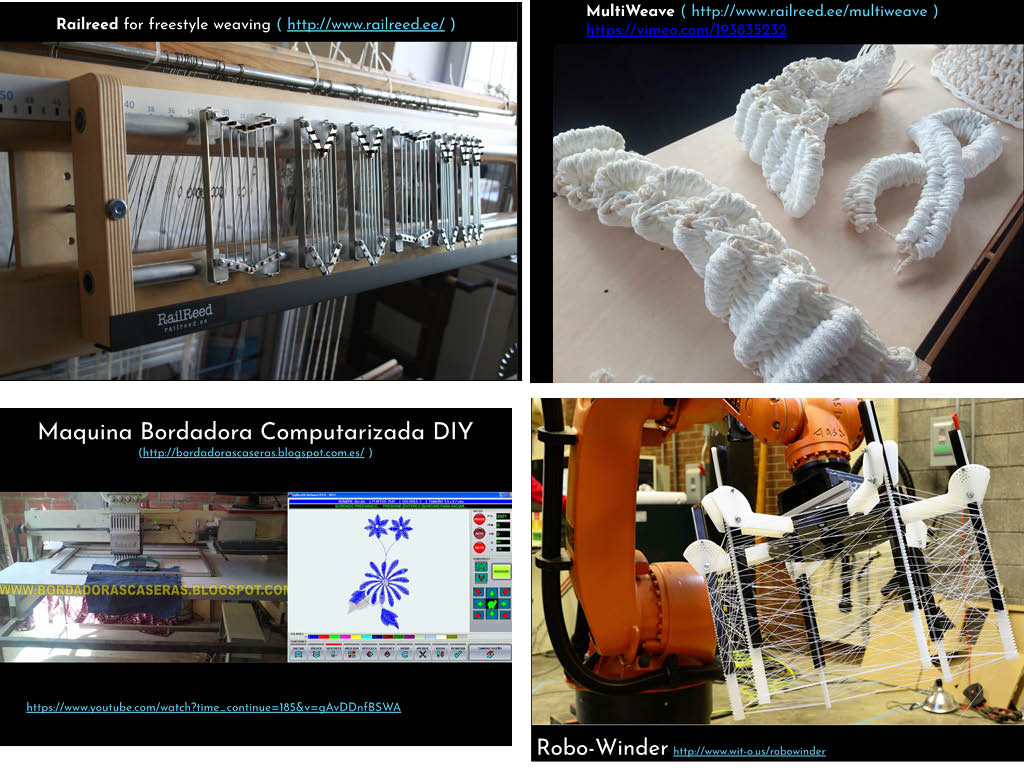
And some open source hardware:


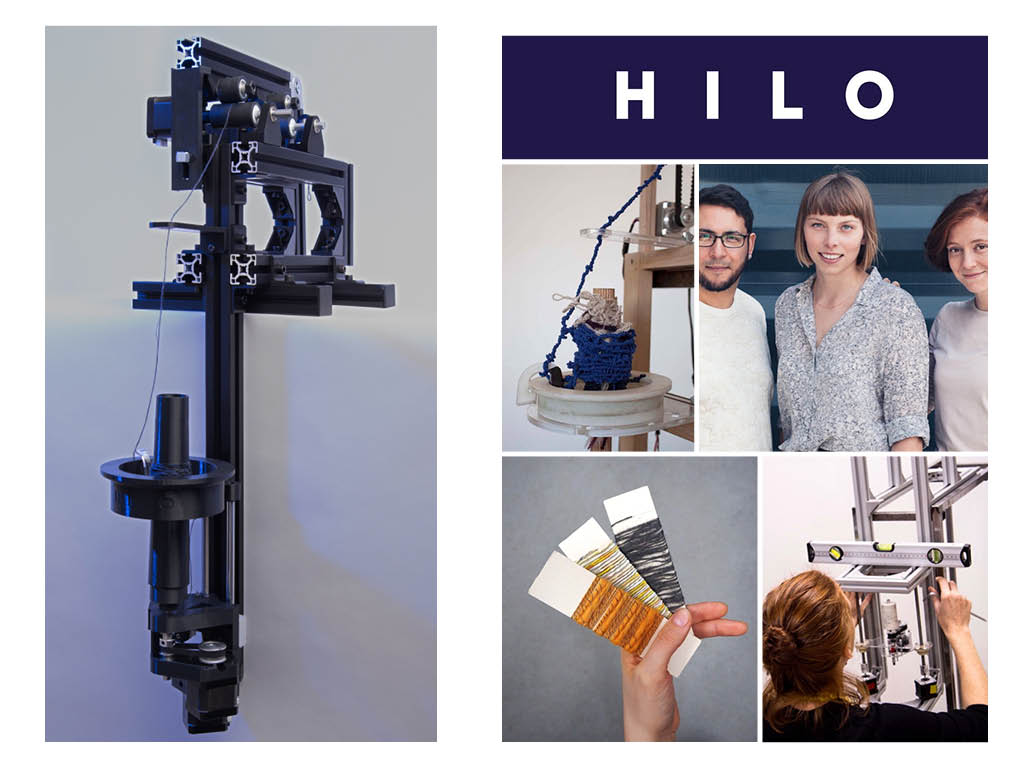
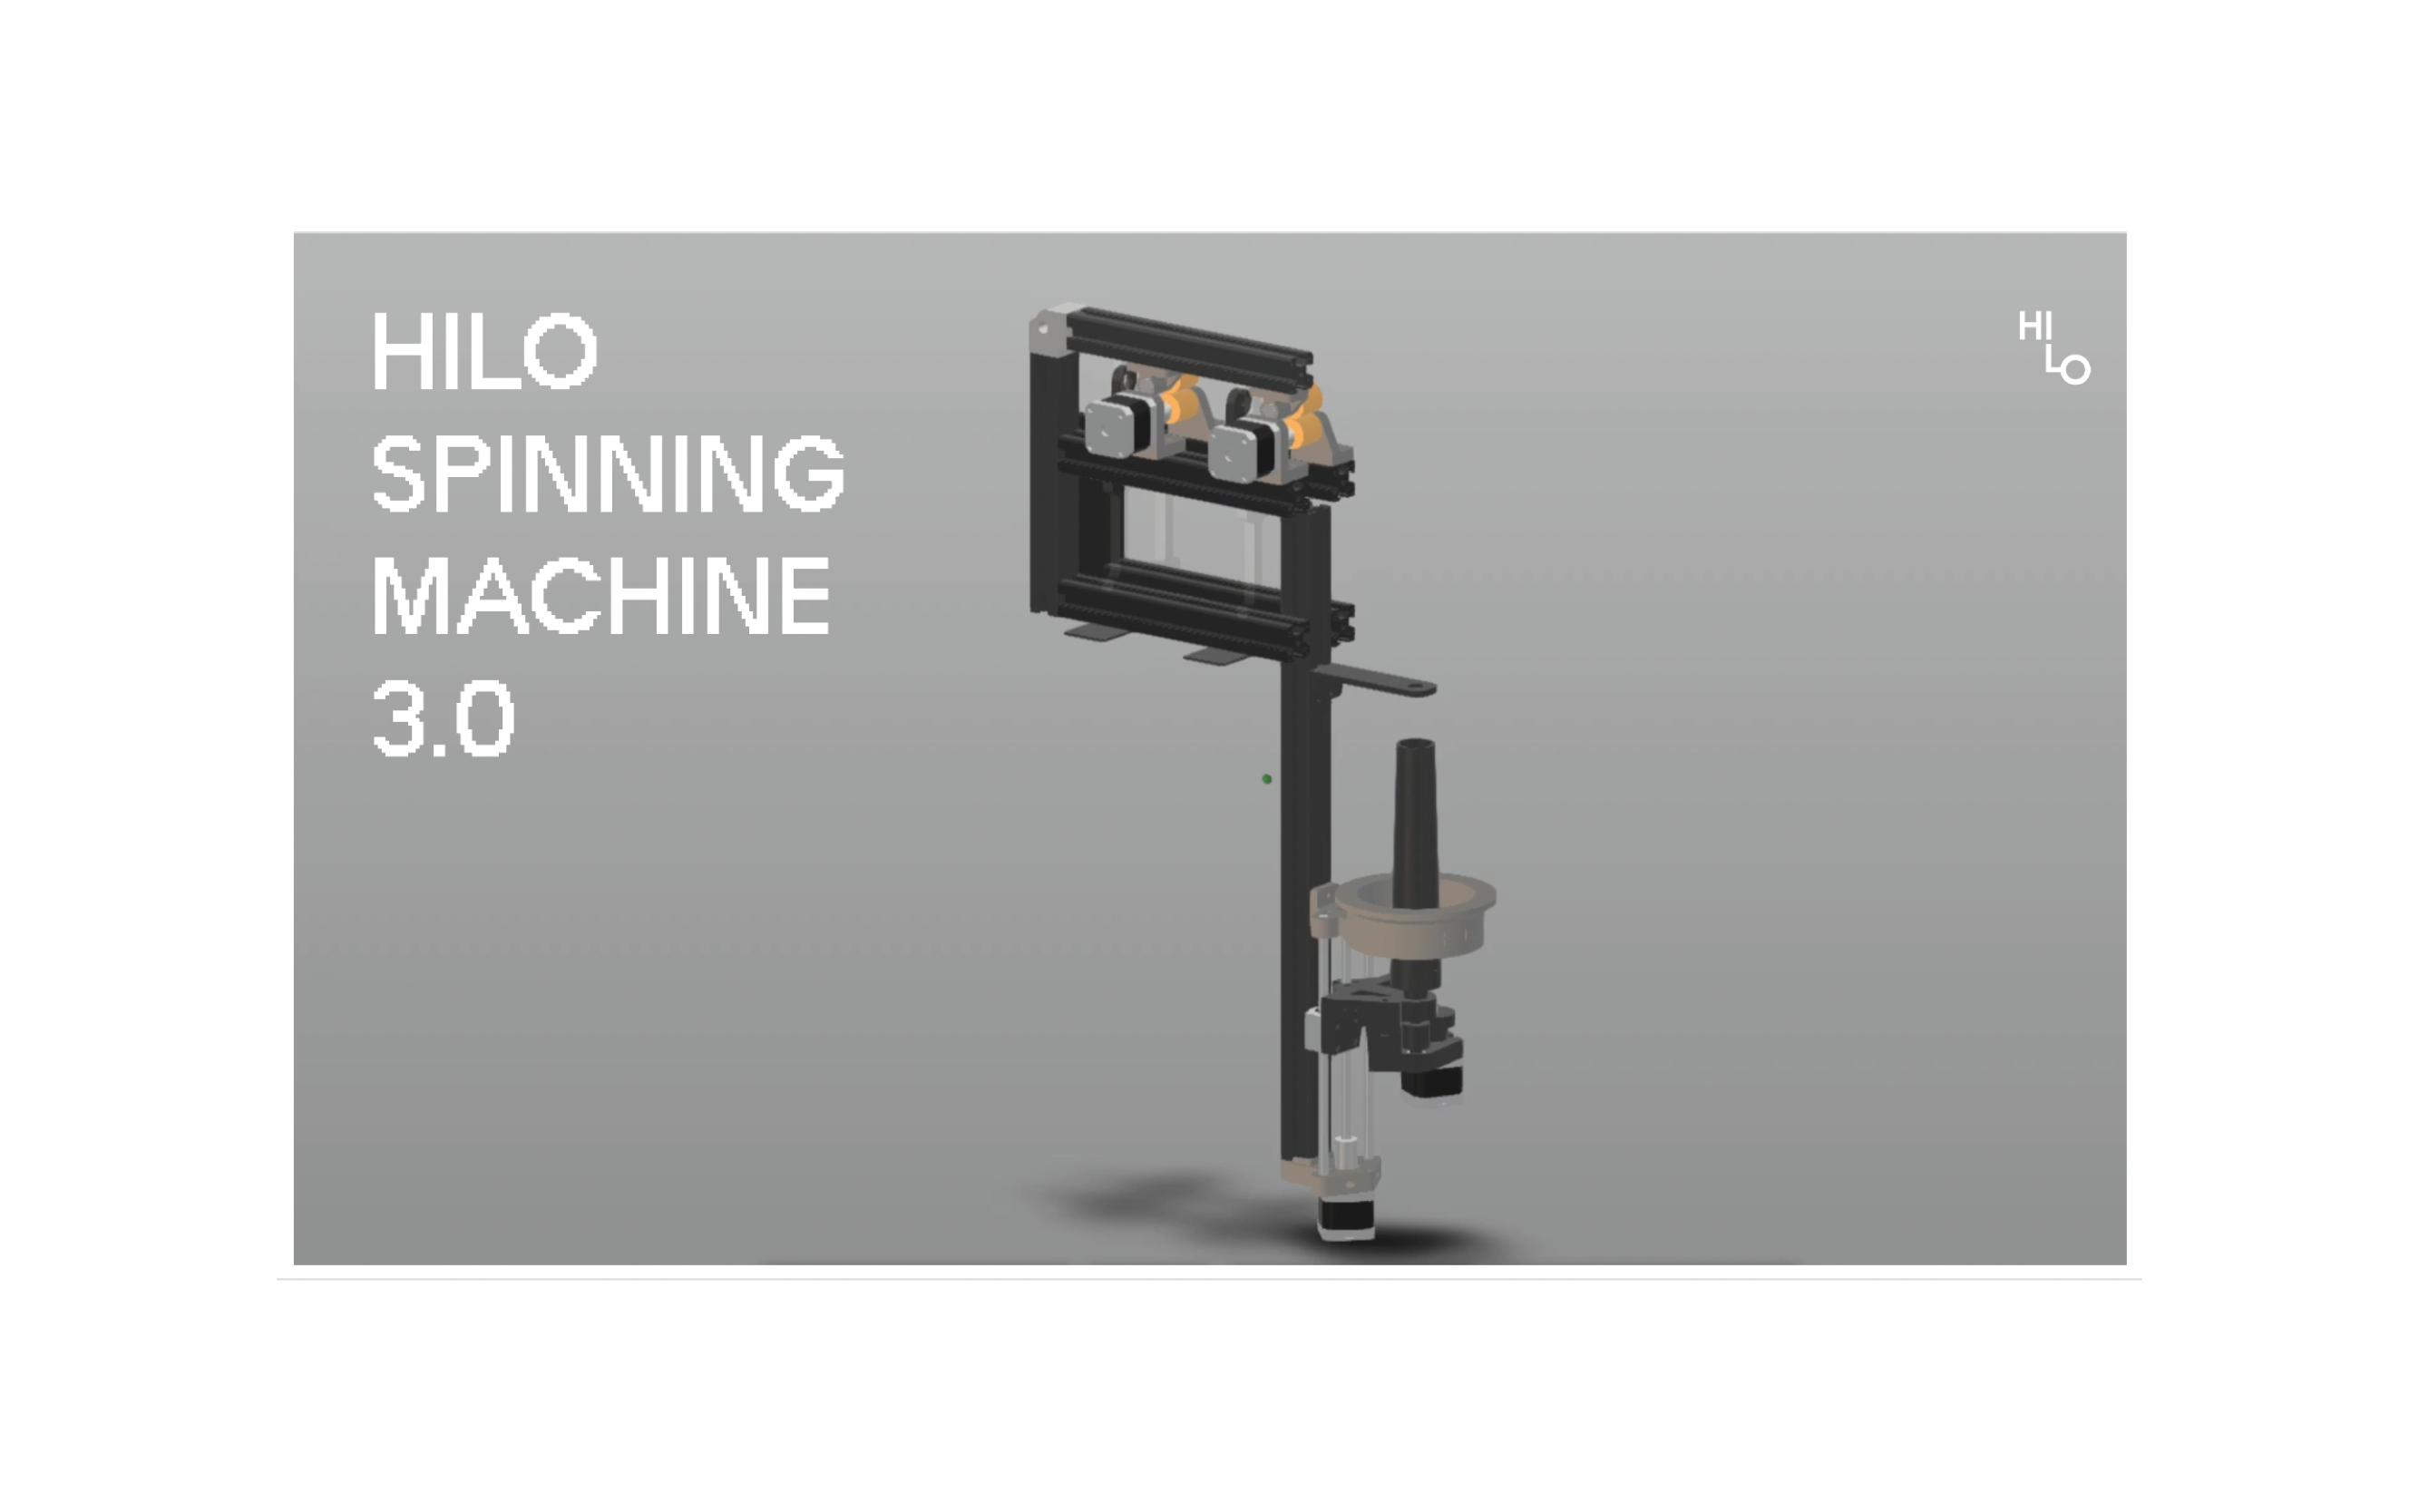
HILO MACHINE by Hilo Studio
We worked on the Hilo Machine made by Hilo Studio:
LINKS:
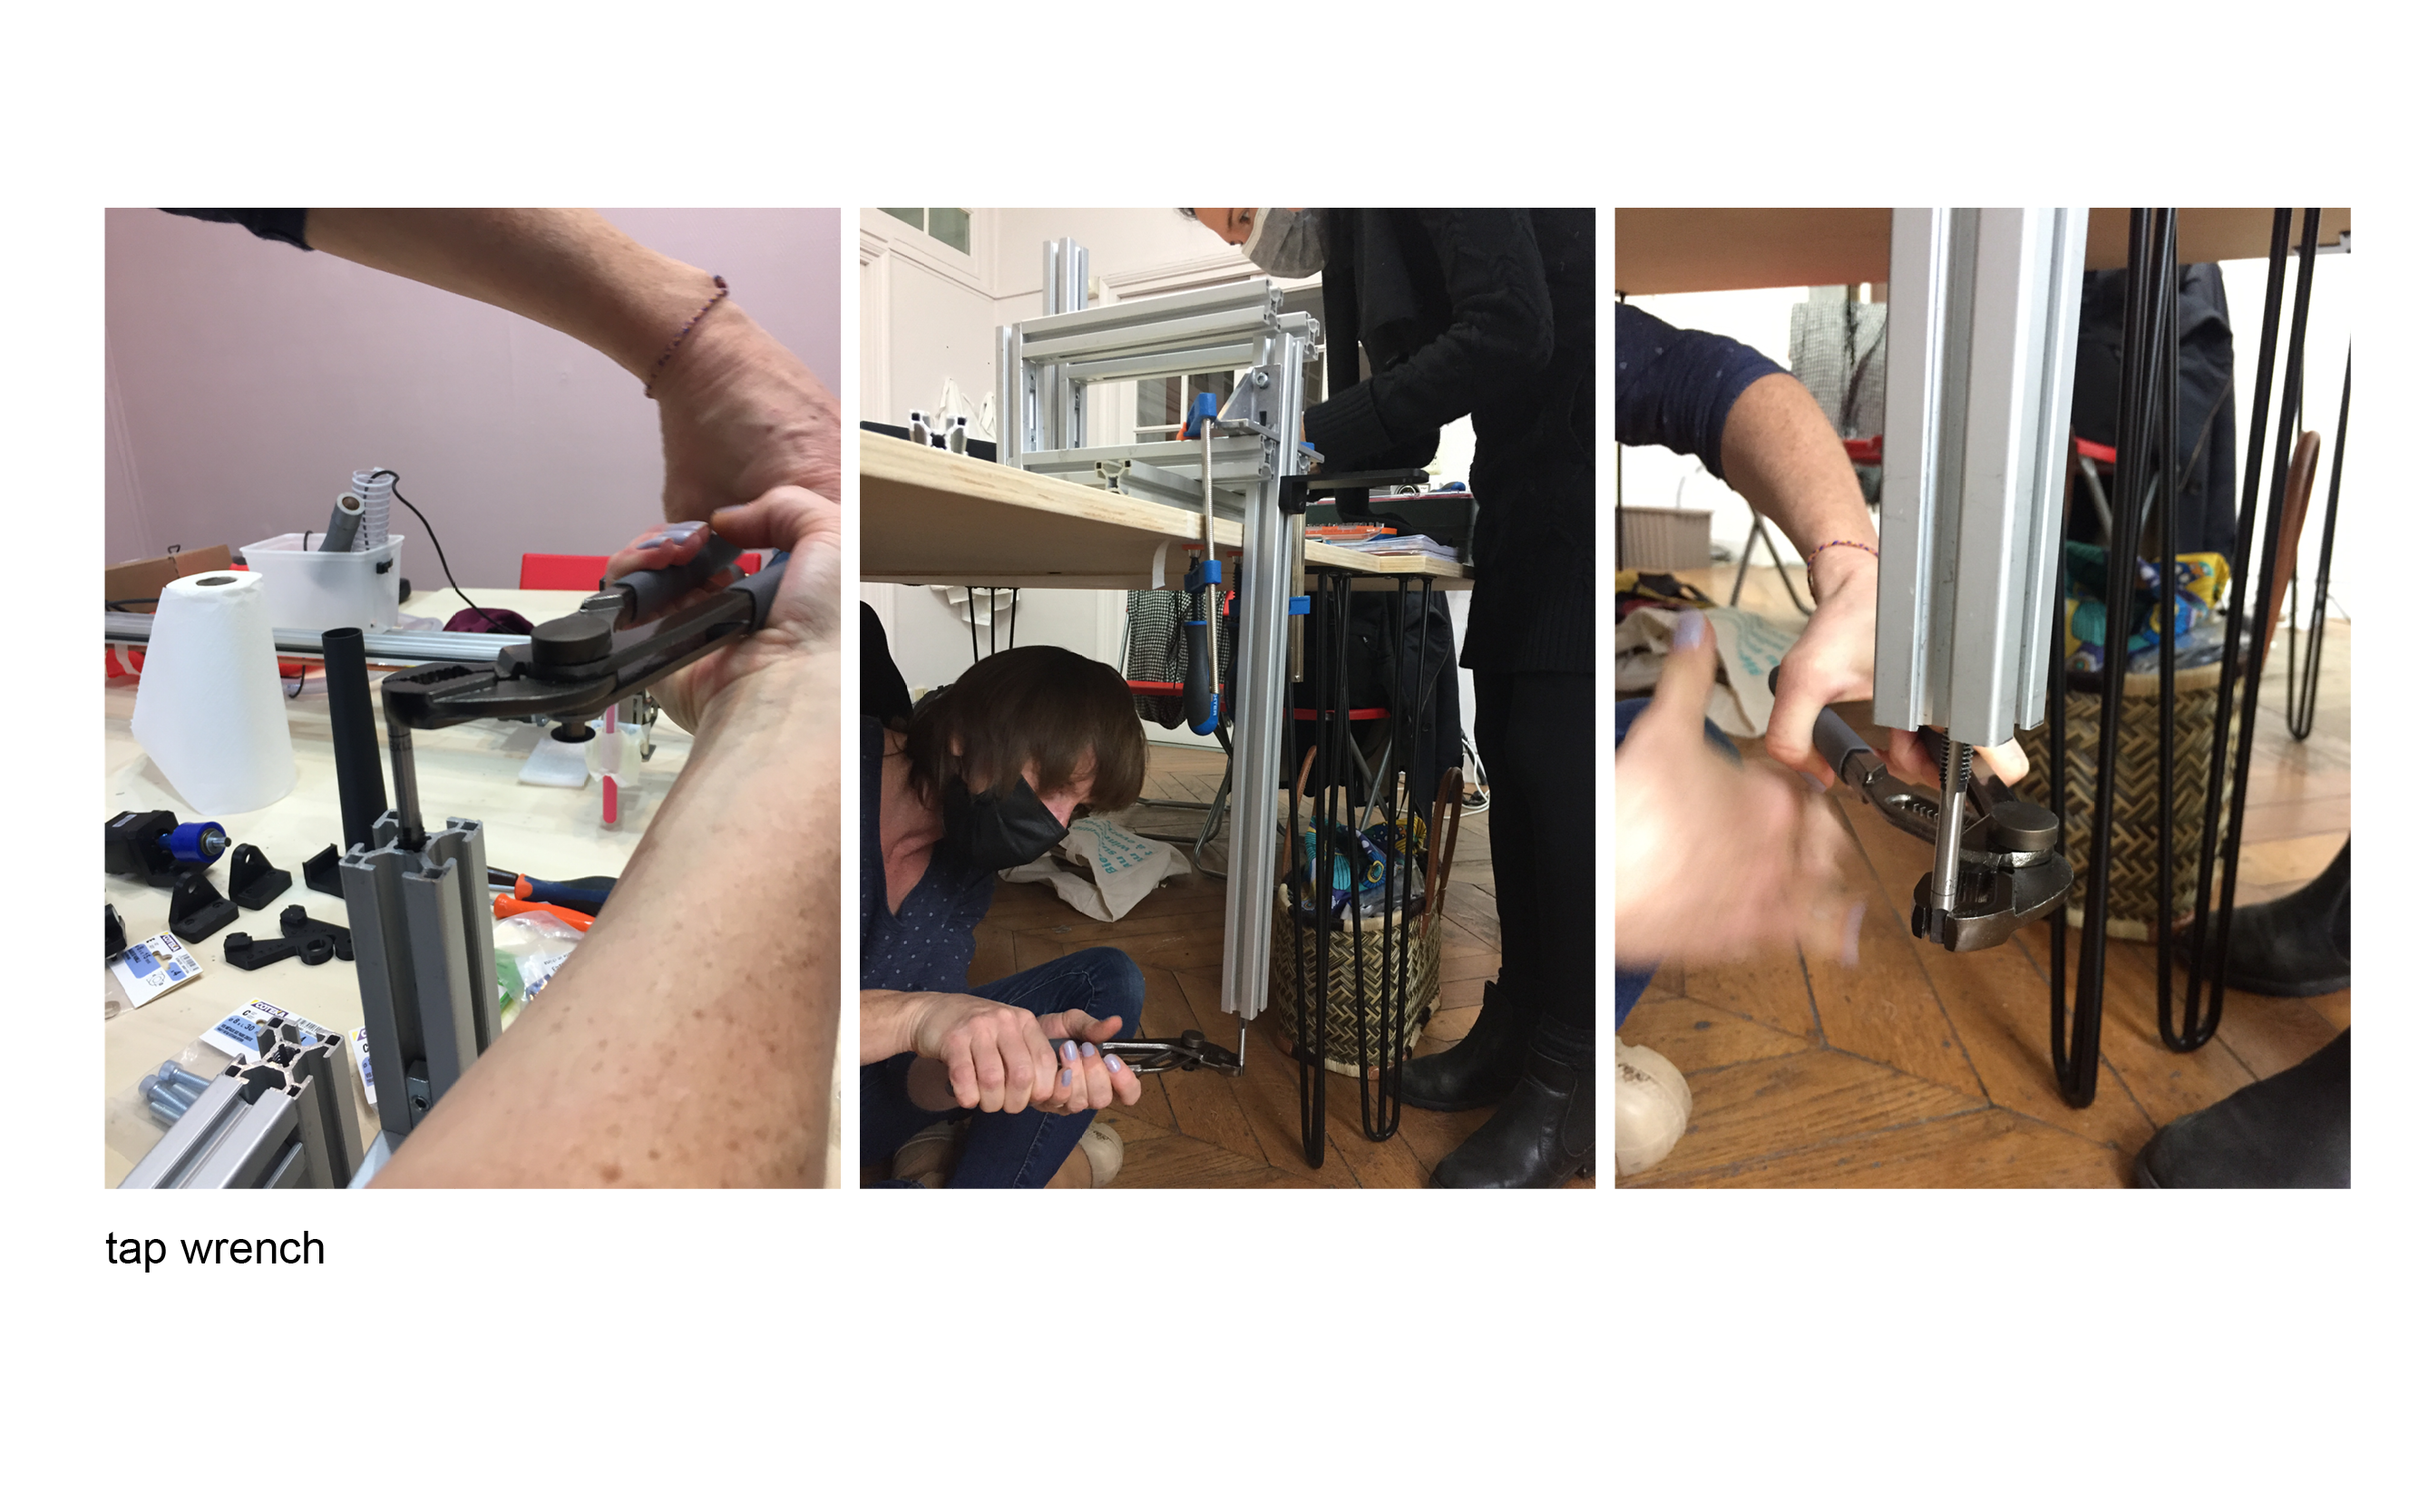
Tips
- Before building the structure/machine : use the tap wrench to tap the makerbeams, it will be easier than doing it when the structure is assembled - we did it when the structure was assembled because we didn't have the tap wrench at the begining.
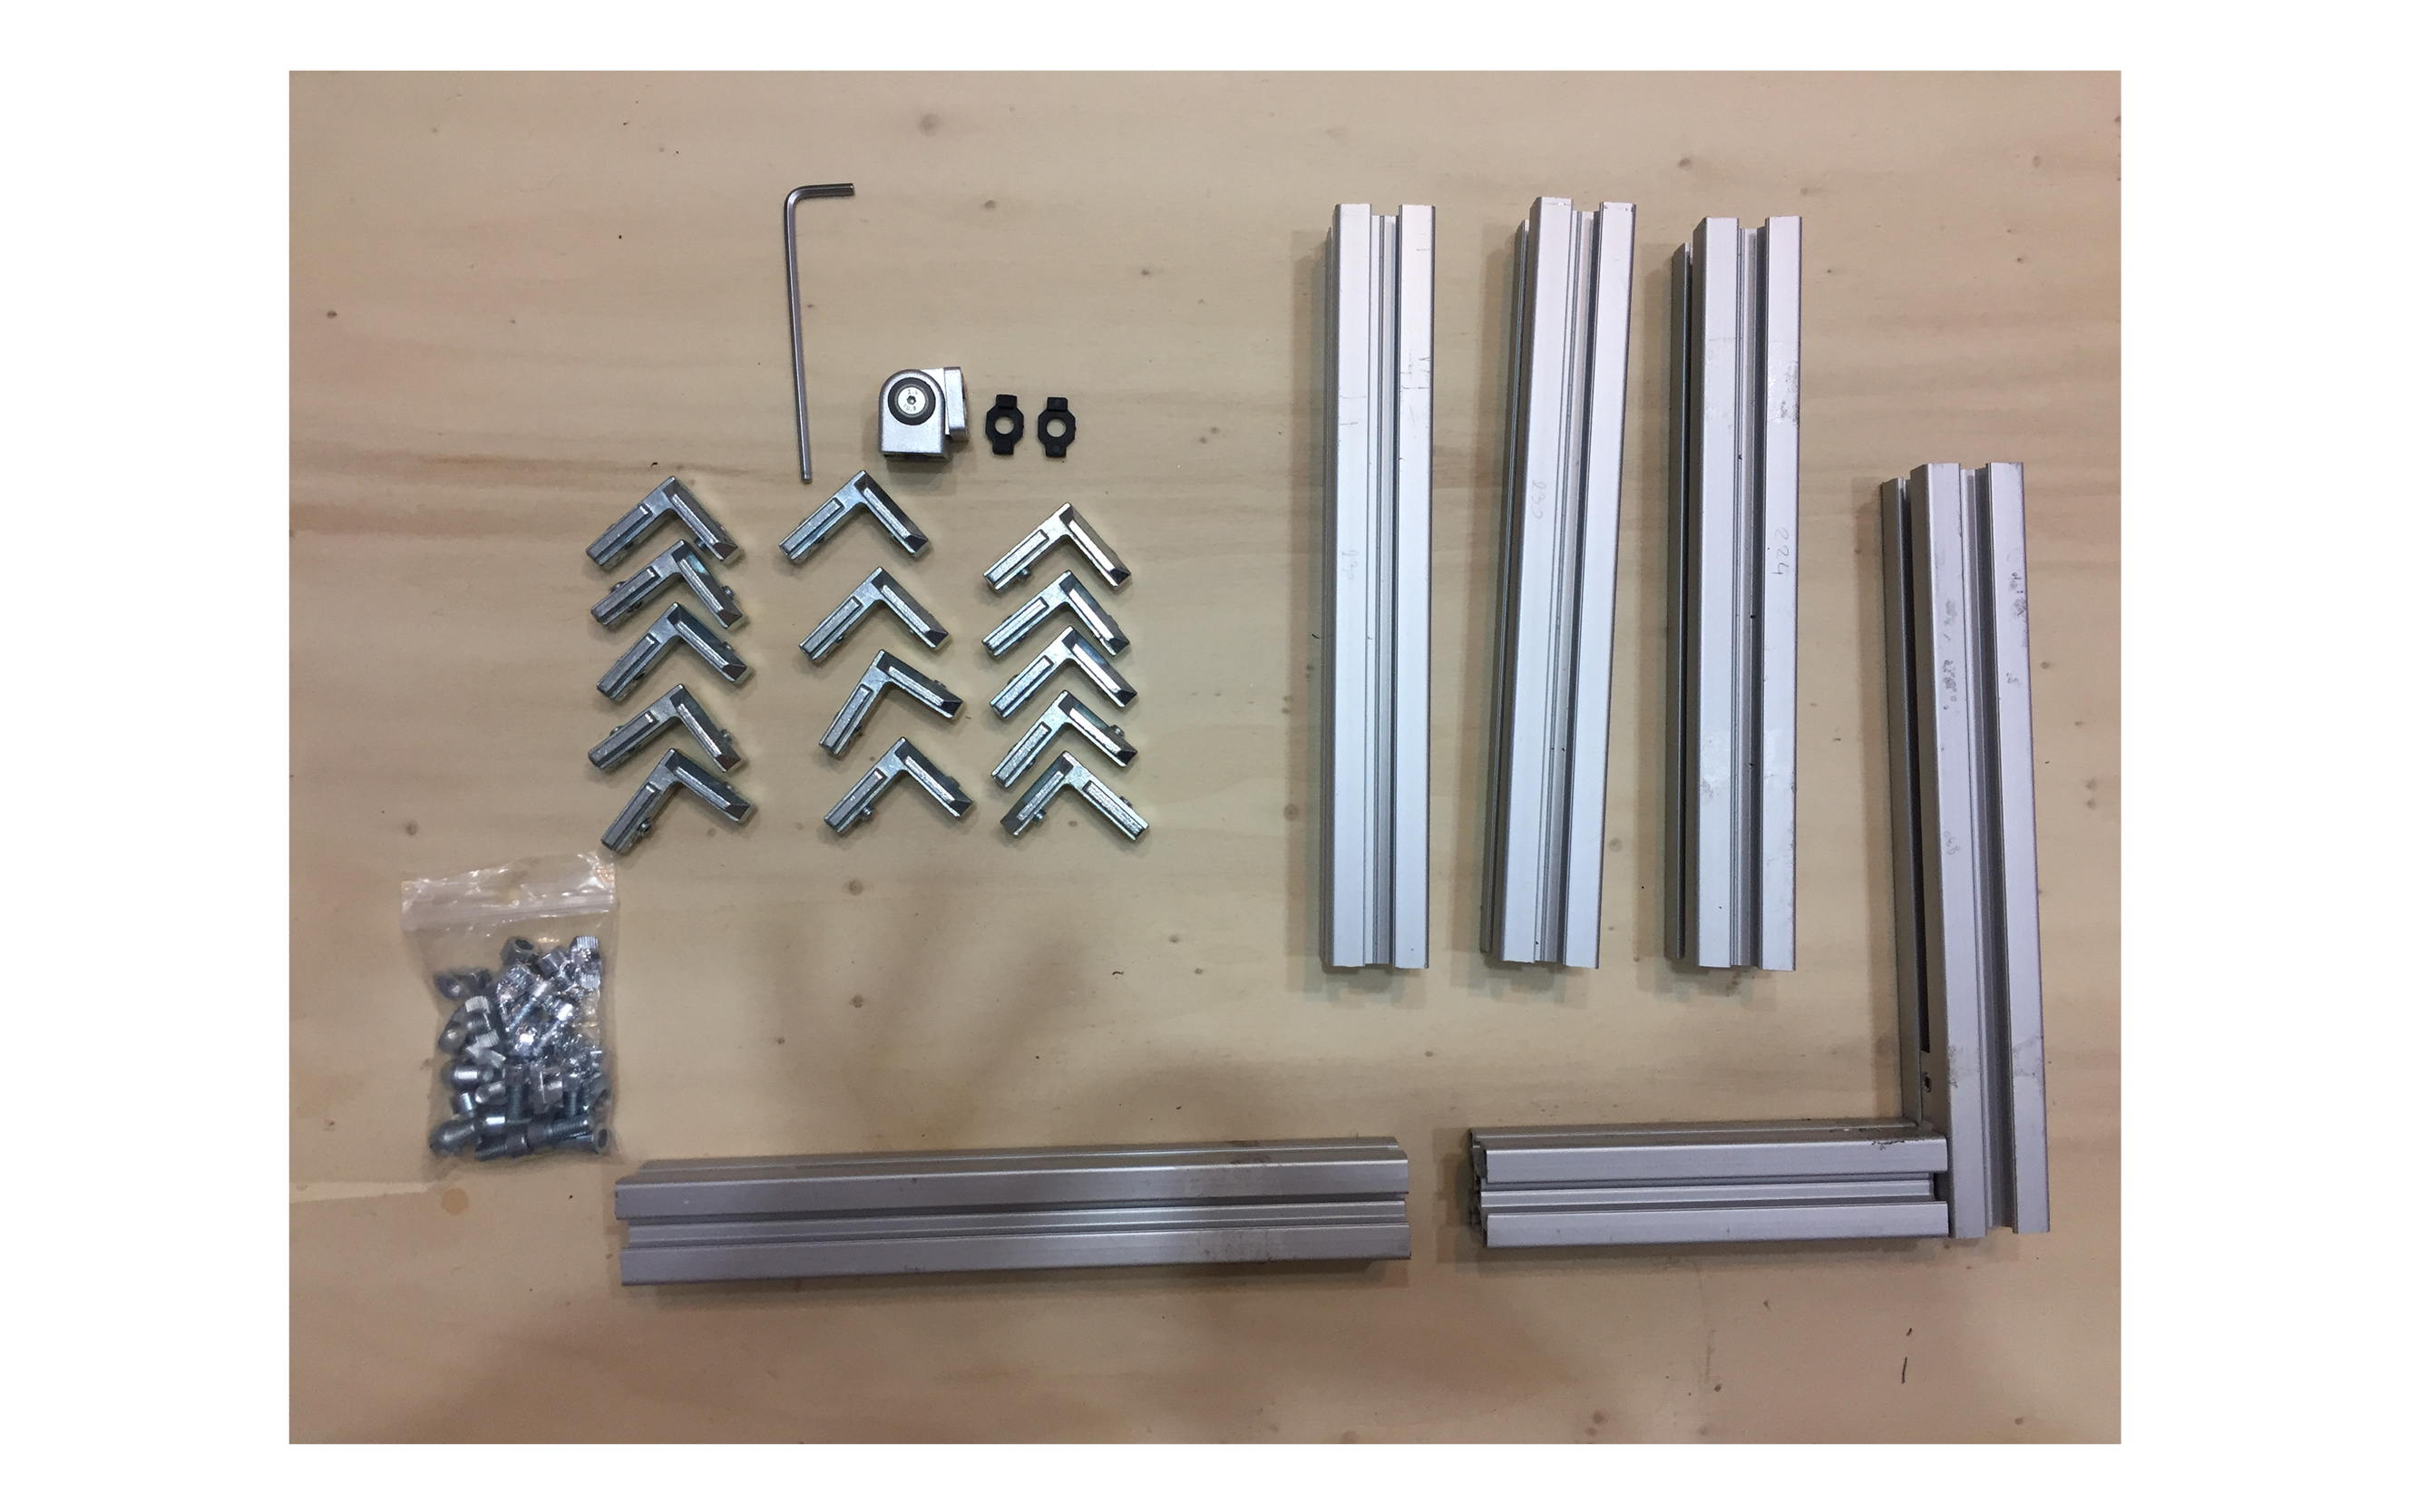
0 | List of parts
First Step was to buy/group all the parts and components that Pauline and Diane had bought and/or produced (for the 3D parts) for us.
The sourcing and buying of the parts is an important step, it takes time, and also figuring out what the language and translation of each component is fundamental to the a more fluid and easy fabrication of the machine. But also try to understand the building process.
IMAGE IMAGE
1 | Structure
In this step, we built the structure of the machine that will support the mechanism, the wheels and their individual motors. The longer makerbeam support the Spindel where the thread will enroll on the cone - once formed between the two wheels. It's really important that the structure is well leveled.
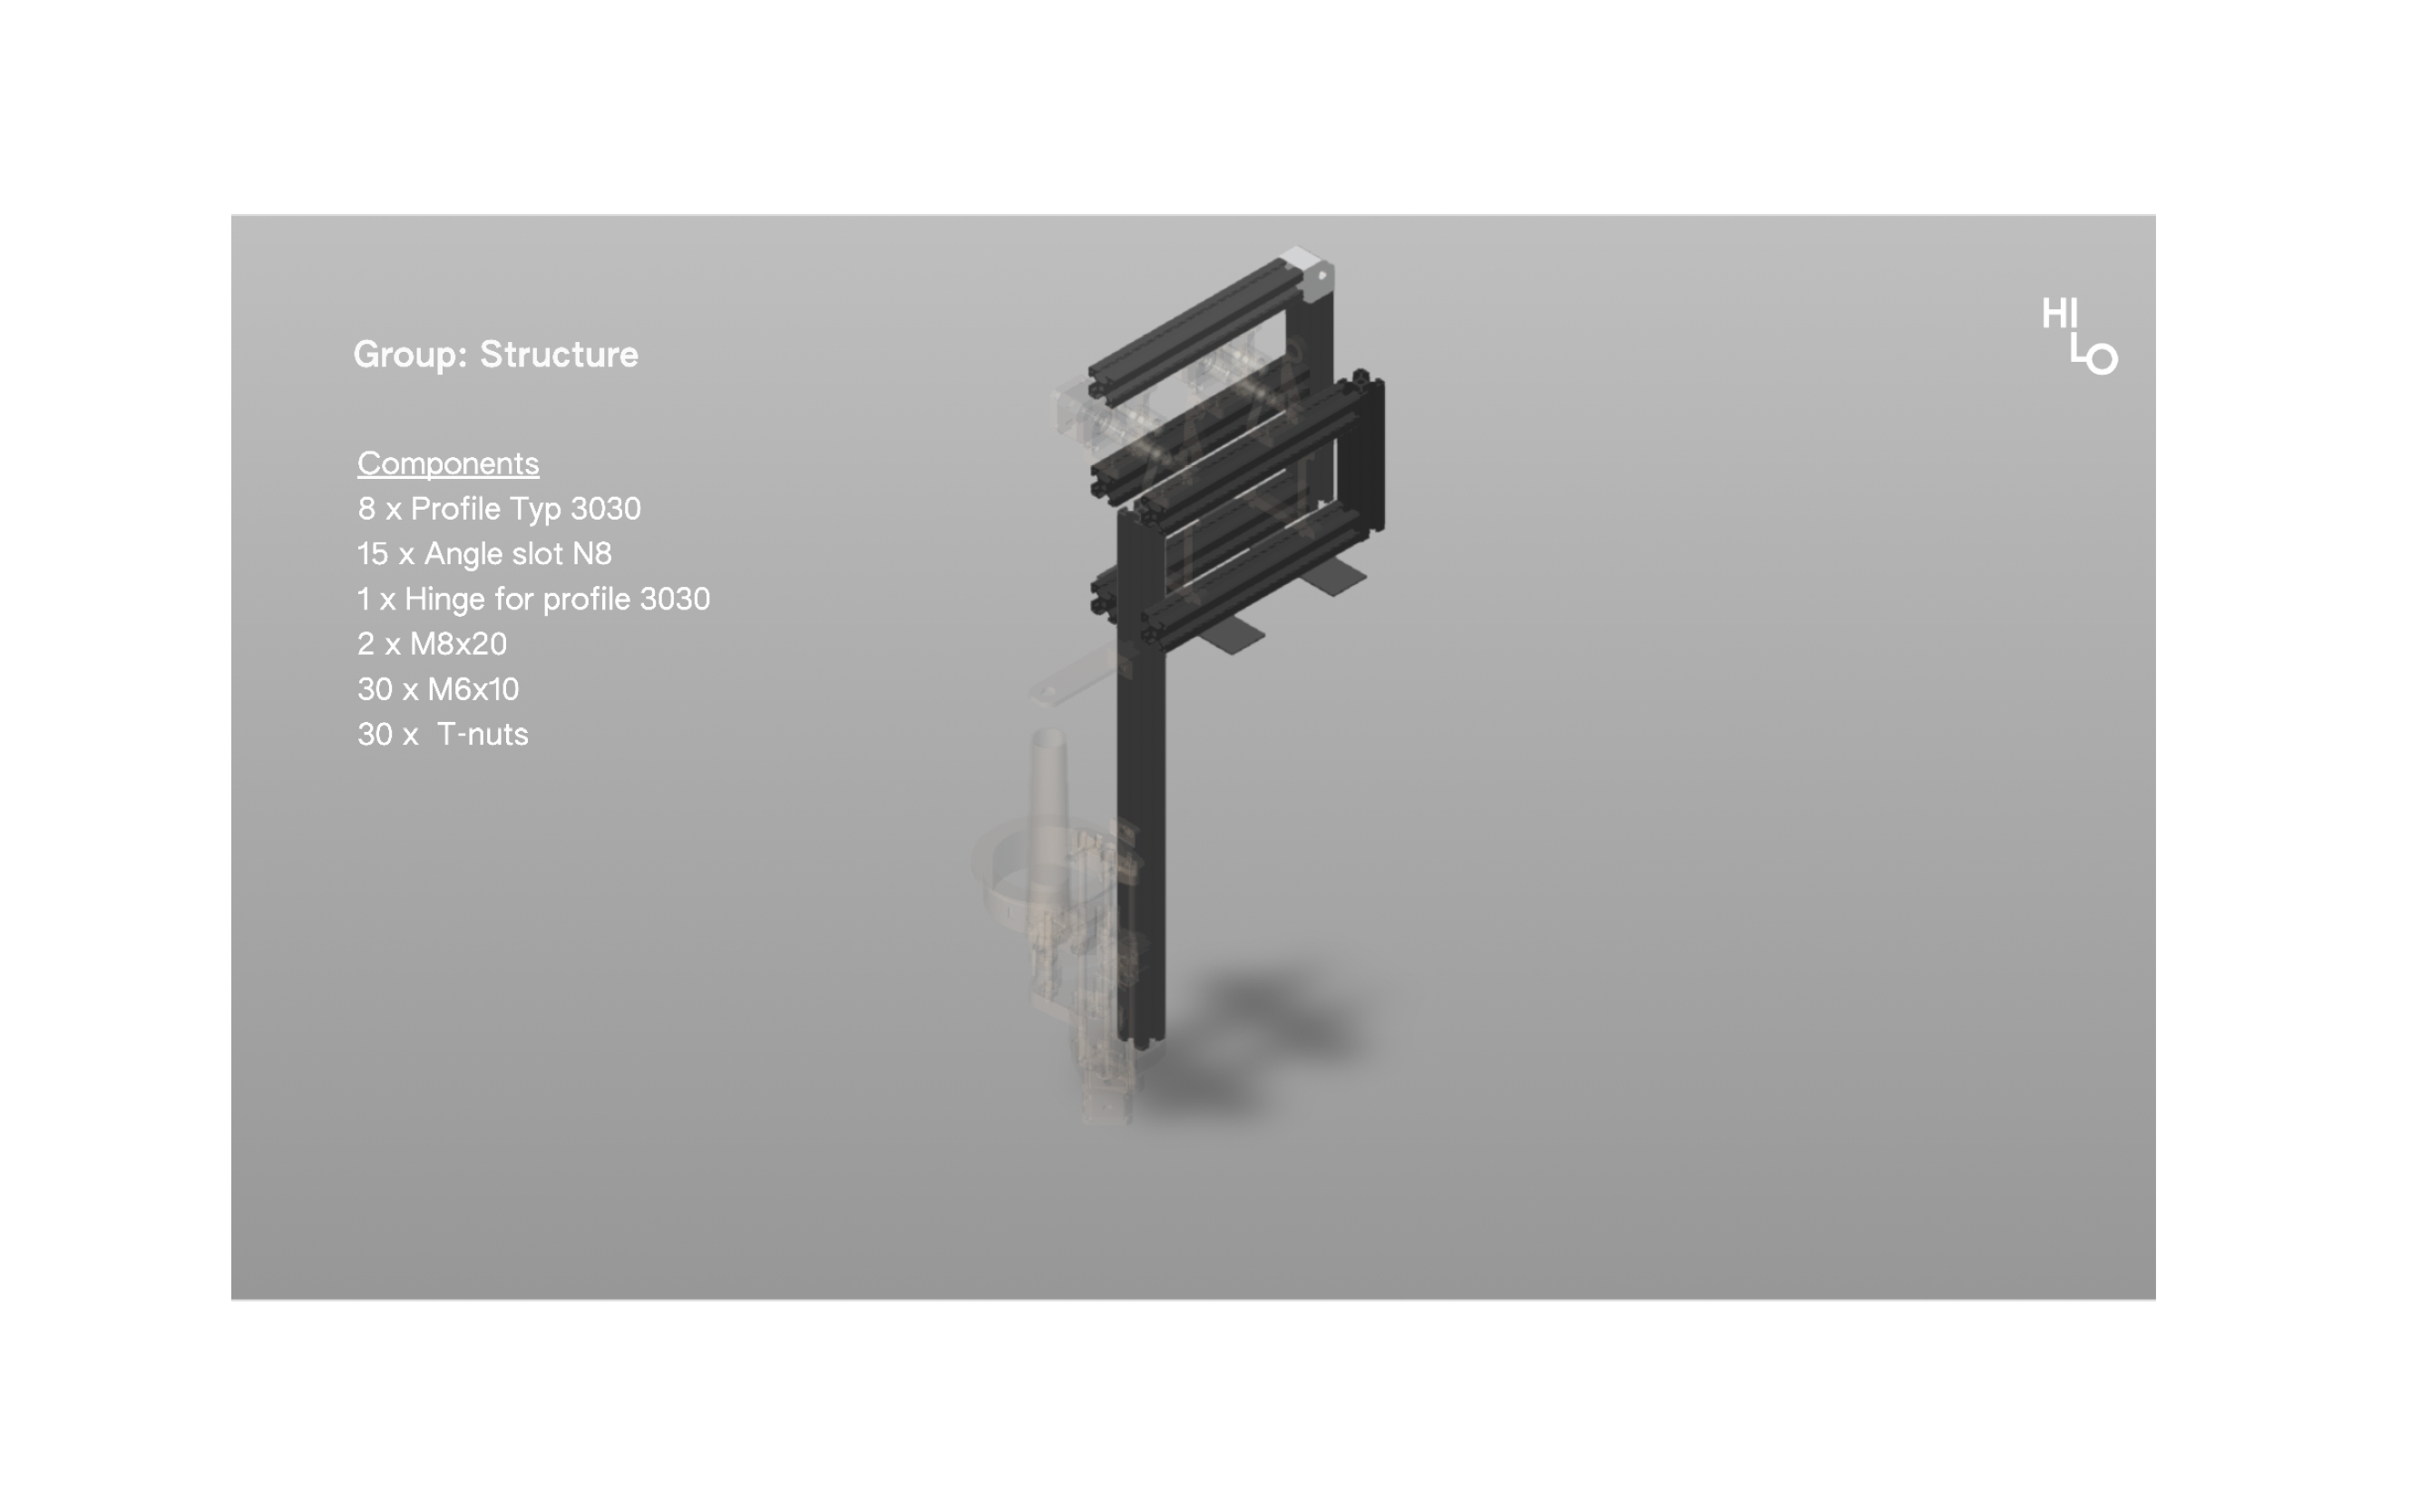
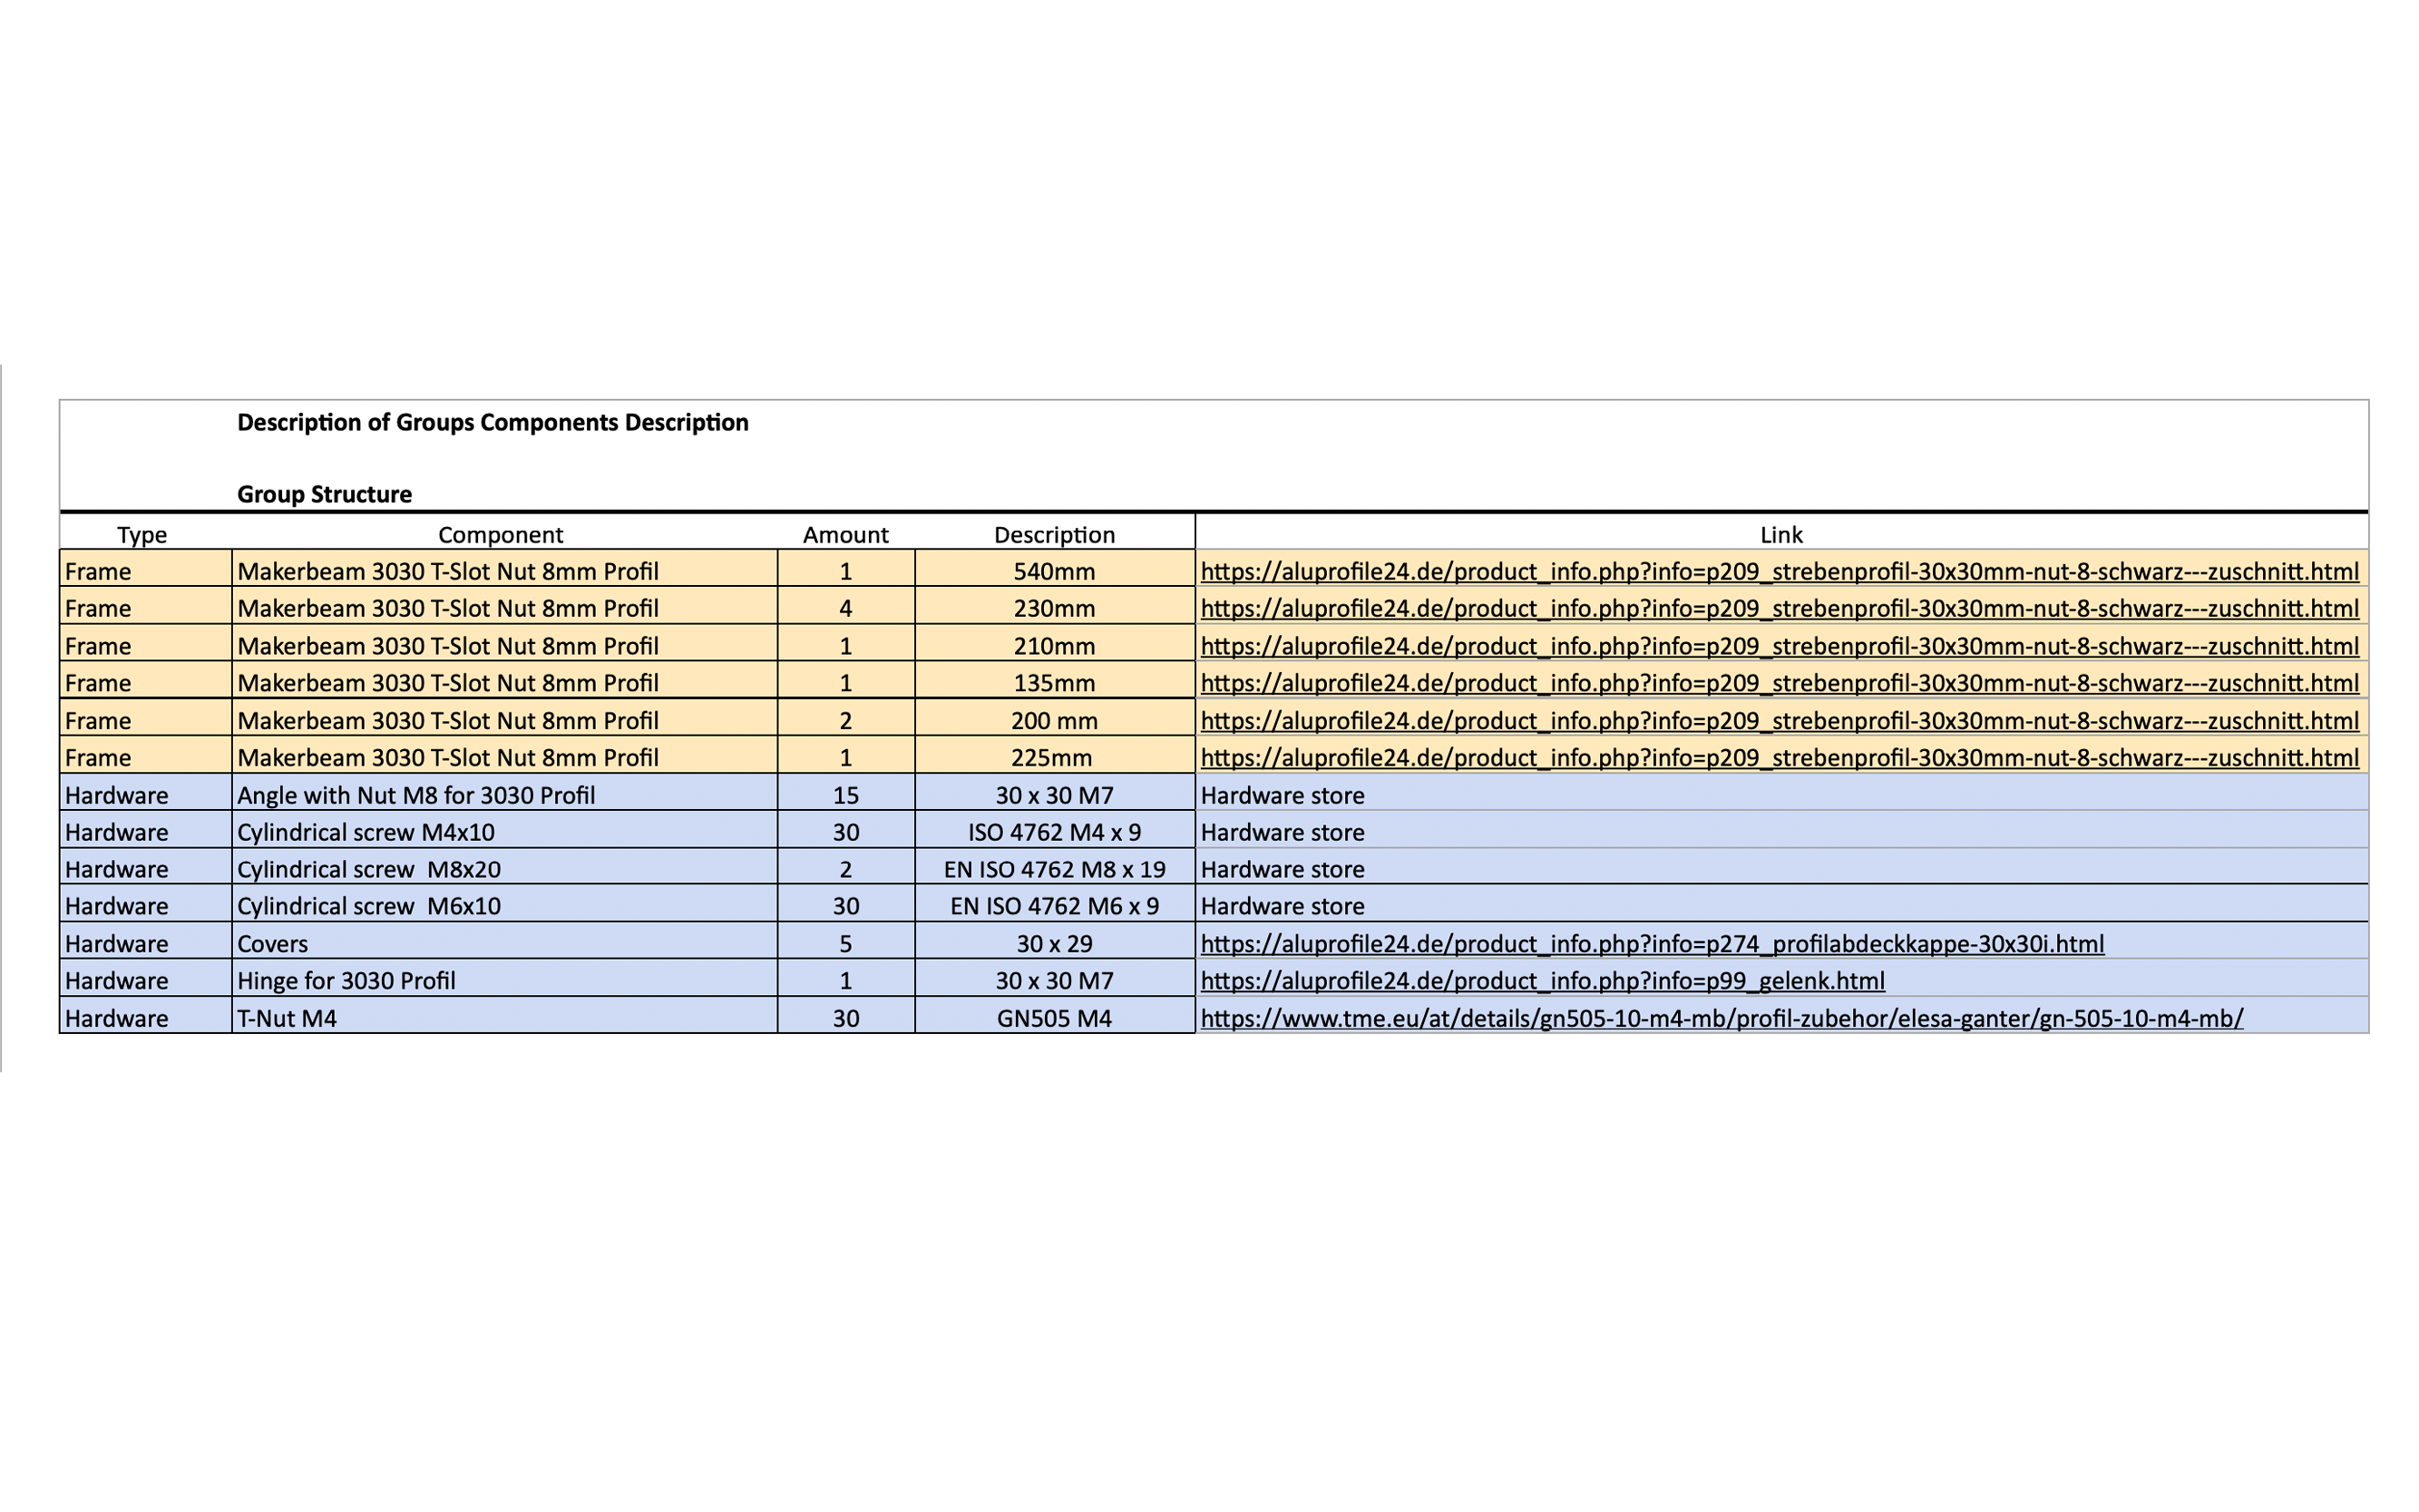
Components
Bulding process
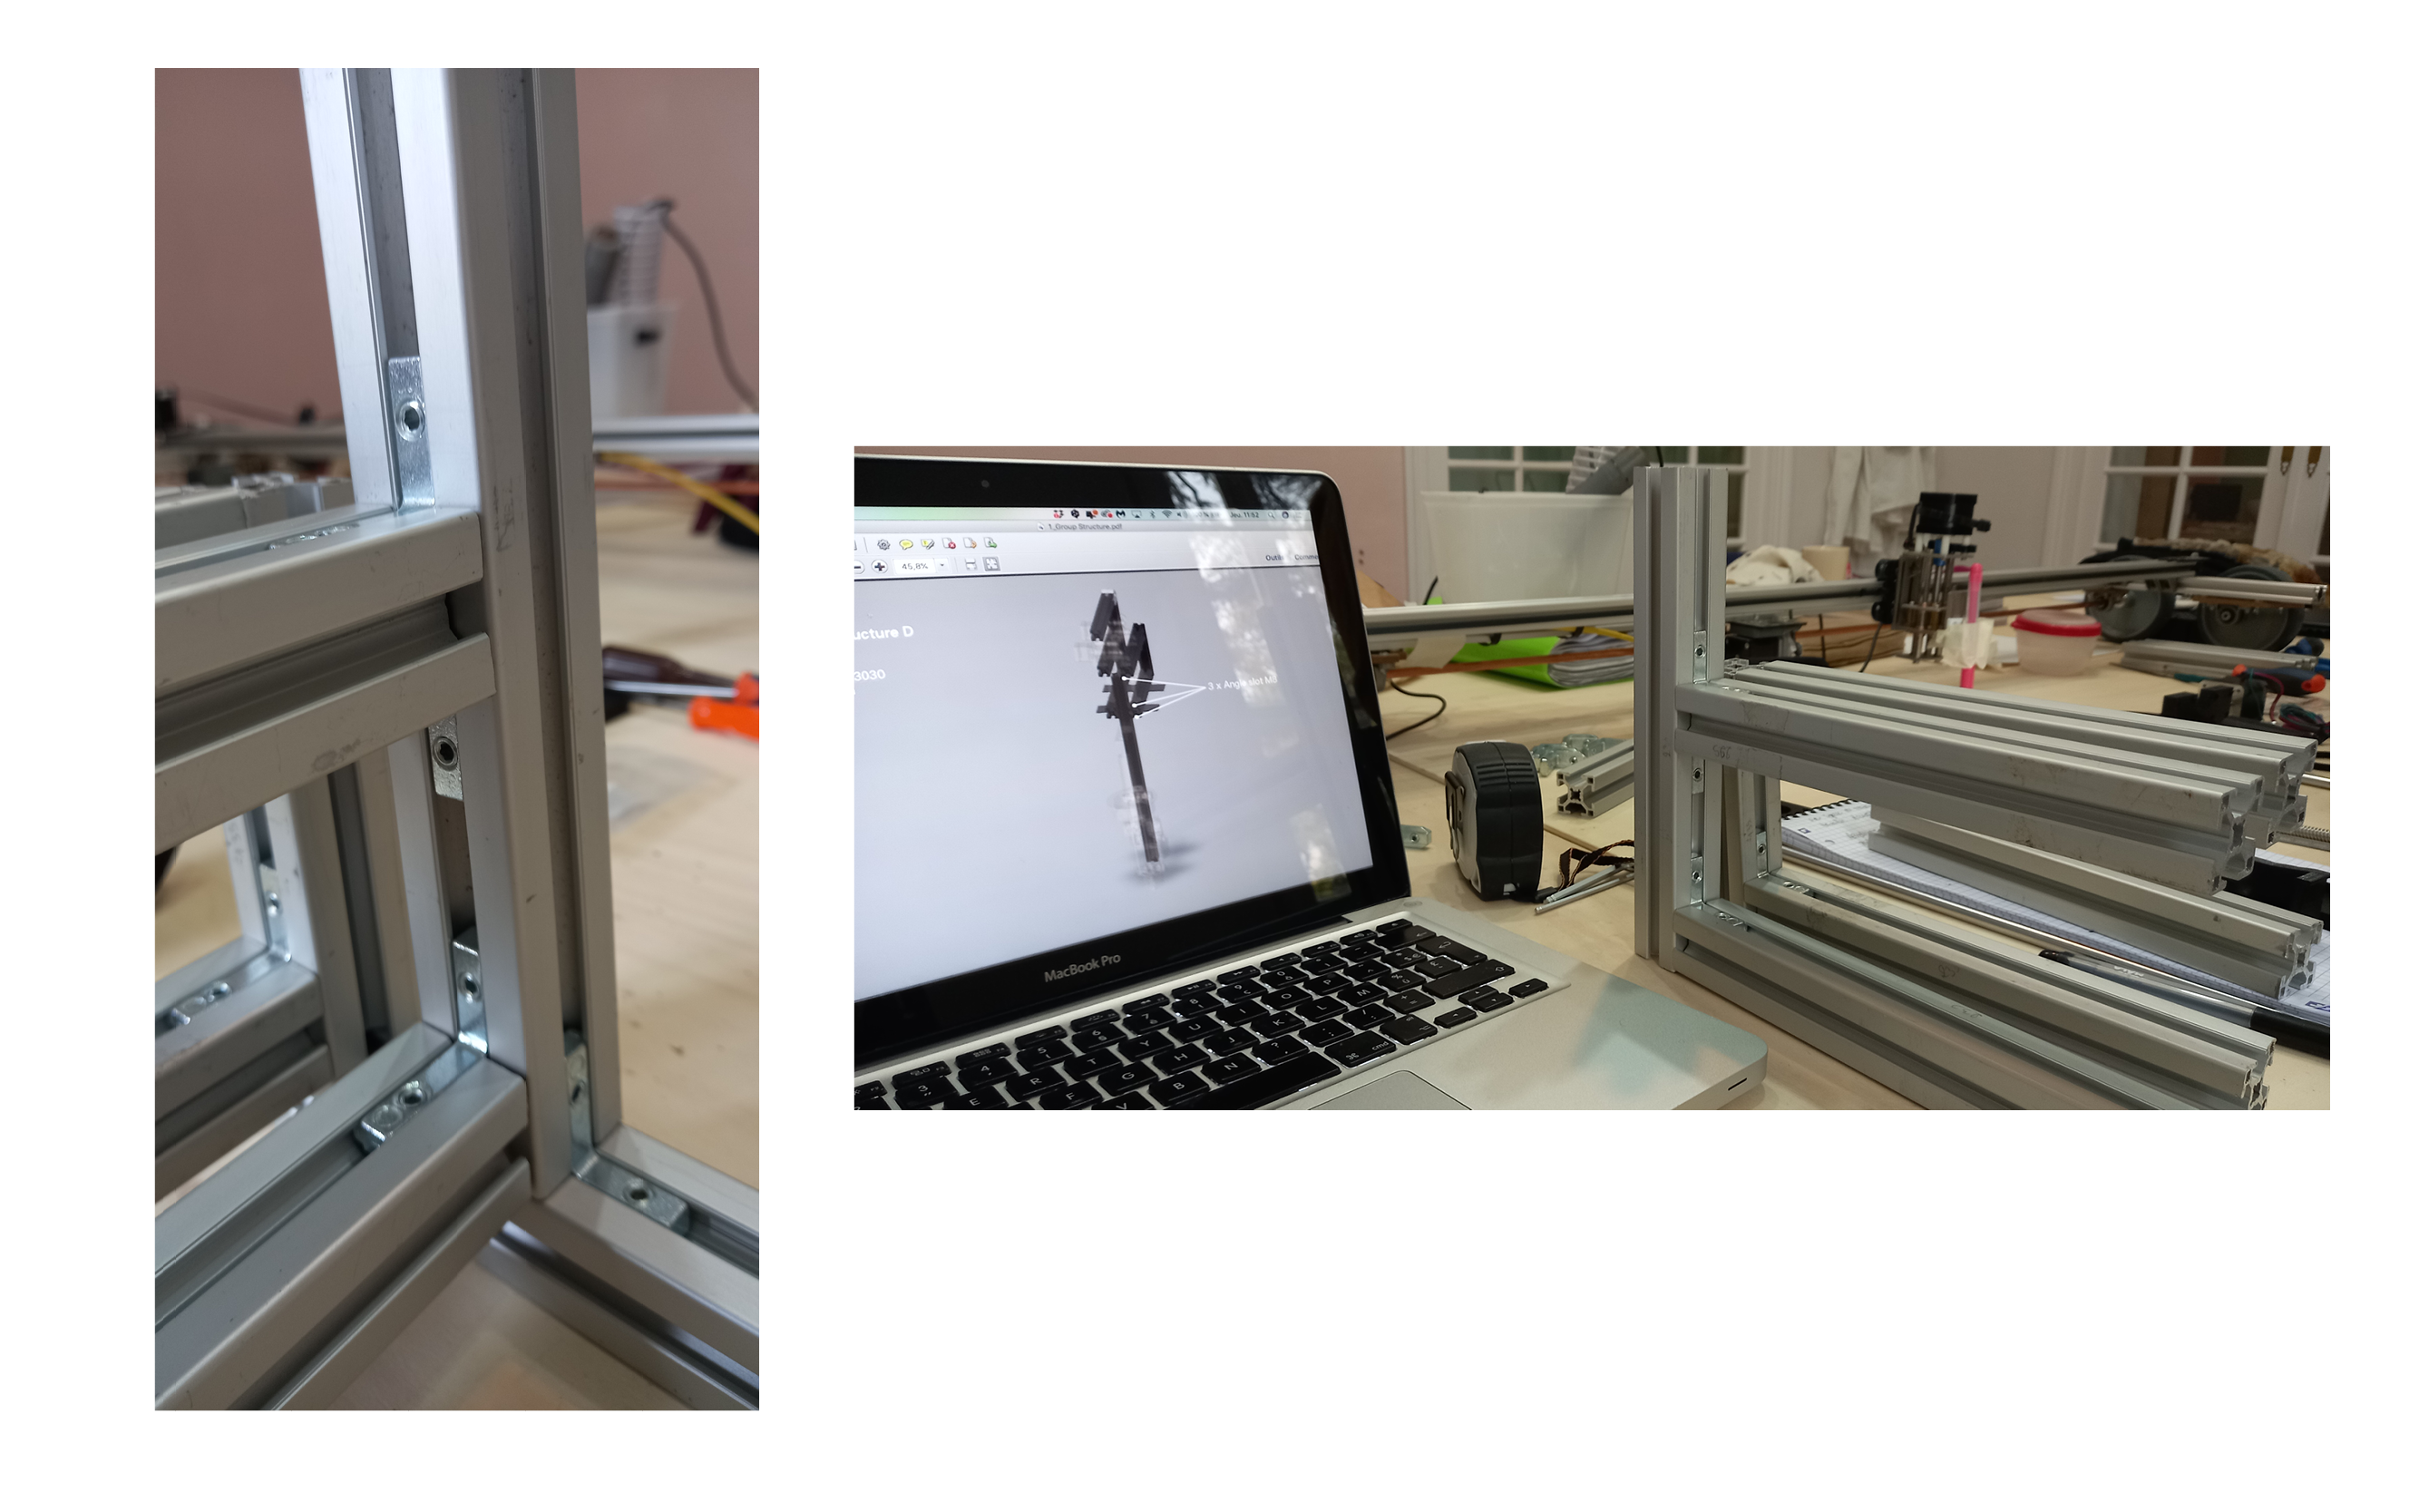
Result
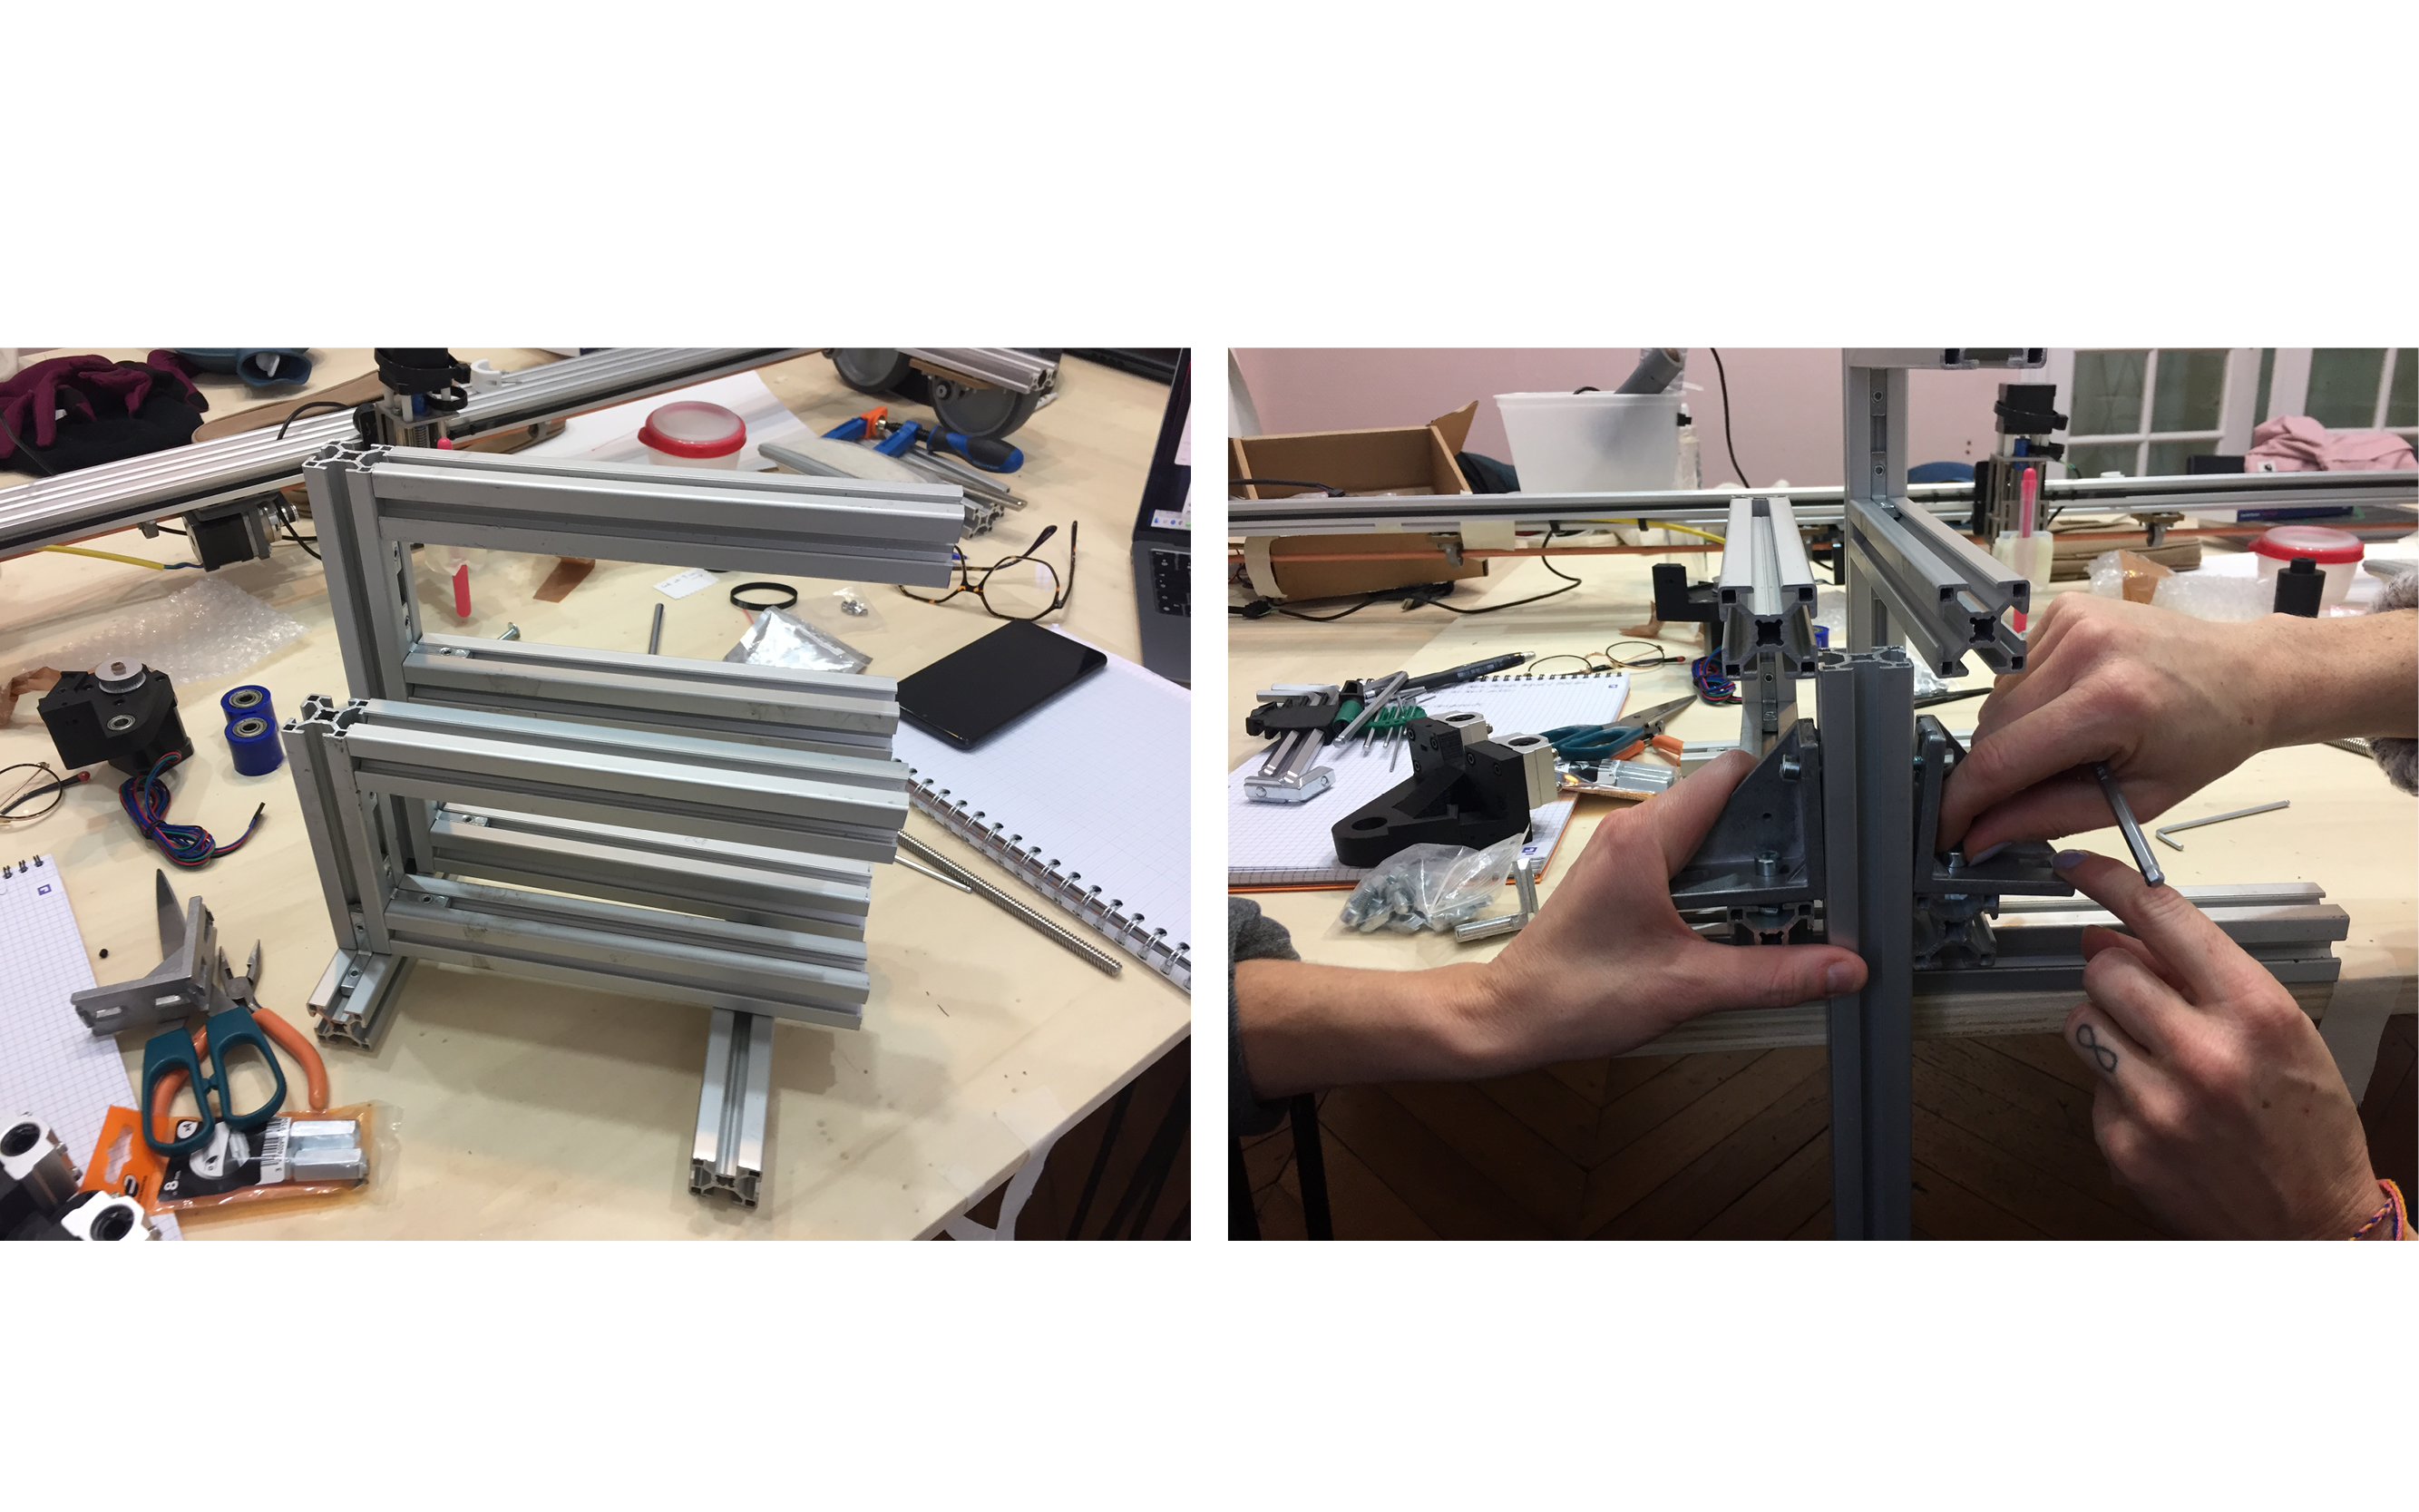
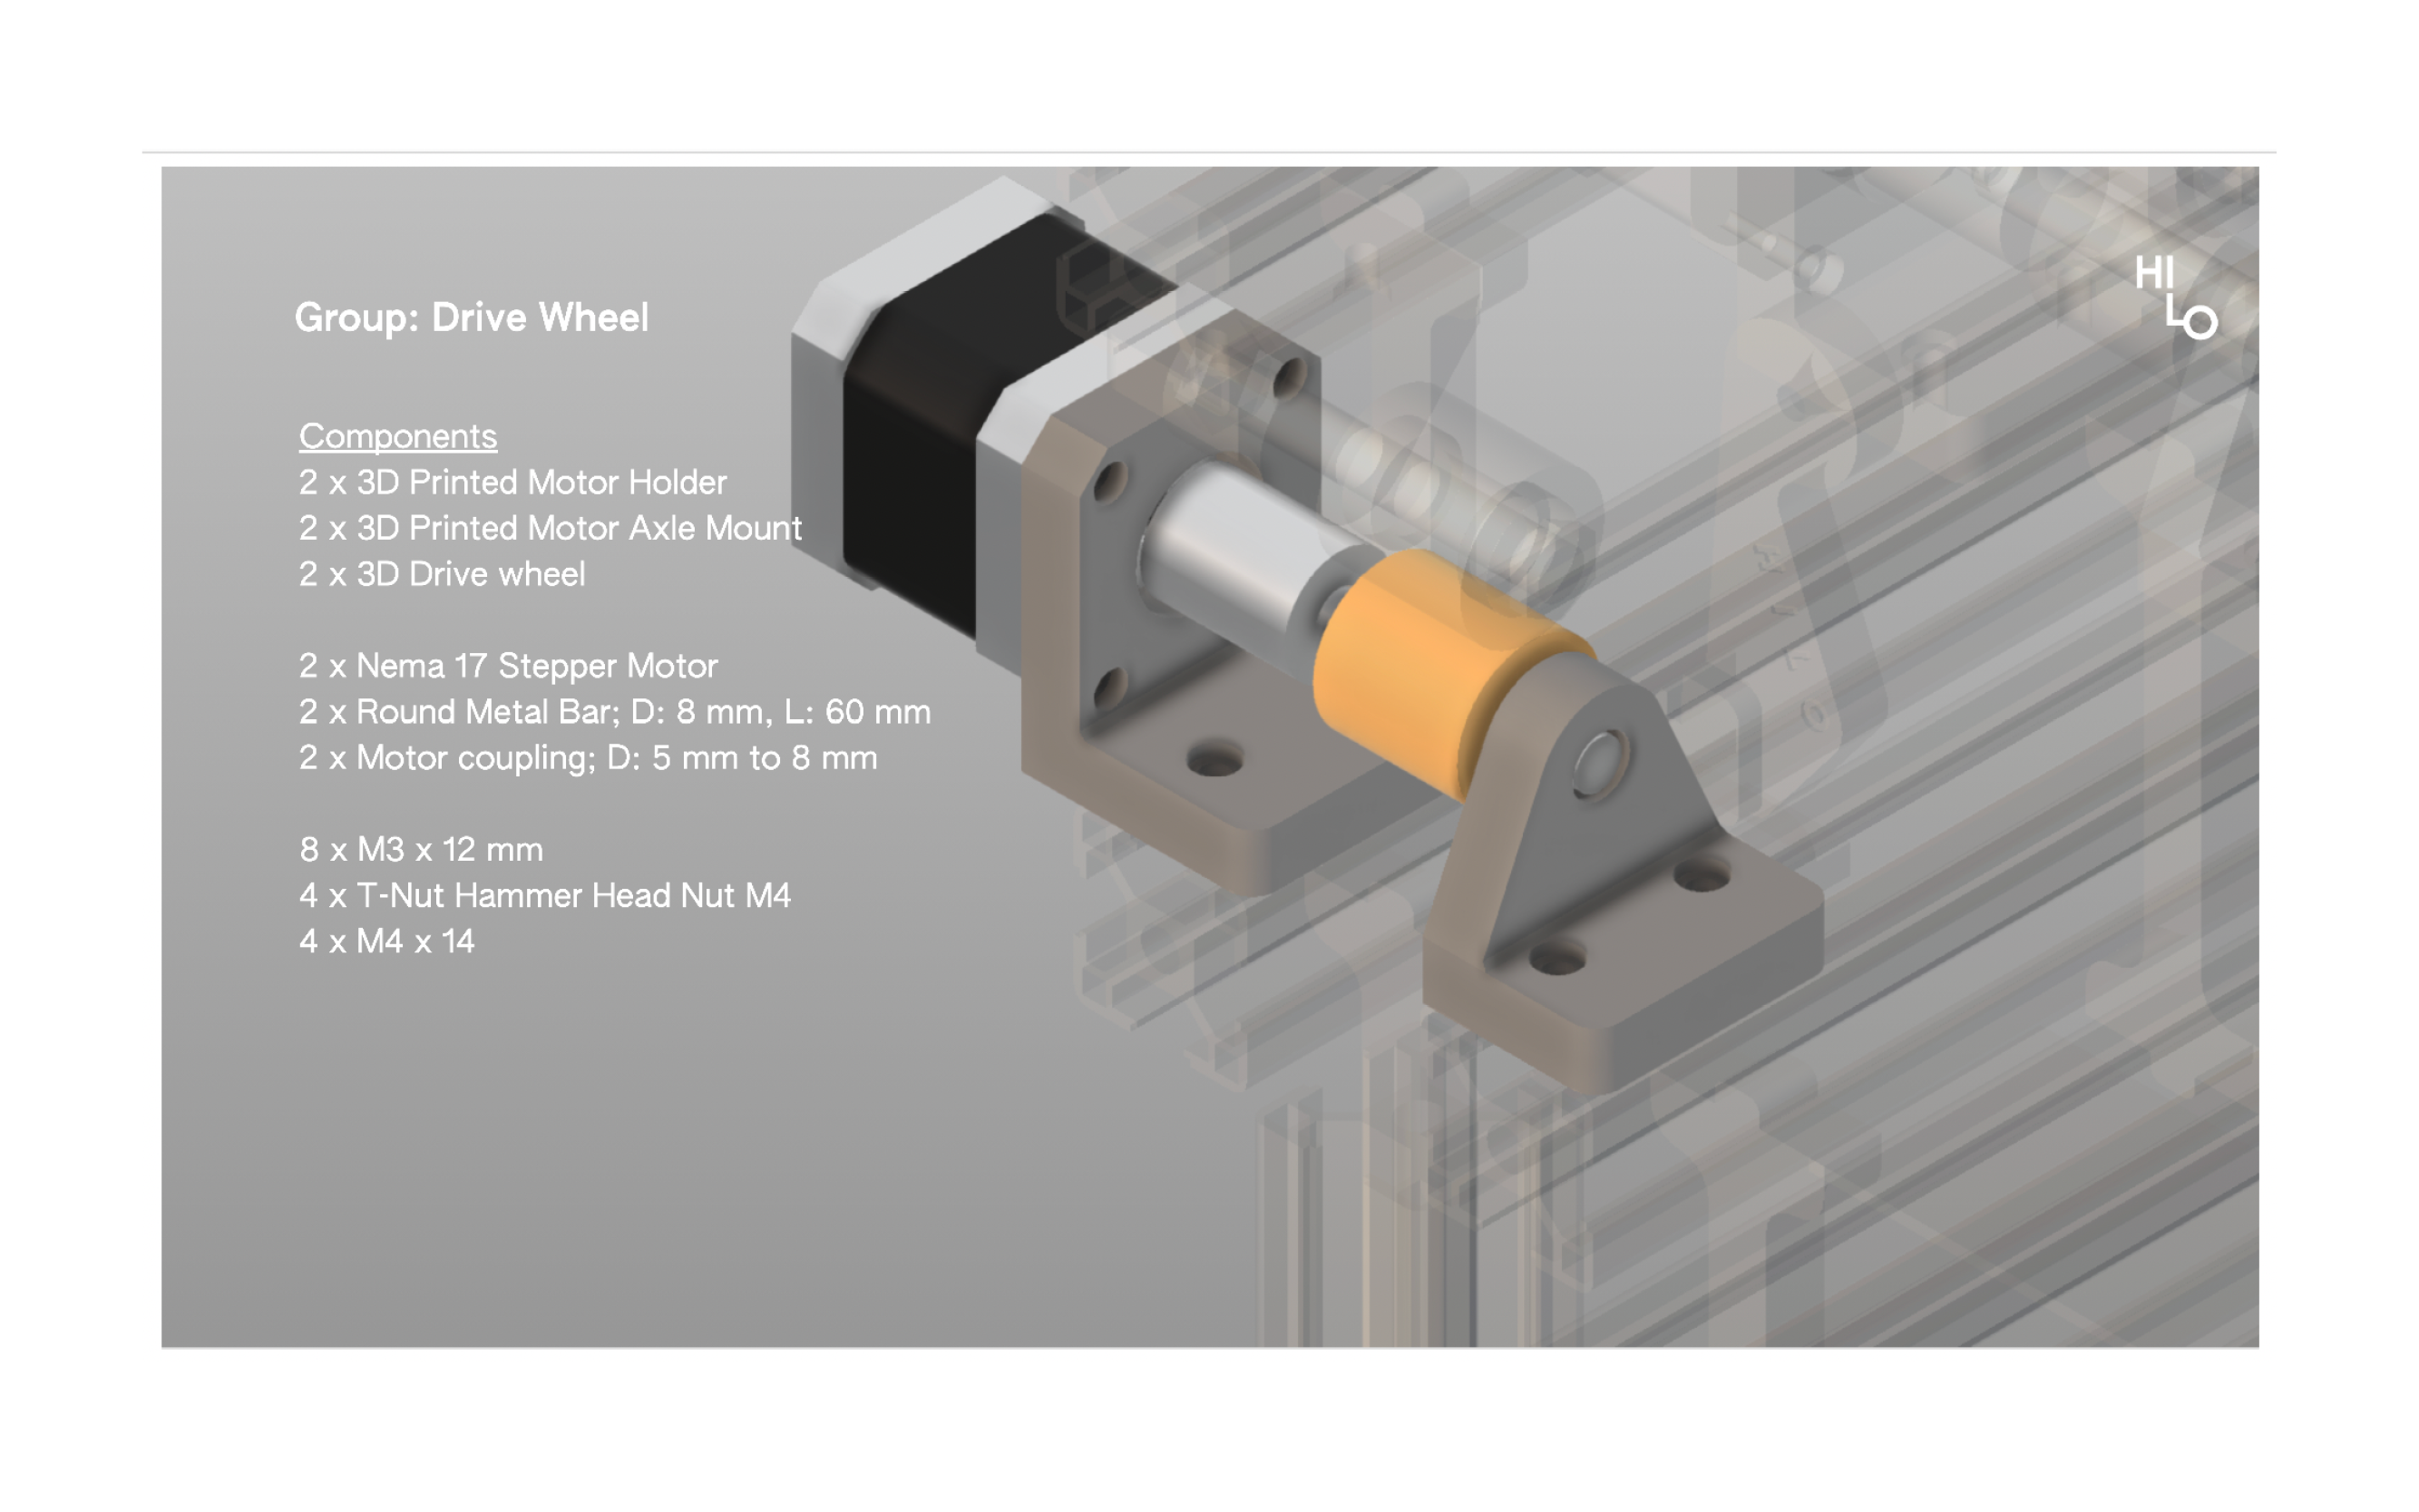
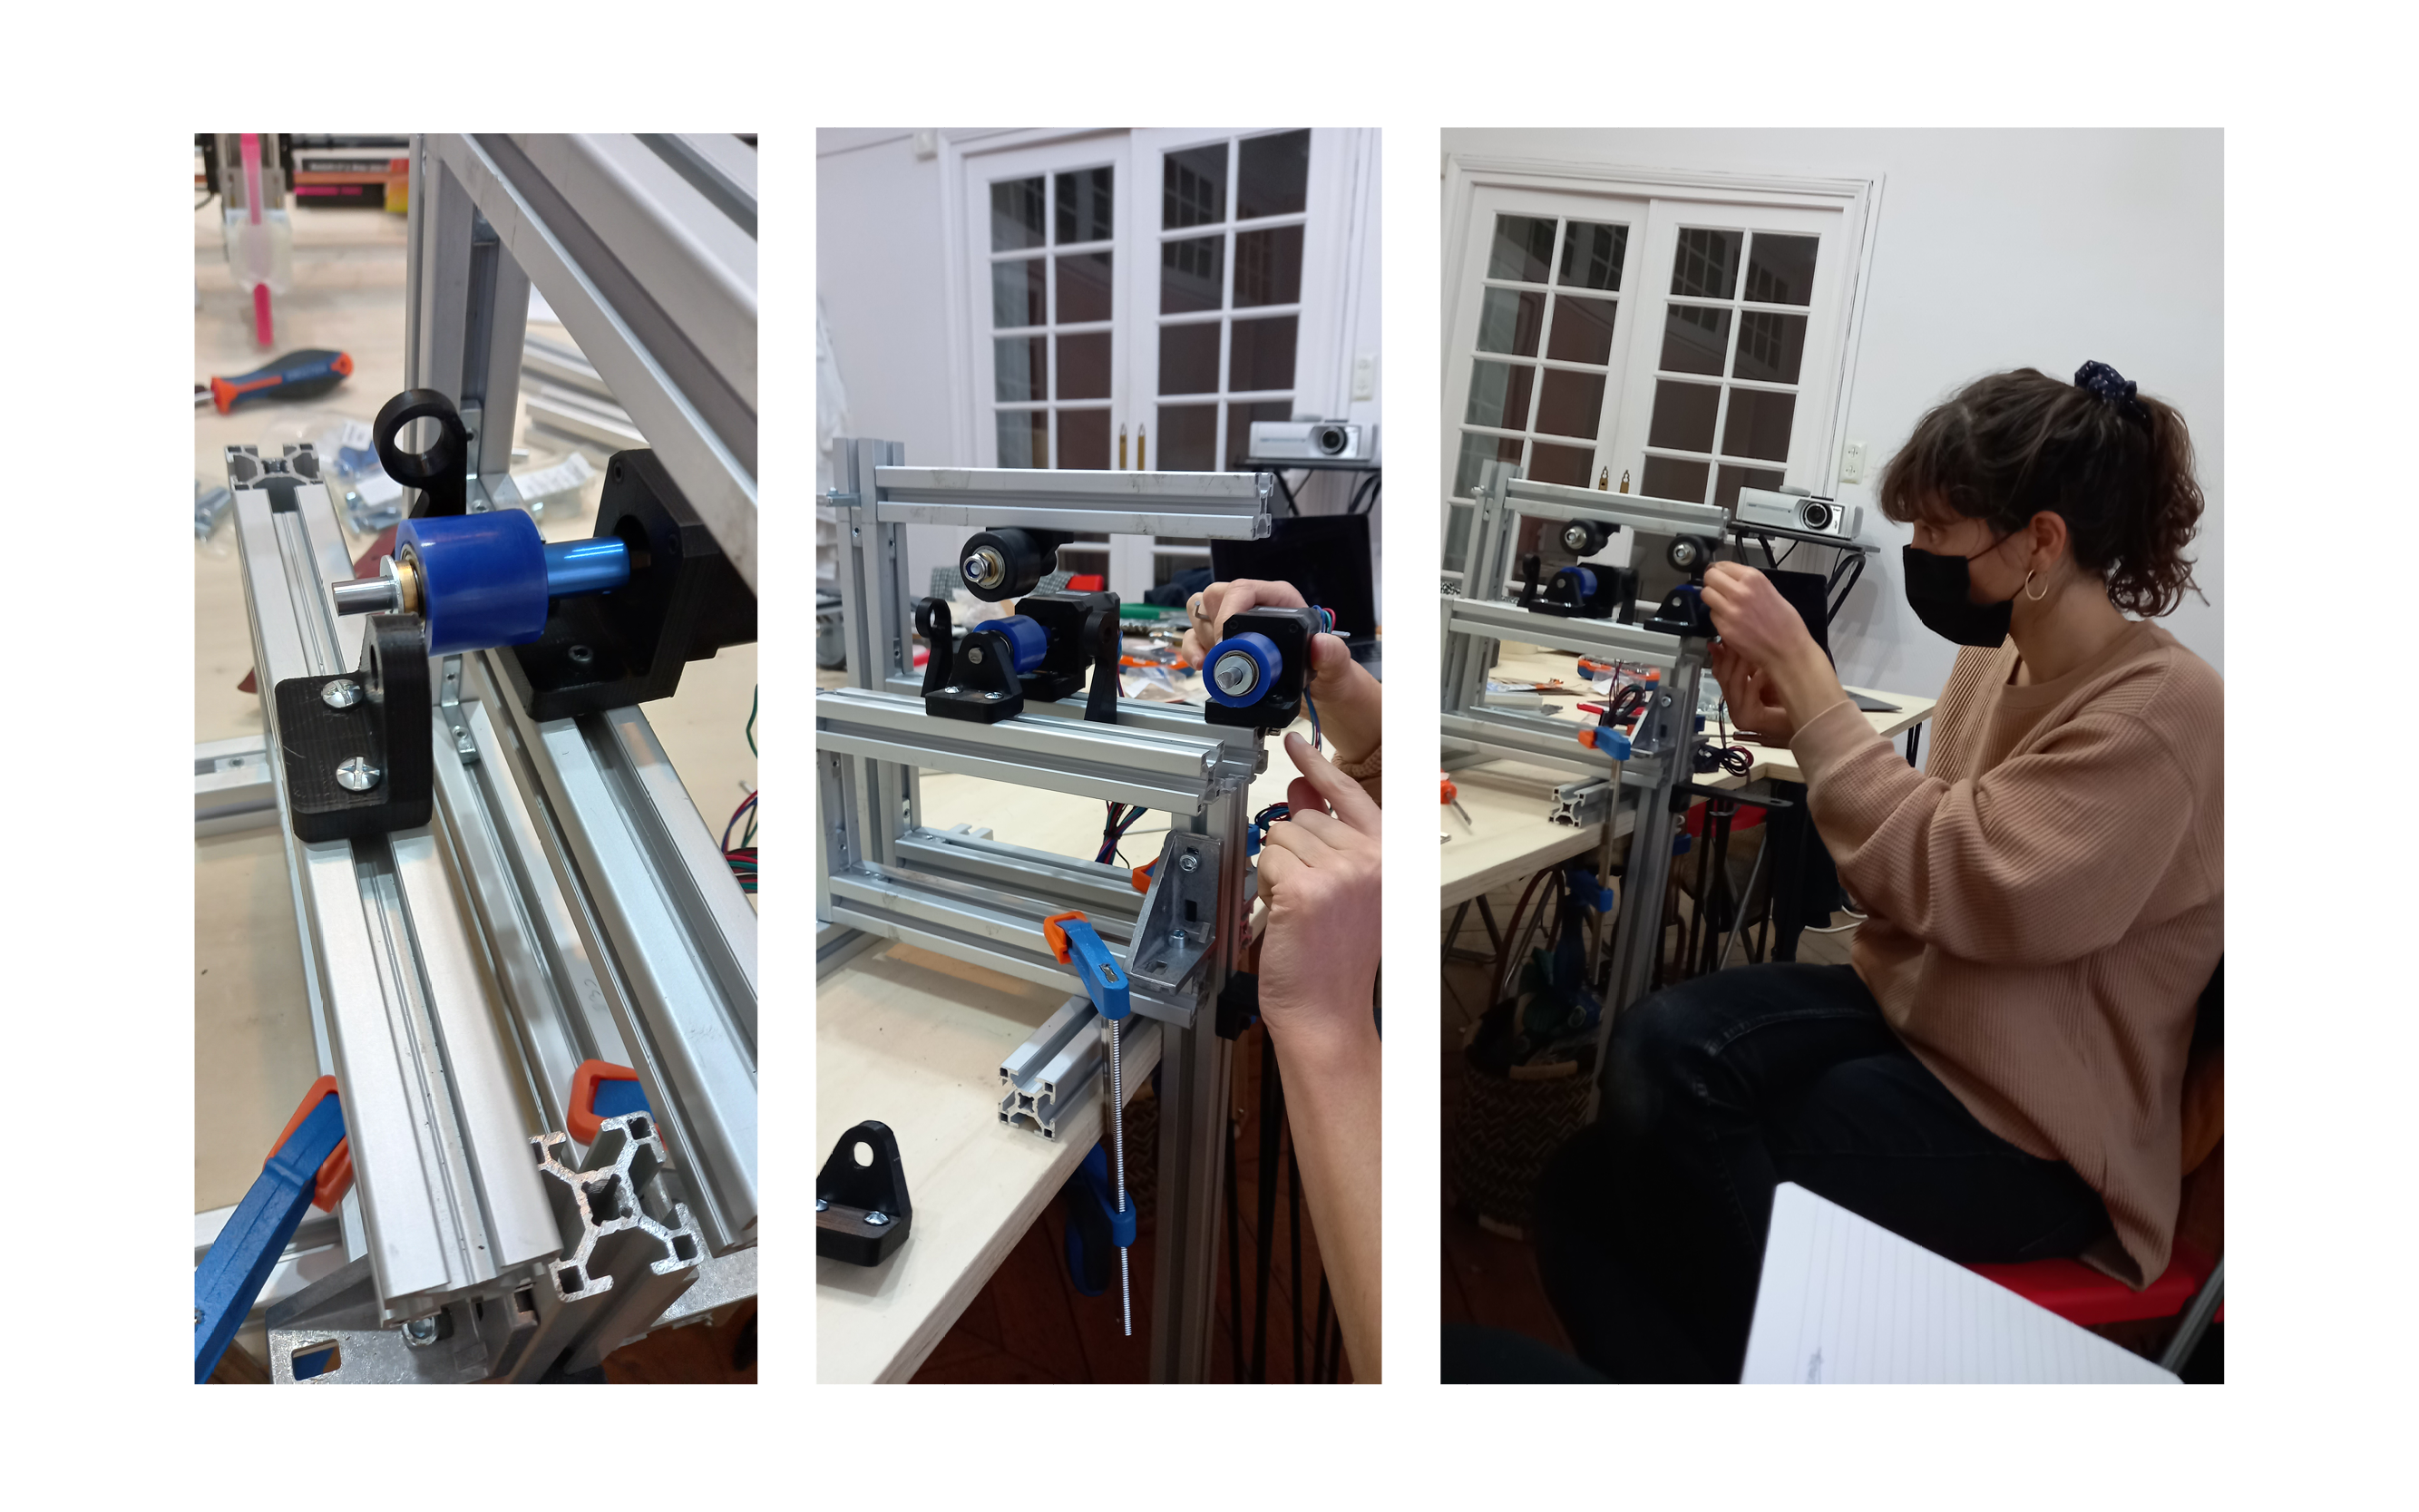
2 | Drive wheels
In this step, we built the bottom wheels. The ones that are driven by the motors and will drive the wheels on top of them, without motors. This allow the thread to be twisted. They are, in the final step, slided on the middle of the structure.
In this step we used a plain rod/round metal bar(cut to the size) that is attached to the motor's rod using the blue part on the two sides in the picture)
Then the wheels need to be glued.
TIPS : our wheels are not well aligned aligne them so they are exactly the same before glueing.
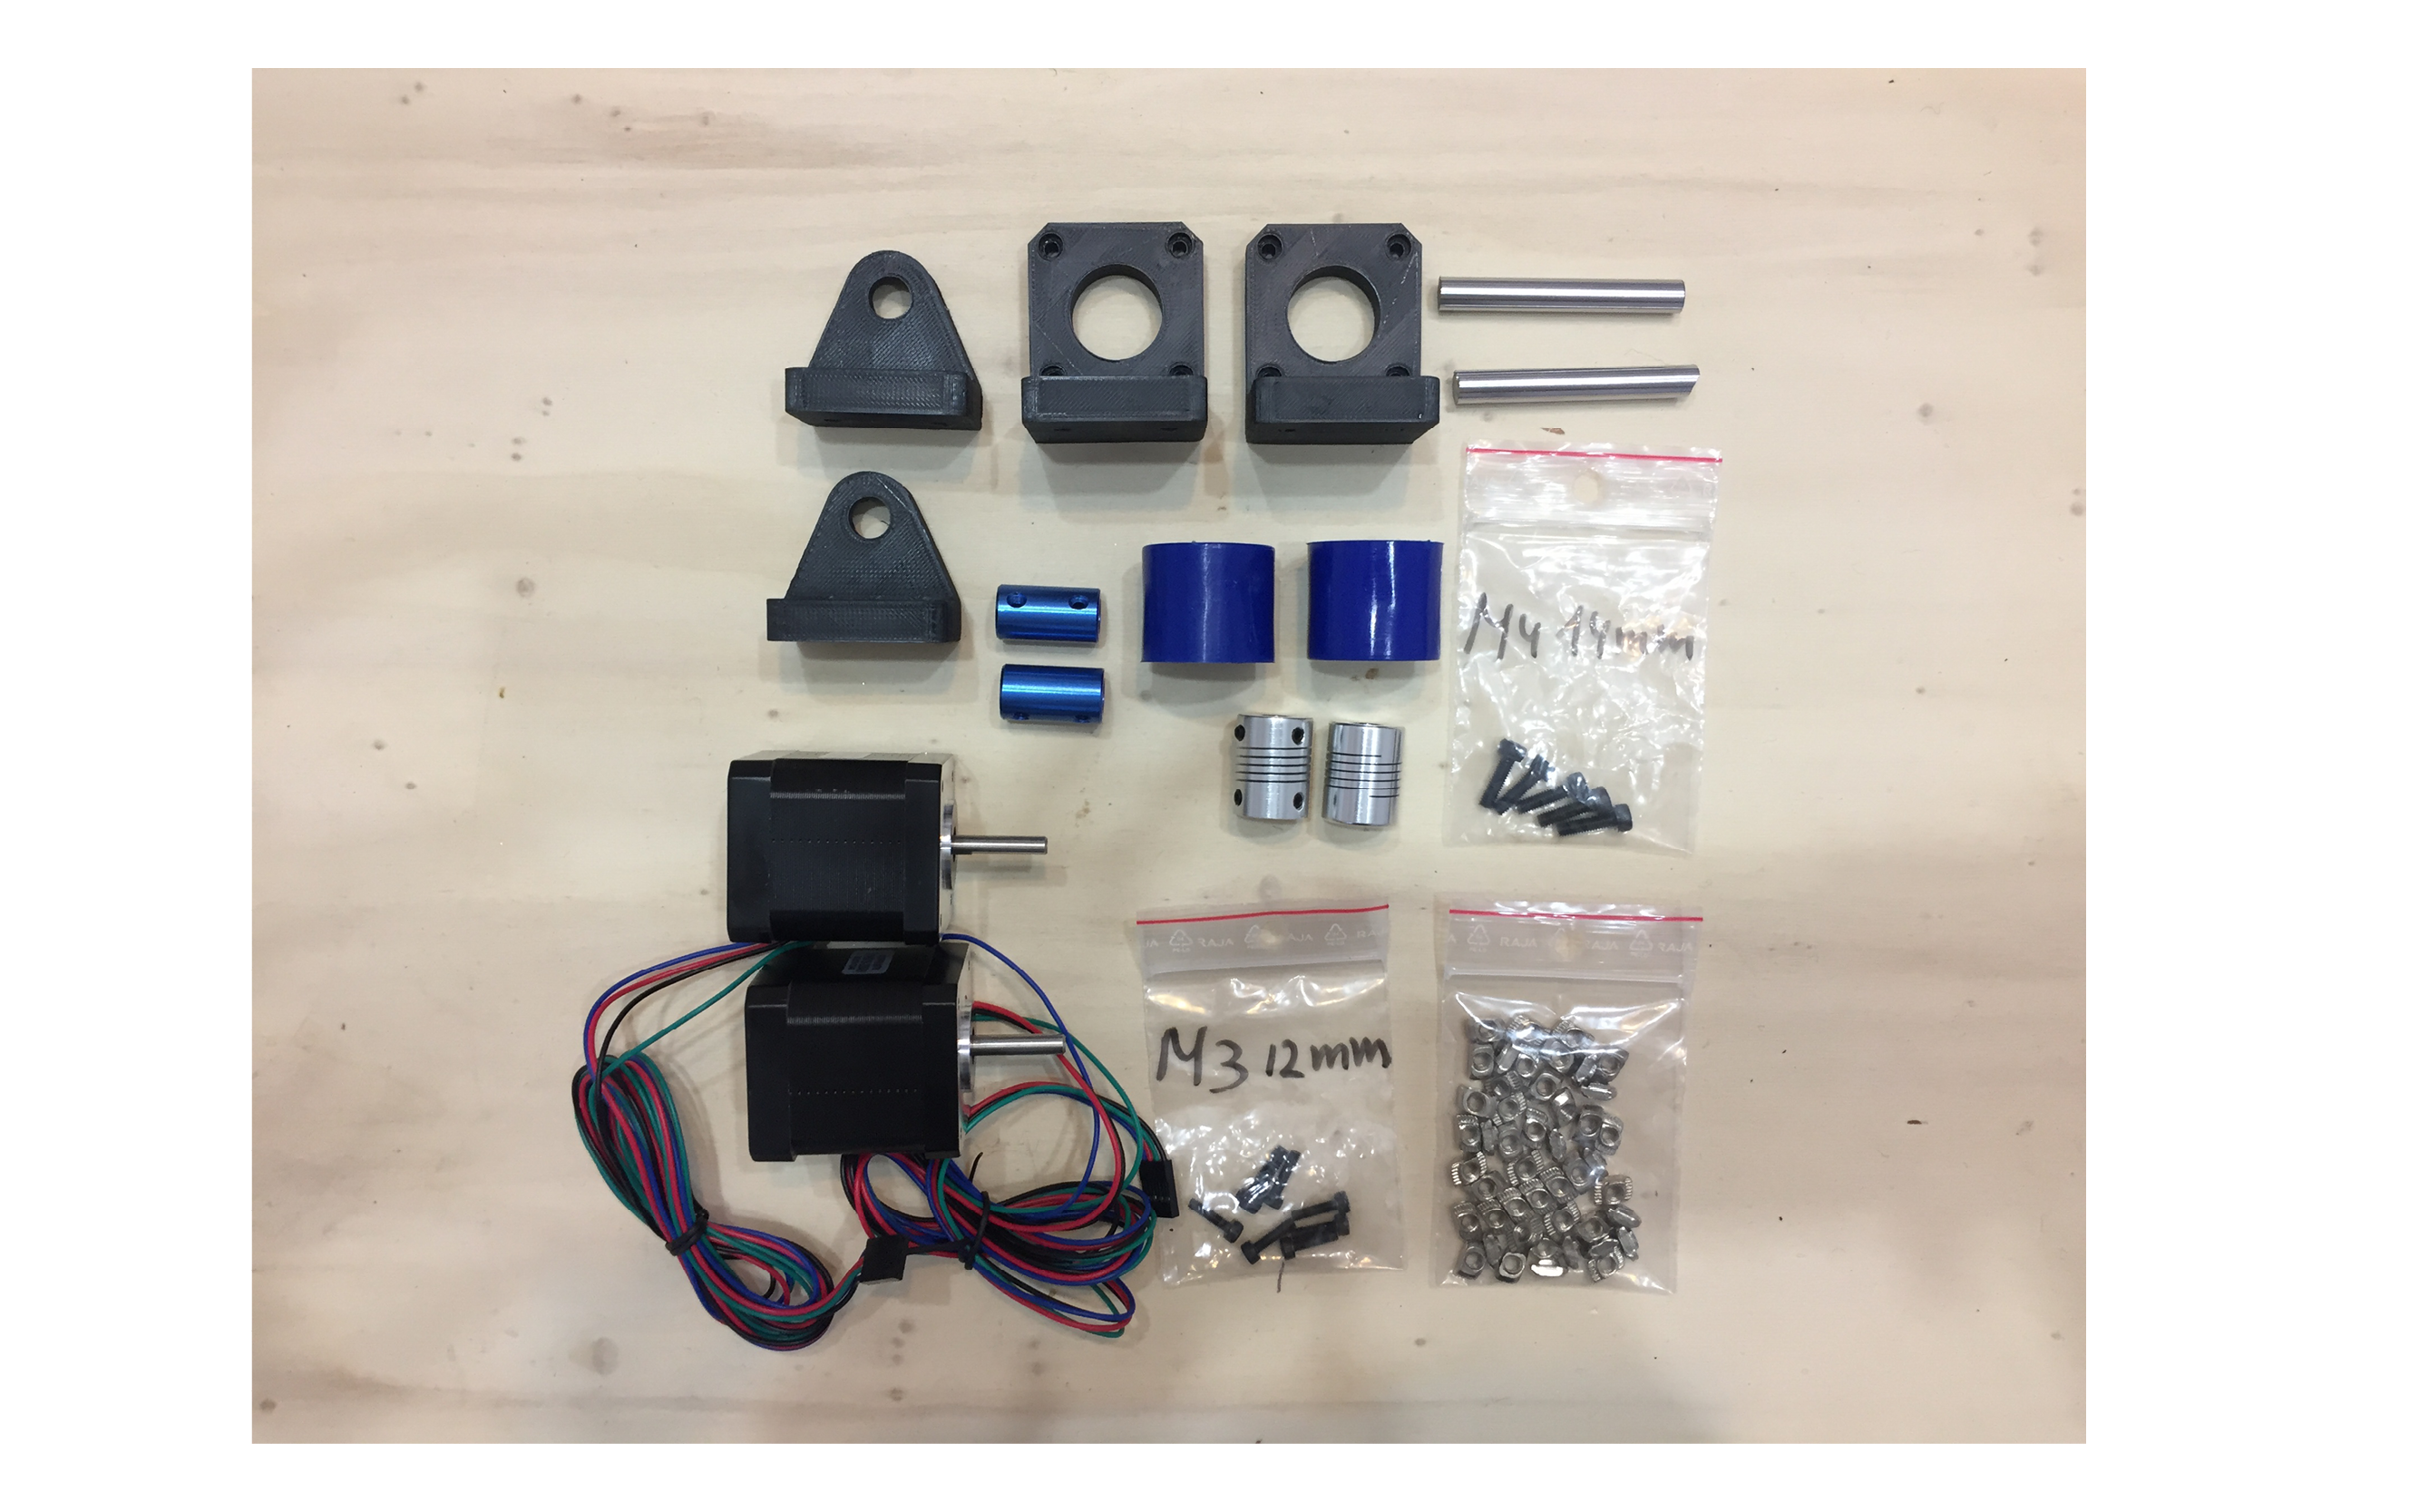
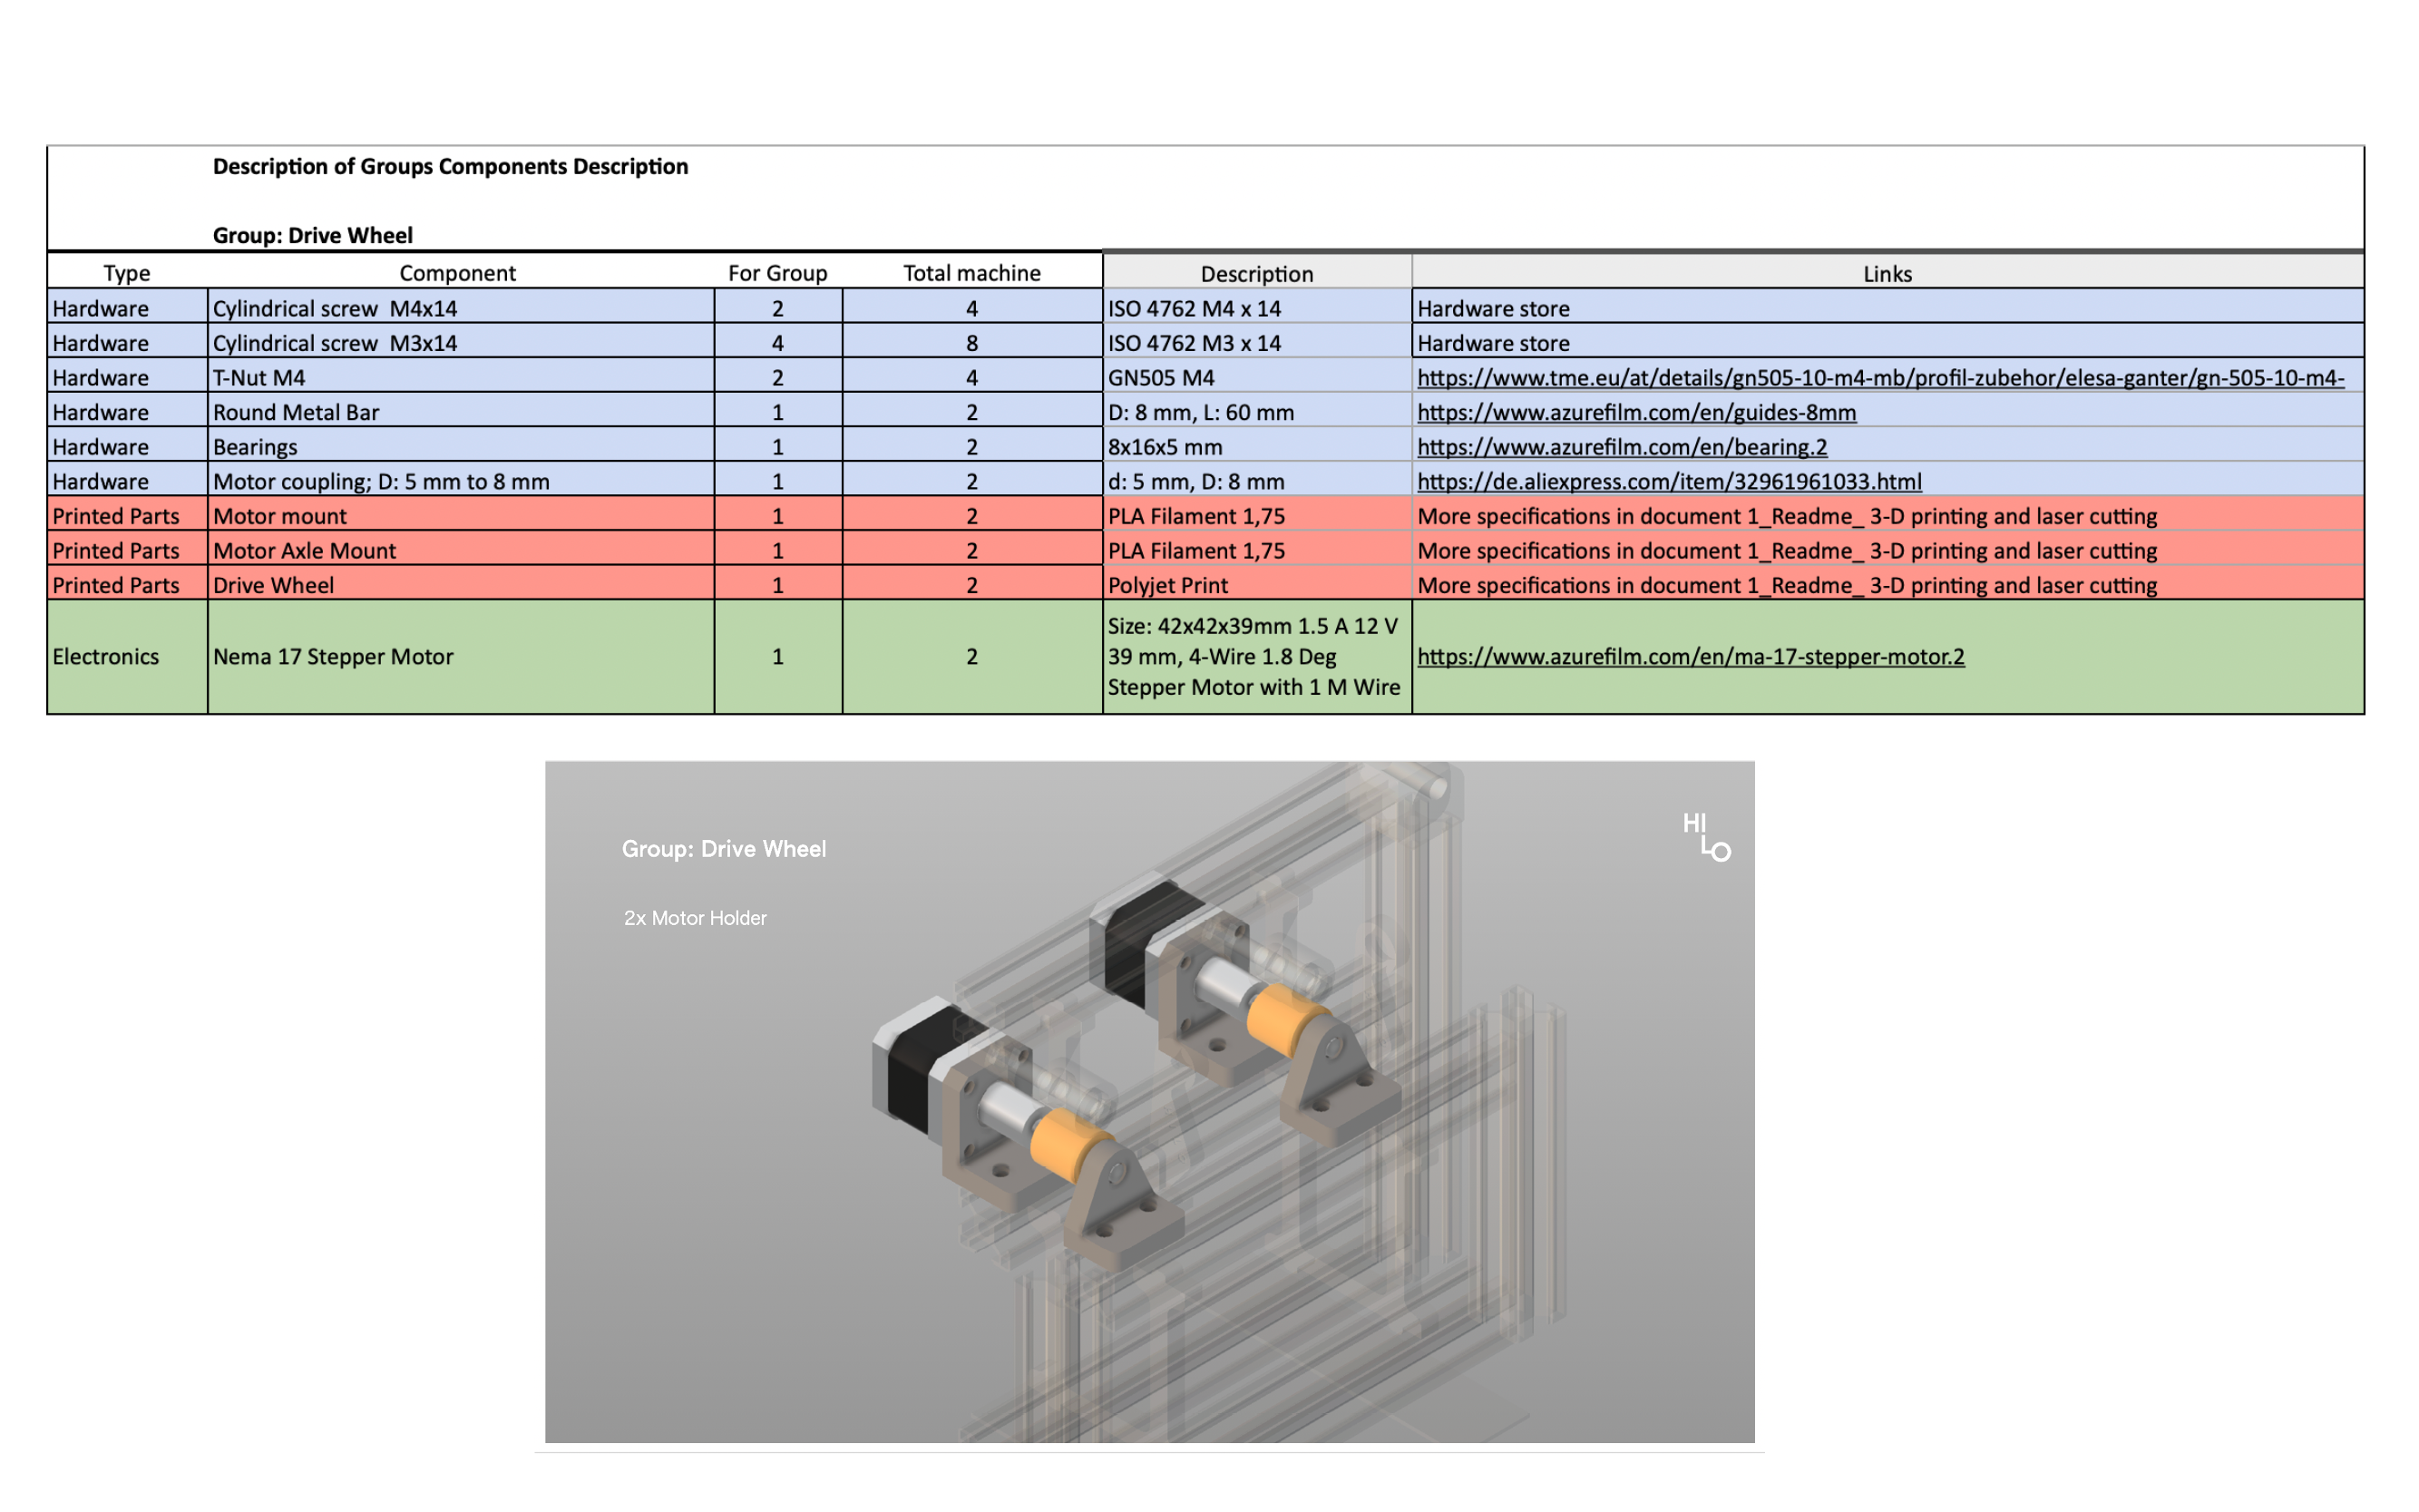
Components
Bulding process

Result

3 | Trailing wheels
In this step, we built the top wheels. The ones that are driven by the bottom wheels. They will be fixed to the top makerbeam.
Carefull
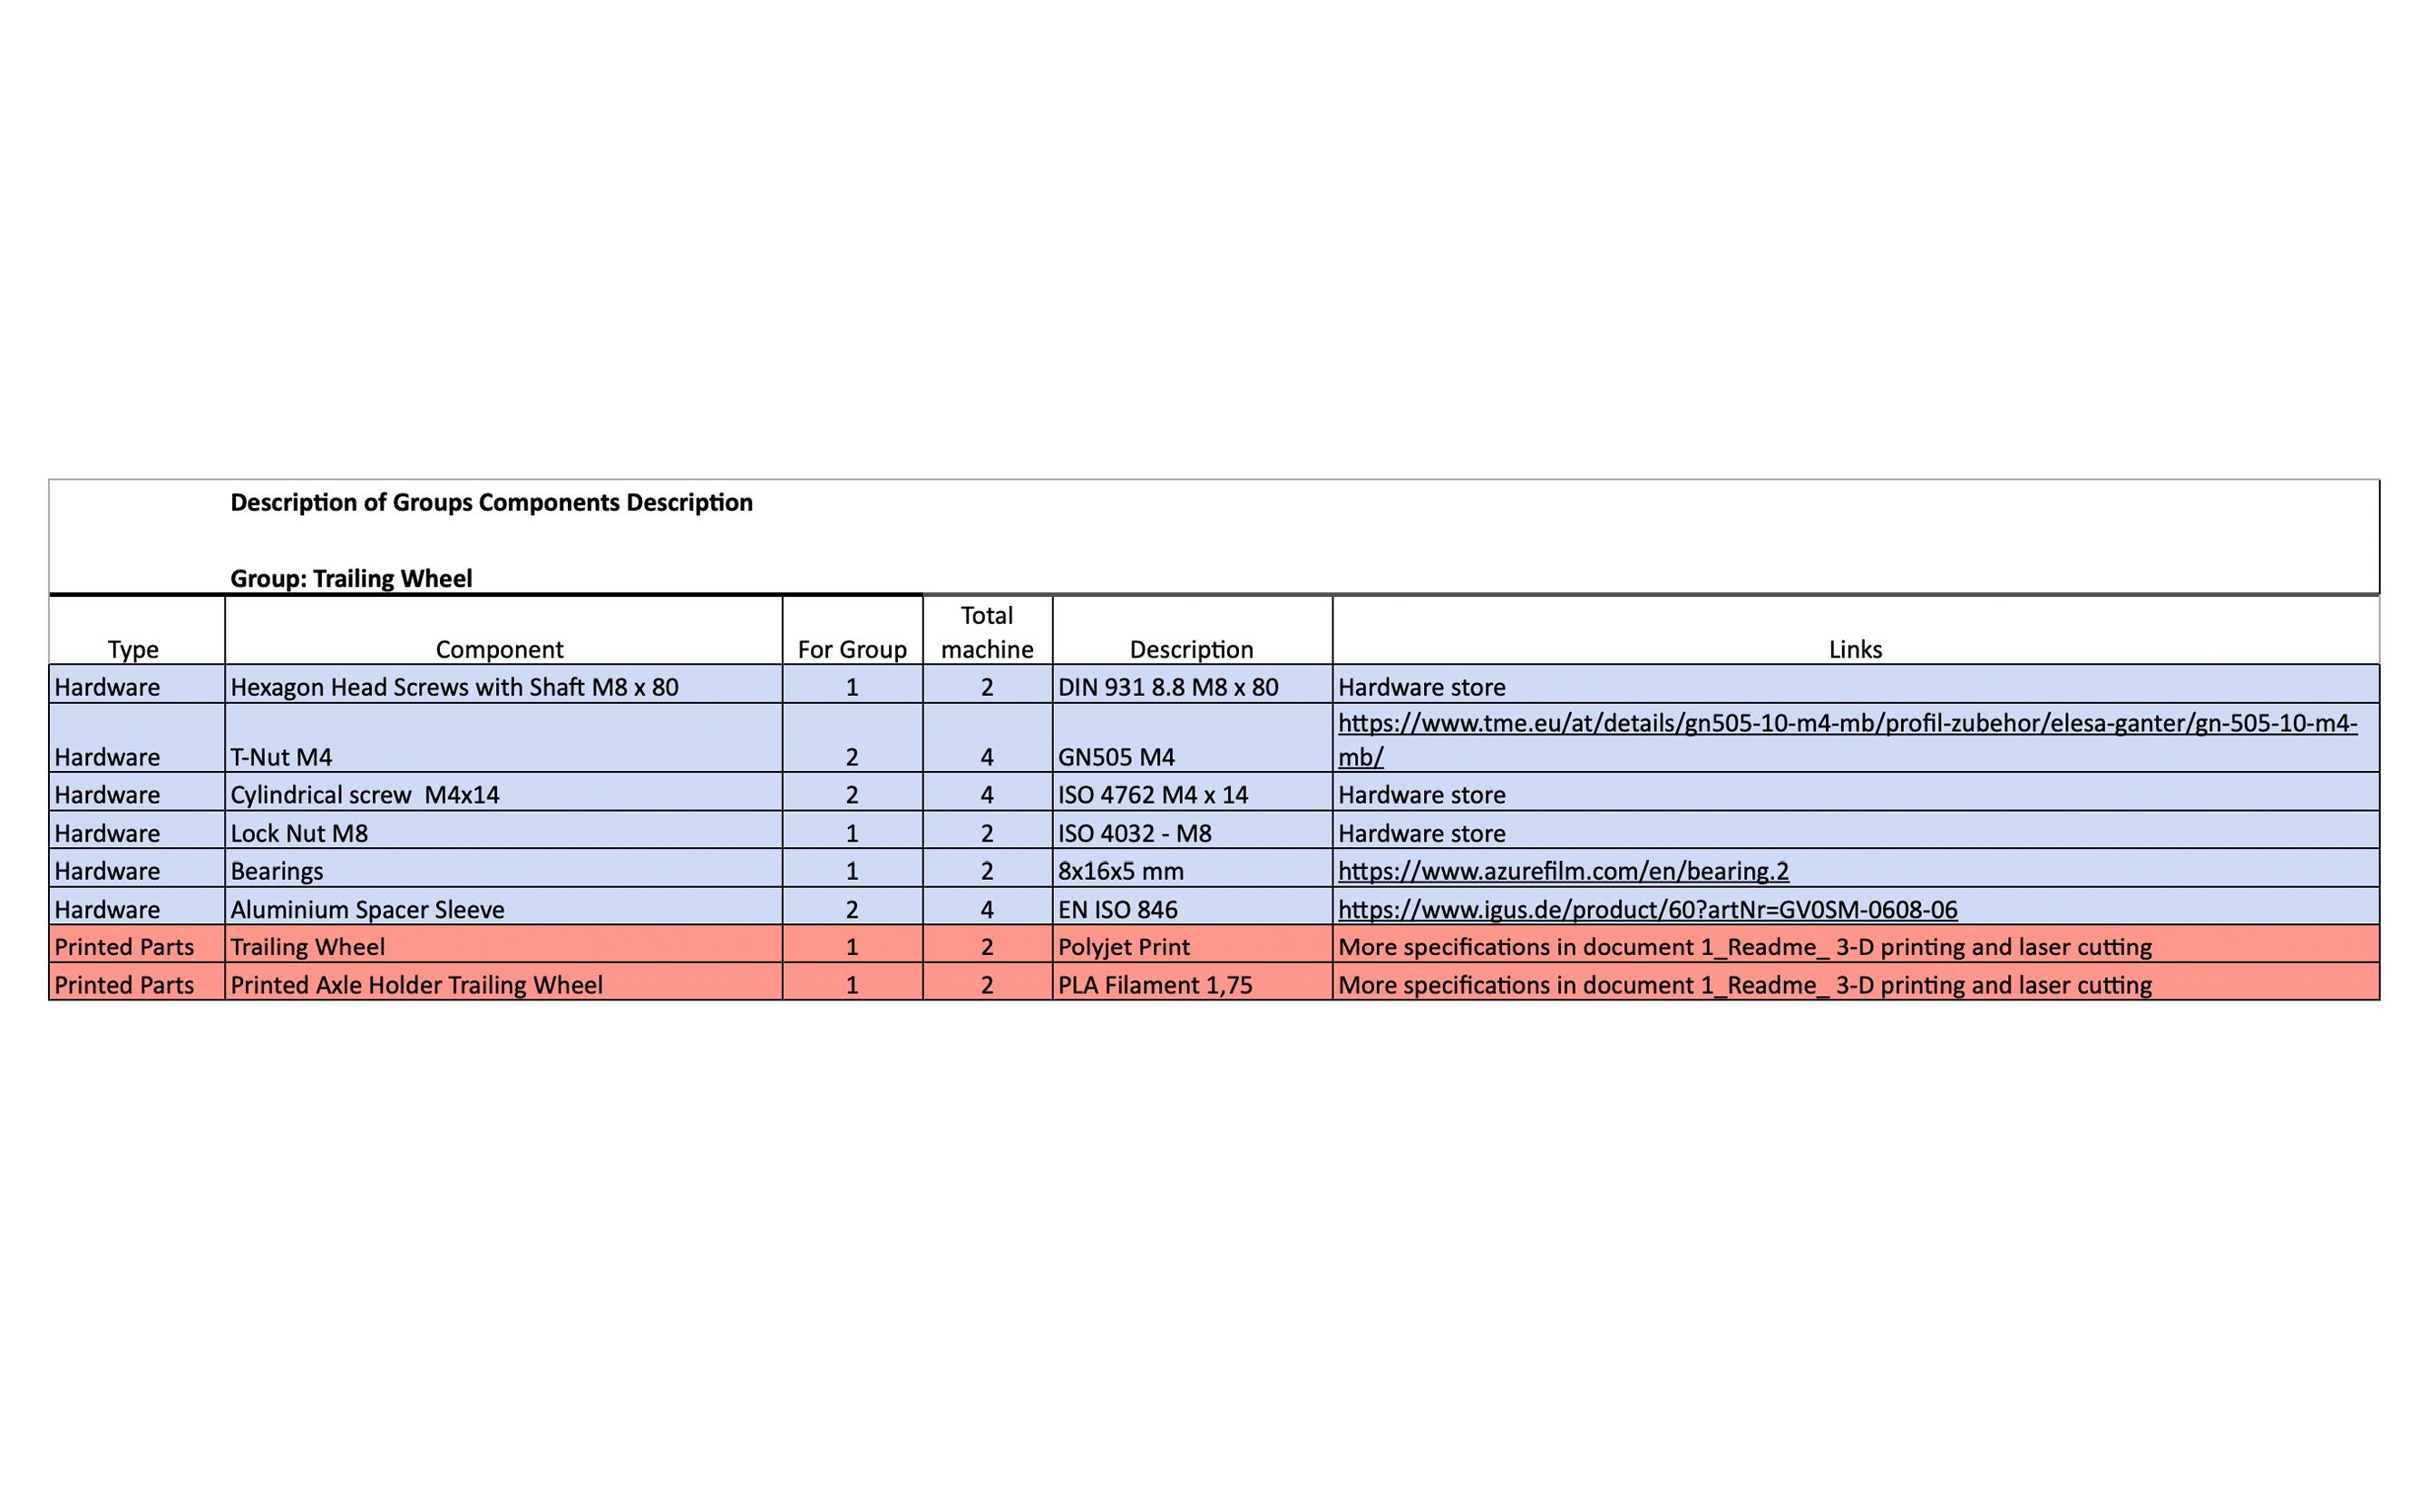
- At the beginning we didn’t have the correct spacer, so we confused the spacer with the bearings, so we had later on (when needing the bearings on another bulding step) to disassemble the wheels and reassemble them again with correct spacers.
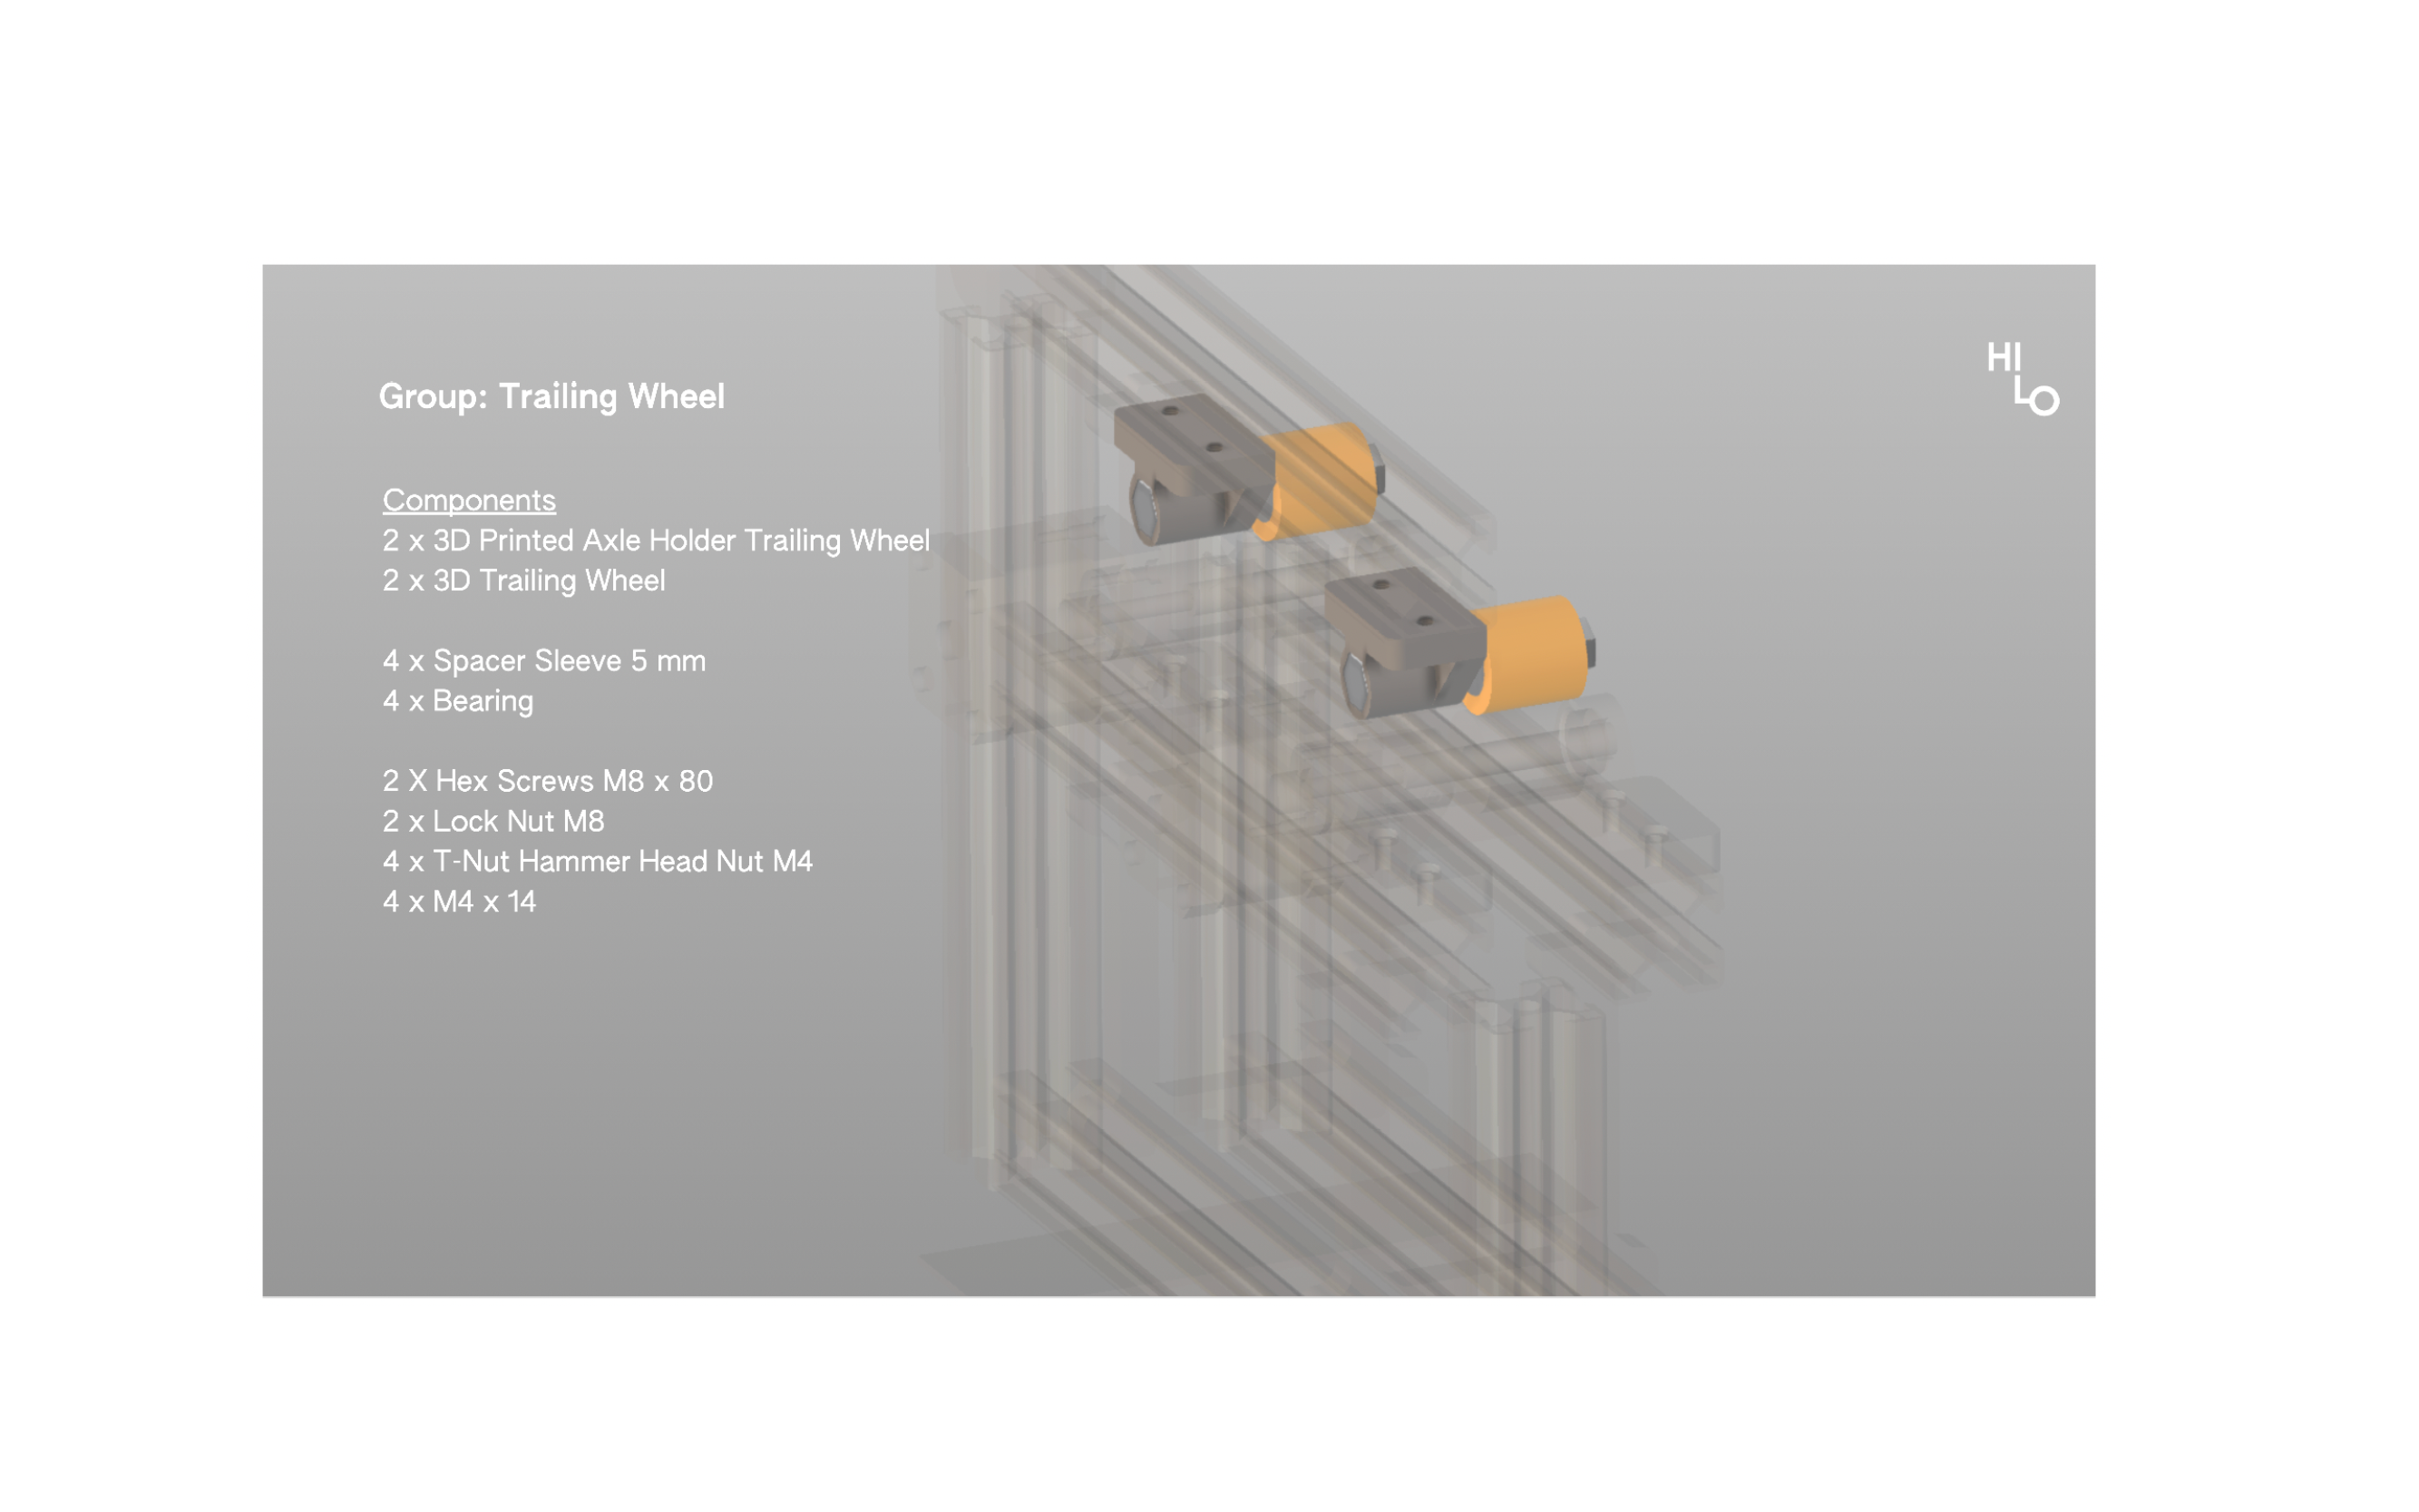
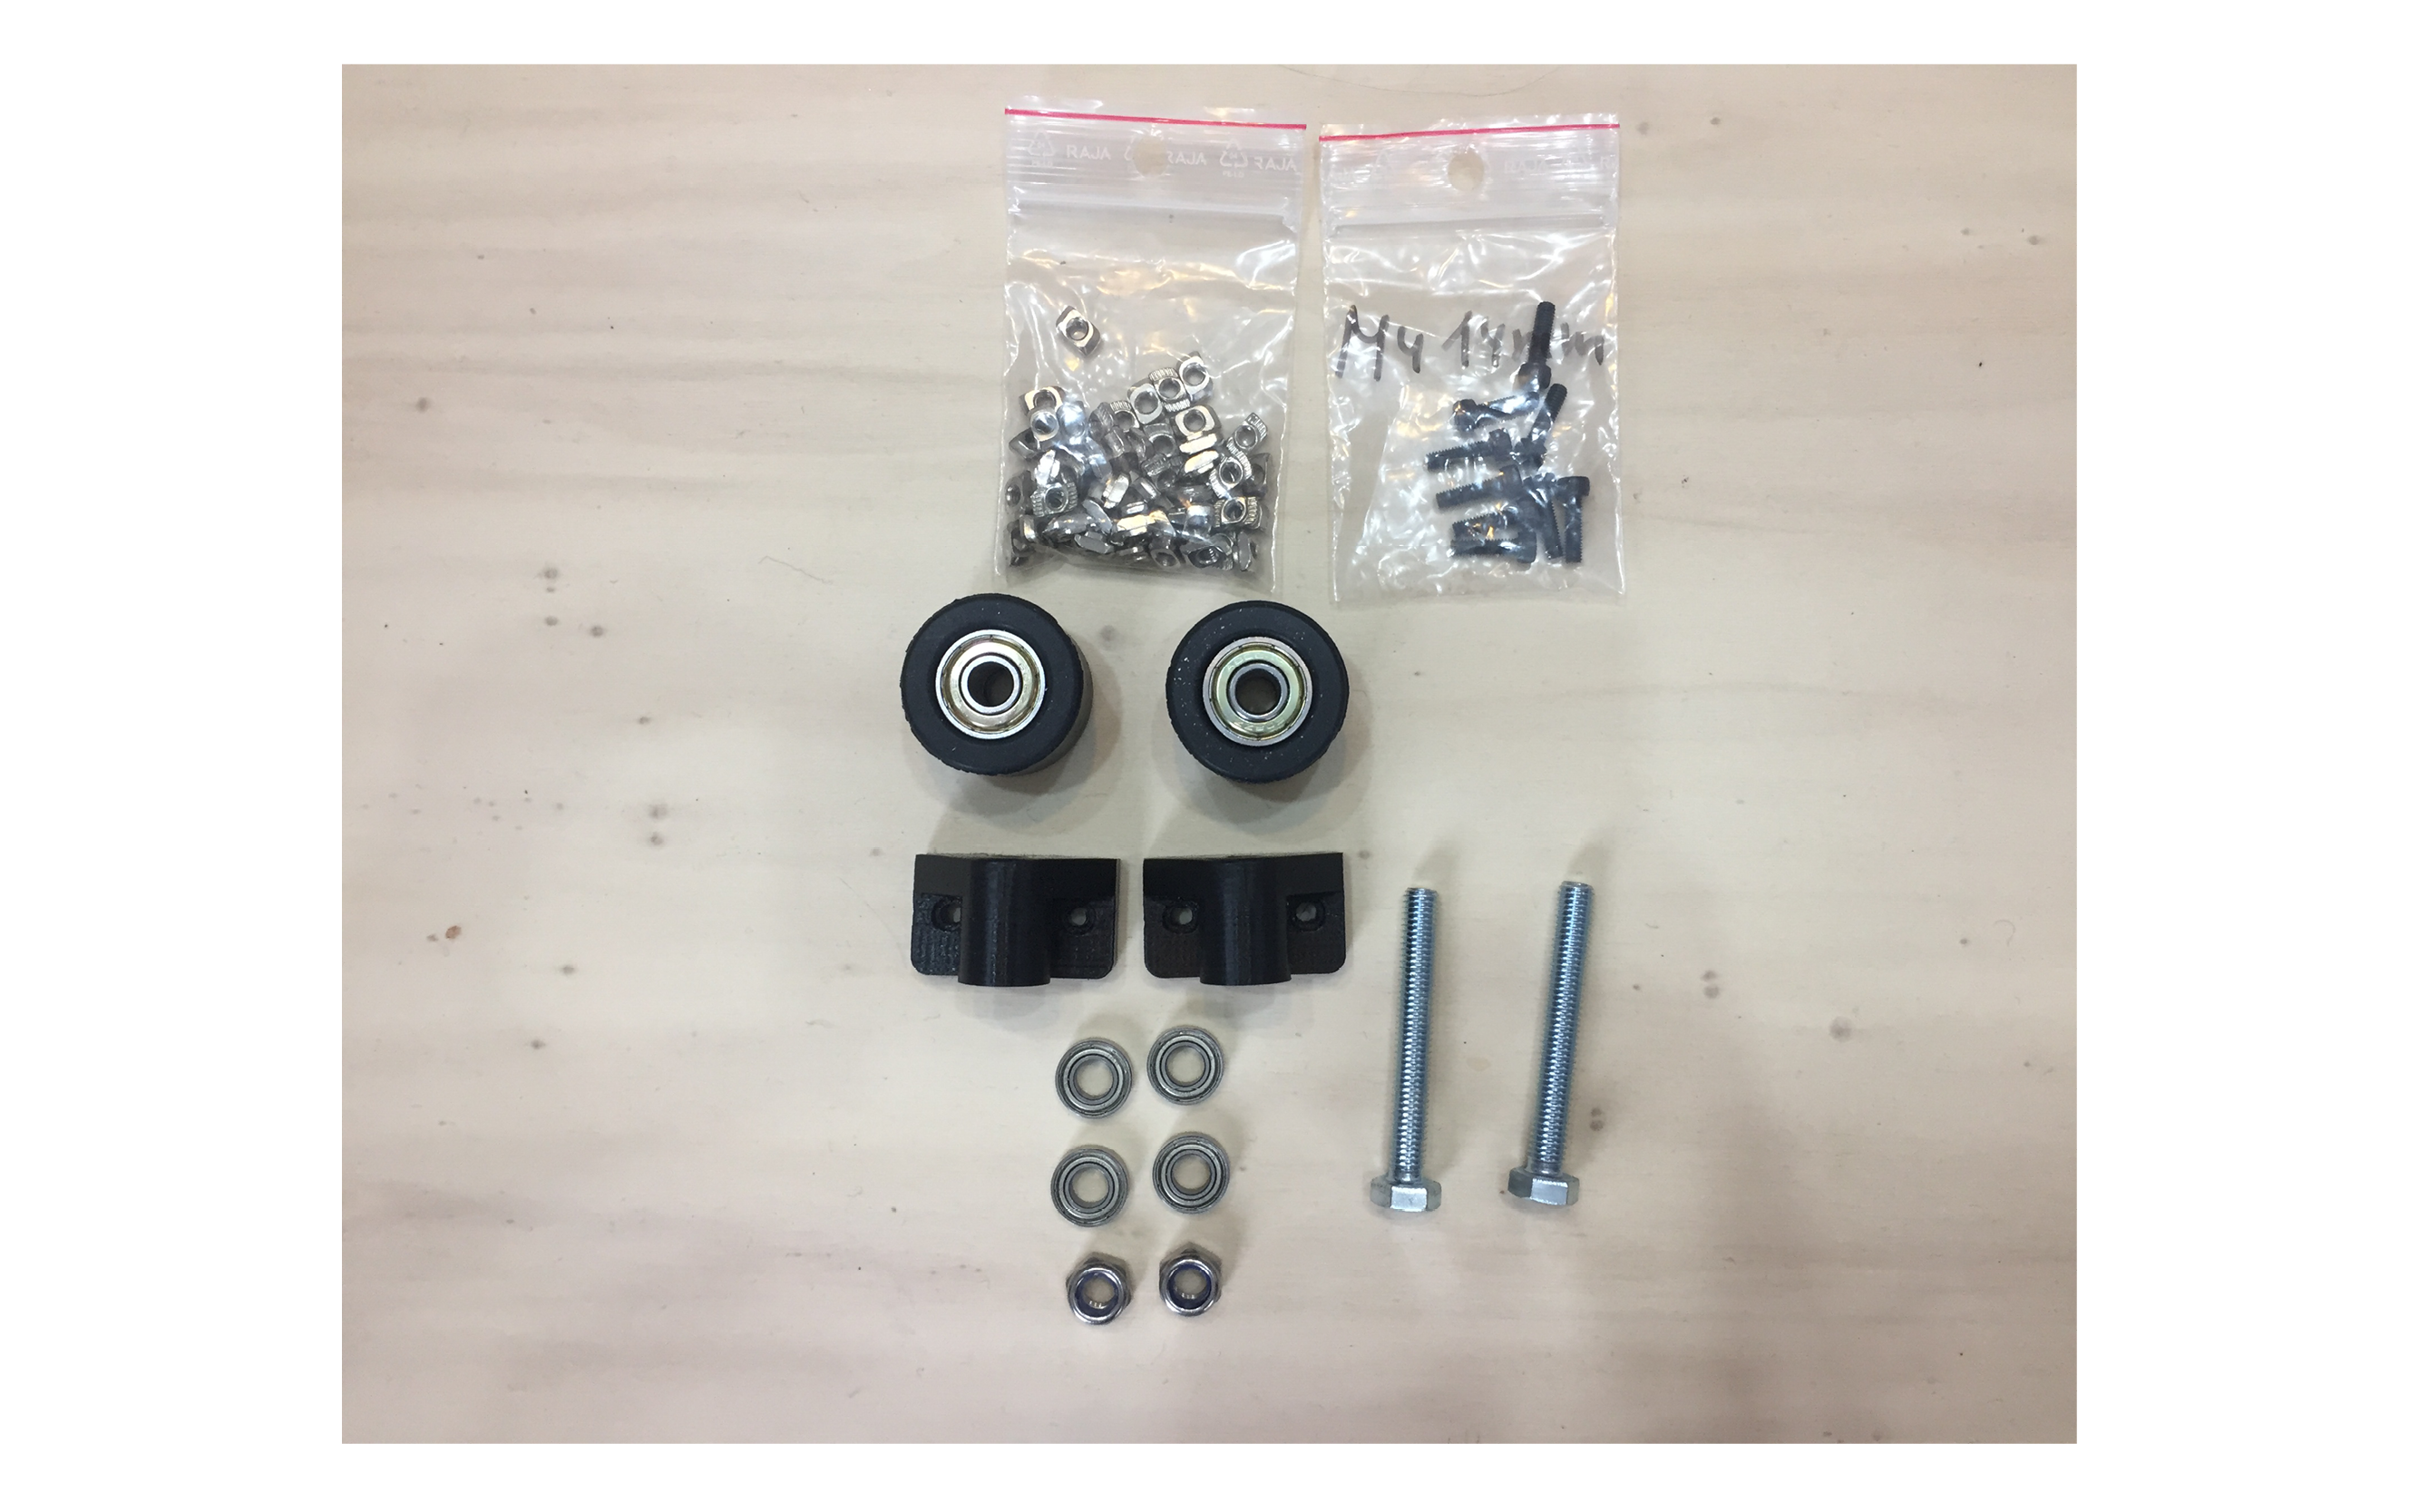
Components
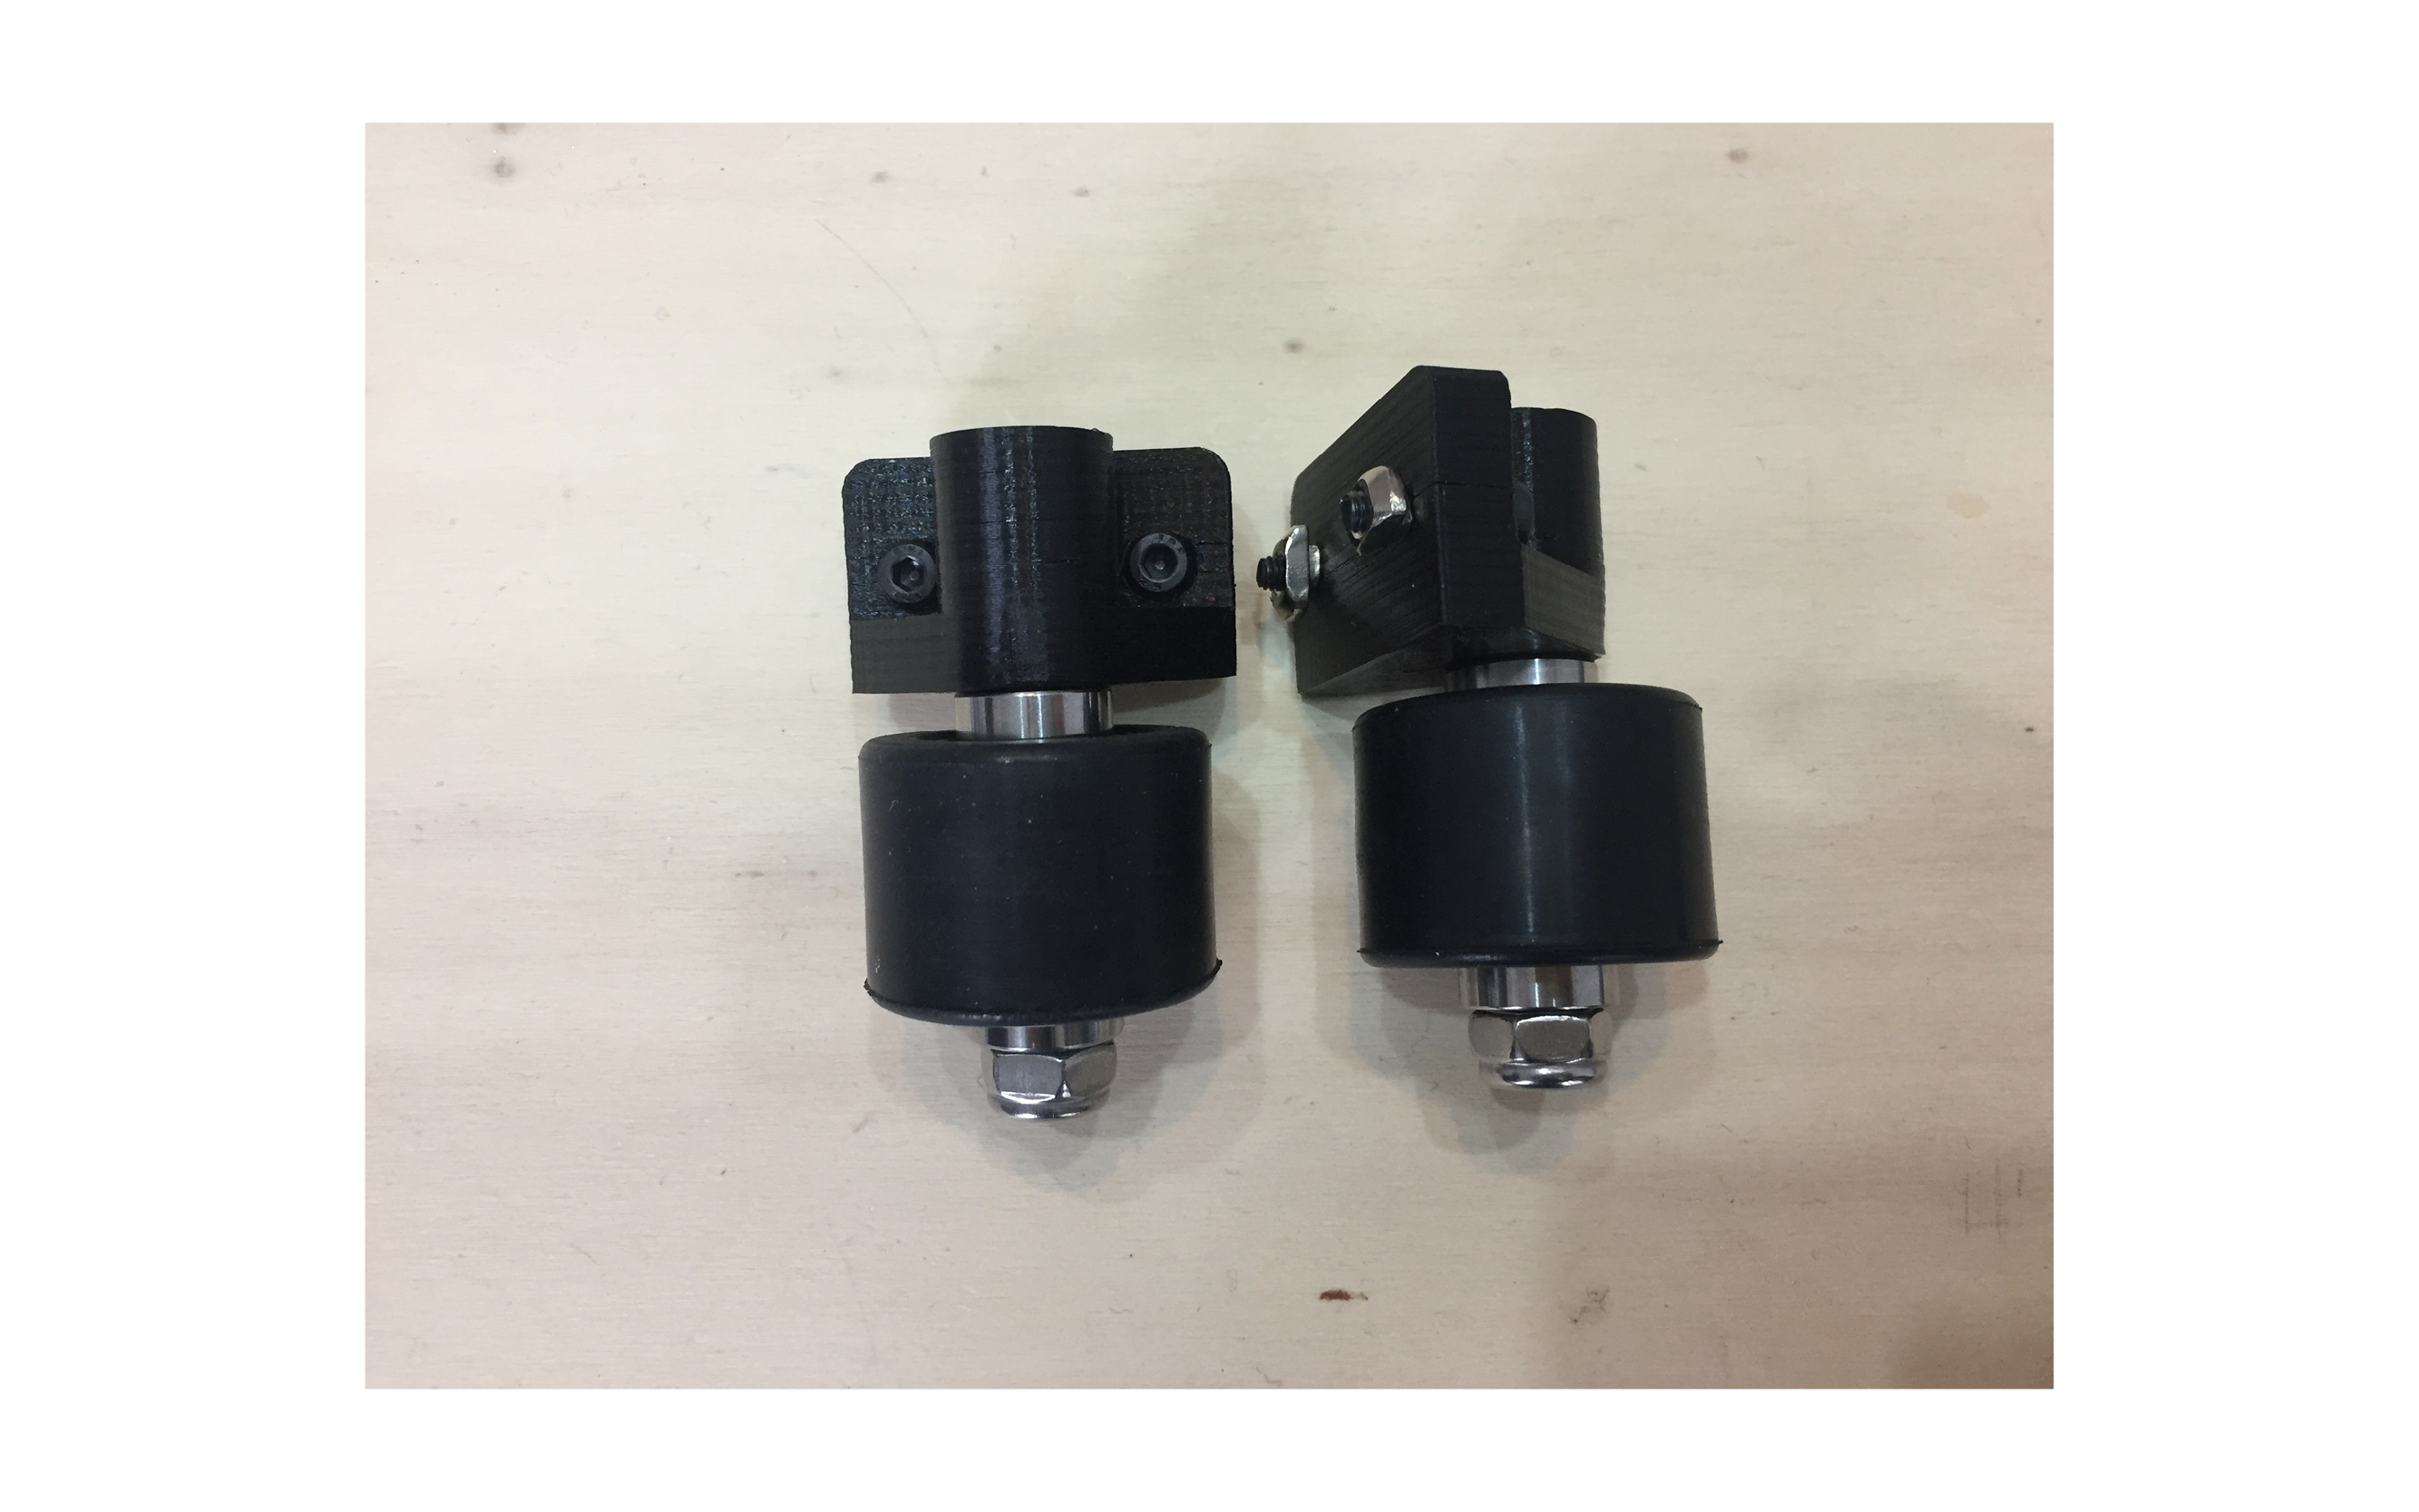
Result
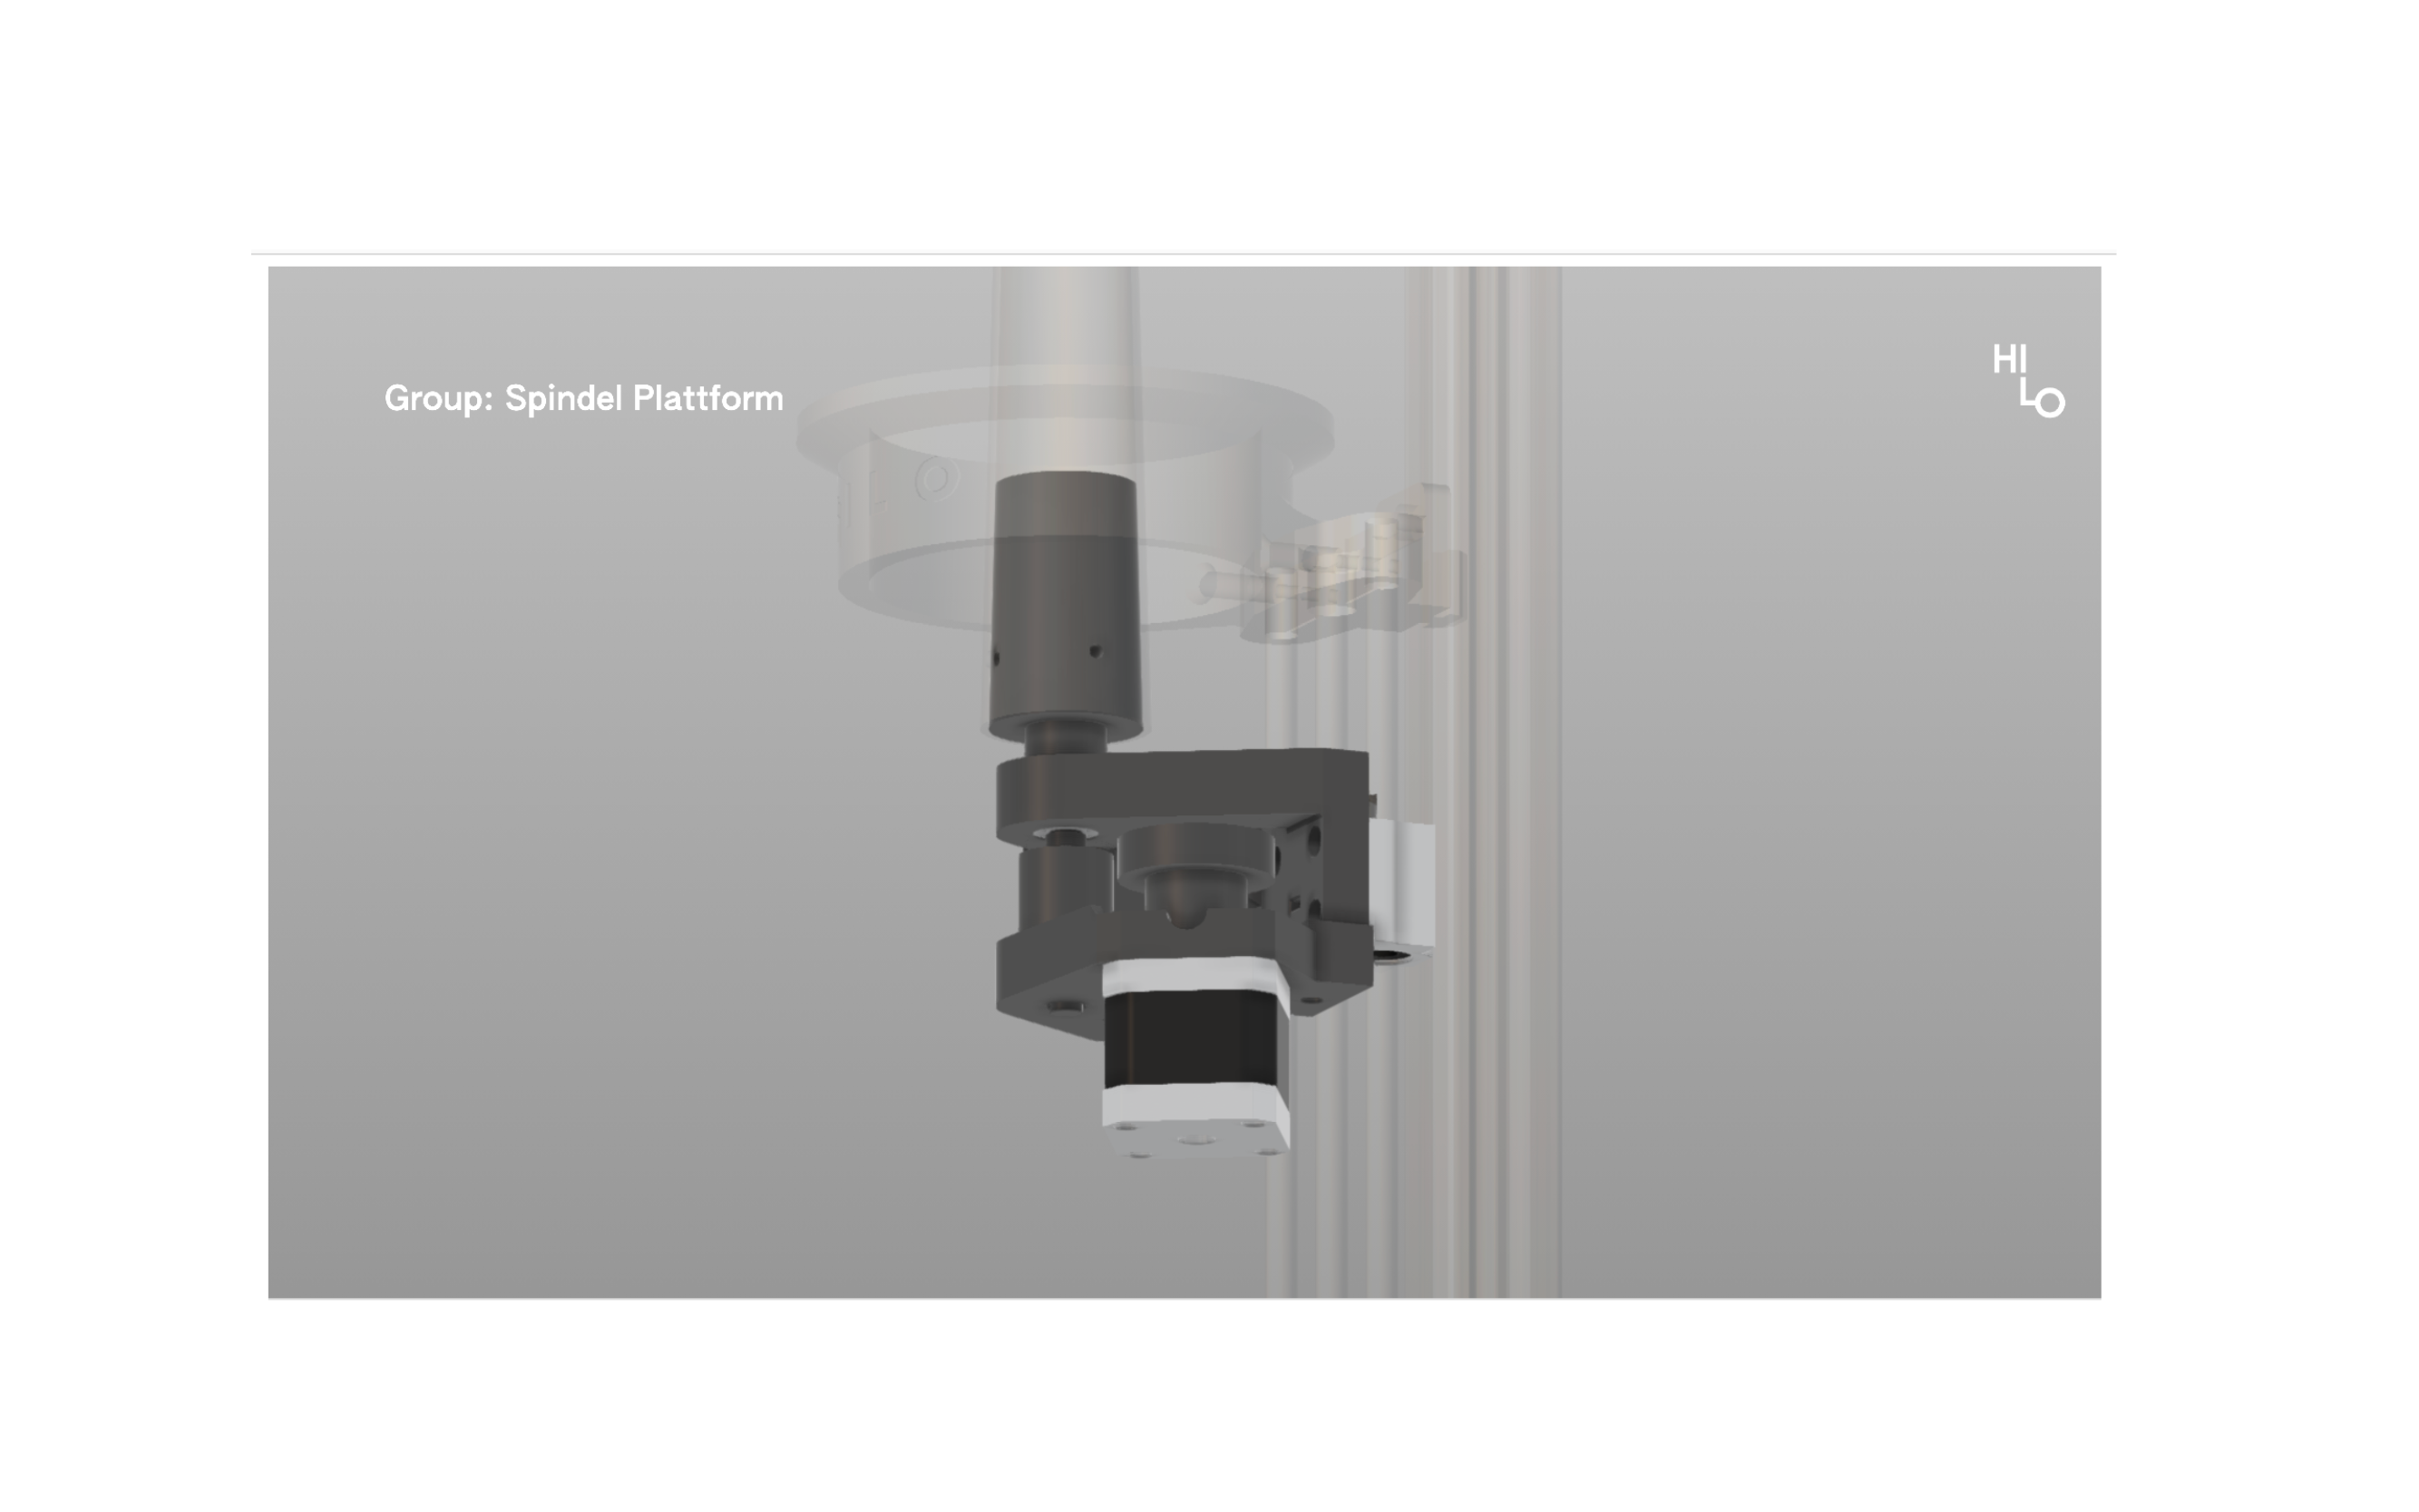
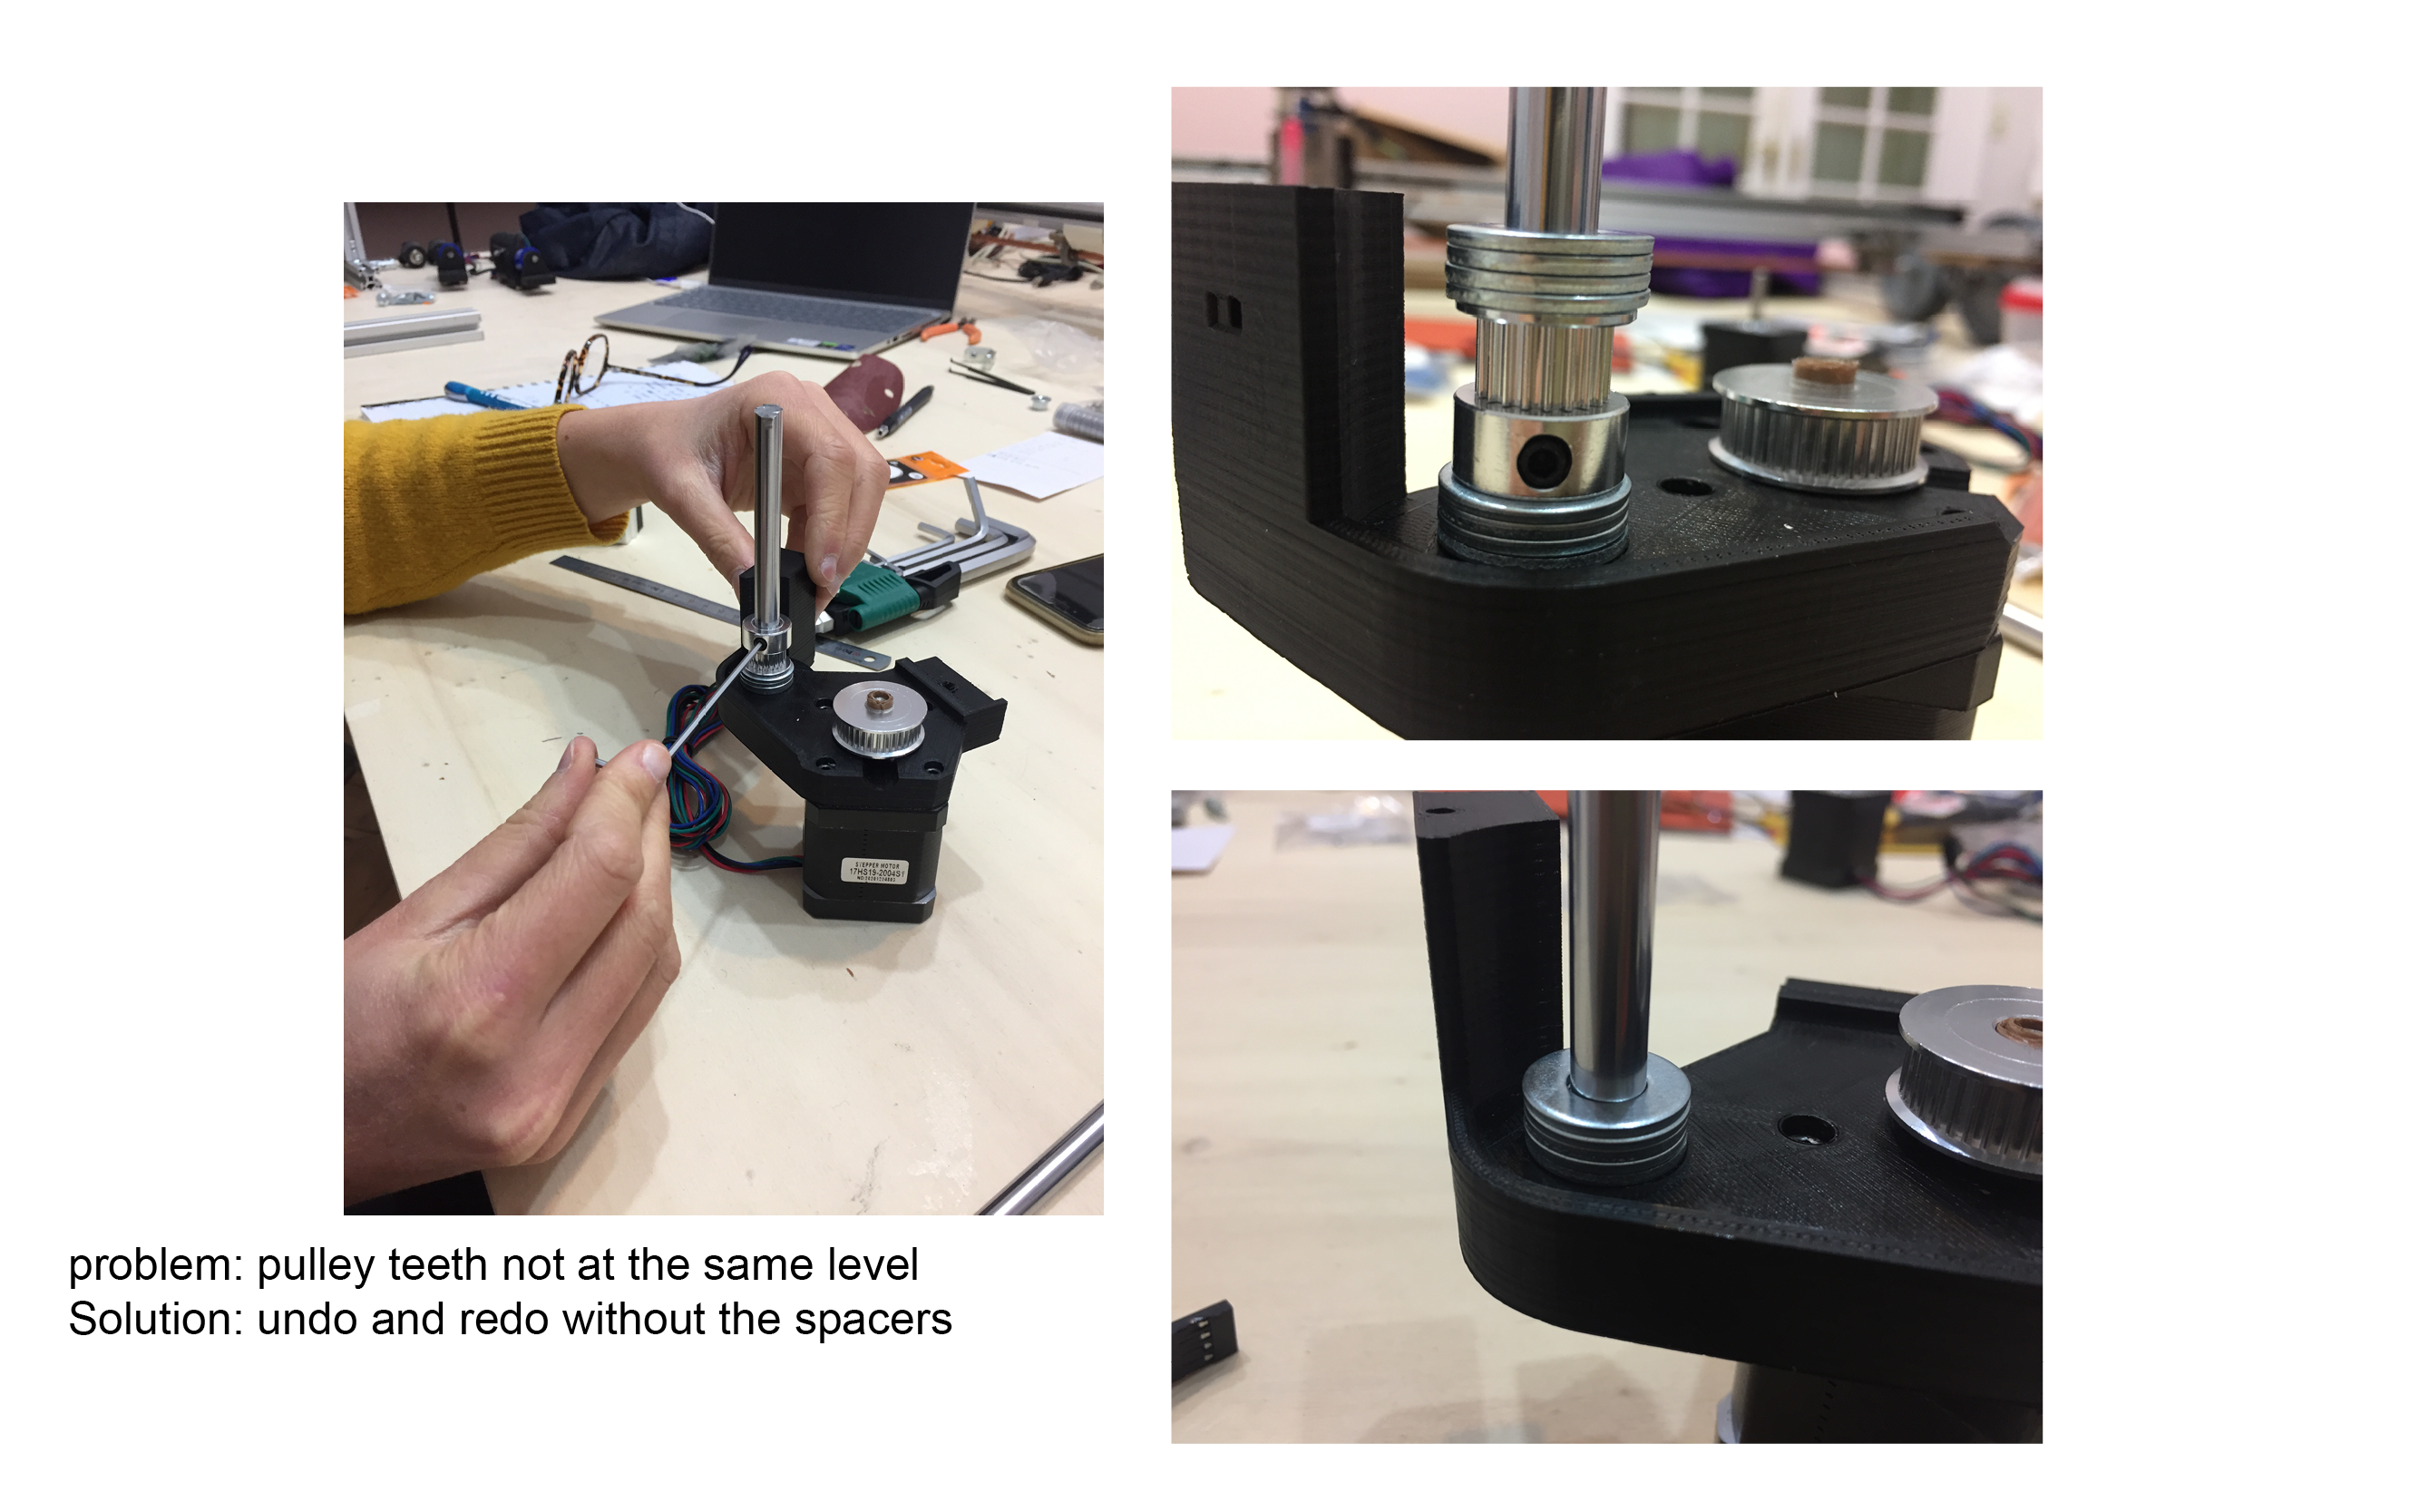
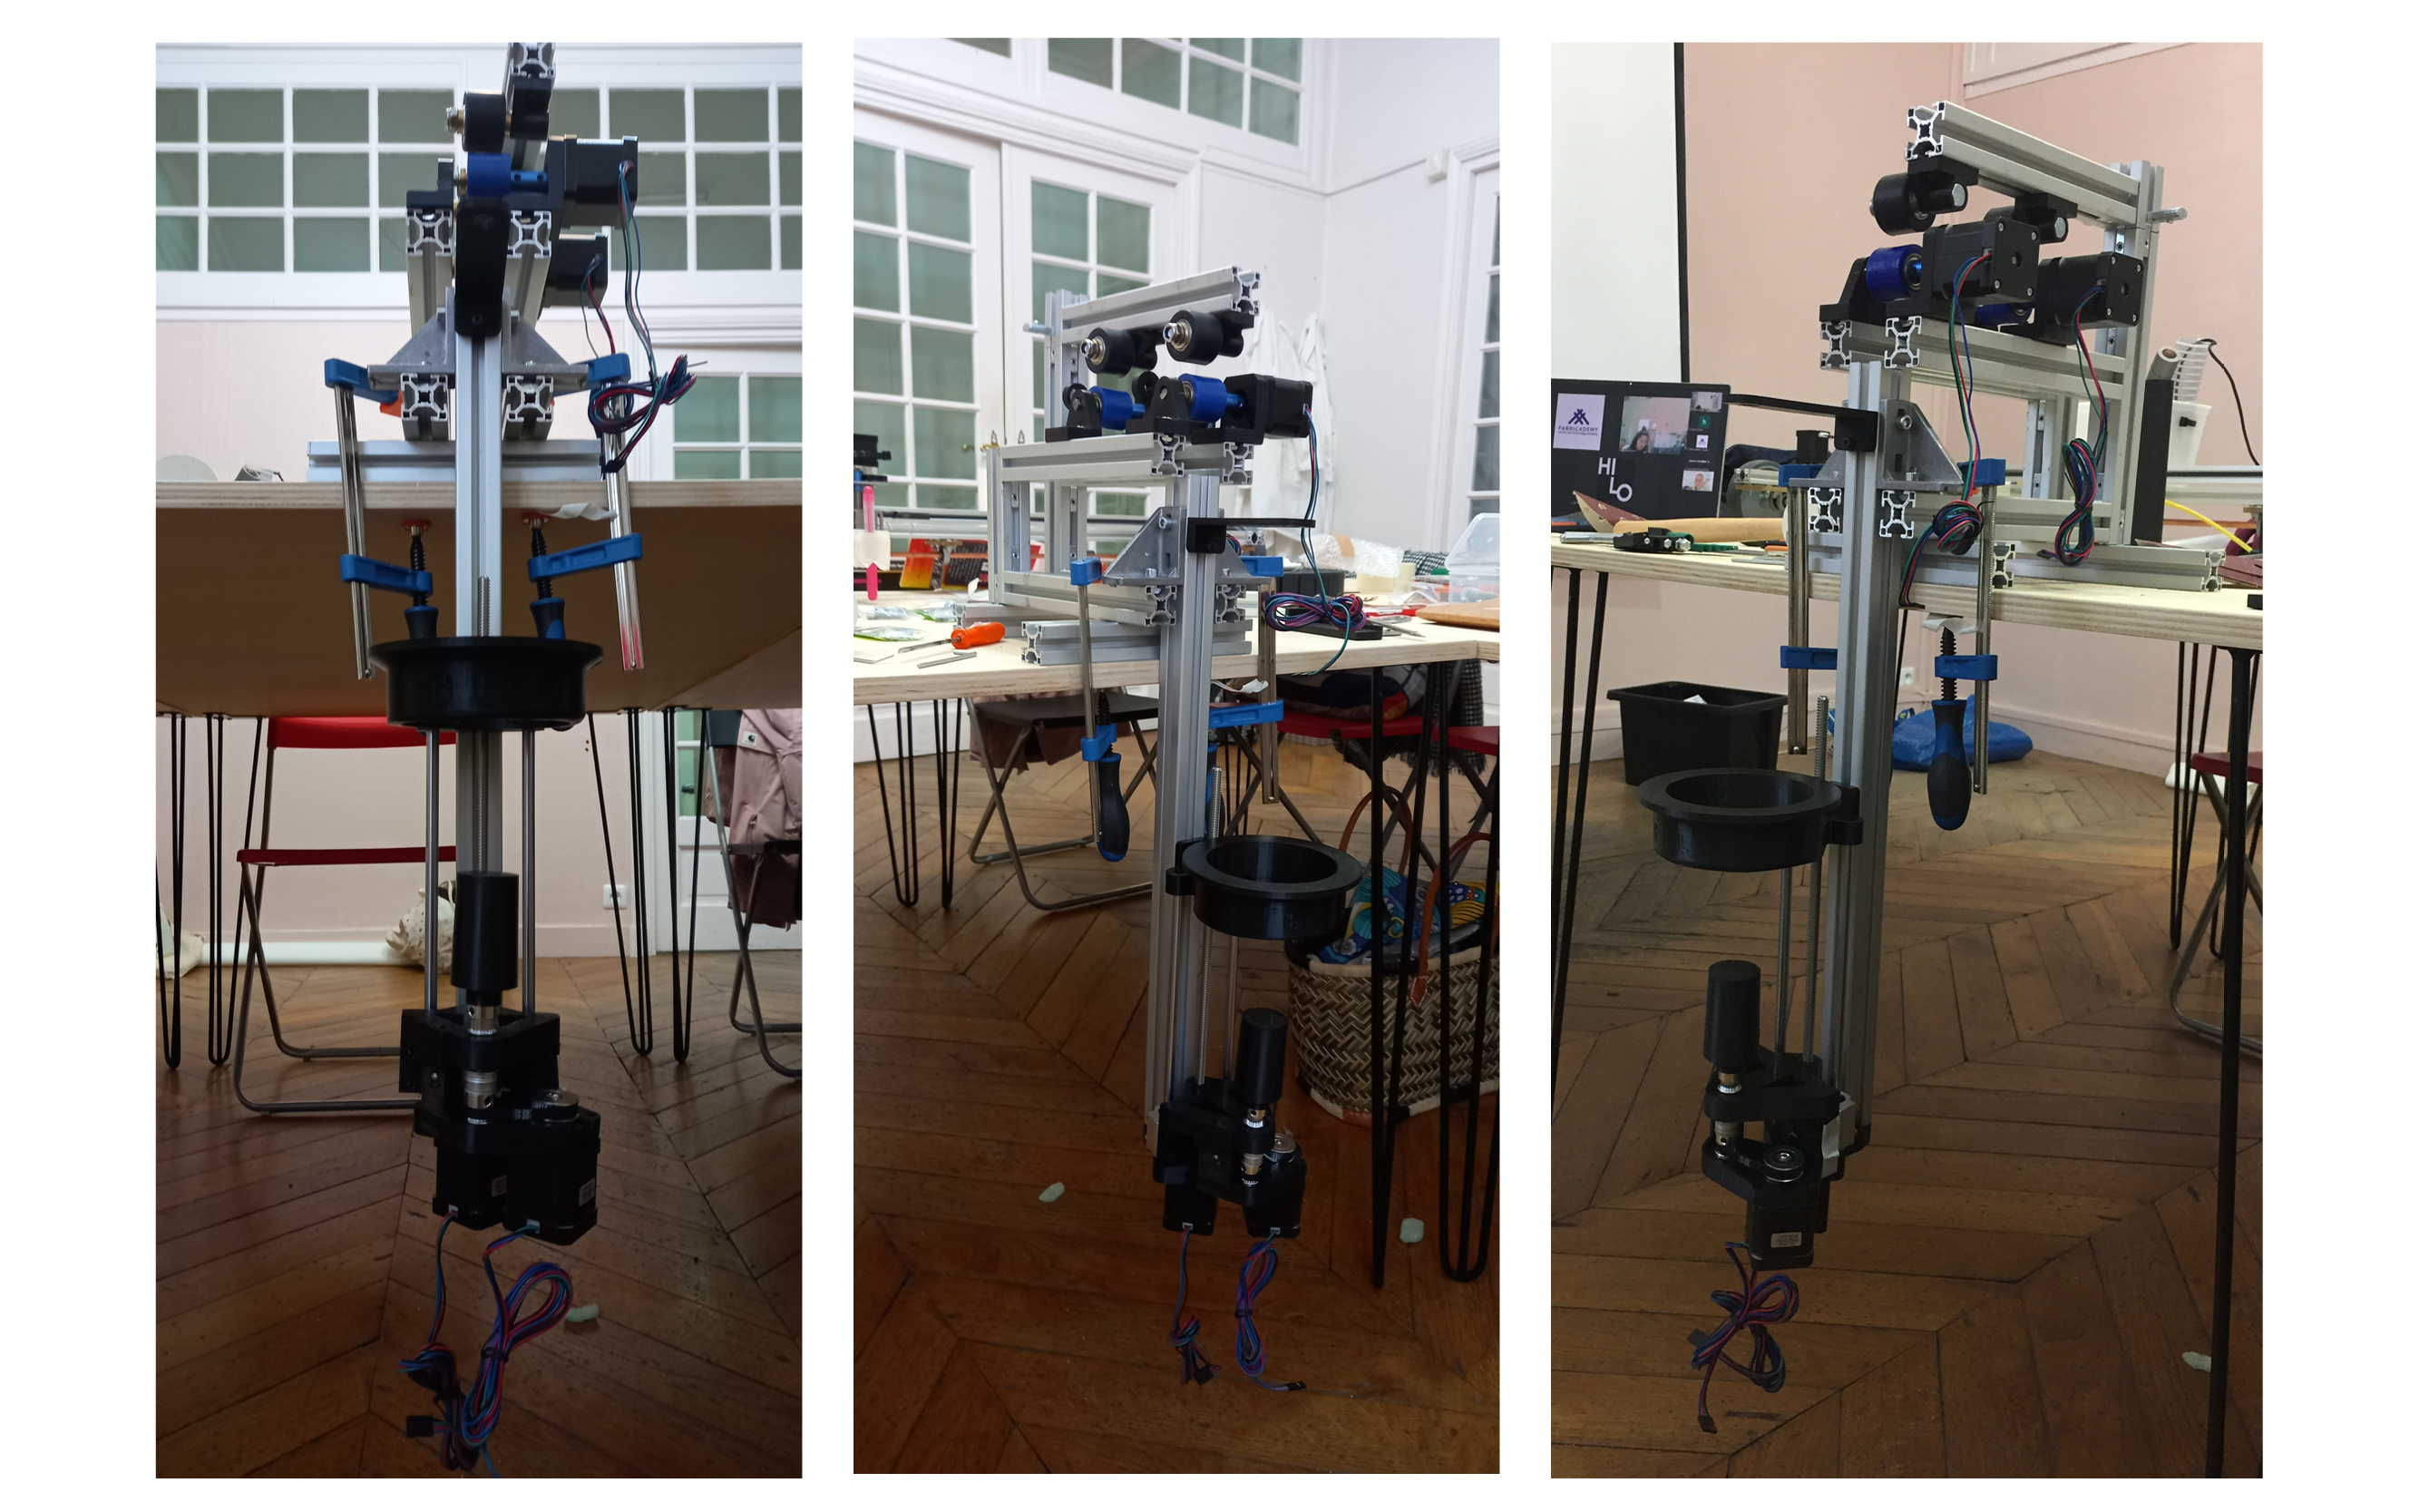
4 | Spindle Platform
The Spindle platform is the platform that will hold the cone where the twisted thread will wrap around. This platform has a motor on the bottom to make the cone rotate in the final step of the spinning process.
The spindle platform is attached to the structure from under/the bottom to the larger makerbeam, using an M8x20 screw, screwed into the tapped hole of the makerbeam (ideally the tap is made previously building the structure)
TIPS
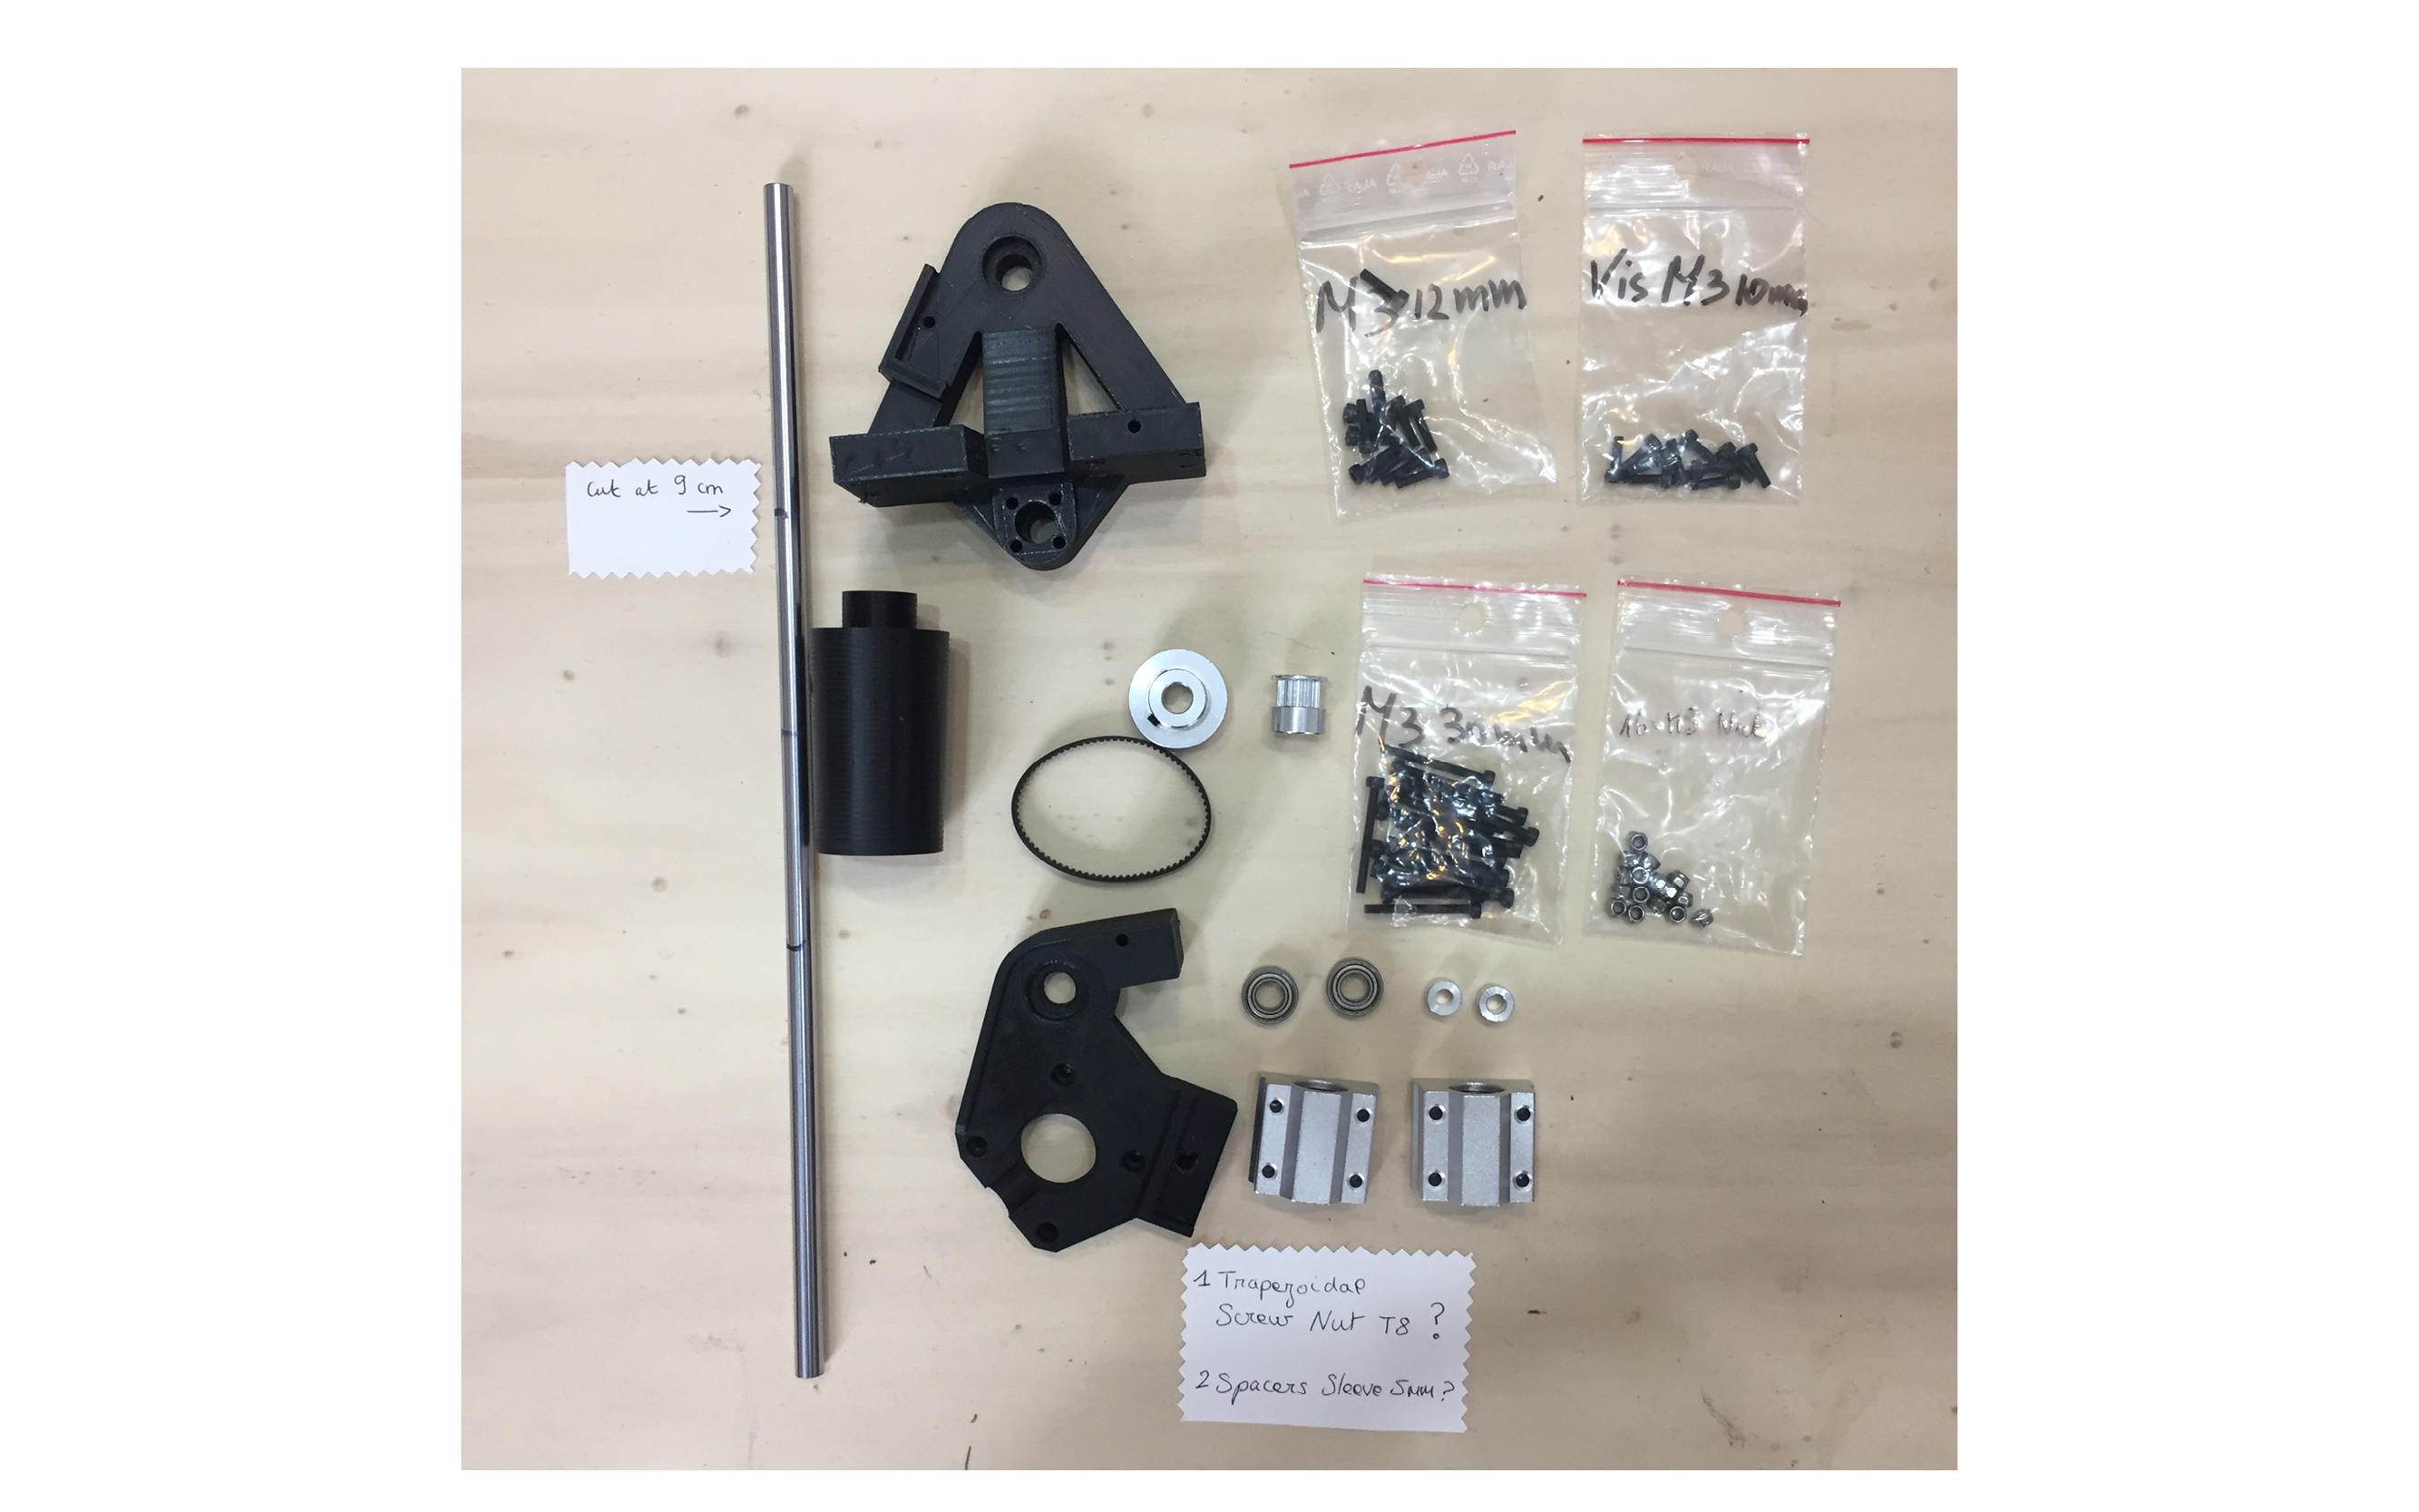
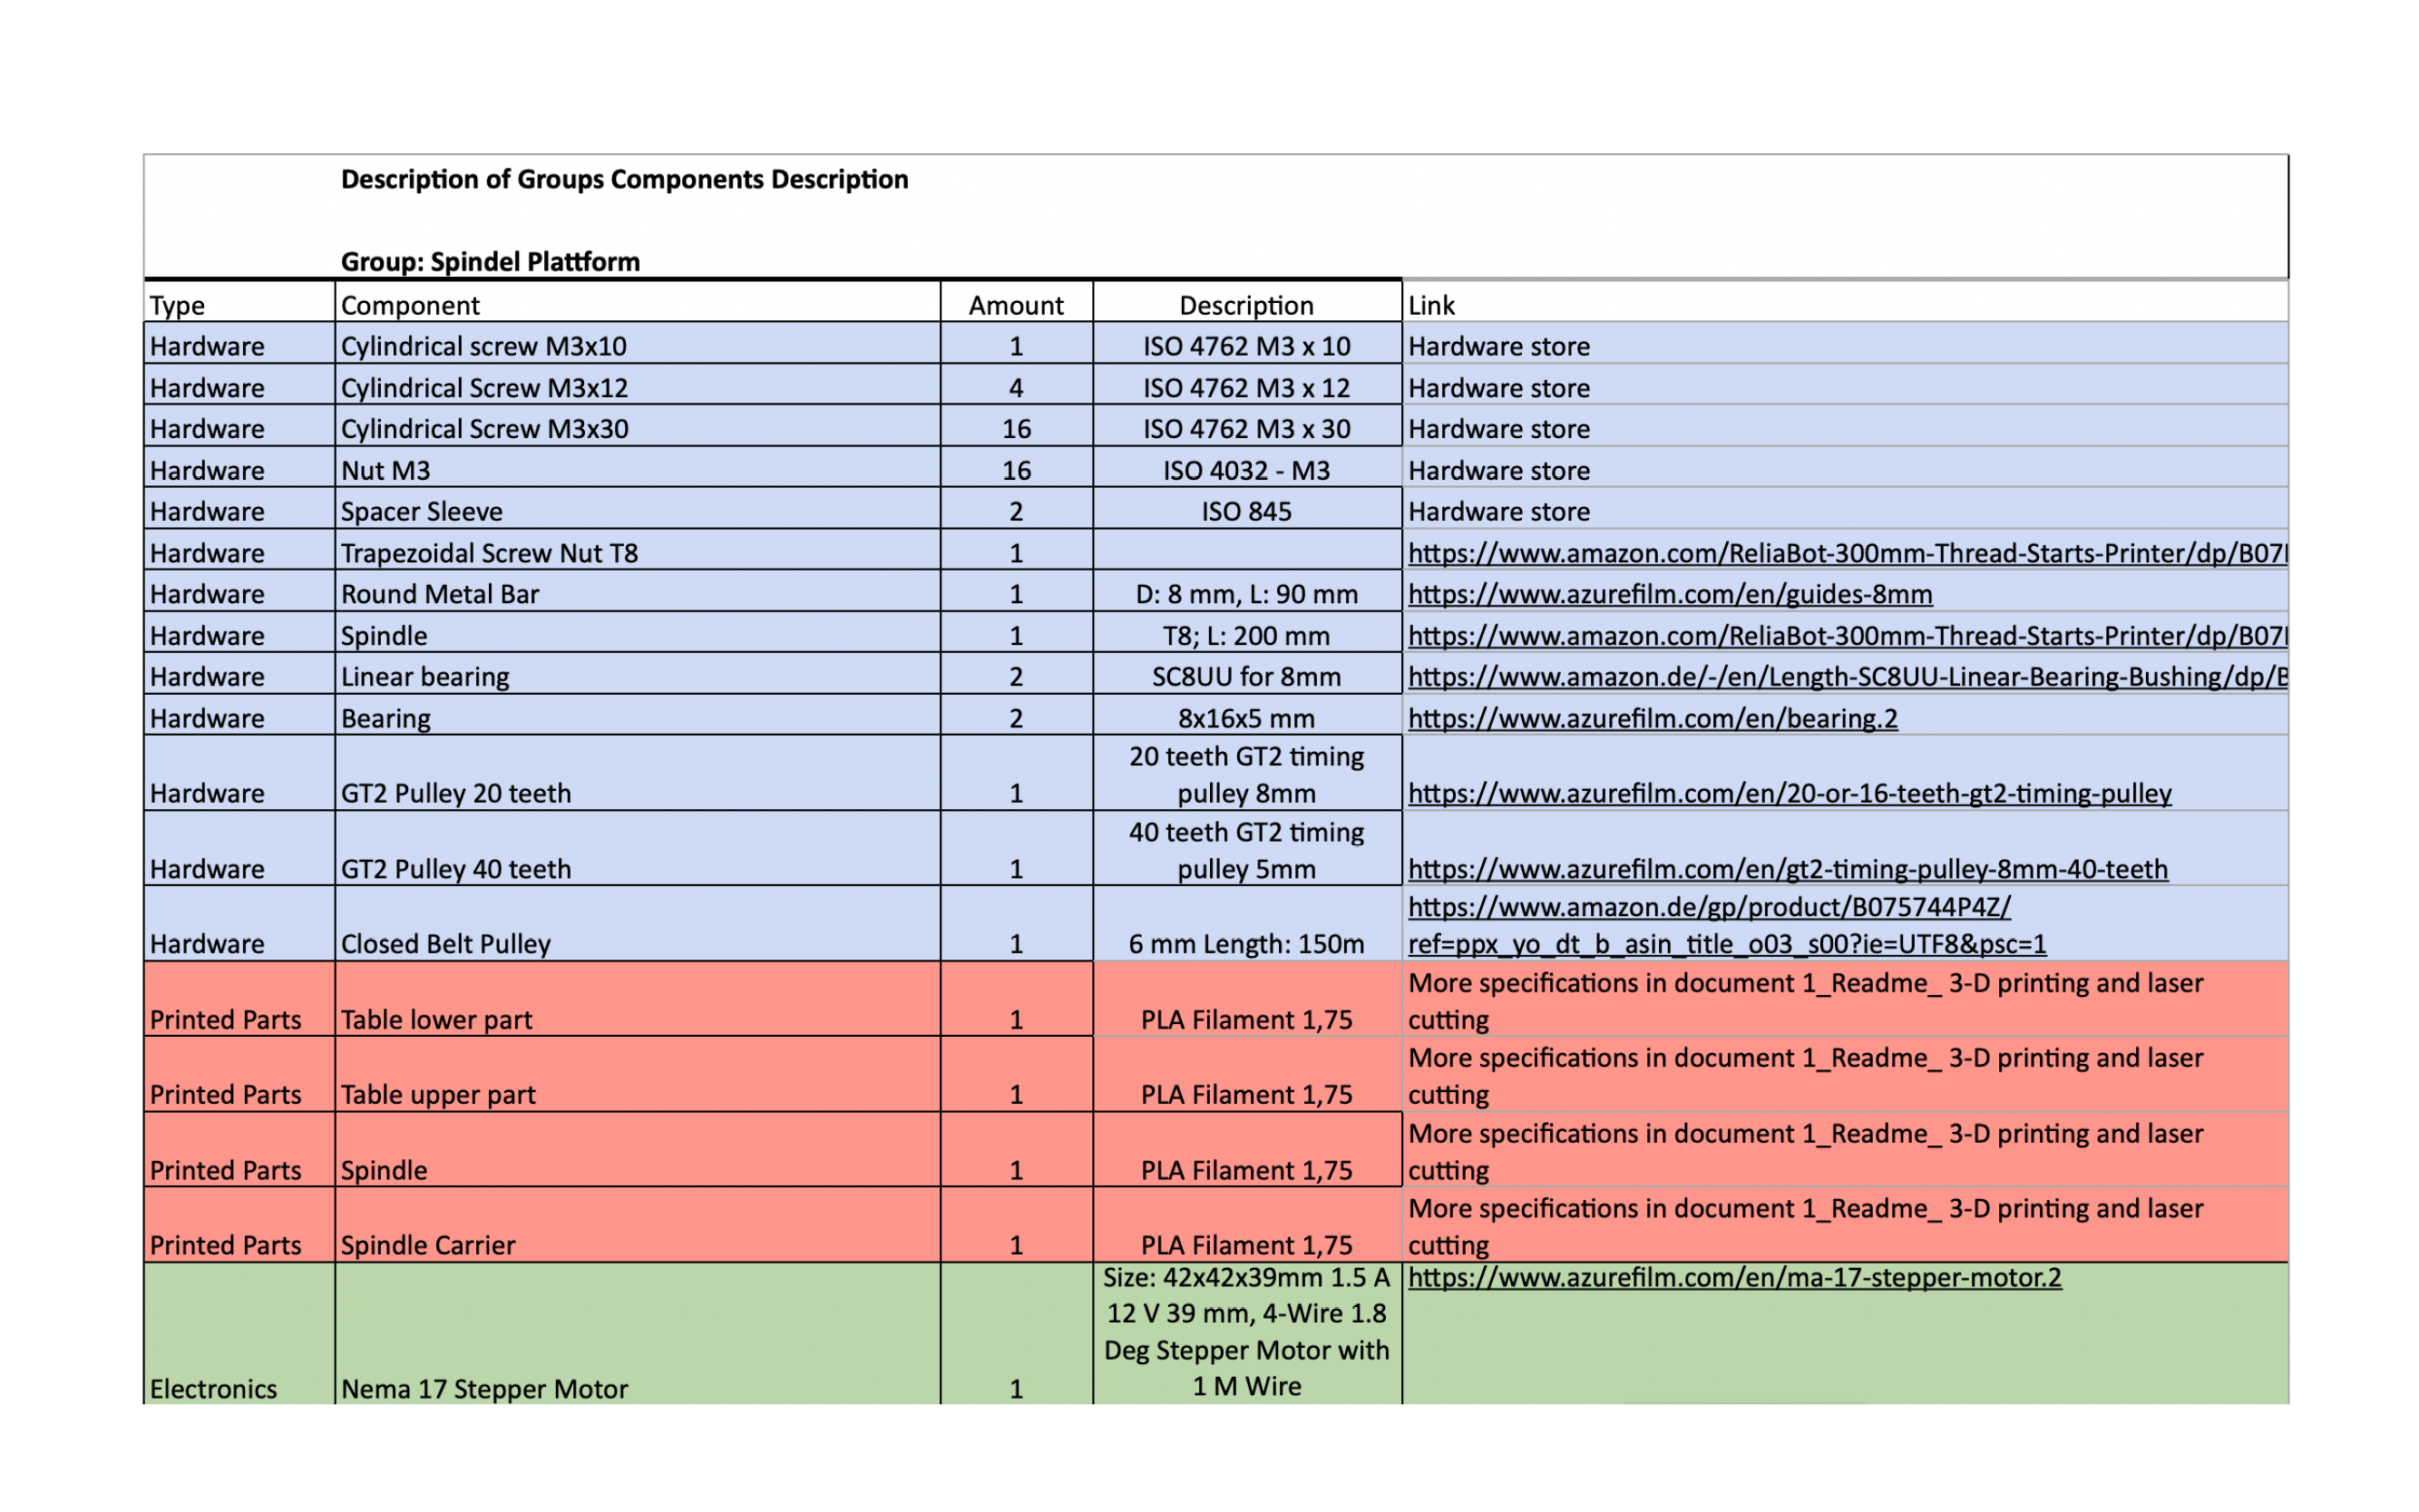
Components
Bulding process
Result
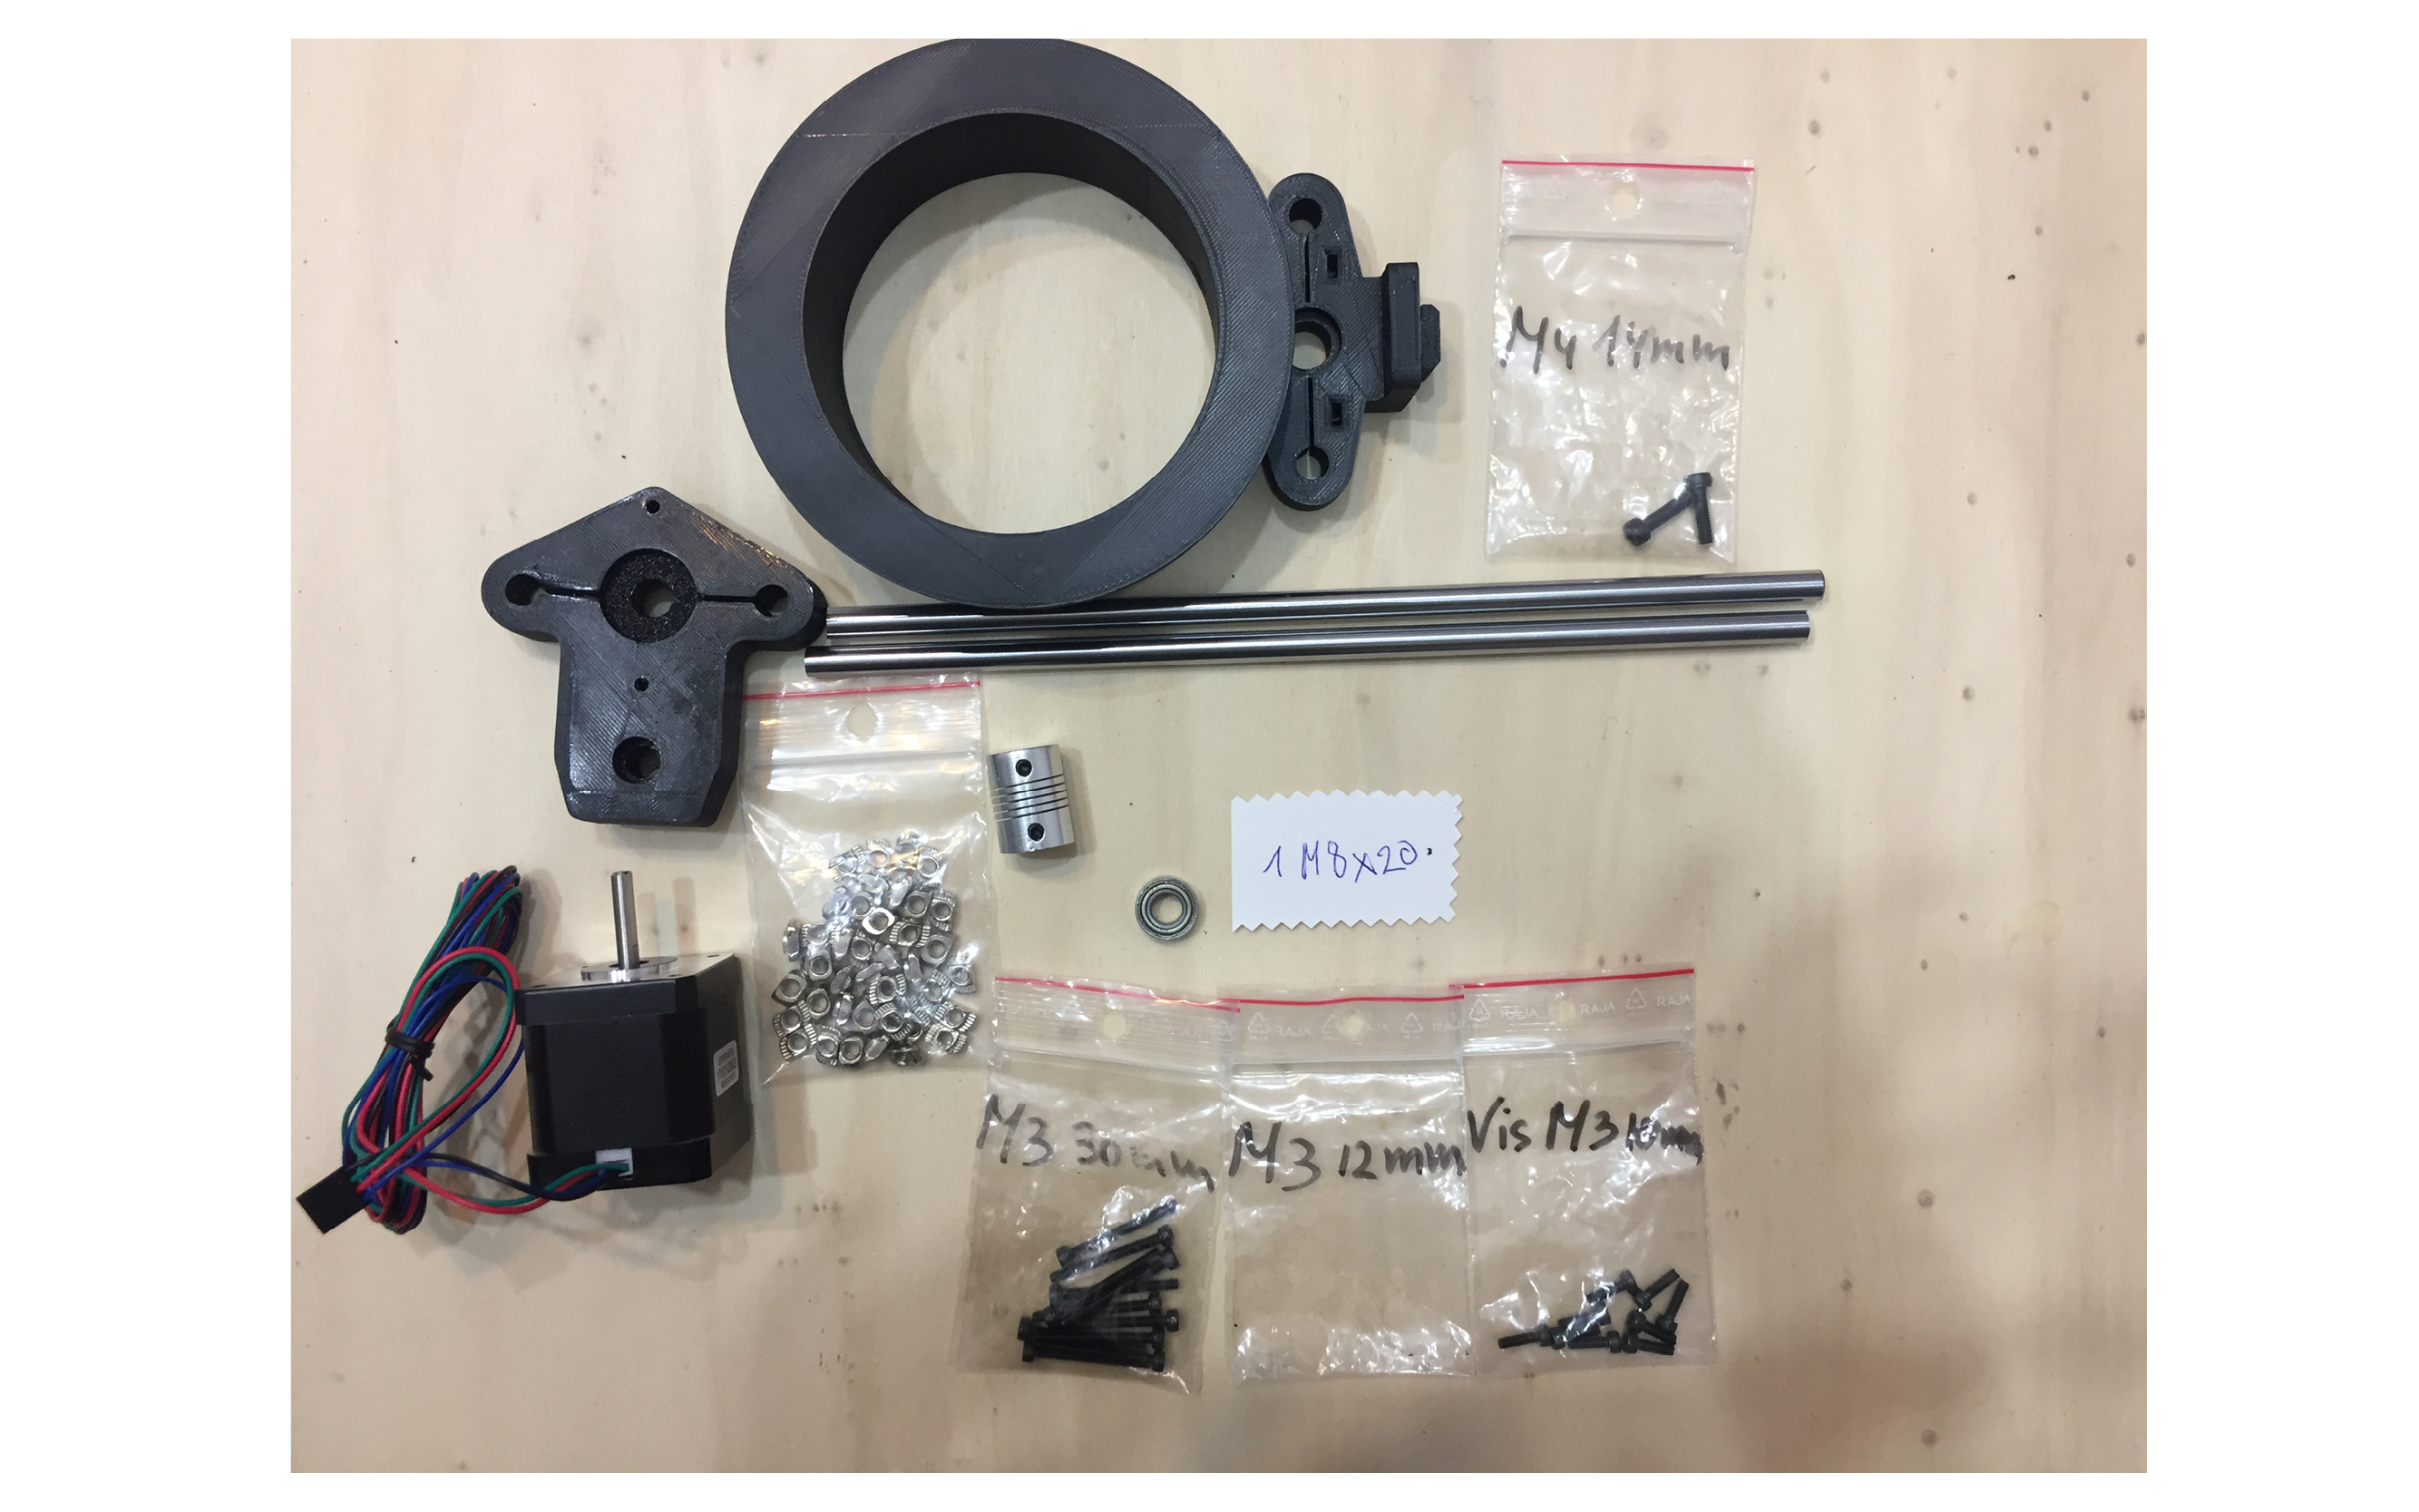
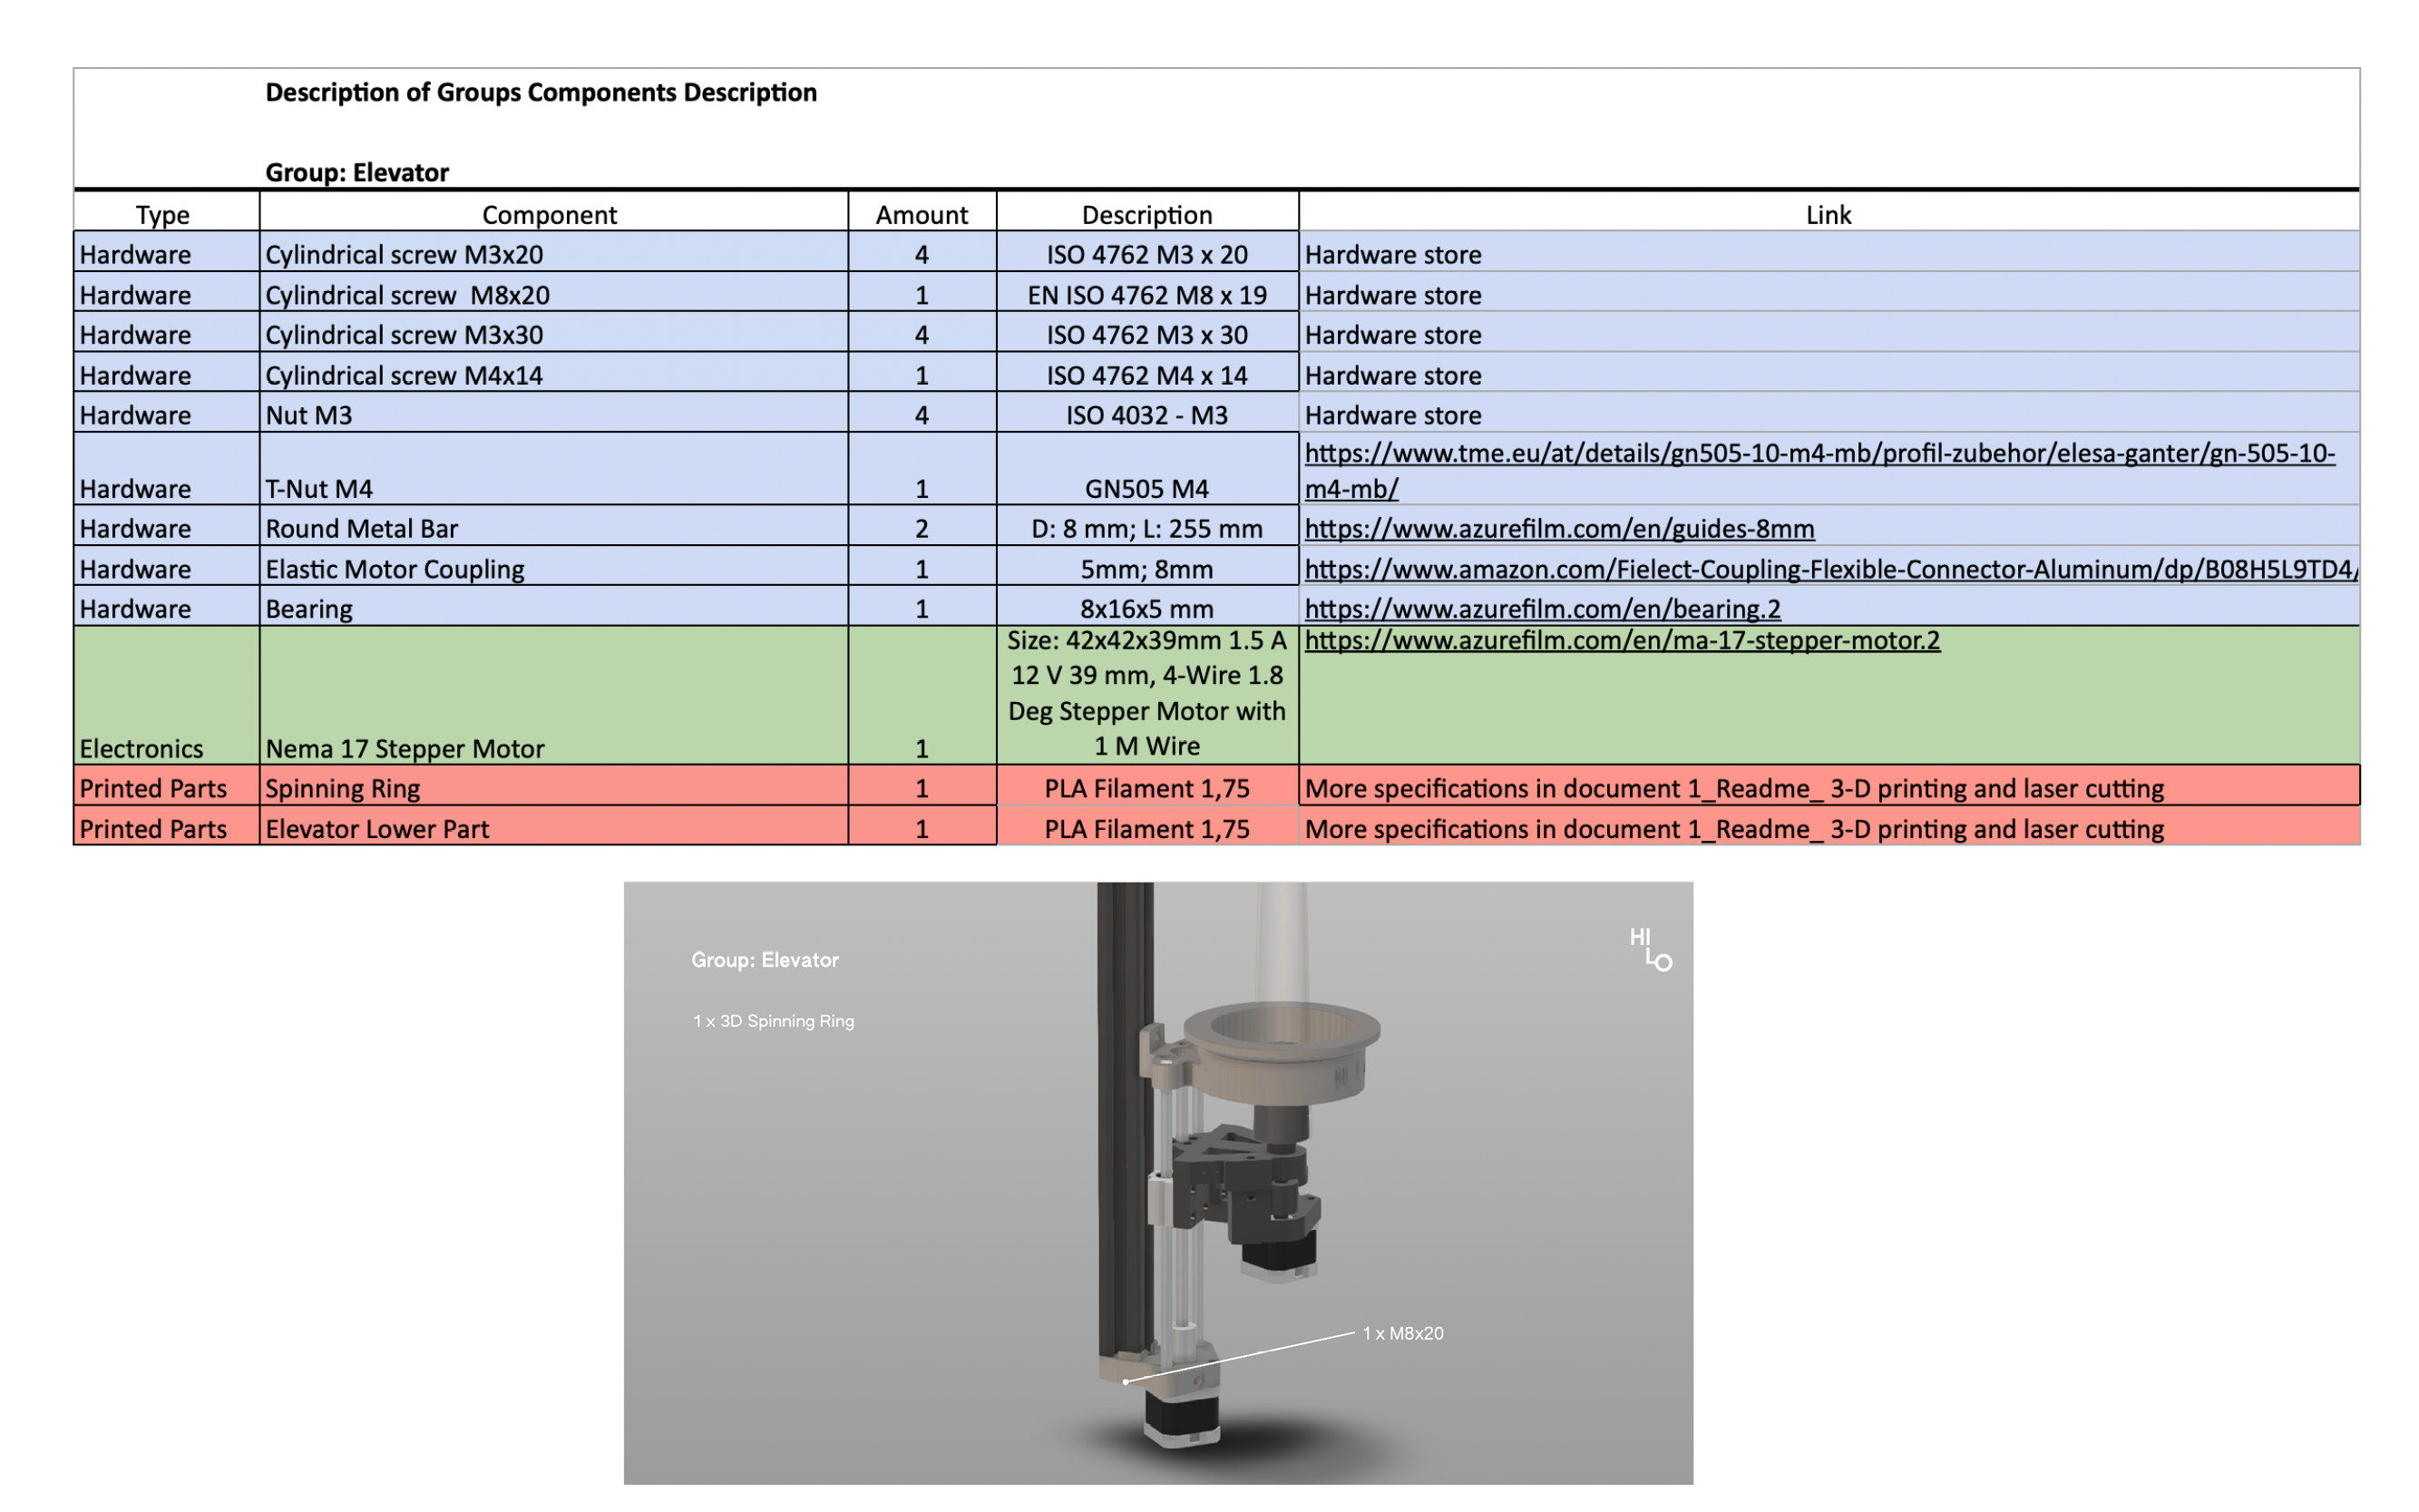
5 | Elevator
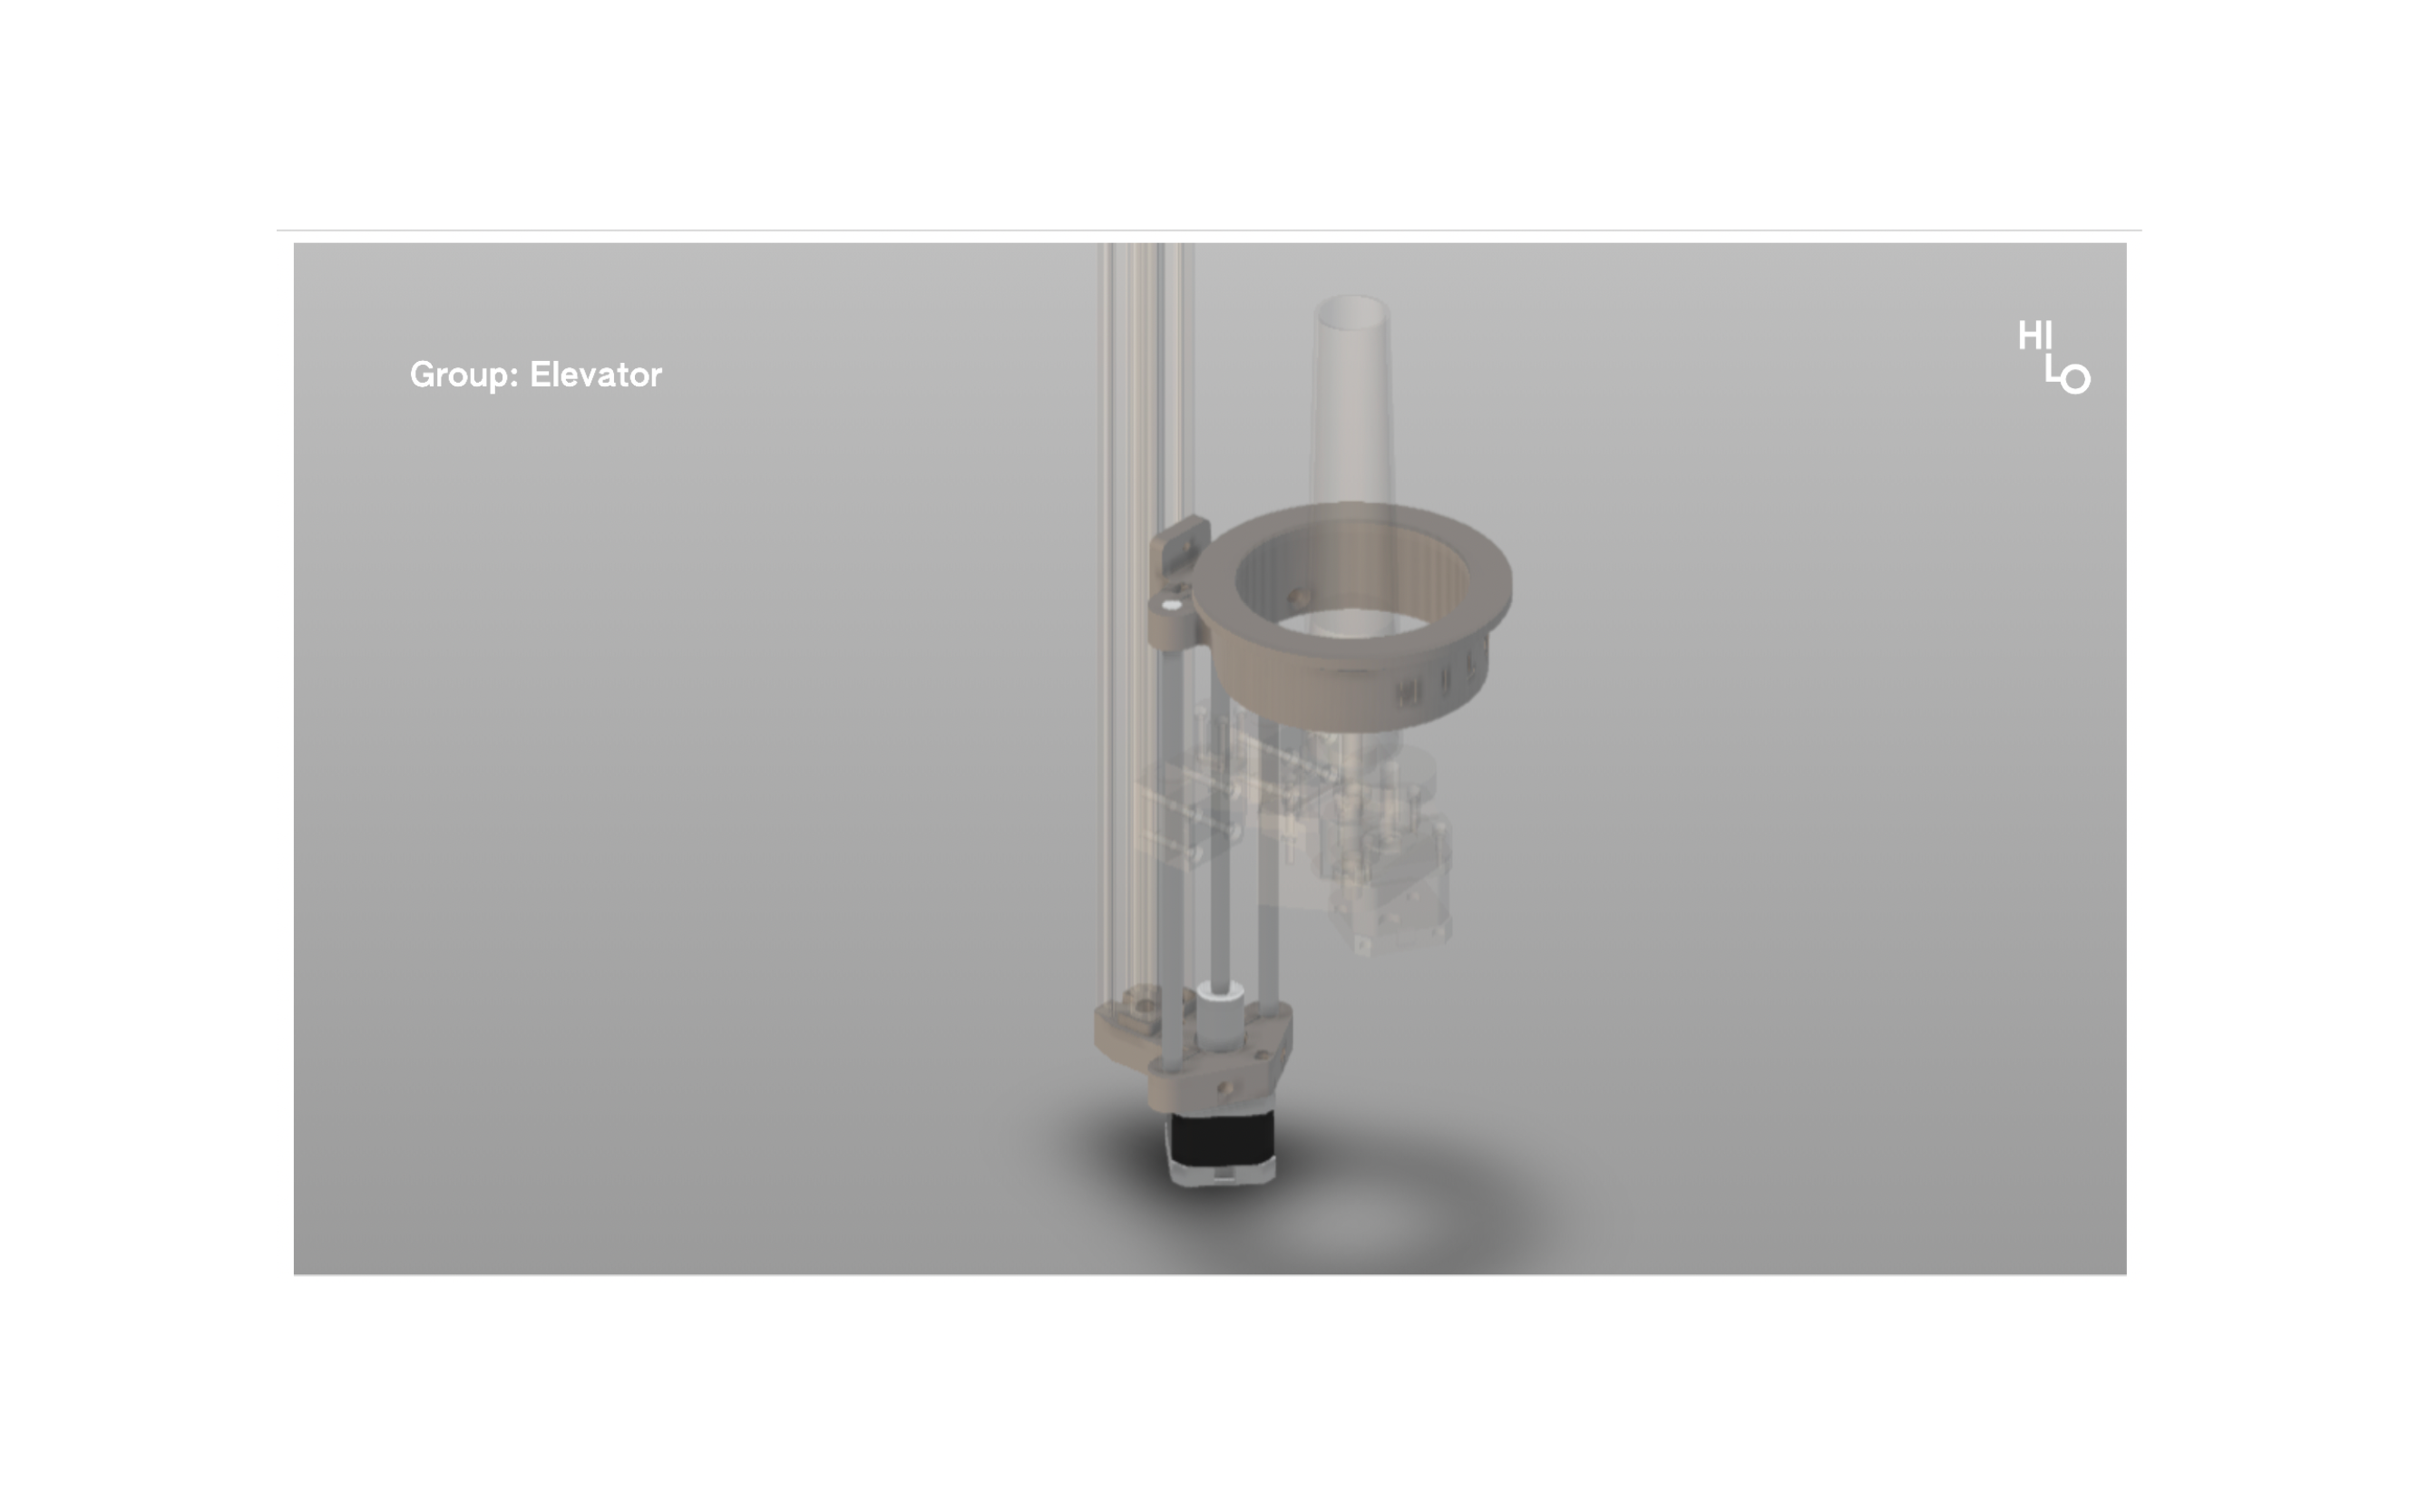
Components
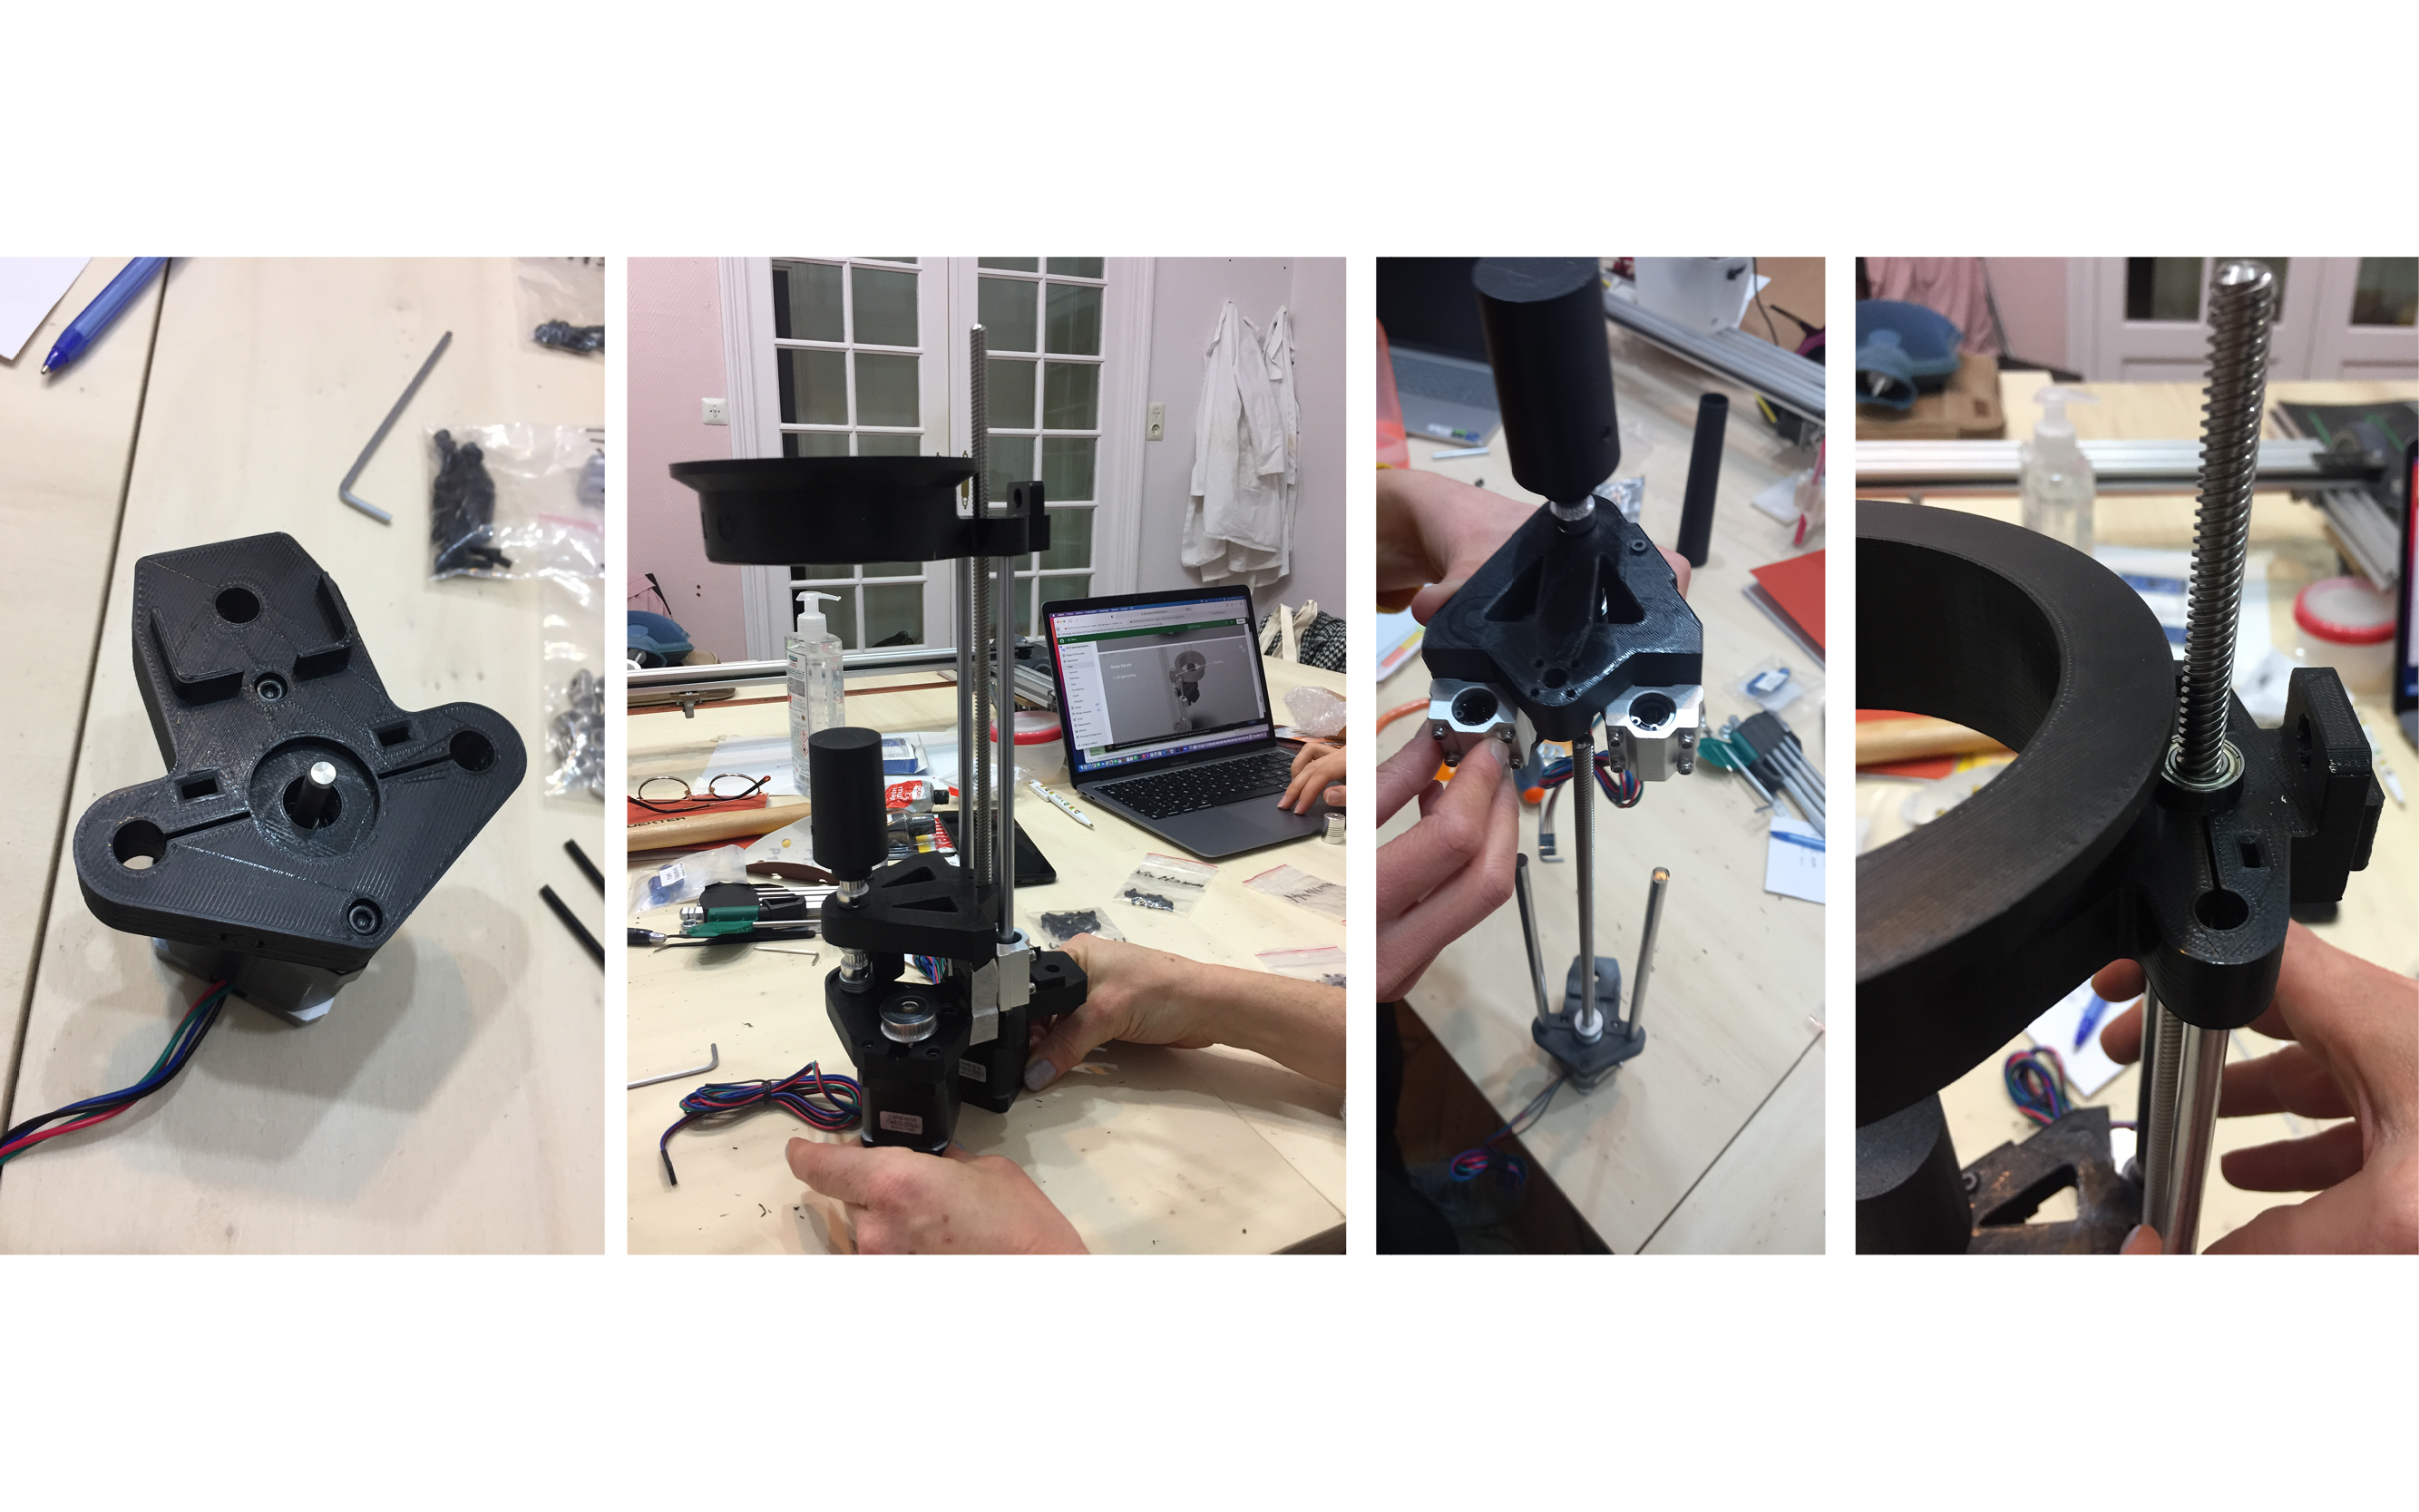
Bulding process + Result**
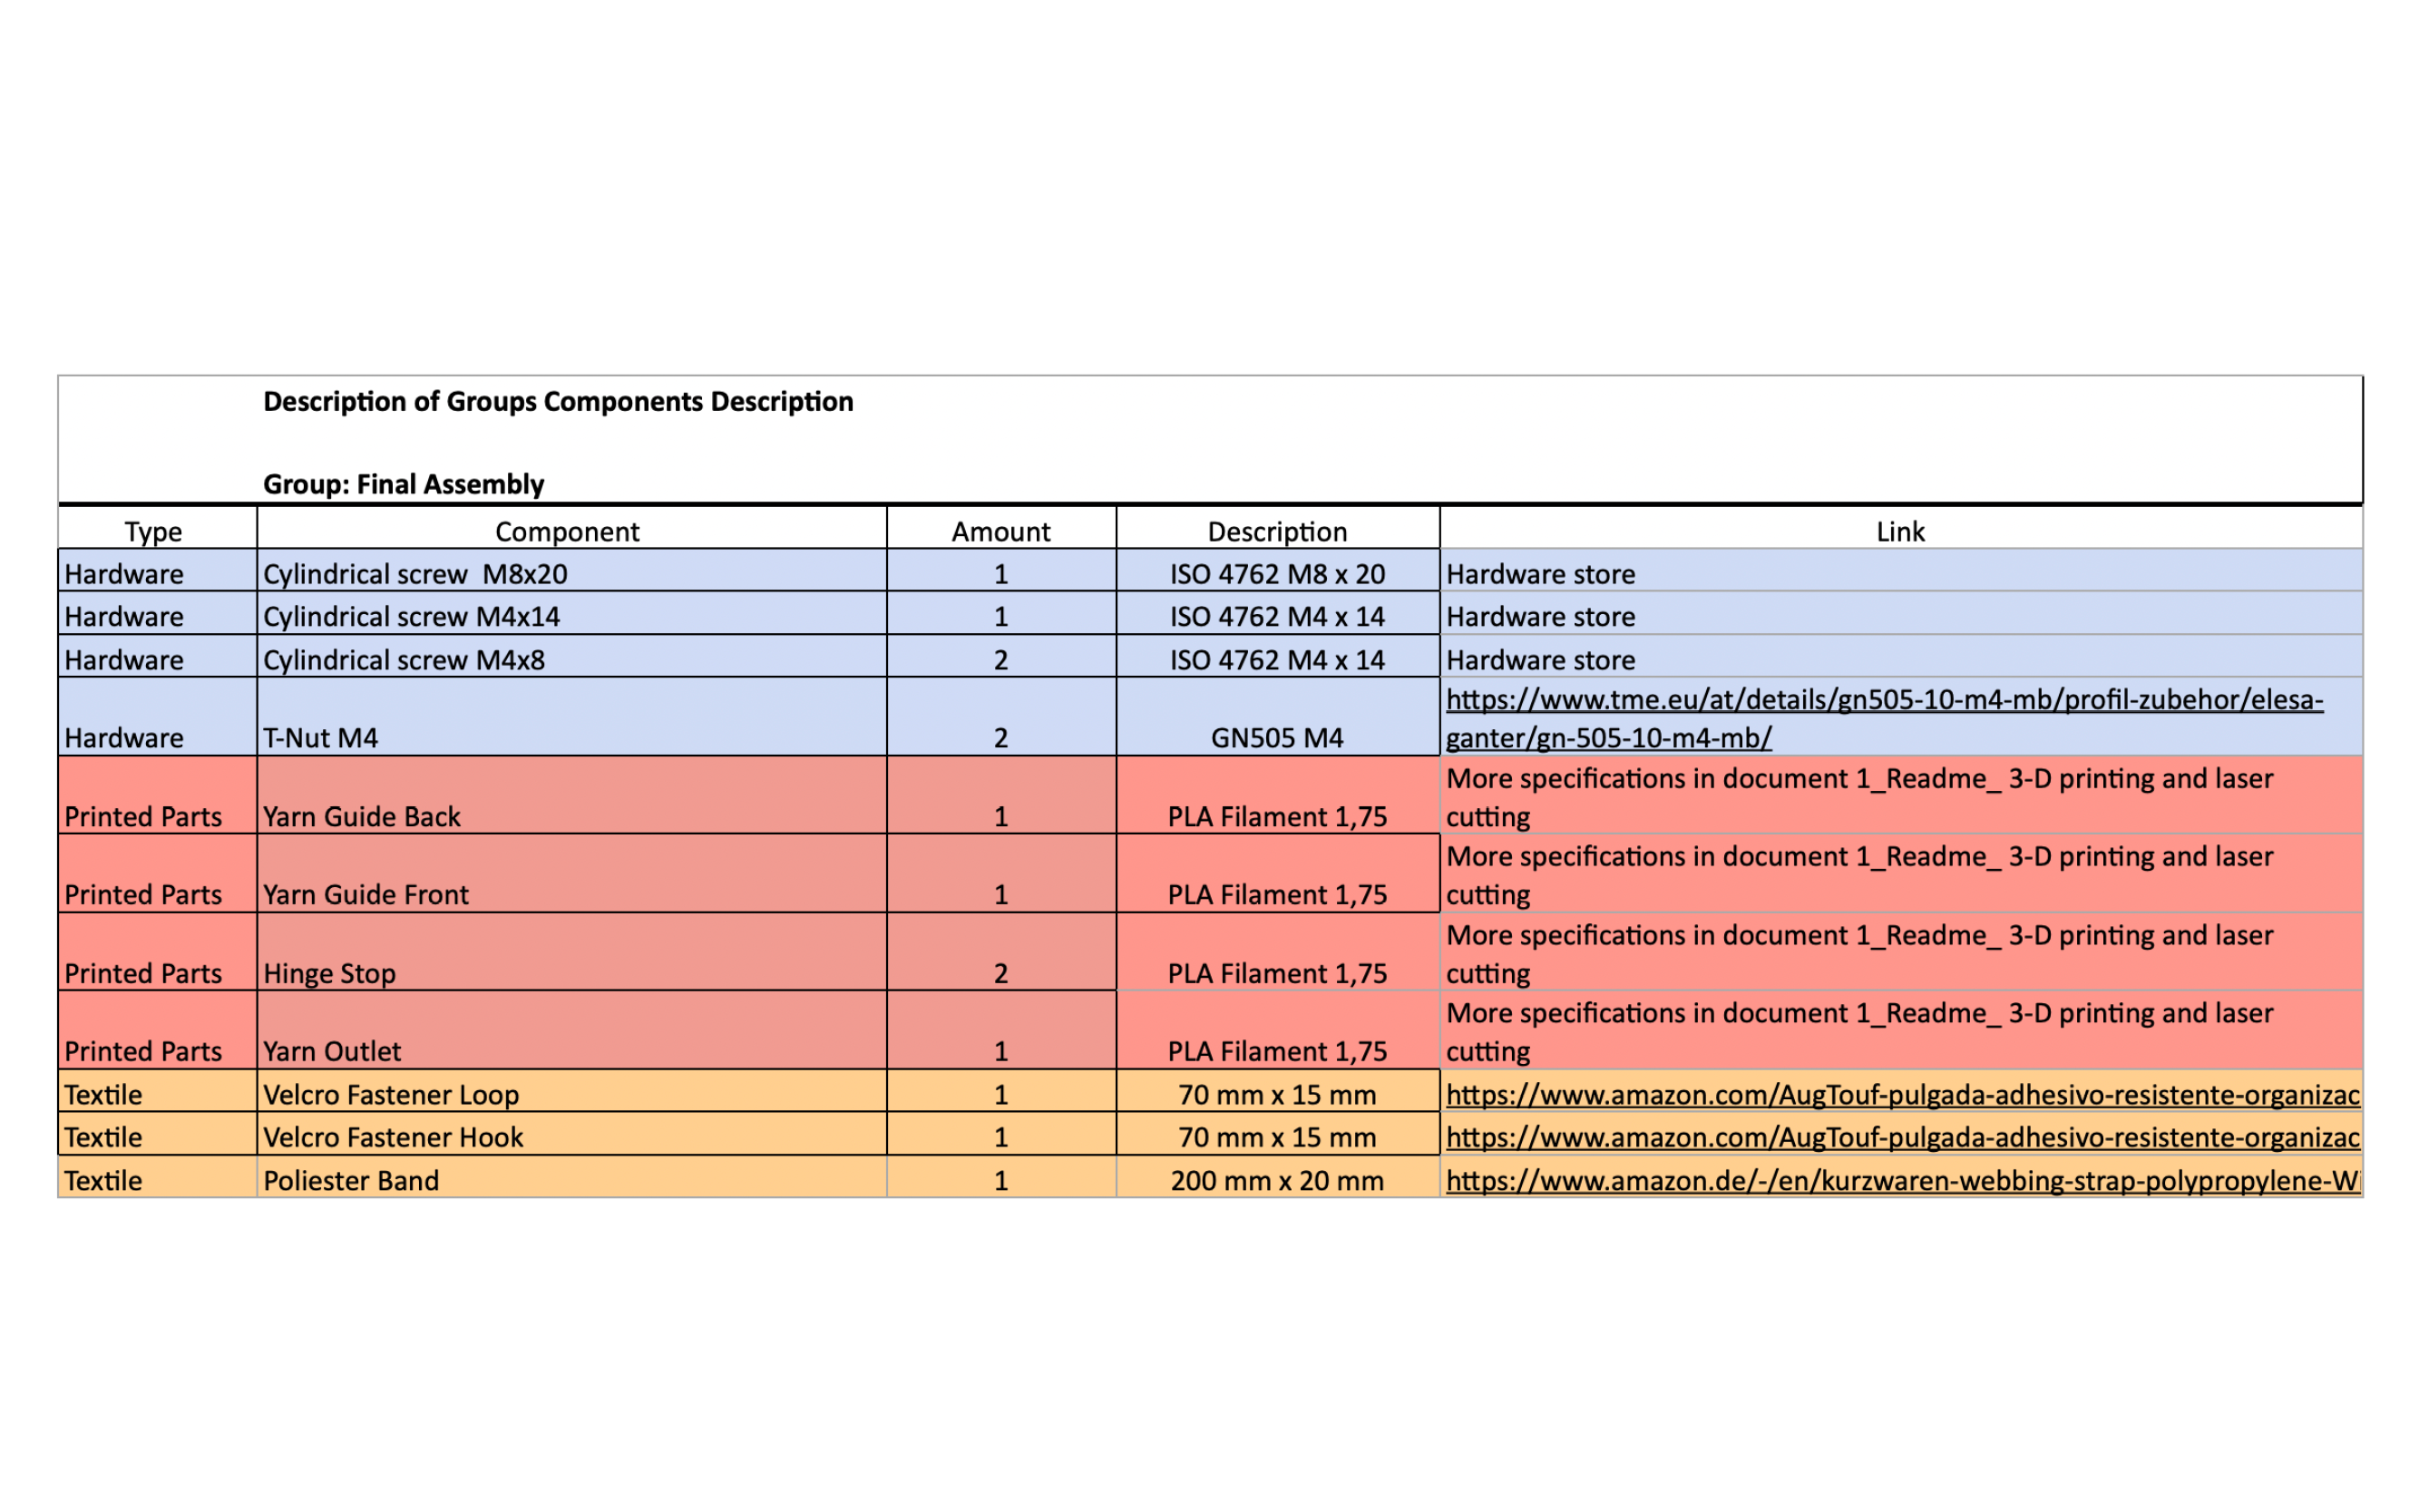
6 | Final Assembly
Components
Each group previously built
Bulding process
Tips When screwing the driving wheels to the structure you should slide them into the structure at the same time as the motor holder 3d printed part - and THEN screw
Result
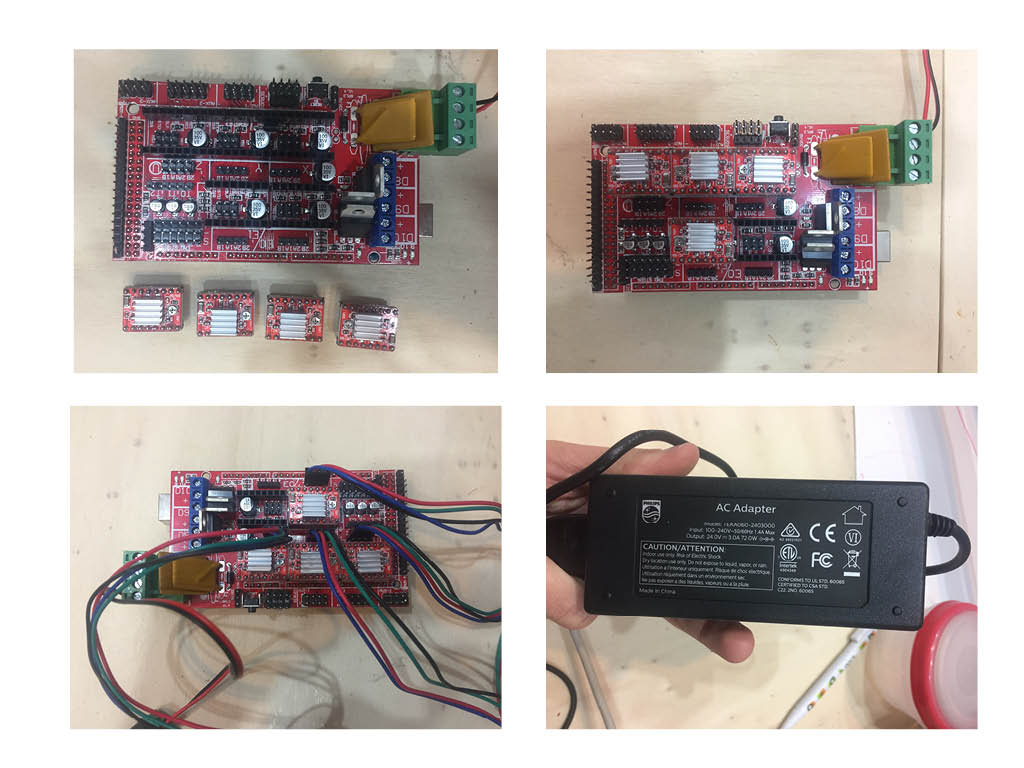
7 | Elec and Software
For elec it was easy we had to paste the drivers motors connect them and follow the steps described
The only things is to calibrate the motors drivers following the tutorial. (wich we did later-first we tried to ake it work - be carrefull follow step by step as you can bburn the motors)
For the software installation of the arduino sketch follow the steps of the Gif: (you have to install the AccesStepper into your library)
Then install Processing and follow the steps of the Giif:
Result & TO DO List
TO DO LIST
NOTE to improve / finish
Structure:
- Changing the hinge
- Make the level - level the wheels
- Screw the elbows
- Screw Wheels - and Maybe 3D print them
- Align the blue driving wheels
- Check the motor drivers-calibrate
Possibles improvements
| Notes for possibles improvements | |
|---|---|
| General | |
| - number of slides (pagination) | |
| - Put more screws | |
| - 3D visuals not always clear, lack of photos or video on the montage, lack of zoom and details | |
| - Lack of a photo of the finished product for each step and what it is on the overall | |
| - Hollow 3D filling shapes too long to remove (time required: 3 hours for 1 person) | |
| Group 1 structure | |
| - 230mm profiles: material list: 4, HILO documentation: 6? (we have the impression), in reality: 5, we have intersected a | |
| - Angle slot: what is an angle slot? appellation + dubious visual, + it is not a profile that we see (the 2 bars where the machine is attached). lack of explanation. | |
| - Small brackets to fix exterior profiles not in the list! | |
| - Visual: no explanation on how to fix the angle slots. | |
| - Tap wrench: what is it? lack of visual + difficult to know what it is for | |
| Group 2 drive wheels (blue) | |
| - M3 12: some are missing | |
| - Visuals: order of slides to review. Otherwise, it looks like a pierced rod is needed to fit into the motor rod | |
| Group 3 trailing wheels (black) | |
| - bearing: ours is already included in the wheel | |
| Group 4 spindel platform | |
| - trapezoidal screw: we don't have any | |
| - with the 9mm rod, specify that you have to go to the bottom | |
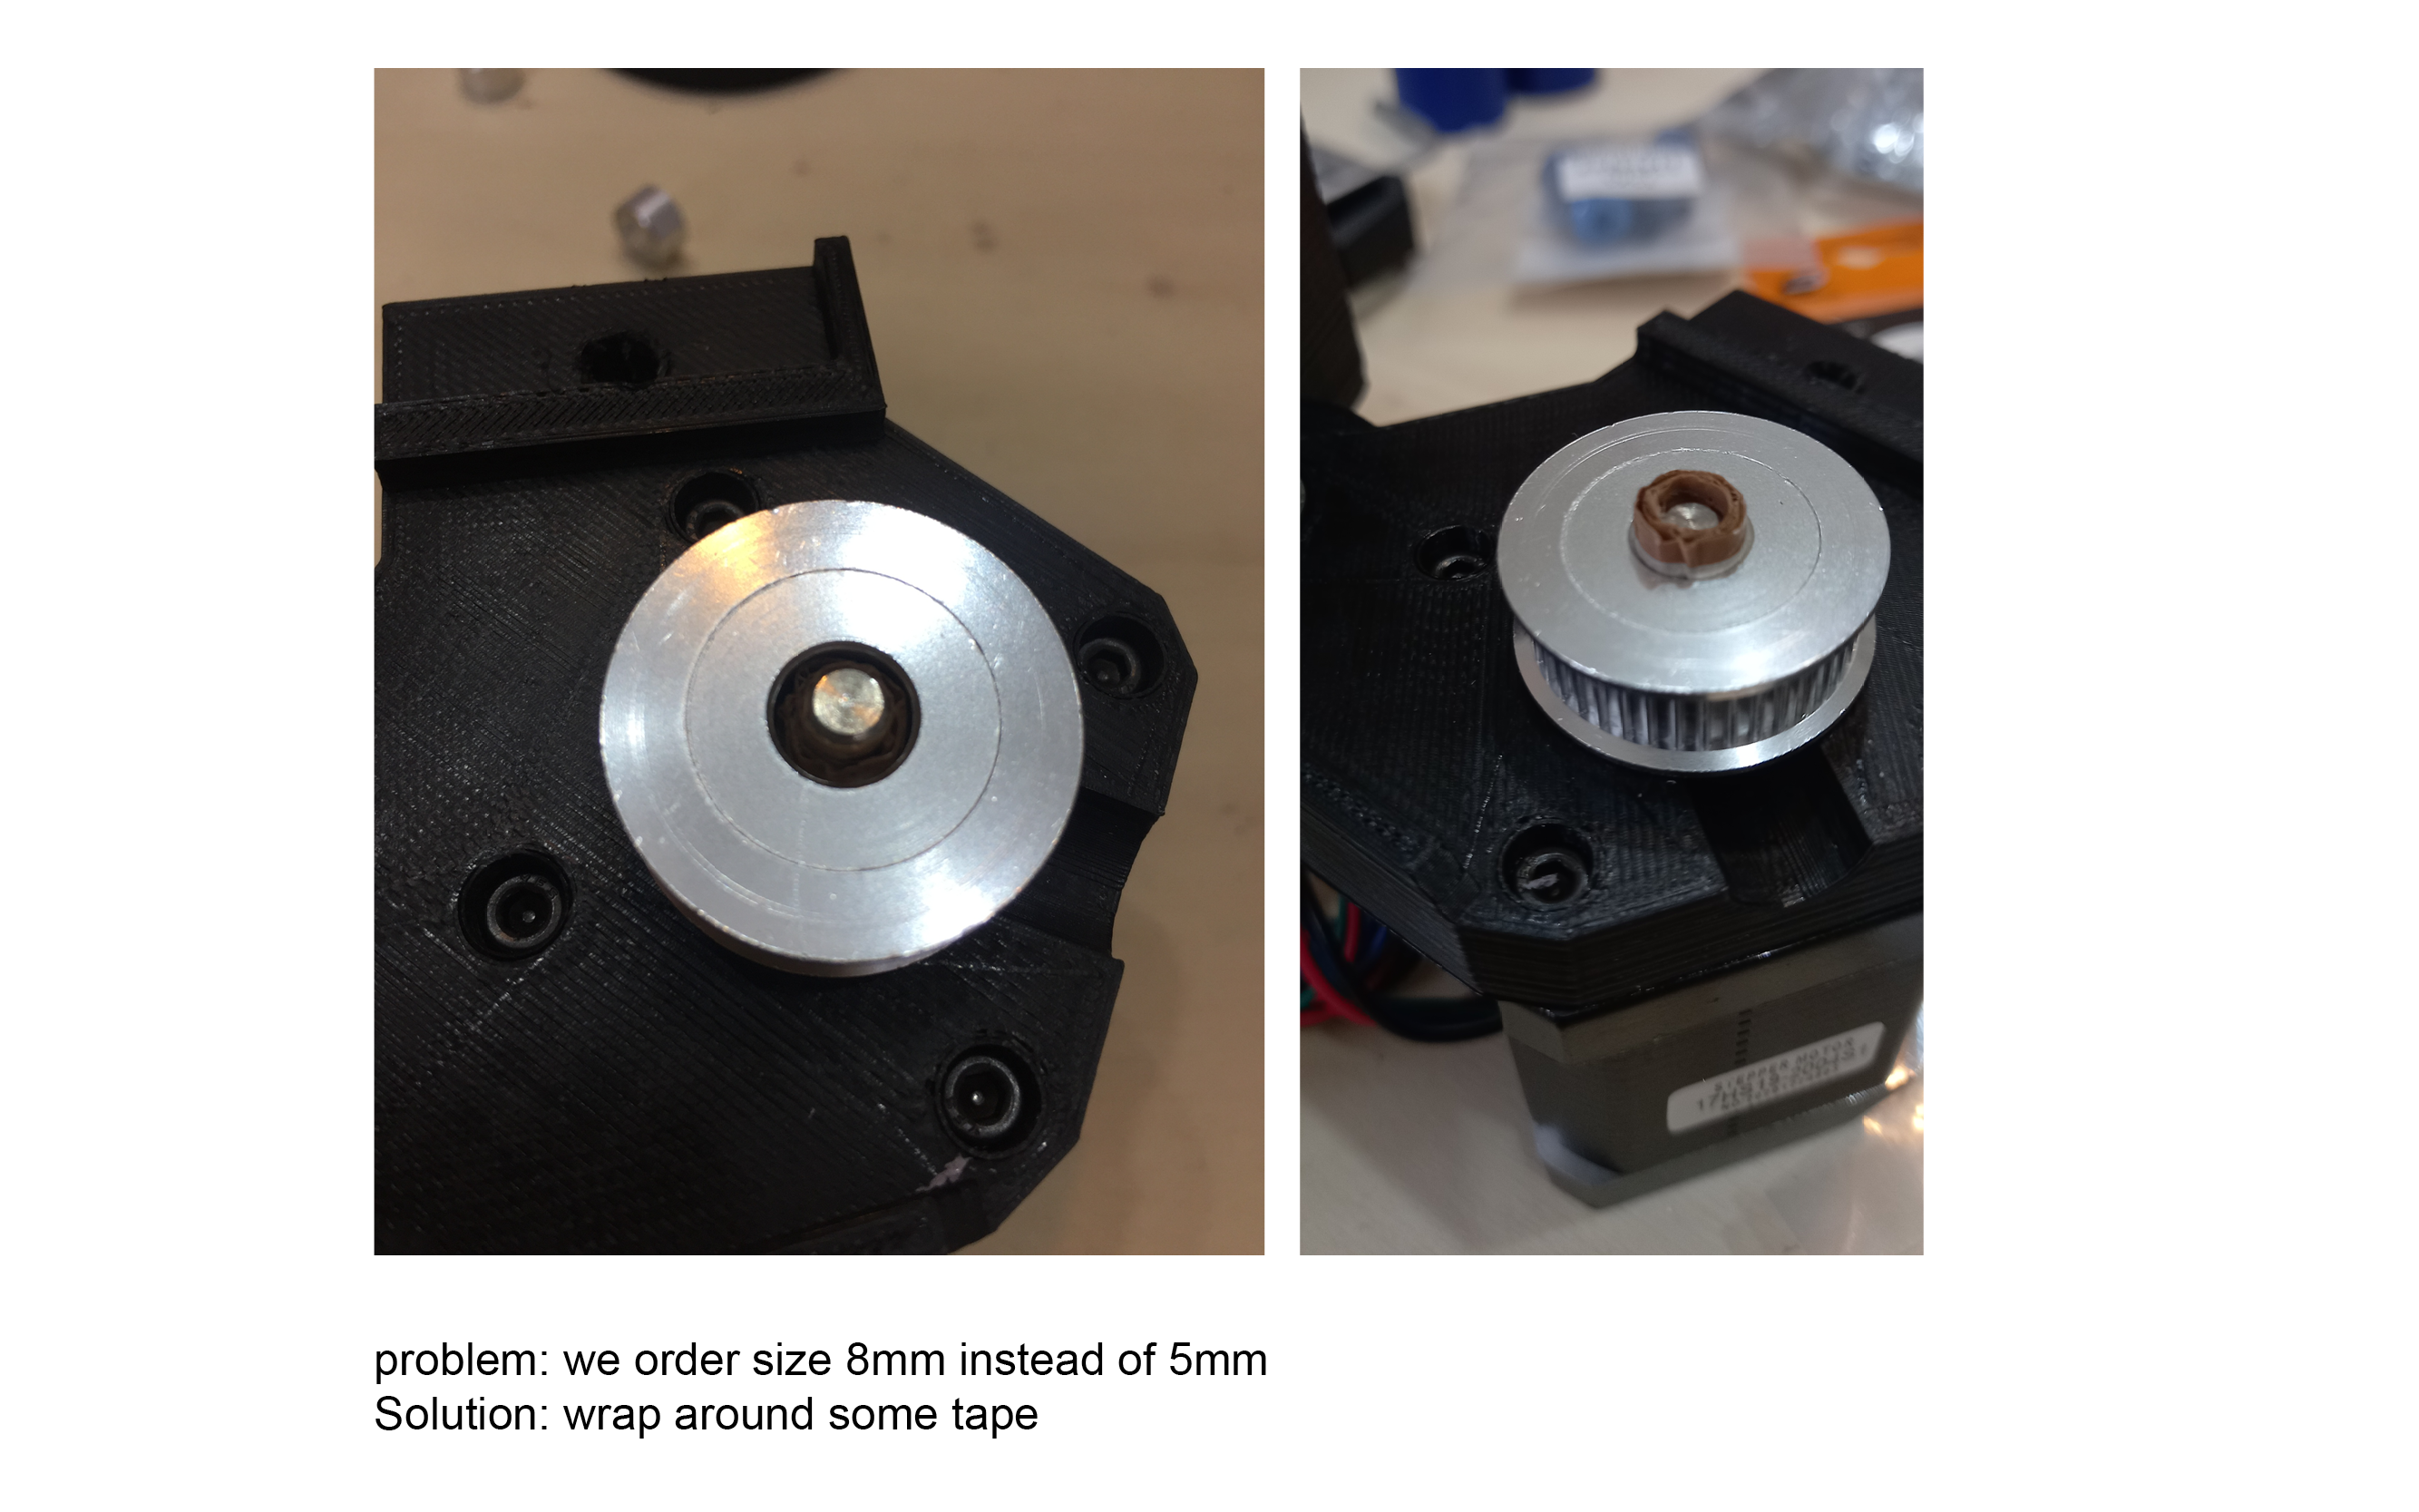
| - GT2 pulley: material to highlight in the list, because we ordered 8 instead of 5 mm. We put scotch around | |
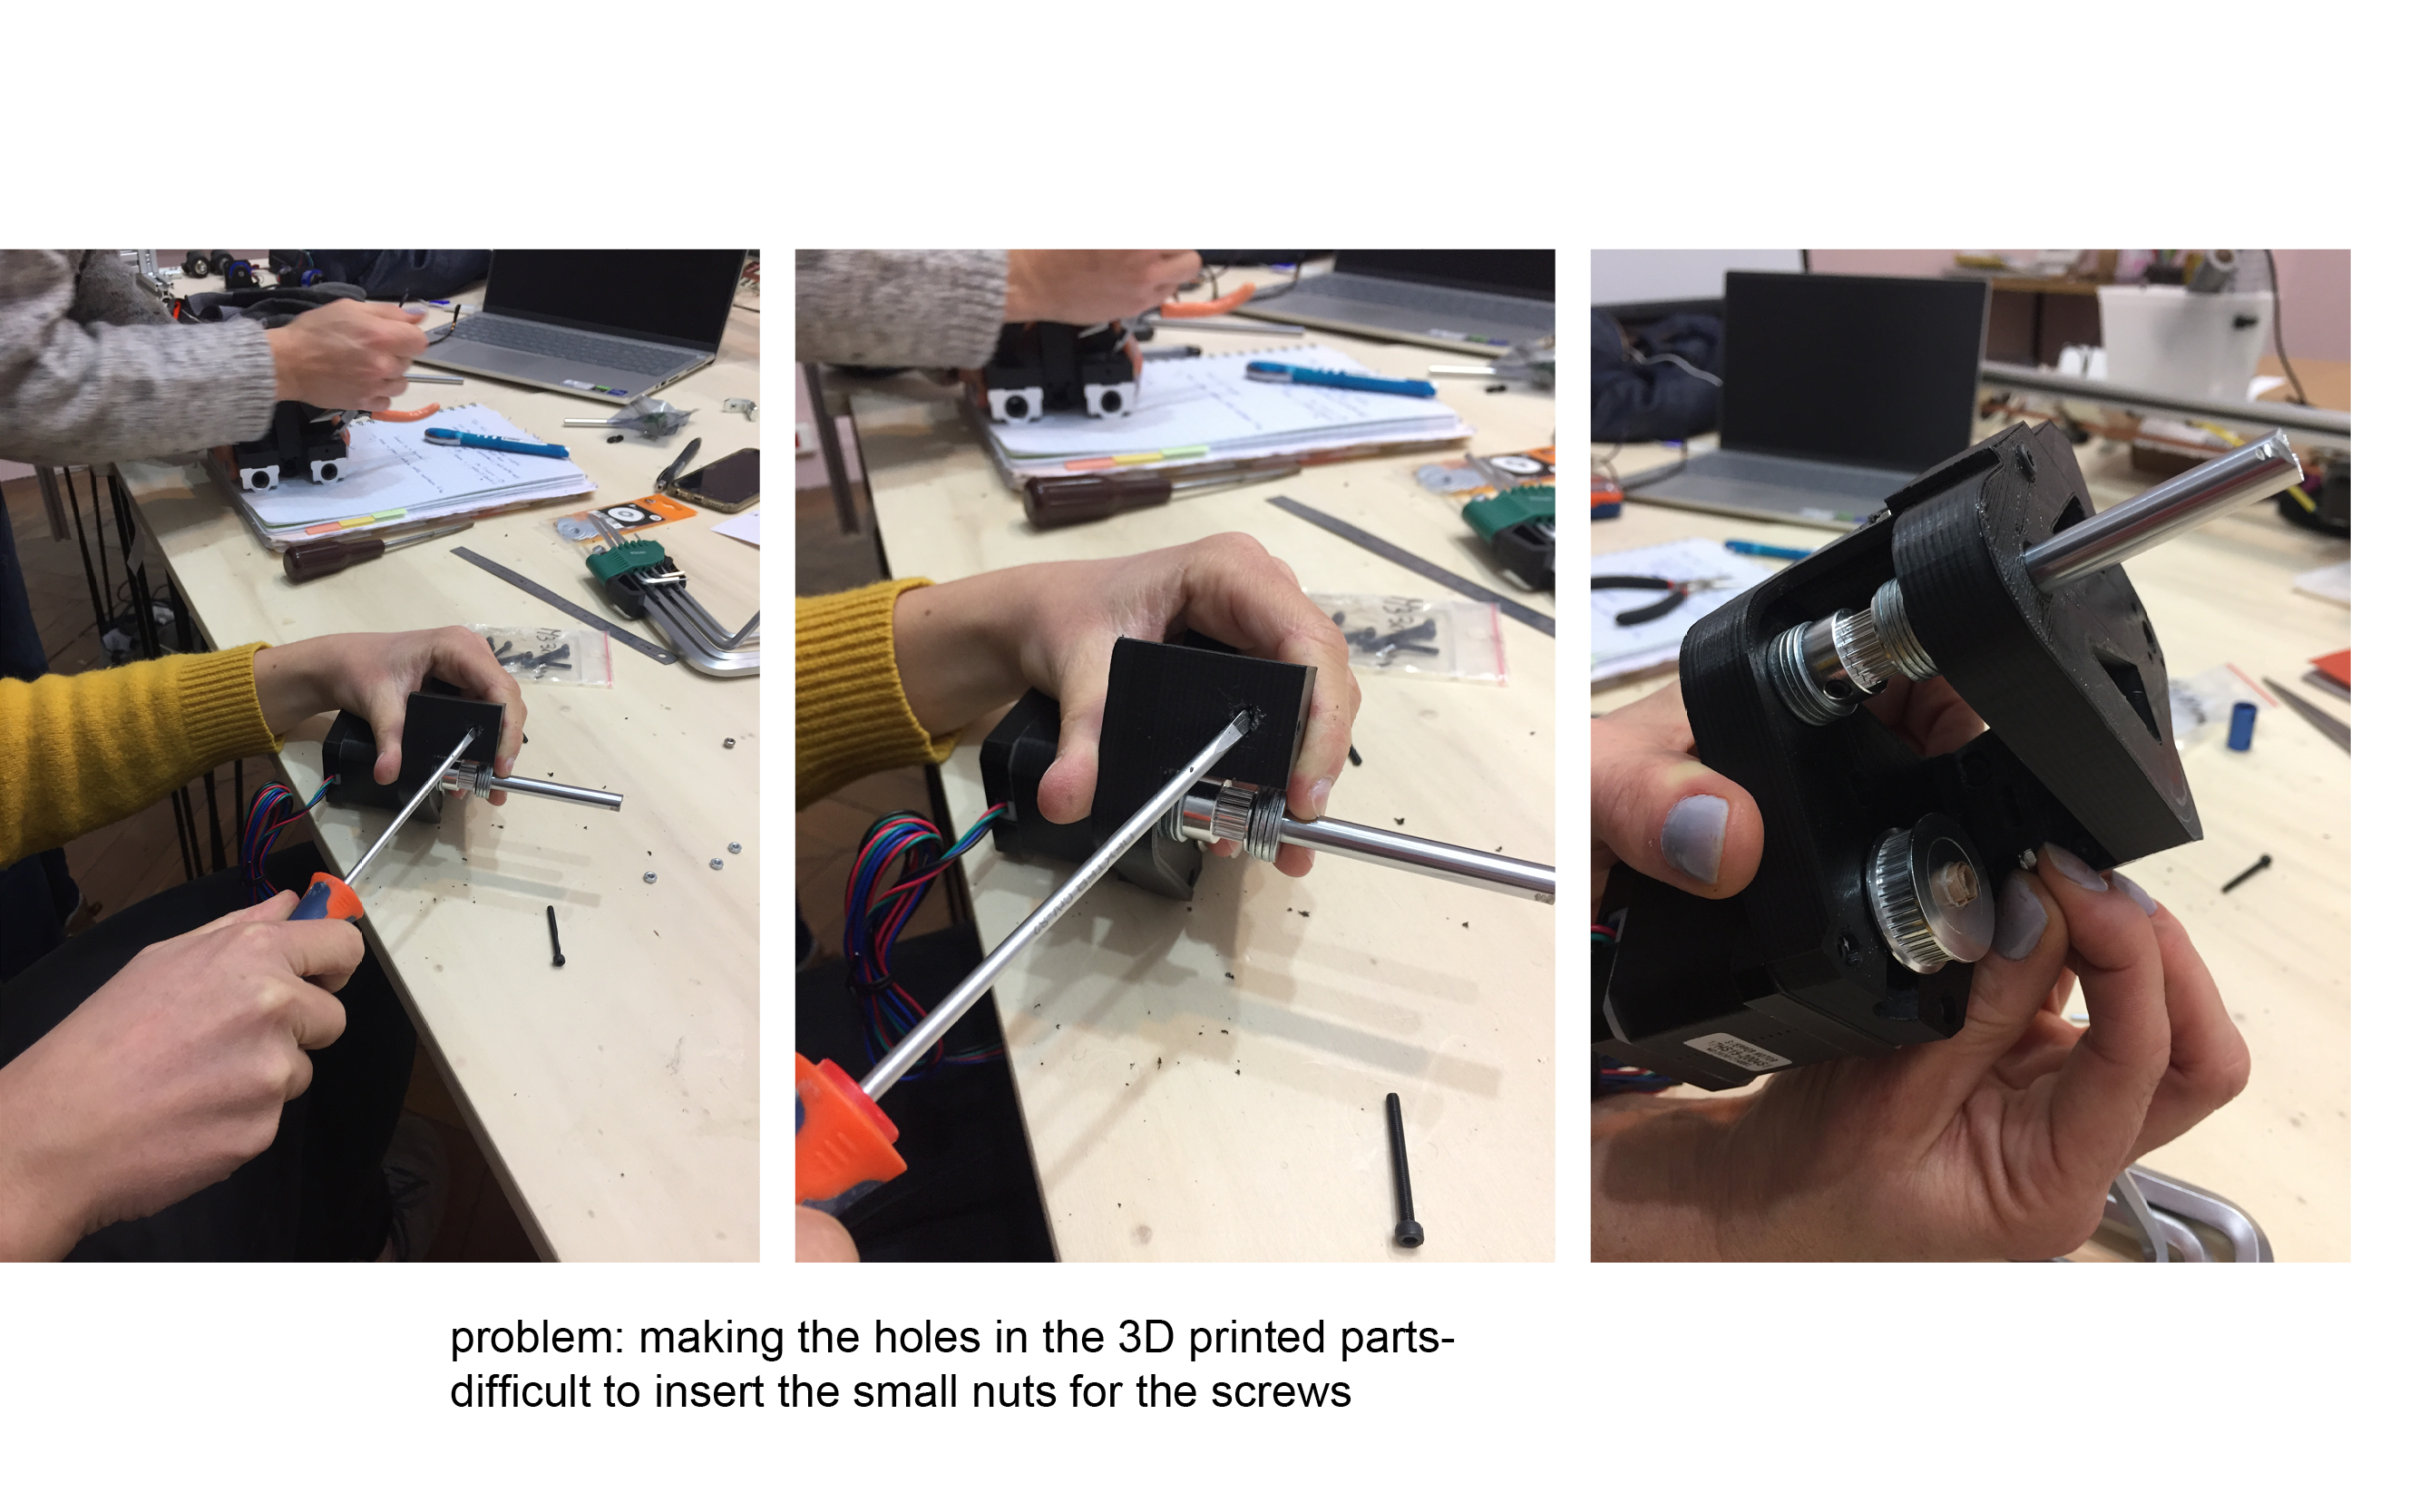
| - M3 nut holes complicated to access (holes too small) | |
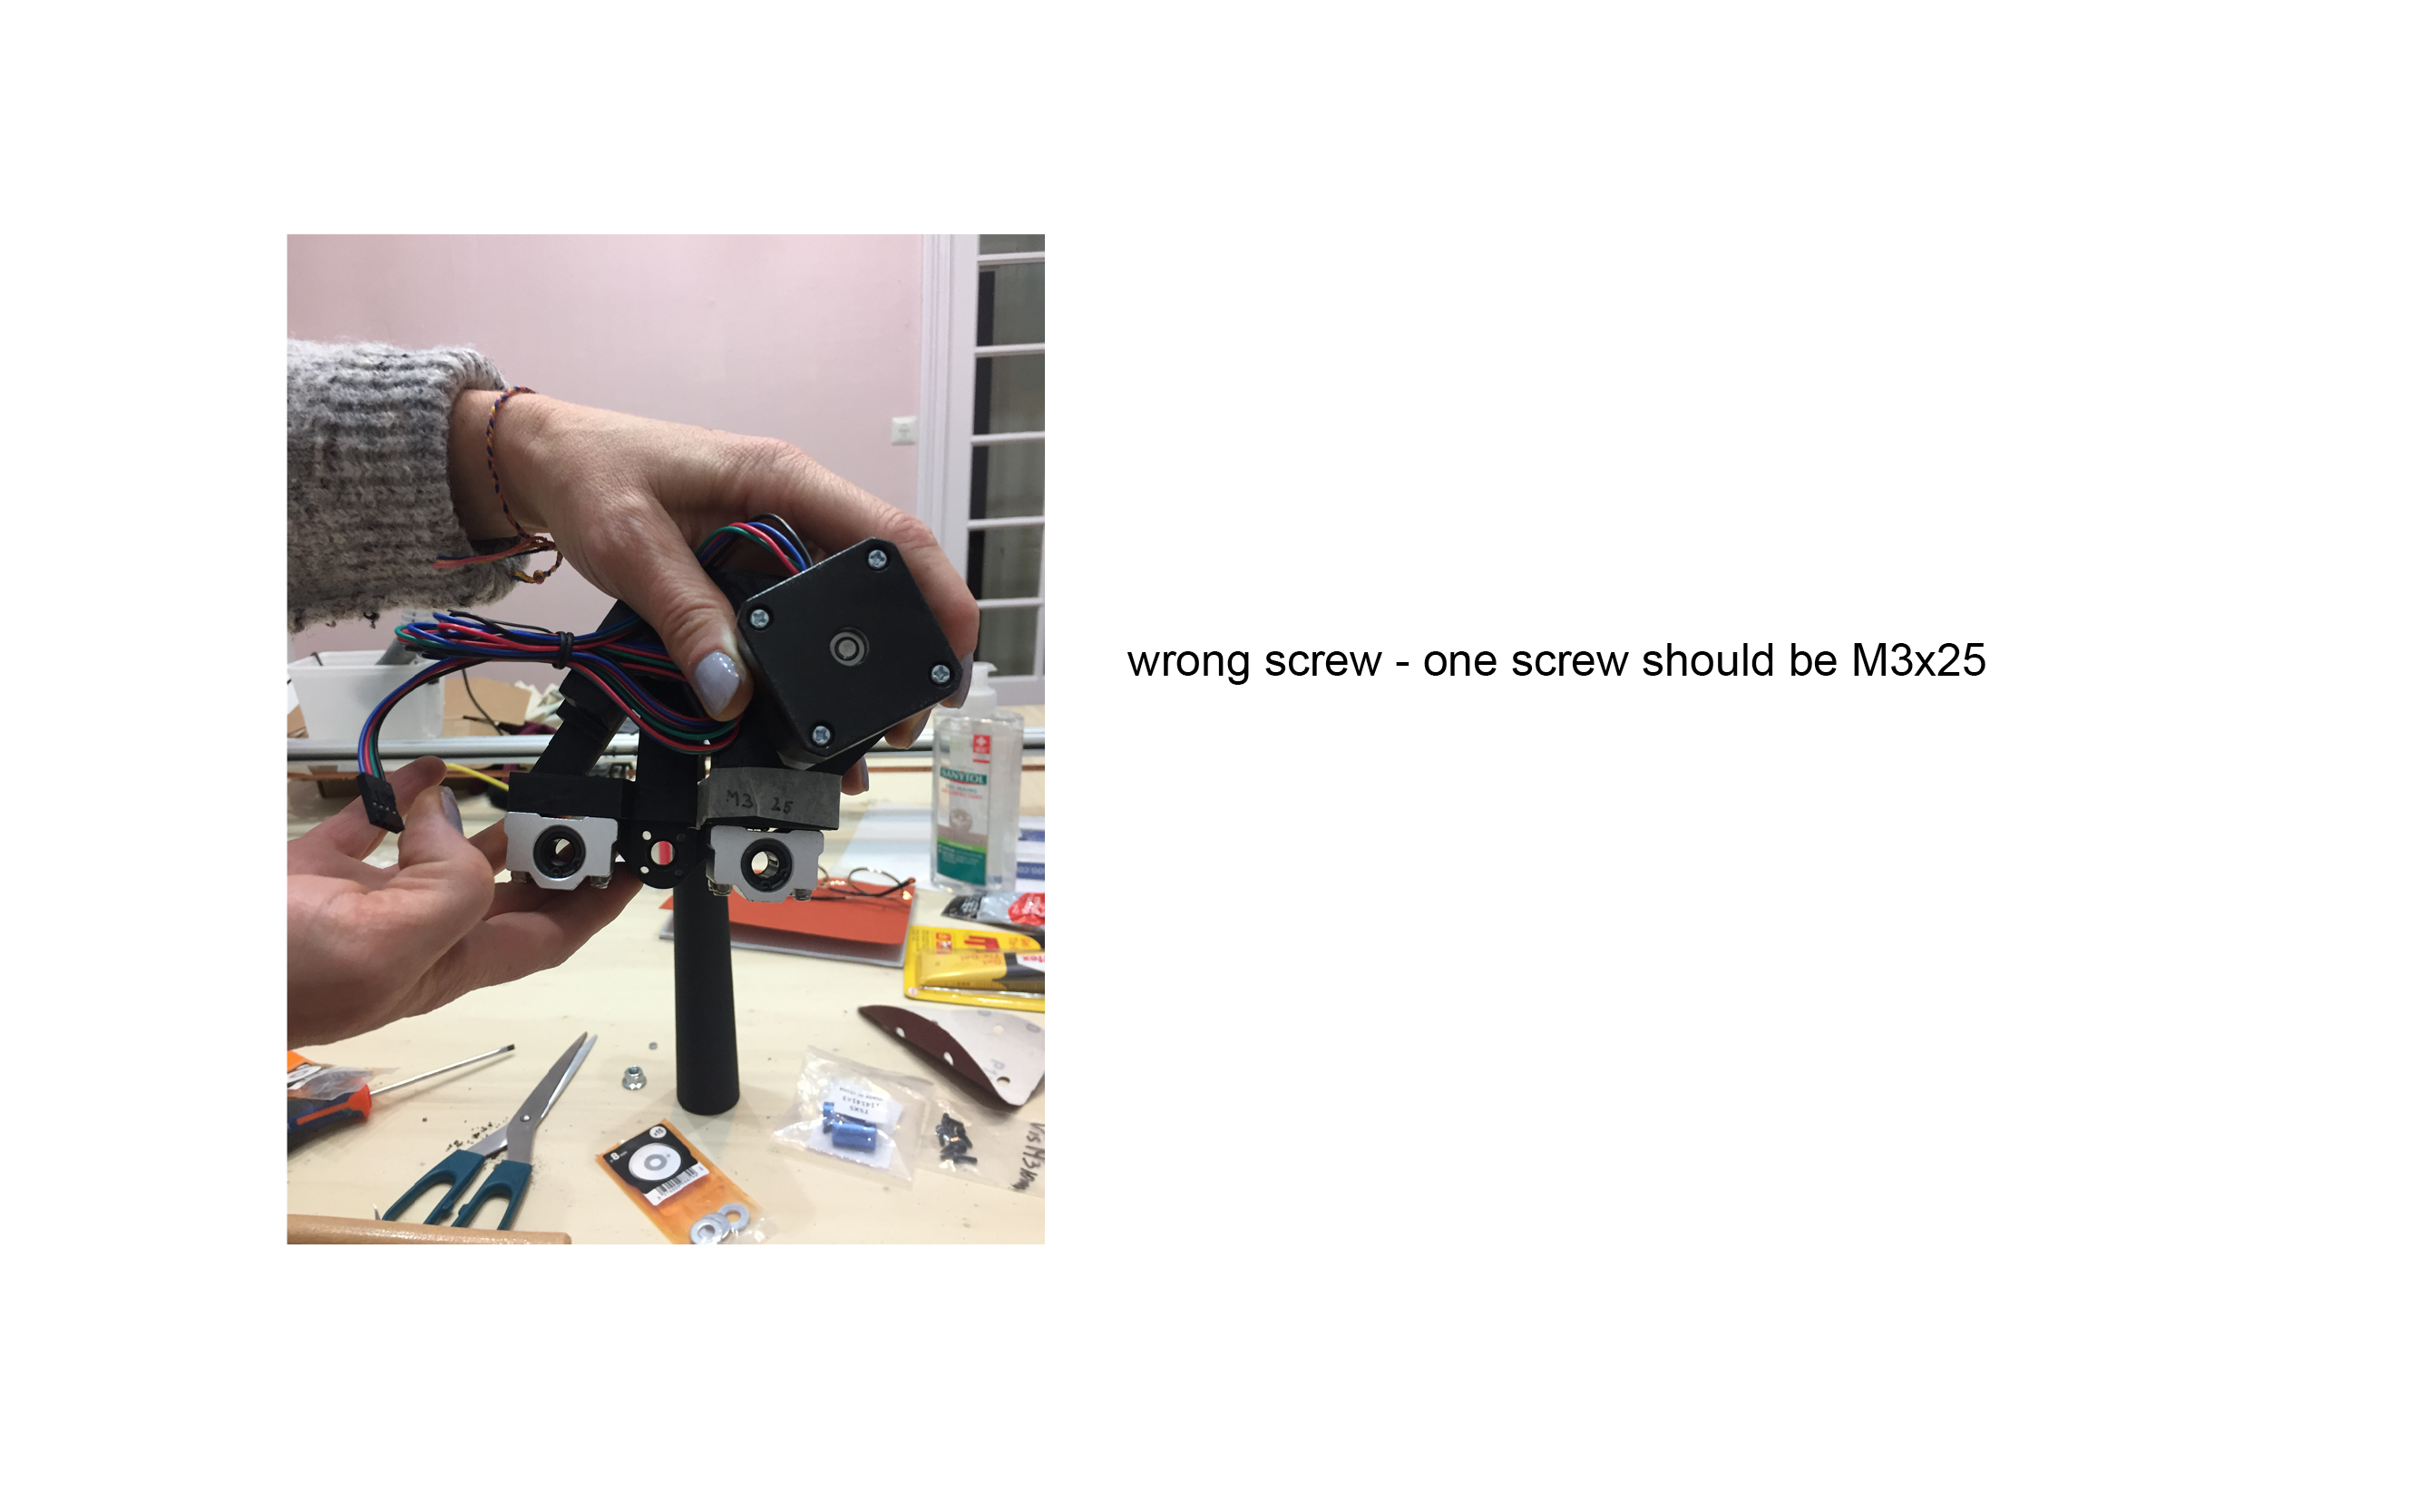
| - A M3 30 screw too large (connects platform A to platform B), you need M3 20 | |
| - Last slide: M3 10? We don't know where to put it | |
| - A step is missing: belt pulley ??? We have to undo everything and put it back | |
| Group 5 elevator | |
| - M3 12 missing | |
| - 3D notch ring too small and screw impossible to screw. Nut too big? Even with the smallest too we did not succeed. - |
Useful links
- Class
- Workshop HILO Machine Part 1 by Sara Diaz
- Workshop HILO Machine Part 2 by Sara Diaz
- Workshop HILO Machine Part 3 by Sara Diaz
Drive https://drive.google.com/drive/u/1/folders/1AAAy_Pwtf1zD_GUeYXFEIw4tMiugKzlC
Gitlab https://gitlab.opensourceecology.de/verein/projekte/cab/hilo-spinning-machine/-/tree/master/5_Hardware/1_Instructions_HILO3.0
Knitting Machine and Drawing Machine with Pauline
Knitting:
Drawing Machine: