8| Wearables
Inspirations


Basic Ouput (LEDs) - Arduino
How to drive an output device (a load) with Arduino
I followed Emma's tutorials, and made a summary table of all the different implementations I tried with the Arduino.
| Implementation | SKETCH | RESULT |
|---|---|---|
| BLINK | ||
| Only one Led / Only one load: Blink a Led, turn on/off a load, Using the Arduino Sketch "Blink" 01_blink_led | 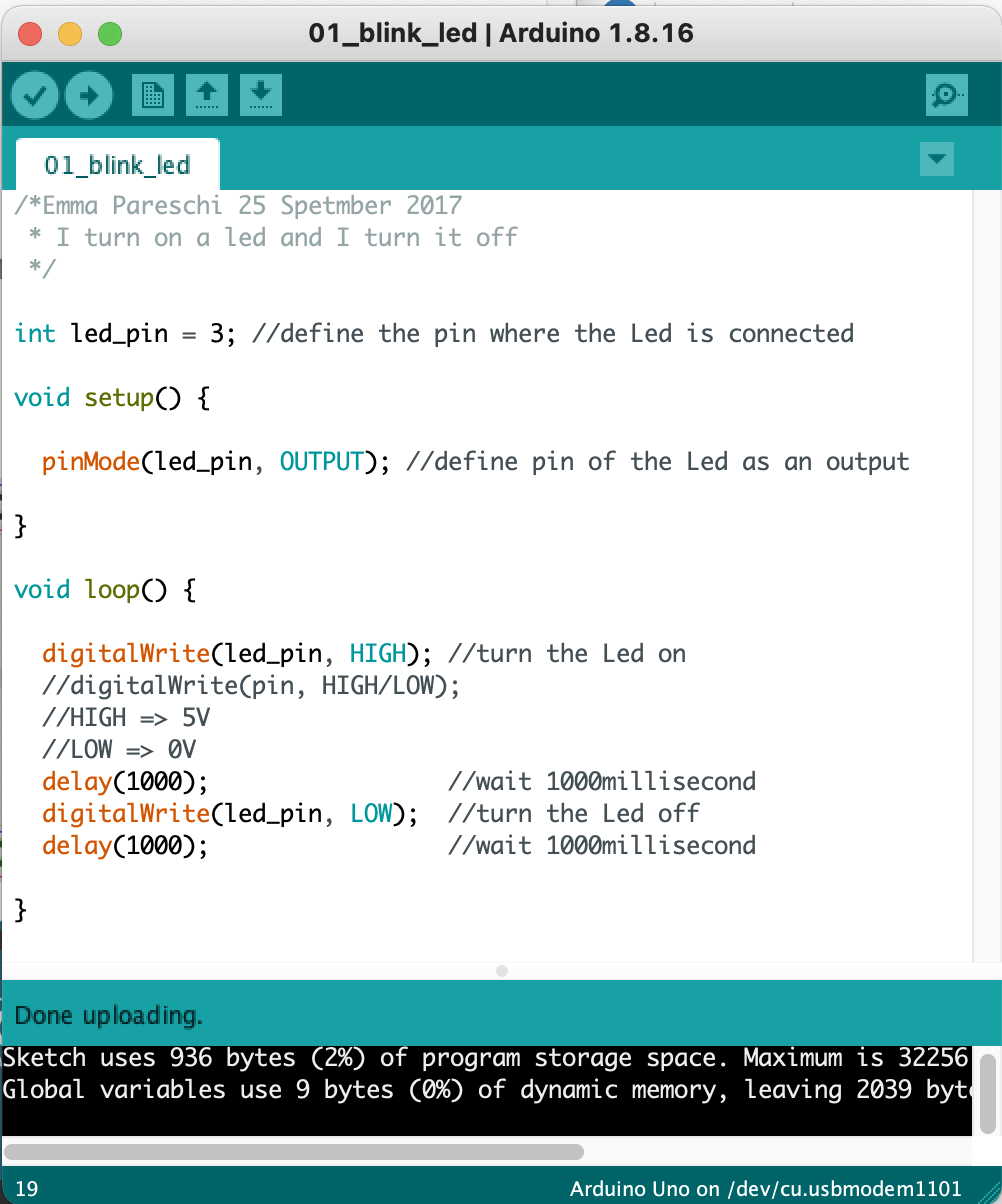 |
|
| INTENSITY | ||
| Set the intensity of the Led, control the amount of current 02_led_analogwrite | 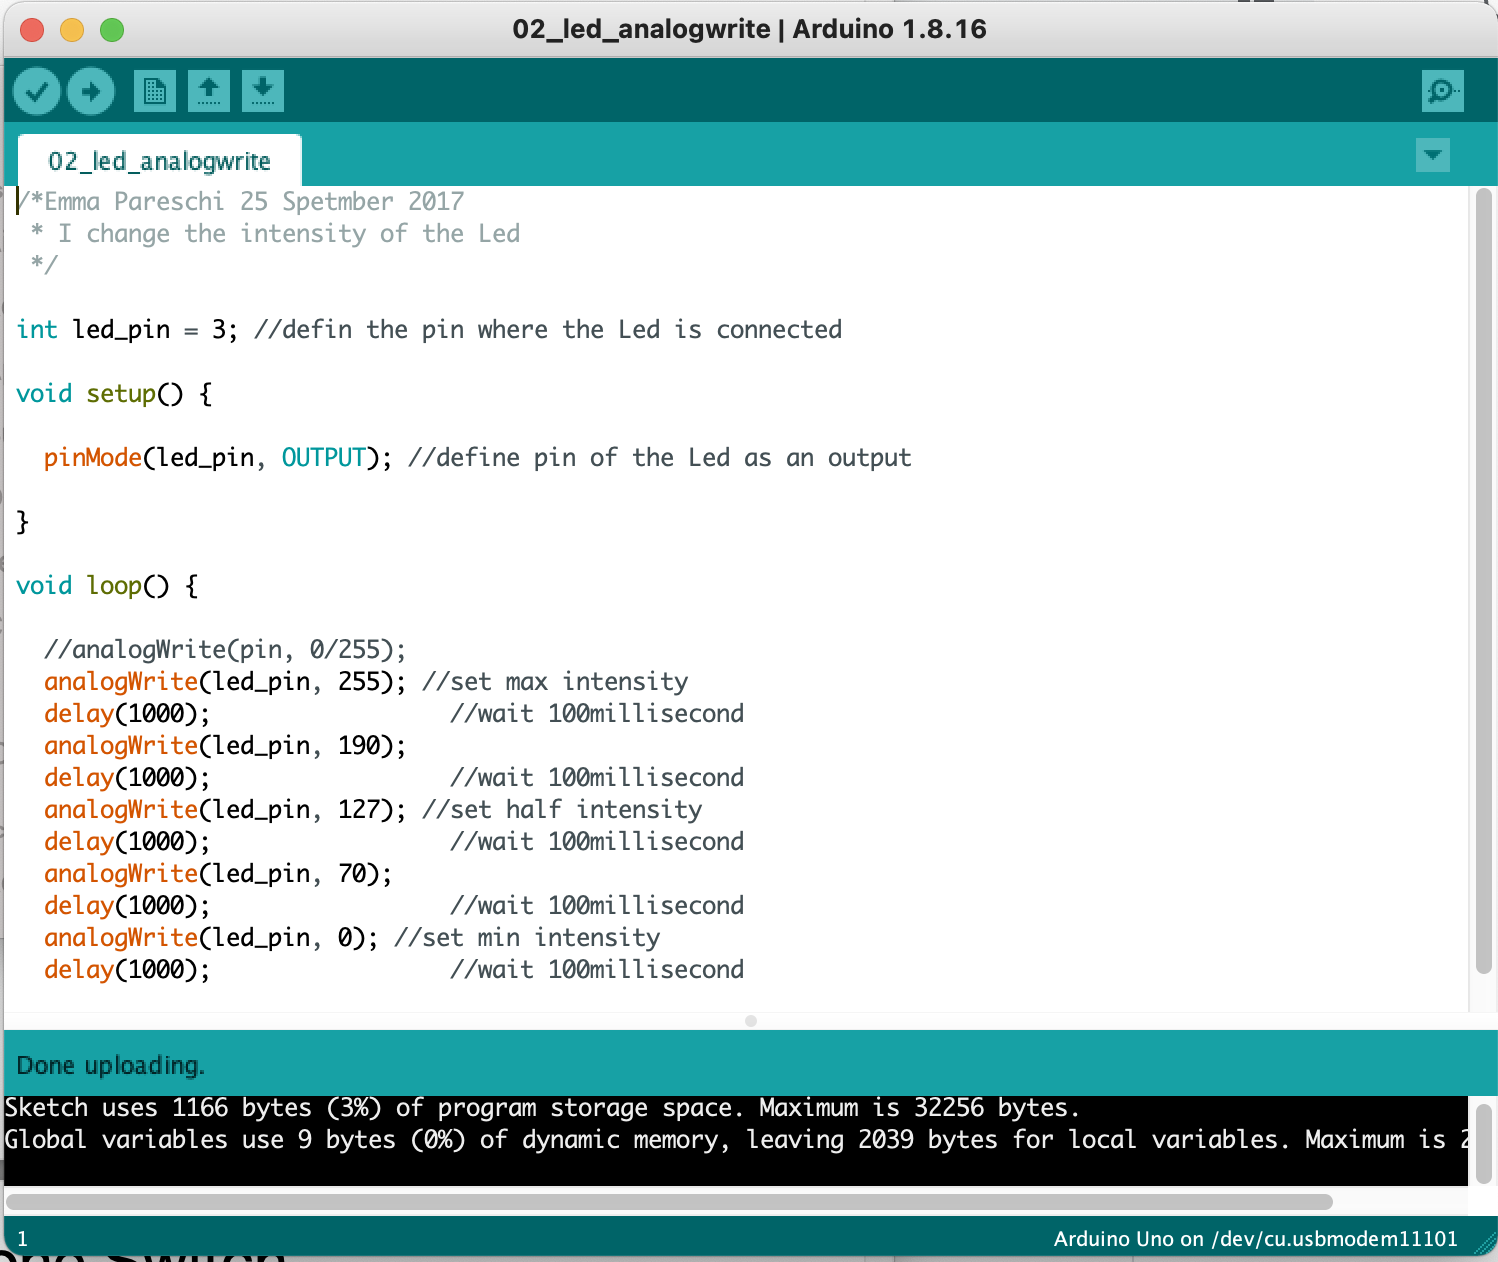 |
|
| READ SENSOR | ||
| Led and Switch / Load and a Digital Sensor , Read the Sensor - 03_read_DigitalSensor | 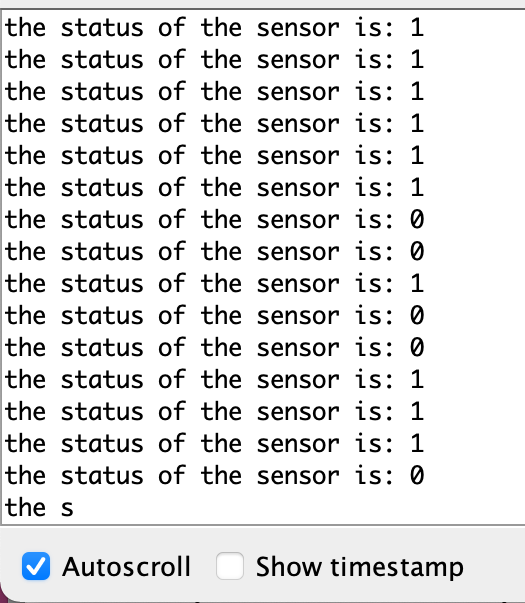 |
 |
| DIGITAL SENSOR - BUTTON ON/OFF | ||
| Led and Switch / Load and a Digital Sensor : if the switch is pressed => Led ON - Turn the led ON/OFF if the switch is pressed 04_button_led | 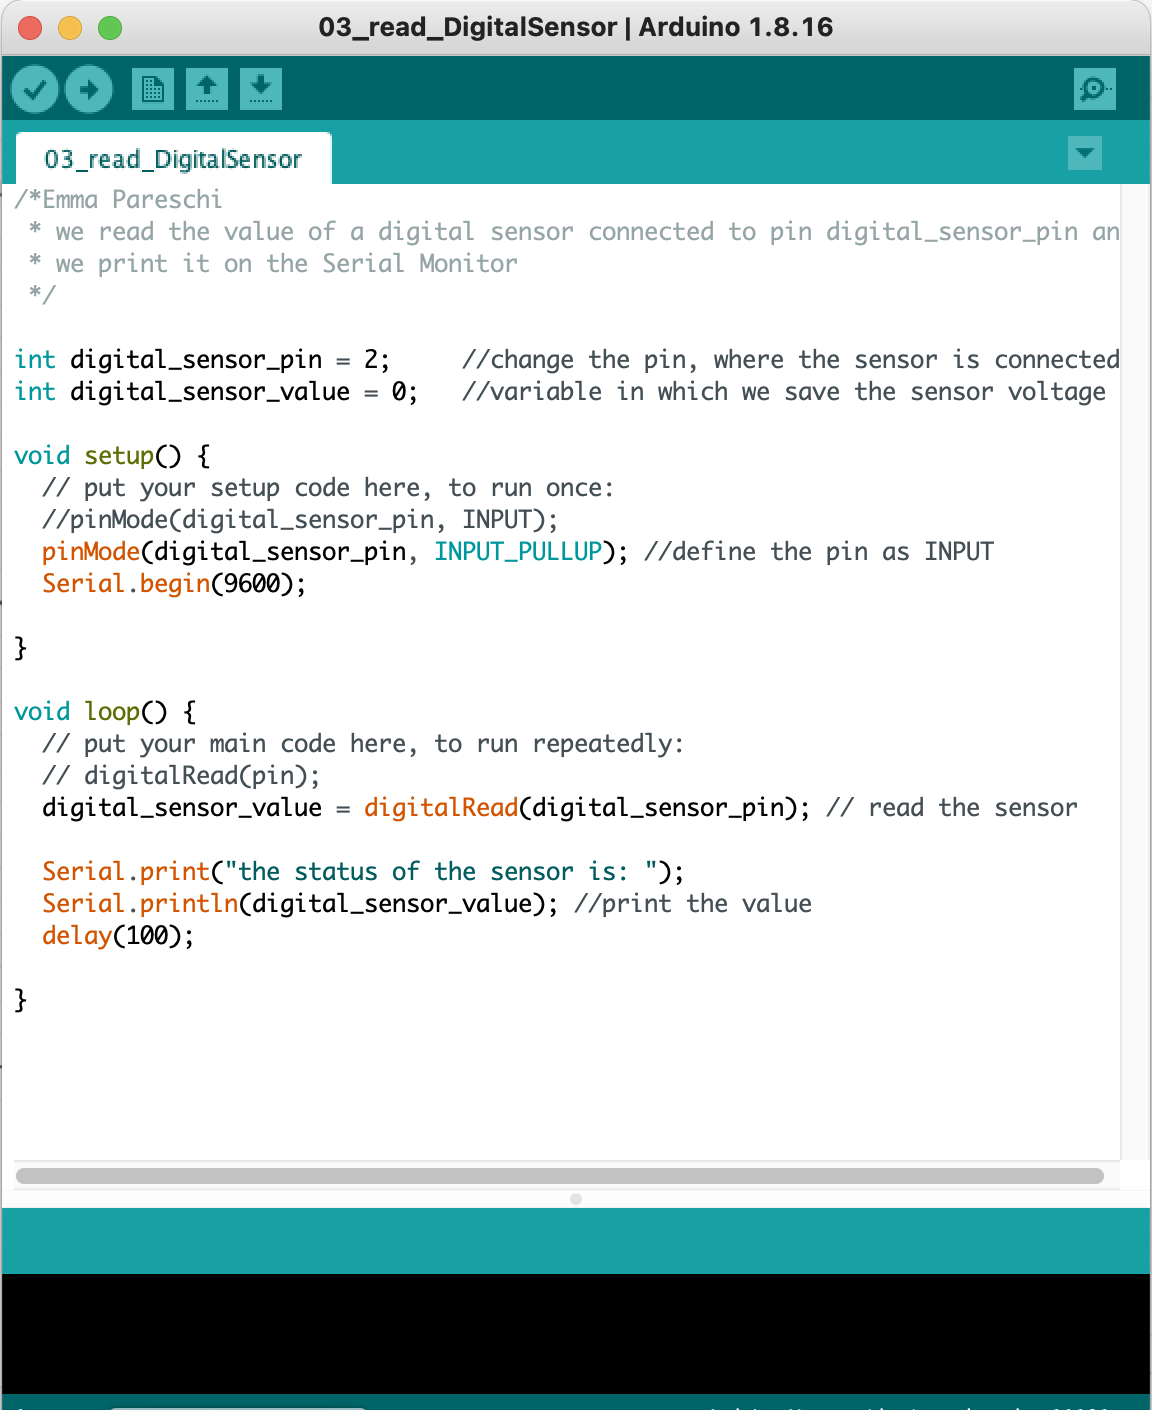 |
|
| COUNT | ||
| Led and Switch / Load and a Digital Sensor : Count how many time the switch is pressed 05_counter | ||
| DIGITAL SENSOR PRESSED ON/PRESSED OFF | ||
| Turn On the Led while the switch is pressed - 06_led_on_off | 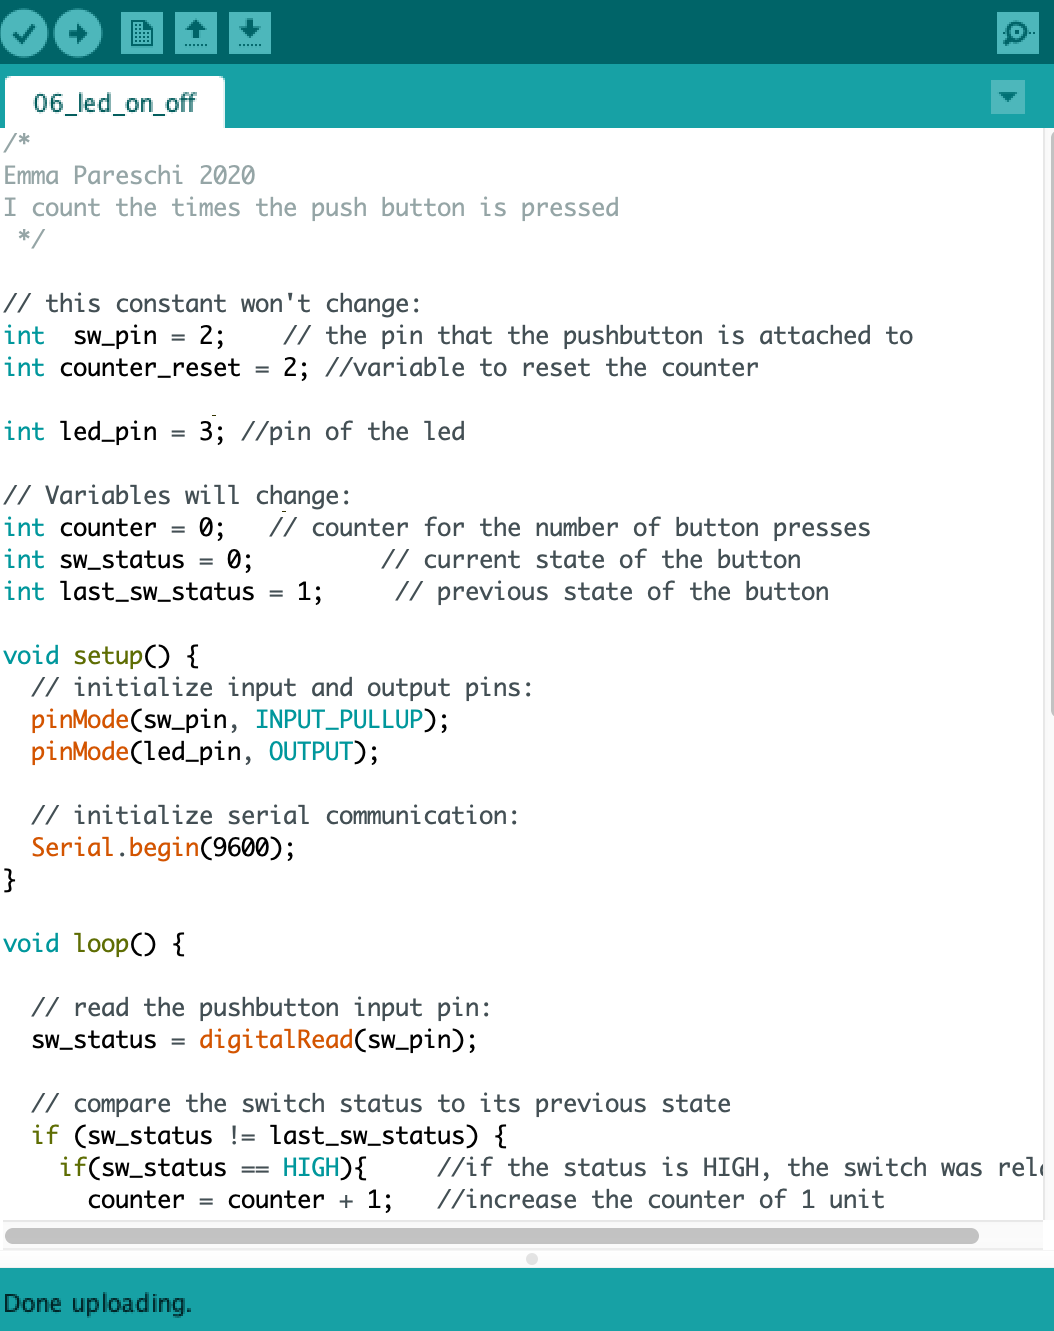 |
|
| ARRAY | ||
| Led Array and Switch / Array of Loads and a Digital Sensor: we control the amount of the Led based on the times we press the switch - 07_array_led_switch | 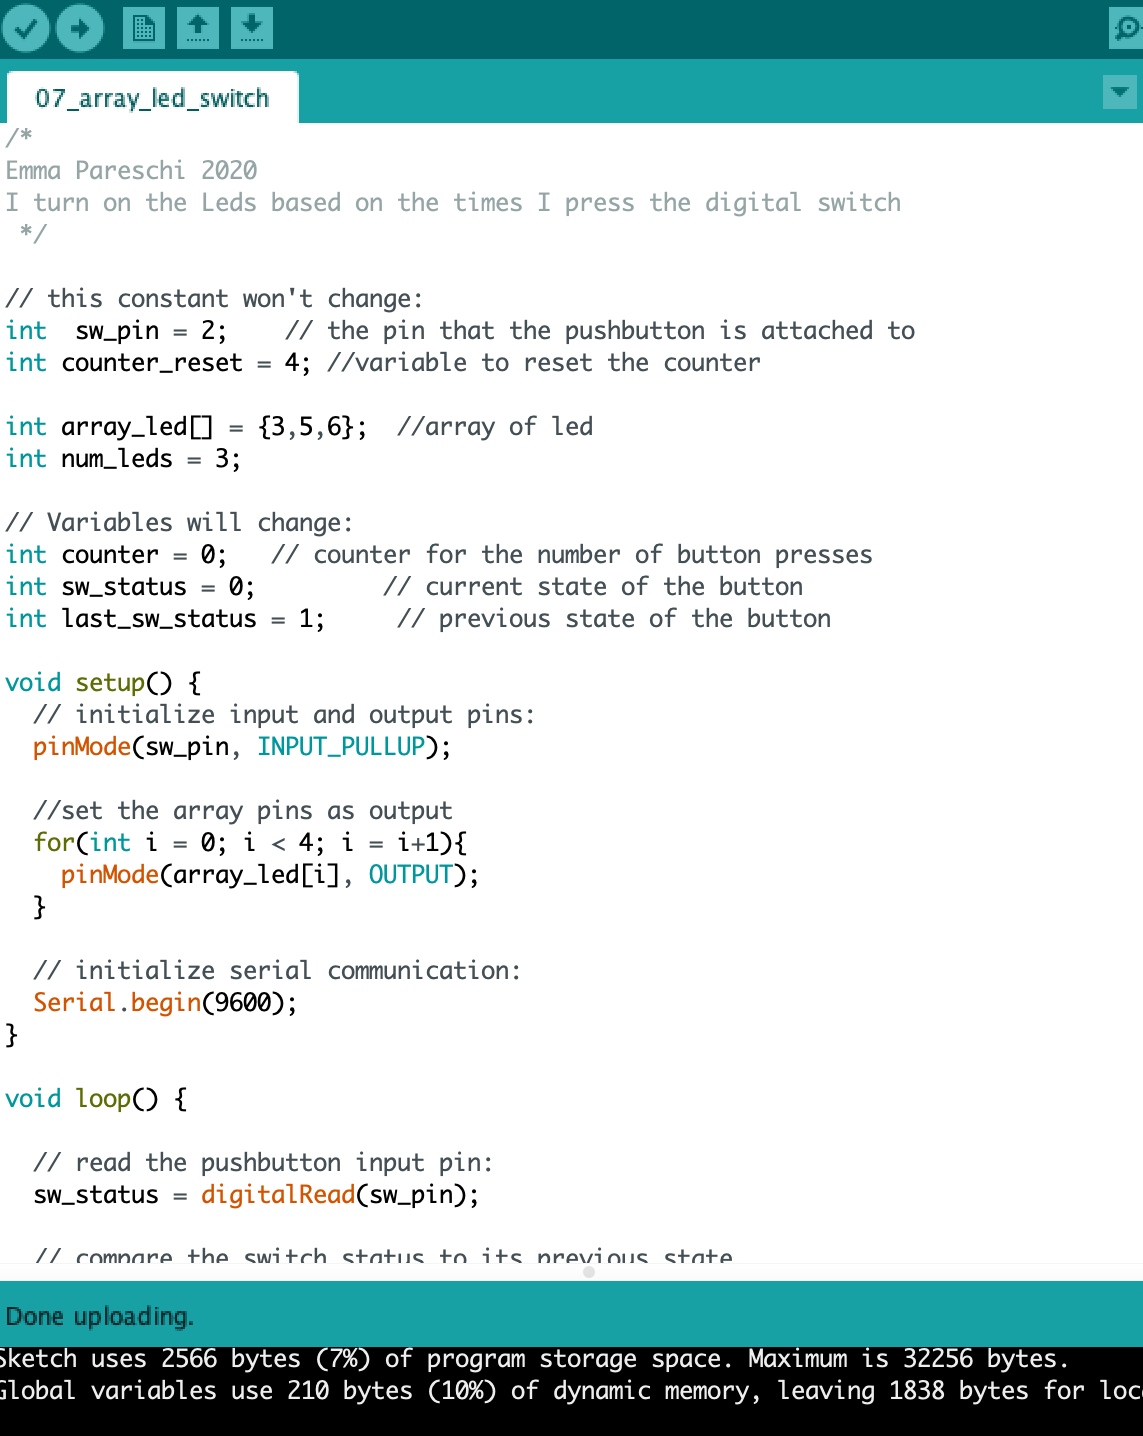 |
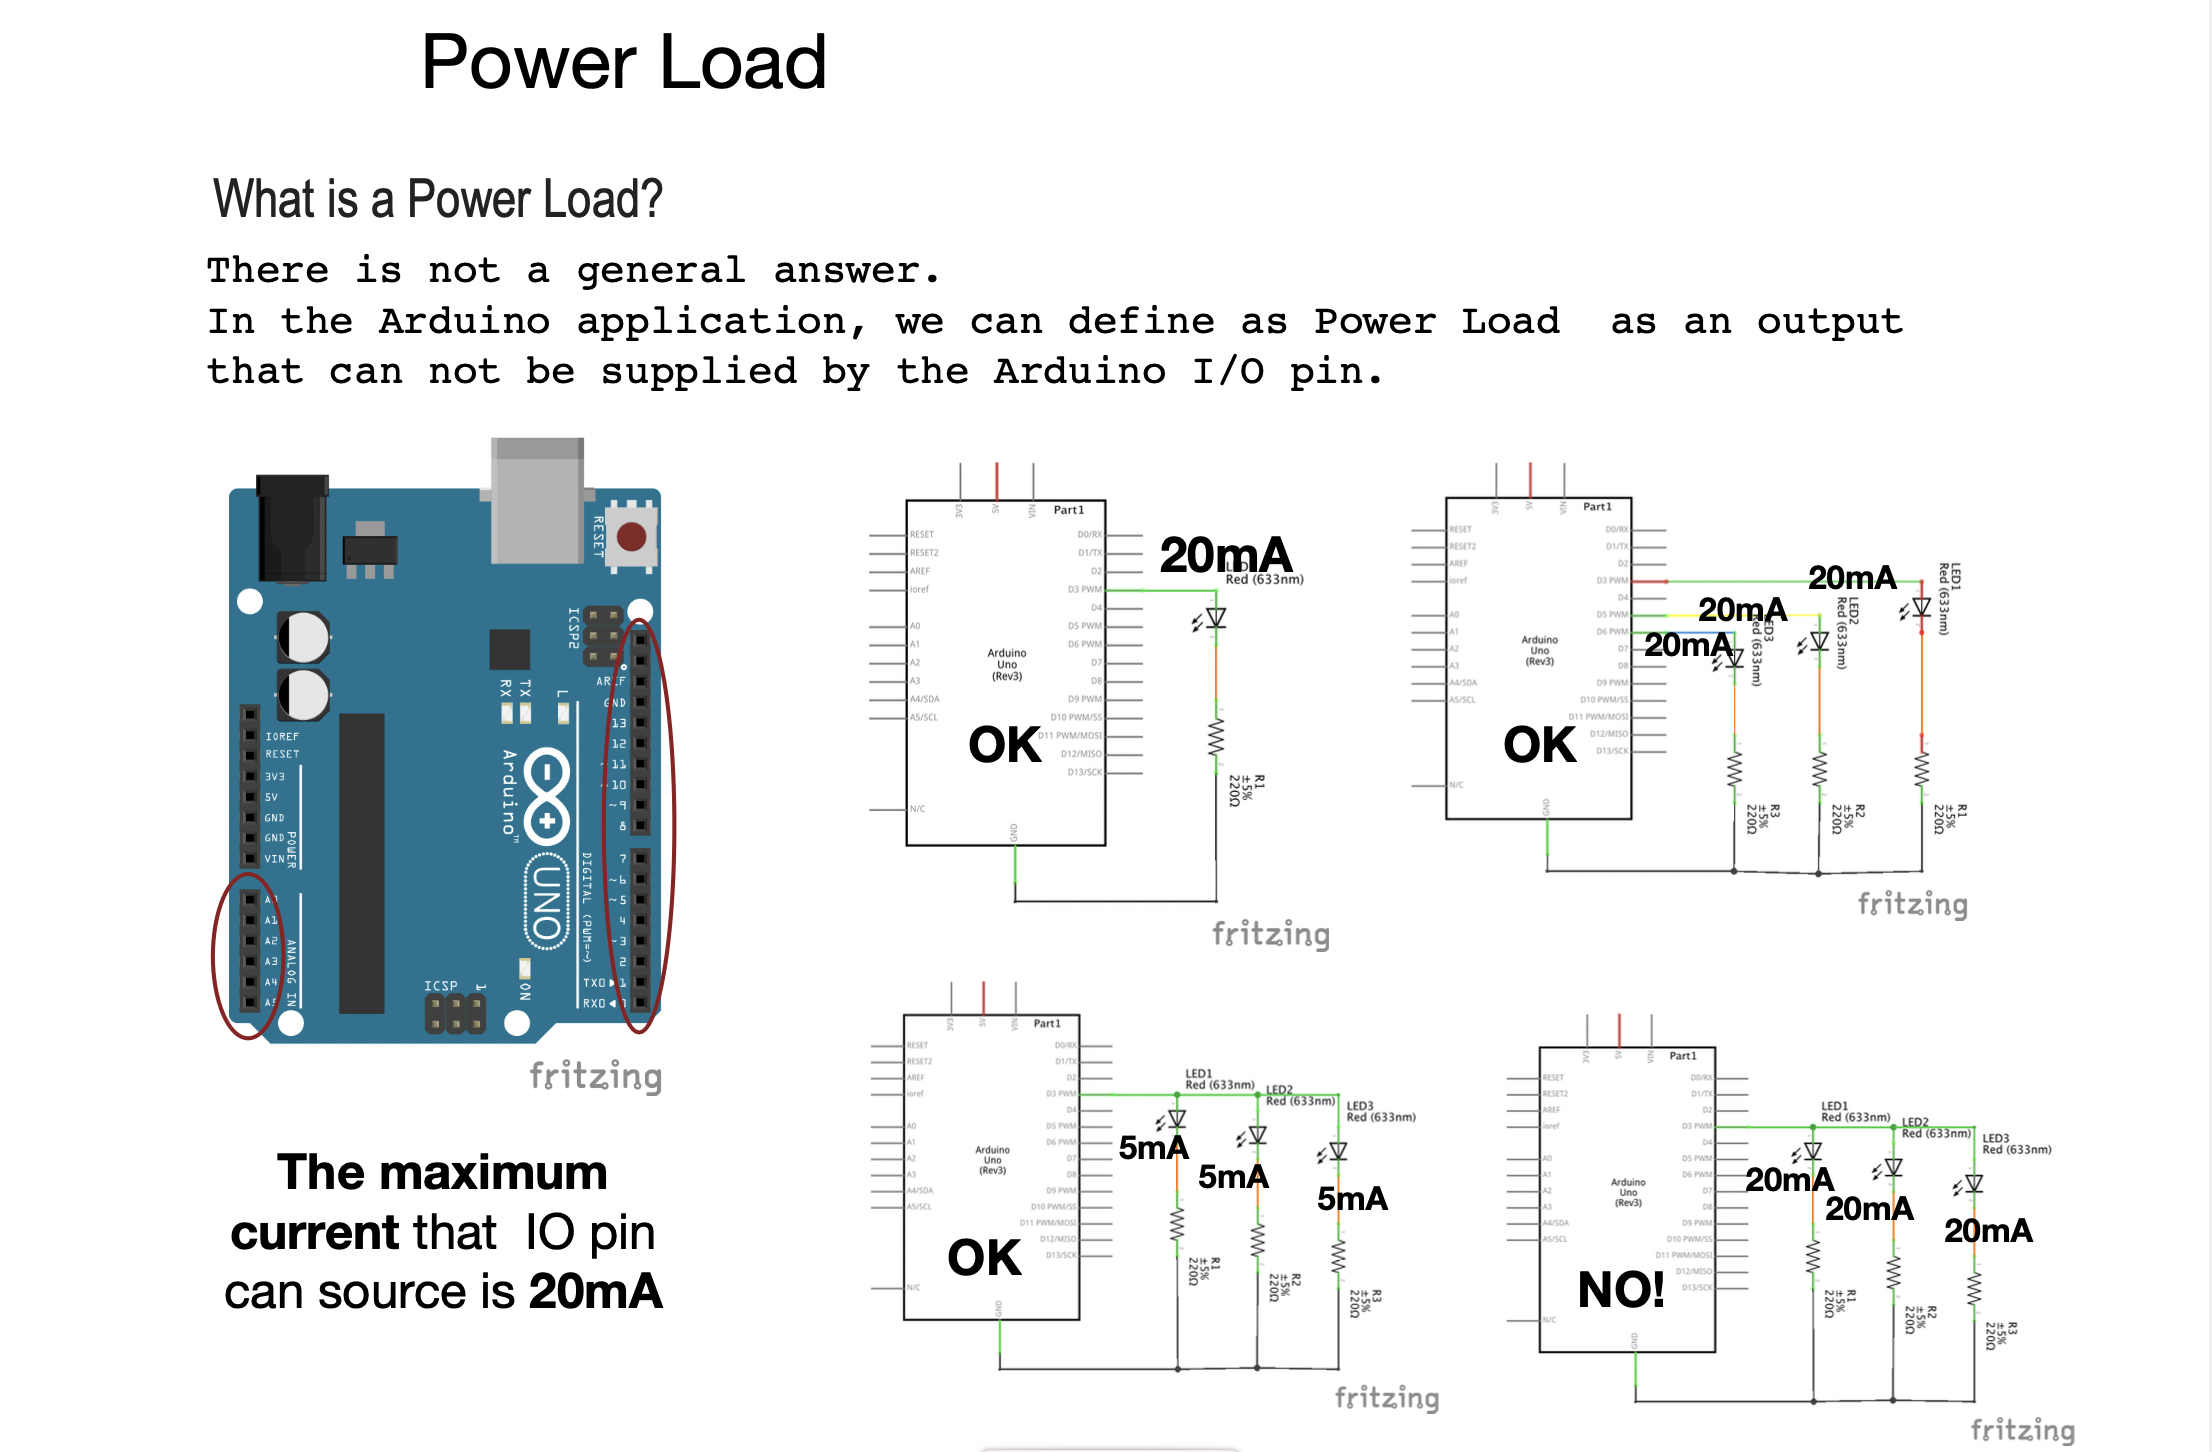
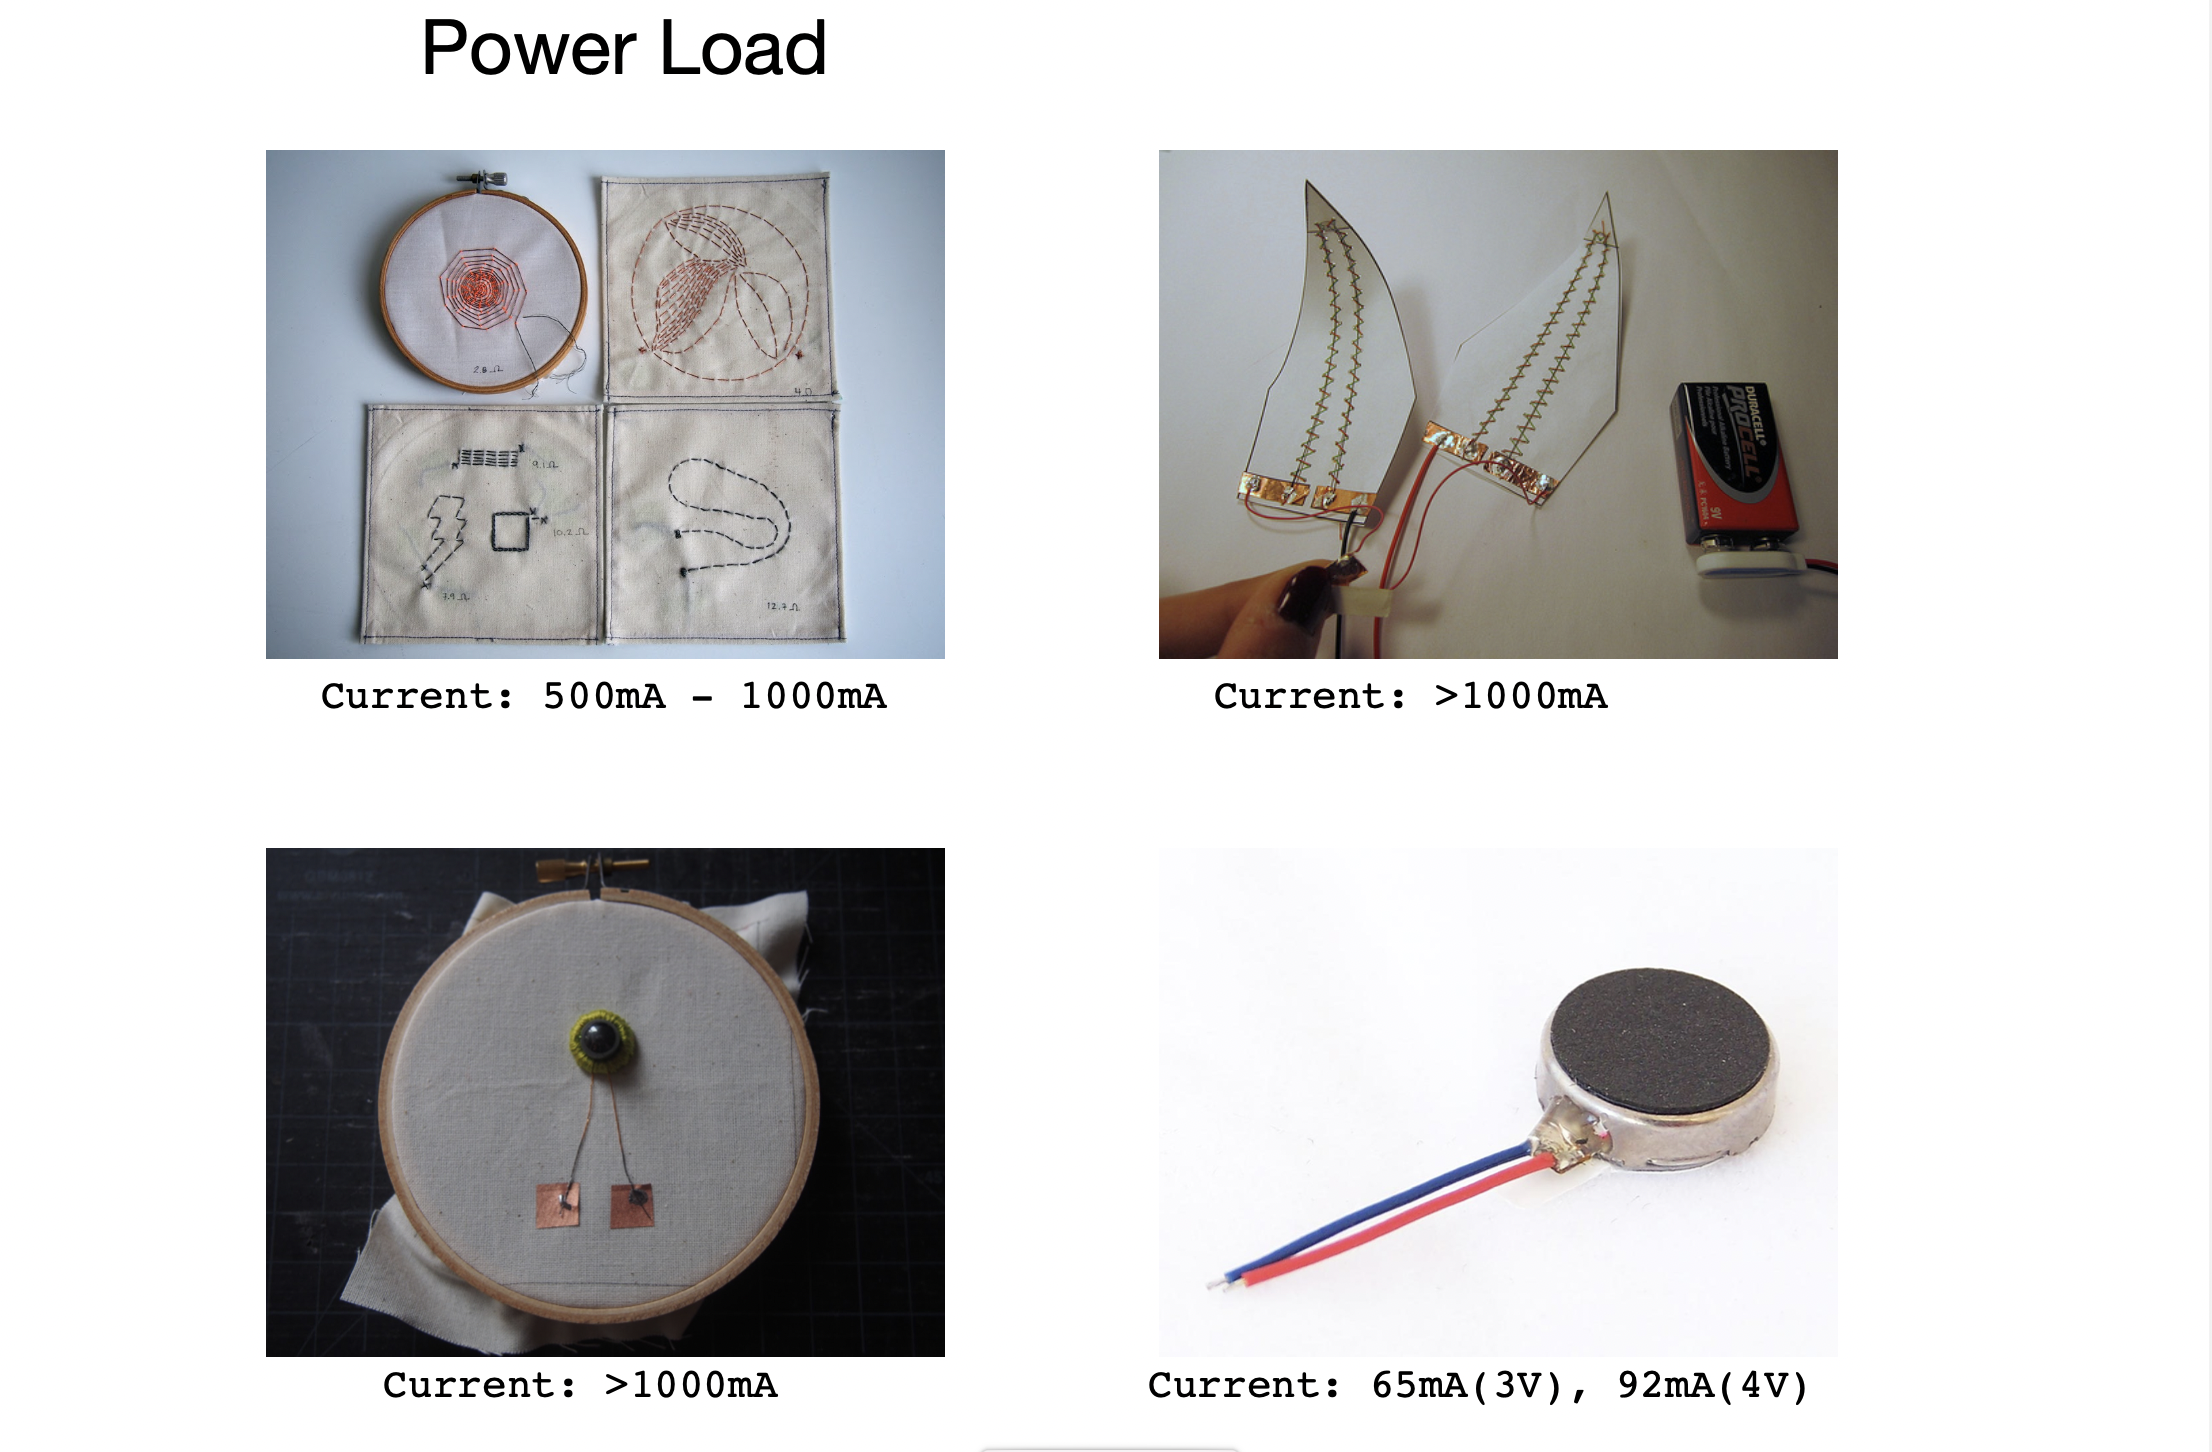
Power loads
Power loads = something that consumes more current than the current that the Arduino can provide.
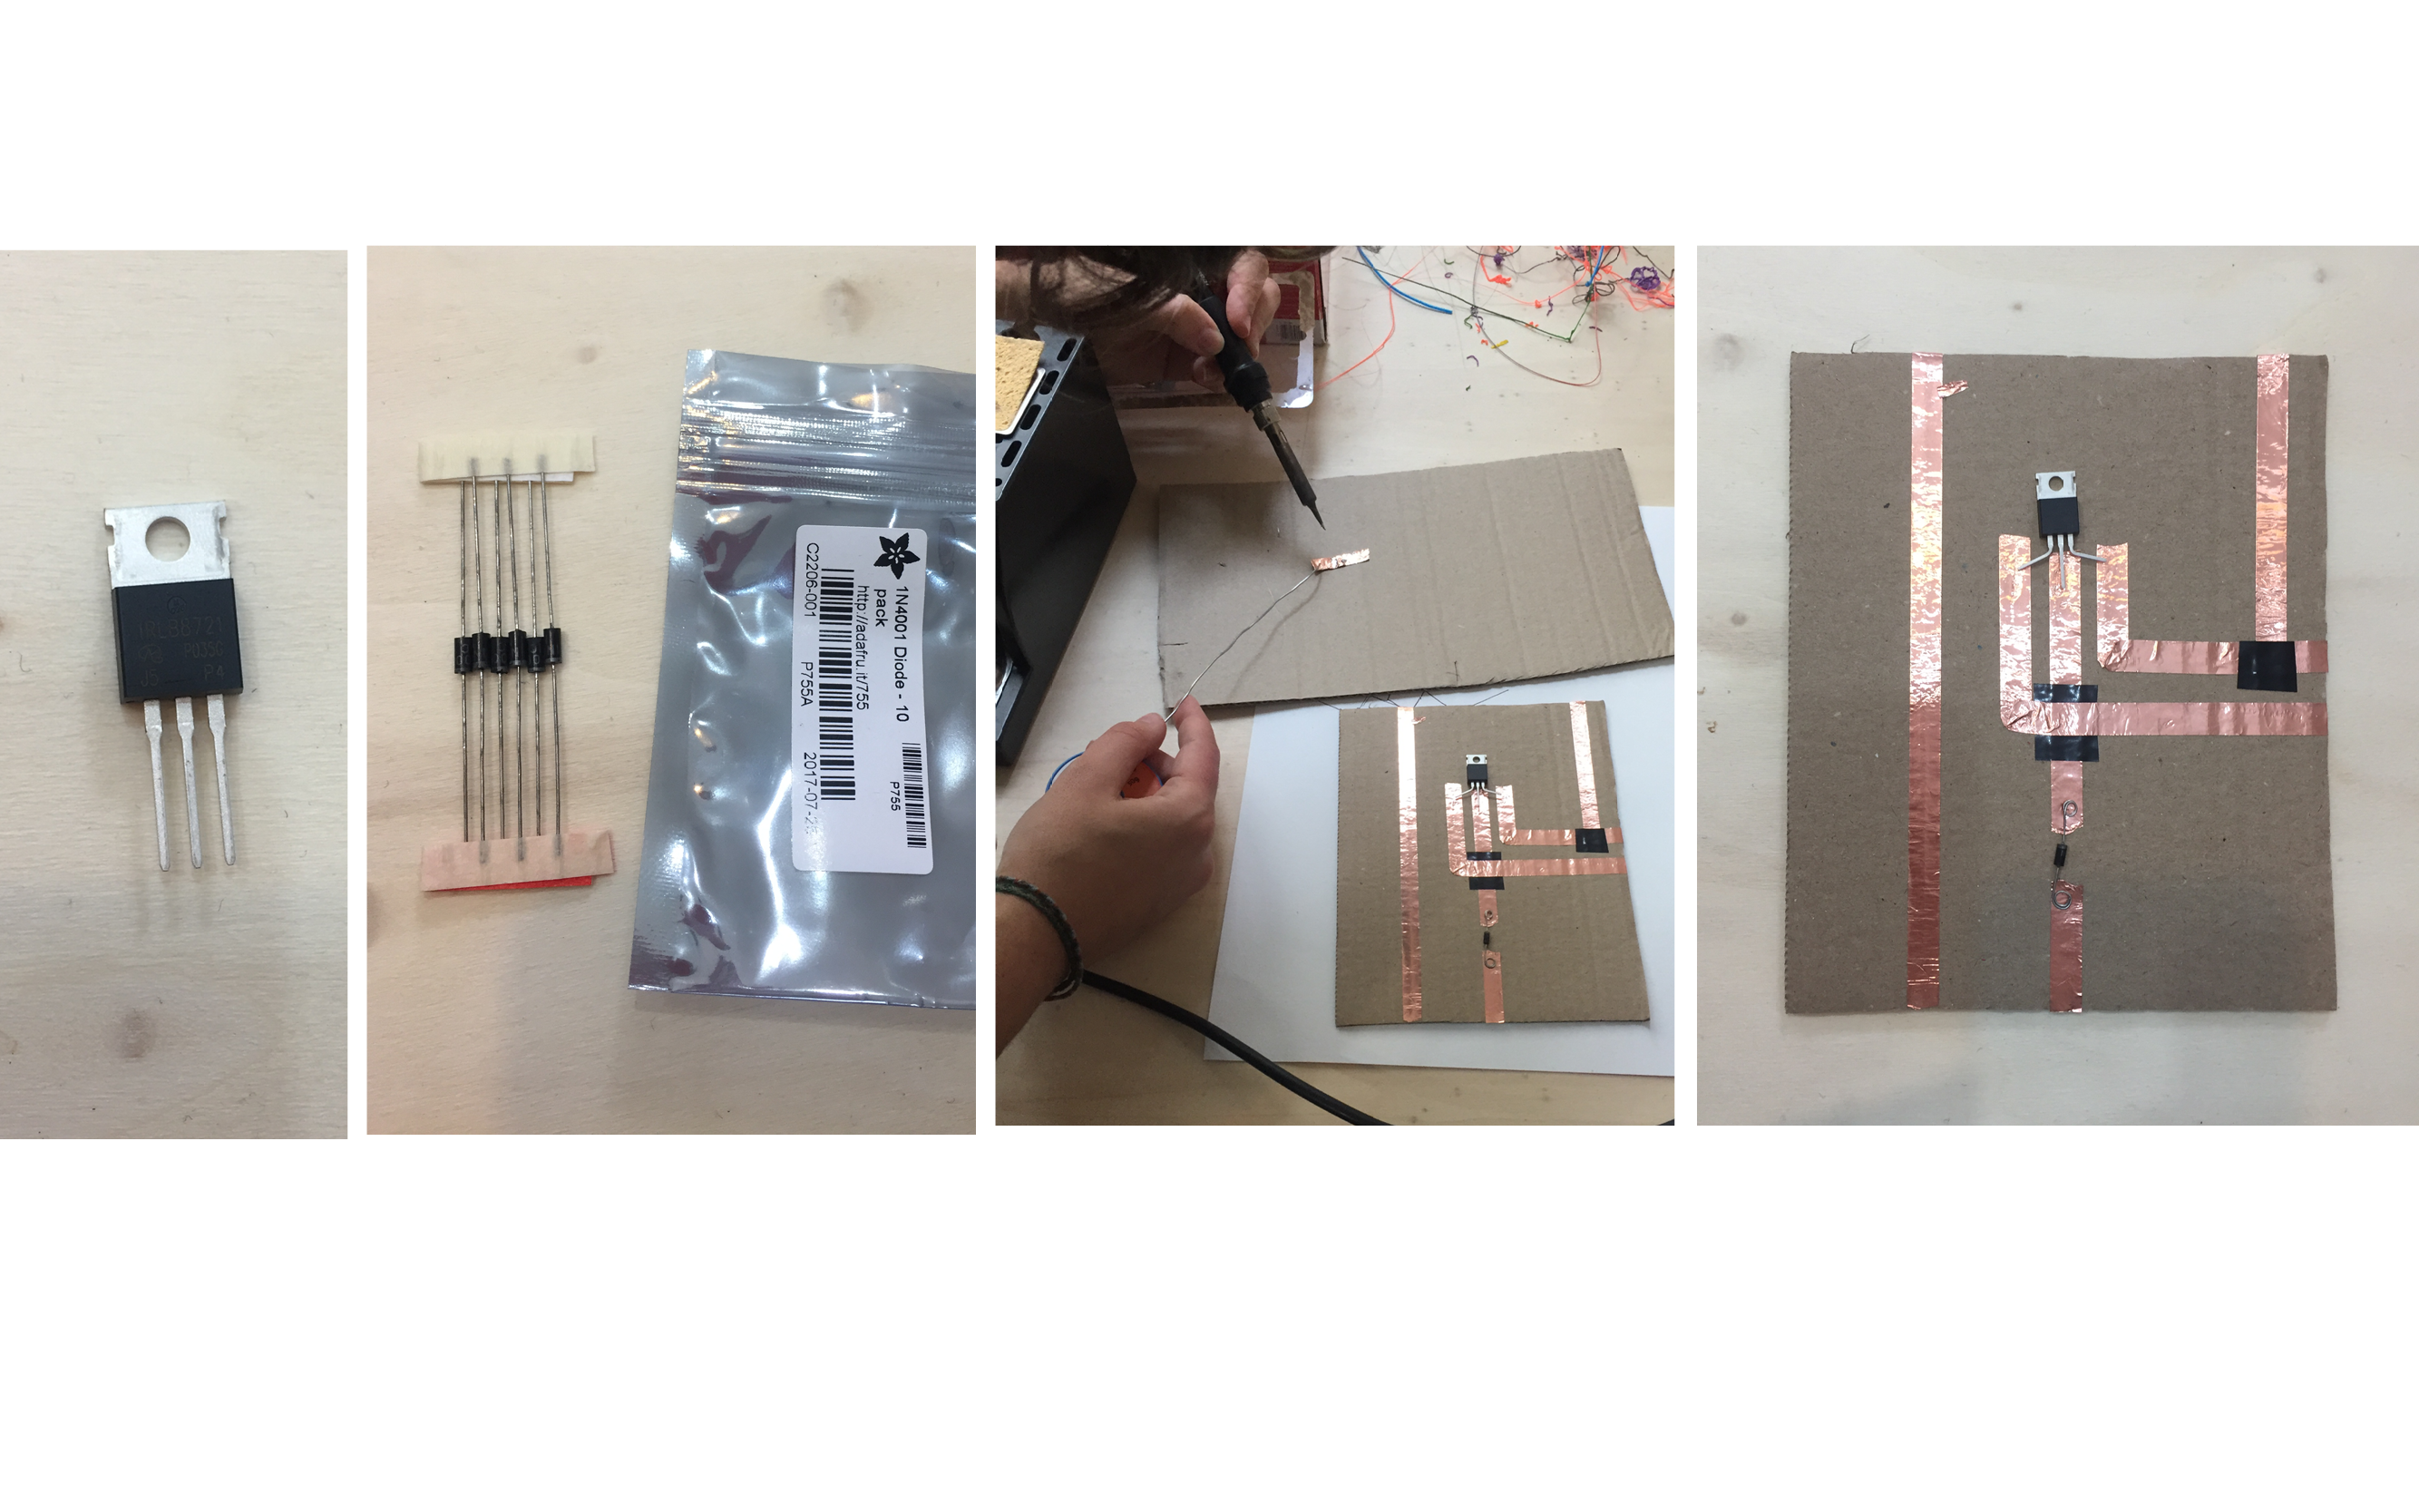
Circuit driver
To be able to control power loads with the Arduino, we created a circuit driver. A circuit that allows you to control a Power Load with low Voltage (Arduino) but the Current for the Load in sinked by a difference source.
The circuit is composed by:
-
A Mosfet N-channel - The transistor (an active component. Its behaviour changes based on the Voltage applied to one pin (Gate).)
-
A Diode 1N4001 - In this configuration, it is called flyback diode. It is used to protect the mosfet.
Magnet - flip dot
- Create a coil. Wrap it 50/100times - Wrap the ens piece around the loop to secure the wire in a circle. - Burn off the enamel and solder the ends - test-it with the power source
Motion - SMA
SMA (Shape memory alloy) + high load circuit/code Resources
Inspiration
Flexinol 0.012", leather and Arduino heat controlling circuit from Afrdt on Vimeo.
PROCESS Flexinol
We teamed up, to prototype and experiment with one power load by team. I worked on SMA motion with Louise and Surzhana. First we tried to understand how Flexinol worked and tried to put it on boiling water to see how it reacted: it just straighten up, because straight wire it's the original shape. To better understand here is the definition of SMA:
- A shape-memory alloy (SMA) is an alloy that can be deformed when cold but returns to its pre-deformed ("remembered") shape when heated.
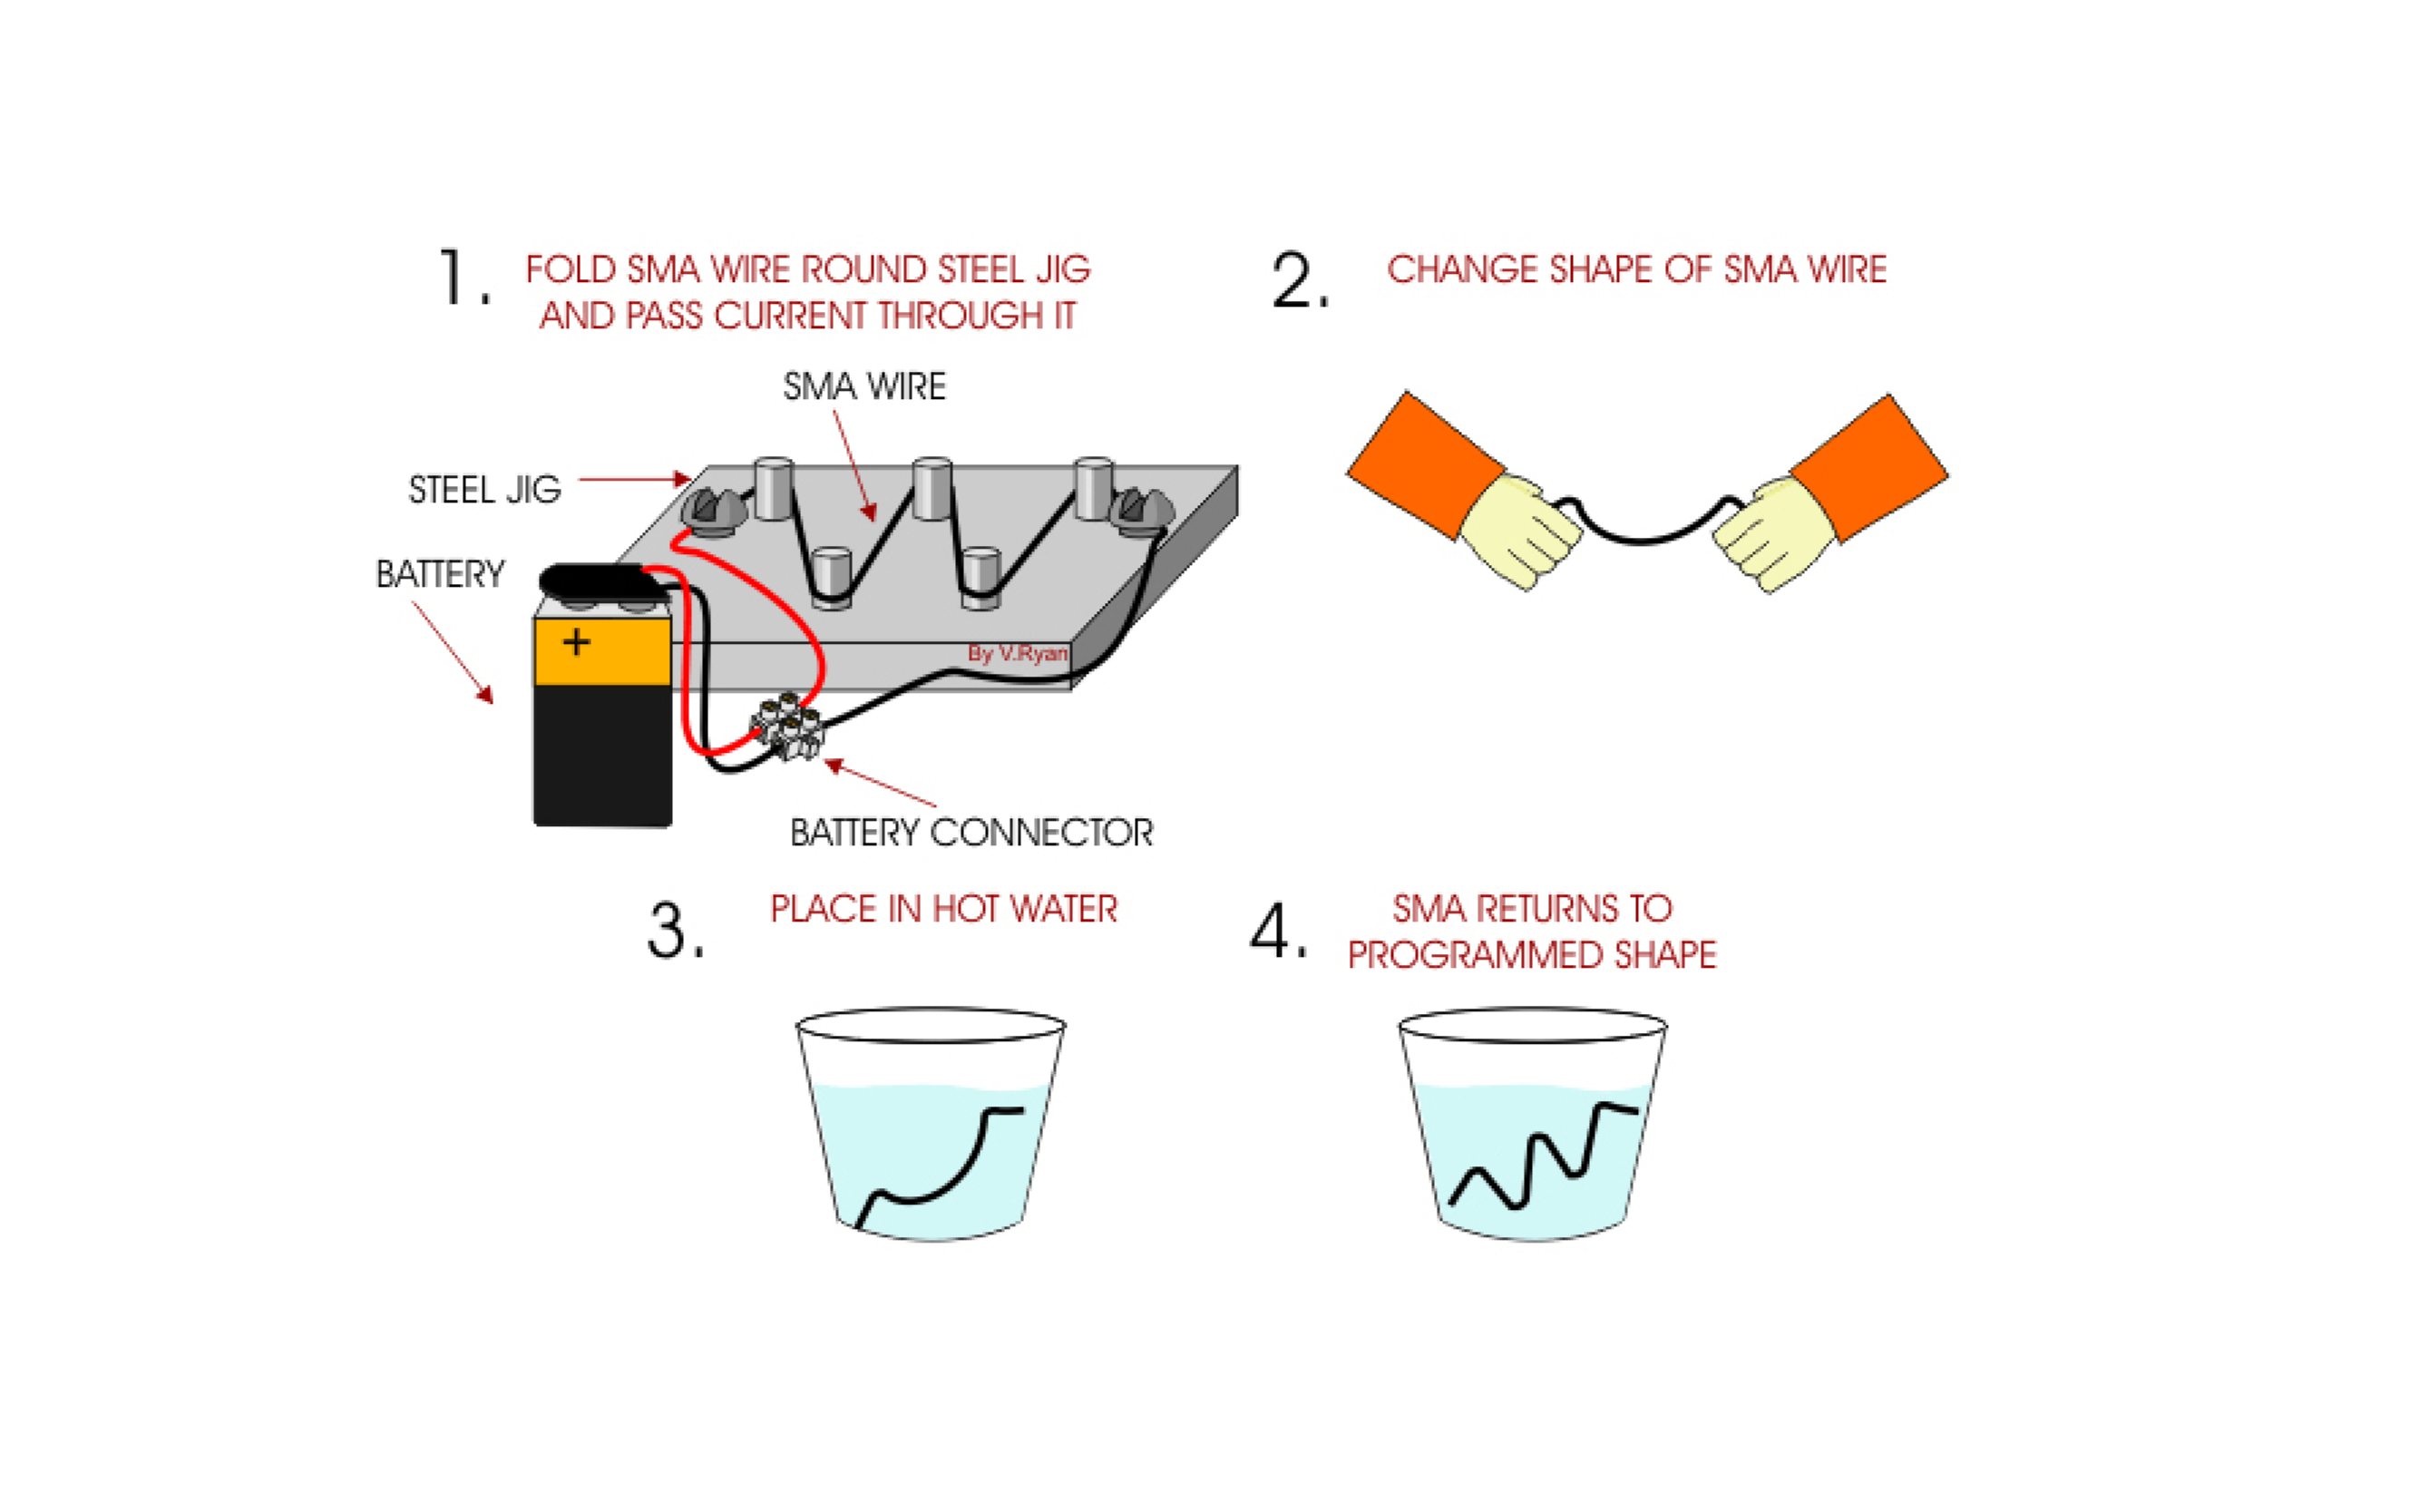
It's possible to a set a "remembered" shape to the SMA: So to give it a specific shape we need to traine the wire, so when heated to activation it returns to this specific preset shape. What does it mean? : To train the wire you have to give it the shape you want and heat it with a flamme in this specific shape during approximately 8-10min.
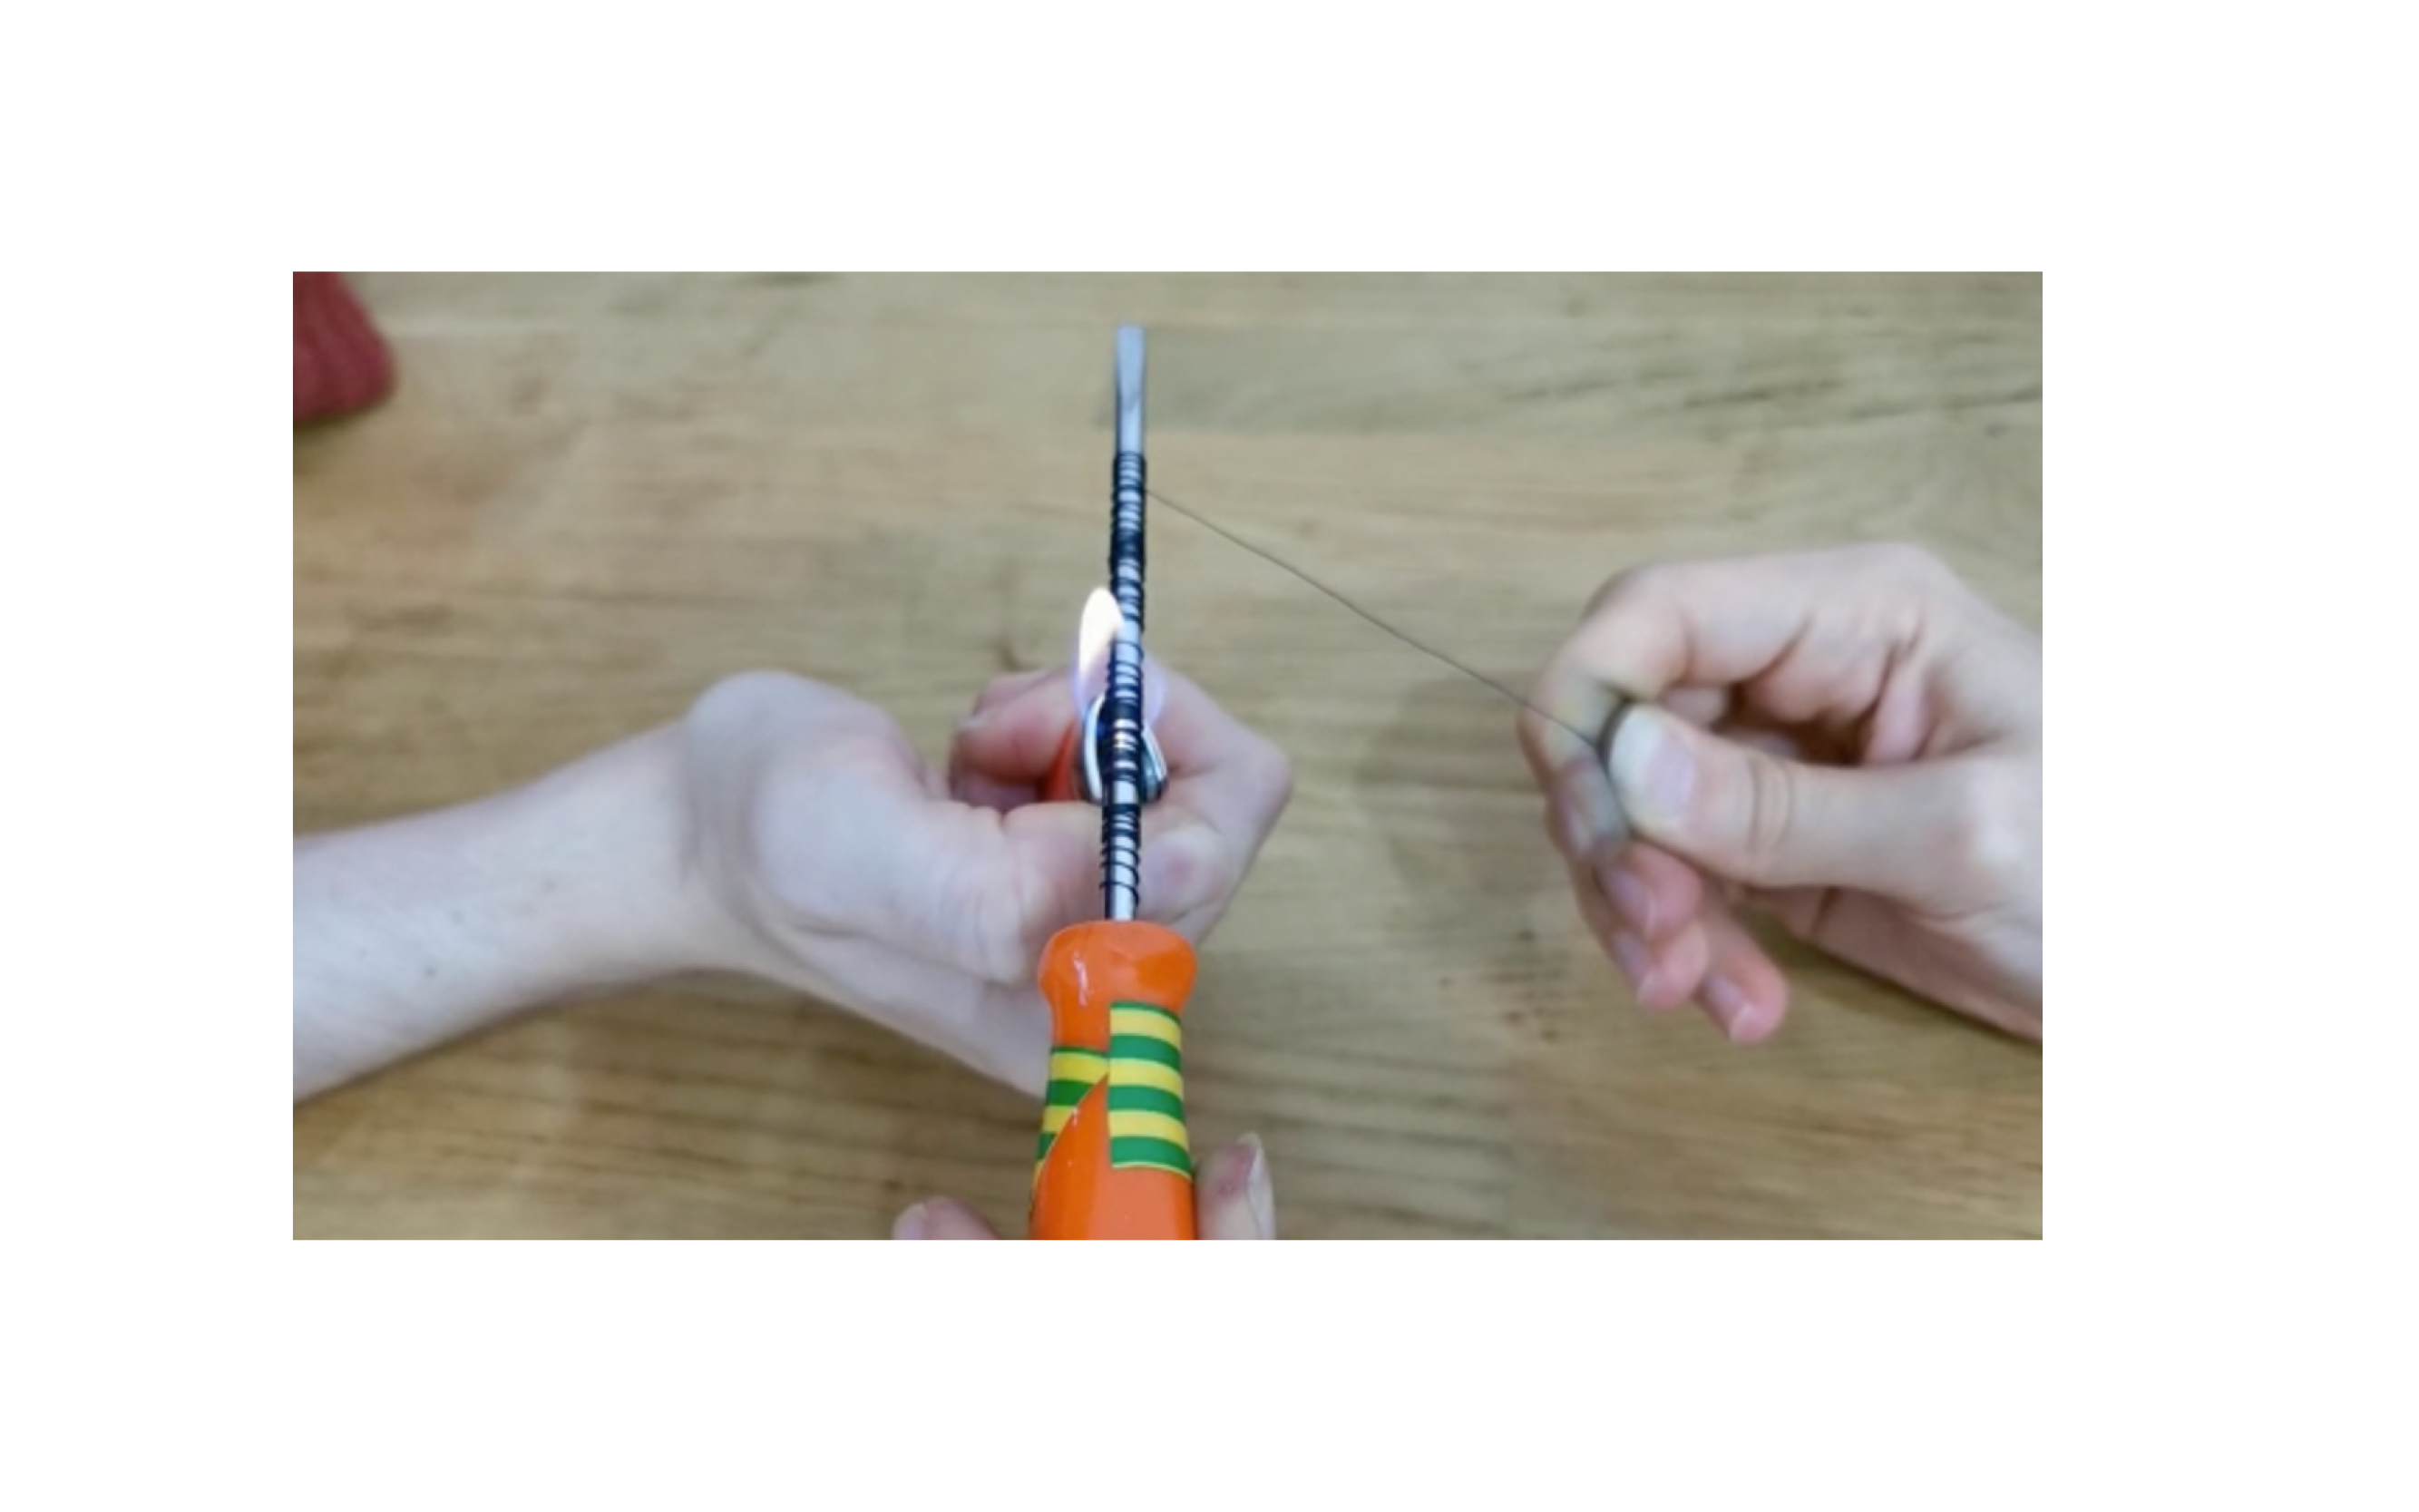
How to train the SMA?
How to train the SMA?

1. wind the cable around a screwdriver (for example).

2. keep it taut on each side

3. heat it over the flame of a **candle** for at least 8/10 minutes
(by heating the wire as close as possible to the flame - the blue part)
| UNTRAINED | TRAINED |
|---|---|
We wanted to try the an SMA smoked pleated pattern We draw the pattern and cut several small pieces of trained SMA wire to create the connections. BUT It is tricky to make a good connection as it does not stick to solder.
Another way is to crimp a small metal bead( You can crimp it together with small wire, or solder wire on the crimp bead (if it is made of material that stick to solder)
But we didn't have them. So we decide to make a loop and to further sew, embroider on top with conductive thread. (Which I realize is not the ideal way because when heated the wire moves, curl from the sawn stitch and then the connection is lost, creating a break into the circuit.)
At this point the flexinol work with one small part of the smoked pleated fabric.
But when we tried to connect it, the hole piece finished, it did'nt work (not with the battery or with the arduino)
We didn't think that a piece so large with so many flexinol , will need a battery with more current, and that we didn't had that in Oullin. So to make it work it needs to be more potent.
Results
Surzhana made a paper Hand and made it work
I then tried with small samples:
- on the left with untrained flexinol - on the right with a trained flexinol
| UNTRAINED | TRAINED |
|---|---|
- I got very inspired by the movement it makes as in my prevoius works I made textile move using manual motion: see bellow
Copyright ©CharlotteBracho | All Rights Reserved
And so I wanted to test with some pleated textile too.
I pleated a piece of organza silk, and trained a piece of flexinol. Sew the flexinol with conductive thread, and fixed with some copper tape just to get it a bit more attached as I do not Have small crimp metal beads.
VIDEO
useful links
Project The Culture Series by Afroditi Psarra and Dafni Papadopoulou https://vimeo.com/119051547 https://afroditipsarra.com/
Las year projects:
Patty Jansen
https://class.textile-academy.org/2021/patty.jansen/assignments/week10/
Sara Alvarez
https://class.textile-academy.org/2021/sara.alvarez/assignments/week10/
SMAs
SMAs Meet Smocking http://etextile-summercamp.org/2014/sma-meets-smocking/
SHAPE MEMORY ALLOY TRAINING
https://www.kobakant.at/DIY/?p=6682
More Smocking Examples from Kobakant
https://www.kobakant.at/DIY/?p=6687
How to work with Shape Memory Alloy by Jie Qi
https://makezine.com/2012/01/31/skill-builder-working-with-shape-memory-alloy/
about SMA
https://technologystudent.com/equip1/sma1.htm
Thermochromic ink
Thermochromic ink + heated circuit/code
So I tried the Thermochromic pigment. First I mixed the pigment with some white Woodglue. I put enough pigment so the effect will be more drastic. Then tested the painted textile with conductive thread and a battery.
process images RESULT video
NeoPixels
Then I tested some Sketches to control Neopixels:
| Implementation | SKETCH | RESULT |
|---|---|---|
| STRANDTEST | ||
| Run a test - Example -> Adafruit Neopixel -> Strandtest | 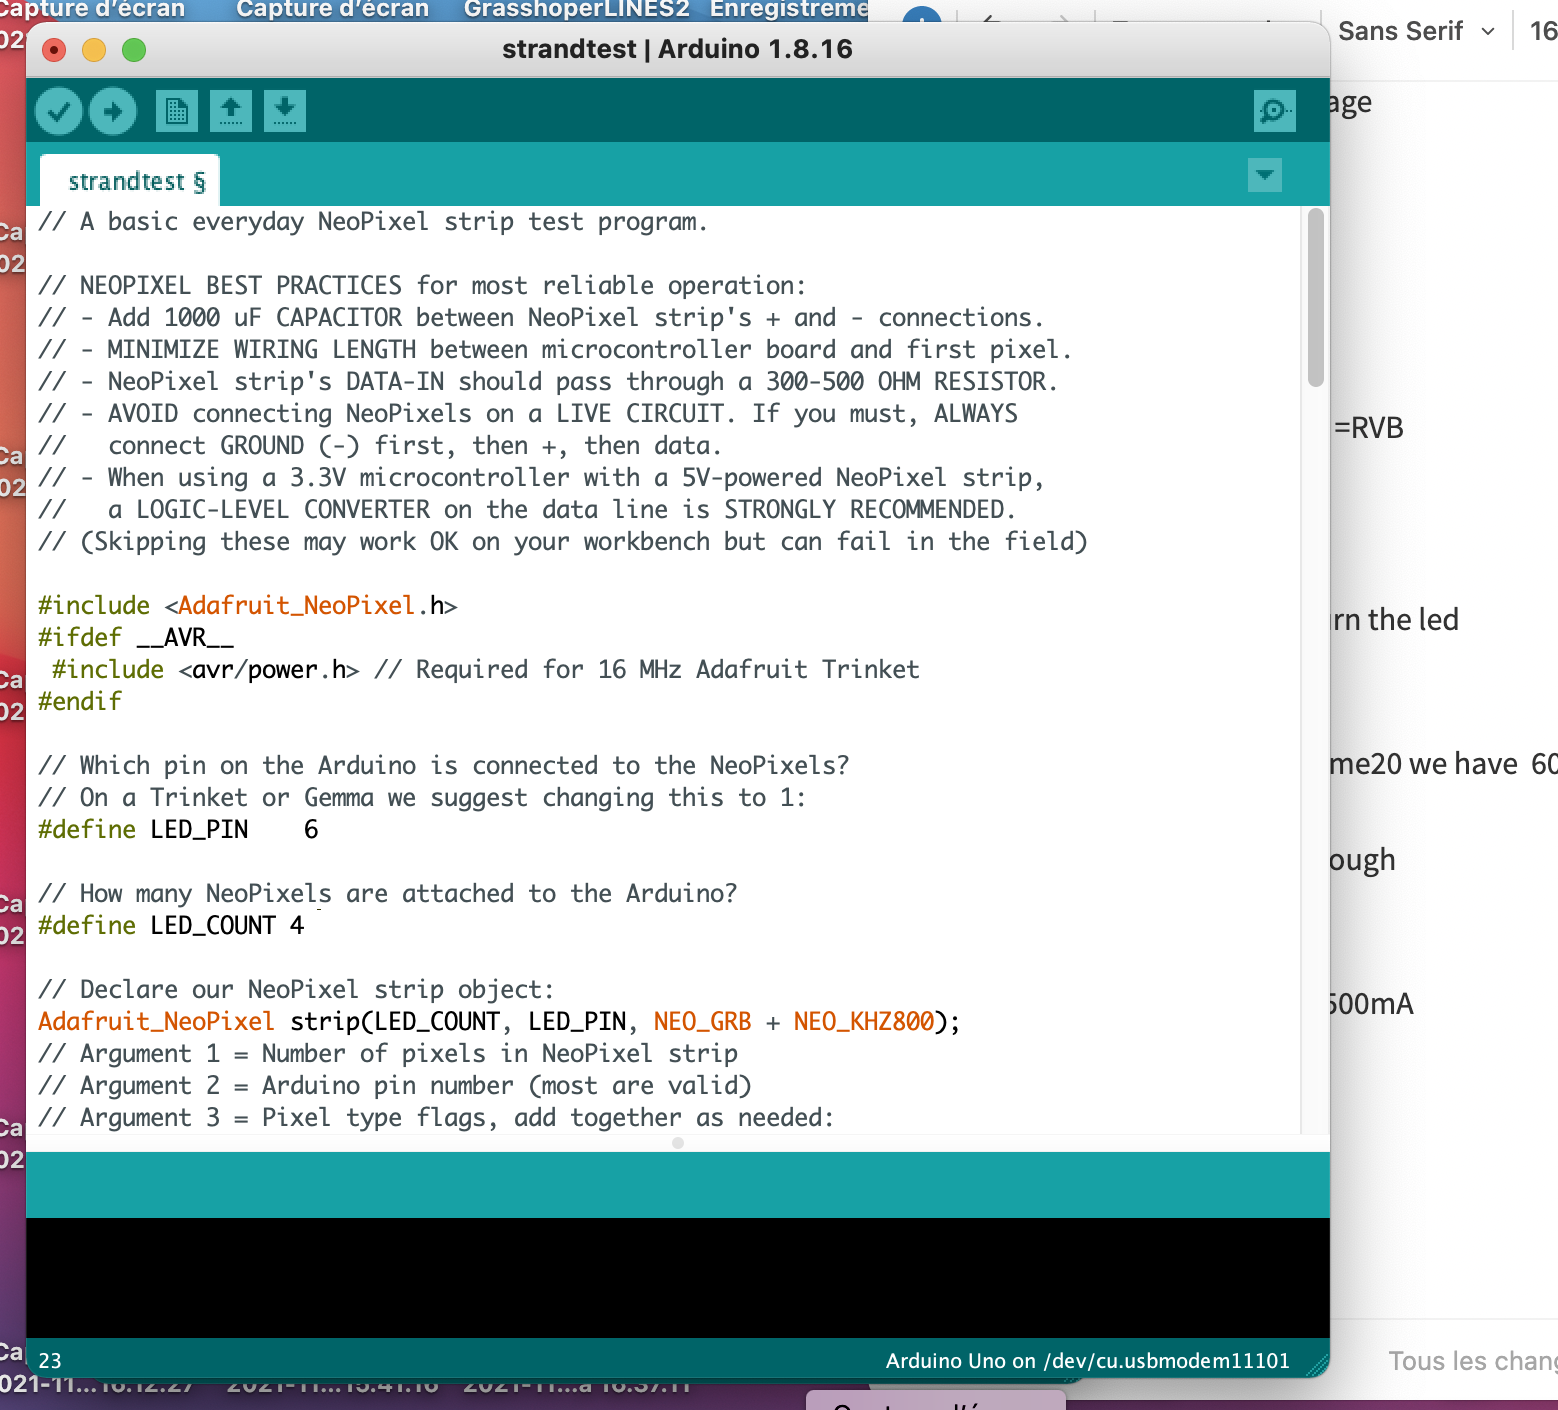 |
|
| NEOPIXEL 1 | ||
| Control single/pixels - 01_neopixel_v1, 01_neopixel_v2 | ||
| NEOPIXEL 2 | ||
| 02_neopixel_full | ||
| USE ANIMATIONS | ||
| Use Animations - 03_Wipe |  |
|
| Use Animations - 03_Rainbow | 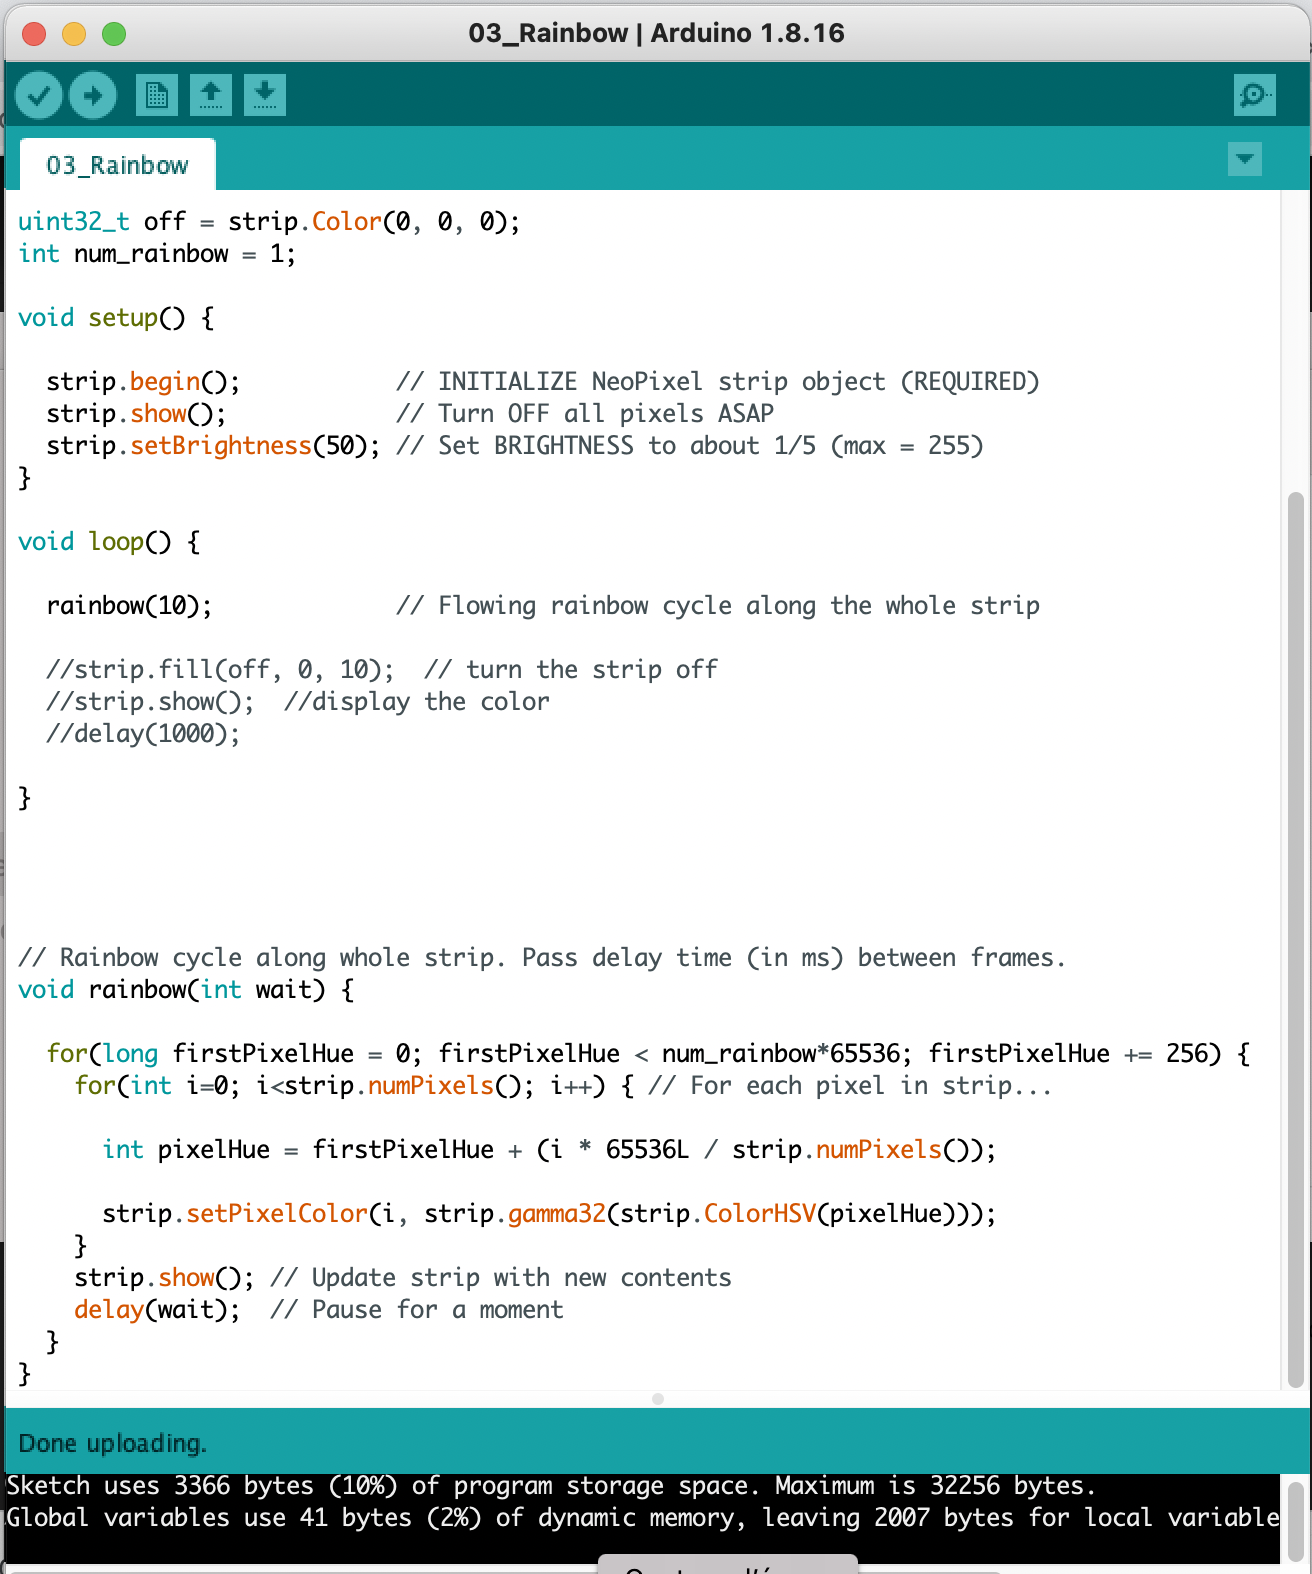 |
|
| DIGITAL SWITCH | ||
| Trigger a sequence with the switch - 04_Wipe_sw and 04_Rainbow_sw |  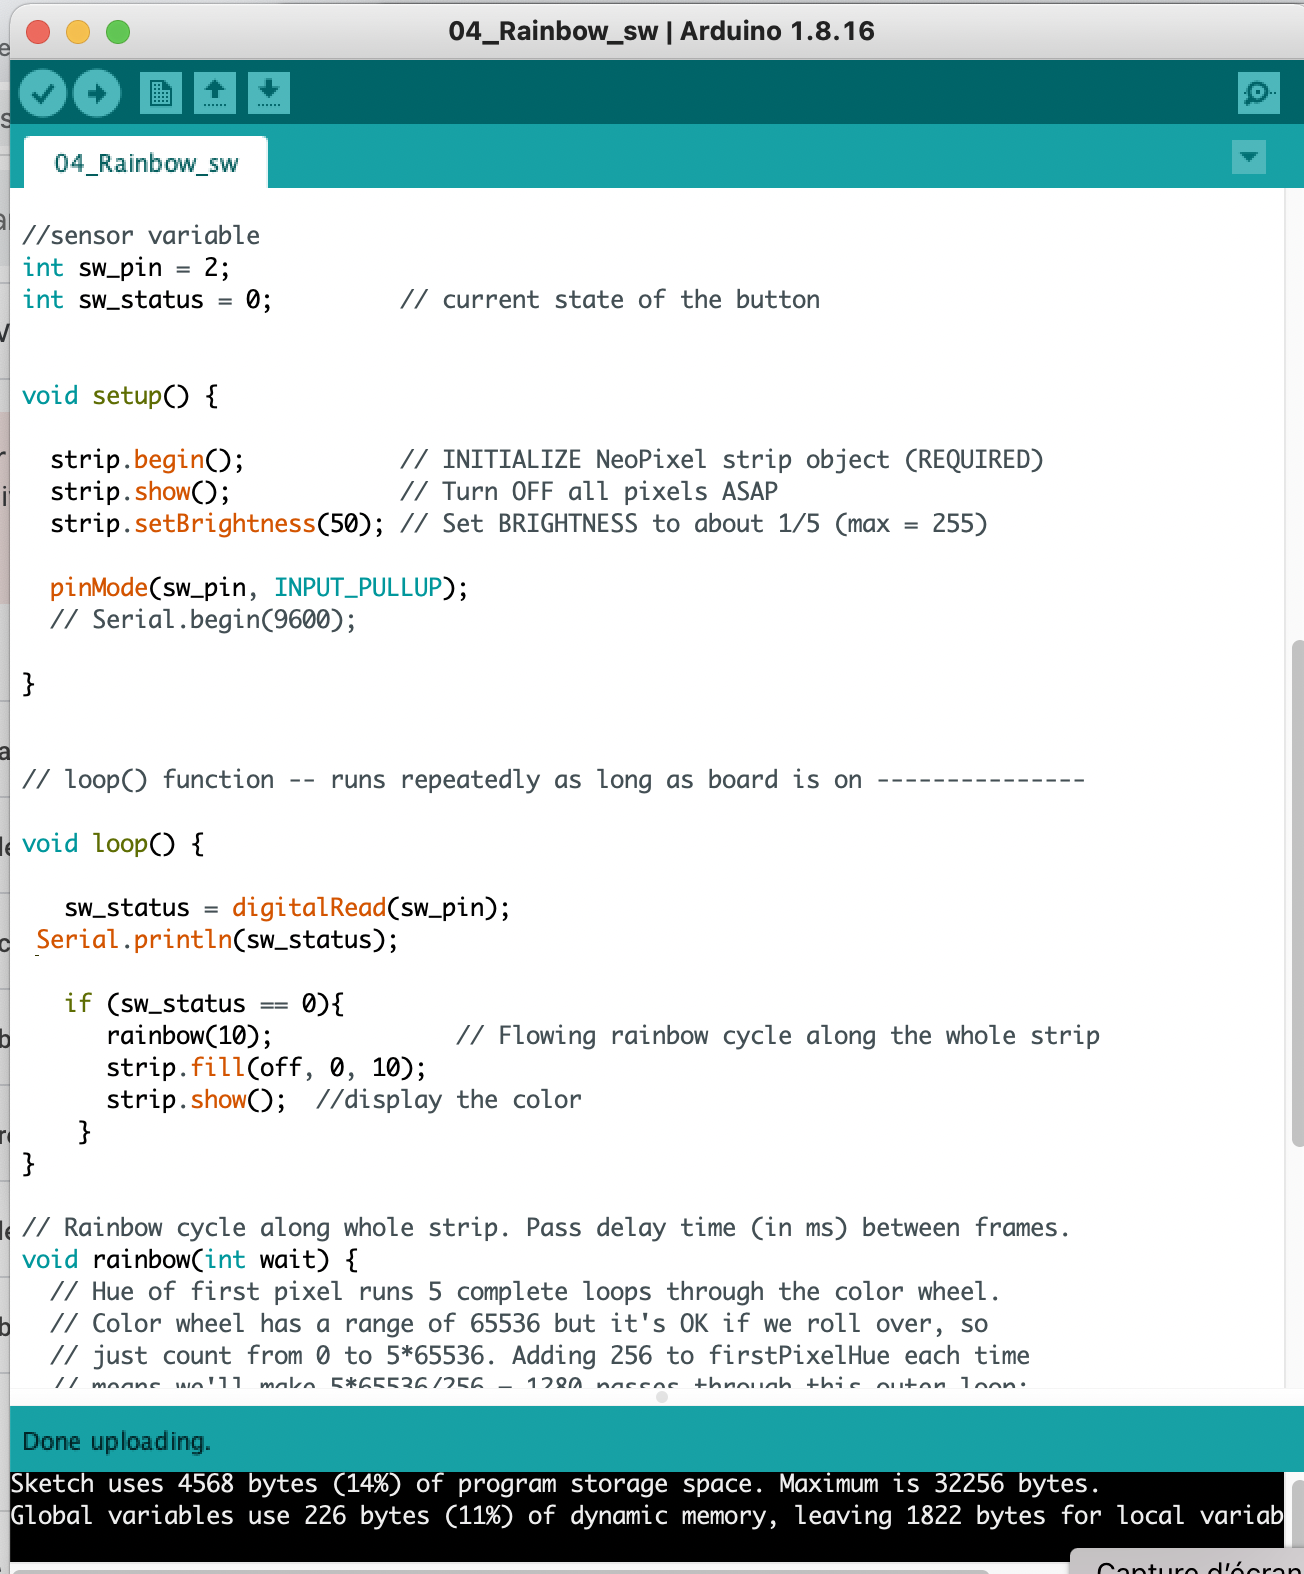 |
Useful Links
Lecture
Tutorials
Other useful resources:
- Files Sketches
- Other