Week 12: Soft robotics
The following module was focusing on the specific field about soft robotics.
The difference between normal robotics and soft robotics is the name. Where soft robotic focus on similar characteristics to our own human body and other living organisms.
The textures and feels of some inflatables give and essence of nature instead of the rigid metals we associate with mechanisms.
Soft robotics is applied to sectors such as prosthetics, wearables and even surgical robots.
To boost this project to a further level artificial muscles and sensors can be incorporated into the design to give the alive effect.
Inspiration:
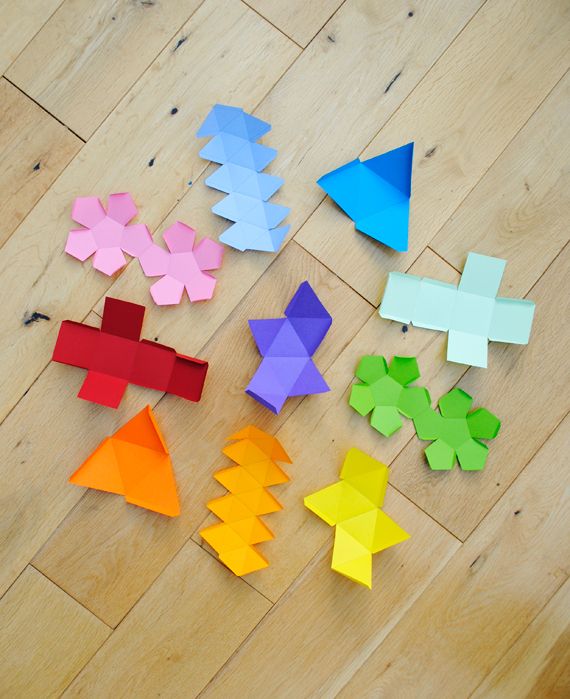
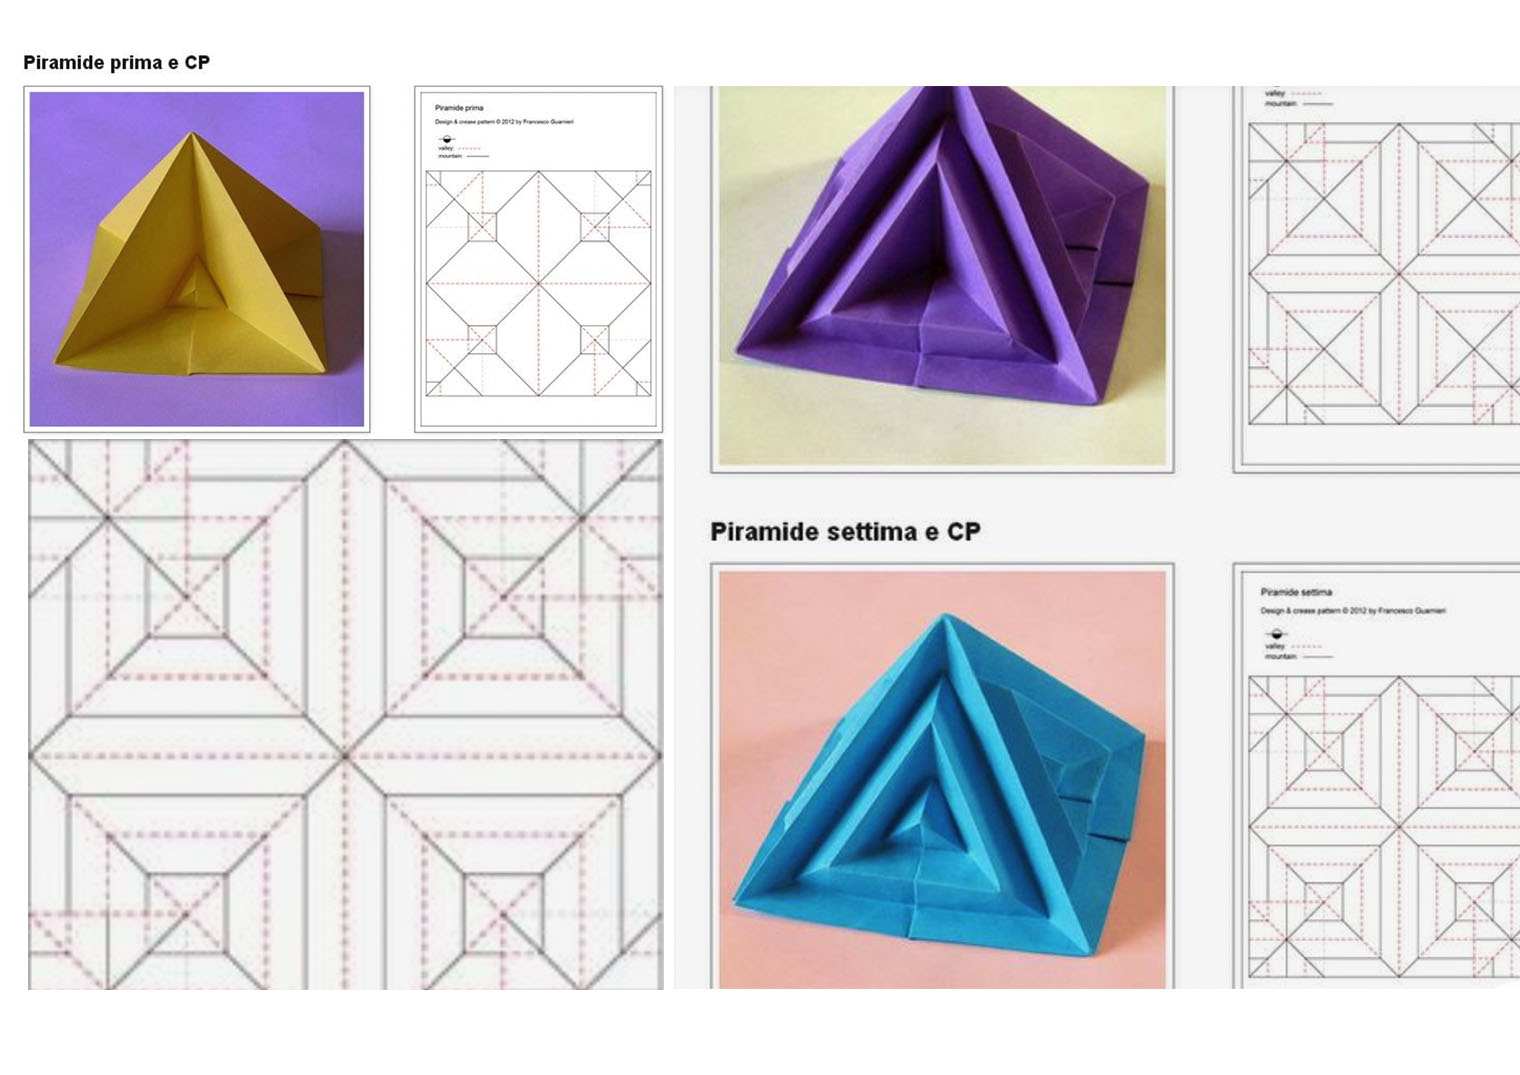
When we started mentioning the concept of inflatables, the first thing that came to my mind was the folding of origami. I was curious to see if I could follow an origami shape in order for the inflatable to fold in different ways once air would be passing through the channels.
Some of the soft robots that really caught my intention:
The Octobot:
The Morph Robot spider: Pretty creepy but so cool!
This structure is monolithic. The process consists of lithography, injection induced self folding and laser - micromachining. The way this has been created just blows my mind.
Power Fabric from Fishing Line Artificial Muscle:
What can this be used in projects?:
Possible uses include artificial muscles for prosthetics, and the design of light weight humanoid robots. In development is a new lymphoedema compression sleeve, which will use these muscle fibres to gently massage the arm. The garment may prevent the build-up of lymphatic fluid and the discomfort that it causes. Woven into clothing fabric, this could create smart garments that are powered by body heat. If the wearer gets too hot, the muscles expand, the weave opens up and that releases some heat until the body has cooled down again. Similar concepts could be used to regulate the temperature in a building or greenhouse.
source: https://robohub.org/robots-podcast-nylon-fishing-line-actuator/
MetaSilicone: Design and Fabrication of Composite Silicone with Desired Mechanical Properties:
This method for example allows for professionals in the medical fielss to practise surgery with prints of silicone organs. The metasilicones are highly elastic and are able to with stand strecthing, pulling and deforming to a certain extent. THe guy in the video even bashes it with a hammer for a second.
Bea to the rescue:
After having watched Beas instruction video on how to design and inflatable on Rhino, my mind was set a little more at ease. Having pitched just the day before, we all felt quite tired and many of us didn’t have the mind set to tackle a whole noew side project. Nonetheless, we tackled Rhino as soon as possible because this week was about getting the inflatables right.
Link to Beas video tutorial: https://drive.google.com/file/d/1fbzCCven-DCOHe_3a-Nb3lWow39qv4yb/view
Thank you Bea!
How to create an inflatable:
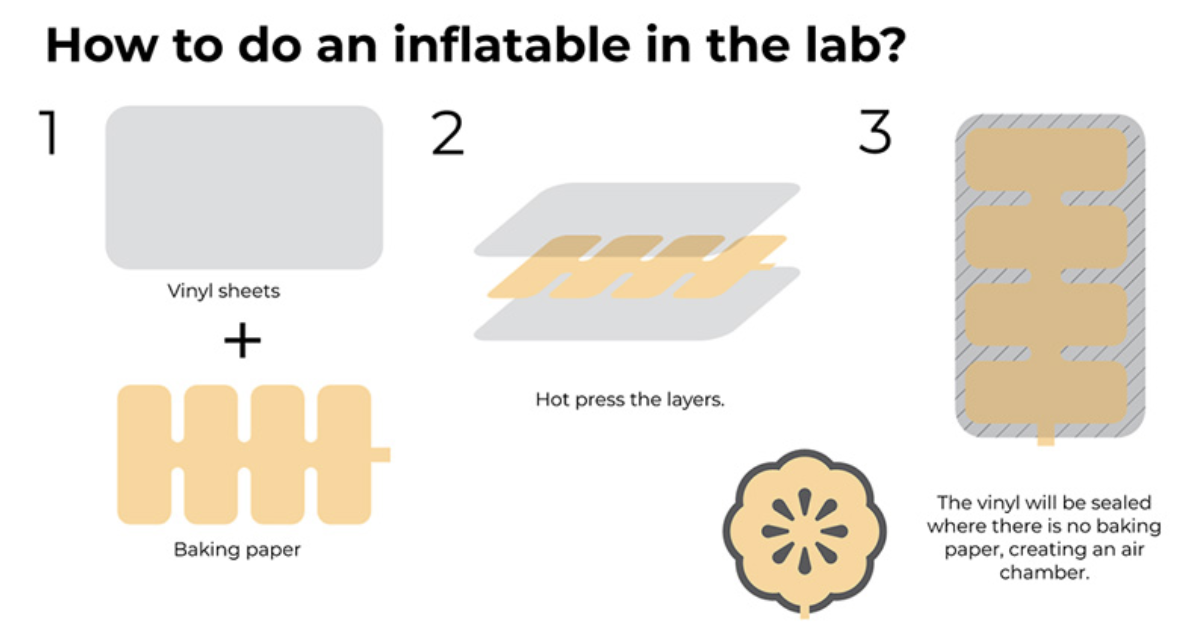
Credits to this manual go to: Adriana Cabrera for Fabric Academyin 2019.
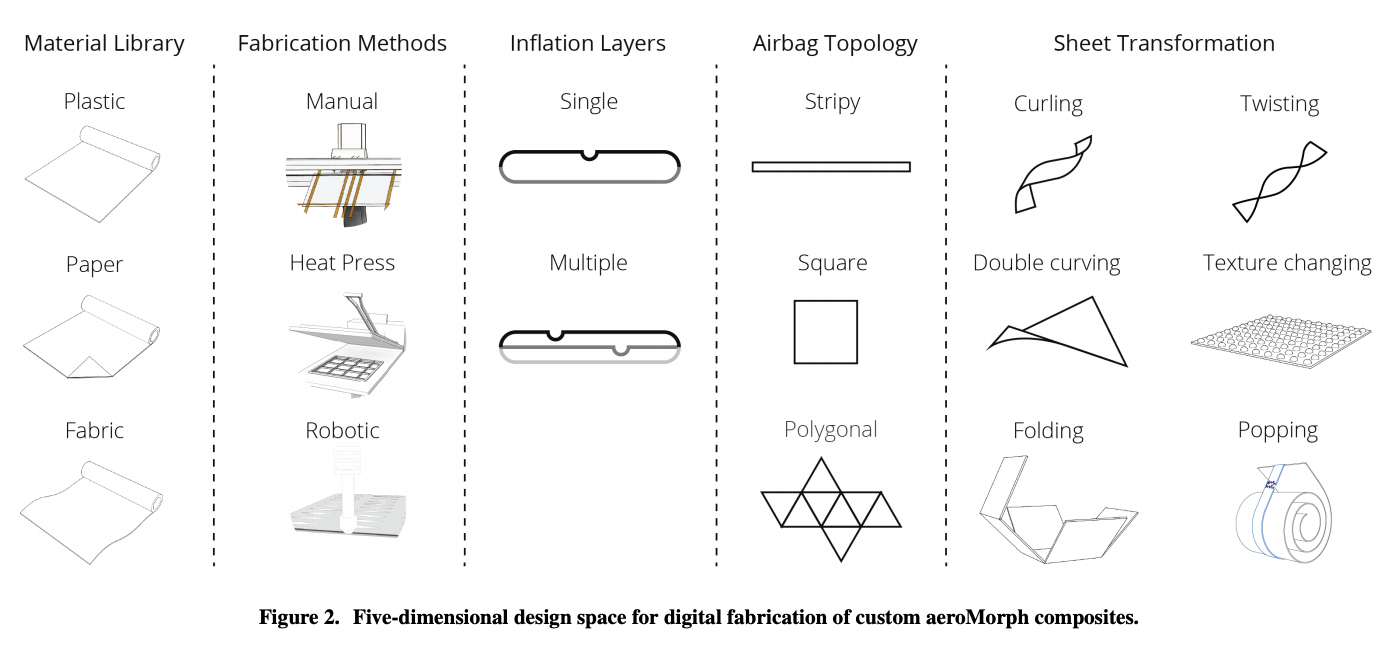
3 types: (Documentation in progress)
Molding from 2D to 3D: Designing inflatable structures
Thermovinyl inflatables:
When designing an inflatable it is important to keep in mind the shape of your design as the inflatable moves accordingto this design.
Firstly, we started by following Margheritas demo. This was a fairly easy practise unless you wanted to design something ove rcomplicated. The idea is that the areas that dont have a closed shape or hole, would be filled with air. This air would pass through and so the shape inflates into some form.
The tools/materials that we were given for this experiment were:
- Thermovinyl
- Baking paper
- Heat press/ Ironing machine
- Straw
- Valve
- Air pump

Here are some basic design tips to keep in mind when you tackle your own inflatable:
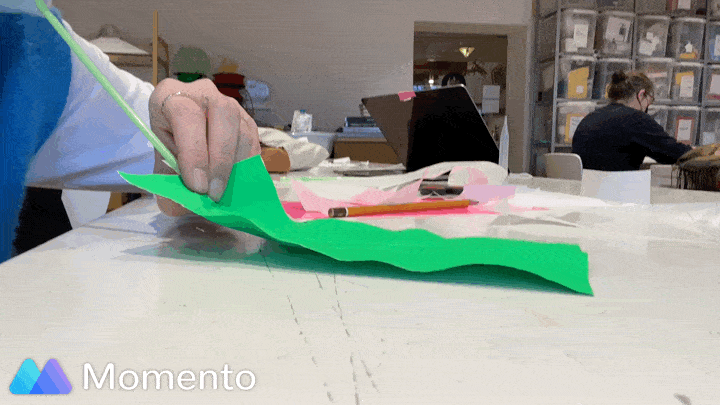
My turn:
Process images:
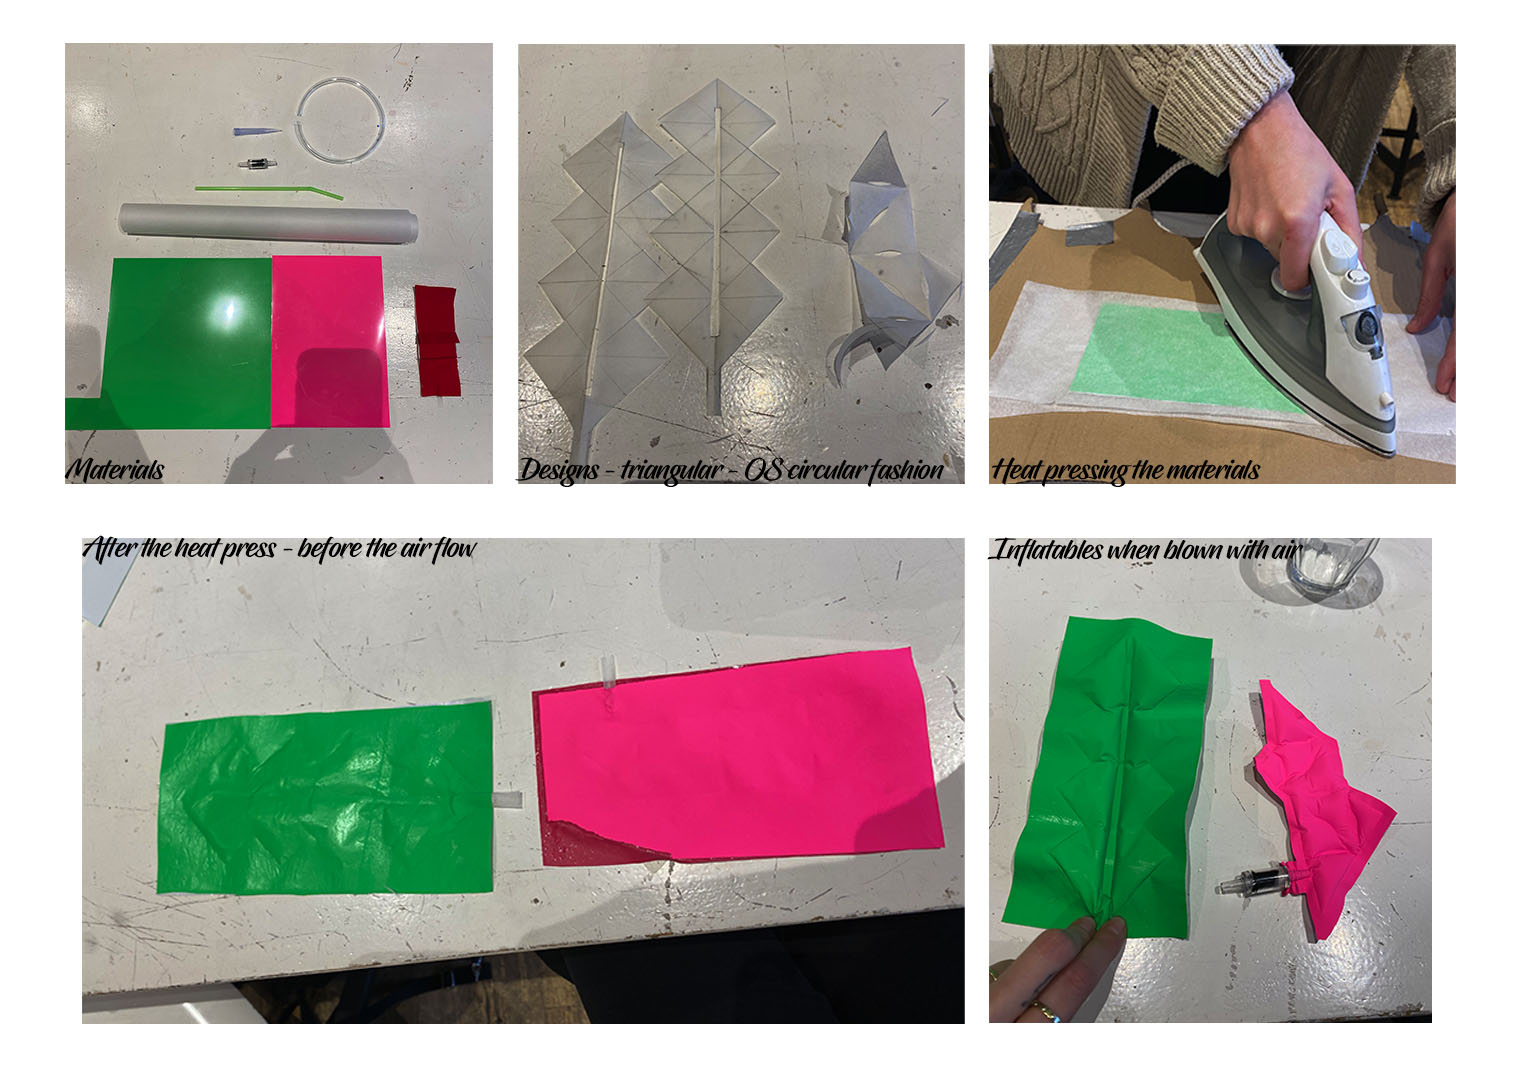
Results:

The TPU:
The idea behind this design was to se whether I could bend the inflatable up as if it where to have two wings. I made the corners more point because I wanted to see whether this would add a nice effect to the aiflow as well. What will happen to the airflow once the inflatble is filled with air or water? I will have to try it out later on i nthe year when De Waag opens it's doors again to students (after the covid pandemic restrictions).
Unfortunately none of my group got to complete this little TPU project seeing as there were issues with the laser cutter. Our dear Sara was so kind to test it but in the end it took a lot longer to figure out and none of us got a go! Getting the settings right was the main issue in this case. The welding had to be hot enough for the TPU sheets to weld together but not that hot that it would burn a hole right through the material. :(
For more informaion about the technical process go to Sara's (link) page.
Molding and casting:
The mold consists of two parts:
The base mold:
- The positive of your shape.
Our example included a tree like looking structure on the inside. This is where the air will be passing through the silicone once it has been casted.
Insert image:
Make sure that this tree like structure is shorter in height than the wall. If the structure is the same height there will be no space for the silicone to pass through later on in the molding phase. The wall that is on the outer edges of your base. This must be taller than the internal tree branch structure so no liquid can pour out of the side.
- The base to hold it all together.
The other half:
-
You will need a wall/frame or the same height as the wall before.
-
Similar base to the once before.
-
Textile to place on top of the silicone after to make sure that it doesn’t stretch.
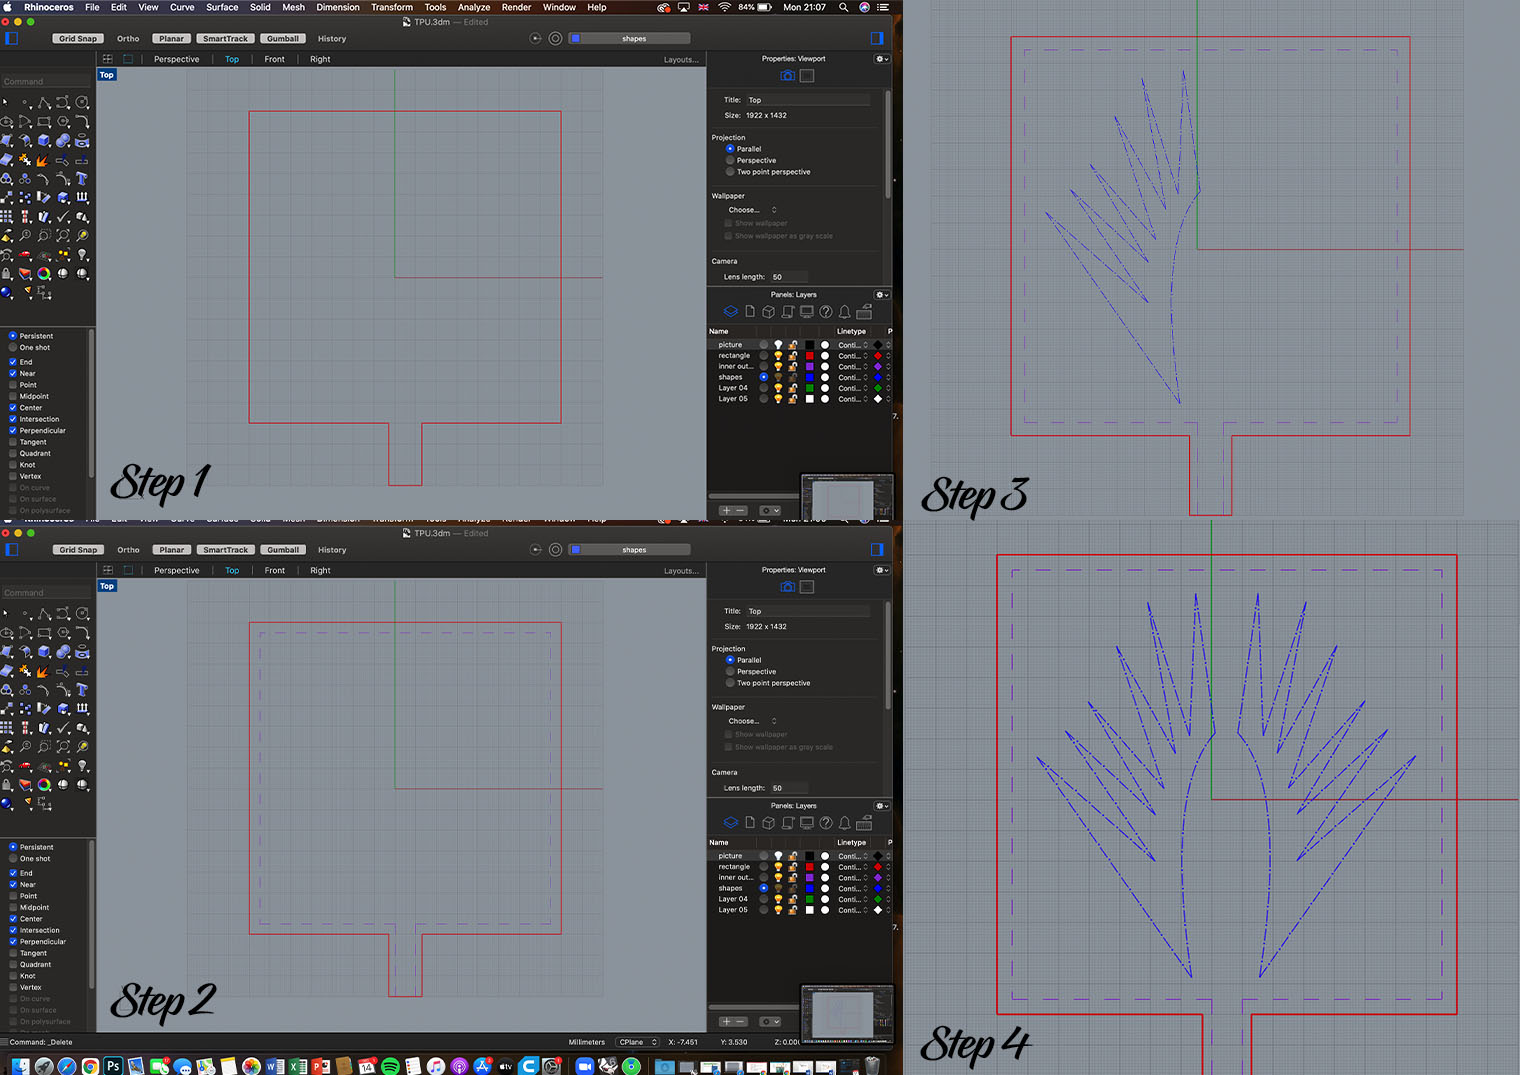
Steps in Rhino: (the final shape on the inside is up to the designer)
-
Open - Set lines in place, polyline for the base. Join the outside lines.
-
Offset - 8mm.
-
Measure the hole for your mould. Make the line from midpoint in Rhino on one layer. Make the airpath 3mm and join all the lines on the inside. Then, mirror the lines and join both the sides. Here you can sketch an didea ofyour mold.
-
Your "X-mas tree" has to be lower than the wall of the mold.
-
First cut out the outer lines. The base x 2, wall x 2 and the design x 1.
-
Be aware of the thickness of your plexiglass: 8mm.
Rhino process: screenshots of your process.
I didn't get this far with the casting technique but my fellow classmate Rebecca made a beautiful mold with silicone. Rebecca's(link) documentation is absolutely fabulous, be sure to check it out! After having dealth with a few technical issues, her development of her soft robotic made from silicone was super successful. Technical issue example: The space between the areas in which the air would flow was too thin, she managed to tweak her design to make a successful model.
Rebecca's page: I'm an inline-style link
The end result was fabulous!
Useful links
Nylon Fishing Line Actuator, with Geoff Spinks: https://robohub.org/robots-podcast-nylon-fishing-line-actuator/
Very Thin Tattoo-Like Wearable Patch Monitors and Diagnoses Health Problems from Sweat: https://www.wearable-technologies.com/2019/01/very-thin-tattoo-like-wearable-patch-monitors-and-diagnoses-health-problems-from-sweat/
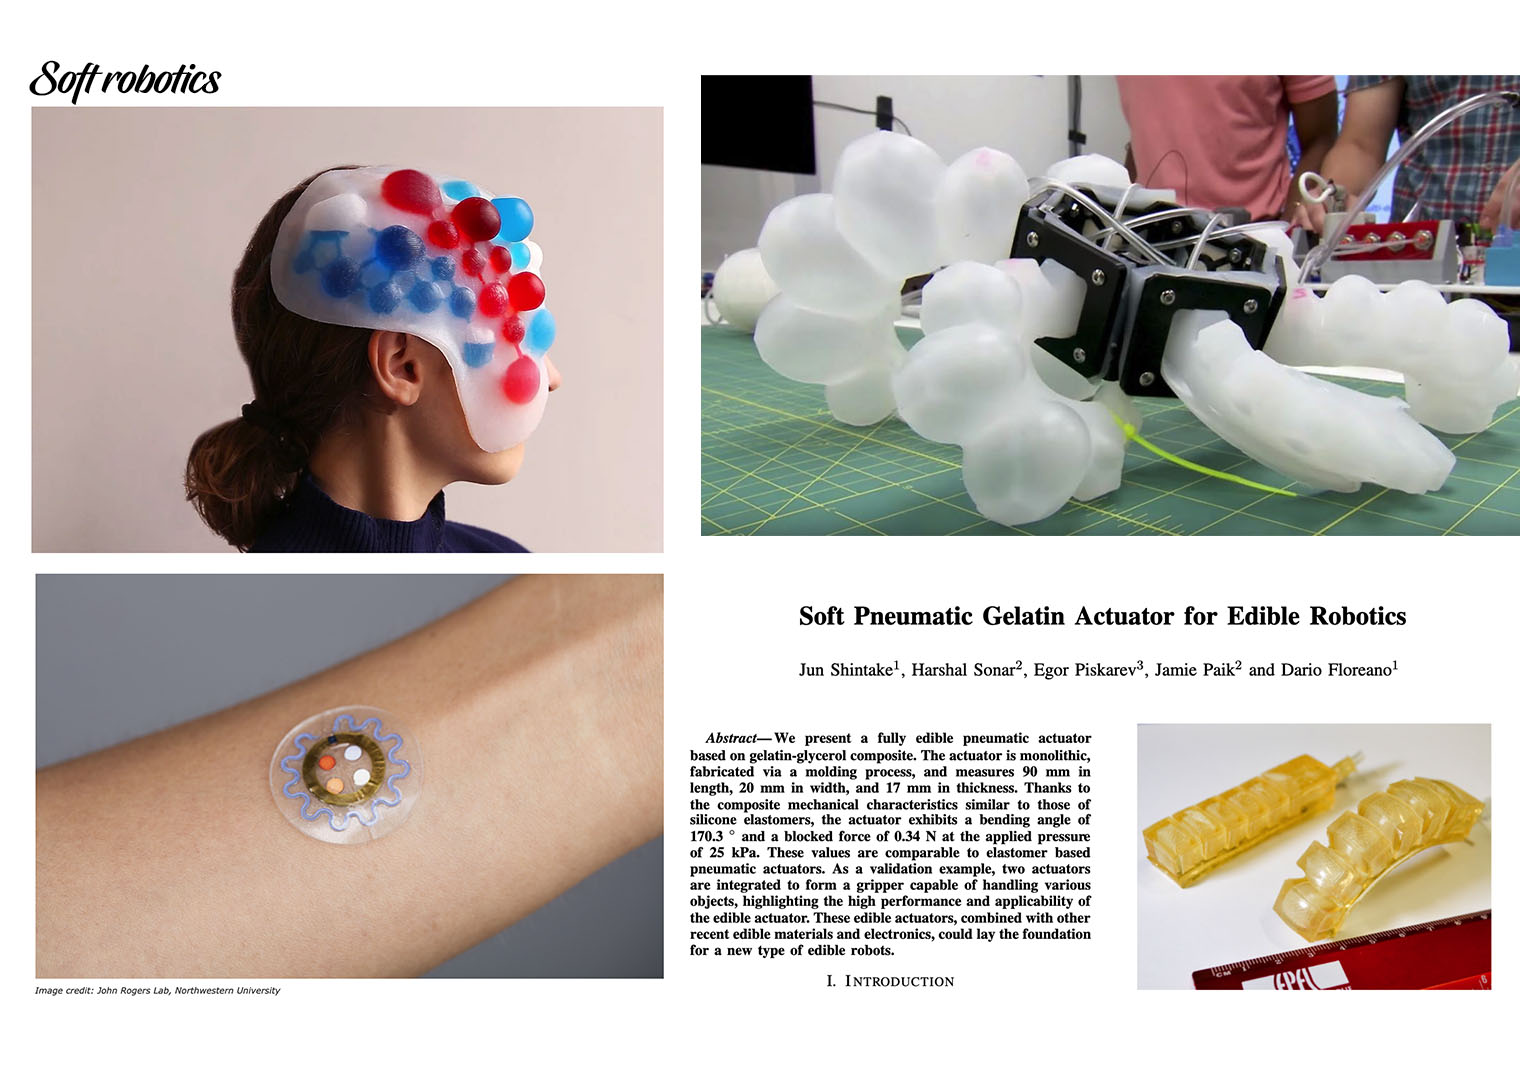
Soft Pneumatic Gelatin Actuator for Edible Robotics: https://www.researchgate.net/publication/321817038_Soft_pneumatic_gelatin_actuator_for_edible_robotics
general information on soft robotics: https://softroboticstoolkit.com/