4. BioChromes
This week we worked on building a color card together. It was fun to work as a group and we managed to gather quite a lot of samples during the limited time.
We worked on a range of different natural dye including:
Natural and bacteria dyes as well as discovering how we can actually reuse the leftovers from the the process to extract Ink, dye and pigments
Natural dyes have a long and rich history the oldest samples discovered dates back 36000 years.
However since industrial revolution it have largely disapeared, today only 1% of all dyed material are coming from natural resources.
BASIC TERMINOLOGY
Natural dyes can be divided in few different groups:
Plant based:
Flower
Stems
Leaves
Bark
Algae
Wood
Animal based:
Insect
Molusks
Organism:
Bacteria
Myco
Mineral:*
Minerals
Earth
Rocks
Salts
Metals
Tanning: gives cellulose fibers the ability to more readily accept a mordant, it is mainly done on cellulose fibers
Scouring: is a preparatory treatment of certain textile materials. Scouring removes soluble and insoluble impurities found in textiles for example, oils, waxes, fats, vegetable matter, as well as dirt.
Mordanting is a substance used to set (i.e. bind) dyes on fabrics by forming a coordination complex with the dye, which then attaches to the fabric.
NATURAL DYE
On the first day we started with creating dyes
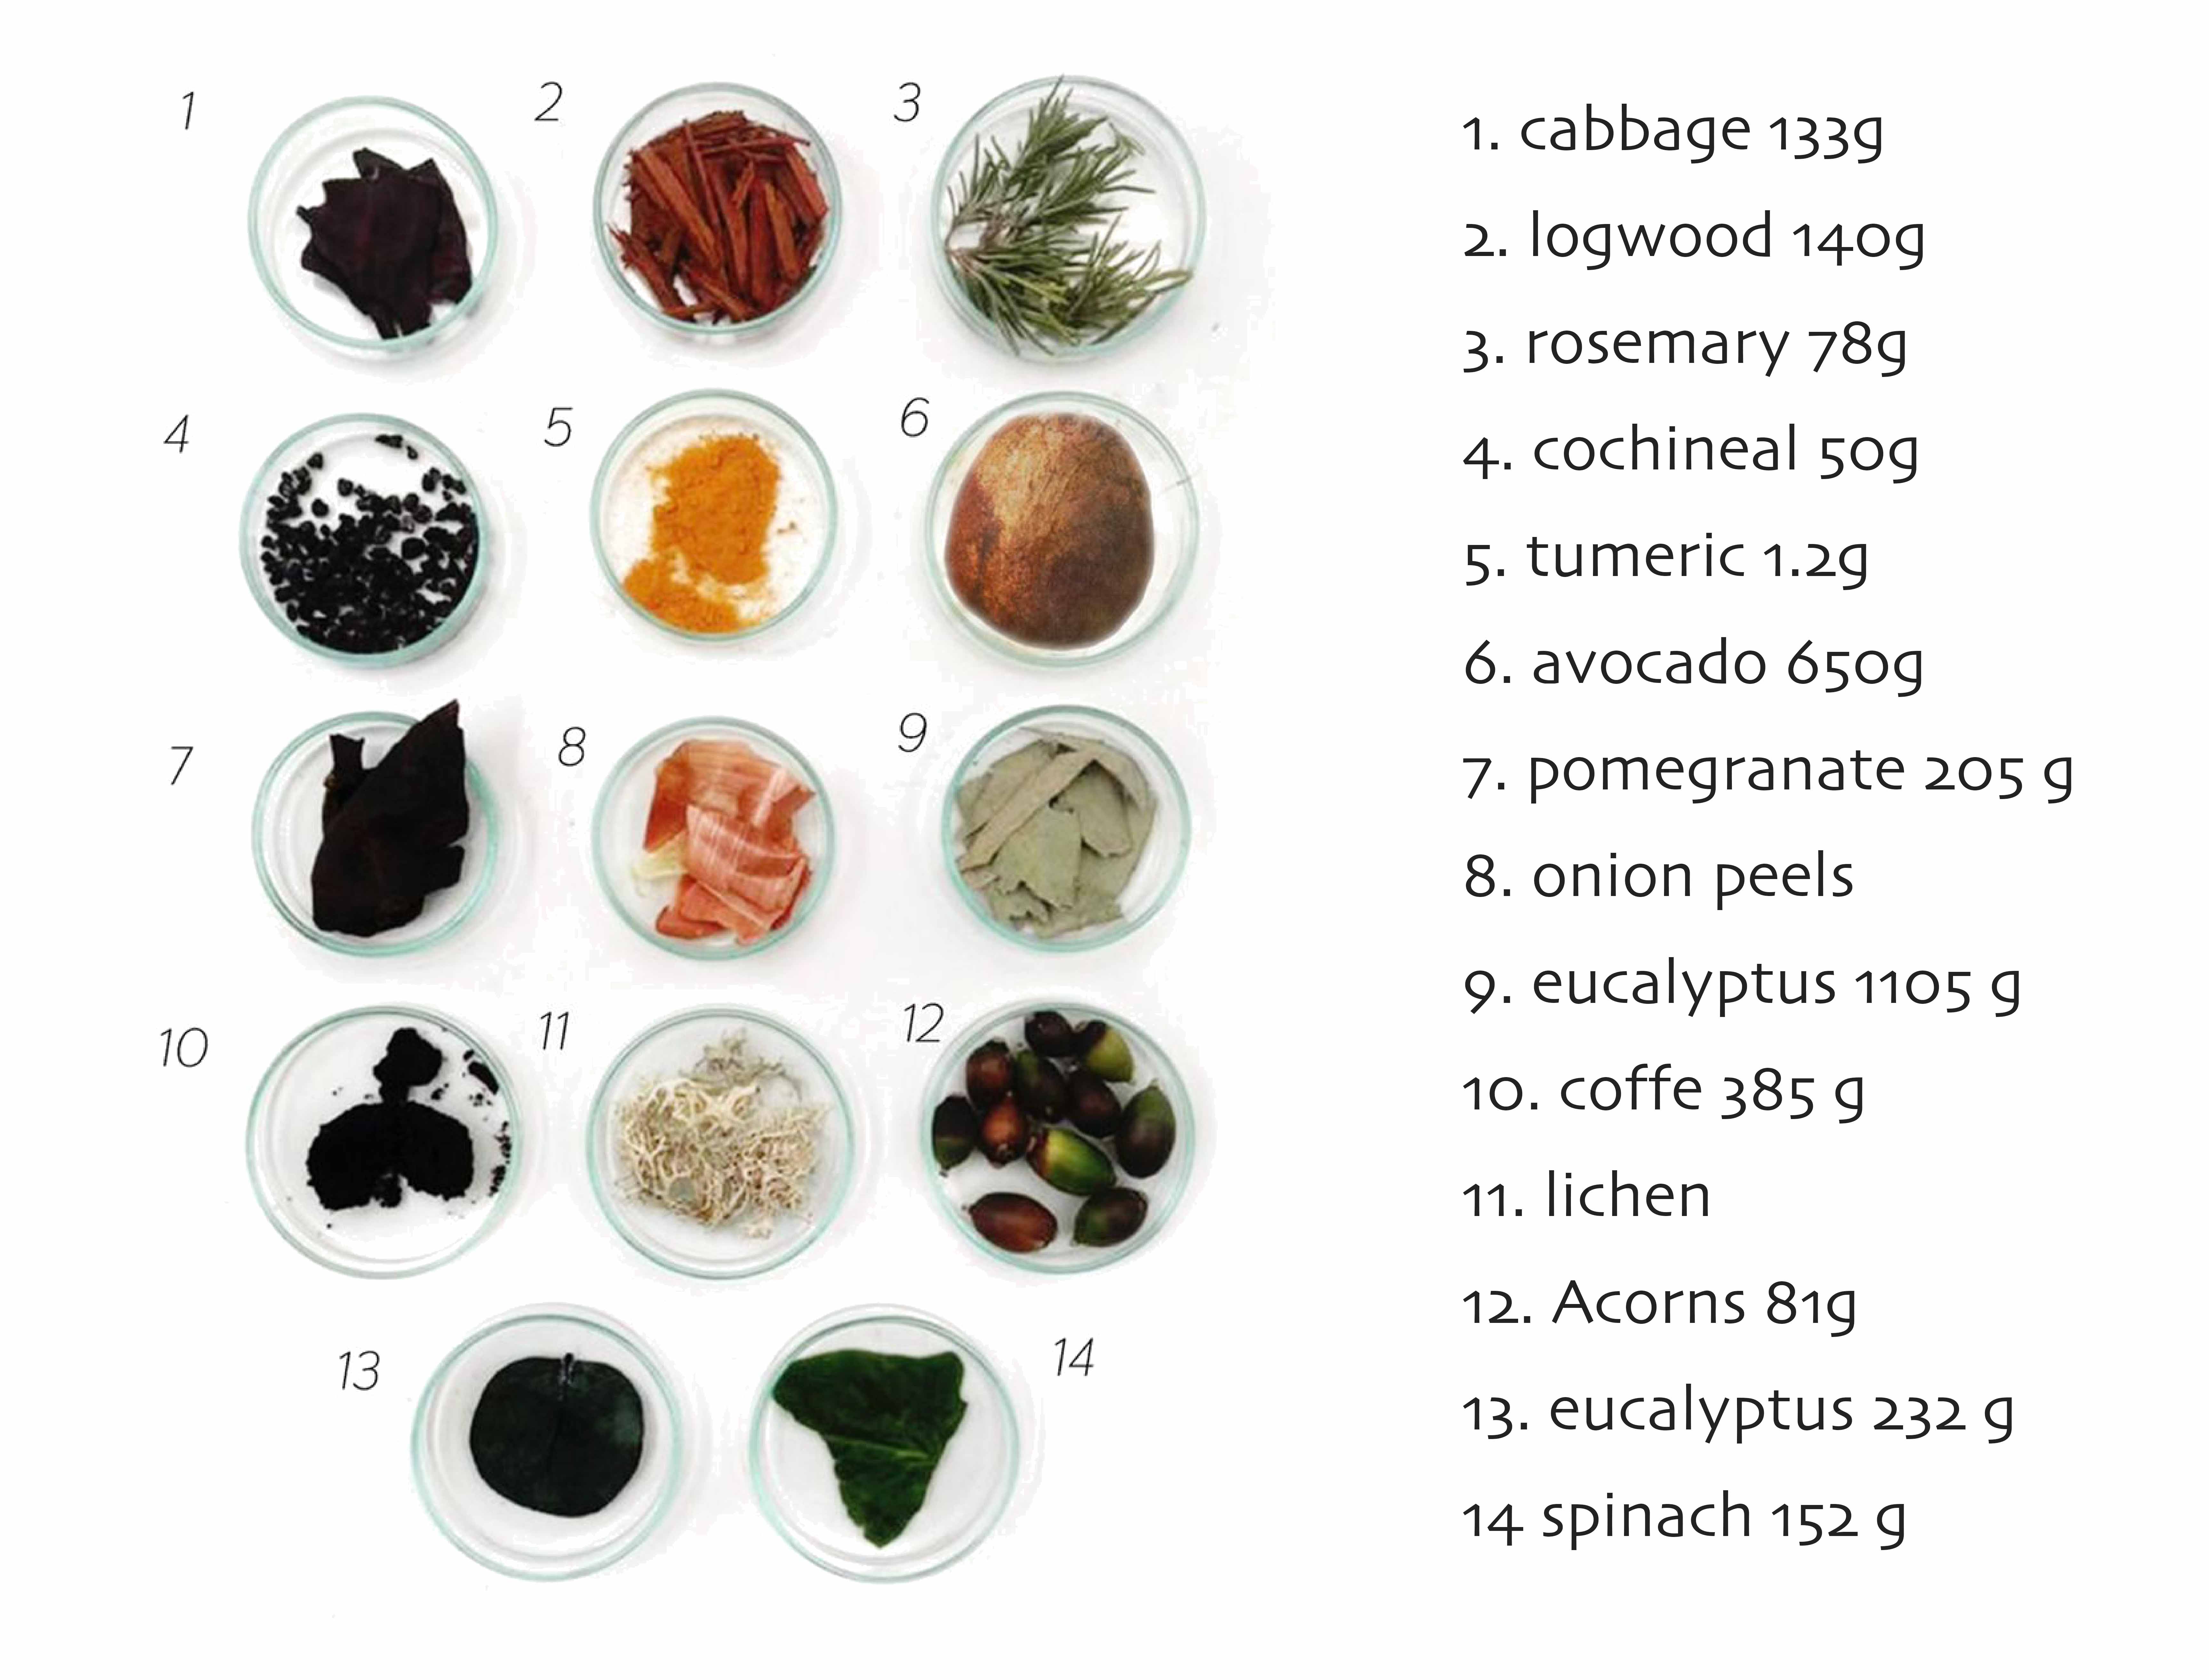
1) material: measure all our raw materials:
2) Soak: let them soak for 1 hour together with the agent before putting them to a gentle simmer (in the same water) for 1-3 hours

 Eucalyptus and Rosemary
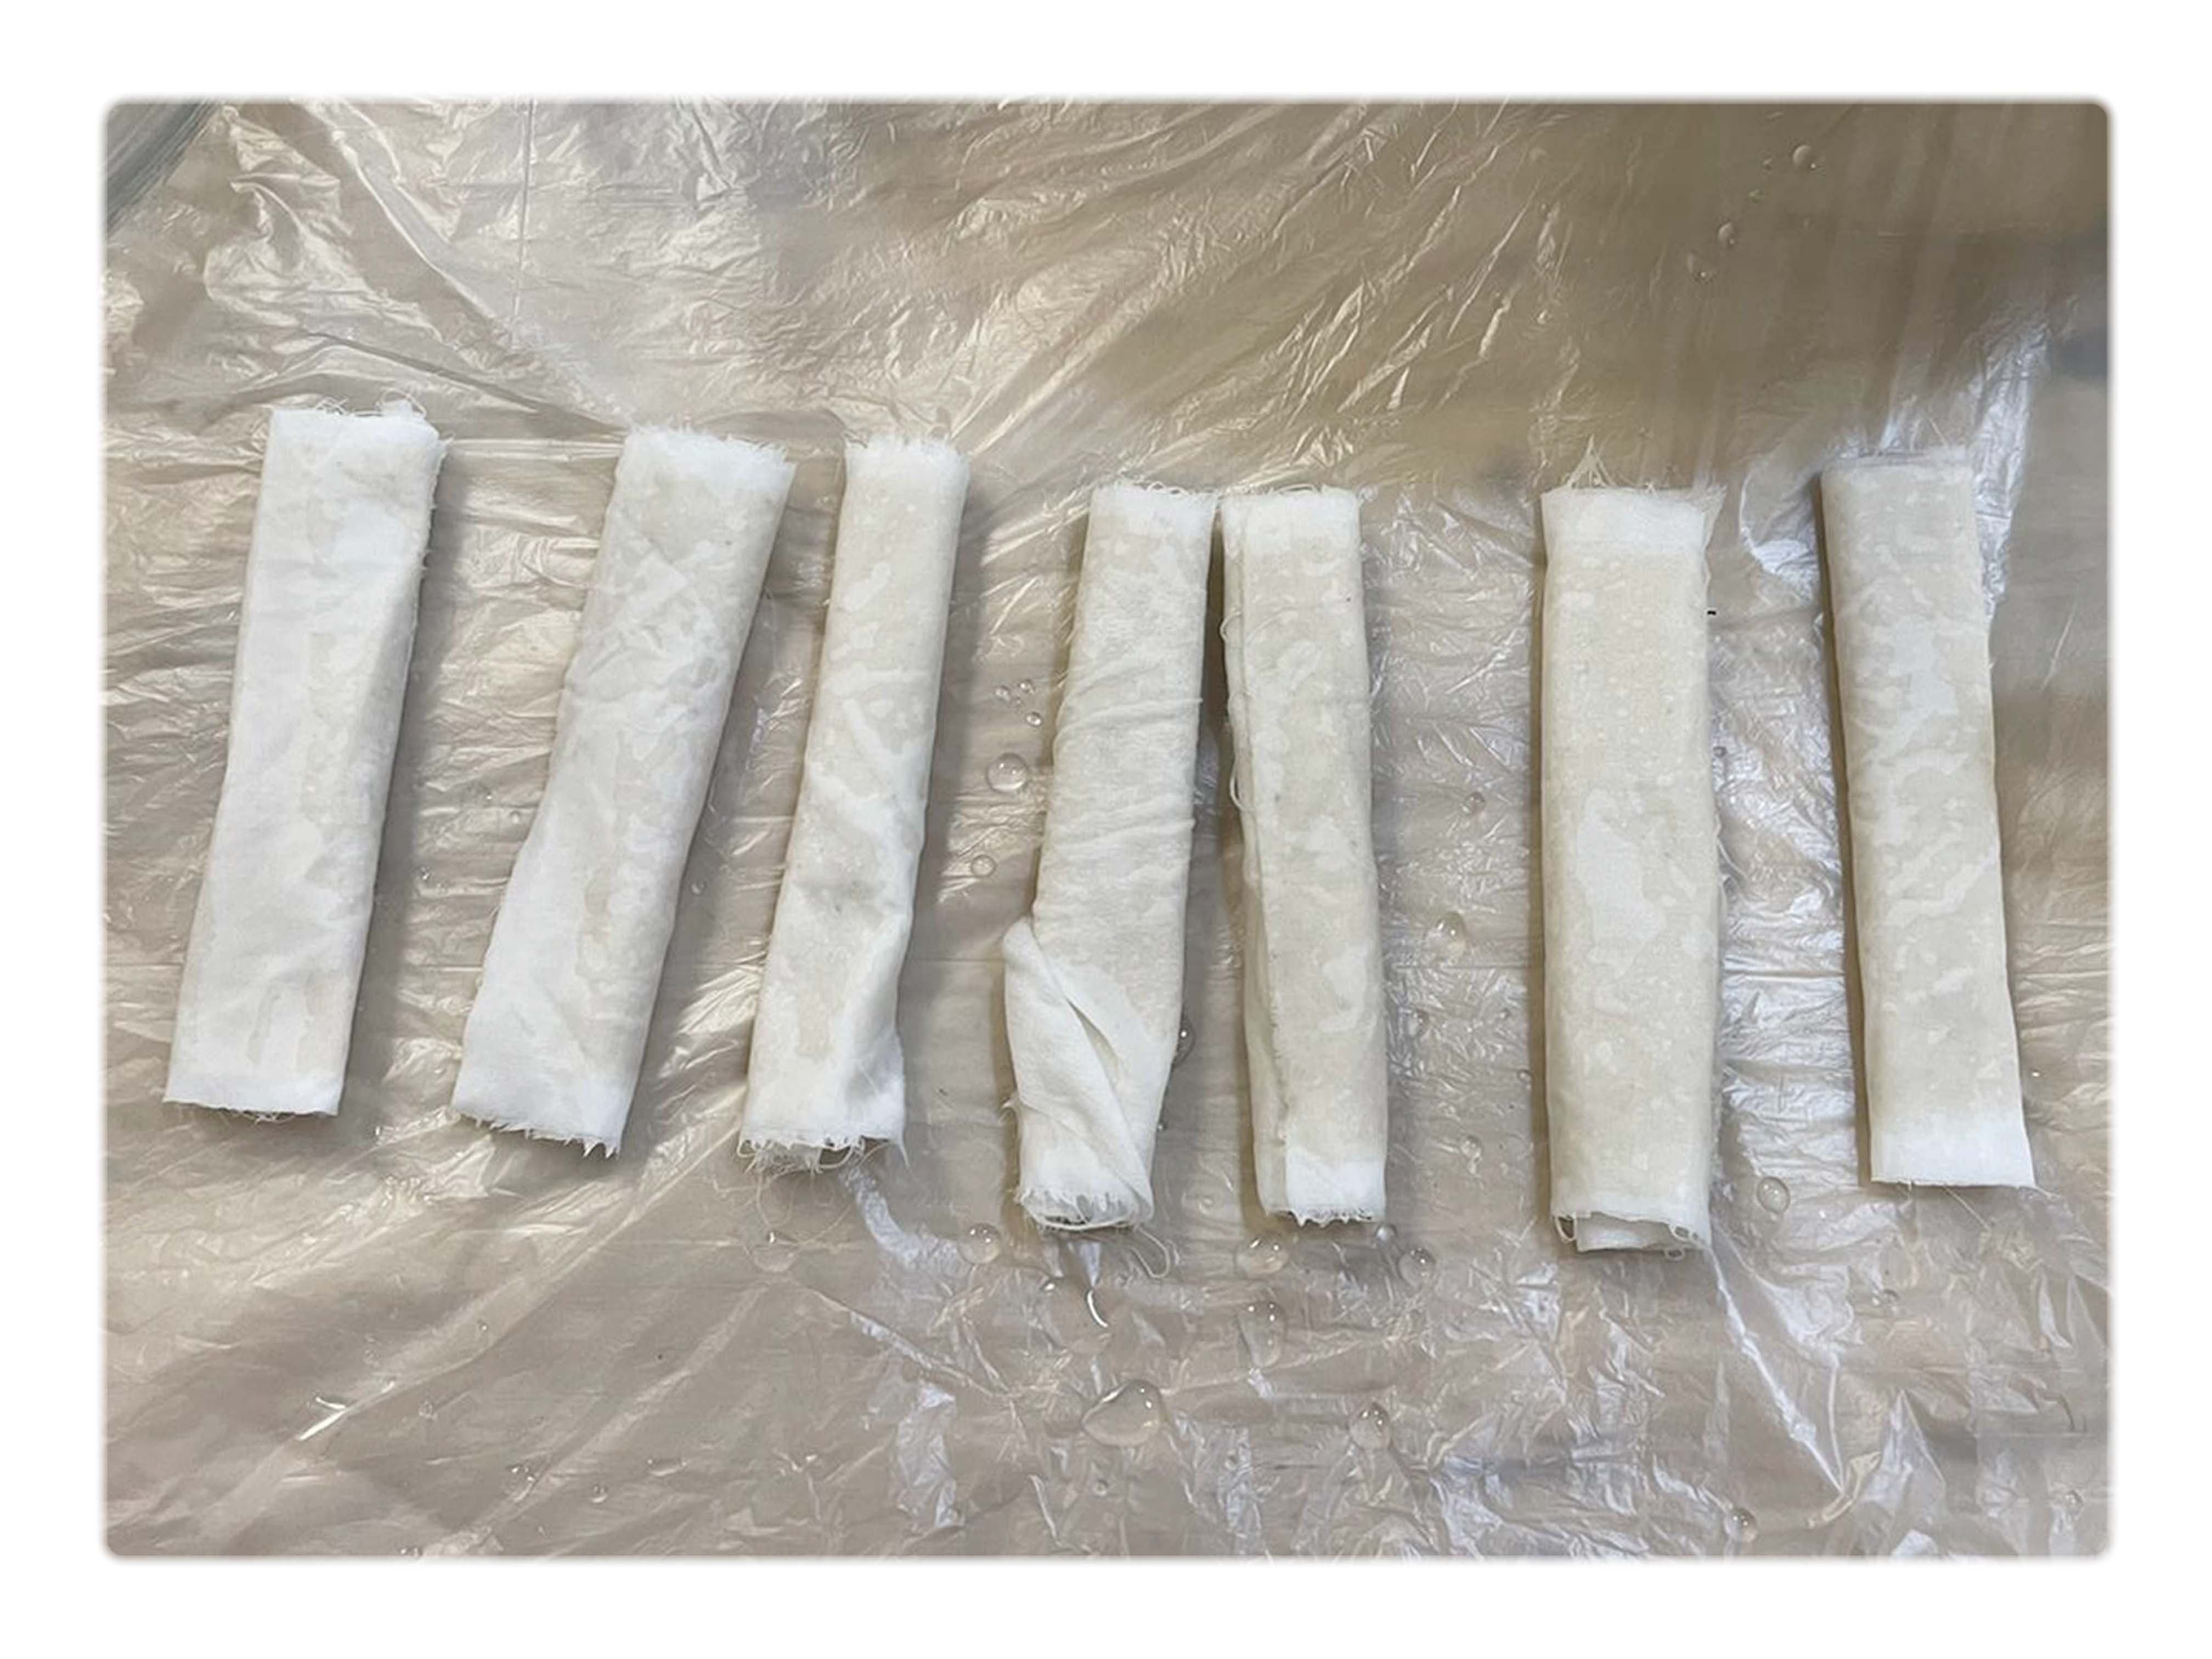
3) scouring: Cut our fabrics (cotton, silk and viscose) into pieces (12x12 cm) and boiled them together with an scouring agent.
Each fabric roll: 4,5g iron 0,045g Alum 0,54g
Recipe:
sodium carbonite (2% of fabric weight)
Water
4) dying We strained the liquid and divided into two different dye baths to be able to experiment with two different mordants.
Dye bath A: 1% Iron
Dye bath B: 12% Alum
The iron tends to give deeper and more blueish tones wile Alum produces brighter colors
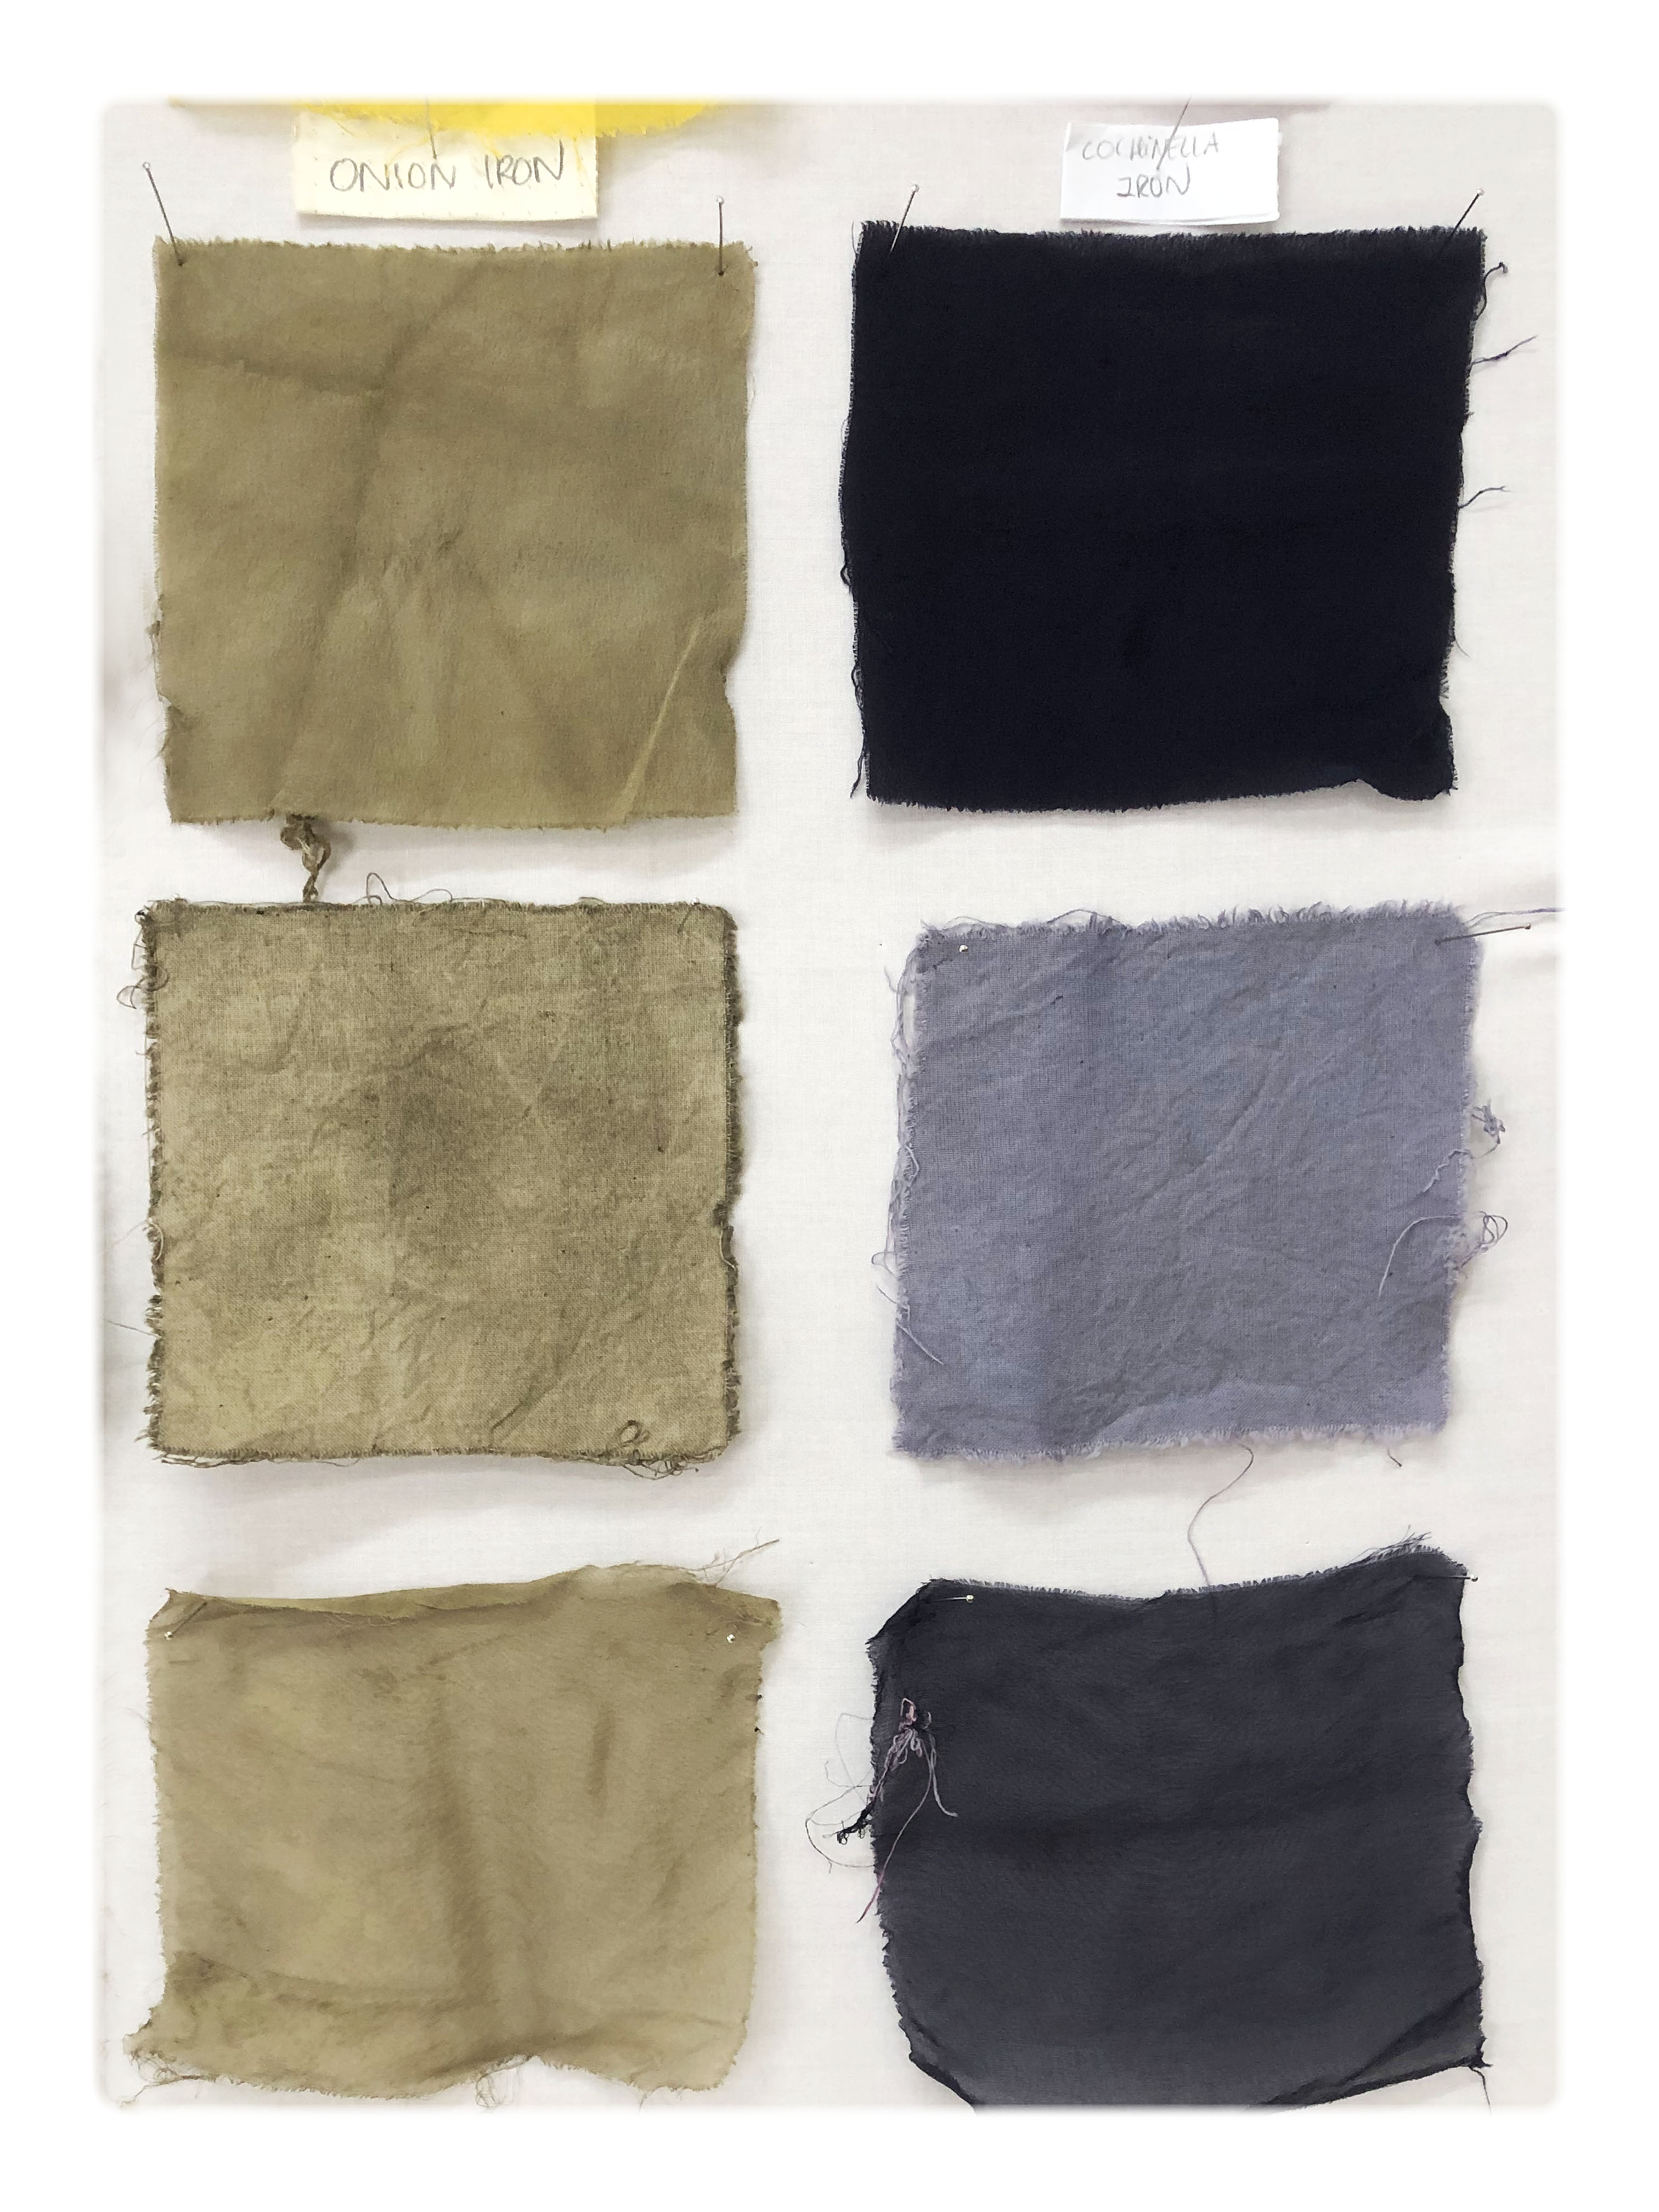
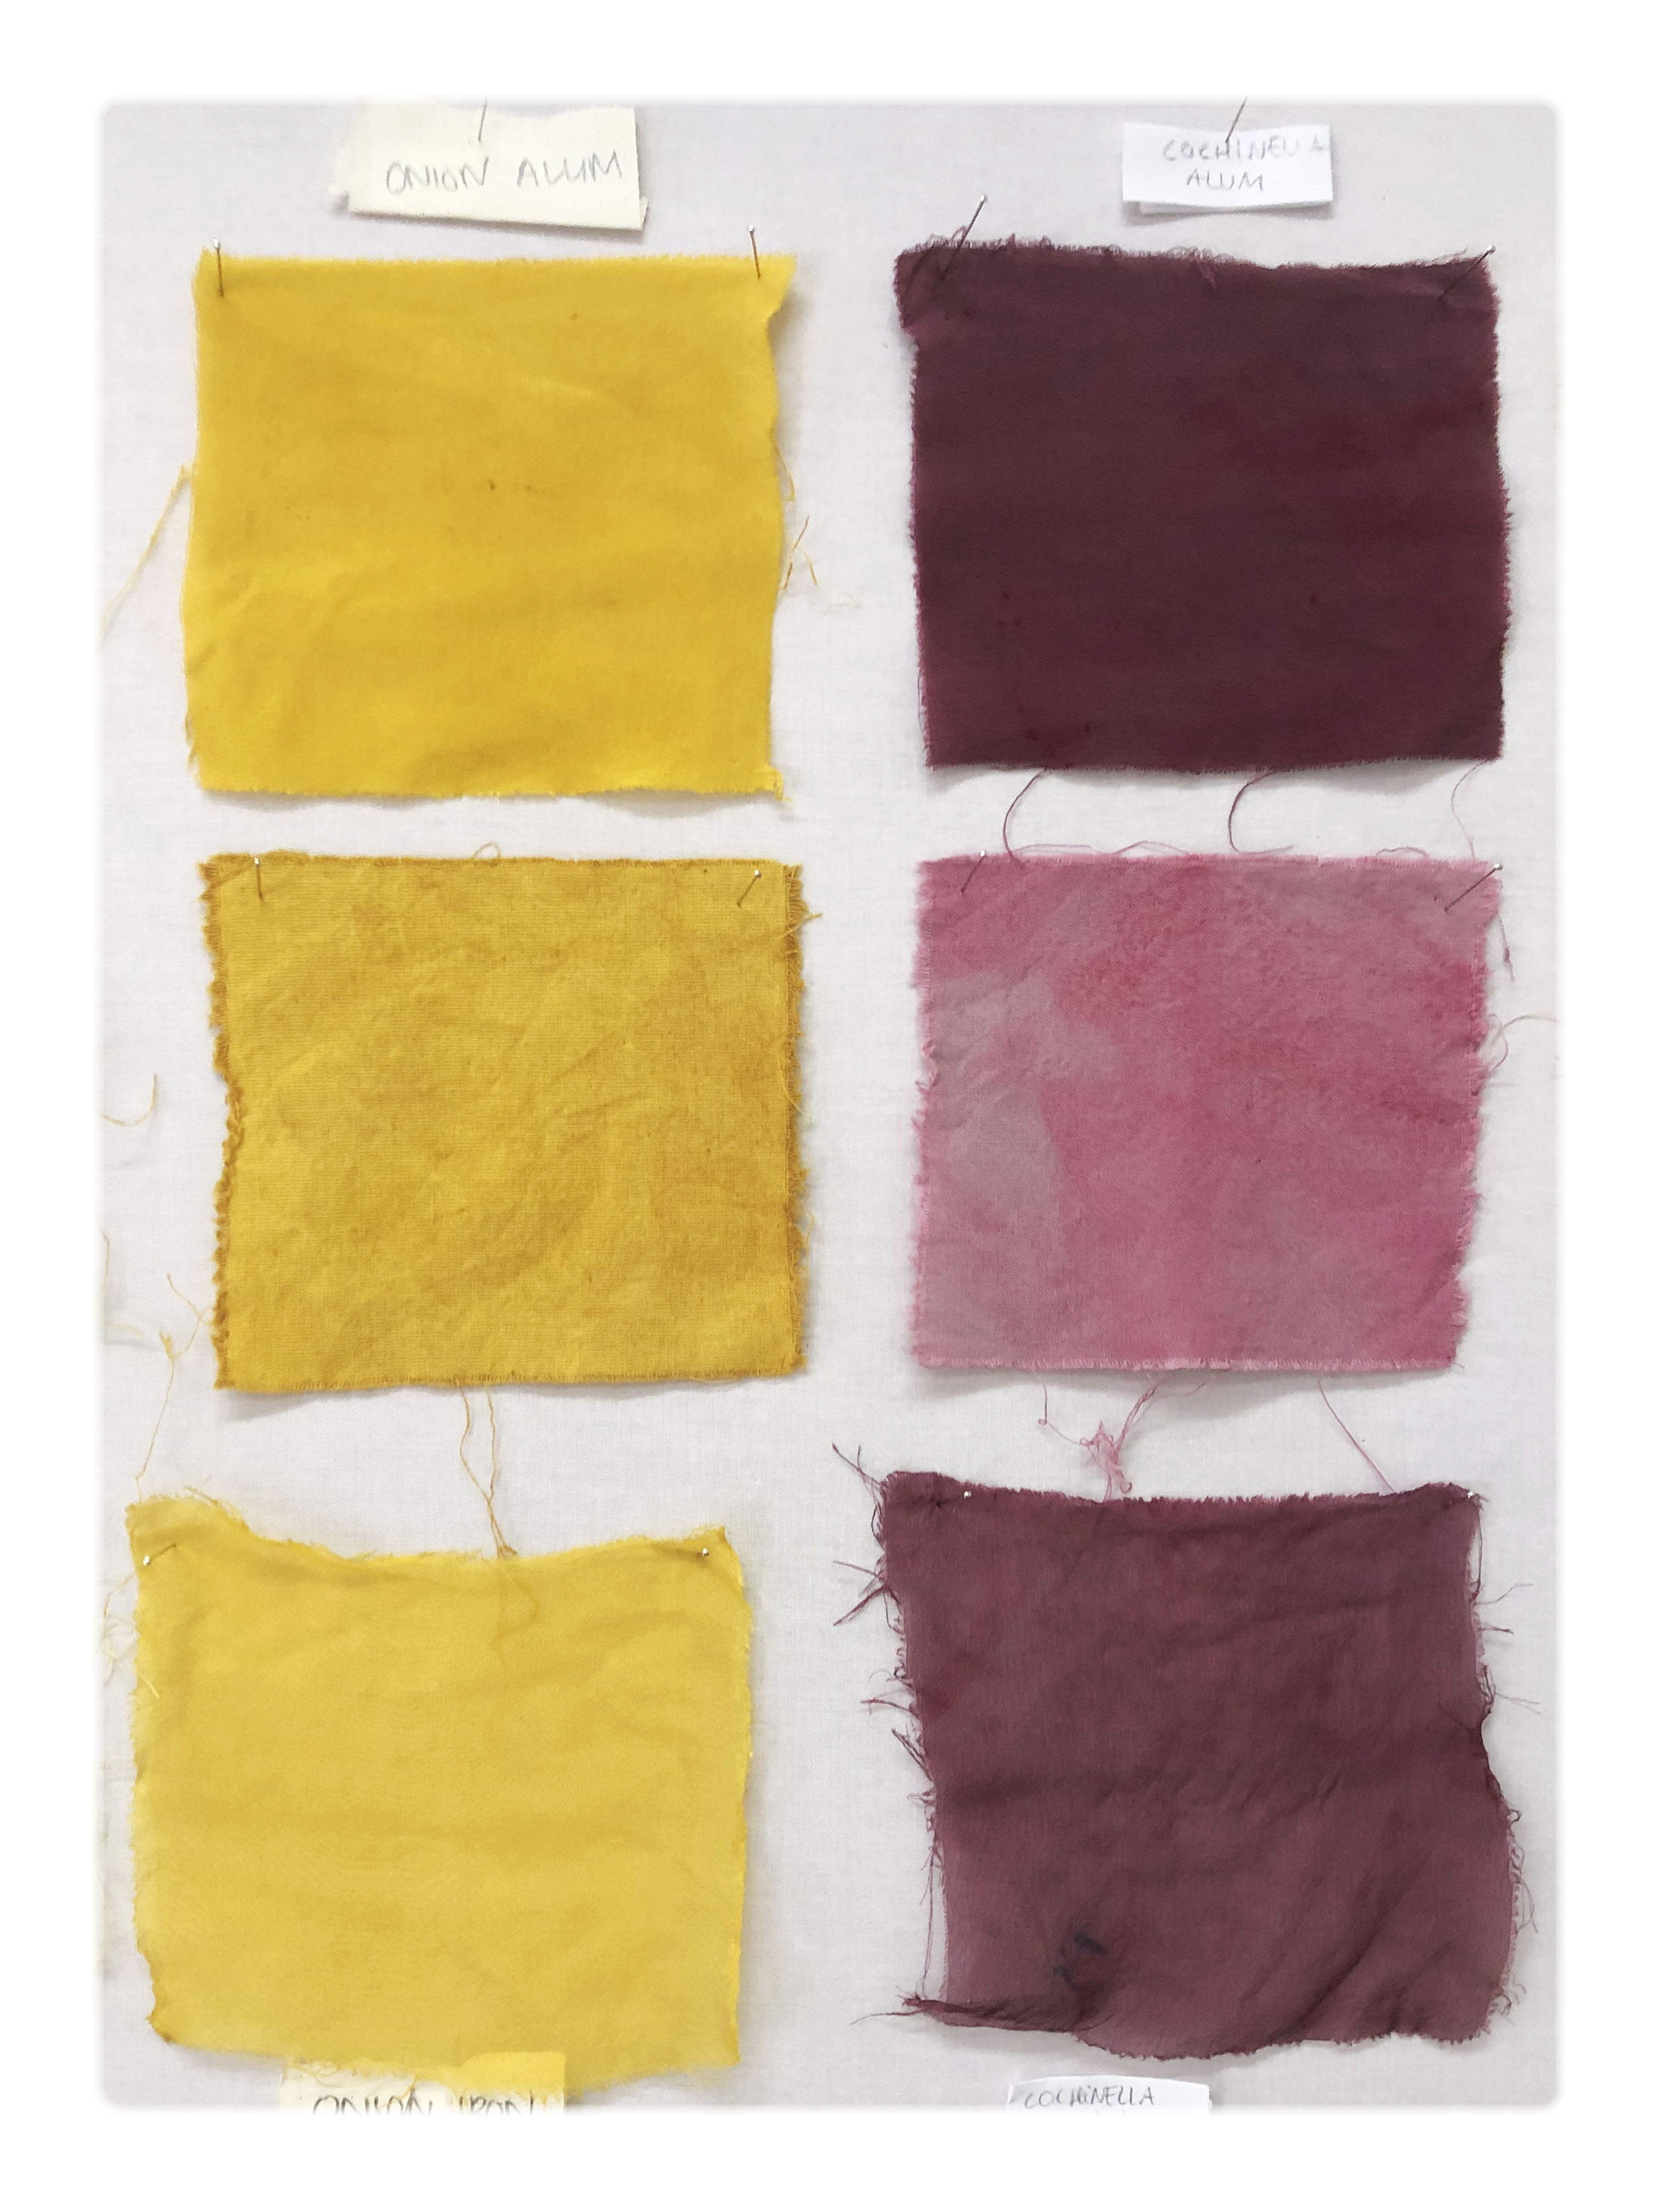 Left: 1% Iron Onion and Cochinella Right: 12% Alum Onion and Cochinella
 _fabric
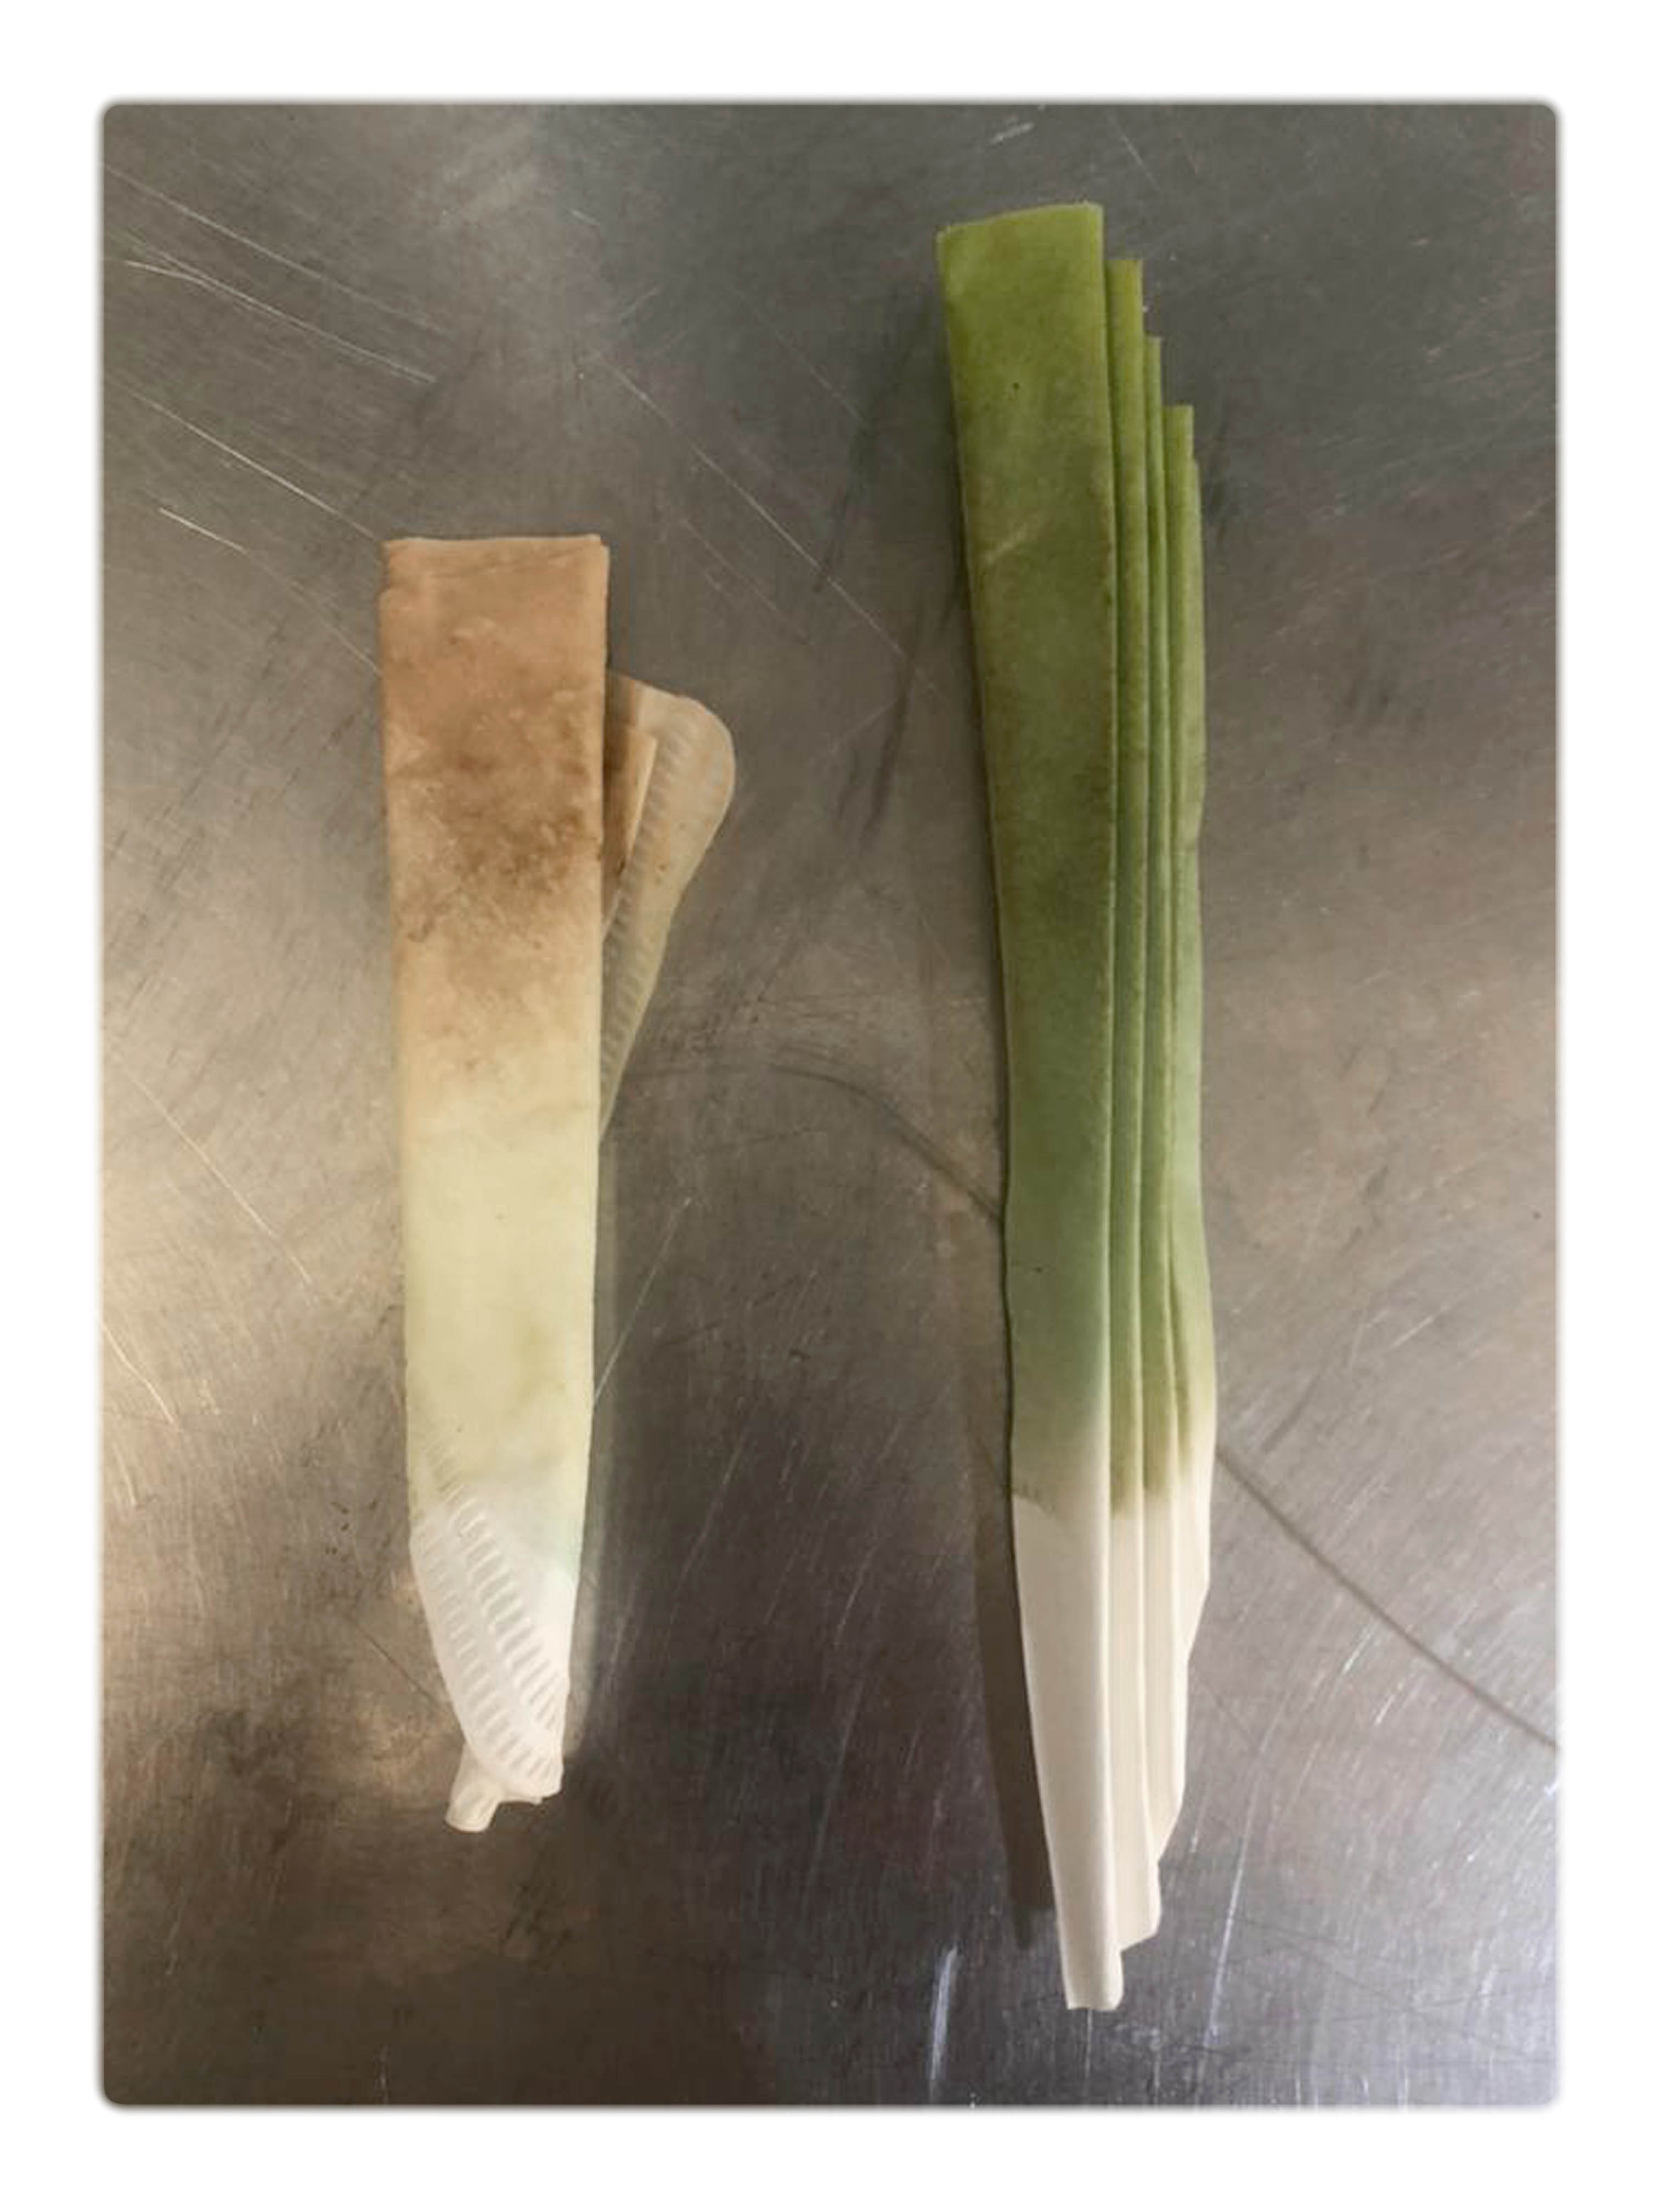
5) Time In every dye bath we put two sets of our “springrolls” of fabric one to be dyed for 30 and the other for 60 min.
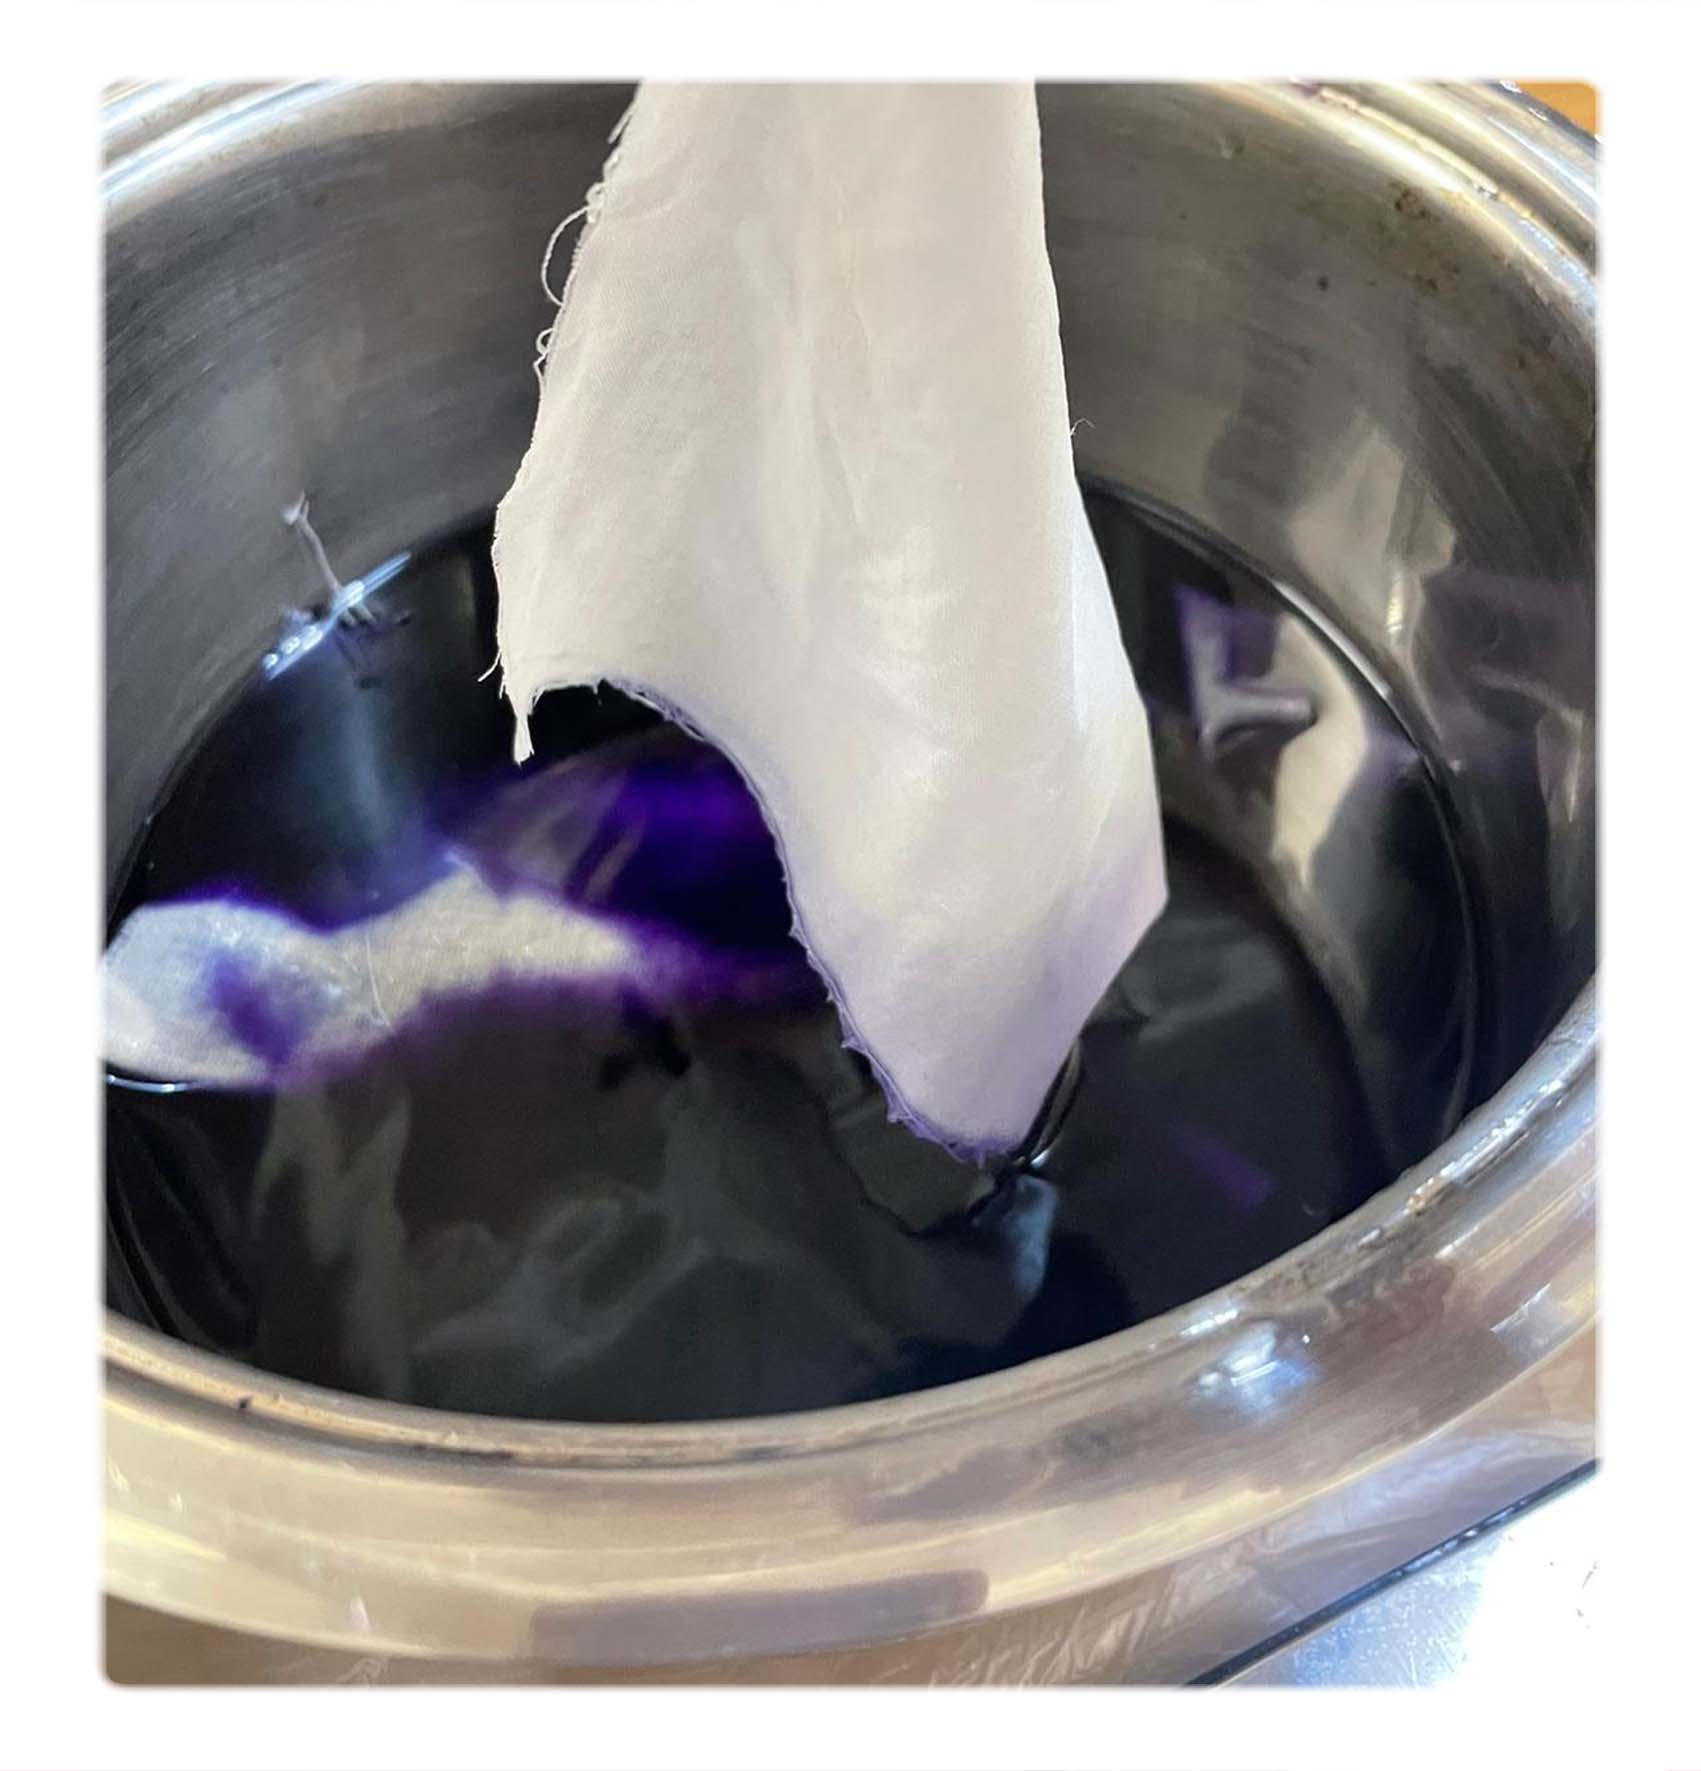
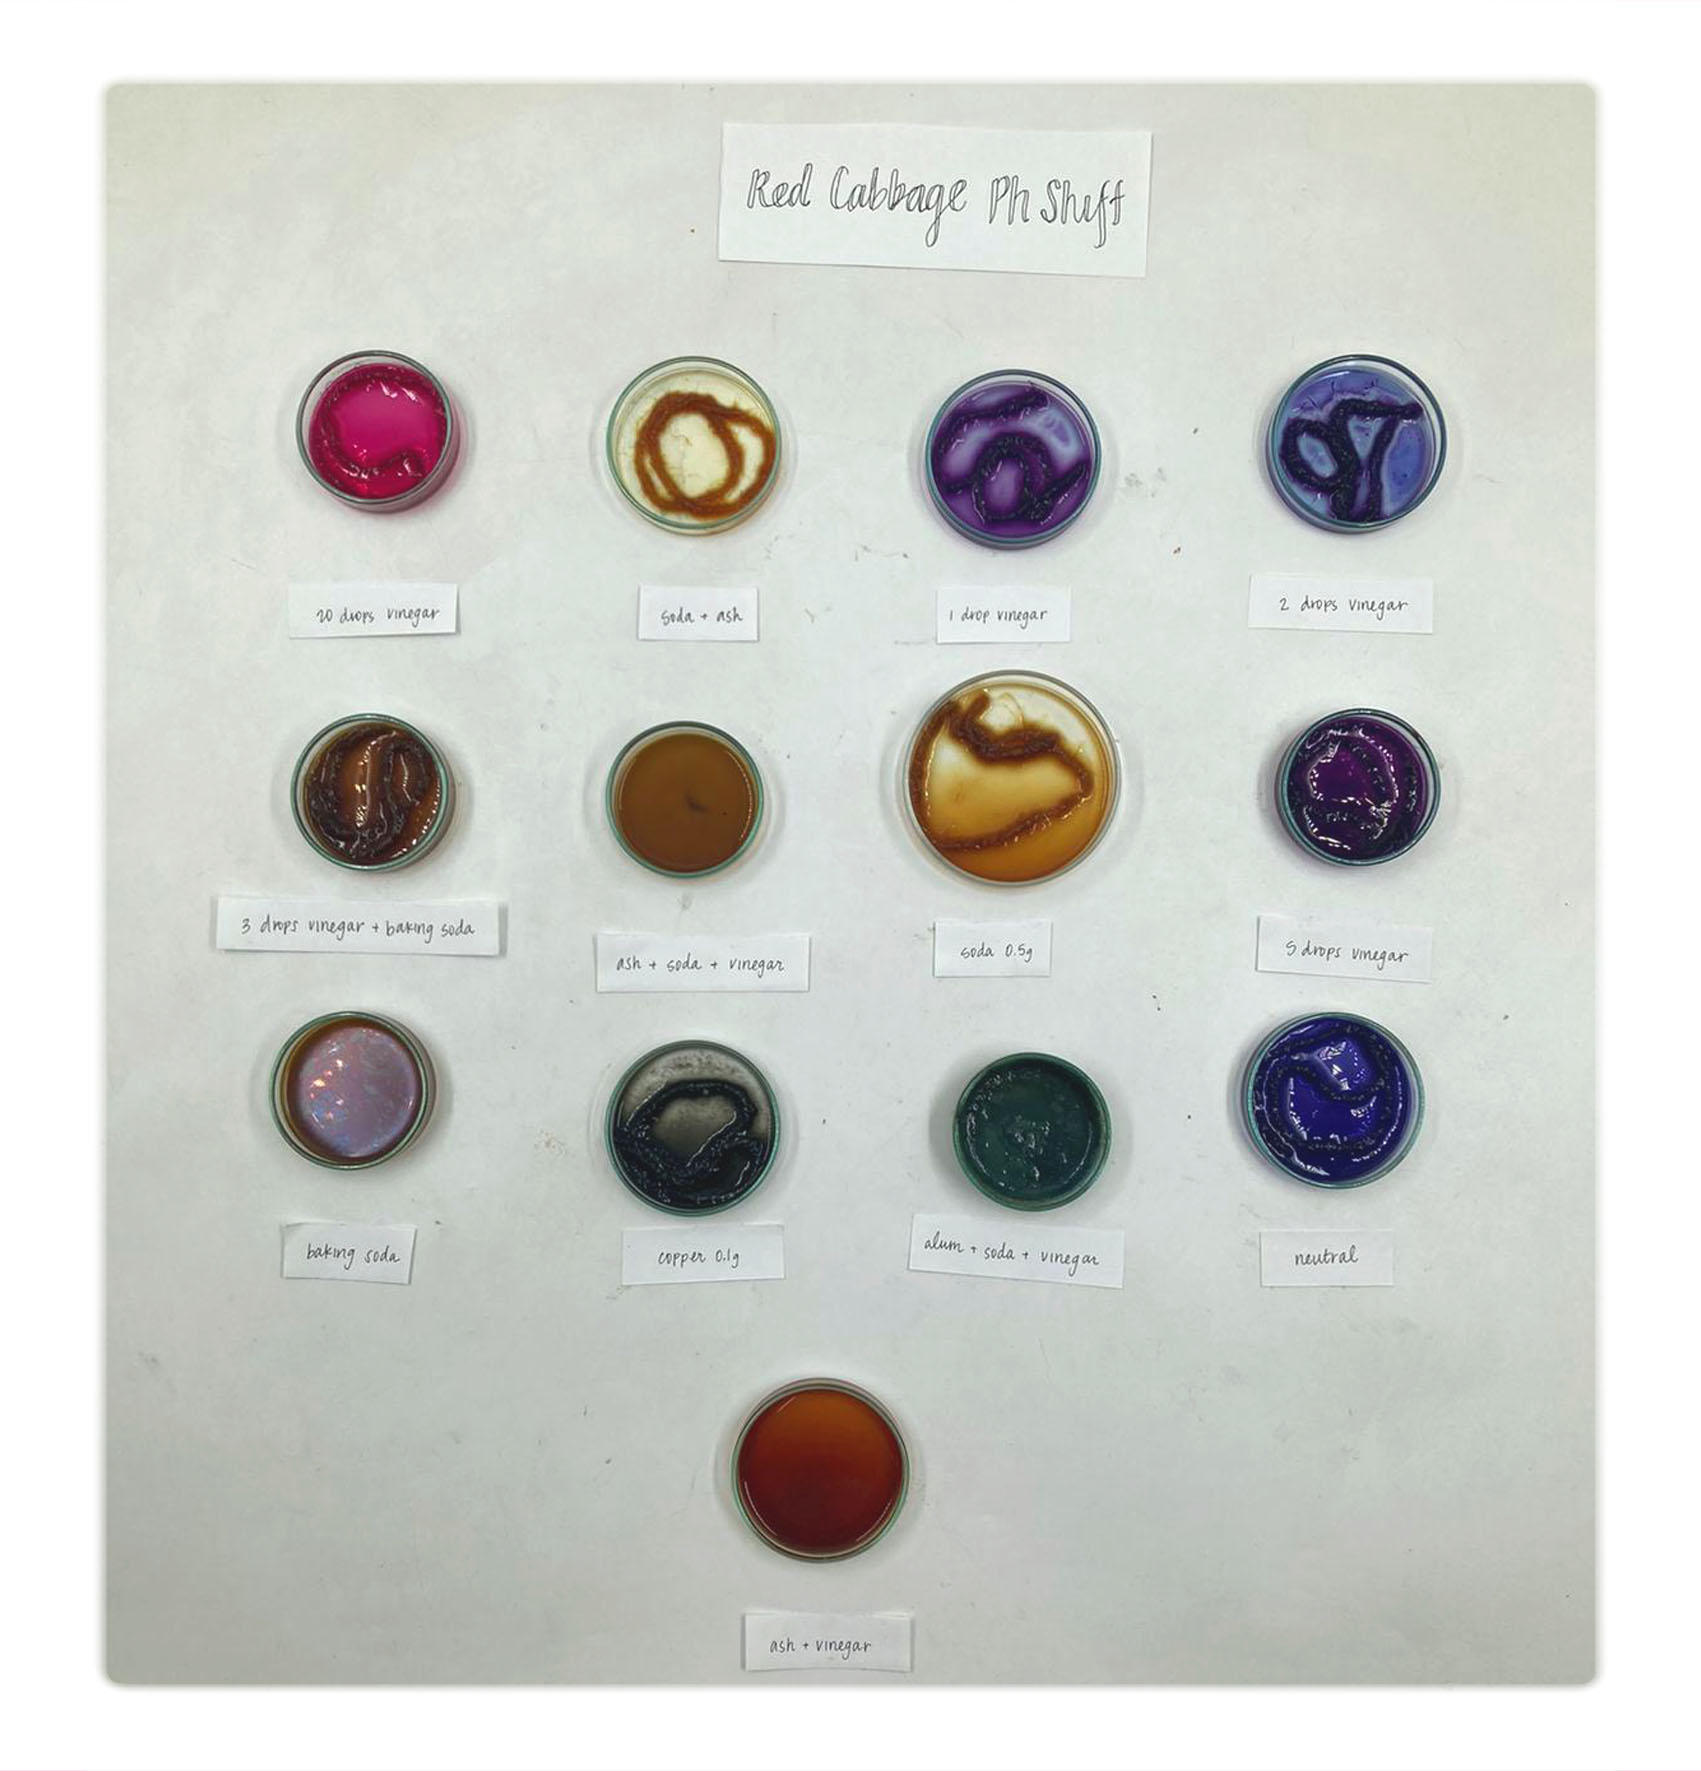
6) Modifying: Cabbage is one of the most versatile raw materials and depending on the different PH value it can produce a wide range of colors. We used bicarbonate and vinegar as modifier and was producing range of different color experiments while tracking the PH value with a ph-strip
 Cabbage
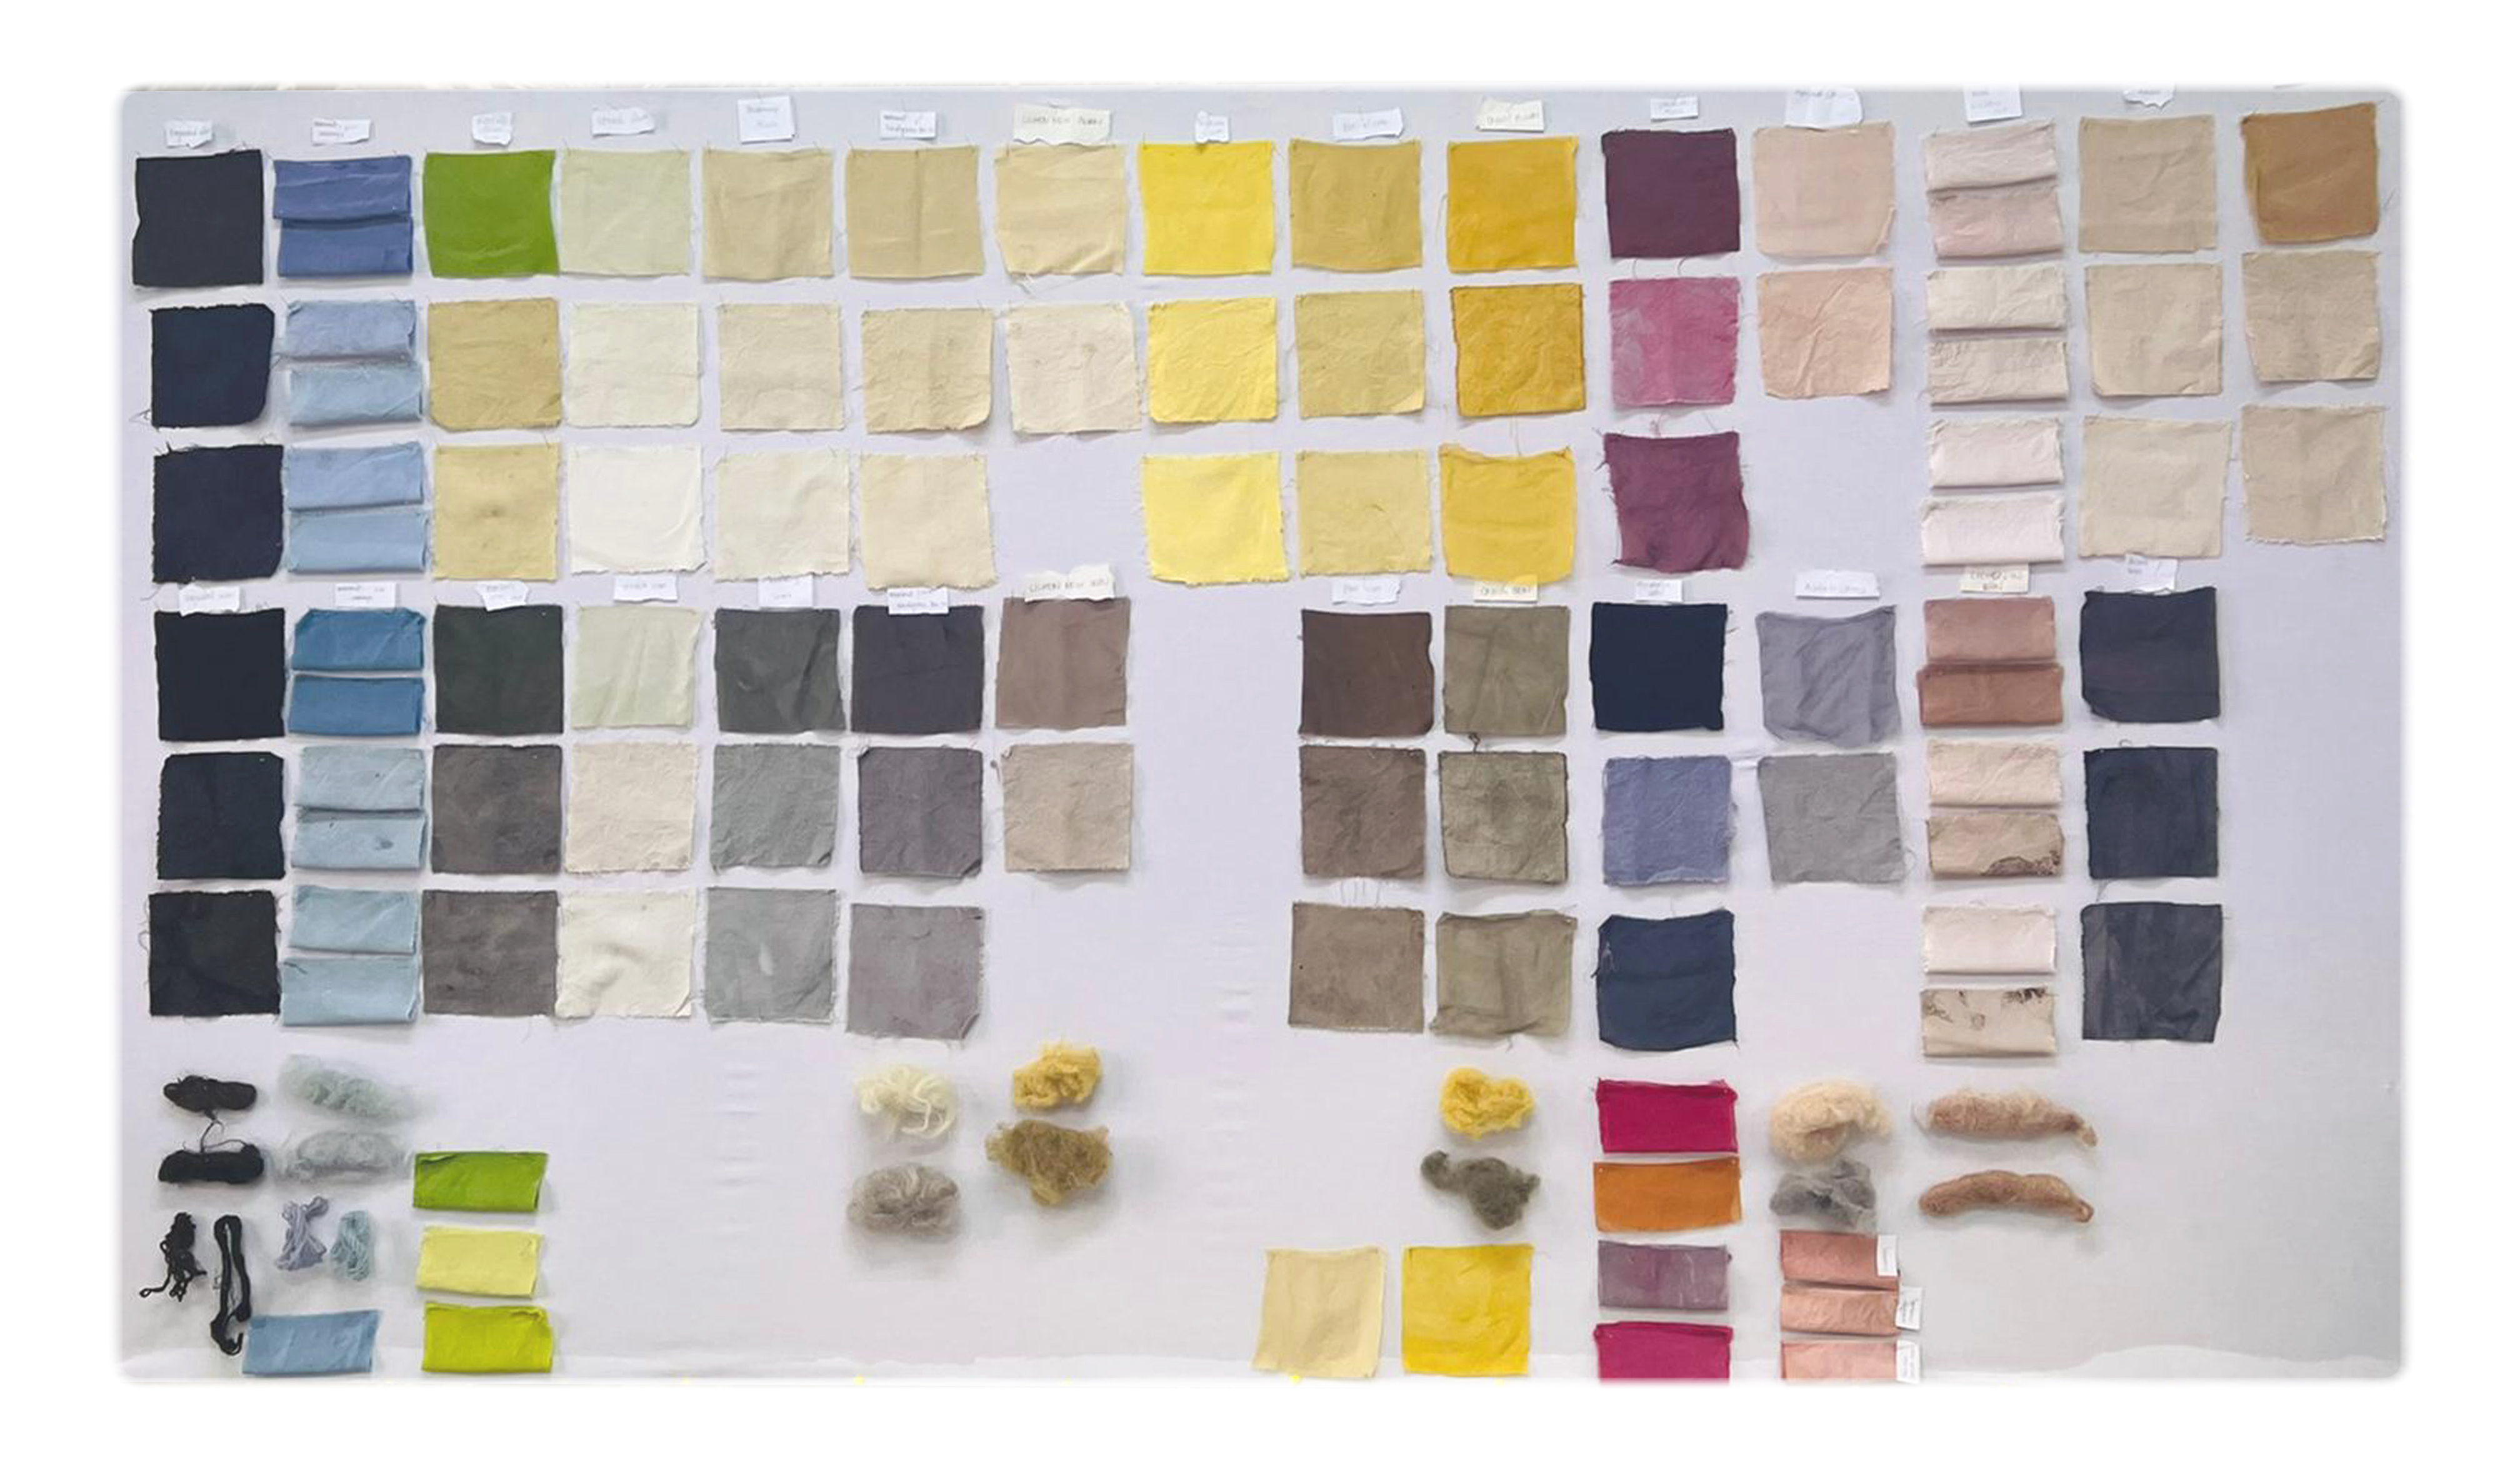
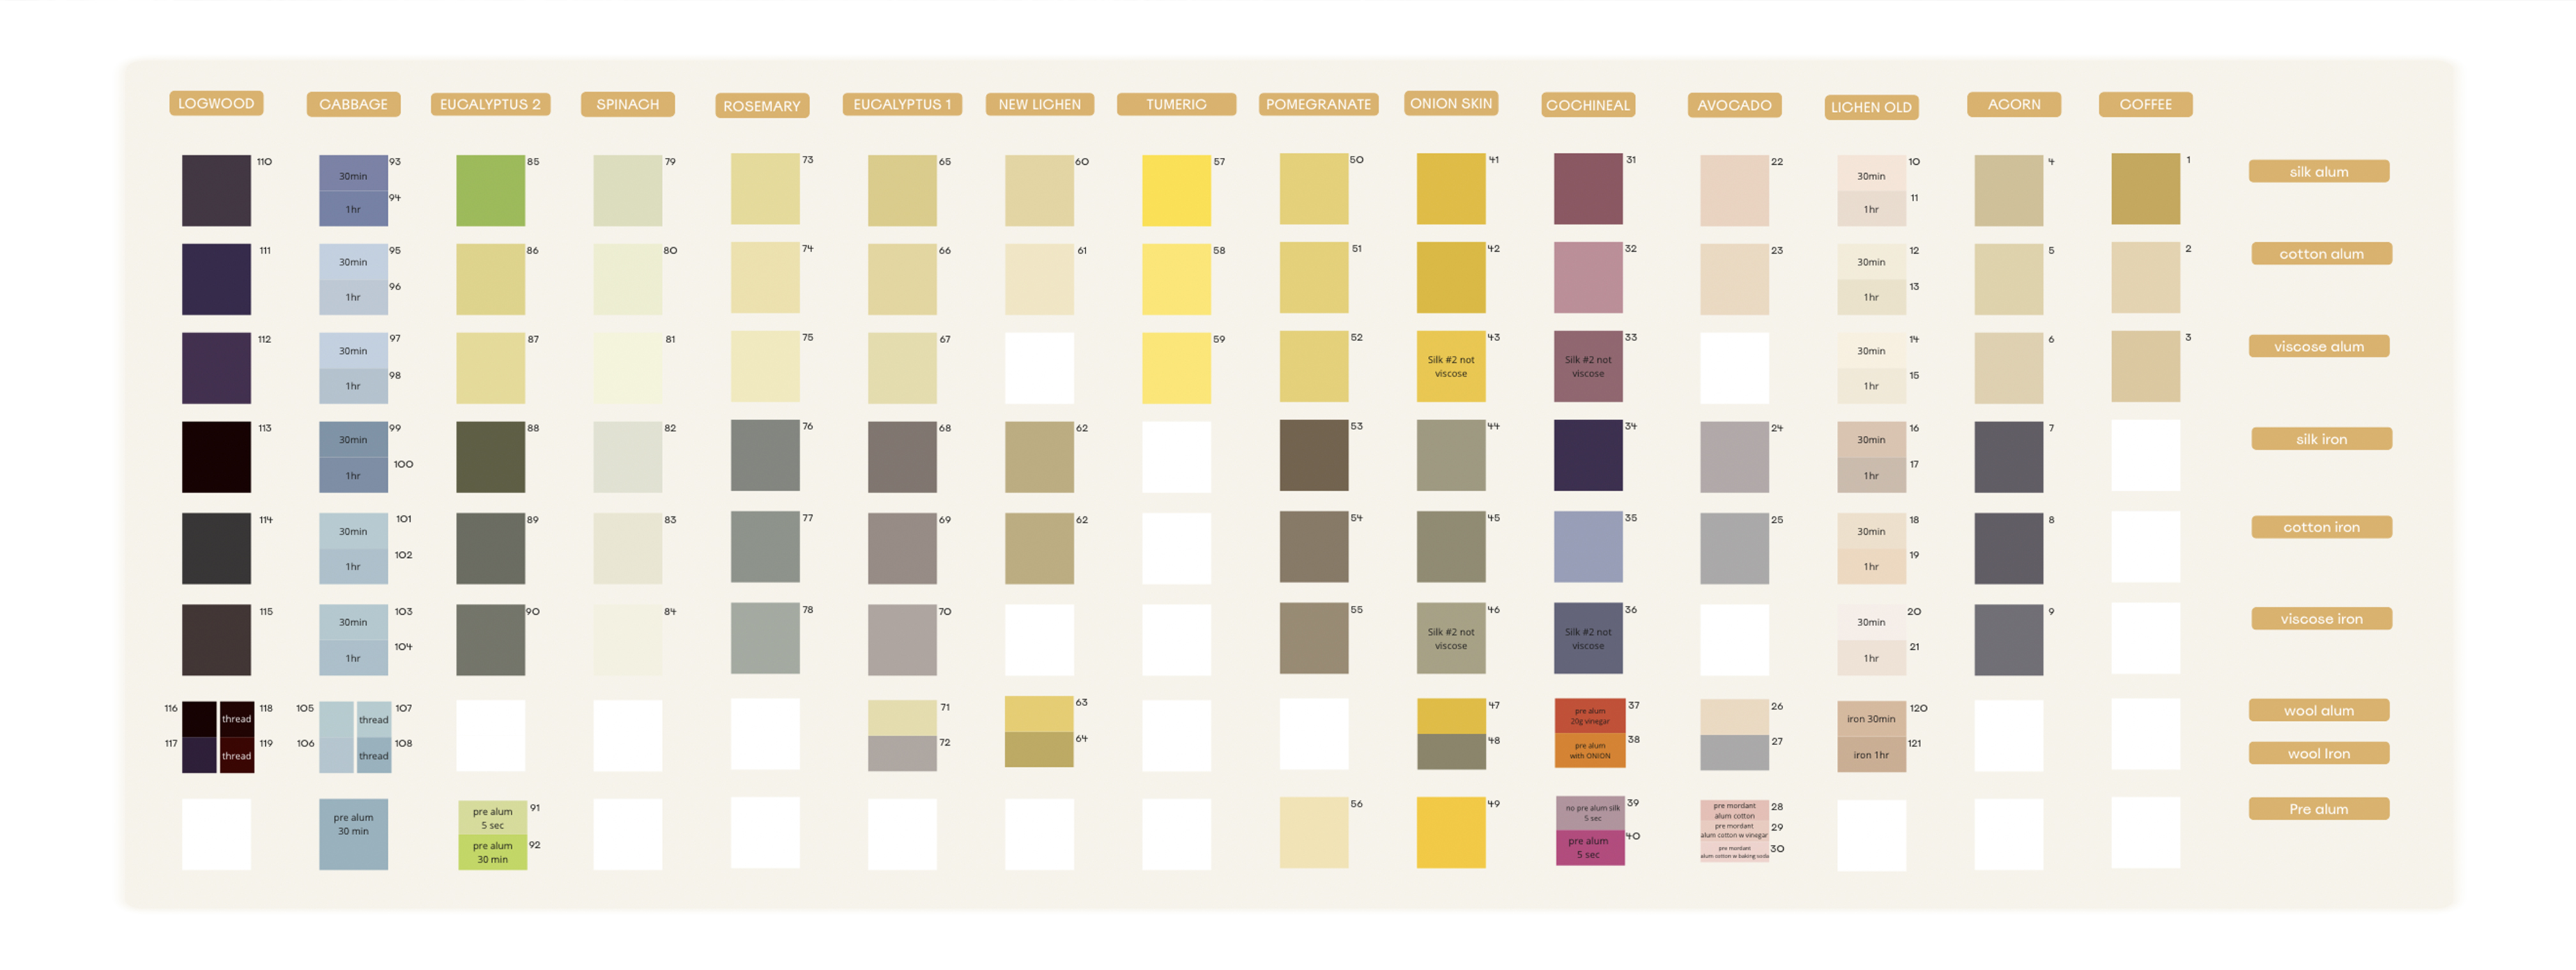 This is the colors that we died, see detailed overview and reciepes here
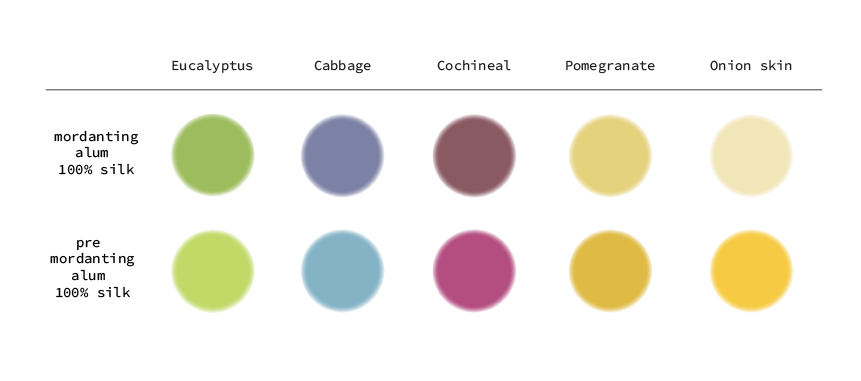
Comments: By the end of the week we started experimenting with pre-mordanting the fabrics with Alum (instead of putting the mordant in the dye bath) this process gave us much brighter colors but of course added another step to the process

recipe:
- measure the dry silk
- clean the silk with soap and mild water
- measure alum at 15% WOF
- dissolve the alum in a pot of water and add the silk
- leave for 45 minutes on very low heat
- move the silk to the dye bath and leave for an amount of time depending on how saturated you want the color to be
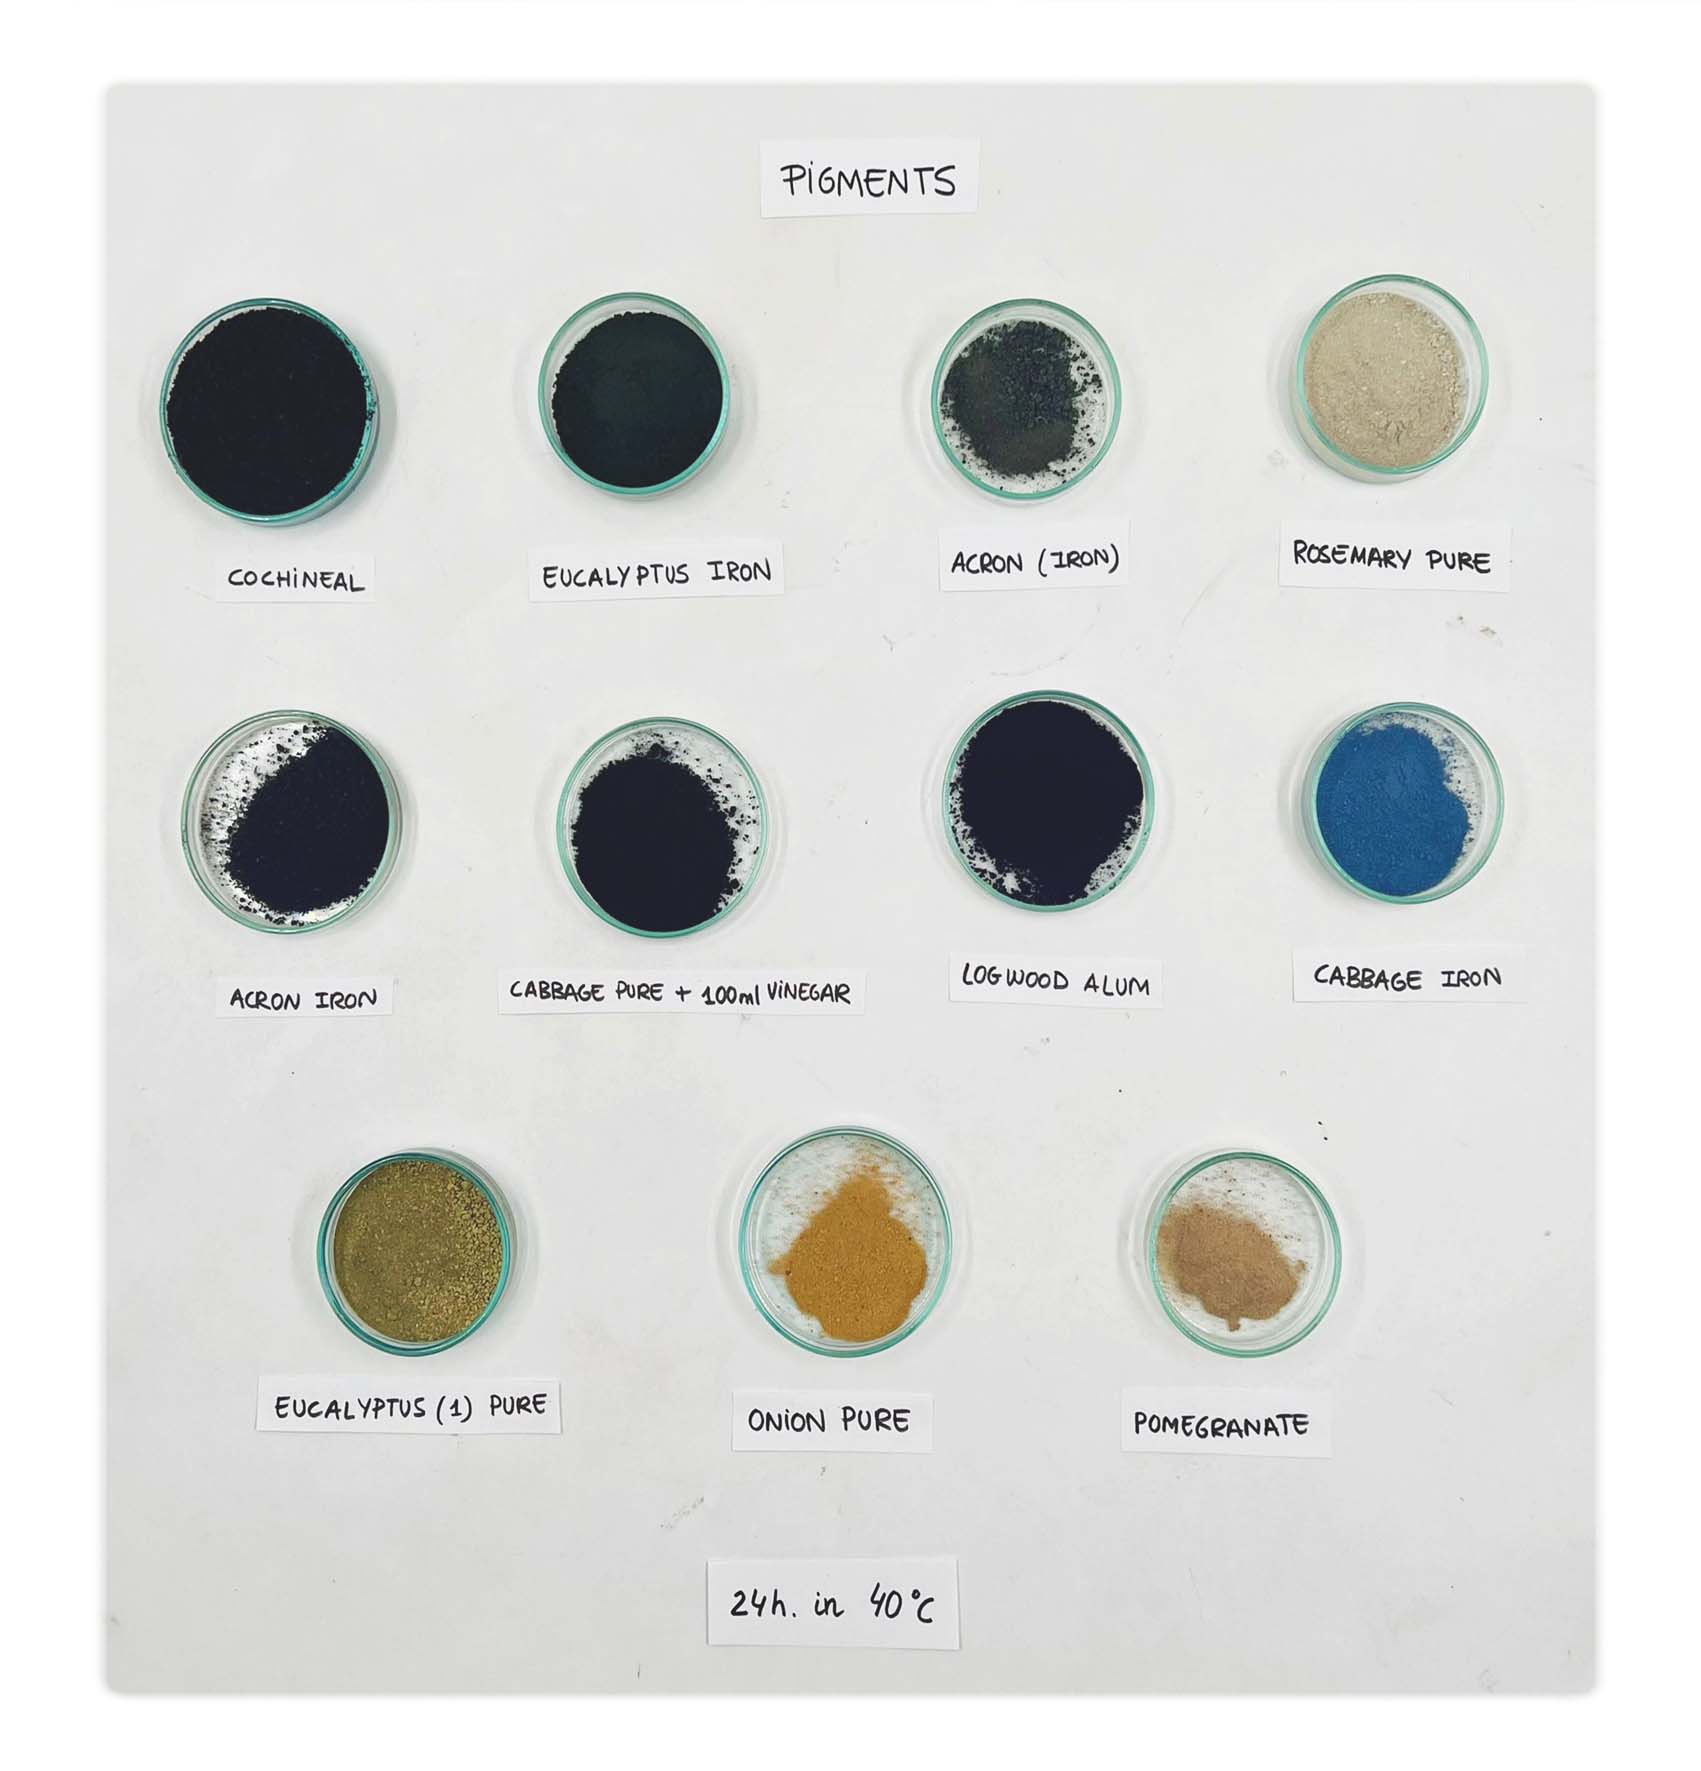
PIGMENTS
Pigments are a great way to preserve the colors, you can store it for a long time and by mixing it with different mediums you can create dyes, inks, and paints with it.
We used our leftover dye baths to make the pigments
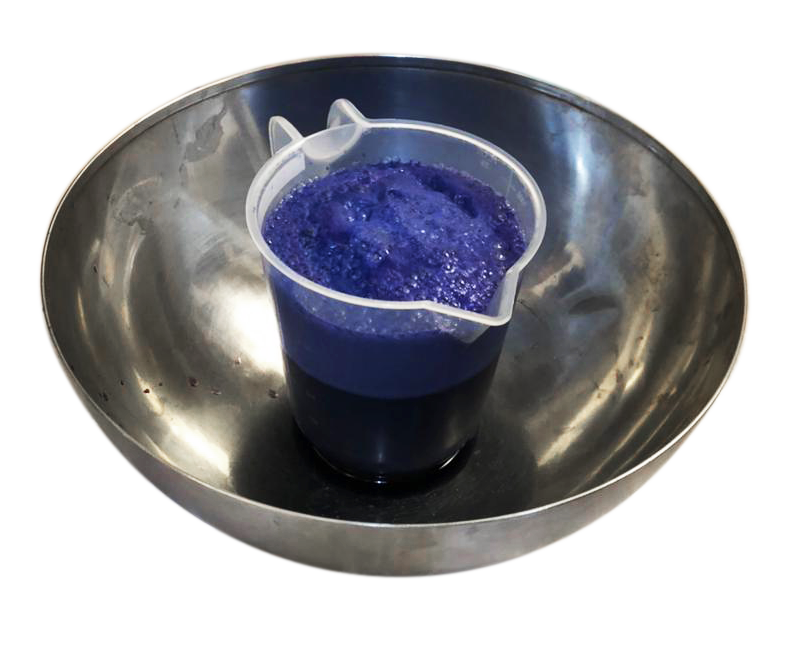
1) Let the dye batch cool down
2) Pour it into a container so that it filled to 50-70%, the liquid will need some roam to foam during the process
3) Dissolve the alum in hot water
4) Dissolve the sodium carbonate into the dye batch
5) Pour the alum mixture slowly into the dye bath
6) You can use a spoon to gently stir down the pigments that will get forced up by the foam
7) Let the mixture sink in for about an hour
8) Pour the mixture through a fine filter (we used normal coffee filter)
9) Dry the pigments in the filter (we used a dehydrater)
10) Scrape the pigments of the filter
11) Grind them in a mortar
recipe:
 ≈ 350 ml dye bath
50ml hot water
6 gram sodium carbonate
18 gram Alum
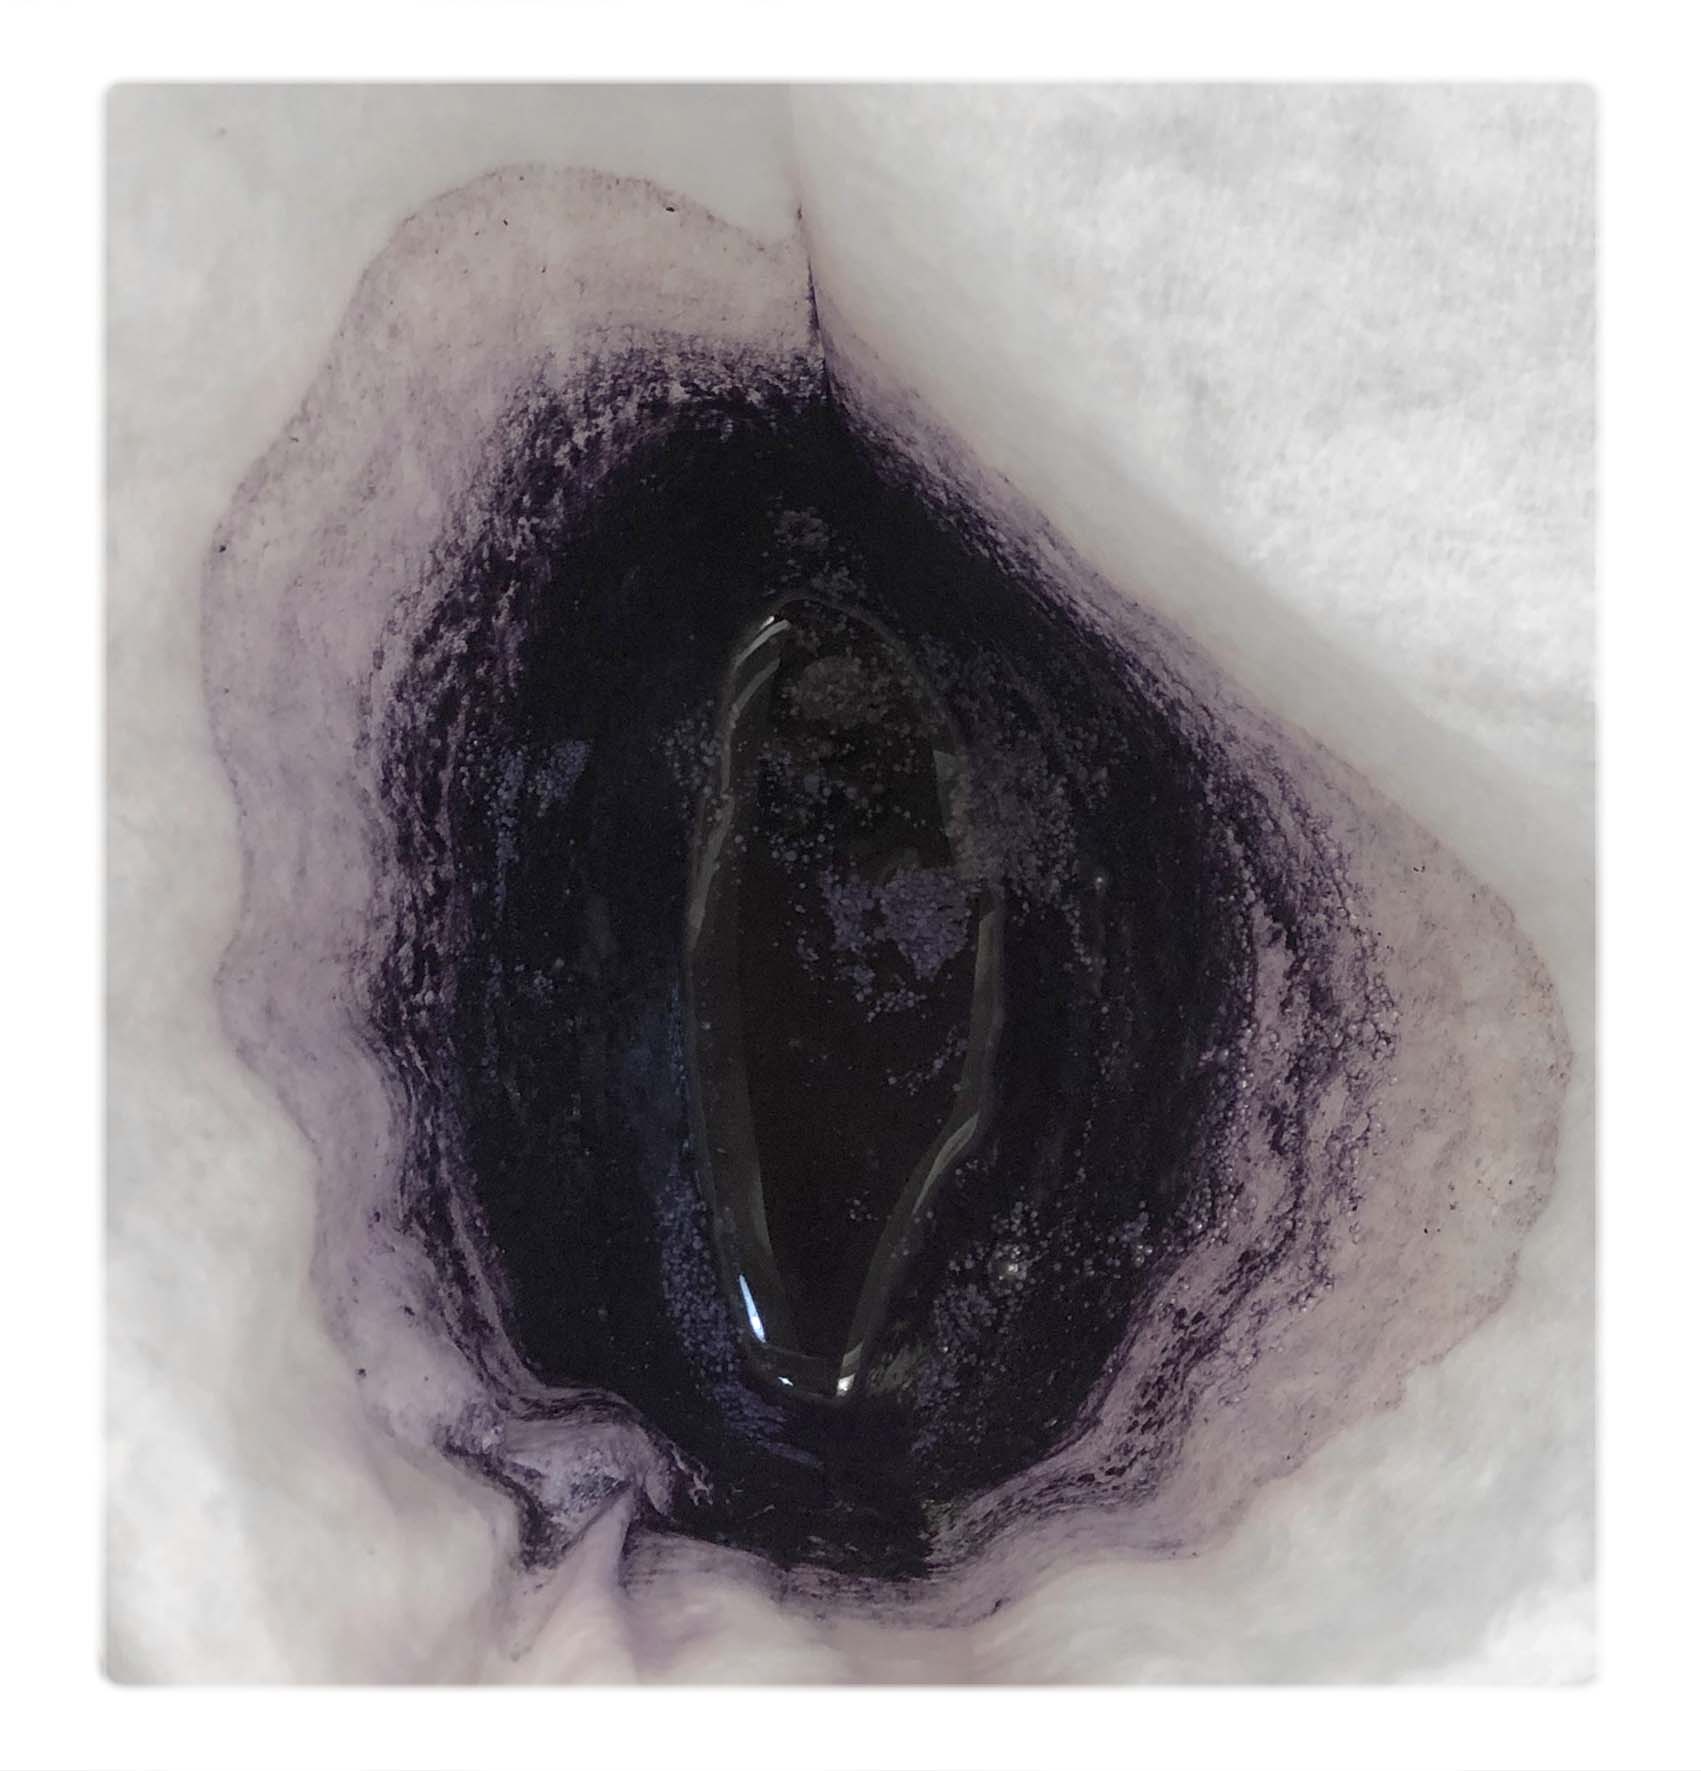
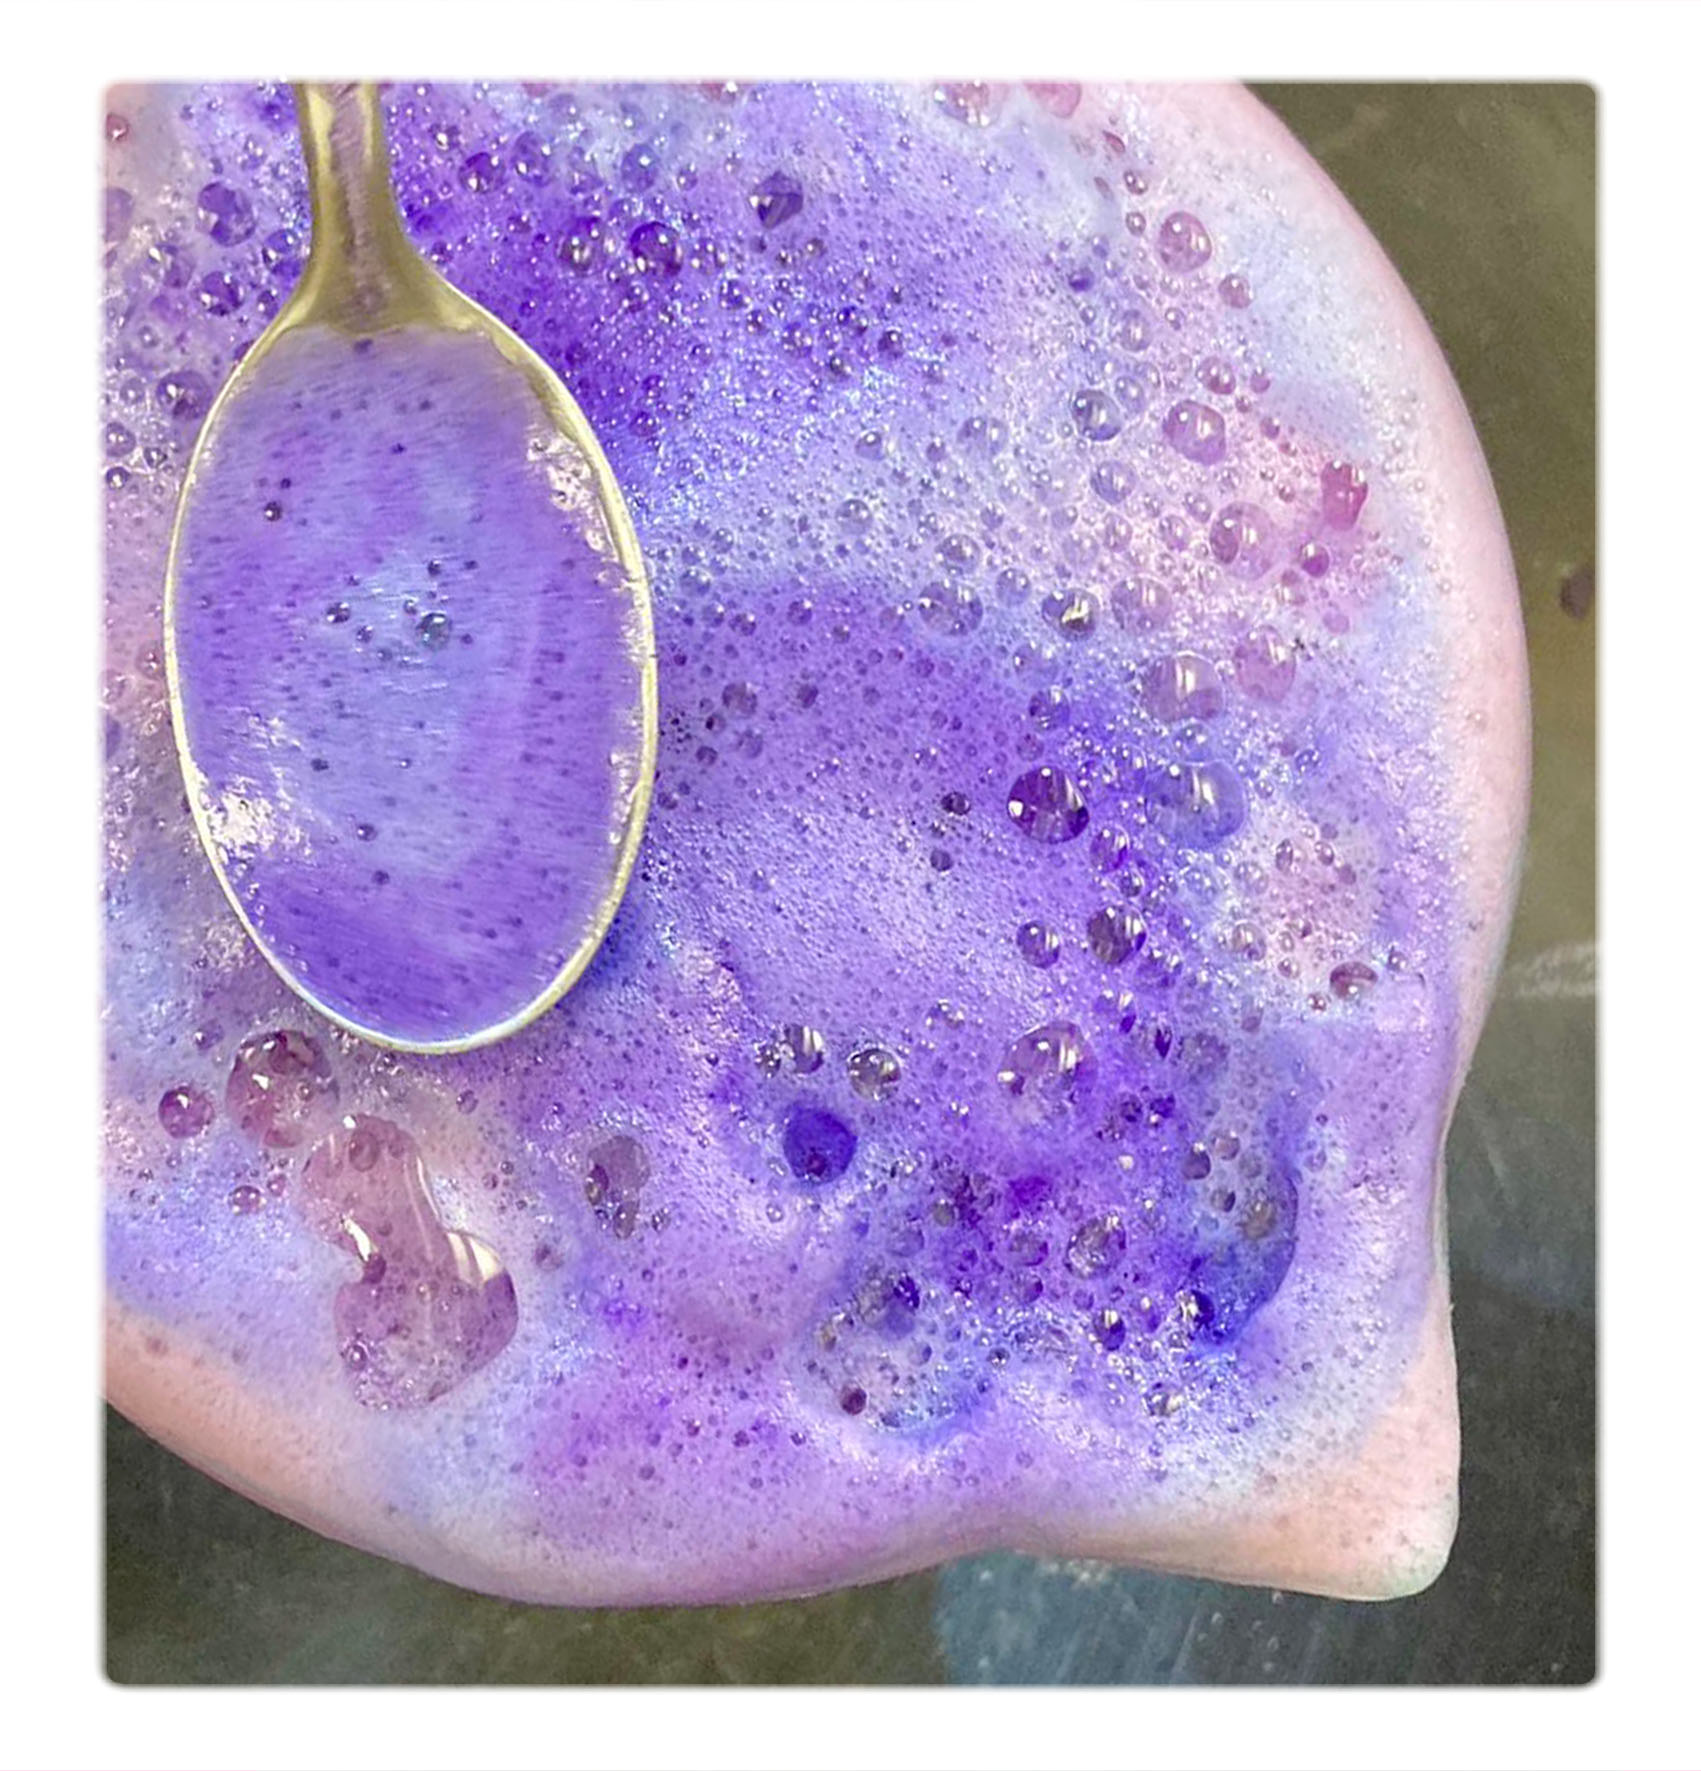 foaming
 filtration
 dried pigments
 finished pigments
INKS
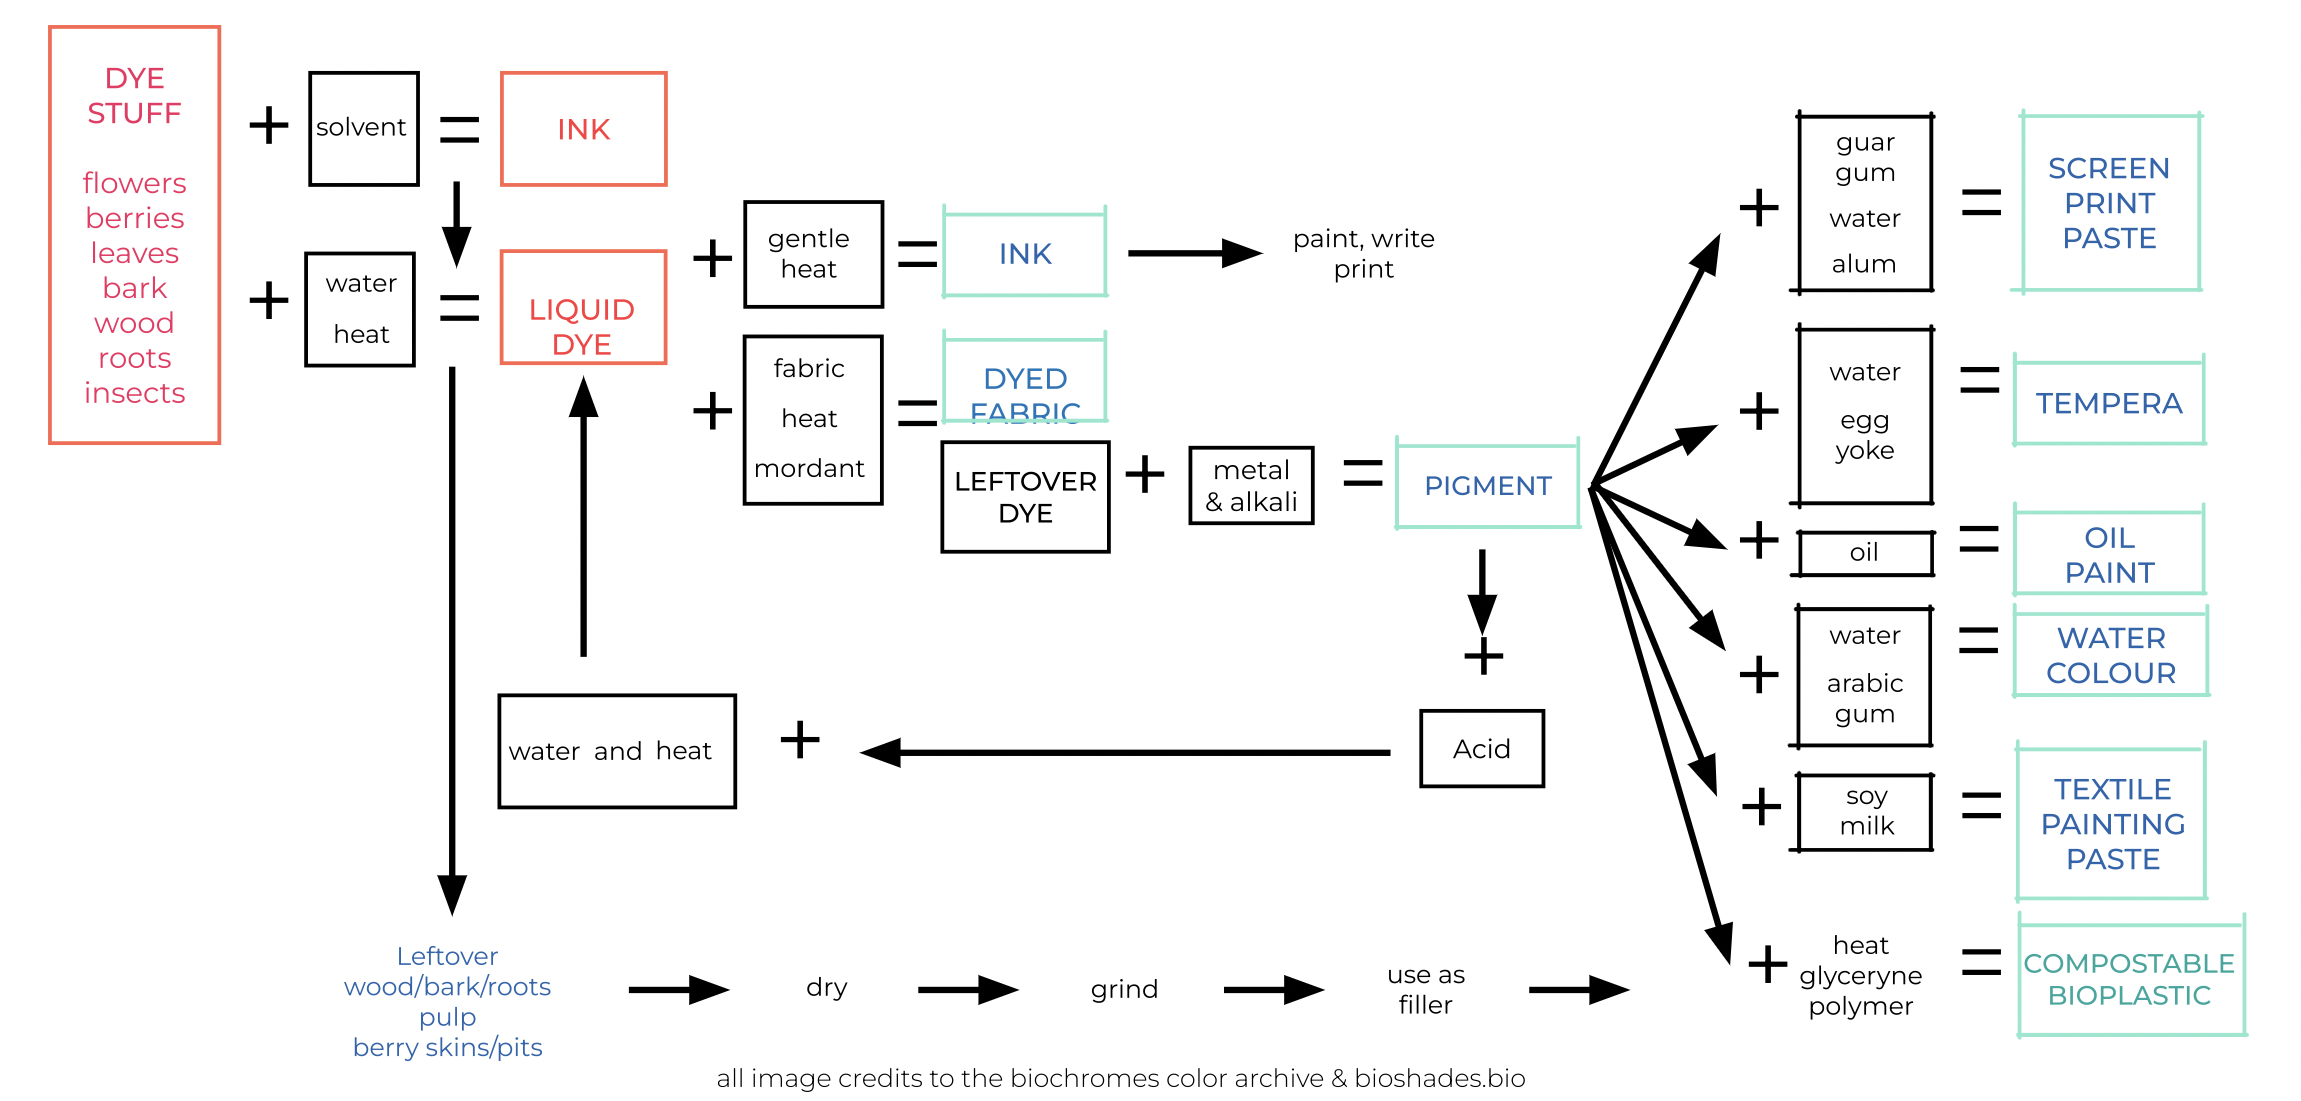
There are several ways that we can create Ink from a dye bath, pigment, or straight from the raw material.
Normally we use:
Vehicle: which is the liquid in which the pigment is suspended
Binder: that binds the dye to the liquid
Additive: that helps stabilize and preserve the color
Method A
We used:
Veichle: dye bath 50 ml
Binder: Guar gum 6 gram
Additive: Iron 0,5 gram
1) Add the gum and iron into the dye bath
2) You can use a hand blender to mix it since the gum can be hard to dissolve
3) The consistency should be quite thick
 DIY screenprint process
 screenprint sample
Comments: This method will create a thicker jelly-like liquid, suitable to paint or print with.
We experimented with a range of different applications for color painting, block printing, or an improvised DIY screen-printing technique using the material we had at hand.
From our initial test, it seems the consistency of the ink might be most suitable for screen-printing
The dry time for the print is approximately 2-3 hours
Method B
For this method, we used leftover raw material from the dye bath and dissolved it with ethanol.
Recipe:
Vehicle: Ethanol
Binder: N/A
Additive: N/A
Method:
1) Blend the material into a pulp
2) Pour enough ethanol to cover the material
3) Let it soak in the alcohol for 2 hours
4) Strain the mixture through a paper filter
5) Ready to use
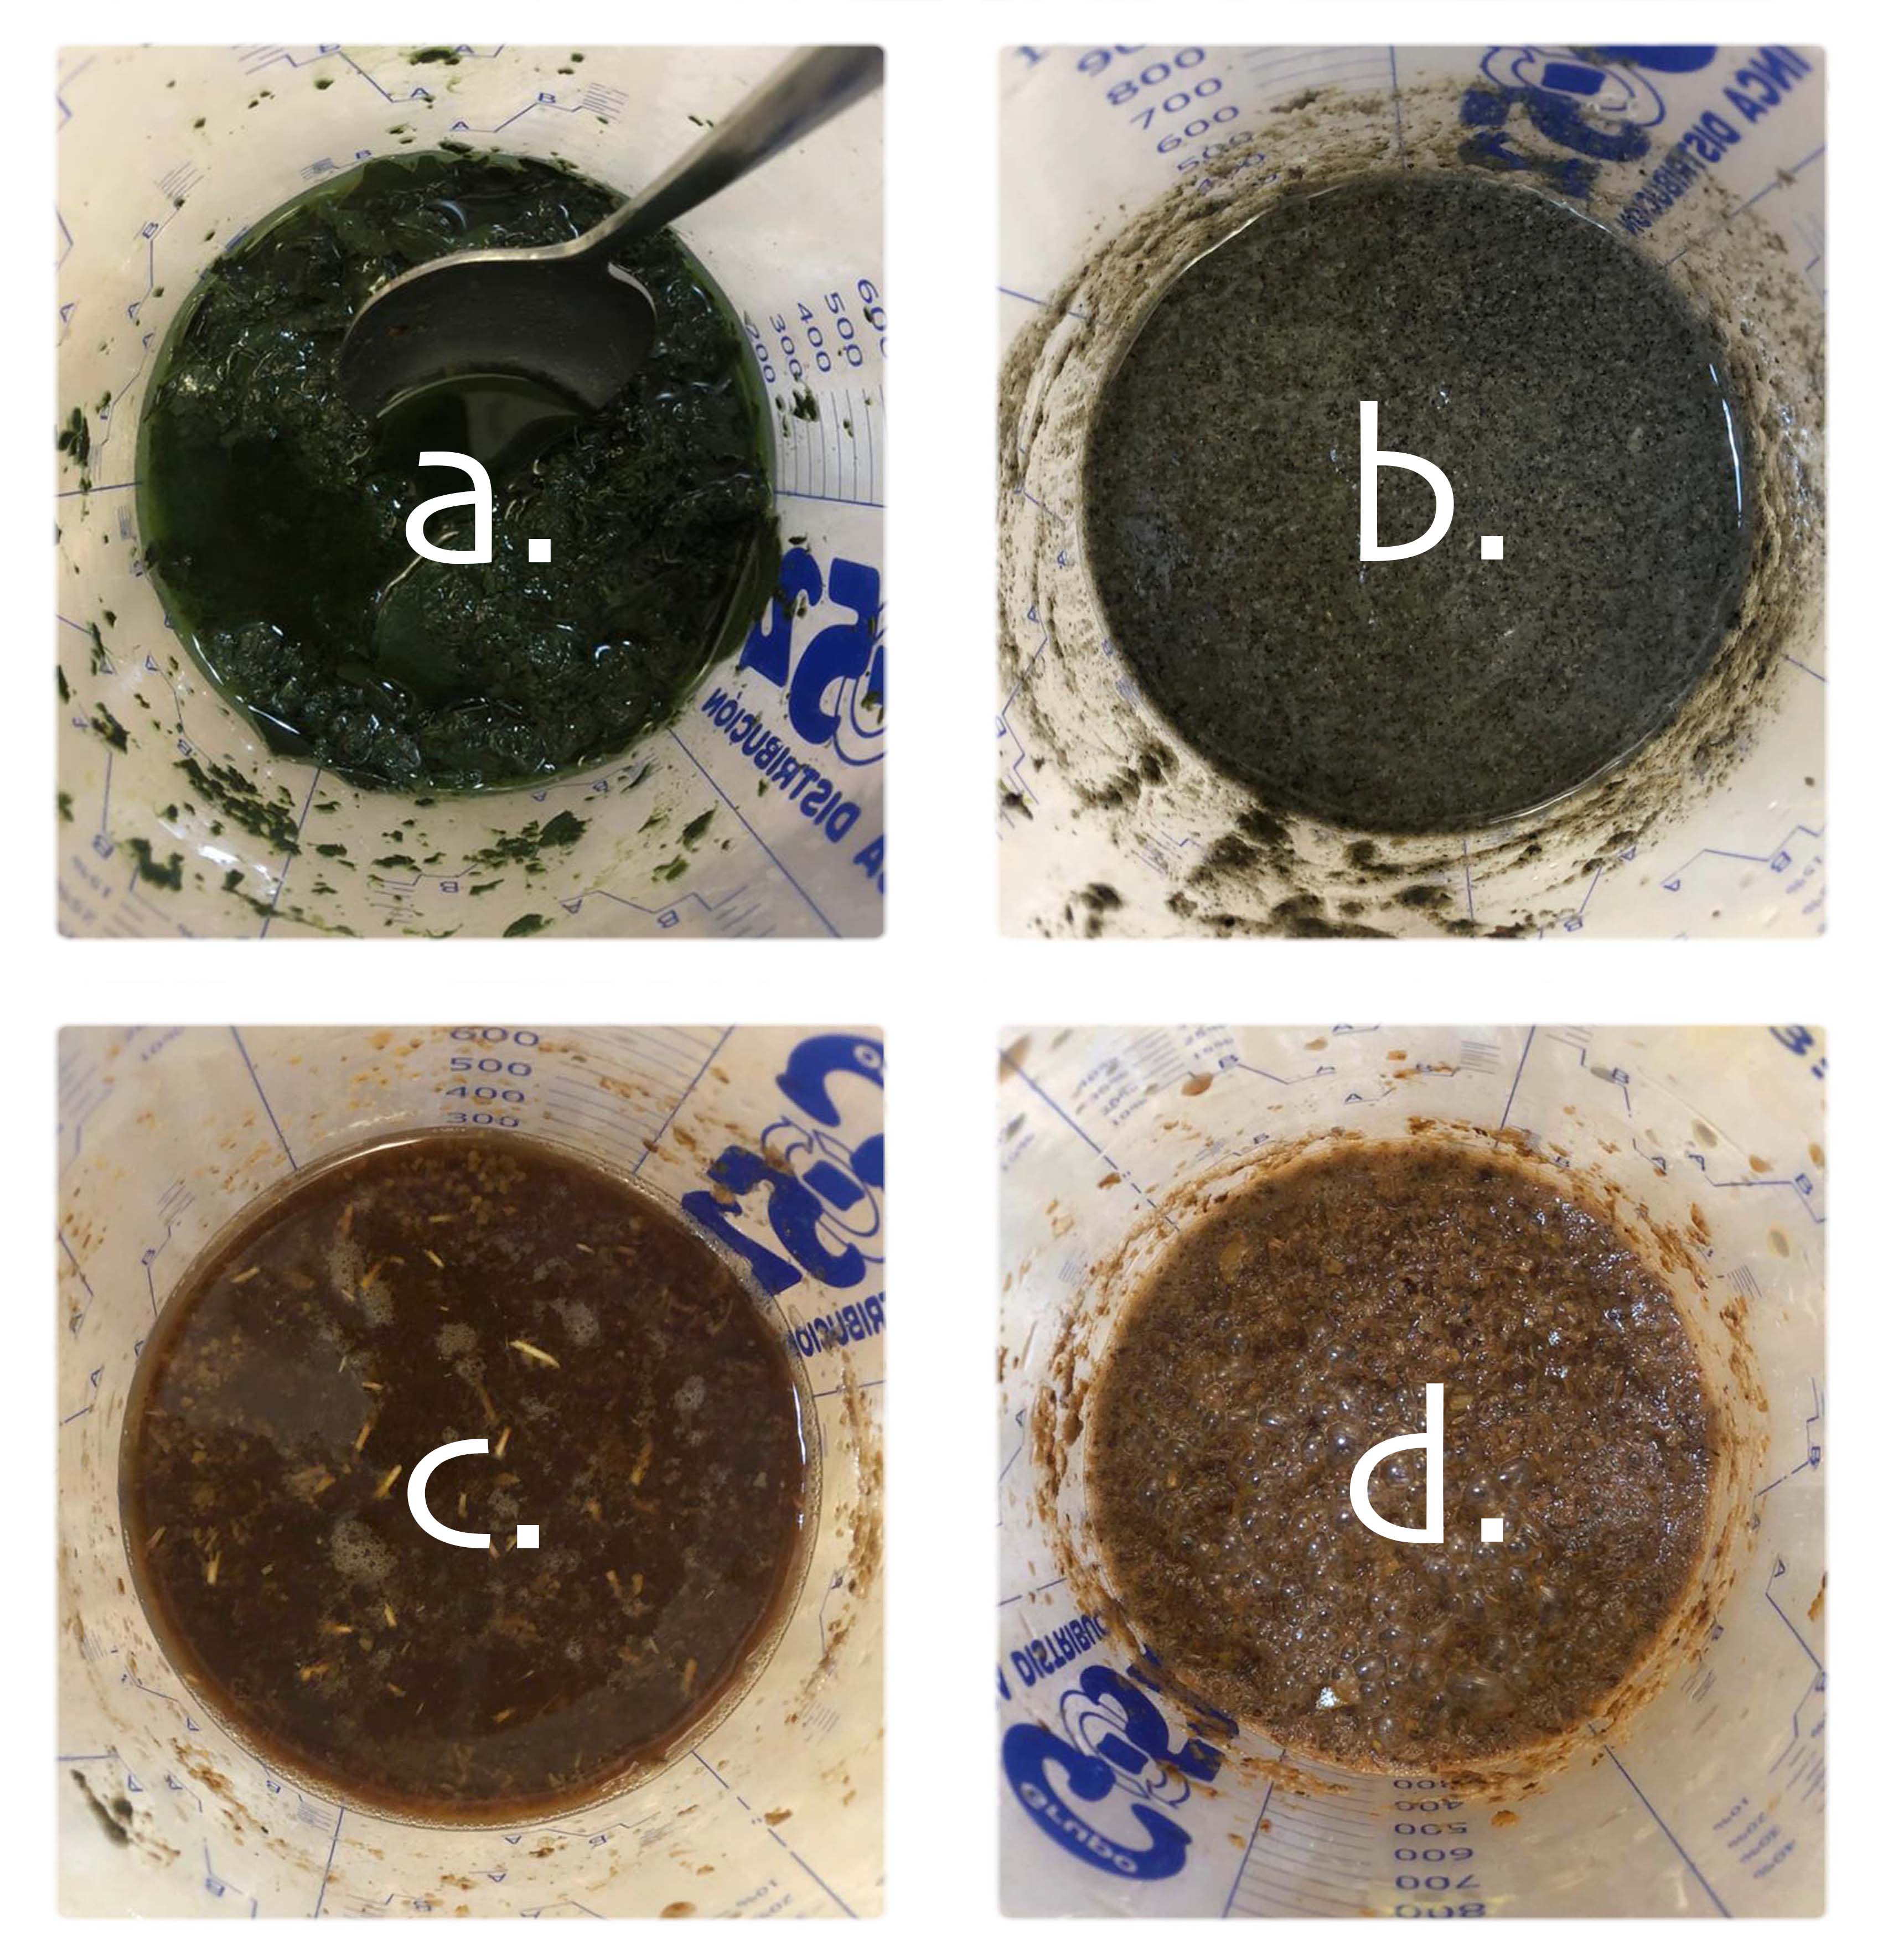 We used 3 different materials to extract colors from:
A) Eucalyptus leftover from the dying (still wet)
B) Lichen leftover from the dying (still wet)
C) Autumn leaves (dry)
D) Autumn leaves (that's been soaked in water for 3 days)
 DIY marker pen fabricated from coffe filters
 process
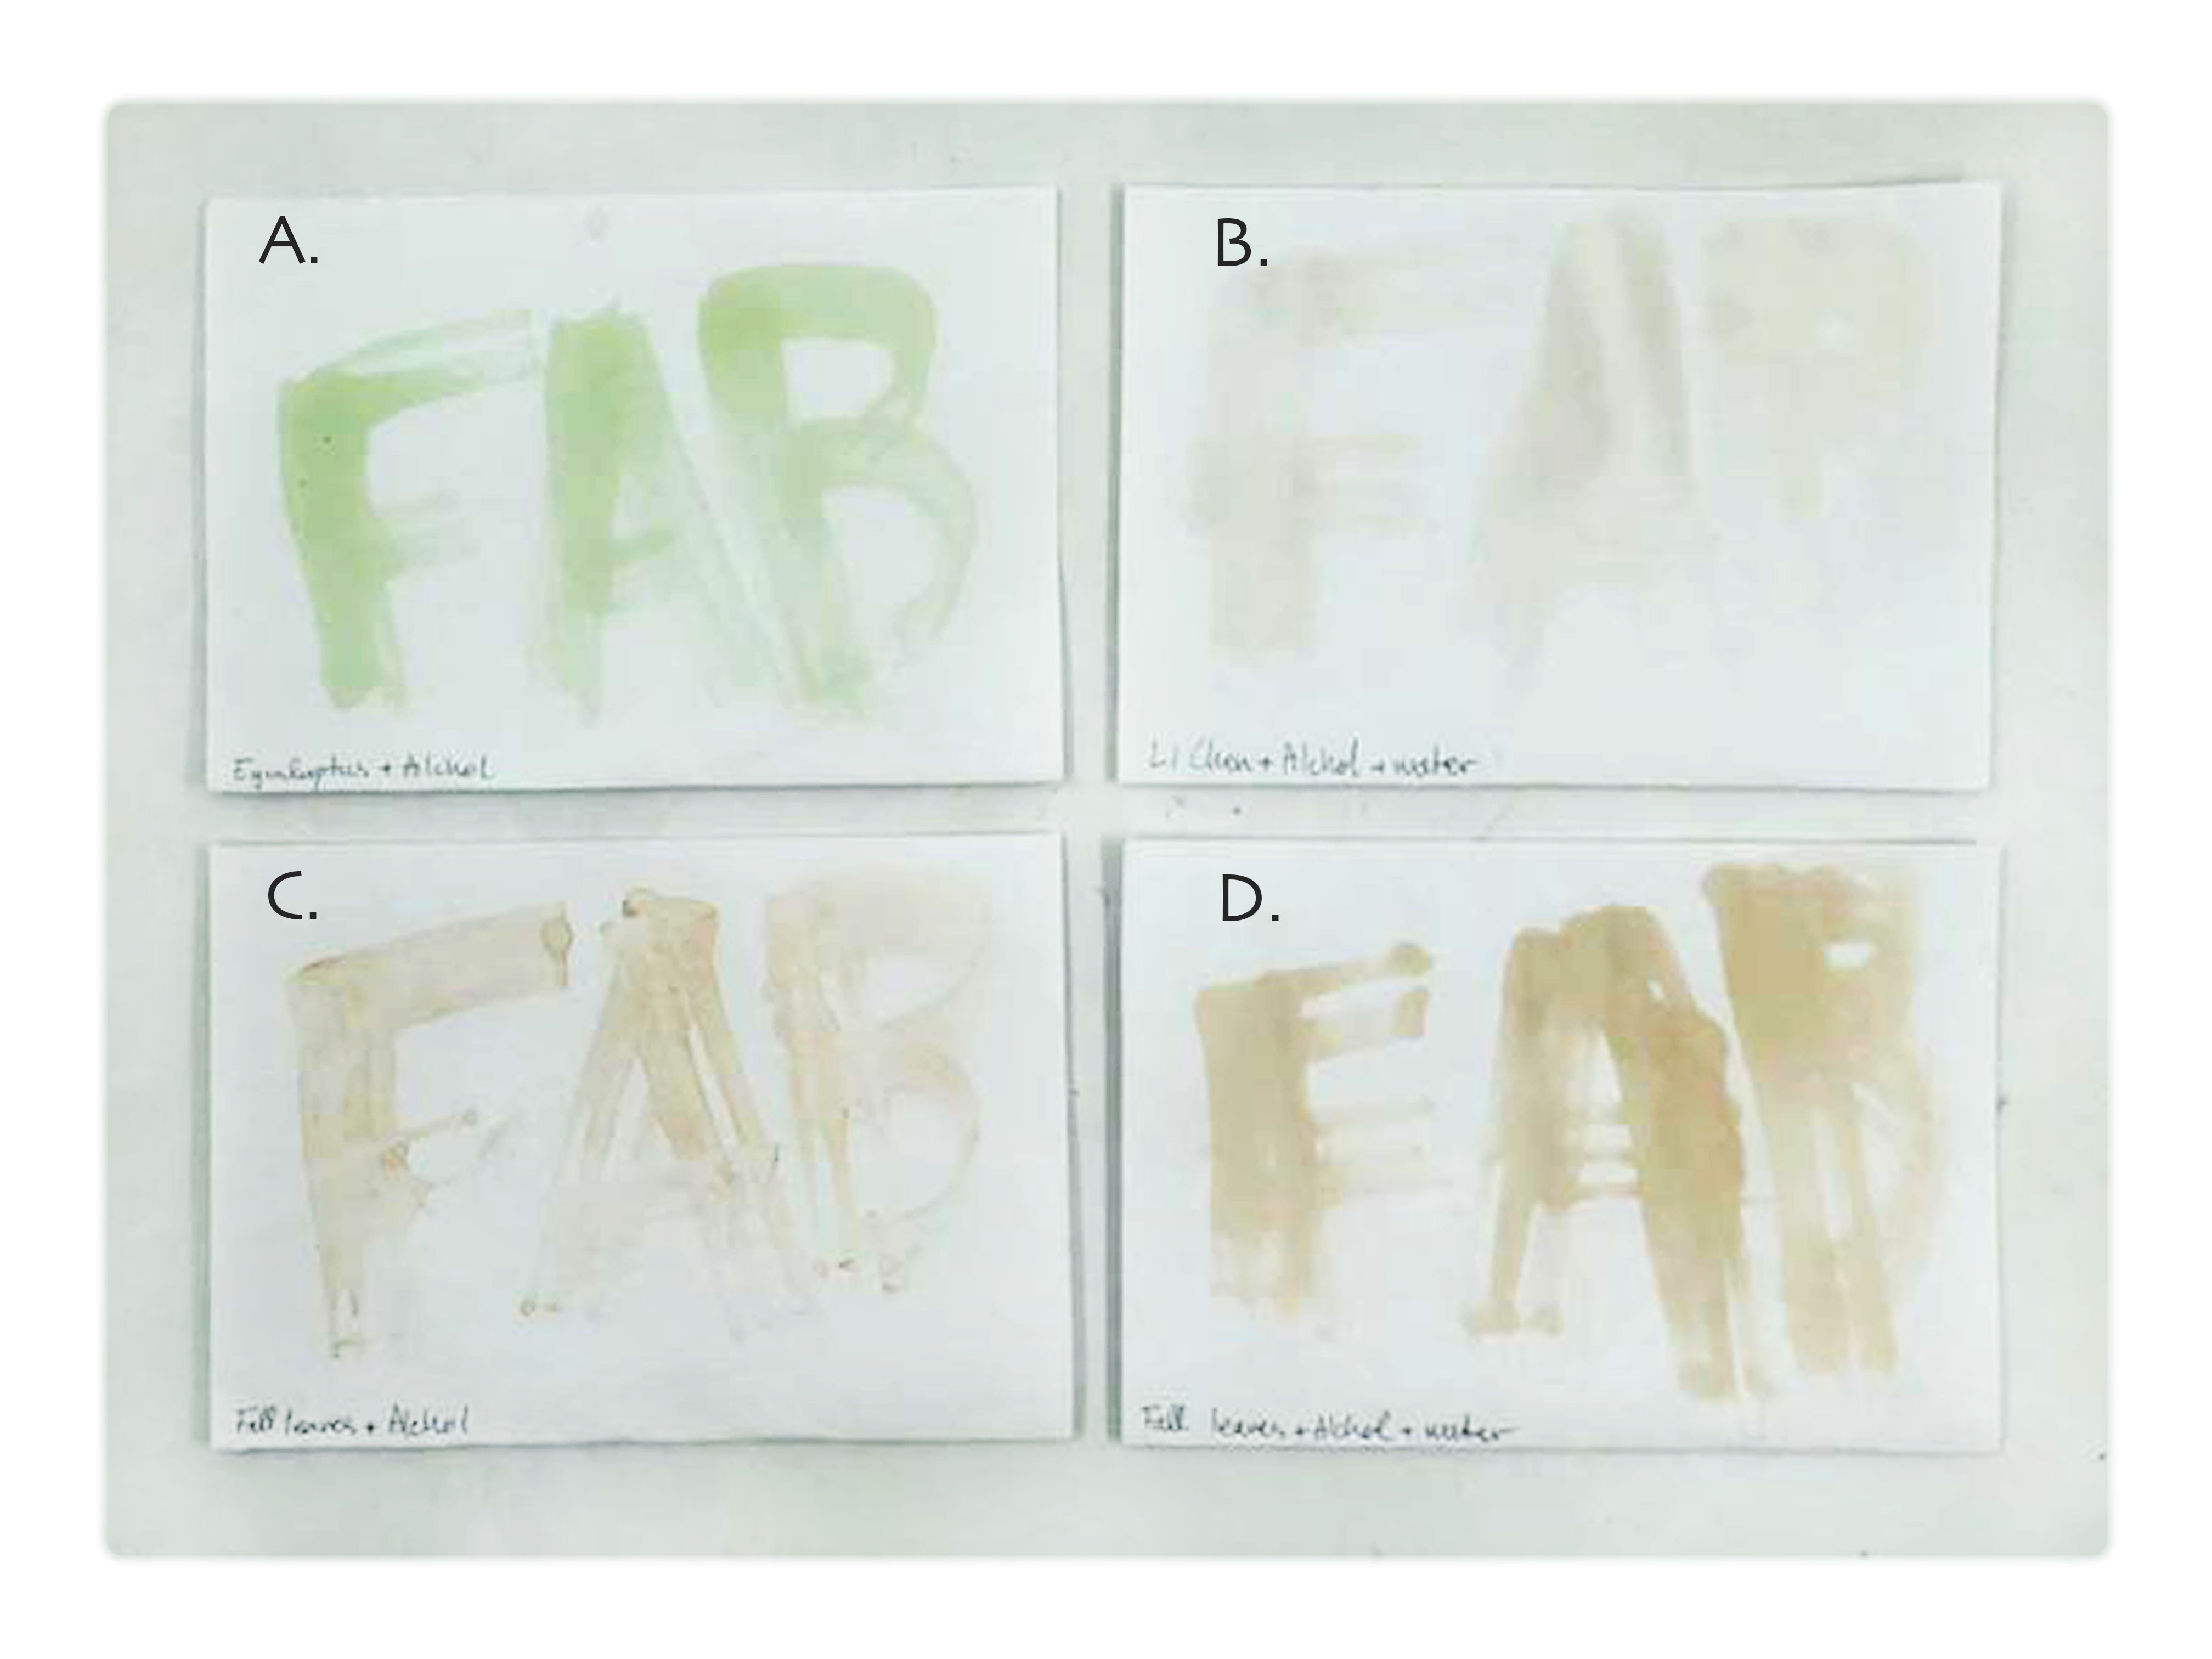 paint test
Comments: This method is particularly good for marker pens on “normal” paper since the alcohol dissolves quickly when applied, solving the problem of puckering paper.
Unfortunately, the raw material from samples B and D contained too much water to give a good result.
Moreover, the colors were very pale, this might be due to that we used recycled materials or/and too small a quantity
Method C
For this method, we used leftover dye bath.
recipe:
Vehicle: dye bath (Cabbage) 250 ml
Binder: N/A
Additive: N/A
Method:
Boil down the dye bath until it reaches a desirable consistency
We also experimented with adding vinegar and soda to experiment with different color combinations. see picture:
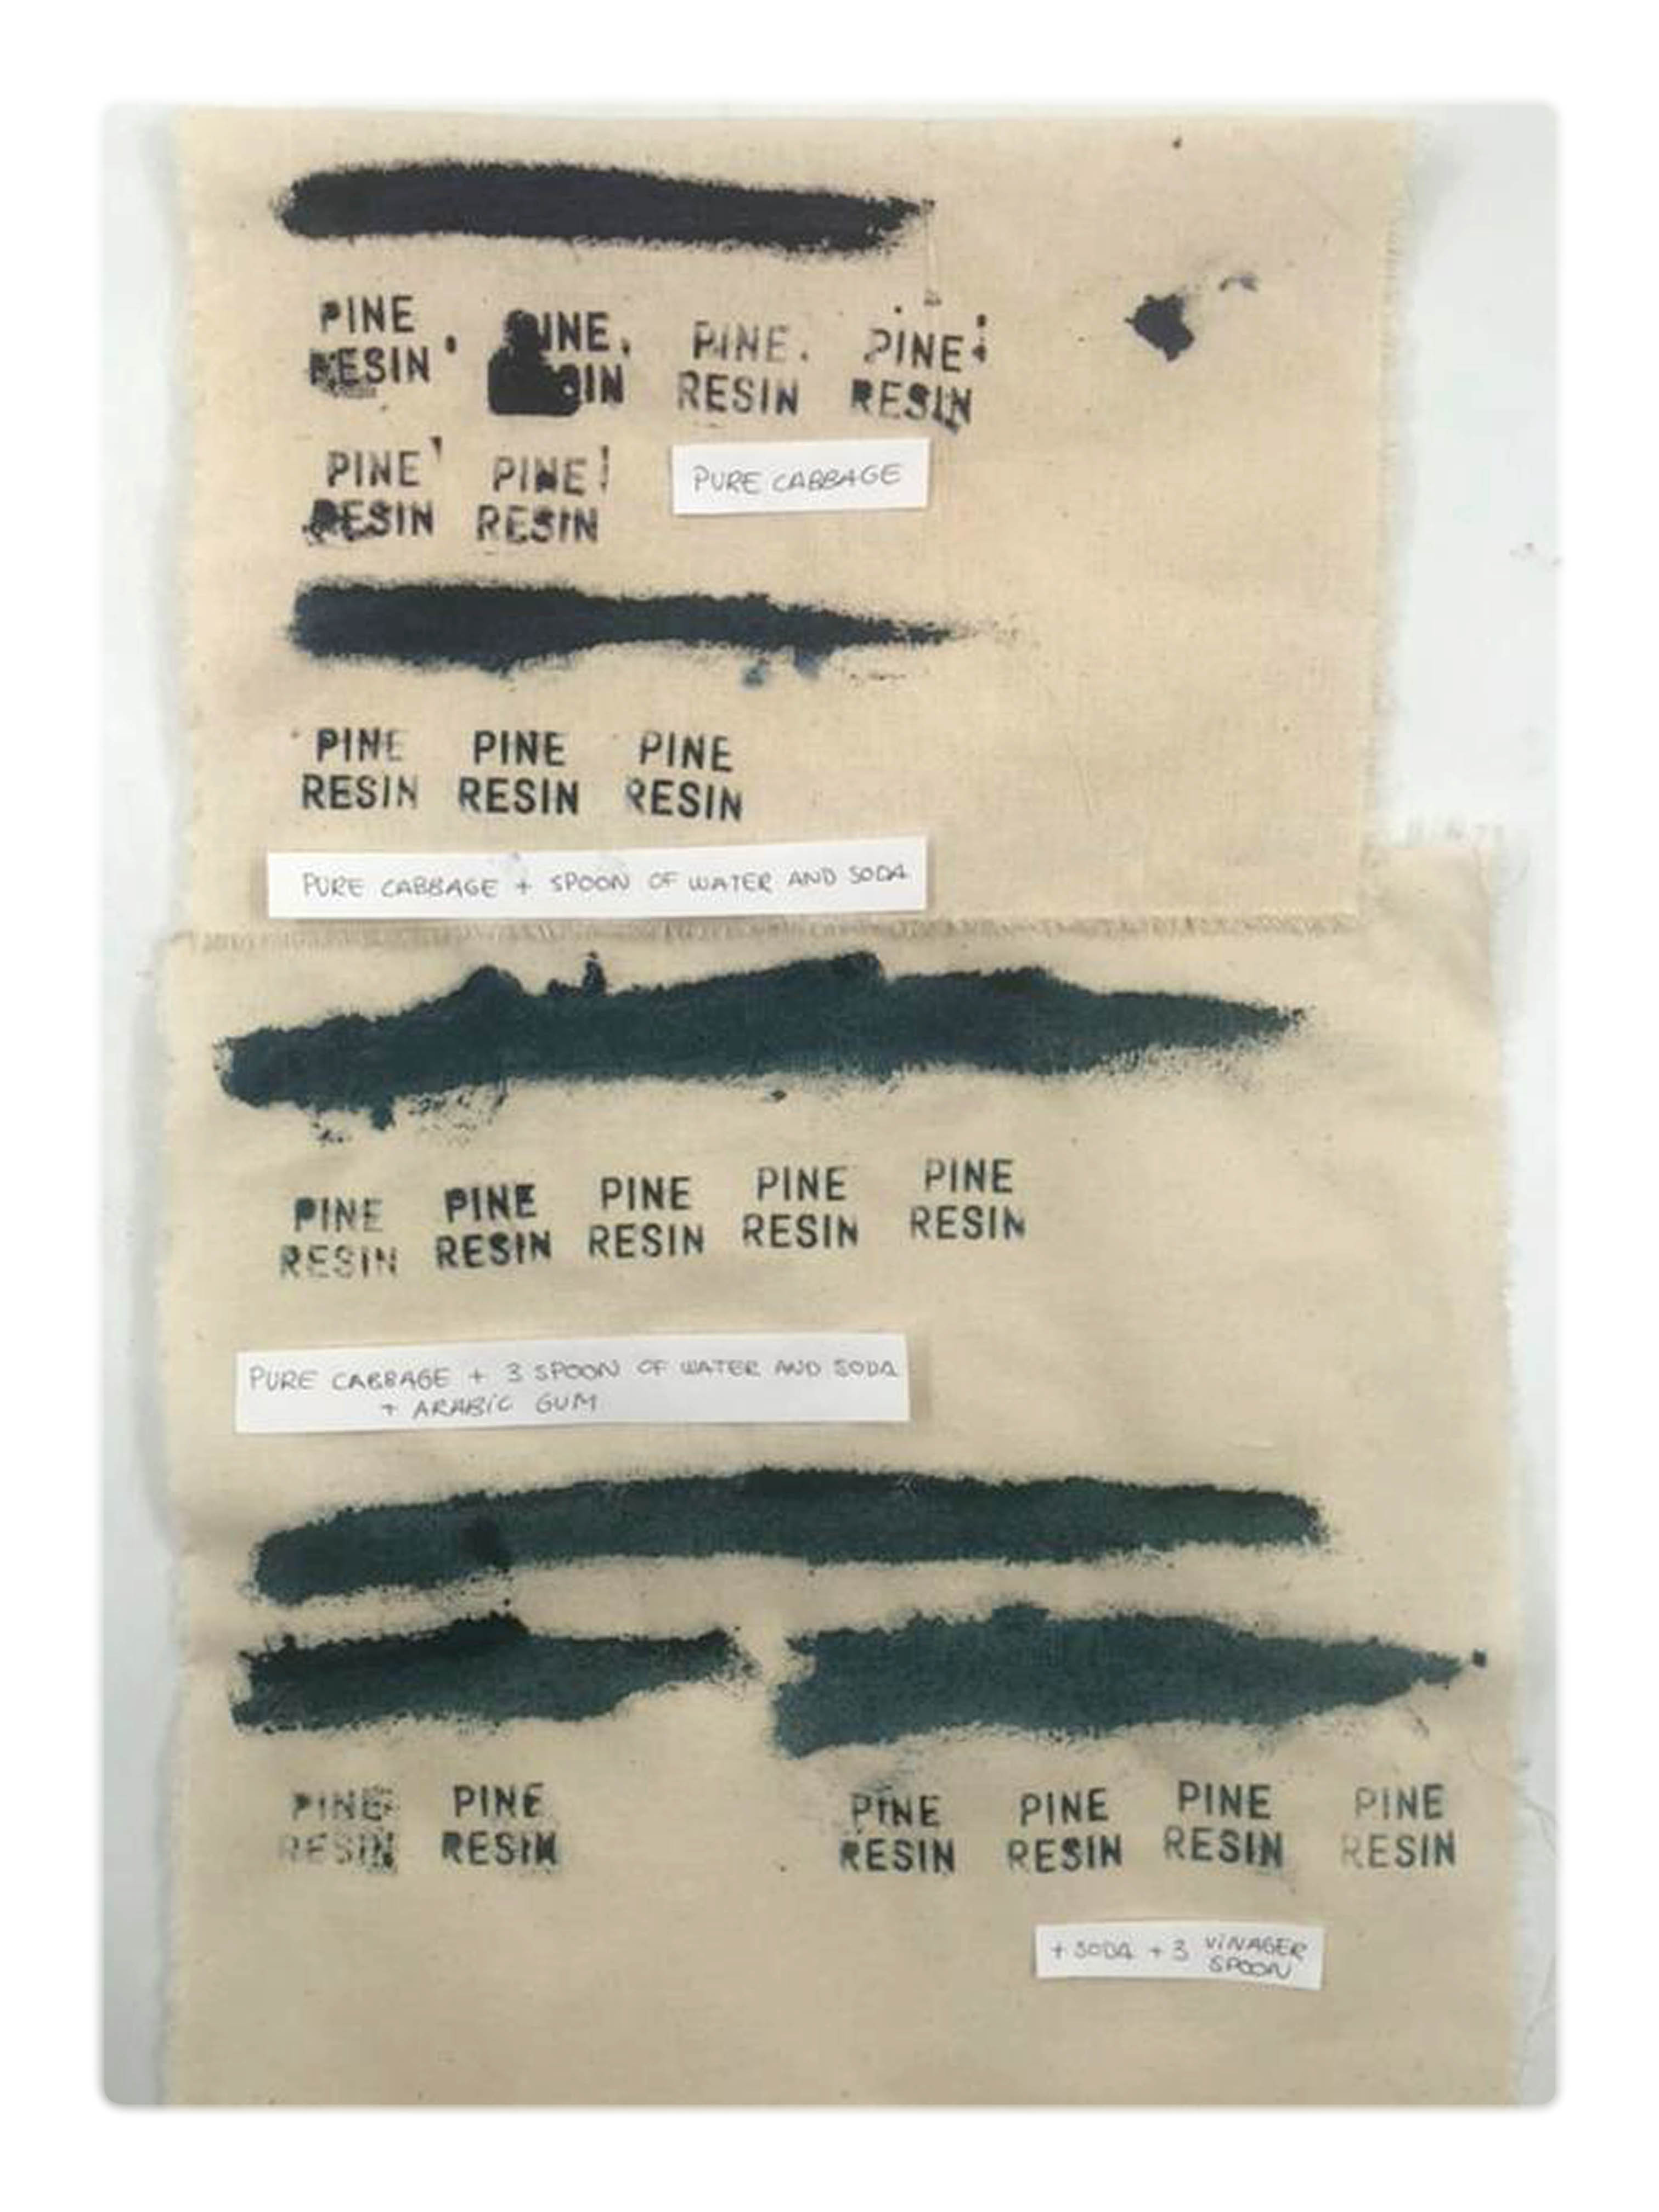
Comments: We got good result with block printing and painting. It might be good to add a mordant for better color stability
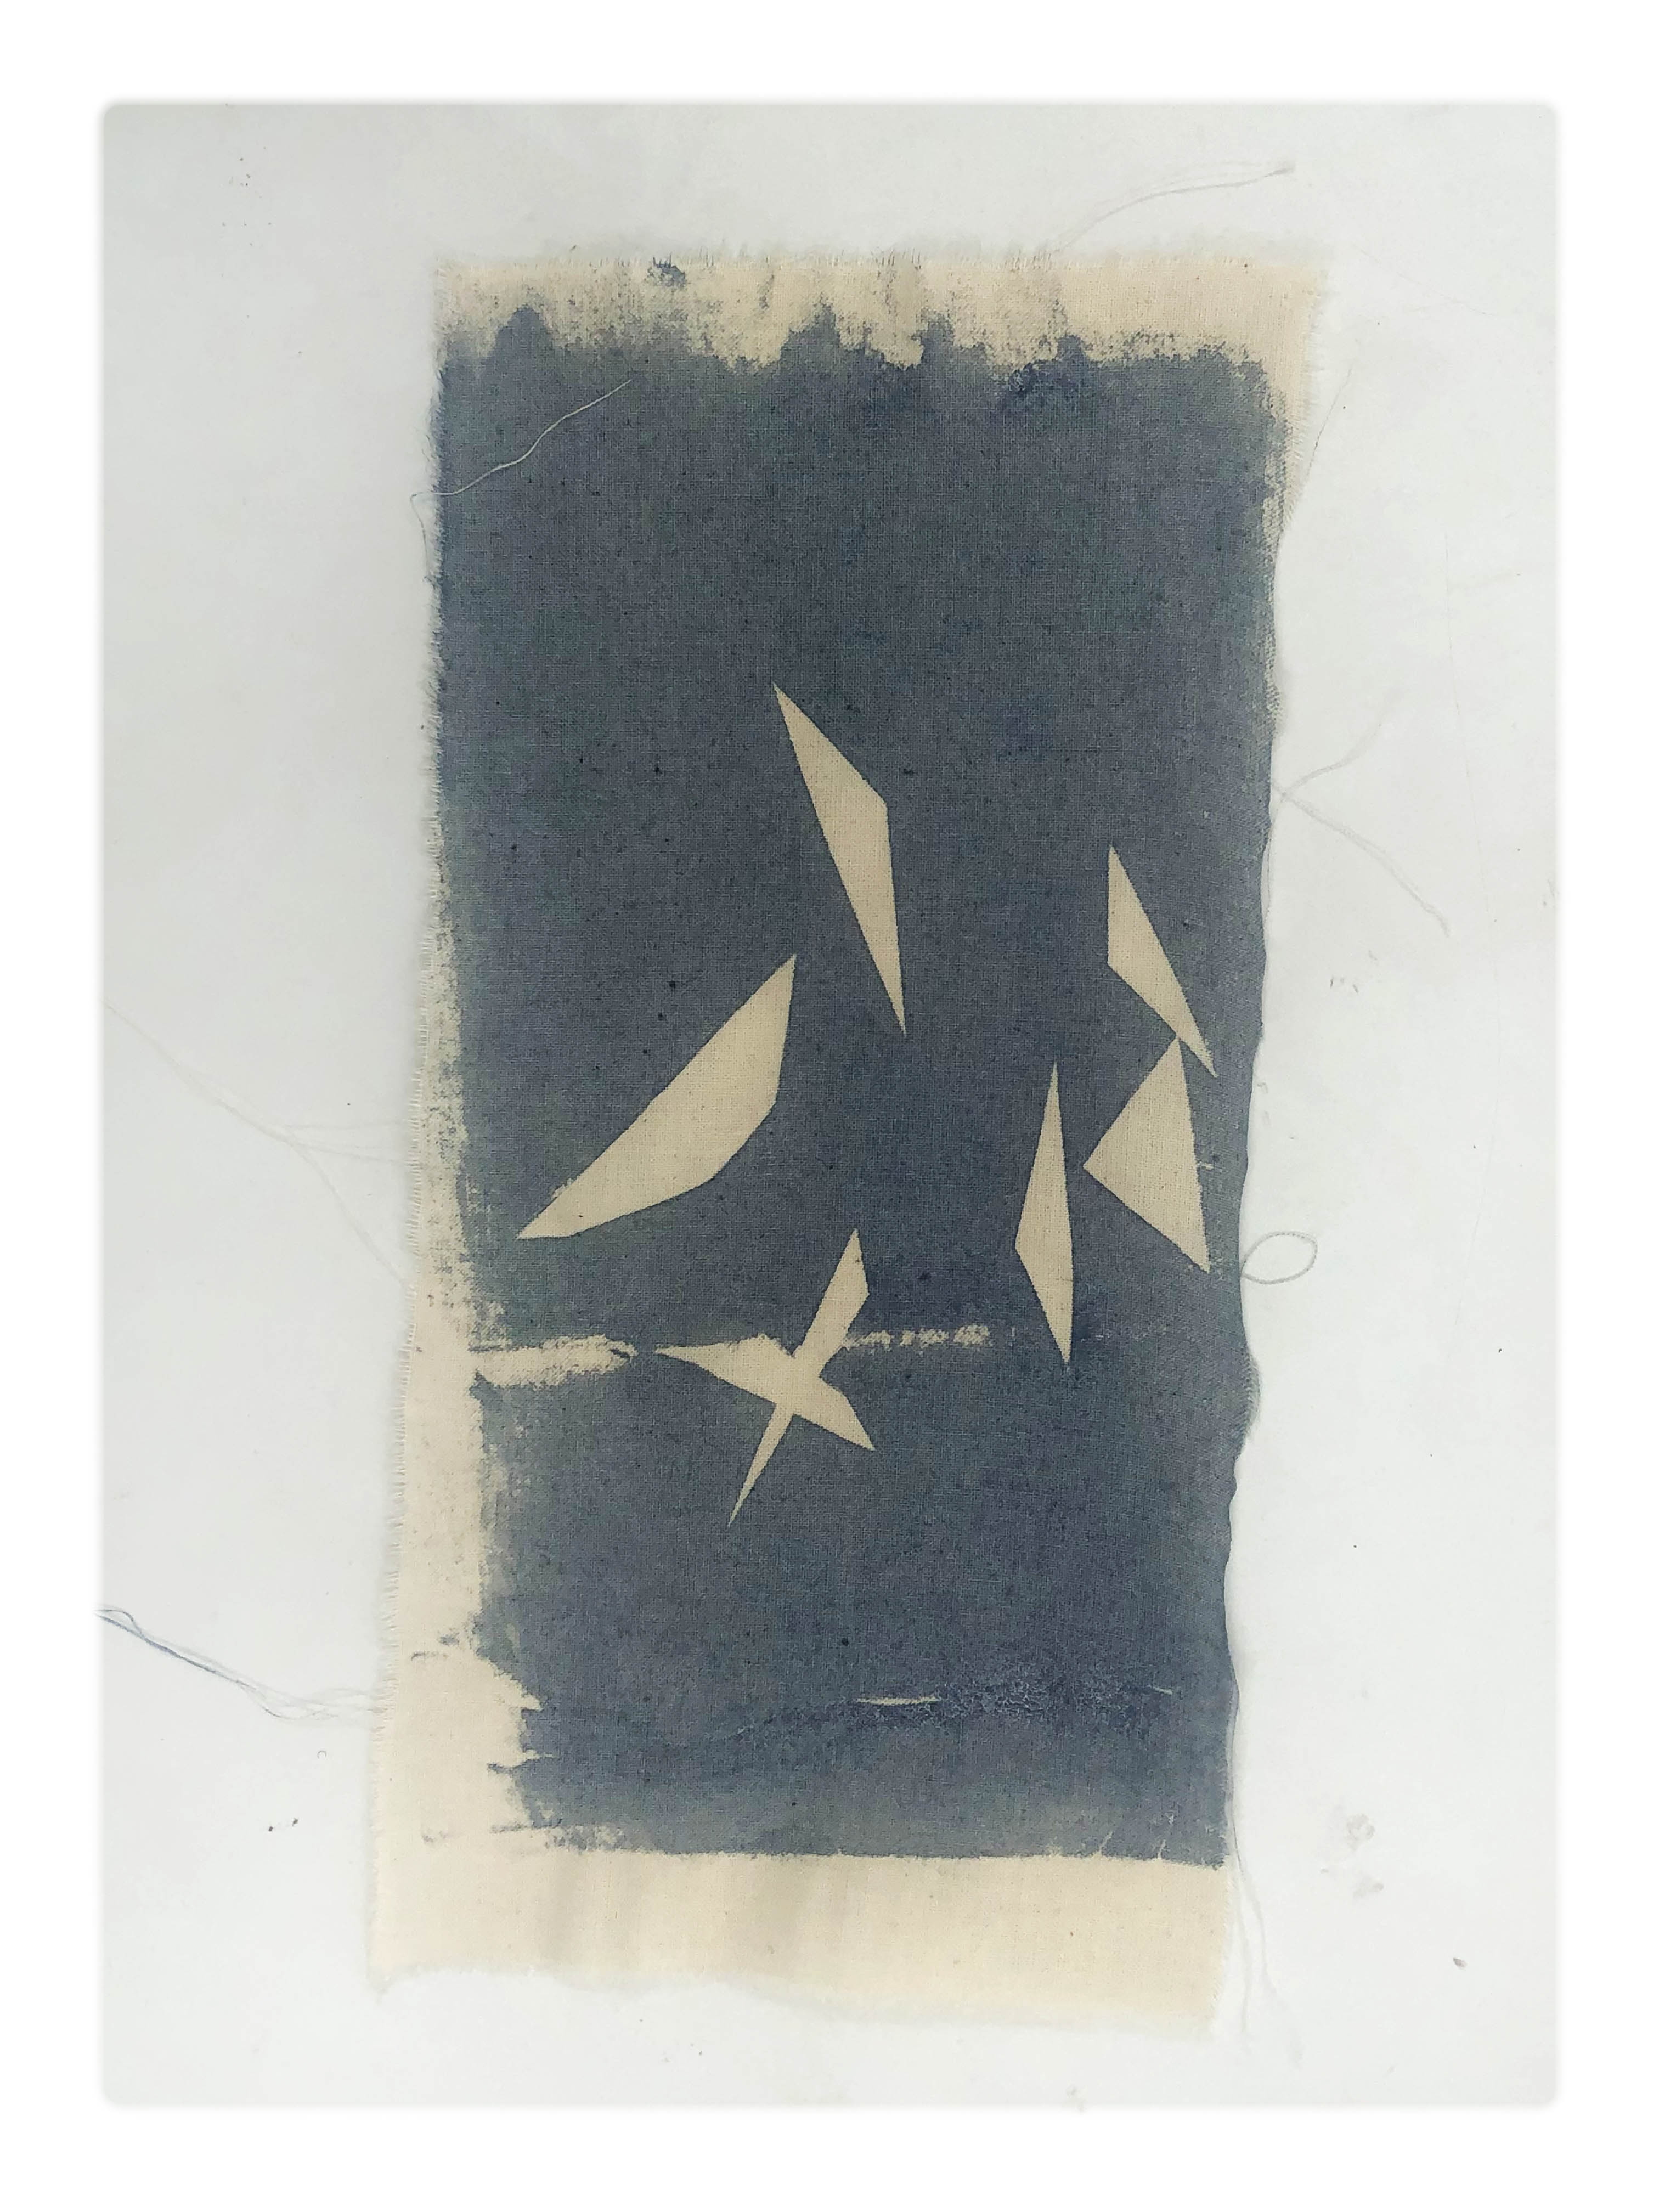
BACTERIA DYE
Bacteria are microscopic single-celled organisms. They are found almost everywhere on Earth and are vital to the planet's ecosystems. The human body is full of bacteria, and in fact is estimated to contain more bacterial cells than human cells.
We used a silk fabric for our experiments, you can create different patterns on the fabric by folding it in different ways I used a simple folding technique to create a graphic square pattern.
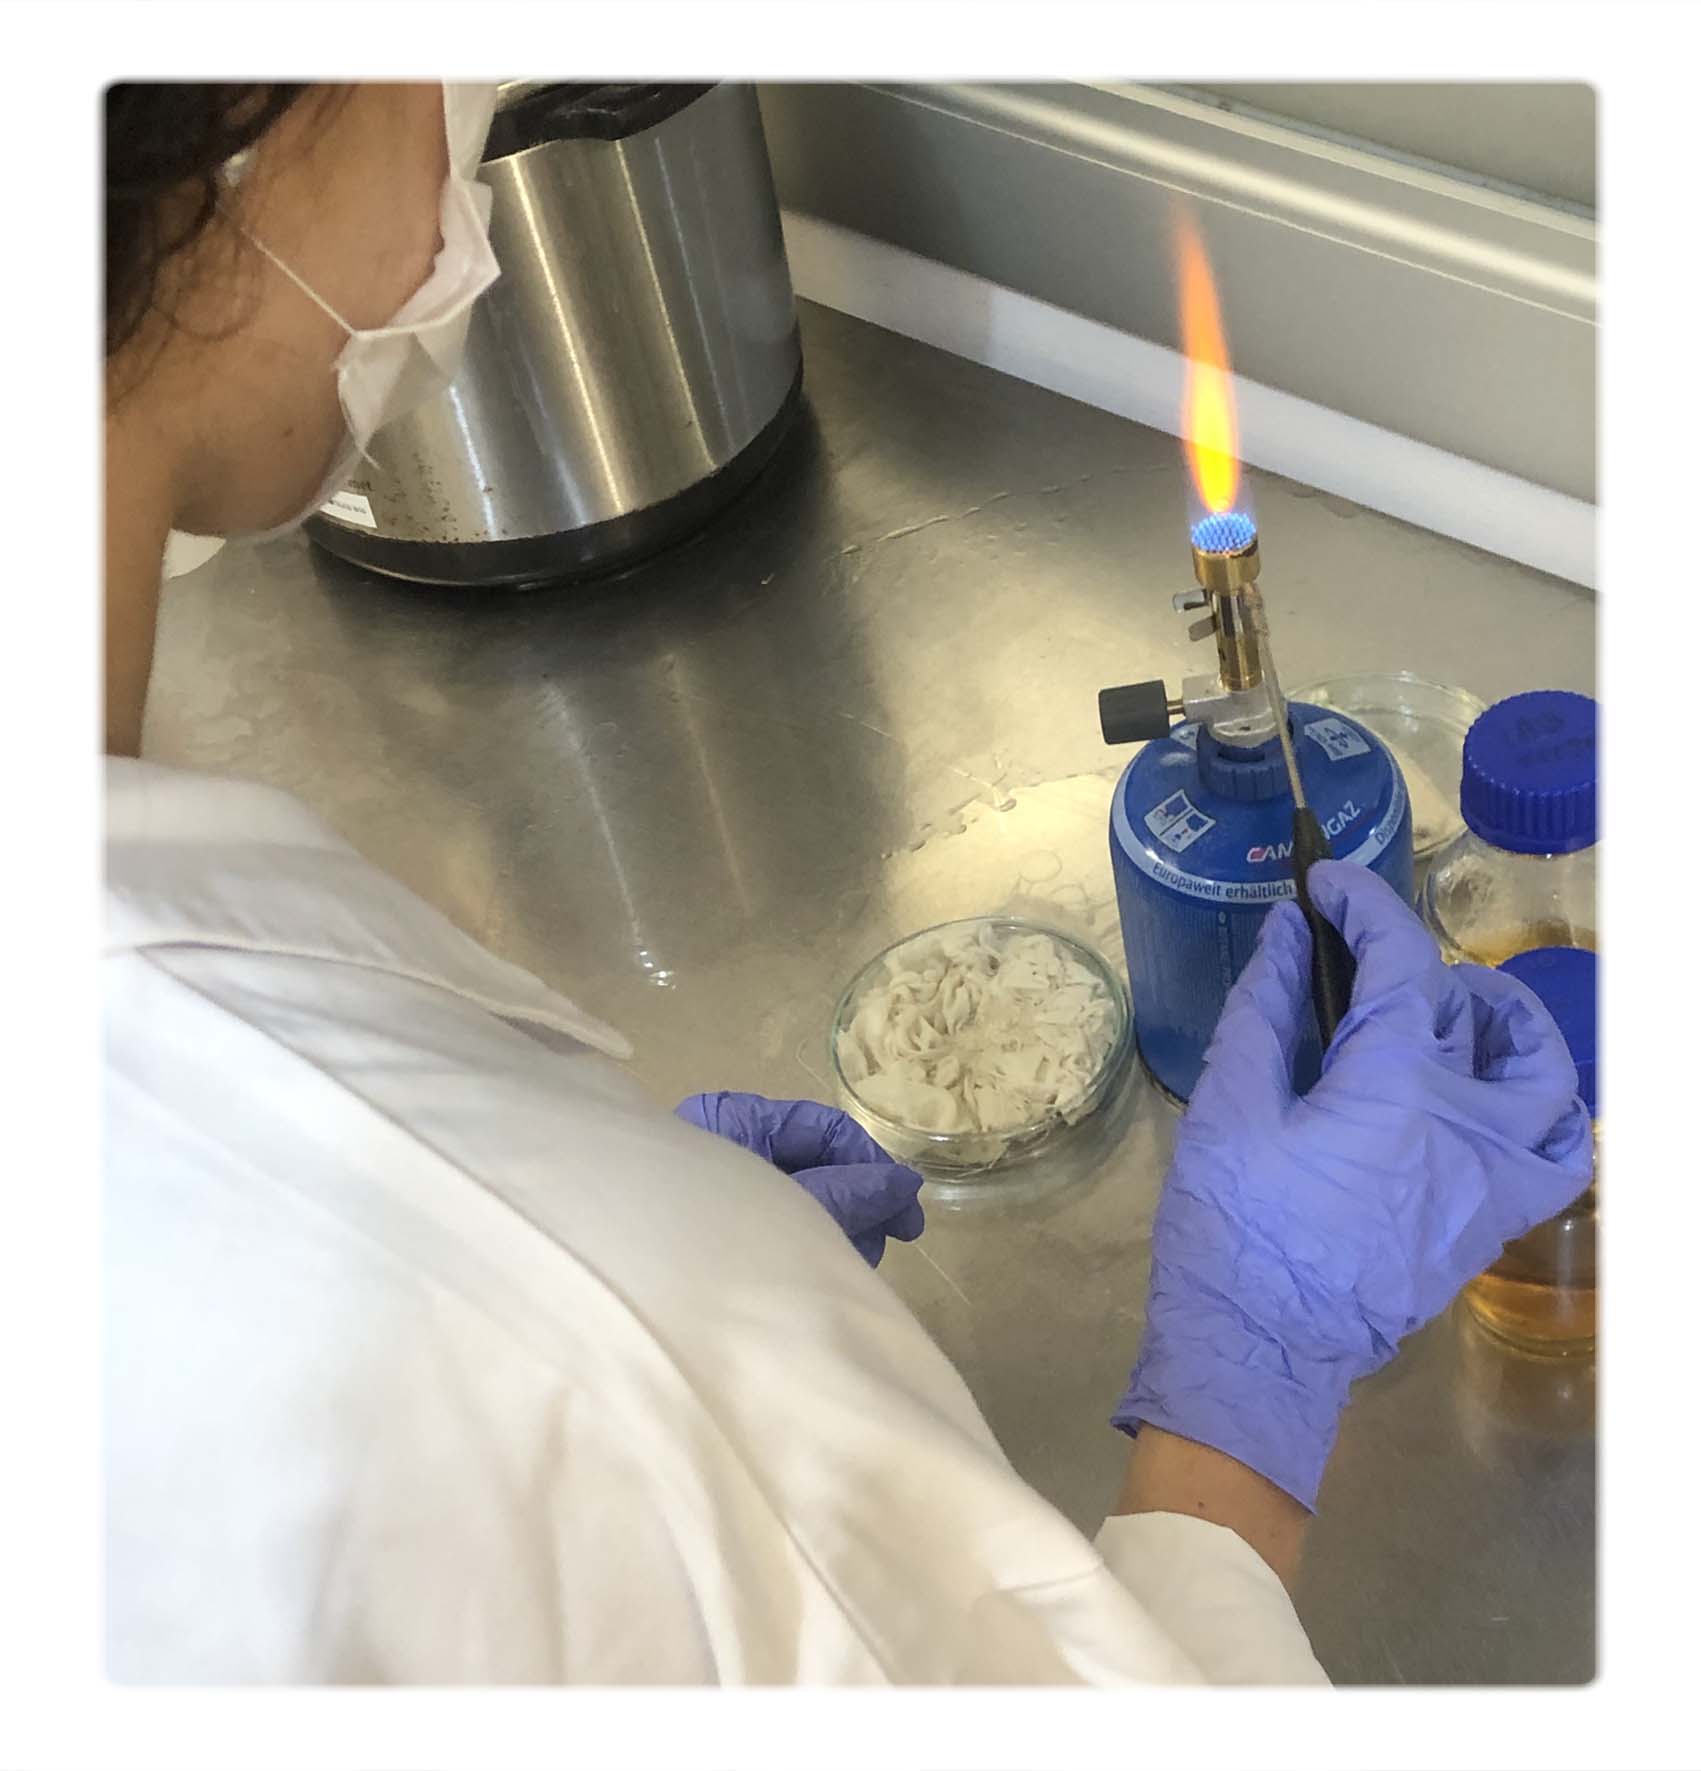
Since bacteria is all around it is important to keep an sterile environment, wearing labcoats, tie up long hair and wear gloves and facemasks
Sterilization: material
1) Place the fabric in a petri dish
2) the growing medium in a glas bottle with the cap loosely tighten (to avoid explosion during cooking)
3) Put everything in a outerclave bag and then into a pressure cooker, cook for 30 min on 120°
4) Remove the bag carefully (it is hot) and make sure no contaiminated air gets into the bag
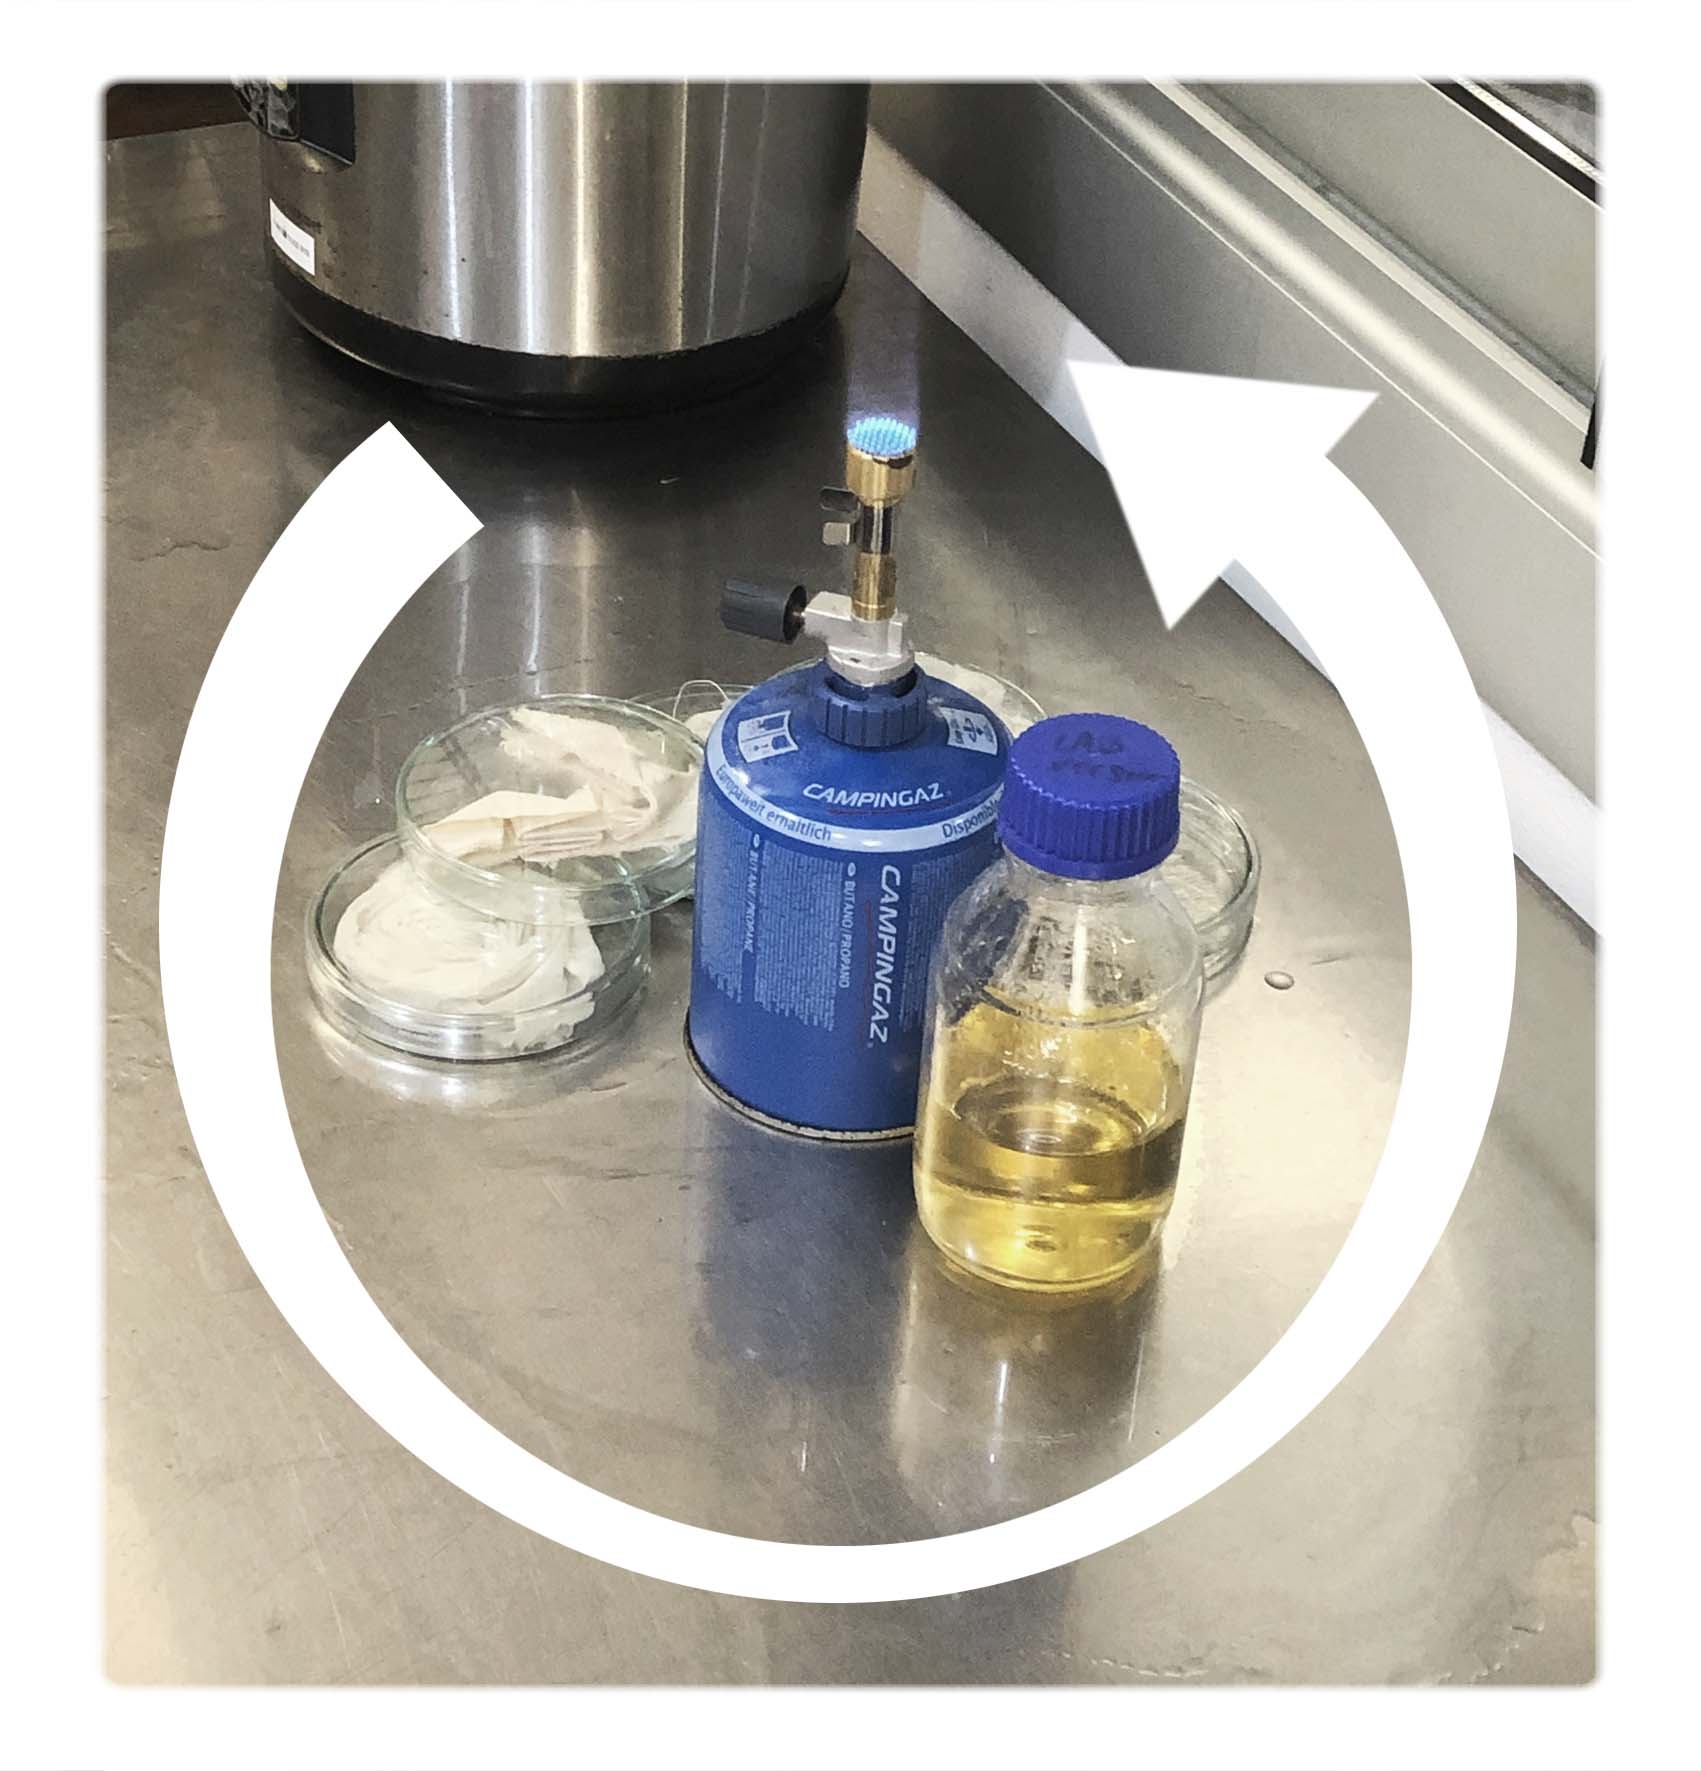
Sterilization: workspace
The purpose for this is to create a sterile “mushroom cloud”
1) Wipe your gloves and the workspace with alcohol
2) Turn on the gasburner
3) “Paint” a circle of alcohol around the burner
4) Place the sterile petri dish, inoculation loop, bacteria and growing medium inside the cloud
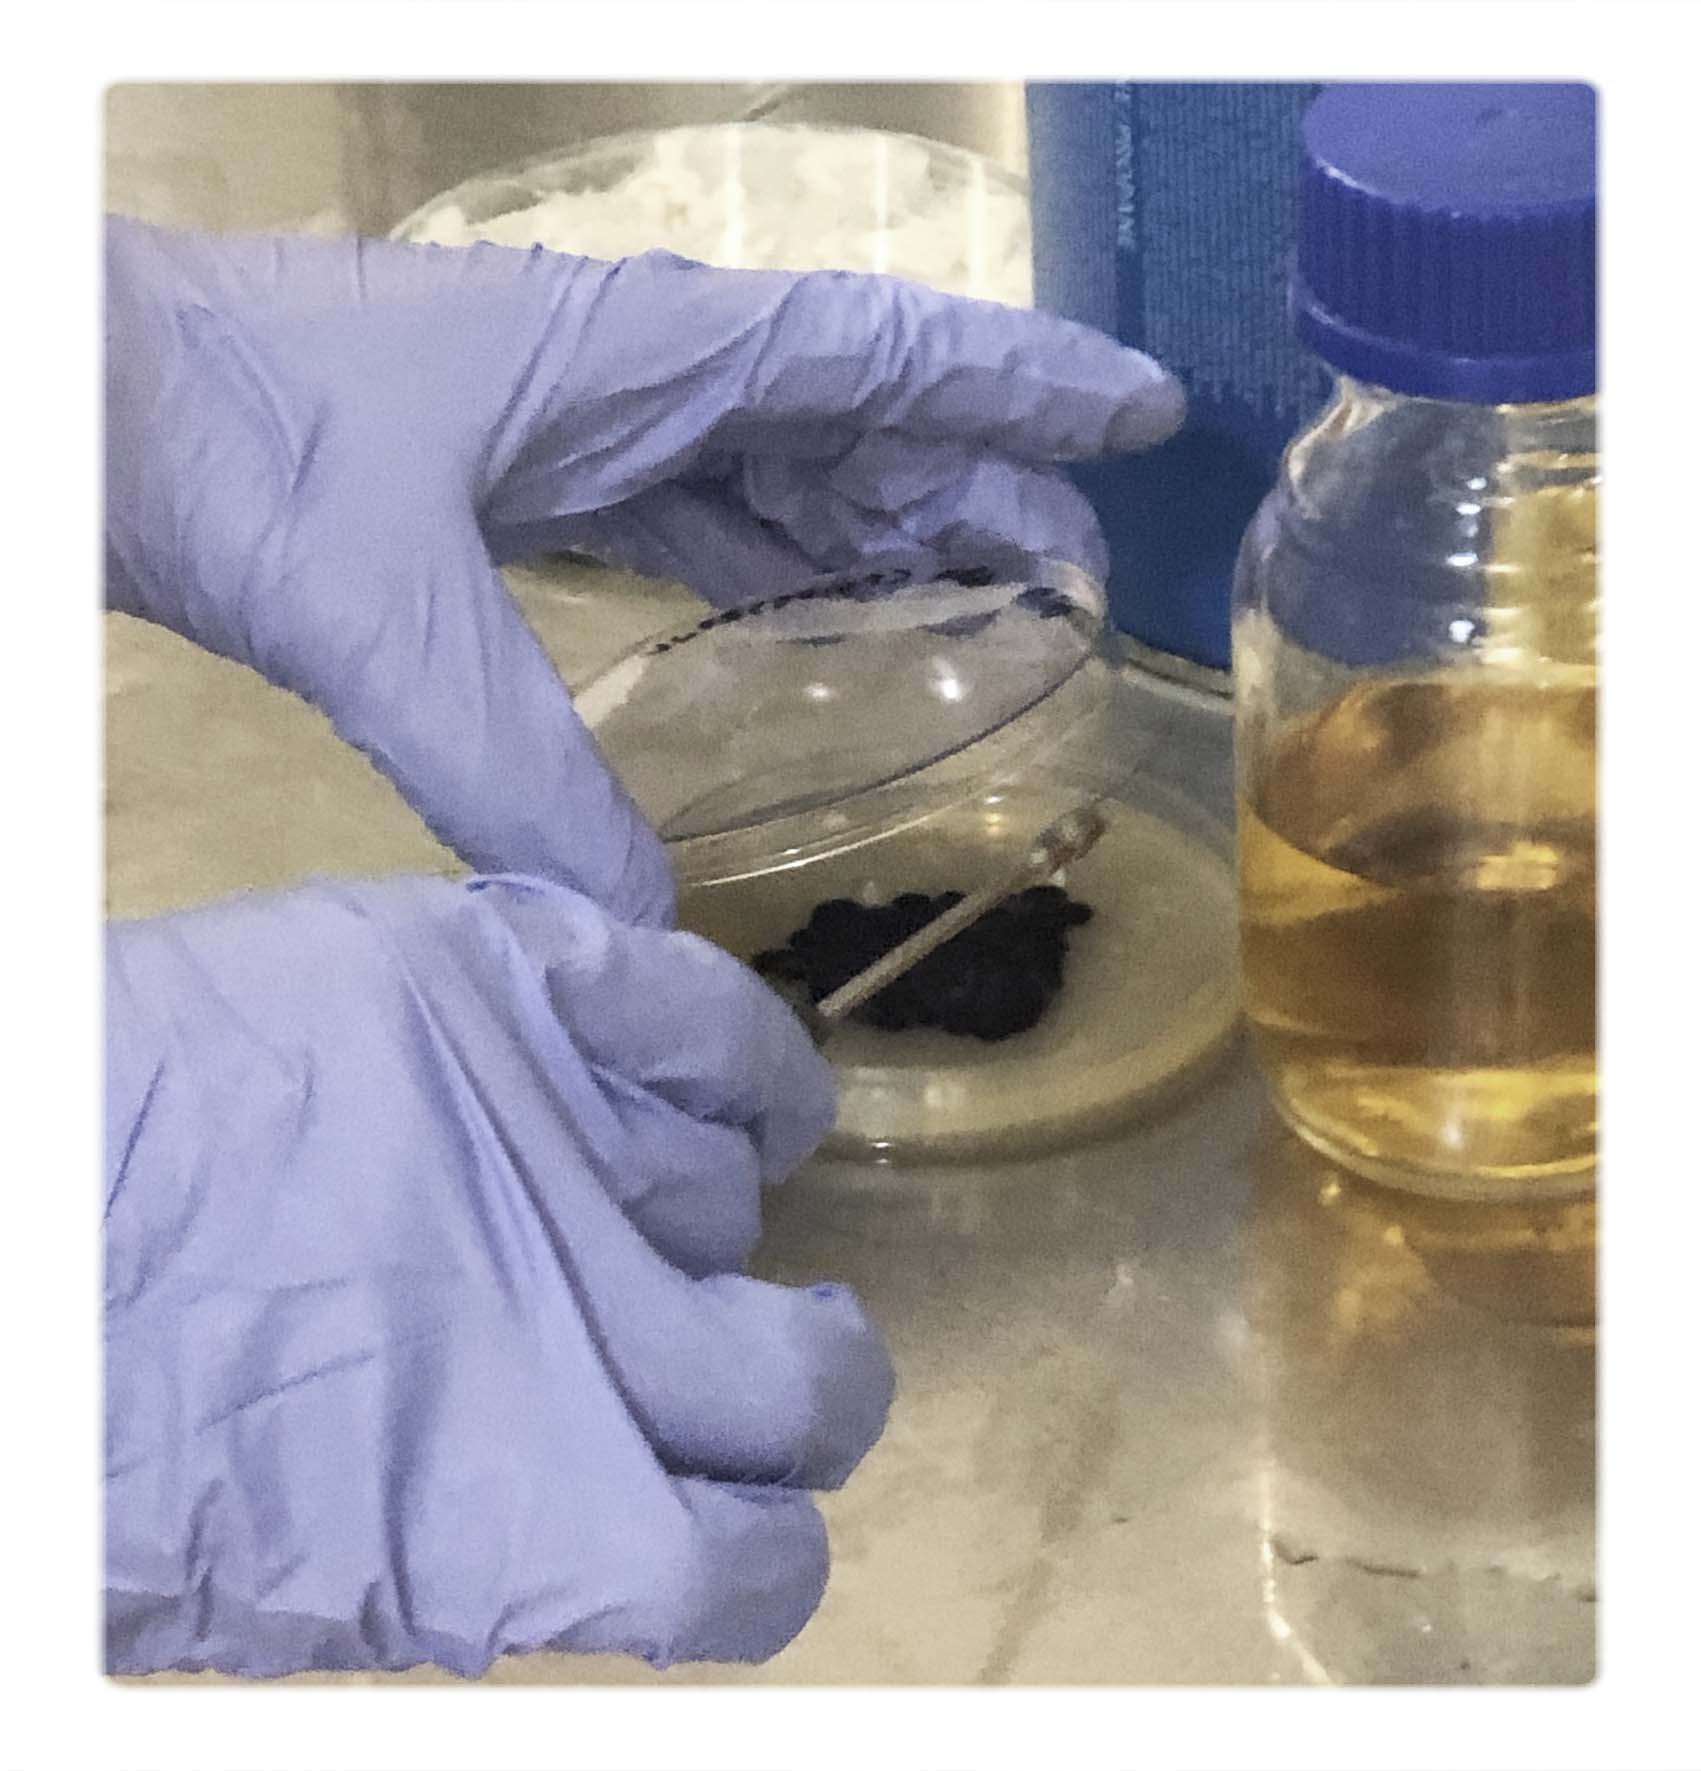
 Inoculation
While working with the inoculation it is important not to move any material outside or into the cloud, move quickly and efficient and do not talk or breath heavily it can contaminant the workspace.
When opening the Petri dishes you should lift the lid as little and possible and always turn the opening away from you and towards the fire
1) Sterilizes the LG bottle by holding the bottle opening over the fire for a few seconds
2) Open the Petri dish (with your fabric) using your left hand While pouring the broth on the fabric with your right hand
3) Sterilize the inoculation loop for a few seconds over the fire
4) Carefully scrape a small piece of the bacteria (avoid digging to deep) onto the loop
5) Draw few “lines” with the bacteria loop over your fabric
6) Sterilize the inoculation loop for a few seconds over the fire
7) Seal the petri dish with parafilm tape
8) Place the inoculated fabric dish in an incubation chamber (24-26°)
9) First sign of a successful inoculation should be visible within 2 days
10) Sample ready within 7 days
 Sterilization of the inoculation loop
 lift the lid as little and possible
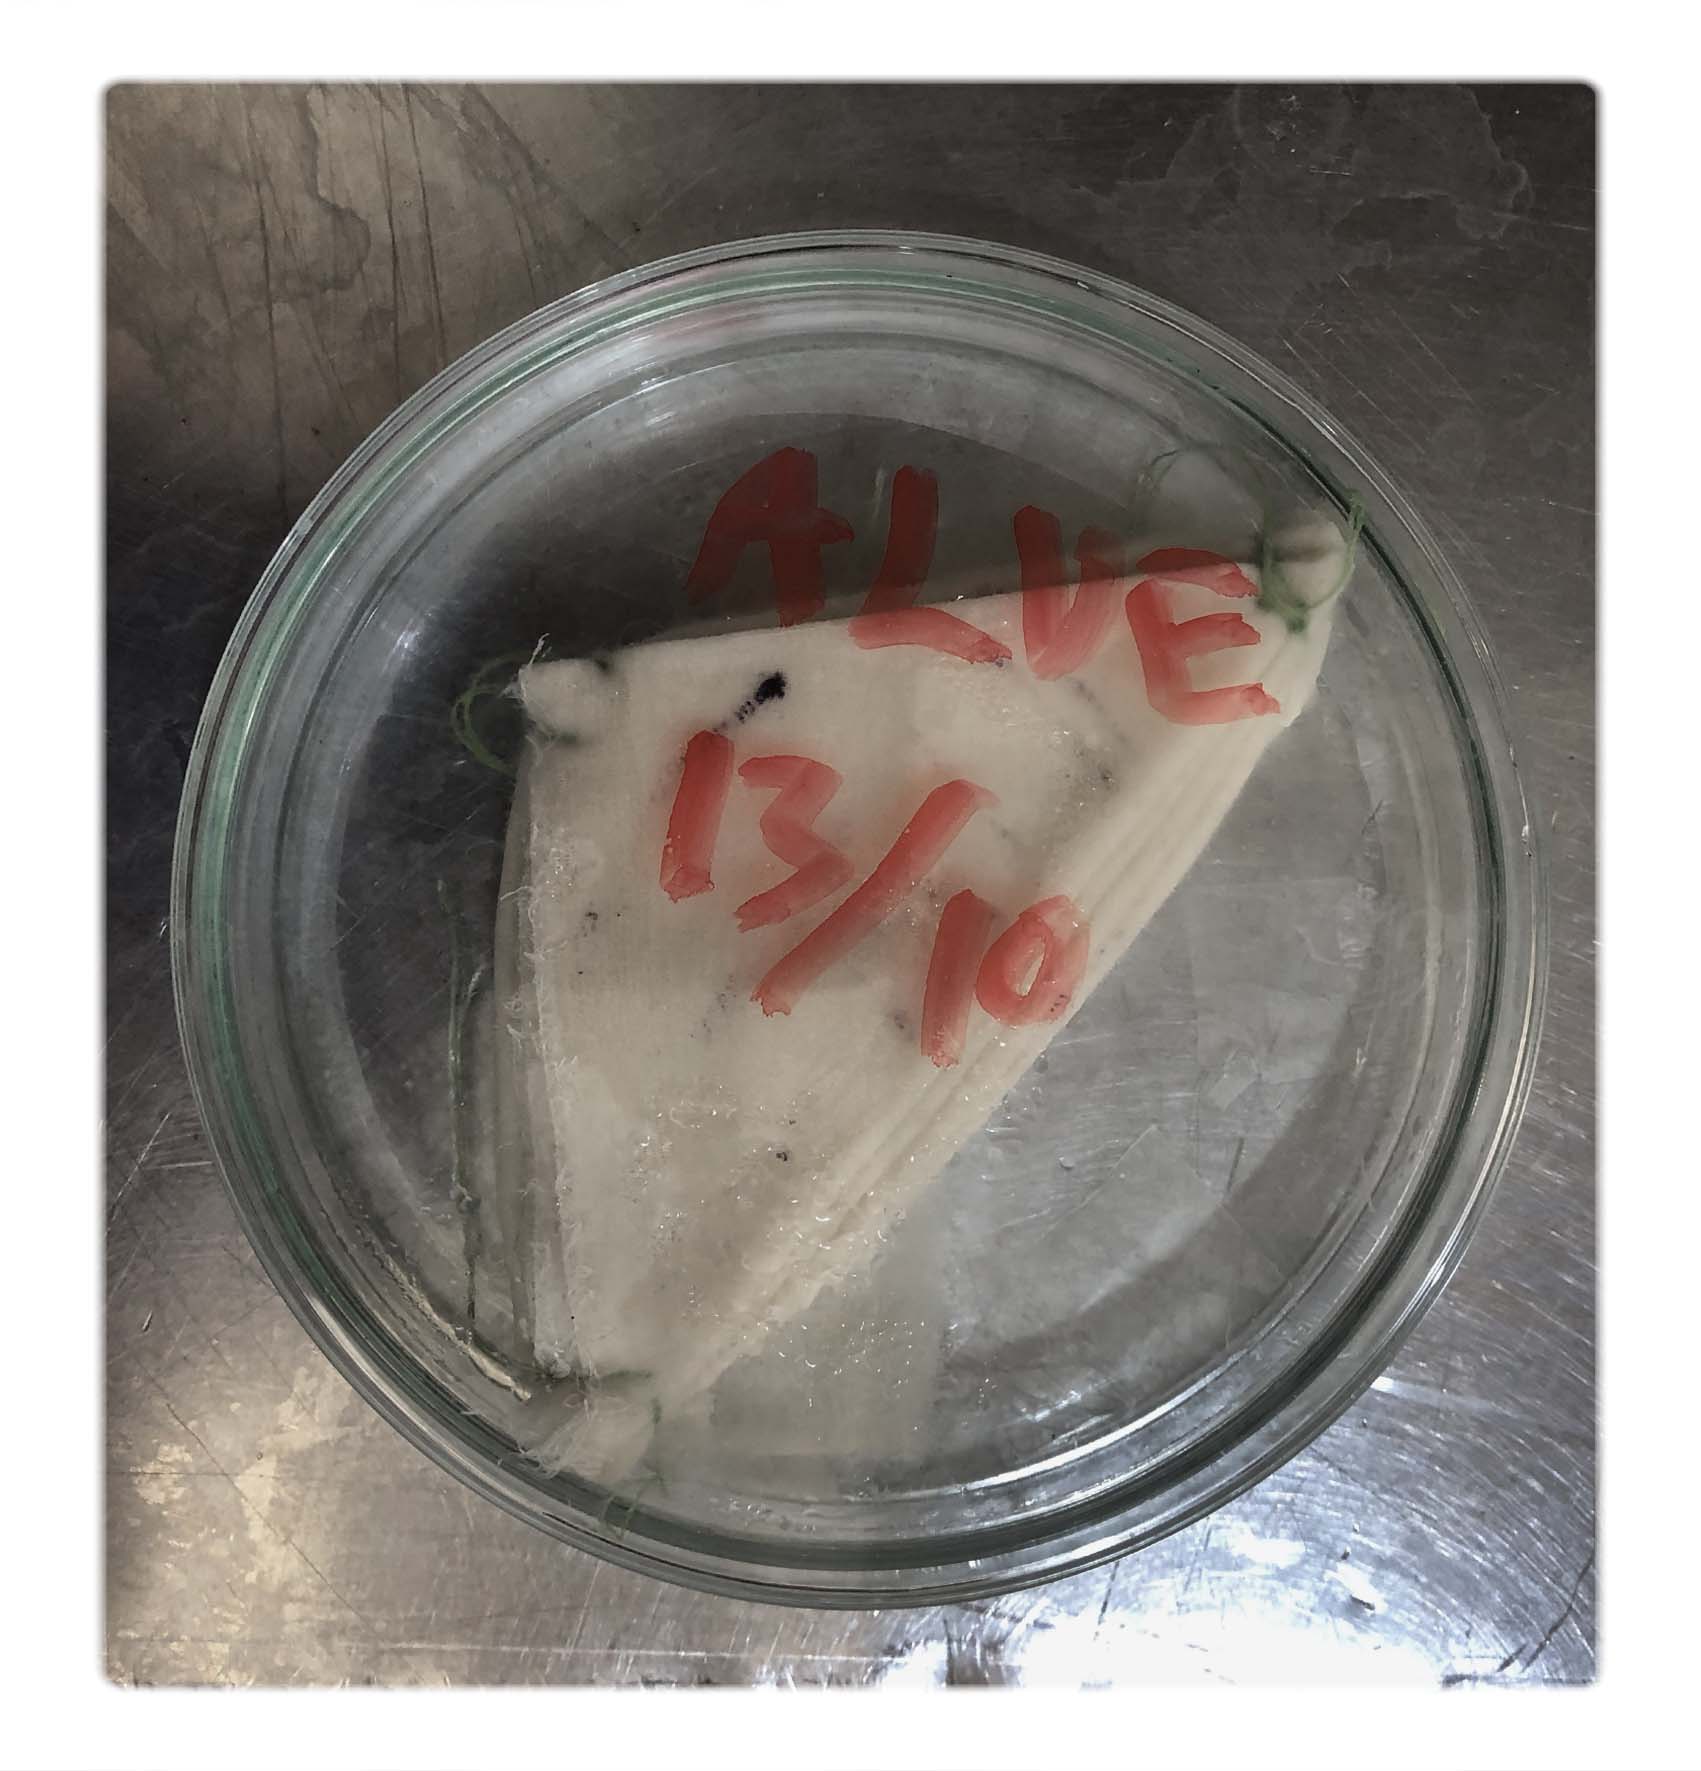
Once sample is ready you should kill the bacteria by putting it in the pressure cooker for 30 min (120°) and then wash the fabric with soap and water.
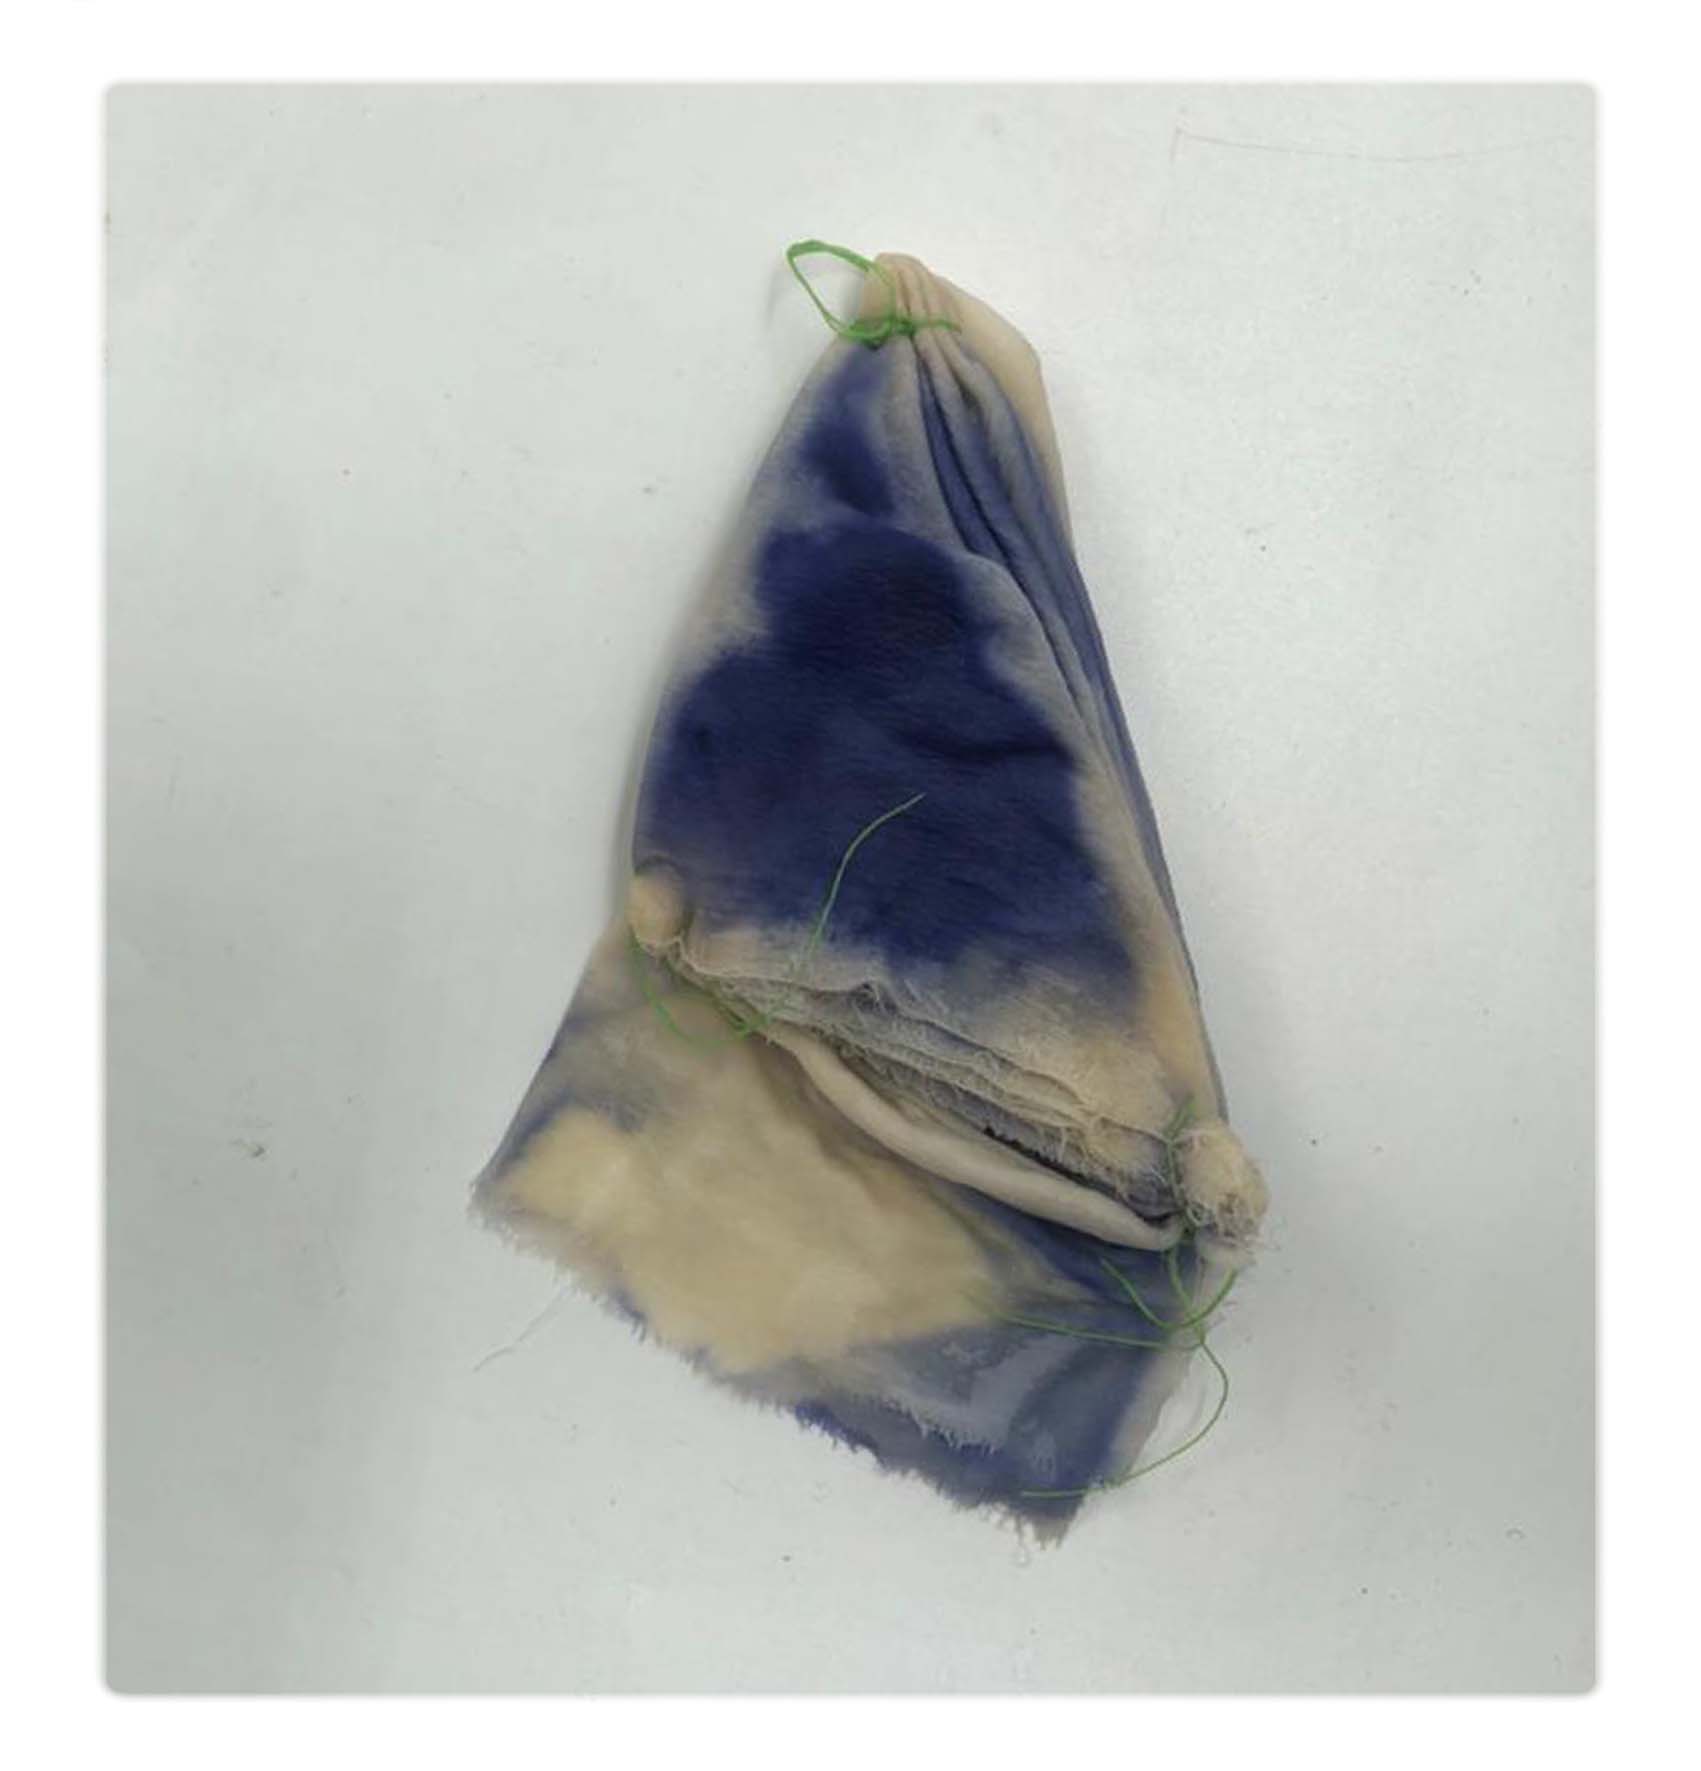 sample folded
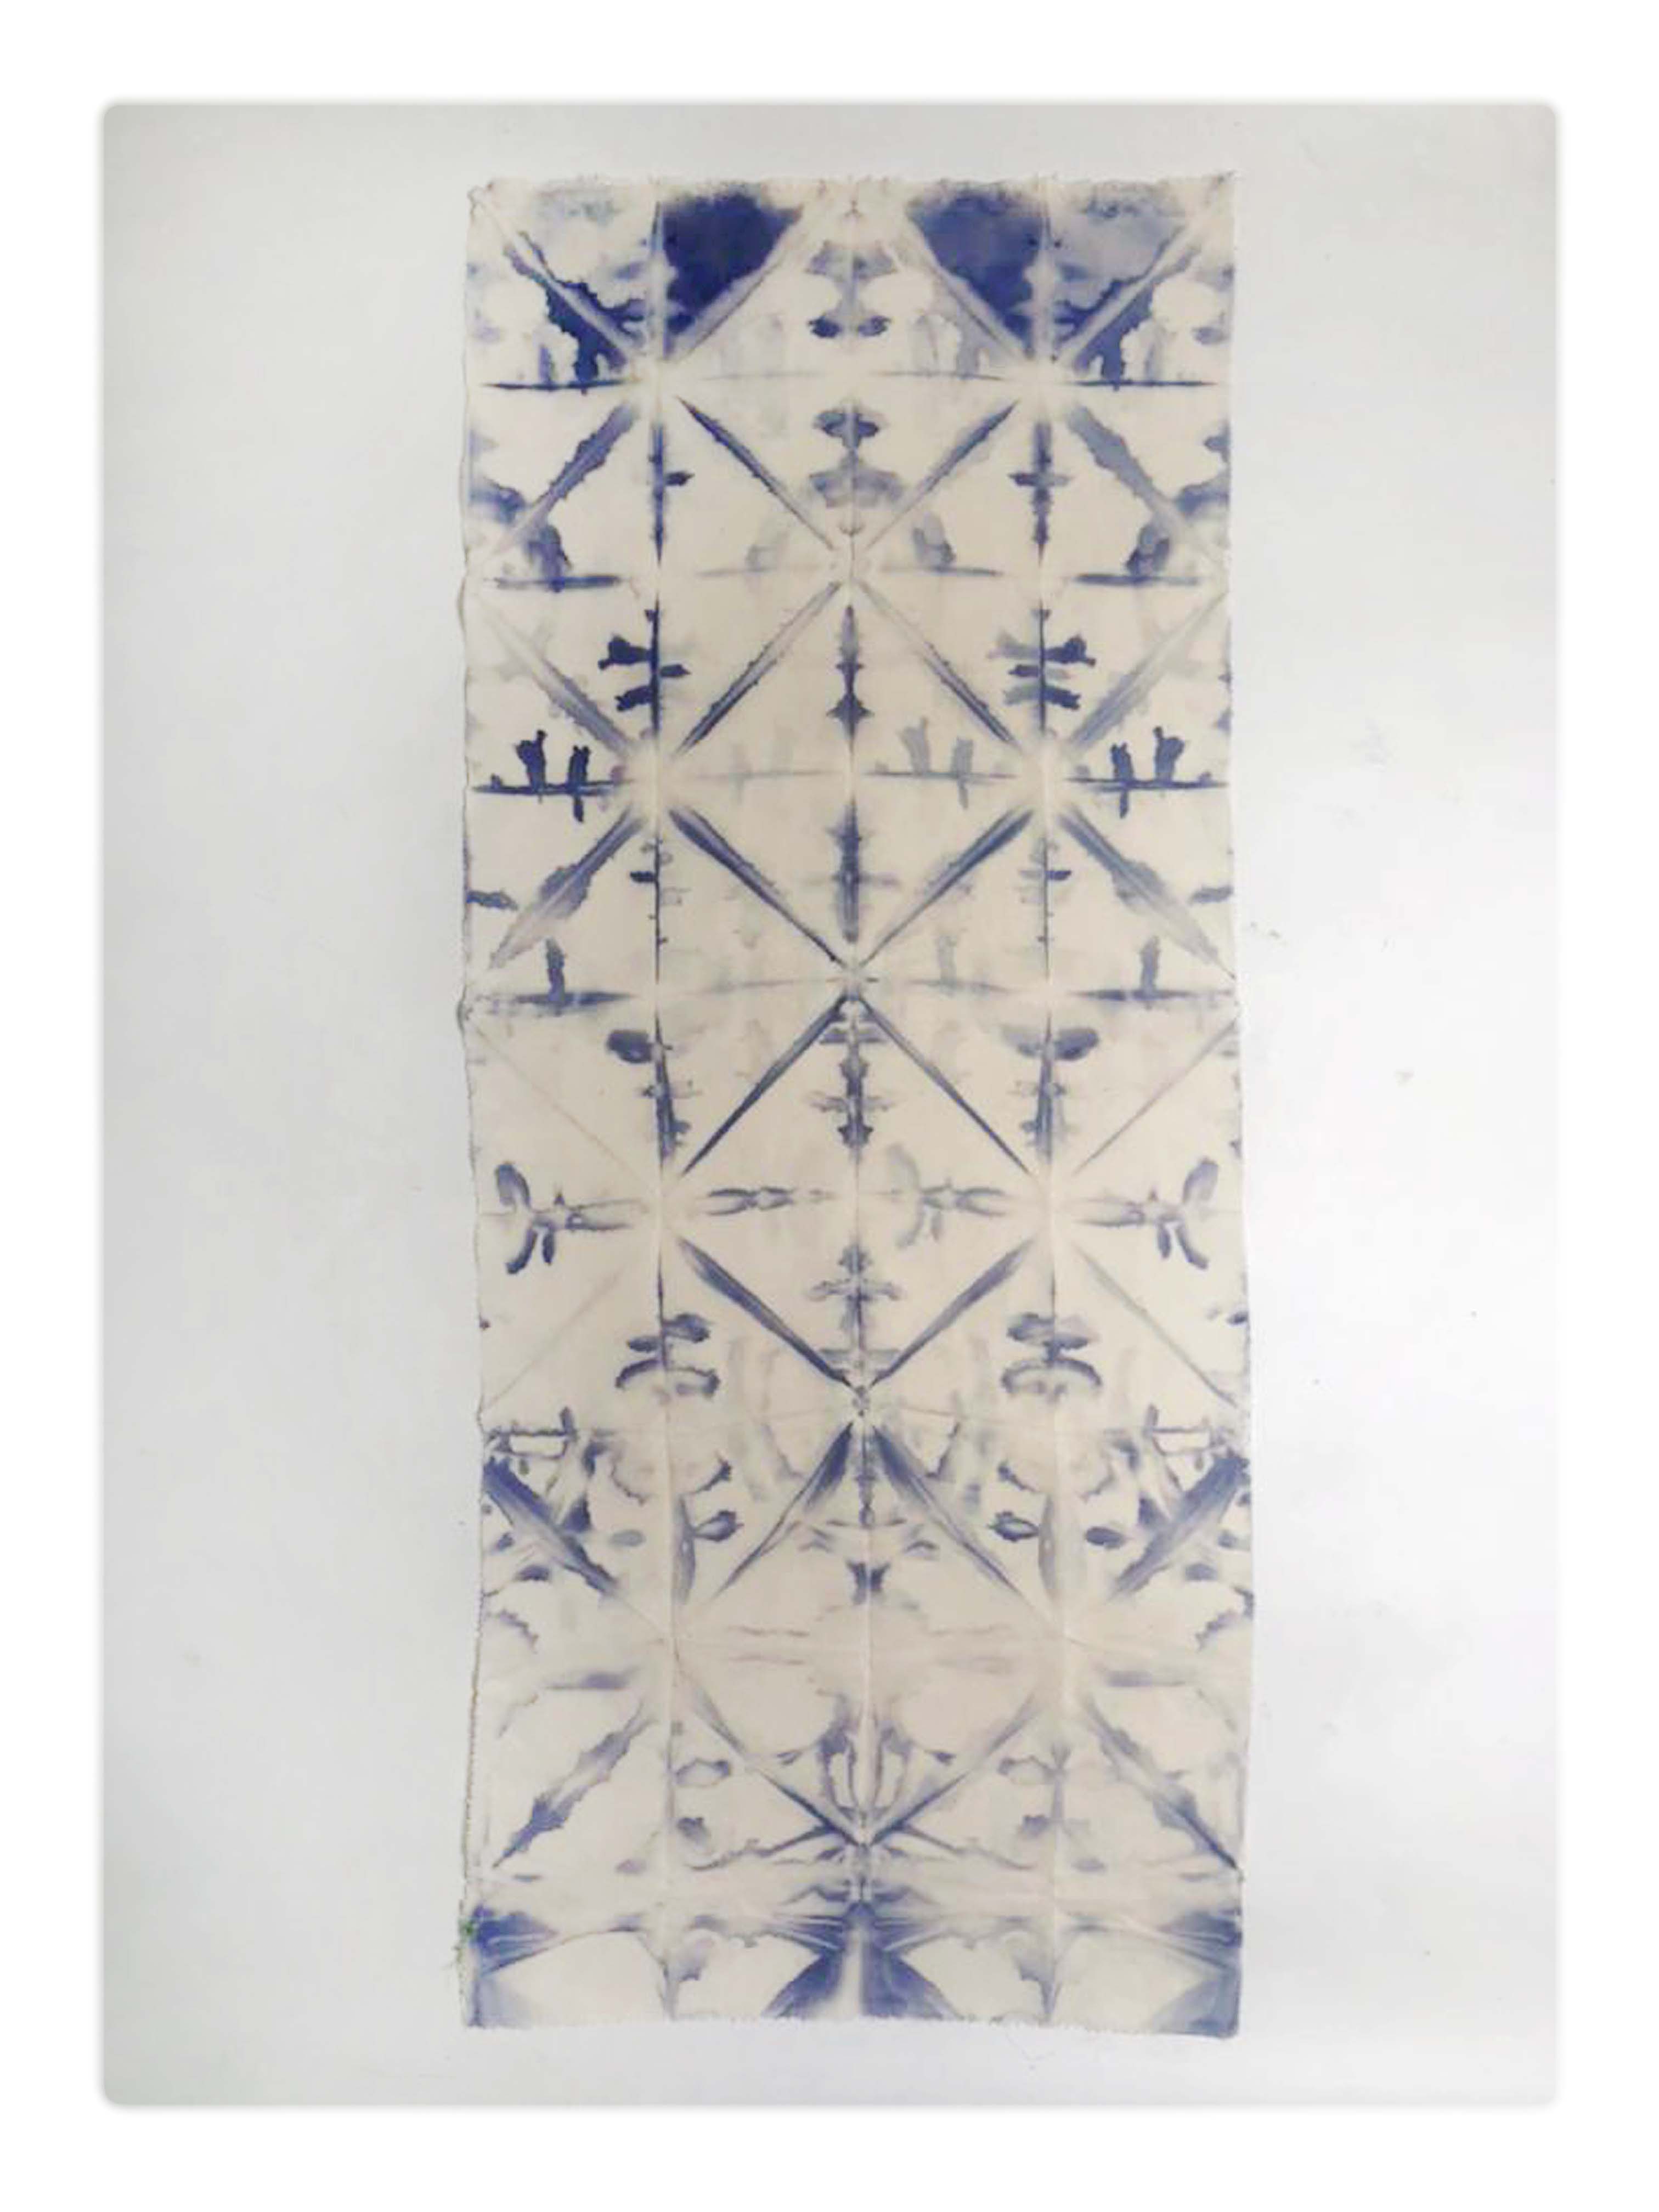 sample unfolded
Comments: We ended the growth already after 3 days, it would be interesting to see how much more color I would get by leaving it longer, but overall I am happy with the result and would love to experiment further on this technique
AFTER THOUGHTS
It is exciting to see how many startup companies working on different options for natural dyes but few seems to have actually been able to bring their product to the market yet. Its also worth noting that natural dyes also can be problematic, its common that harmful chemical are used as mordants and the huge agricultural areas that would be needed to produce the dyes on scale could create problems, during our experimentation I was surprised by how much raw material we had to use to produce even small amount of colors. Of course, there is a lot of research done how to get better yield from the raw material:
fibre2fashion
aic
voiceoffashion
As a dye n00b it seems to me that bacteria dye has a better potential to be scaled in a sustainable way because it could be lab grown. But then why would it not be possible lab grow cabbage cells?
Some interesting natural dye companies:
KBcolscence
Algaeing
EVER DYE
LIVING INK
STONY CREEK COLORS
AN HERBALS
HUUE
SODHANI BIOTECH
INDIDYE
INDIGO MILLS DESIGNS
VIENNA TEXTILE LAB
COLORIFIX
PILI-BIO