7. Computational Couture
Research
Some thoughts on biomaterials and printing:
3D printing
This week was very exciting for me since a lot of the topics tied into my final project. We learned about the Grasshopper plugin for Rhinoceros and generative design as well has got introduced to the world of 3D printing.
There are many different types of 3D printing technologies that all have their own pros and cons:
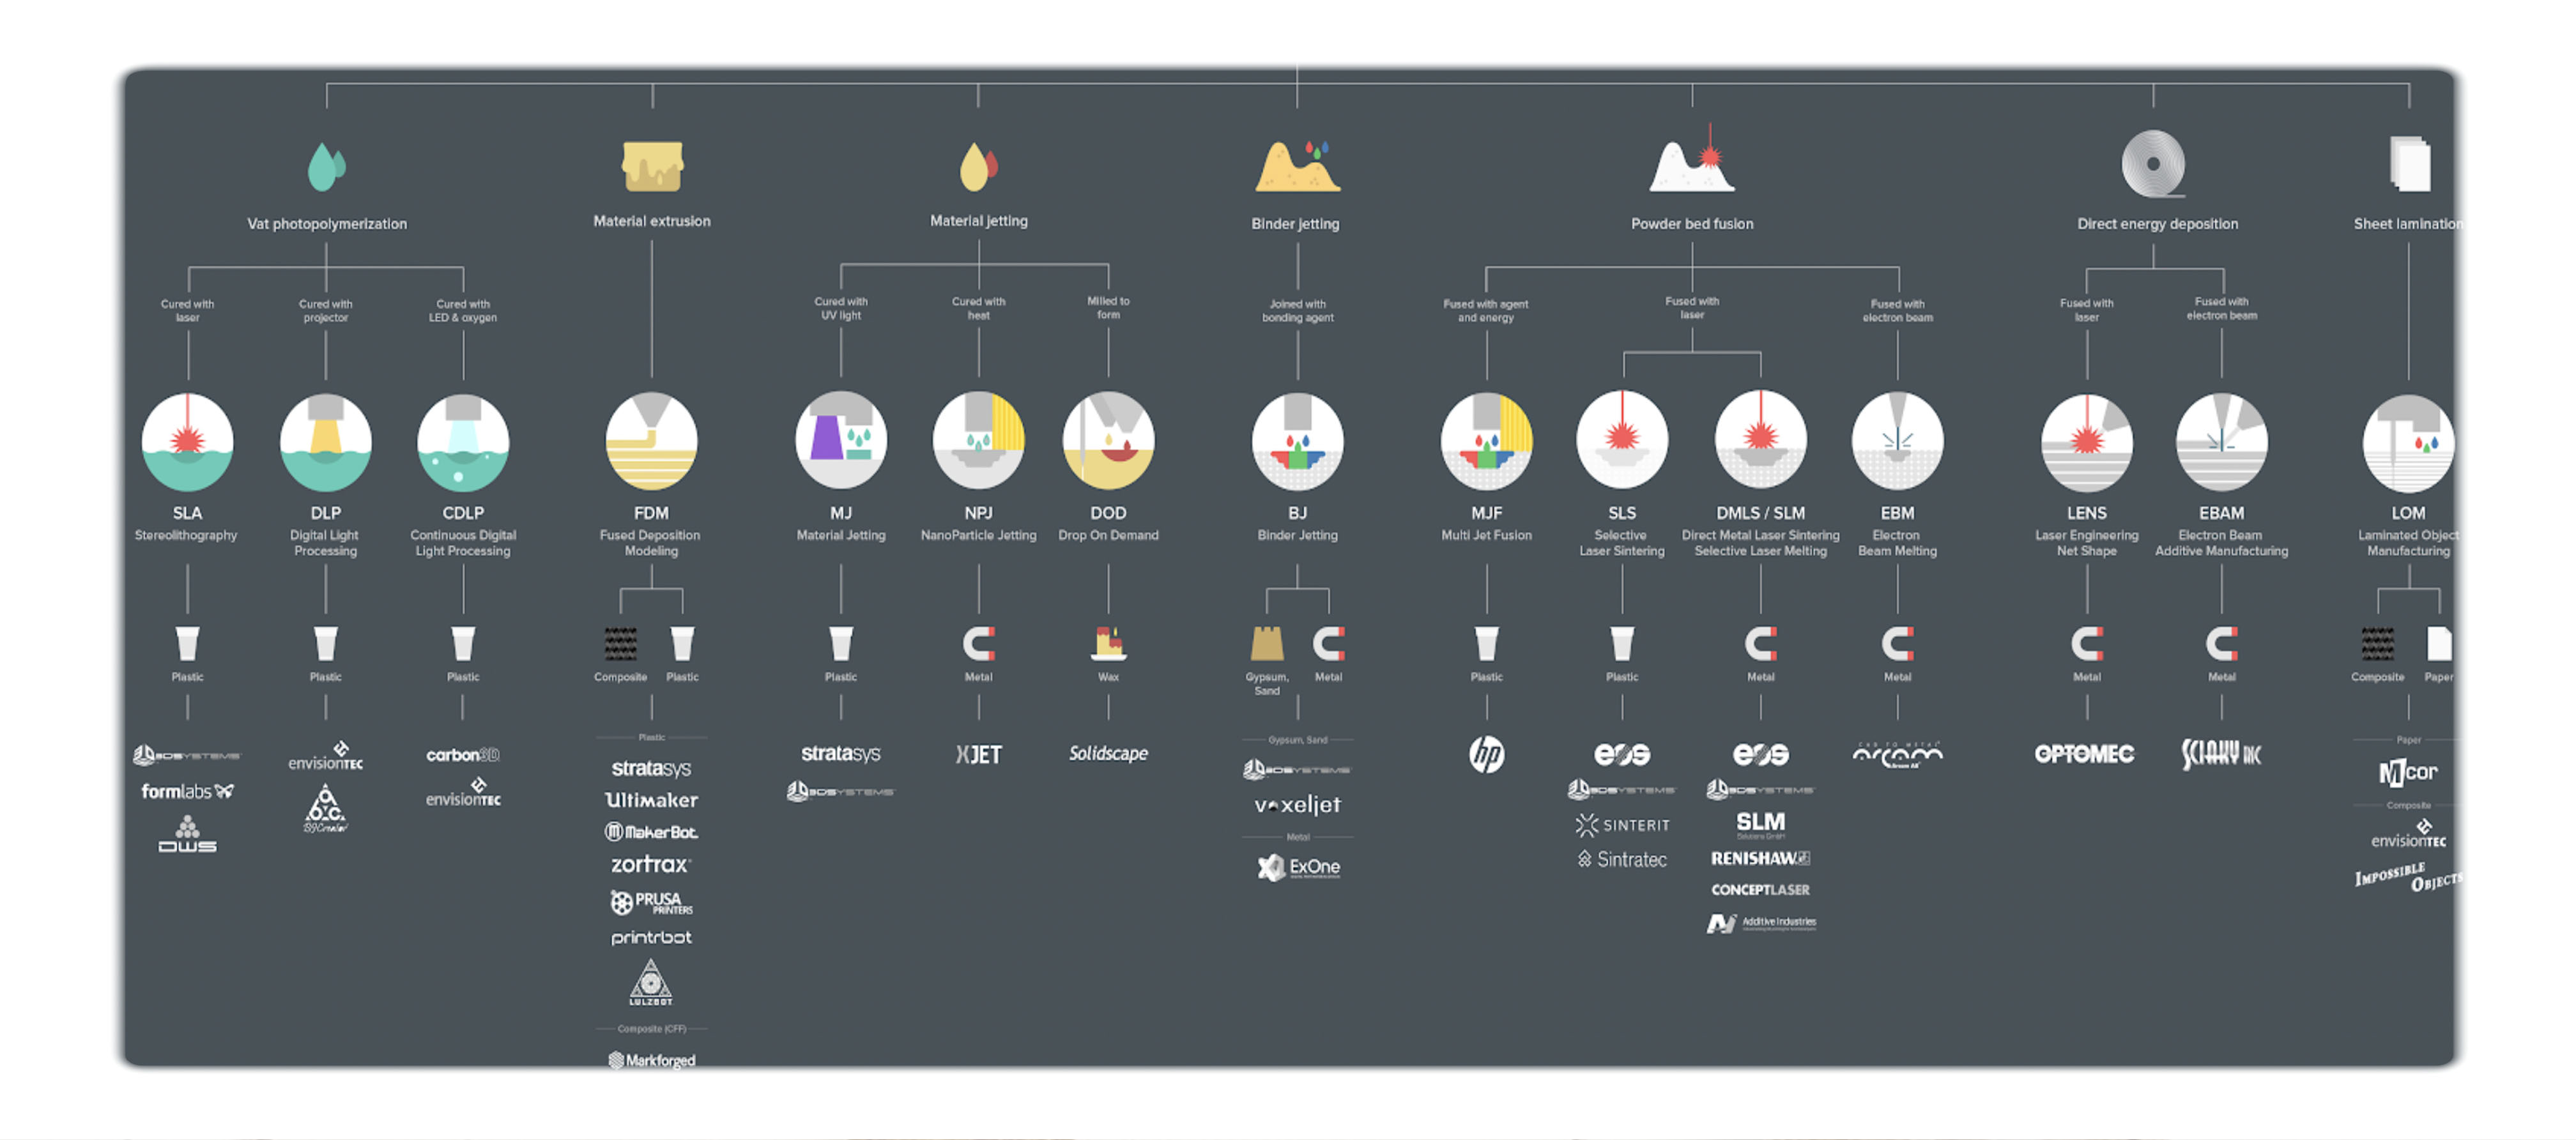 overview of different 3D-printing technologies
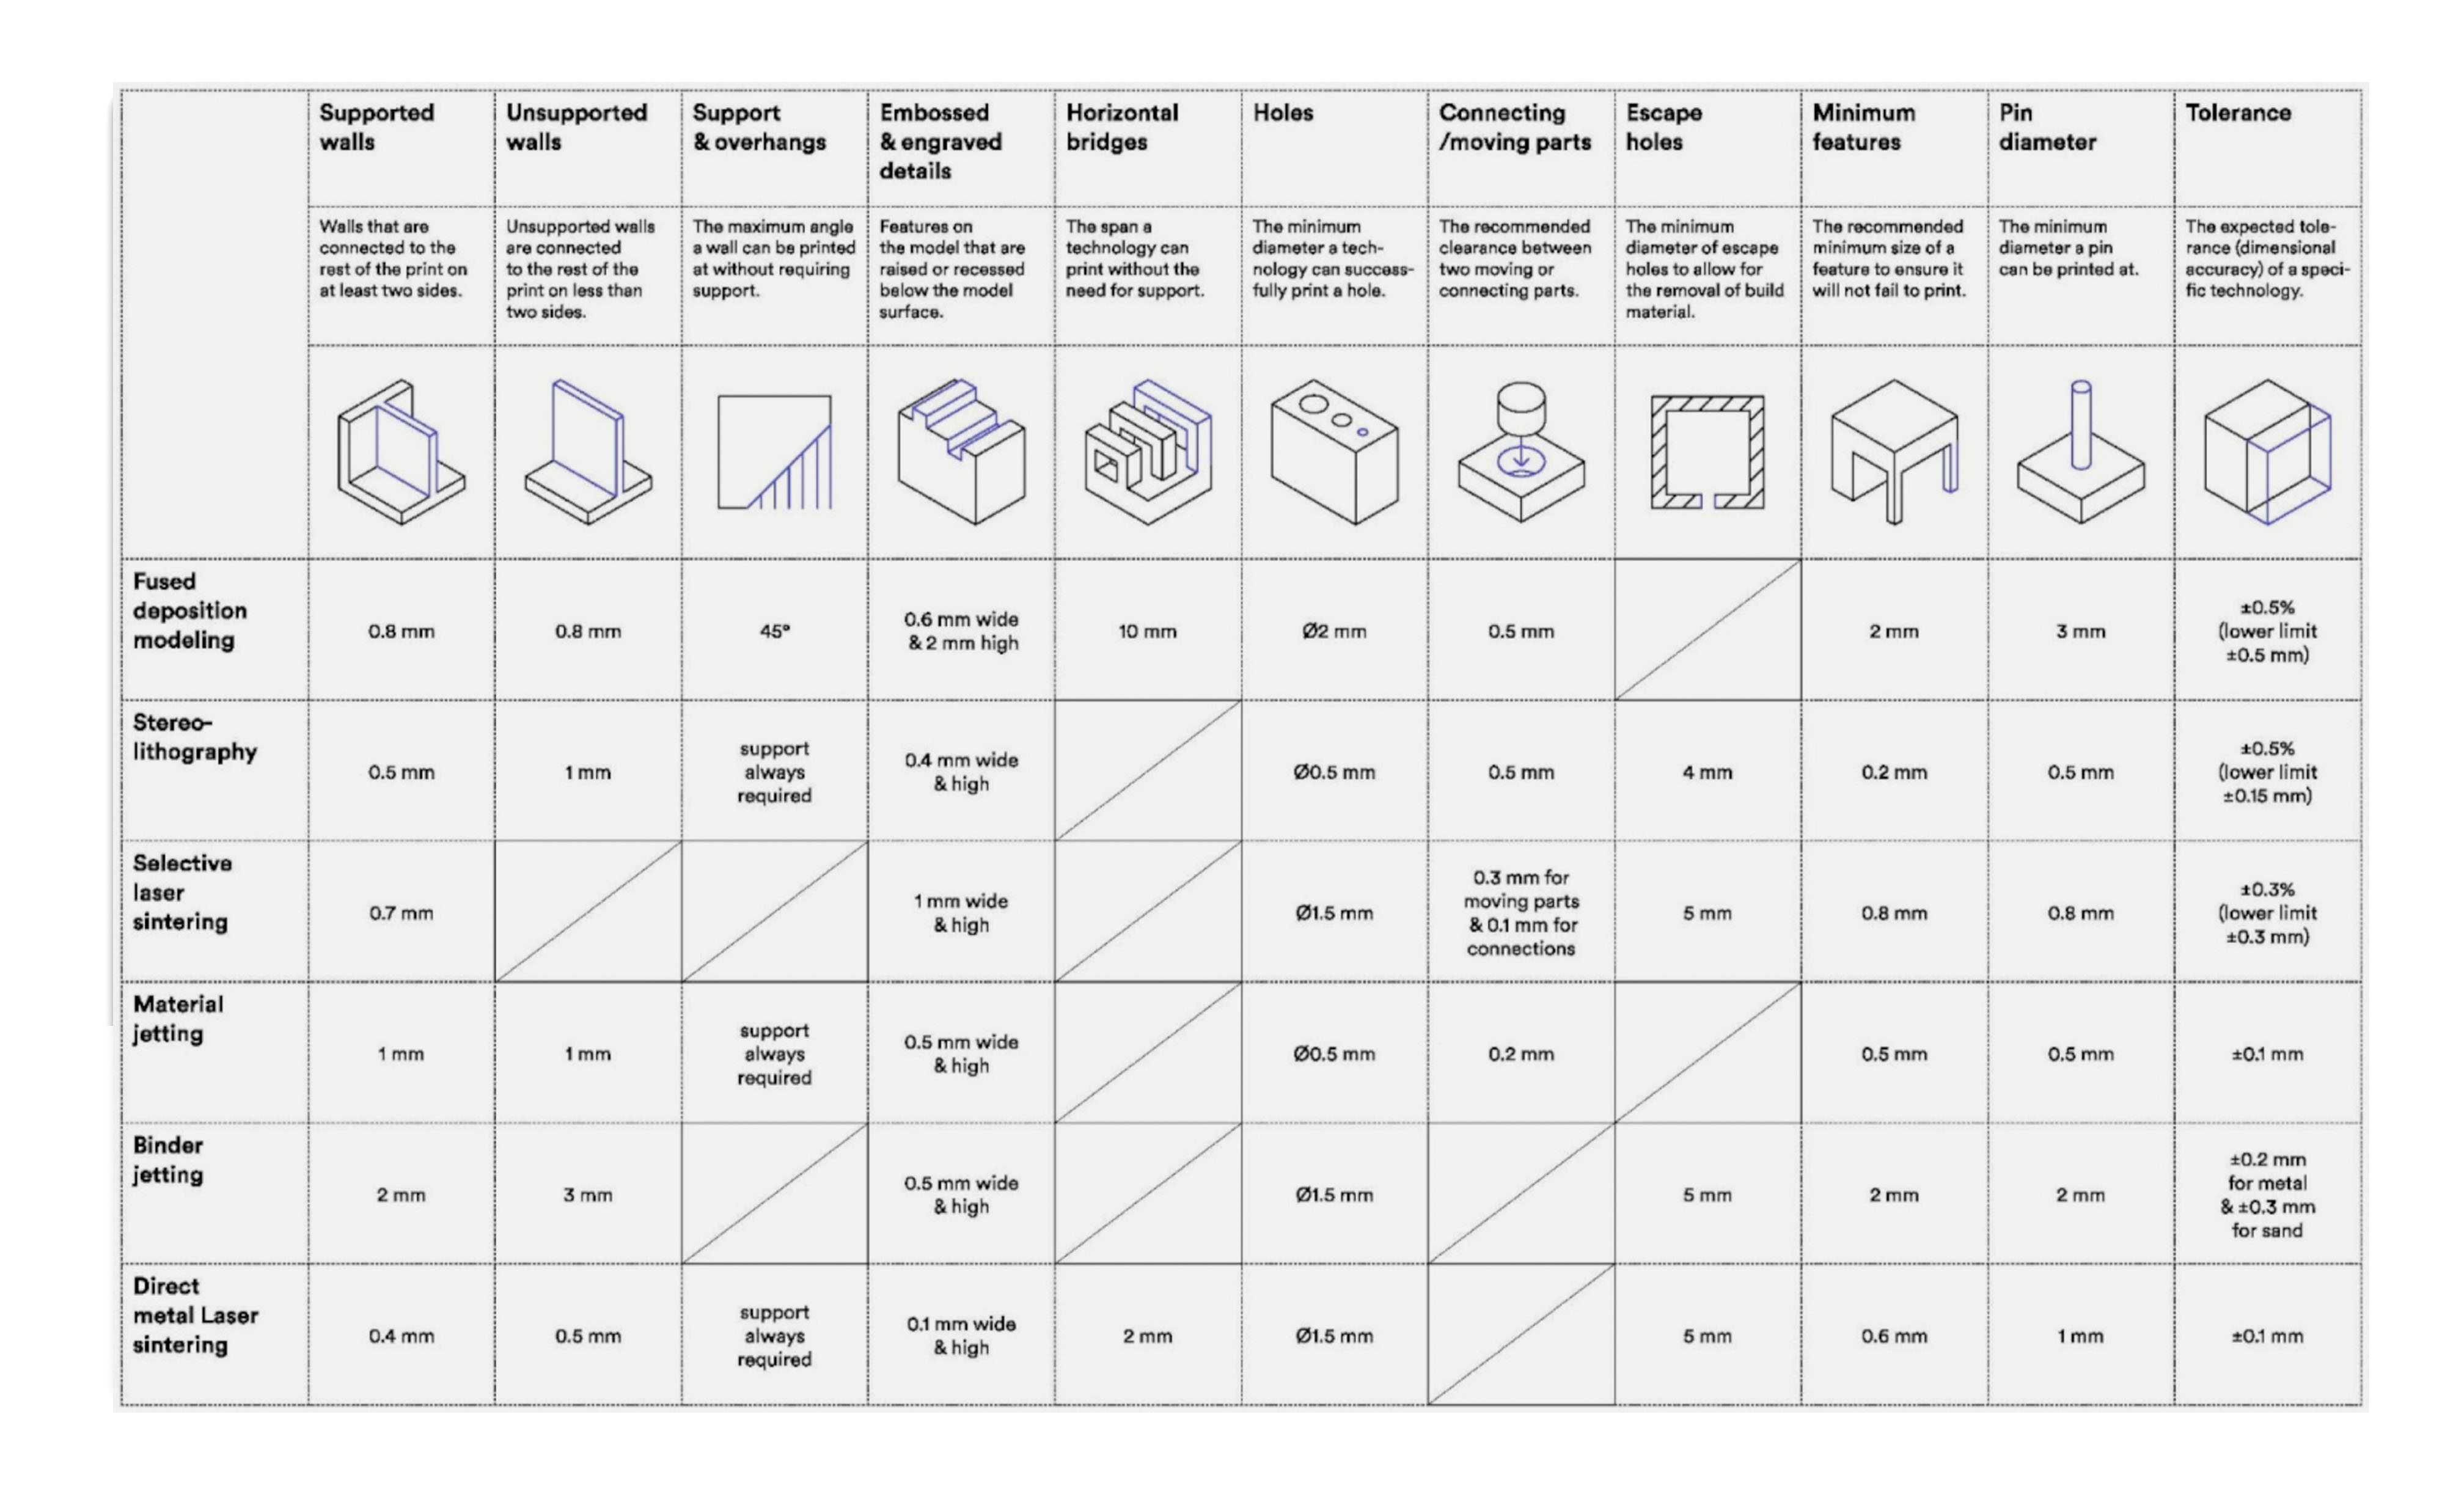 pros and cons of different technologies
For this week we used FDM printing (fused deposition modeling) it is one of the most widely used and maybe most cost-effective 3D printing technologies.
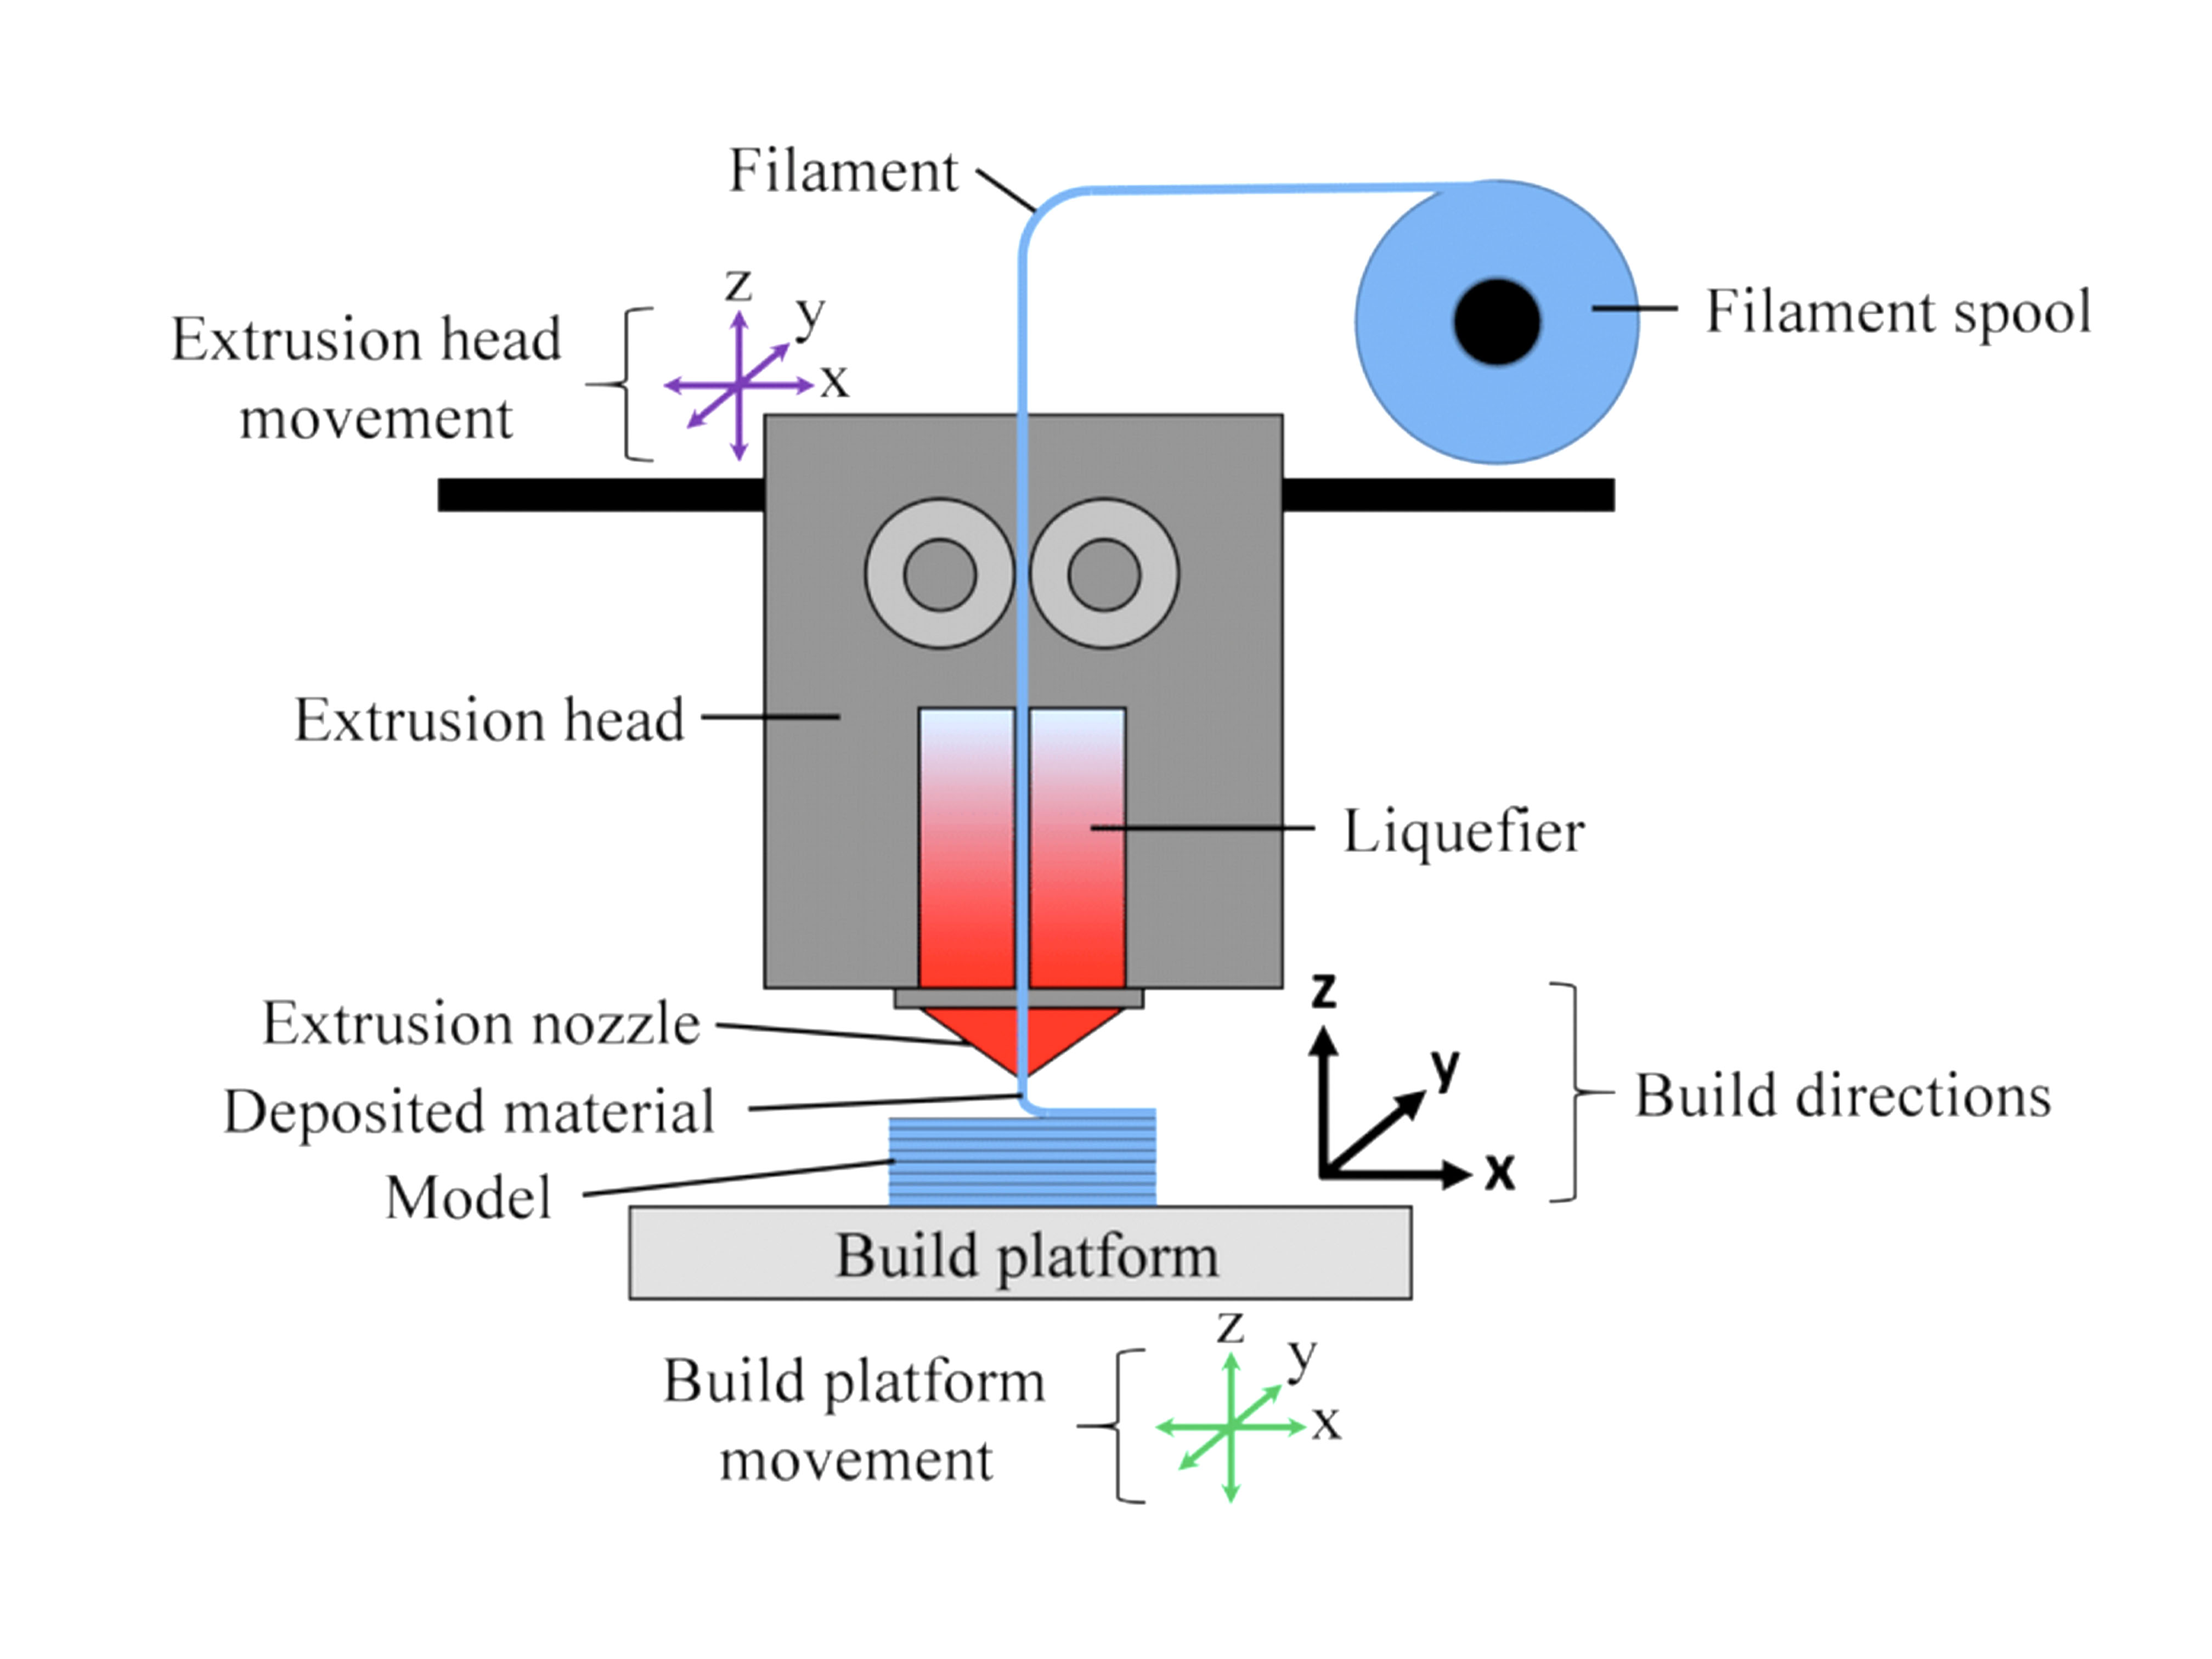 how FDM printing works
FDM printers are technically not a 3D printer but rather works in 2.5D since it only deposit layers in X and Y axis, this comes with certain limitations mainly:
1)Printing lines can be quite prominent especially on curved surfaces, to avoid this lower the print height, but keep in mind that will also increase the print time.
2)The design is much weaker at the print direction since the layer can detach from each other when put under extended force.
Shell/infill
Shell should be around 2-3 layers (more if you need a lot of post processing)
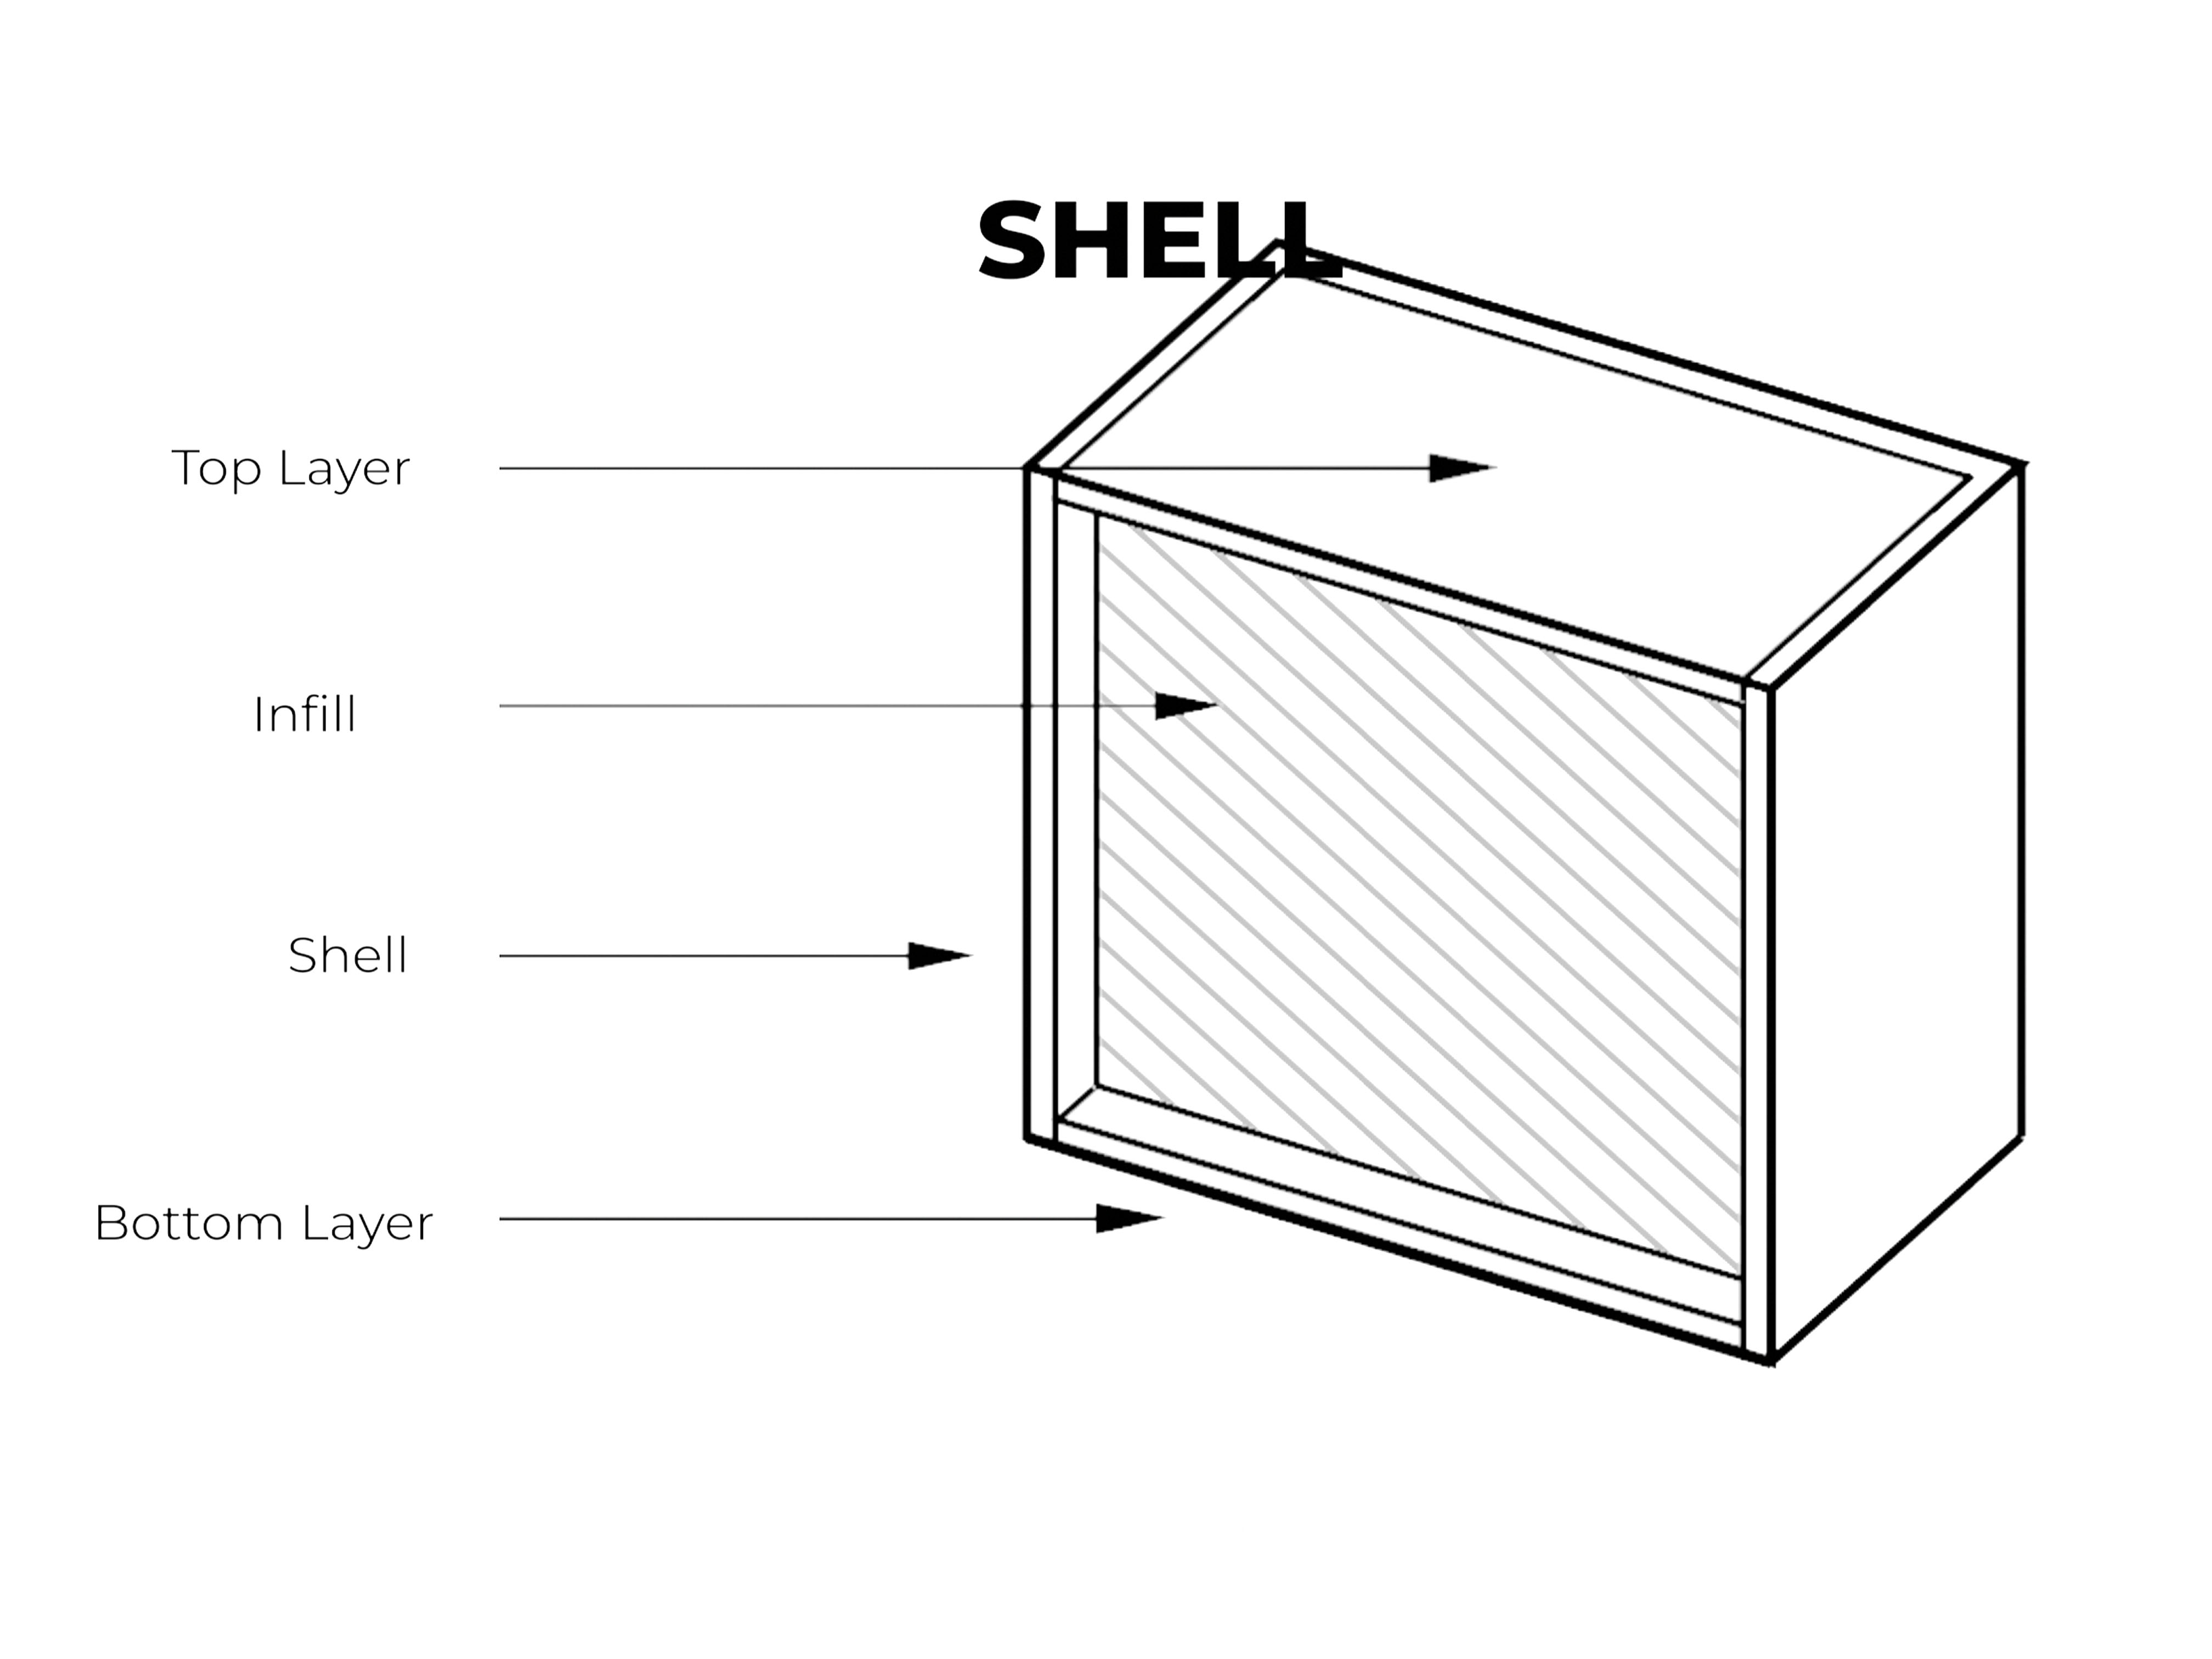 shell and infill
Infill design depends on the type of geometry, see bellow overview of most popular common geometries:
shell and infill
Infill design depends on the type of geometry, see bellow overview of most popular common geometries:
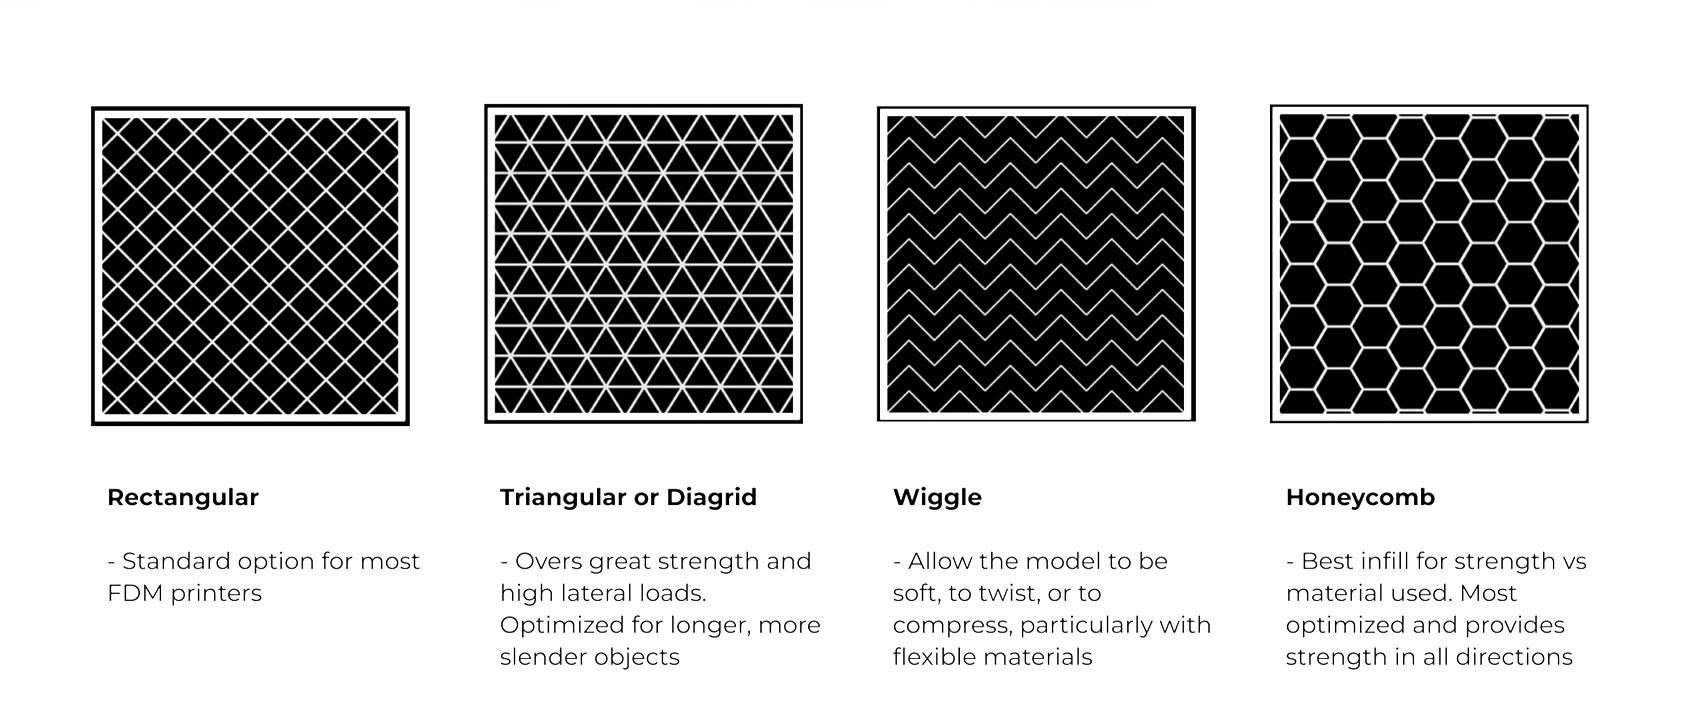 _infill pattern
Process
- Transform your design to a closed mesh
- Export as STL
- Open design in a slicer software (we use Cura)
- Define printer settings
- Export G-code
- Print
Grasshopper
Grasshopper is a visual programming language and environment that runs within the Rhinoceros 3D application. The program was created by David Rutten at Robert McNeel & Associates. The plugin is primarily used to build generative algorithms and parametric models for architecture and digital fabrication.
Designing with Grasshopper is very different then with for example Rhino in the sense that you don't design a result but a behavior by defining certain rules for the program to solve. In a fashion context this opens for completely new ways of thinking about design, mass-customization and fabrication.
Grasshopper can be quite confusing to wrap your head around, here is a few good resources to dig into:
Grasshopper docs
Grasshopper primer
Grasshopper forum
Mcneal forum
Ieatbugsforbreakfast
Dan piker github (especially for the kangaroo plugin)
Experimentation: Attractor, repulsive and spin
Based on one of the files we created with Eugenio I continued to work on the concept, playing around with the different charges and parameters
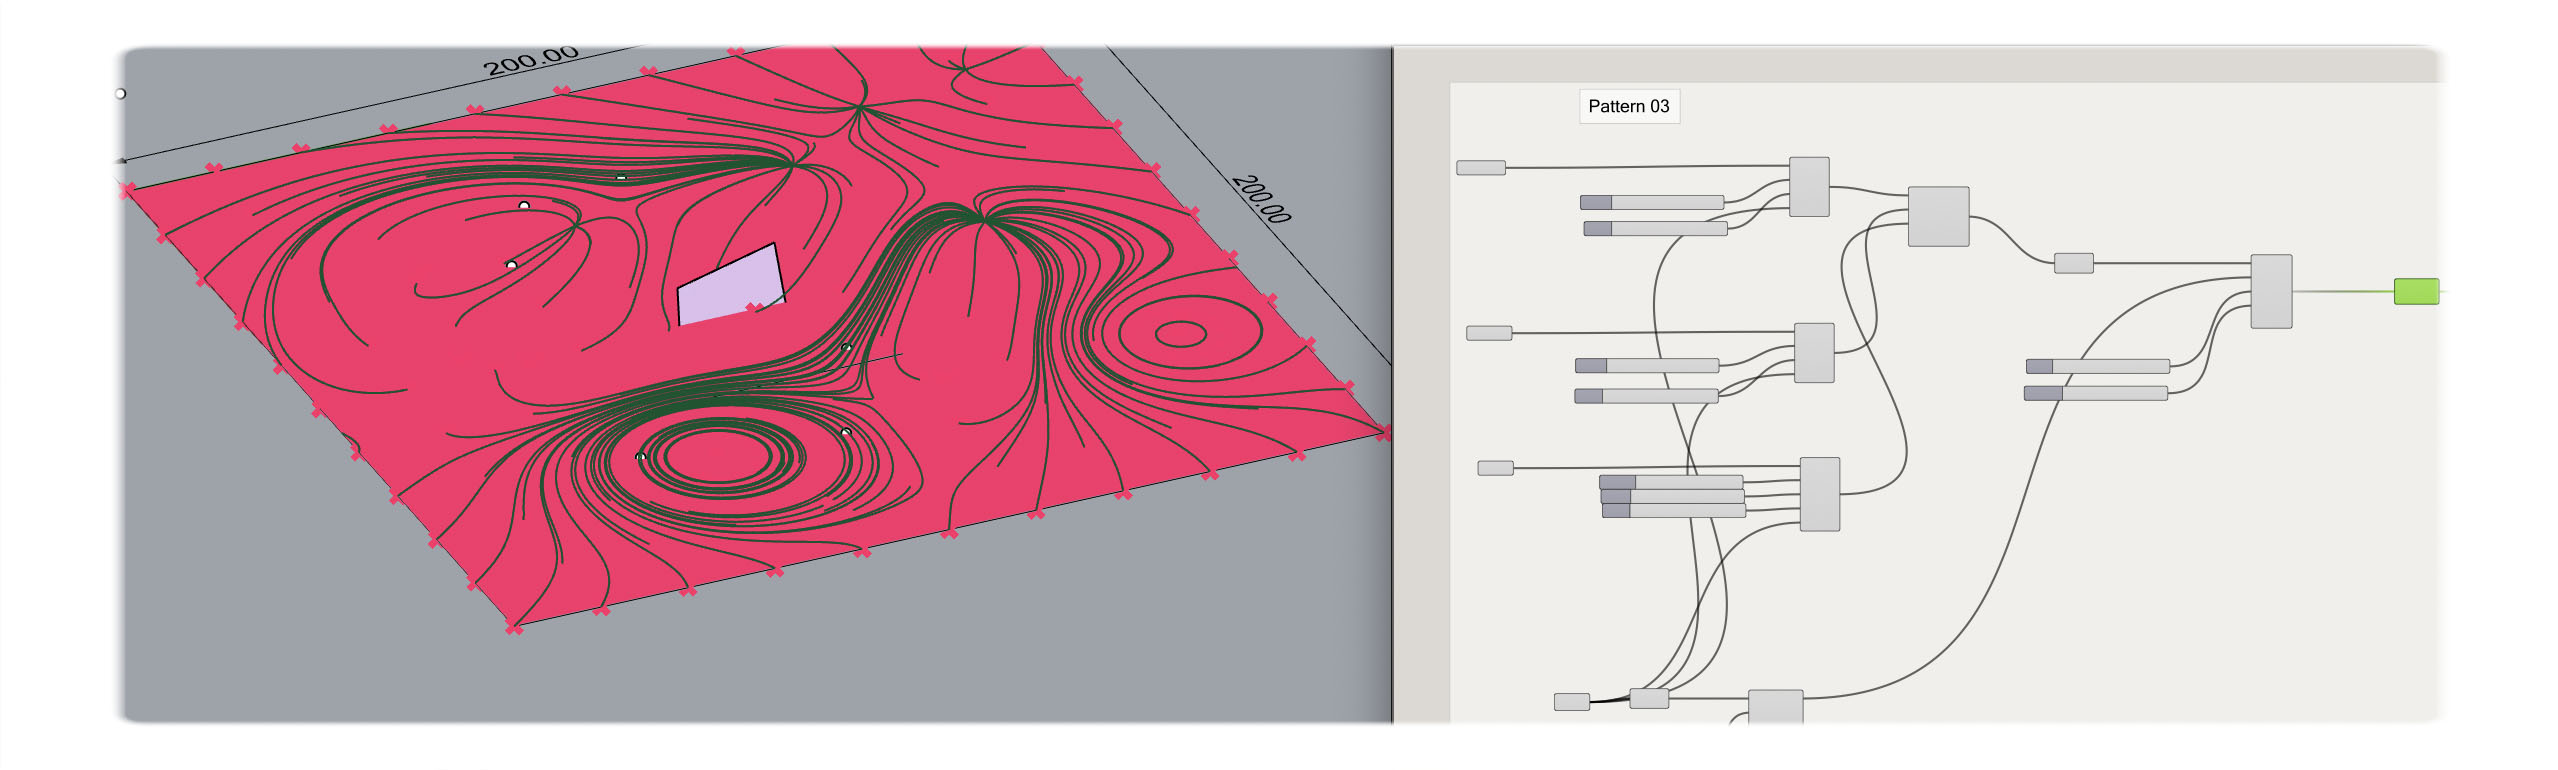
Attractor points: randomly placed points that attracts the polyline
Repulsive point: negatively charged point repulse the lines that will repulse the charge
Spin: will force the lines into a vortex
We can create endless of different pattern variations from just a few points by adjusting this parameters using the number sliders. By further adding points in Rhino we can further make even more complex patterns.
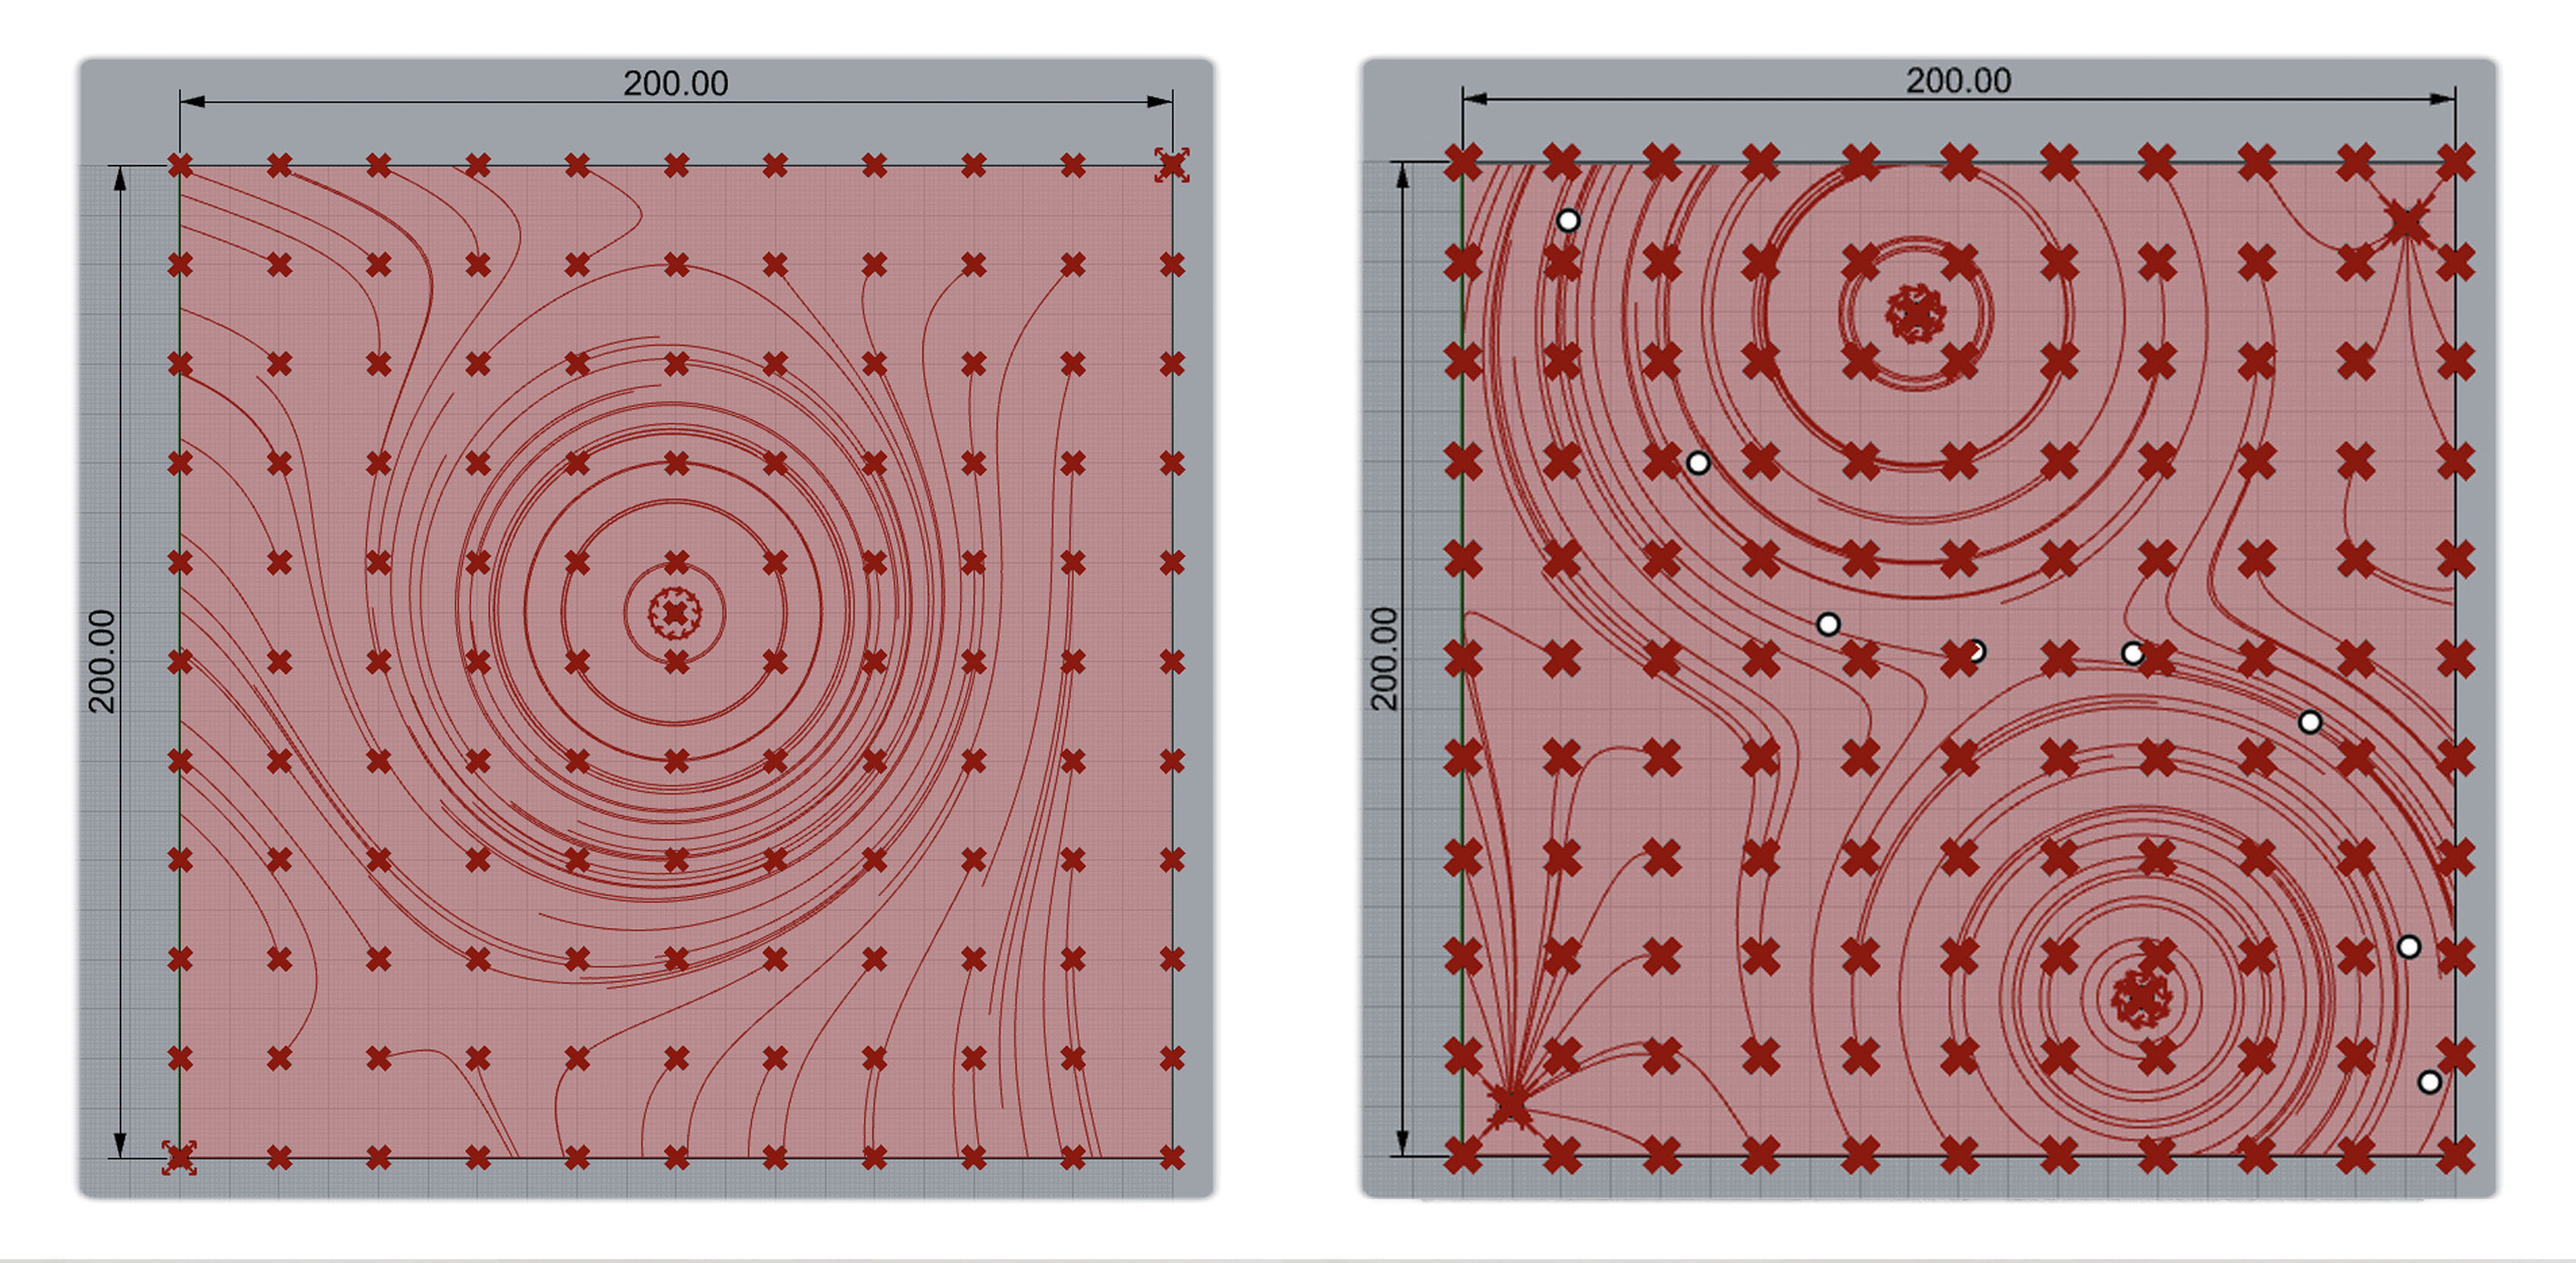 design development
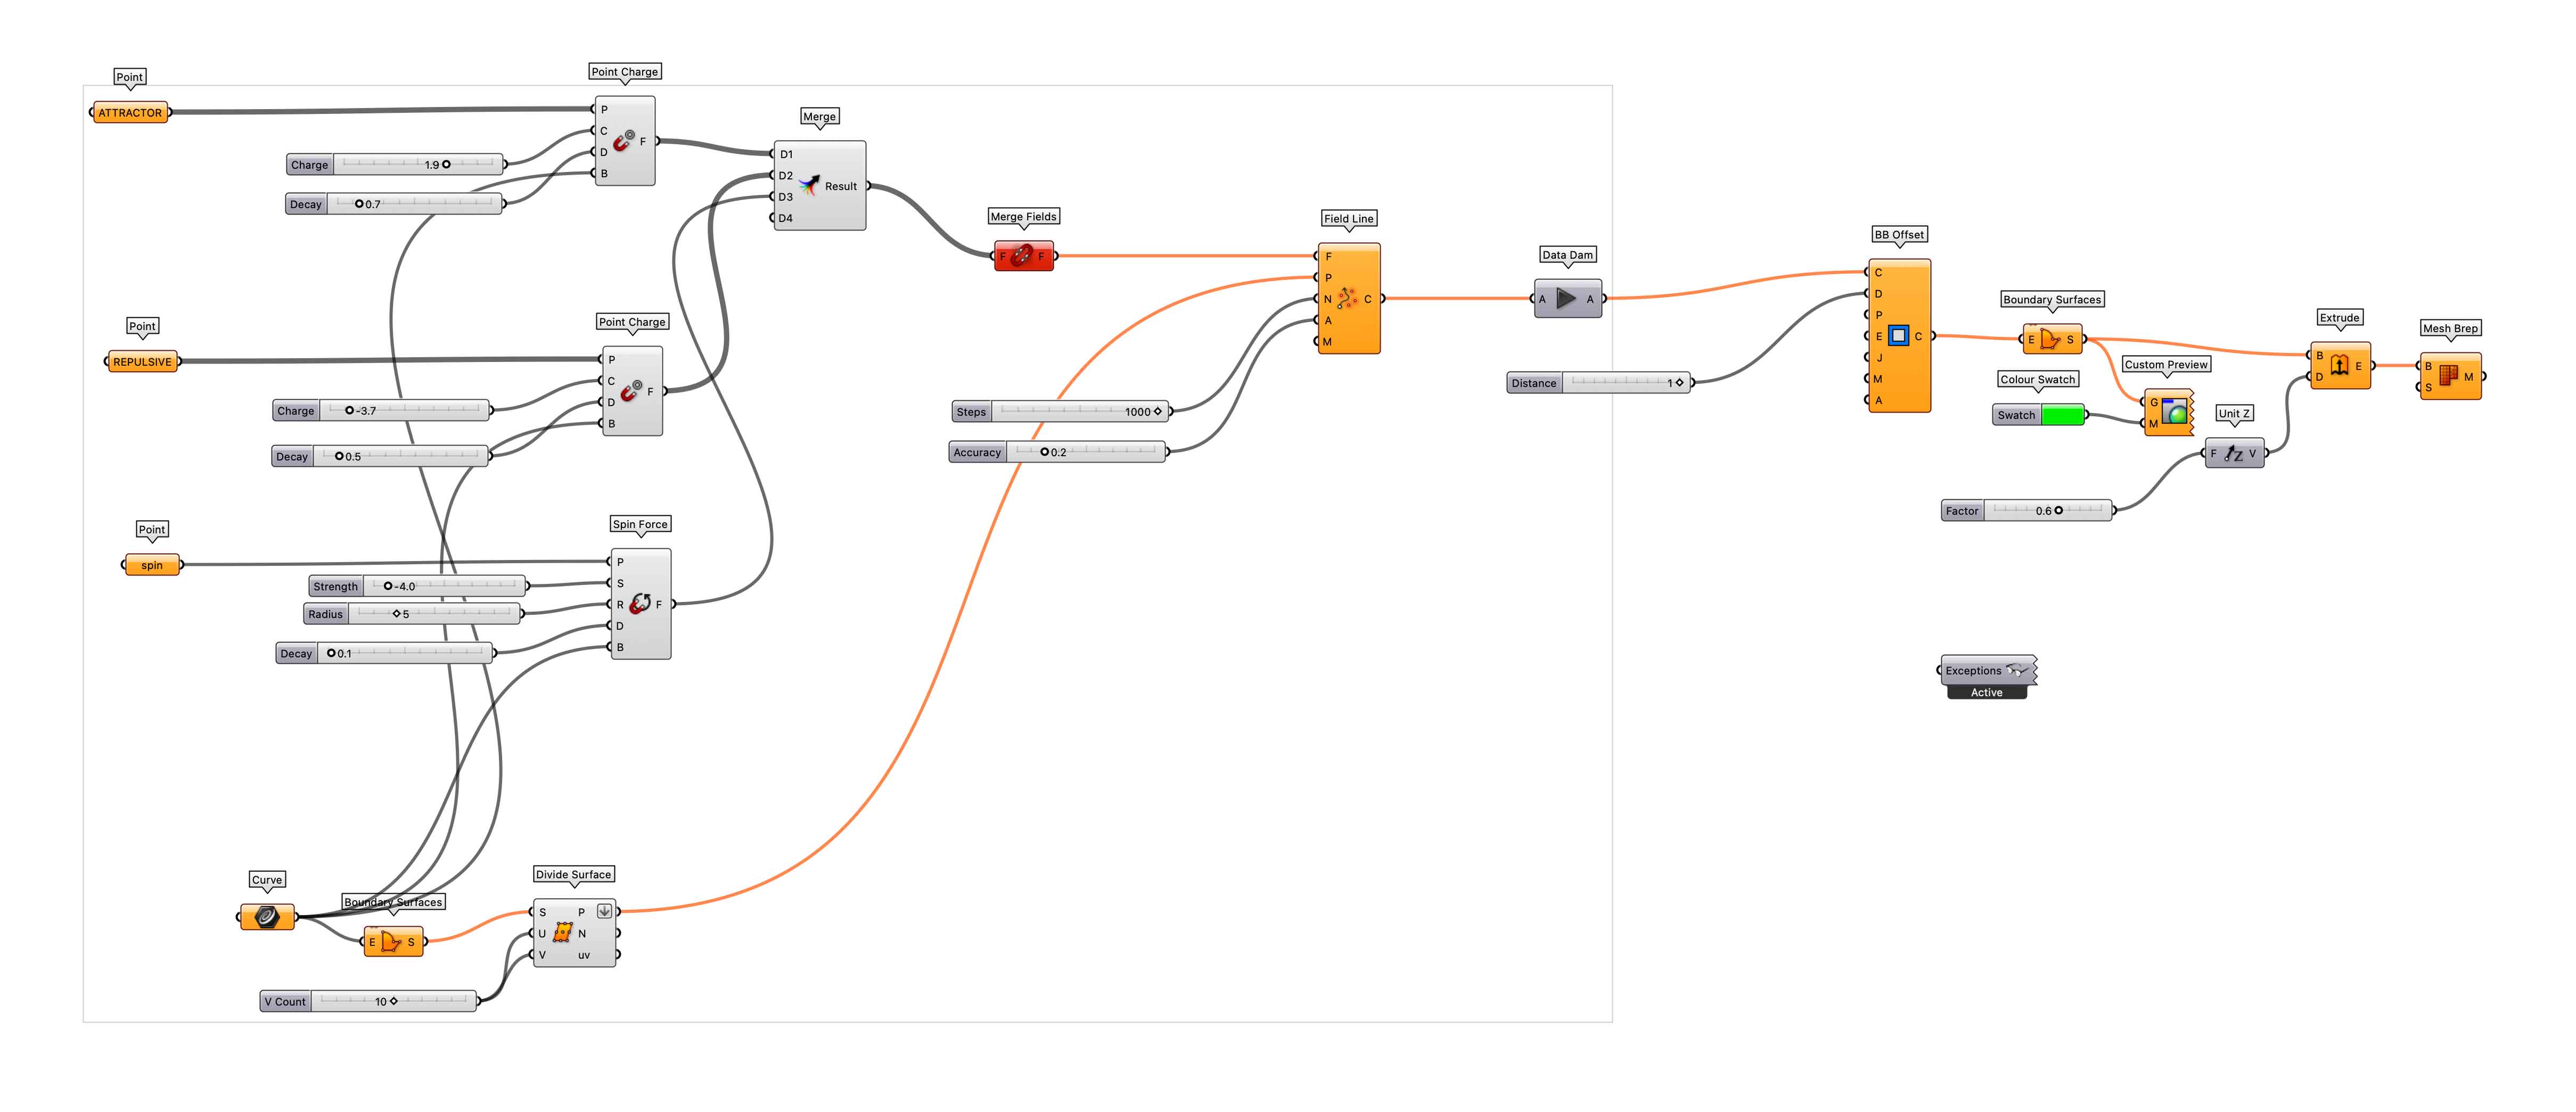 script
 final design
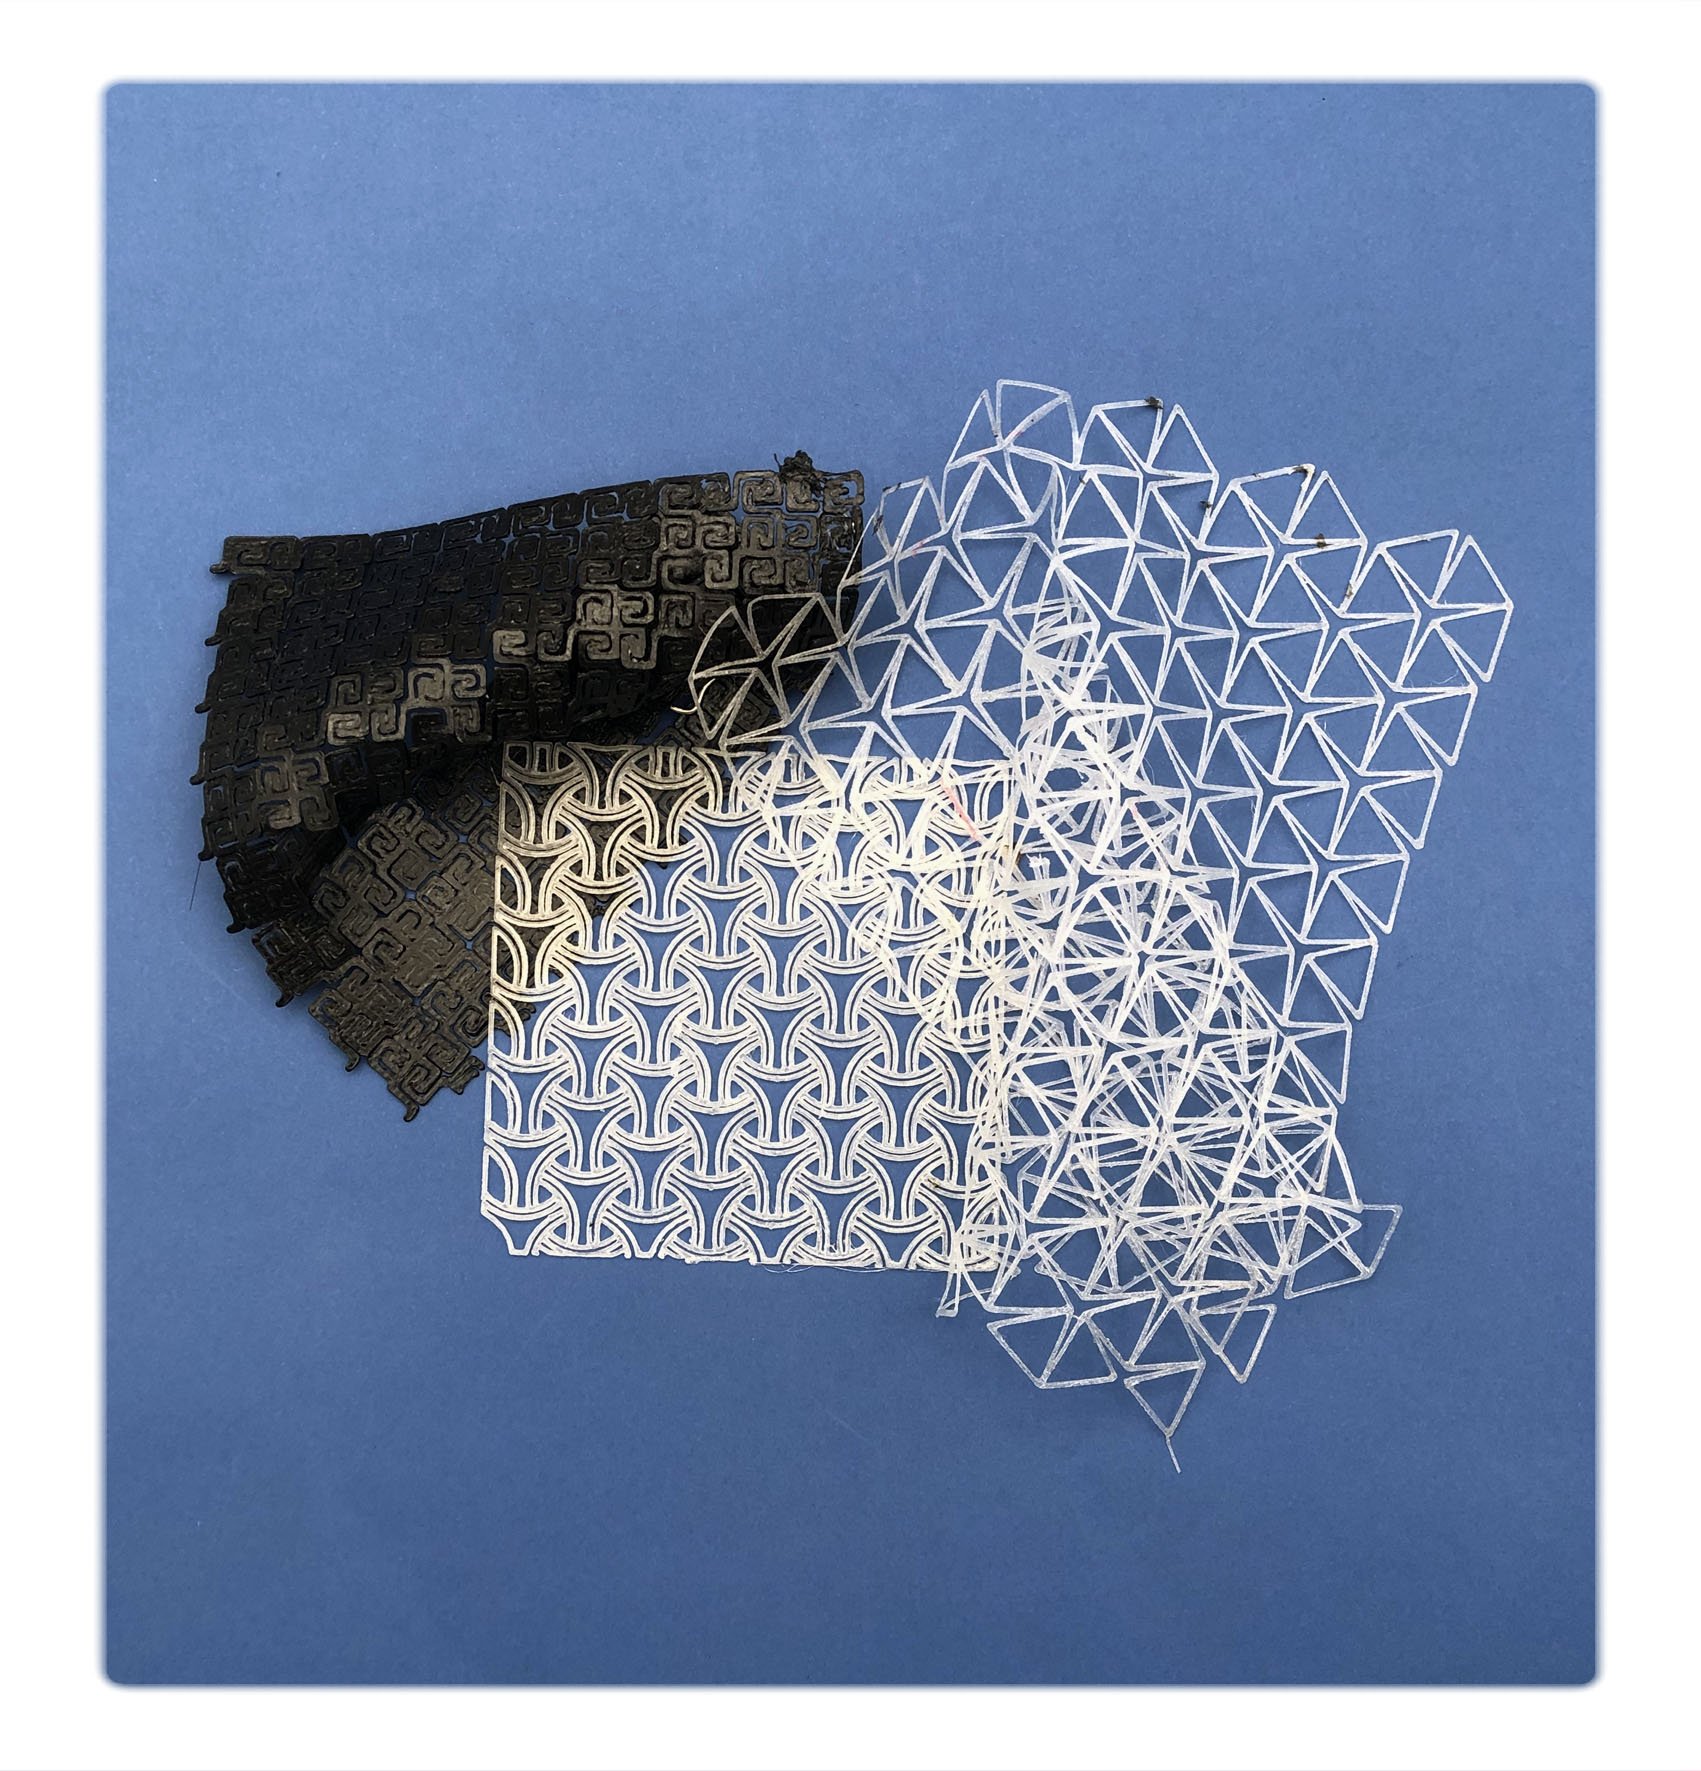
Design and fabrication: Auxetic patterns
For this week I wanted to continue my experimentation from week03 how we can design for stretch and flexibility in solid materials as well as utilize limited work space (laser cutting or 3D printing beds). During my research I got interested in Auxetic materials, which is structures, that exhibit an unexpected behaviour when they are subjected to mechanical stresses and strains.
When they’re stretched in the longitudinal direction, they become thicker in one or several of the perpendicular width-wise directions.
sampleA
 research paper published by Carnegie Mellon University
Since this types of patterns can be quite mind bugging to understand the logic around Grasshopper was a great tool to experiment and predict what result the different geometries would give.

I started with a script from Eugenio that I modified by removing the planes and worked only with print lines in order to maximize stretch and minimize printing time. We can use the number slider "tringualar" to adjust the proportions of the geometry and the "subtraction" slider to visualize exactly how much stretch the geometry will give.
 scrip:
Conclusion Grasshopper: Designing with Grasshopper is very different then what we are used to in traditional design. We are designing a certain set of rules or behaviours rather then a specific "product". Within the specified rules we can create endless of behaviours.
Even though it takes some time to wrap your head around the logic in Grasshopper we discovered that its acctually possible to create pretty unique pieces by building and tweaking the rules from already existing scripts. I think this is, atleast for me the best way to start learing Grasshopper.
 final design
print settings:
Nozzle: 0.4
Temperature: 230° (bed 60°)
Printing speed: 30
Layers: 2 (0.2mm)
Material: TPU
Comments: The fabric is very stretchy and have a nice lace like appearance. The print test was very fragile due to under extrusion. It might be worth trying printing the design in 3 layers.
sampleB
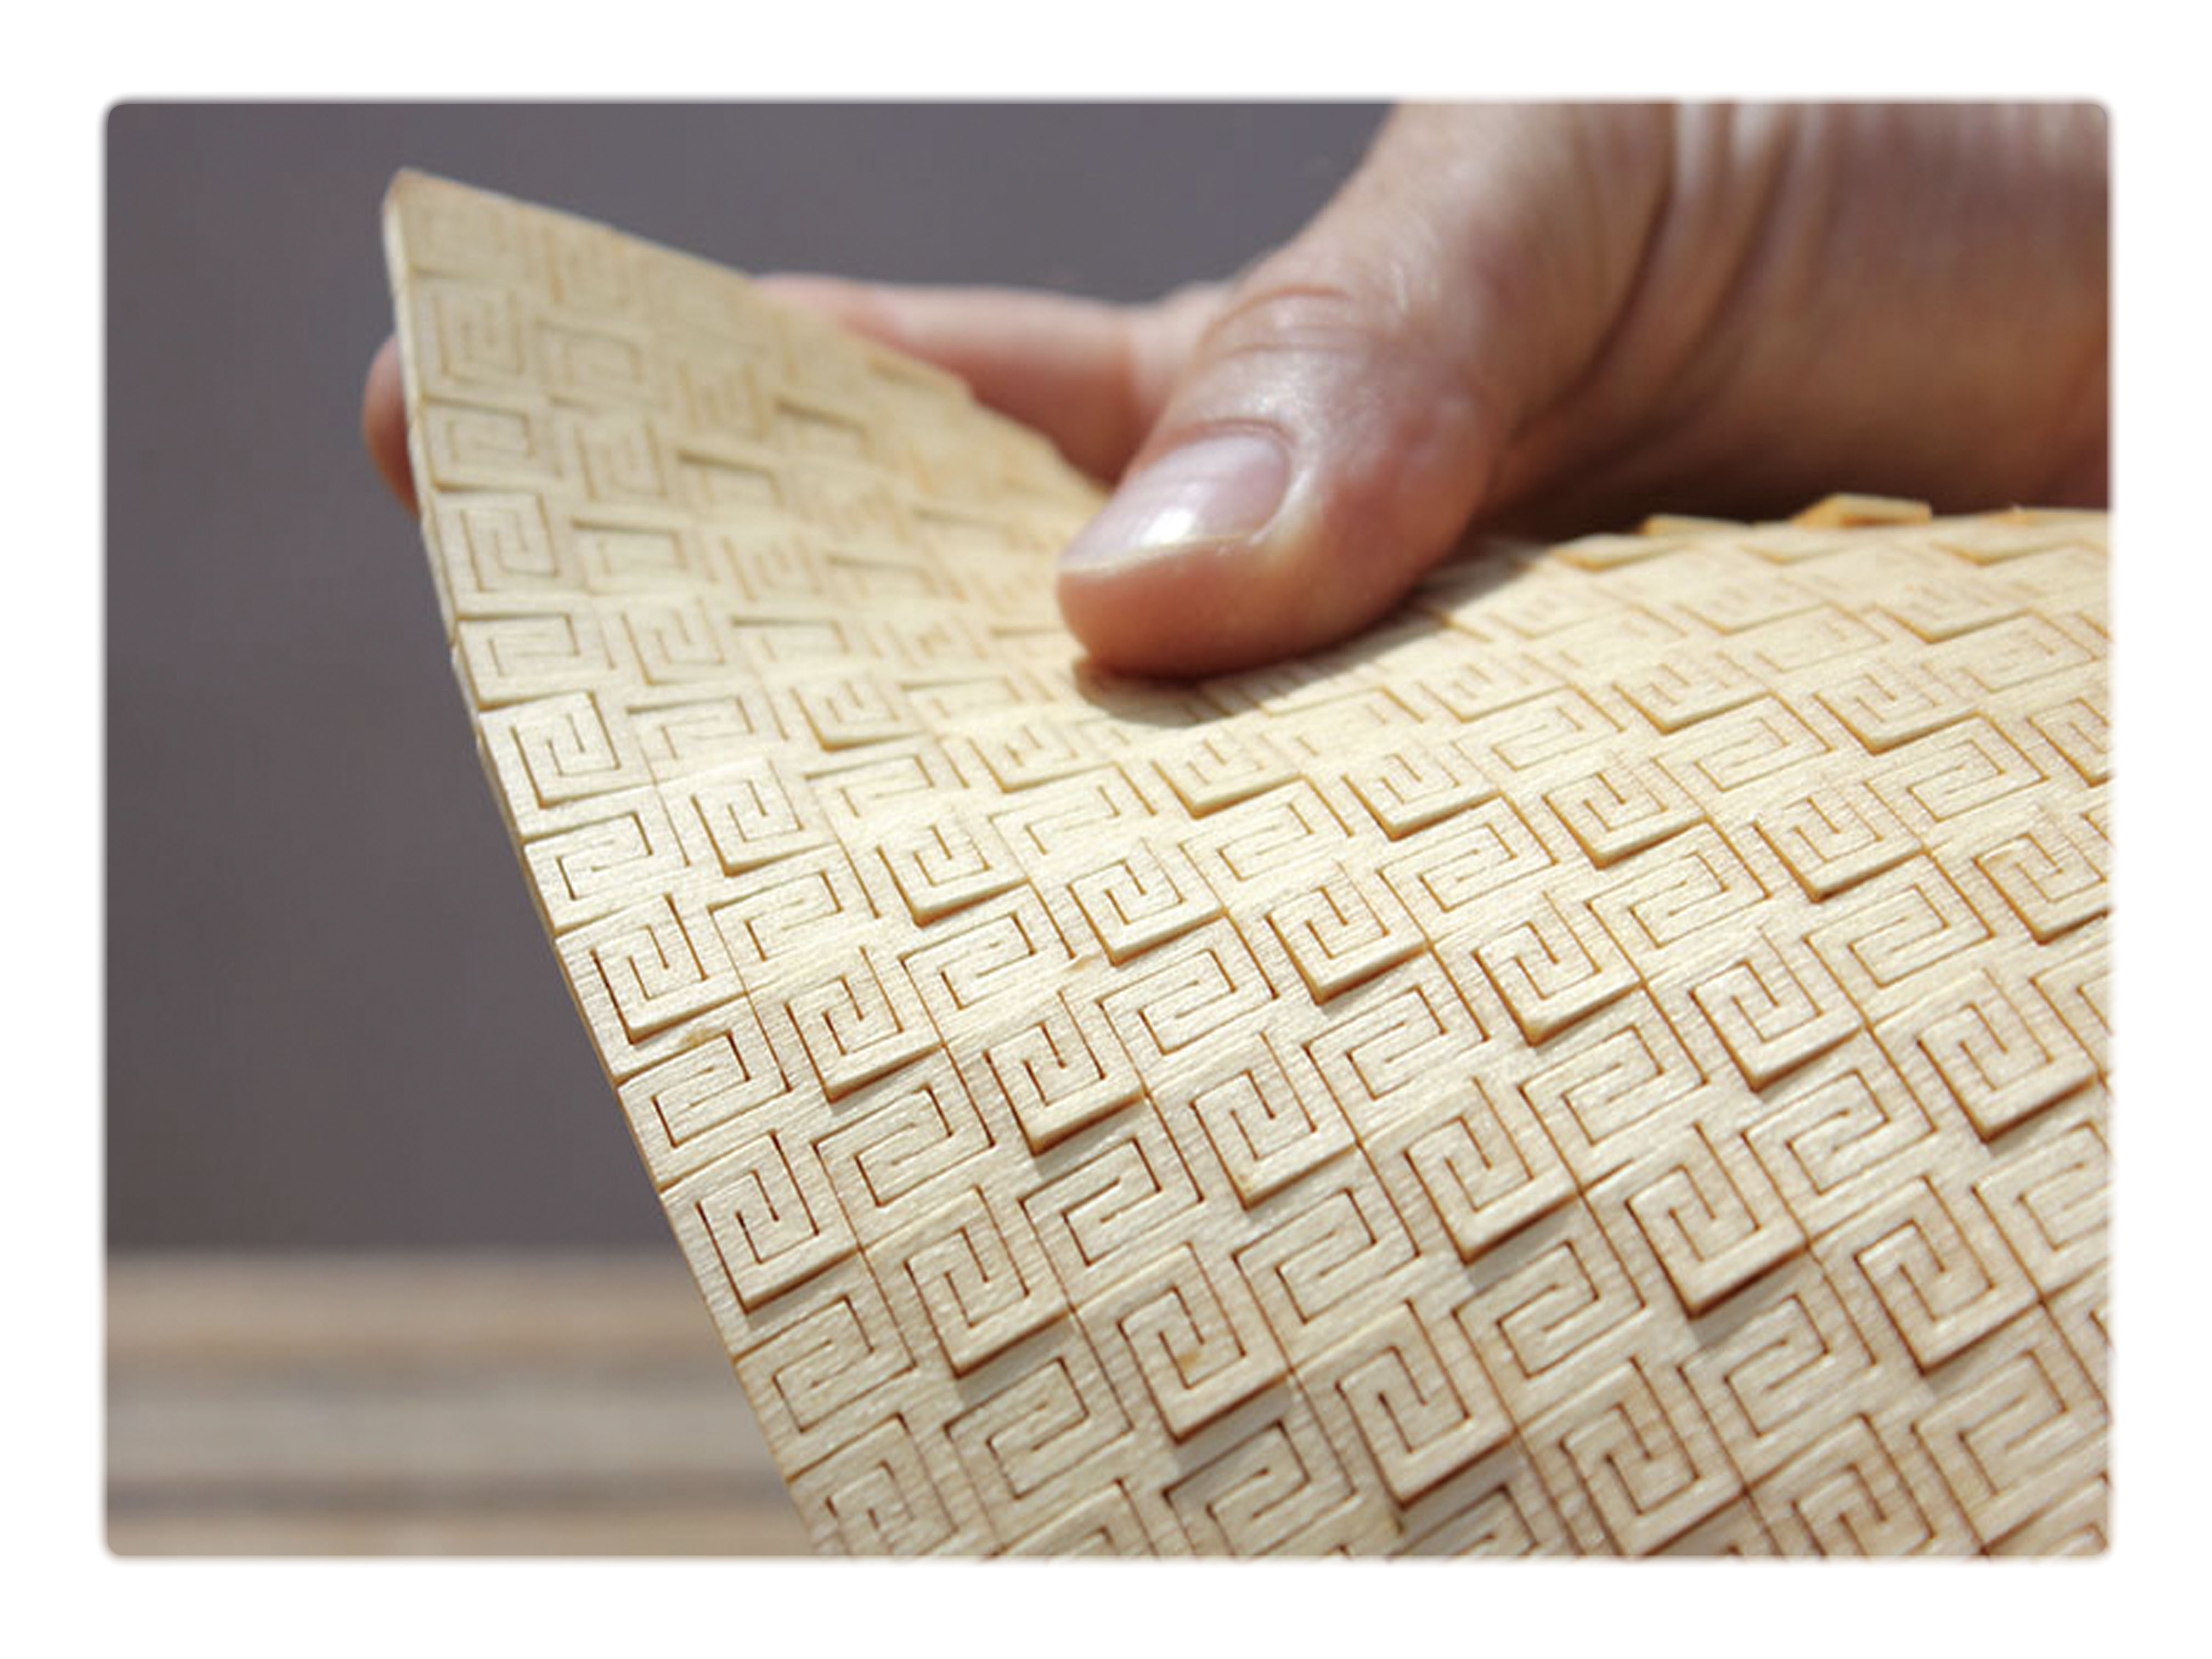 koFAKTORlab
This design was inspired by a wood kerfing pattern developed by koFAKTORlab that I modifield for better streatch properties
 final design download here:
print settings:
Nozzle: 1mm
Temperature: 220° (bed 50°)
Printing speed: 40
Layers: 2 (0.3mm)
Material: TPU
Comments: The design acctually turned out to be a lot more stretchy than I expected, due to its closed geometry it have an dramatic visaul effect when stretched.
Some of the lines was gluing together when printed for better result a smaller nozzle would be a better option
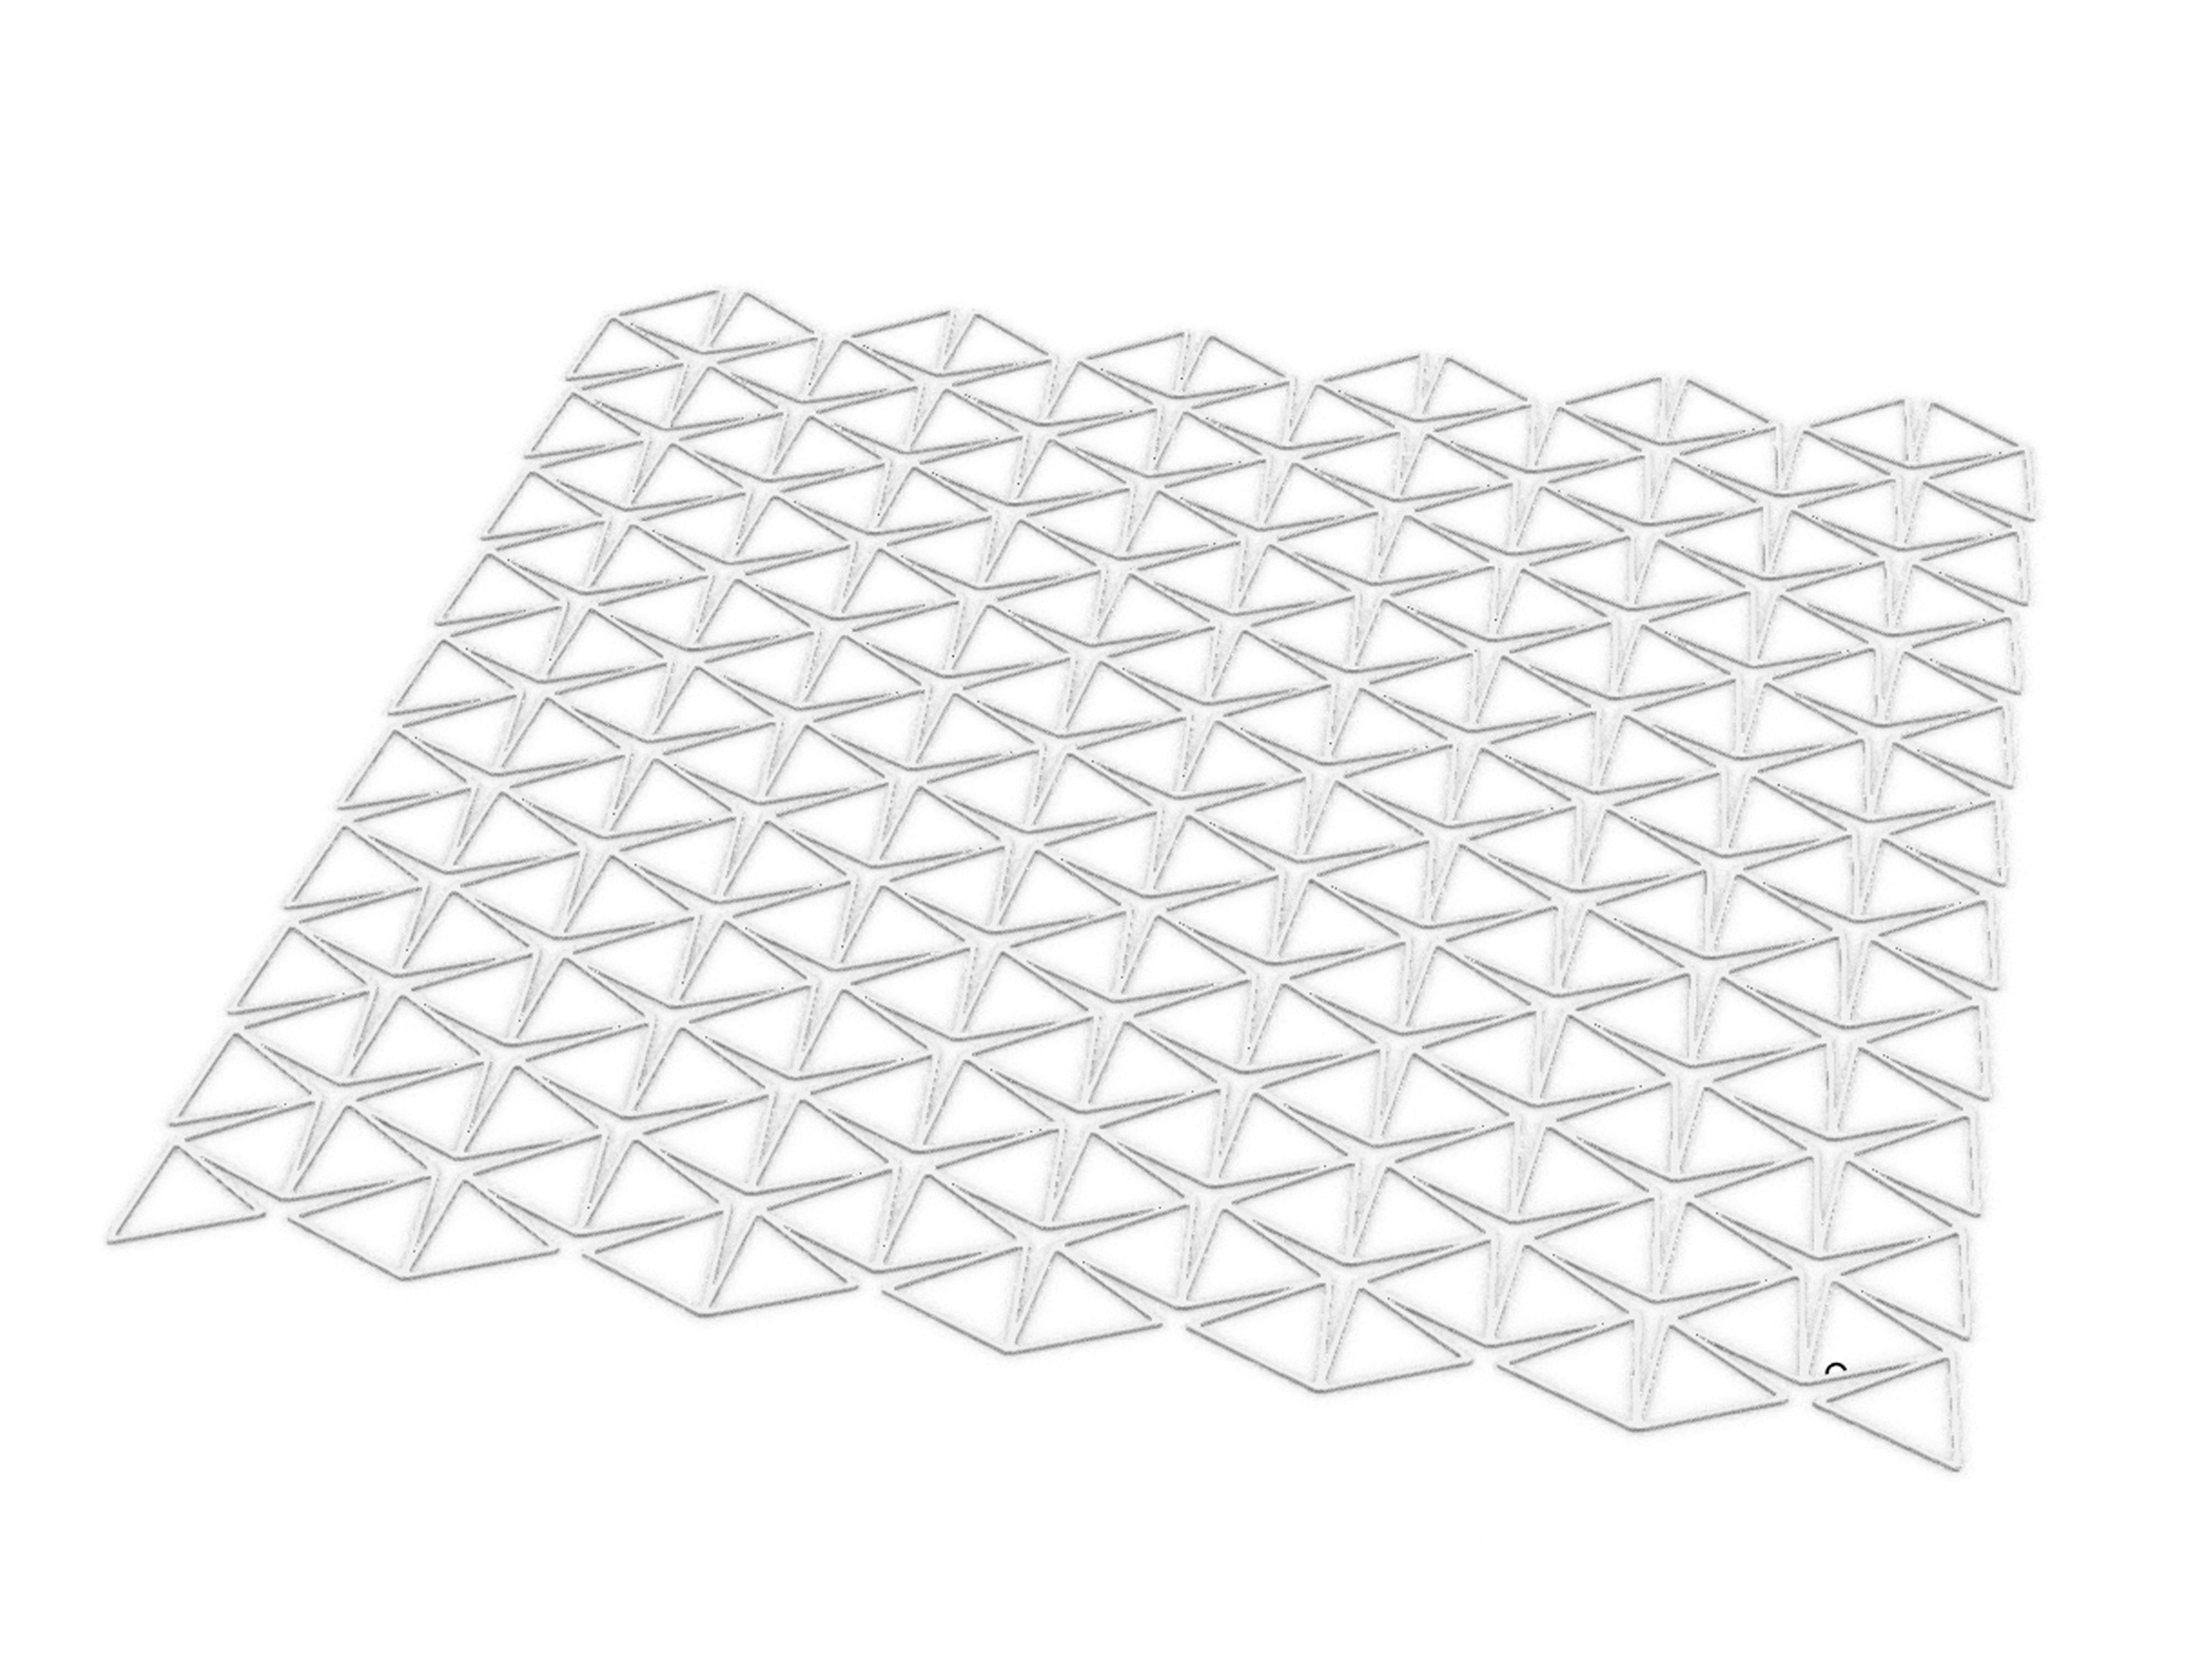
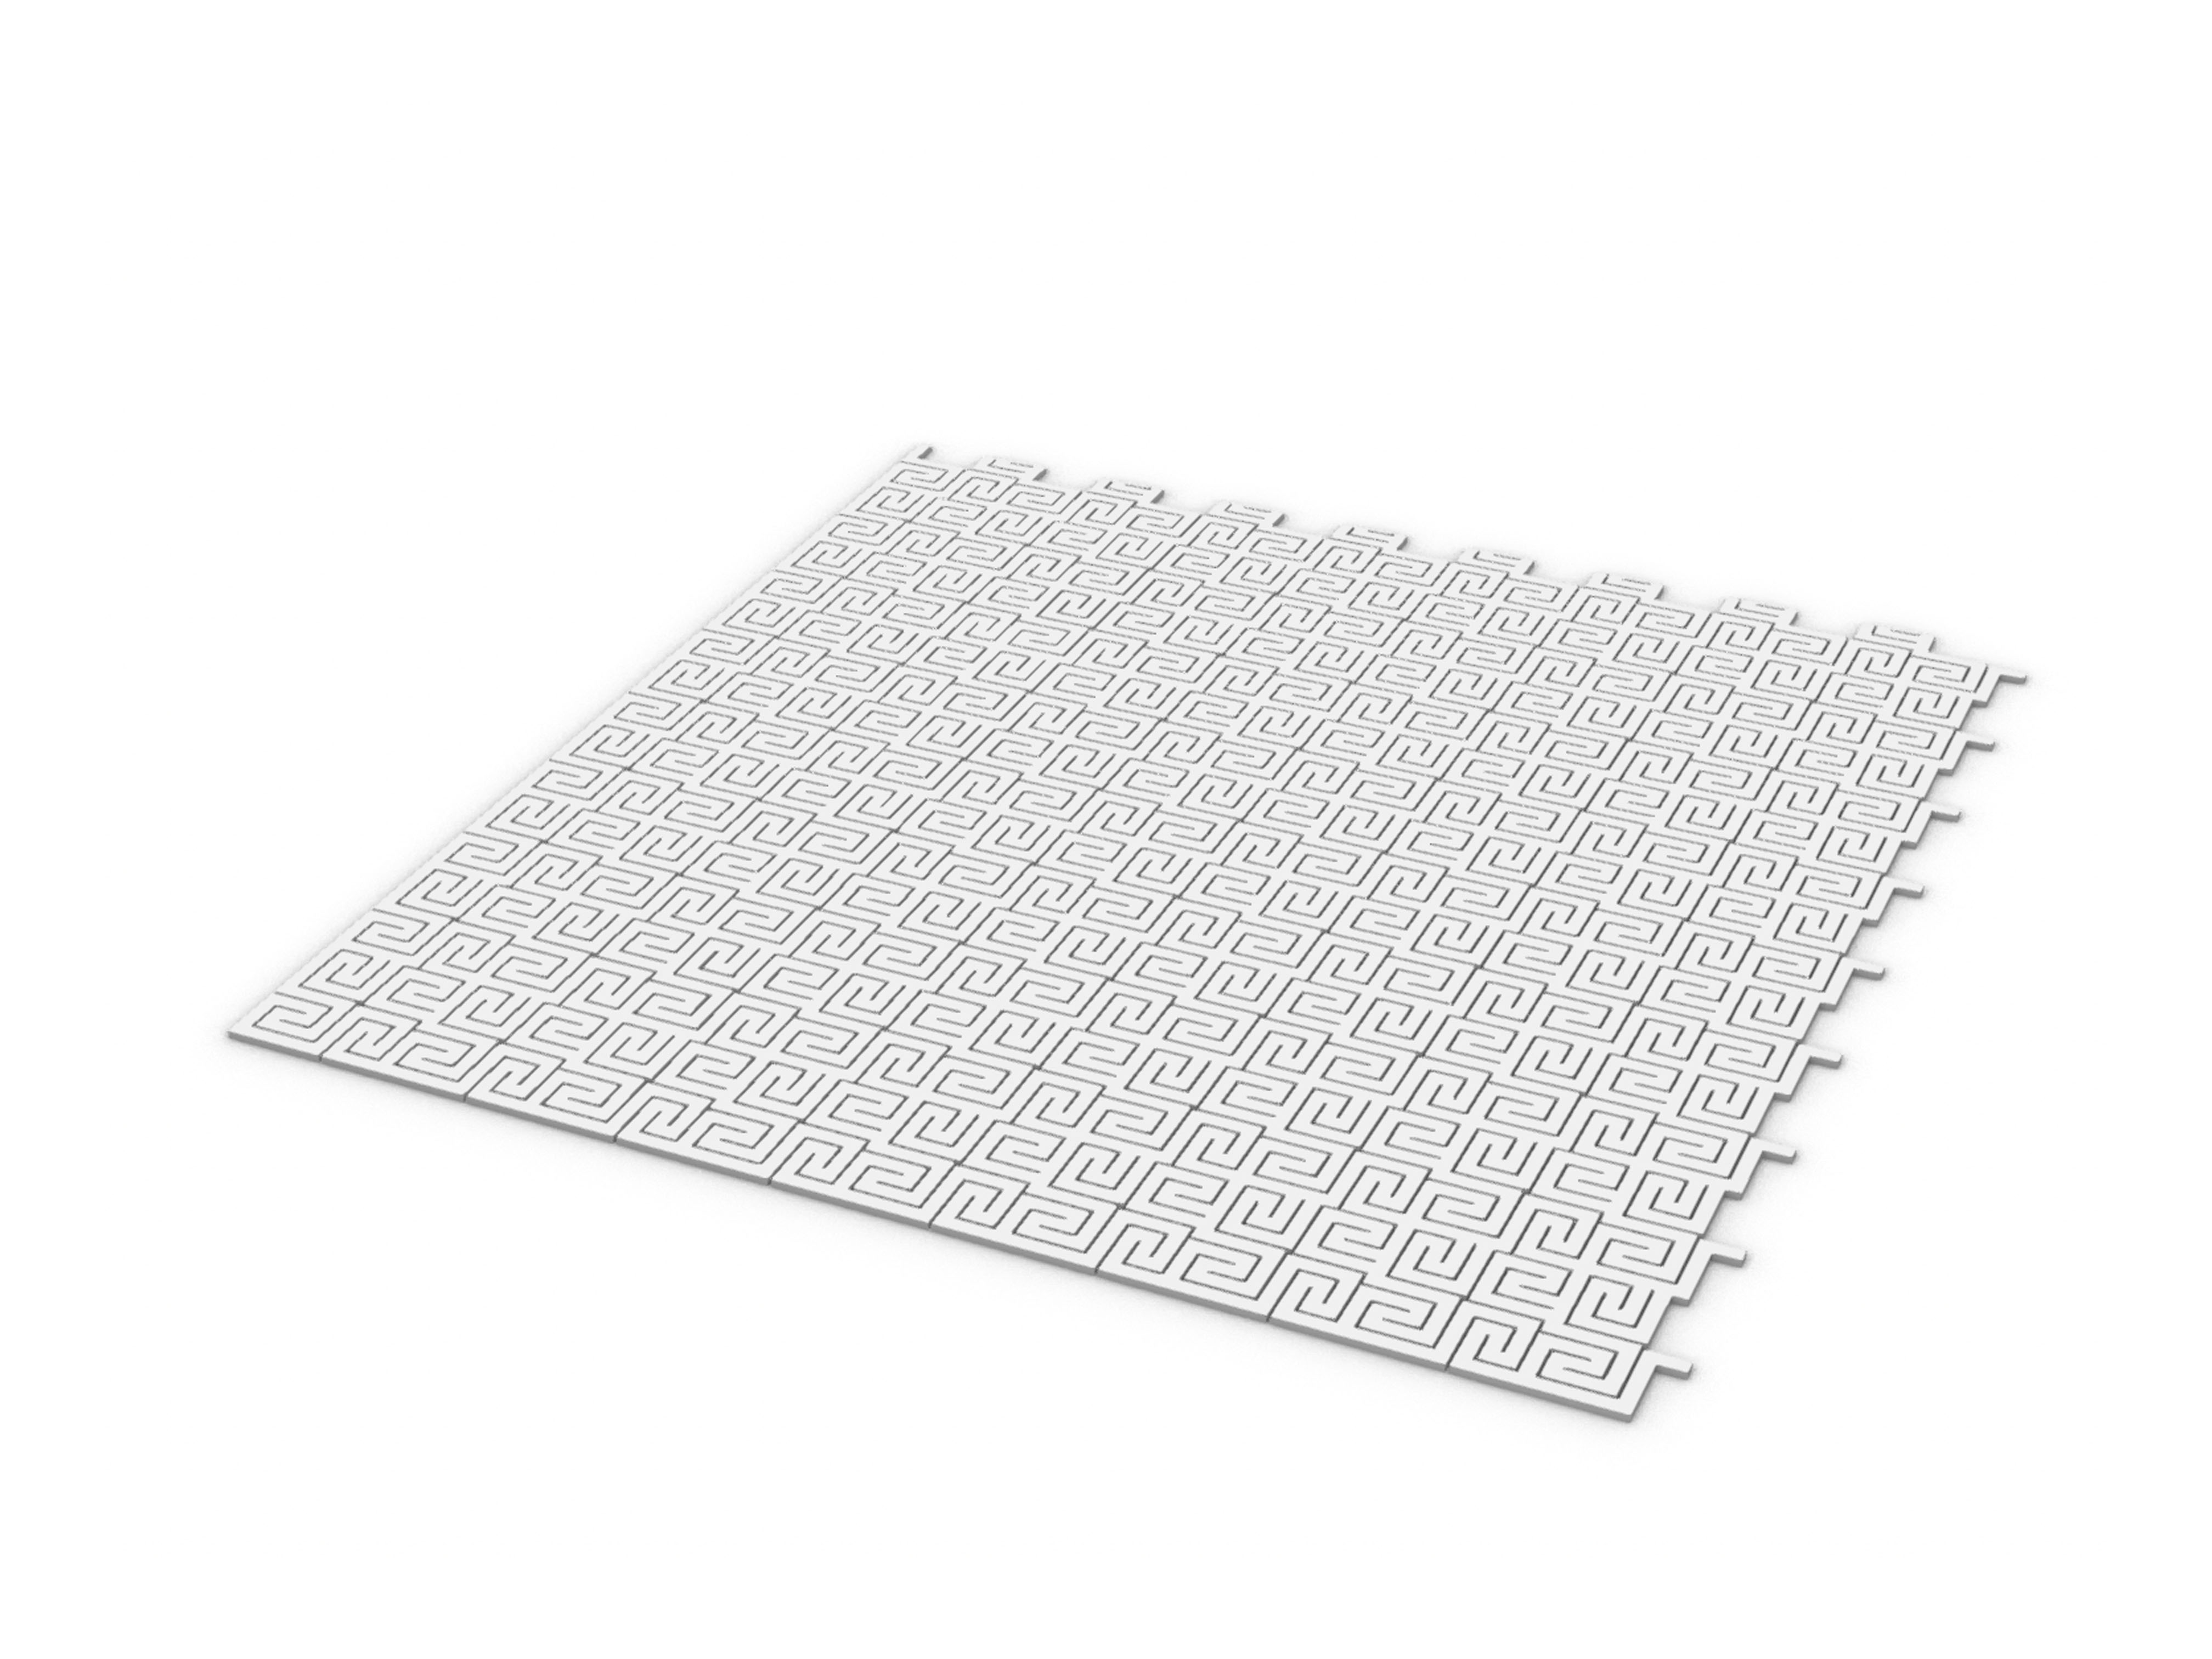
sampleC
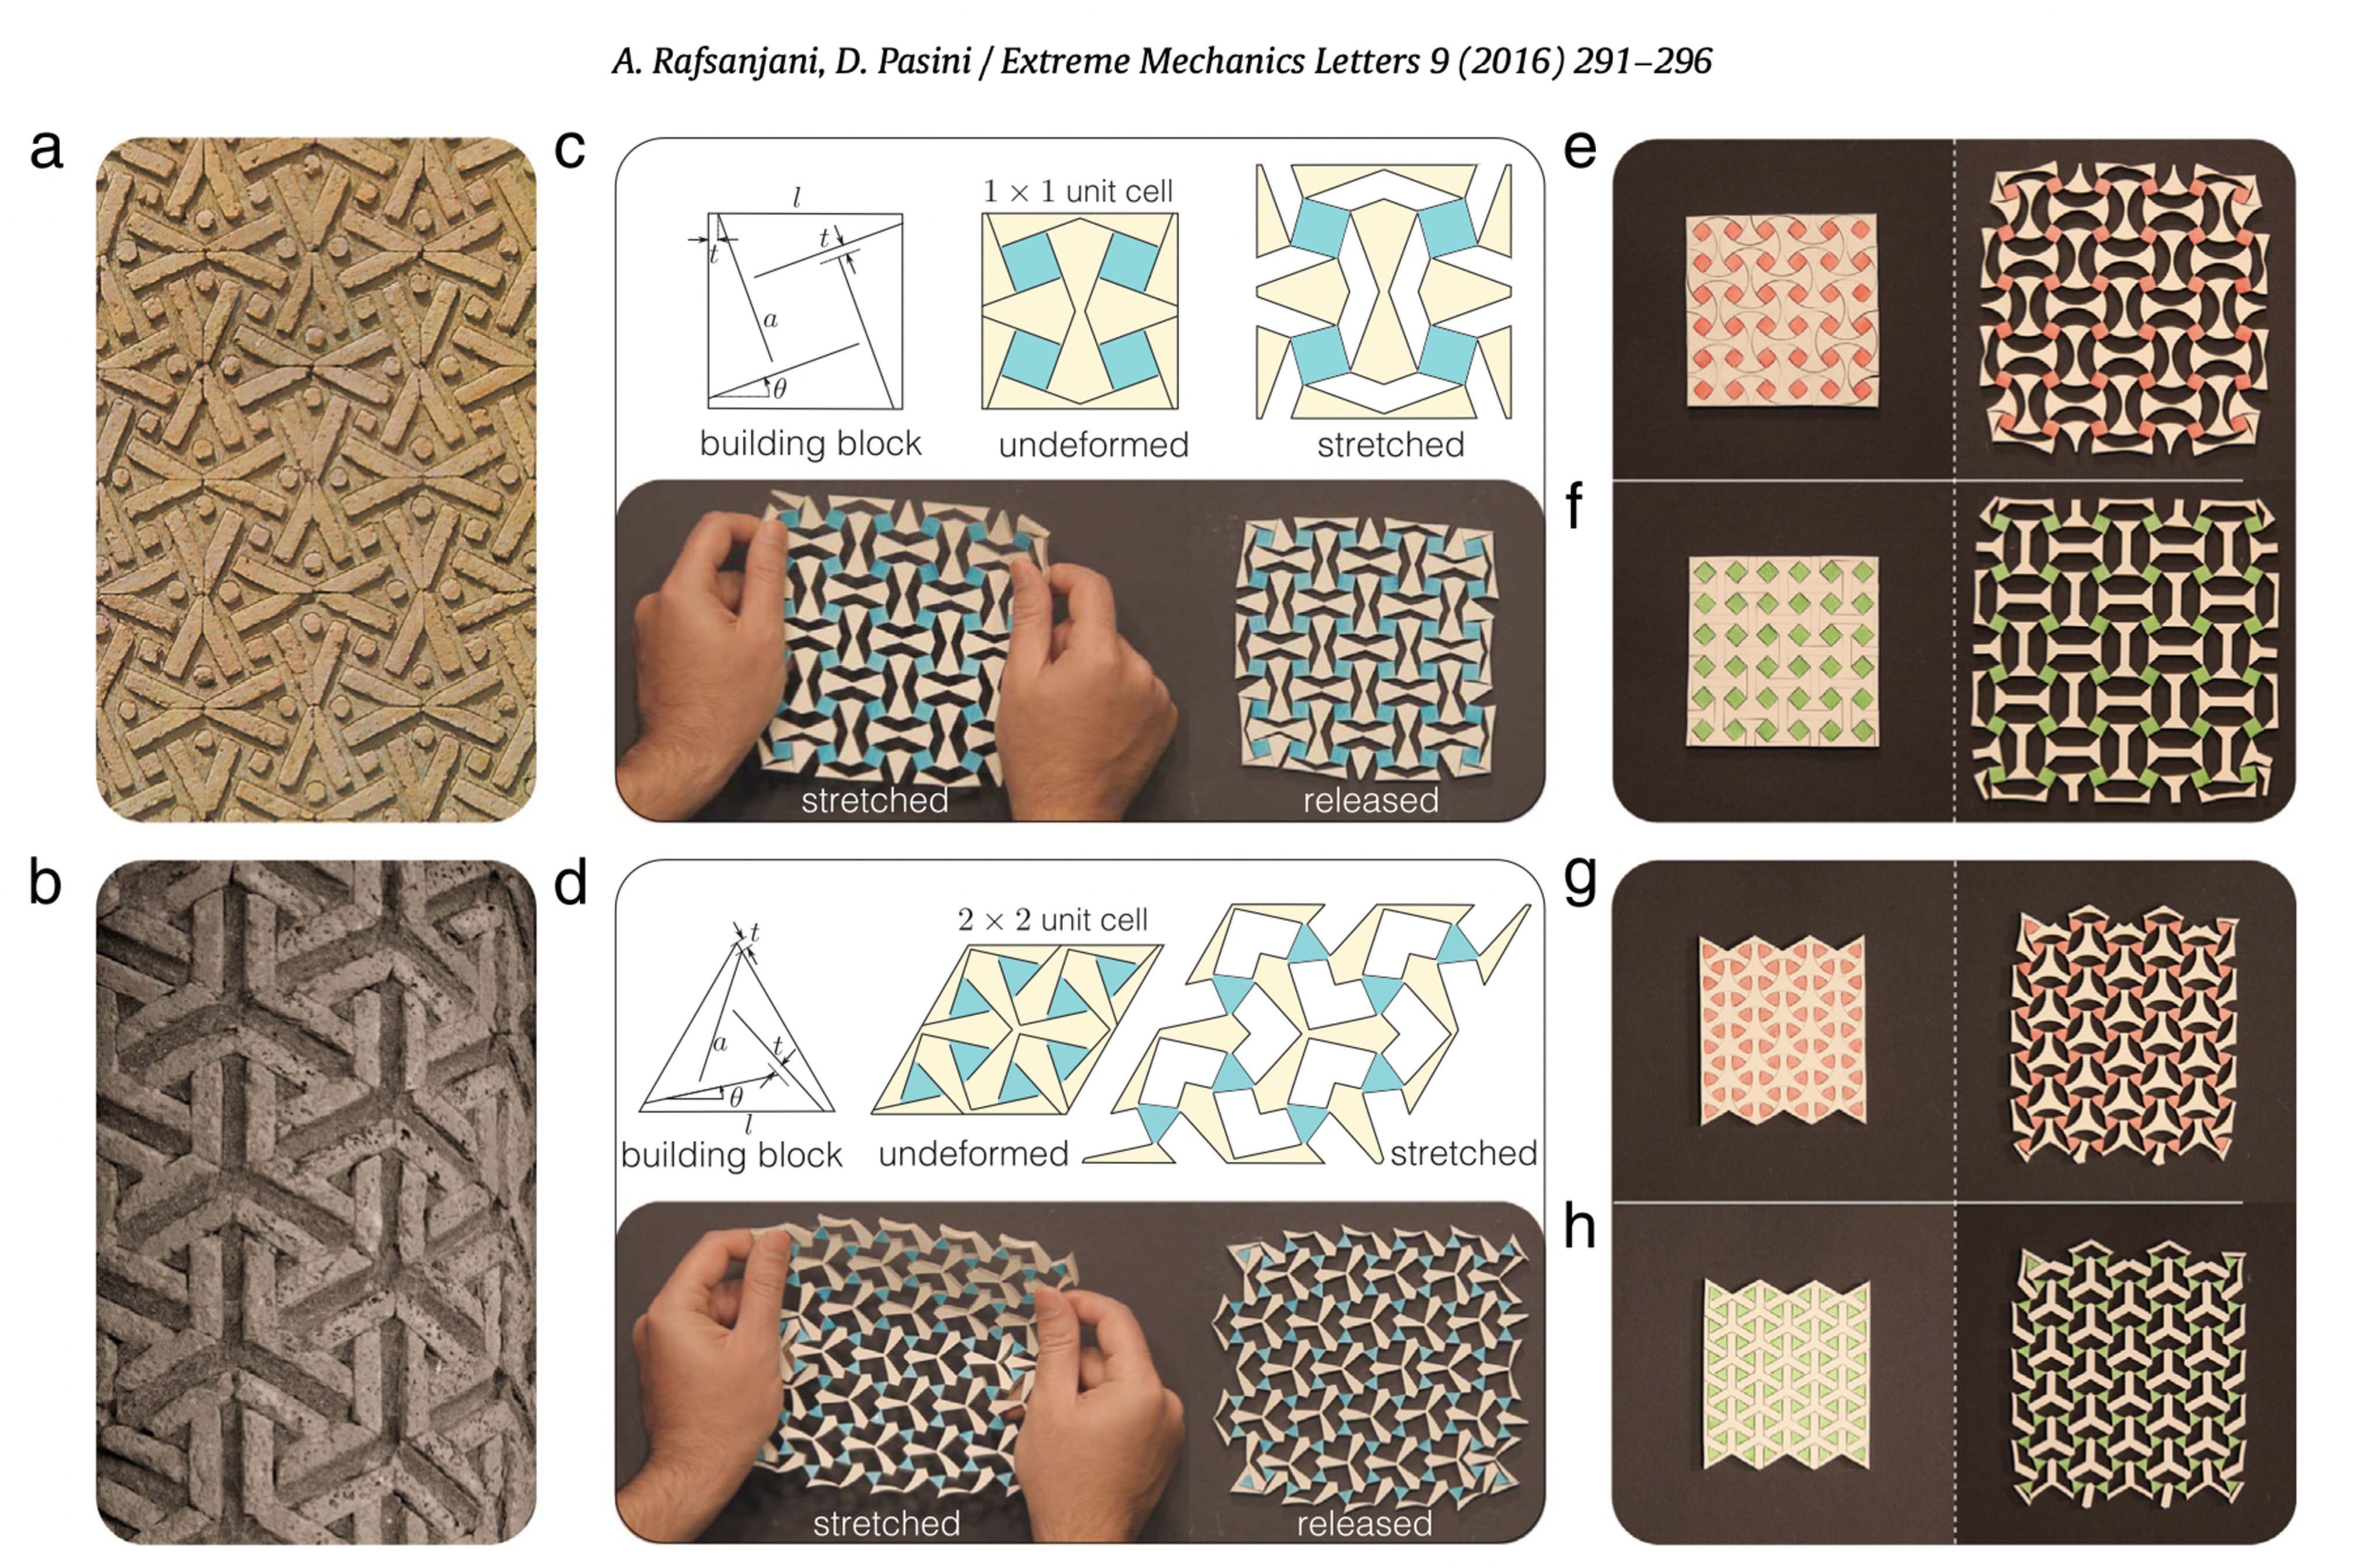 research paper published by Harvard University _
Reworked pattern from a Harvard research project
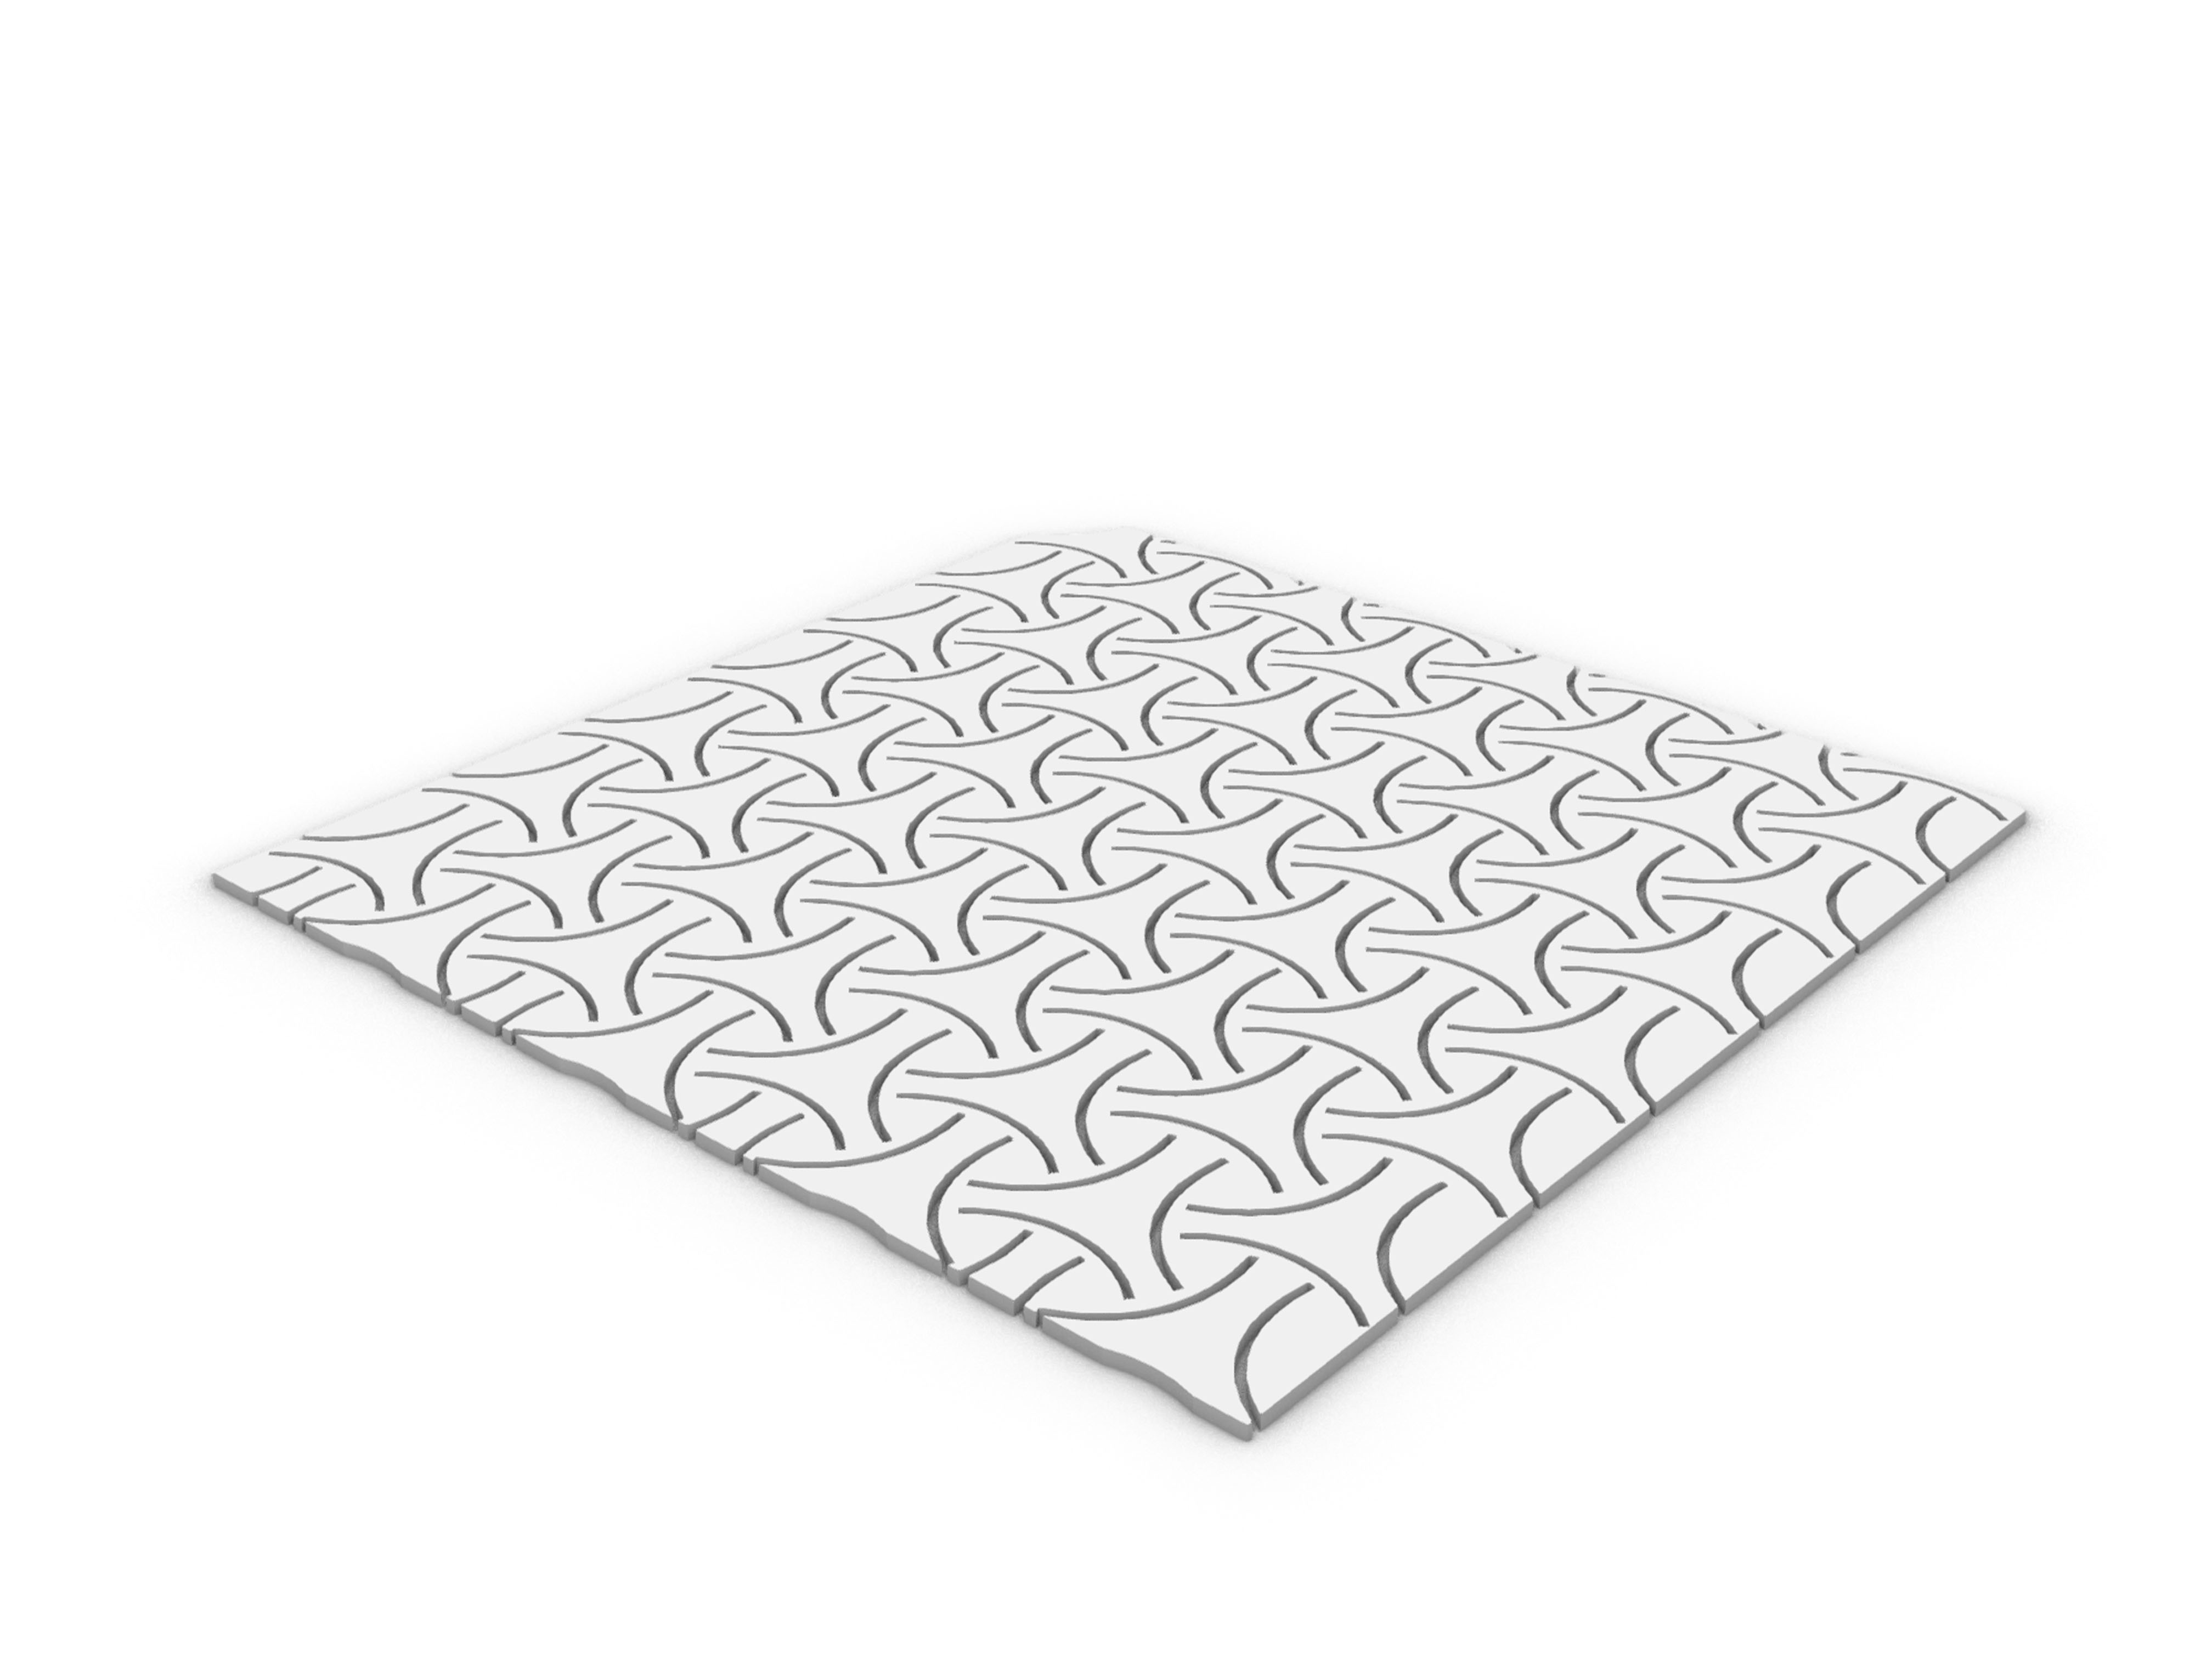 _Final design
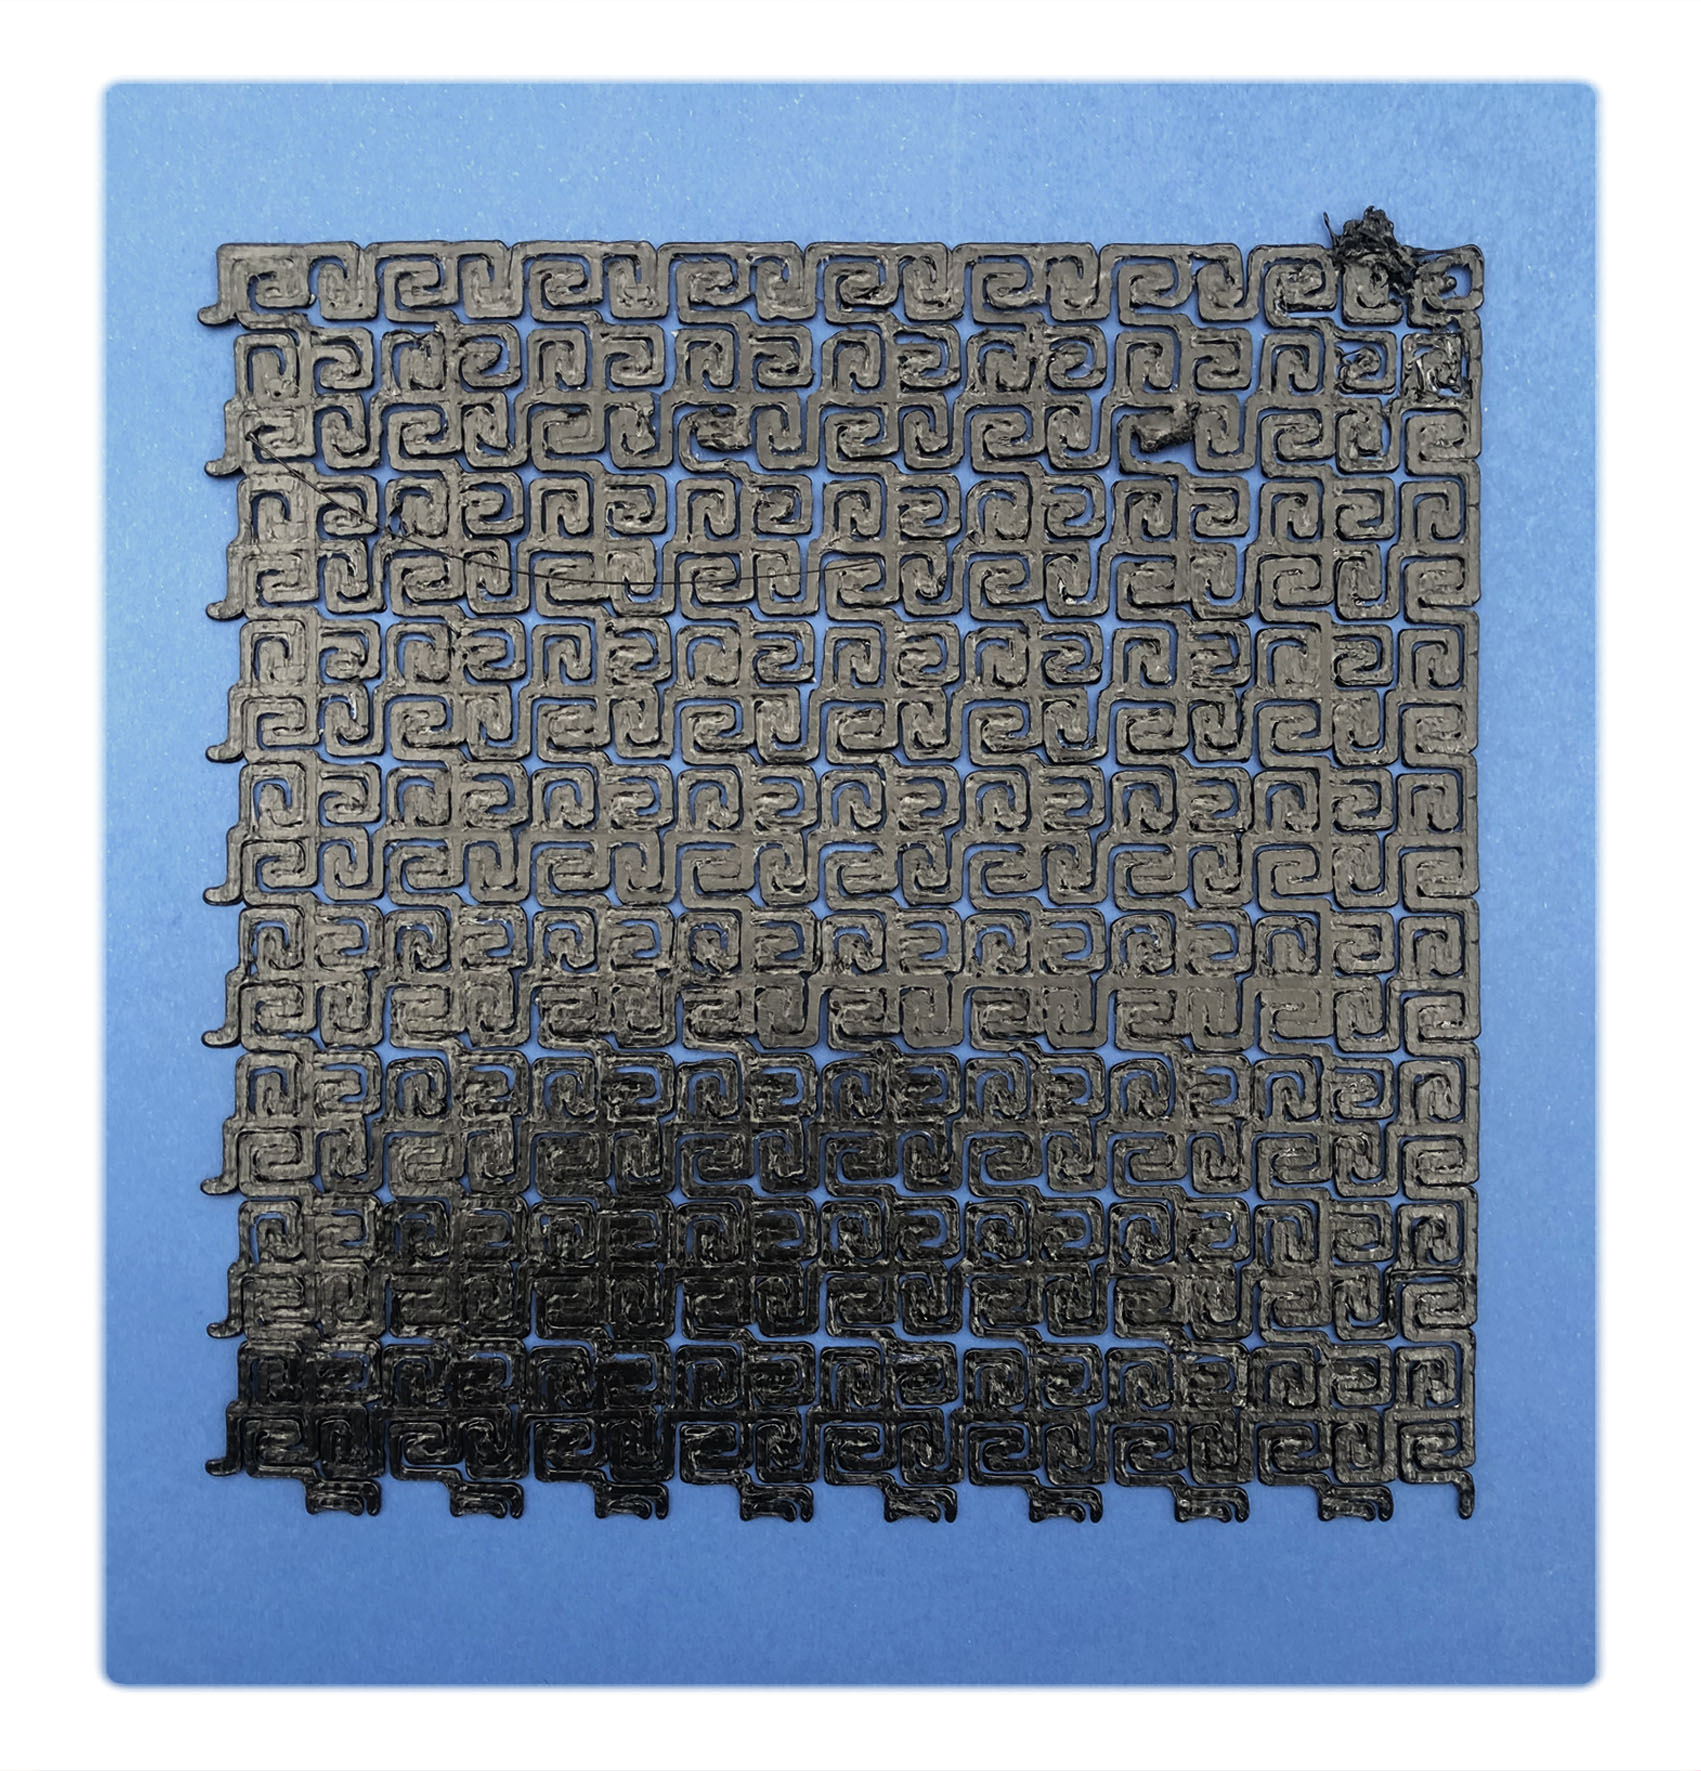
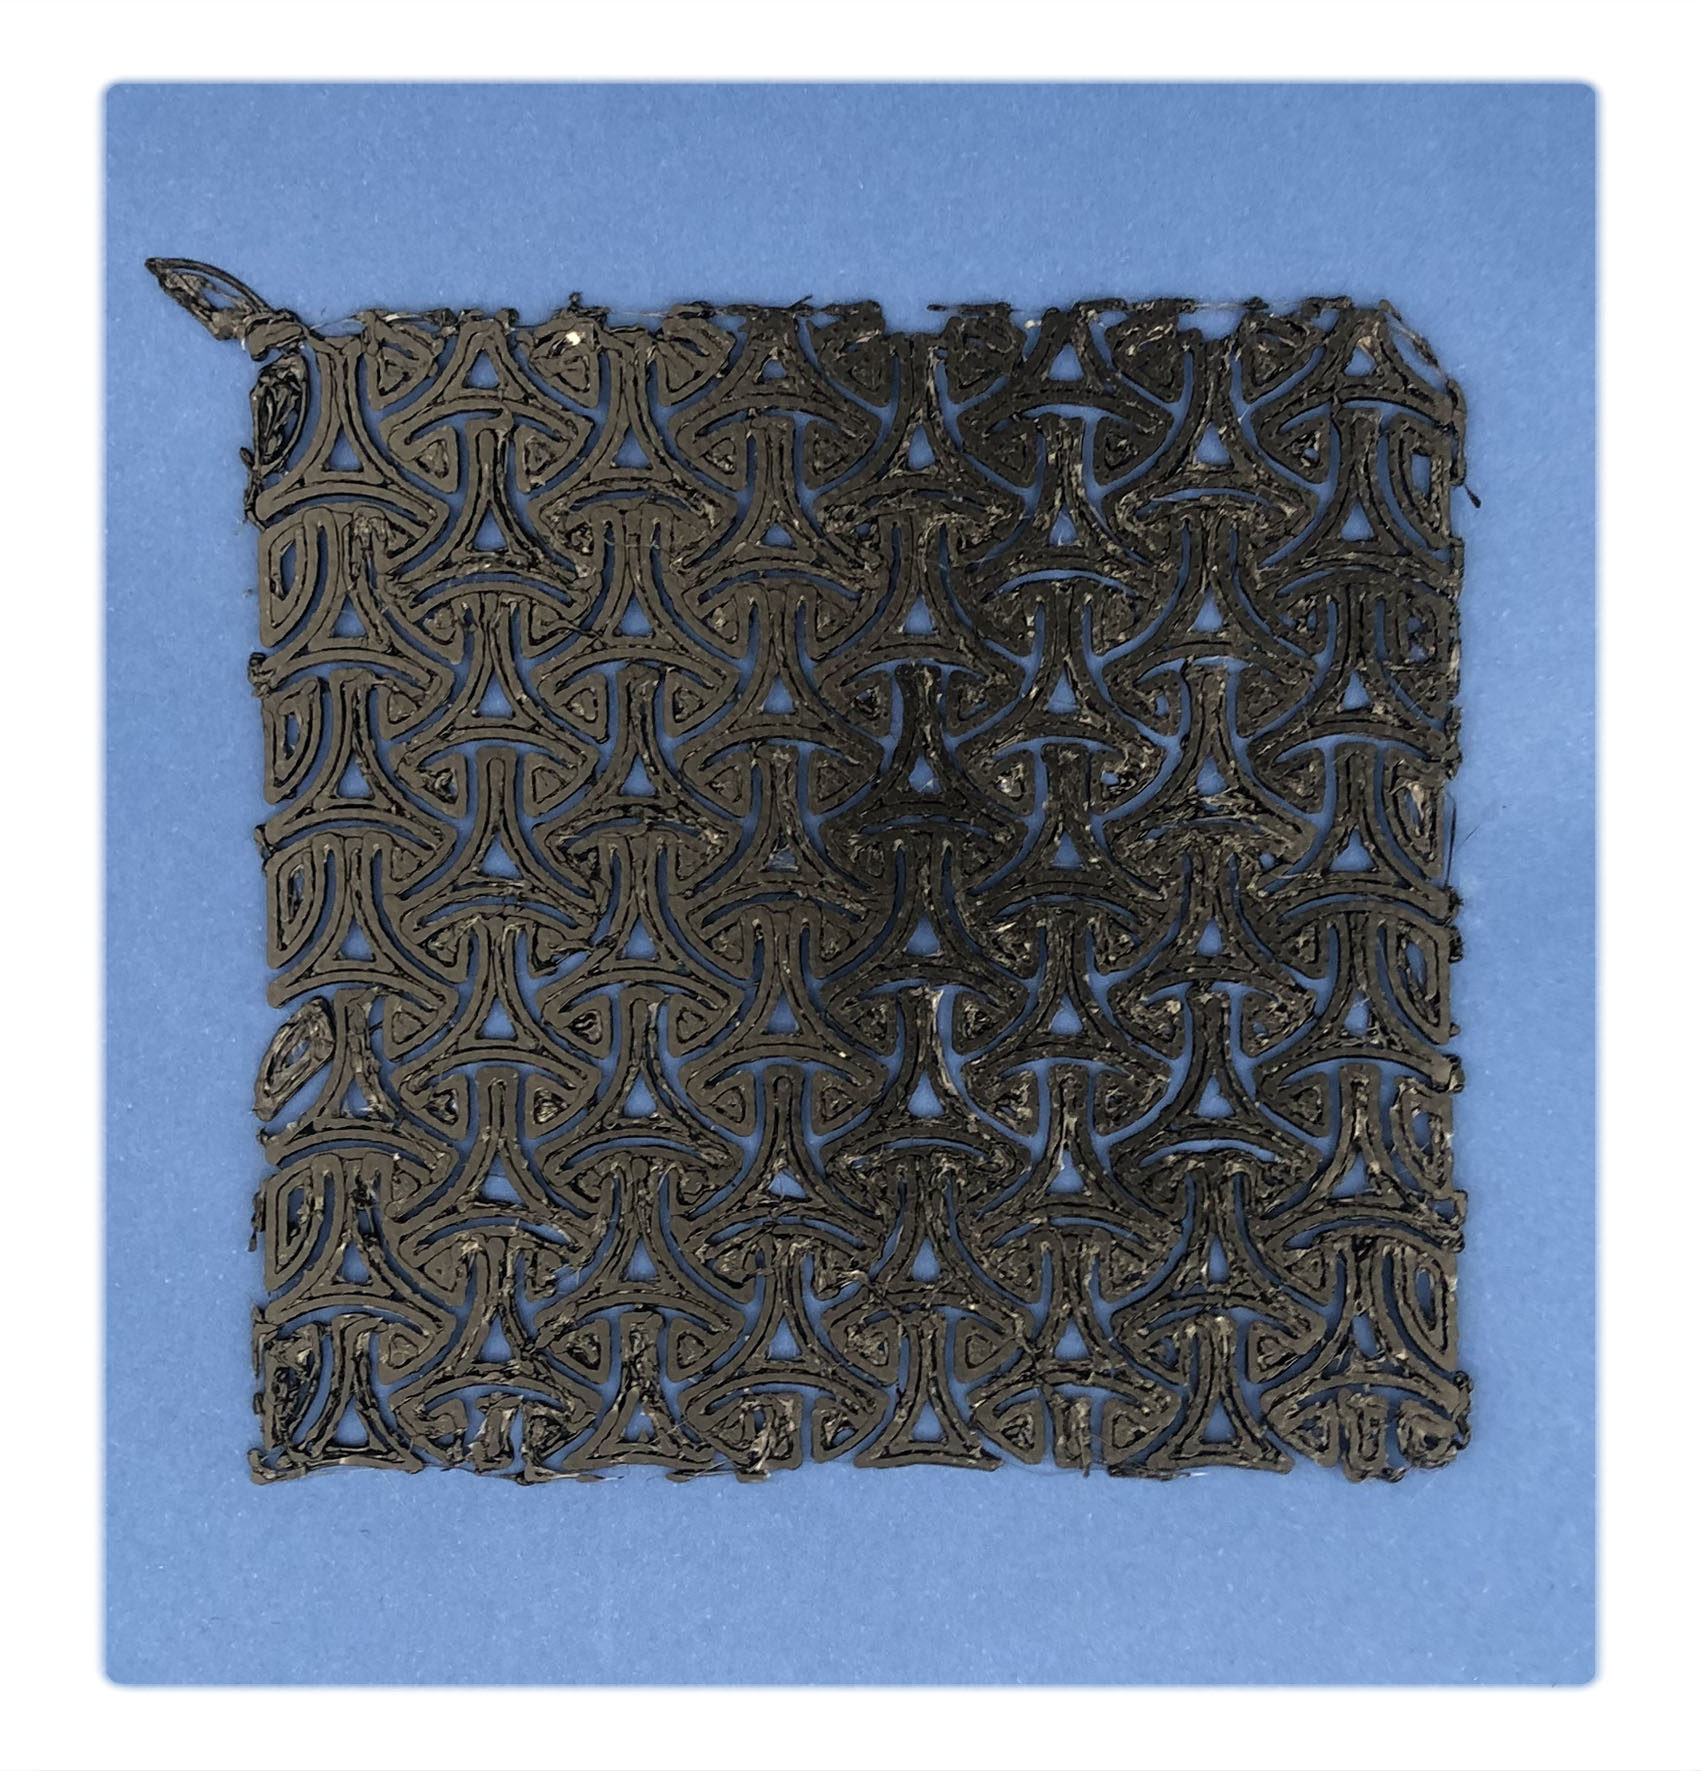 C1: First print test using 1 mm nozzle didnt allow enough details in the artwork
print settings C1:
Nozzle: 1 mm
Temperature: 230° (bed 40°)
Printing speed: 30
Layers: 2 (0.3mm)
Material: TPU
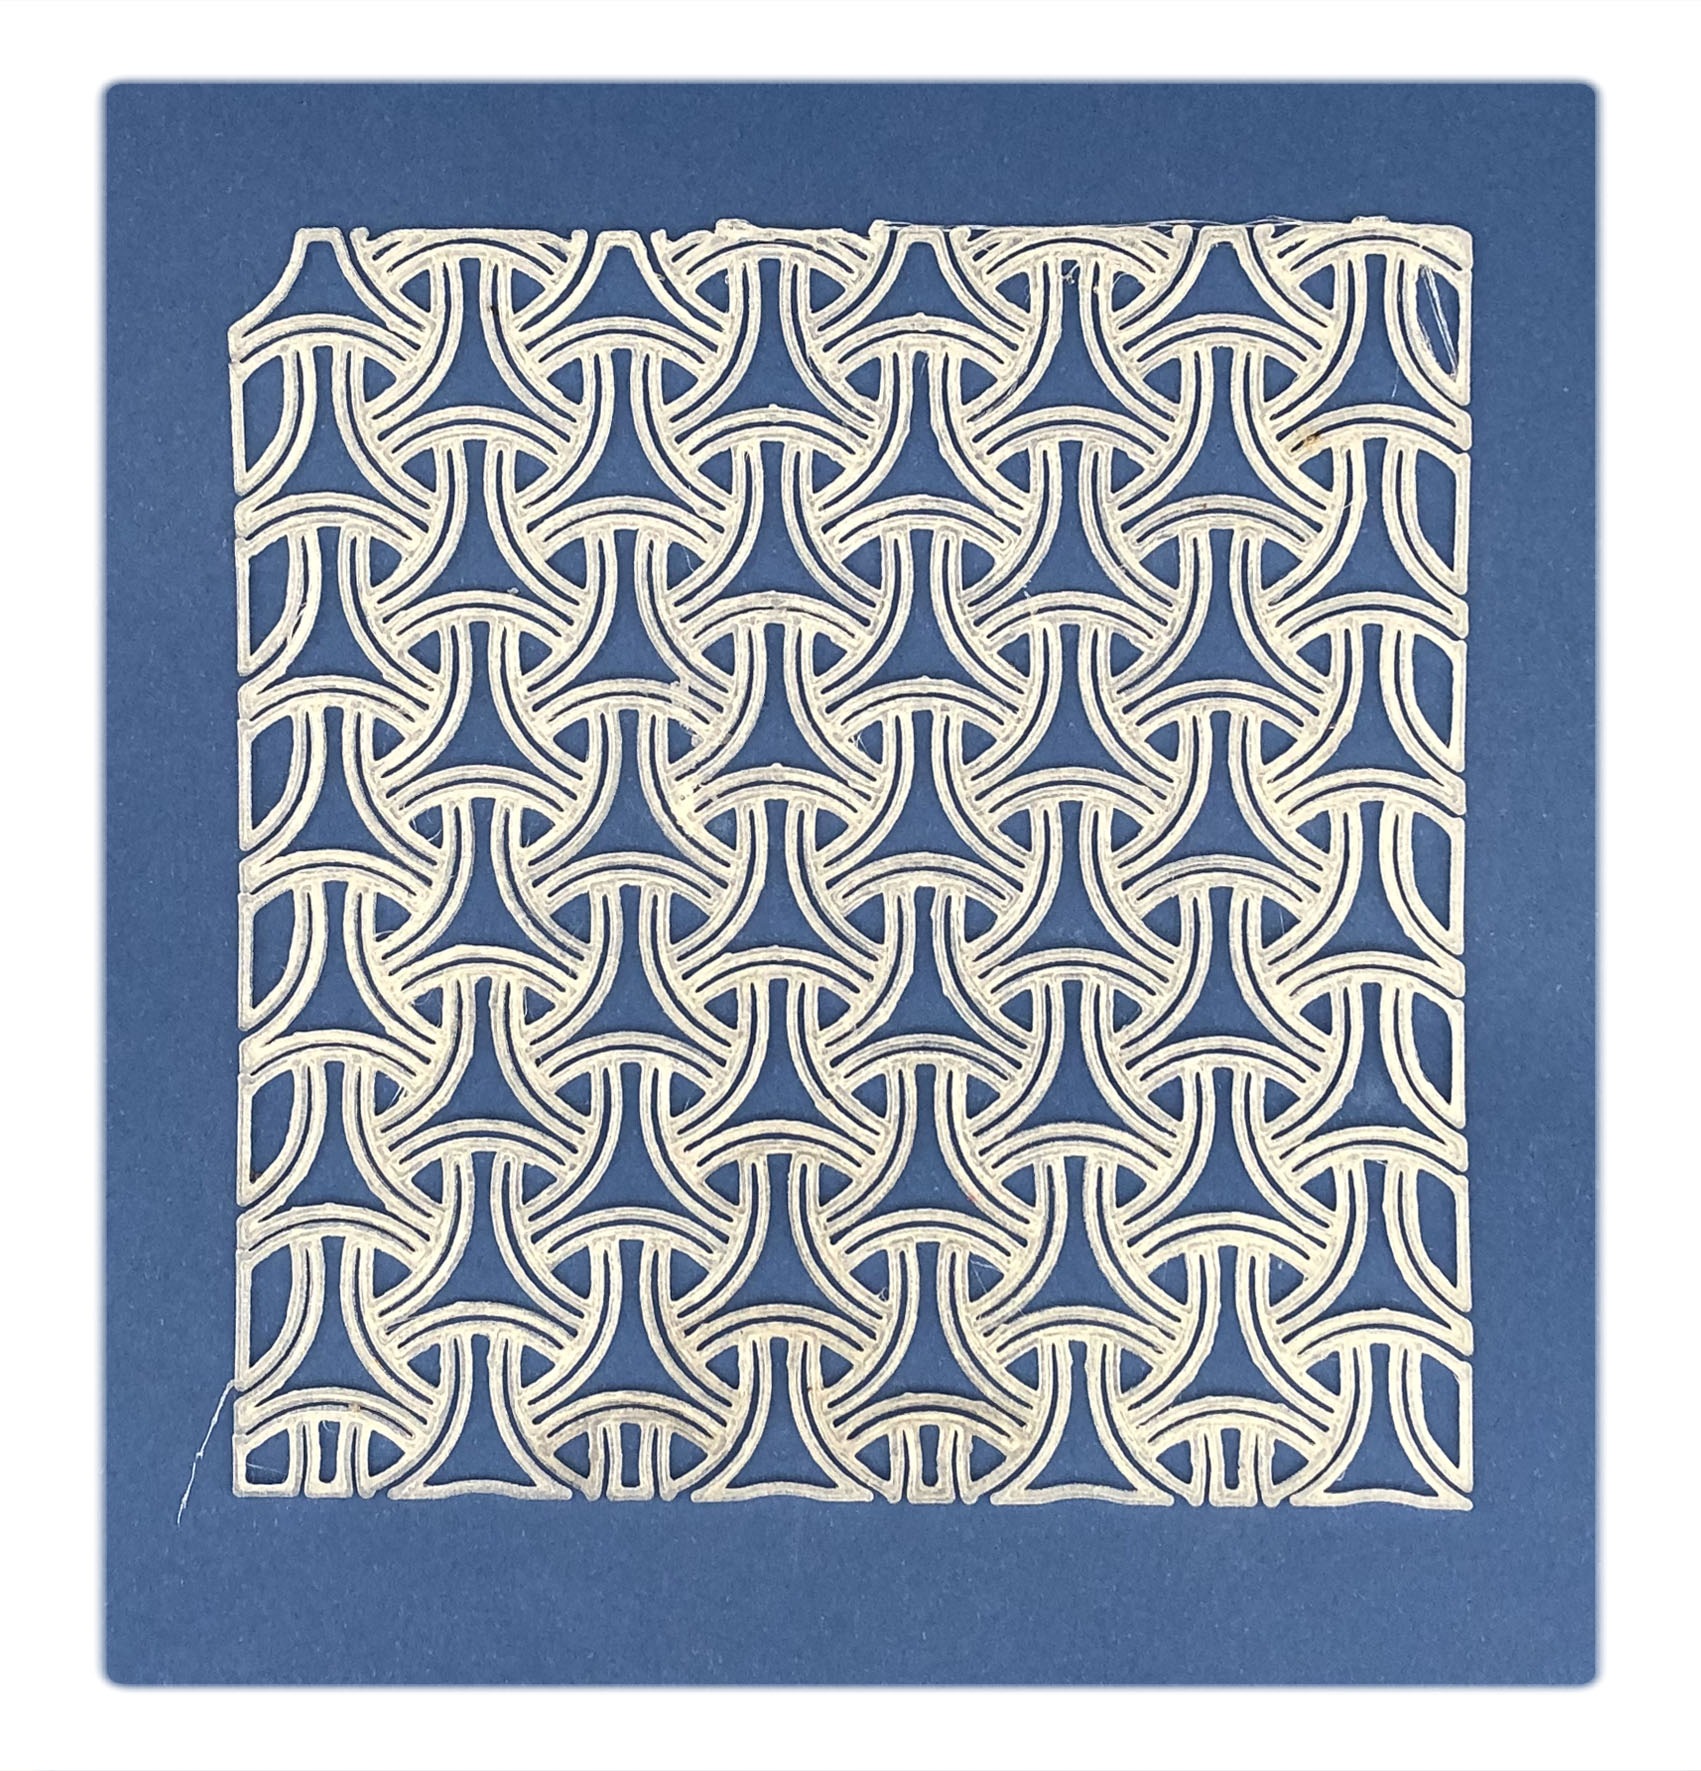
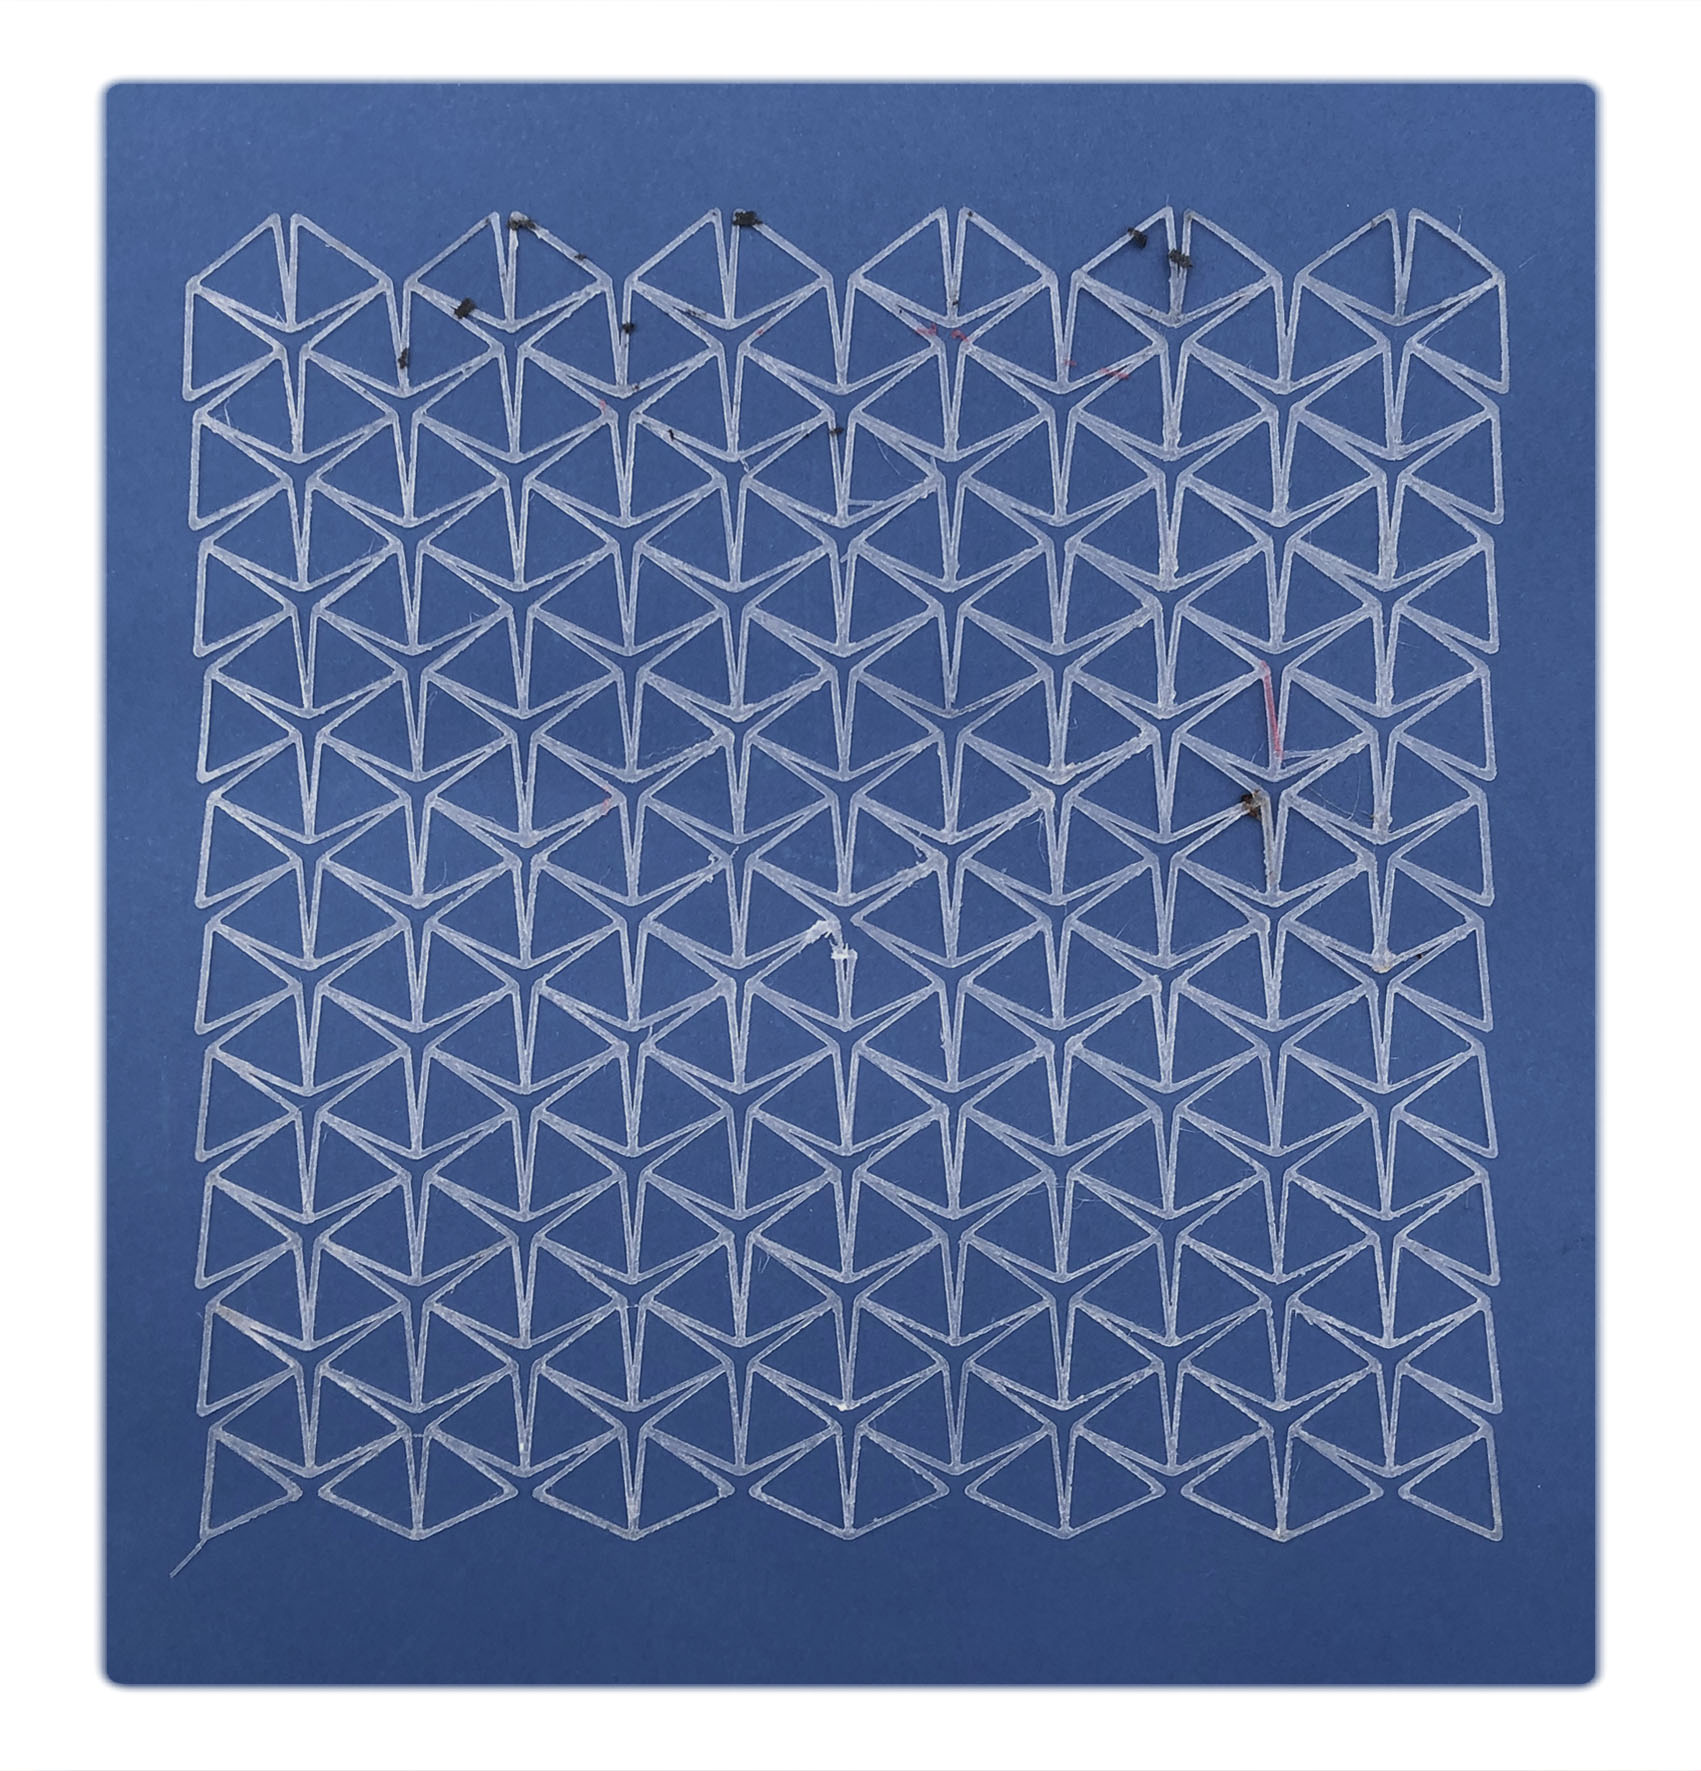
 C2: using 0.4 mm nozzle
print settings C2:
C2:
Nozzle: 0.4 mm
Temperature: 230° (bed 60°)
Printing speed: 50
Layers: 2 (0.2mm)
Material: TPU
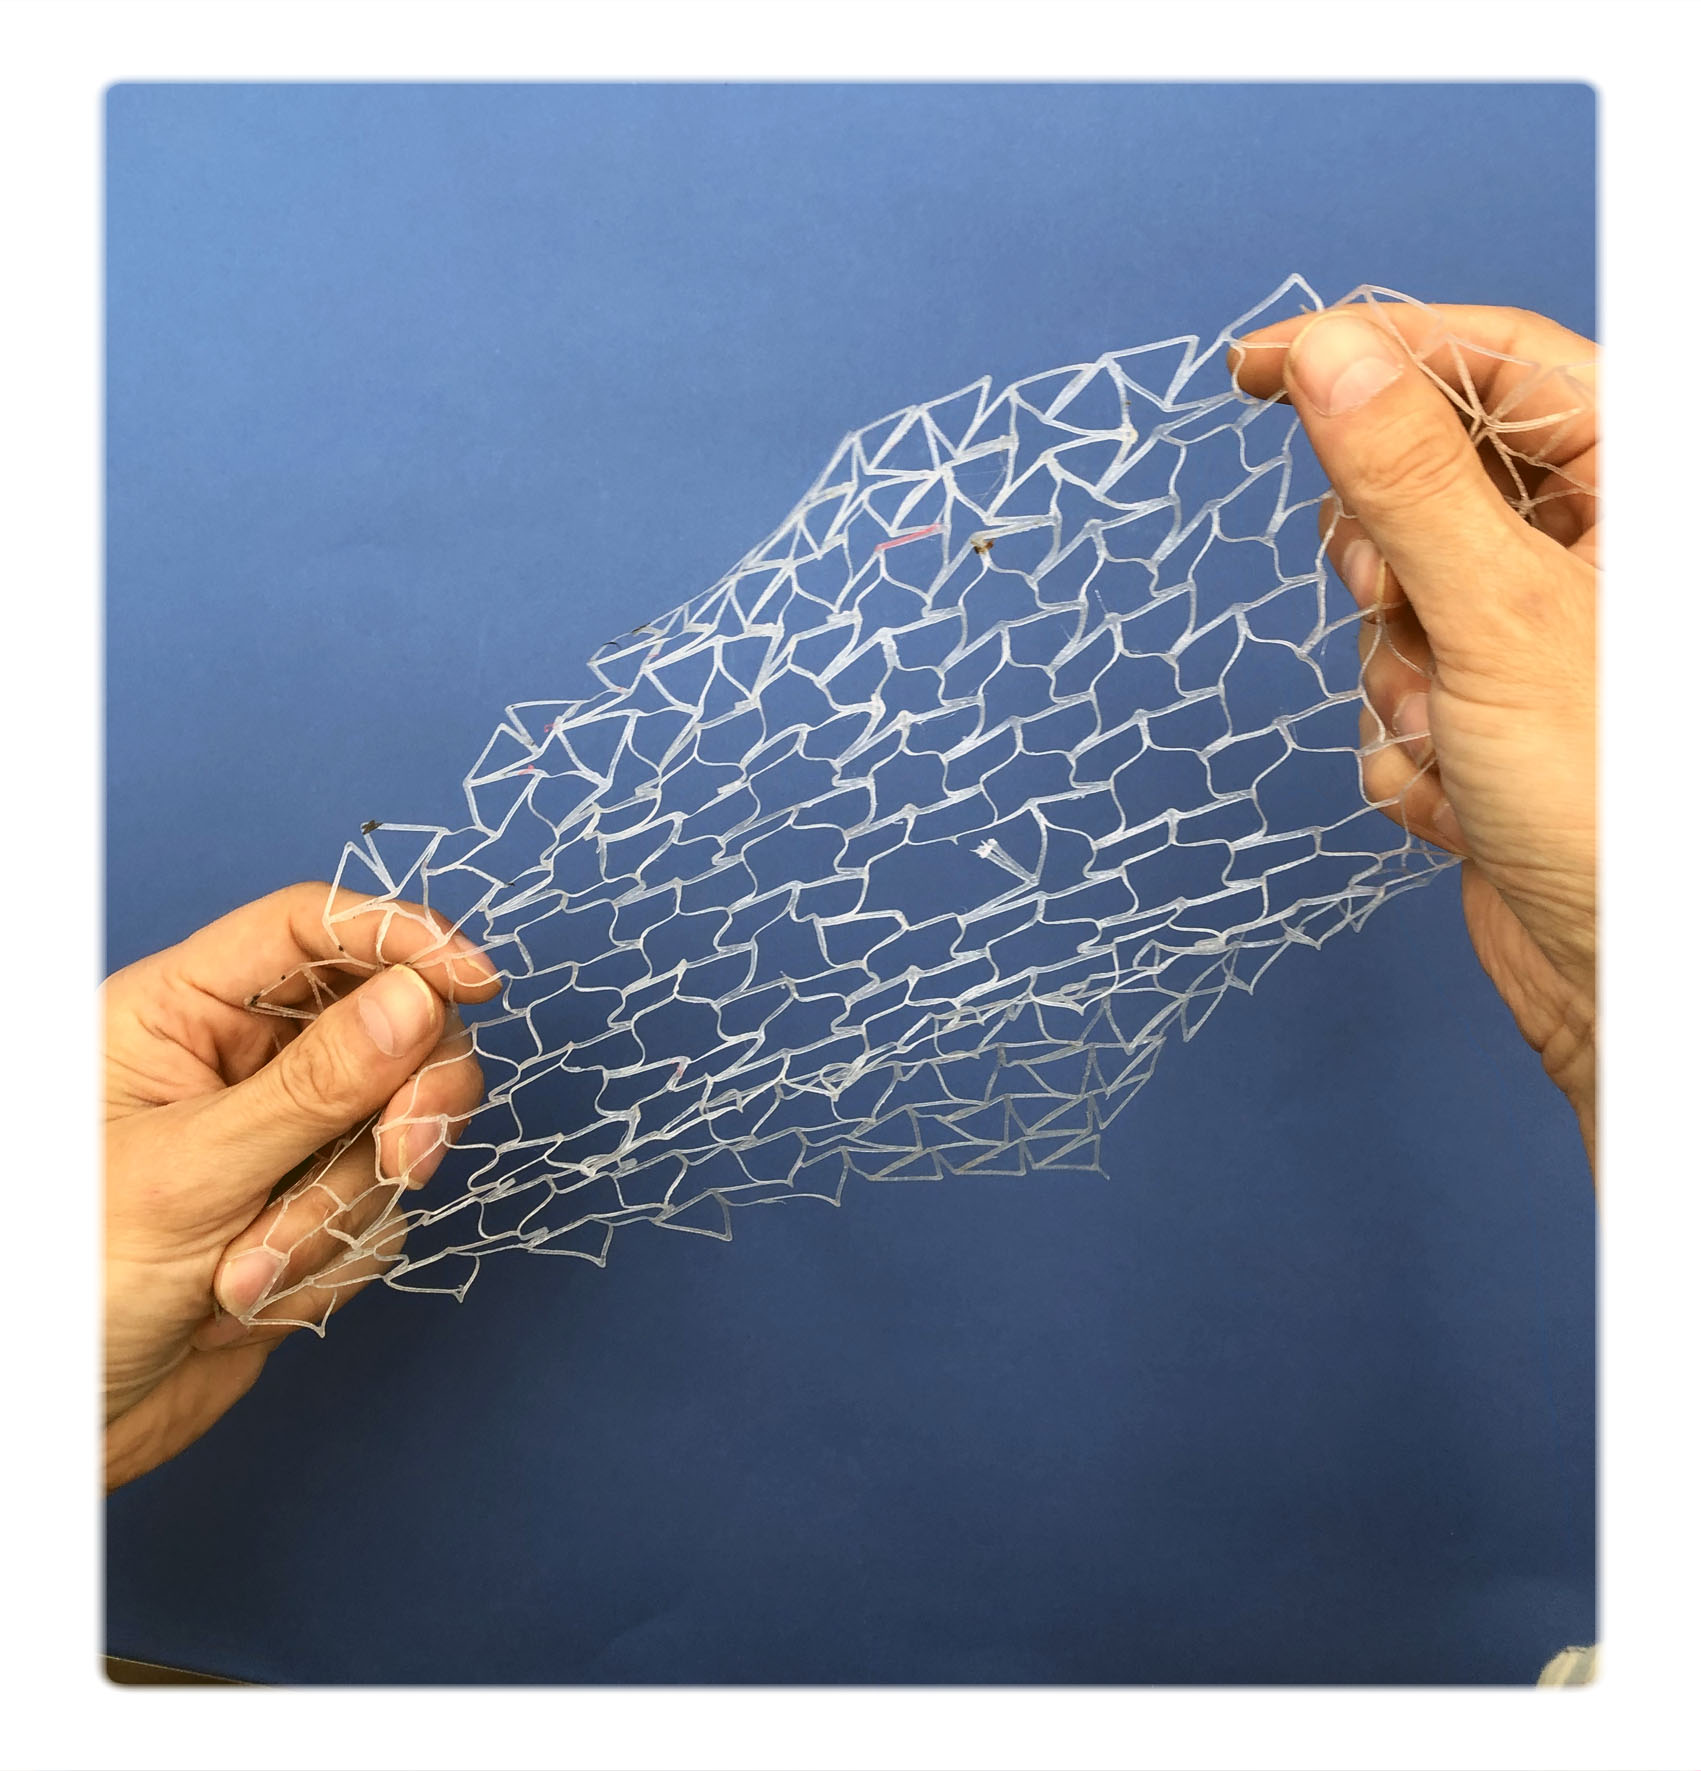
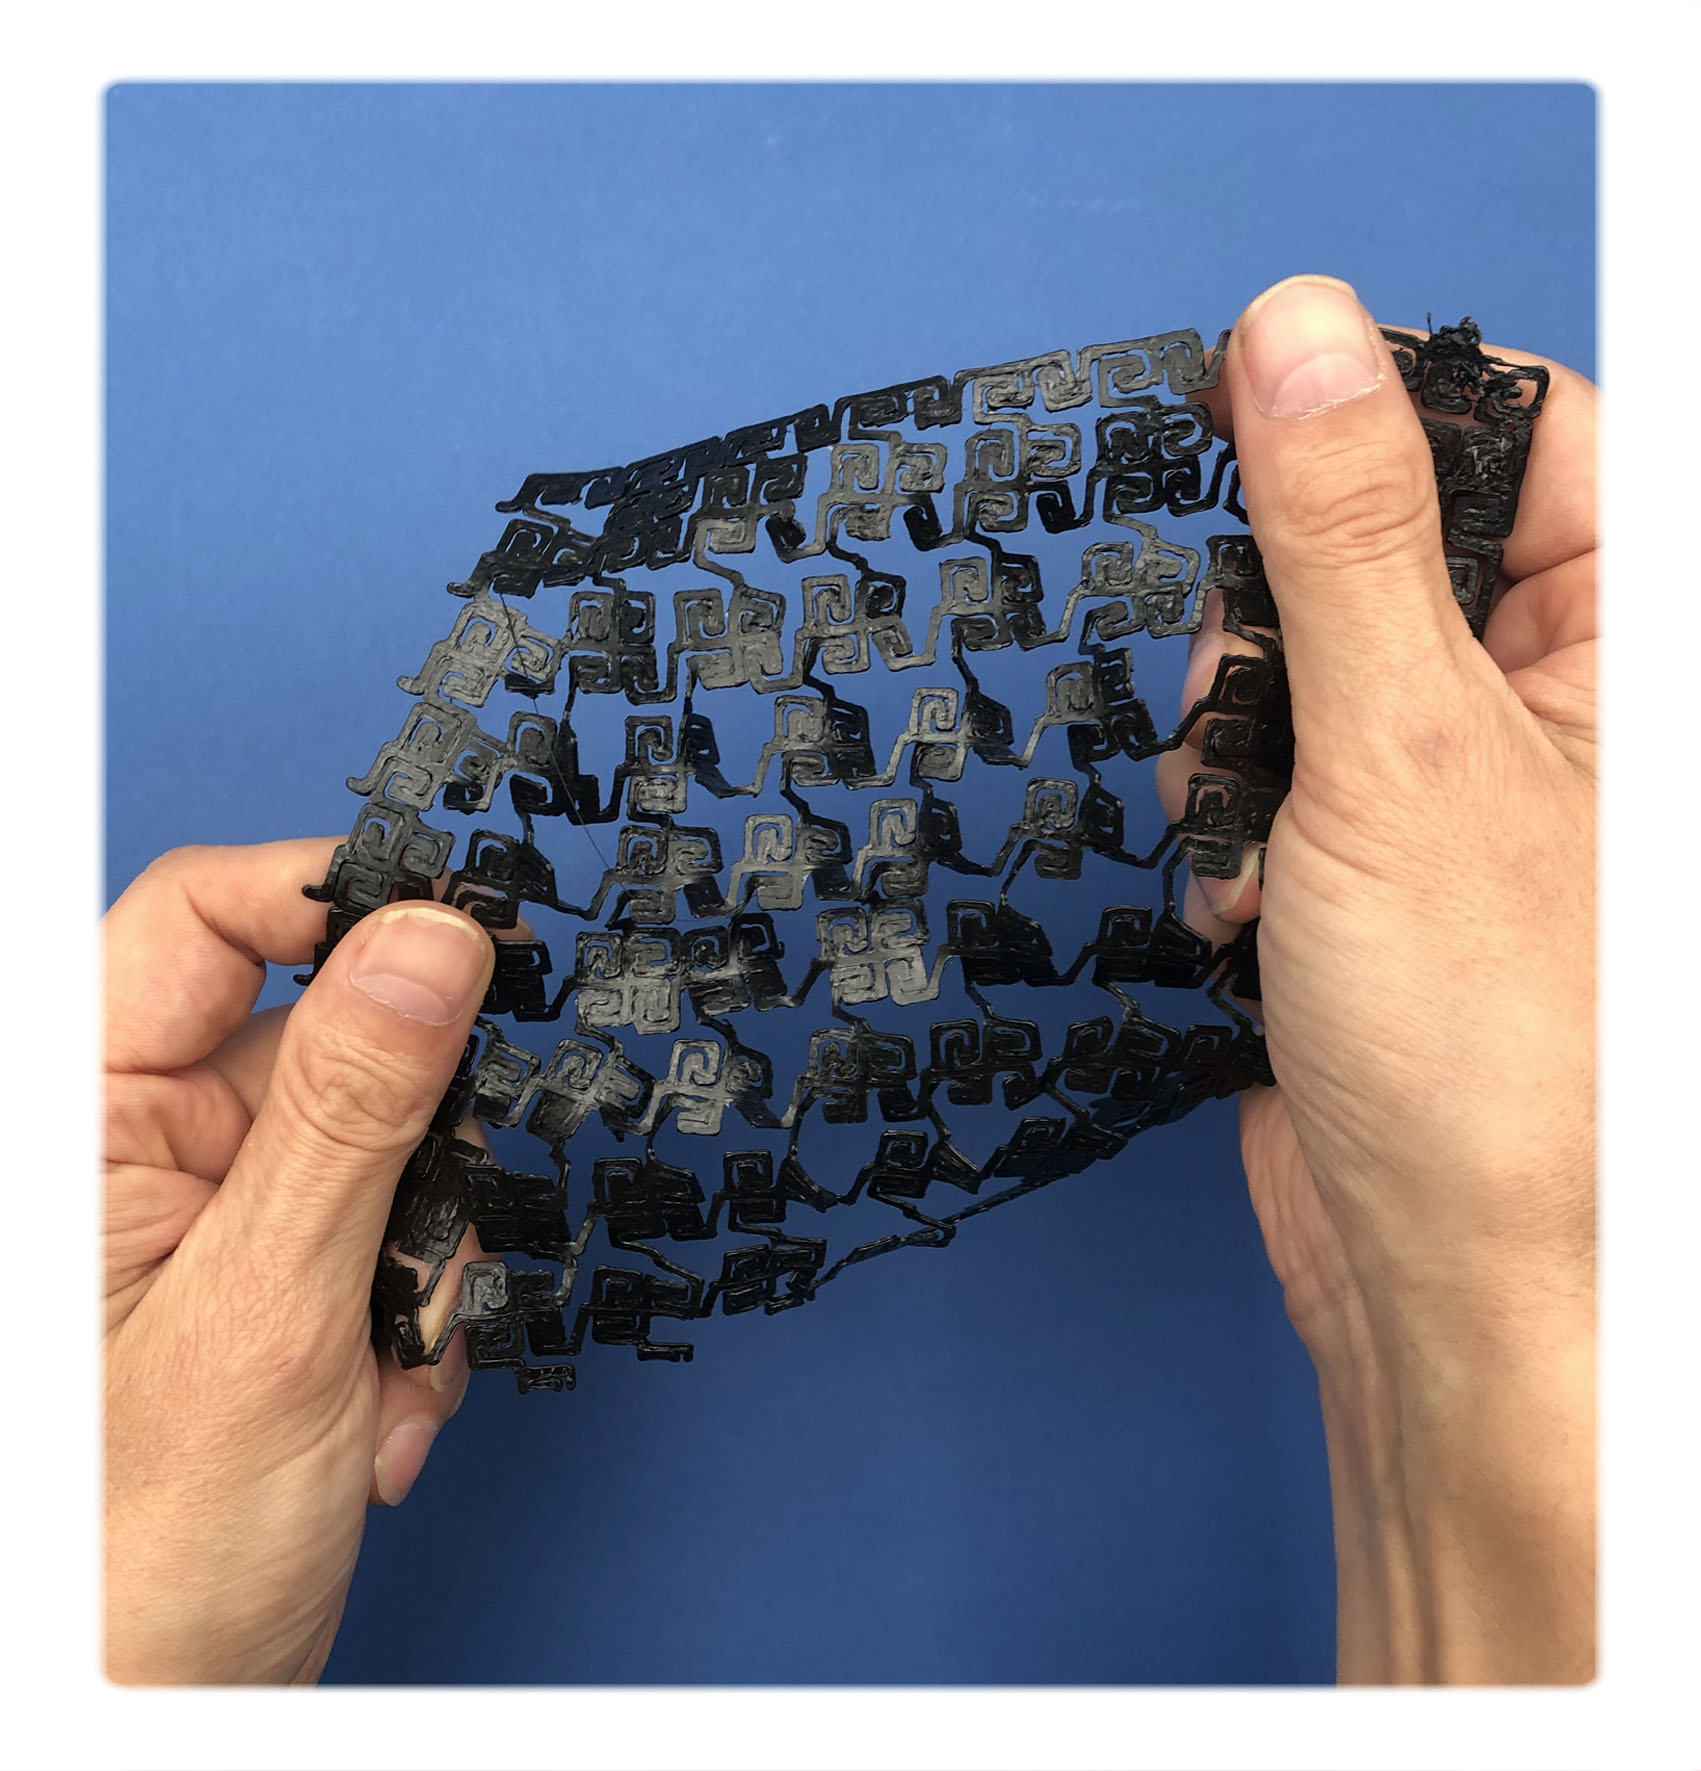
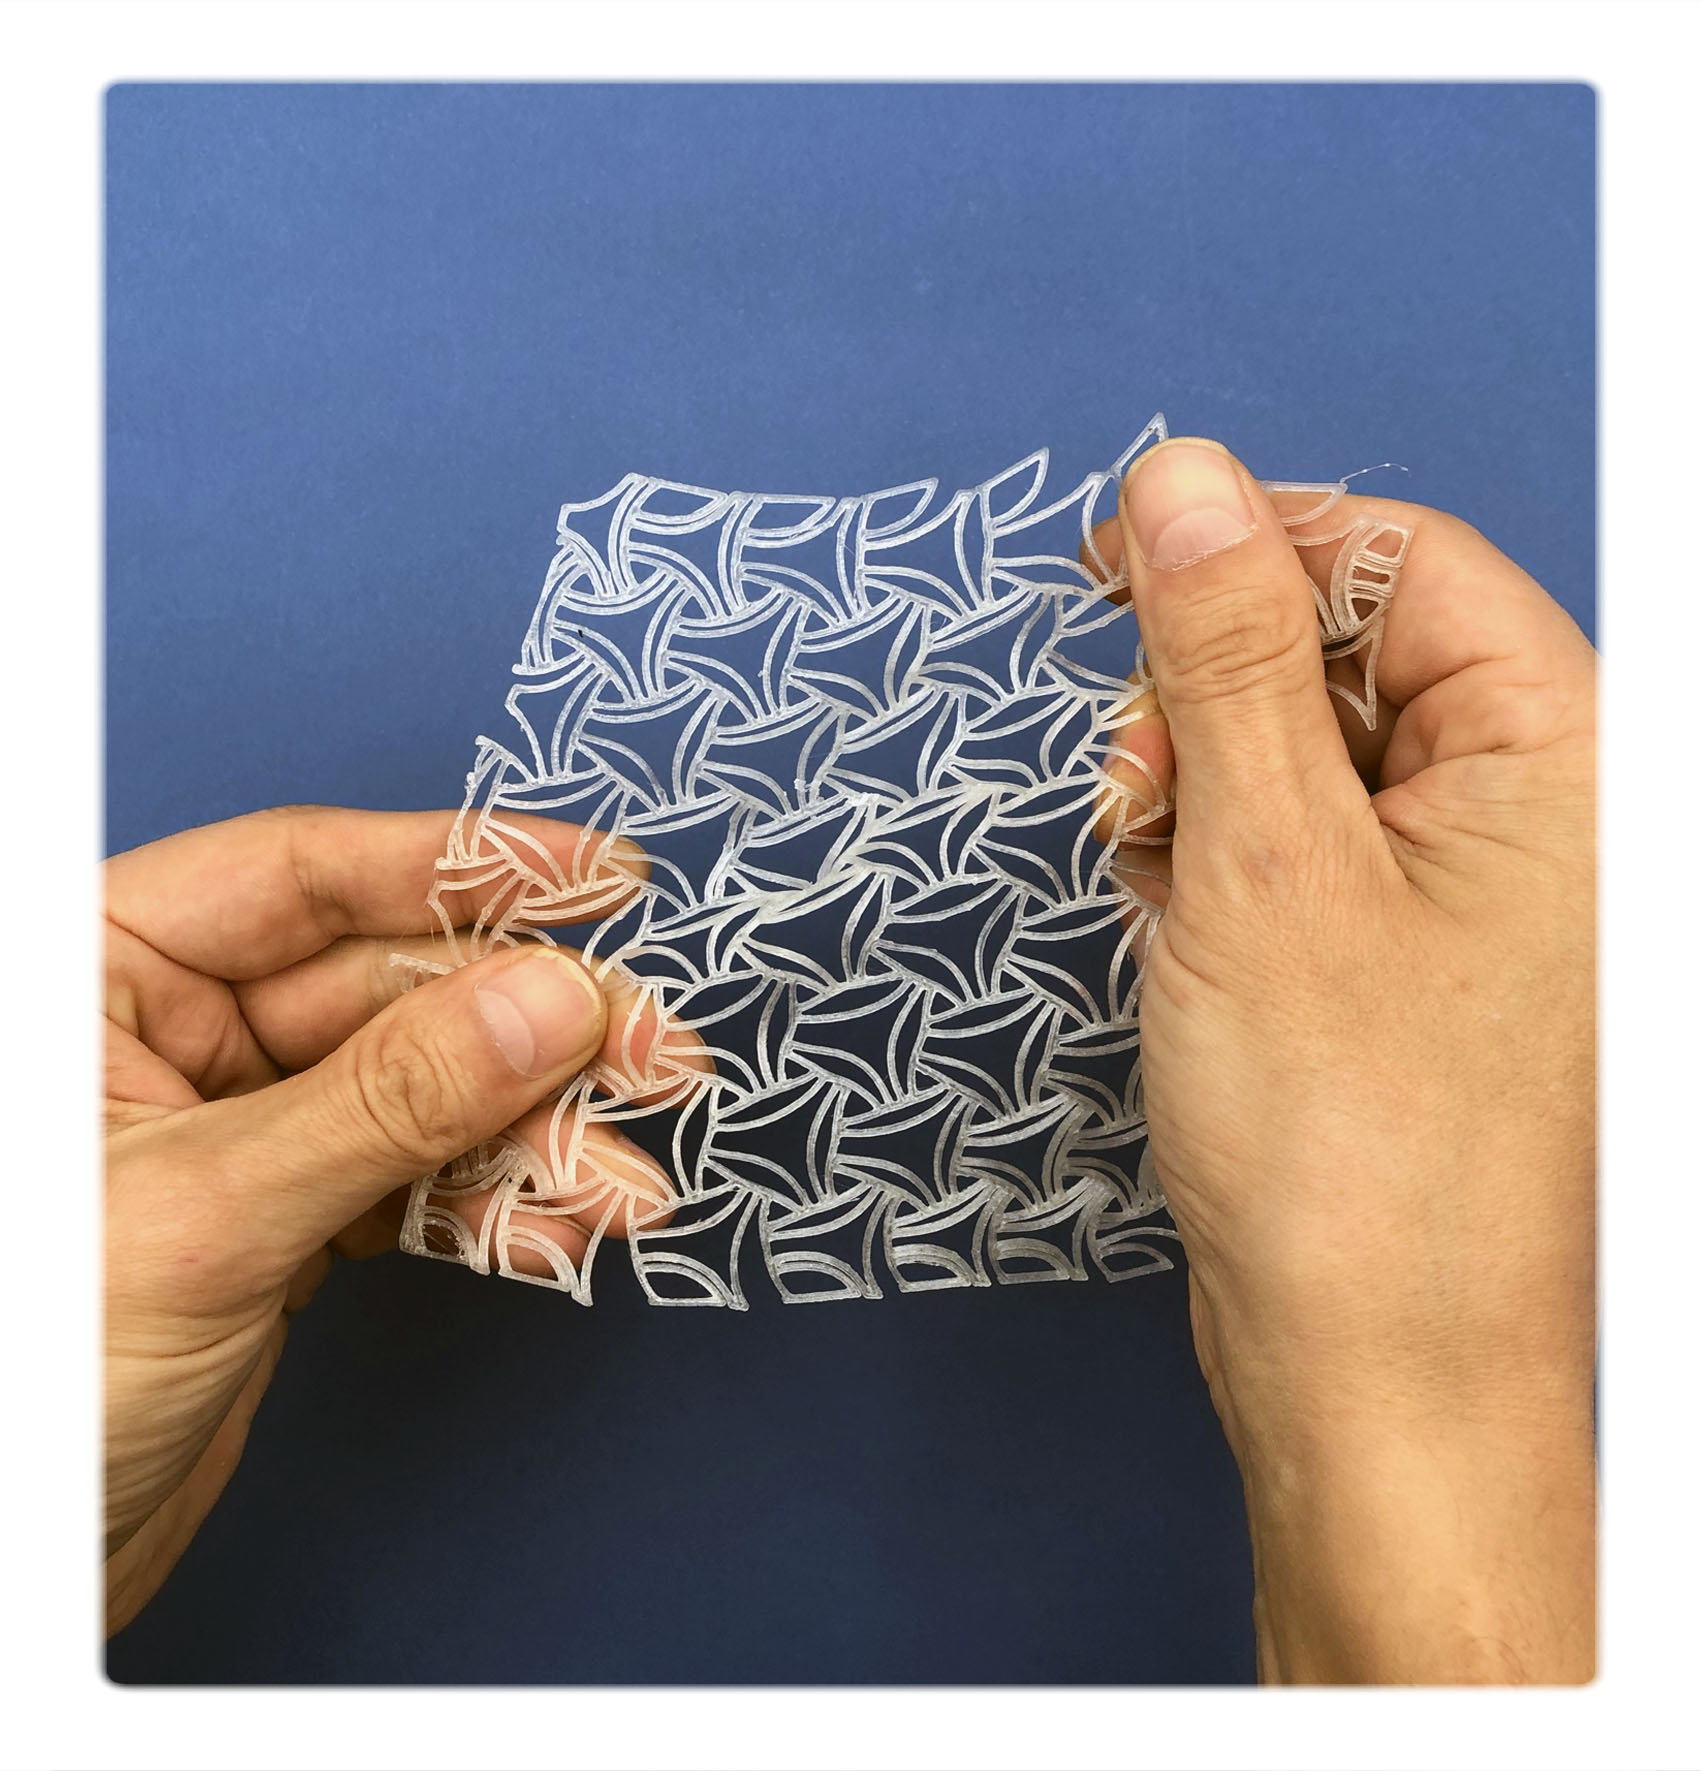
Comments: Due to the design of the "hinges" the pattern was not opening up as much as the refference pictures, however it had a beutiful transformation between stretched and relaxed position and should be useful for a more structured garment.
Design av Alve Lagercrantz
Conclusion:
It was interesting to see that, by working with the structure the plastic filaments could become something that could be considered wearable. All the patterns that I fabricated had an interesting drape and 3-ways stretch that would be useful in garment construction.
However they are still far from materials suitable for every day garments, the plastic touch remains a problem and of course all the patterns are open lace like structure that might be useful for some cases but missing many of the properties that we need in fashion.
It was interesting to start to understand the possibilities with Grasshopper and parametric design. Especially In a fashion context it could vecome a key to mass-customization and decentralized design practice but it is clear that in order to realize that we need fabrication technology that can be as flexible as the design process.
Bioprinting?