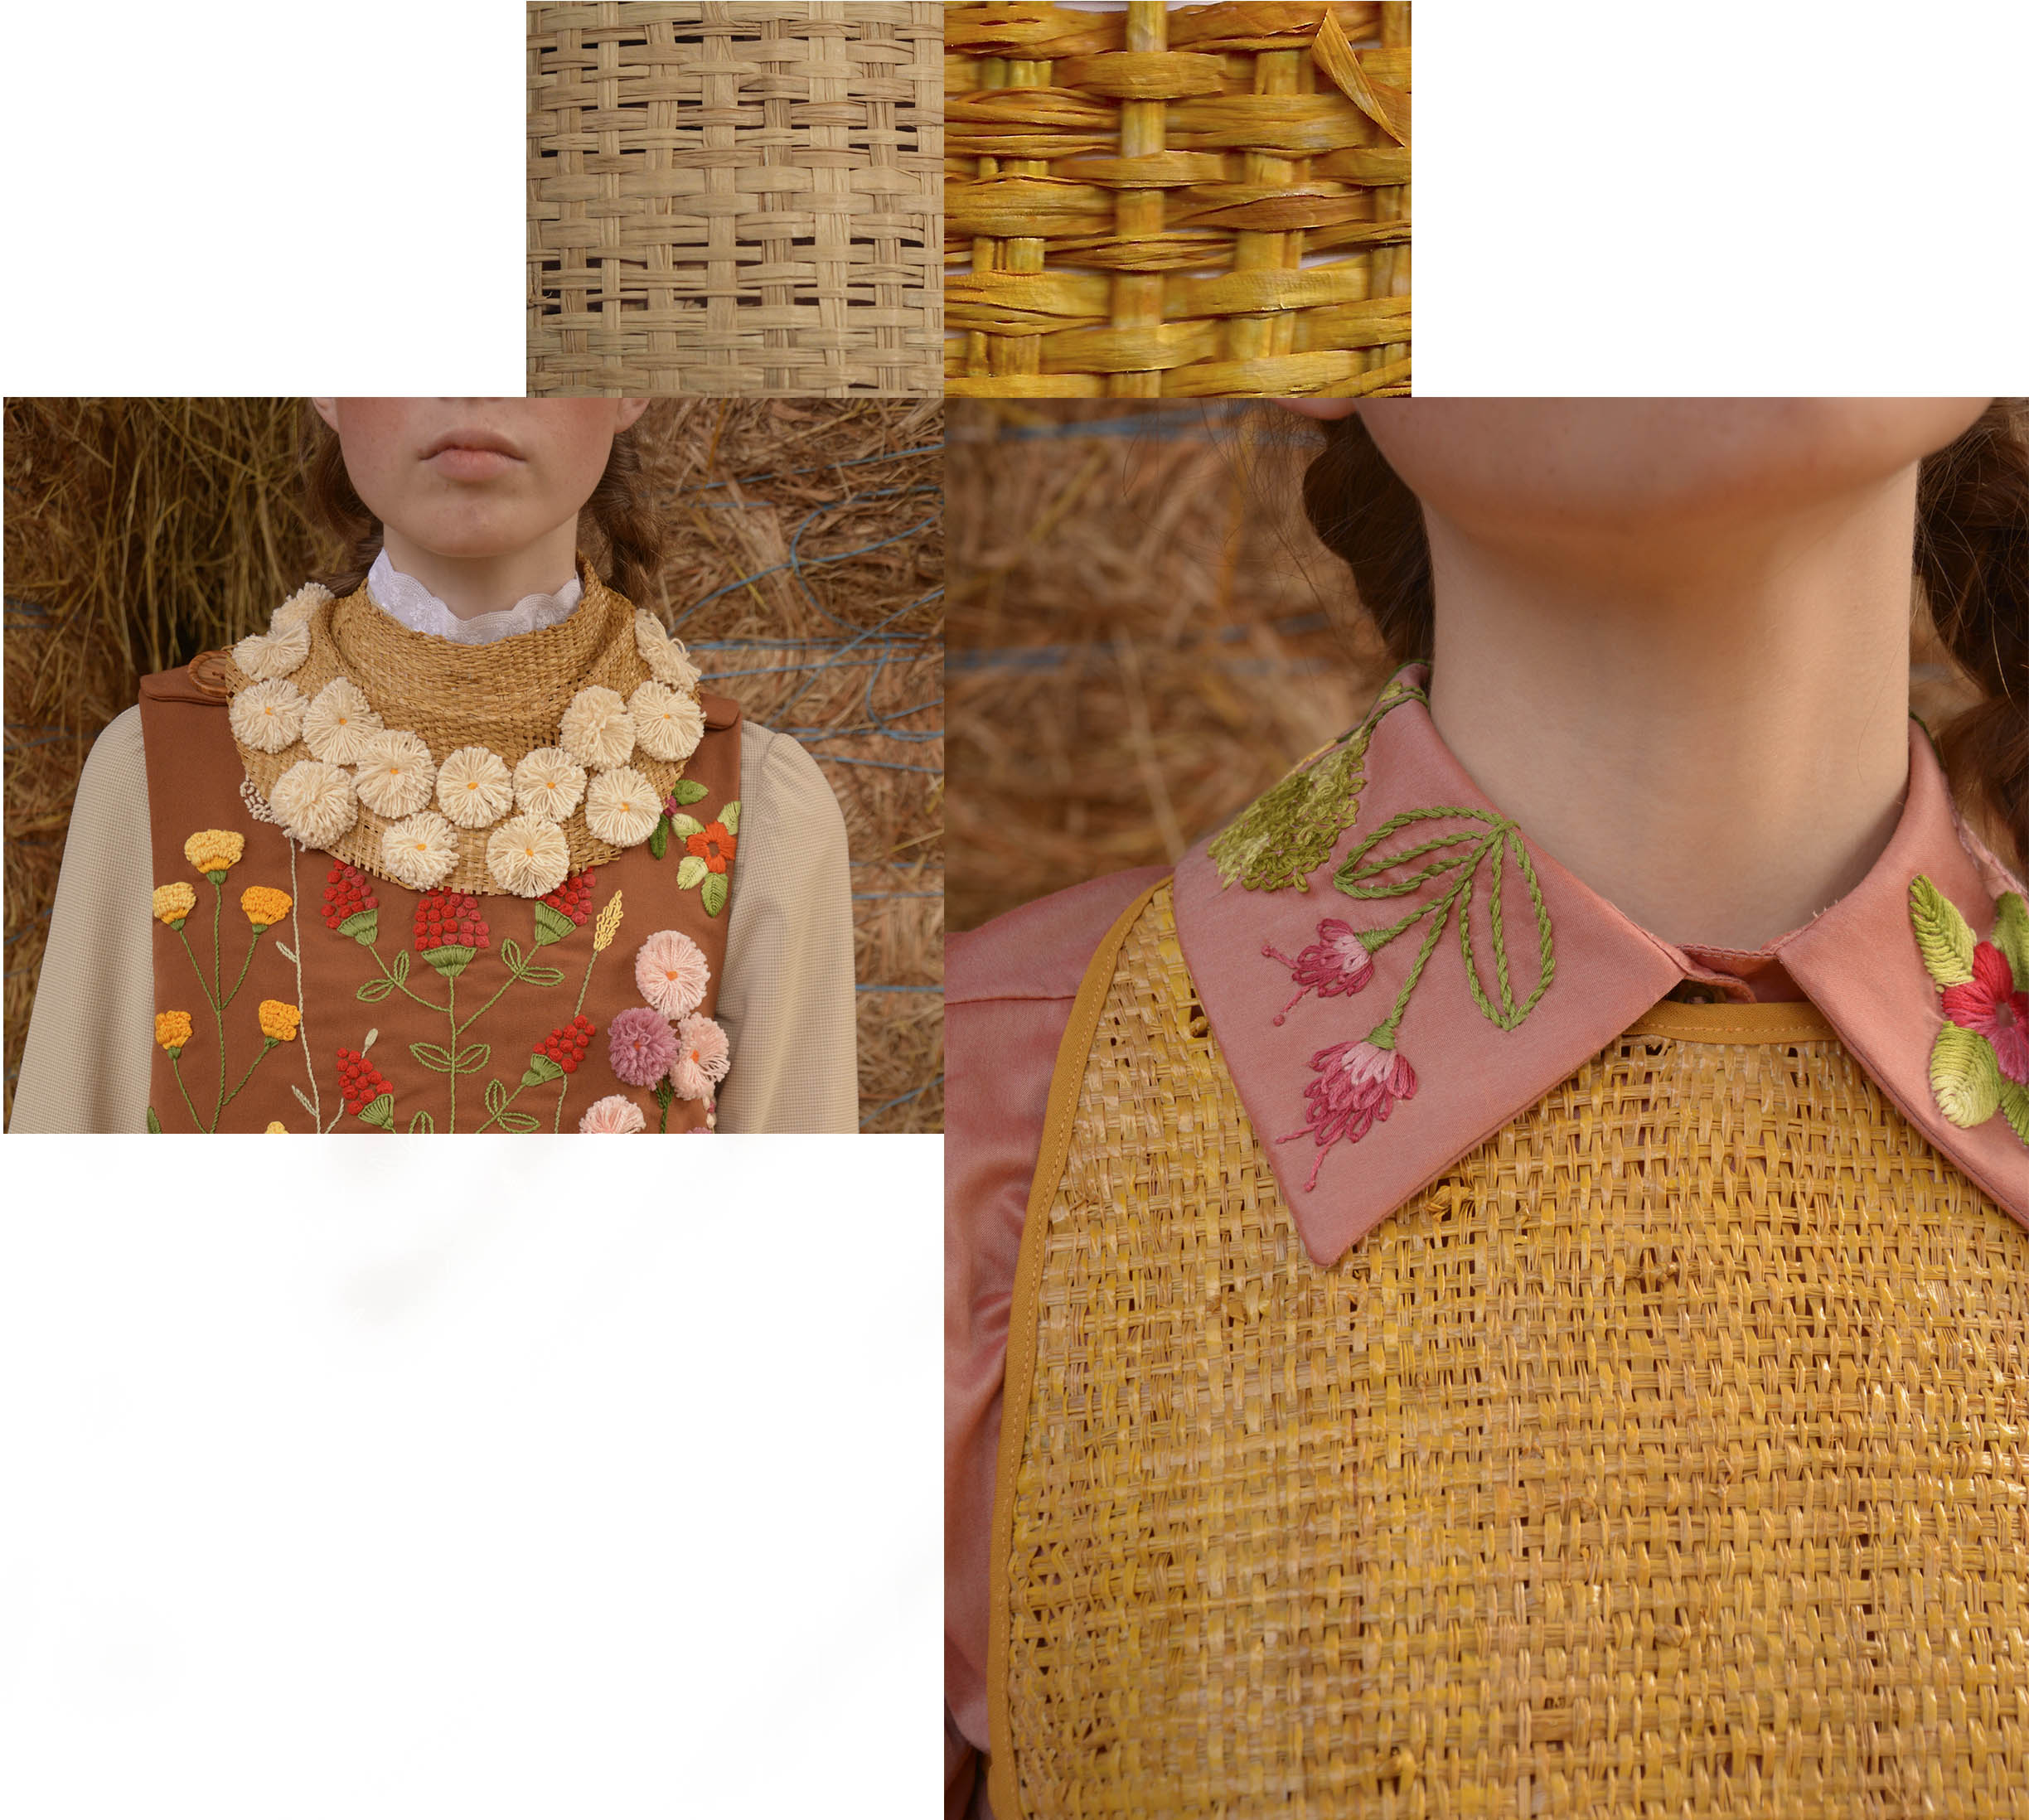
4. BioChromes
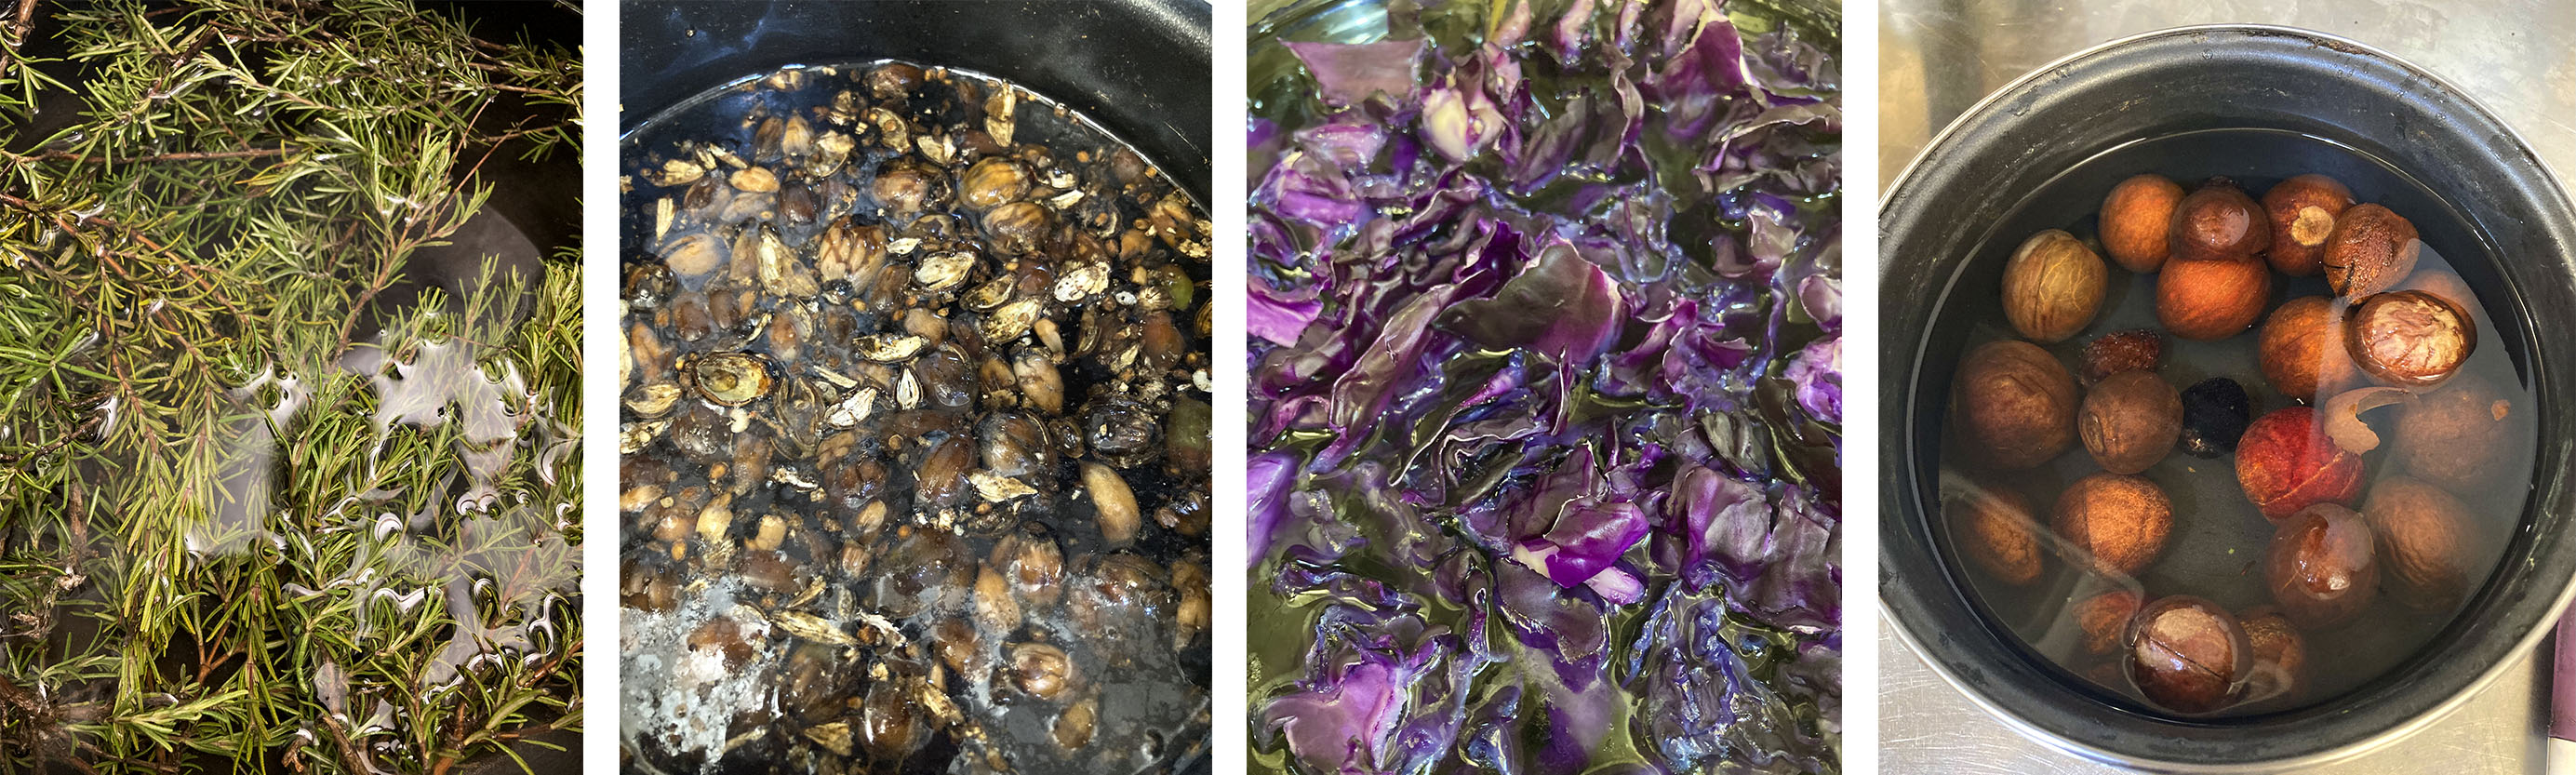
This week was super interesting and fun for me as I have worked with natural dyes before as Curcuma and tea leaves but I need to explore more about them. Also, the idea that I have some of the natural dyes surrounding my house excited me more! Rosemary, the acorn of evergreen oak and more materials to try...
These days we are going to work together to create a colorful palette.
Introduction
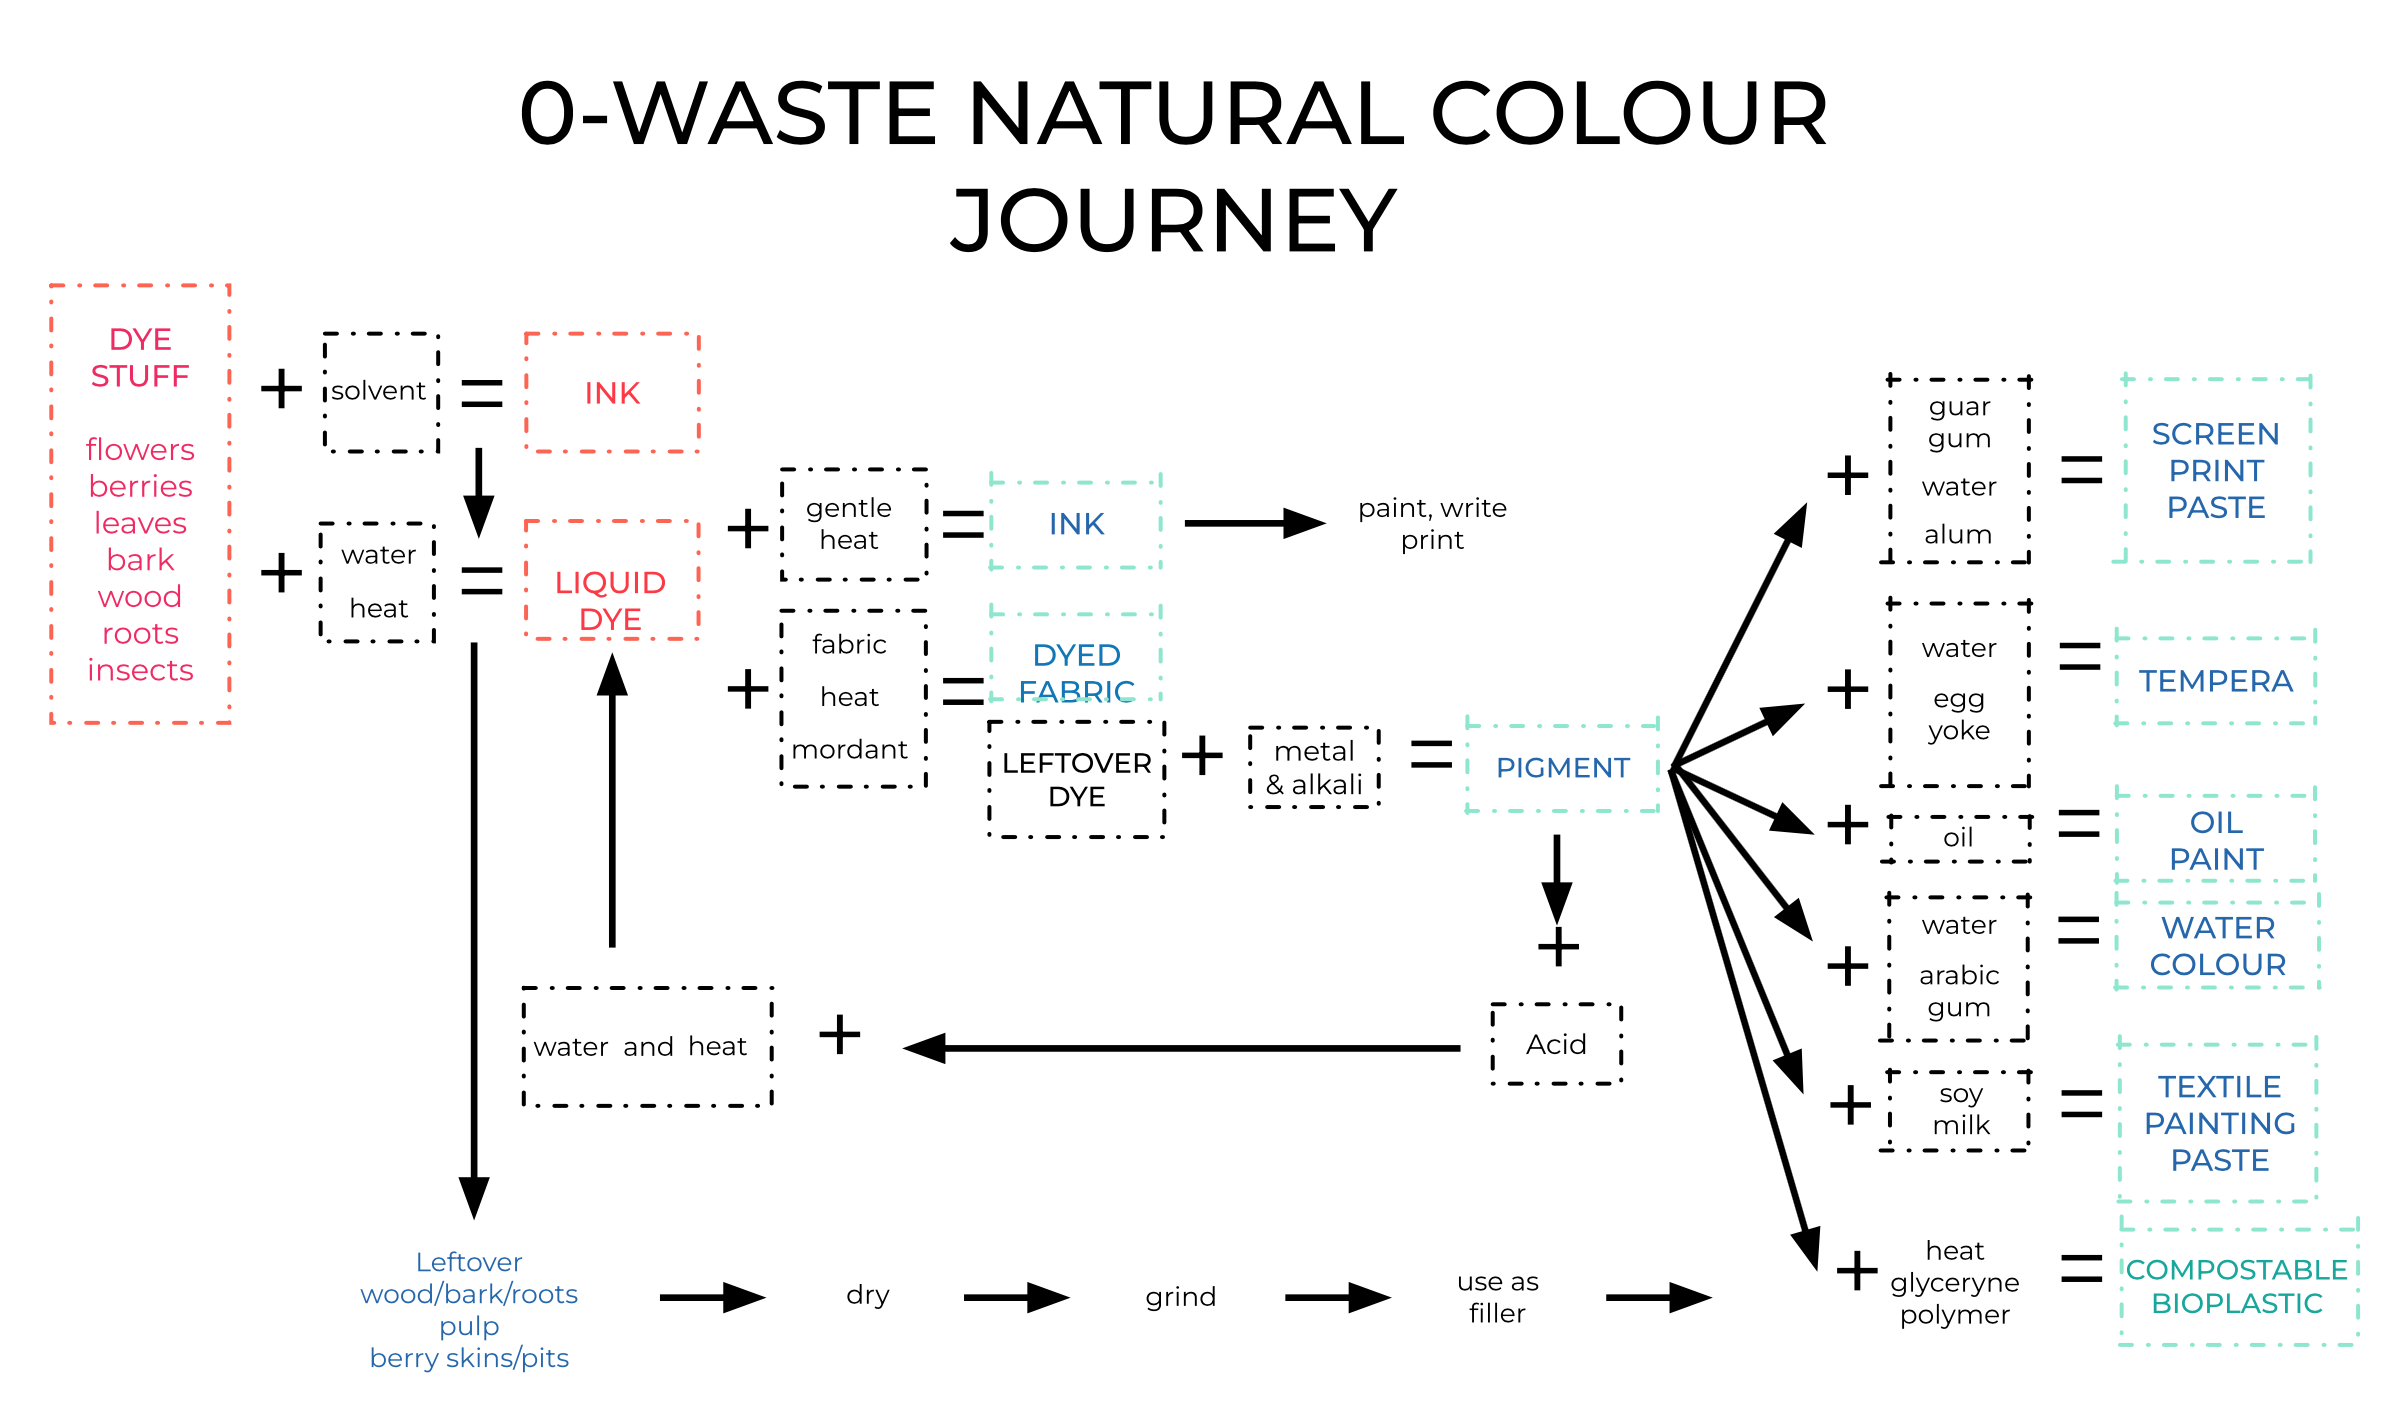
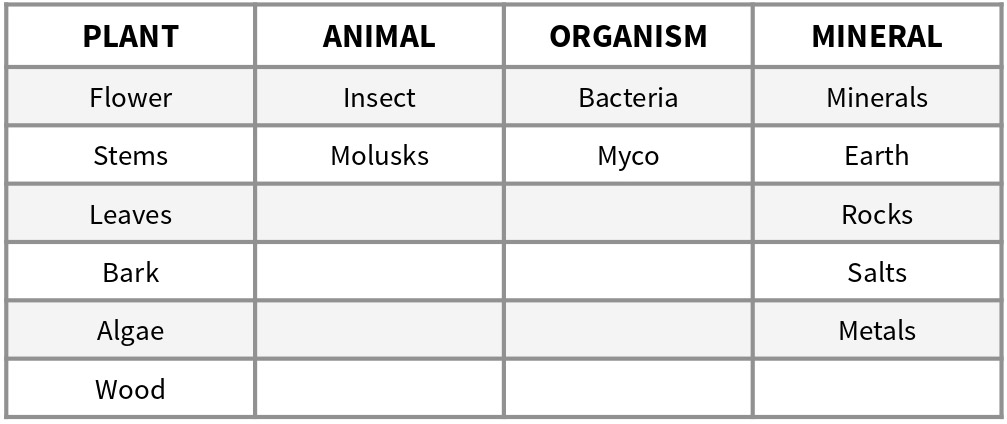
- Biochromes: Any pigment produced by a living organism. Living colors. Locally positive, 0 waste and biobased (compostable).
- Dyes: Is a colored liquid bath that chemically bonds to the substrate to which it is being applied.
- Tanning: Gives cellulose fibers the ability to more readily accept a mordant, it is mainly done on cellulose fibers.
- Scouring: Is a preparatory treatment of certain textile materials to removes soluble and insoluble impurities found in textiles. As oils, waxes, fats, vegetable matter or dirt.
- Mordanting: Is a substance used to set dyes on fabrics.
- INK: Is a colored dense liquid that is applied to a surface and is absorbed by, but not bonded to the surface. Liquid Aquarelle.
- Pigment: Are a powder color that stays colorful. Inorganic/ organic compounds precipitated onto inorganic matter.
- Bacteria: A single-celled organism.
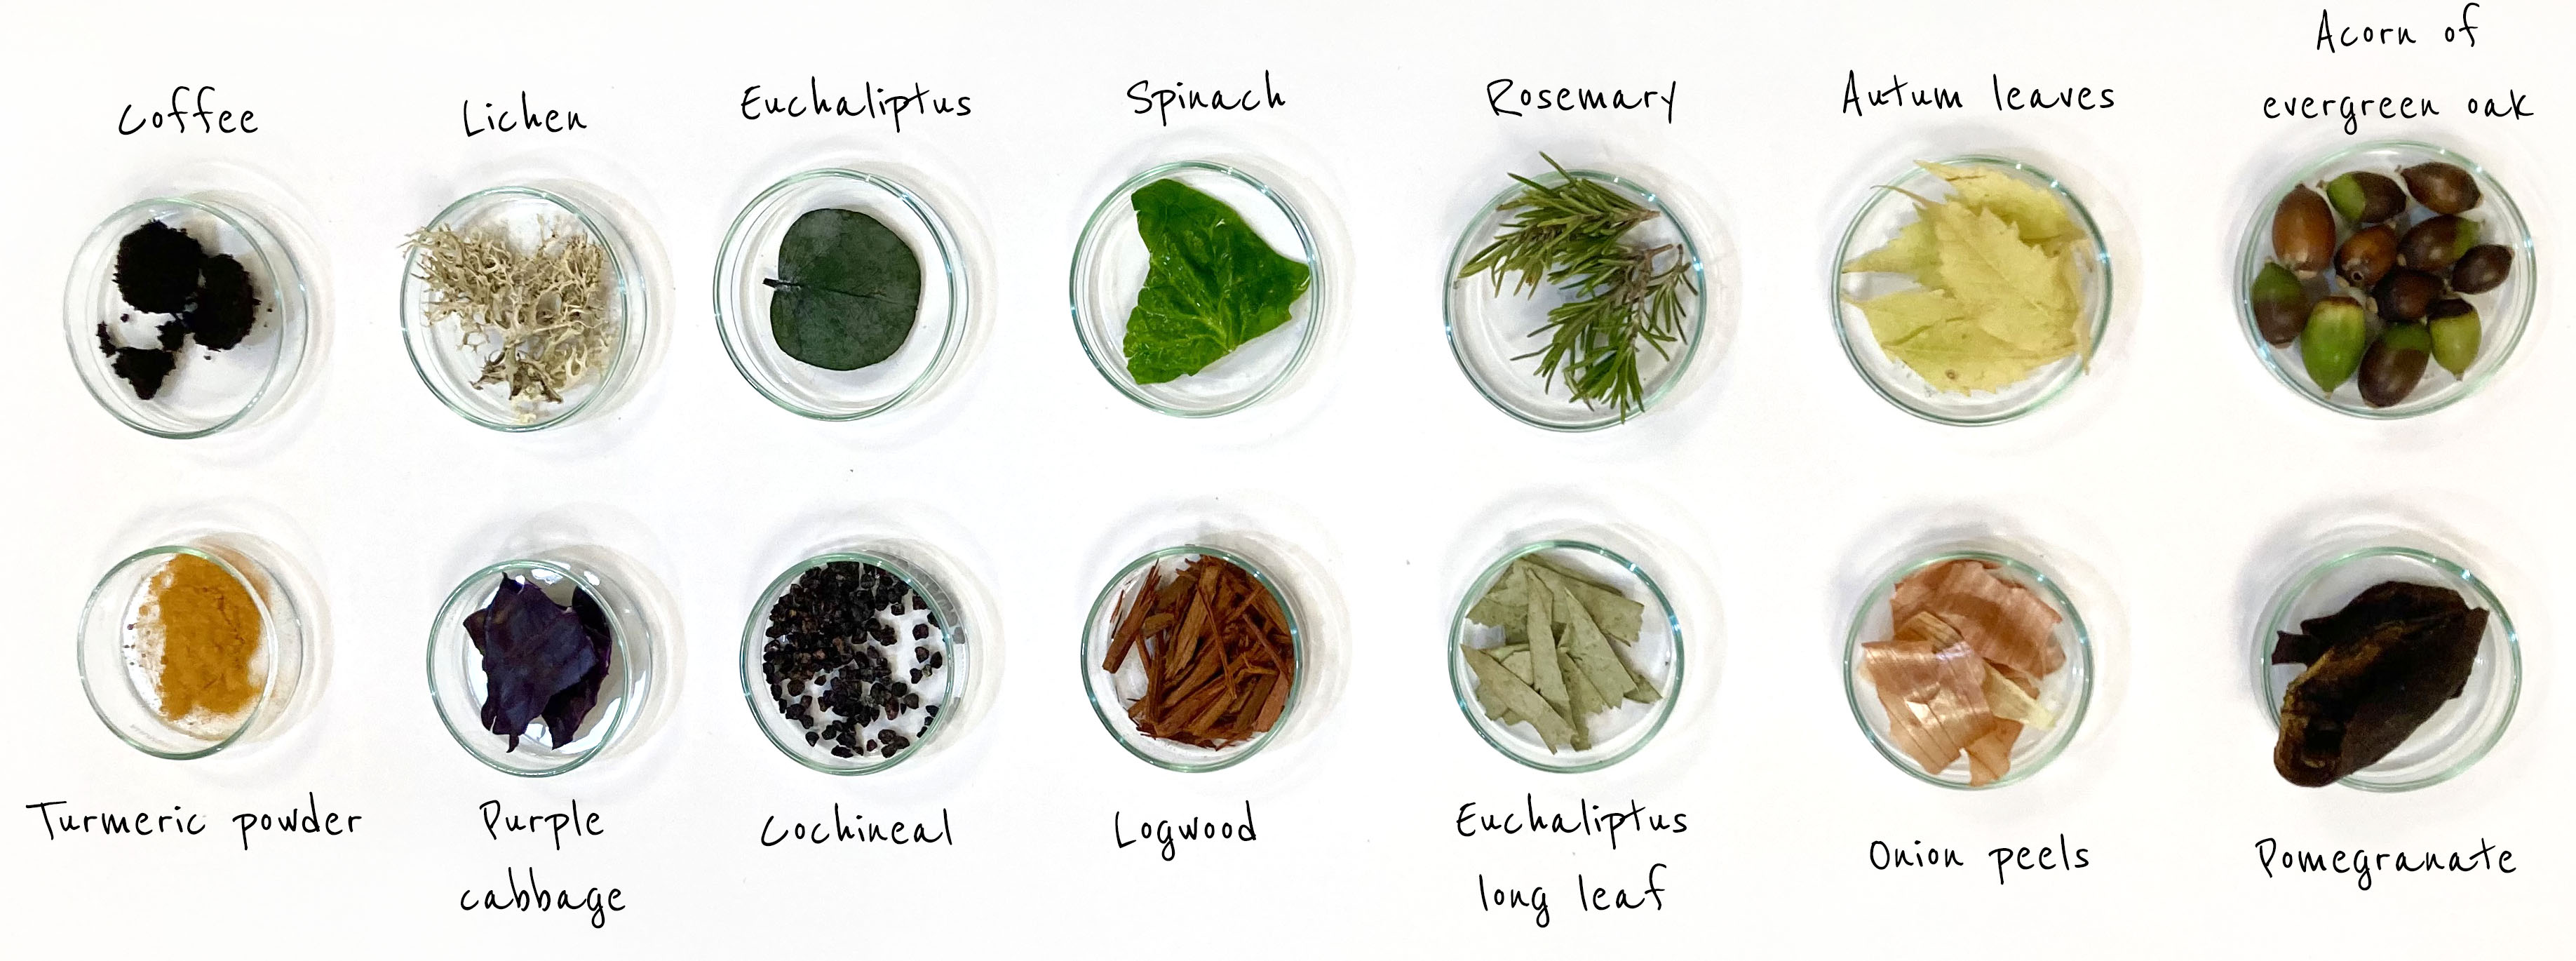
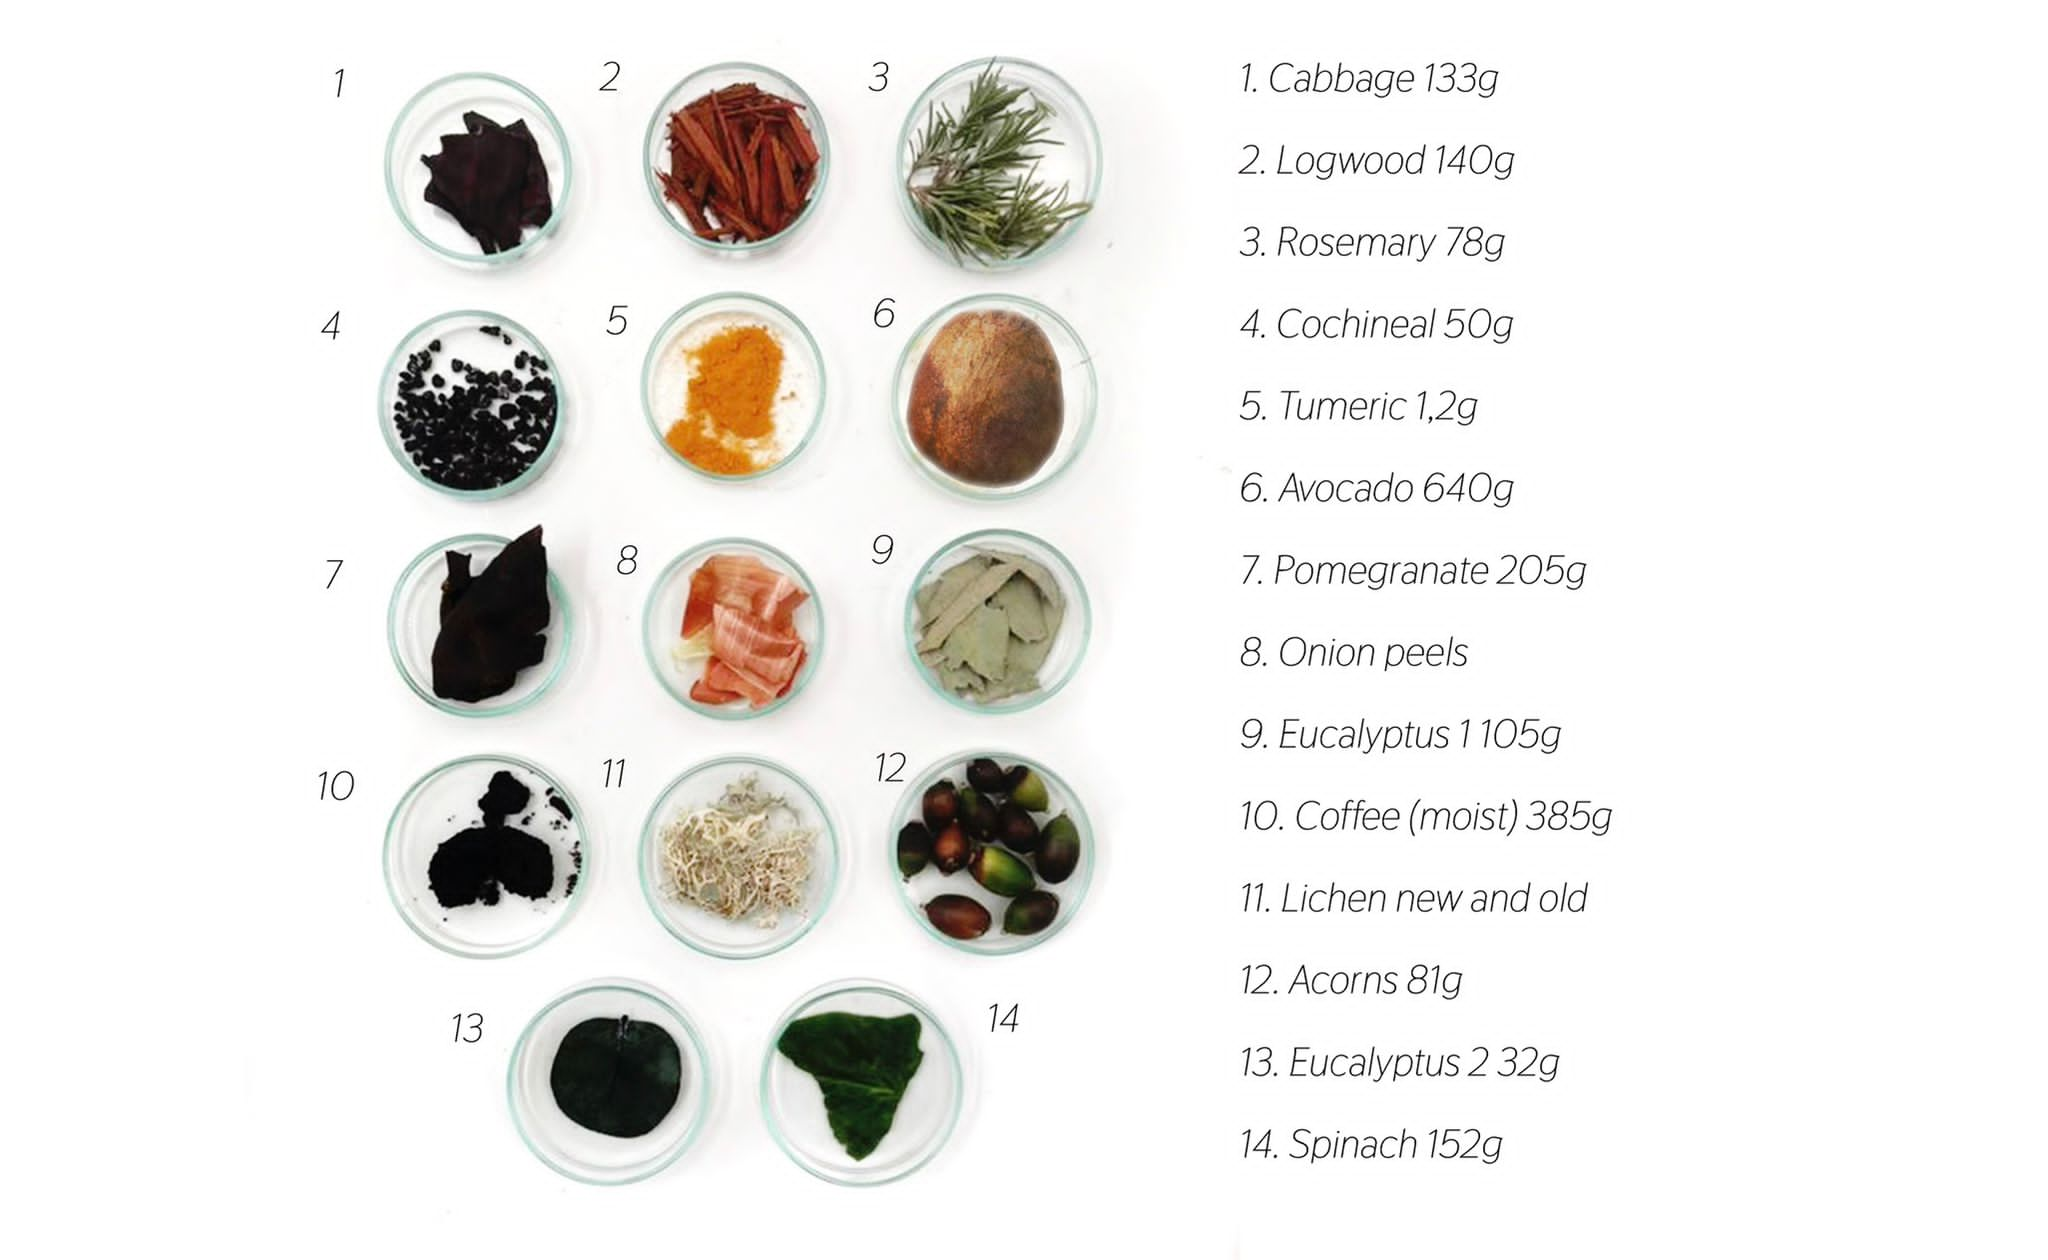
Some dyes materials to use
- Avocado pits and peels
- Pomegranate
- Flowers
- Old copper
- Madder root
- Alkanet roots
- Turmeric roots or powder (Cúrcuma)
- Hibiscus flowers
- Onion peels
- Campeche wood
- Weld plant
- Annatto seeds
- Indigo
- Purple cabbage
- Autumn Leaves
- Spinach
- Paprika
- Carrots
- Coffee
- Eucaliptus
- Rosemary
- Sage (Salvia)
- Oregano
- Acorn caps
- Acorn of evergreen oak
- Logwood
- Cochineal
- Lichen
- Basil
- Black beans (leave them in water over the night, next day there will be the colored water to dye the fabric)
More:
Natural Dye
Natural dyes only work on natural fibers so we are going to work work with silk, viscose, cotton and wool.
Tools and ingredients
- Scale
- Dye materials (plants, insects or minerals you will use to dye)
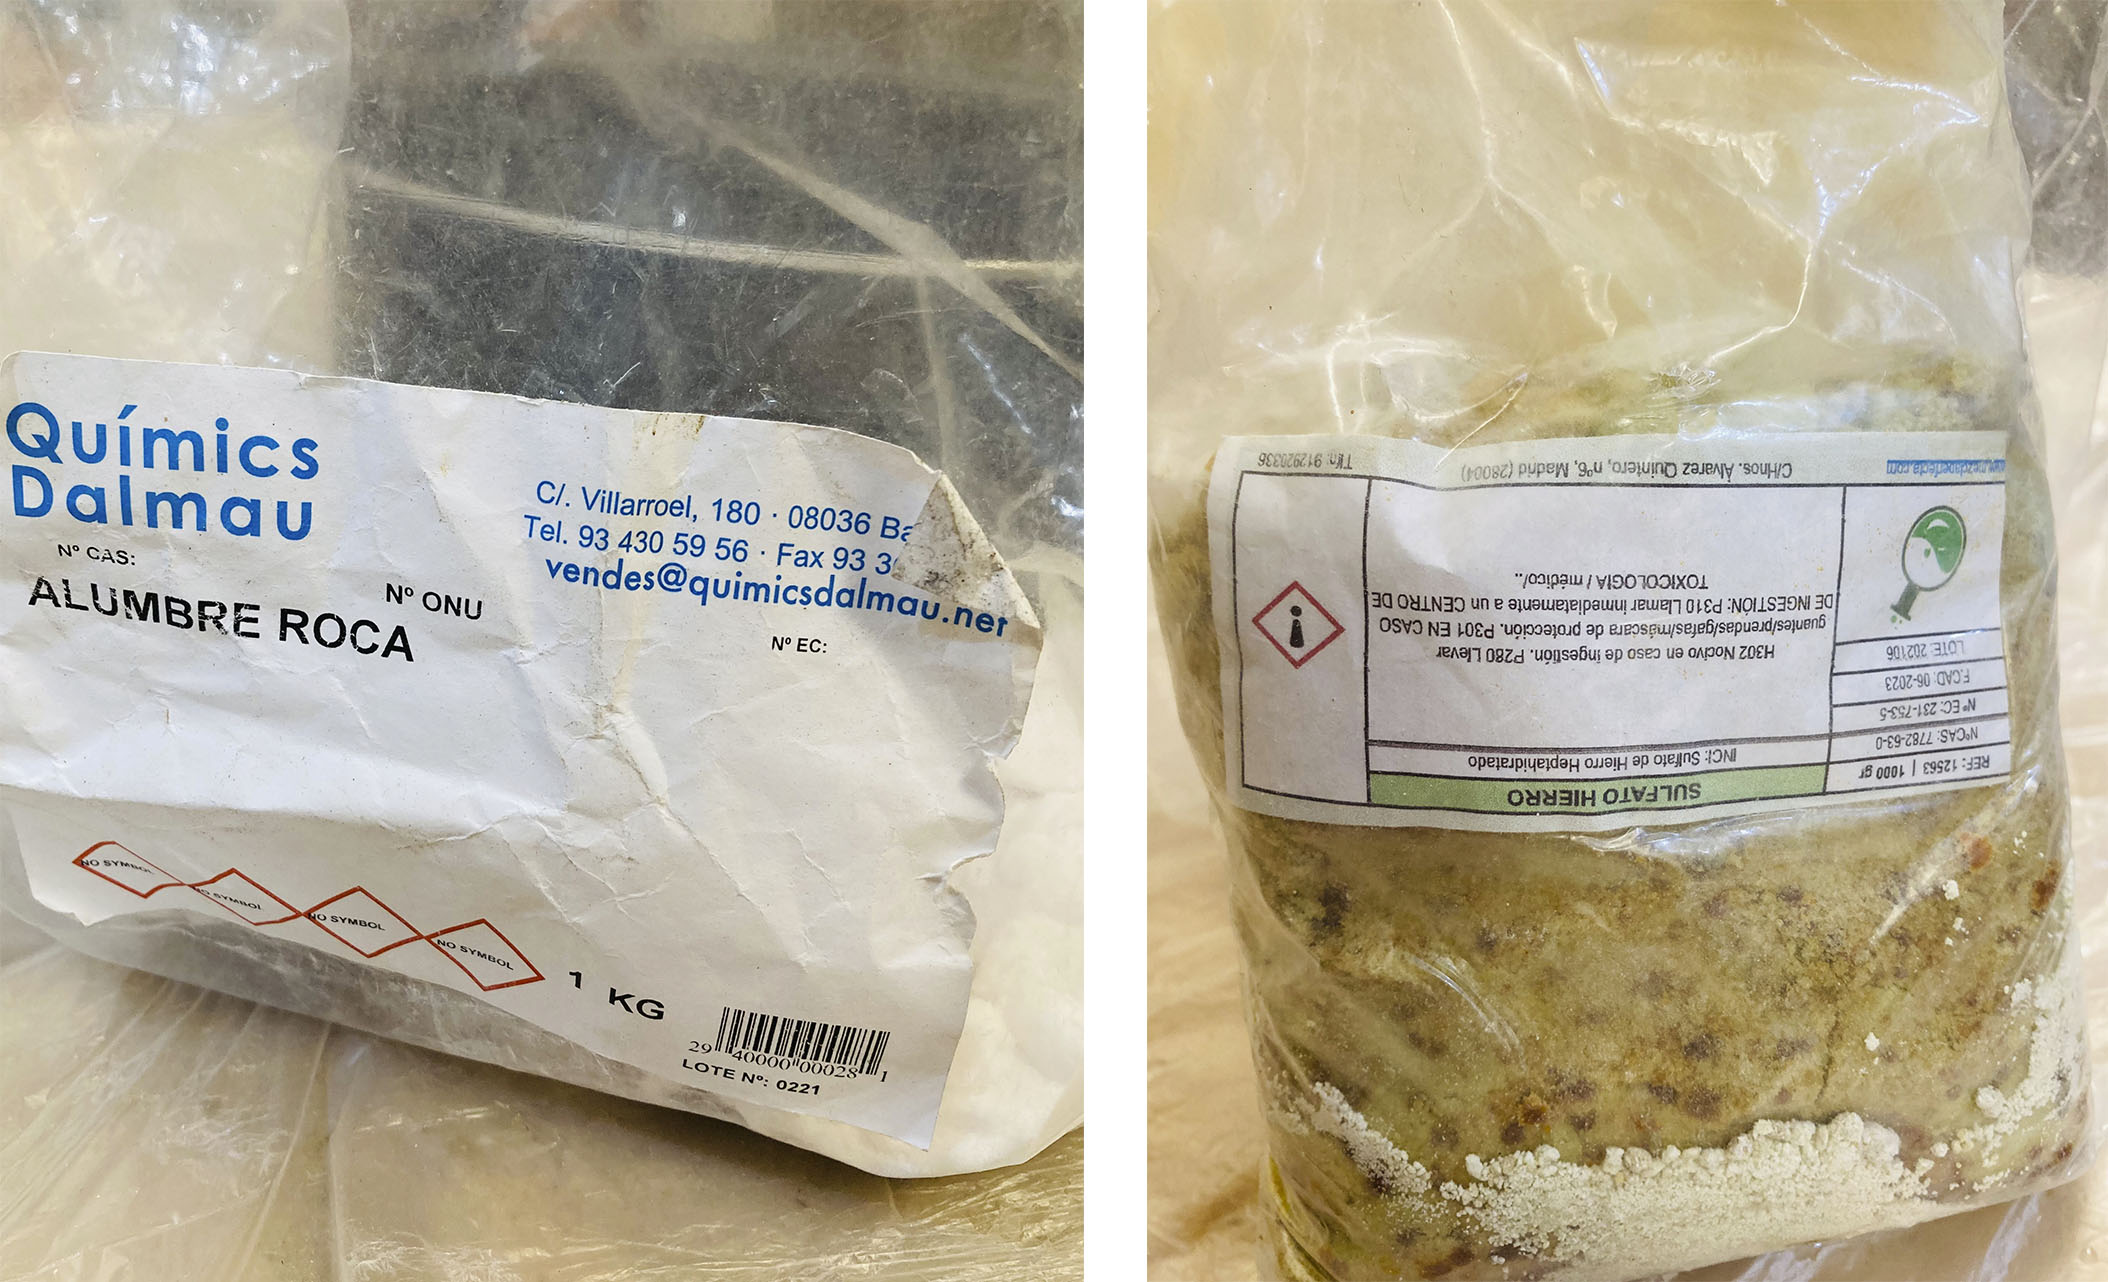
- Mordants (Alum and Iron)
- Fabrics to dye (cotton, linen, viscose, silk, wool).
- Cooking stove
- Stainer
- Pots
- Pans
- Bowls
- Spoons
- Measuring cups/containers
- Access to water to obtain and clean.
Proces
- Weight of fibers (WOF) Cut the fabrics in 12x12cm and weigh them in a scale.
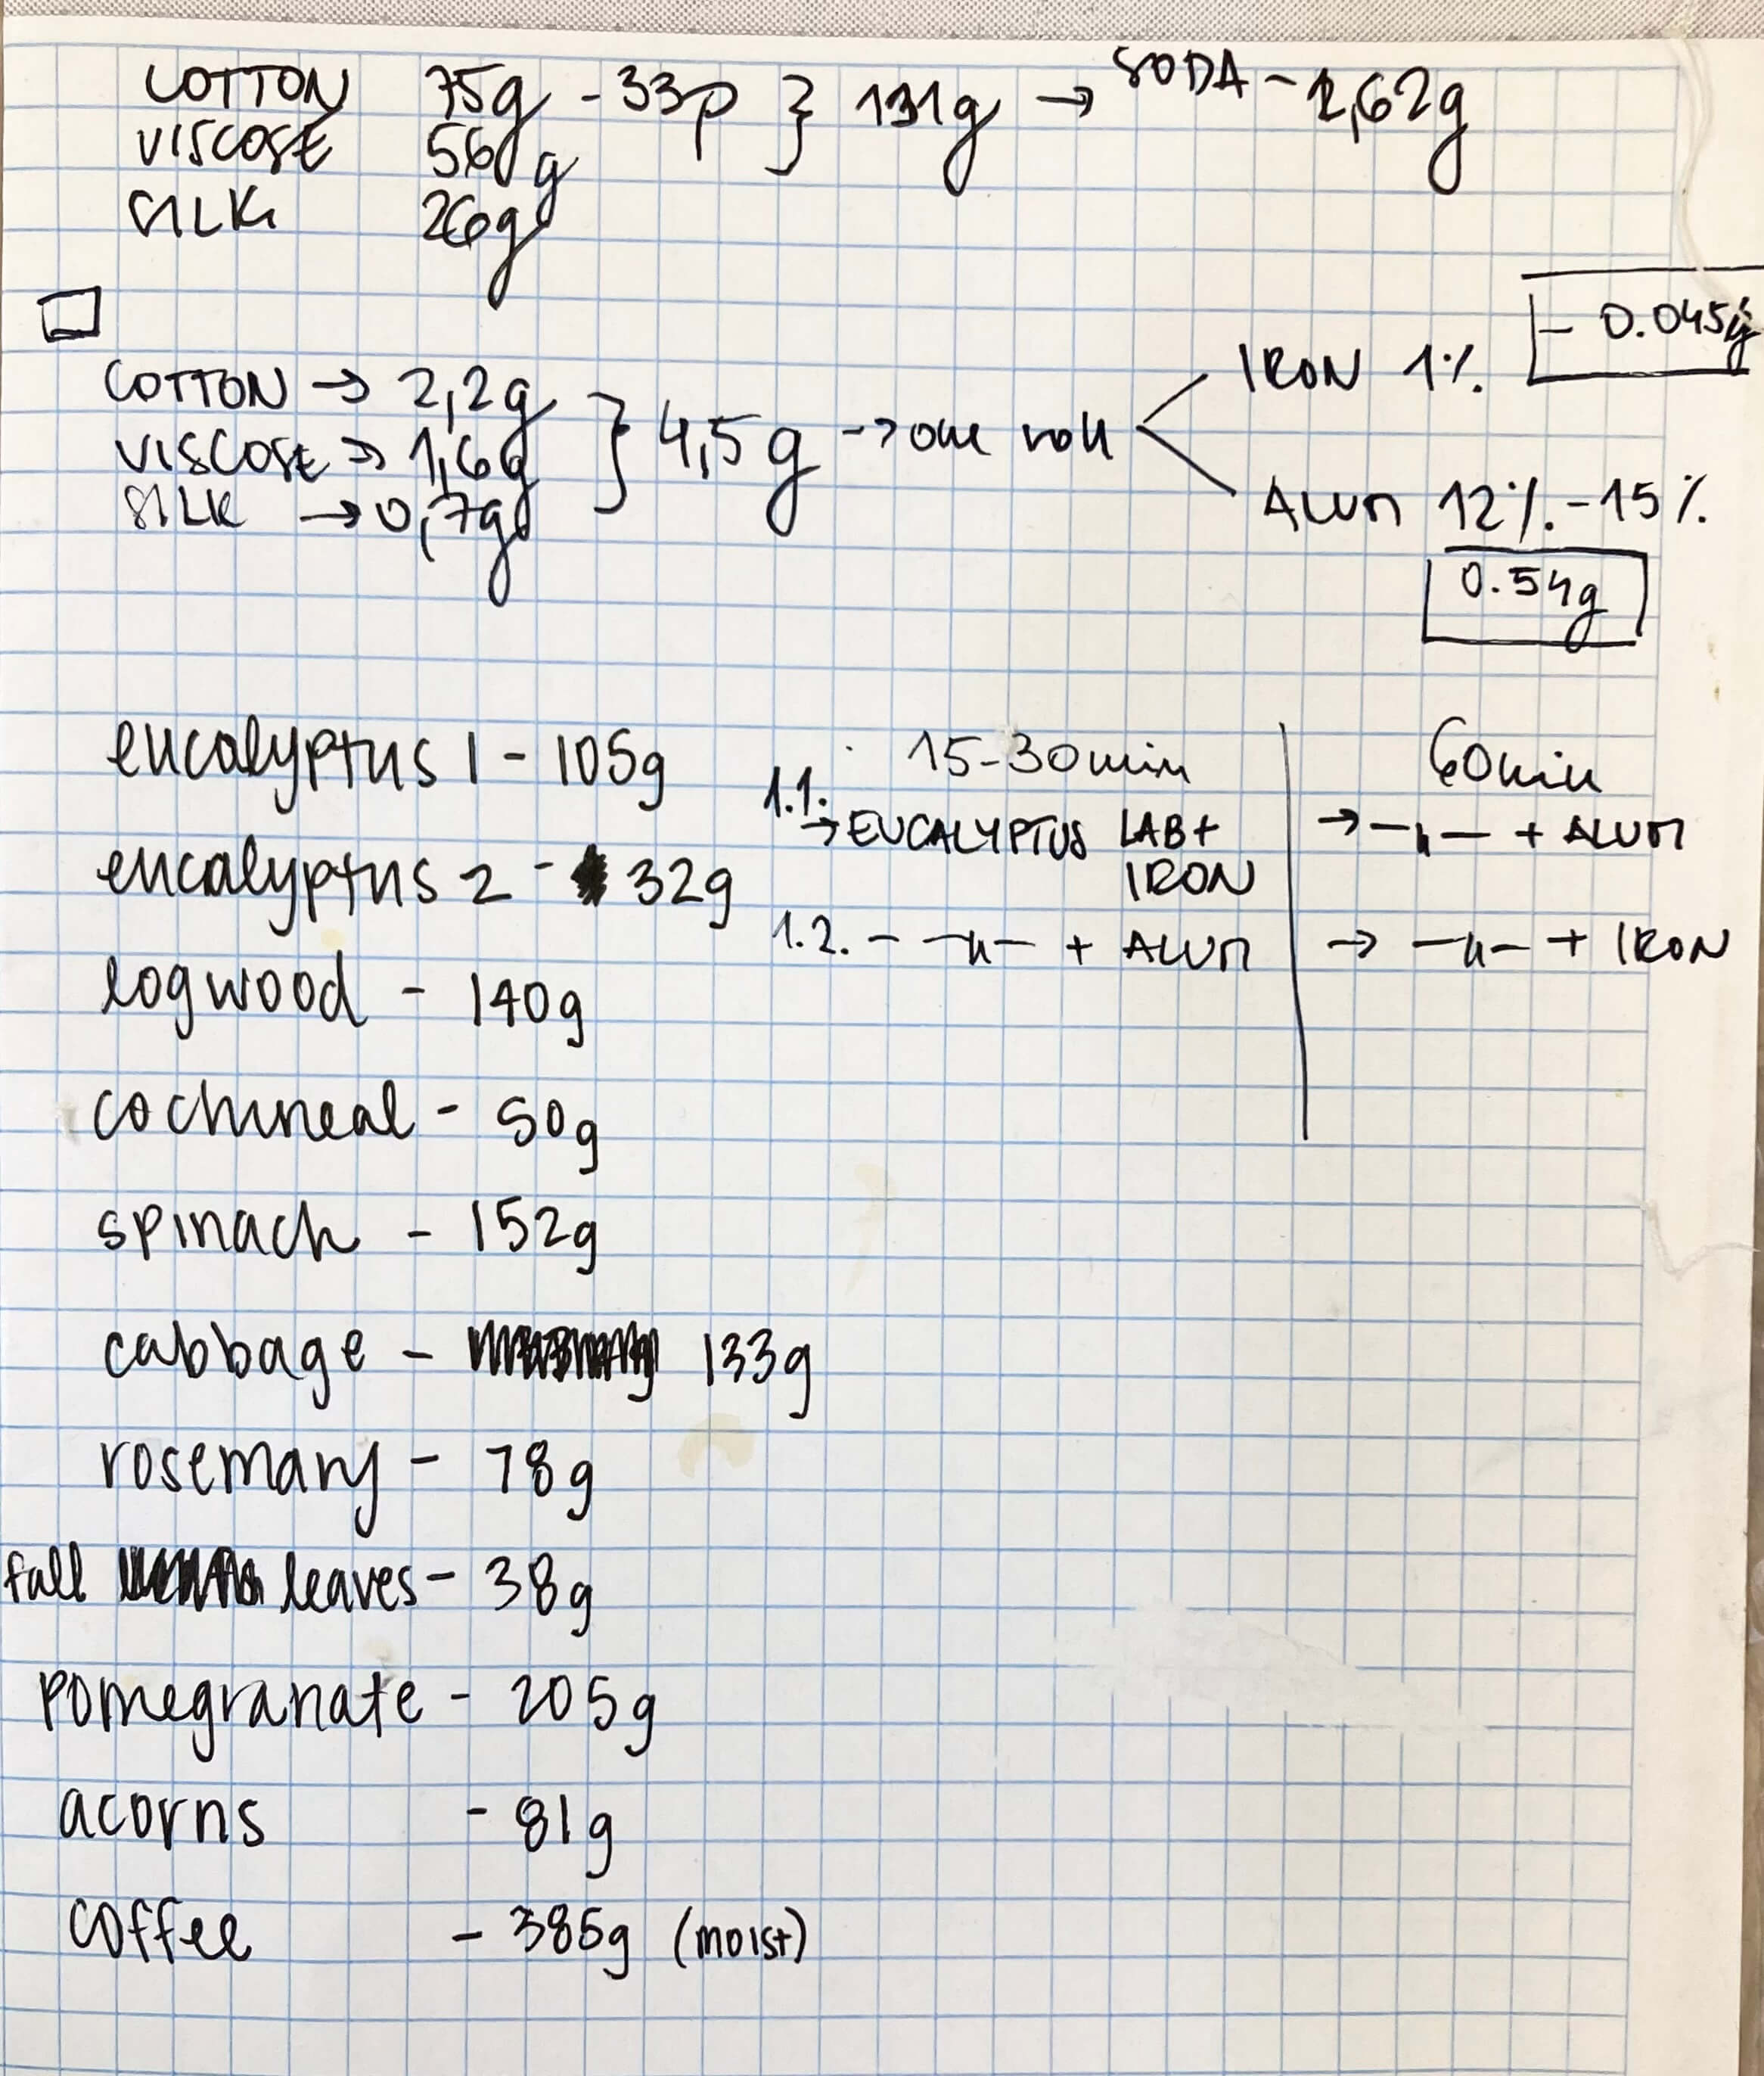
- Scouring Put the plant based fibers (cotton and the viscose) in a pot and add 2% of soda of the total WOF. Let them simmer 1 hour. For the animal based fibers (silk) clean with neutral soap and warm water. This step is so important to get the fabrics are clean and ready to dye without any treatment.
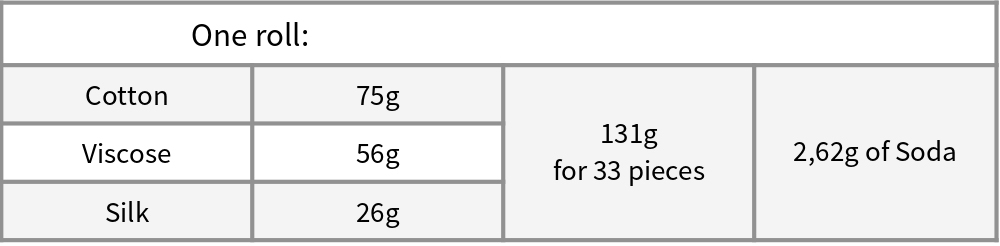

- Mordanting this step let the fabric absorb easily the dyes. There are two types, the Alum to get brighter tone (12% of the WOF) and the Iron for darker tone (1% of WOF).

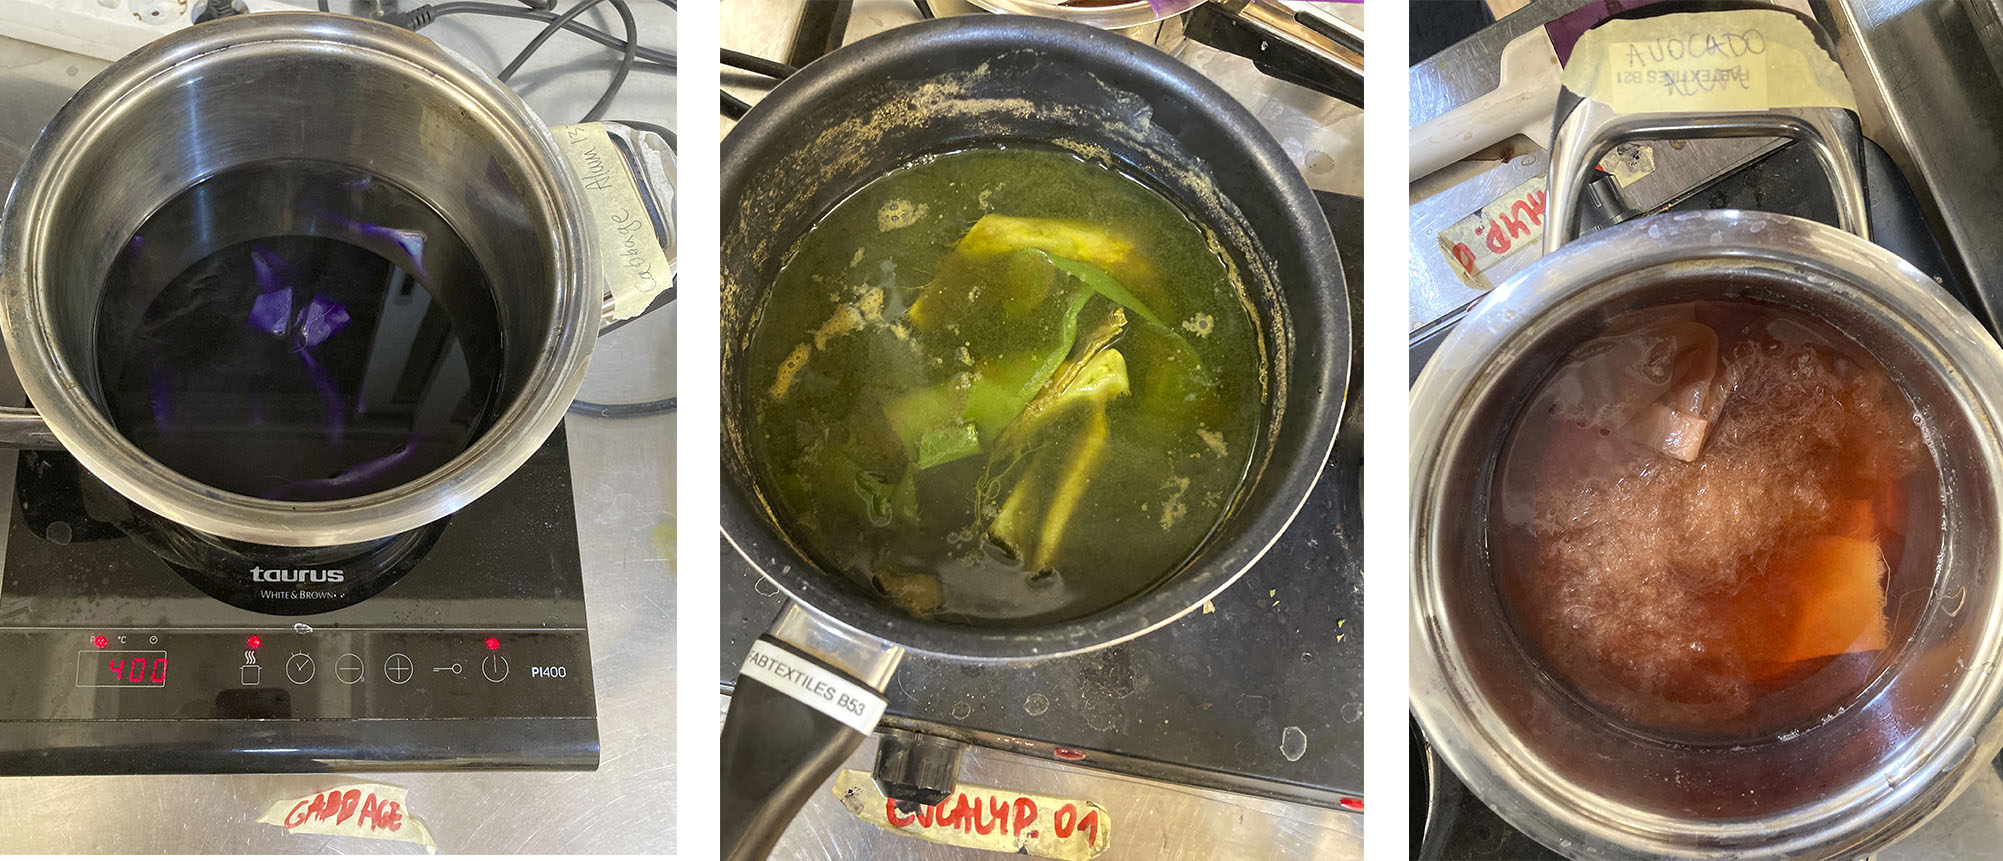
- Prepare dye bath depending on the WOF. Add the dye material to one pot. Then fill the pots with water and slowly heat to about 70/85ºC. Be careful to do not let boil the dye. Let this temperature during 1 hour or more depend of the material dye. The water should be coloured. Turn off the heat and let the dye bath soak with the dye material overnight.
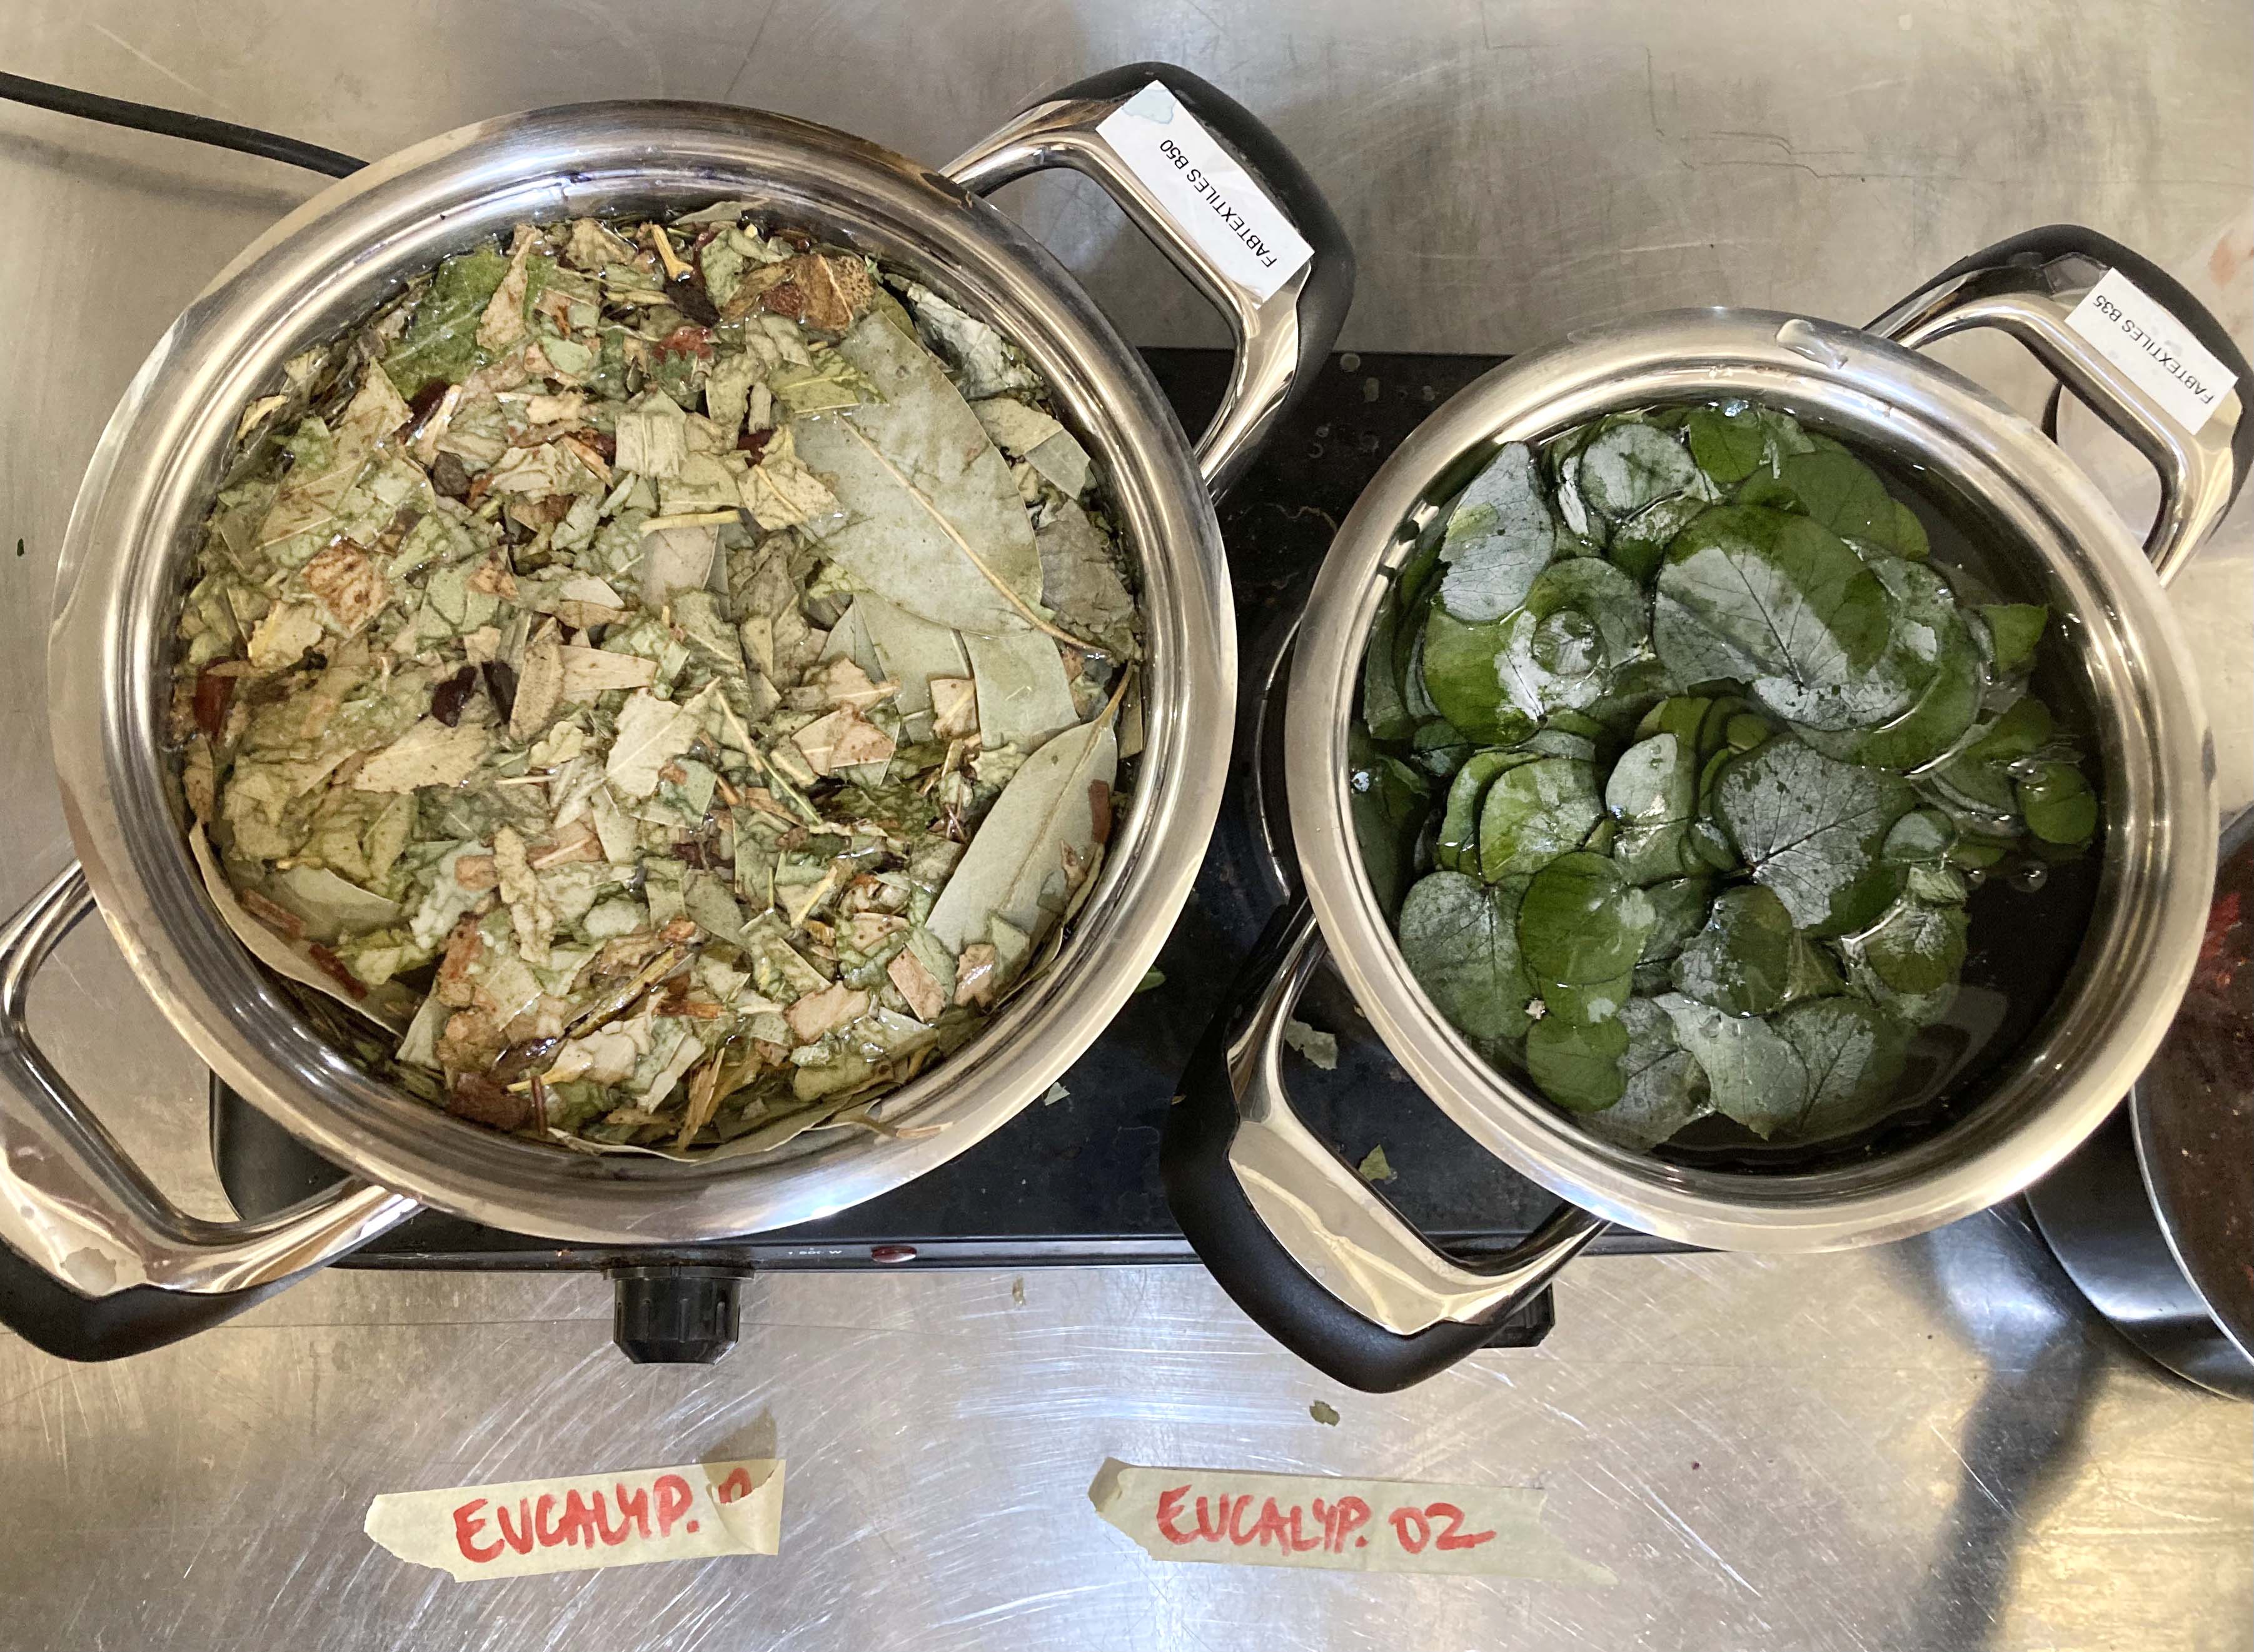
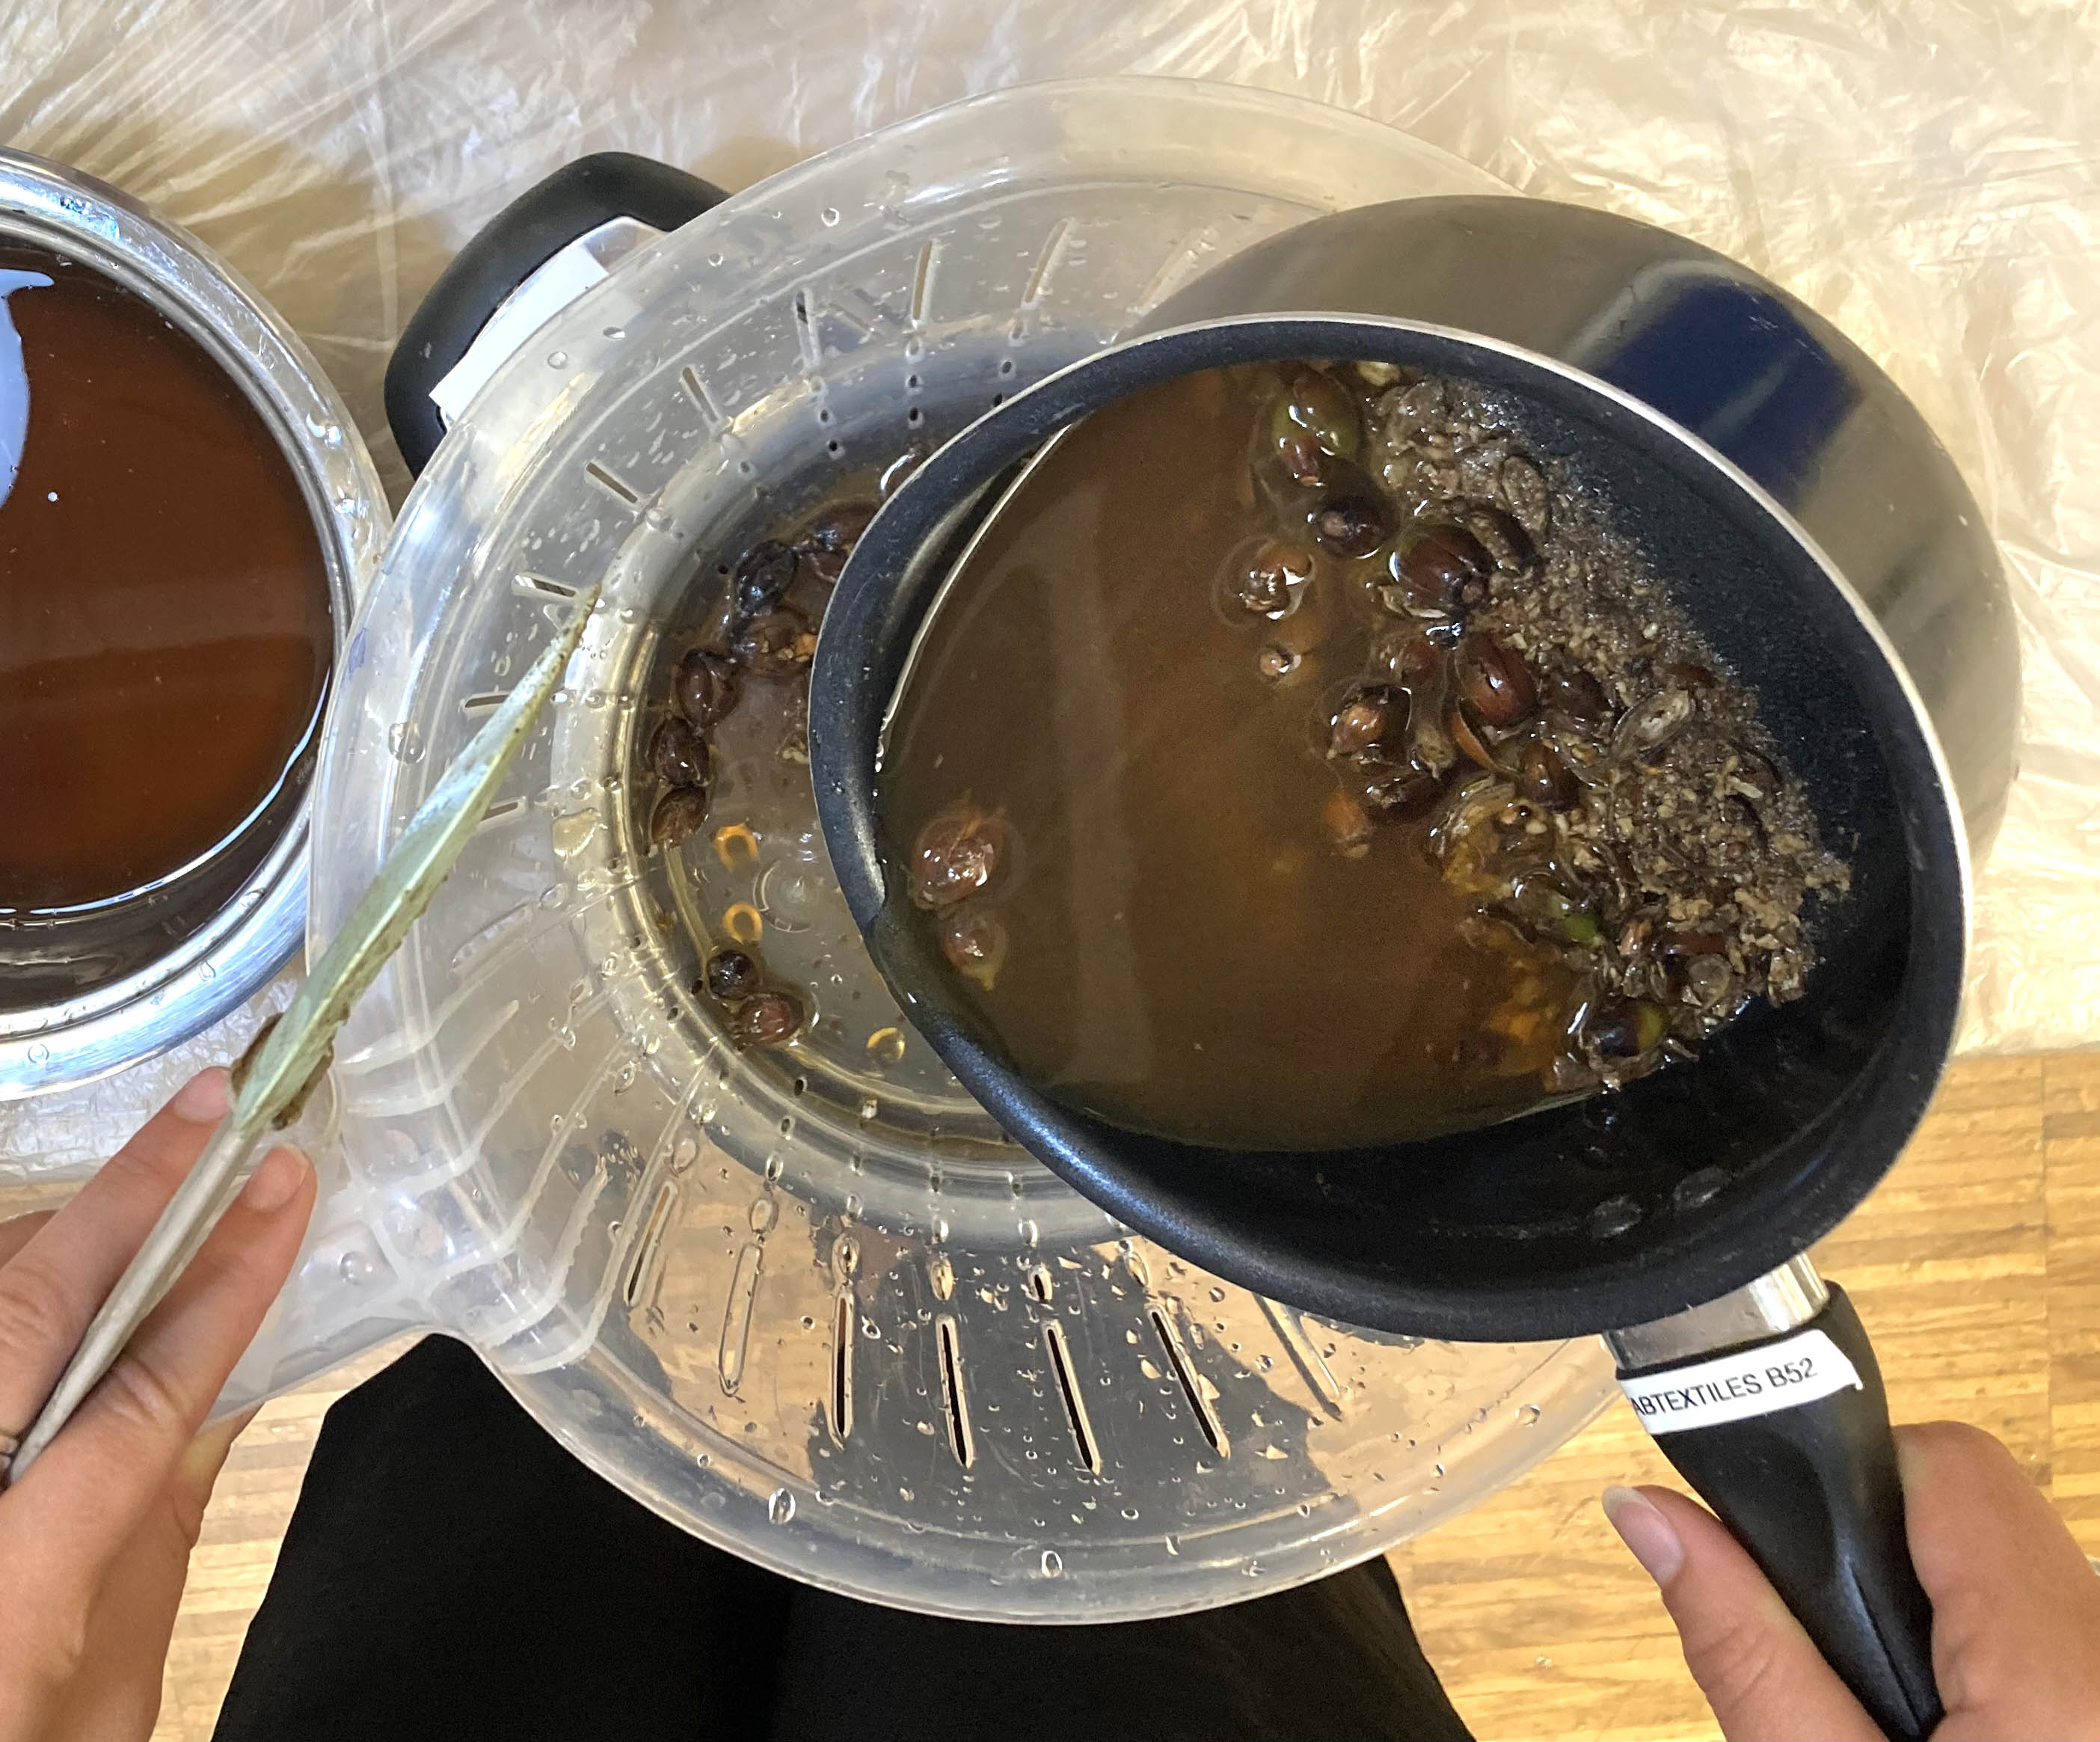
- Strain the dye bath with material dye to get the dye bath ready to use.
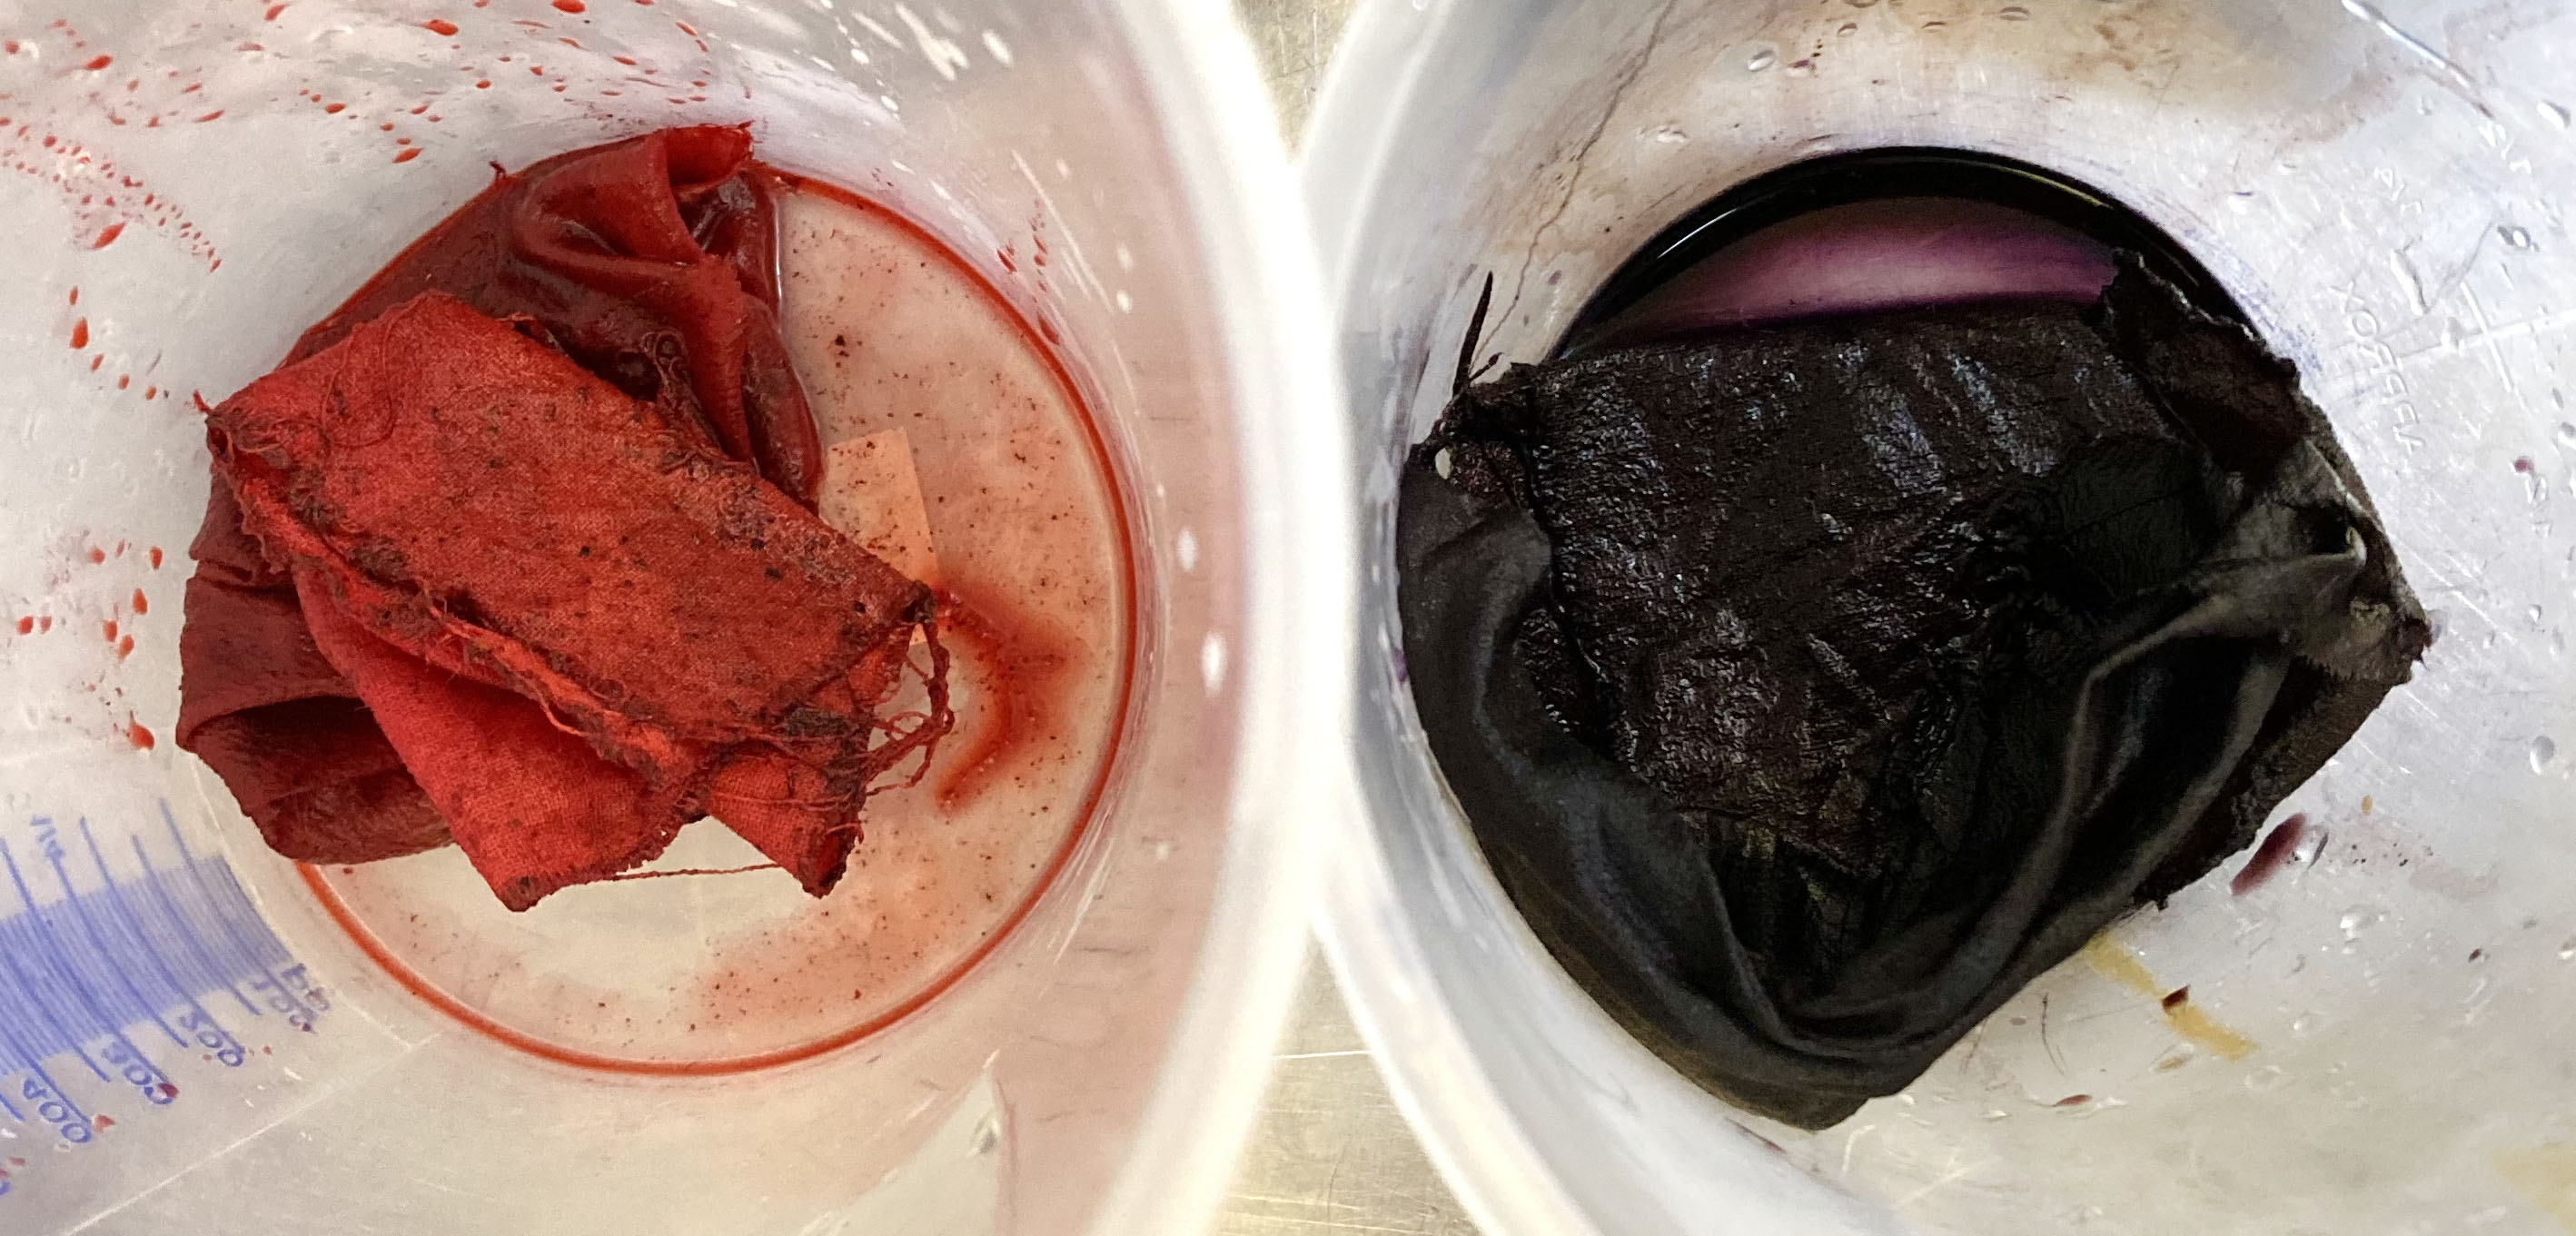
- Take your wet mordanted fabric in the dye pots, one with Alum and the other with Iron. Bring it very slowly to simmer (do not boil!).

- Let simmer for a few hours, depending on the materials, in our case we use 30' and 1 hour. During this time the fiber will take up as much dye as it possibly can.
If the dye bath still has color after our first dye bath, you can add more fiber and simmer it for a few hours for a second dye bath. However, the first dye bath will have always the deepest tones.
- After the Dye Bath, wash the fabrics in water and dry them.
To know more about between material and the fabric dyes you could follow the Dinesh page.
To get brighter tones we used a pre-mordanting technique.
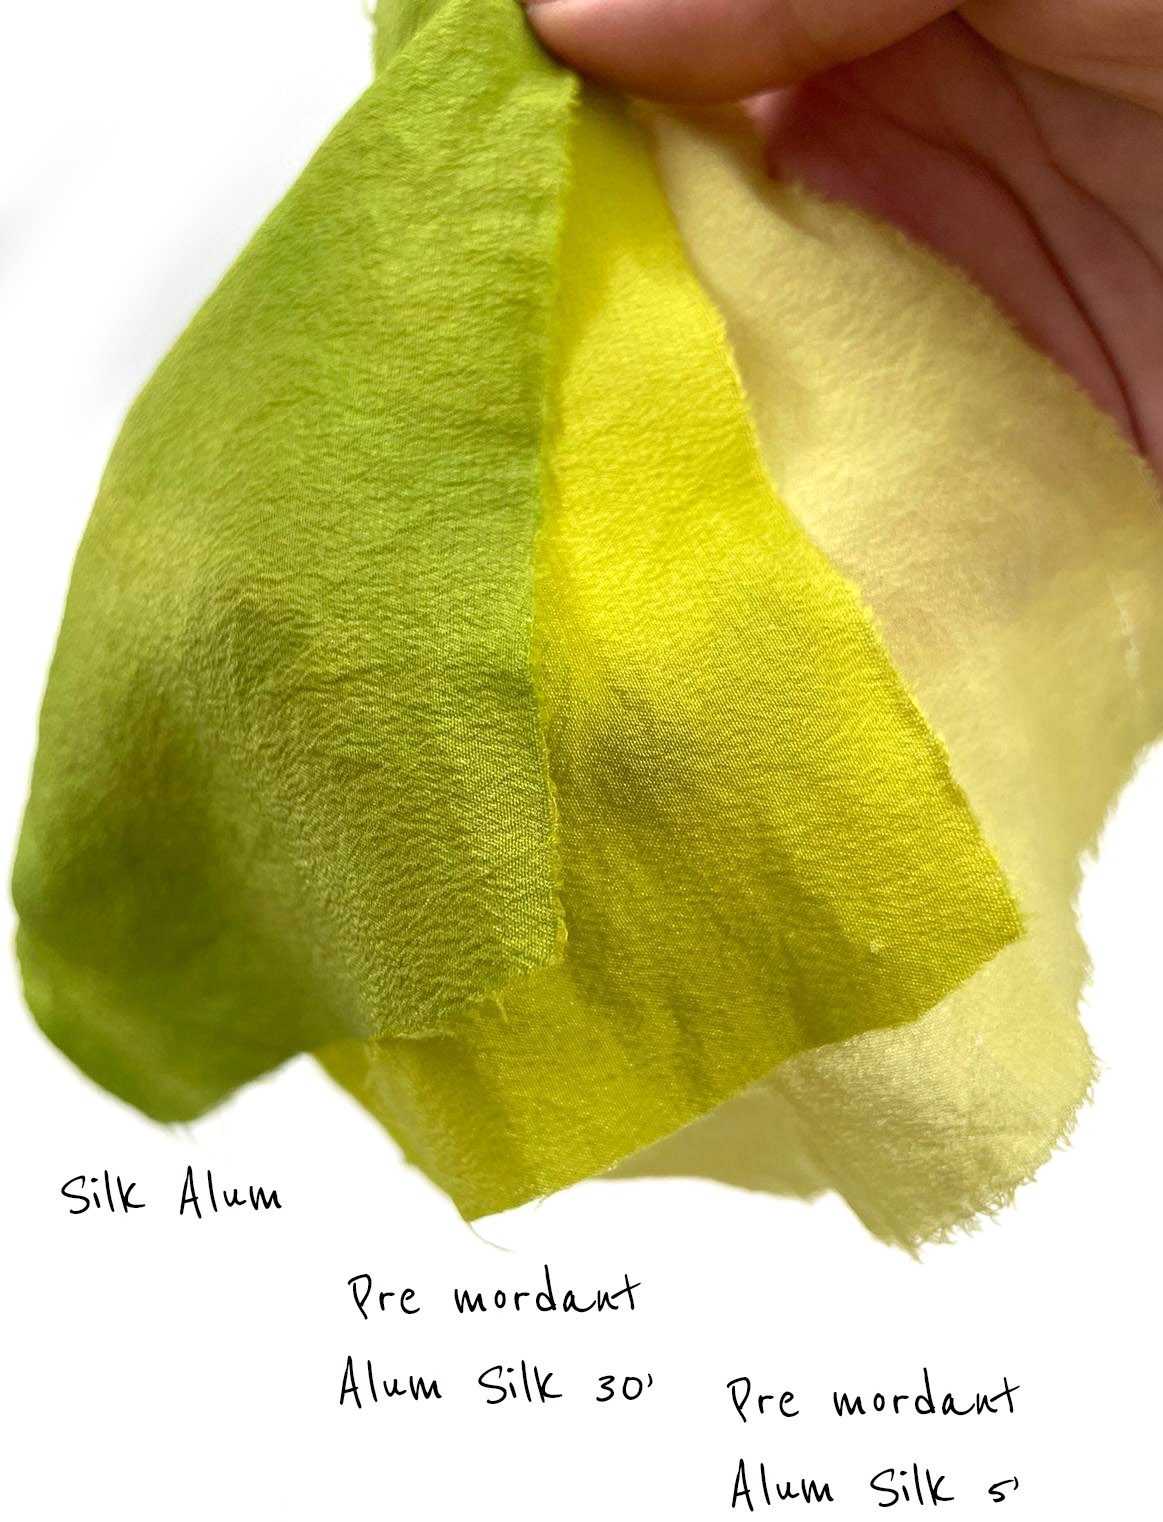
Steps for a brighter tone:
- Measure the dry silk
- Clean the silk with soap and mild water
- Measure alum at 15% WOF
- Dissolve the alum in a pot of water and add the silk
- Leave for 45 minutes on very low heat
- Move the silk to the dye bath and leave it for an amount of time depending on how saturated you want the color to be
Biopantone result
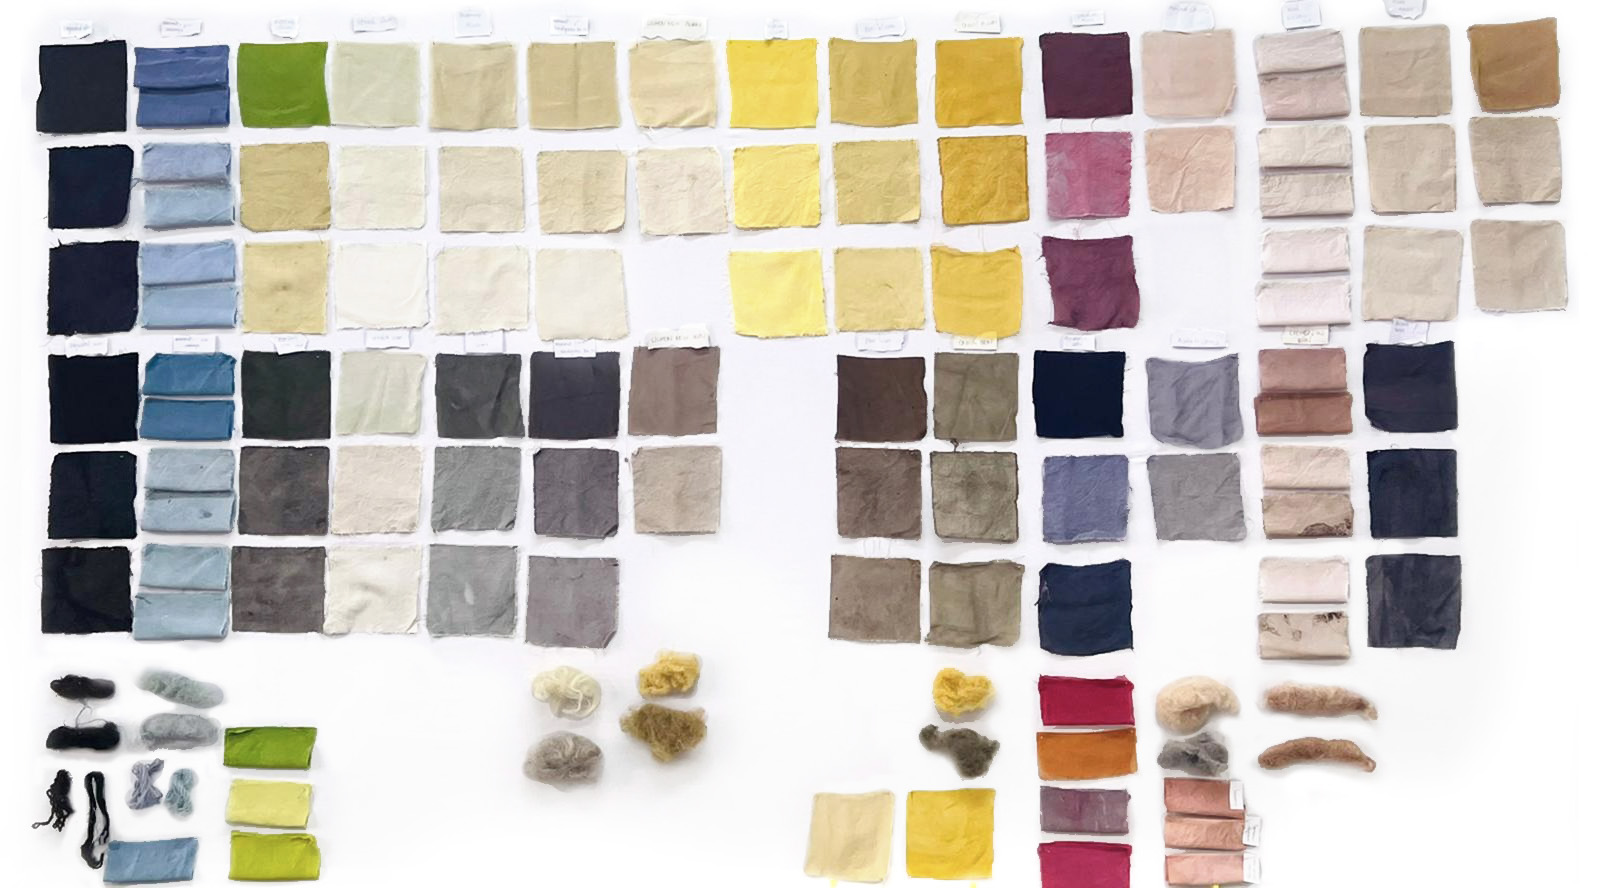
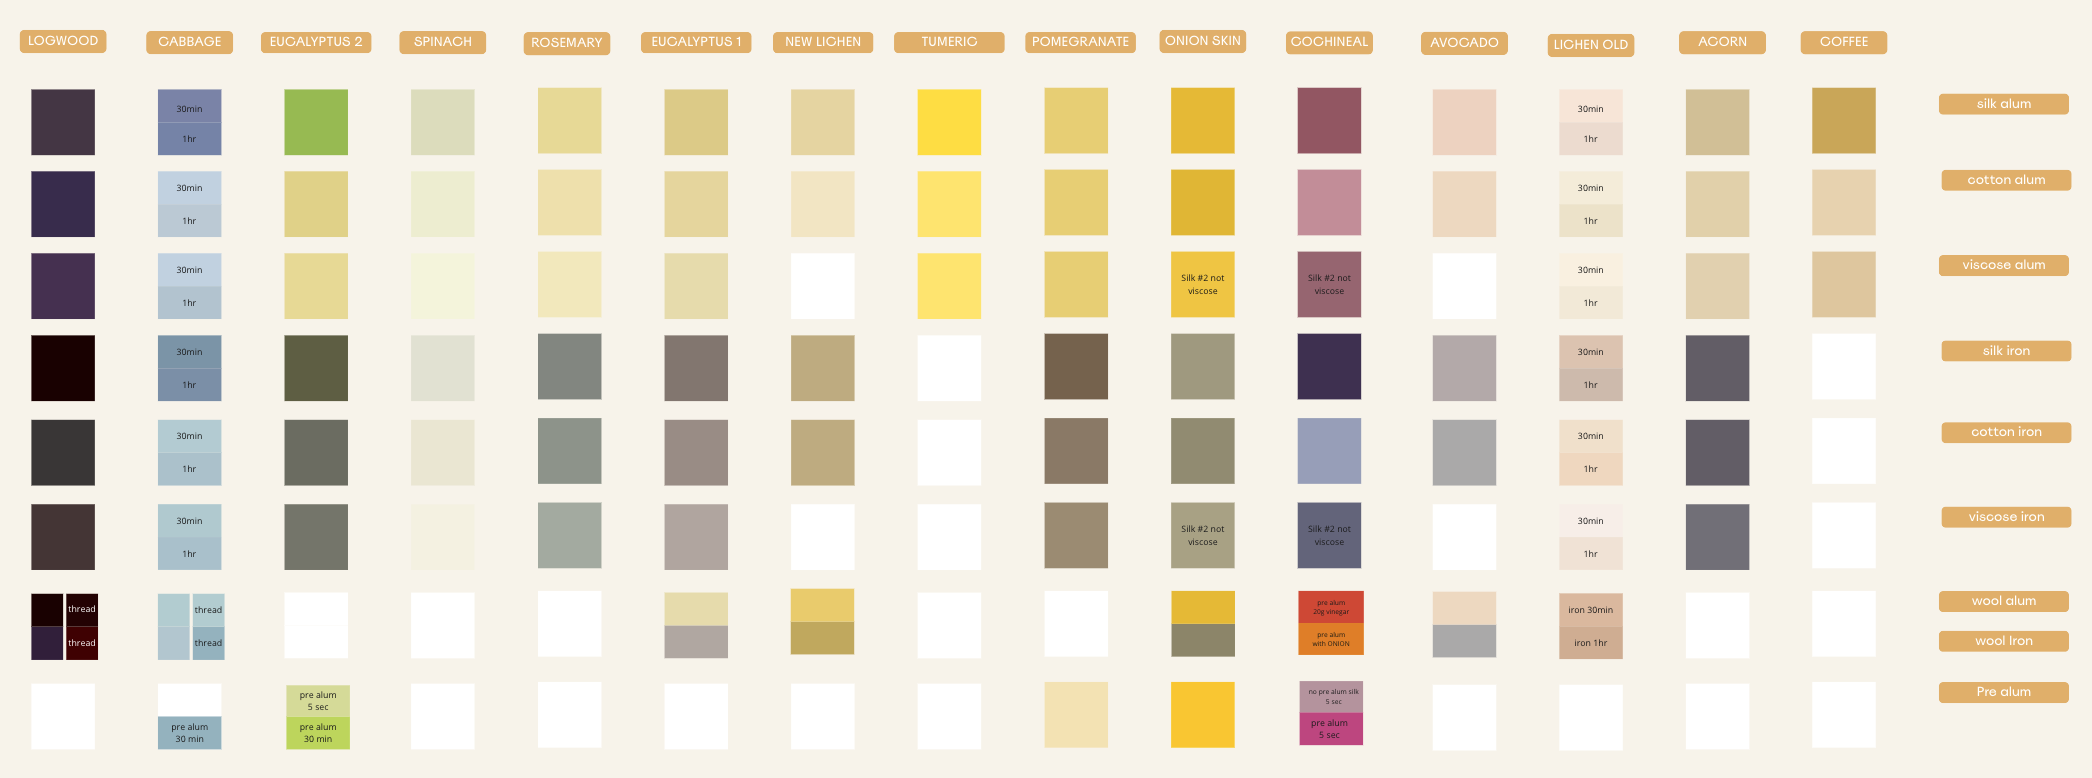
Take a look in our final Digital Biopantone
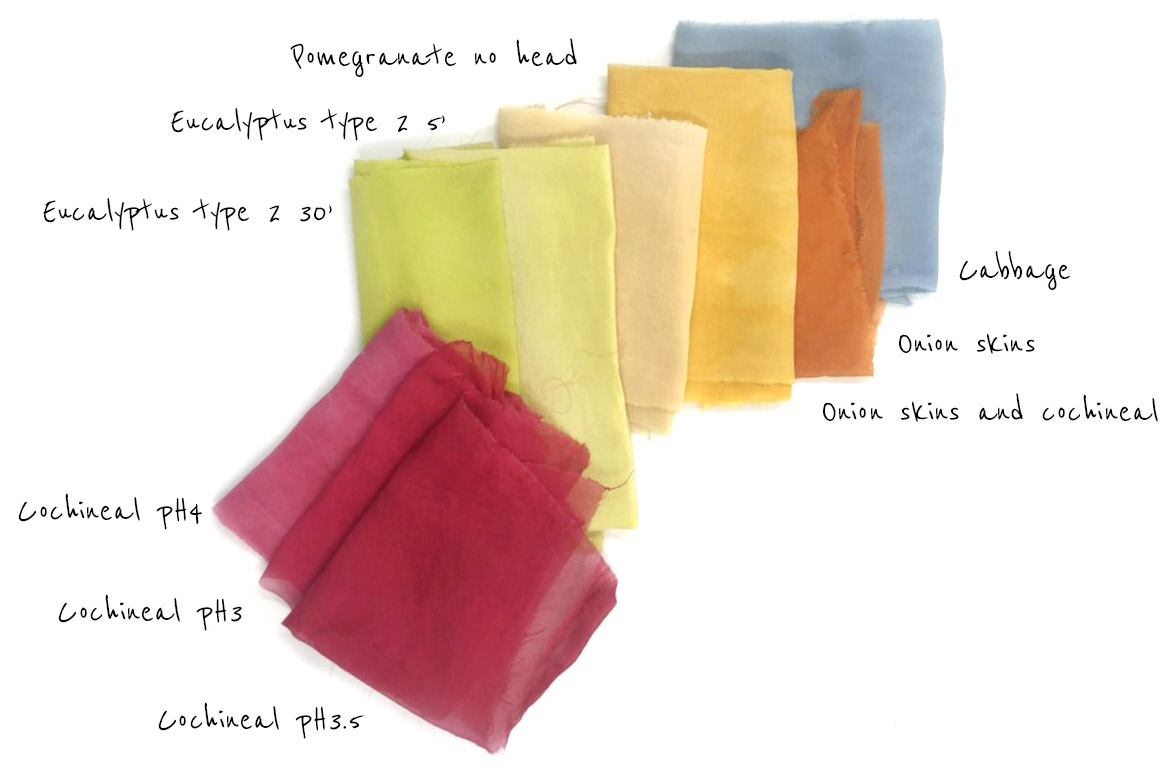
We save the pomegranate peels, the acaron deshidratated (during 9h in 40ºC), and the most colored dye bath to dye the bioplastics the following week!
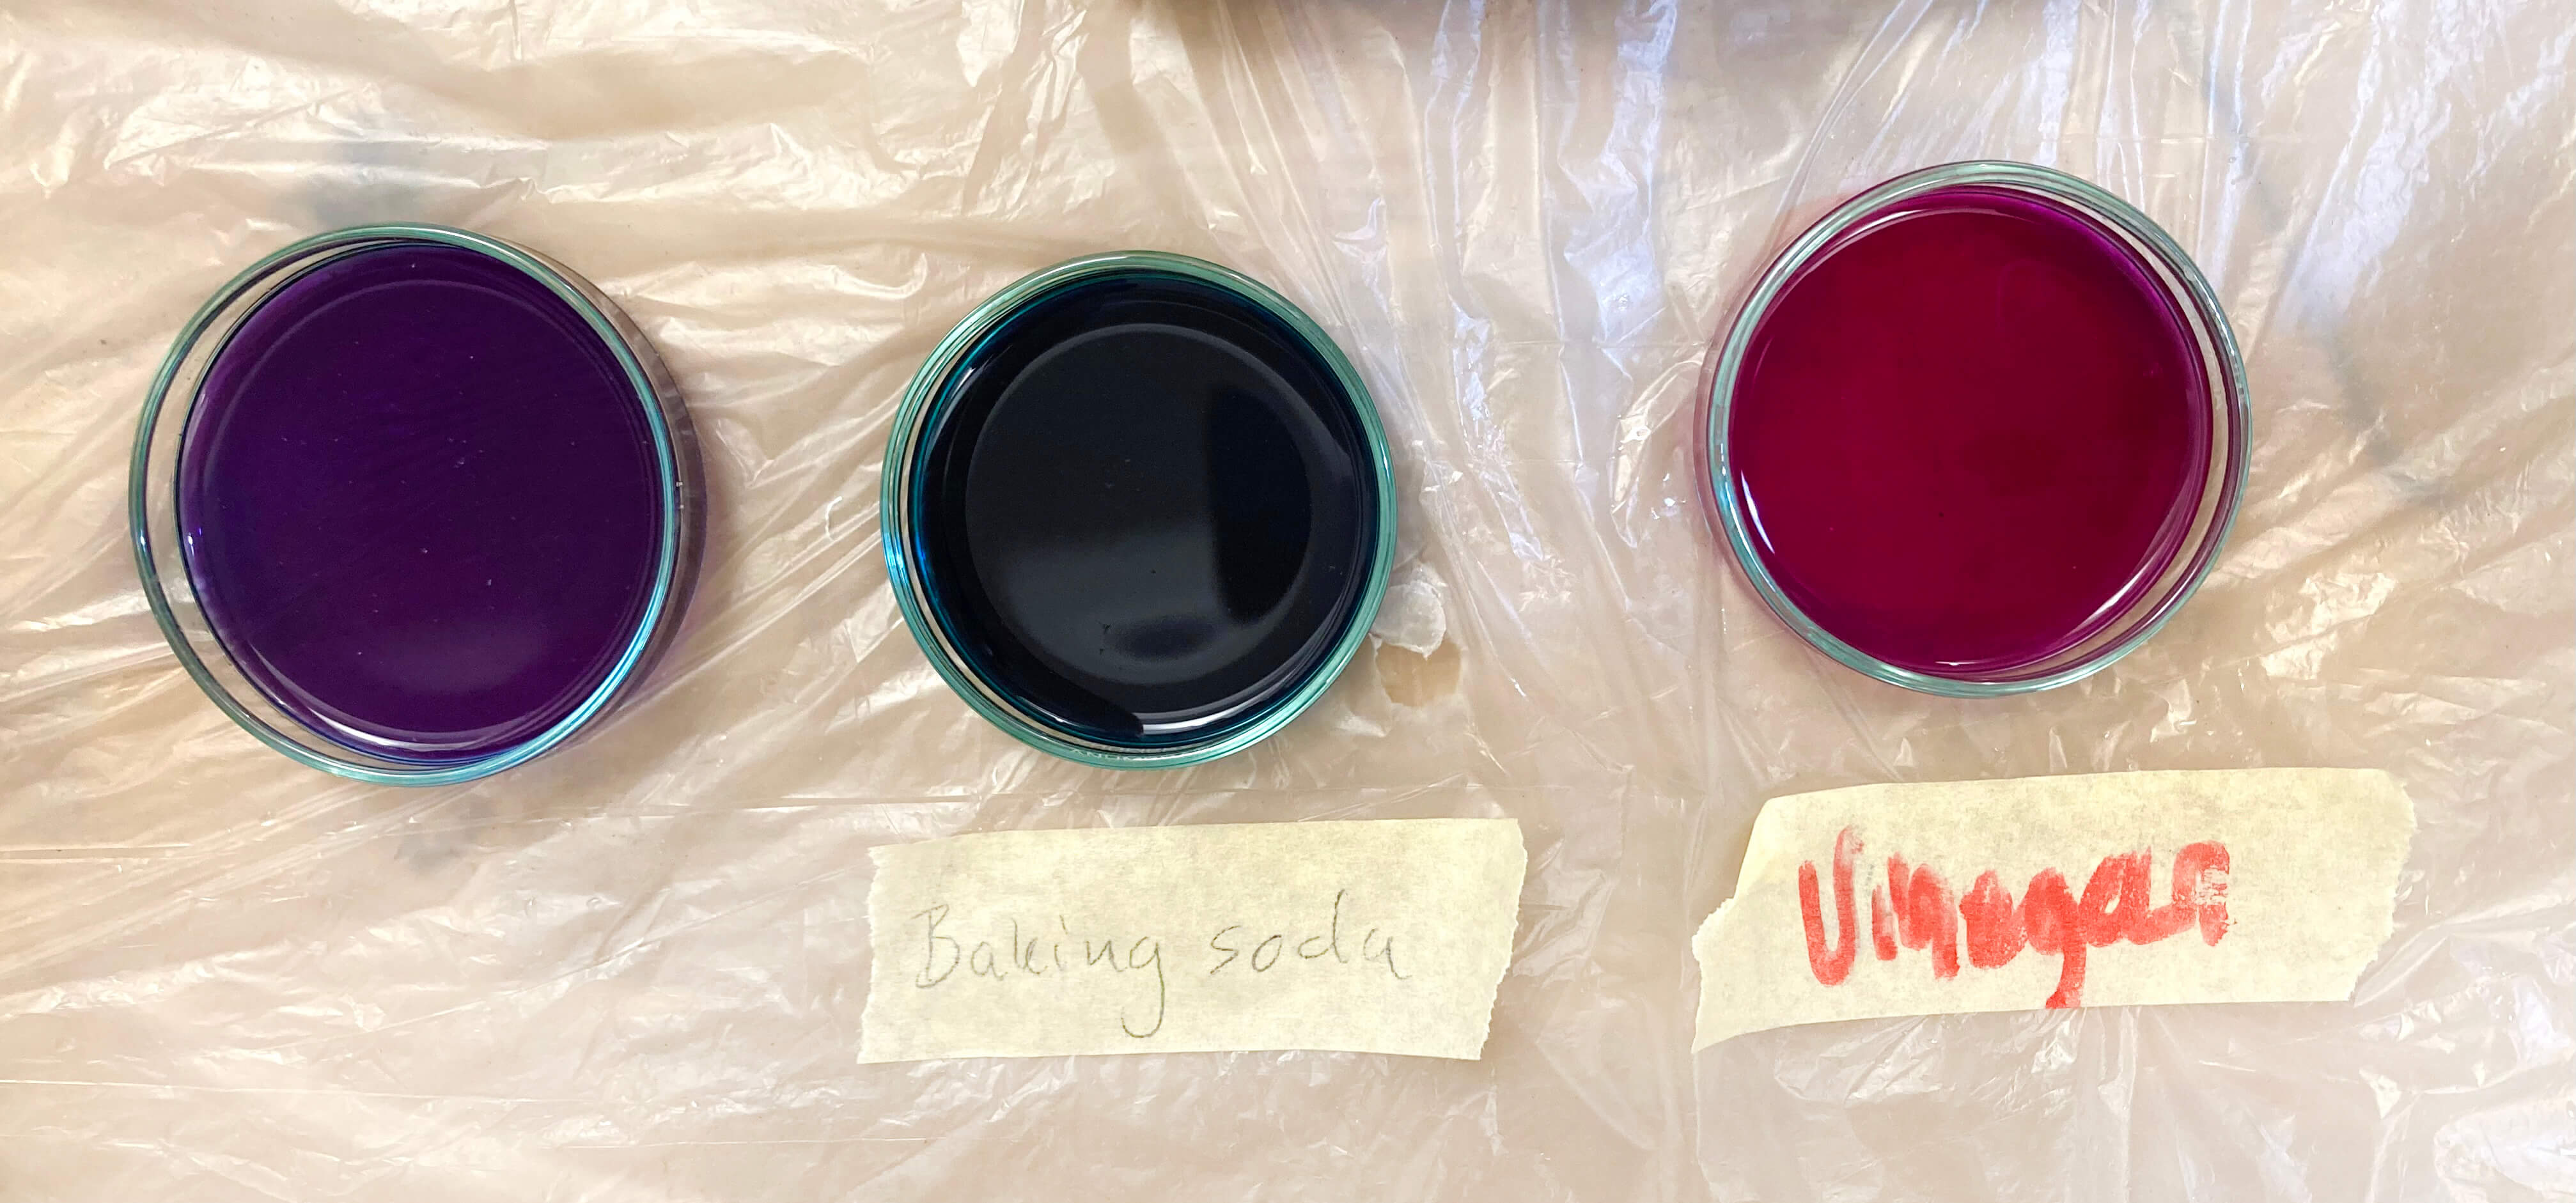
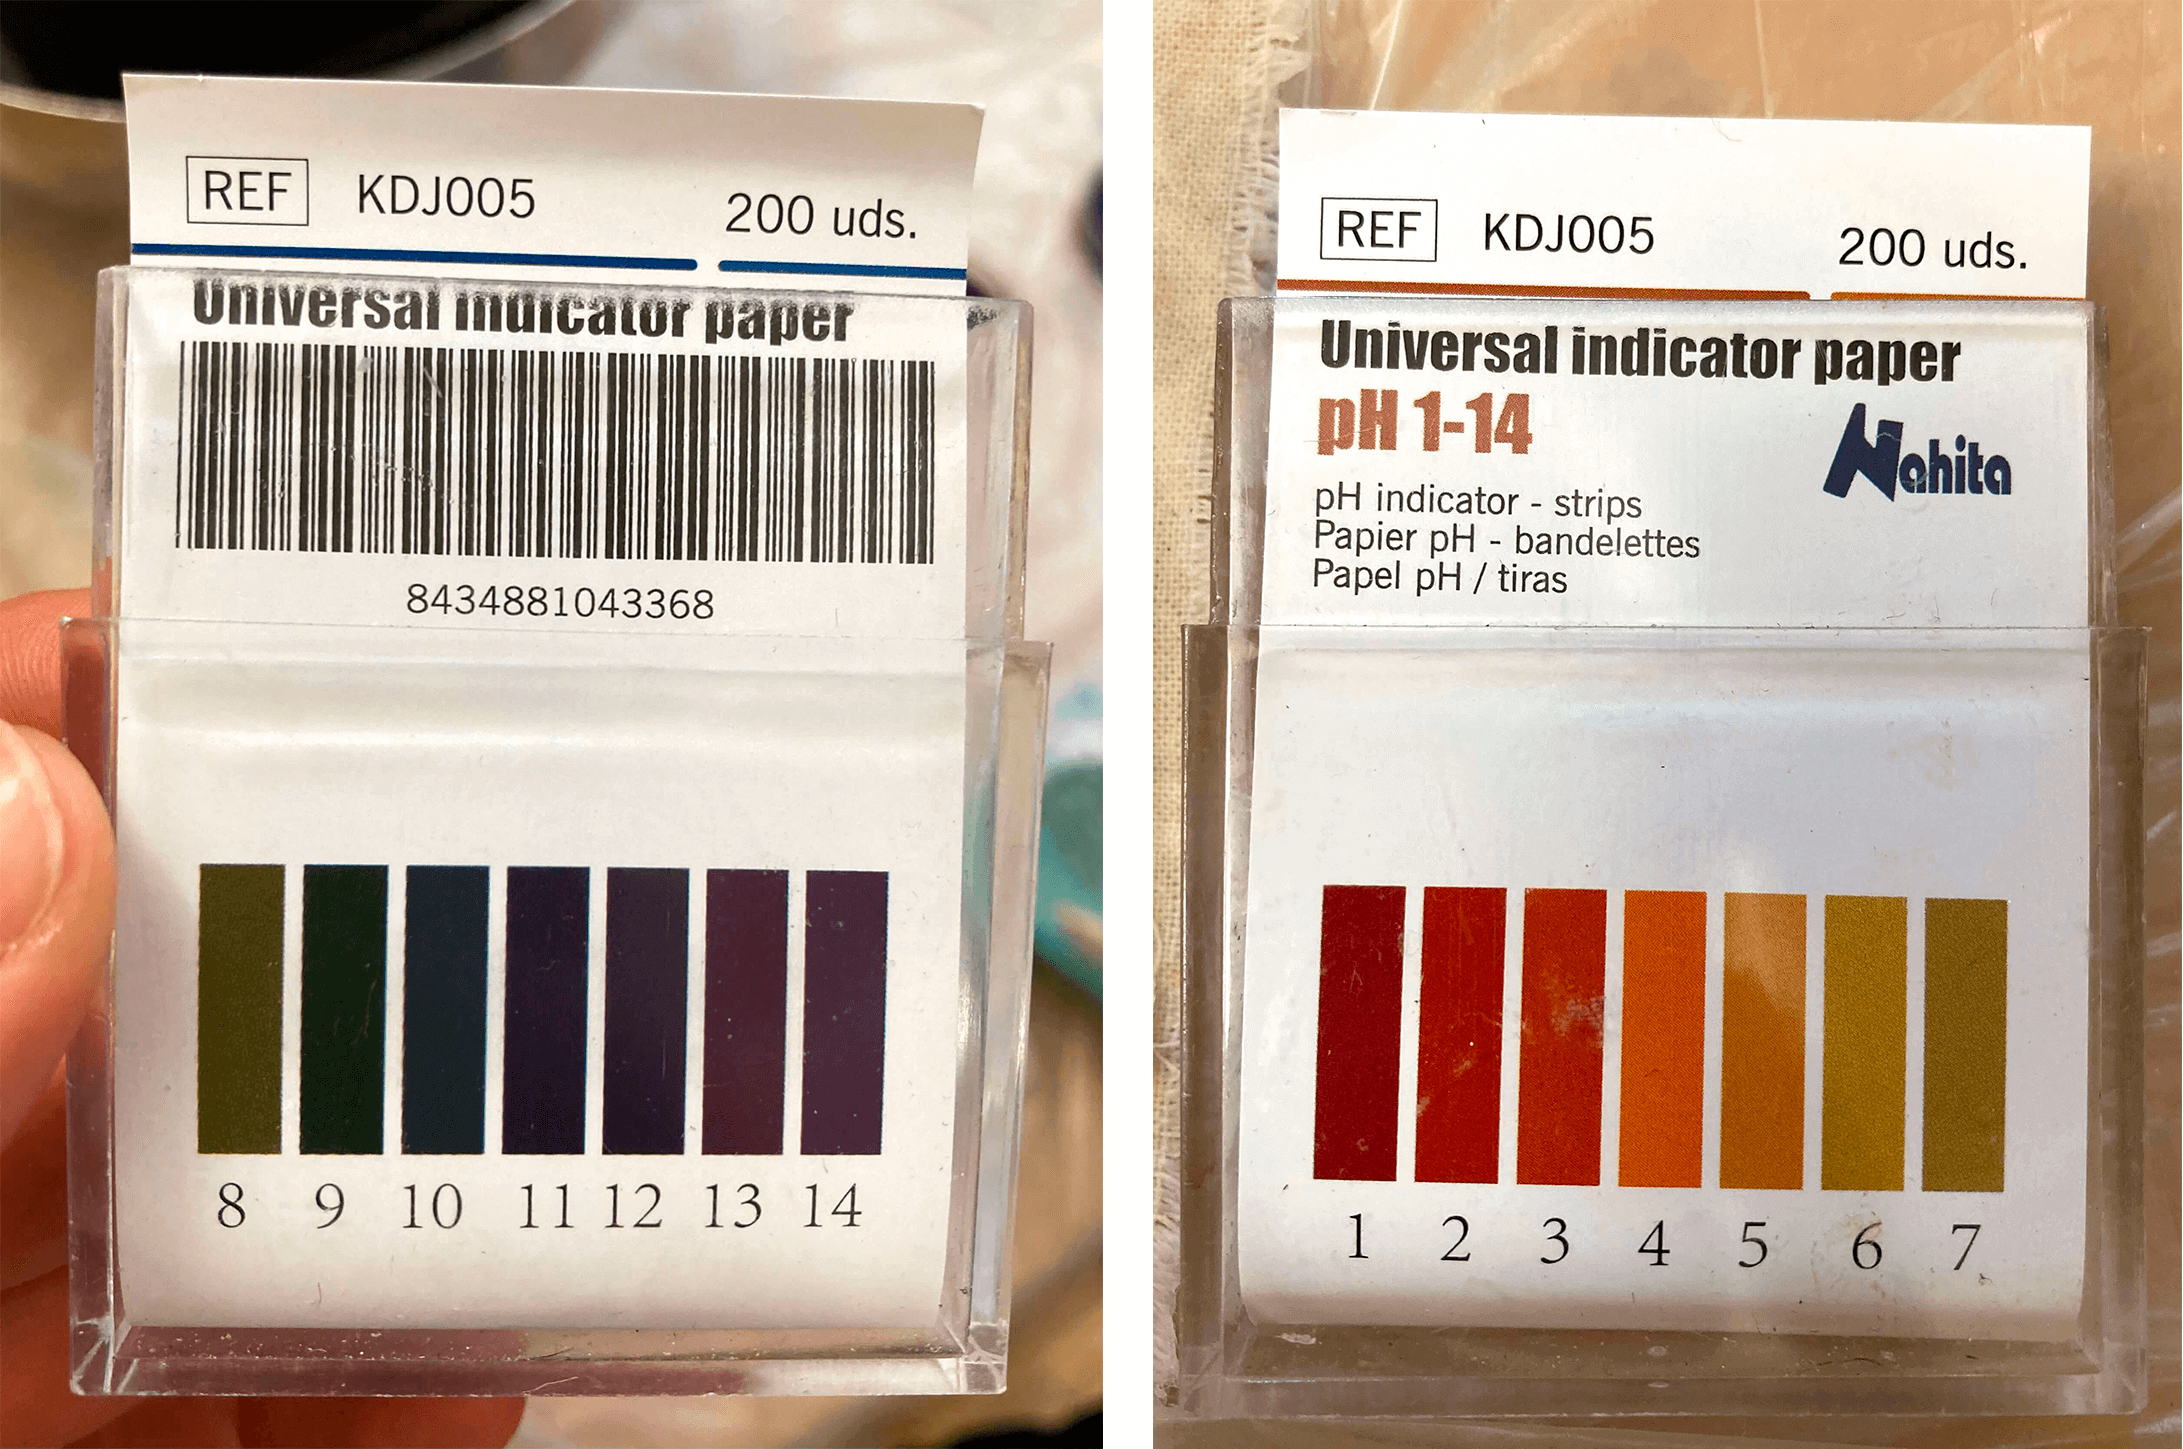
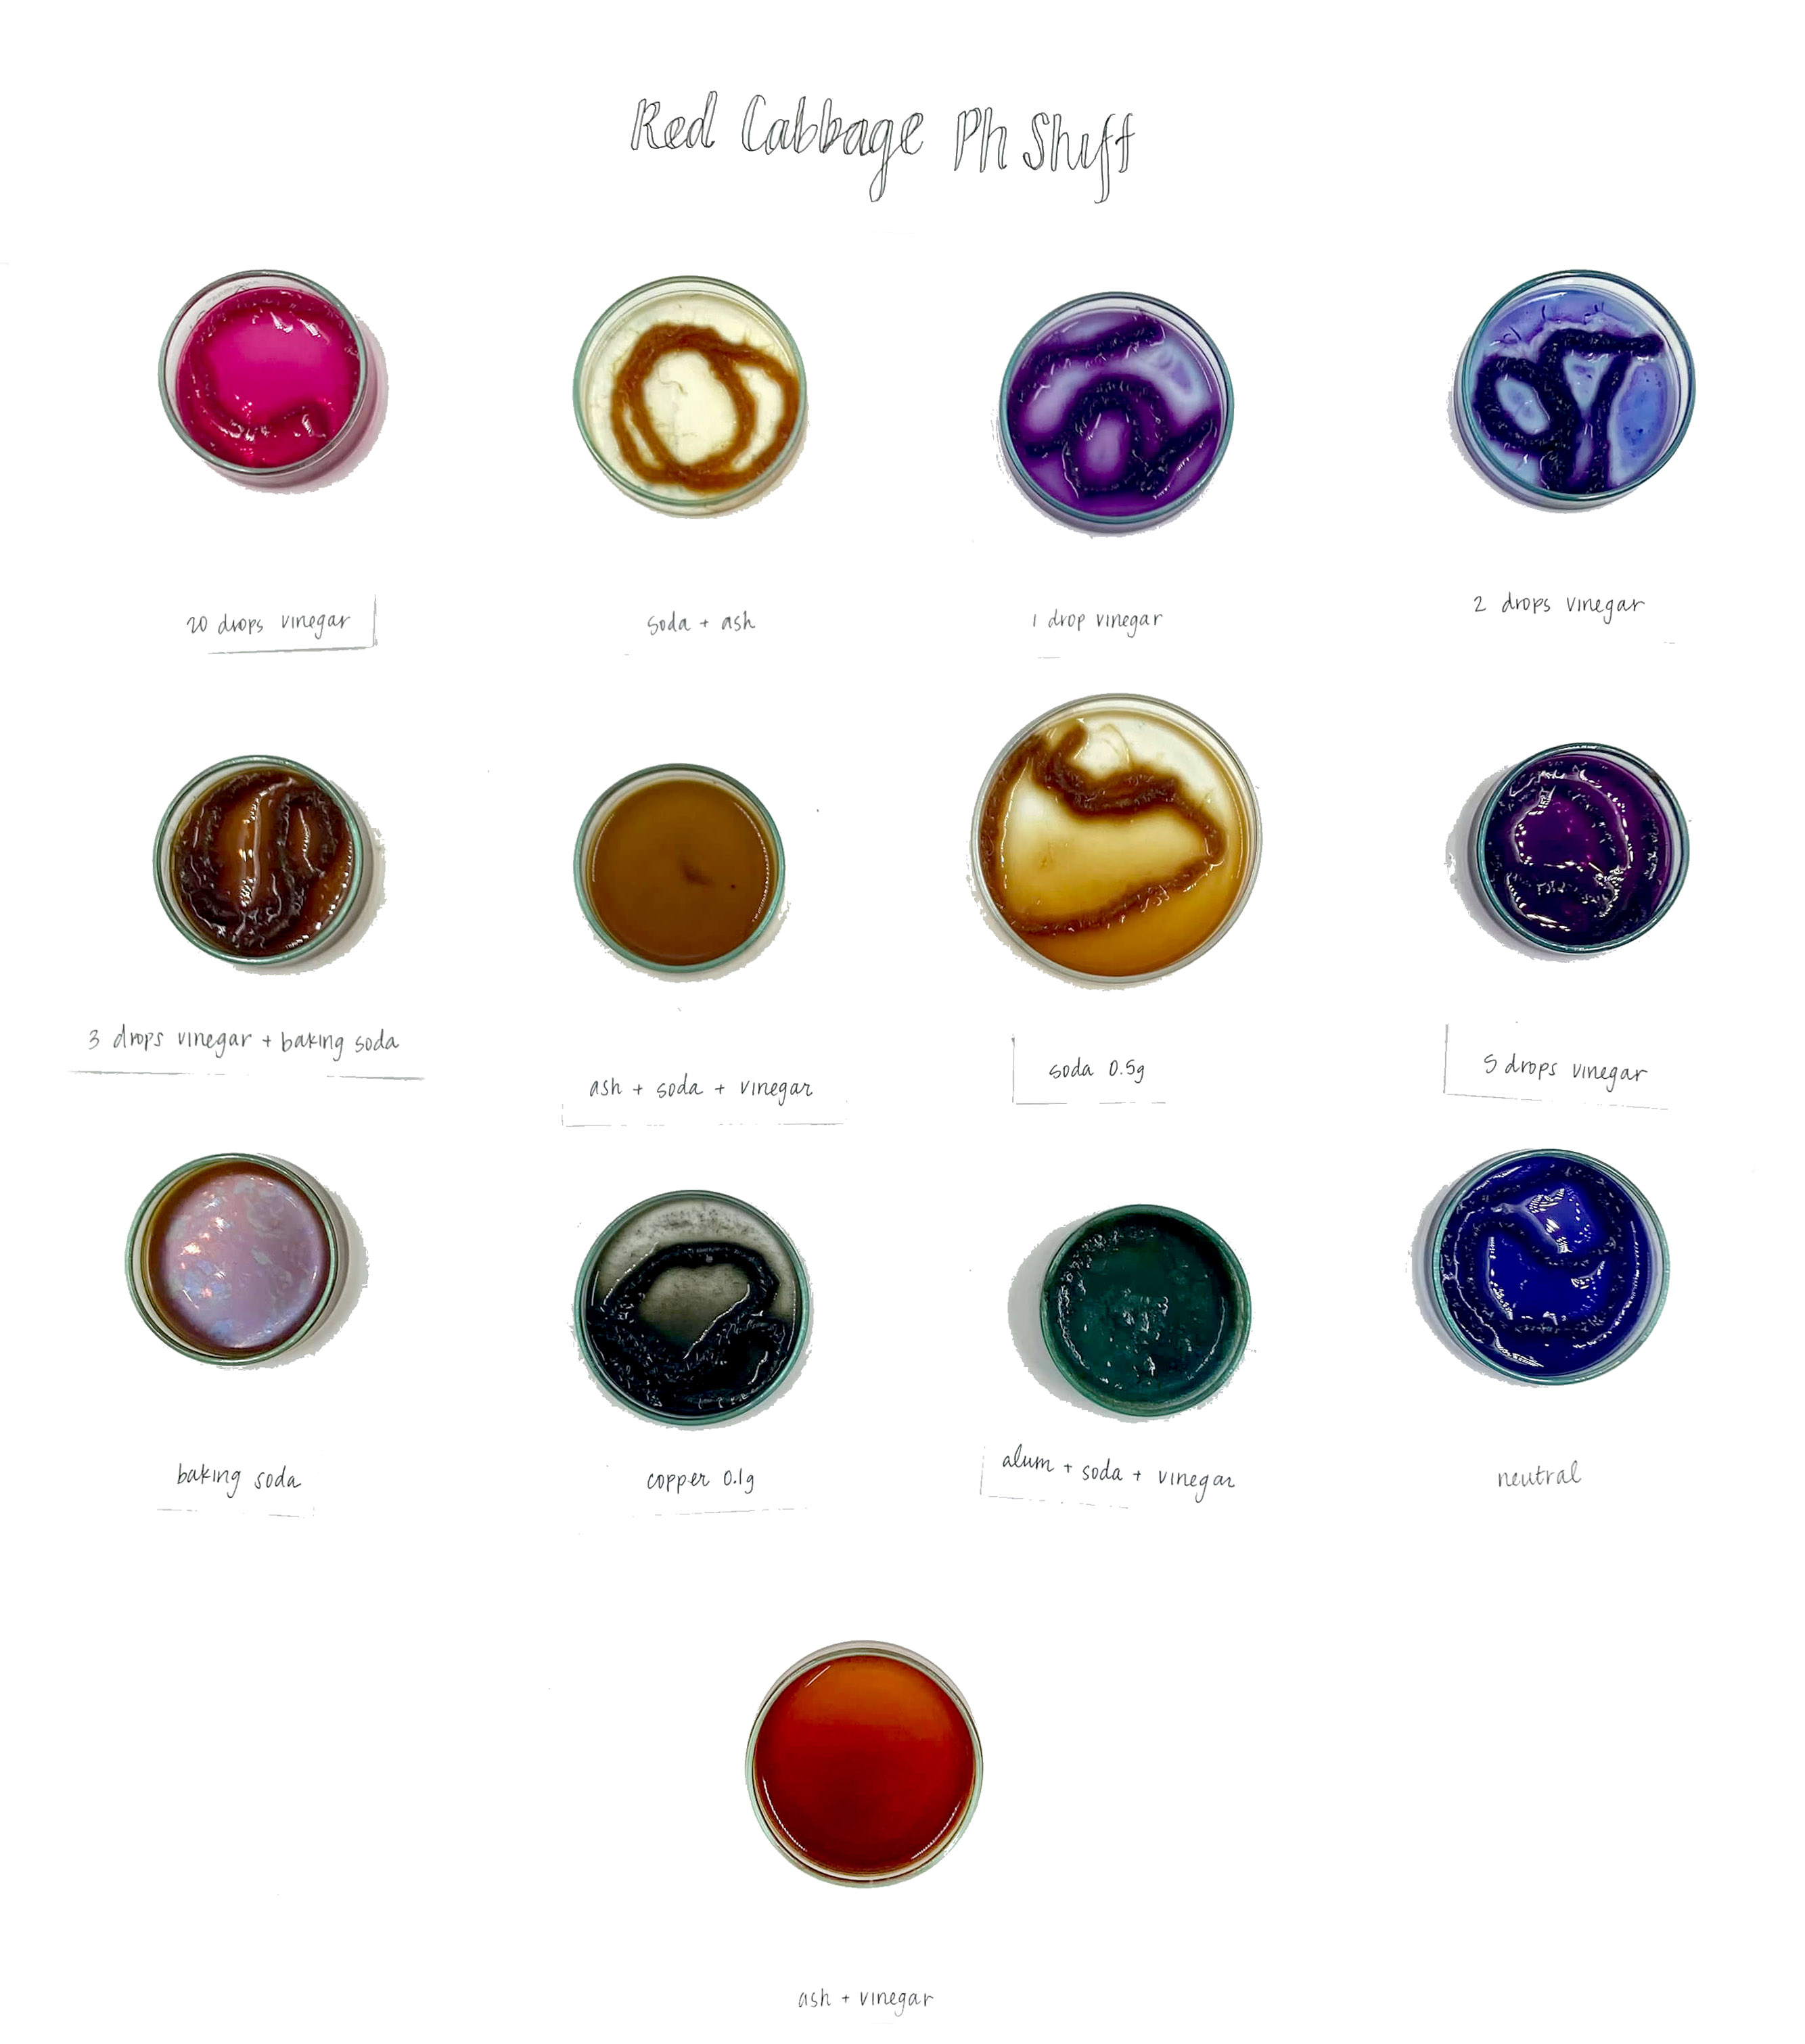
Change the pH level
Change the pH level which, in turn, changed the color of the dyes:
-
Acid: Vinegar/ lemon to get warm colors.
-
Base: Baking soda to get cold colors.
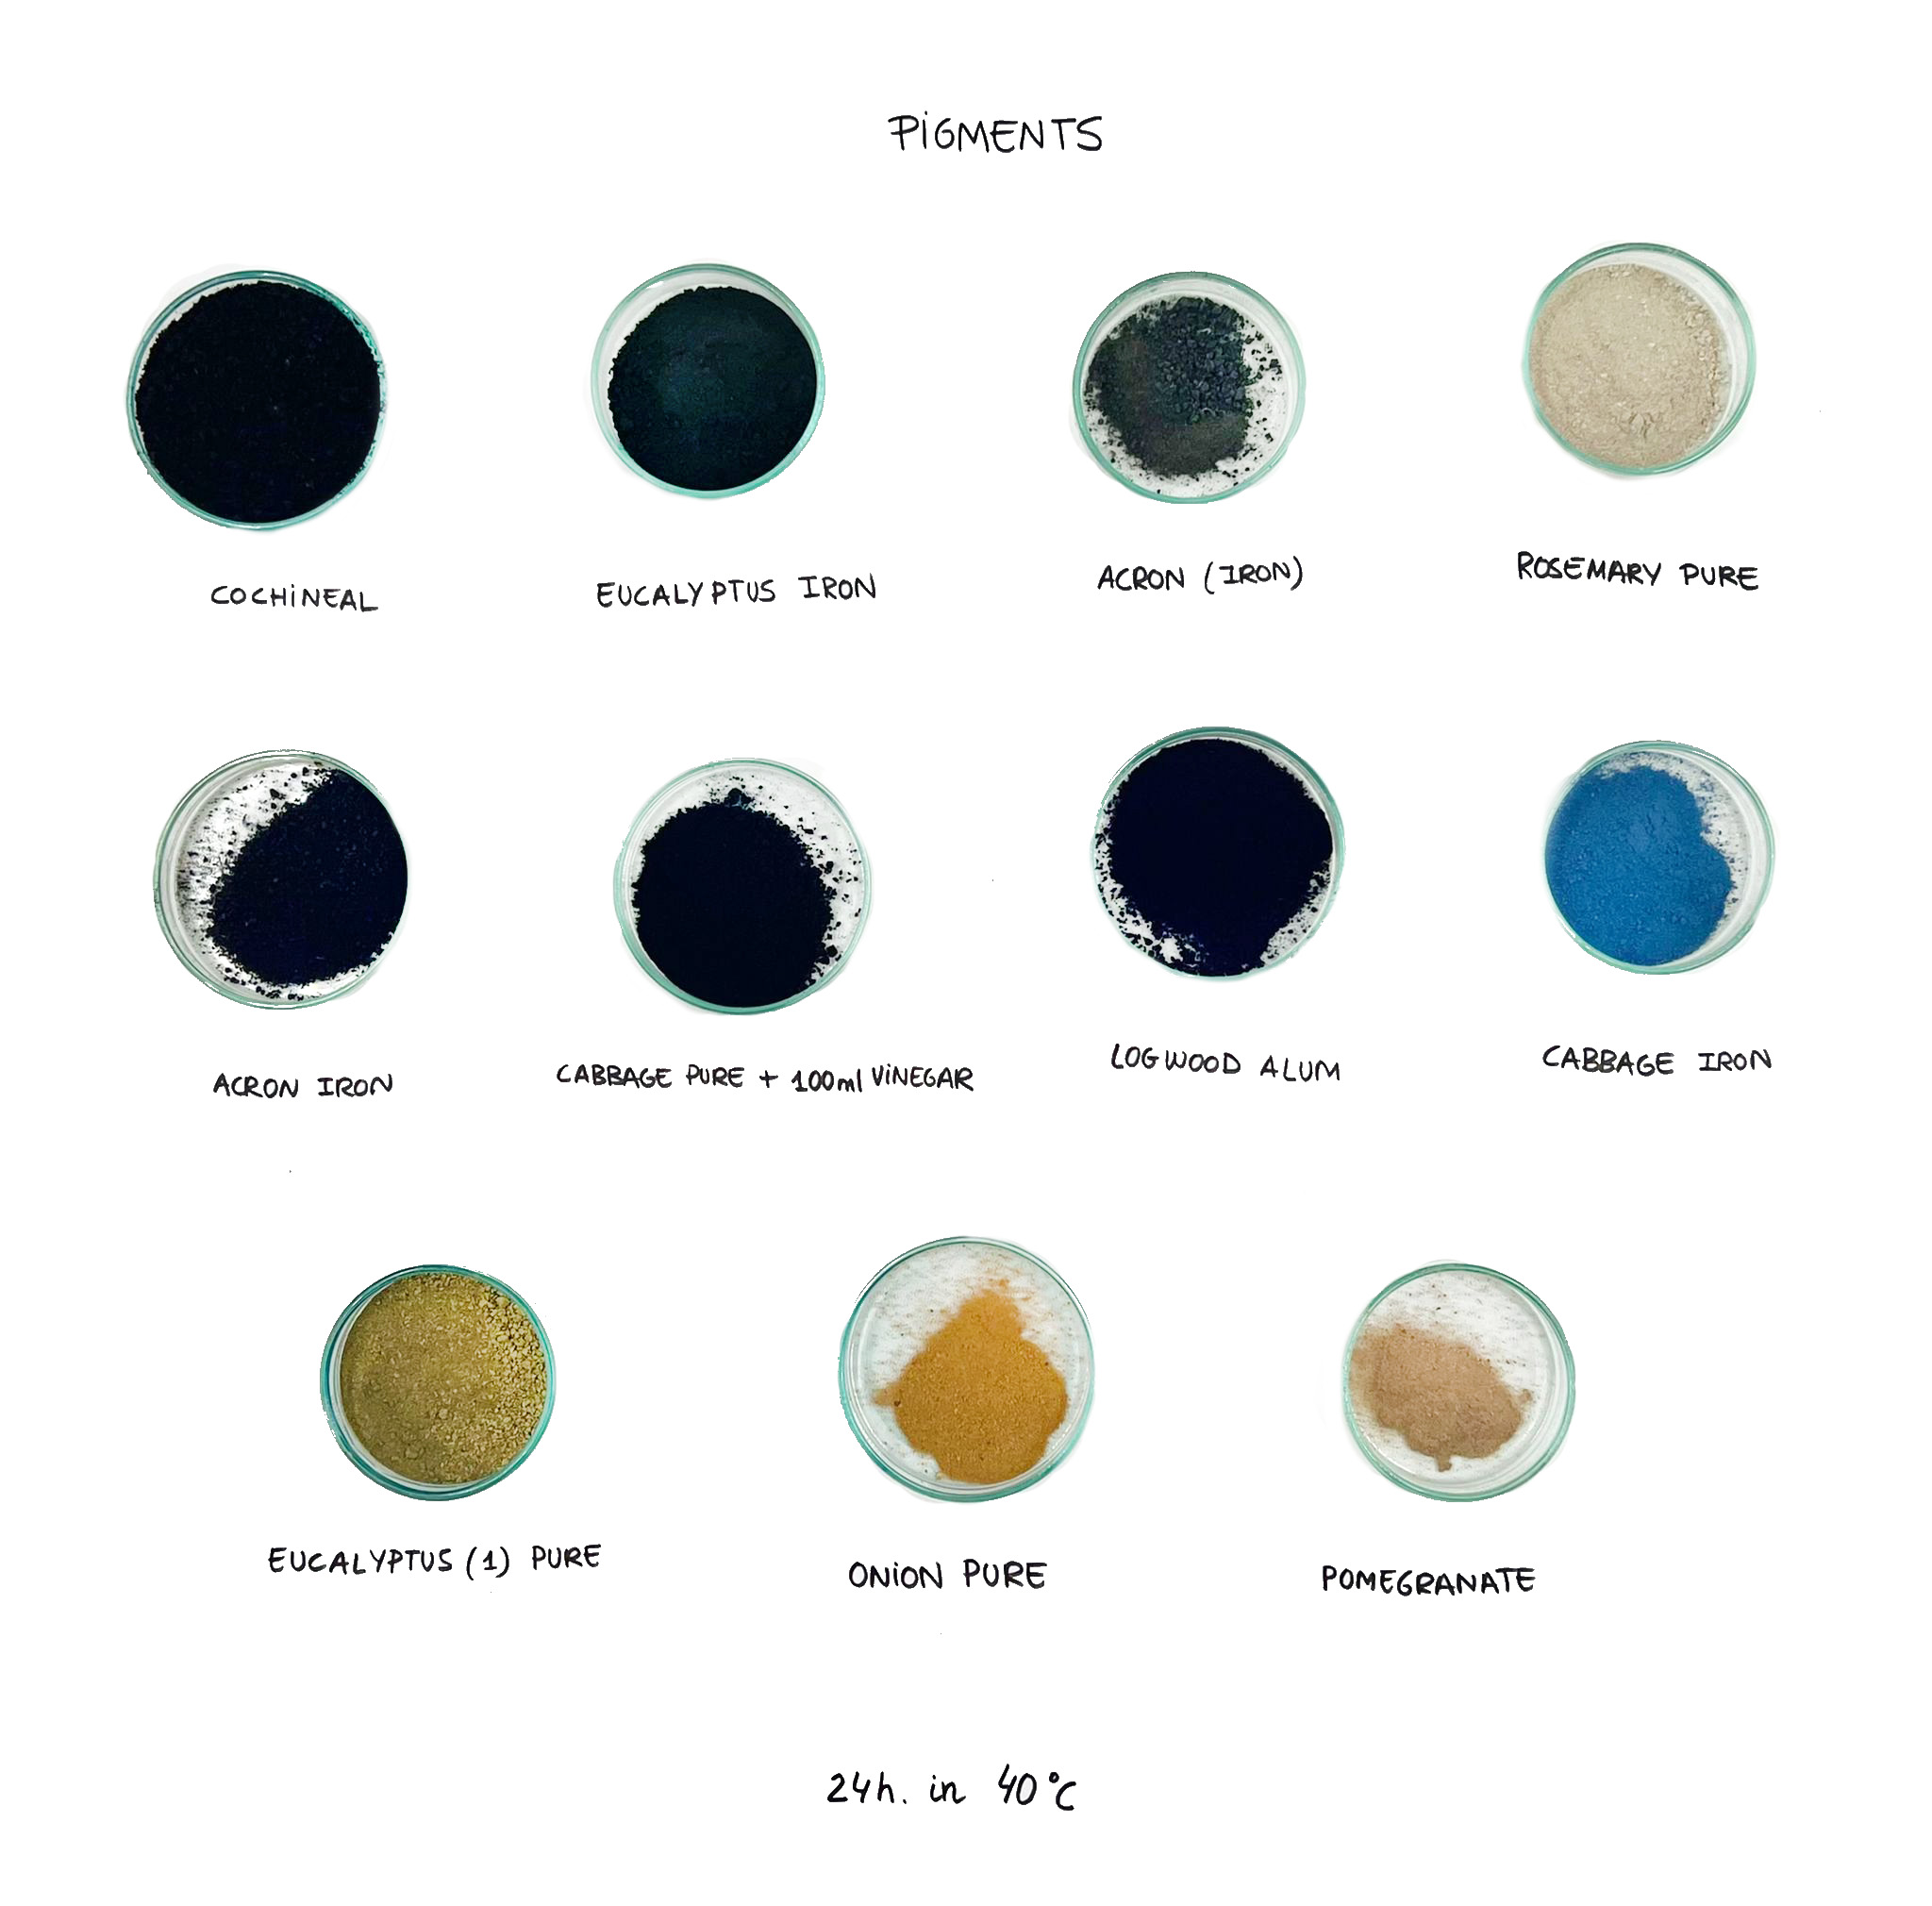
Pigments
Ingredients:
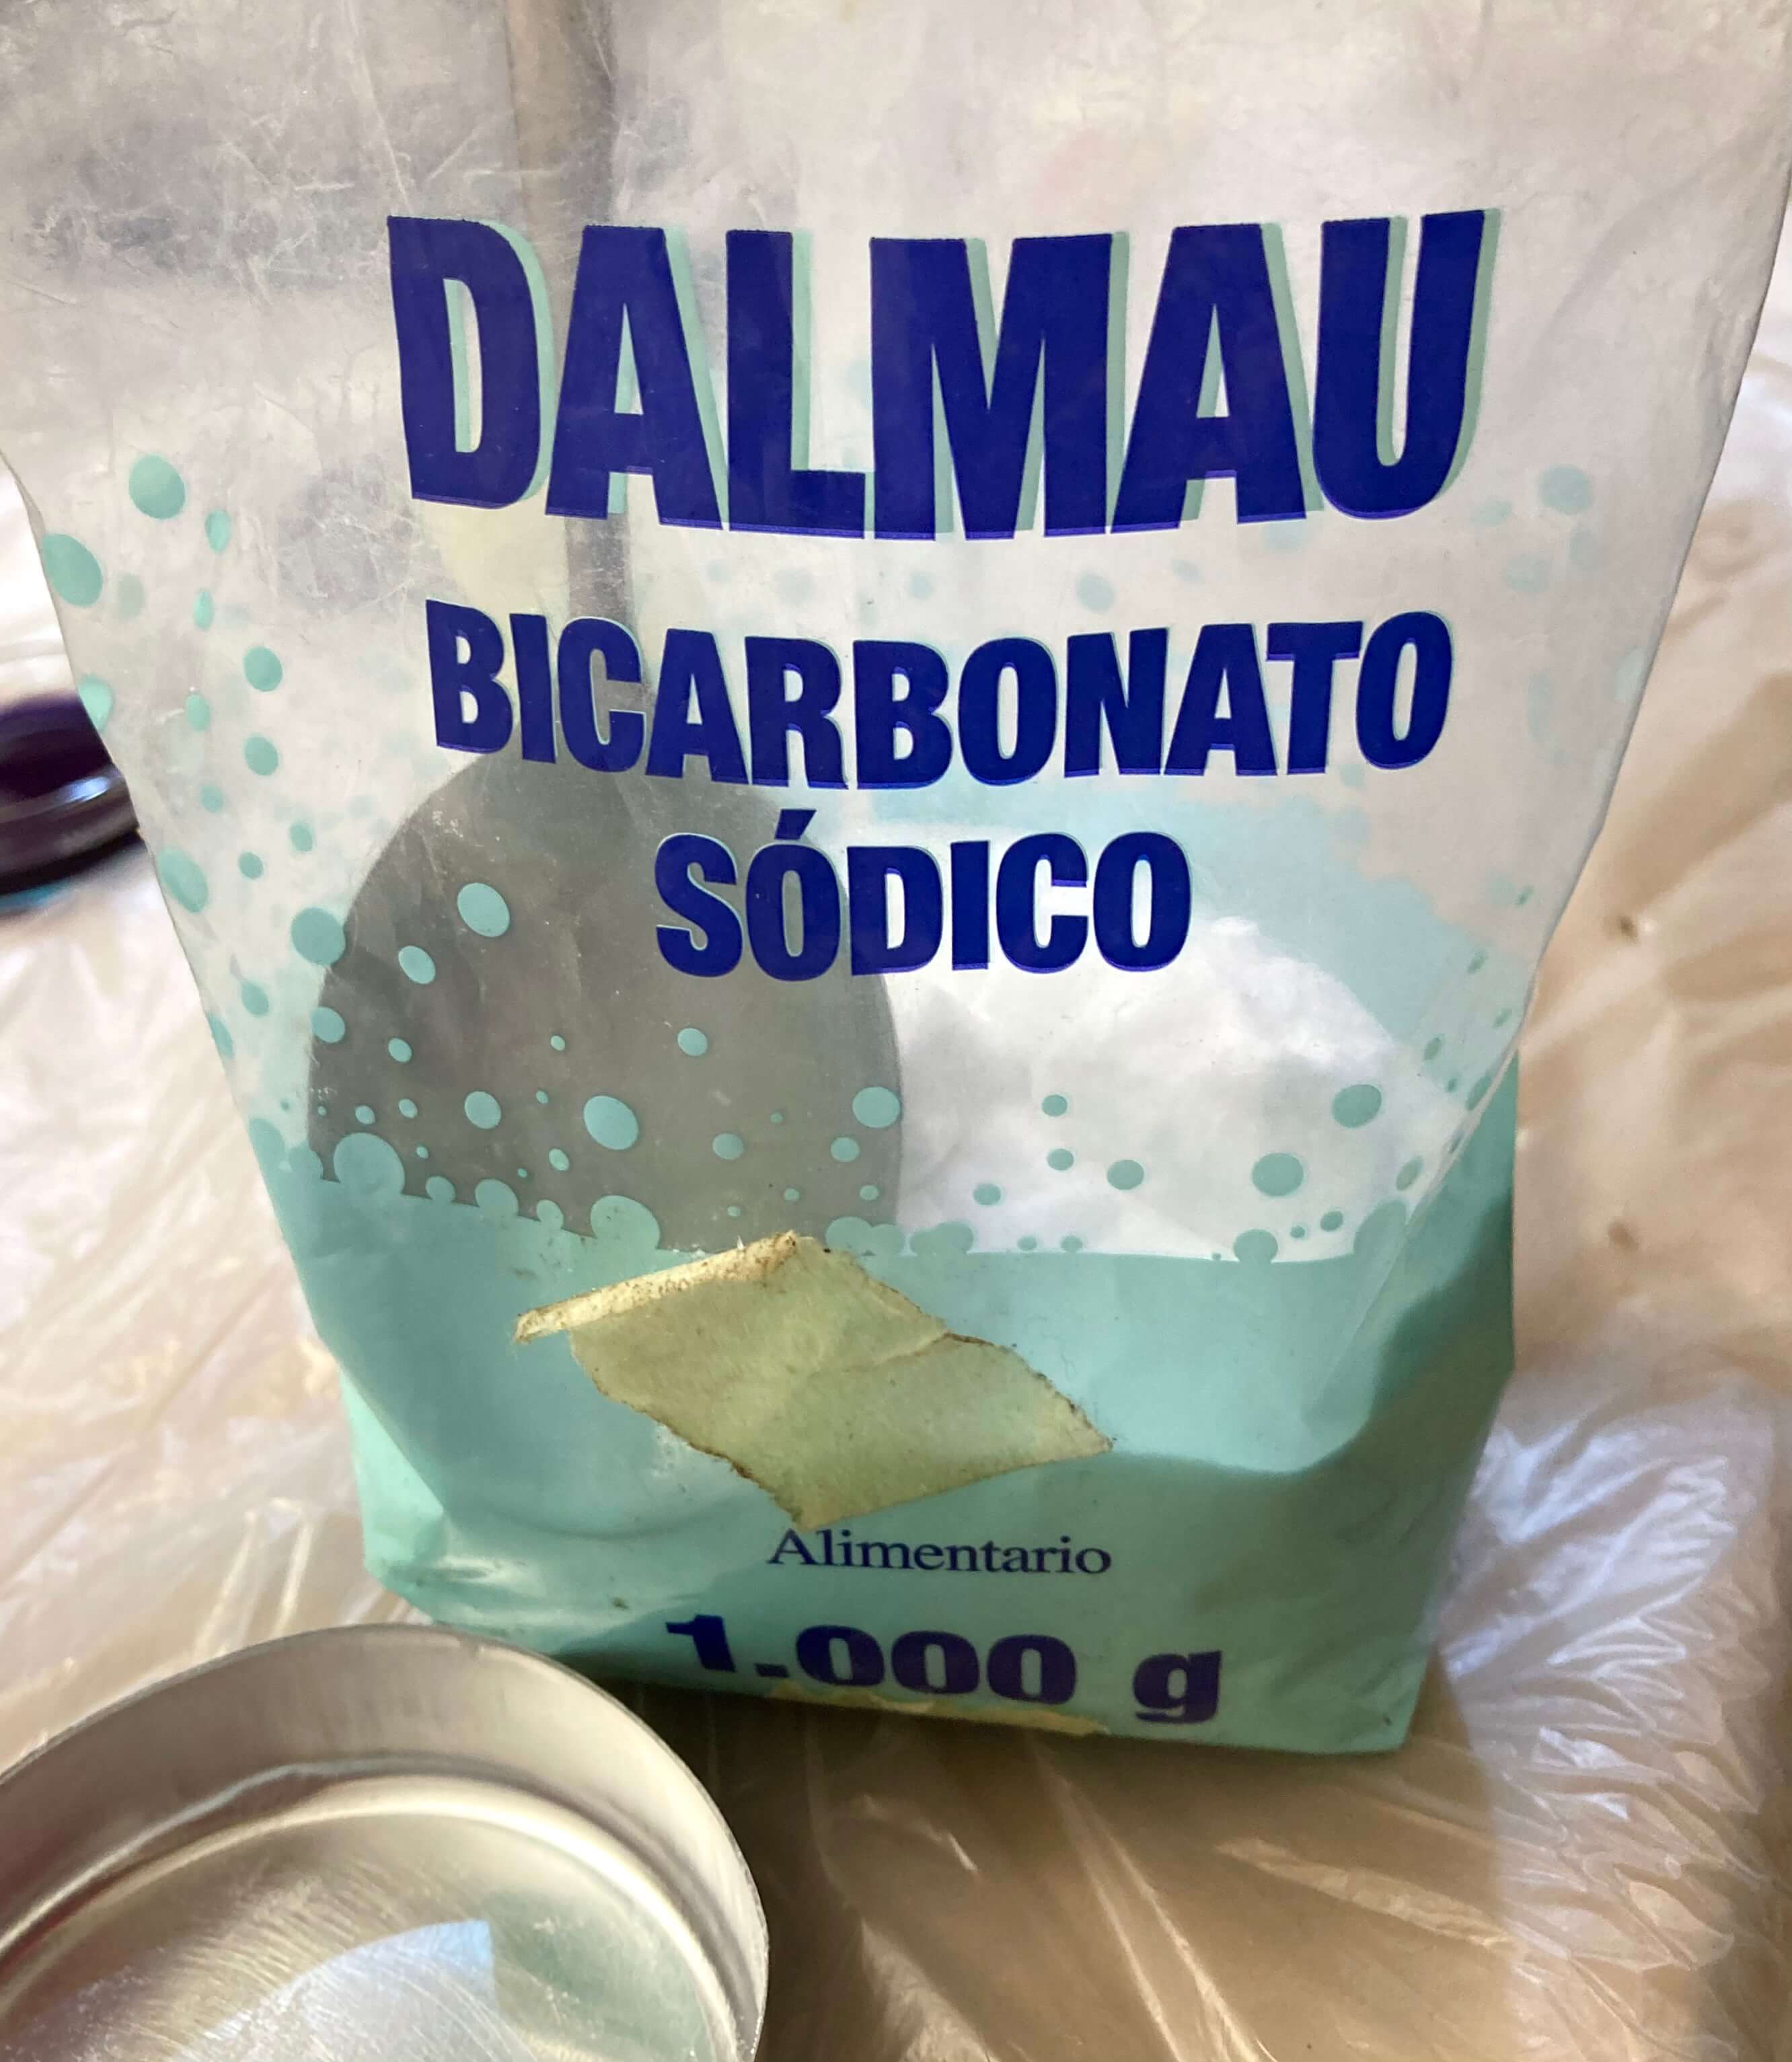
- 6g of Baking soda
- 18g Alum
- 700 ml Dye Bath
Steps:
- Mix with a spoon the 6g of baking soda in the dye bath until it dissolves.
- In another pan add 50ml of hot water to dissolve the 18g of Alum.
- Add one by one the pan of baking soda, in the dye bath pan, slowly.
- Press with the spatula to get the pigment down.
- Wait until all the pigment is going down the bottom.
- Prepared another pan with a coffee filter or recommended to use a pleat filters.
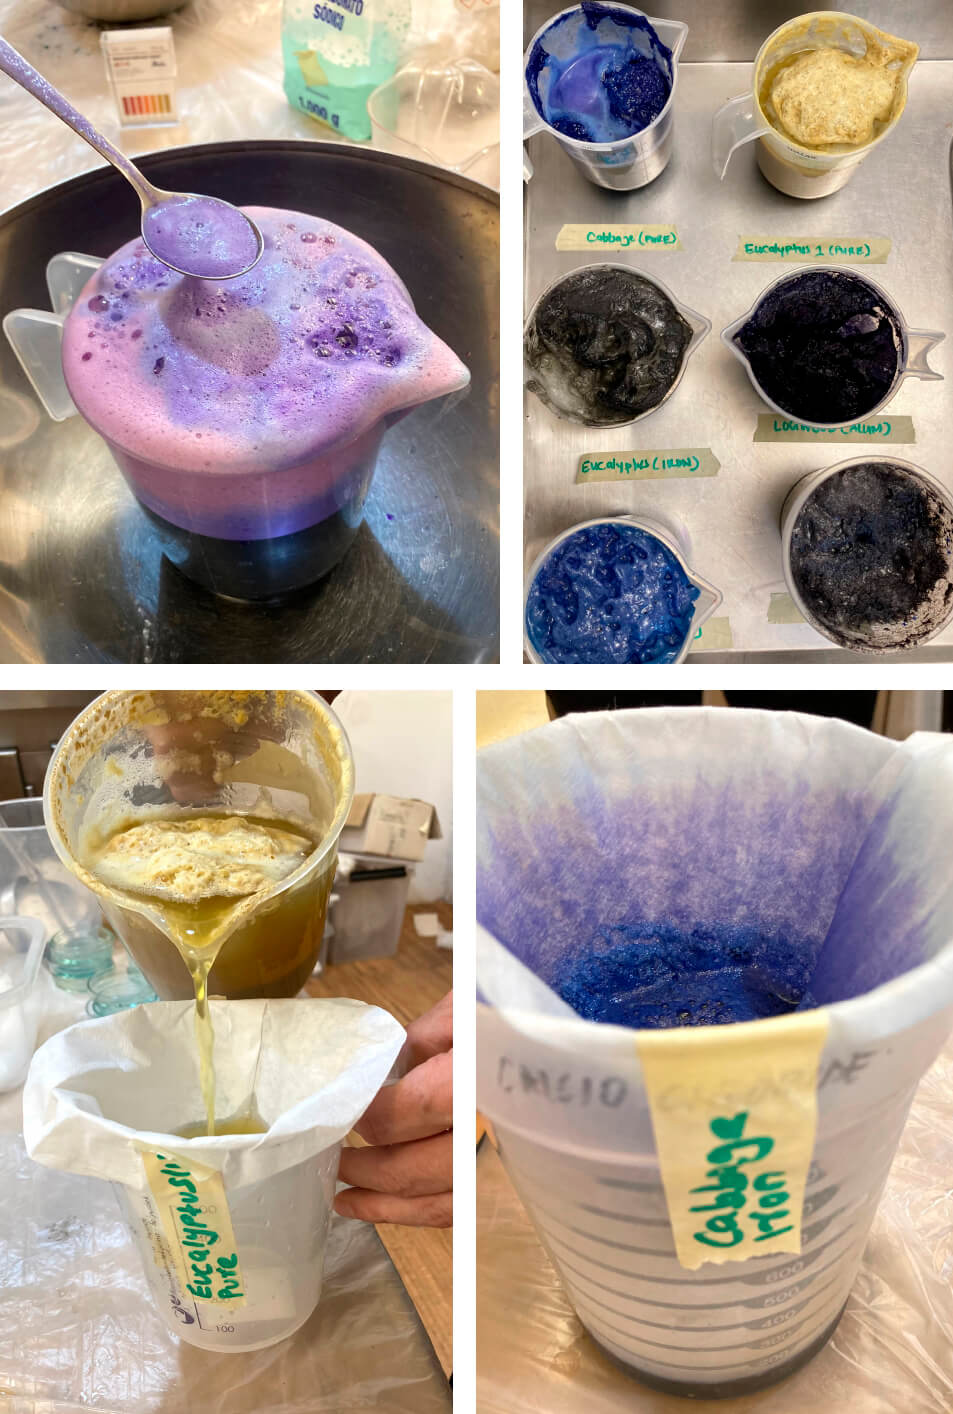
- Filter the dye bath to get the pigment. Foaming.
- Move the pigment into a petri dish to dehydrate and save it in the oven to evaporate the dye bath and get the powder.
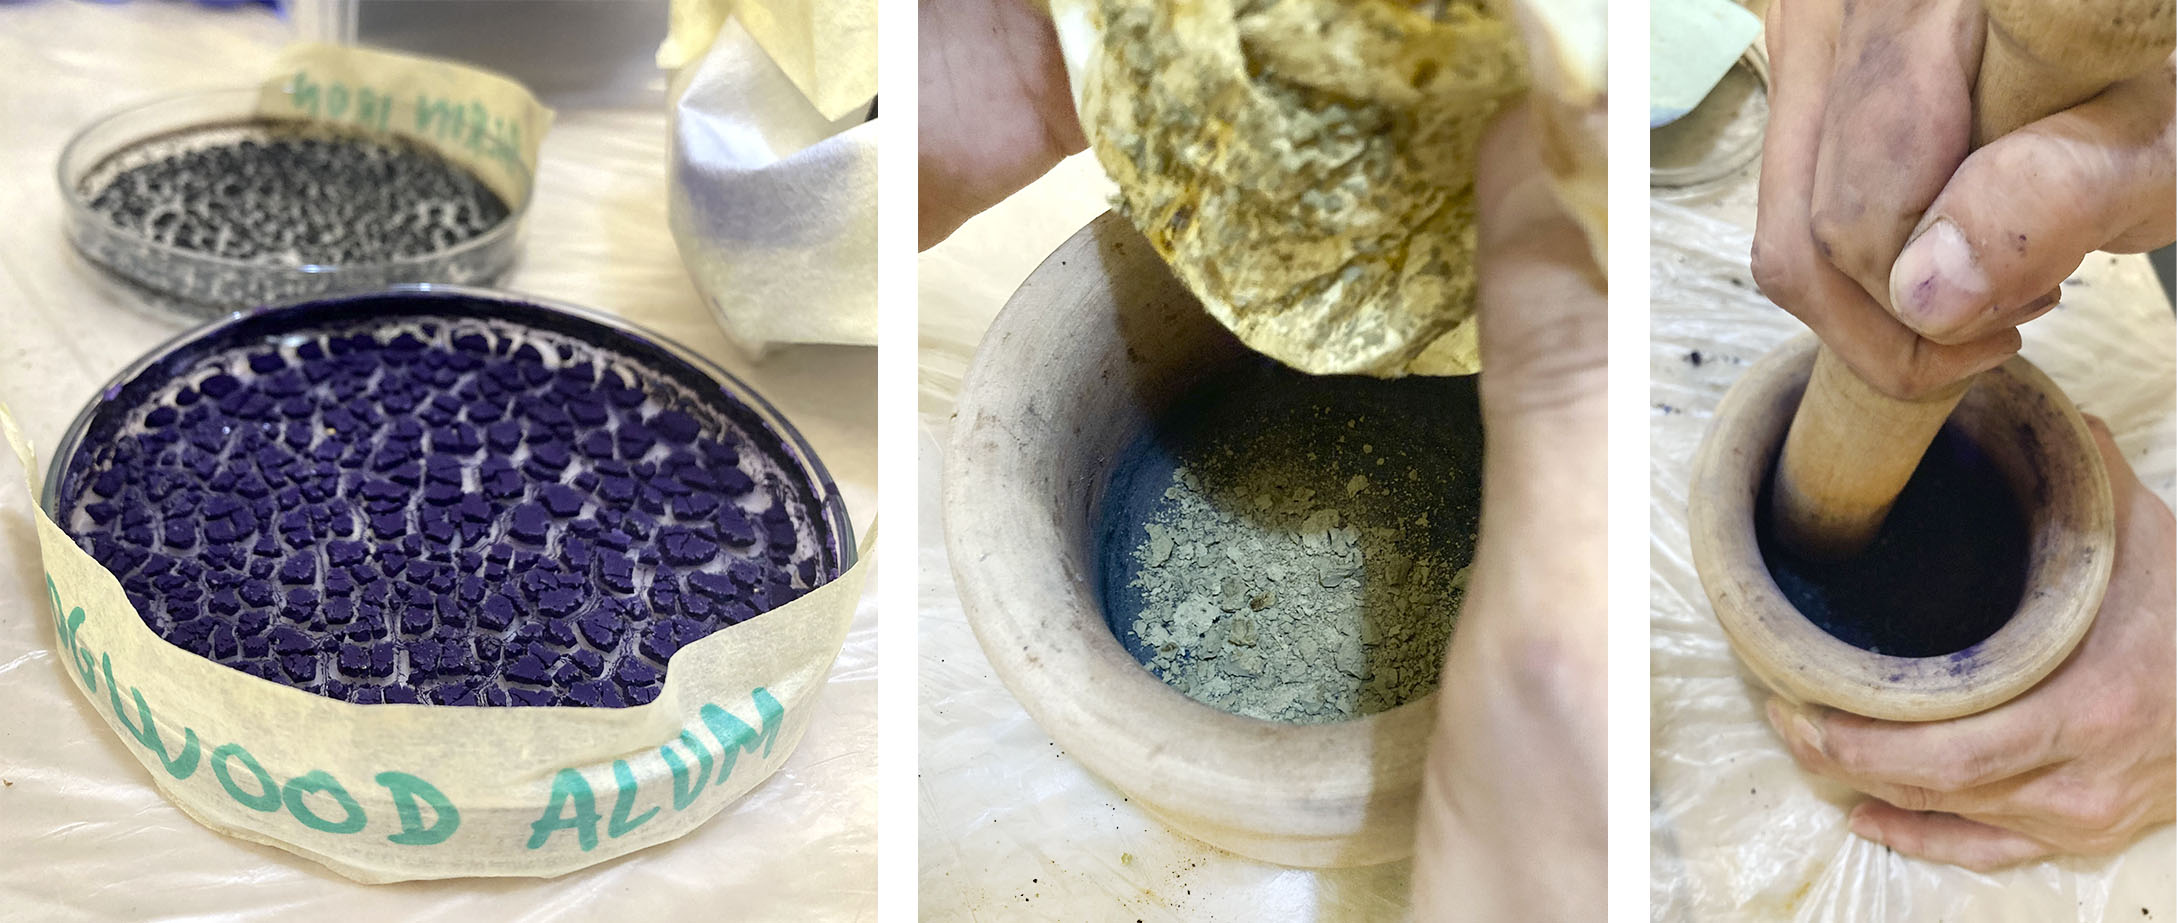
After it's dry:
- Remove the pigment from the dish or the filter and grind to get the powder with a mortar.
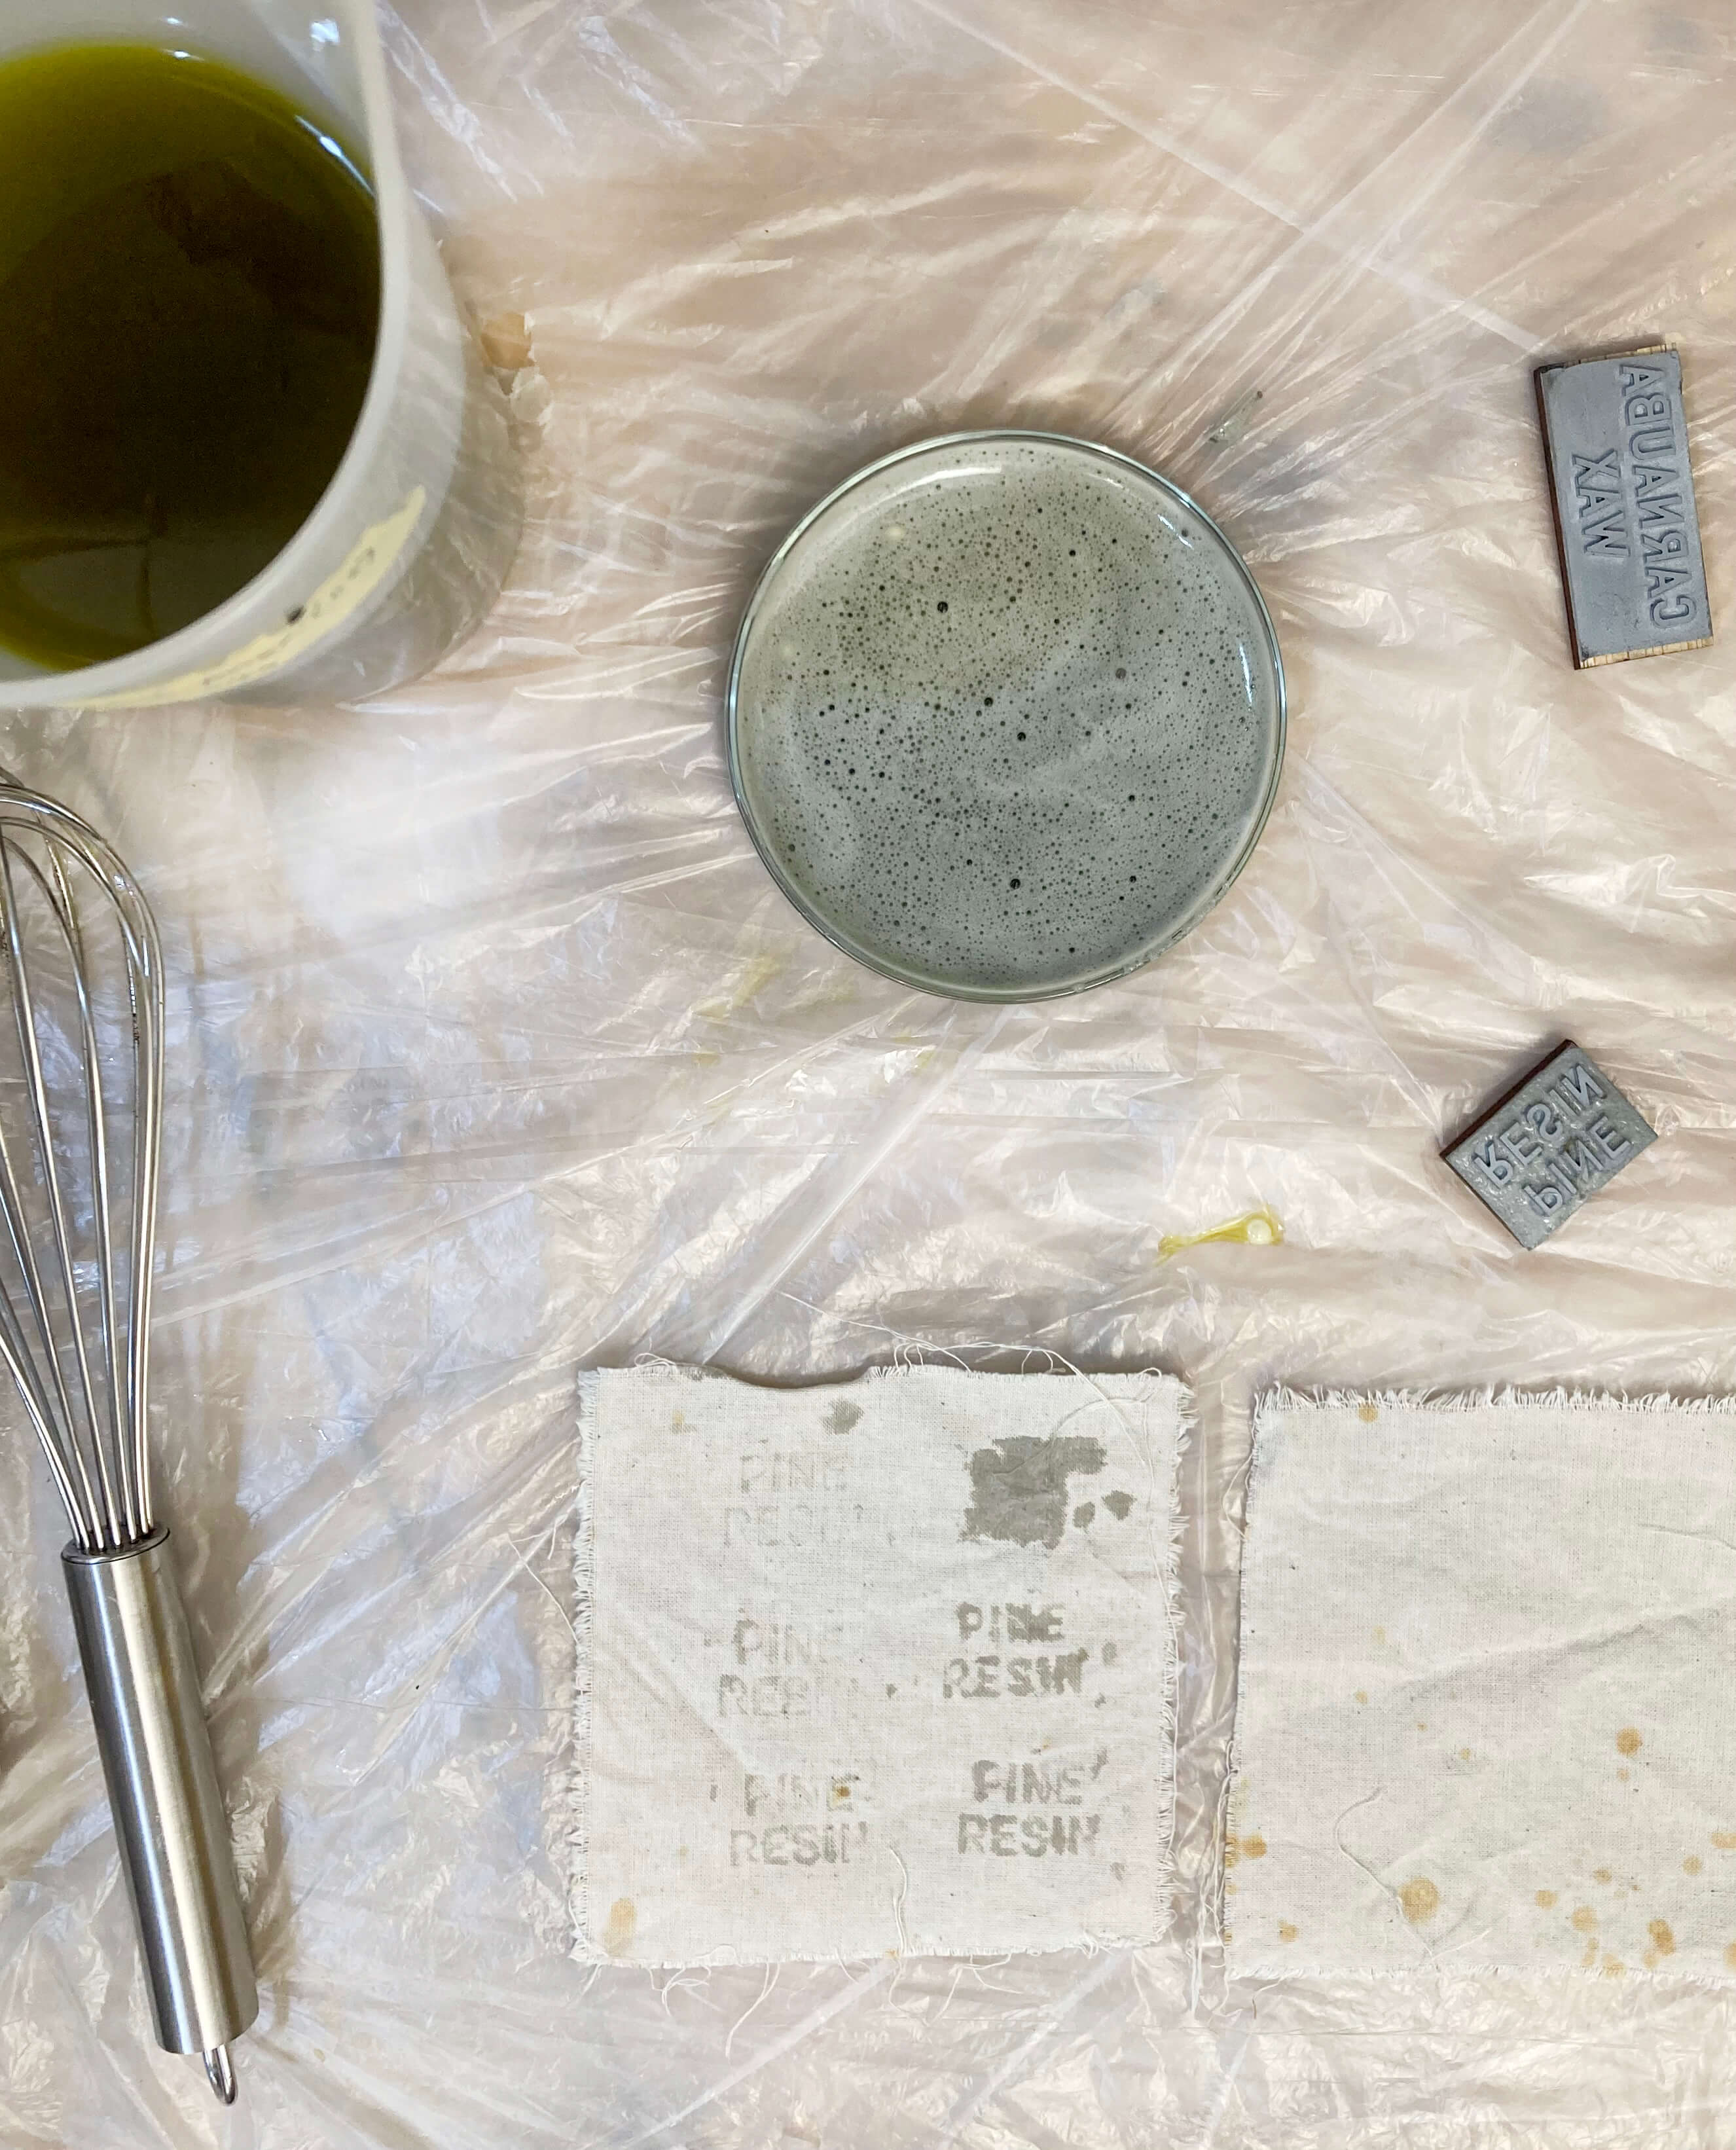
INK
The INK could be used for 3D printing.
There are 4 difference options to obtain a INK:
OPTION 1
Ingredients:
- 6g of Arabic Gum (Binder)
- 0,5g of Iron (Additive)
- 25 ml Dye Bath (Veichle)
Mix the dye bath with the Arabic Gum and then disolve the Iron.
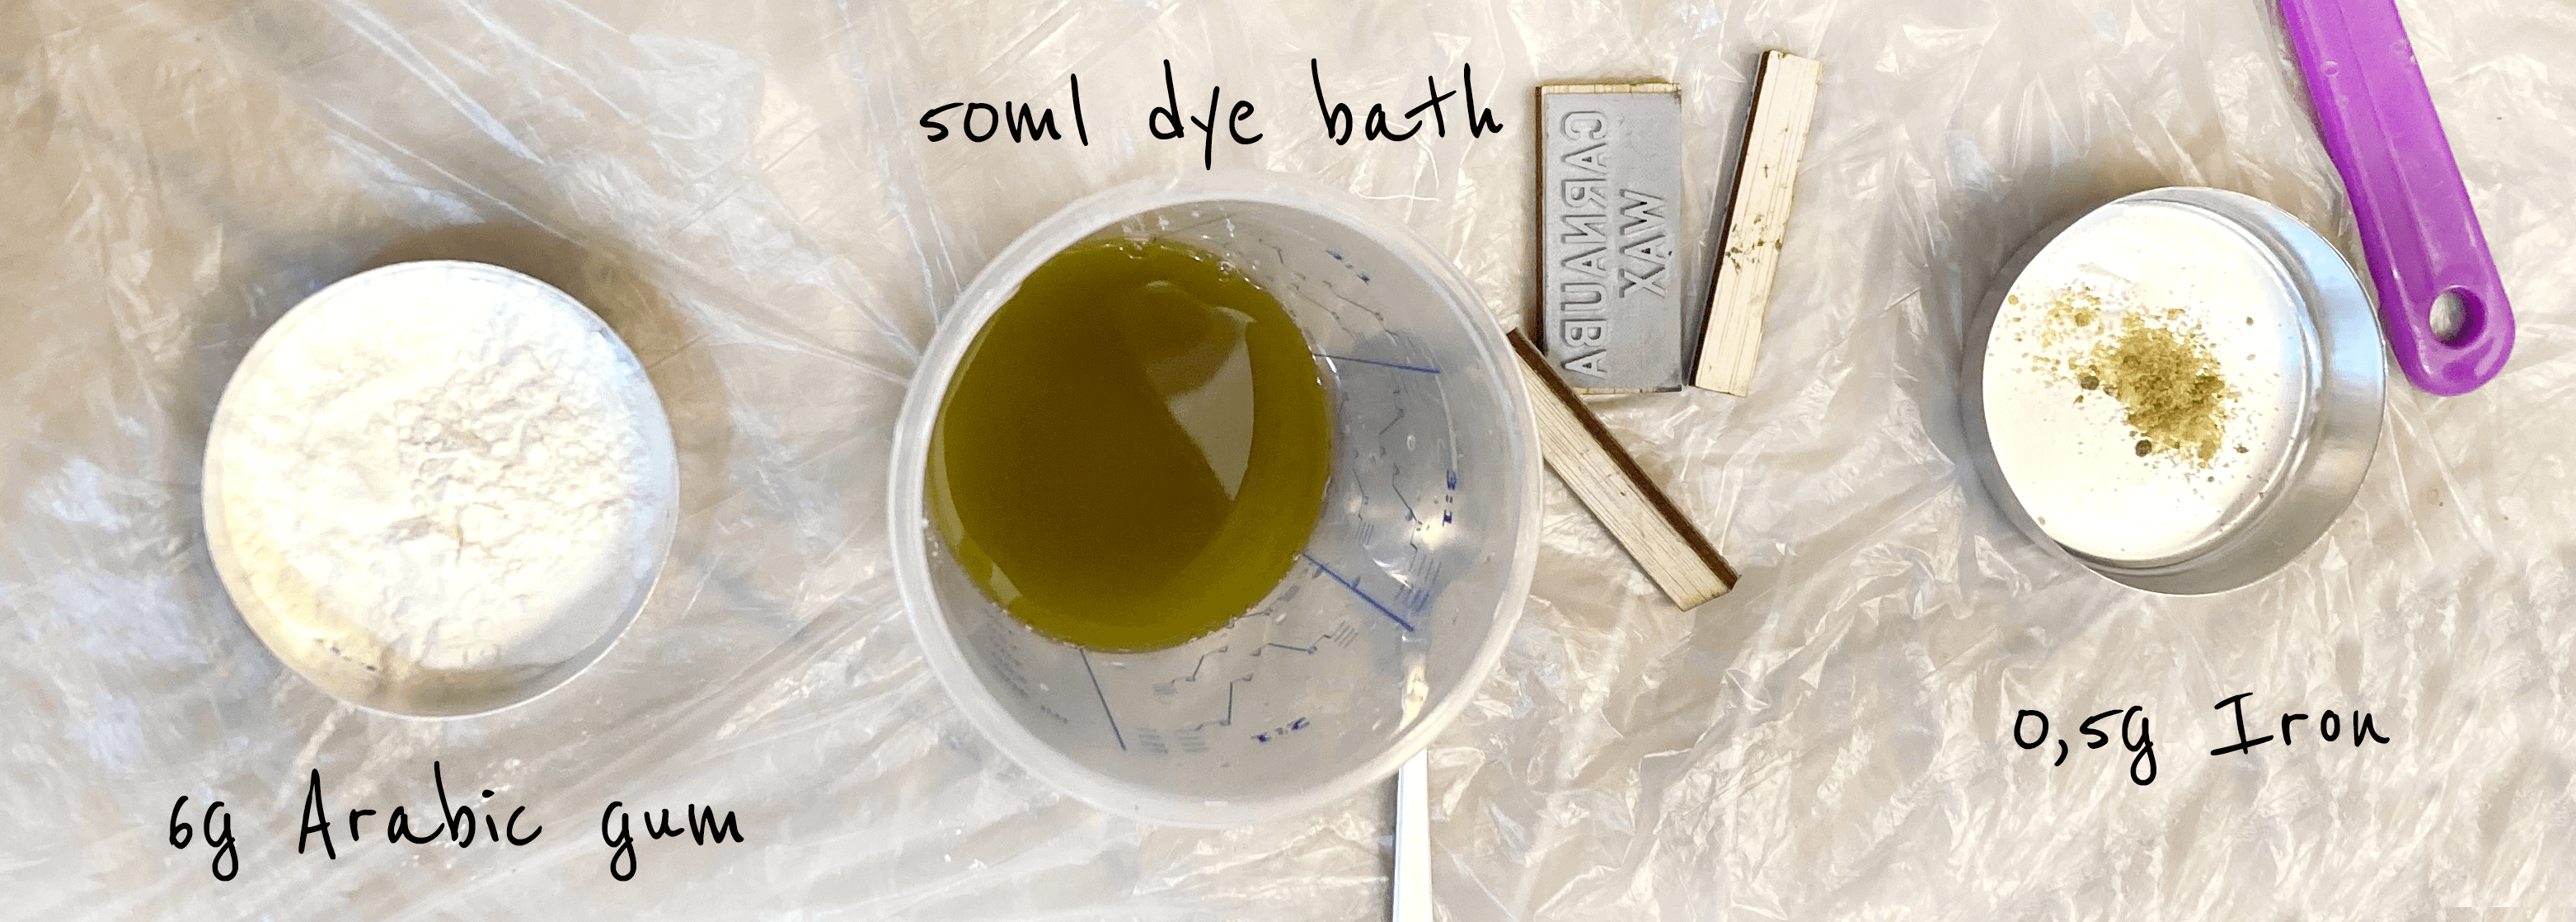
The consistency should be quite thick and gely.
OPTION 2
Ingredients:
- 6g of Guar Gum (Binder)
- 0,5g of Iron (Additive)
- 50 ml Dye Bath (Veichle)
Screenprint process.
OPTION 3
For this alternative, you just only need a dye bath to get the INK.
Steps:
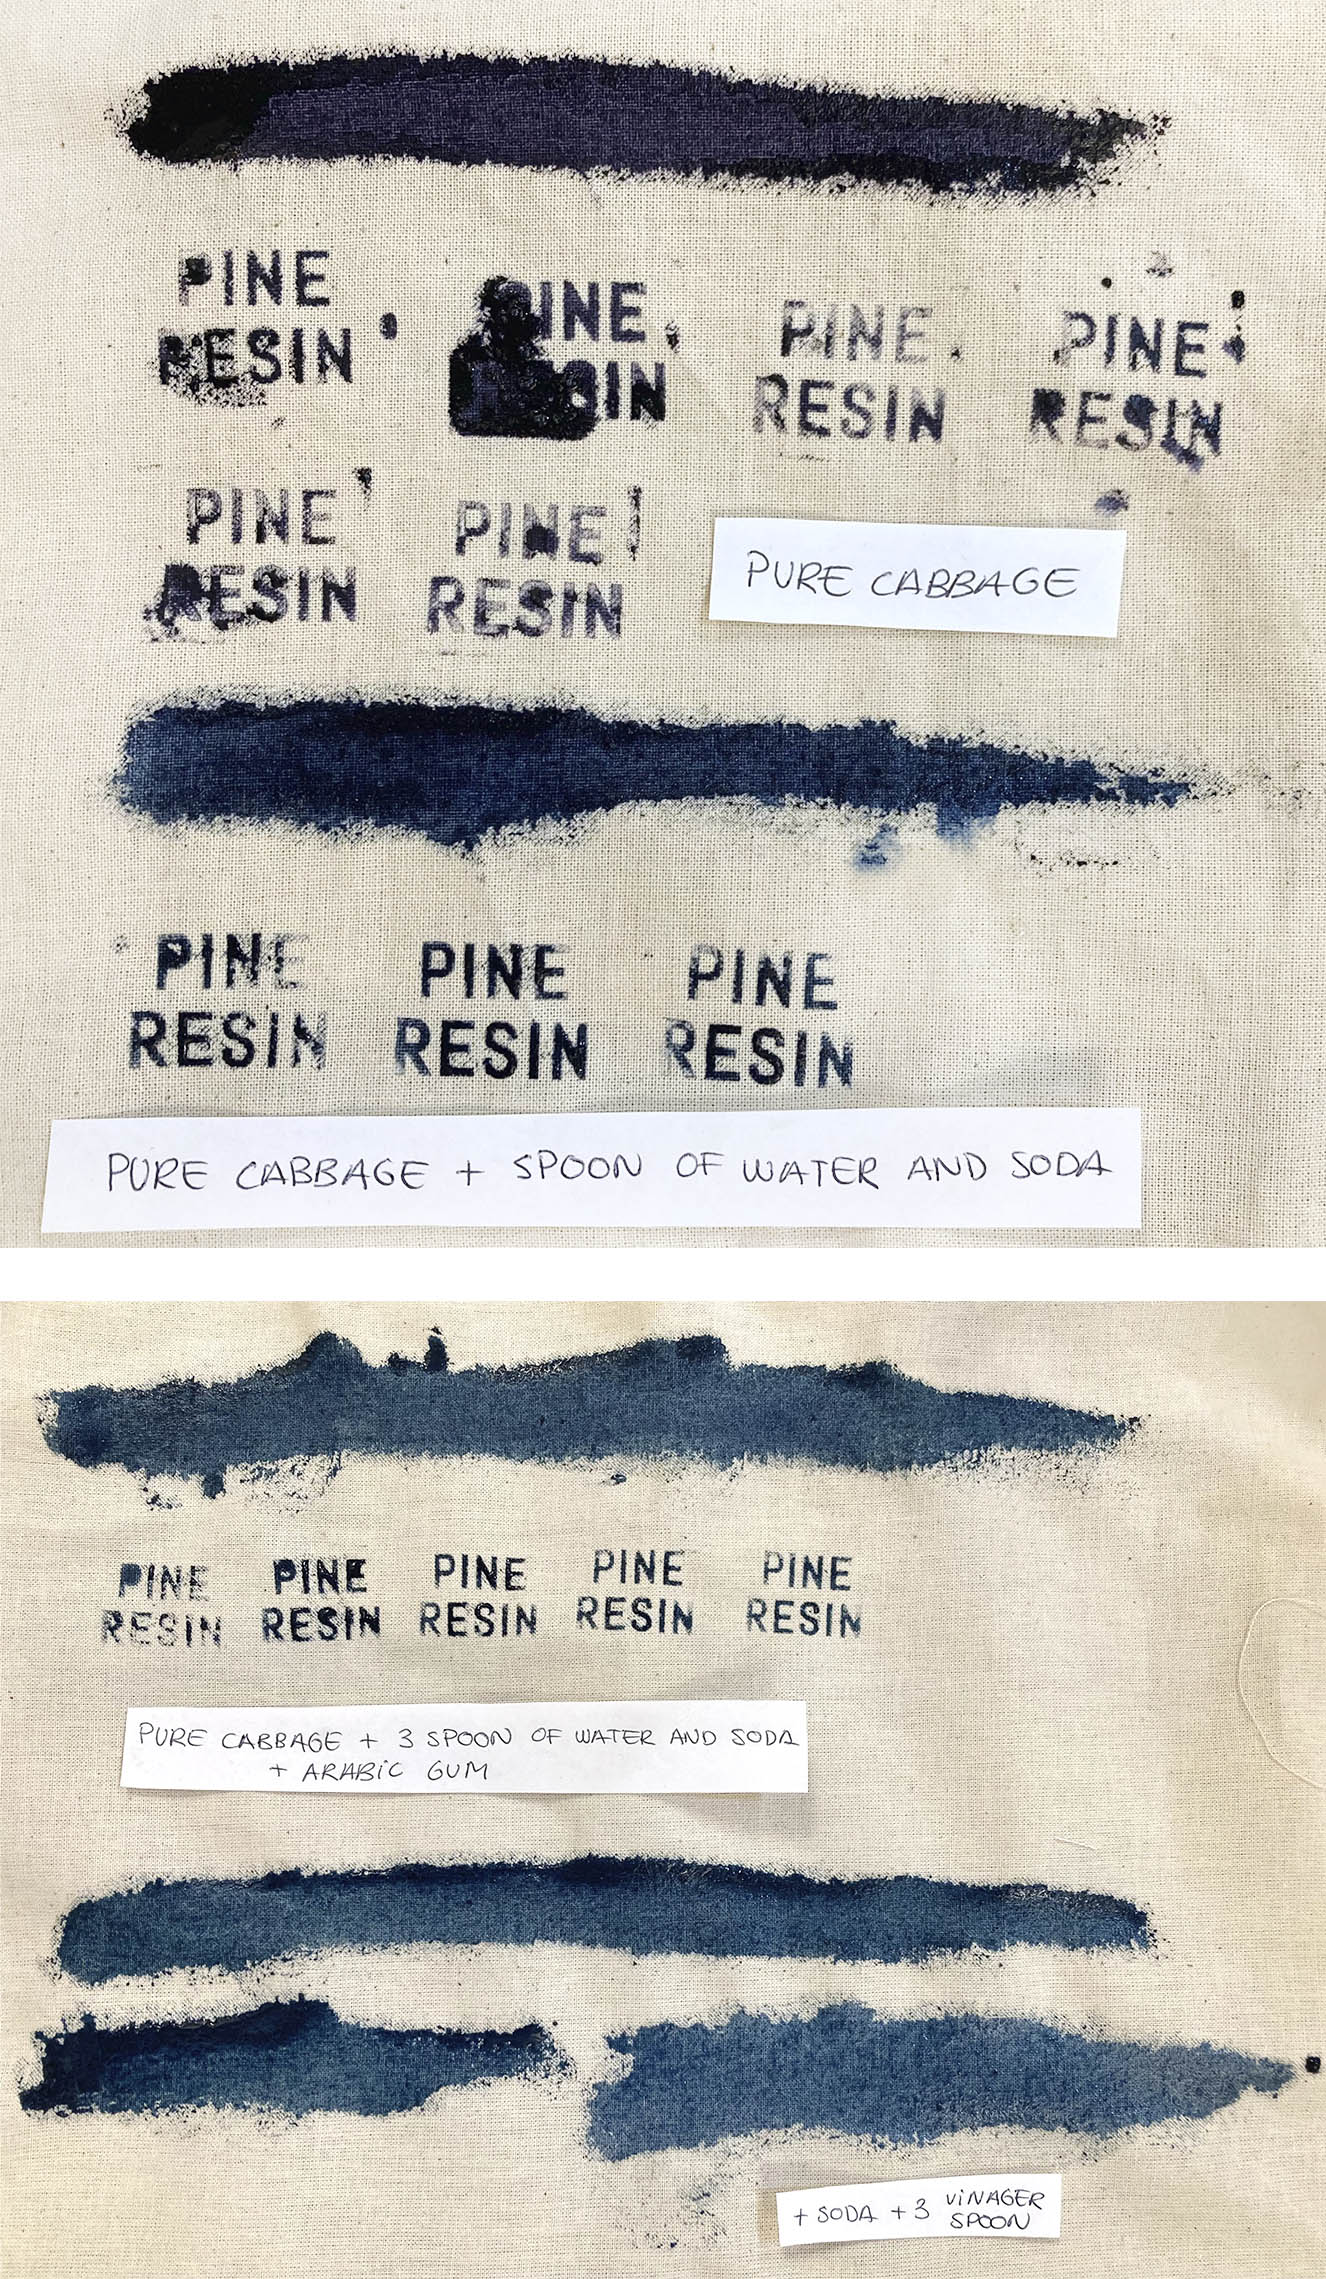
- Get the Dye Bath boiling and reduce until you make it thicker. It could take some time... In our case, we use 450ml of Cabbage.
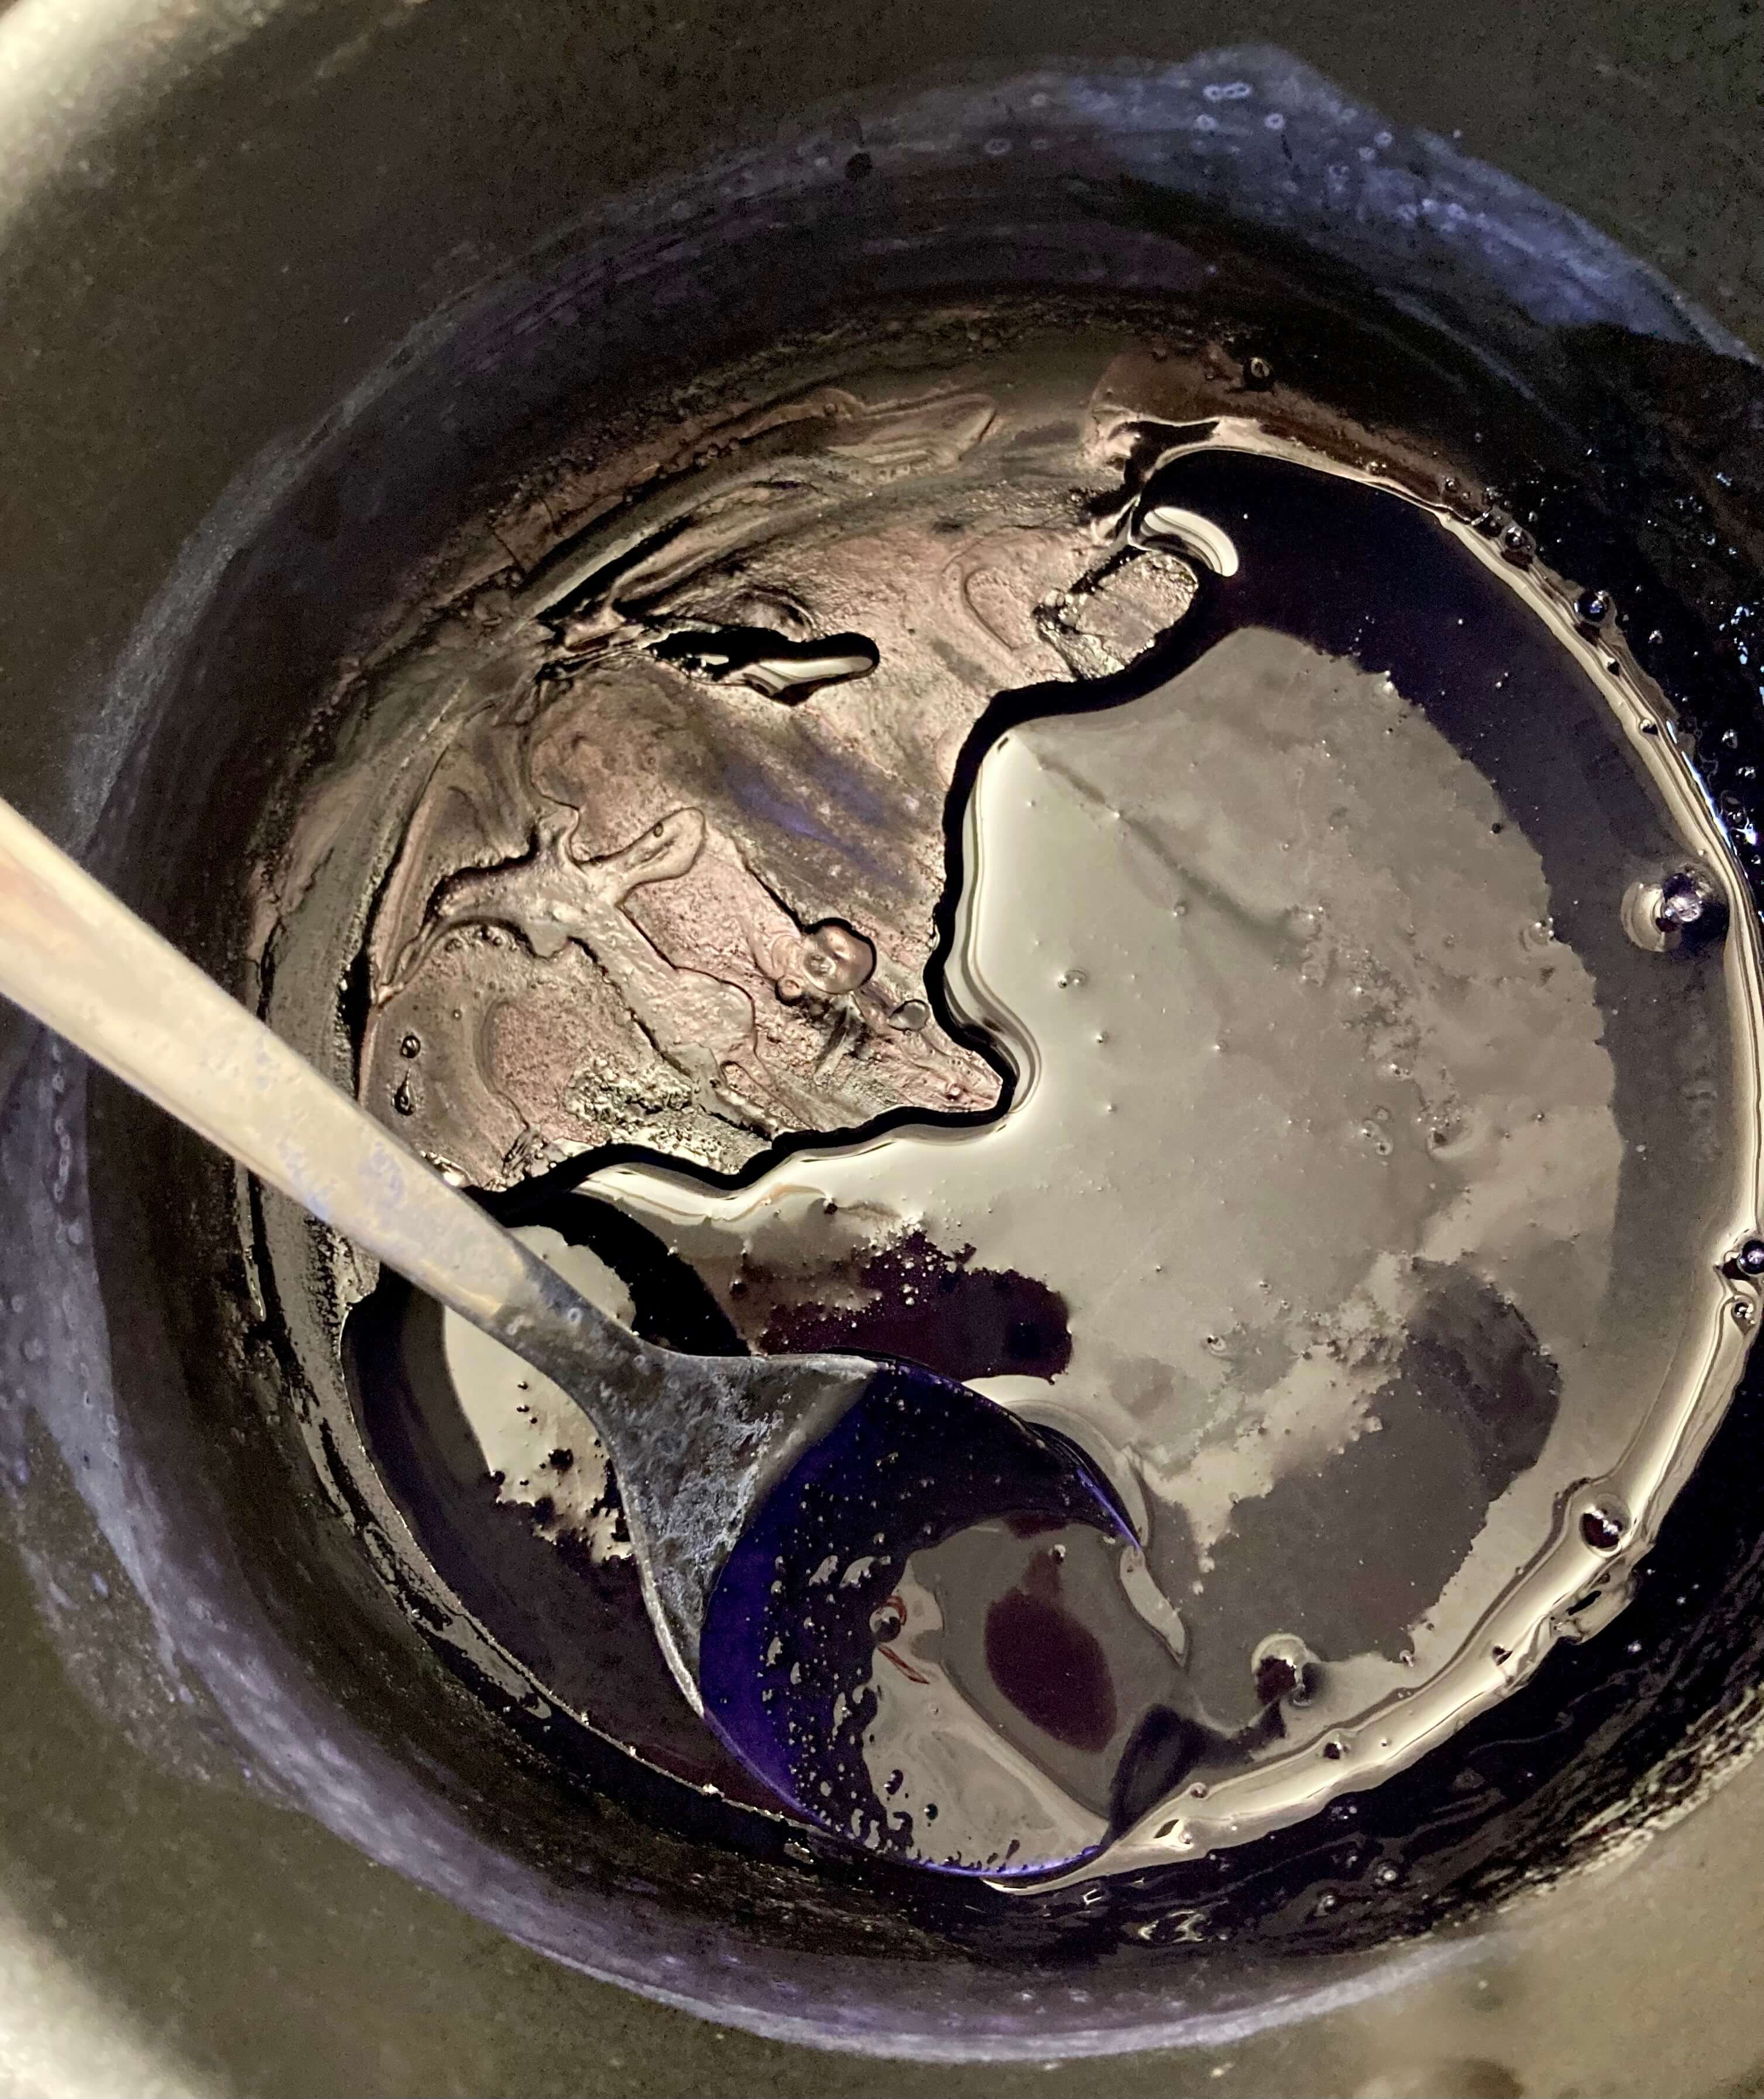
-
Test the INK, if it's too soft you should boil it again.
-
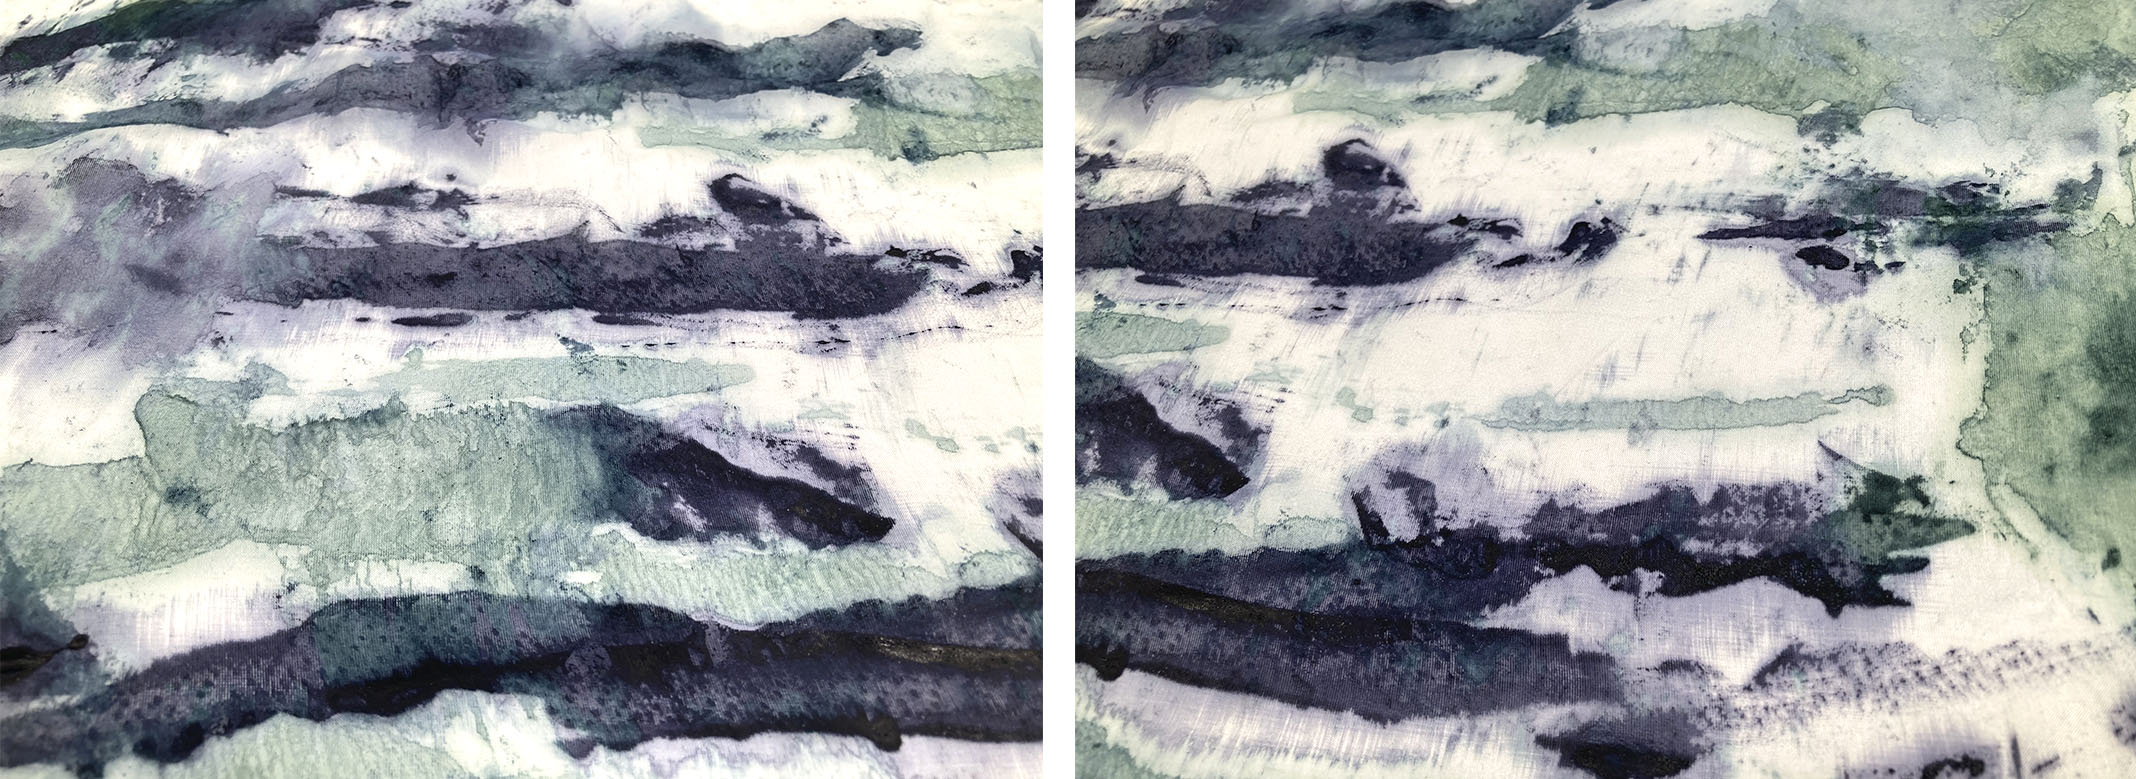
Then you could paint with the INK or modify it with soda or vinegar to get different tones.
OPTION 4
For this optional is to get an INK as a maker pen.
Used leftover raw material from the dye bath and dissolved it with Ethanol.
Ingredients:
- 96% Ethanol (Vehicle)
Steps:
- Blend the material into a pulp
- Pour enough ethanol to cover the material
- Let it soak in the alcohol for 2 hours
- Strain the mixture through a paper filter
- Ready to use
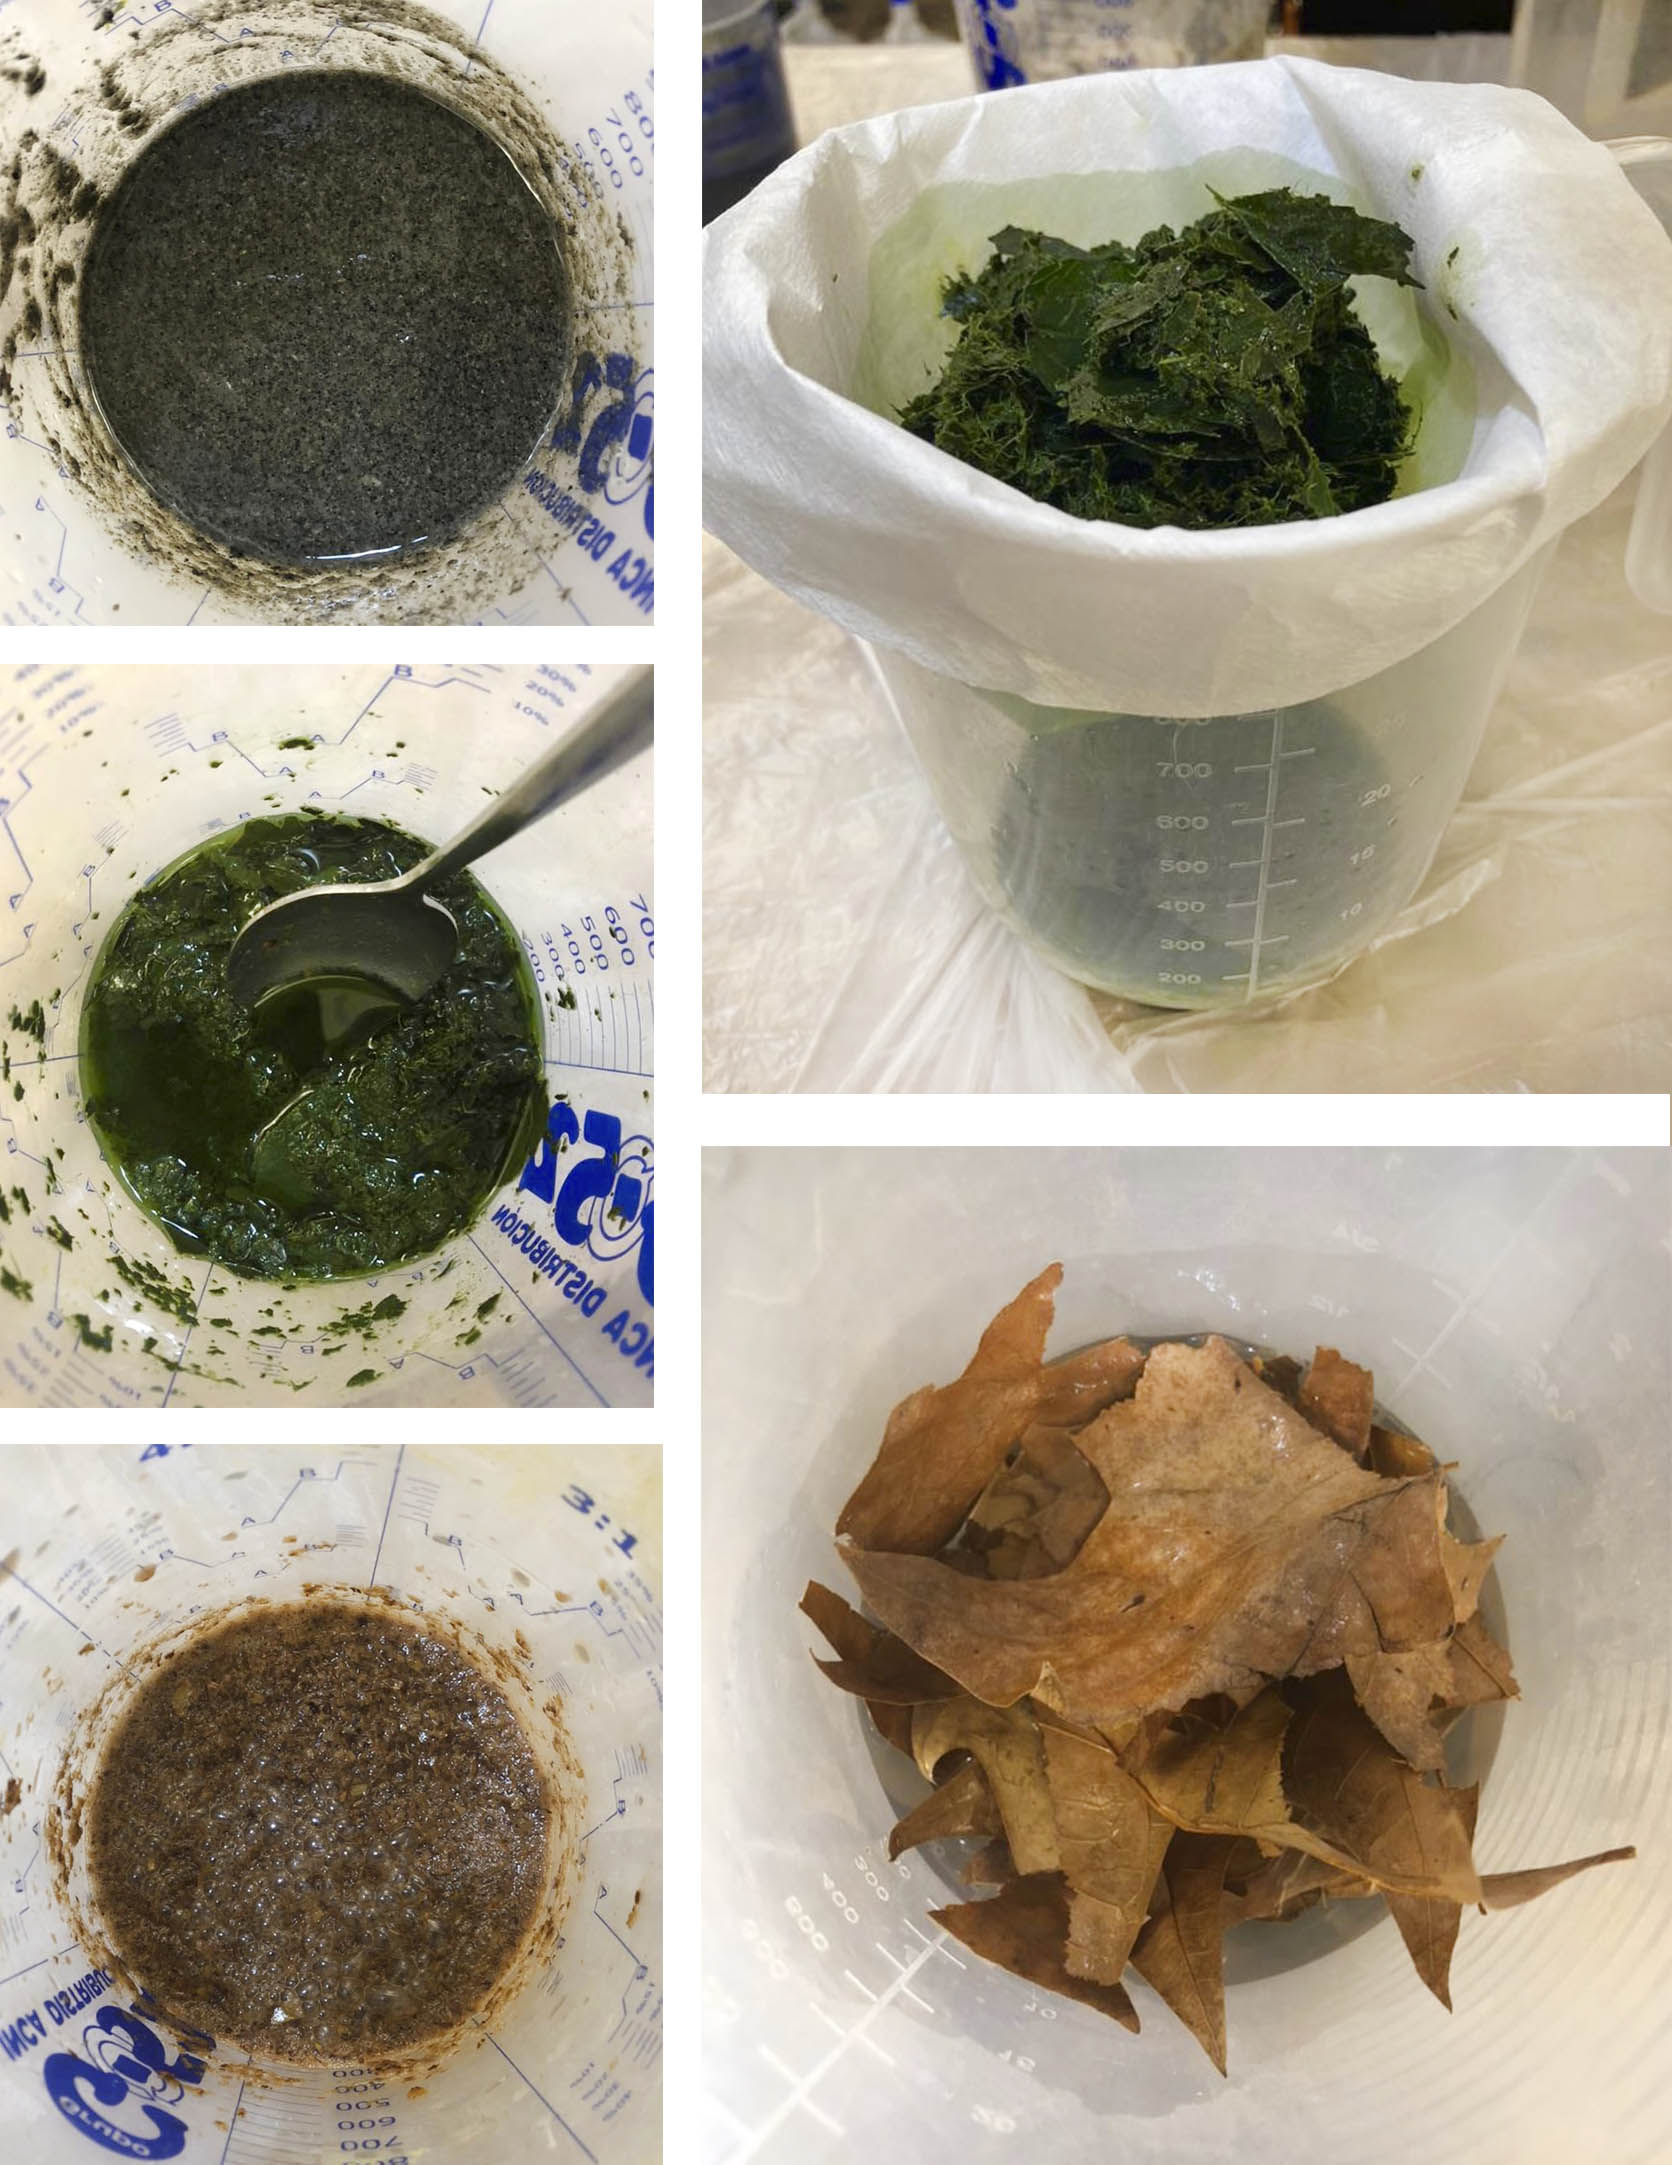
We extract INK from various materials:
- Eucalyptus leftover from the dying (still wet)
- Lichen leftover from the dying (still wet)
- Autumn leaves (dry)
- Autumn leaves (that's been soaked in water for 3 days)
Trying the INK in the paper as an aquarelle with a marker pen fabricated from coffee filters.
The dry time for the print is approximately 2-3 hours.
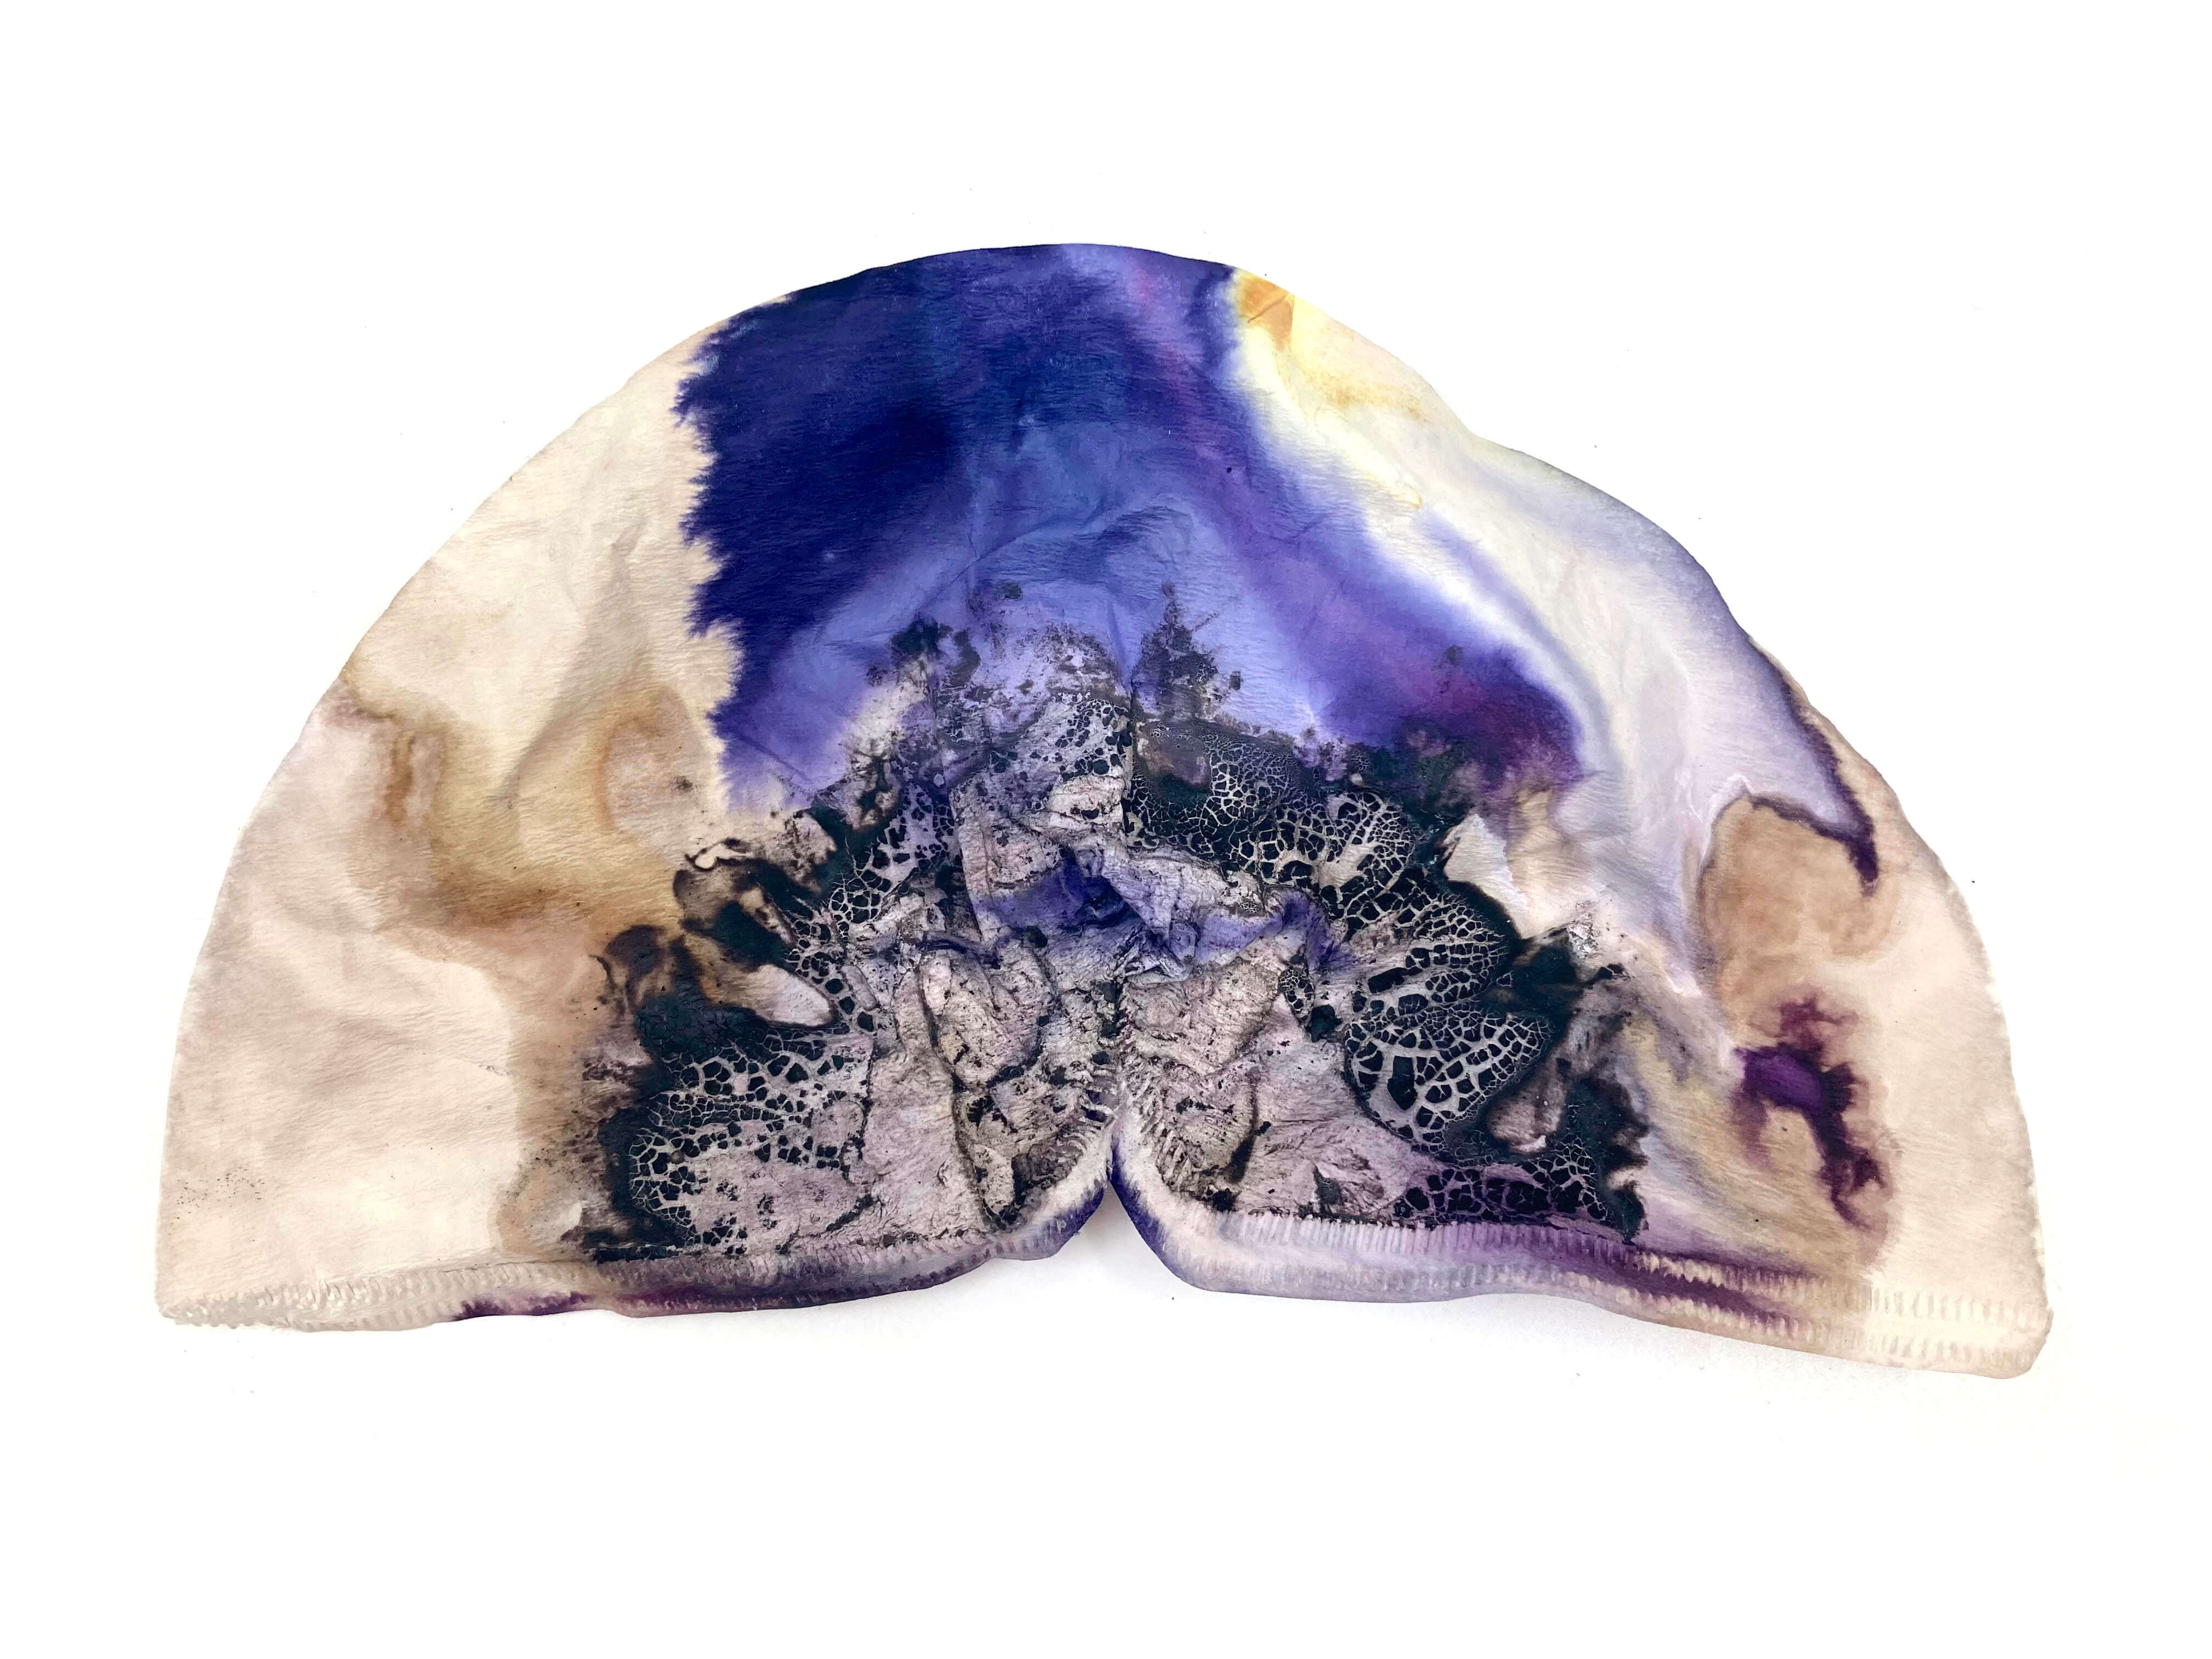
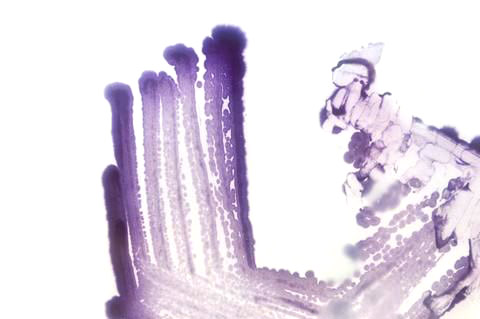
Bacterial Dyes
Name of the bacteria: Janthinobacterium Lividum
Is an aerobic, gram-negative, soil-dwelling bacterium that has a distinctive dark-violet color. This color is due to a compound called violacein, which is produced when glycerol is metabolized as a carbon source. Violacein has anti-bacterial, anti-viral, and anti-fungal properties. 🐸
Bacteria nutrient Agar (bacteria food) for 4 petri dishes is made with:
- 200ml of desthiled water
- 4g of Nutrient Agar
- 1ml of Glycerin
Bacteria LB Broth:
- 250ml desthiled water
- 6,75g of LB Broth
- 1ml of Glycerine
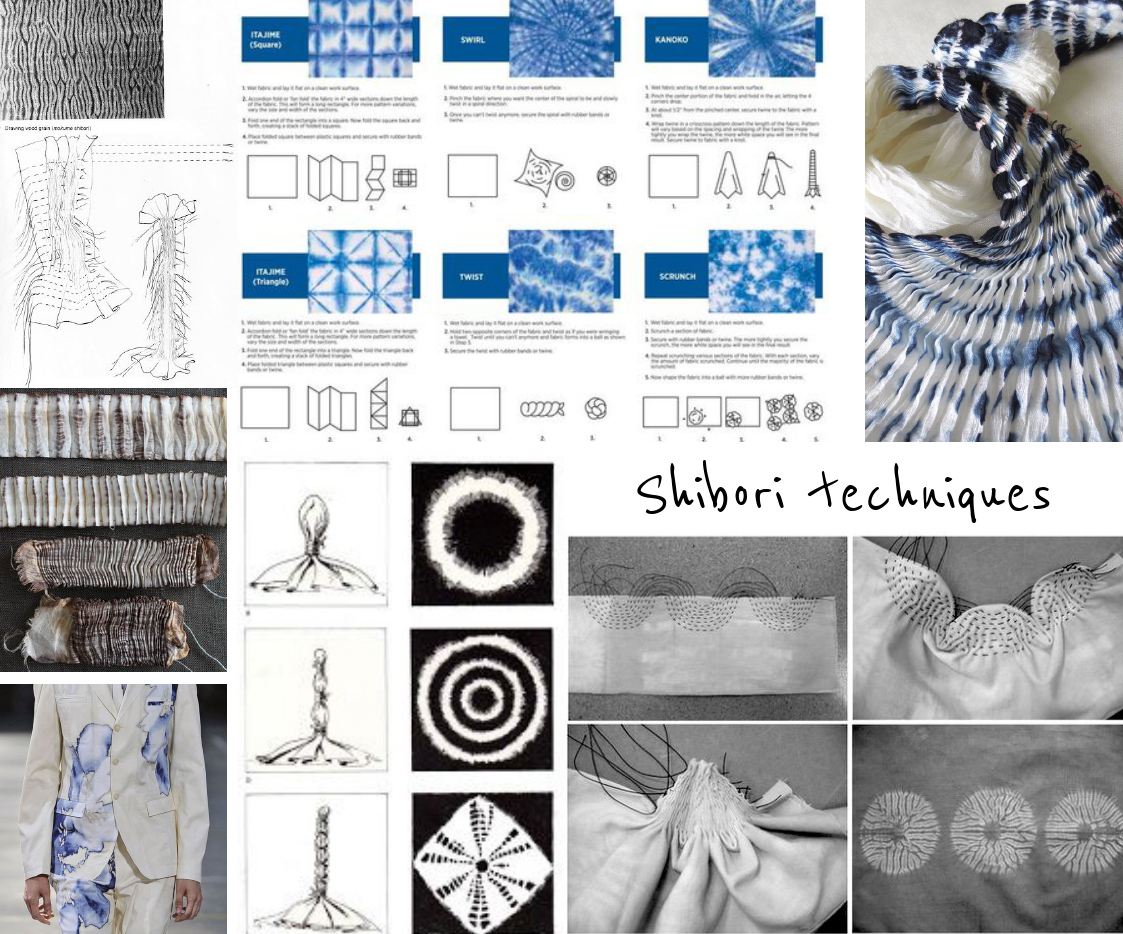
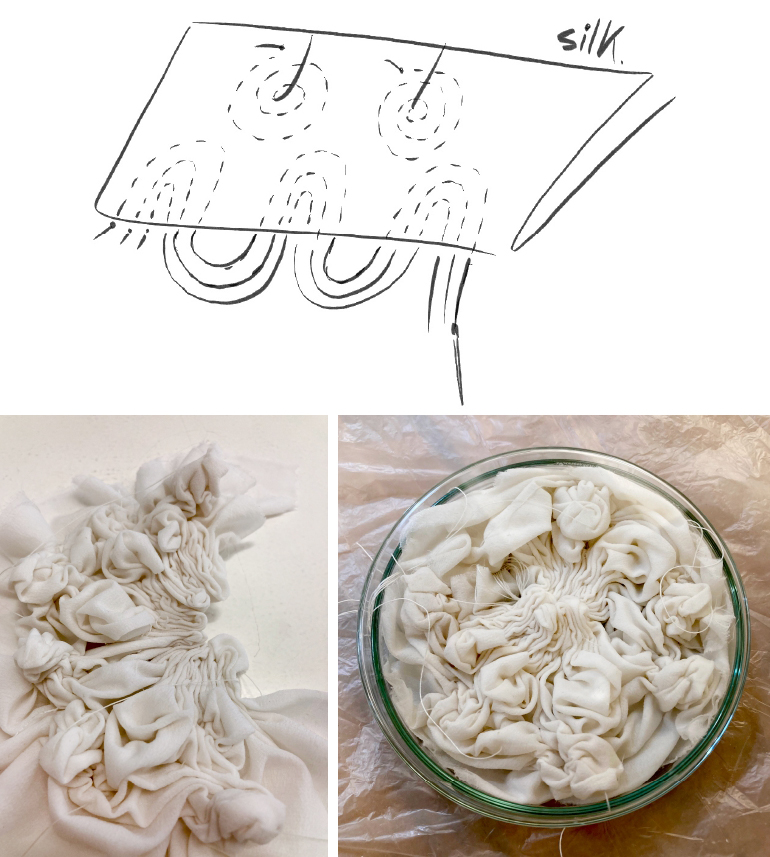
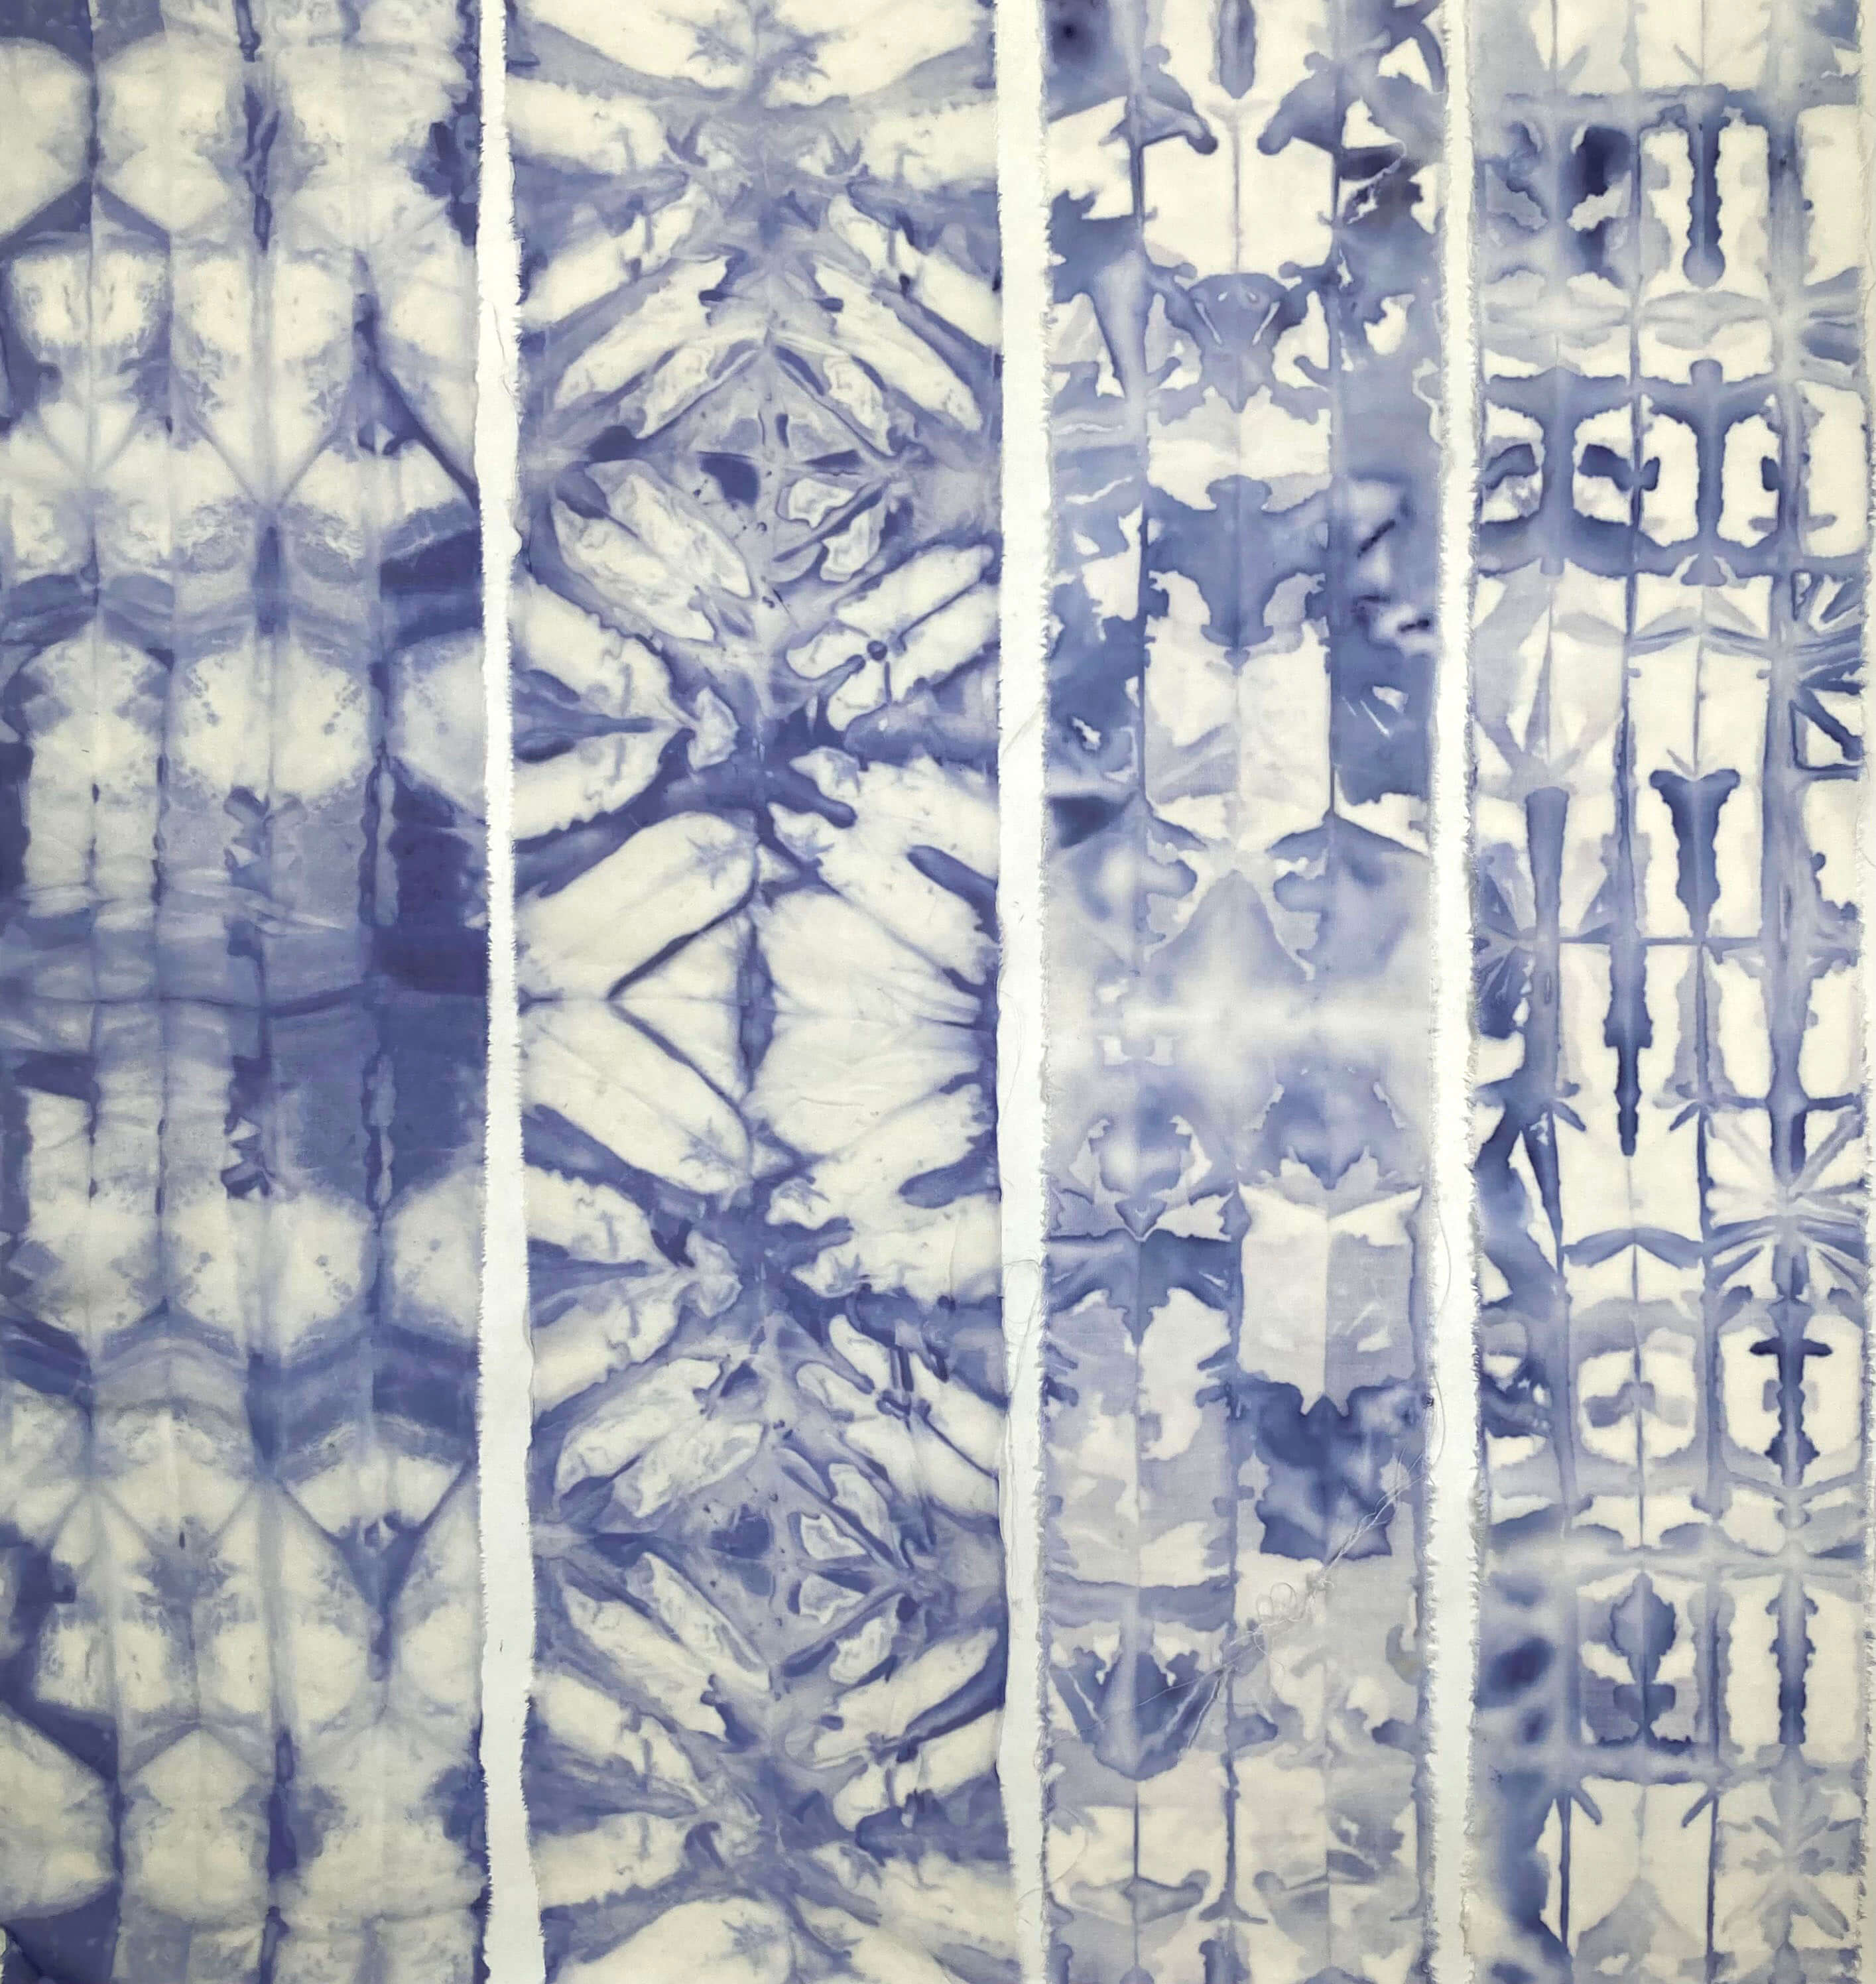
Shibori techinc
Tool and ingredients
- 500ml glass bottle with cap (have to fit in the pressure cooker)
- Nutrient broth NR1
- Nutirent Agar
- Pipette
- Glycerine
- Still water
- Pressure cooker
- Electric stove
- Petri dishes
- Inoculation loop
- Camping gas + lighter
- Parafilm tape
- Autoclave bag
- Fabrics (silk,cotton, linen...) Plant based have to be scoured.
Proces
Wear gloves, a mask, and a lab coat.
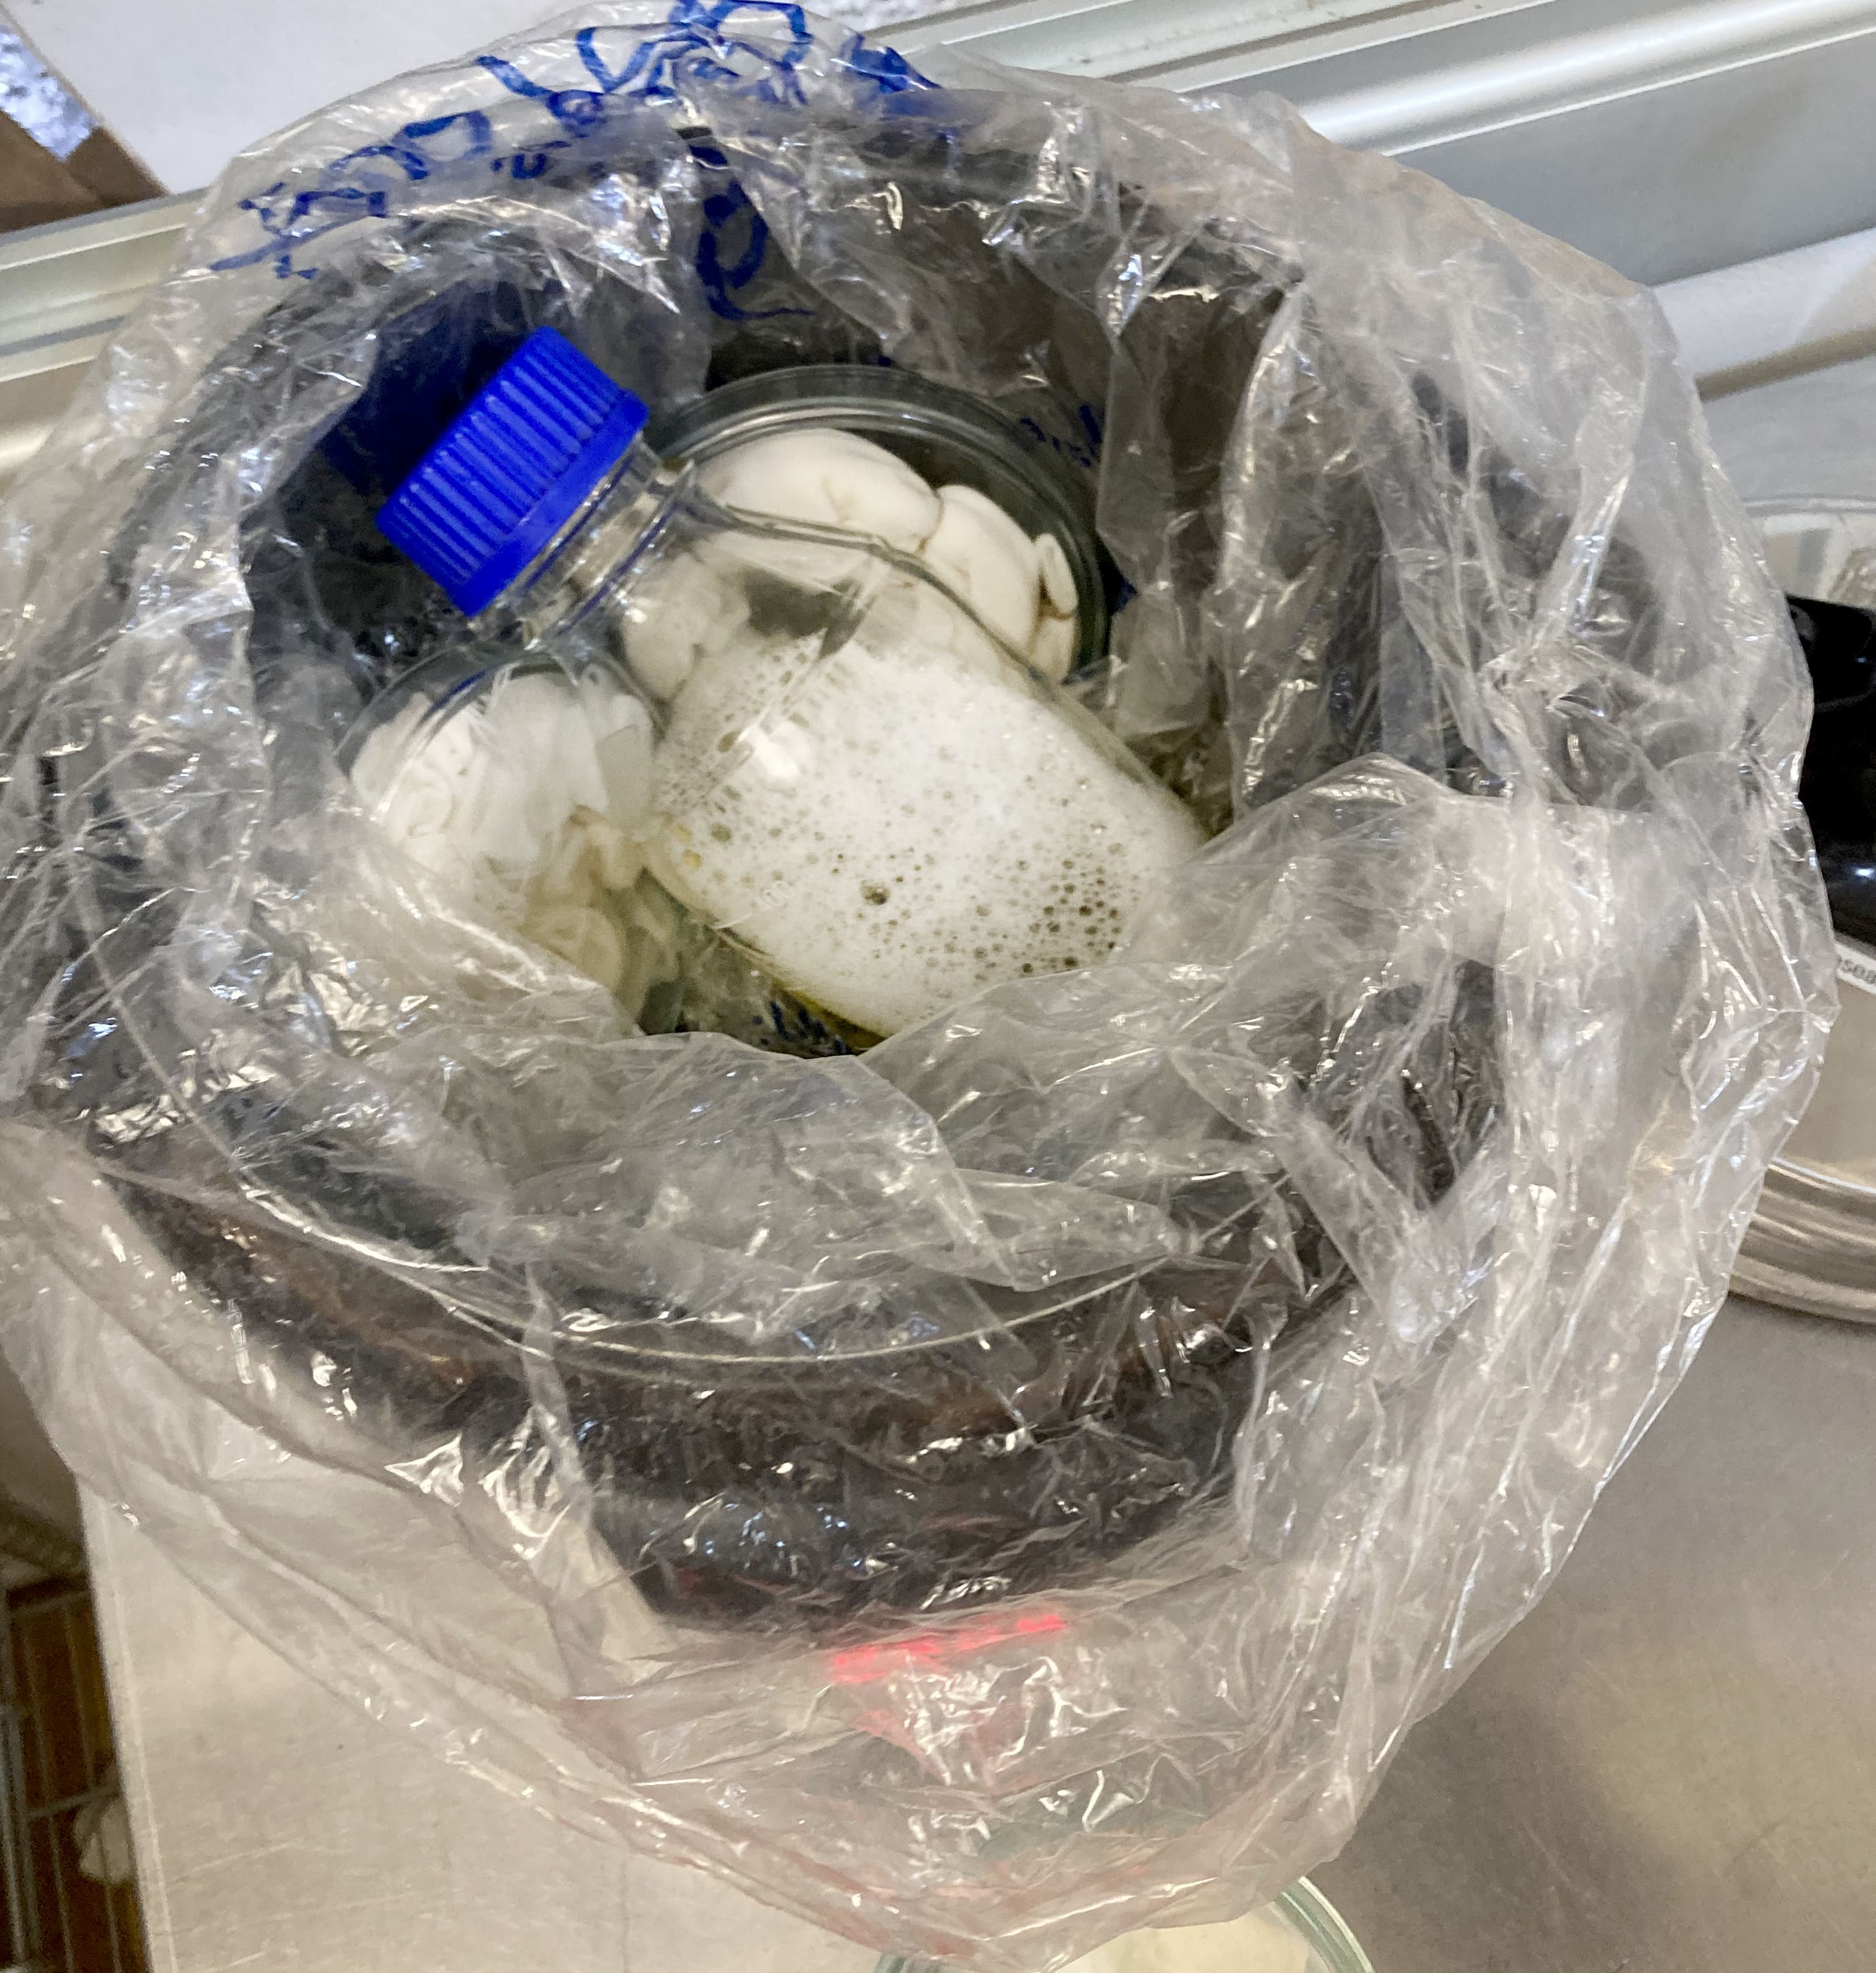
- 1 To estarlizate the fabric, the dishes, and the Agar we must put them in the pressure cooker with 2cm of water inside and a special plastic bag (autoclave) with all inside. We should let them in during 30’. Meat mode.
Attention: Be must open the plug of the bottle to put inside the cooker. Be careful when we close the cooker, it can not catch the bag, it will explode!
-
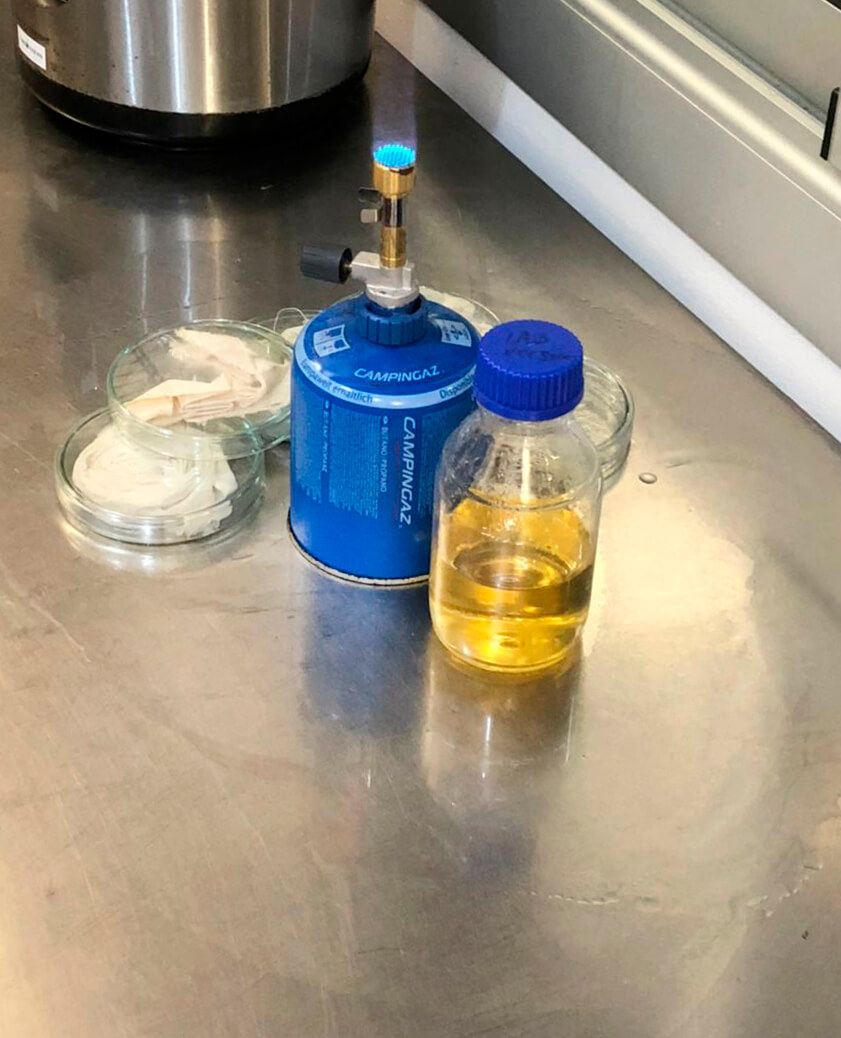
2 Meanwhile, prepare the table to work. First of all we must clean it, always! Then we put the caping gas in the middile, and turn it on. We do a circle with ethanol 96%, we should wait 3’ to have the zone starilizated.
-
3 When we take the recipients out the cooker we have to close the bottle quickly for do not lose the sterilization. Put all in the mushroom zone 🍄.
-
4 Open the food bottle and get closer to the fire. Dress the fabric with the food to let the bacterias grow. Don’t have to float! Do not open to much the dishes and be fast.
-
5 Put the loop tool in the fire to sterilize. Get some bacteria softly and draw stripes in your fabric. And get the tool back to the fire. You could repeat sometimes to get enough bacteria to grow around the fabric.
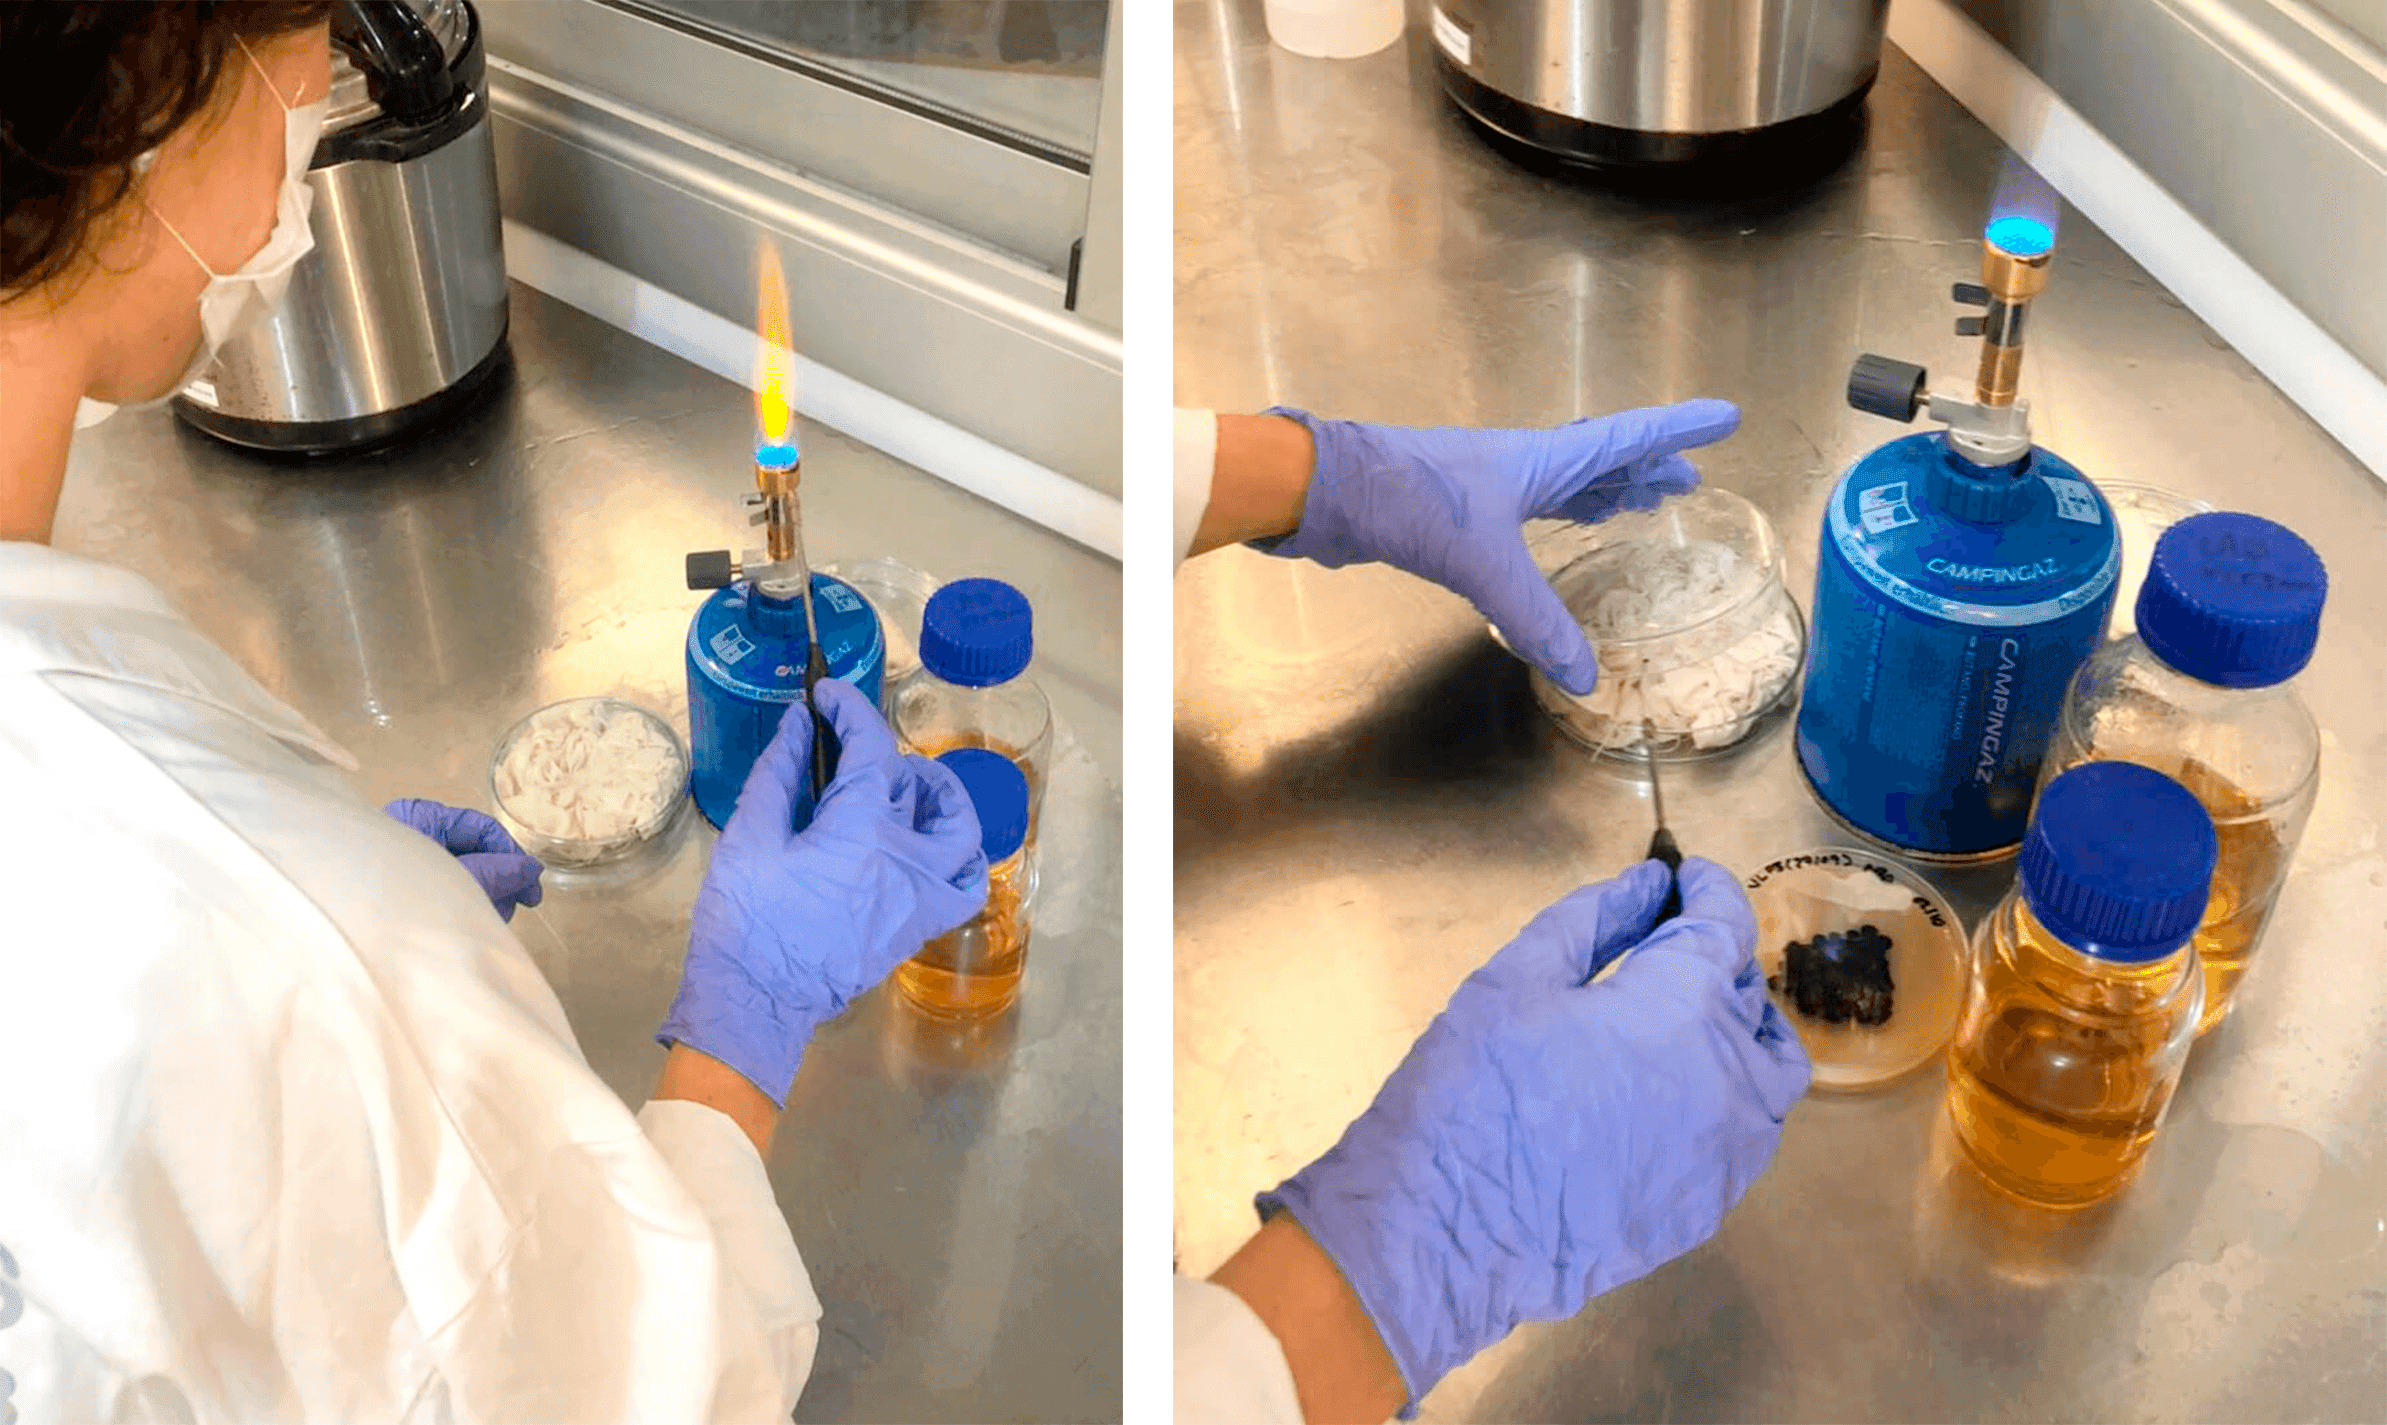
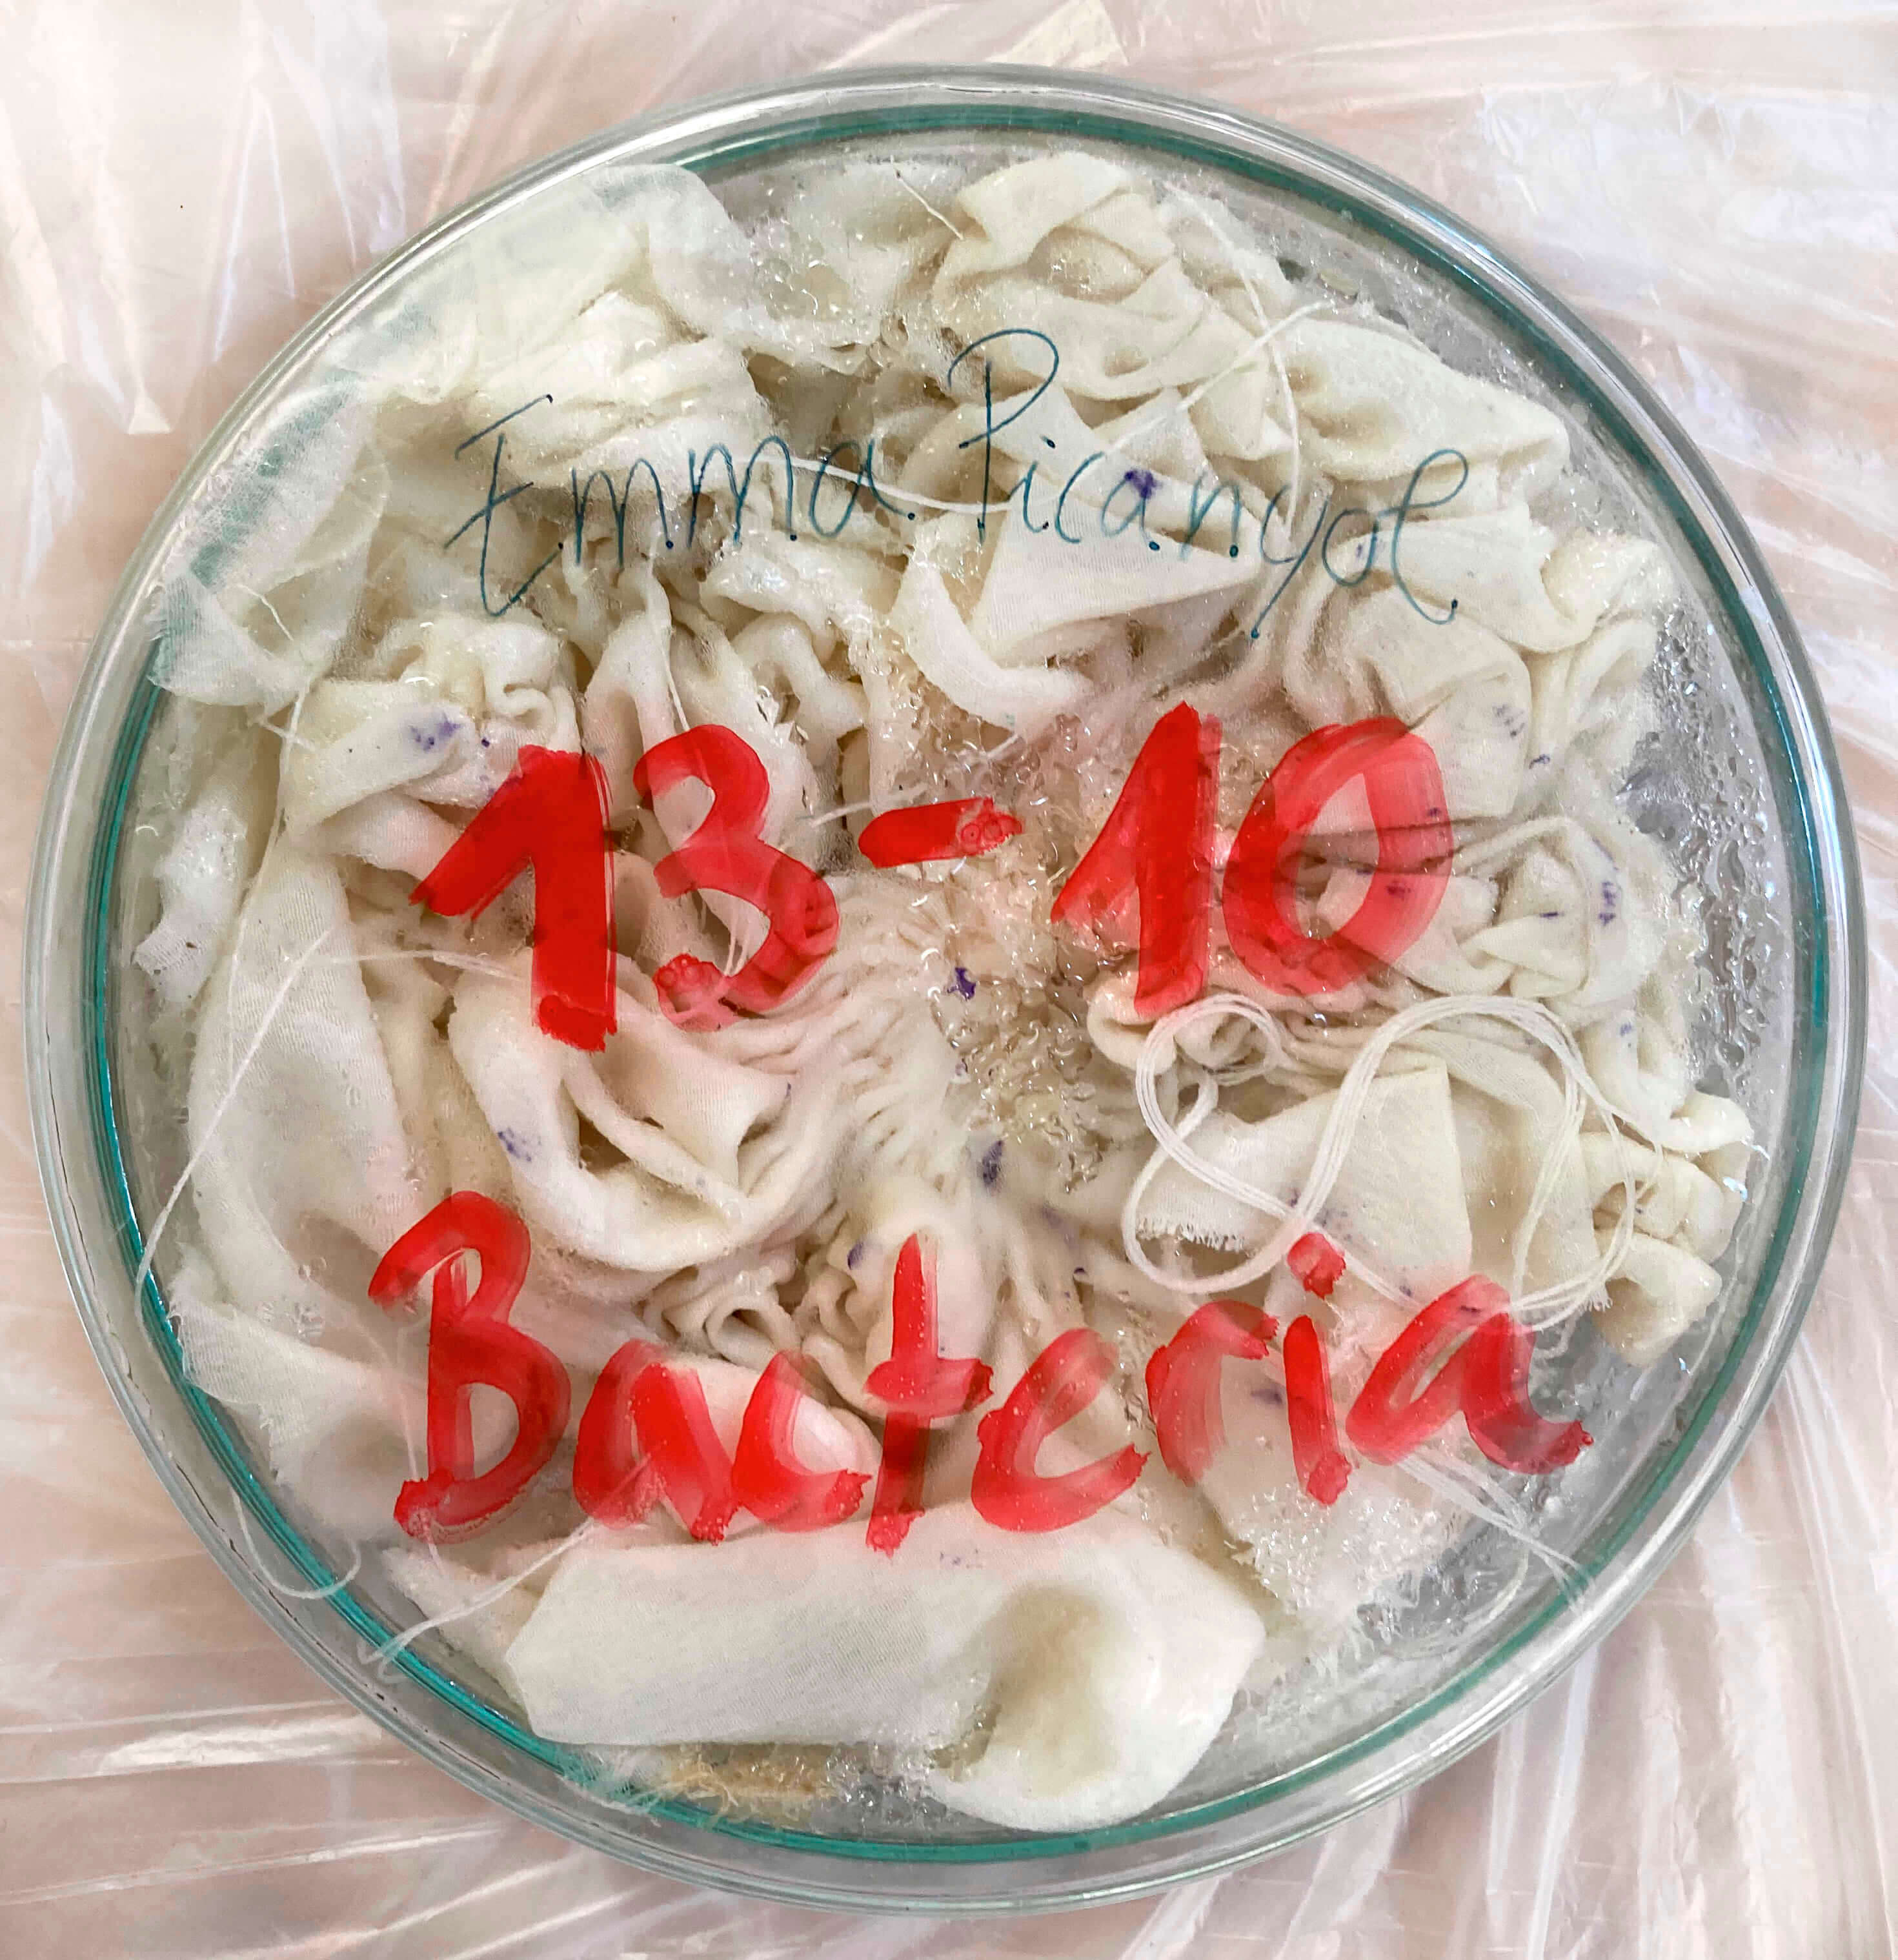
- 6 Close the dish with a special stripe. Tag the petri dish, write the date, your name, and what was. And put it in the incubator. We will see some results in 2-3 days.
- 7 Let 5-7 days in the incubator grow the bacteria and get it to dye! If the dishes turn white it’s because the incubator is too hot.
The easy fabric to grow bacteria is the silk, and the most difficult to get is wool, in that case, we must put more Ager in the dishes than the other types of fabrics. As you could see in the photo, the cotton fabric just has a few bacterial dyes, rather than the other ones, which are silk.
-
8 Take out the petri dish and kill the bacteria in the pressure cooker. Put inside the plastic bag as same as the first time to get sterilized (step 1). In case your fabric doesn't have enough bacterial dye, you could repeat adding once more some bacteria.
-
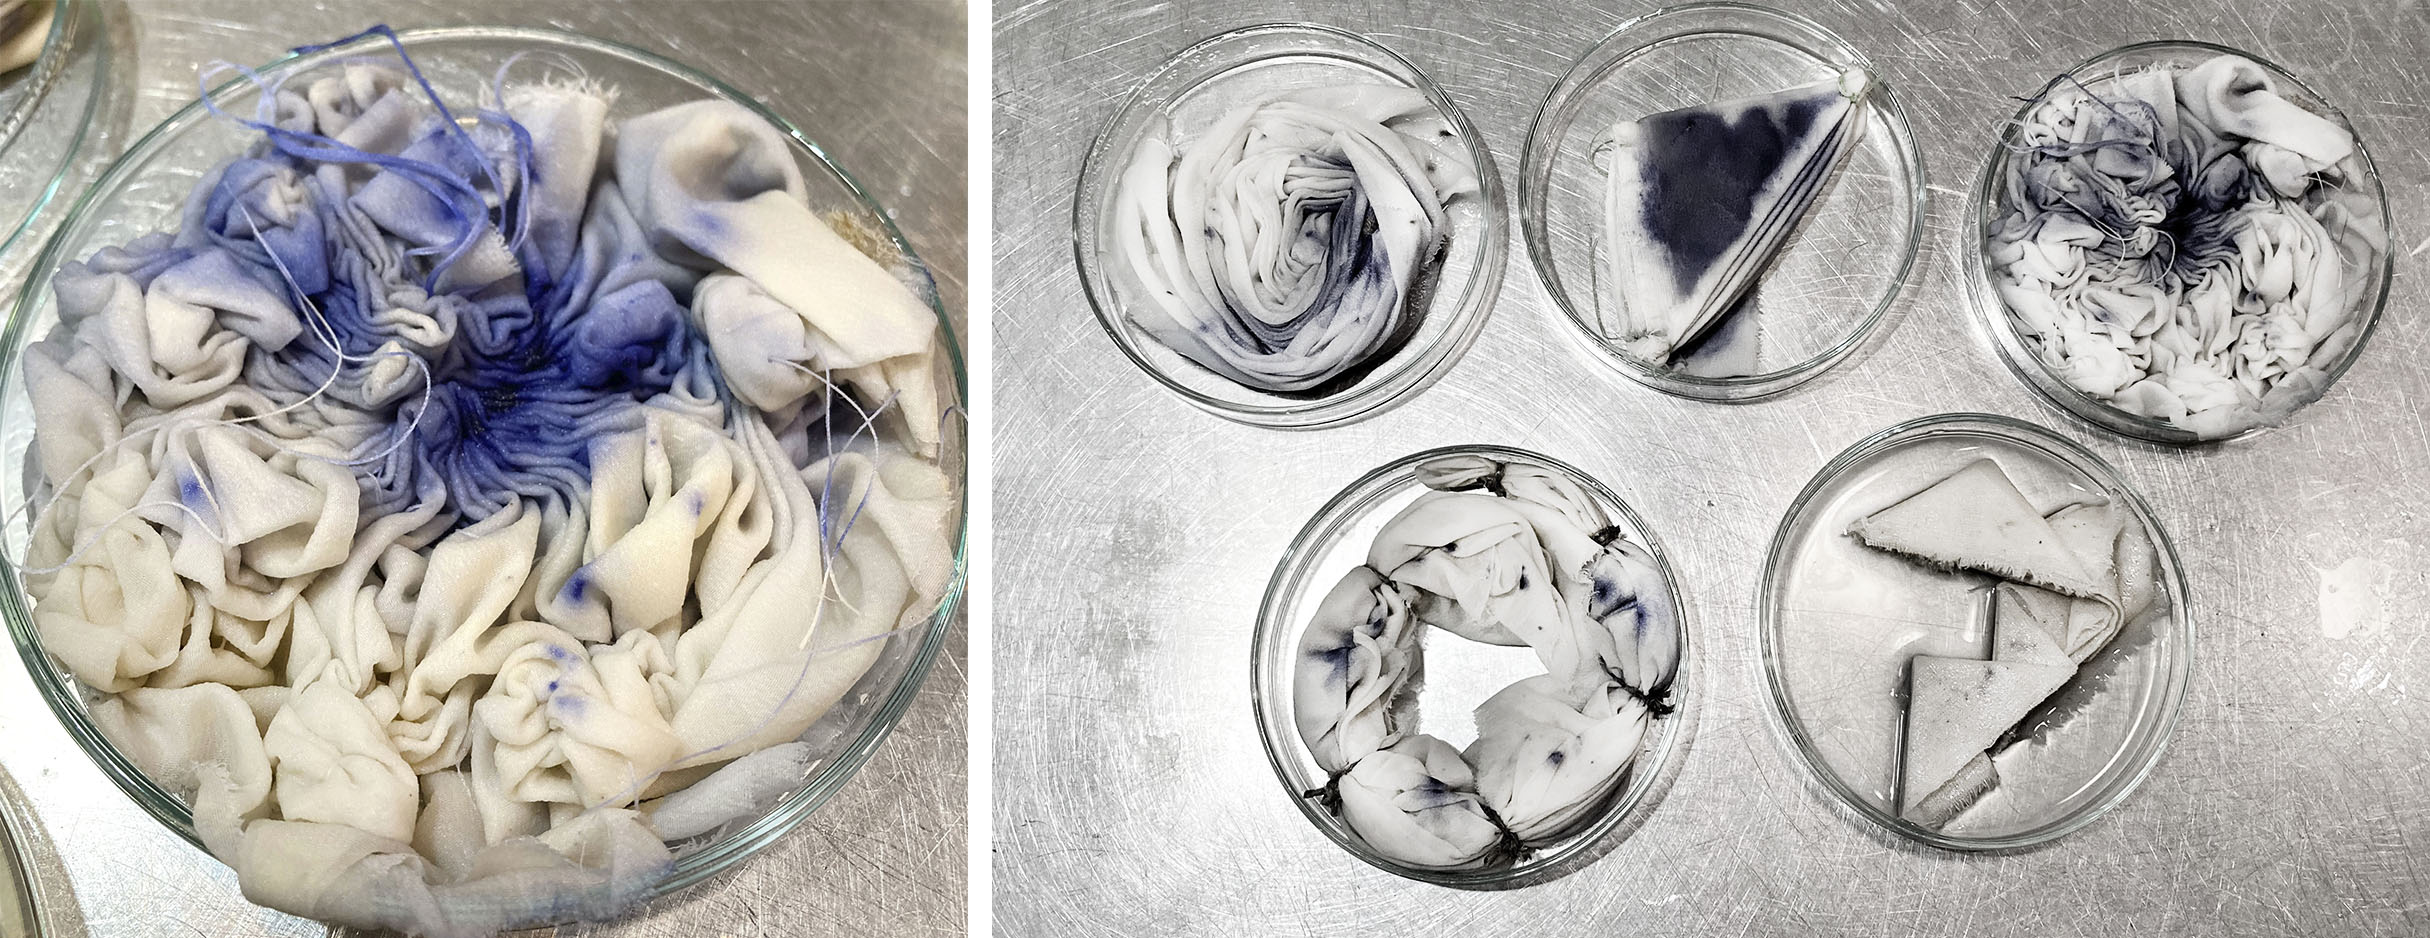
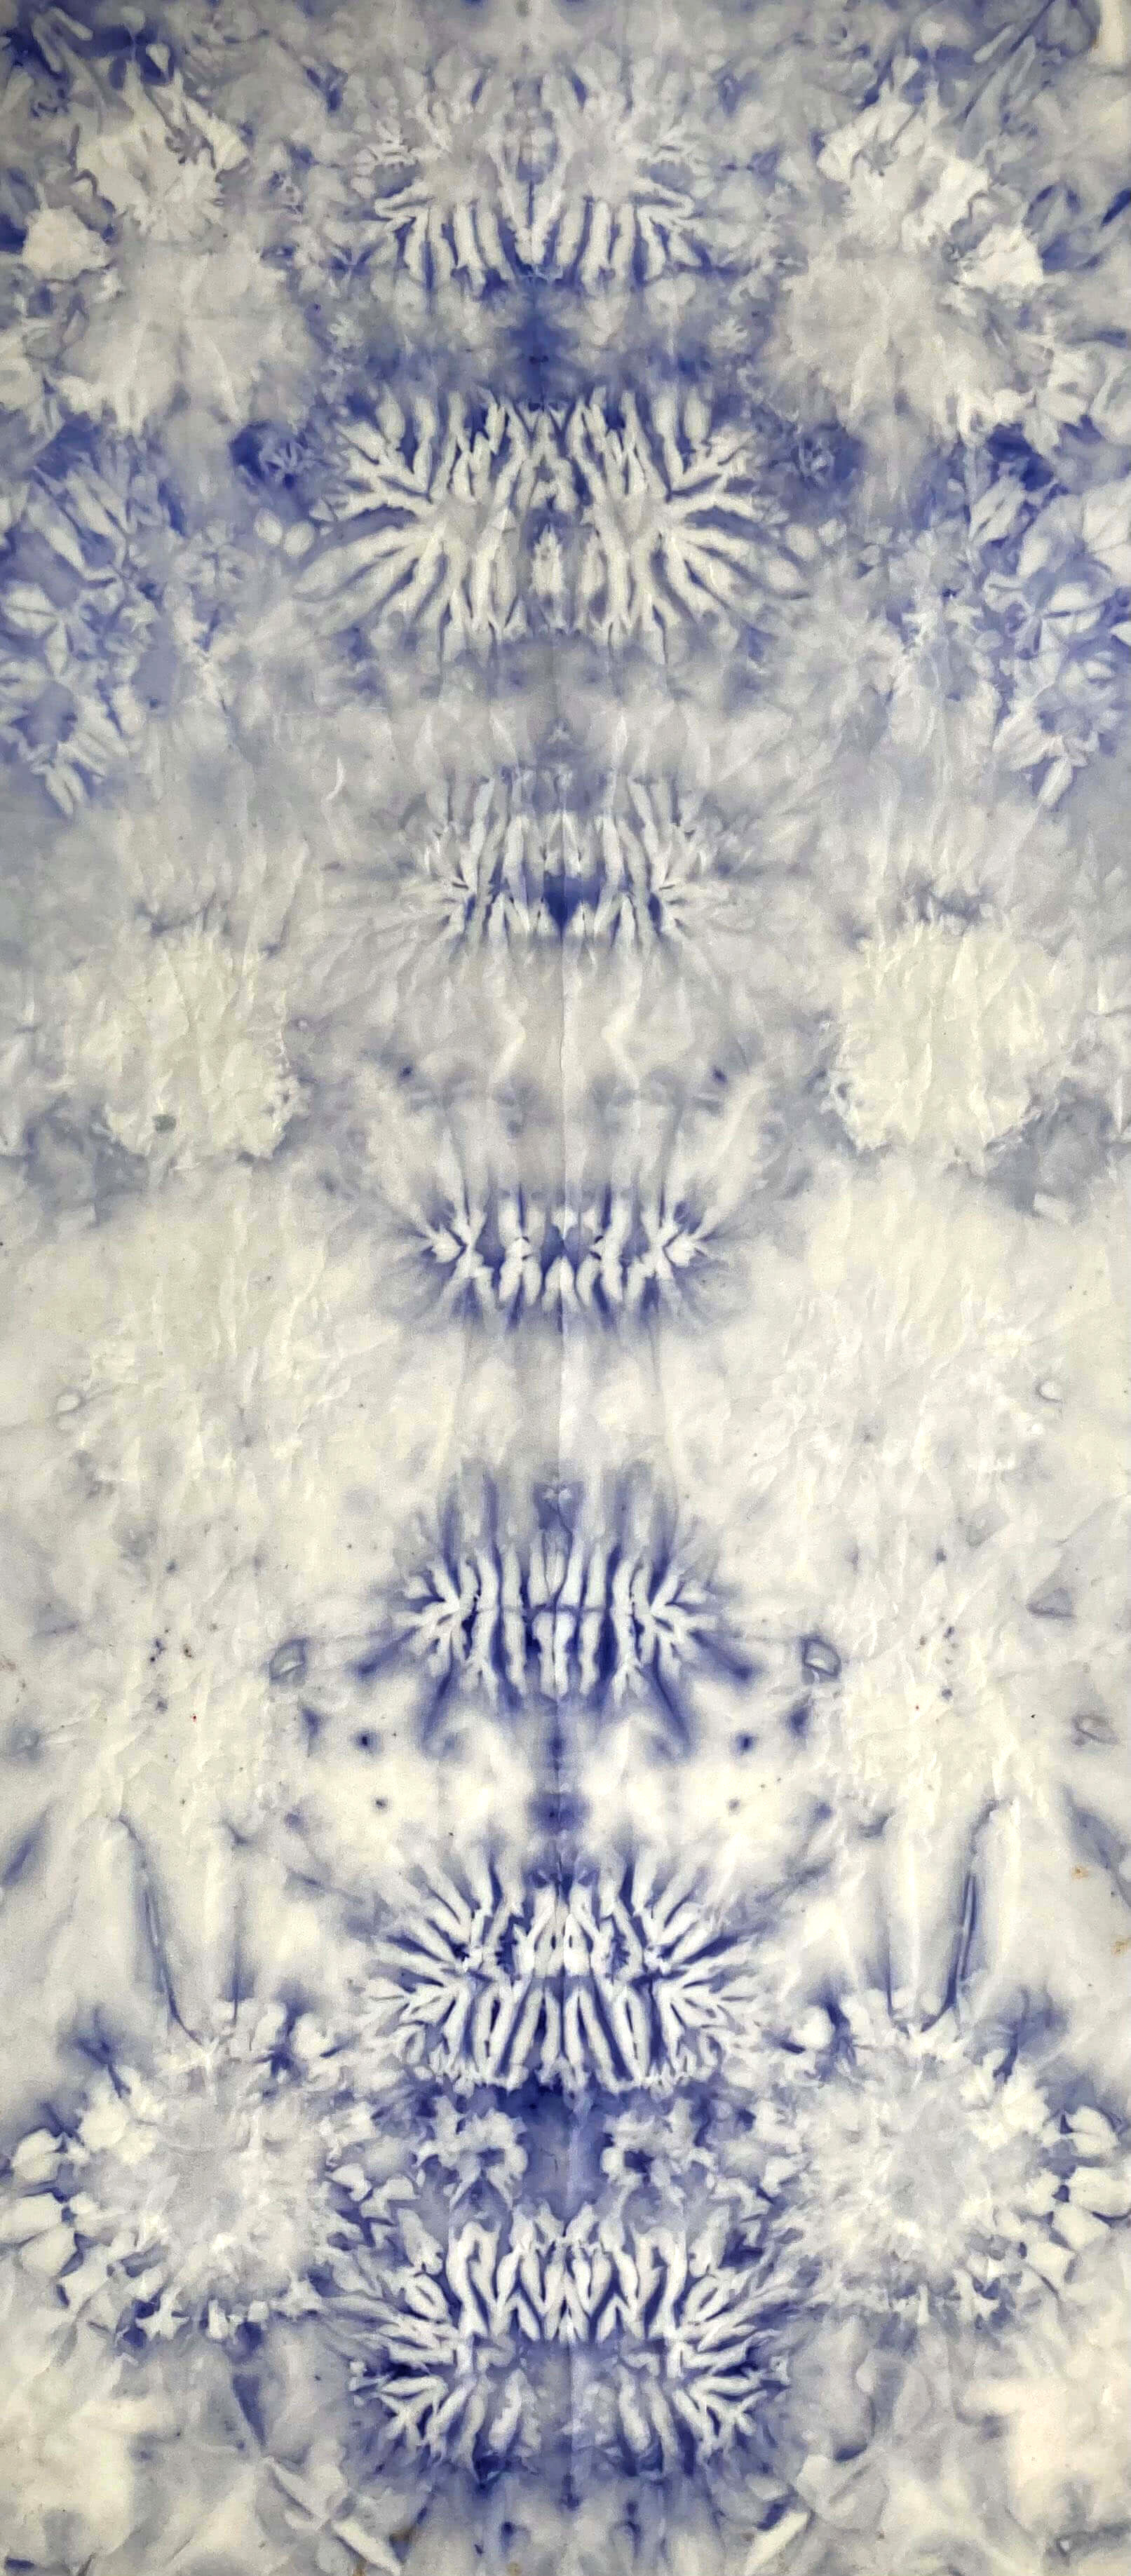
9 When you are satisfied with the dye result and you killed them, let the fabrics cooled and then wash them in water. Untie the plates or the shibori technic and dry.
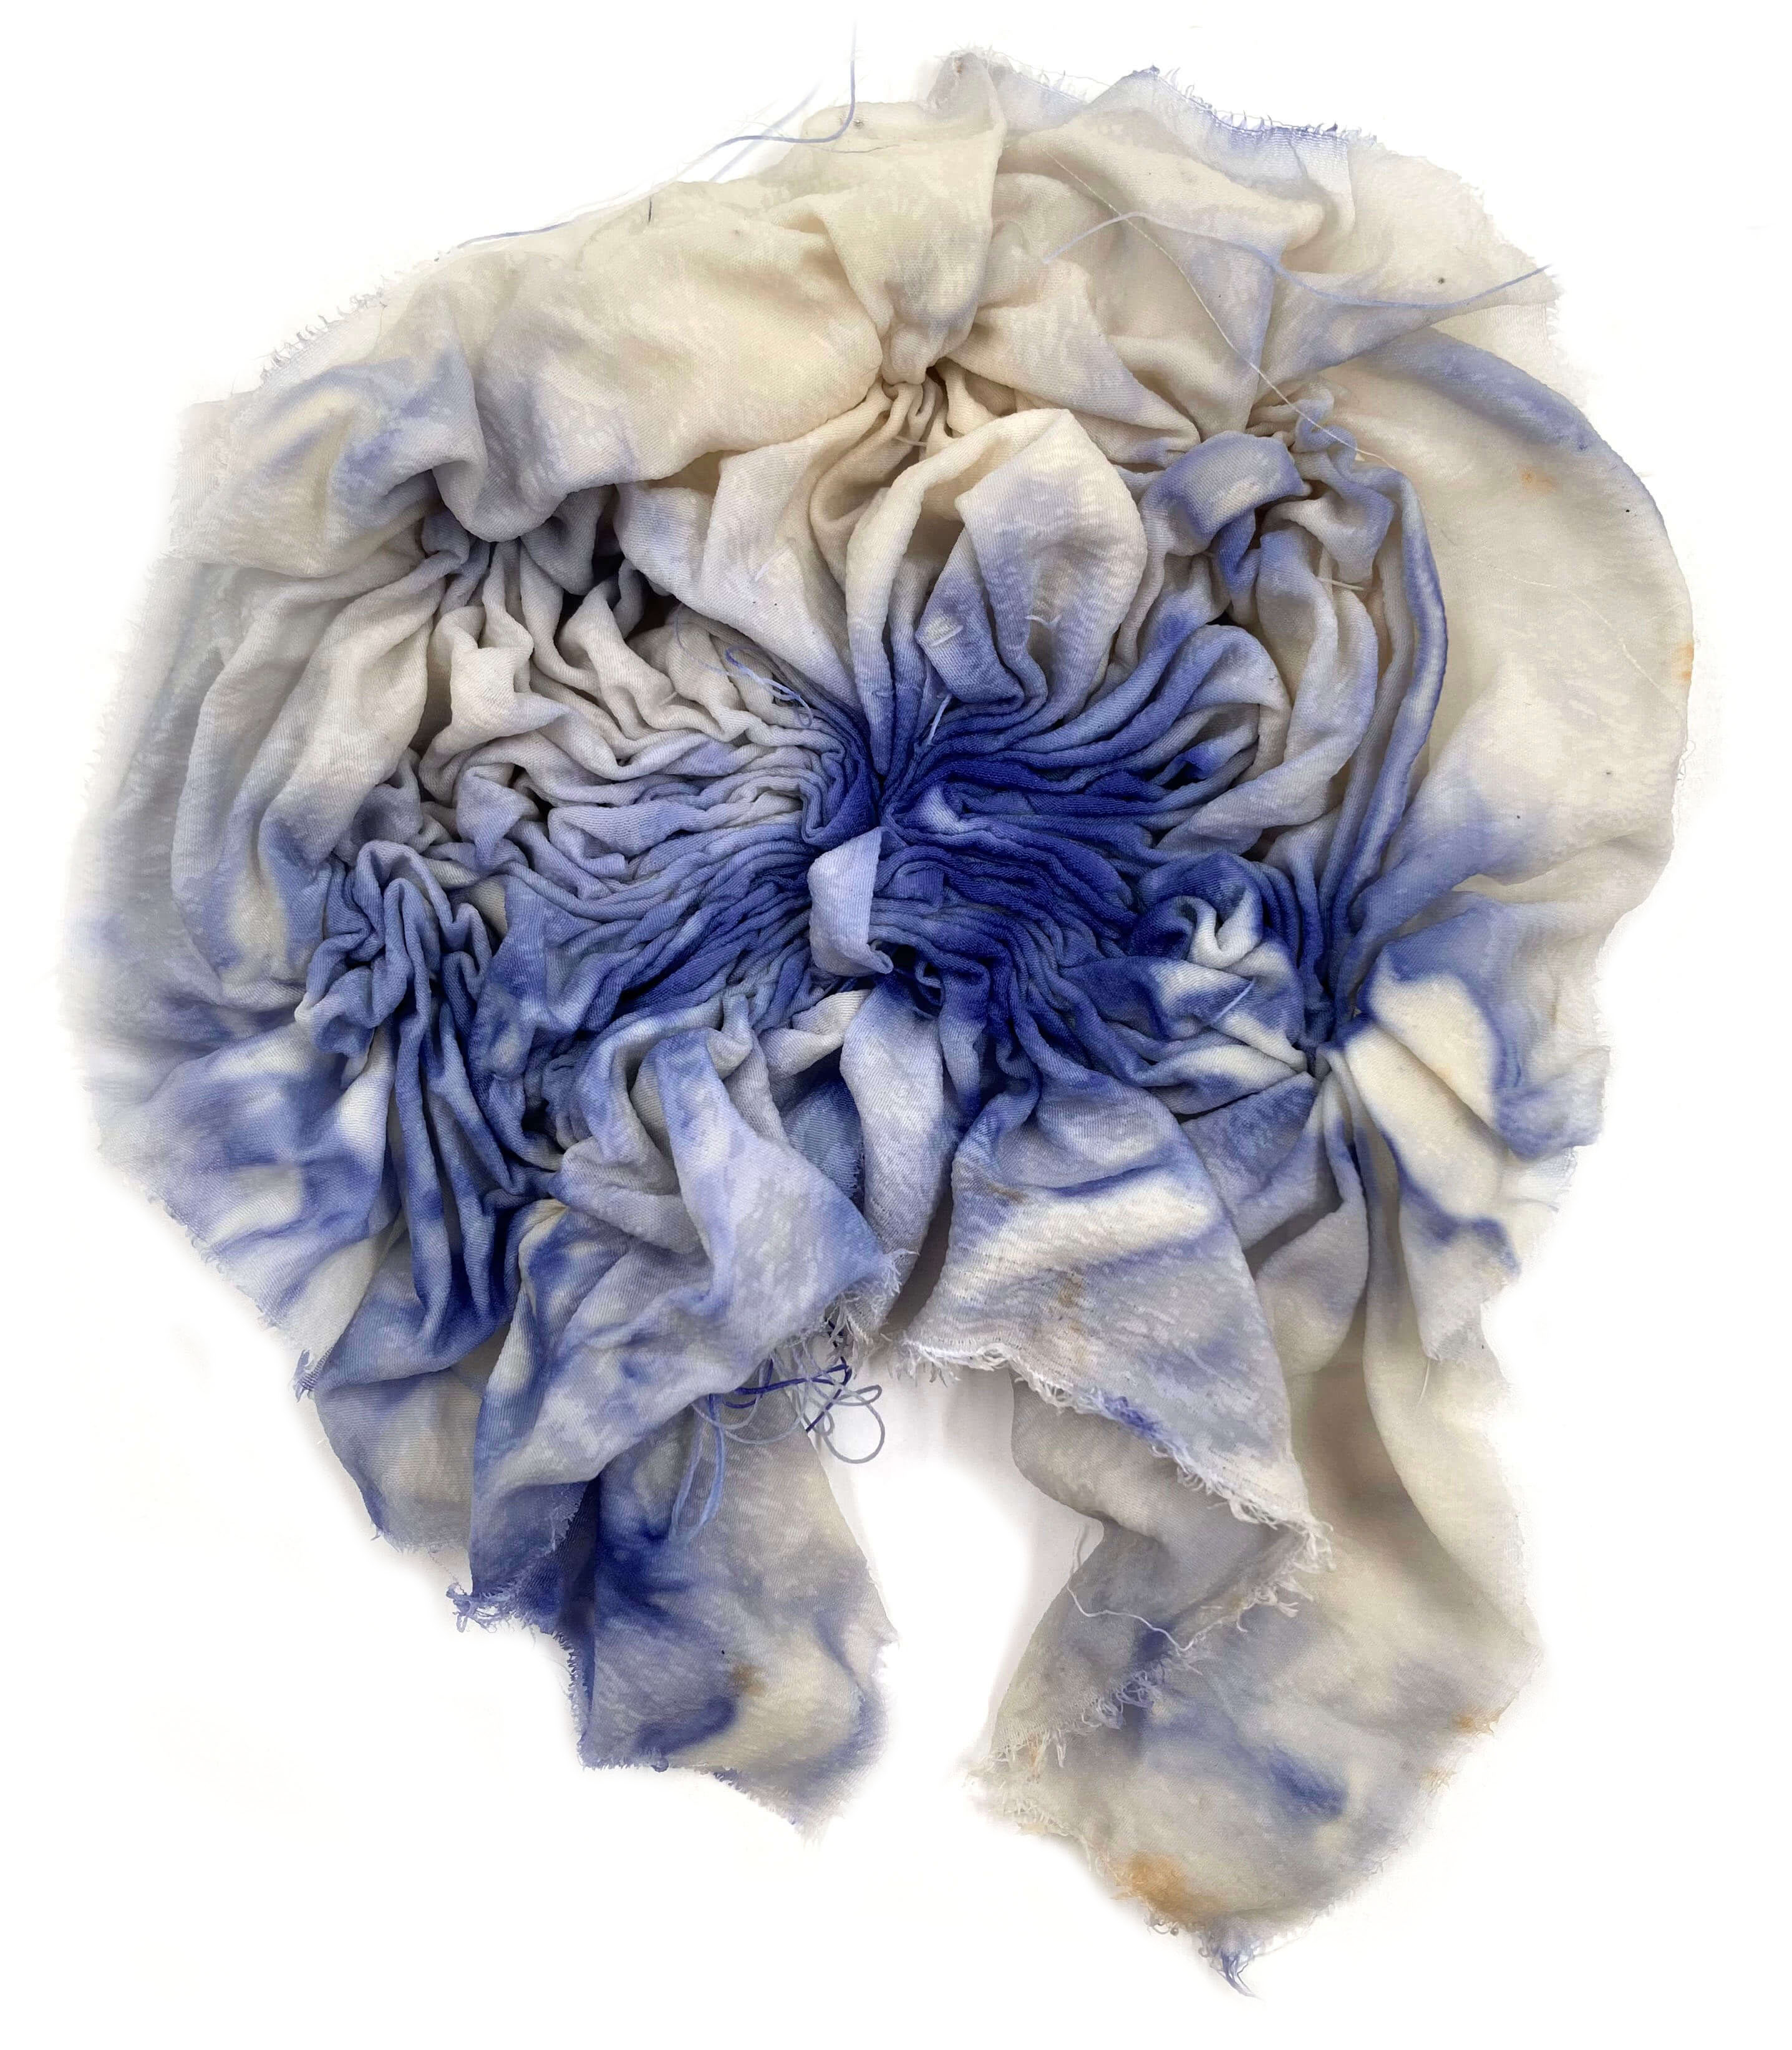
- 10 The bacterial dye final result:
For future experiments, we would like to try naturally dyeing silk and then growing bacteria over to see how they respond or how the colors look together. Also, I would like to investigate if the bacteria are growing in natural leather.
More about bacteria:
See you the following week!🍁