1. State of the art, project management and documentation
In our first week we have to familiarize ourselves with Gitlab and Markdown, the latter being an open-source text-to-HTML conversion tool for web writers. As as assignment we have to create:
- The landing page (to introduce ourselves and describe our motivation for joining Fabricademy)
- The page for week 01 (to discuss our inspirations and research, and share some experiences with Gitlab)
Inspiration
Let me start with telling some more about my inspirations. There are several area's that continue to inspire me:
- Traditional utilitarian crafts
- Color and texture
- Nature
- Art
Traditional utilitarian crafts
The difference between arts and crafts is an age-old debate.
In my view the traditional crafts are types of work where useful objects are made completely by hand or by using simple tools. Over the ages such items often had cultural or religious significance.
When taking in such items, the individual artisanship never ceases to amaze me. It's not only that I admire the skill and finesse with which those objects are made. The meaning of a handmade object often extends far beyond its functional use. And you can feel that. So, I get touched by the deep emotion that craftsman invest in their work. You see their soul through their work.
In my view beautiful utilitarian objects bring art into everyday life and everyday use.
Our cheese making is an obvious example of the traditional crafts. But there is way more I like.
I have for example always admired the beauty of well-made baskets. Whether made for purely utilitarian purposes, or with added decoration for household decor or storage of special items, a careful basket-maker creates useful containers of natural materials, each unique and having their own beauty.
The polder Lopikerwaard I live in, is part of a river area. Therefore alder, ash, willow, and poplar, as well as reeds and rushes have always been present in abundance. In the early stages of human civilization of this polder (from the eleventh century) twigs of those plants were used for braiding baskets, roofs, and walls of huts.1
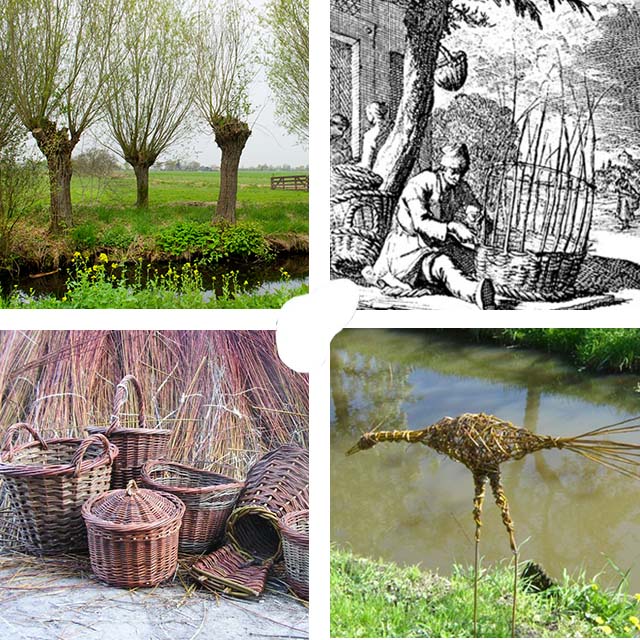
Image left-top by Marieke van Eyndhoven
Image right-top from vlechtwerk.com
Images left-bottom and right-bottom by Mandenmakerij de Mythe
Color and texture
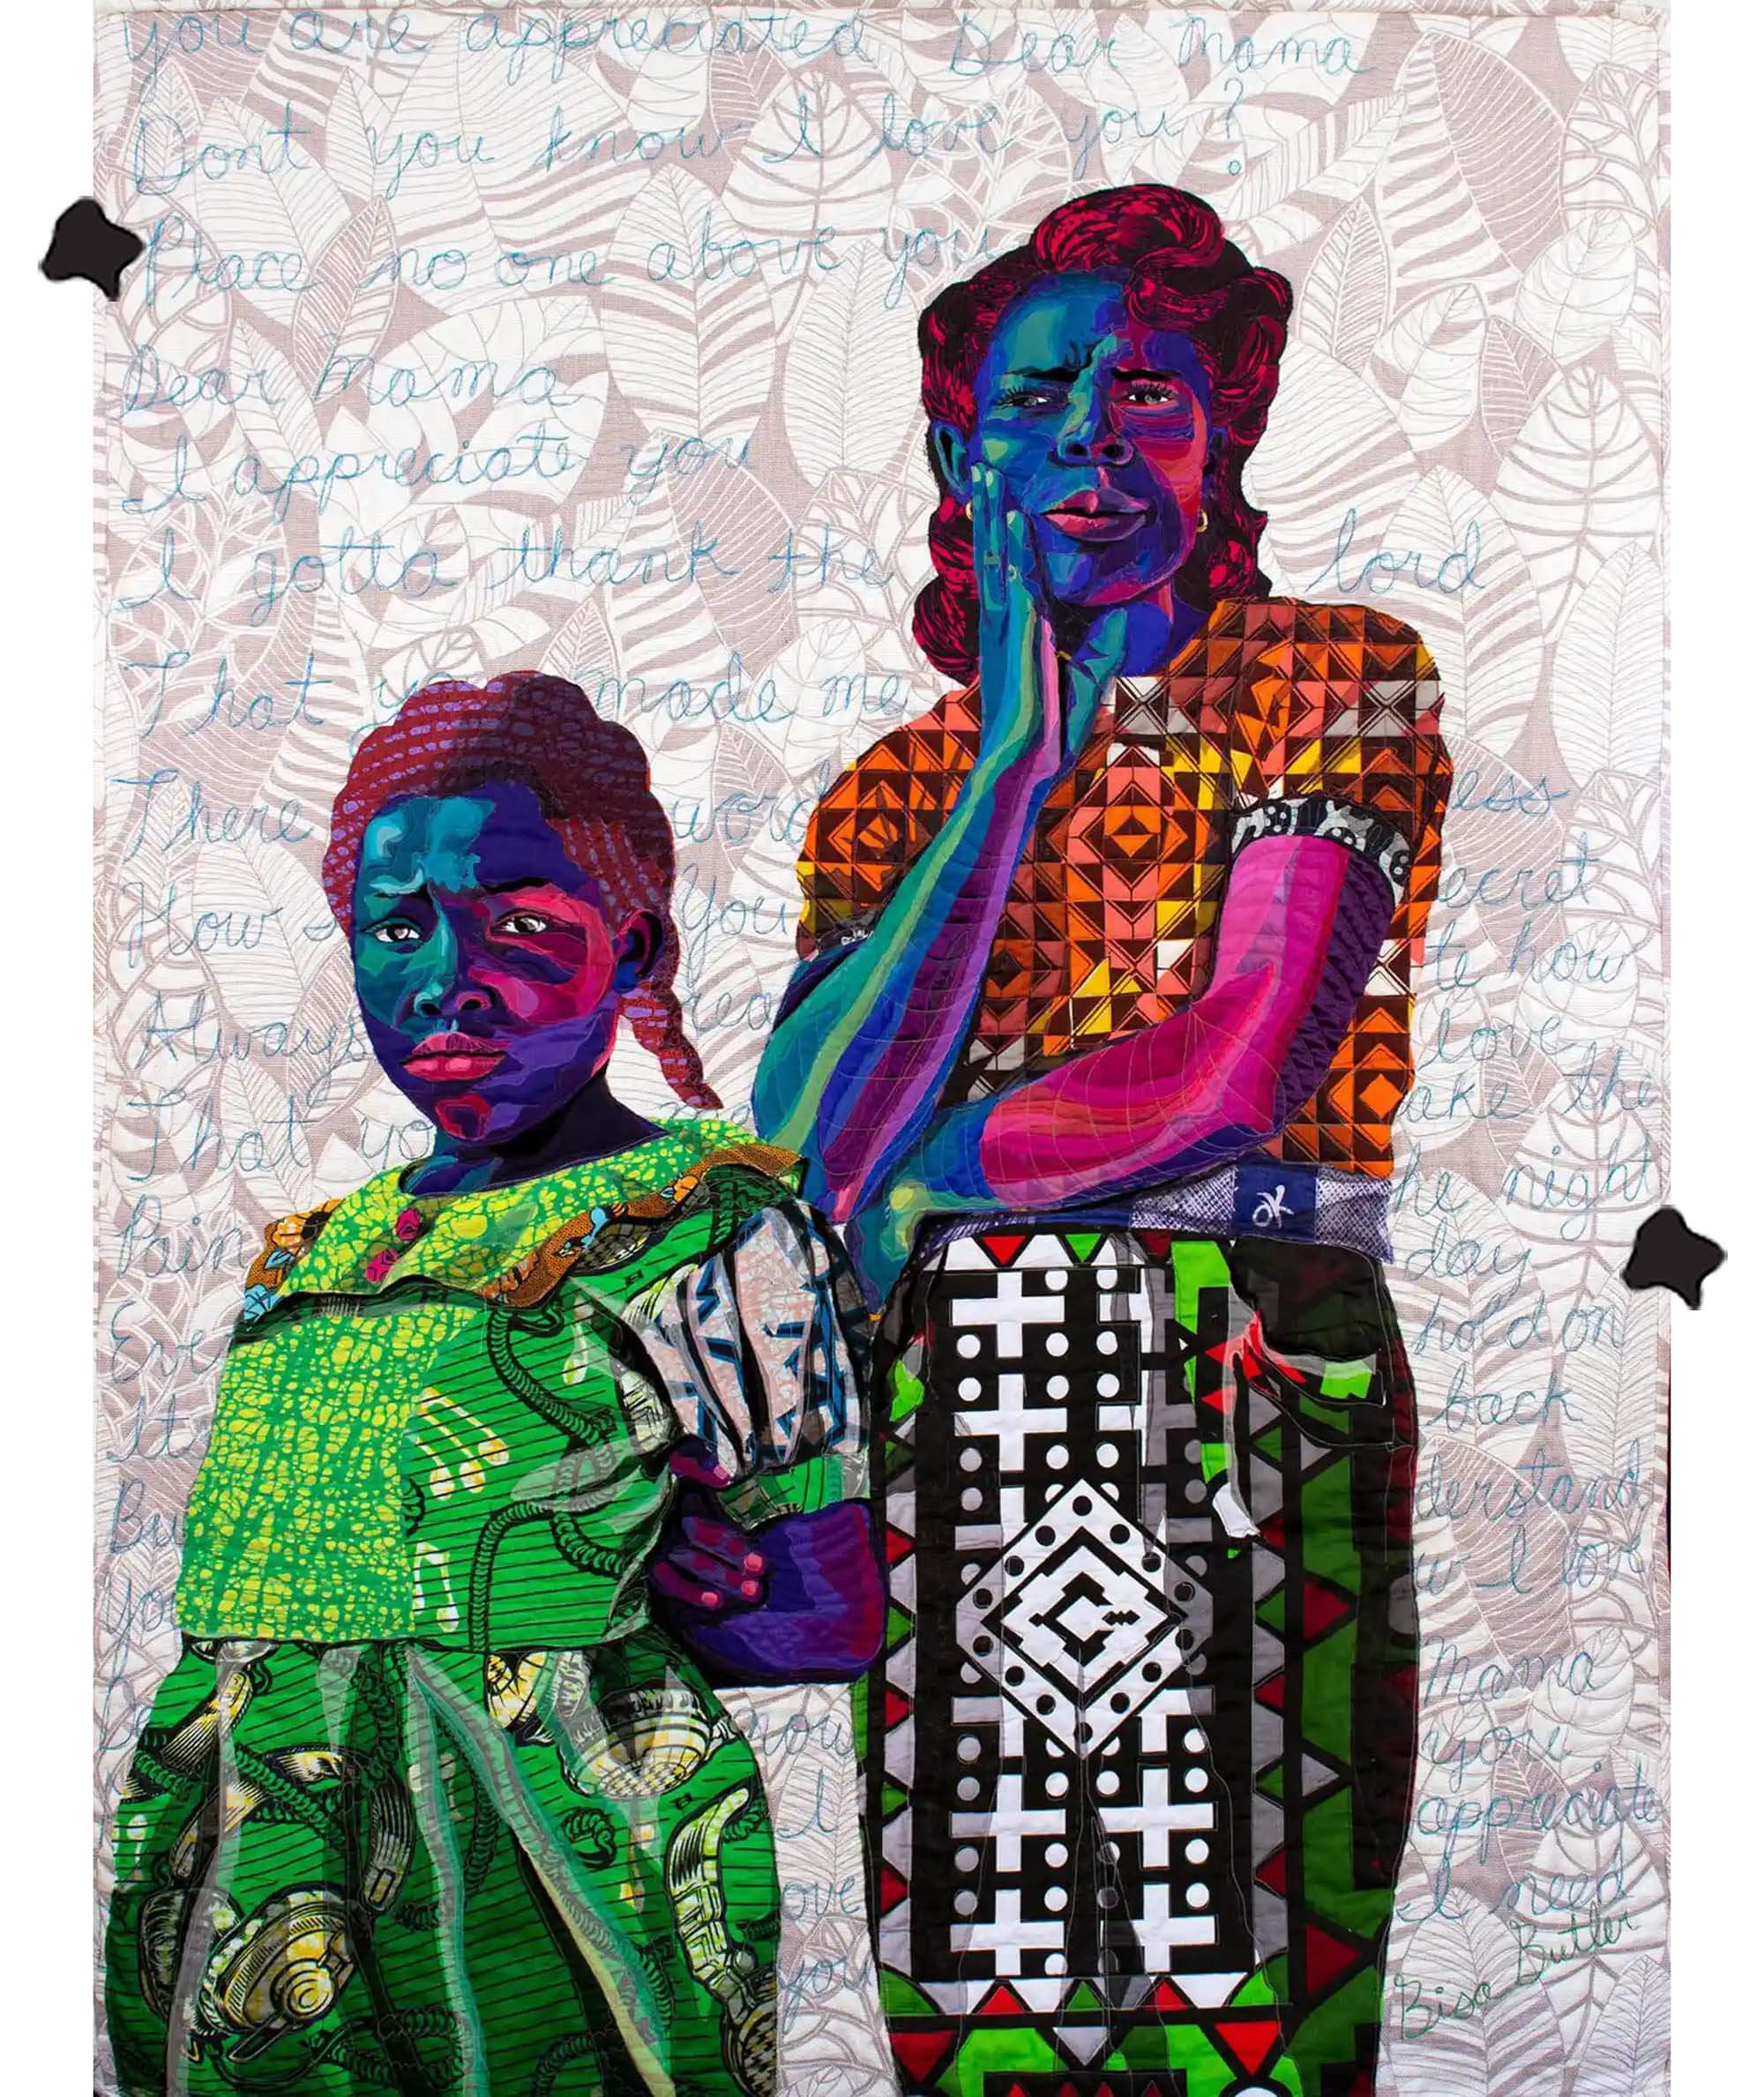
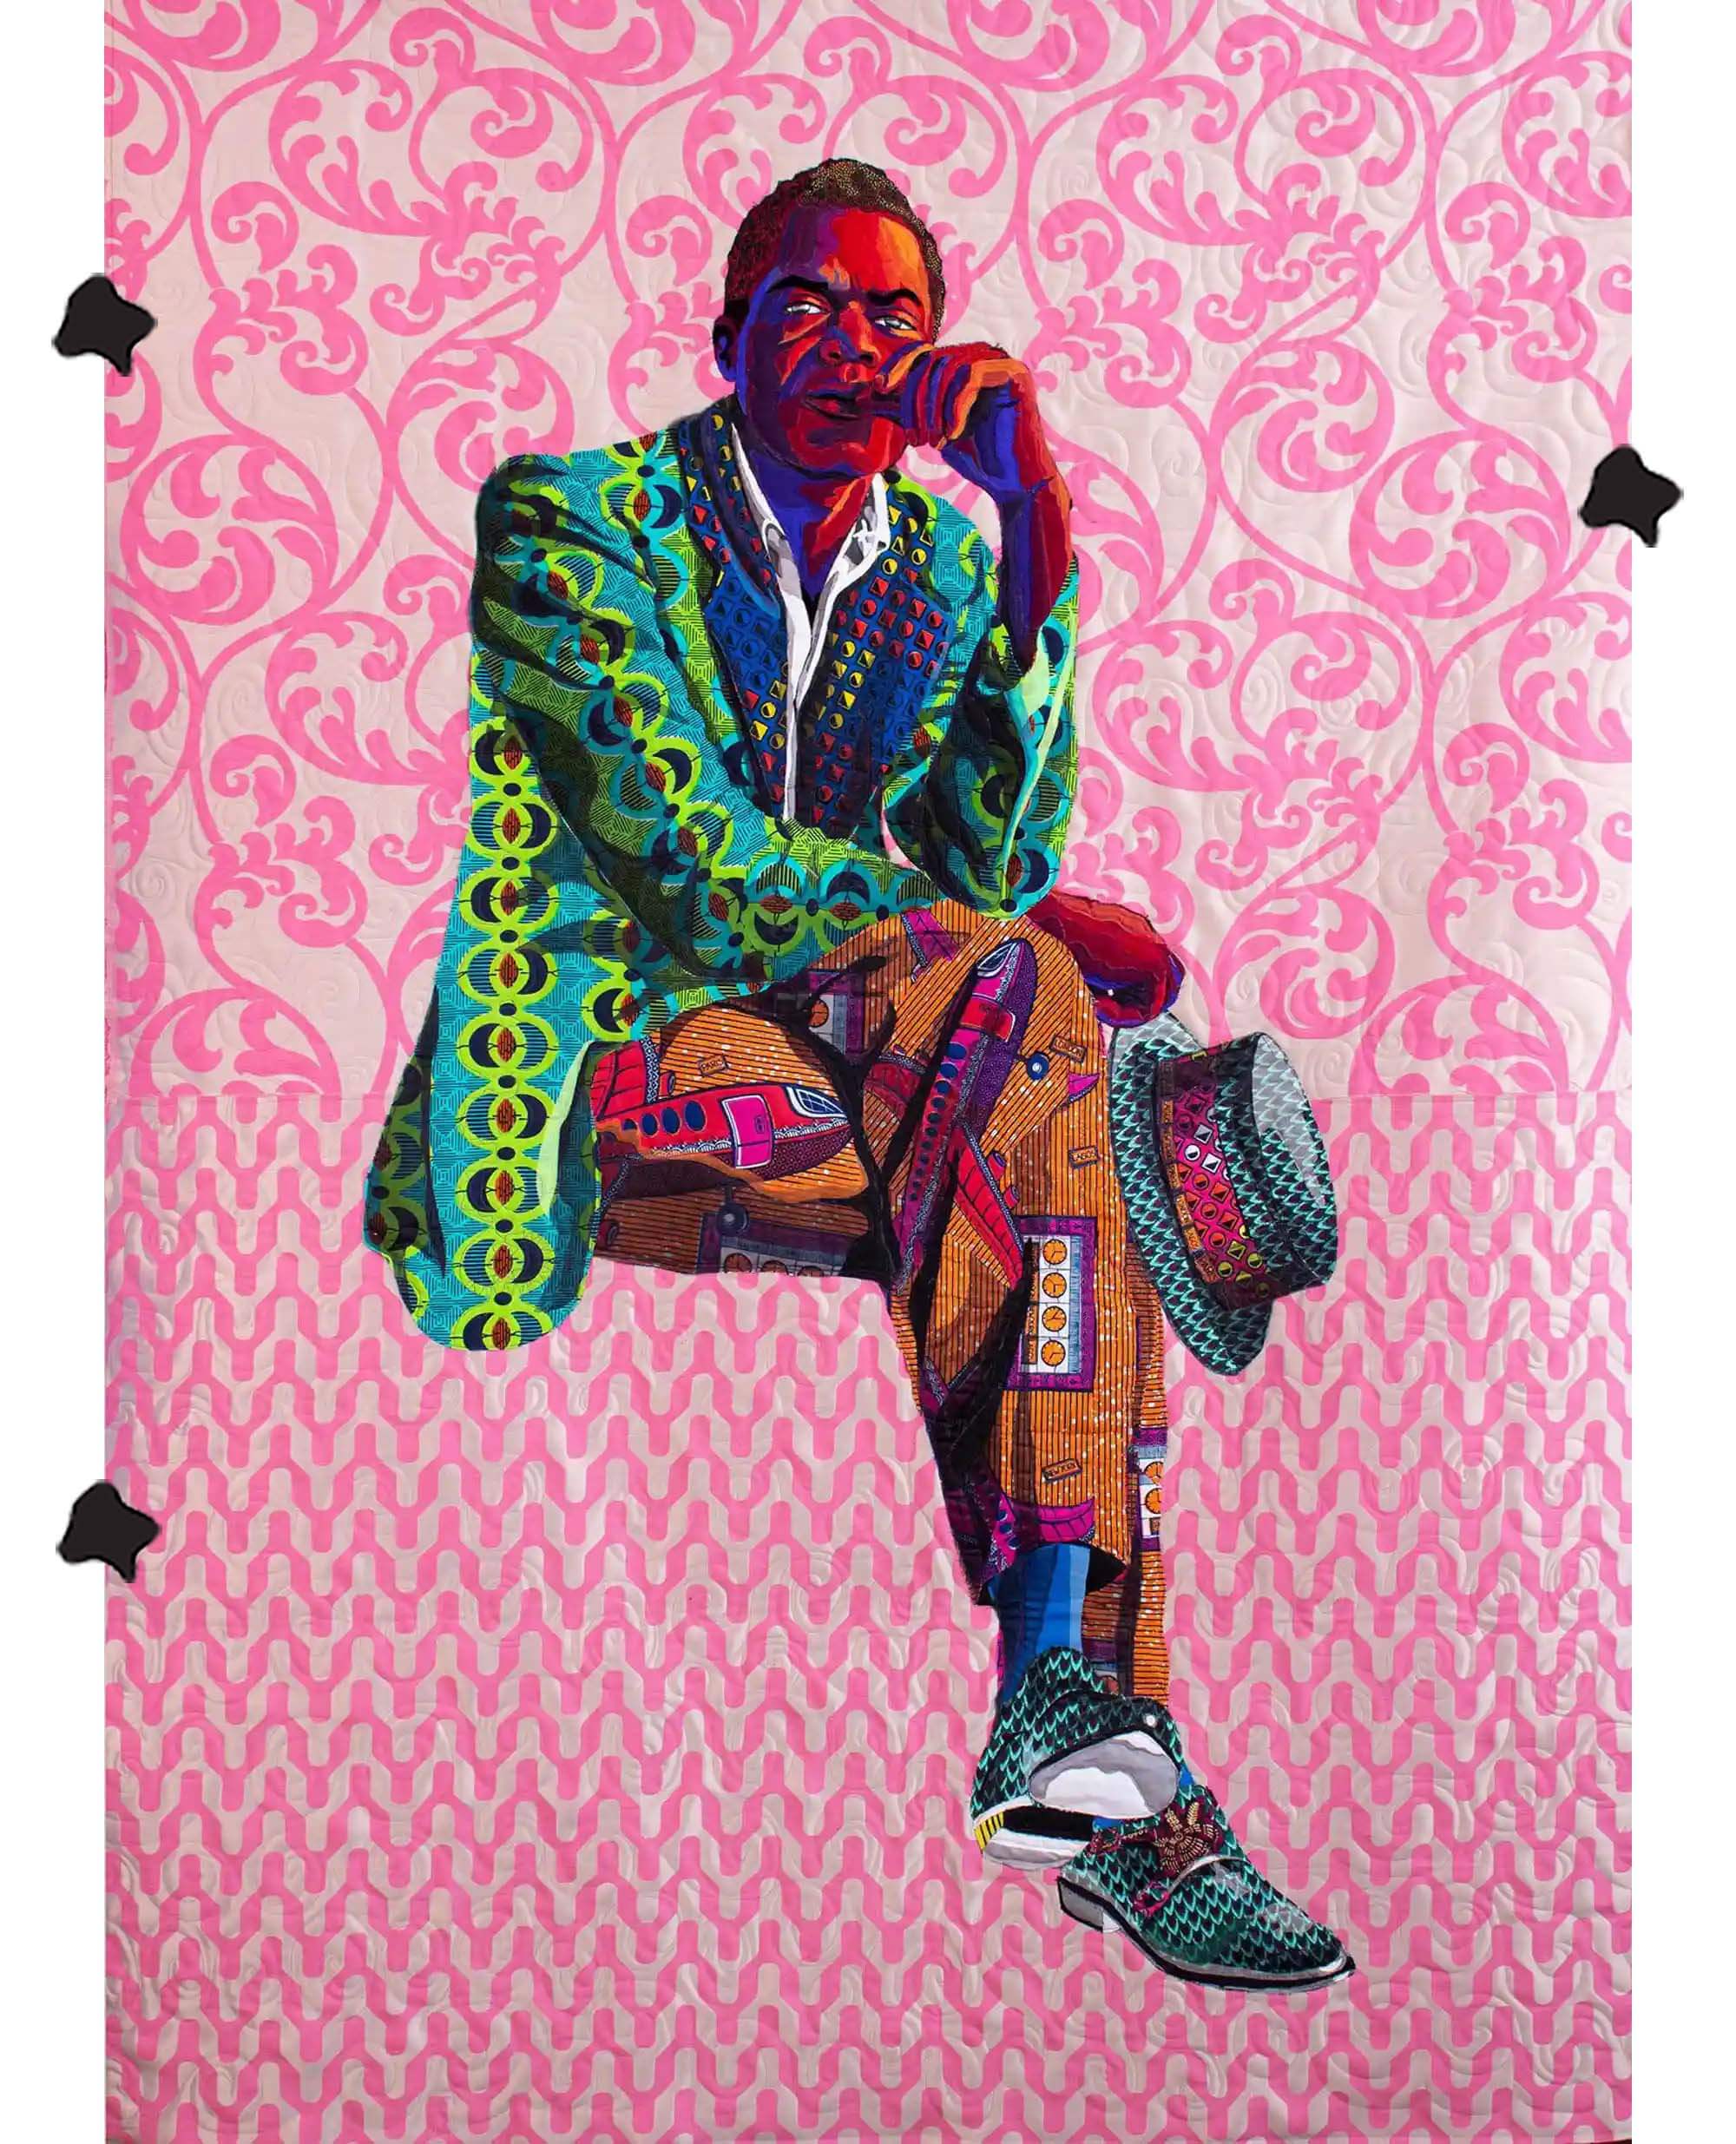
Some things in life are simple. Just like there are cat persons and dog persons, there are persons that thrive on black and white, and persons that need color to get a kick. I actually love dogs (we have three of those hairy balls) and I cannot live without colors. Mix those colors with a bit of texture, and you make my day.
I dare you, look me in the eye and tell me you don't find the textile art of Bisa Butler gorgeous  !
!
Nature
For me part of the beauty of nature is that it's always changing! That sacred transformation from winter to spring to summer to autumn.
In every season I see, hear, smell, and feel different things when being outside. Pleasing textures, colors, patterns, and shapes catch my eye. I like the satisfying crunch of a fallen leaf beneath my foot. I recognize the scent of approaching rain. I smile when I hear a herd of honking geese, flying over in V-shape.
Nature fills my senses. And in that way gives me both peace and energy.
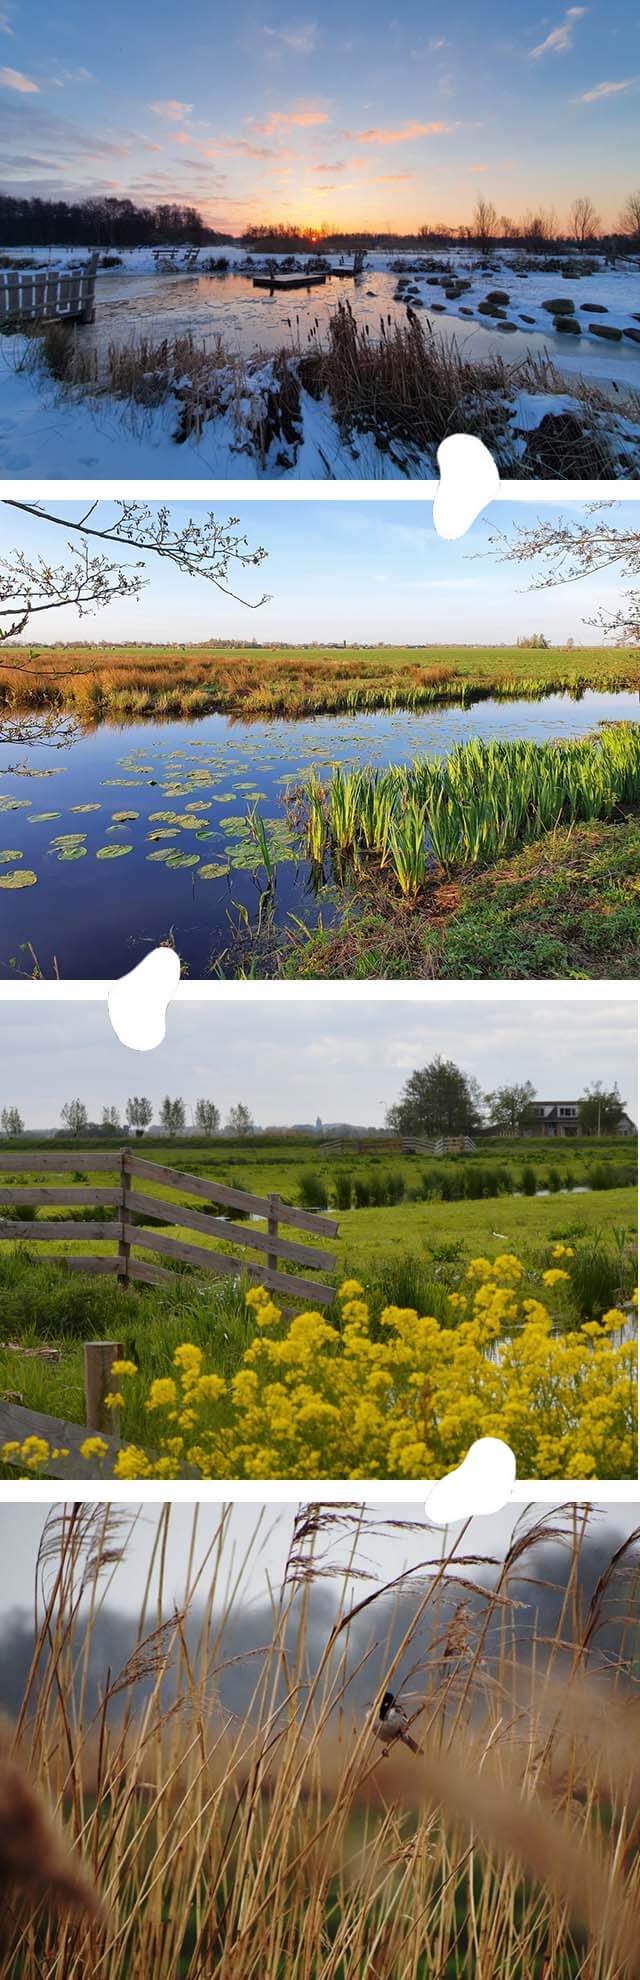
Images by Marieke van Eyndhoven
Art
I love art and especially paintings and drawings. My favourite streams are Realism, Impressionism and Post-Impressionism. All three streams have seen the light in the nineteenths century.
The focus of Realism was to bring art closer to real life. So, the subject matter for art in this stream was picked from real life situations. The topics included events and scenes from daily life like farmers, landscapes, workers, and other aspects of life that were observable. Some artists during the early stages of Realism saw it as a means for painters to capture and document the world around them in the same way newspapers were doing. In that sense Realism, in my view, was about storytelling. Among the most notable names of this period were Millet, Manet, Courbet and, Bonheur.2
But my personal favorite artist of this stream is Edward Hopper. I get really touched by his paintings. His paintings are marked by a minimum of action with almost no sign of life or mobility. Almost like a stilled scene. Only his composition and use of color suggest the psychological state of his subjects. The solo figures, couples, or groups are usually depicted isolated and disconnected from their environments. With this approach Hopper aimed to project the solitude of modern life. That ultimate melancholy and loneliness strikes a chord with me.
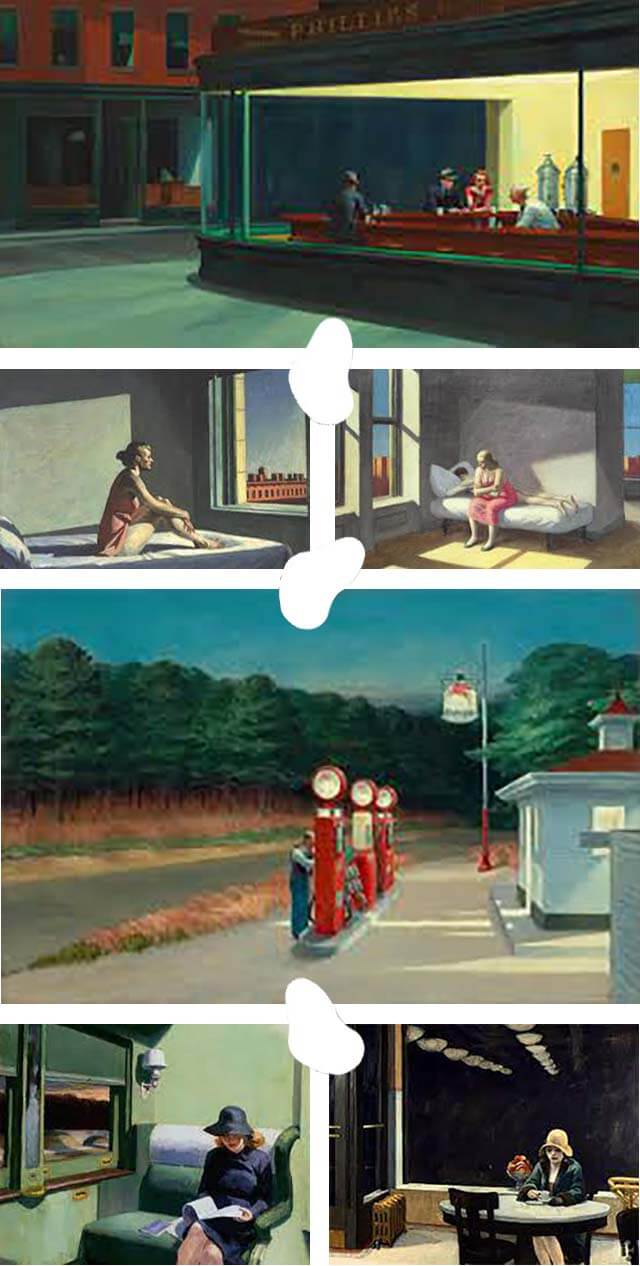
Paintings by Edward Hopper
From top to bottom and from left to right:
Nighthawks, Morning Sun, Summer in the city, Gas, Compartment C, Automat
After the end of Realism, came the Impressionism era. Monet, Degas and Pessarro were the founding members of the Impressionism movement. The central focus of the artists in this stream was the effect of color and light and they mostly painted outdoor scenes. Mainly sunny landscapes, portraits, and leisure scenes were created by artists in this period. With the end of Impressionism came Post-Impressionism. The artists of this period were taking the ideas of the impressionist further, especially in their use of more vivid colors and expressive brushwork.2
My absolute hero from the Post-Impressionism stream is Vincent van Gogh. His bold, dramatic brush strokes which expressed emotion, added a feeling of movement to his works. And he deliberately used colors to capture mood, rather than using colors realistically. As far as I am concerned his paintings radiate raw energy.
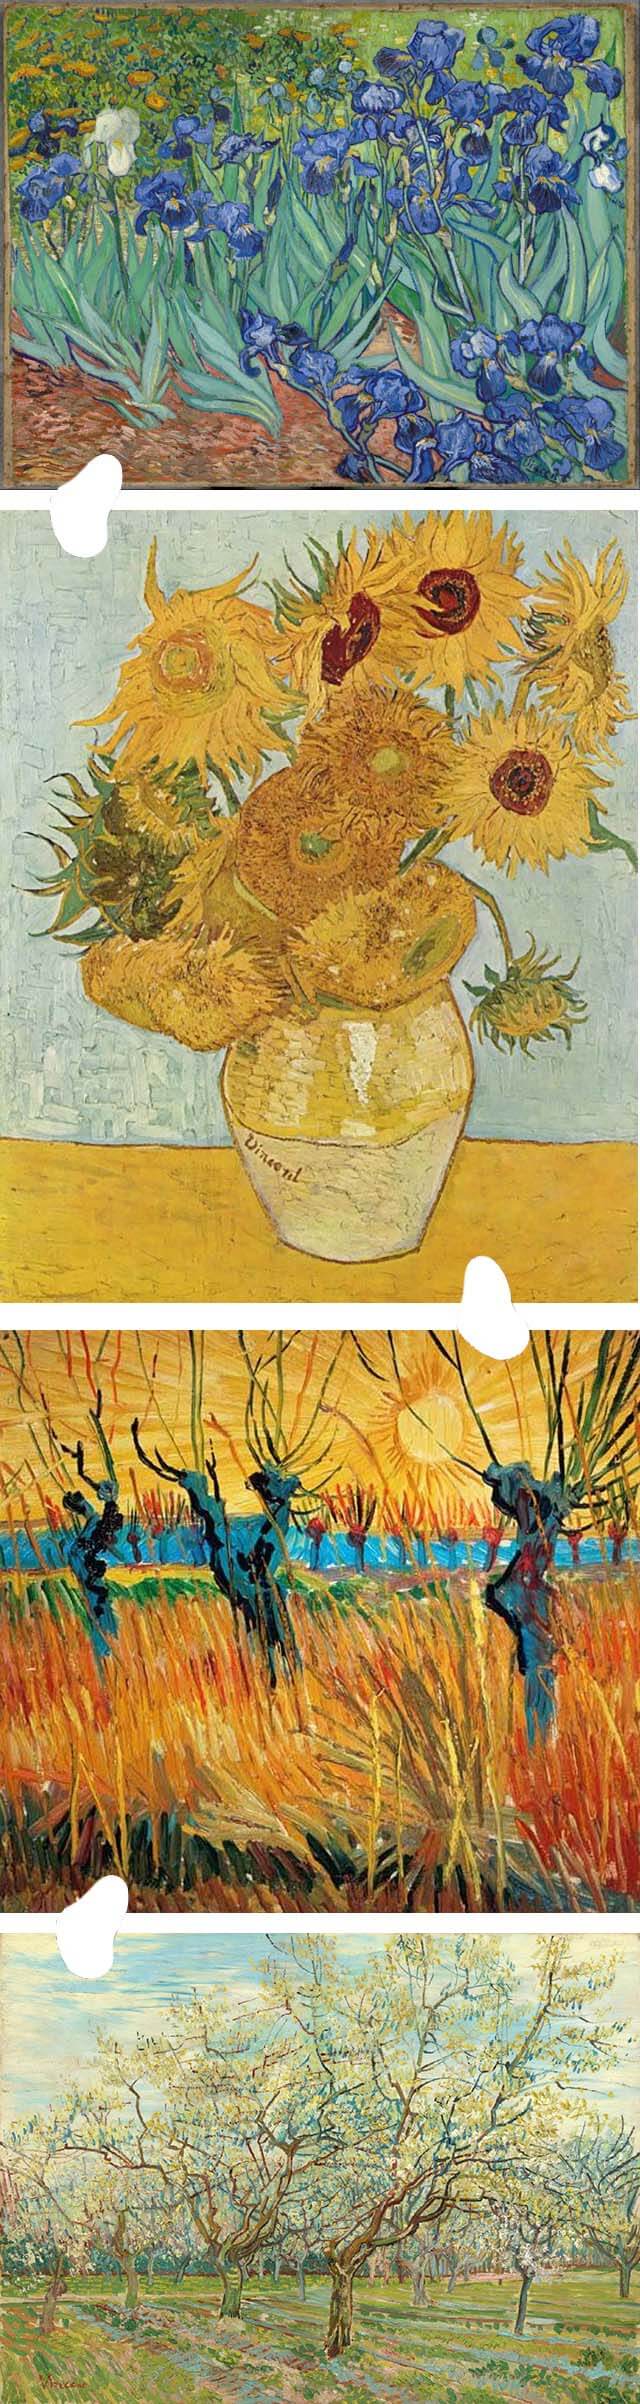
Paintings by Vincent van Gogh
From top to bottom:
Irissen, Vaas met zonnebloemen, Wilgen bij zonsondergang, De witte boomgaard
Infusing my project
Remember my intentions for the coming 6 months with Fabricademy?
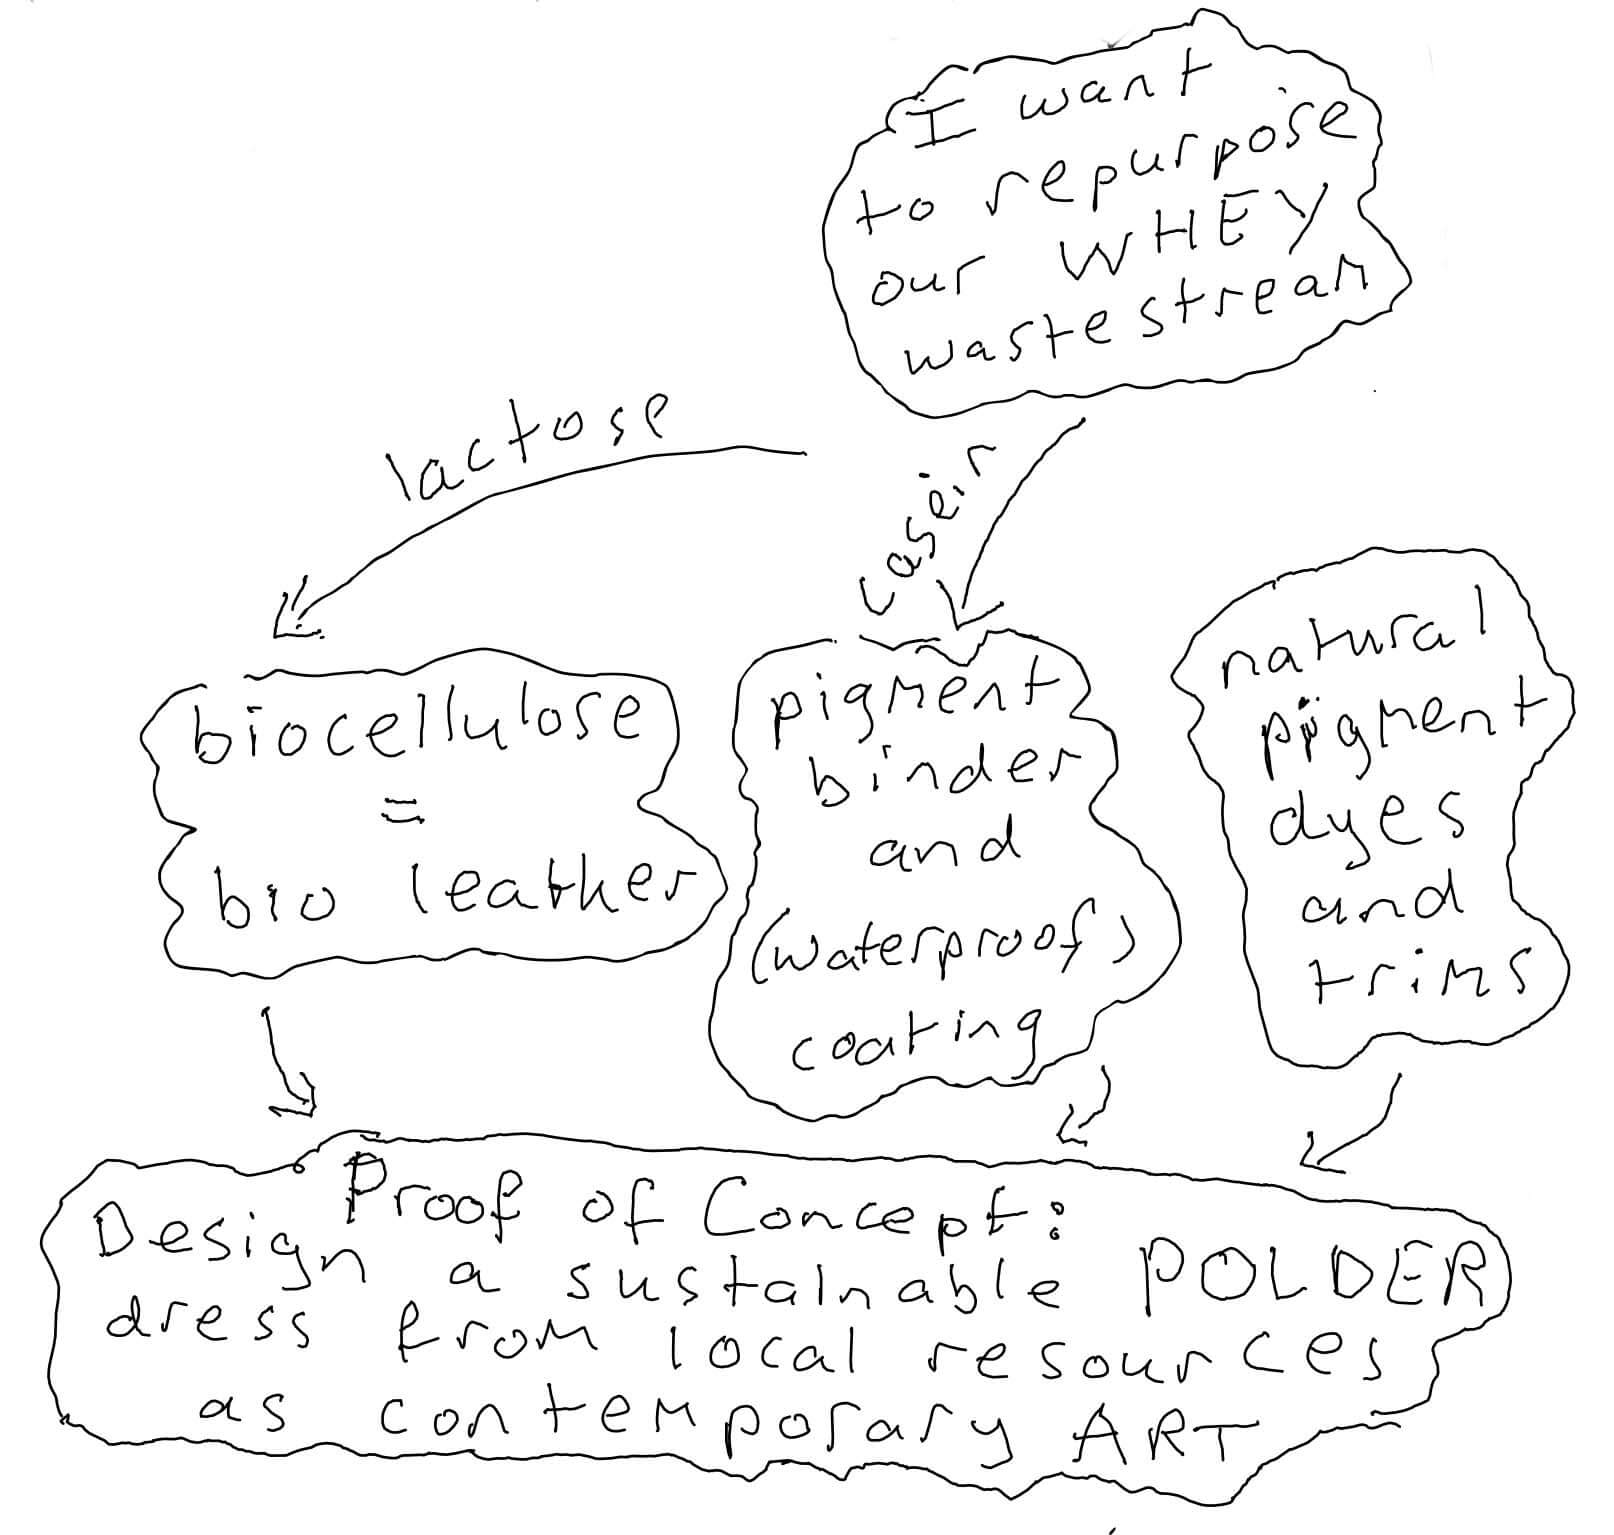
I hope, by sharing my area's of inspiration, I have given more context to the Fabricademy project intention I have voiced. Specifically the element of approaching the final garment design as contemporary art.
Research and first experiments
This summer in preparation for the Fabricademy program I searched for (scientific) articles about using whey, and more specifically about using lactose and casein, for biorefinery. I also did some little experiments to test the waters.
Research
My search question were:
- Has the lactose in whey been used earlier to produce biocellulose, paint binders, coatings or films?
- Has the casein in whey been used earlier to produce paint binders, coatings or films?
Lactose for biorefinement
I found one great scientific article in the Journal of Food Technology and Biotechnology from June 2021 summarizing in depth all recent research into the biorefinery of whey.3
In this article no mentioning was made about biocellulose production from lactose.
However the article gave some great references towards research regarding production of bioplastics from lactose. According to the article you can convert the lactose enzymatically into lactic acid, which then can be fermented into polylactid acid (PLA) or polyhydroxyalkanoates (PHA). PLA might be a replacement for polystyrene (foam) and PHA for polyethylene (film). However upon further reading I concluded that those processes are still too complicated and costly to replicate.
 -> Lactose is a no for film.
Further searching provided me with two more articles dealing specifically with the subject of producing biocellulose from whey.
The first article from the university of Latvia was a mini-review of the current research on this subject. The article concluded rather negatively, stating: "currently whey can be recognised as quite a problematic alternative growth substrate for industrial biocellulose production."4
-> Obviously I chose to ignore this article.
The other article was more upbeat about the possibility of producing biocellulose from whey. It is an older article from 2018 in the Brazilian Journal of Microbiology. The article described the method for production, gave the biocellulose growth results, provided optimization suggestions and also detailed how the lactose in the whey substrate was reduced with 50% over the course of the production period (and that is what we want!). Even better the described method closely resembles the brewing of Kombucha, so a pretty straightfoward approach.5
 -> Lactose is a yes for biocellulose. I will use this article as the basis for some first experiments.
Casein for biorefinement
I found a treasure read on casein! A book from 1906 from Robert Scherer, titled Casein, Its Preparation and Technical Utilisation.6 In the book there are literally hundreds of recipes to make paint, binder, glue, adhesive, putty and plastic from casein.
-> Casein is a yes for everything. This book will be my bible.
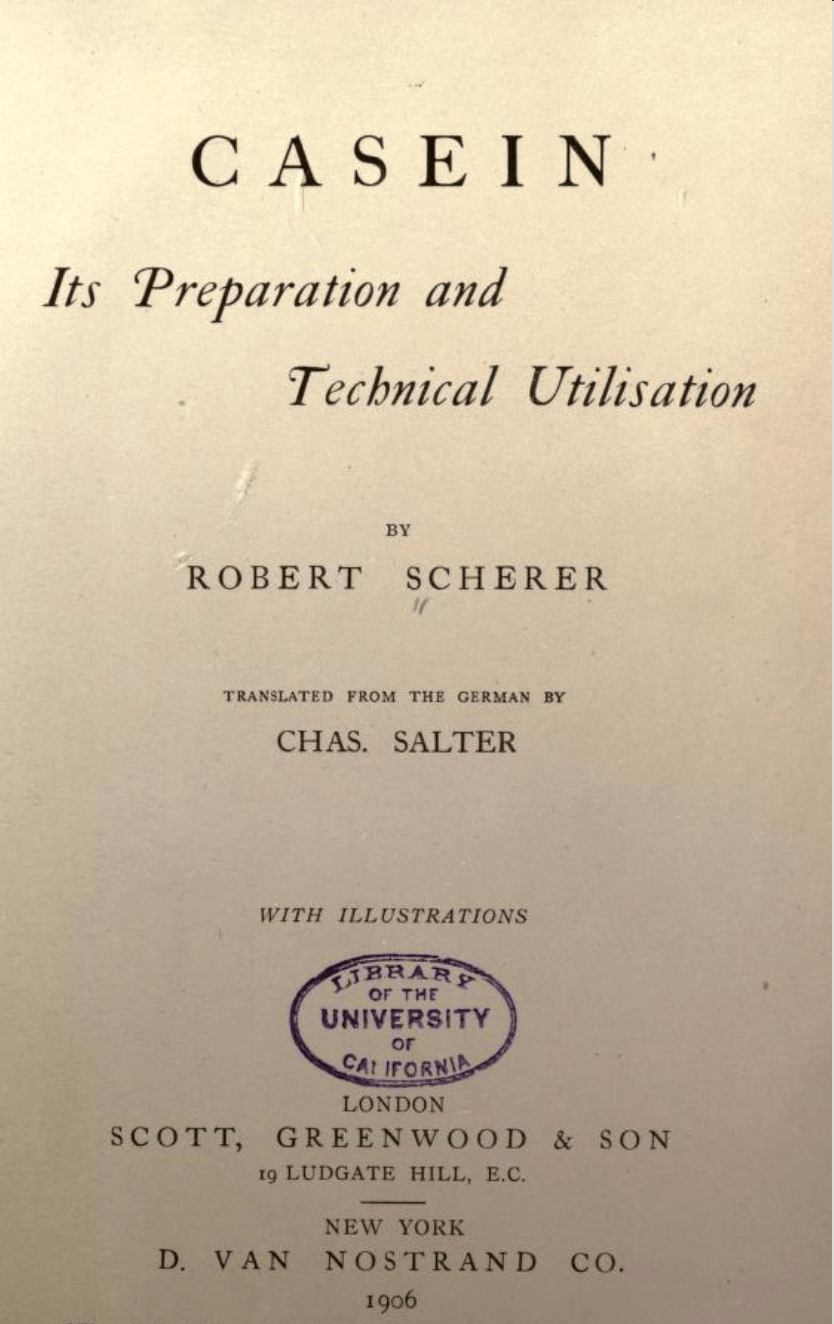
Book about casein
First Experiments
During last summer I wanted to do some experimentation to test the validity of my project idea.
First I tried to grow bioleather from whey. And it worked!
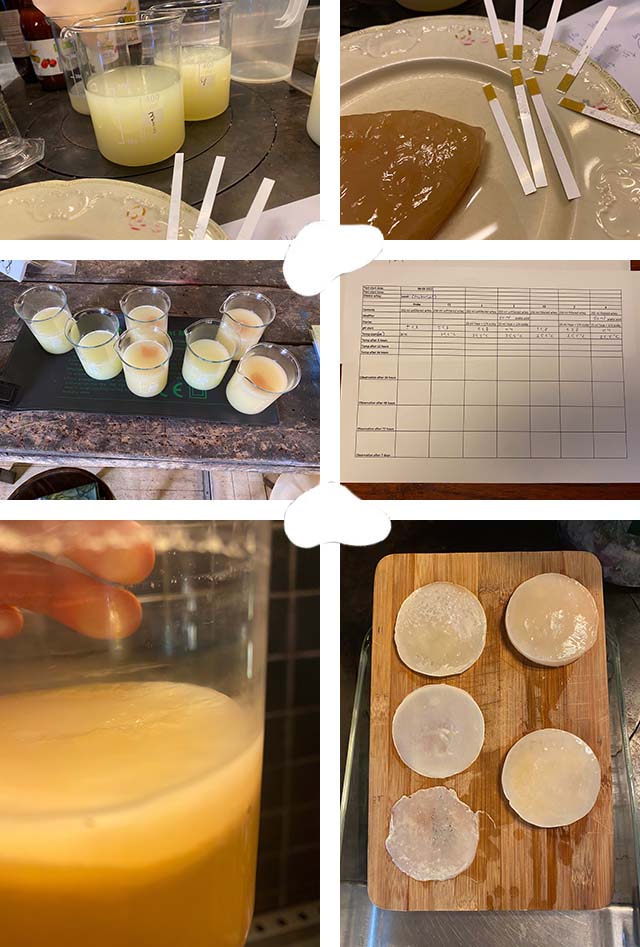
Photos by Marieke van Eyndhoven
Then I tried out one of the casein binder recipes from my new casein bible. I first made a kind of ricotta from some waste-water whey and citric acid. Thereafter I dissolved it with baker's ammonia. Finally I grinded some natural green pigment through it and painted one of my dry bioleather pieces. And it worked! The good news is that casein paint dries in seconds, so no time for the bioleather to swell or deform.
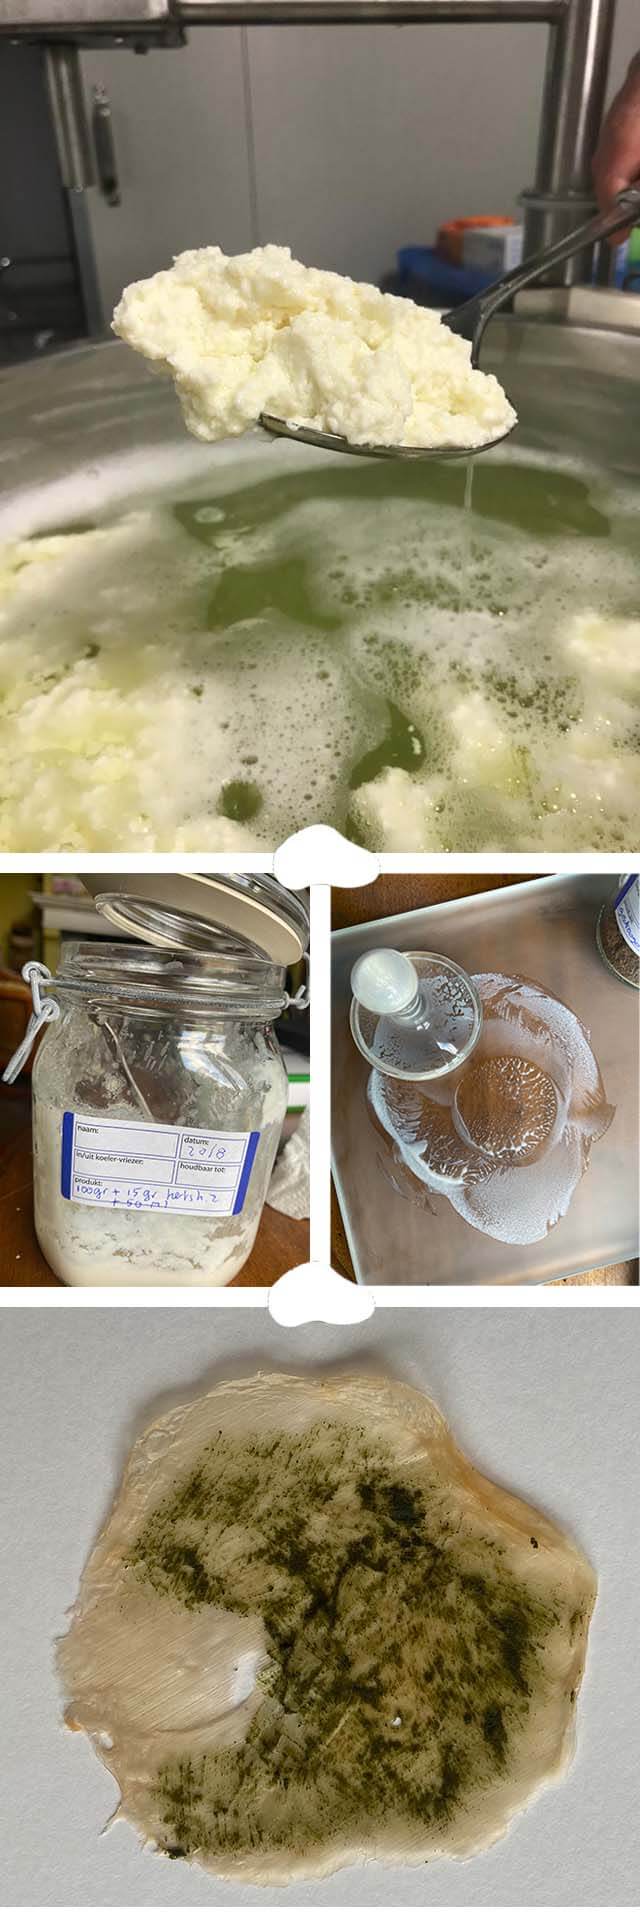
Photos by Marieke van Eyndhoven
There was another exciting chapter in the book. When you treat a casein paint layer with tannin, you get a waterproof layer! That's something to further experiment with.
Albeit the experiments were rough, they gave confidence about the direction of my project idea.
Documenting with Gitlab
Since the Fabricademy program is an open-source program, aiming to share all participants's knowledge, it is important we document everything and all we are doing. For this purpose we use Gitlab and Markdown.
Gitlab
Gitlab is a web-based repository that provides free open and private repositories, issue-following capabilities, and wikis.. It is a platform that enables groups of people to perform all tasks in a project - from project planning and source code management to monitoring and security.
Markdown language
Within Gitlab we will use the Markdown language to create our personal websites. Markdown is an open-source text-to-HTML conversion tool for web writers.
On the Fabricademy page there is a great tutorial explaining all the functionality of the Markdown language. Here you can also take a deep dive in more detailed documentation on the Gitlab website.7 8
My struggle with images
In Markdown there are different ways to add images.
The first you have to do is upload the image into the Gitlab repository. In the Gitlab structure every website page has its own address, for example this page can be found in the structure as week01.md. Those pages can be edited. In the Gitlab structure there is also a map structure. In those maps you can upload documents and images. An image you want to add on this page (called week01.md) can best be uploaded in the map docs/images/week01. In this way you keep it organized.
The general code to add an image is as following:

Screenshot
Between the square [] brackets you can add an internal name for your own reference. Between the round brackets () you add the internal path which points to the right Gitlab map in which you uploaded the image.
So far so good.
Now you can do several more things.
You can align images left or right.
You do that simply by adding an extra piece of code:

Screenshot
If you want to add a caption to your image you need to use HTML:

Screenshot
The code between the round squares is your internal path. The caption can be added between the figcaption items.
When you want to add a link to a string of text or to an image, the code is almost the same as for adding an image. You only do not use the exclamation mark.
Adding a link:

Screenshot
You can combine the code for an image with a code for a link. In other words you place a link on the image.
This is the code to add a link to an image:

Screenshot
In fact you place the code for an image into the code for a link, you nest it. Notice how you place the square-link-brackets completely around the code for the image.
Now I wanted to do something else. My aim was to make an image WITH a caption, and then add a link to that image and caption. I tried all kind of things to make it work (since this was on a Sunday, I didn't want to ask Julian).
Long story short, some hours later and after a lot of reading up on Markdown, I figured out that this is simply not possible. You can either have an image WITH a caption, or an image WITH an added link, but not an image WITH a caption and WITH an added link.
The only way to do that is by creating a table structure. But without the table structure it won't work. Here you find a good explanation how to set up a table in the Markdown language.
References and links
-
Whey Utilization: Sustainable Uses and Environmental Approach ↩
-
Production of bacterial cellulose from whey, Applied Microbiology and Biotechnology, september 2020, S. Kolesovs, University of Latvia ↩
-
Cost-eefective production of bacterial cellulose using acidic food industry by-products, Brazilian Journal of Microbiology, 2018, V. Revin ↩