4. BioChromes
The week started with an in-depth presentation of Cecilia about biochromes. A fascinating world of coloring matters that can be extracted from plants, animals and bacteria.
For our assignment, the students in the Amsterdam lab collaborated to make a shared repository of dyed fabrics, inks and pigments.
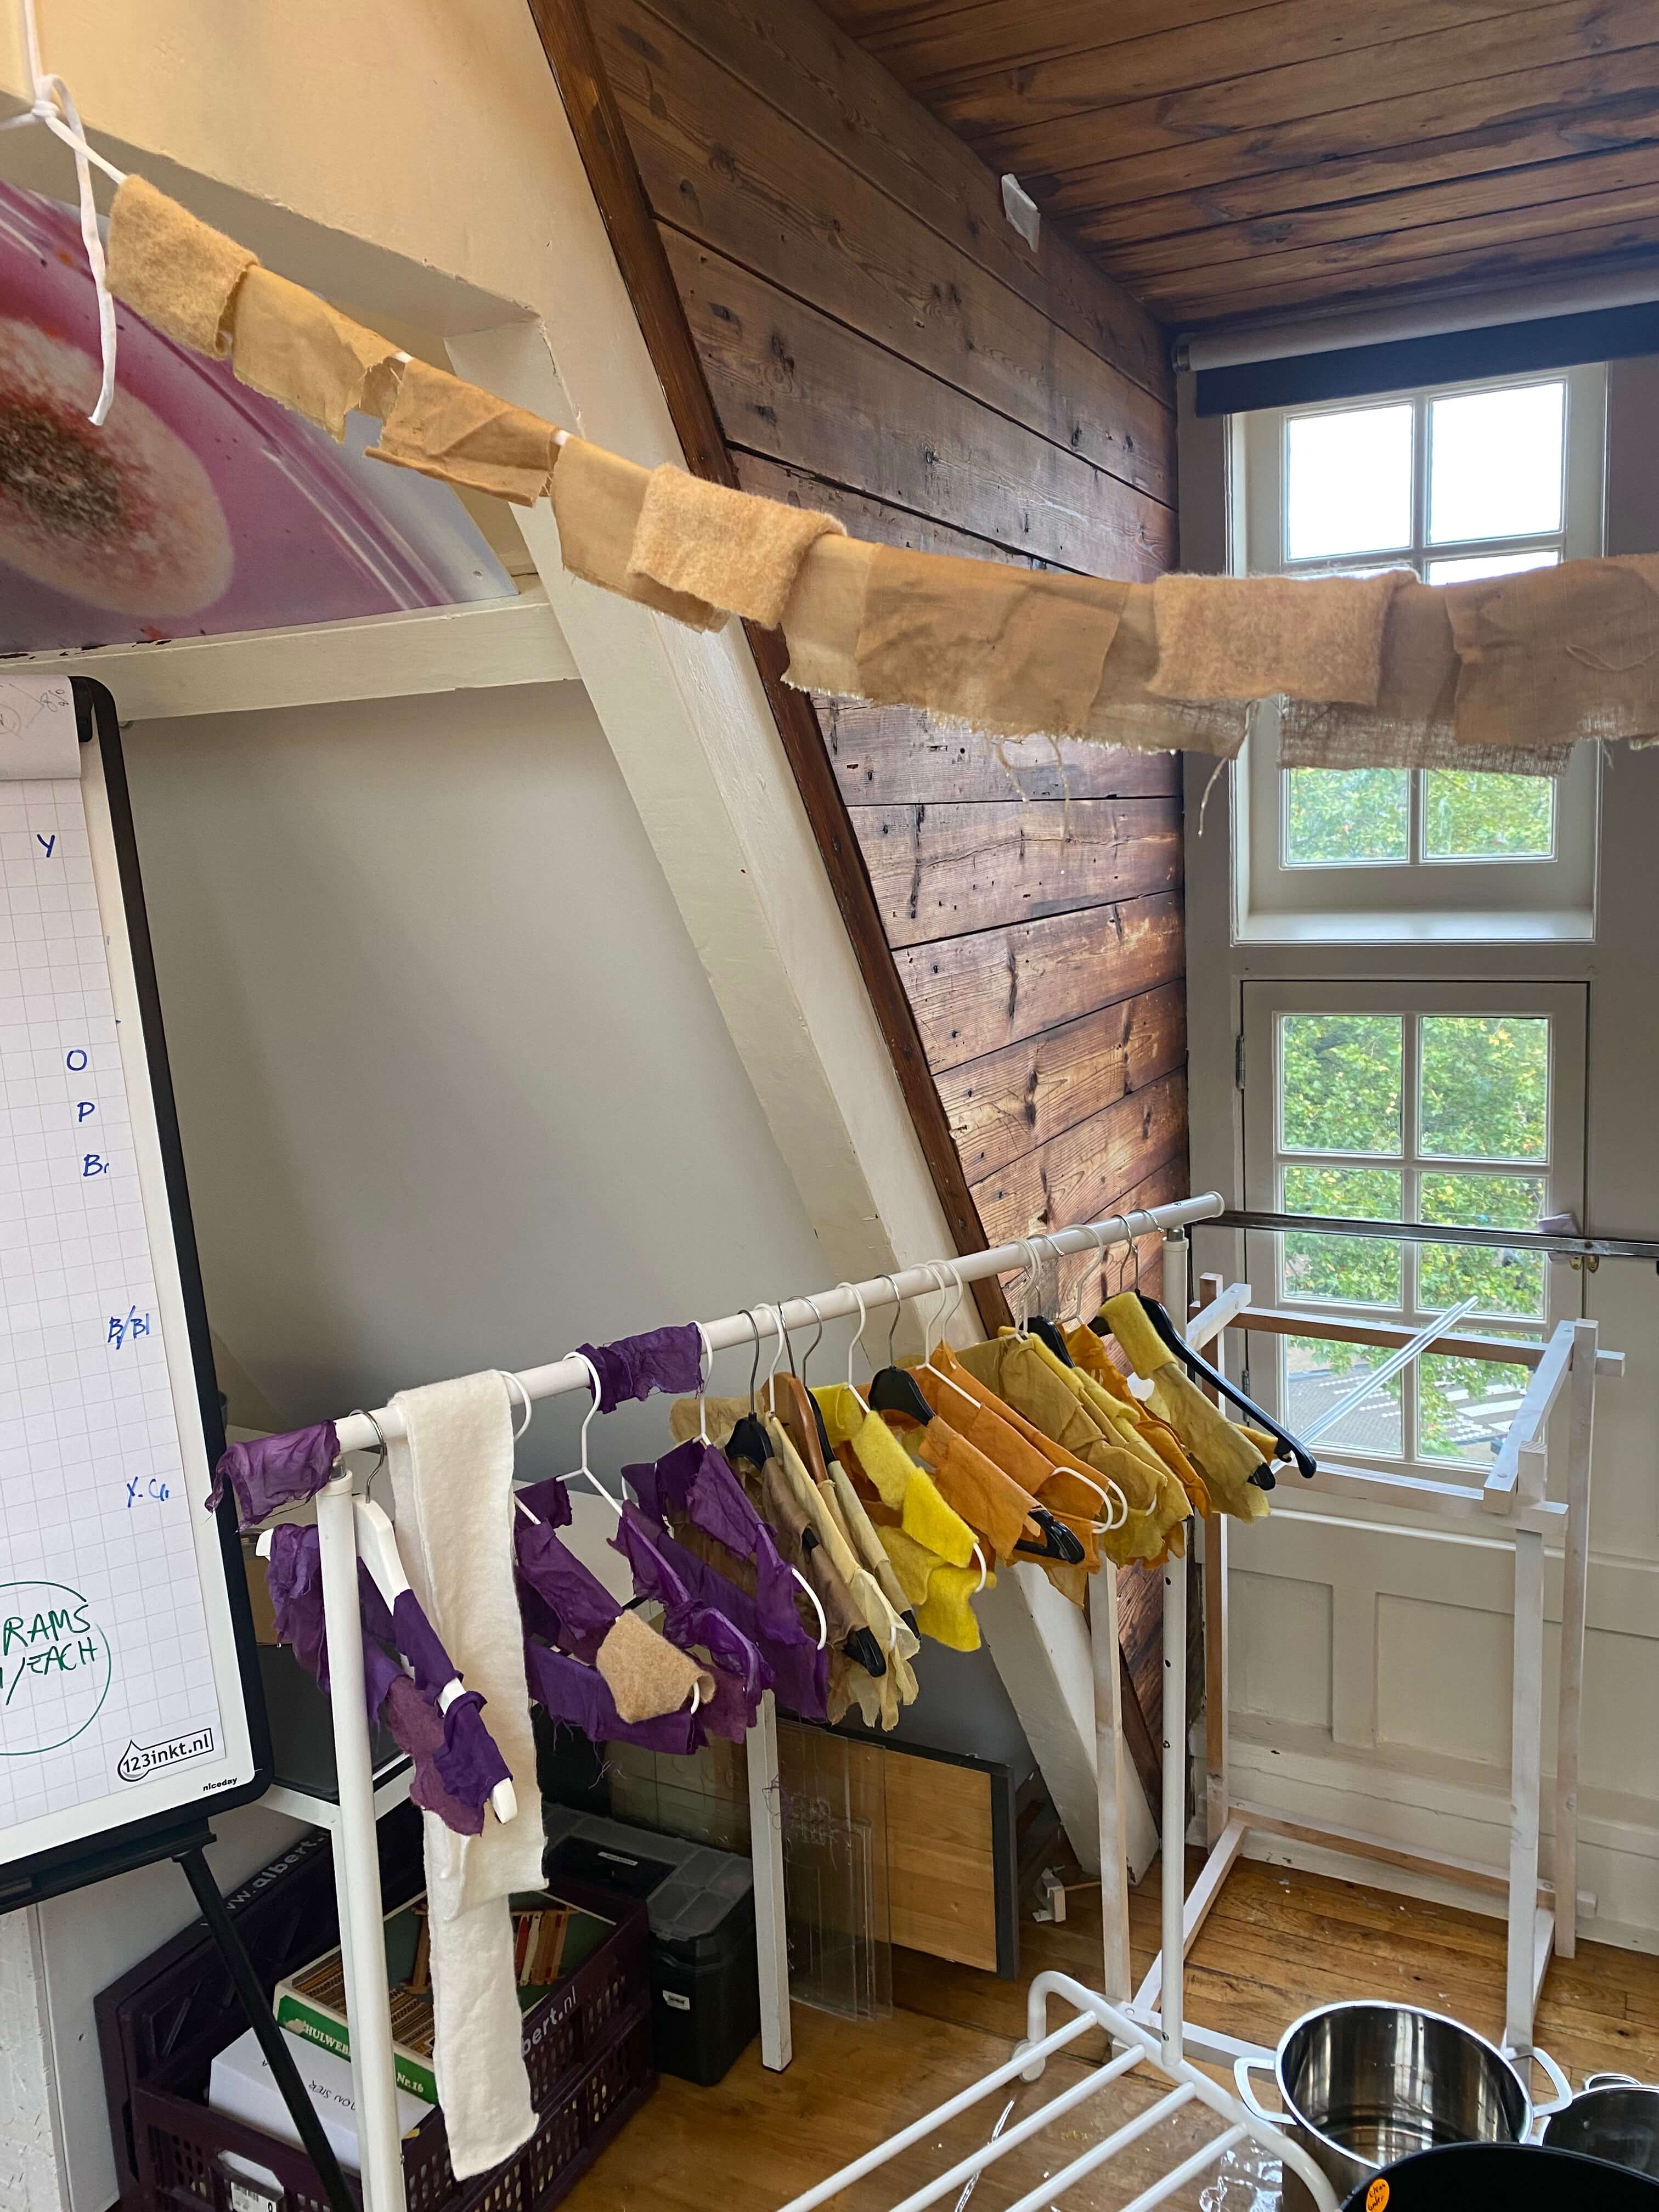
Dyeing fabric
We all died several cottons, bleached and unbleached linen, silk and wool. Individually we made an overview of dyeing with one particular material: I worked with walnut hulls.
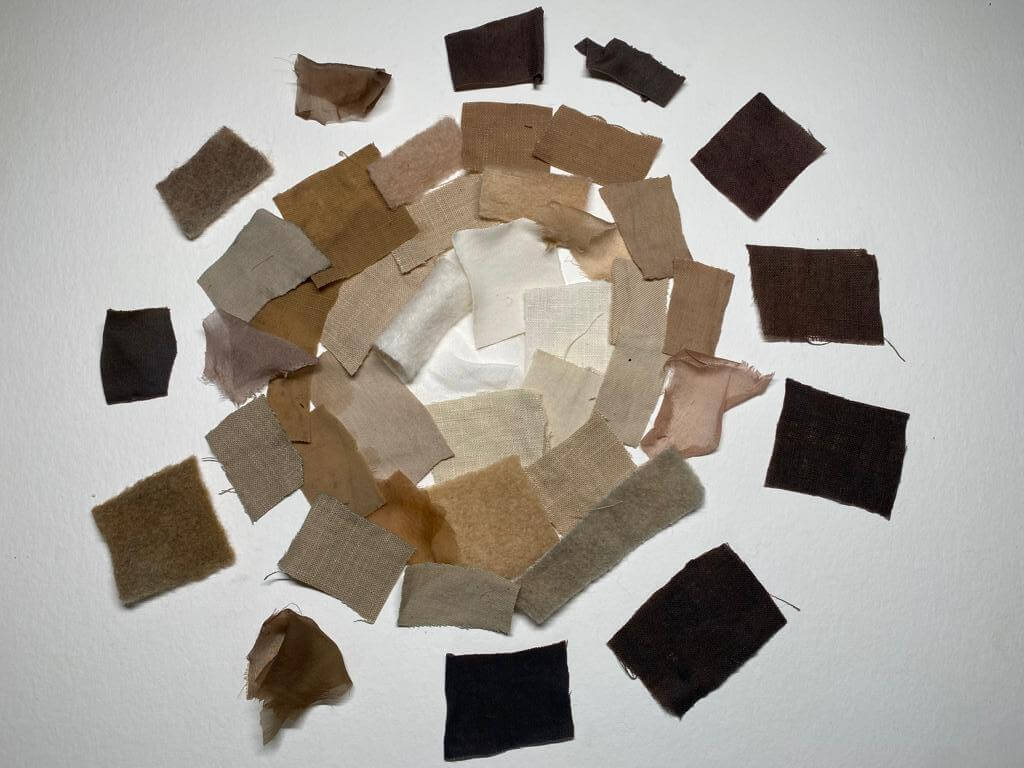
All the beiges, browns and greys from wallnut hull
Making ink
From part of the dye bathes I made several inks.
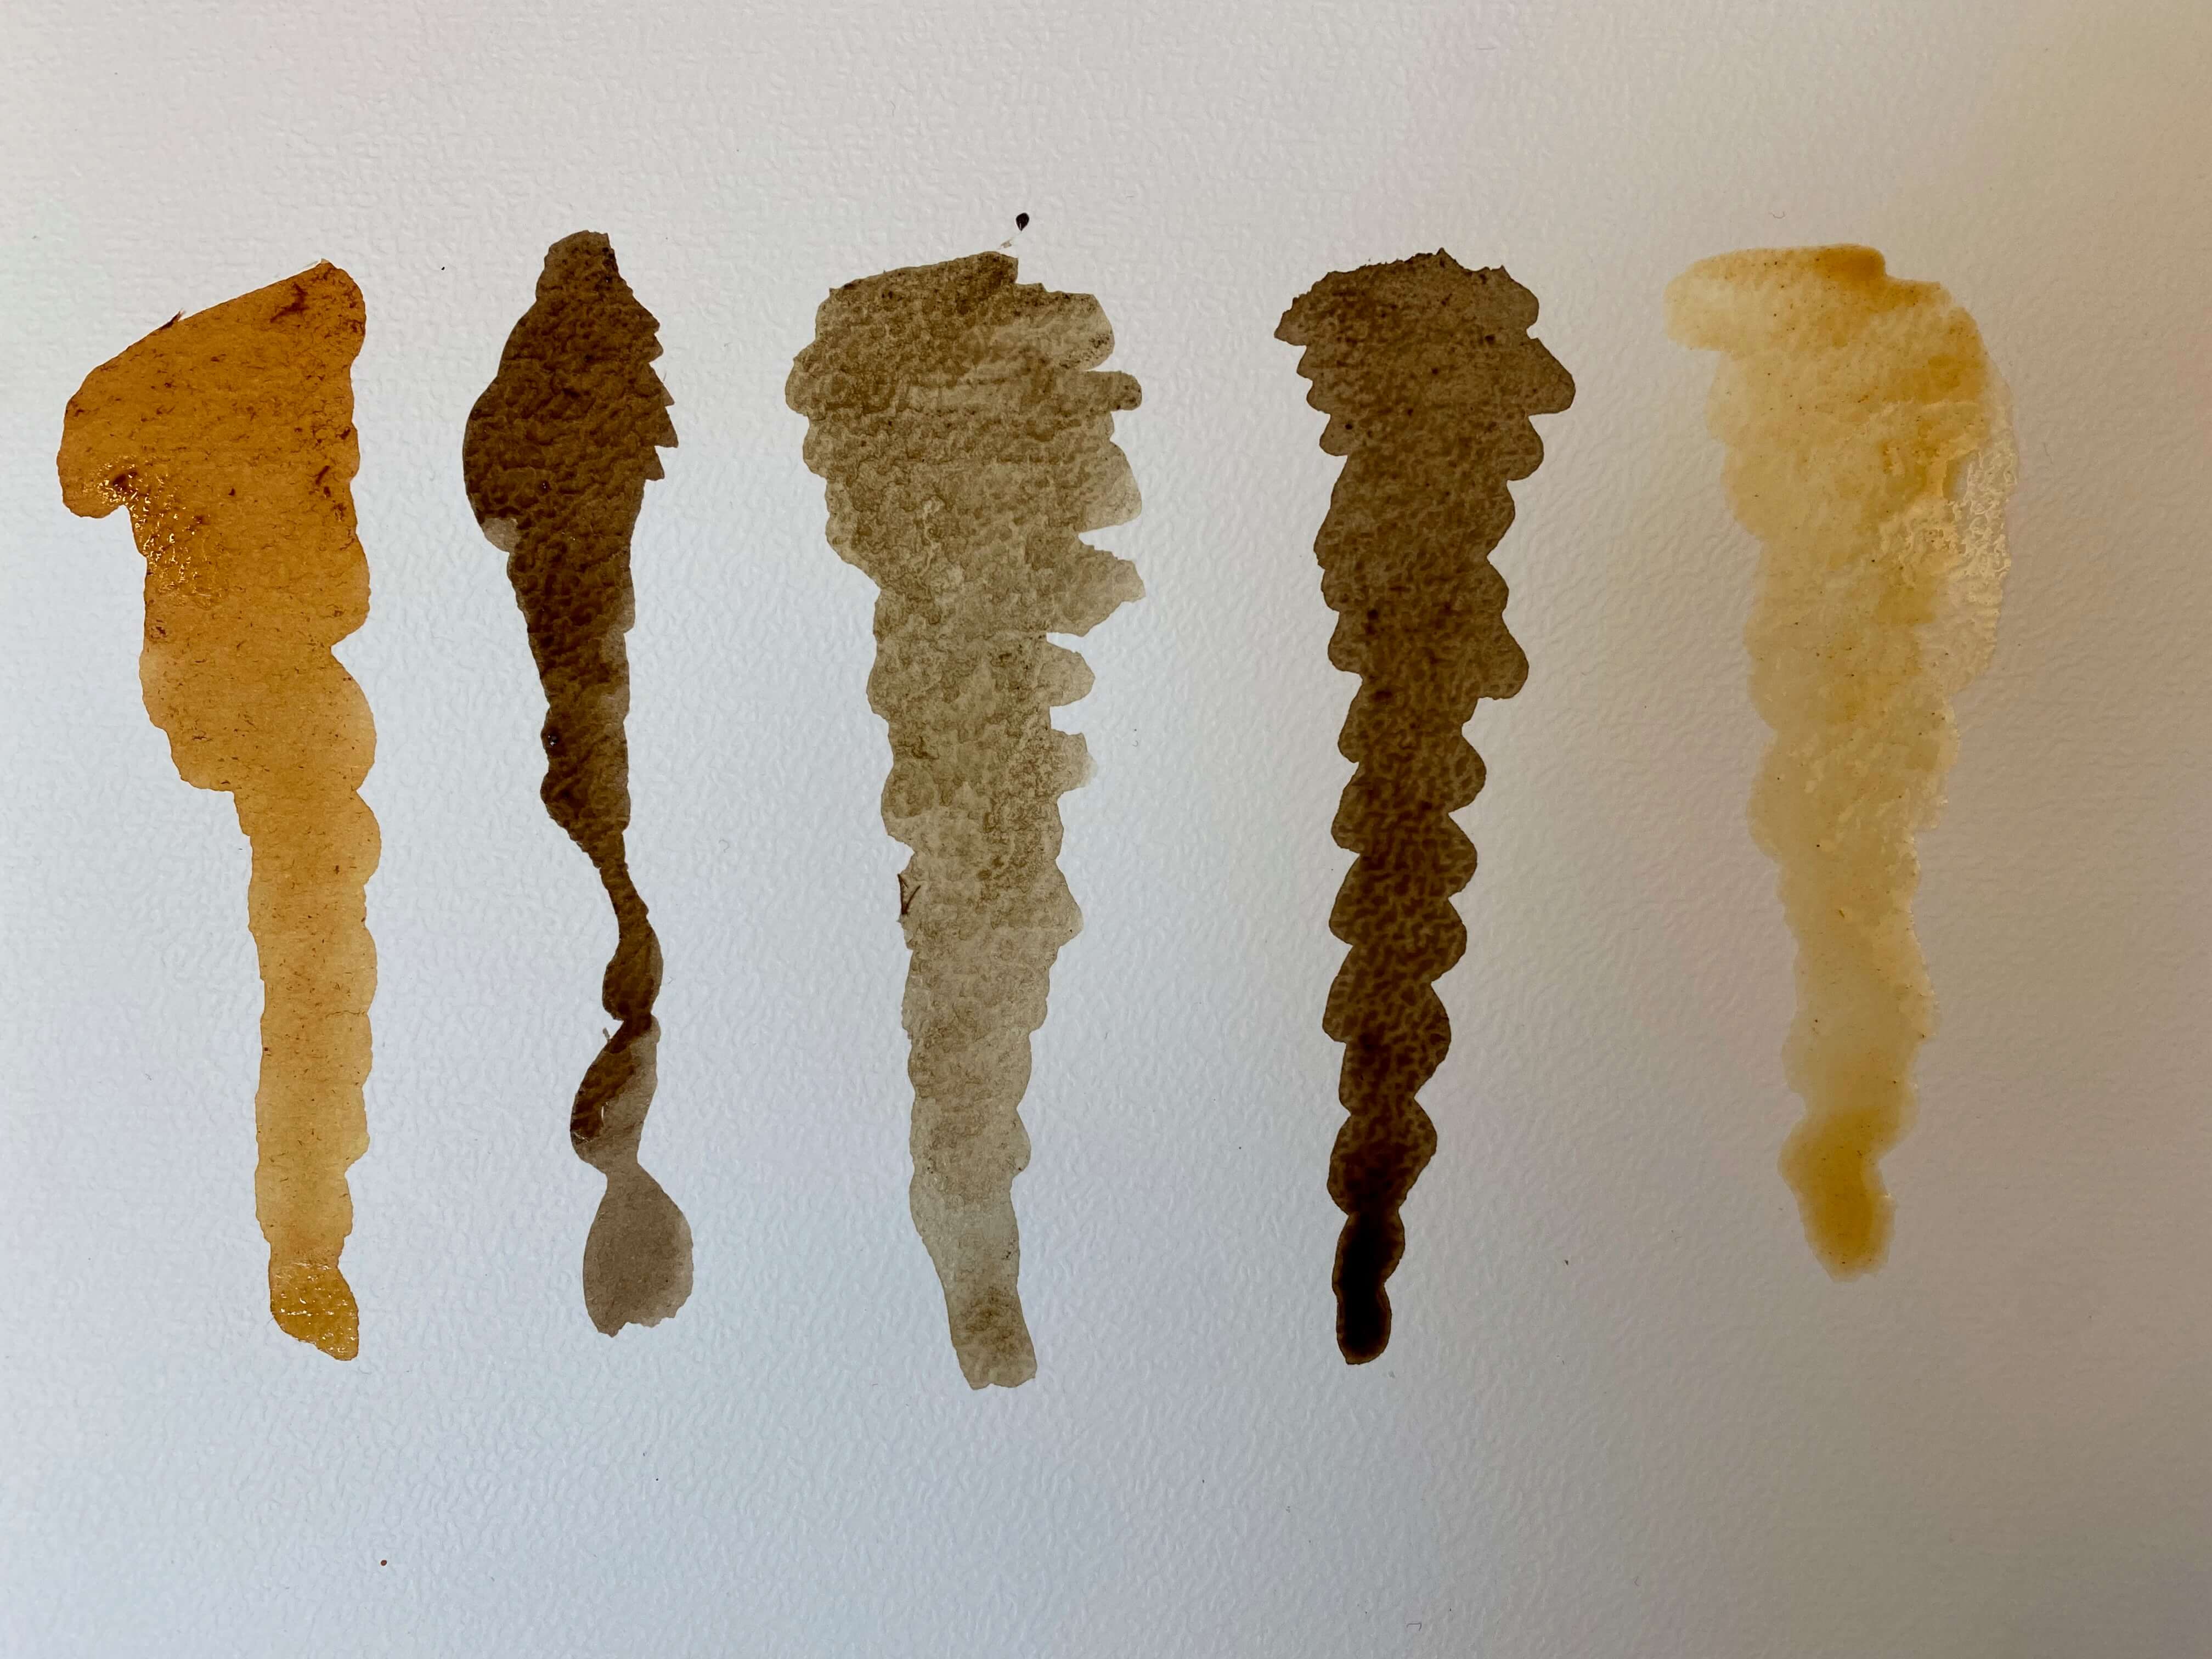
Dancing ladies in inks
Making pigment
From the walnut dye liquid I extracted the brown pigments by the so-called laking process.
Dyeing with bacteria
And the most exciting part. I dyed a piece of silk using the Serratia marcenscens bacteria, which is grown and nurtured by Cecilia in the Biolab. We cooked the growing medium together, sterilized our silks and tools together and each one of us dyed our own piece of silk.
Inspiration
I follow India Flint, an ecological printer from Australia, who is specifically known for printing and dyeing with the eucalyptus plant.
She describes herself as: "Botanical alchemist, forest wanderer & tumbleweed, stargazer & stitcher, string twiner, working traveller, dreamer, writer and the original discoverer of the eucalyptus ecoprint, dyeing for a living in the deep south of Australia."
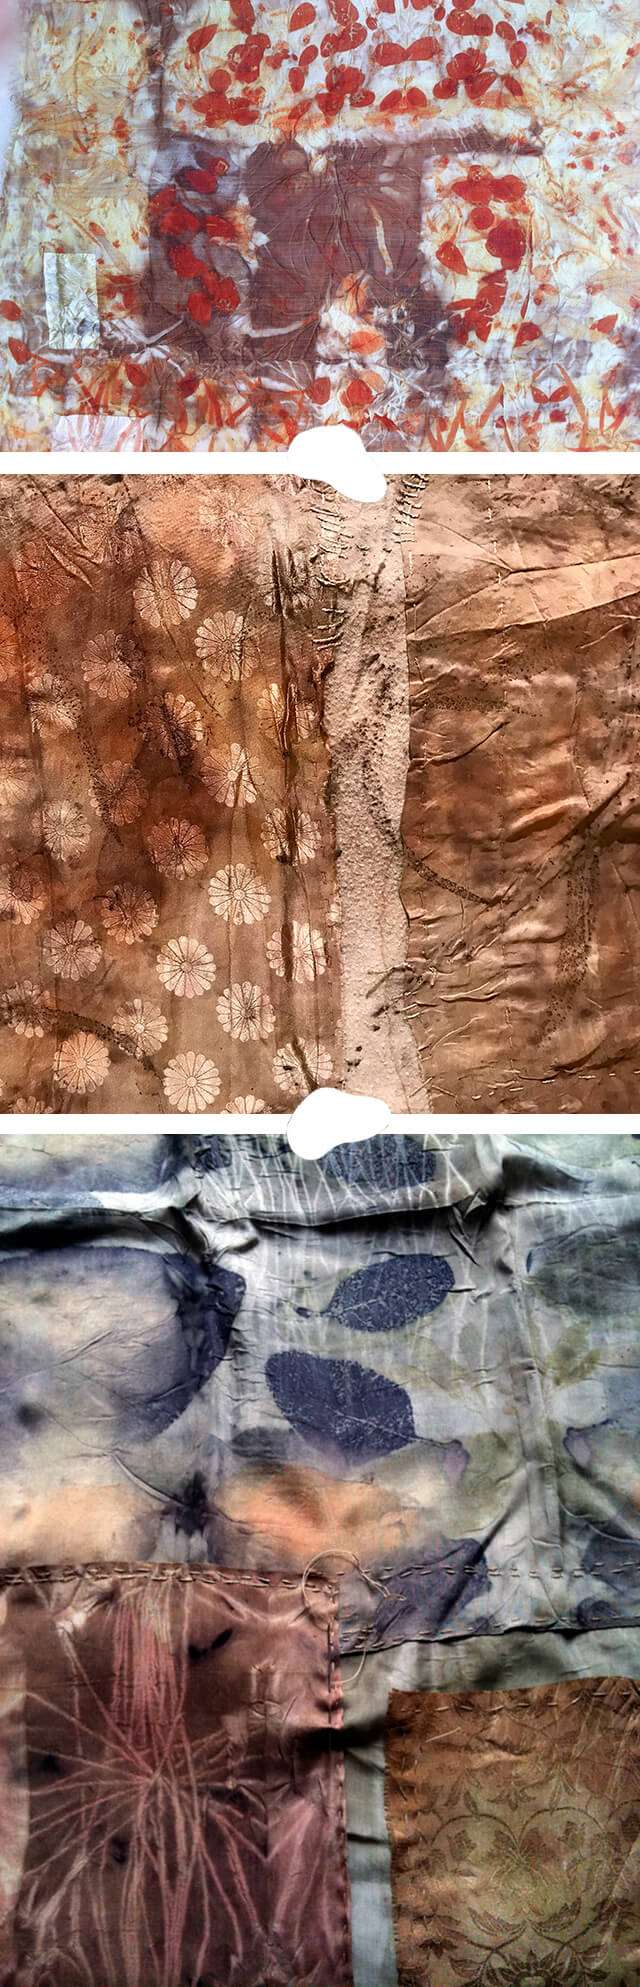
Work by India Flint
One of her projects, in which she dyes a coat, is named very appropriately Wearing the land.
Wearing the land by India Flint
India Flint is all about using local materials to create a visual print of a local country-side.
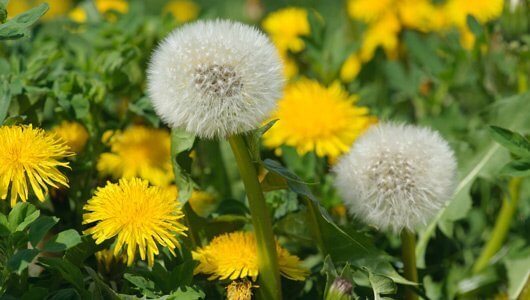
As I love nature (especially the polder we live in) and gardening, I decided this summer to follow her example. I made a list of all native plants and trees growing in the meadow behind our farm and looked up what colors could be extracted from those. Ever since I know that nettle leafs give a deep green, that buttercup and dandelion flowers provide a rich yellow, and that the roots of bur yield a reddish pink color, I don't see them anymore as those unpleasant weeds that overtake everything, but as species with a function.
Obviously I had to try my hand on making dye from some of the plants on my list. Since I love drawing and painting I decided to focus on making pigments. I found a wonderful project on the internet, named the Foraged book project. This is a collaboration between the forager Fergus Drennan and artist James Wood to produce a unique book made entirely from plants foraged from the wild. In the book they describe how to make pigments with help of alum and sodiumcarbonate. And theirs was the recipe I followed for some of my experiments.1
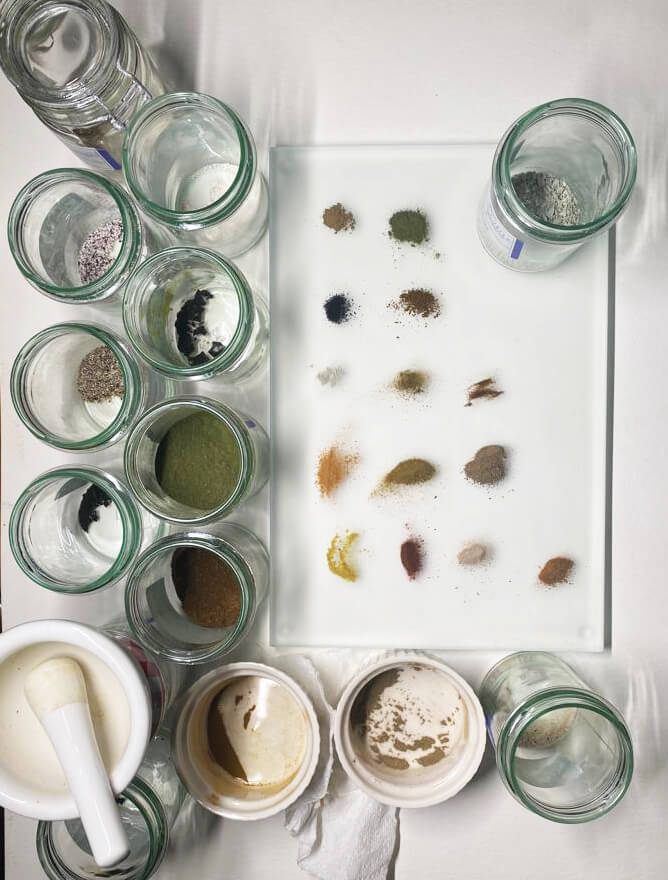
Photo by Marieke van Eyndhoven
First row, l-to-r: nettle leaf lake, nettle leaf dried
Second row, l-to-r: elder berry lake, elder berry dried
Third row, l-to-r: lakes from grass, dandelion, willow leaf
Fourth row, l-to-r: lakes from apple leaf, cherry leaf, pear leaf
Fifth row, l-to-r: lakes from daisy, pear bark, cherry bark, apple bark
I love the orange color from apple leaf and the deep red lake from pear bark. Funnily grass gives a light green mint color (maybe not too light-fast). And the daisy flowers do not dissappoint, yellow they yield! I wasn't too fancy at that time, so didn't add any modifiers and didn't check the pH while laking. That's what this week's assignment is all about.
Basics of biochromes
Some theory from Cecilia's lectures:
- Dye is basically a liquid bath, its soluble in water, and goes into the fiber.
- Ink is a more dense liquid, also soluble in water, also goes into the material.
- Pigment is a powder, it's not soluble (in water) and goes onto the material.
Some dye-language explained:
-
Biochromes: coloring matters that can be extracted from natural dyestuffs like plants and animals.
-
Vehicle: the solvent that helps getting the color out of your dyestuff. For example you could soak or boil the dye material in water or ethanol.
-
Animal fabrics: those are fabrics from protein fibres, like silk (made from fibroin) and wool (made from keratin). These don't need to be scoured before dyeing, they tend to dye well in bright, deep colors. The protein binds well with mordant, which then bonds with the dye. One note: do not boil animal fibres, keep them simmering at between 60-80 degrees celcius. Do not shock them in cold water when rinsing.
-
Vegetable fabrics: those are fabrics from cellulose, like cotton, jute, hemp, algae, linen, and sugar cane. These need to be scoured to open up the fibres before dyeing. You can boil and shock these, they won't be bothered.
-
Scouring: is done with scouring agents such as sodium ash (sodium carbonate). These are used to prepare vegetable fibres for dyeing, basically to clean them by removing all the waxes, oils, and pectins to make the textile material hydrophilic or water absorbent.
-
Mordants (or dye fixatives): are used as a bridge or bond between the molecules of the fibre being dyed, and the natural color that is being used to dye it. (The word mordant comes from the Latin mordere, meaning 'to bite'). In that way mordants improve the light- and wash-fastness. Mordants may be applied before, during or after dyeing. These processes are commonly called pre-mordanting, co-mordanting, and post-mordanting. Mordants have traditionally included such compounds like ammonia, urea, acetic acid, tannic acid, sumac, gall nuts, various bark extracts, oleic acid, stearic acid, sulphuric acid, tartaric acid, and cream of tartar; and metallic substances like soluble salts of iron and copper. Other salts like sodium carbonate (soda ash) and potassium aluminium sulphate (alum) also function as a mordant. Since mordants can alter the pH of the dye bath, mordants can effect the shade of the dye too (soda ash for example is alkaline and alum is acidic).
-
Modifiers: are additives that change the hue of the dye. You can modify for example the color of PH sensitive dyes by adding acidic modifiers (citric acid, vinegar), or alkaline liquids (like soda ash dissolved in water). Adding iron water will darken colors, whereas adding copper water will enforce green and blue hues.
Fabric dyeing process
The preparation of the fibres we did together, once it was dyeing time, we went out on our own.
Making the samples
We had 6 fabrics:
- Unbleached linen (vegetable)
- Bleached linen (vegetable)
- Cotton twill (vegetable)
- Organic stretch jersey (vegetable)
- Silk (animal)
- Wool (animal)
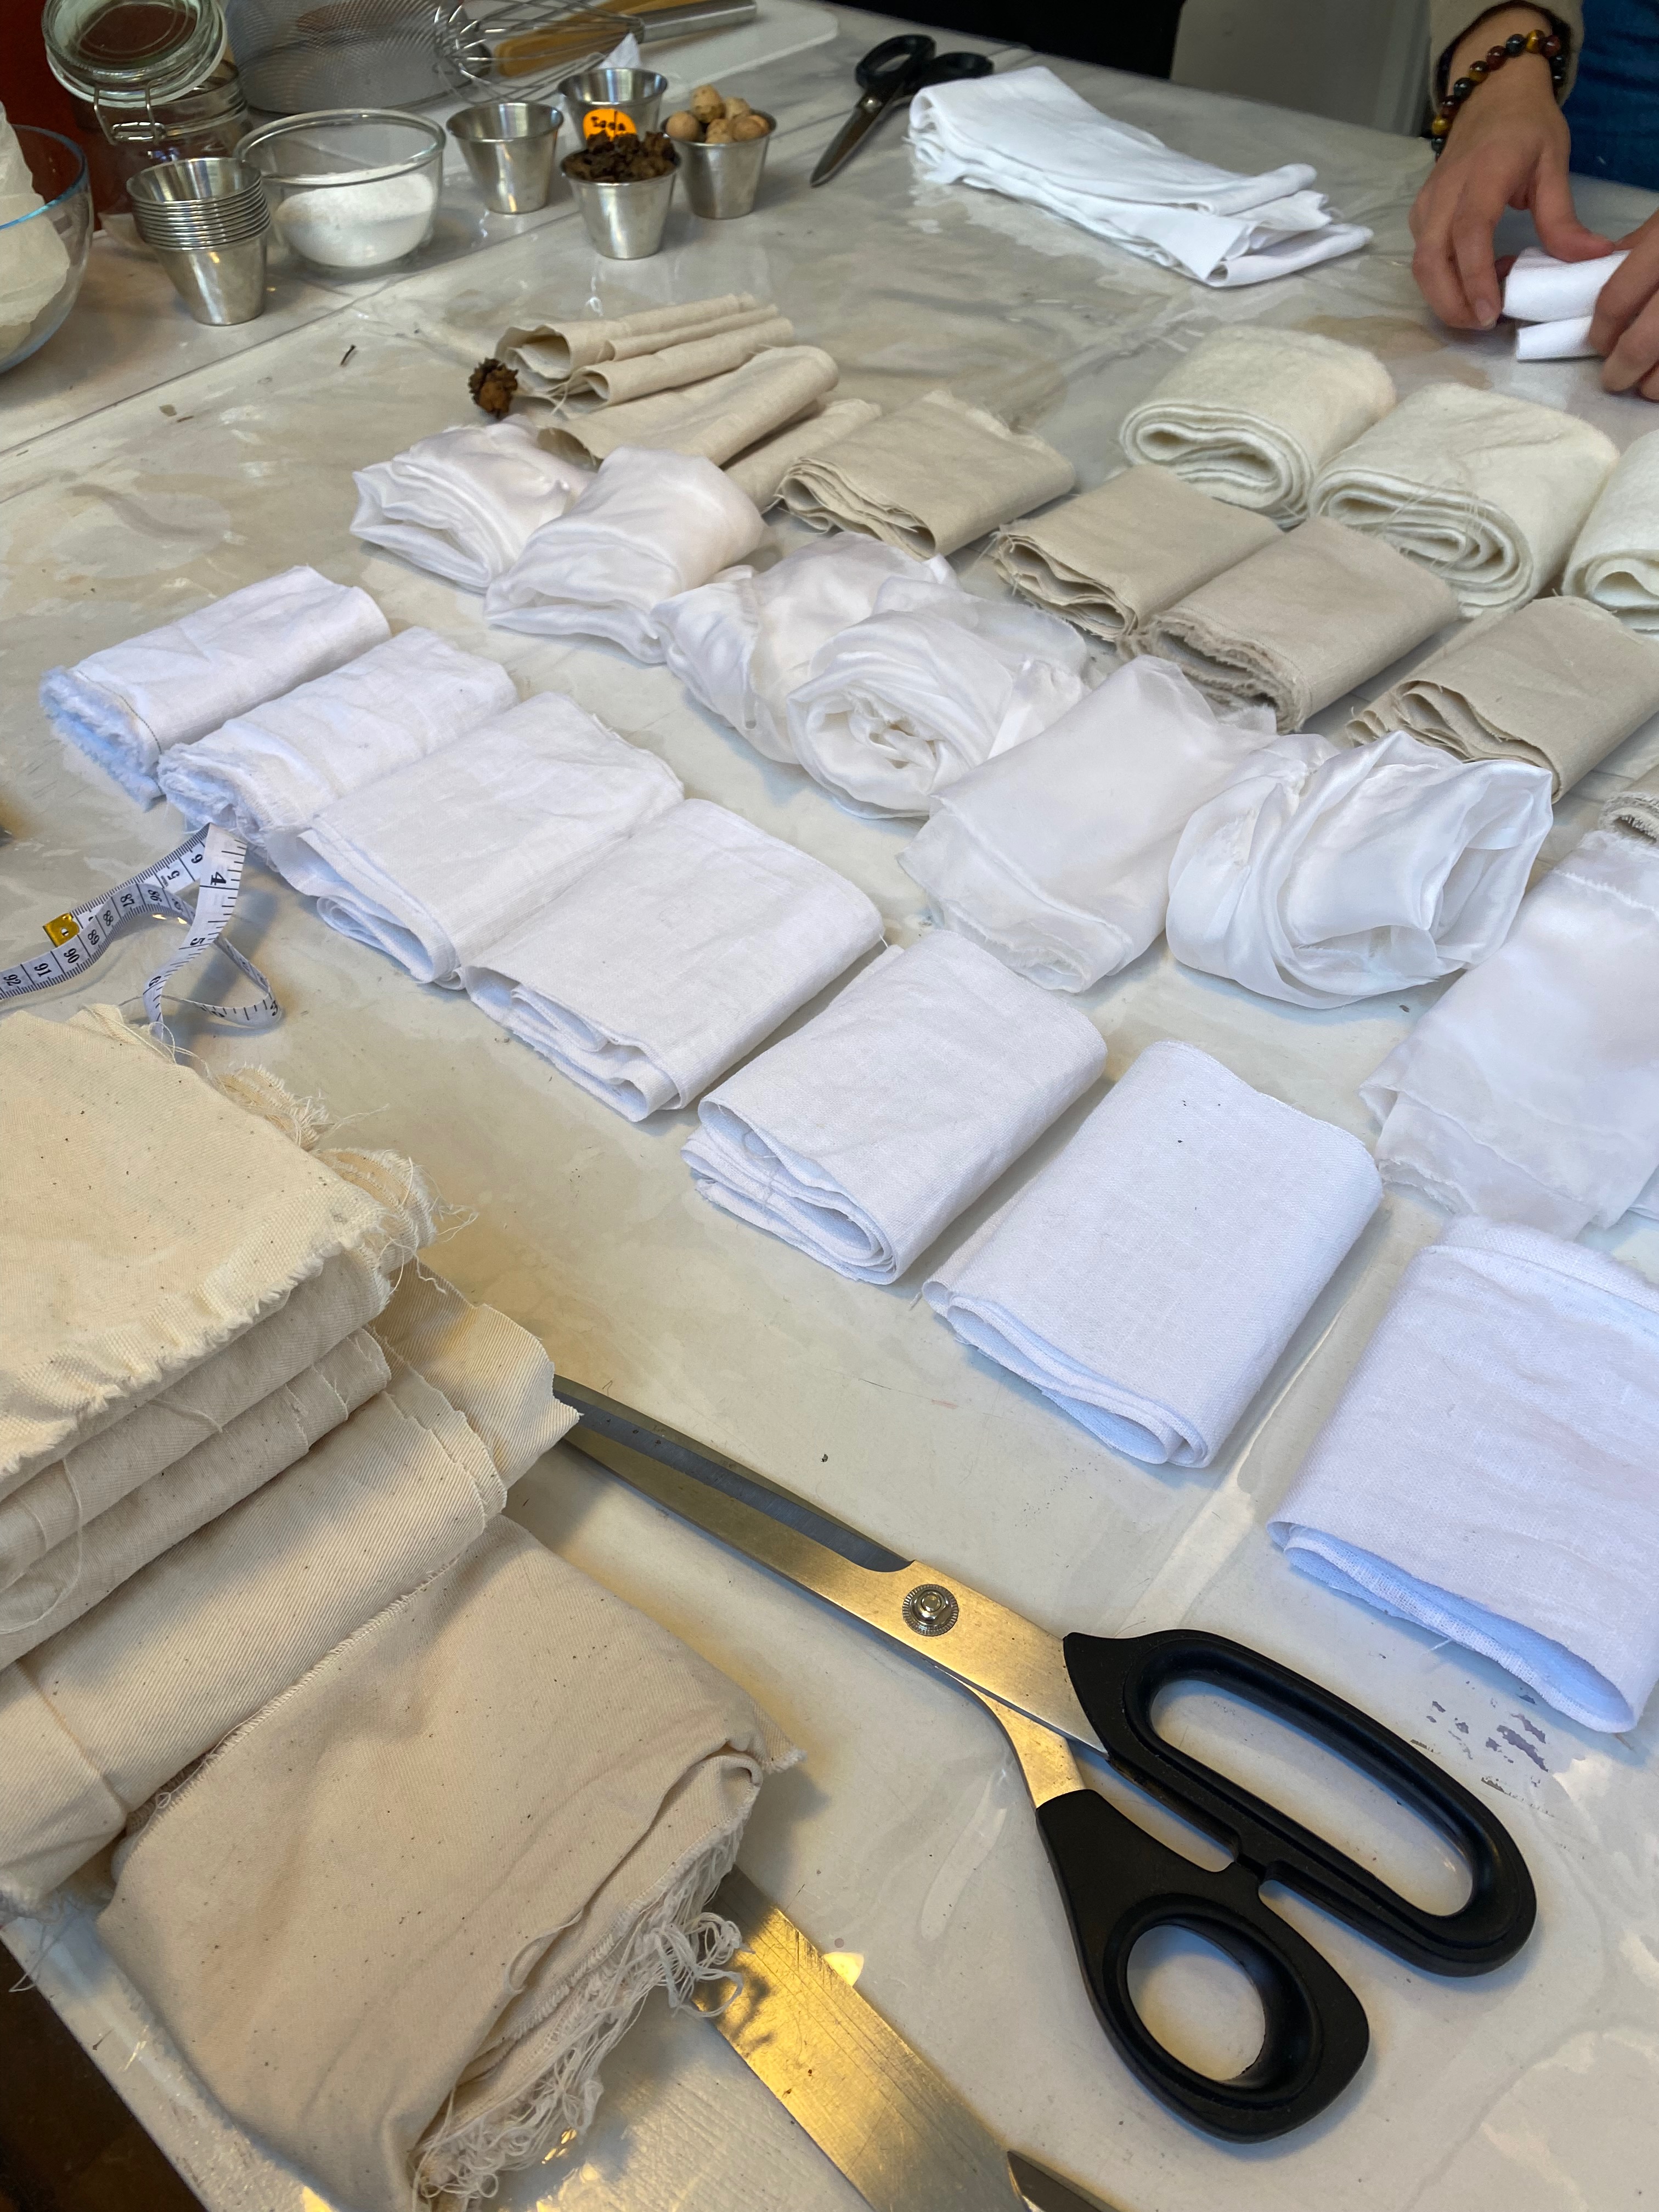
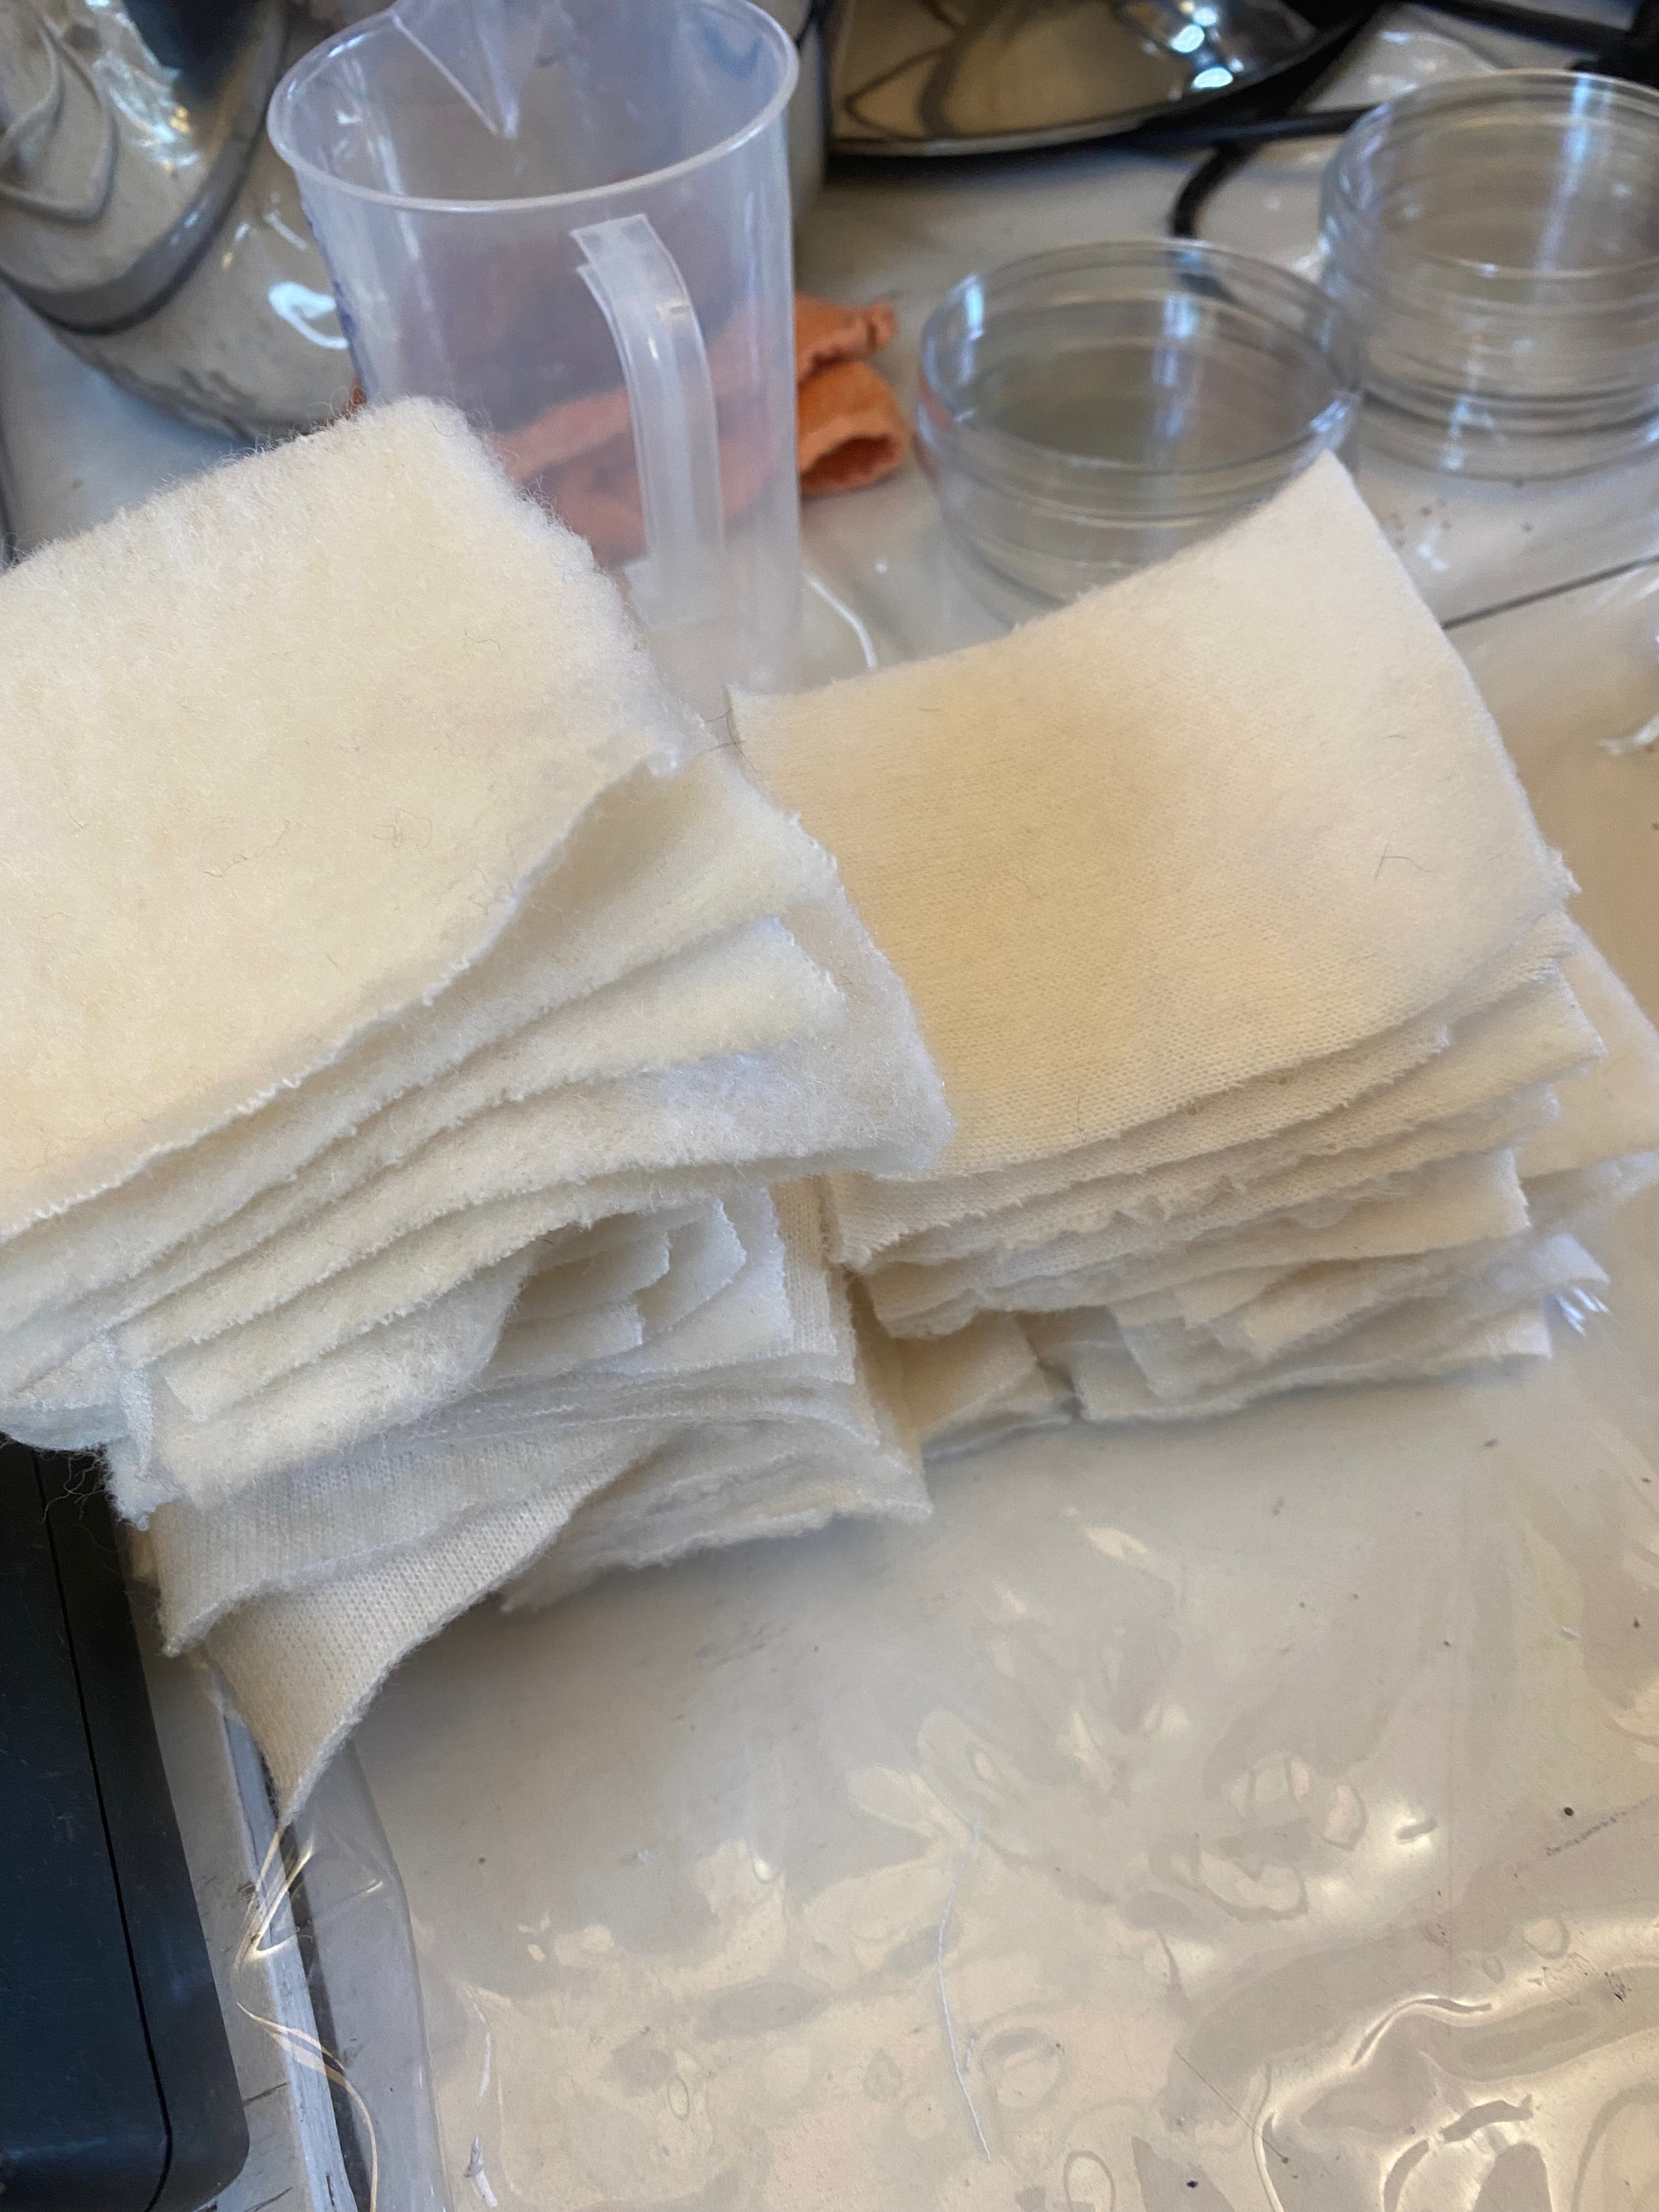
We started out by cutting 7 strips of 10 cm from each fabric. One for each one of us and one for the lab.
Weighing the dry fibre
Once our strips were cut, we weighed them. This is important as you later have to calculate the required scouring agent and mordants as a percentage of the dry weight of fabric (WOF)
Photos by Marieke van Eyndhoven
Scouring the vegetable fabrics
Officially this should be the next step. But we were lucky. The scouring had already be done. But the actual scouring process is pretty straightfoward. Add up the weight of each vegetable fibre that goes into one pot, and based on the WOF, calculate the amount of scouring agent needed.
Dissolve soda ash in hot water. Add to the pot with fibres. Cover the fabrics with hot water and boil for at least an hour. Afterwards rinse the fabrics.
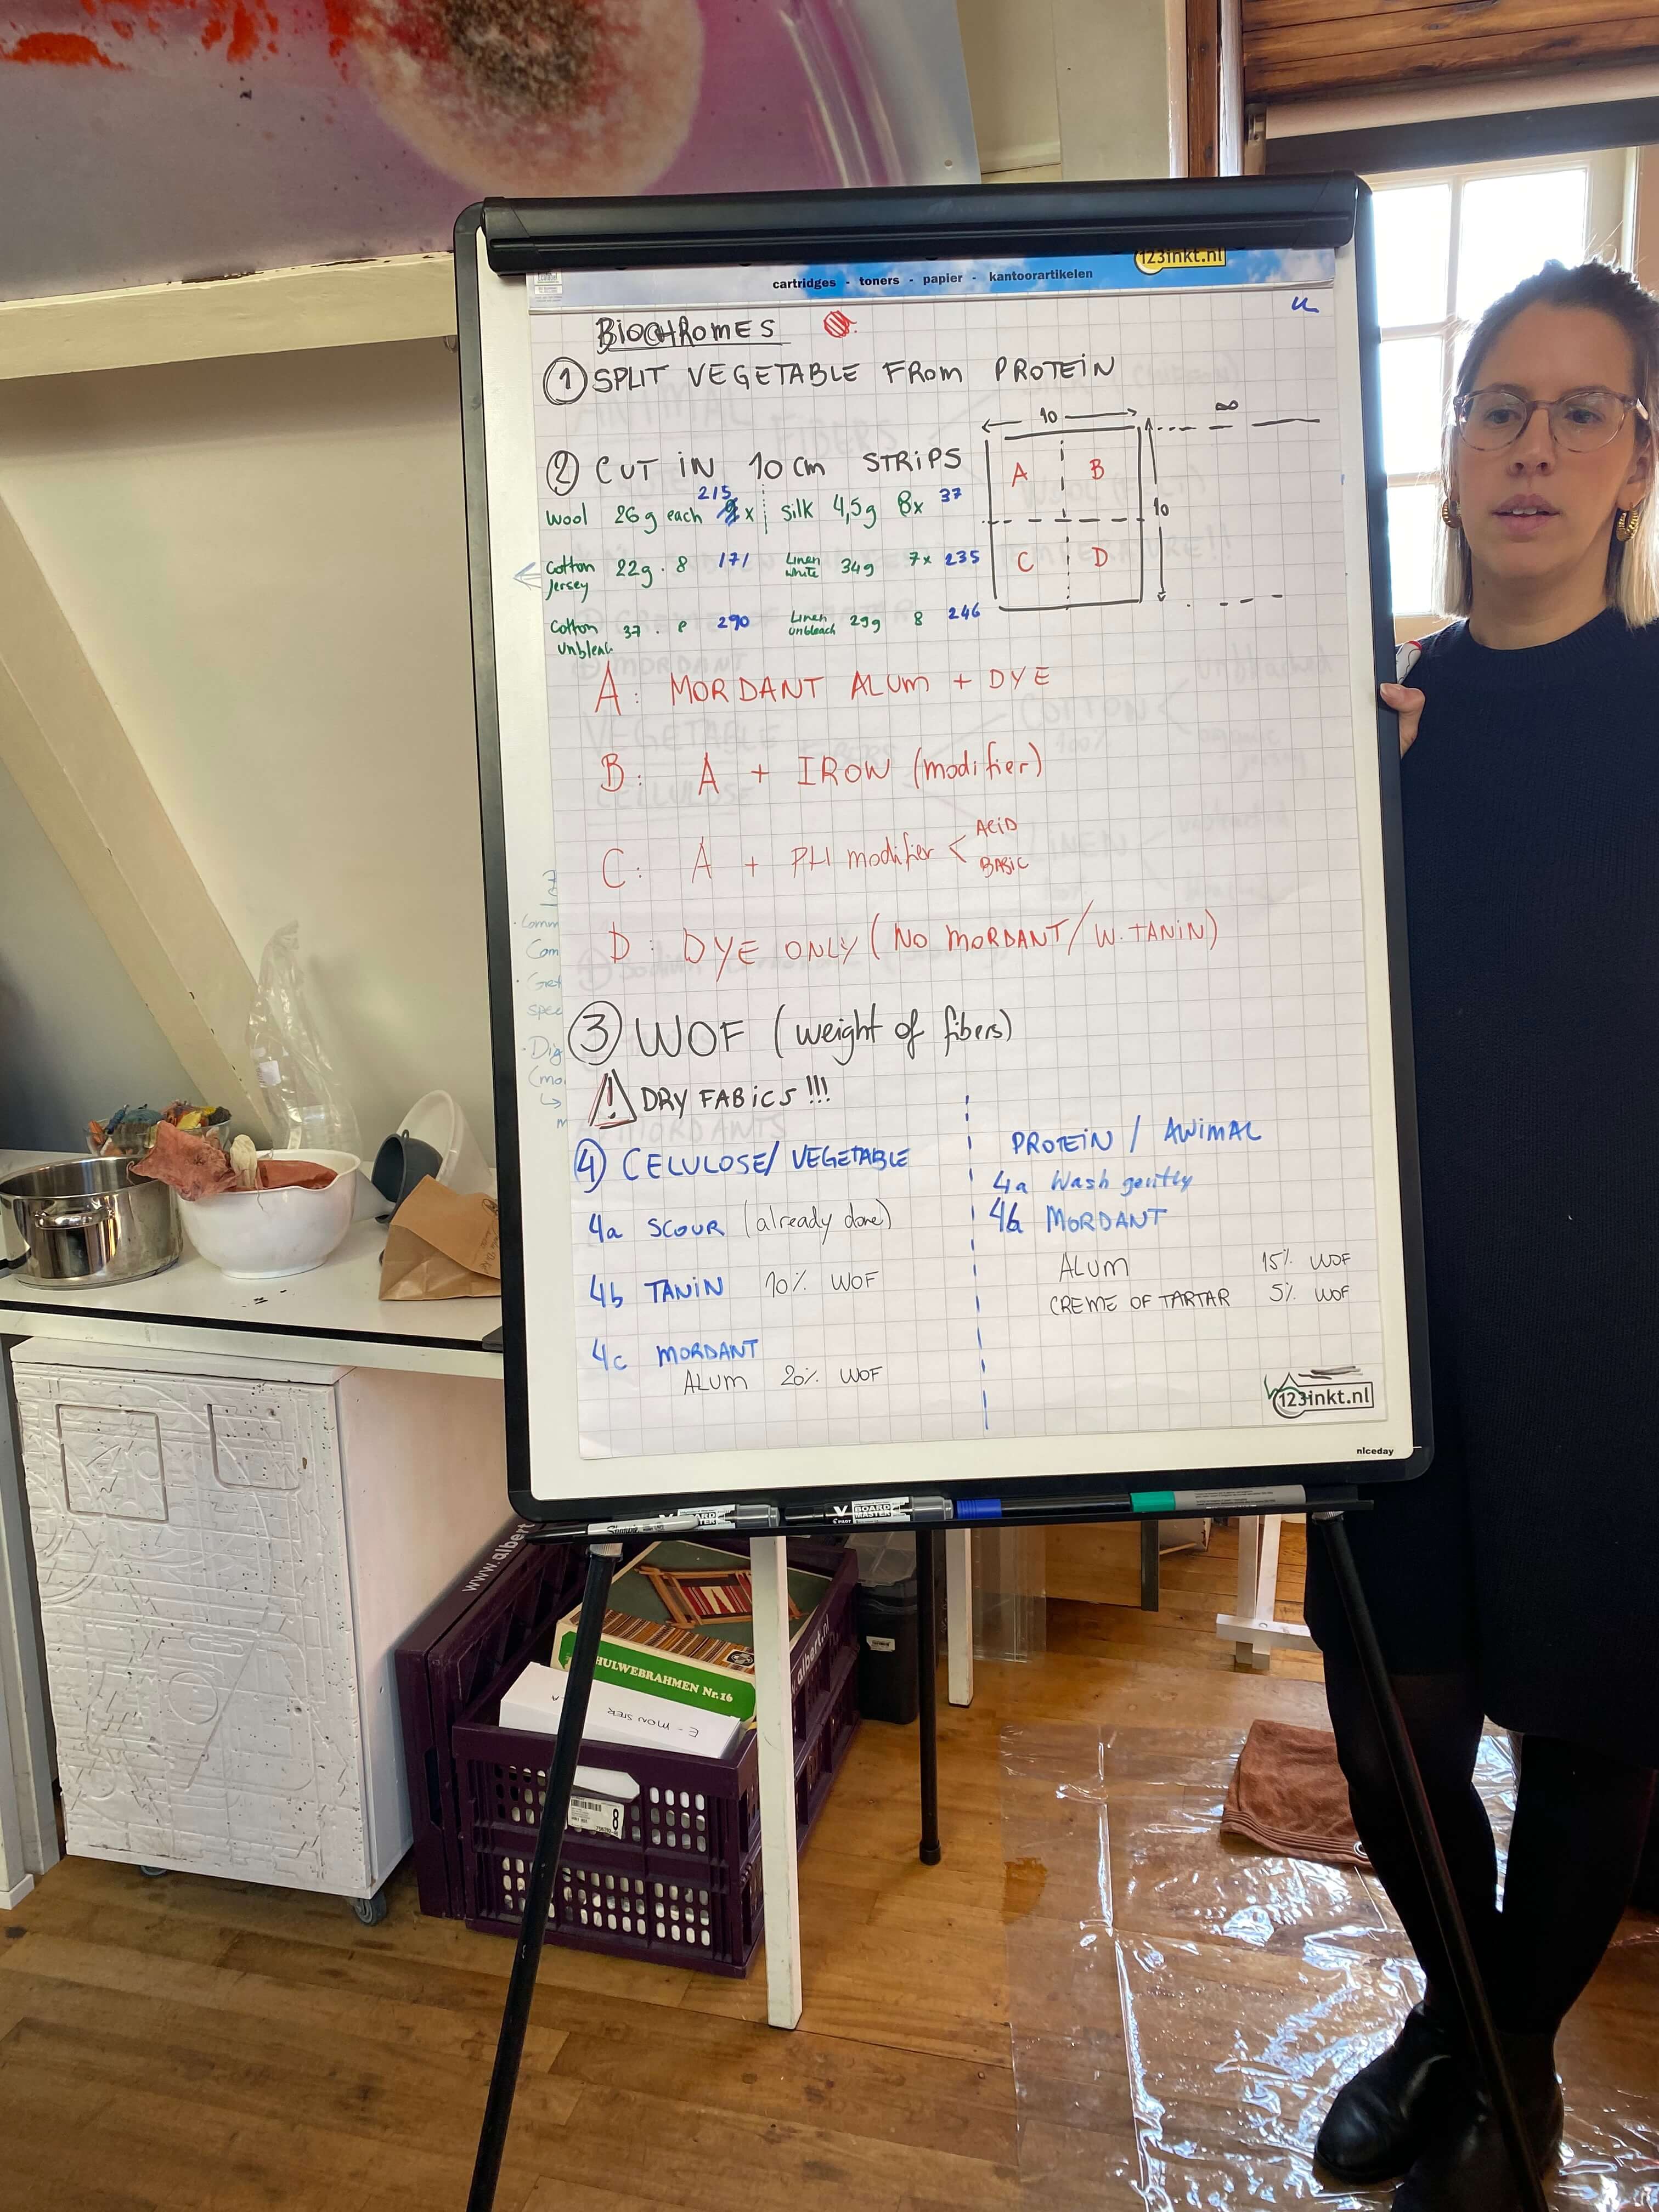
Mordanting fabrics
After the scouring, comes the mordanting process. This should be done for both types of fabrics. But the recipes for mordanting vegetable and animal fibres are just slightly different.
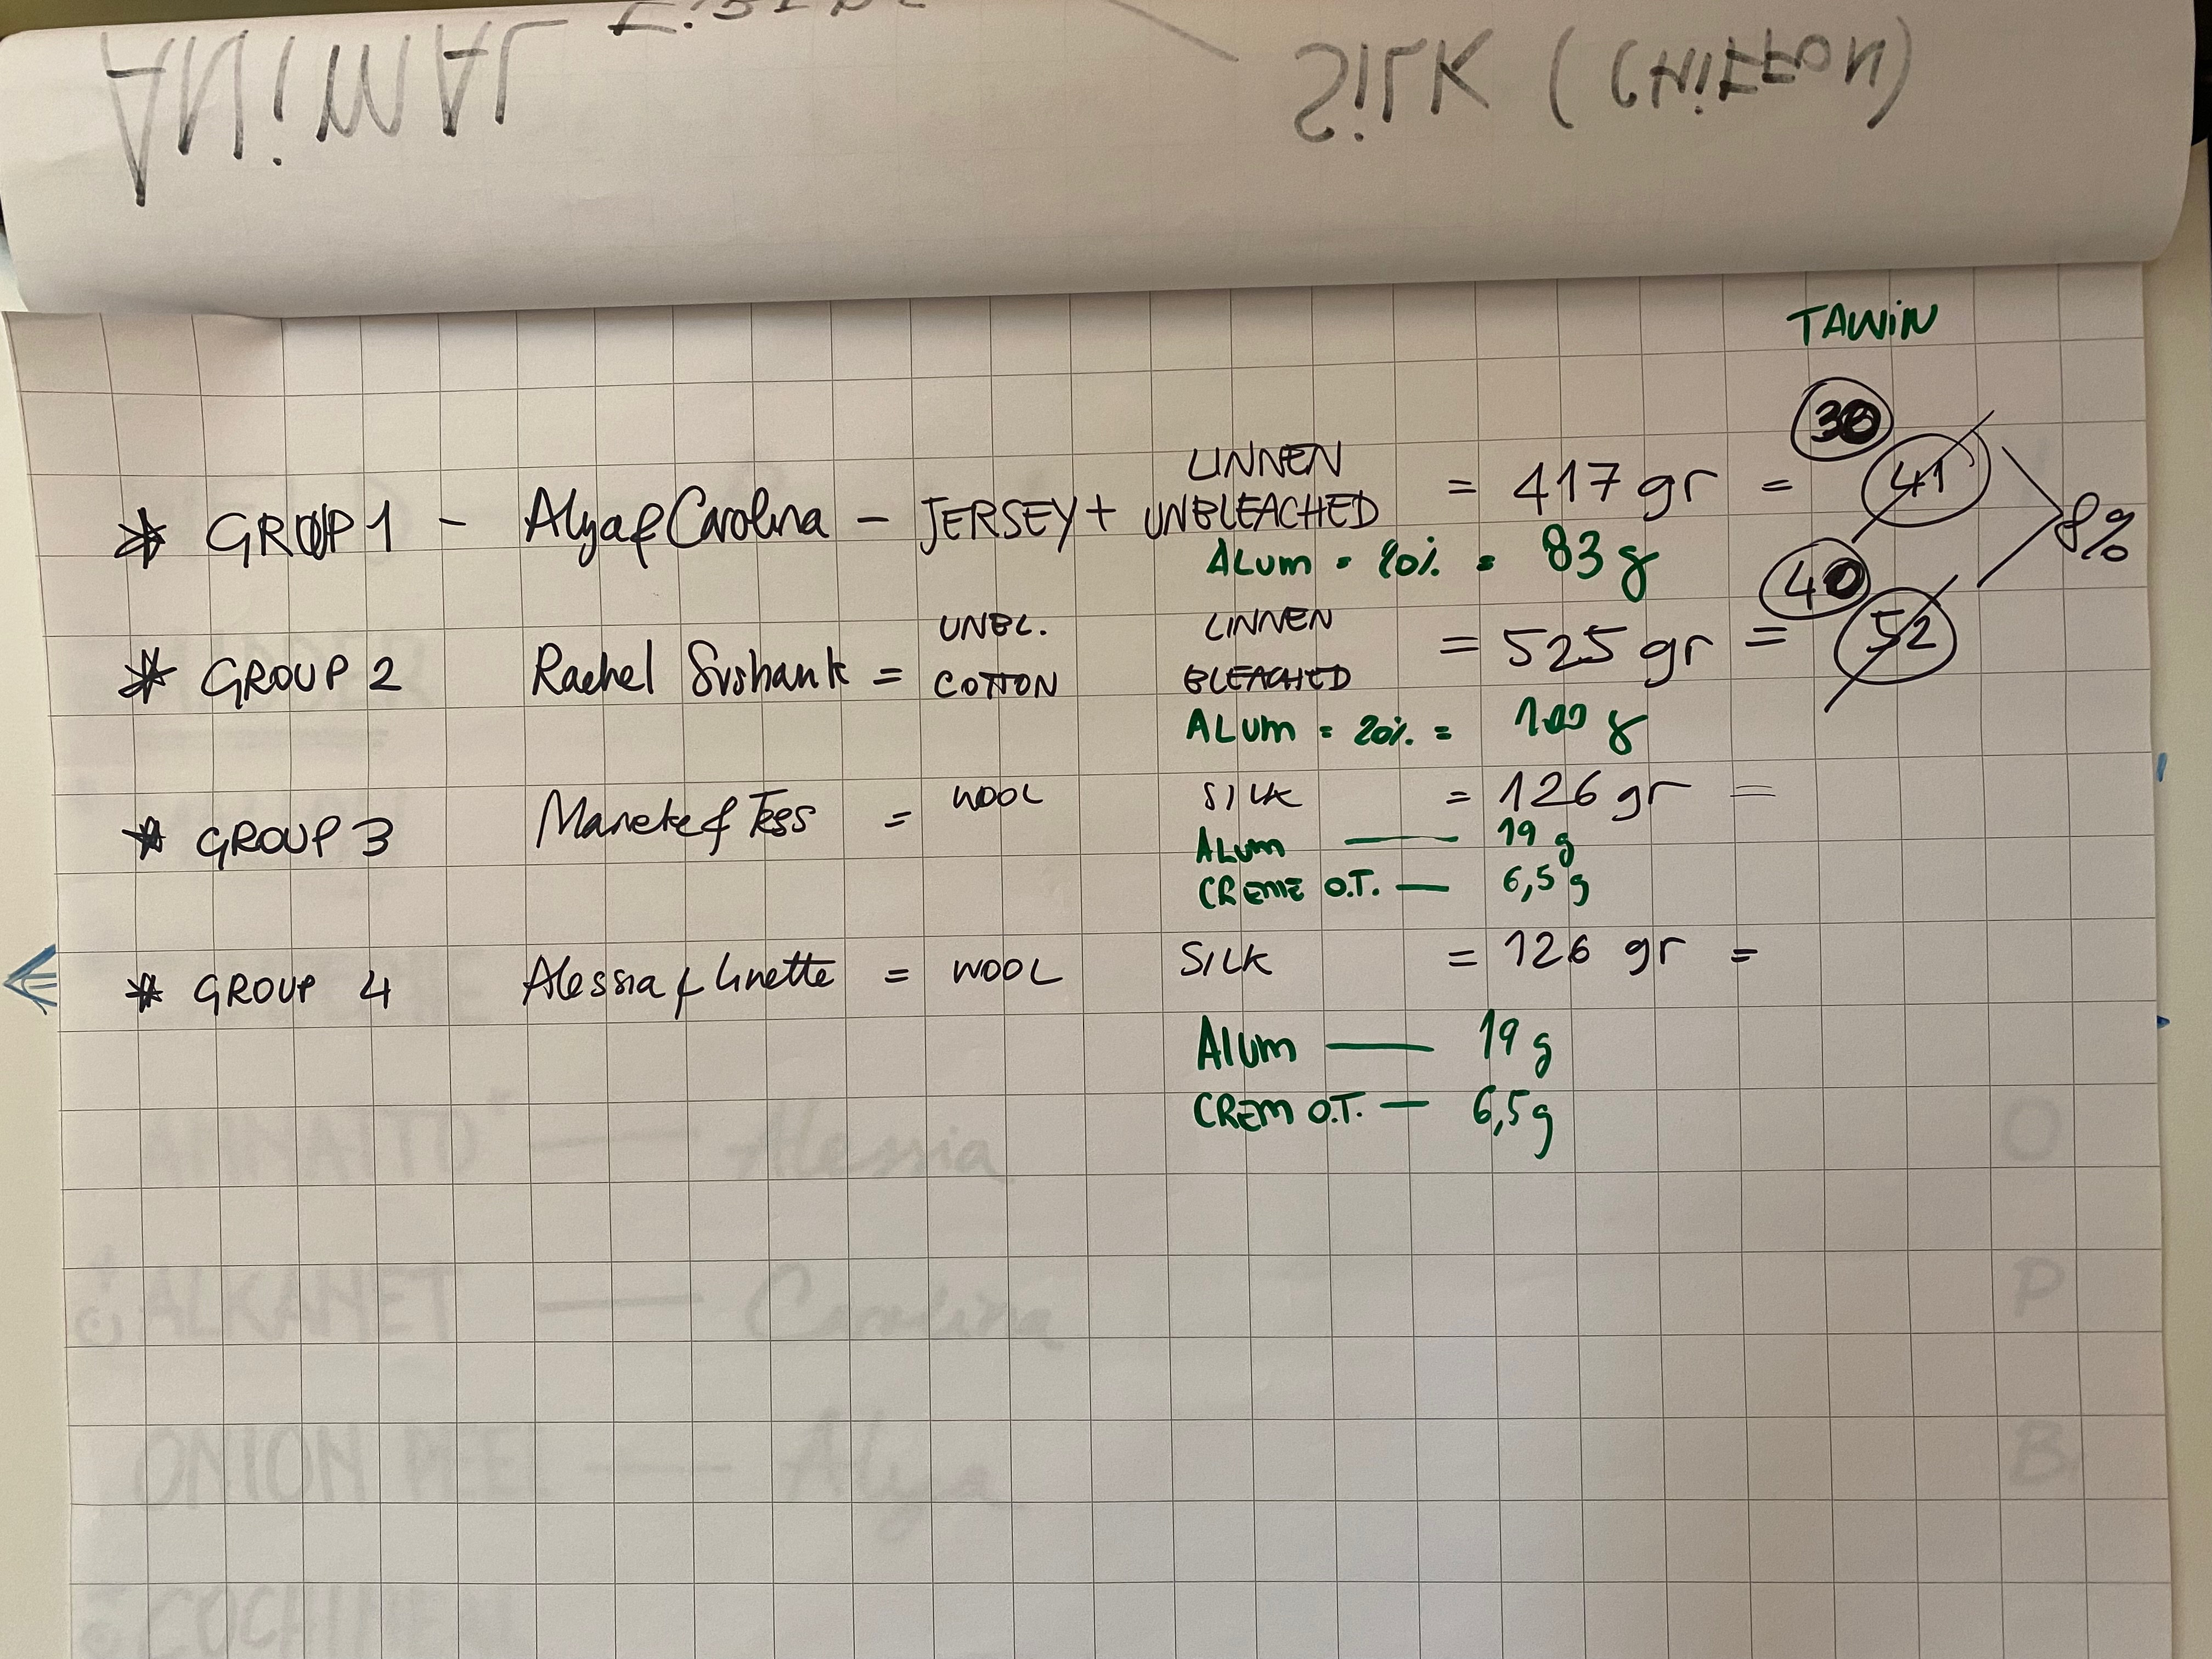
Vegetable fibres
Our jersey cotton and unbleached linen were combined and weighed 417 gram (the WOF). The twill cotton and bleached linen were combined and weighed 525 gram (the WOF). We prepared two pots for them. In each pot water and 8% of WOF tannin was added. The pots were heated up and once they simmered we added the fibres. After an hour we let the pots cool and rinsed the the fabrics.
The same bundles of fabric were then mordanted. We prepared two pots. We first dissolved 20% of WOF alum in hot water. We added this solution with water in the pots. The pots were heated up and once they simmered we added the fibres. After an hour we let the pots cool and rinsed the fabrics.
Animal fibres
Our silk and wool strips were divided in two. Each bundle weighted 126 gram (the WOF). For each bundle we weighed 19 gram of alum (15% of WOF) and 6,5 gram cream of tartar (5% of WOF), that we first dissolved in hot water, and then added to the pot. We further filled up the pots with water, heated them and once they simmered added the fabrics. We simmered for around an hour and continuously checked the temperature to not exceed 80 degrees celcius. Then we took the fibres out of the pot and rinsed them.
Once our strips were dried, we cut them again in 10x10 cm squares.
Photos by Marieke van Eyndhoven
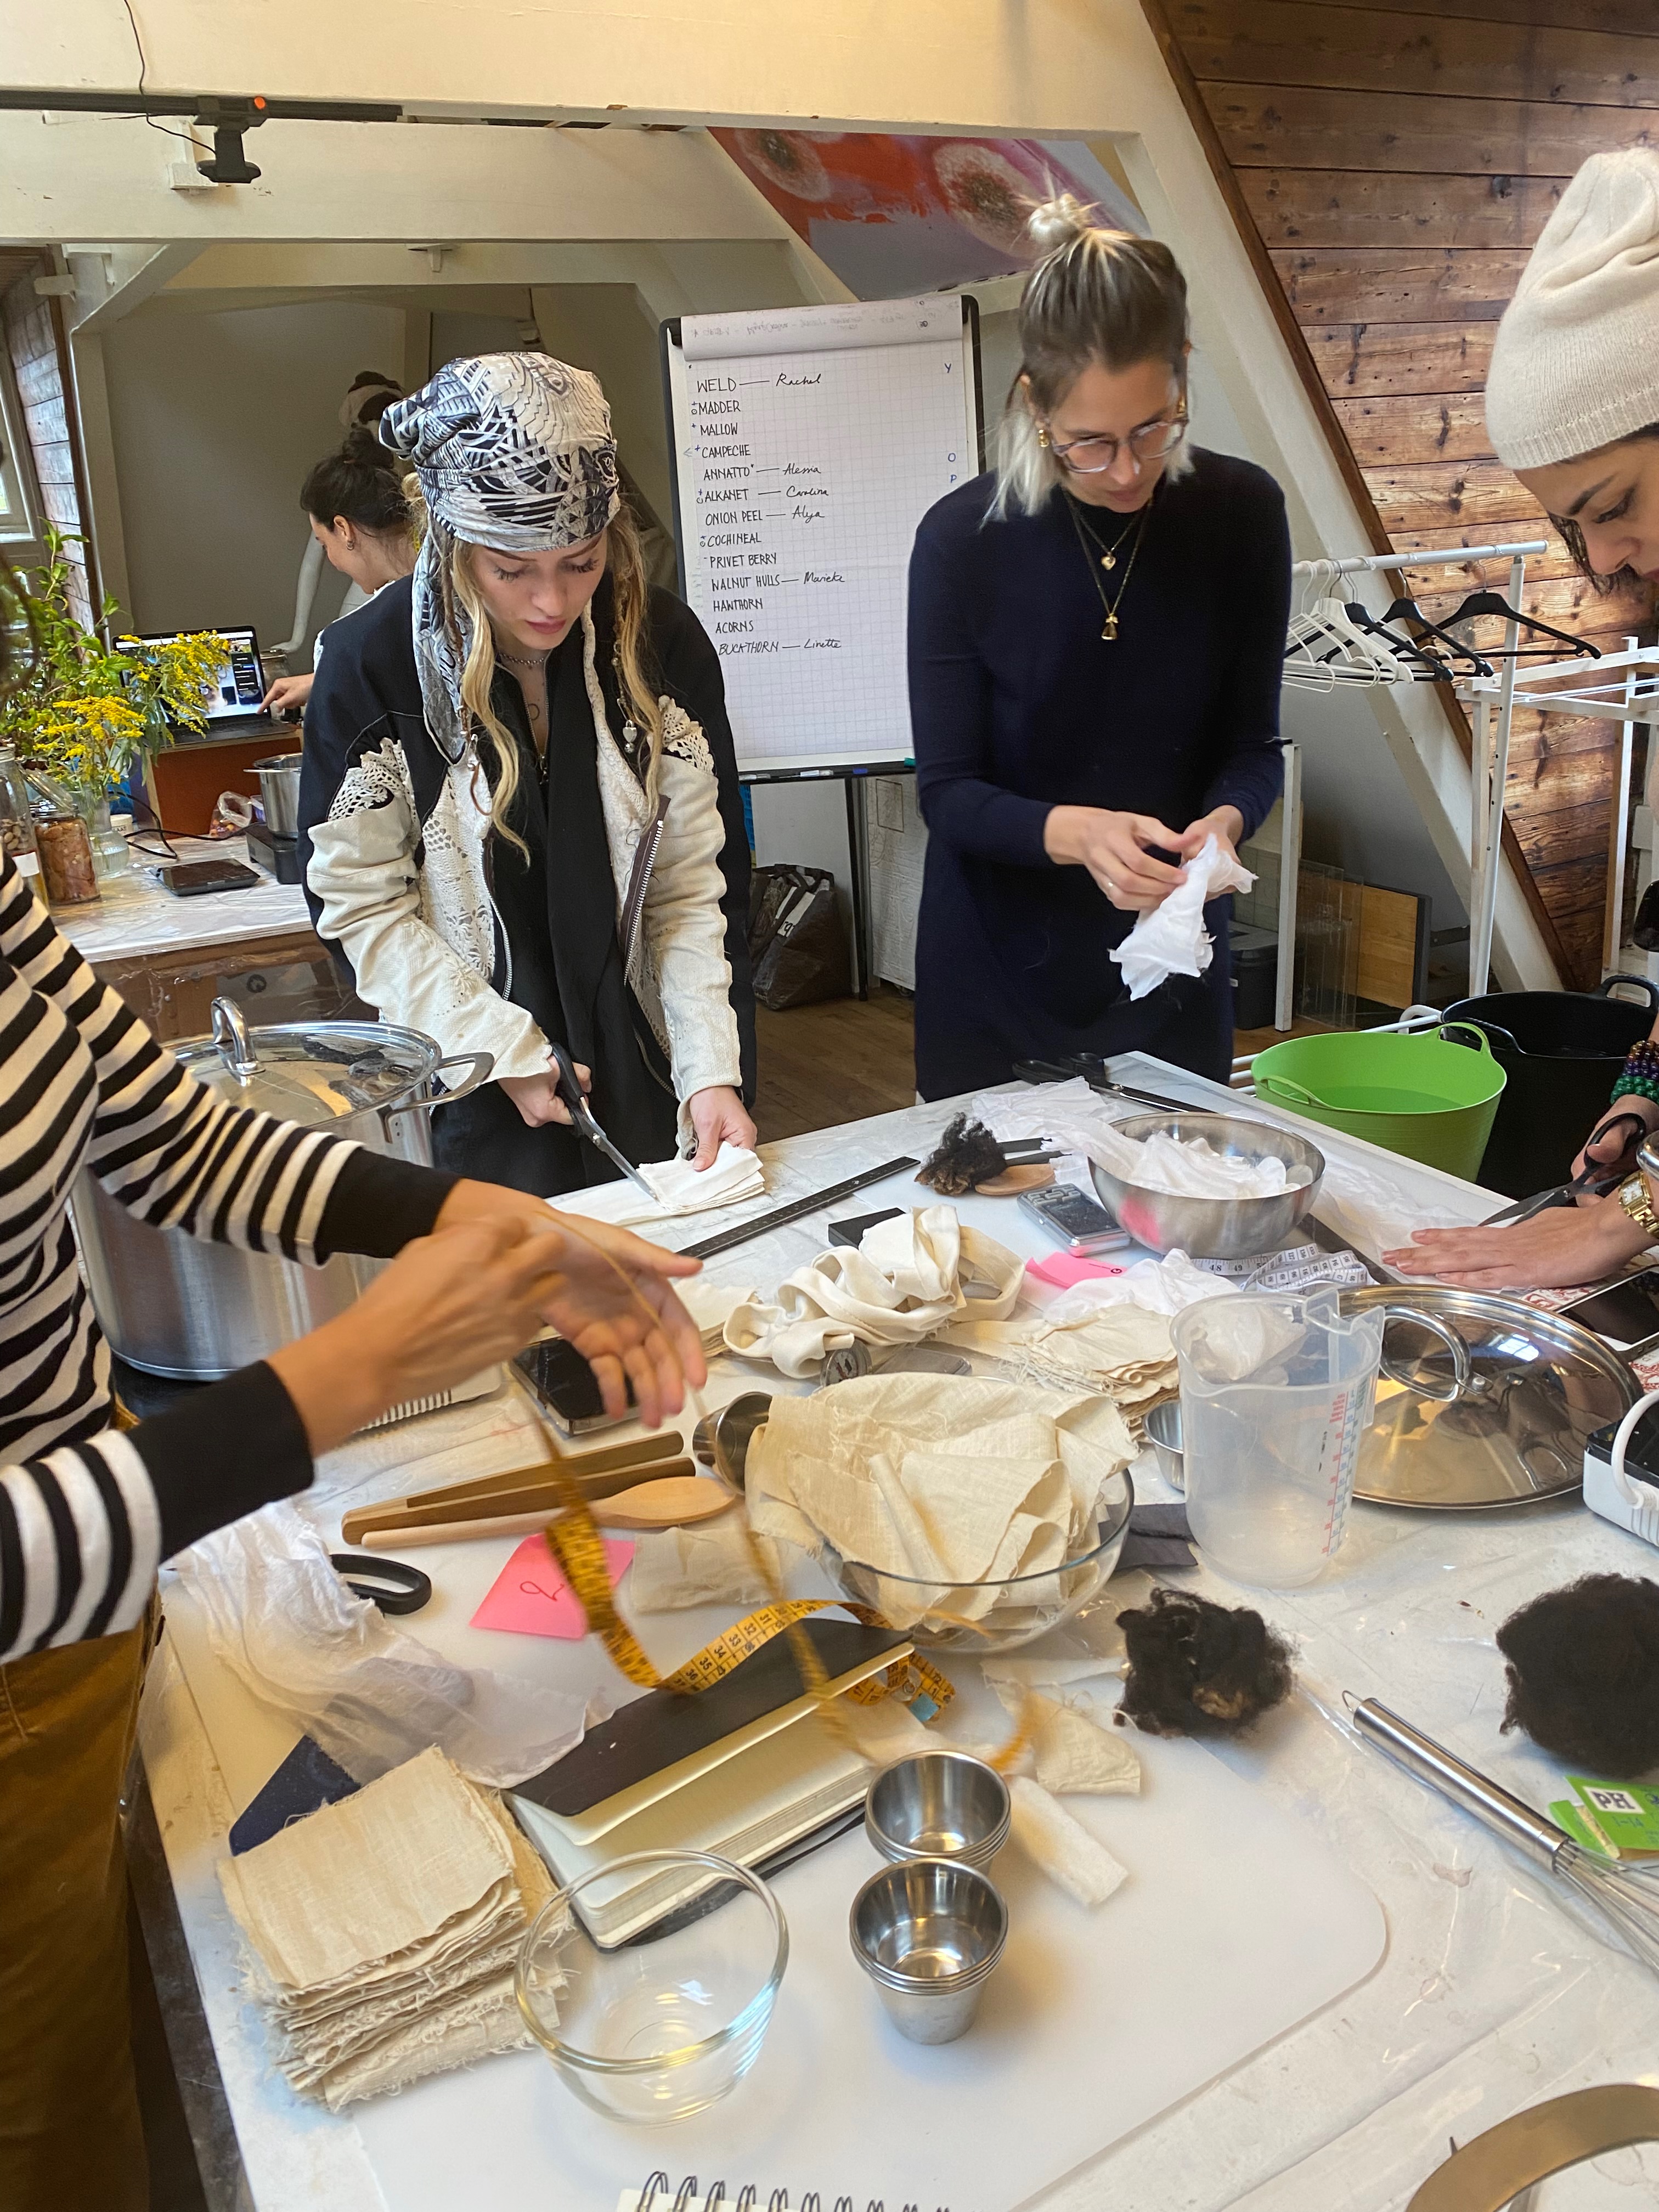
Dyeing the fabric on our own
We seperated the fibres so that everyone had 7 squares of each fabric. Each of these bundles weighed 90 gram. We all choose a dyestuff to work with:
- Weld - Rachel
- Annatto - Alessia
- Alkanet - Carolina
- Onion peel - Alya
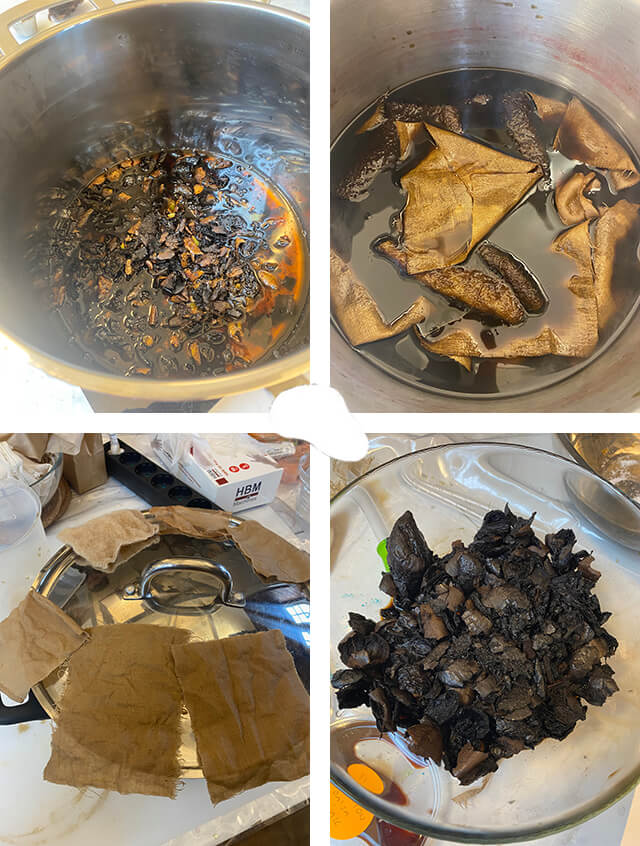
- Walnut hulls - Marieke
- Buckthorn - Linette
For my walnut hulls, I used the recipe for Turkey oak and akorn caps.
Photos by Marieke van Eyndhoven
My dyestuff:
- Name: wallnut hulls
- Biochrome: juglone (5-hydroxy-1,4-naphthalenedione)
- Origin: garden Marieke, Lopikerkapel
- Date: 12/10/2022
My fabrics:
- Unbleached linen (UL)
- Bleached linen (BL)
- Cotton twill (CT)
- Organic stretch jersey (OJ)
- Silk (S)
- Wool (W)
My recipe:
- Amount: 135 gram walnut hull, chopped and grinded
- Vehicle: water
- Dyeing time: base dye - 1 hour | overdye - overnight rest in bath
- Modifier 1: 5 minute dip in acidic pH modifier, citric acid solution
- Modifier 2: 5 minute dip in alkaline pH modifier, soda ash solution
- Modifier 3: 5 minute dip in copper water solution
- Modifier 4: 5 minute dip in iron water solution
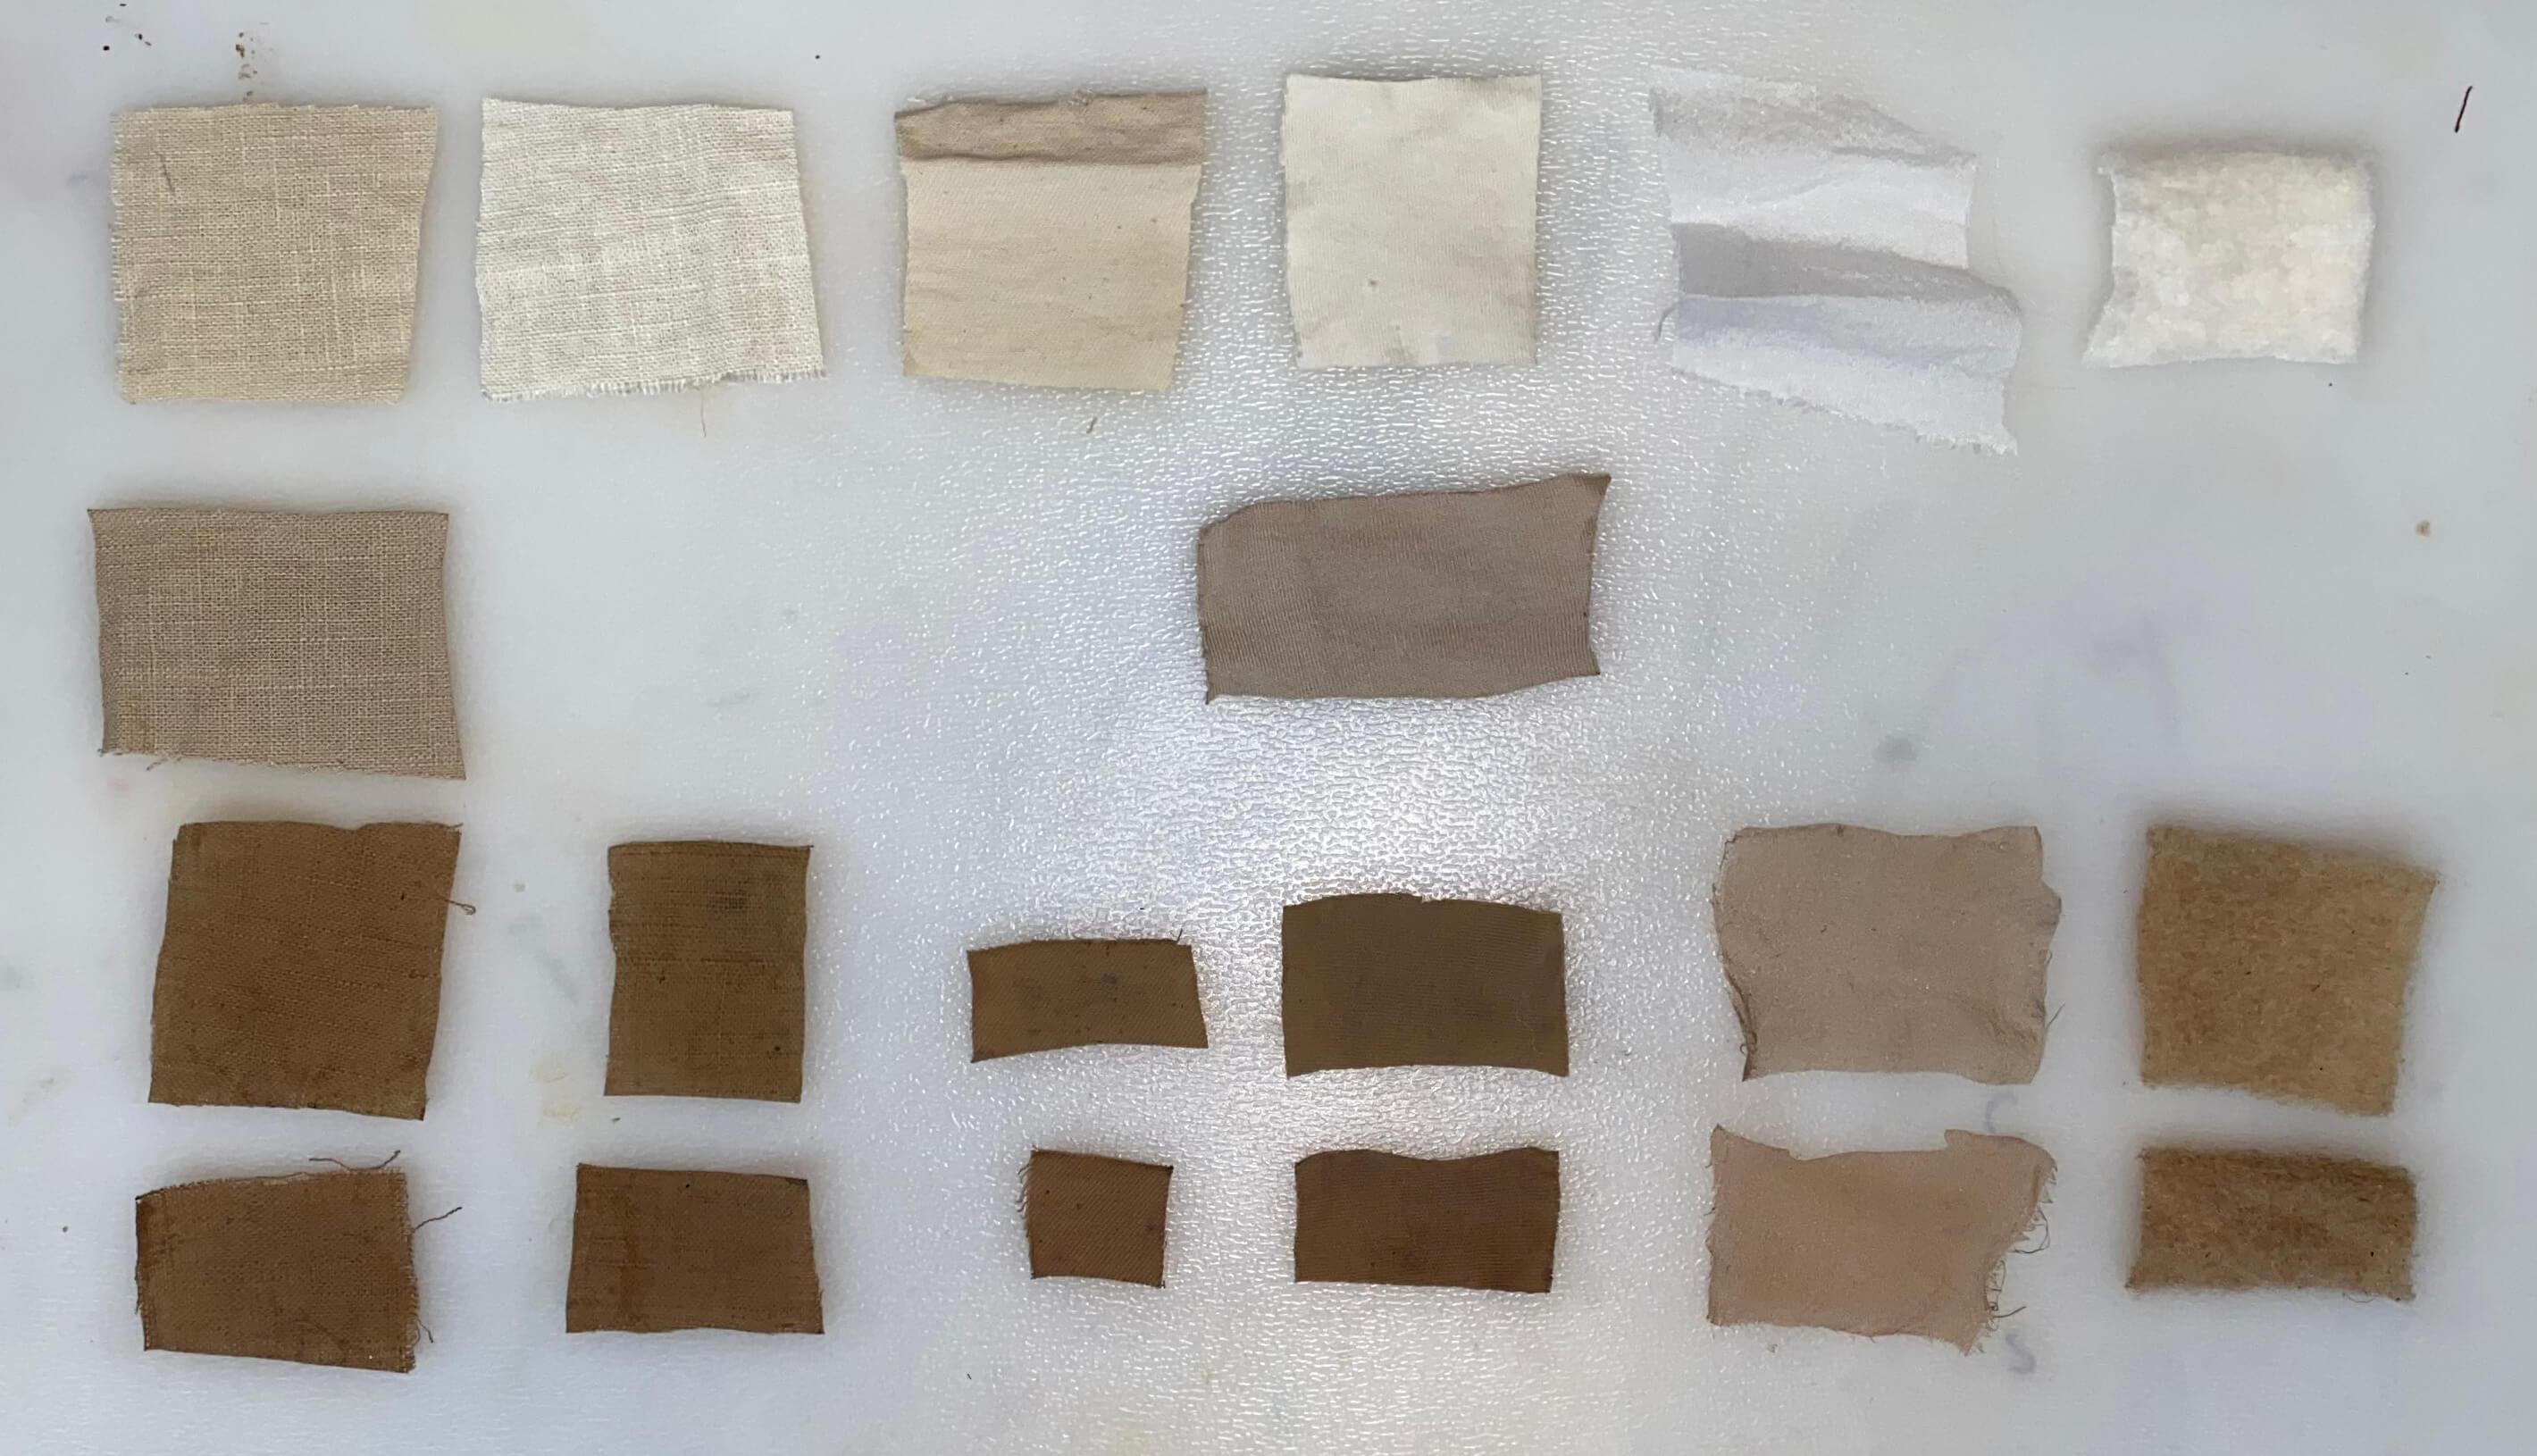
Photo by Marieke van Eyndhoven
From l-to-r: UL, BL, CT, OJ, S, W
First row: undyed fabric
Second row: base dye on unmordanted fabric
Third row: base dye on mordanted fabric
Fourth row: overnight dye on mordanted fabric
It is very clear that the unmordanted fabric was lighter in color than the mordanted fabrics. The overnight dye did not do much for deepening the color.
Modifying
I started playing with the base dye squares by dipping them in several modifiers.
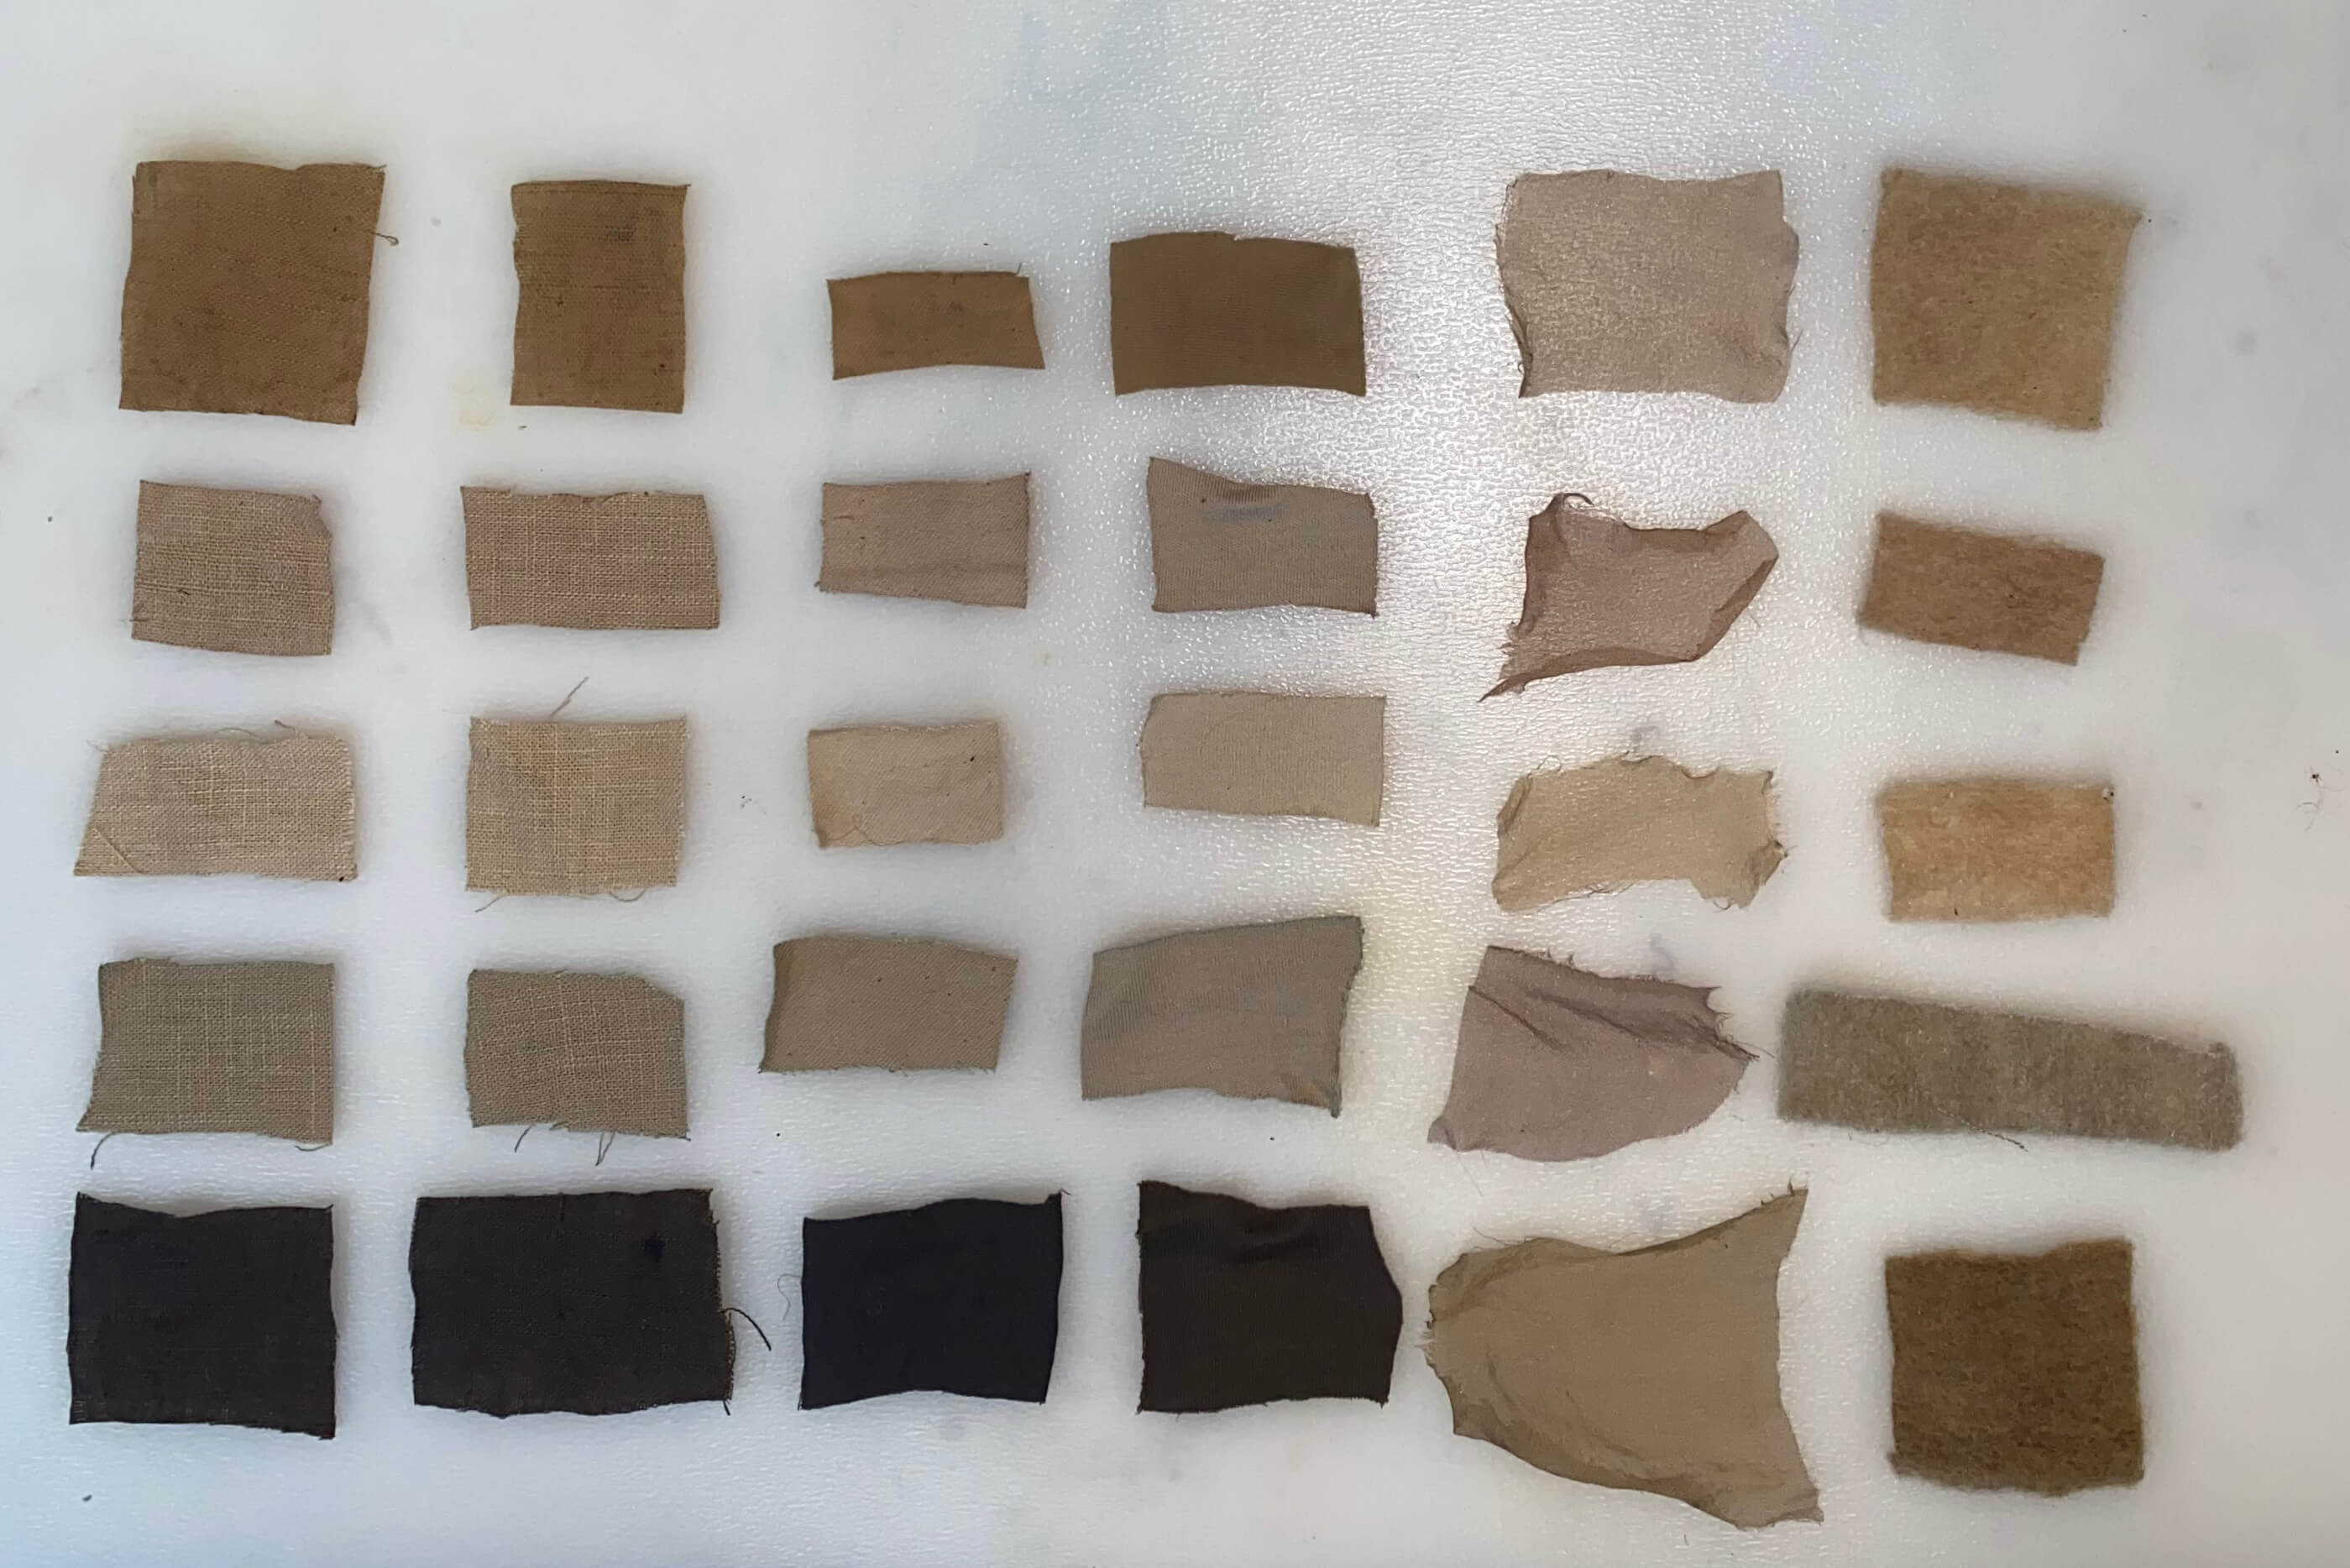
Photo by Marieke van Eyndhoven
From l-to-r: UL, BL, CT, OJ, S, W
First row: base dye on mordanted fabric
Second row: alkaline modified
Third row: acidic modified
Fourth row: copper modified
Fifth row: iron modified
Cecilia had warned me that walnut hull dye is not really sensitive to pH changes. And she was mostly right. The alkaline modified squares had a slightly more reddish hue, and the acidic modified ones a slightly more orangy hue. But you had to take a very good look for noticing that. The squares I dipped in the copper solution took on a modest green-grey hue. Only the squares that I dipped in the iron solution changed their colors dramatically and became dark grey-black.
I was a bit envious of the other girls since their experiments with the pH modifiers gave wild results. So I enjoyed the show Cecilia gave with alkanet. From blue to red to blue to red. And with campeche going from deep yellow to bright fuchsia. And all by playing with the pH.
Cecilia showing pH sensitivity
Get the best of iron
I was curious to see if I could further deepen the color with the iron modifier. So I did two more experiments:
- I dipped the overdyedd squares for 5 minutes in the iron solution.
- I cooked the base dye squares for 1 hour in part of the dye bath to which I added 15 ml of iron solution.
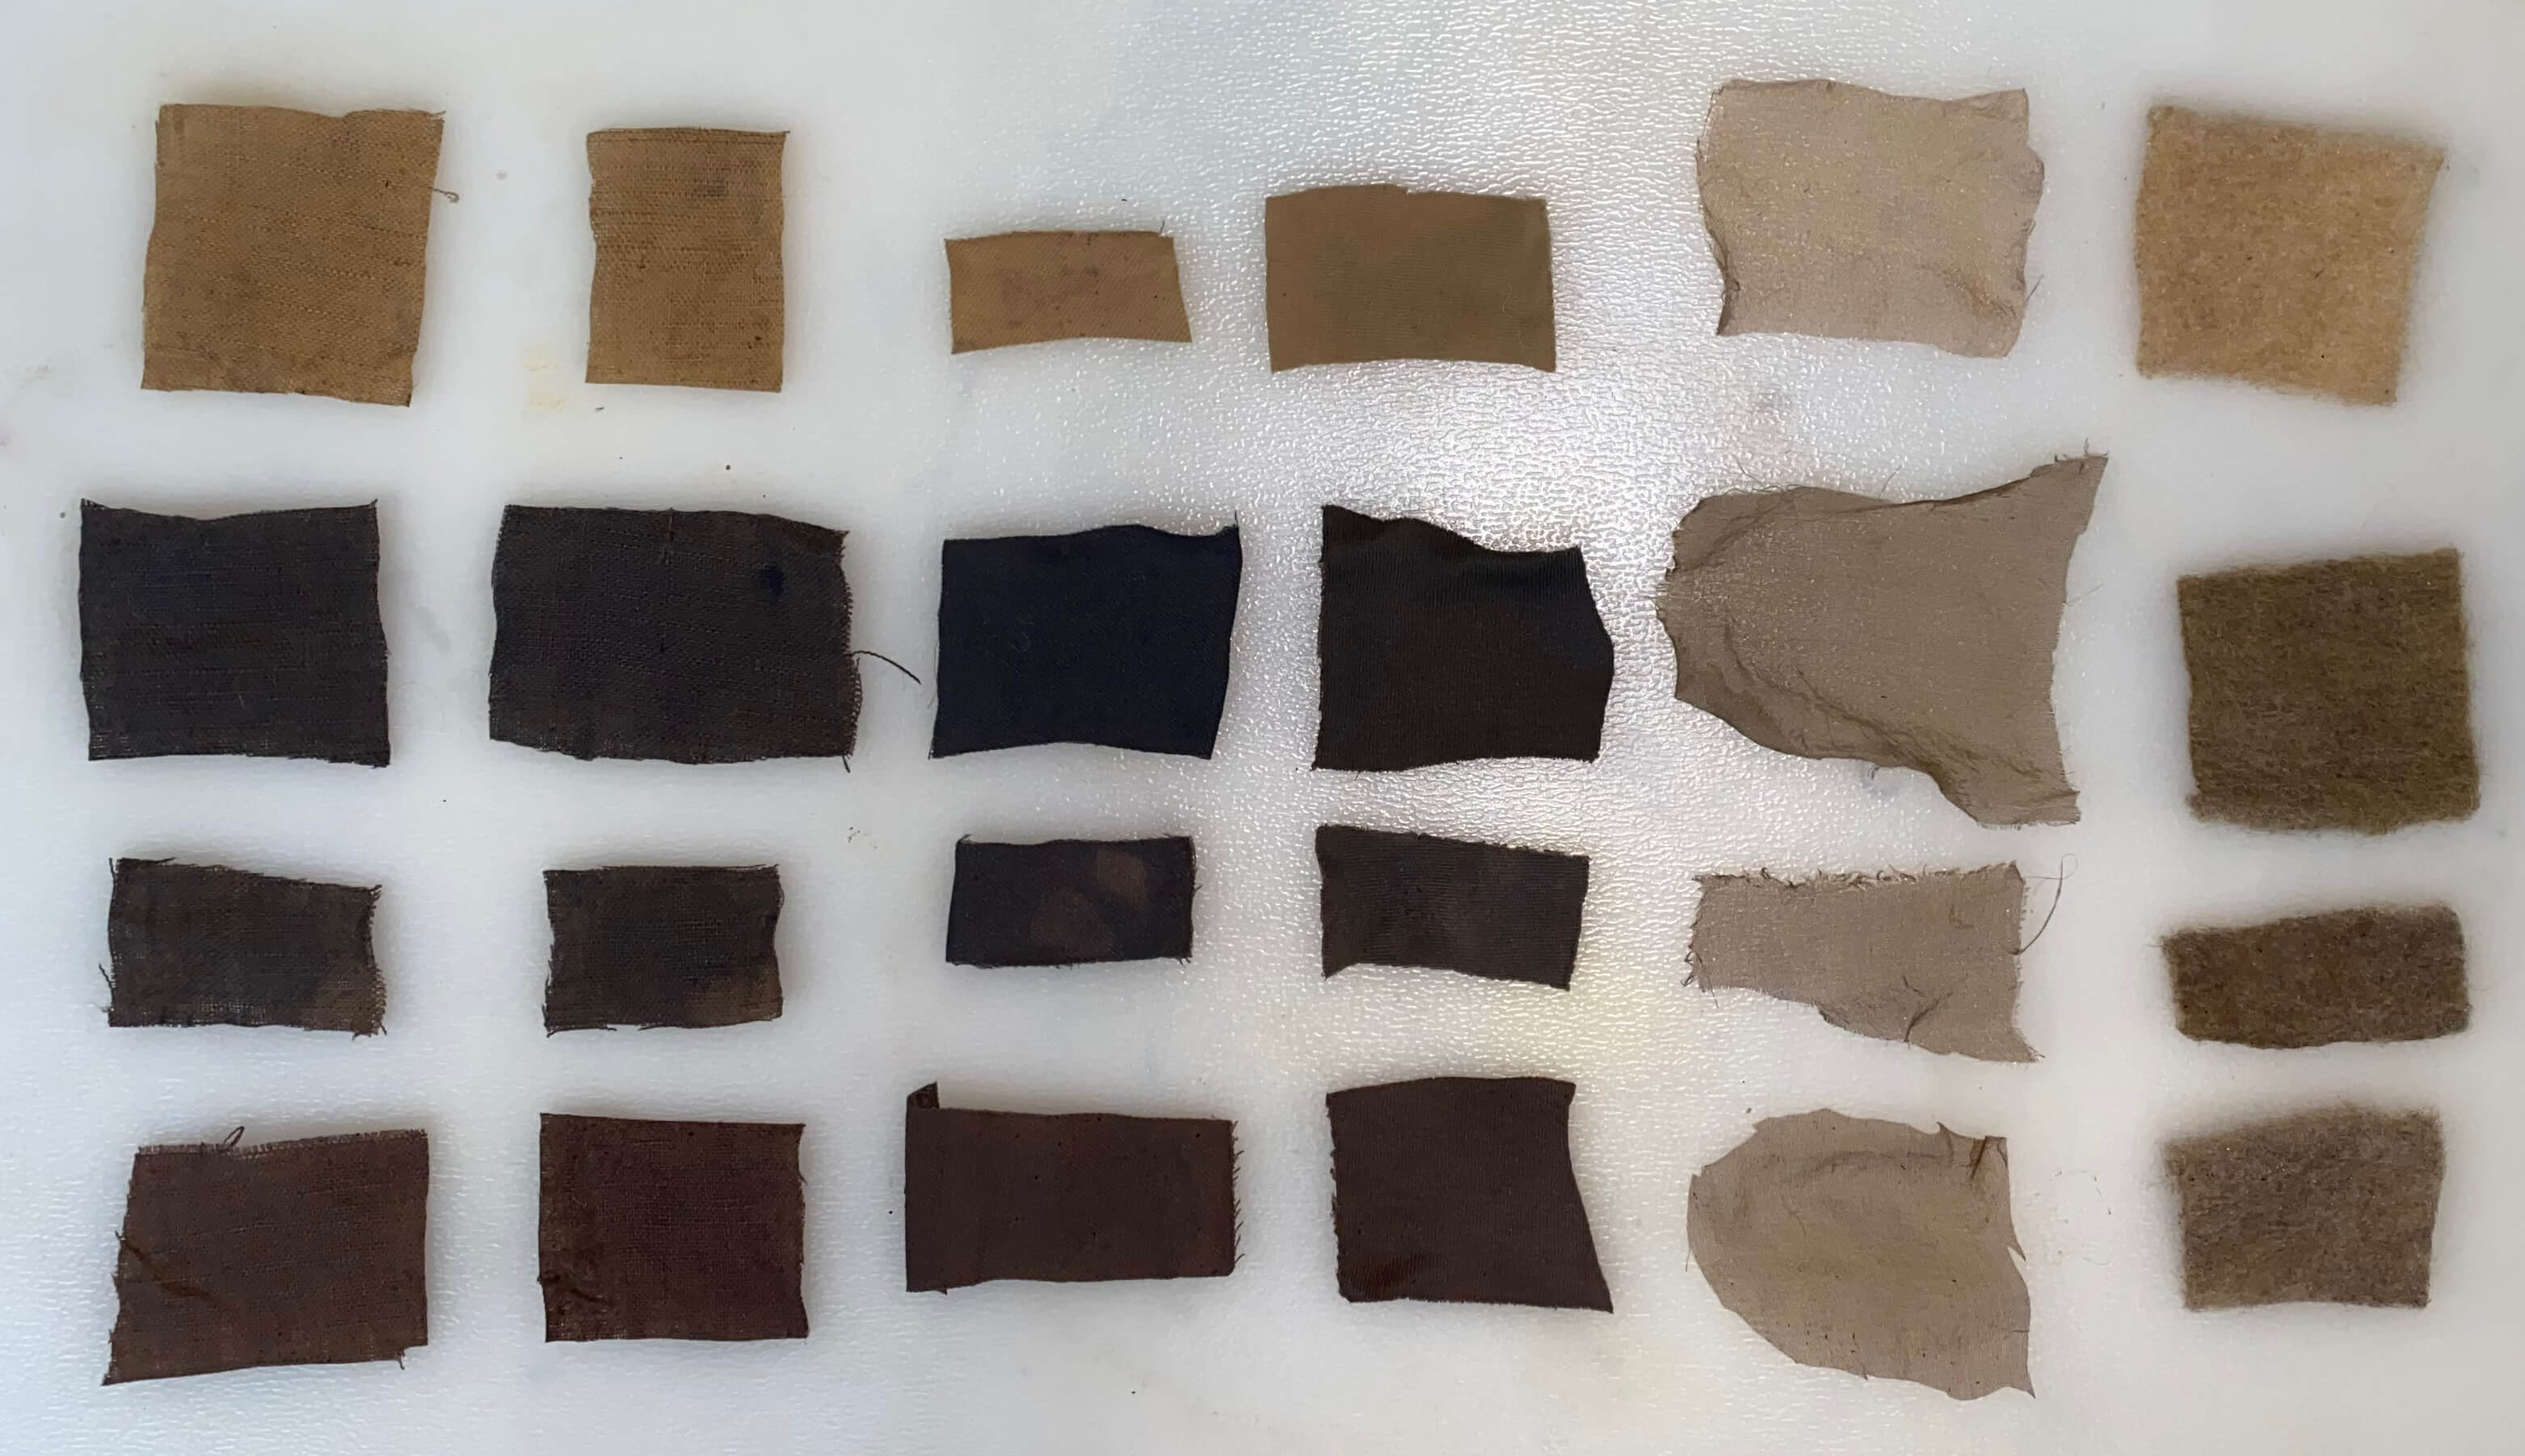
Photo by Marieke van Eyndhoven
From l-to-r: UL, BL, CT, OJ, S, W
First row: base dye on mordanted fabric
Second row: base dye, iron modified
Third row: overdyed, iron modified
Fourth row: cooked in the dye bath enriched with iron solution
It is hard to see, but where the base dye dipped in iron gave a solid dark grey-black colour, the overdyed squares after an iron dip became lighter and spotty. But the base dye squares I cooked for an hour in the dye bath enriched with iron solution surprisingly lost their dark grey-black color and took on a deep chocolate brown hue.
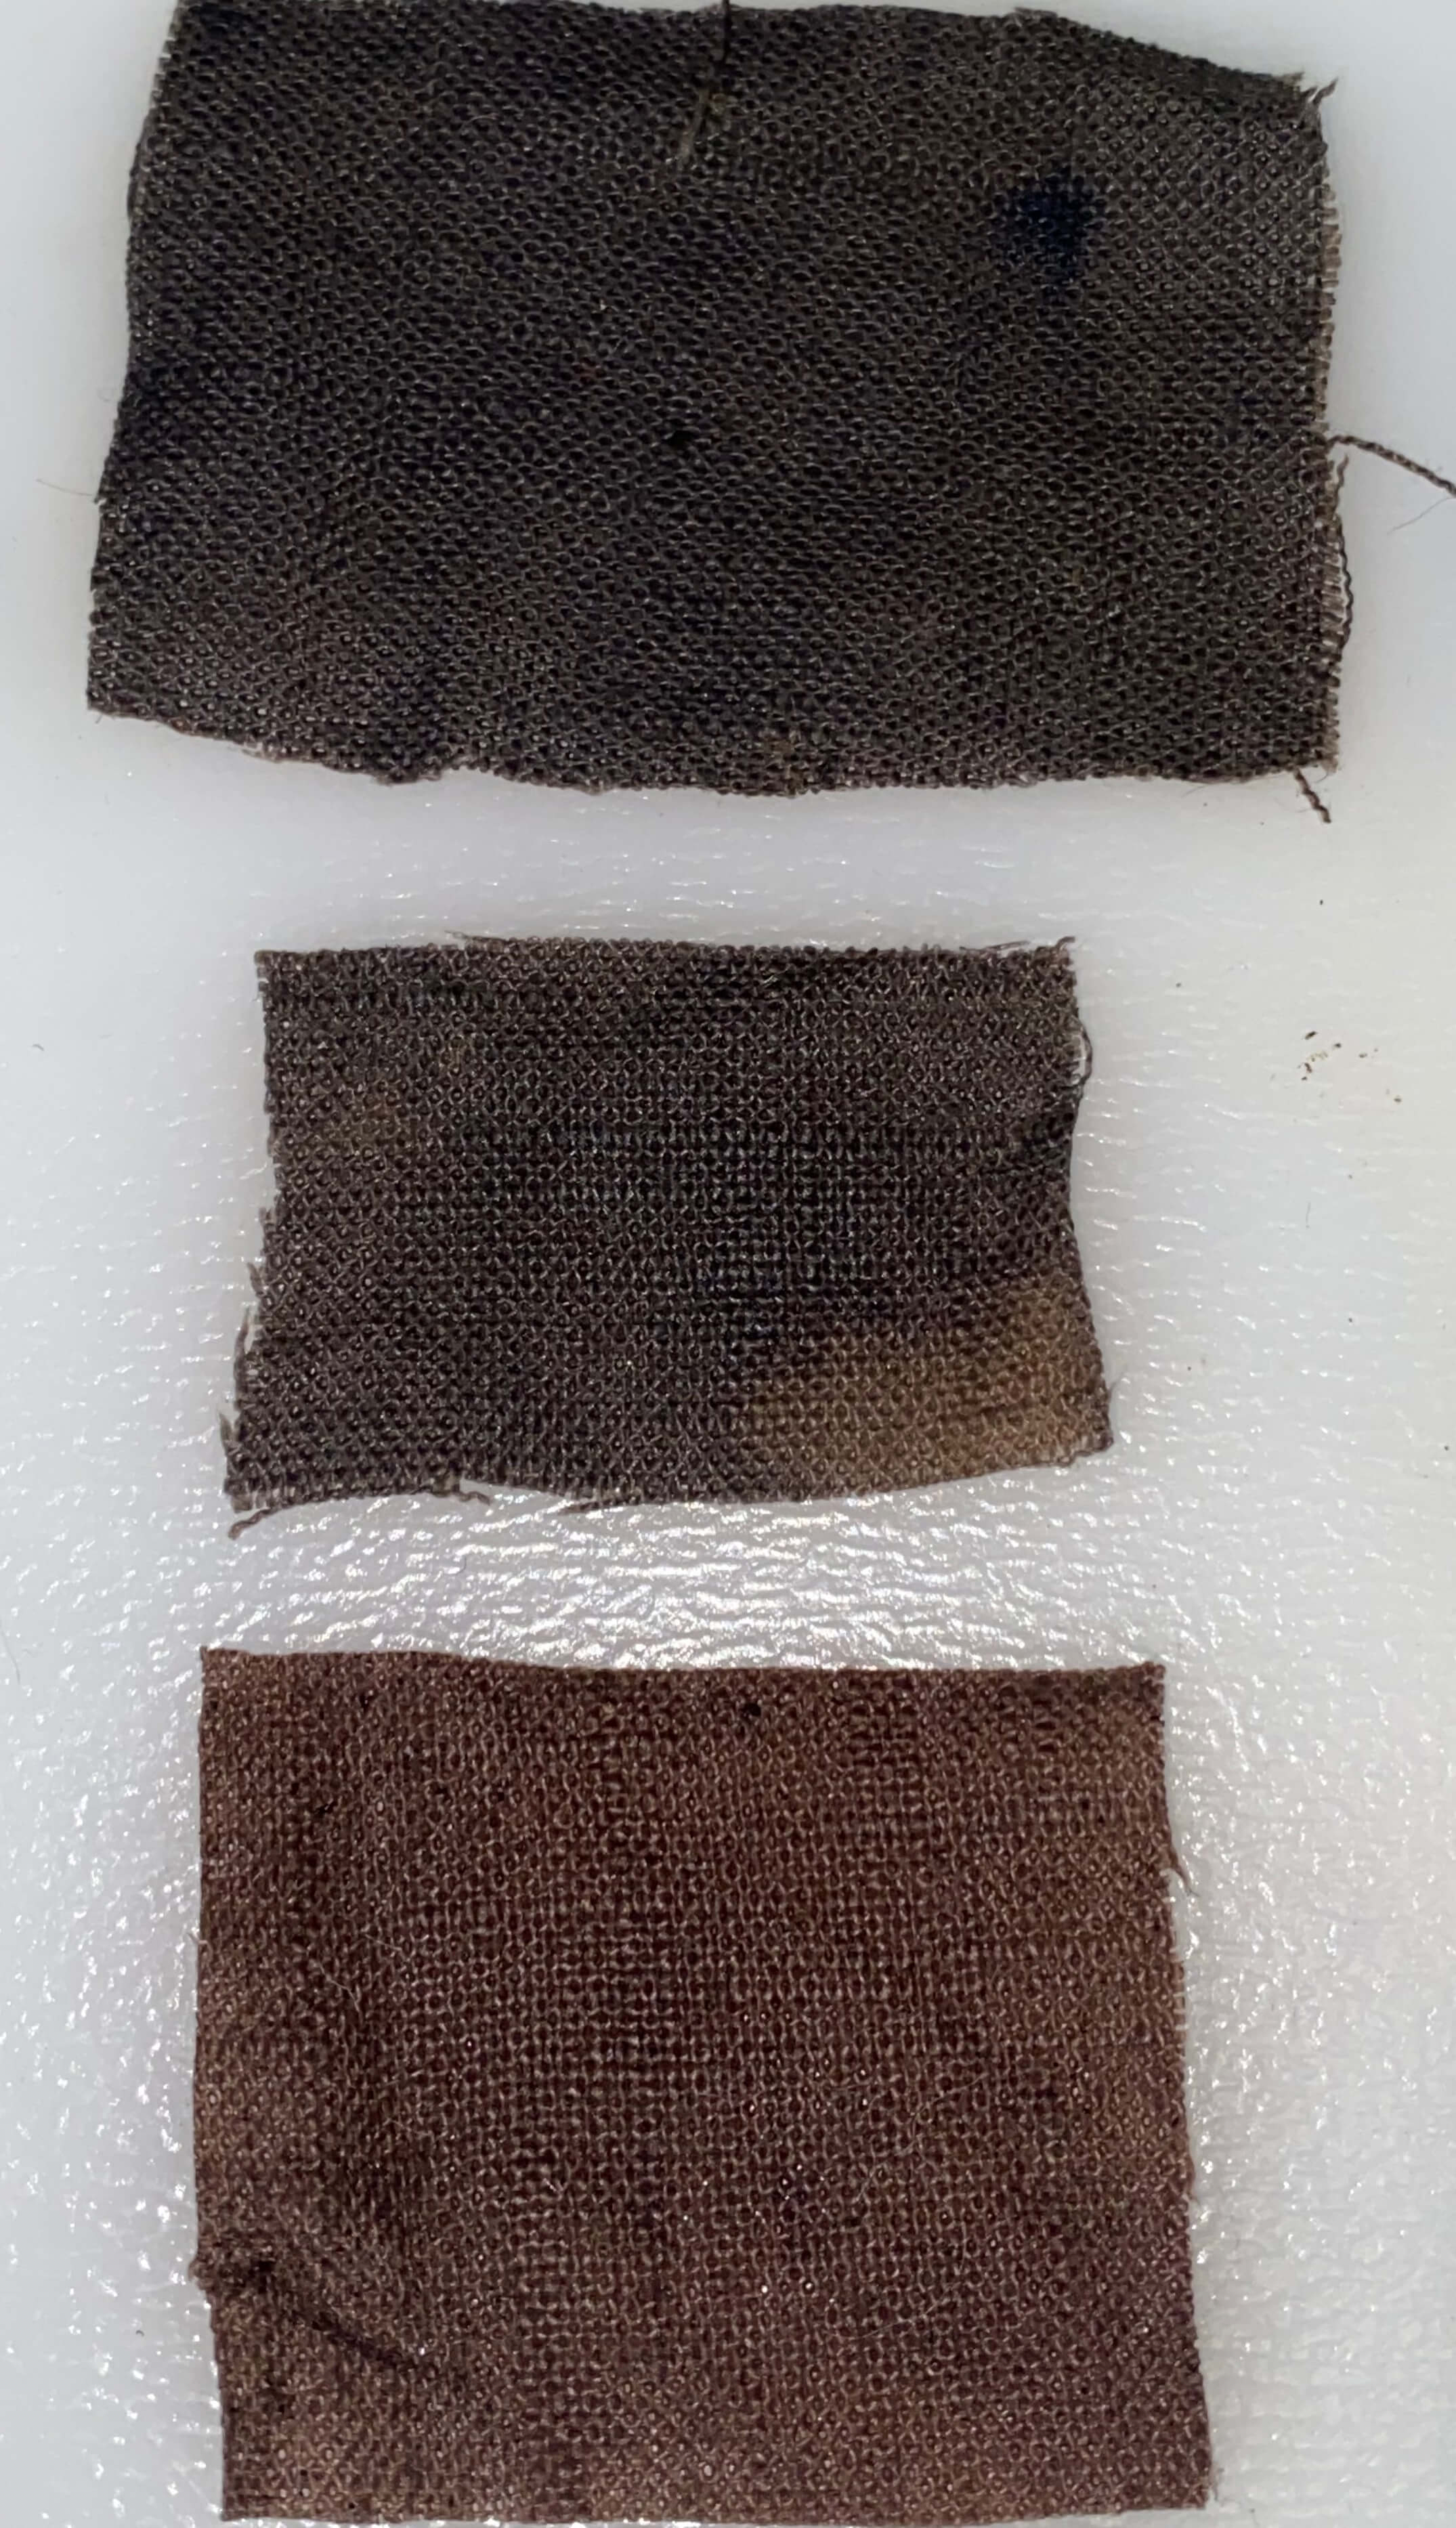
Photo by Marieke van Eyndhoven
First row: base dye, iron modified
Second row: overdyed, iron modified
Third row: cooked in the dye bath enriched with iron solution
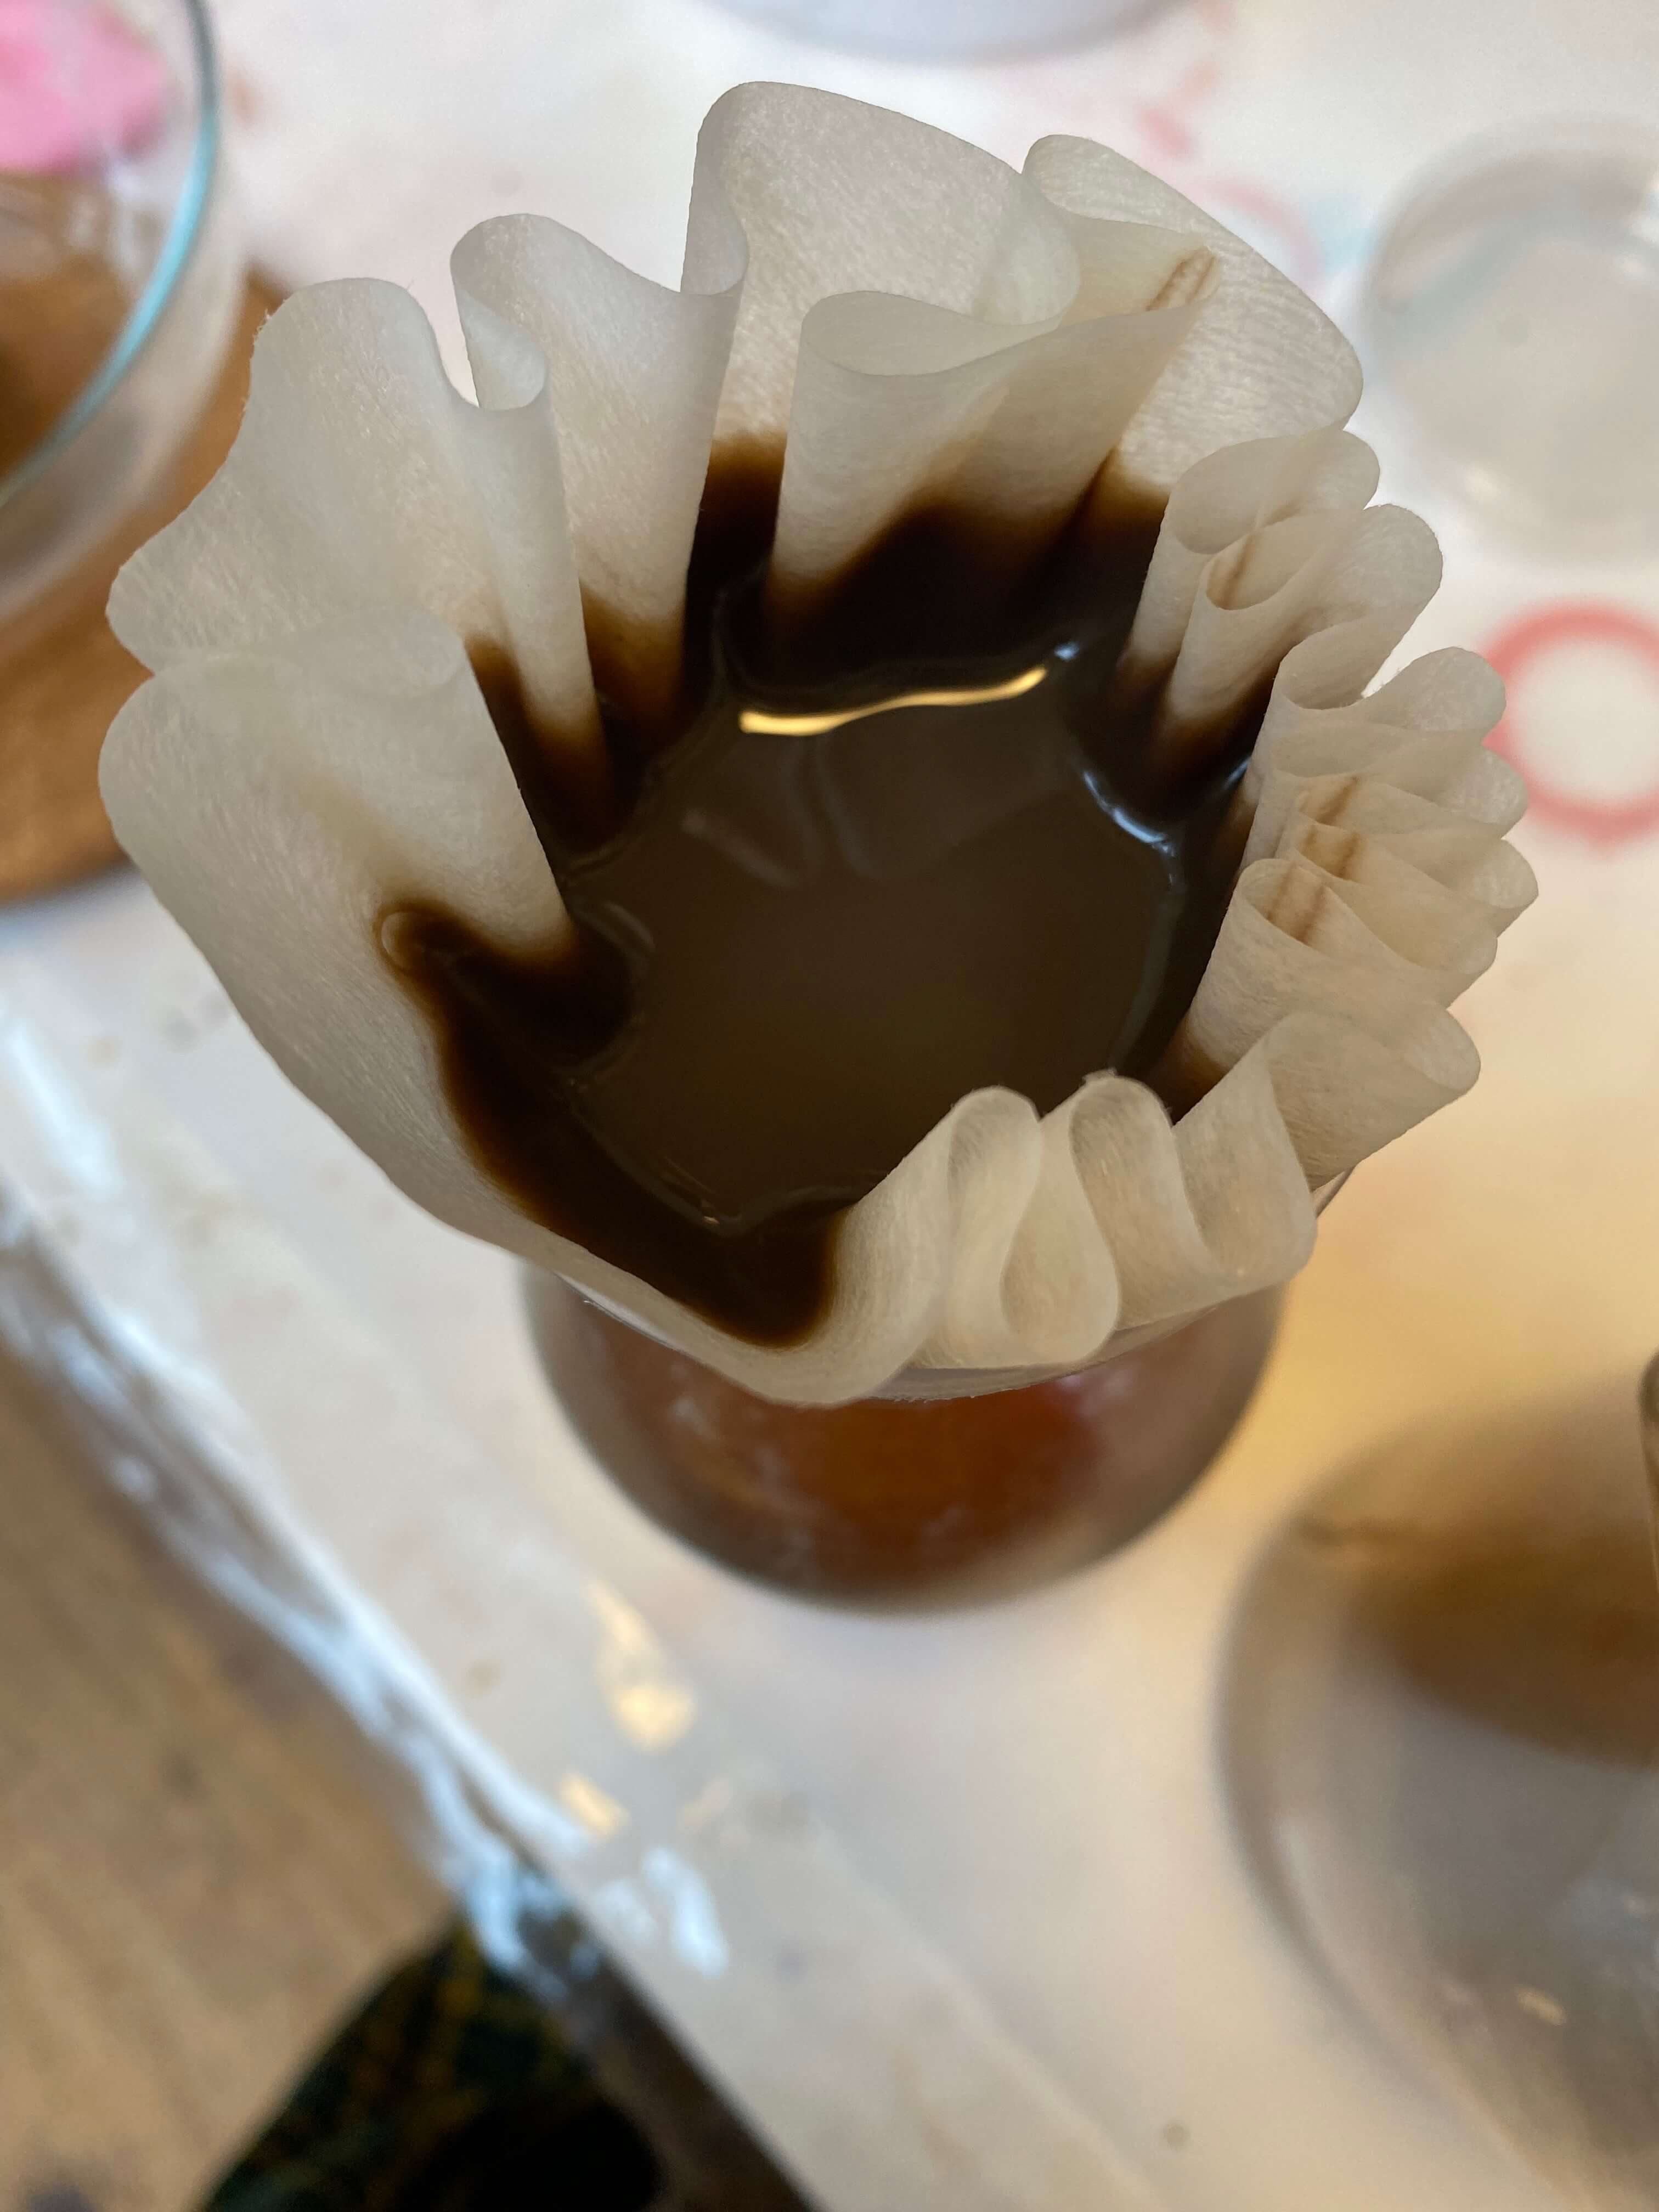
Making ink
From several dye bathes I took a small amount and boiled down the dye liquid till it became thick enough. That was all it took to make ink. Not from all dye bath you can make the water-based inks. Some dyestuff need ethanol as vehicle. And some dyestuff cannot stand a high boiling temperature.
Photo by Marieke van Eyndhoven
Inks from left to right:
onion peel
walnut base dye
walnut base dye modified with copper
walnut base dye modified with iron
annatto
Experiment with tannin and casein
This summer, when preparing for my project idea, I found a treasure read on casein! A book from 1906 from Robert Scherer, titled Casein, Its Preparation and Technical Utilisation.2 In the book there are literally hundreds of recipes to make paint, binder, glue, adhesive, putty and plastic from casein. There was one exciting chapter in the book, stating that when you treat a casein paint layer with tannin, you get a water-resistant surface. Since walnut ink is rich in tannin, this was my chance to test this statement.
From an earlier experiment in the summer, I had some casein binder left. It is a colorless glue that dries in seconds.
I drew two rectangles on a piece of paper. The first rectangle on the left I filled in with walnut ink. In total I covered the rectangle with three layers of ink. The second rectangle on the right I first filled in with a layer of casein binder. Once dry, I overpainted this layer with the walnut ink. I repeated this process three times.
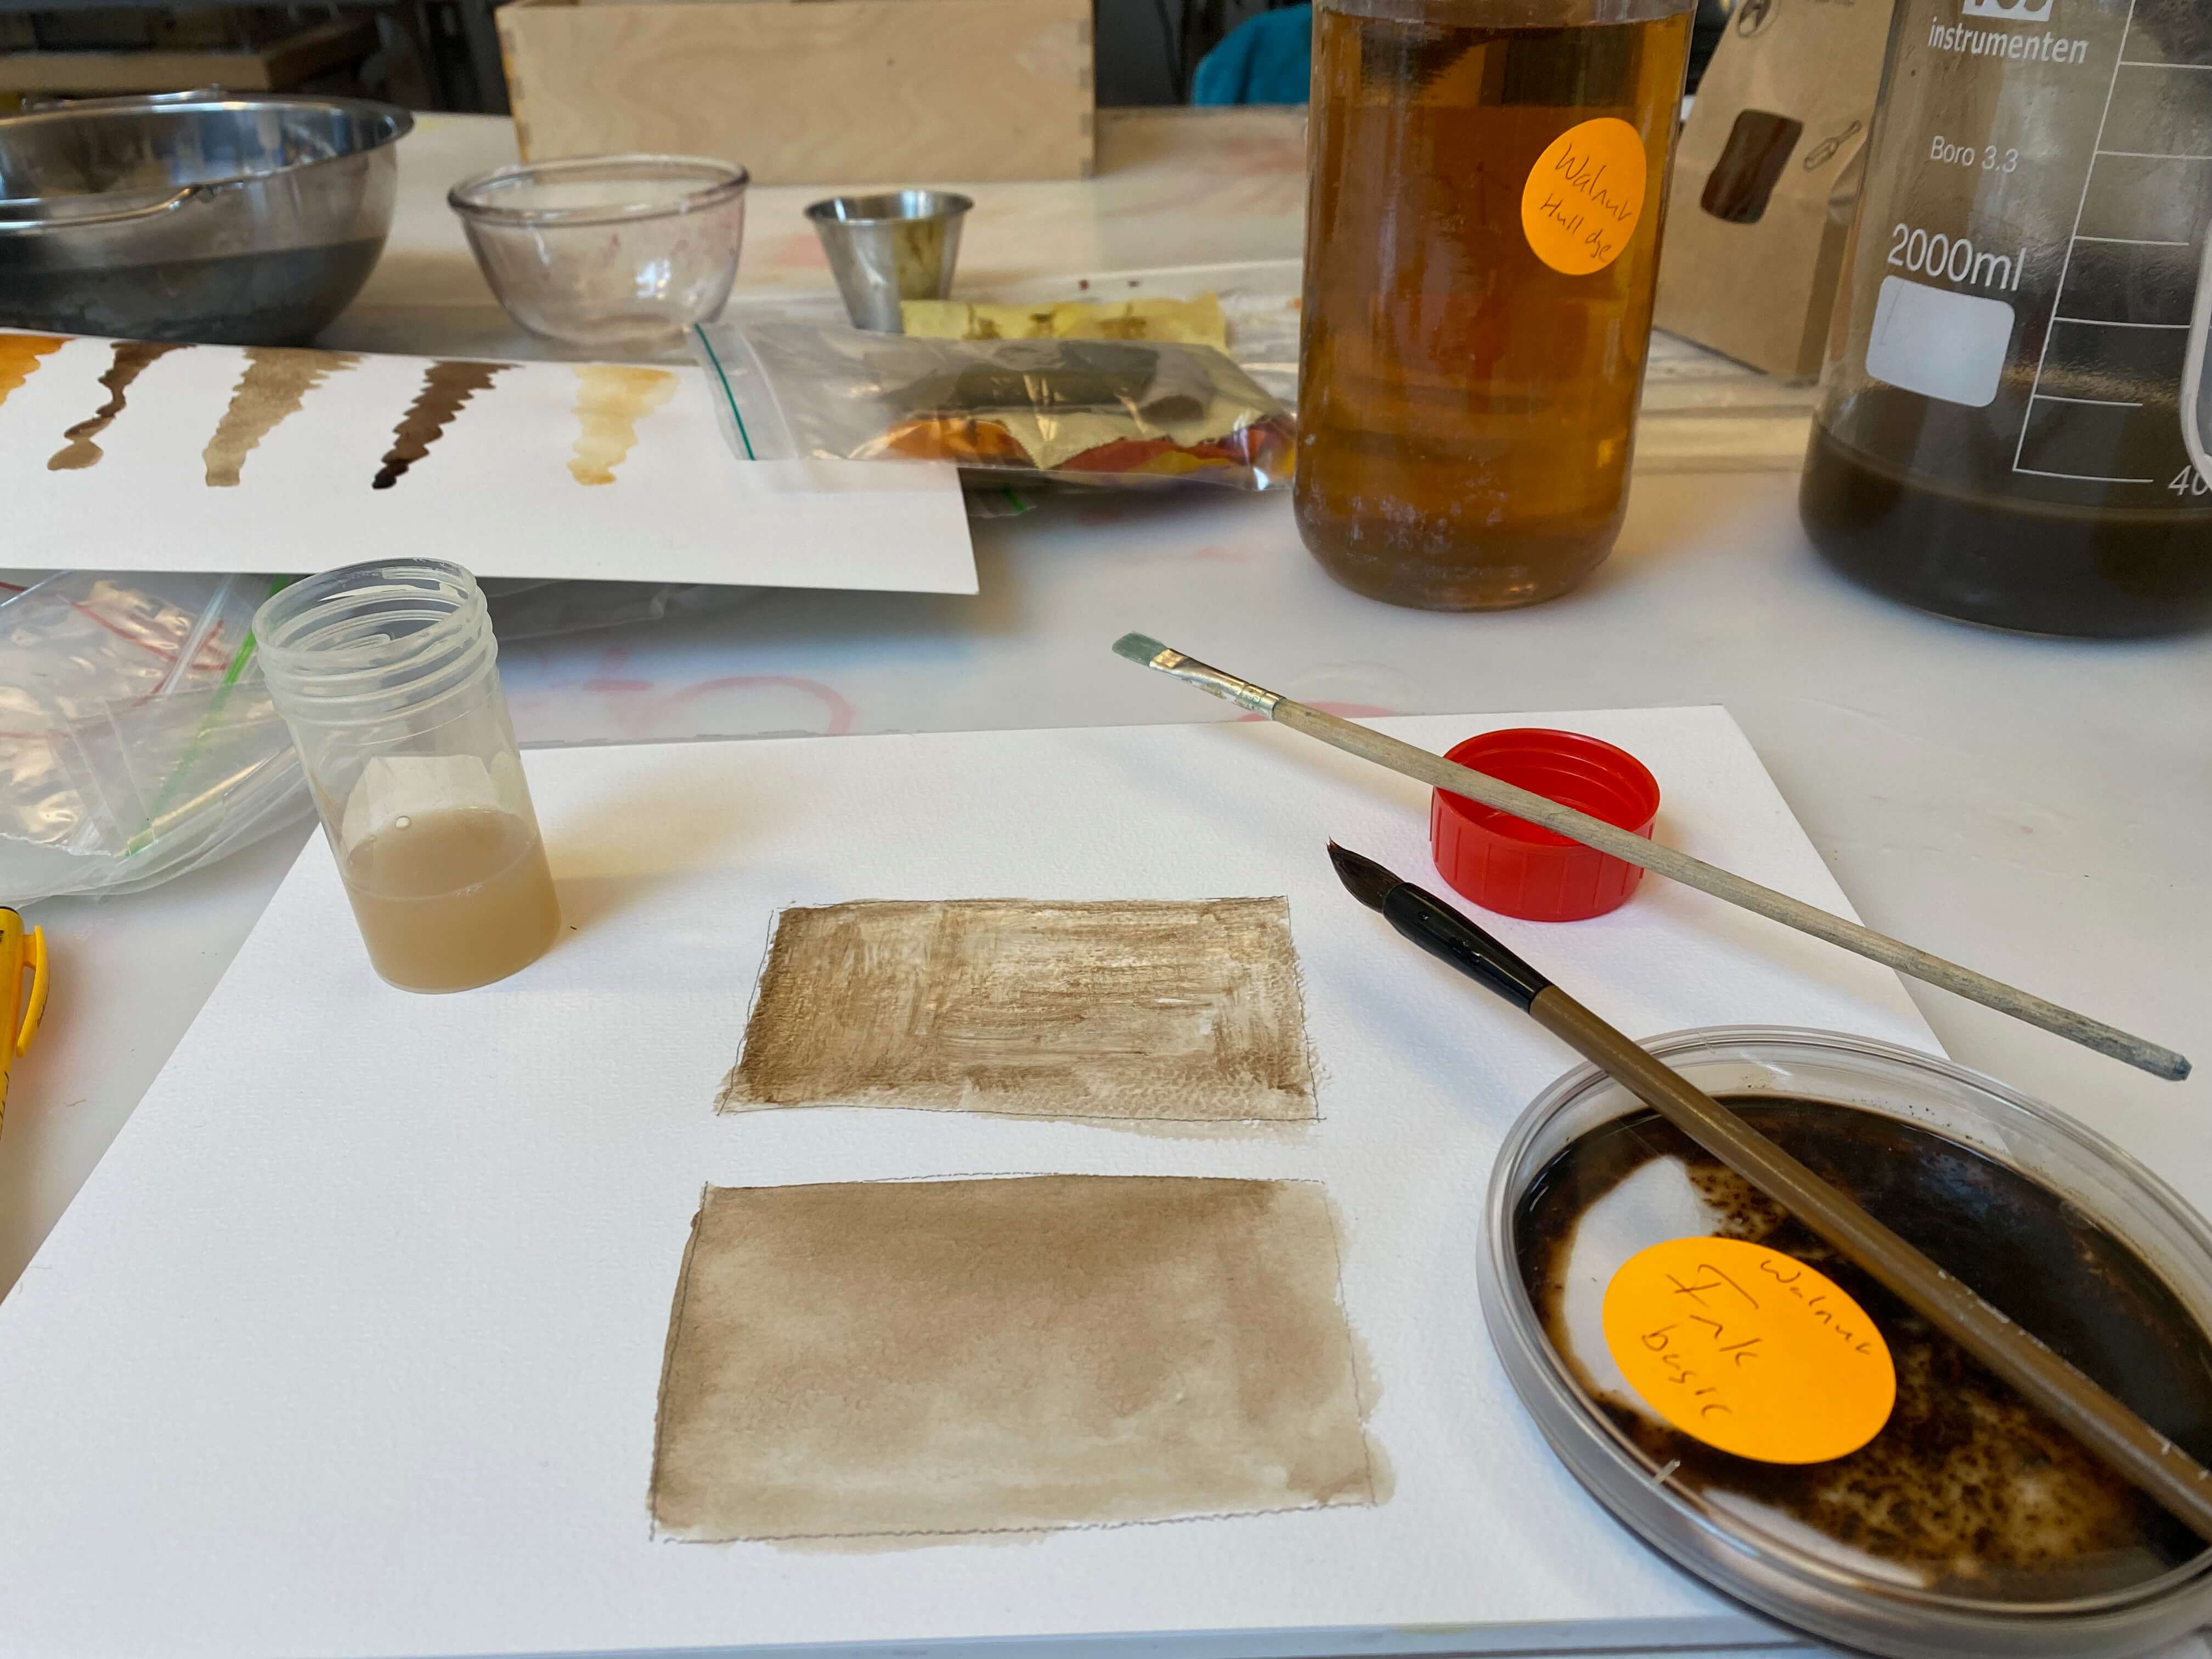
Photo by Marieke van Eyndhoven
Then came the moment of truth: the water test to see how water-resistant each of the surface layers was. I turned the paper in an angle of 45 degrees, and dripped water on each of the rectangles. And ...... the casein-tannin layer was clearly way more water-resistant than the ink-only layer.
This is an approach I could further optimize to use in my final project!
The water test, a succes!
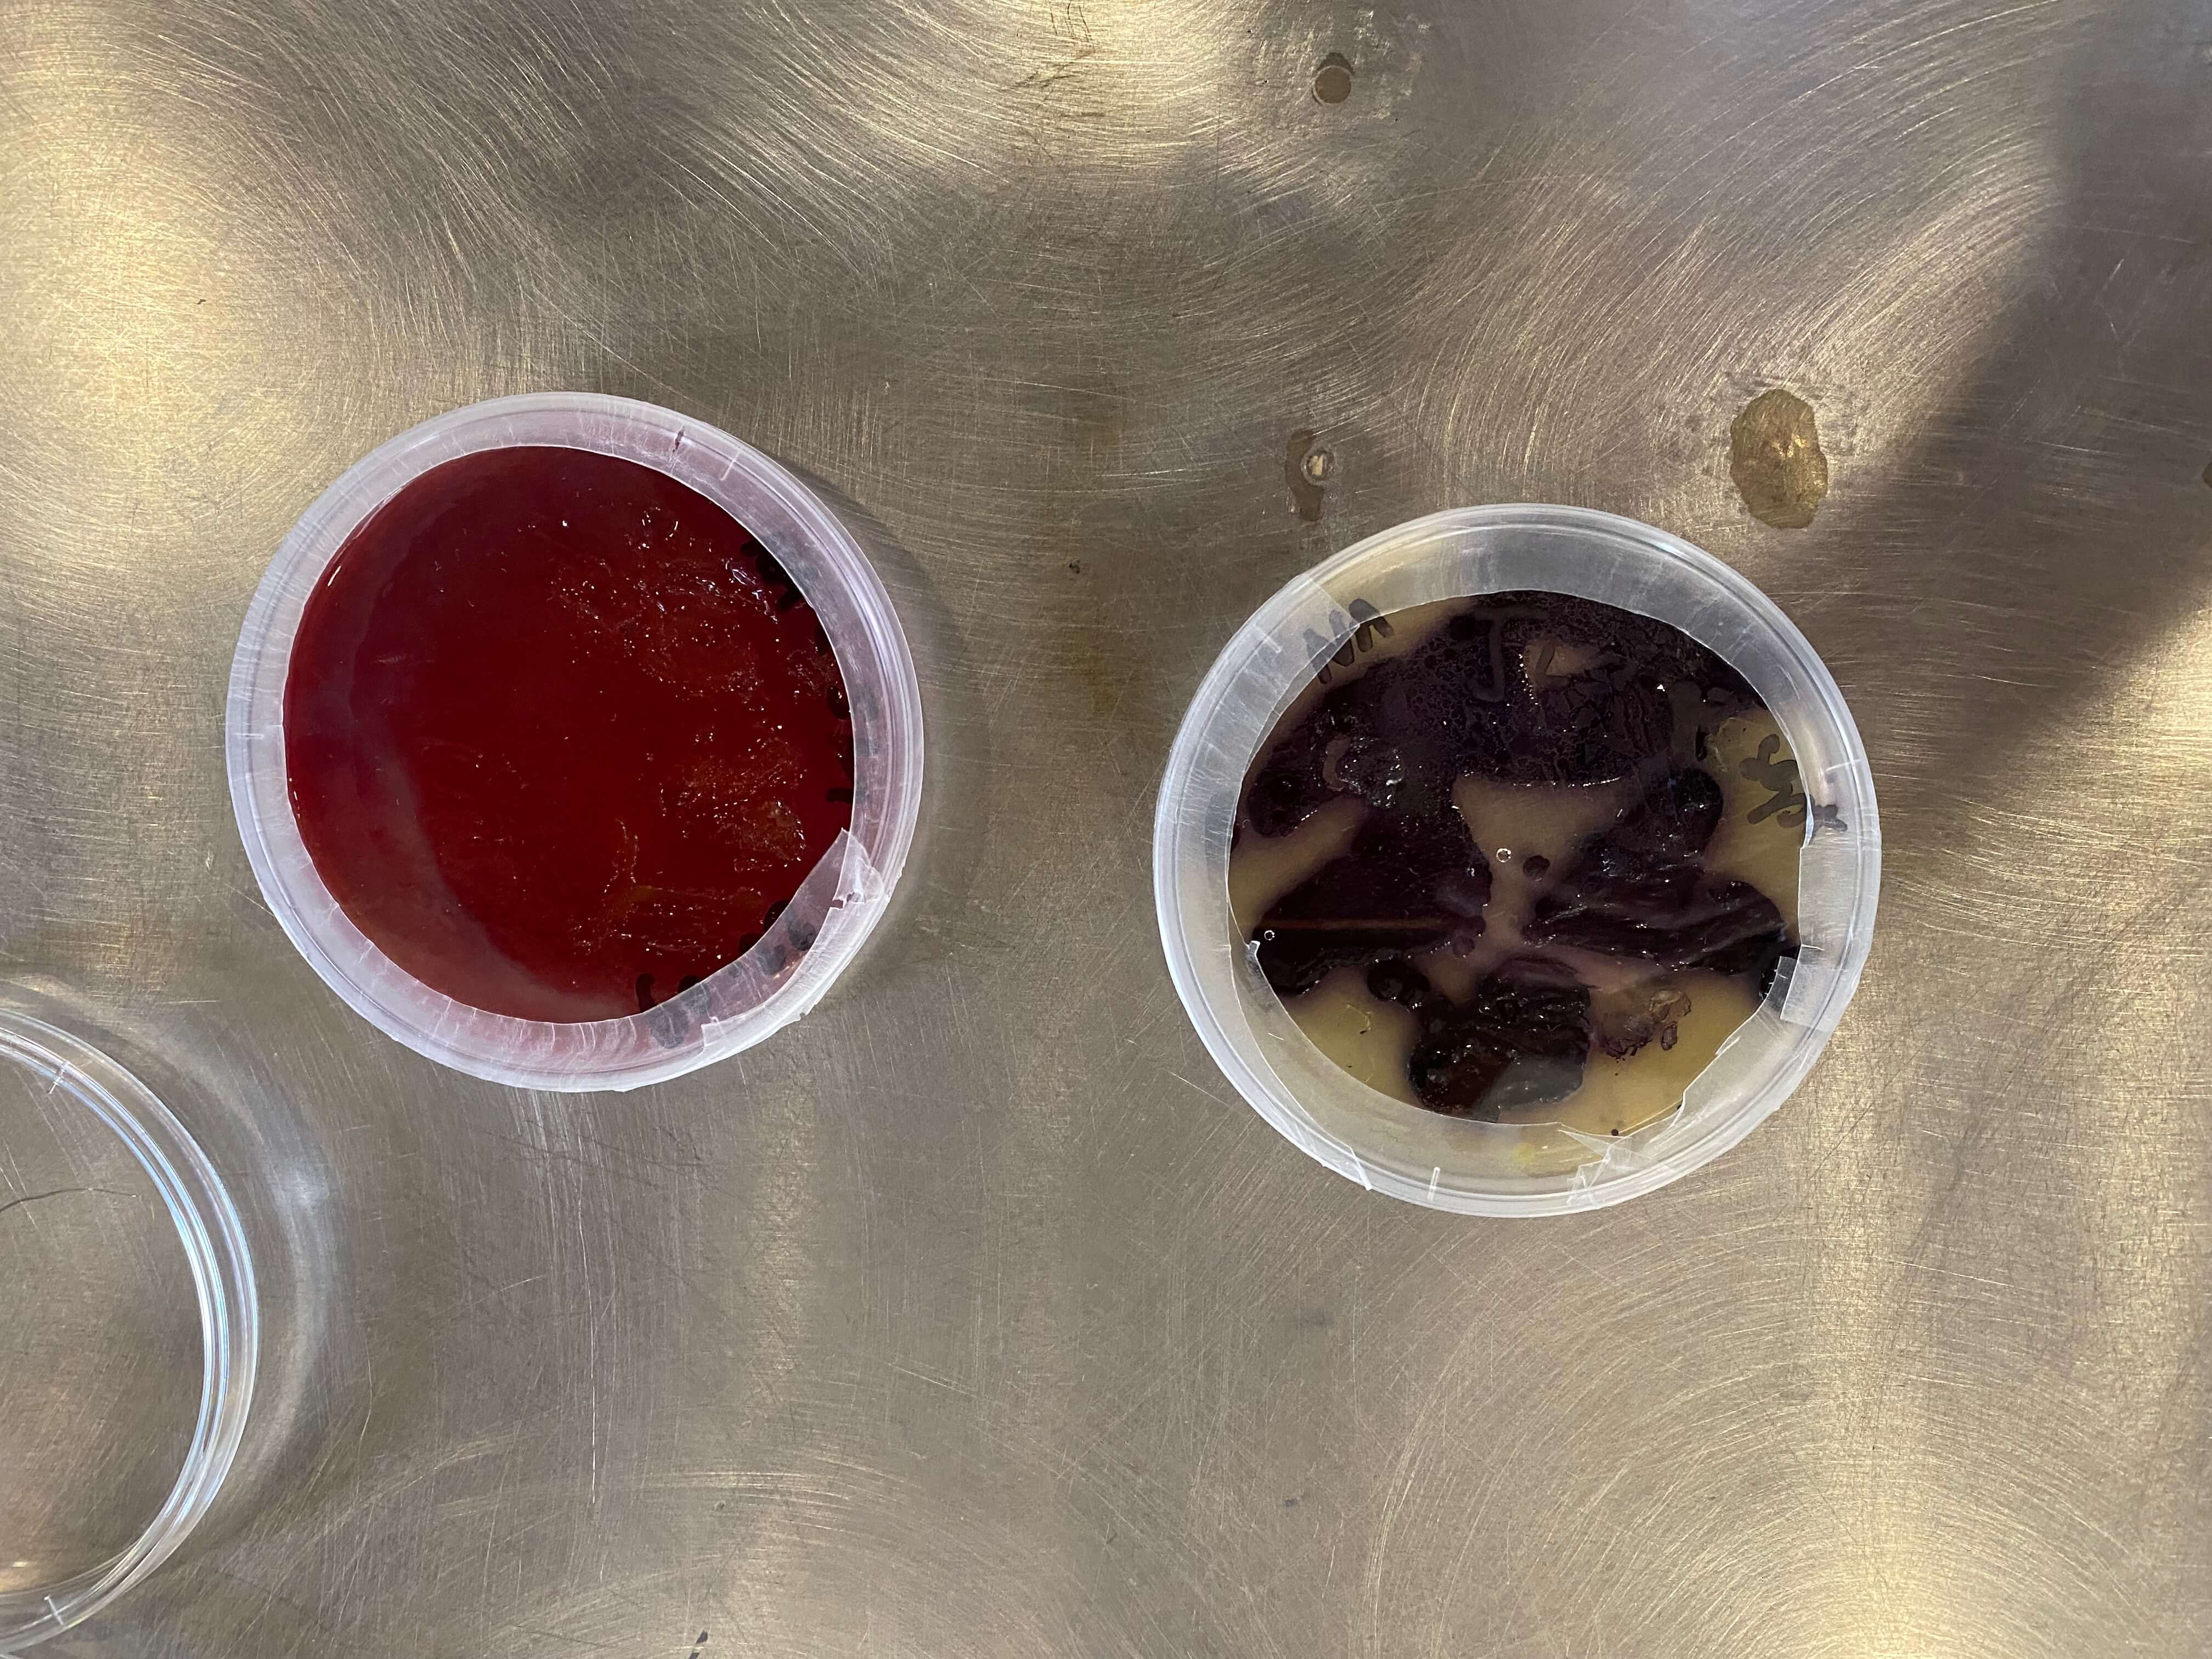
Making pigment
I precipitated my leftover dye bath with alum and soda ash to form a lake pigment.
The steps for laking are as following:
- I dissolved 15 gram alum in hot water.
- I dissolve around 7 gram soda ash in hot water.
- Then I poured the leftover dye bath in a high erlenmeyer or pot.
- Thereafter I poured in the alum solution and mixed it well with the dye liquid.
- Next I very slowly added the soda ash solution (take care, the bath starts to foam).
- I kept mixing till the foam had mostly dissappeared.
- I measured the pH of the mixture (aim for a pH of around 7 or neutral)
- I left the mixture standing overnight.
- In the morning the pigments had dropped to the bottom and the liquid at the top was almost colorless.
- I slowly poured the mixture through a filter.
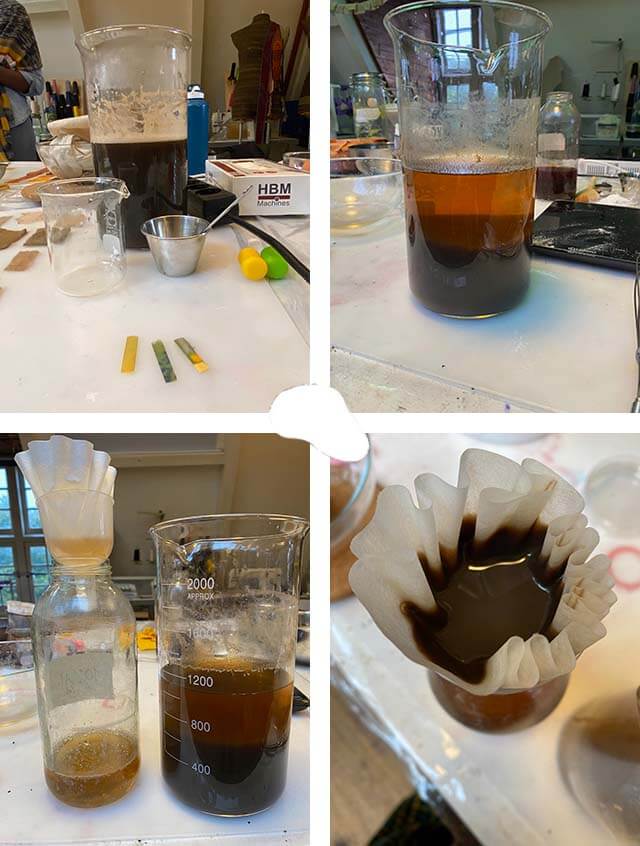
Photos by Marieke van Eyndhoven
Once the pigments are fully dried, you are able to grind them with a mortar and pestle into a fine powder. This powder is not soluble in water, but can be dissolved in all kind of paint binders, like arabic gum, lineseed oil, soy milk, tempera, and also in my selfmade casein binder!
A bit of hapazome
Cecilia brought the leaves of persicaria tinctoria (Japanese indigo) to the lab. That was a chance for some bit of hapazome, the Japanese technique of smashing flowers and leaves into fabric (the technique comes with noise).
The steps for hapazome are as following:
- I covered the wooden floor with a towel.
- On the towel I placed my first square of fabric.
- I positioned the leaf on the square.
- On the leaf I placed a second square of fabric.
- With a hammer I carefully smashed the spot where the leaf was positioned.
- I first started on the outer edges of the leaf.
- Then hammered inwards.
- I kept hammering till the leaf was clearly shining through the fabric on the top.
- I carefully peeled of the squares from the leaf.
If you do hapazome with this Japanese indigo, mordanted fabrics will provide a more greenish print, while unmordanted fabric will yield a blue-turquoise print. Alternatively you can rinse the printed fabric with a light alkaline solution for getting this blue hue. This is due to the fact that there is a secondary yellow color in indigo that binds only with mordants.
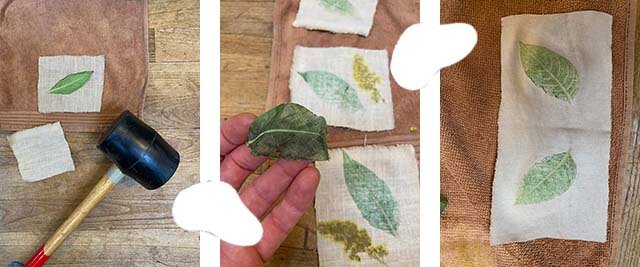
Photos by Marieke van Eyndhoven
Unfortunately, the print on my unmordanted jersey did not differ in color from the print on the mordanted linen.
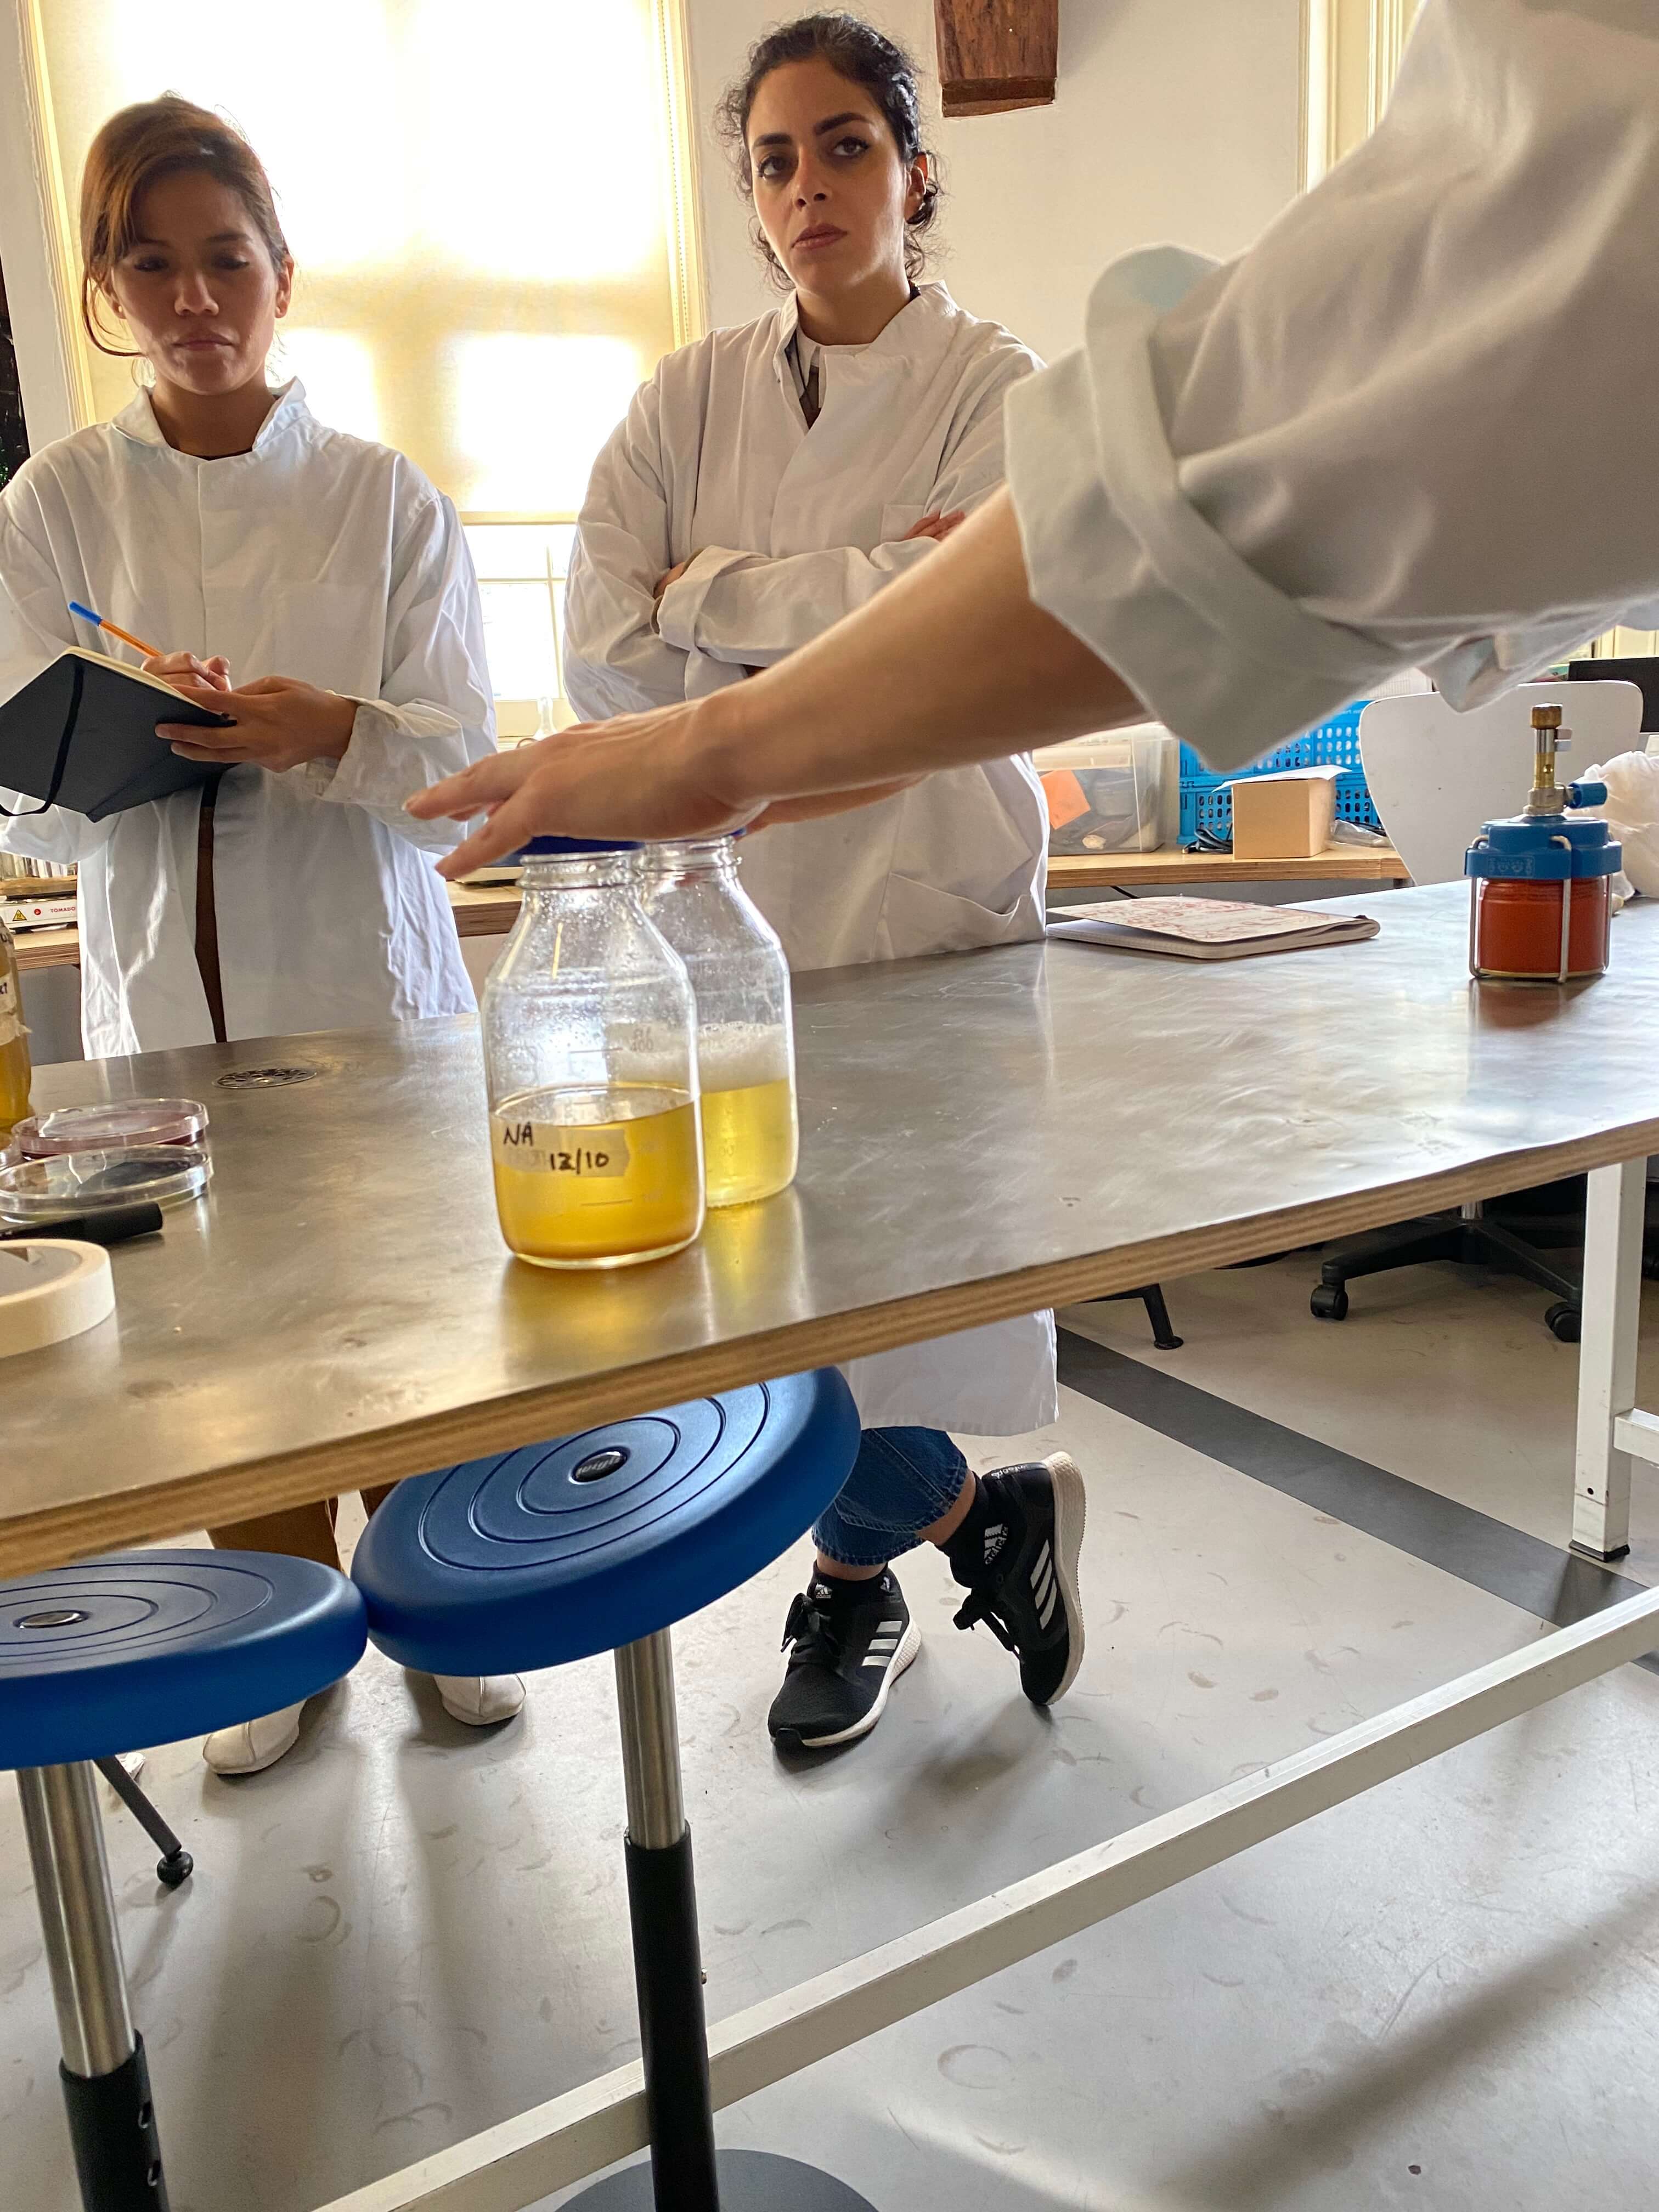
Dyeing with bacteria
Biolab safety
When we entered the lab Cecilia first gave an explanation about biolab safety.
We are not allowed to bring food and drink in the lab. We don't want to eat any traces of the bacteria cultivated in the lab.The other way around, we don't want to contaminate the bacteria cultures in the lab, hence we should wear labcoats and clean our hands and the tables we work at with ethanol. Long hair should be tied up.
Once we start working with the bacteria: close doors and windows, avoid talking and walk carefully. All airflow moves bacteria around and into our plates, and this should be avoided.
The bacteria for dyeing
There are two bacteria we worked with:
- Serratia marcenscens (SM)
- Janthinobacterium lividum (JL)
Serratia marcenscens
Serratia marcescens is a species of rod-shaped, gram-negative bacteria in the family Yersiniaceae. It will grow and multiply in oxygen-rich and oxygen-depleted environments.
Due to its abundant presence in the environment, and its preference for damp conditions, this bacteria is commonly found growing in bathrooms (especially on tile grout, shower corners, toilet water lines, and basins), where it manifests as a pink, pink-orange, or orange discoloration and slimy film feeding off phosphorus-containing materials or fatty substances such as soap and shampoo residue.
Serratia marcescens produces a reddish-orange tripyrrole dye called prodigiosin, and that is what we going to leverage to color our silk.
Janthonibacterium lividum
Janthinobacterium lividum is an aerobic, gram-negative, soil-dwelling bacterium that has a distinctive dark-violet (almost black) color, due to a compound called violacein, which is produced when glycerol is metabolized as a carbon source.
Violacein has antibacterial, antiviral, and antifungal properties. Its antifungal properties are of particular interest, since this bacteria is found on the skin of certain amphibians, including the red-backed salamander, where it prevents infection by the devastating chytrid fungus.
The name for this bacterium is well-chosen. The genus name, Janthinobacterium, comes from Latin janthinus, which means "violet" or "violet-blue" + bacterium, which means rod or staff. The species name is also from Latin, lividum, which means "of a blue or leaden color". And with this violet-blue color we hope to paint our silk.
Hello little friends, photo by Marieke van Eyndhoven
I couldn't resist the funky color of the Serratia marcescens. After all the beiges, browns, greys and blacks of my walnut hull, it was time for some flashy pink!
The process from start to end
With Cecilia we went through all the steps from start to end:
- Preparing the food for the bacteria.
- Preparing and sterilizing silk and tools.
- Plating.
- Inoculating.
Preparing food
We had to prepare sterilized food for two different goals.
We wanted to multiply (or culture) the bacteria with which we were going to dye. This growing takes place on a so-called agar plate. The food is called Standard I Nutrient Agar. This agar can be melted with heat, but will become a solid layer in the petri dish when cooling down.
Also we wanted to dye silk. For the dyeing a petri dish containing the silk has to be plated with liquid food, Luria Broth.
Both foods need to be prepared on beforehand and be sterilized.
The agar was prepared by mixing 9,25 gram of Nutrient Agar powder with 250 ml of clean water in a screw bottle. The liquid food was prepared by mixing 6,25 gram of LB powder with 250 ml of clean water in a screw bottle.
Bottles of food, photo by Marieke van Eyndhoven
Once both bottles with food were ready, they had to be sterilized in a pressure cooker.
The steps for sterilizing are as following:
- We checked that the bottles were not tightly closed.
- We marked the bottles with the name and date.
- Then we stuck autoclave tape on the top of the bottles (will help check if the process went well in the pressure cooker).
- We put both of the bottles in the pressure cooker.
- The bottles should not sit on the (hot) bottom of the pressure cooker, add first a rack on which the bottles can stand.
- We added water, making sure the water level didn't surpass the level of the liquids in the bottles.
- Then we closed and started the pressure cooker.
- When the button of the cooker came out, we waited for 15 minutes, and then opened the lid of the cooker.
- We checked if the autoclave tape had black marks. A sign the process has worked correctly. Otherwise we should have repeated the process.
Once cooled off, our sterilized food was ready to use (any unused food can be kept in the refrigerator after sterilization).
Preparing and sterilizing silk and tools
Folding the silk
We each got a piece of silk that we folded or crumpled up. This is the so-called Japanese shibori technique. When fabric is folded, crumpled, clamped or stitched, areas of resistance are introduced, where no dye is able to attach to the fabric. And exactly these areas produce designs and patterns onto the surface of the fabric to be dyed. Once we were satisfied with our folding, we stitched the fabric together to make sure the fabric fitted in a petri dish without touching the top lid. This to make sure that the bacteria will be able to spread to all parts of the silk (if the silk would touch the top lid, it would become an accidental area of resist).
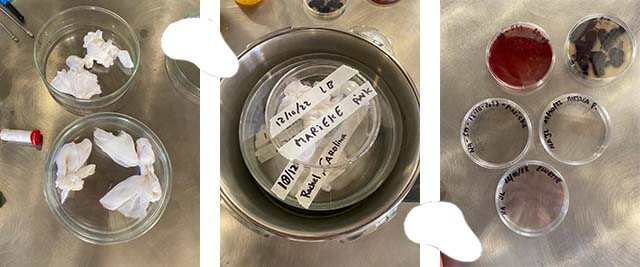
Silk on the way, photo by Marieke van Eyndhoven
Sterilizing
Once our piece of silk was ready, we put it in our petri dish. Our petri dishes where then sterilized in the pressure cooker in the same way we did sterilize the bottles with food. This is necessary to make sure no other bacteria strain is present when inoculating the silk with the dyeing bacteria. We only want to grow the dyeing bacteria.
Plating
We had sterile food and sterile silk and tools. Now we had to create our agar plate and plate our petri dish with silk with liquid food in a sterile way.
The steps for plating are as following:
- I cleaned the table around a gas burner with ethanol. This will create a sterile bubble when the flame is on.
- I collected both my petri dishes so they were close.
- Then I put both food bottles within reach.
- First I kept the rim of the agar bottle in the flame for a second to sterilize the area from which the food would be poured.
- I lifted the lid of the petri dish and poured in some agar food to cover the bottom.
- I closed the petri dish and repeated the process with the second petri dish containing my piece of silk.
- For this second petri dish I used the LB food and made sure to cover the bottom and to wet the silk.
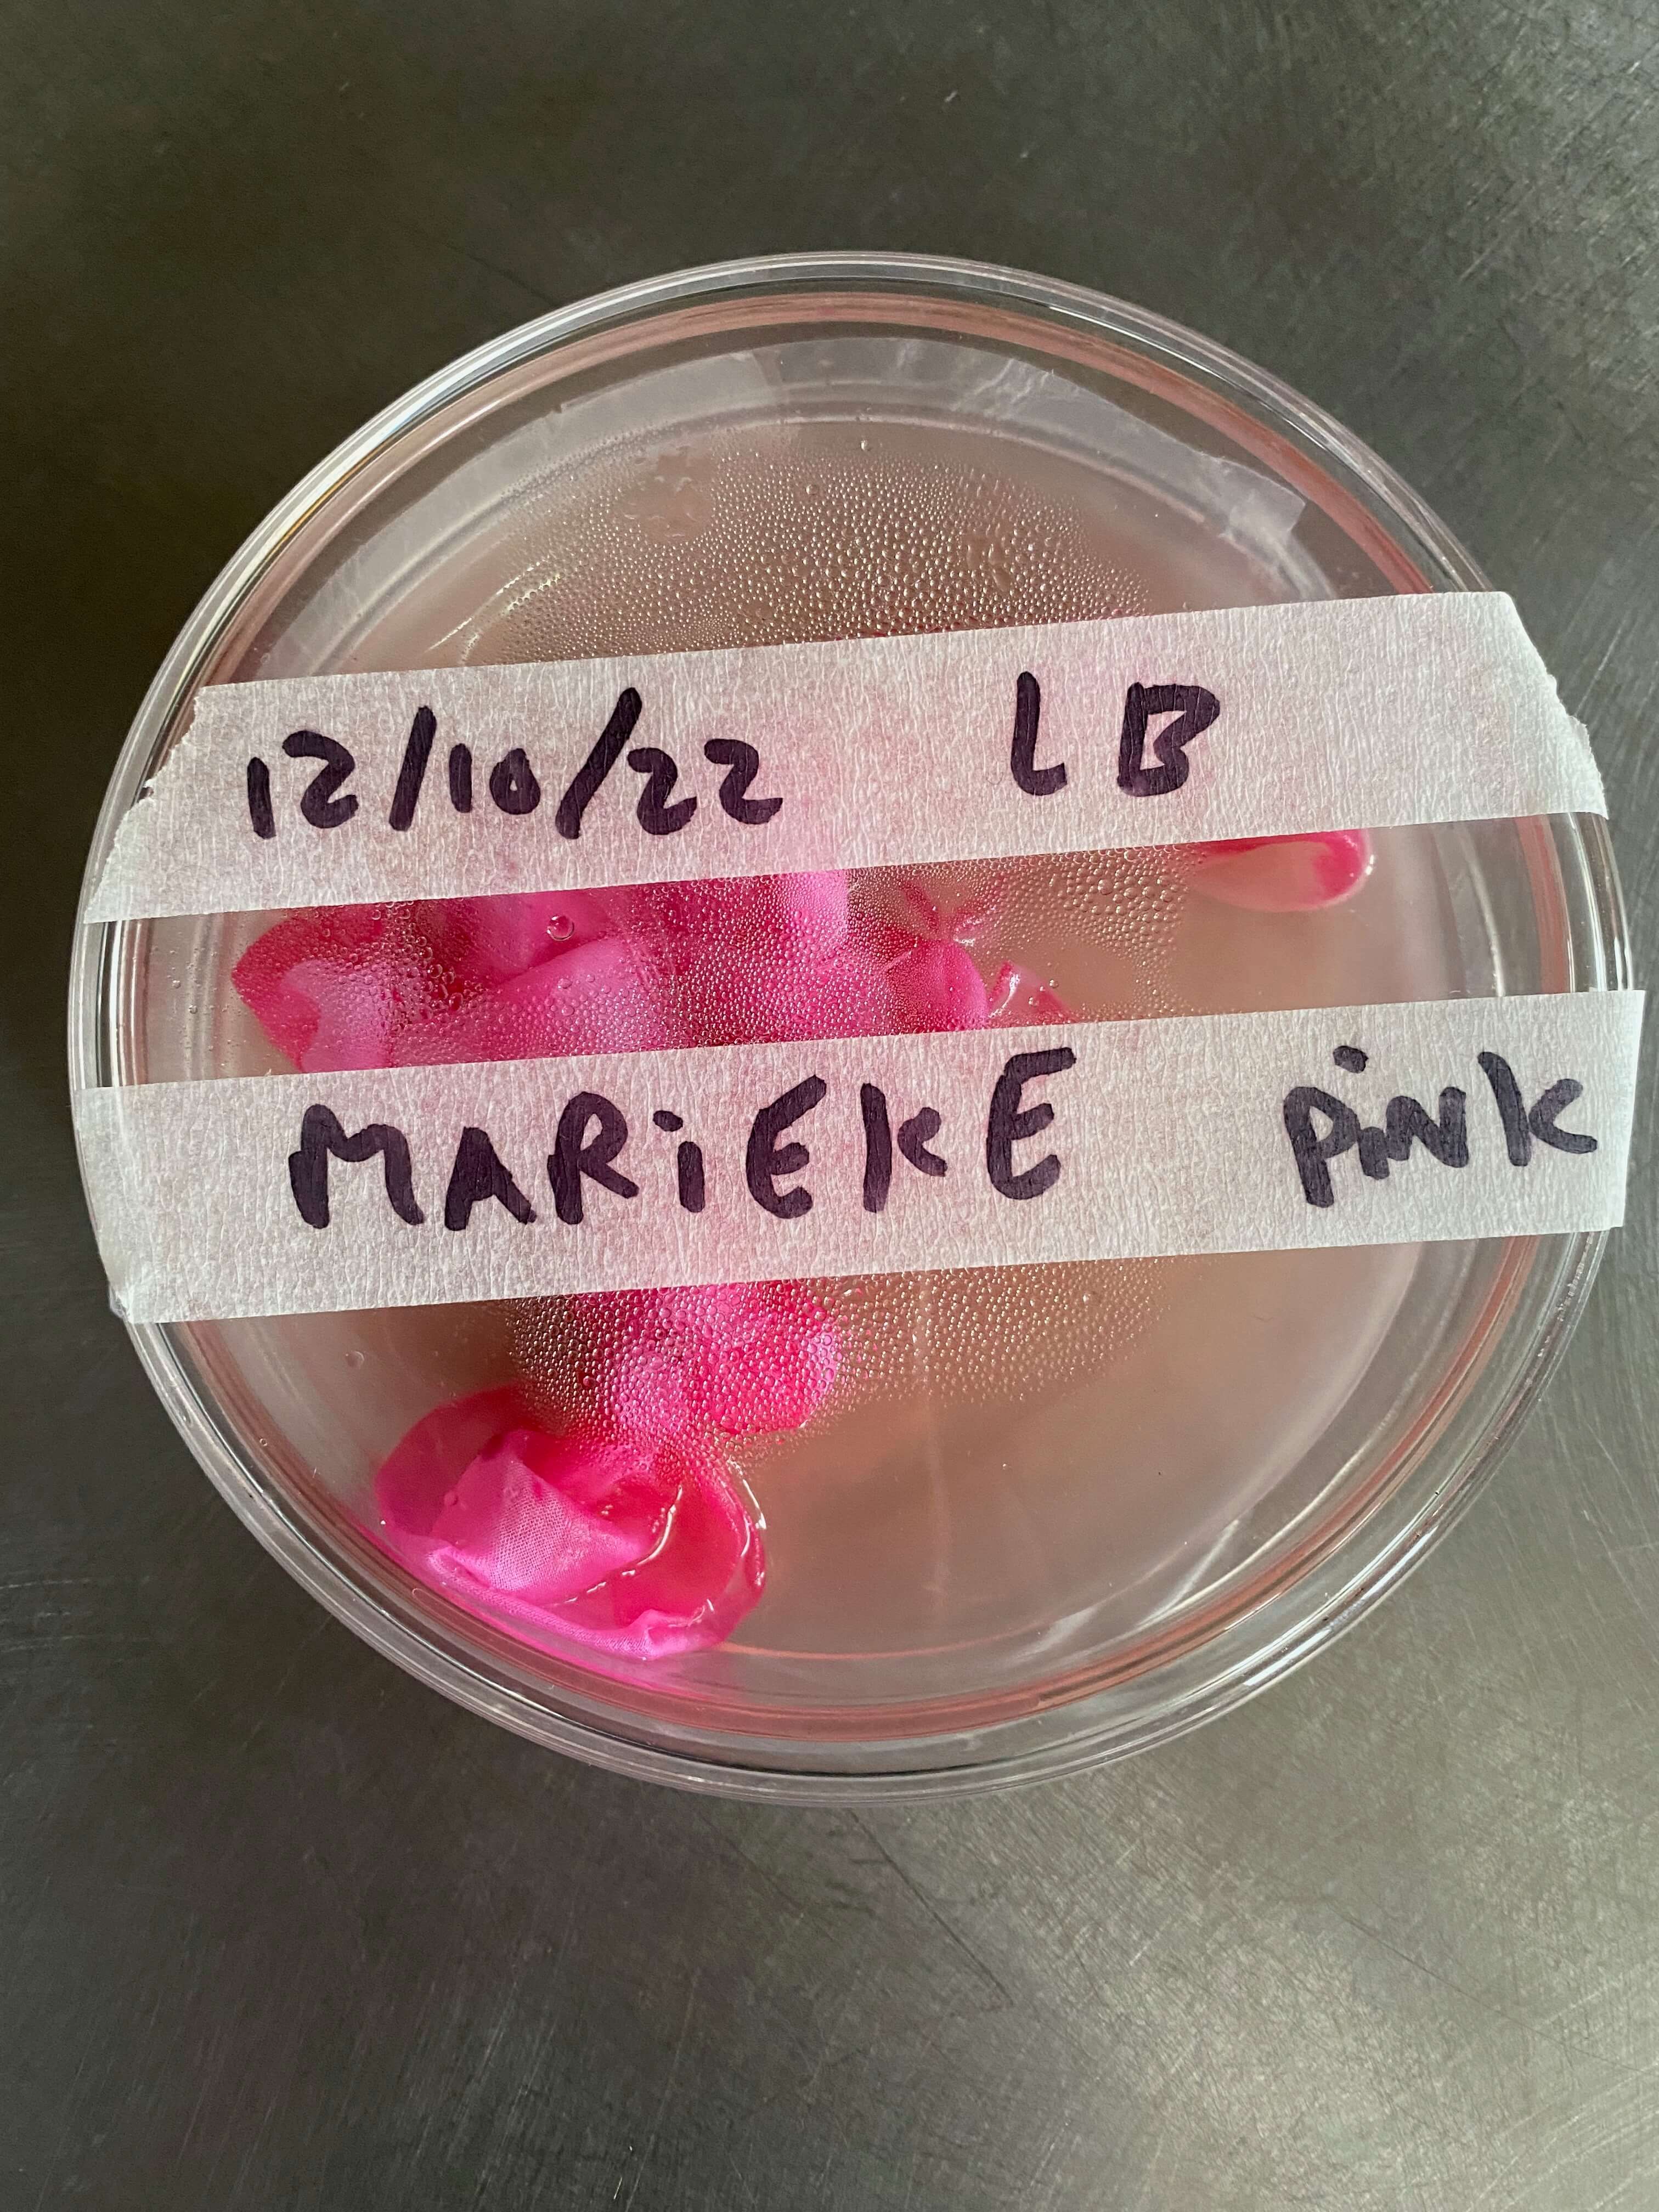
Once done I labeled my petri dishes with:
- name of the bacteria (SM)
- name of the growth media (NA or LB)
- the date
- my name
Plating in a sterile bubble
Inoculating
Once the plating was done, it was time for inoculating. This means that you scrape a tiny amount of the desired bacteria strain from a cultured agar plate with an inoculation loop, and then add the bacteria to the new sterile food plates on which you want to grow the bacteria. We had to inoculate both our new agar plate and our plate with silk.
For me it was the Serratia marcescens I wanted to set loose.
The steps for inoculating are as following:
- I again cleaned the table around the gas burner with ethanol.
- For sterilizing the inoculation loop, I kept the loop in the flame until it turned red.
- I cooled the inoculation loop by dipping it into a bit of cultured agar where no bacteria were growing.
- Then I scraped a bit of bacteria from the cultured plate and spread it lightly all around my new agar plate, on my silk, and on the liquid food around it.
- Finally I sealed the plates with parafilm.
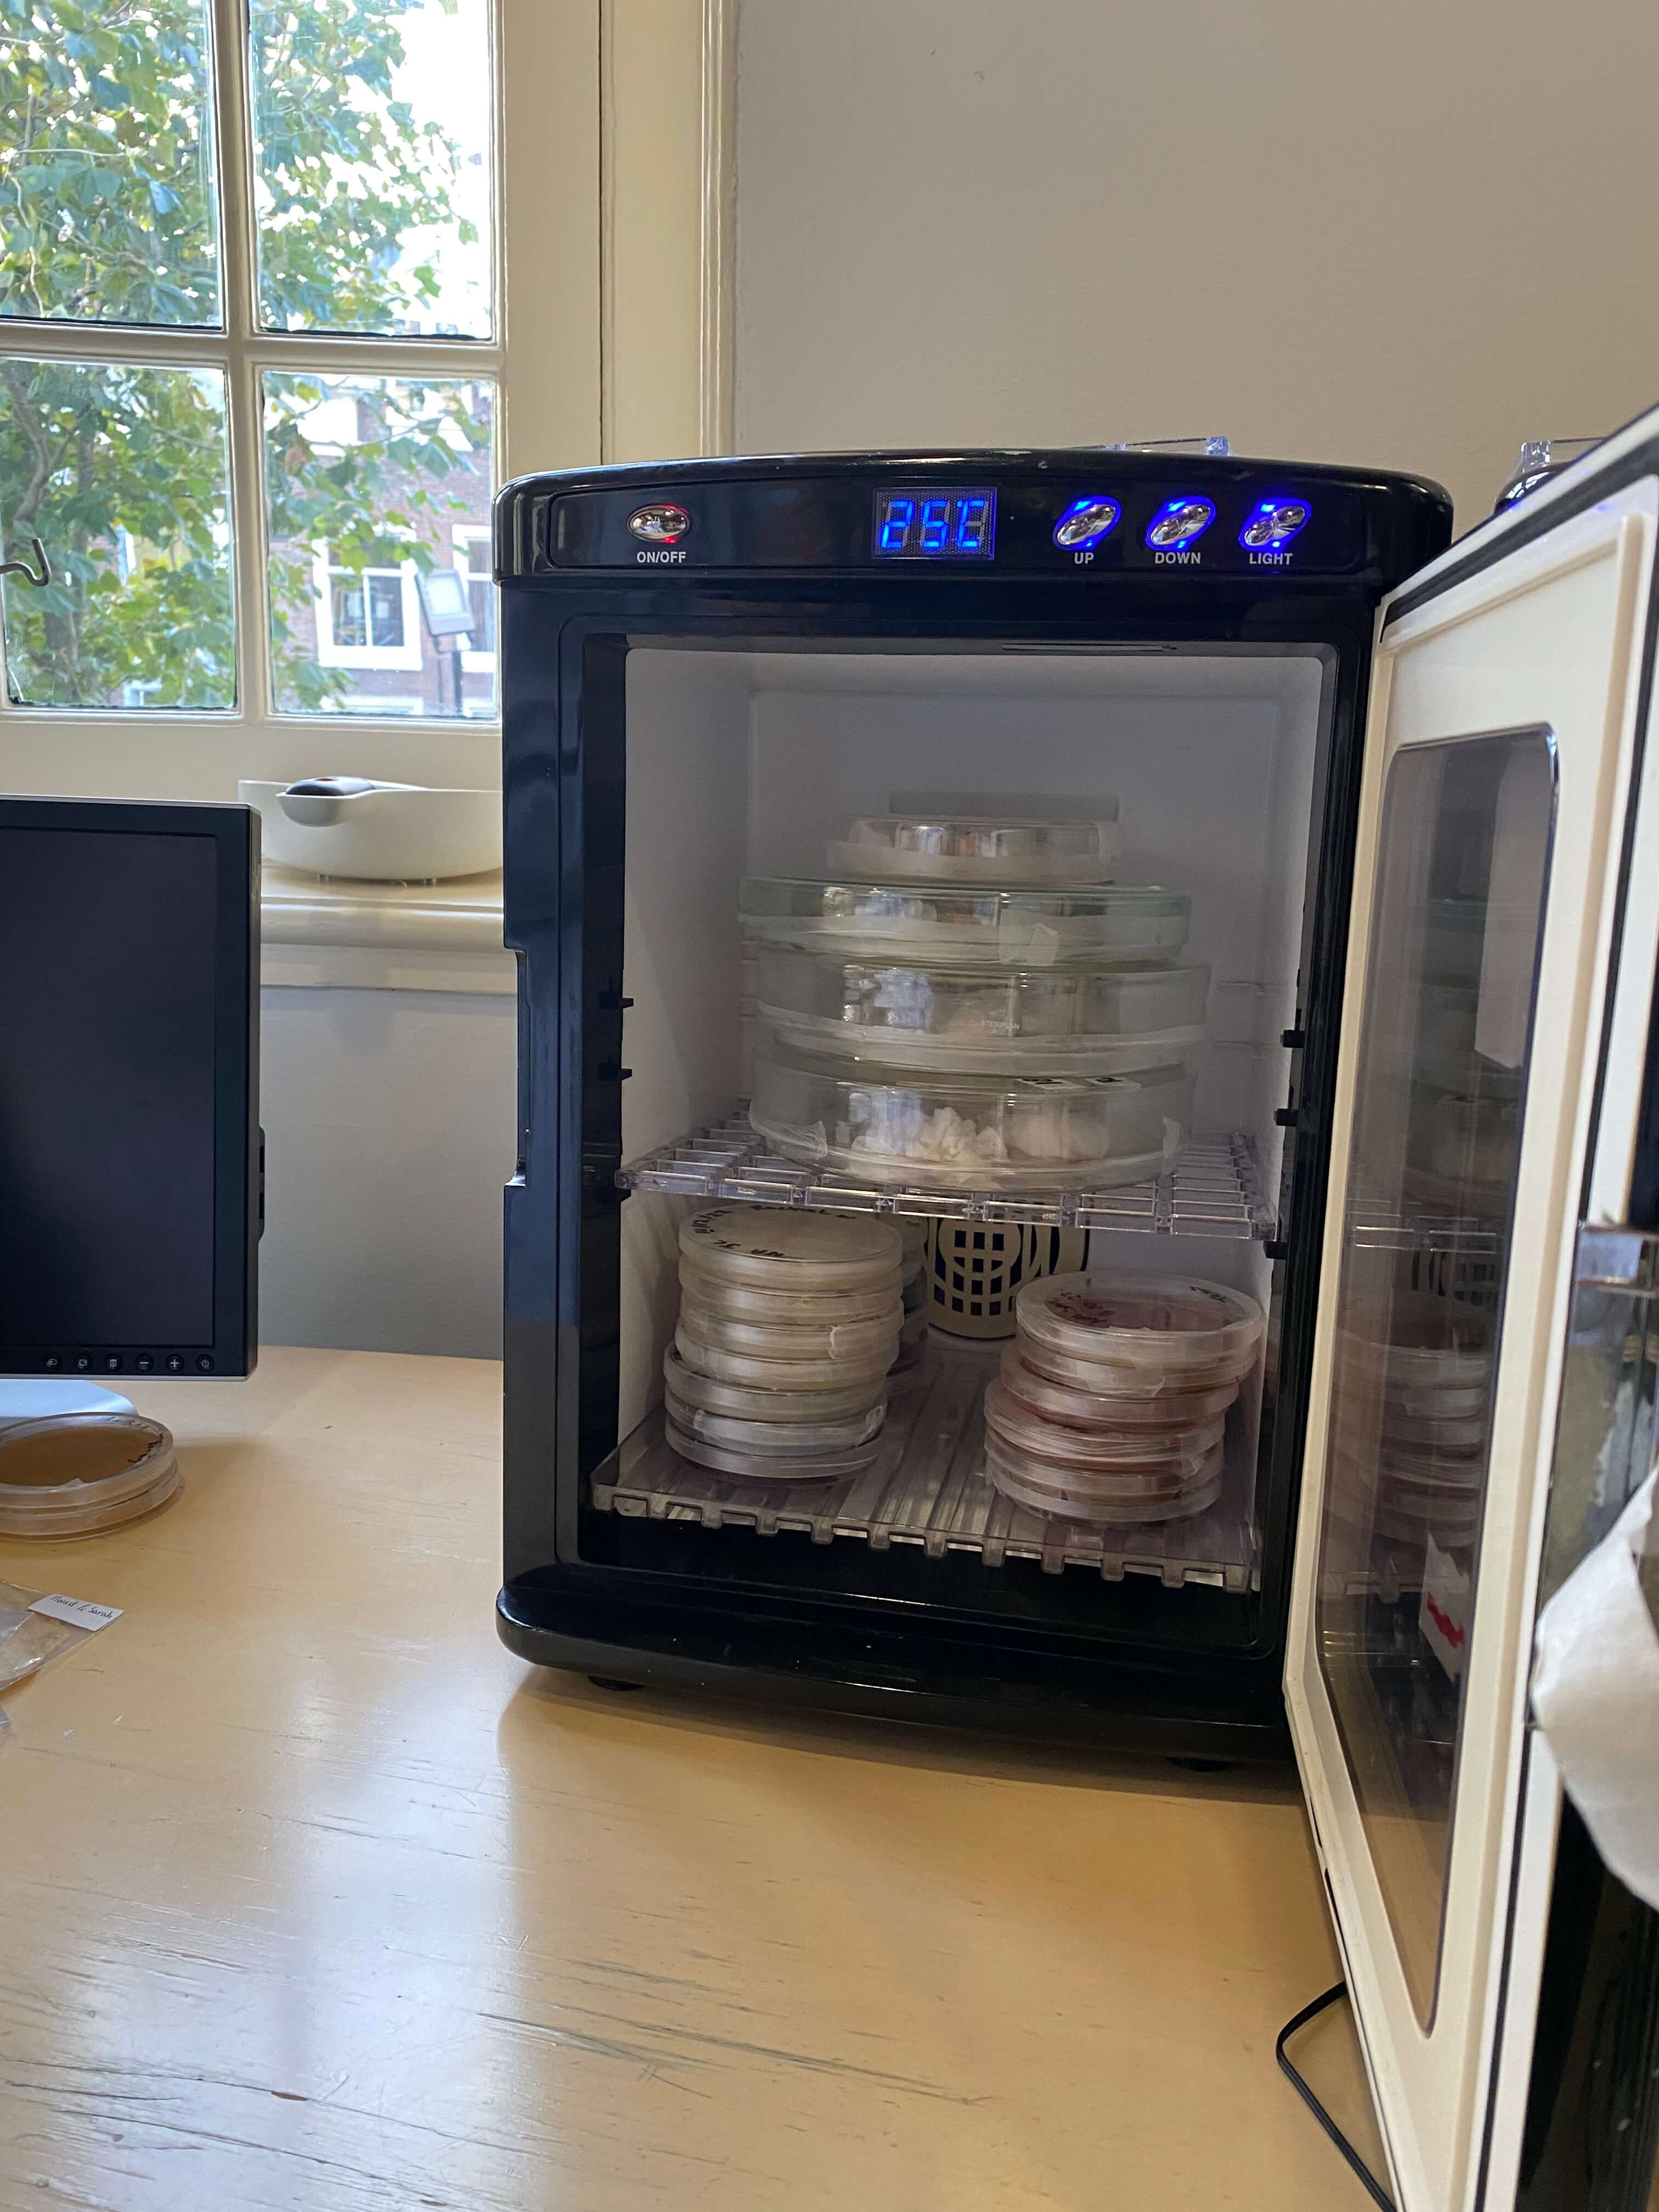
- Then I put the petri dishes in an incubator where they had to rest at 23 degrees for at least 3 days.
Inoculating Serratia maracens
Once our waiting time is over (3-7 days), we will first kill the bacteria on our piece of silk by sterilizing it using the same process with the pressure cooker. Thereafter it is simply a matter of rinsing and drying the fabric.
Obviously I had to check progress after one day, and my Serratia maracens were really doing great!! Cannot wait to see the end result.
And there it is, after 7 days in the stove, a unique piece of dyed silk, which can never be repoduced :). I used some random knots when I prepared my silk. The patterns those knots provided are really beautiful. I love the end result.
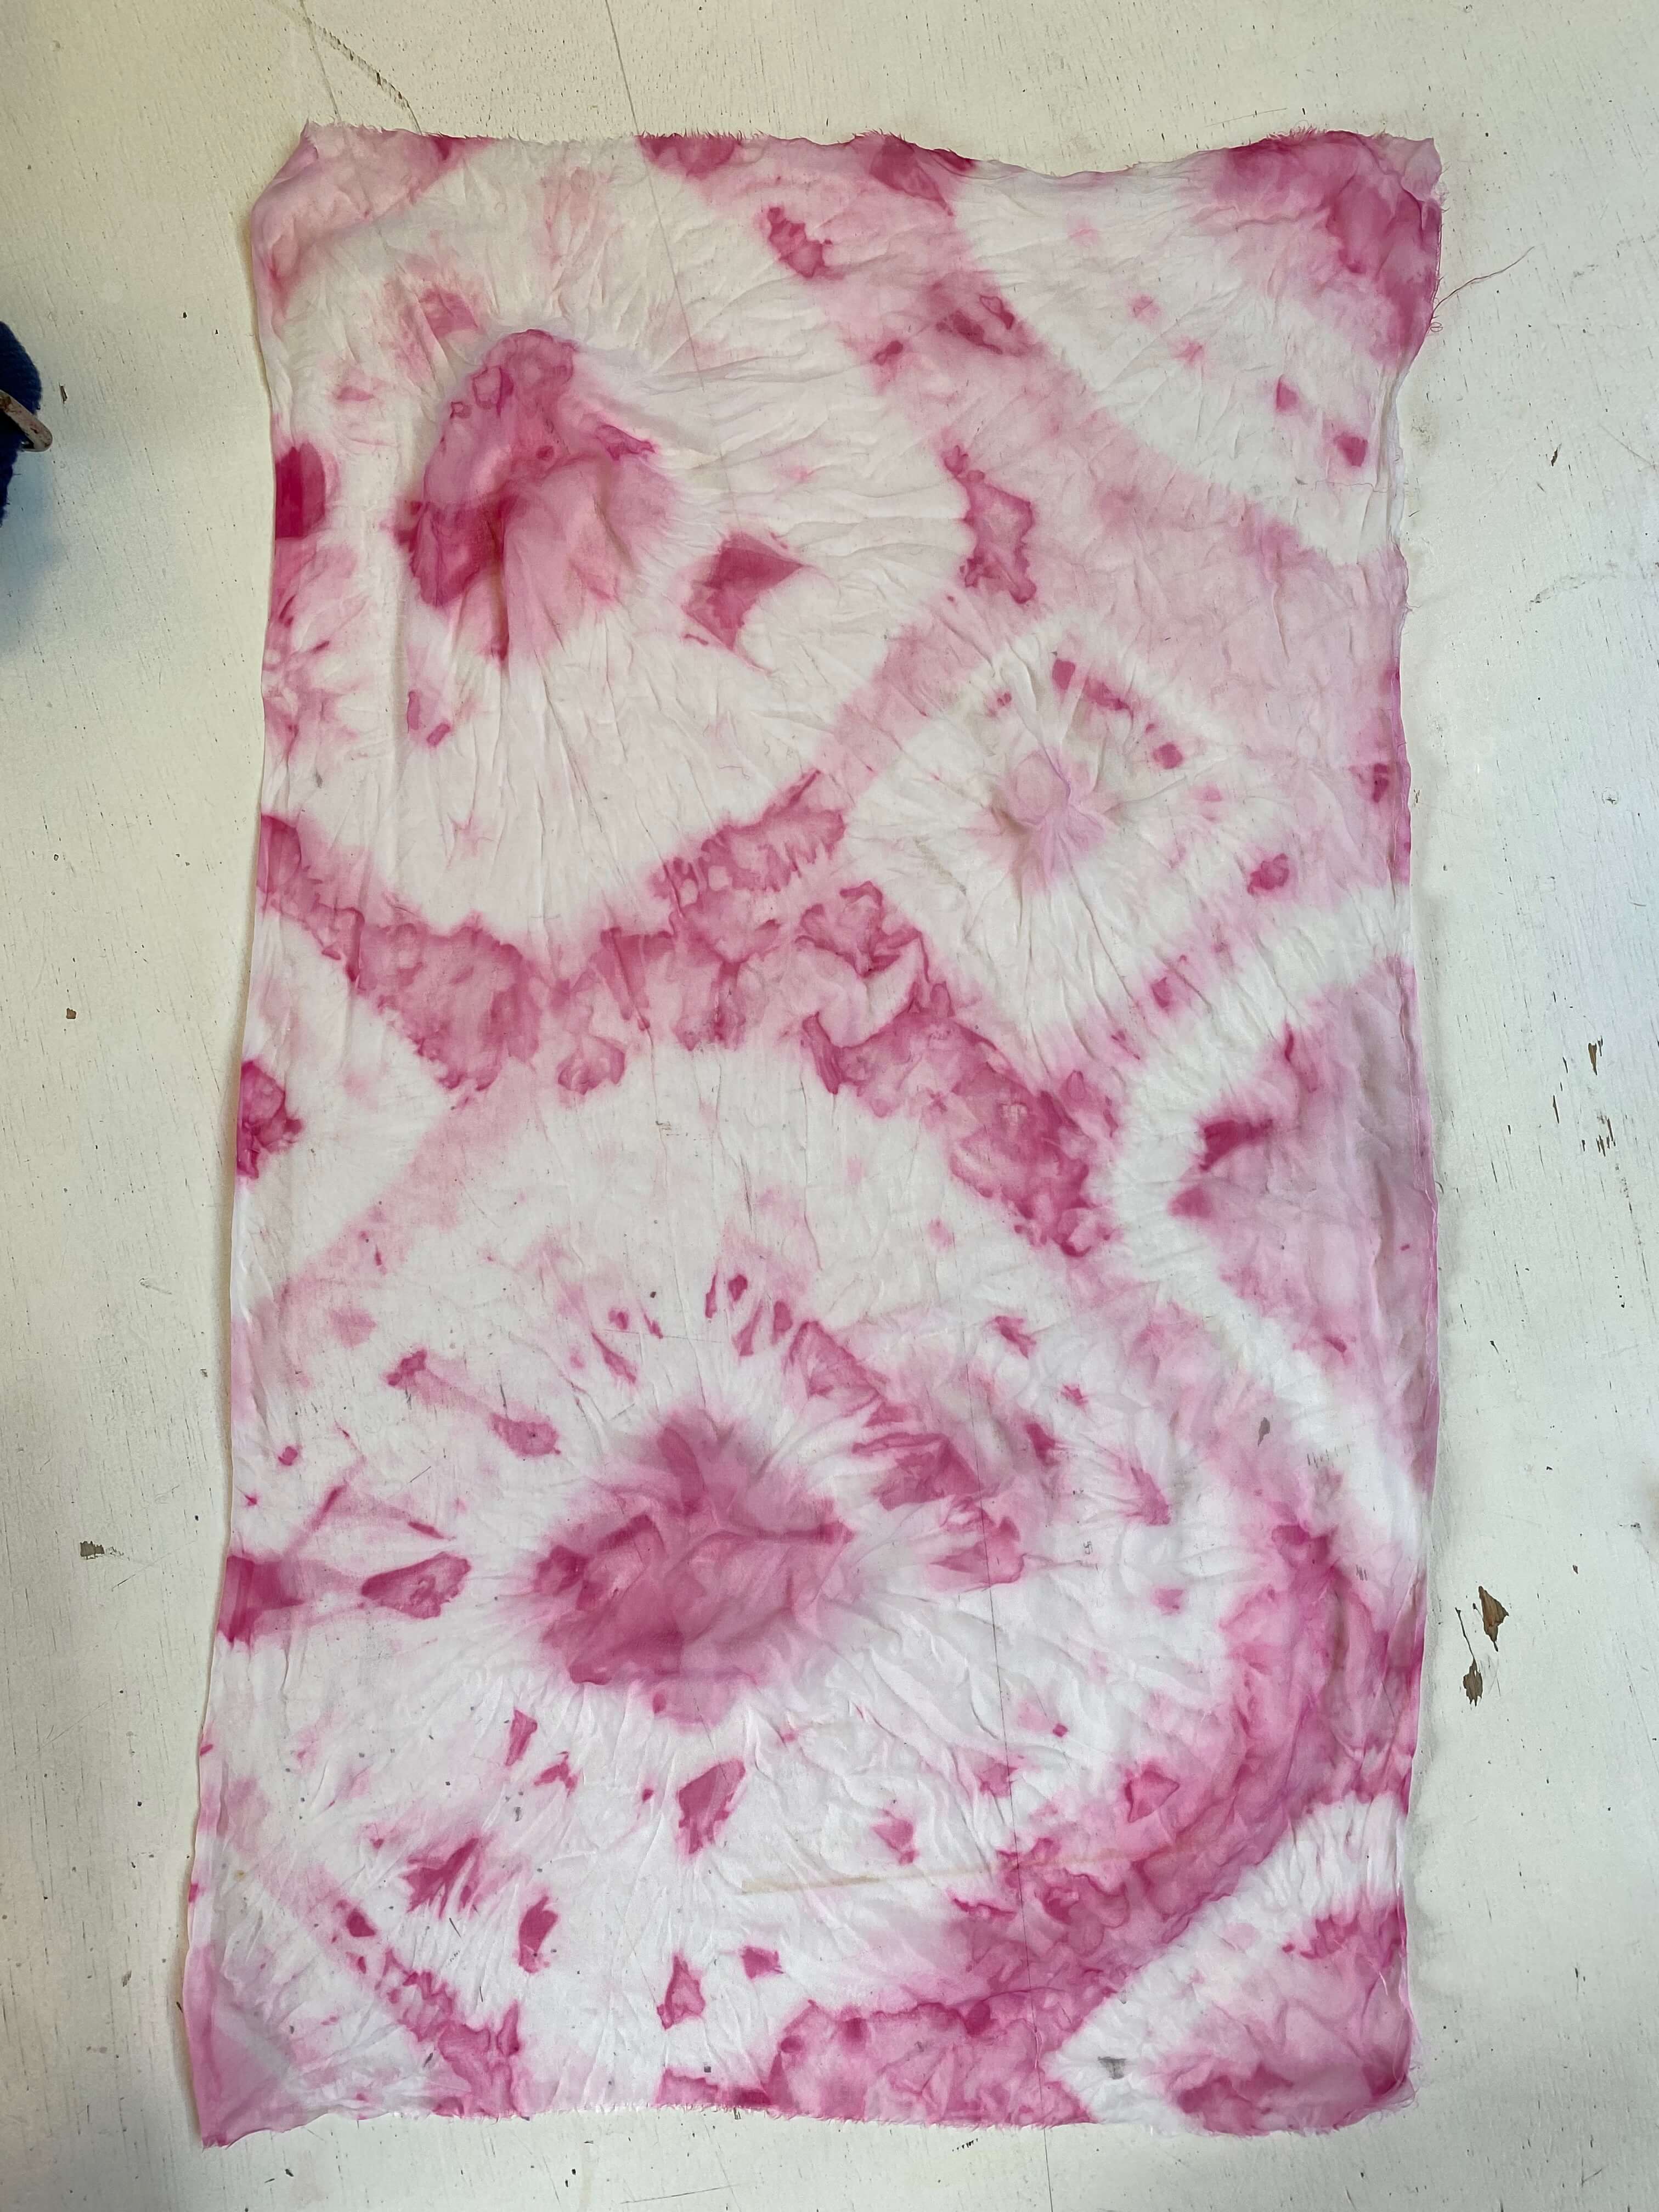
My dyed silk, photo by Marieke van Eyndhoven