9. Textile Scaffold
Just like the biofabricating week, this was again an overwhelming week, full of possibilities. We were introduced to molding with leather and making mycelium, conducting crystalization, making composites, and using the CNC mill, a subtractive manufacturing process that uses a cutting tool mounted on a rotating spindle to selectively remove material from a block of raw substrate.
Our assignment this week was to make one mold using the CNC mill and experiment with two different techniques mentioned above. In Amsterdam, we worked with mycelium as a group. And individually I focused on trying to make imitation leather, several composites, and binary bioplastics from home-made casein.
CNC milling project
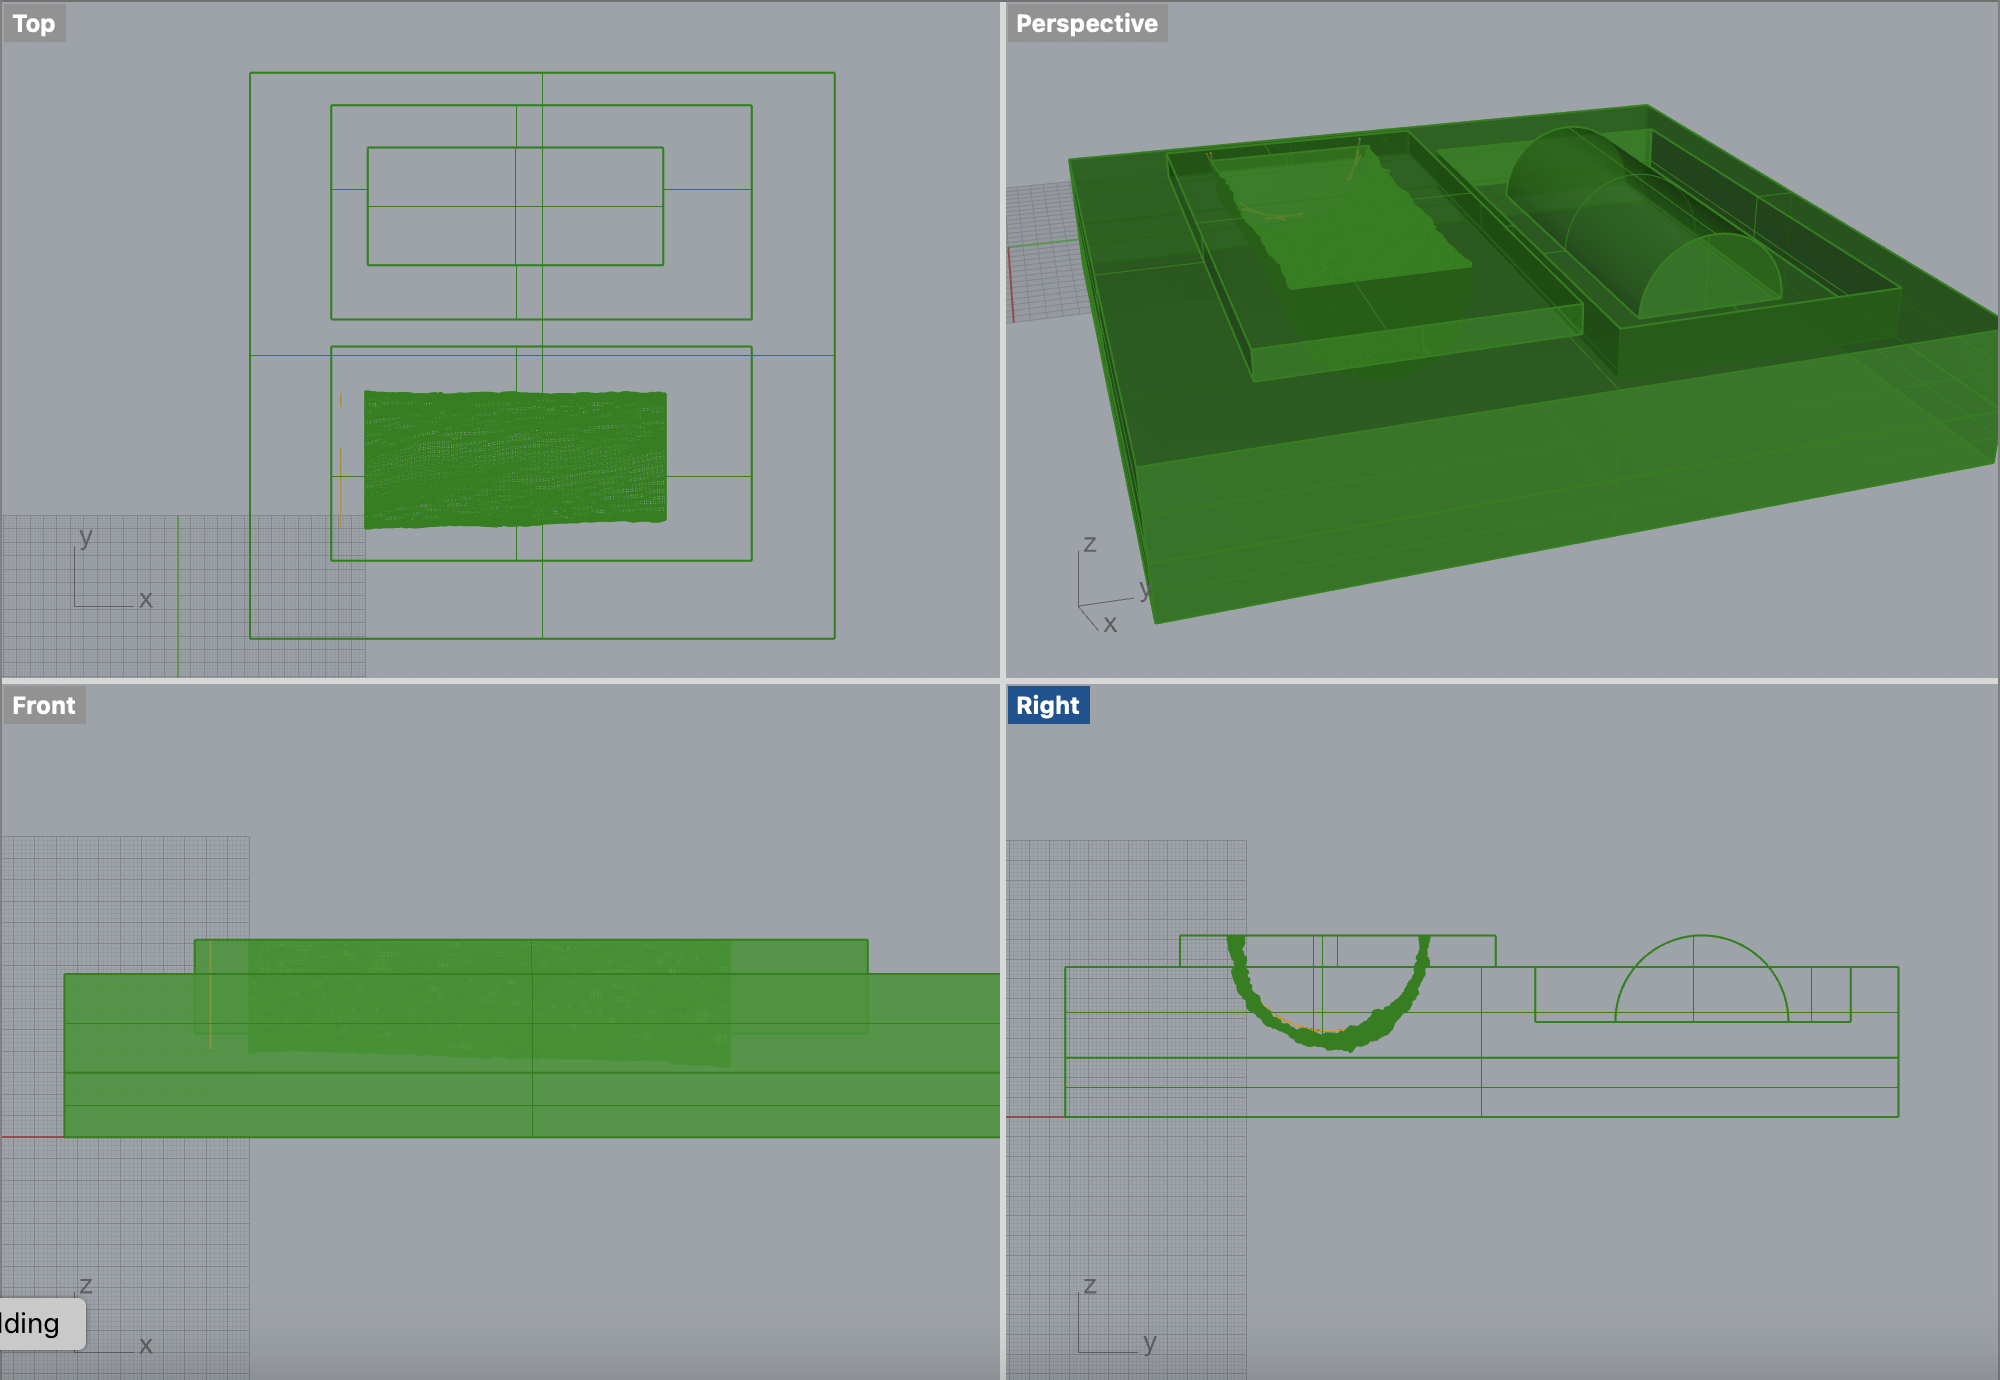
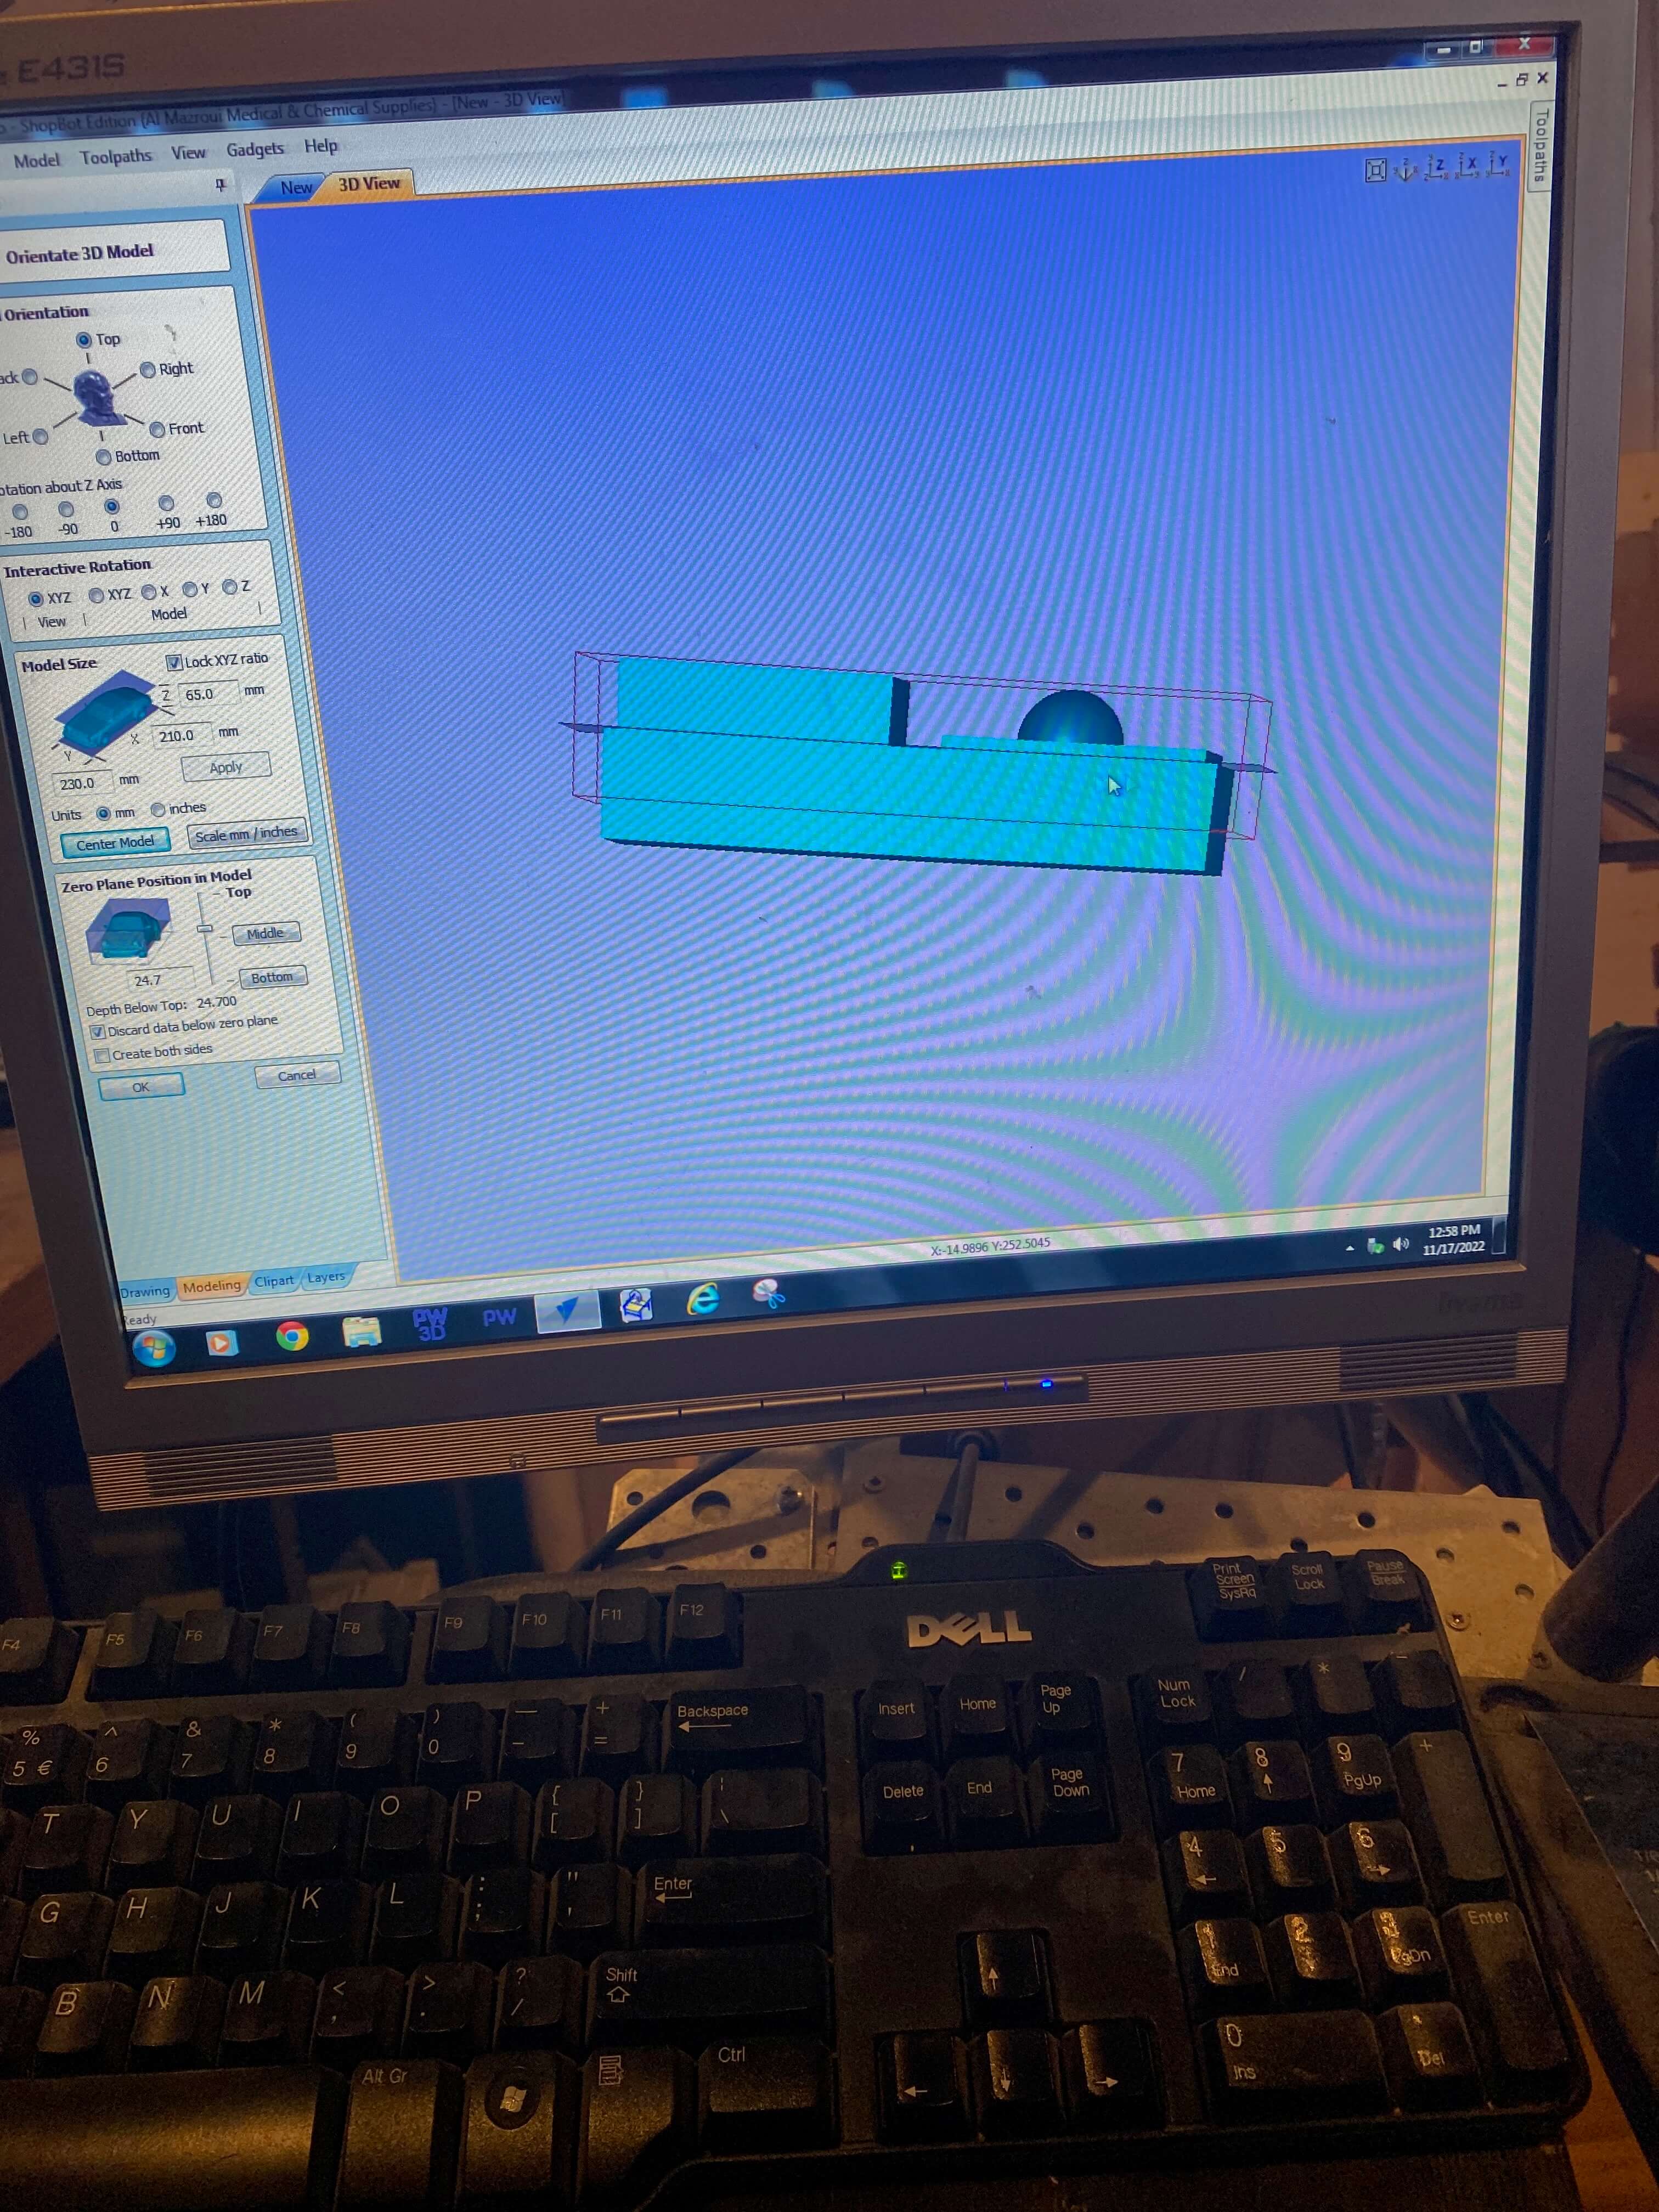
For my mold I selected a 3D file of a tree trunk with clear bark imprints. In Rhino I created a textured tree trunk as the negative and a cylinder shape for the positive form.
Designing the mold
The steps in Rhino to prepare the negative trunk tree mold file are as following:
- Make a box with the dimension of 20 x 25 x 8 mm
- Create a horizontal plane right in the middle of the z-axis
- Split the box with the function BooleanSplit
- Insert the object centred in the box
- Split the object with the function BooleanSplit
- Copy the object to another layer
- Explode the object
- Delete the bottom surface of the object
- Use the OffsetSrf function (distance 2, select solid, select delete input) to copy the surface of the object to a plane 2 mm further (this is the offset between the negative and the positive shape)
- Use the ExtrudeSrf (distance 2, select solid) to merge the copied surface into a solid surface
- Merge the horizontal plane and the object with the function BooleanUnion
For the positive cylinder shape, I just made a cylinder and a box in the right dimensions and merged them with the function BooleanUnion.
Last but not least, I outlined the tree trunk and the cylinder at the top. Then I placed a final box underneath both boxes. I made sure that the total height of the combined objects was below 50 mm (height of the foam to be cut), and that the depth of the negative tree trunk was below 35 mm (cutting bit distance).
Once ready I exported the file as an .stl file.
Safety rules for the CNC mill
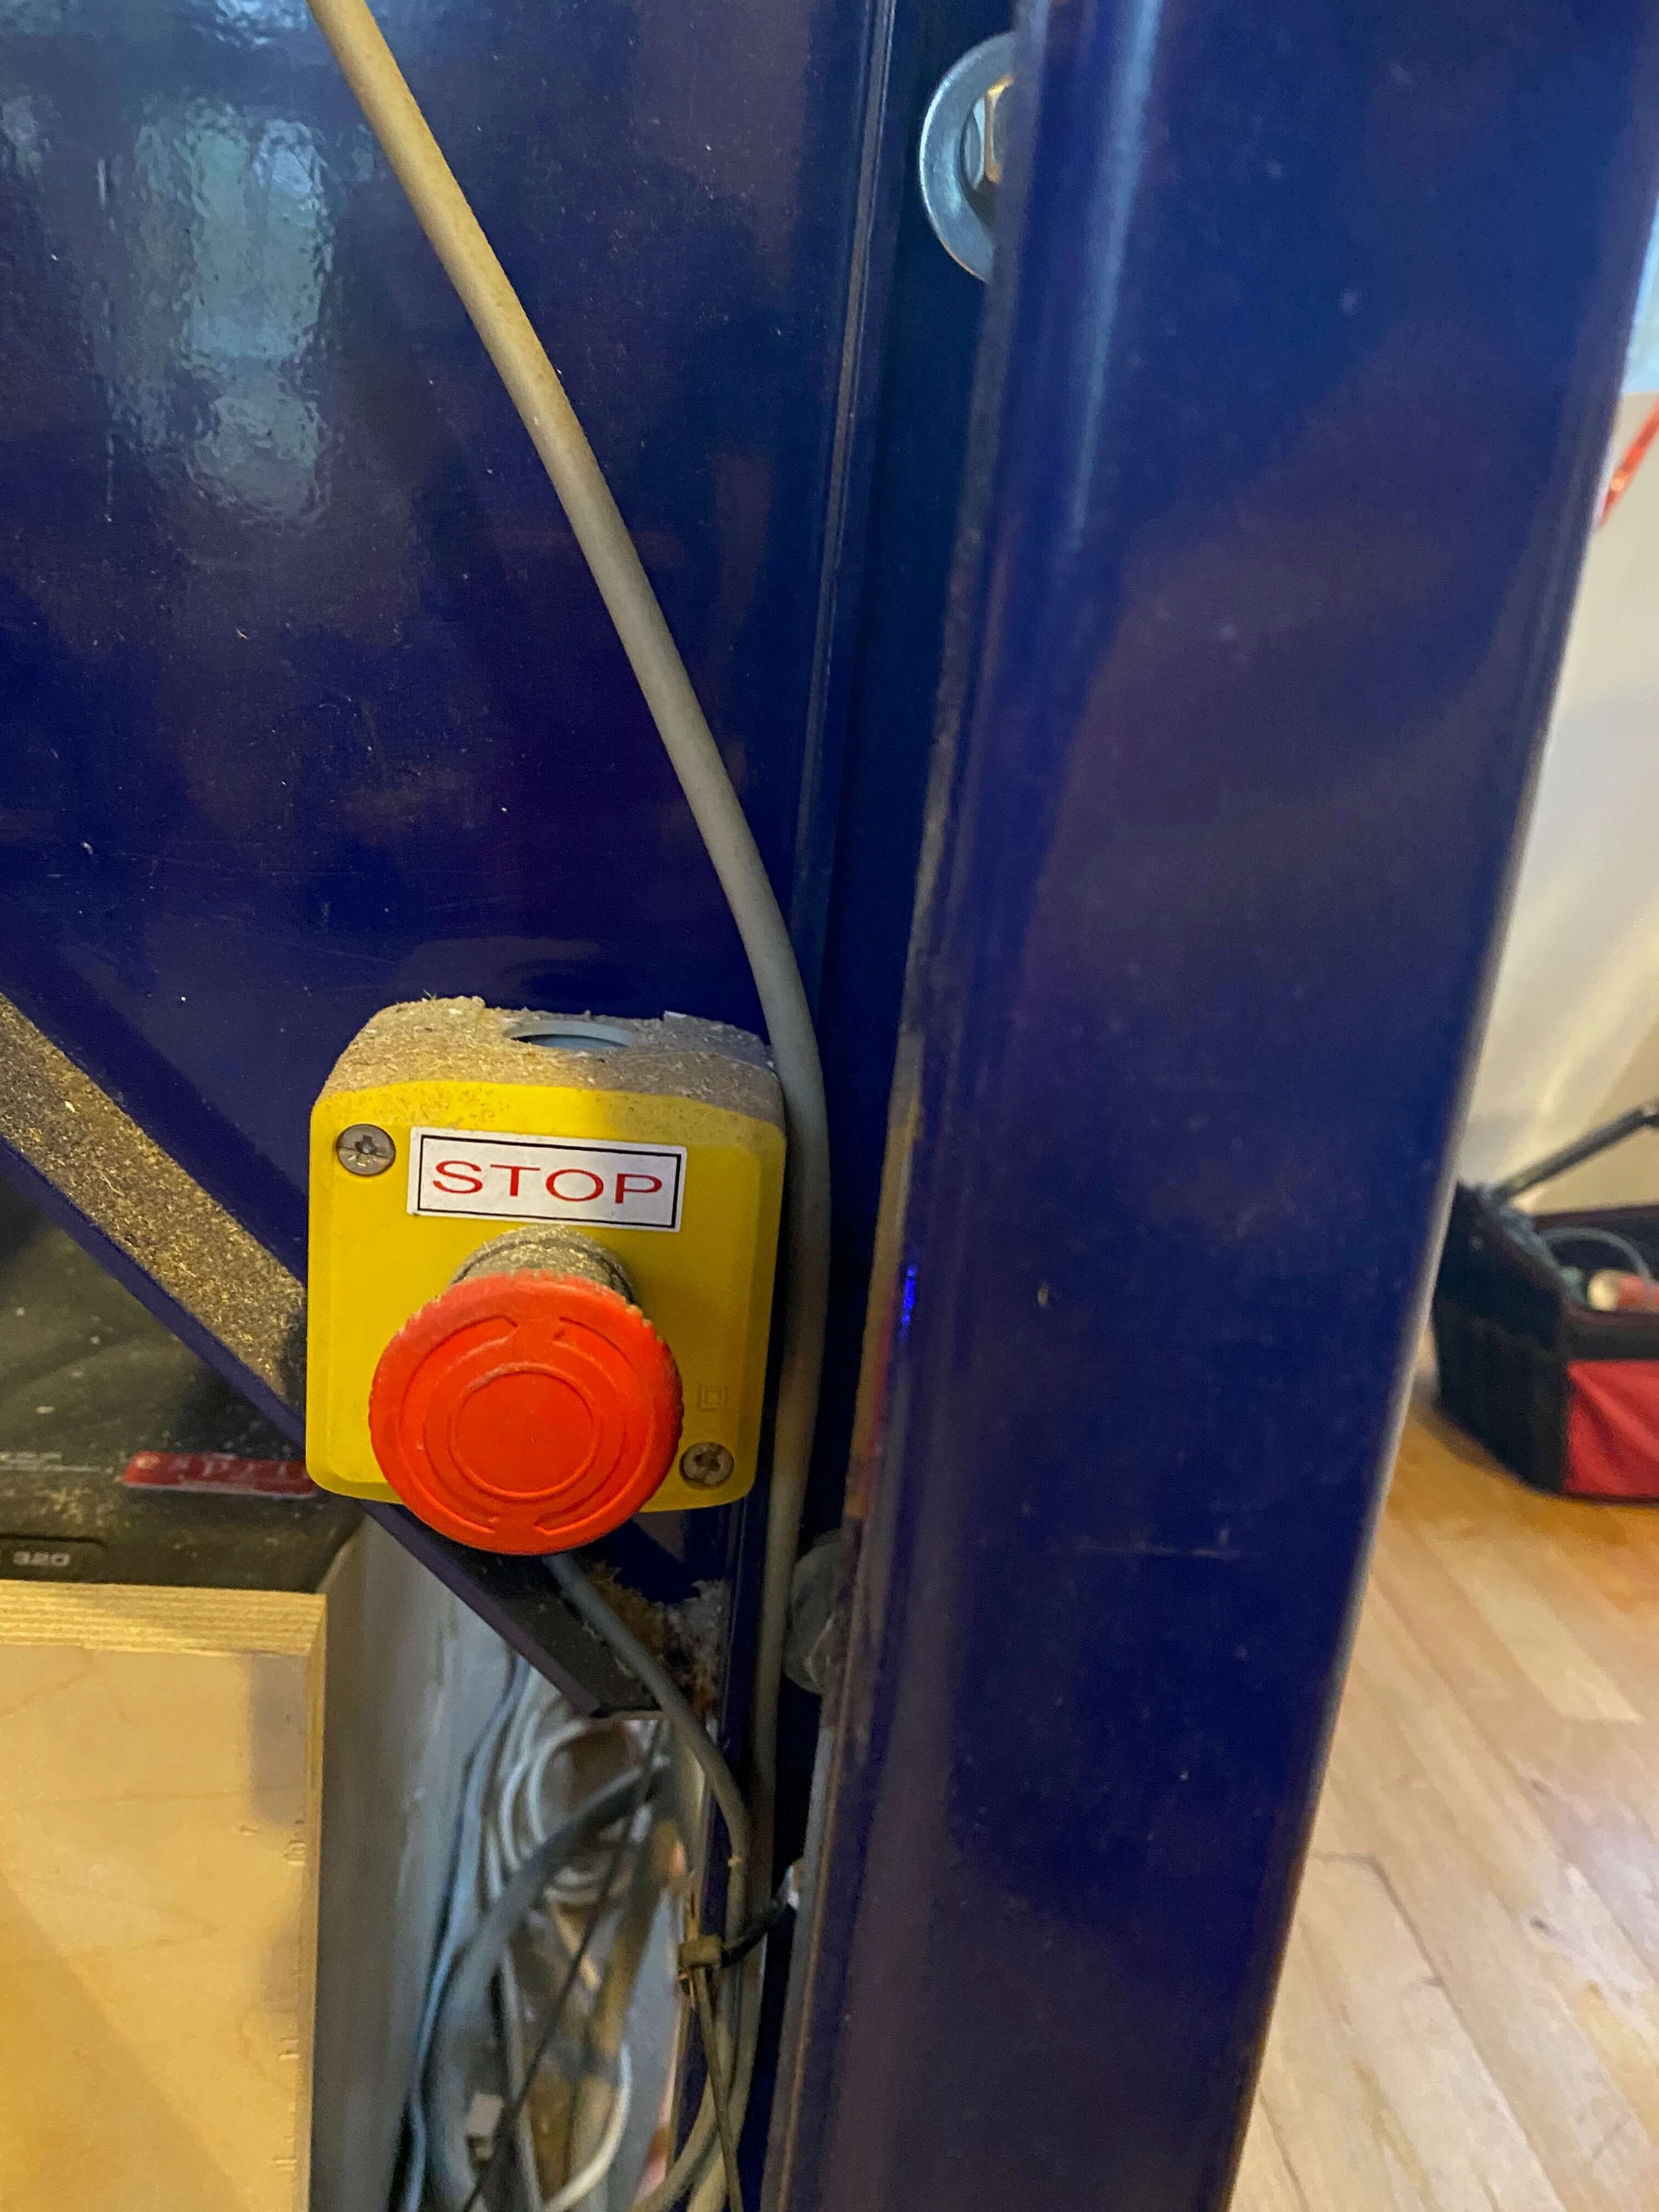
Henk gave us an instruction how to use the big and famous CNC milling machine. His first focus was on the safety rules as this machine uses a lot of power and is an open machine. A lot can go wrong with potentially pretty nasty outcomes:
- The very first Henk pointed out is the Kill Switch, this is an emergency stop button, which is located on the right side below the milling table.
-
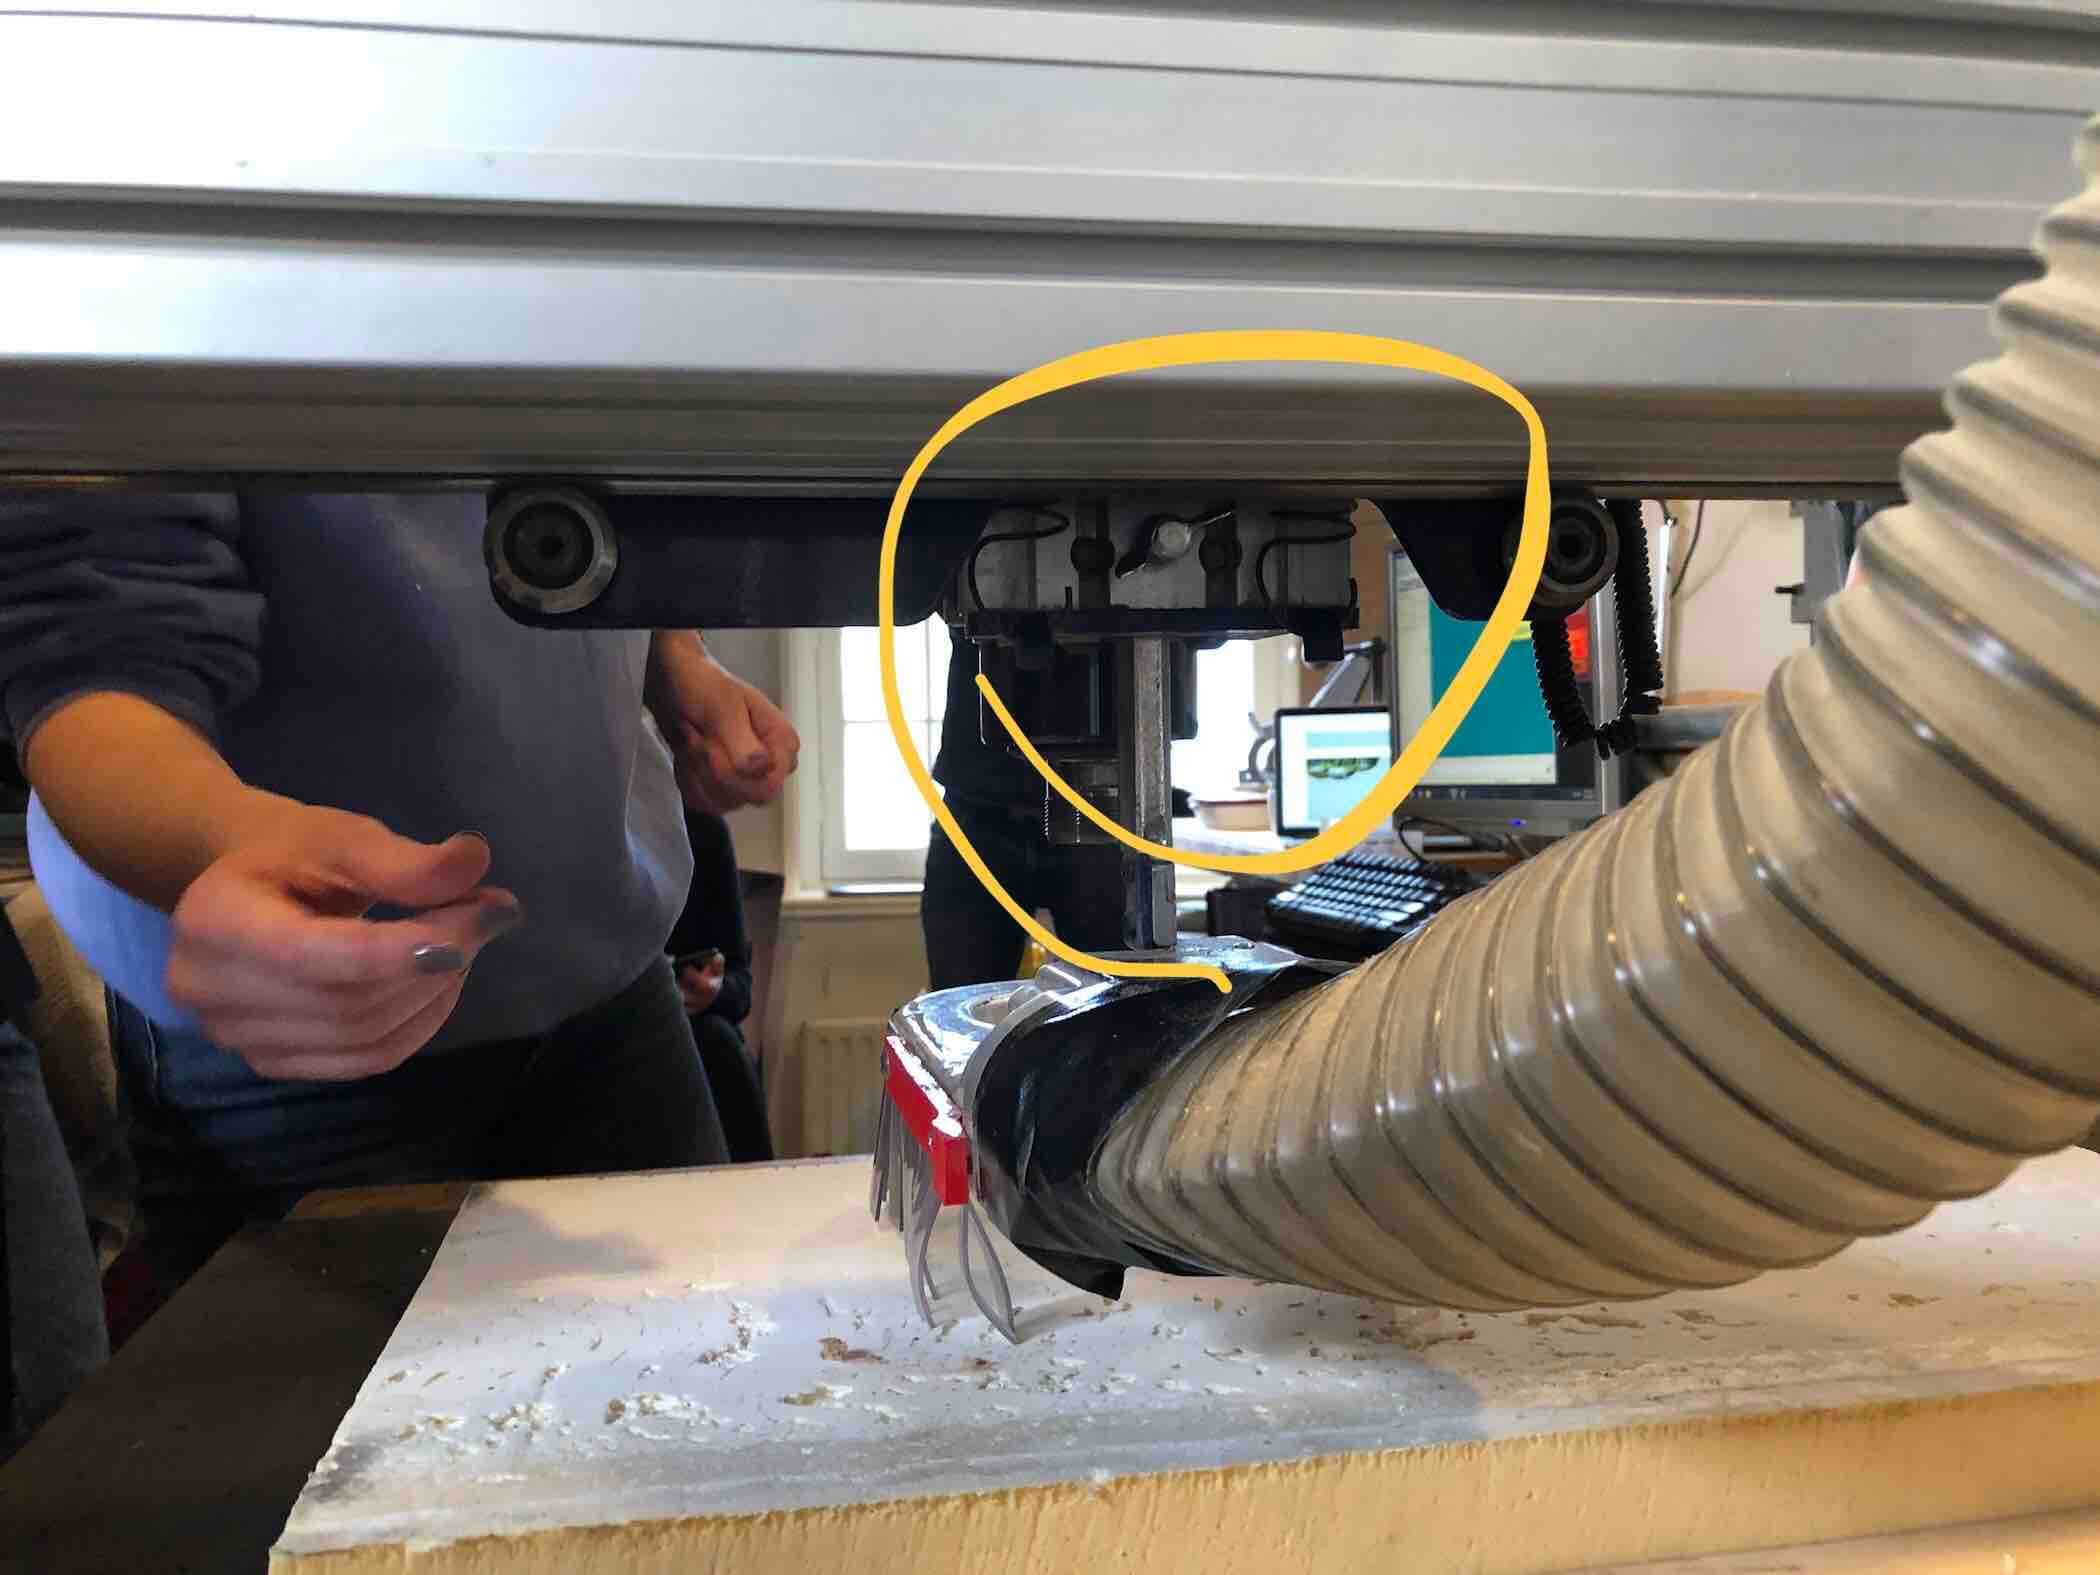
The machine has two parts, the spindle and the dust tube collector, which is connected to a big sack in the back of the room. The spindle rotates with 6.000-18.000 rpm. When operating the machine, do not wear long hair, necklaces or cords attached to your clothes. When those get in the spindle it will be seconds to be pulled in by the spindle.
-
The spindle can work wood, metal, and foam. When working wood and metal, wear safety glasses and ear plugs.
-
The spindle moves over a rails. Before you start, always check if both rails are clear on the inside and the outside. You should never lean on those rails. Keep the surroundings of this rails clear, no wood, plastic or whatever. As the spindle needs to move up and down, never stand by the bridge sides. Also, while operating the machine, a maximum of 2 persons are allowed in the room.
-
Milling causes chips and dust, which are sucked up by the dust tube collector. In the pipe of this collector, wood and oxygen are present. It is a perfect mix for a fire to start easily.
-
When milling a wooden sheet with screws or any sort of metal object attached, the milling machine can create sparks. Also, when by accident, the milling machine touches the table, it can cause sparks. When you hit metal by accident, you should do three things immediately: 1) turn off the spindle, 2) turn of the dust collector, 3) take out the bag with wood dust.
-
When you hear beeping and/or a rattling noise while milling, it means the milling machine goes too fast or the material is not connected well enough to the table.
-
If you are pausing the machine do it when it is traveling around and not when milling, otherwise heat can be generated and another potential cause for fire is created.
Preparing the milling file
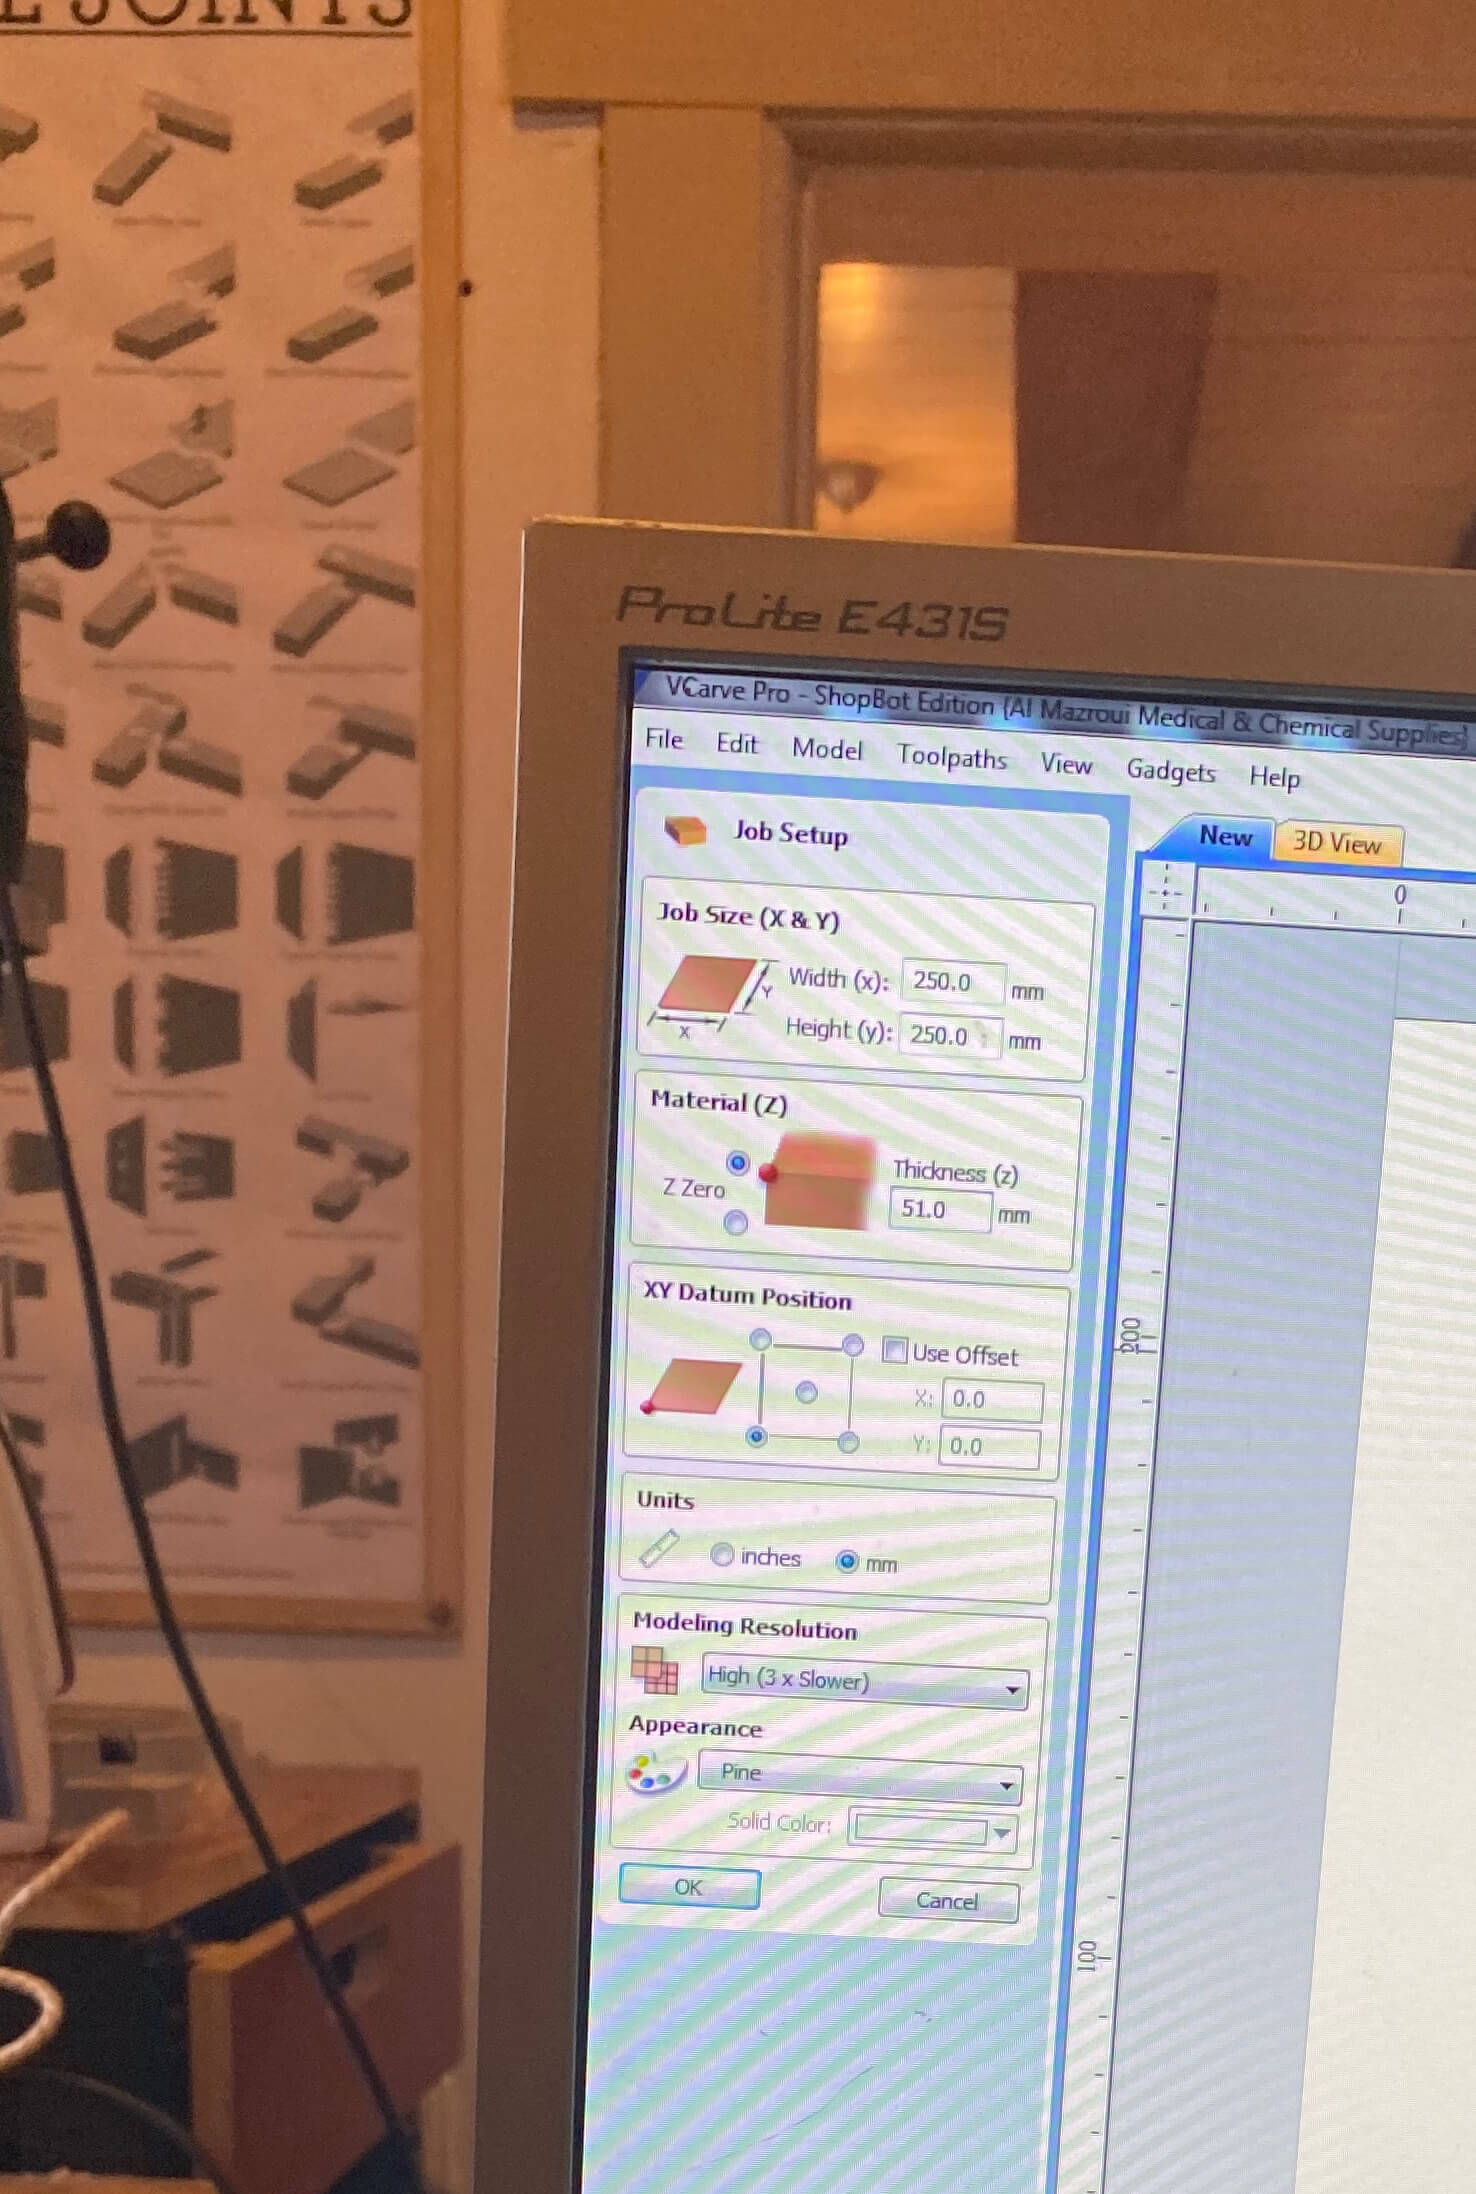
For converting the .stl file into a proper milling file, we used the Vcarve Shopbot software:
- First measure the thickness of the material to be milled (we used foam with a thickness of 50 mm).
- Then import the .stl file.
- First the job needs to be set up: job size (x- and y-axis), the material thickness (z-axis), xy-start position, and units (mm) should be defined.
- Then move the model object into the 'material box'.
- Now the settings for orienting the model should be done.
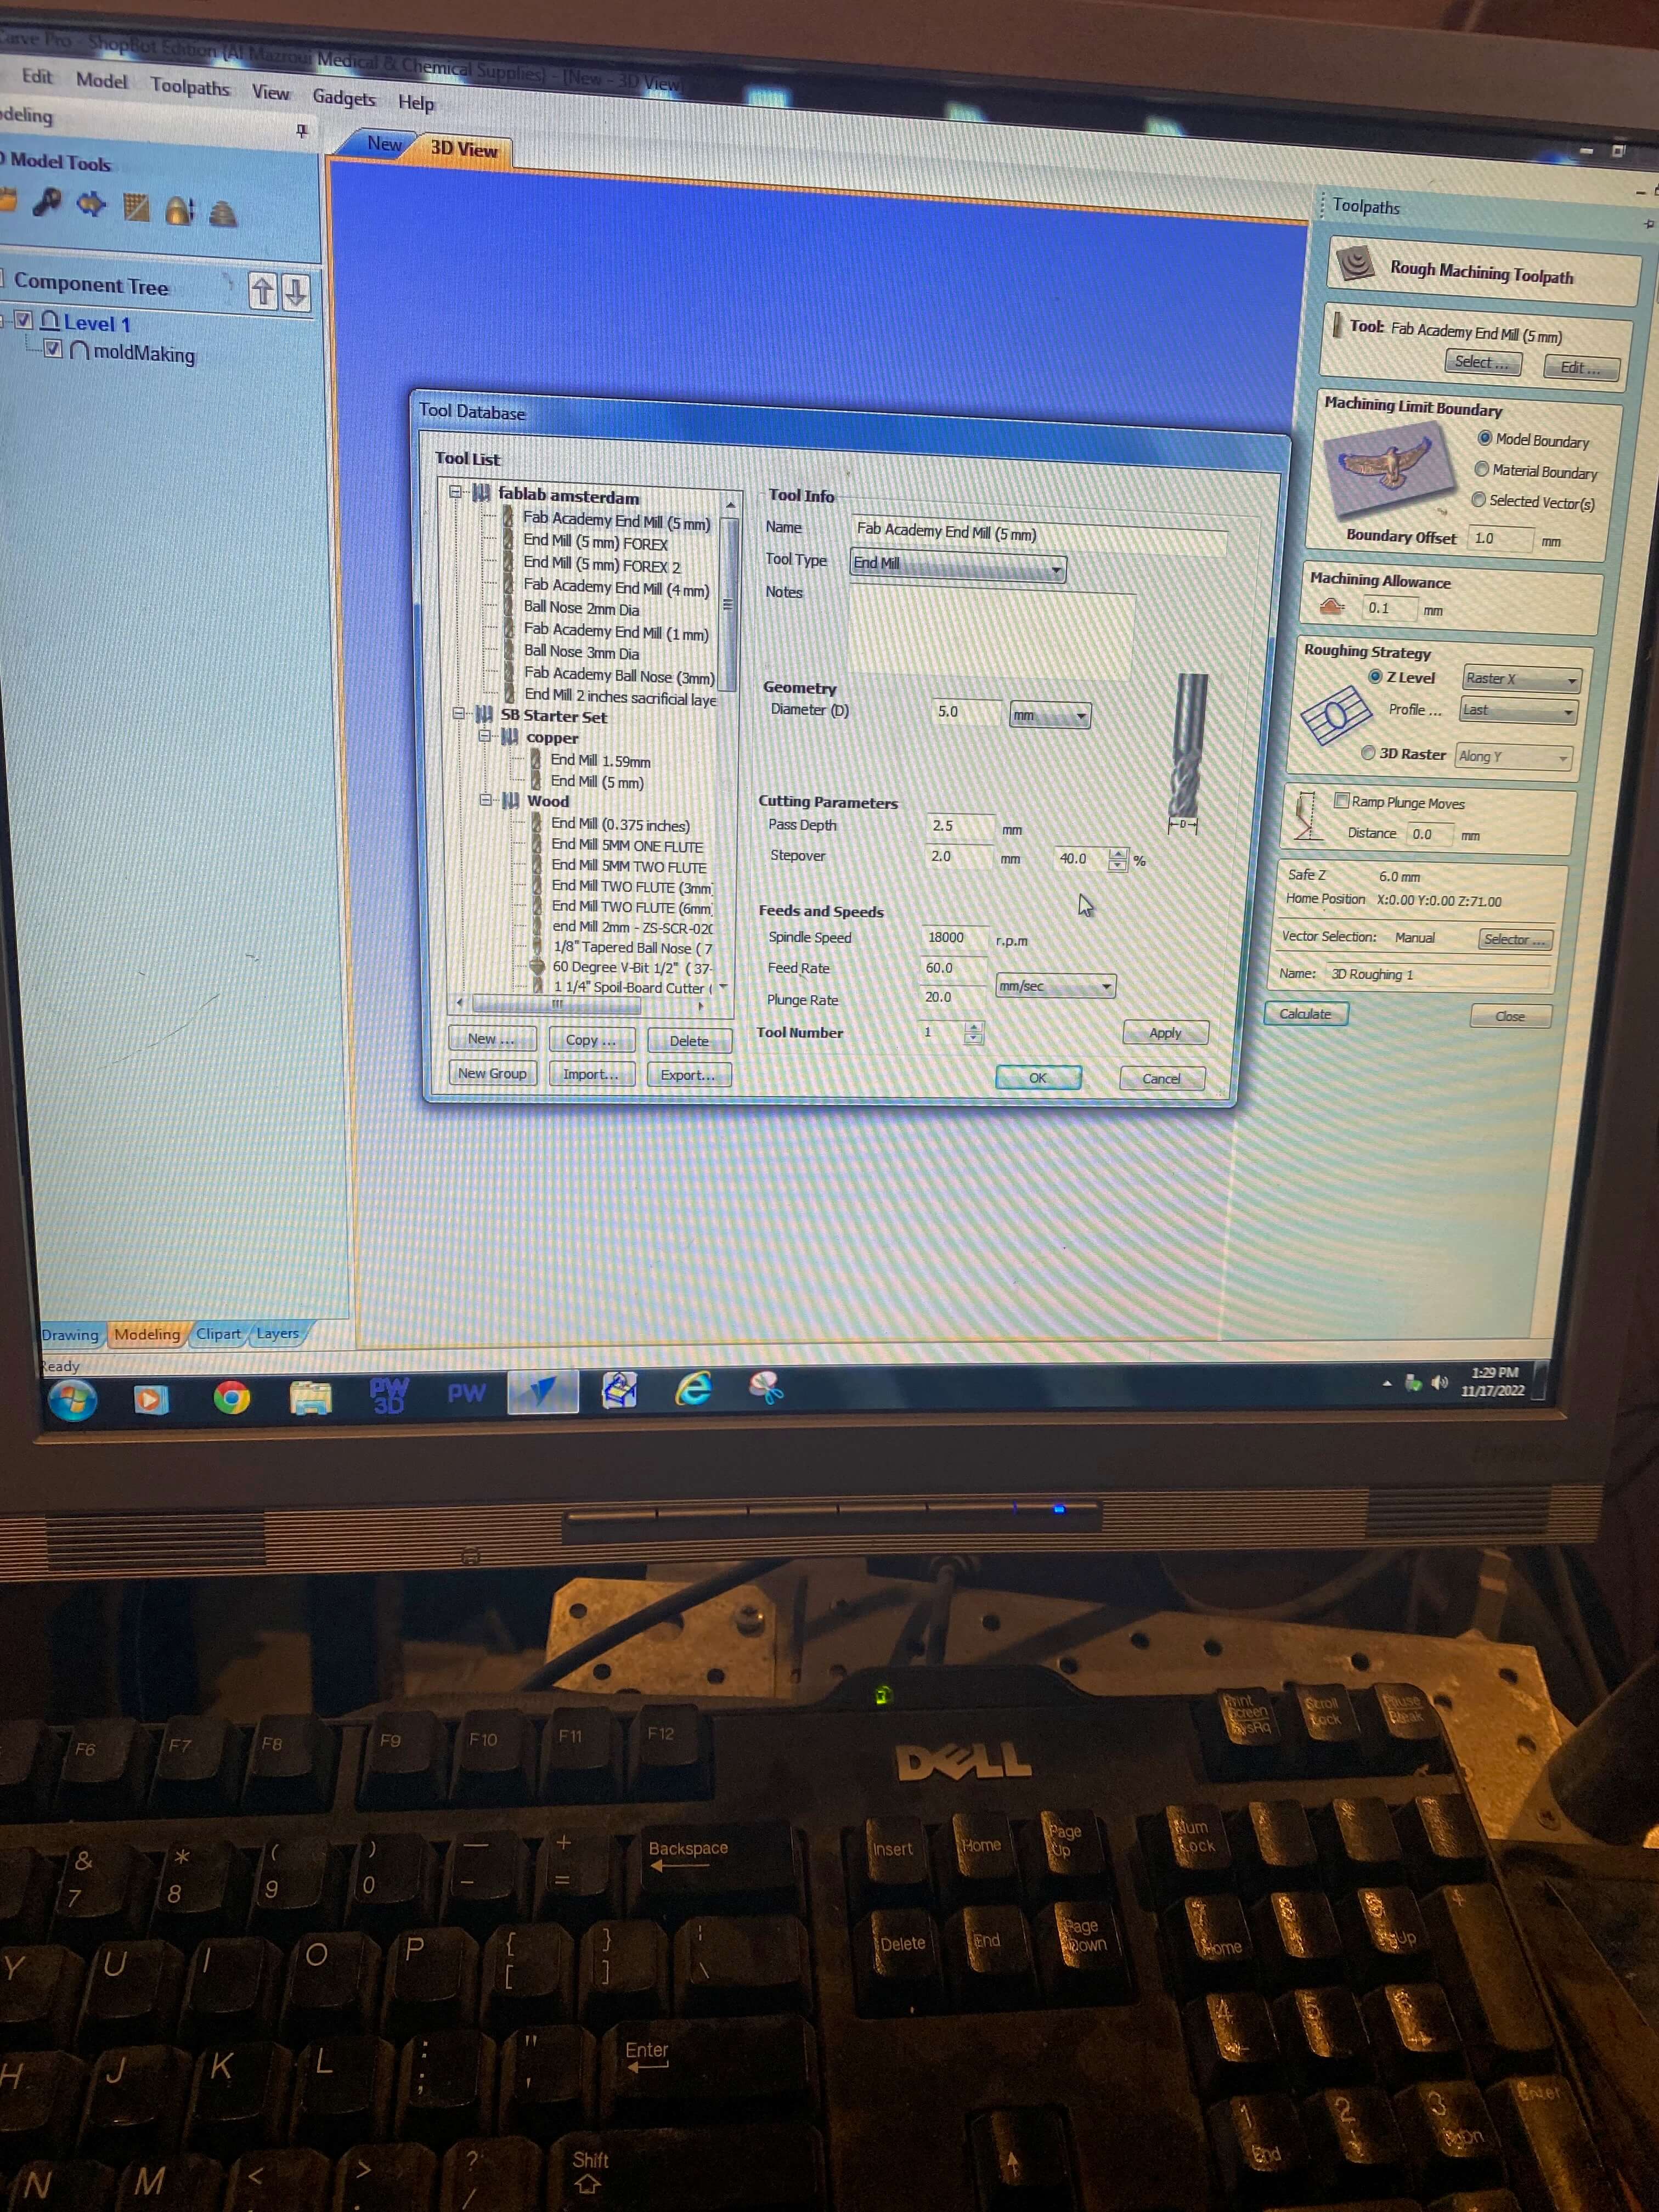
- After this in the software first the Rough Machining Toolpath should be defined. This is the first round in which the milling machine removes excess material as quickly as possible. Within the toolpath the end mill should be selected. For foam, this is the Fabricademy end mill, with a diameter of 5 mm. The settings for soft material are 10.000 rpm, a feed rate of 150 m/s and a plunge rate of 150 m/sec. For roughing the cut stepover should be set at 80%. The machine limit boundaries as model boundary. The machining allowance at 0,1 mm. And in the Strategy, the Z-level should be set on Raster X and Profile last. Once the settings are set and checked, push the button Calculate. Now the toolpath is calculated. The toolpath can be previewed.
- Once the Rough toolpath is ready, it is time to set the Finishing Toolpath. In this second round the milling machine will take more time and use thinner lines, to finish the surface of the mold. For the Finishing toolpath select the same end mill. But for this toolpath the stepover is reduced to 10%, the speed rate to 100 m/sec and the plunge rate to 100 m/sec. Lastly the Strategy is changed in Offset. Again calculate the toolpath and preview it.
Operating the milling machine
Once the milling file is created, it is time to prepare and operate the milling machine:
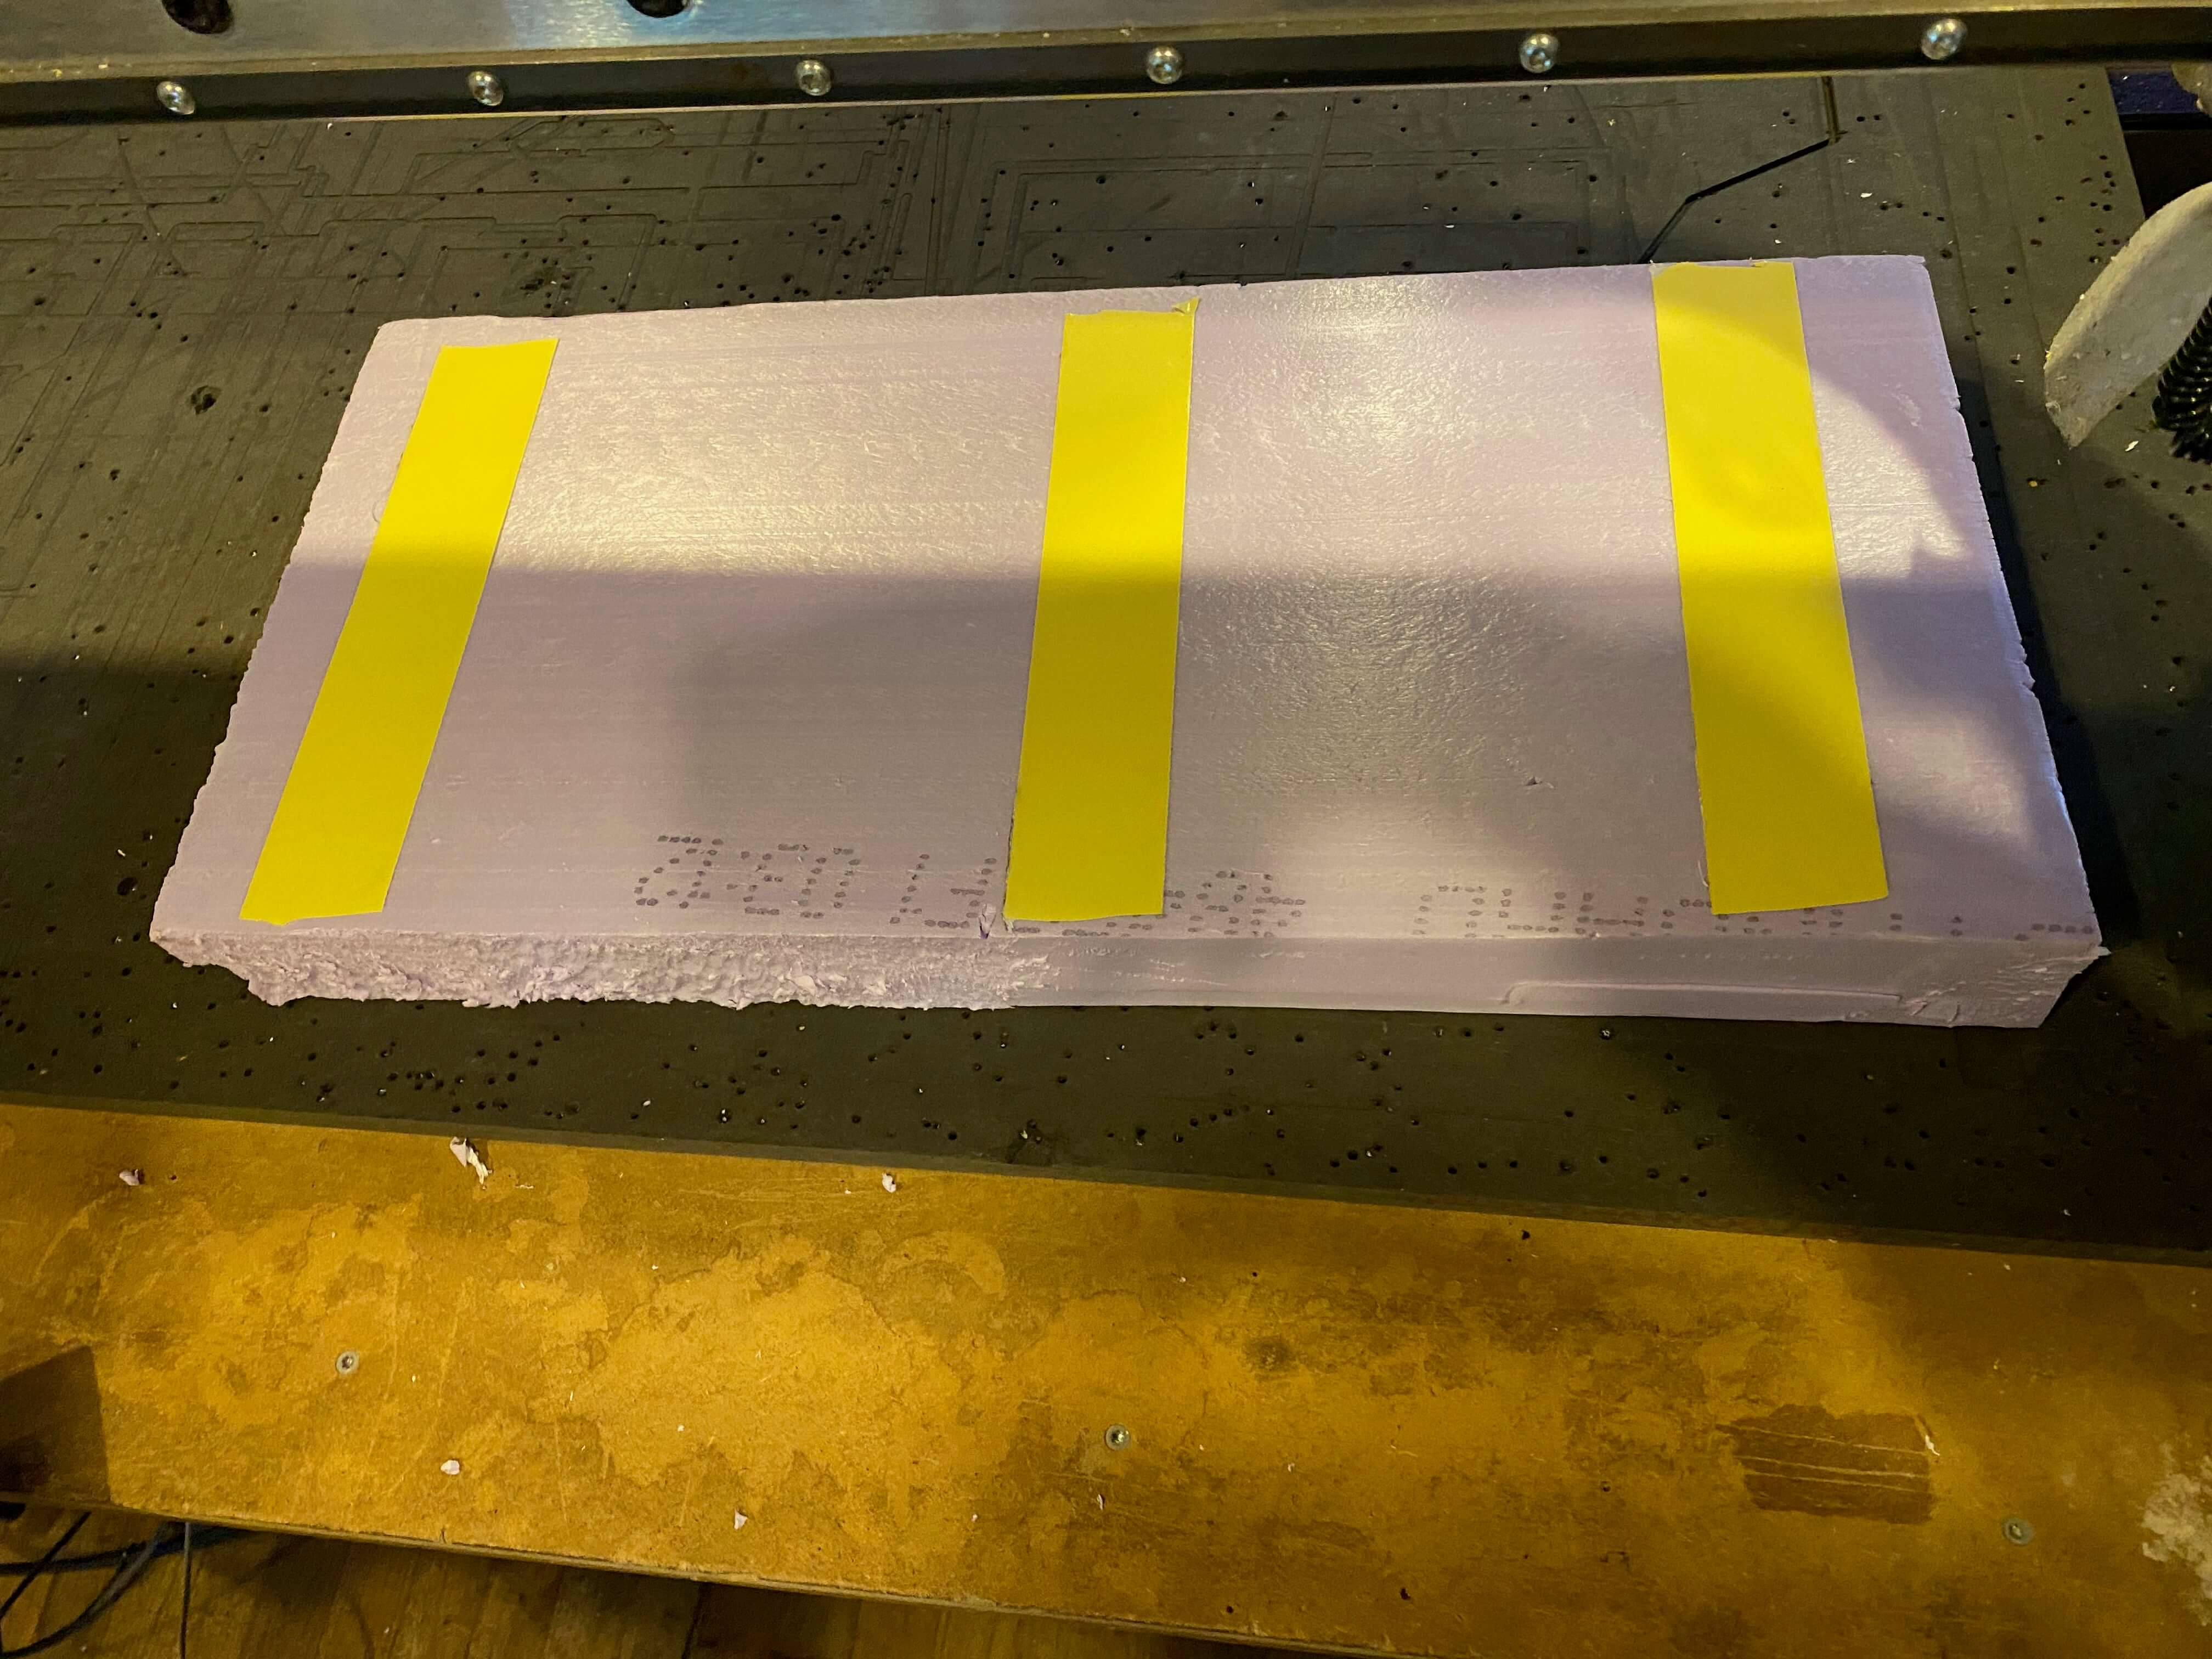
- As a first step, tape the foam material with doublesided tape to the milling bed.
- When you use 10.000 rpm, at the bottom of the milling machine change the rpm manually to 10,0.
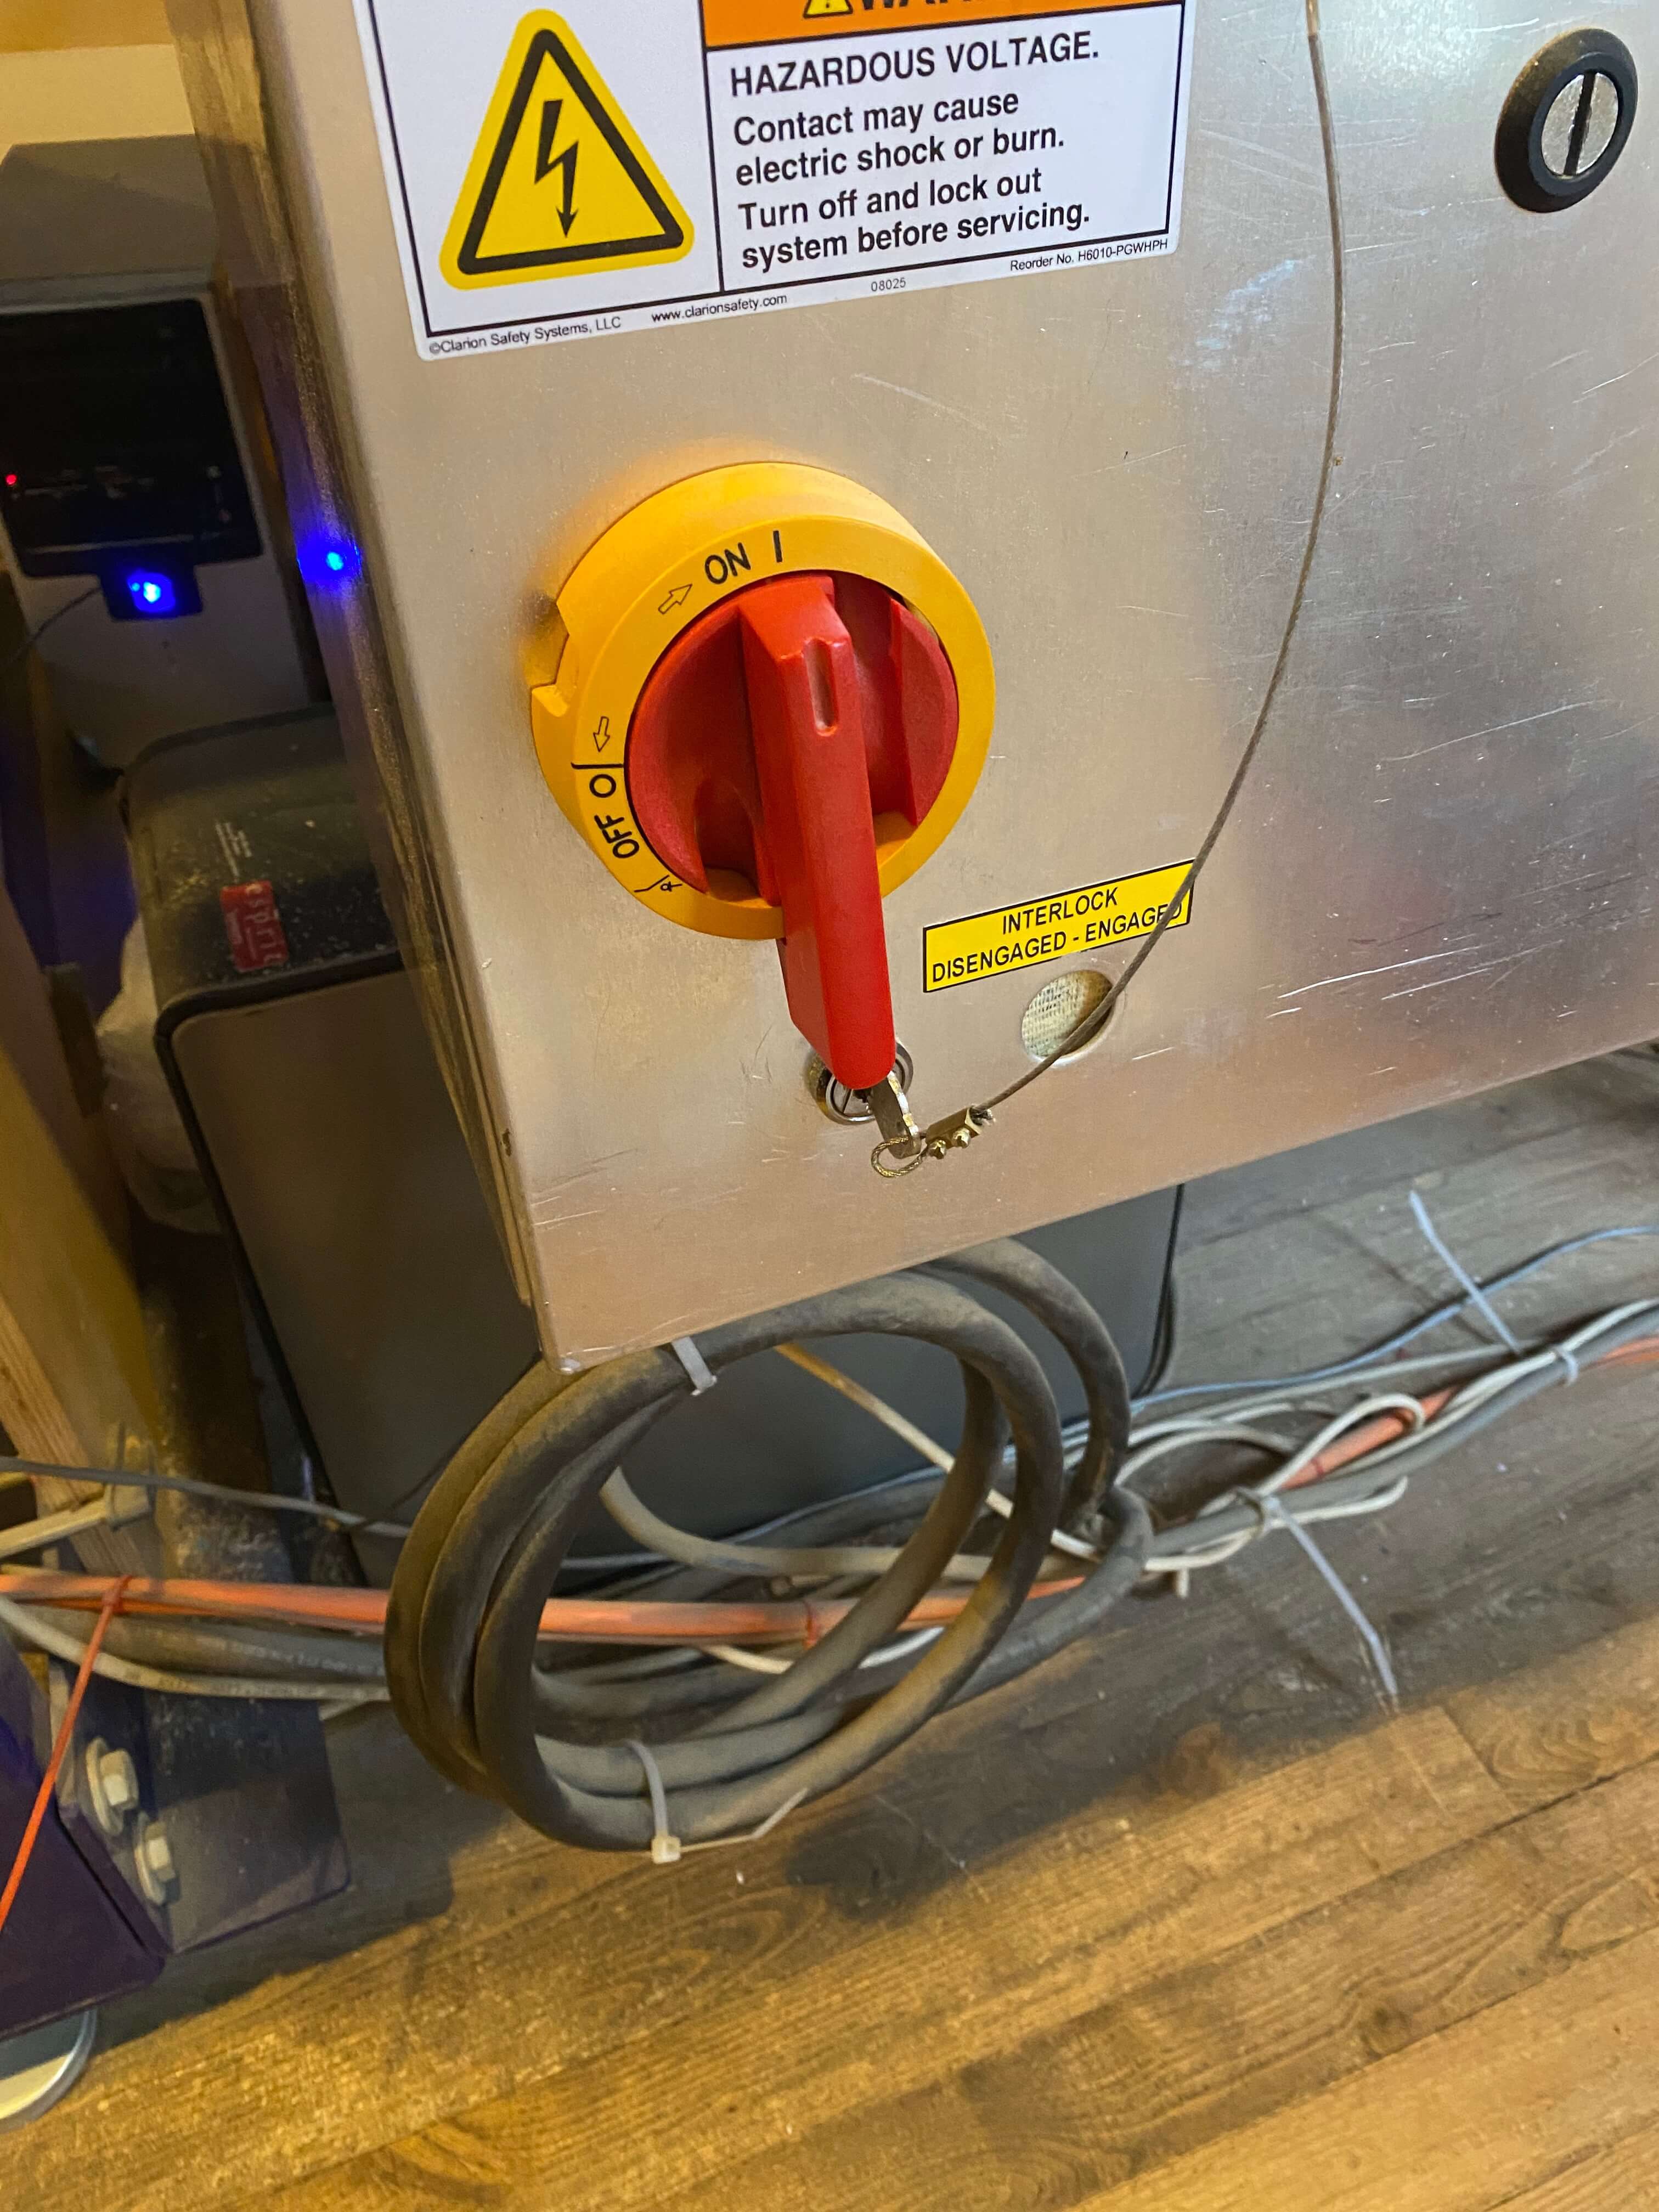
- Turn on the machine at the side.
- Open the Shopbot software program. Only open the software when the machine is on, otherwise it gives you an error message. In Shopbot the units are expressed in mm (with 3 data behind the comma!). 1=z, 2=x, and 3=y. The arrows are the x-y movement. The page up and page down buttons are for z movement.
- Press K to work with the machine manually, the yellow box comes up. Bring the tip close to you and move it up on the z-axis.
- Unscrew the butterfly in the back to lift up the skirt so you can work in the tip
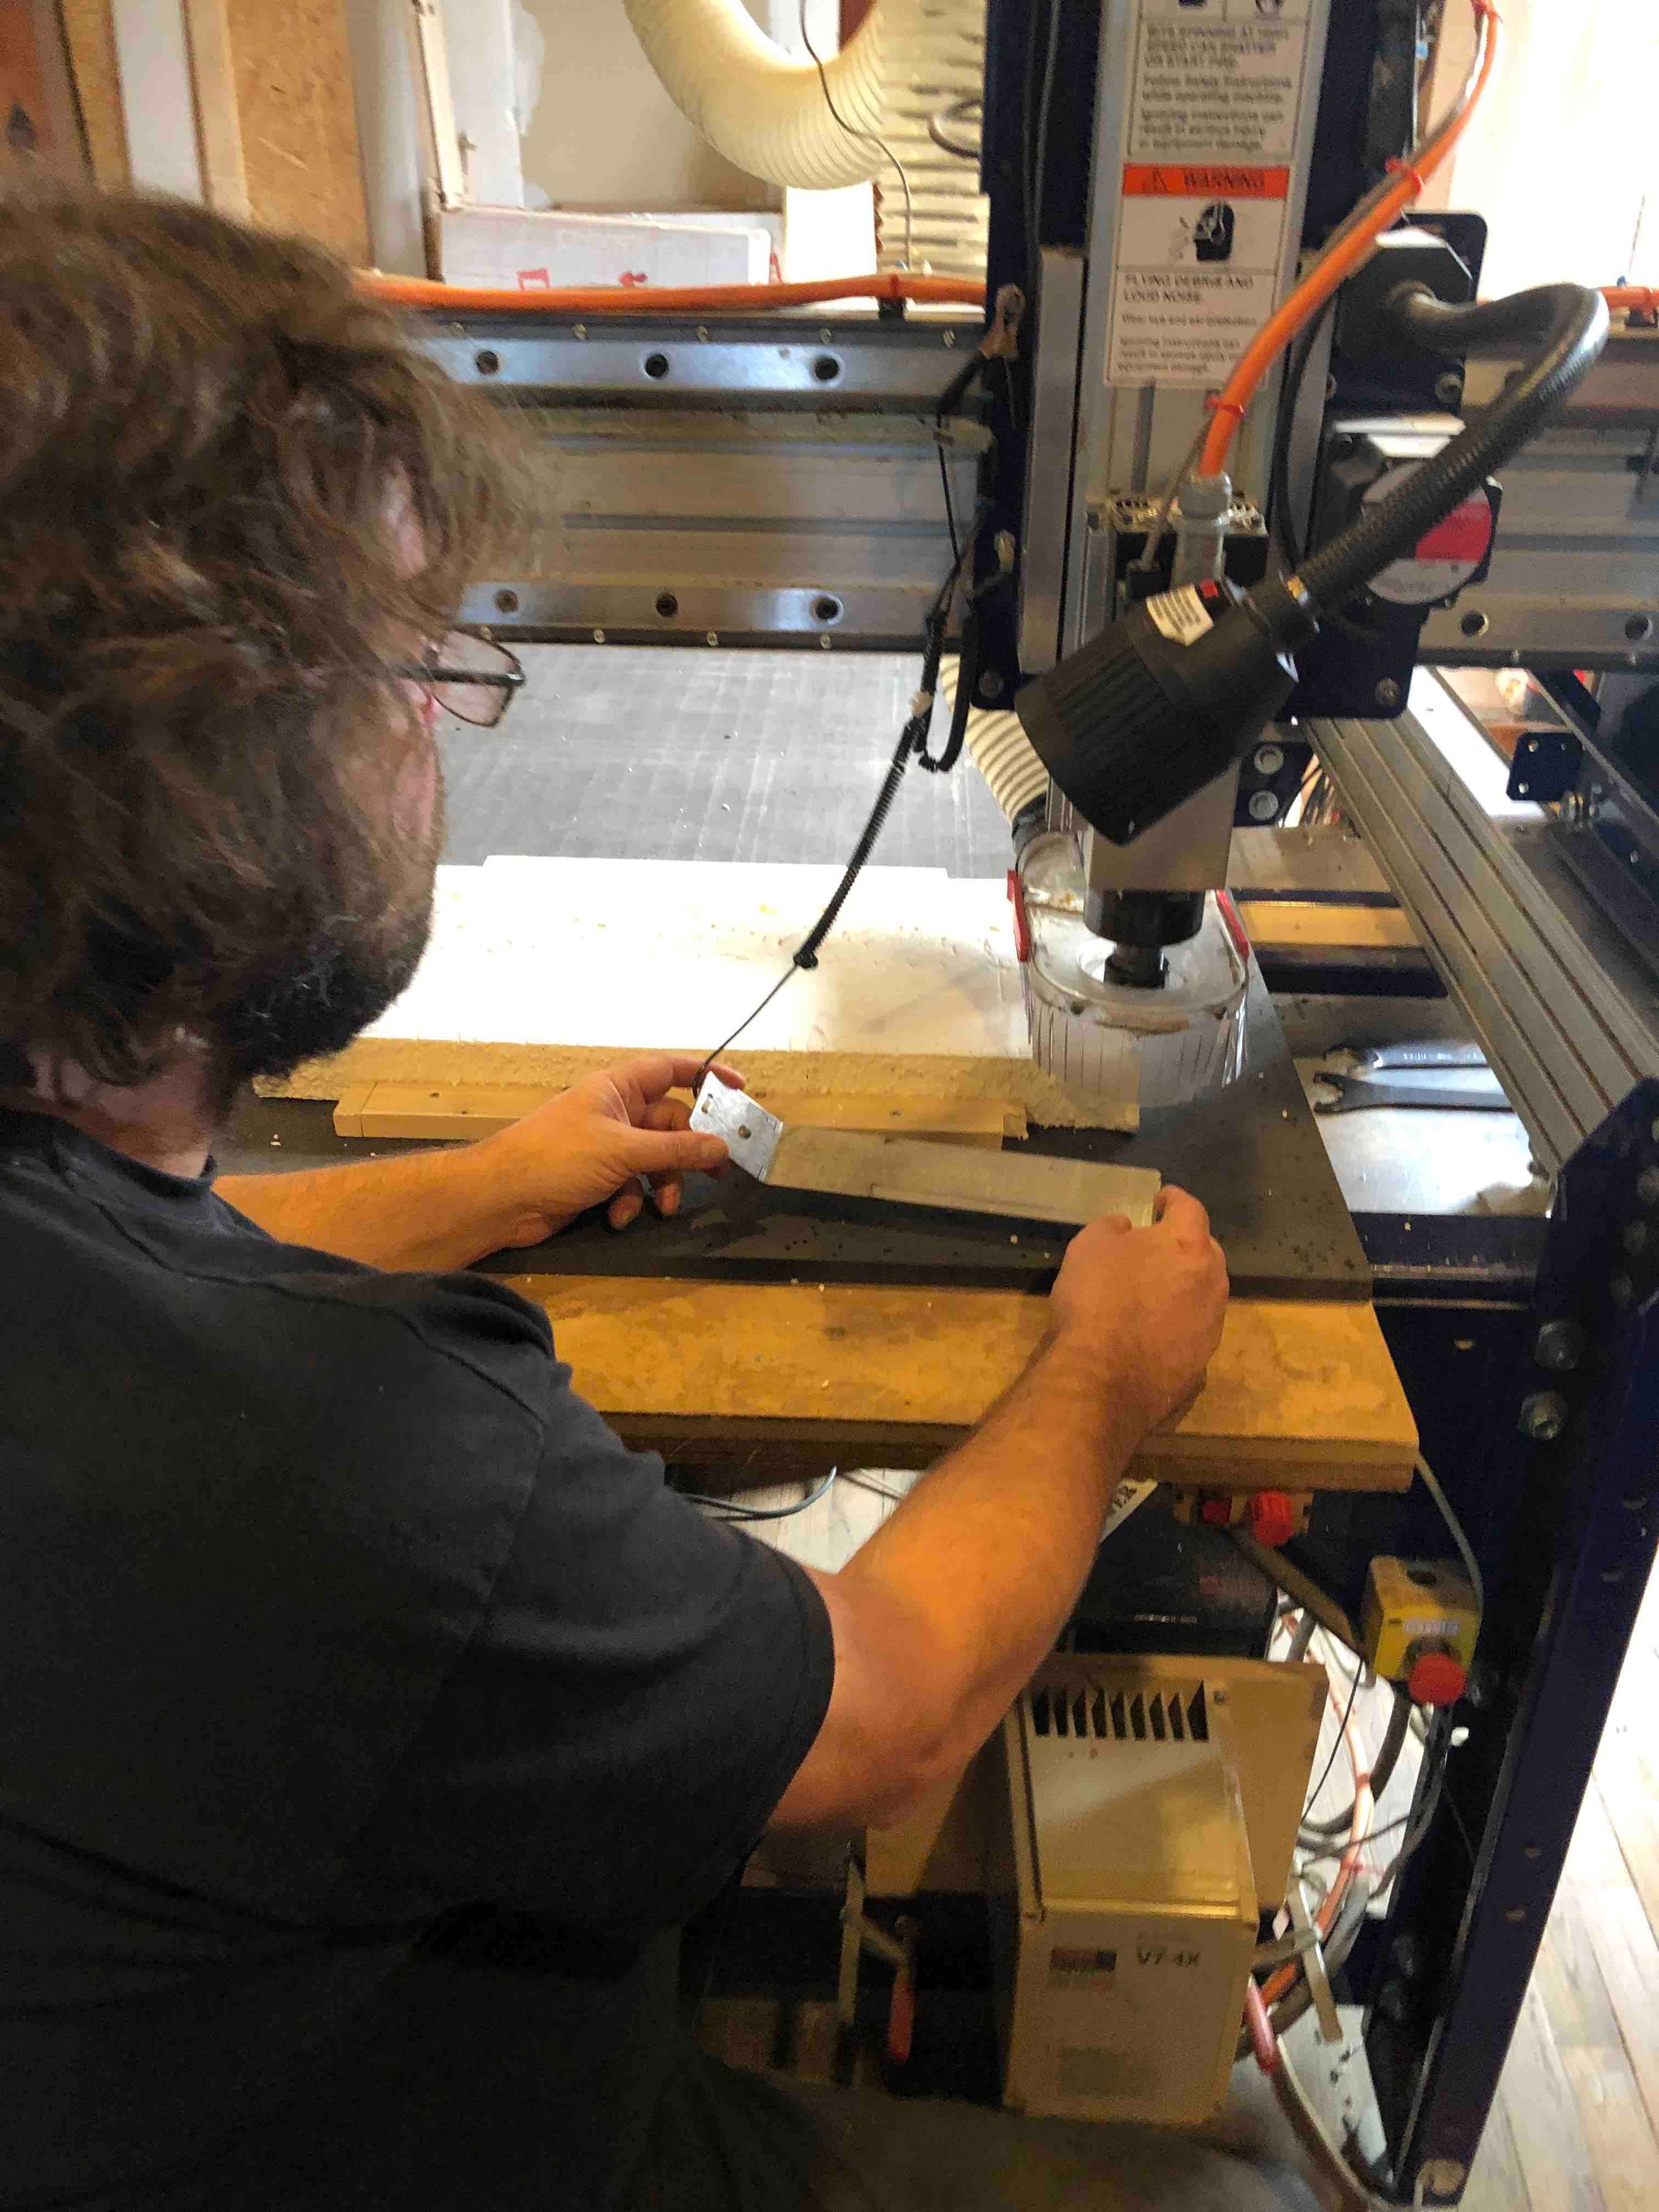
- Then connect the bid, nut and collet. Measure how much you want to have the bid stick out, as a rule of thumb this should be max 33 mm for foam of 50 mm thick.
- Move the skirt up again and screw the butterfly at the back in place.
- Move with the arrows the spindle to the job home above the material (write the numbers for the x-axis and y-axis down).
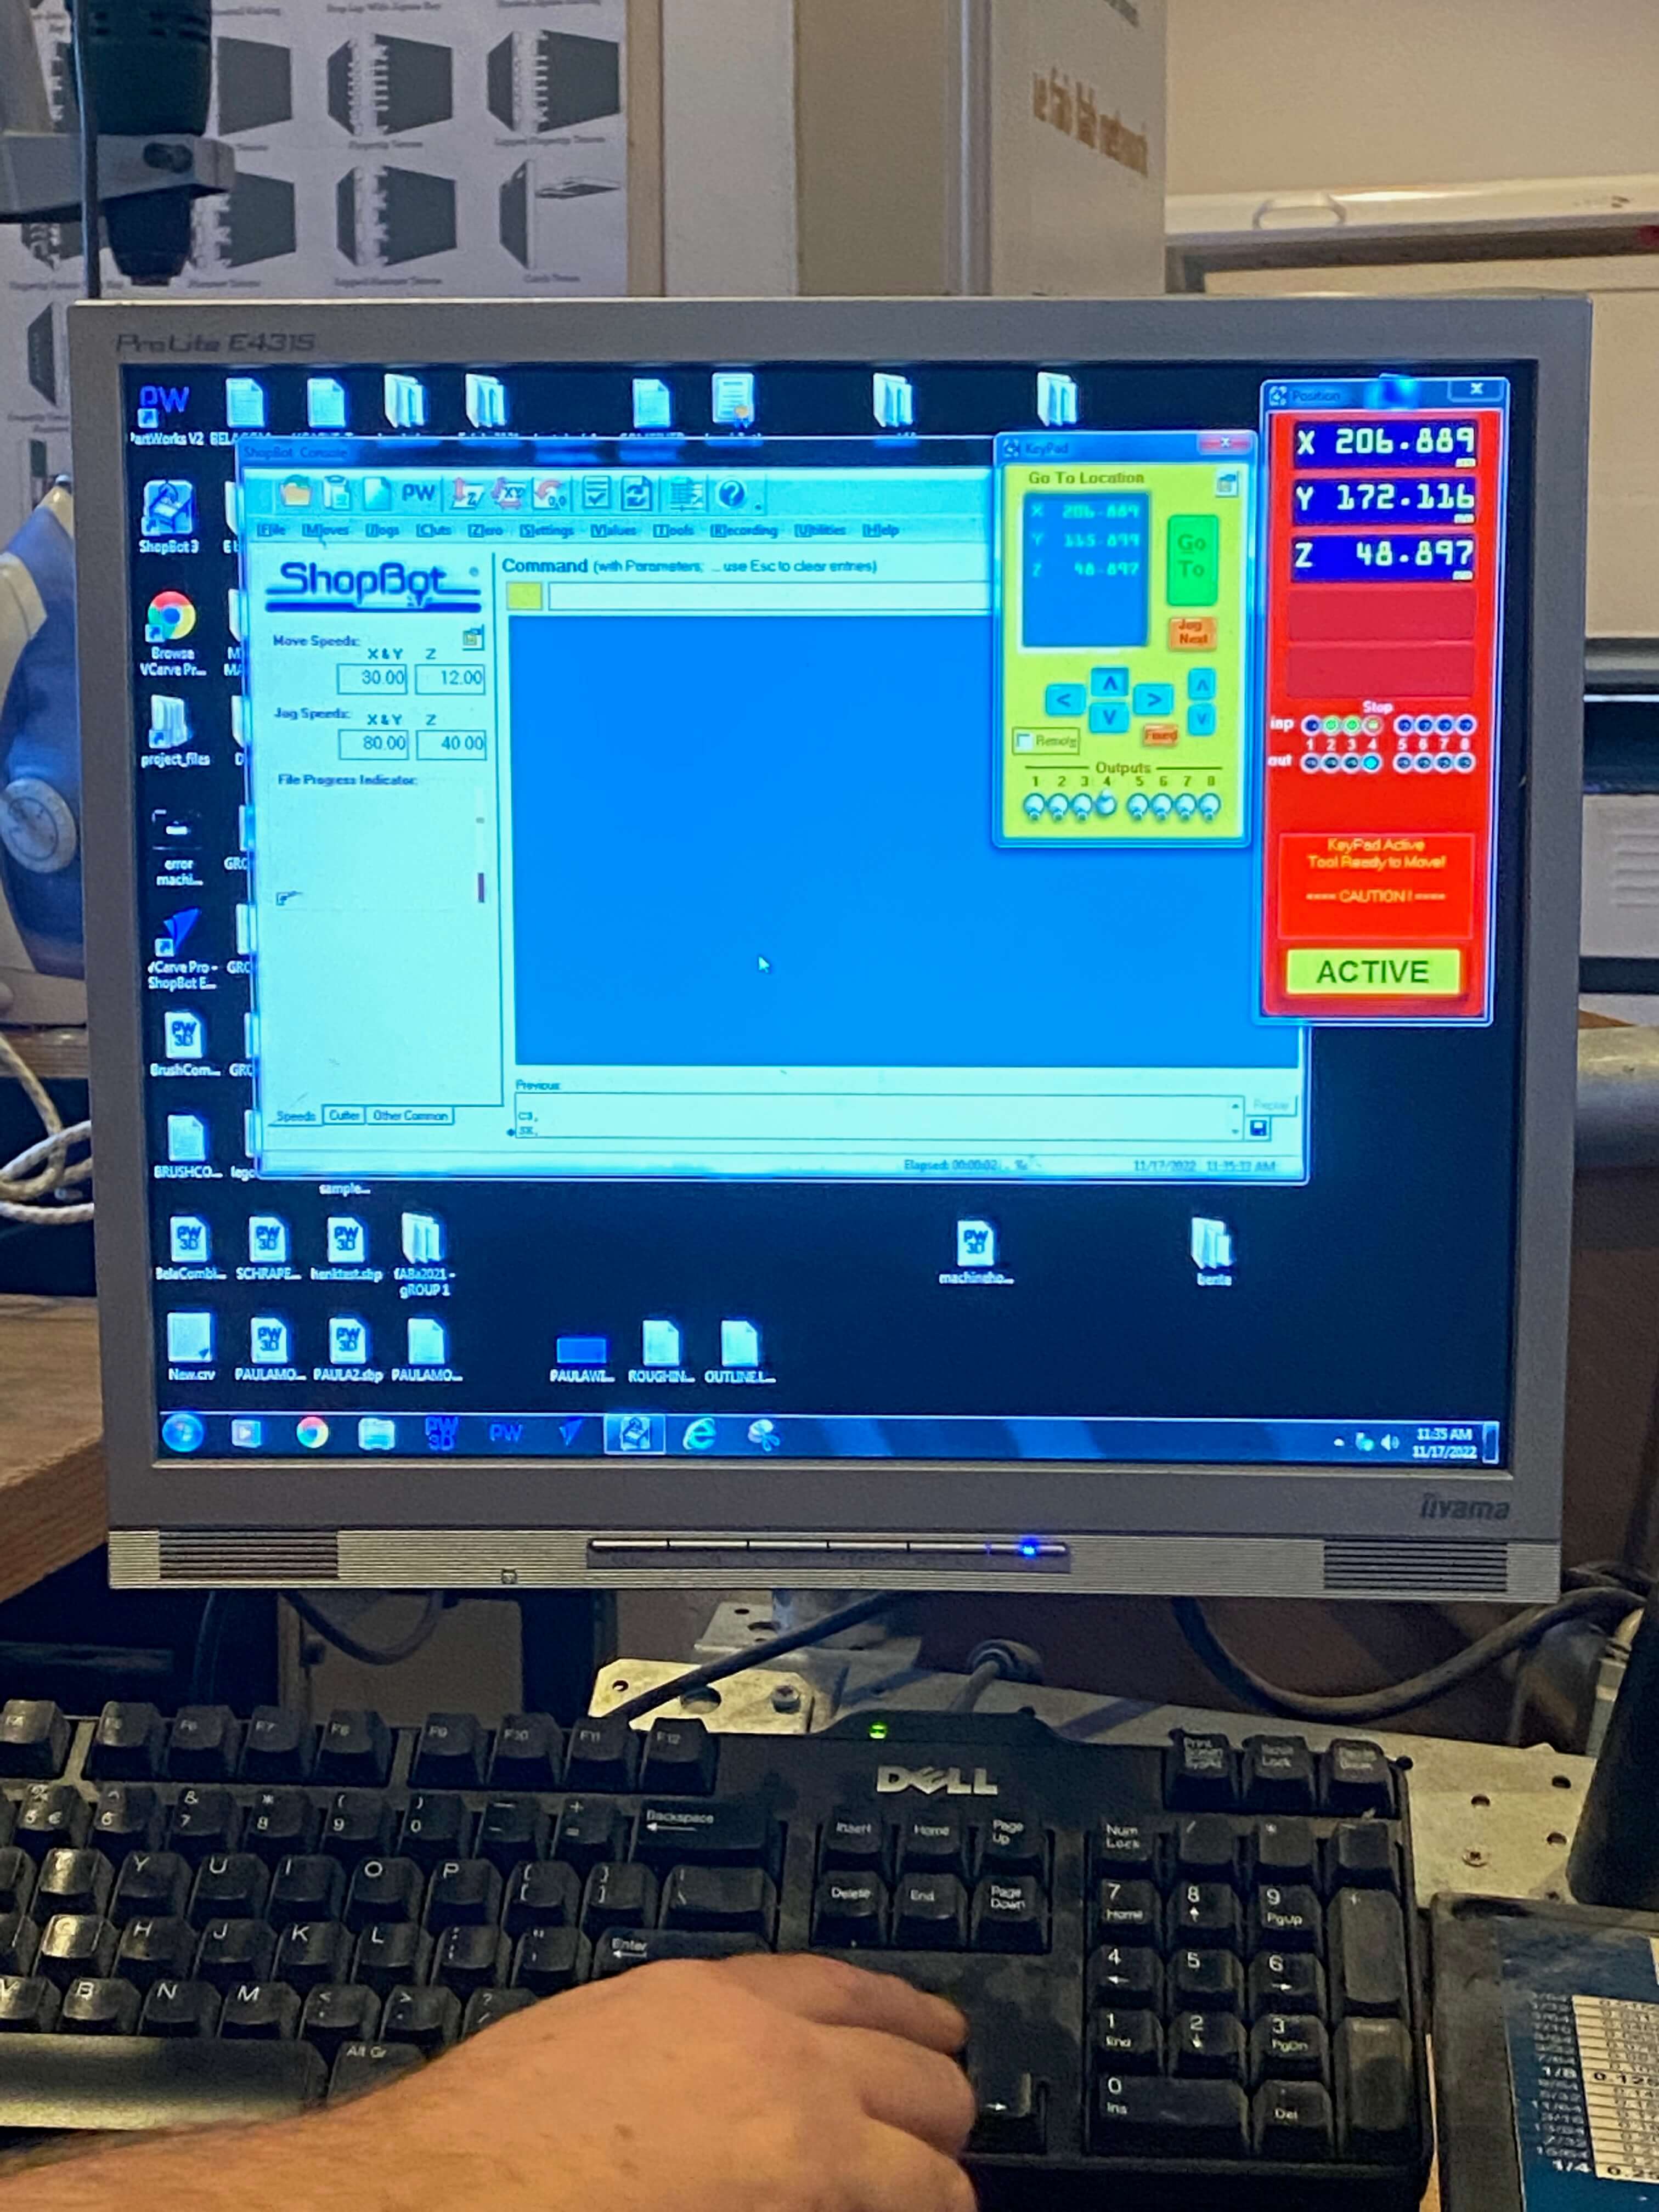
- Use the button Zero X-Y so the software will know that this is the job home, the machine sets the x-axis and y-axis to 0 for this location.
- Calibrate the z-axis. Place the alligator clip under the spindle. This clip is the sensor, but creating an eletronic circuit it knows that the tip of the bid touched it (the machine knows that the aligator clip tickness is ~3.007 mm).
- Push the button Zero Z to level the z in the middle of the place where you start milling.
- Press K and use the Page Up command to remove the alligator clip.
- Open your milling file.

- Turn on the dust collector in the back of the room.
- Switch the dust collector power button on the table.
- With the key switch the milling machine on.
- And finally press start on your file. Milling in progress!
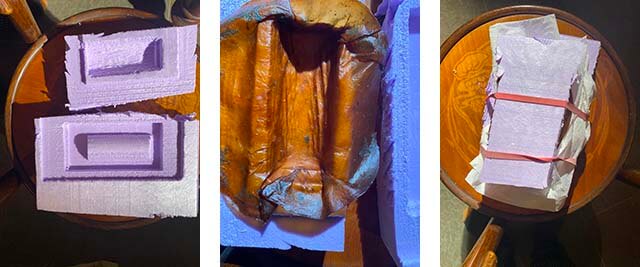
Milling my tree trunk mold
Using the mold
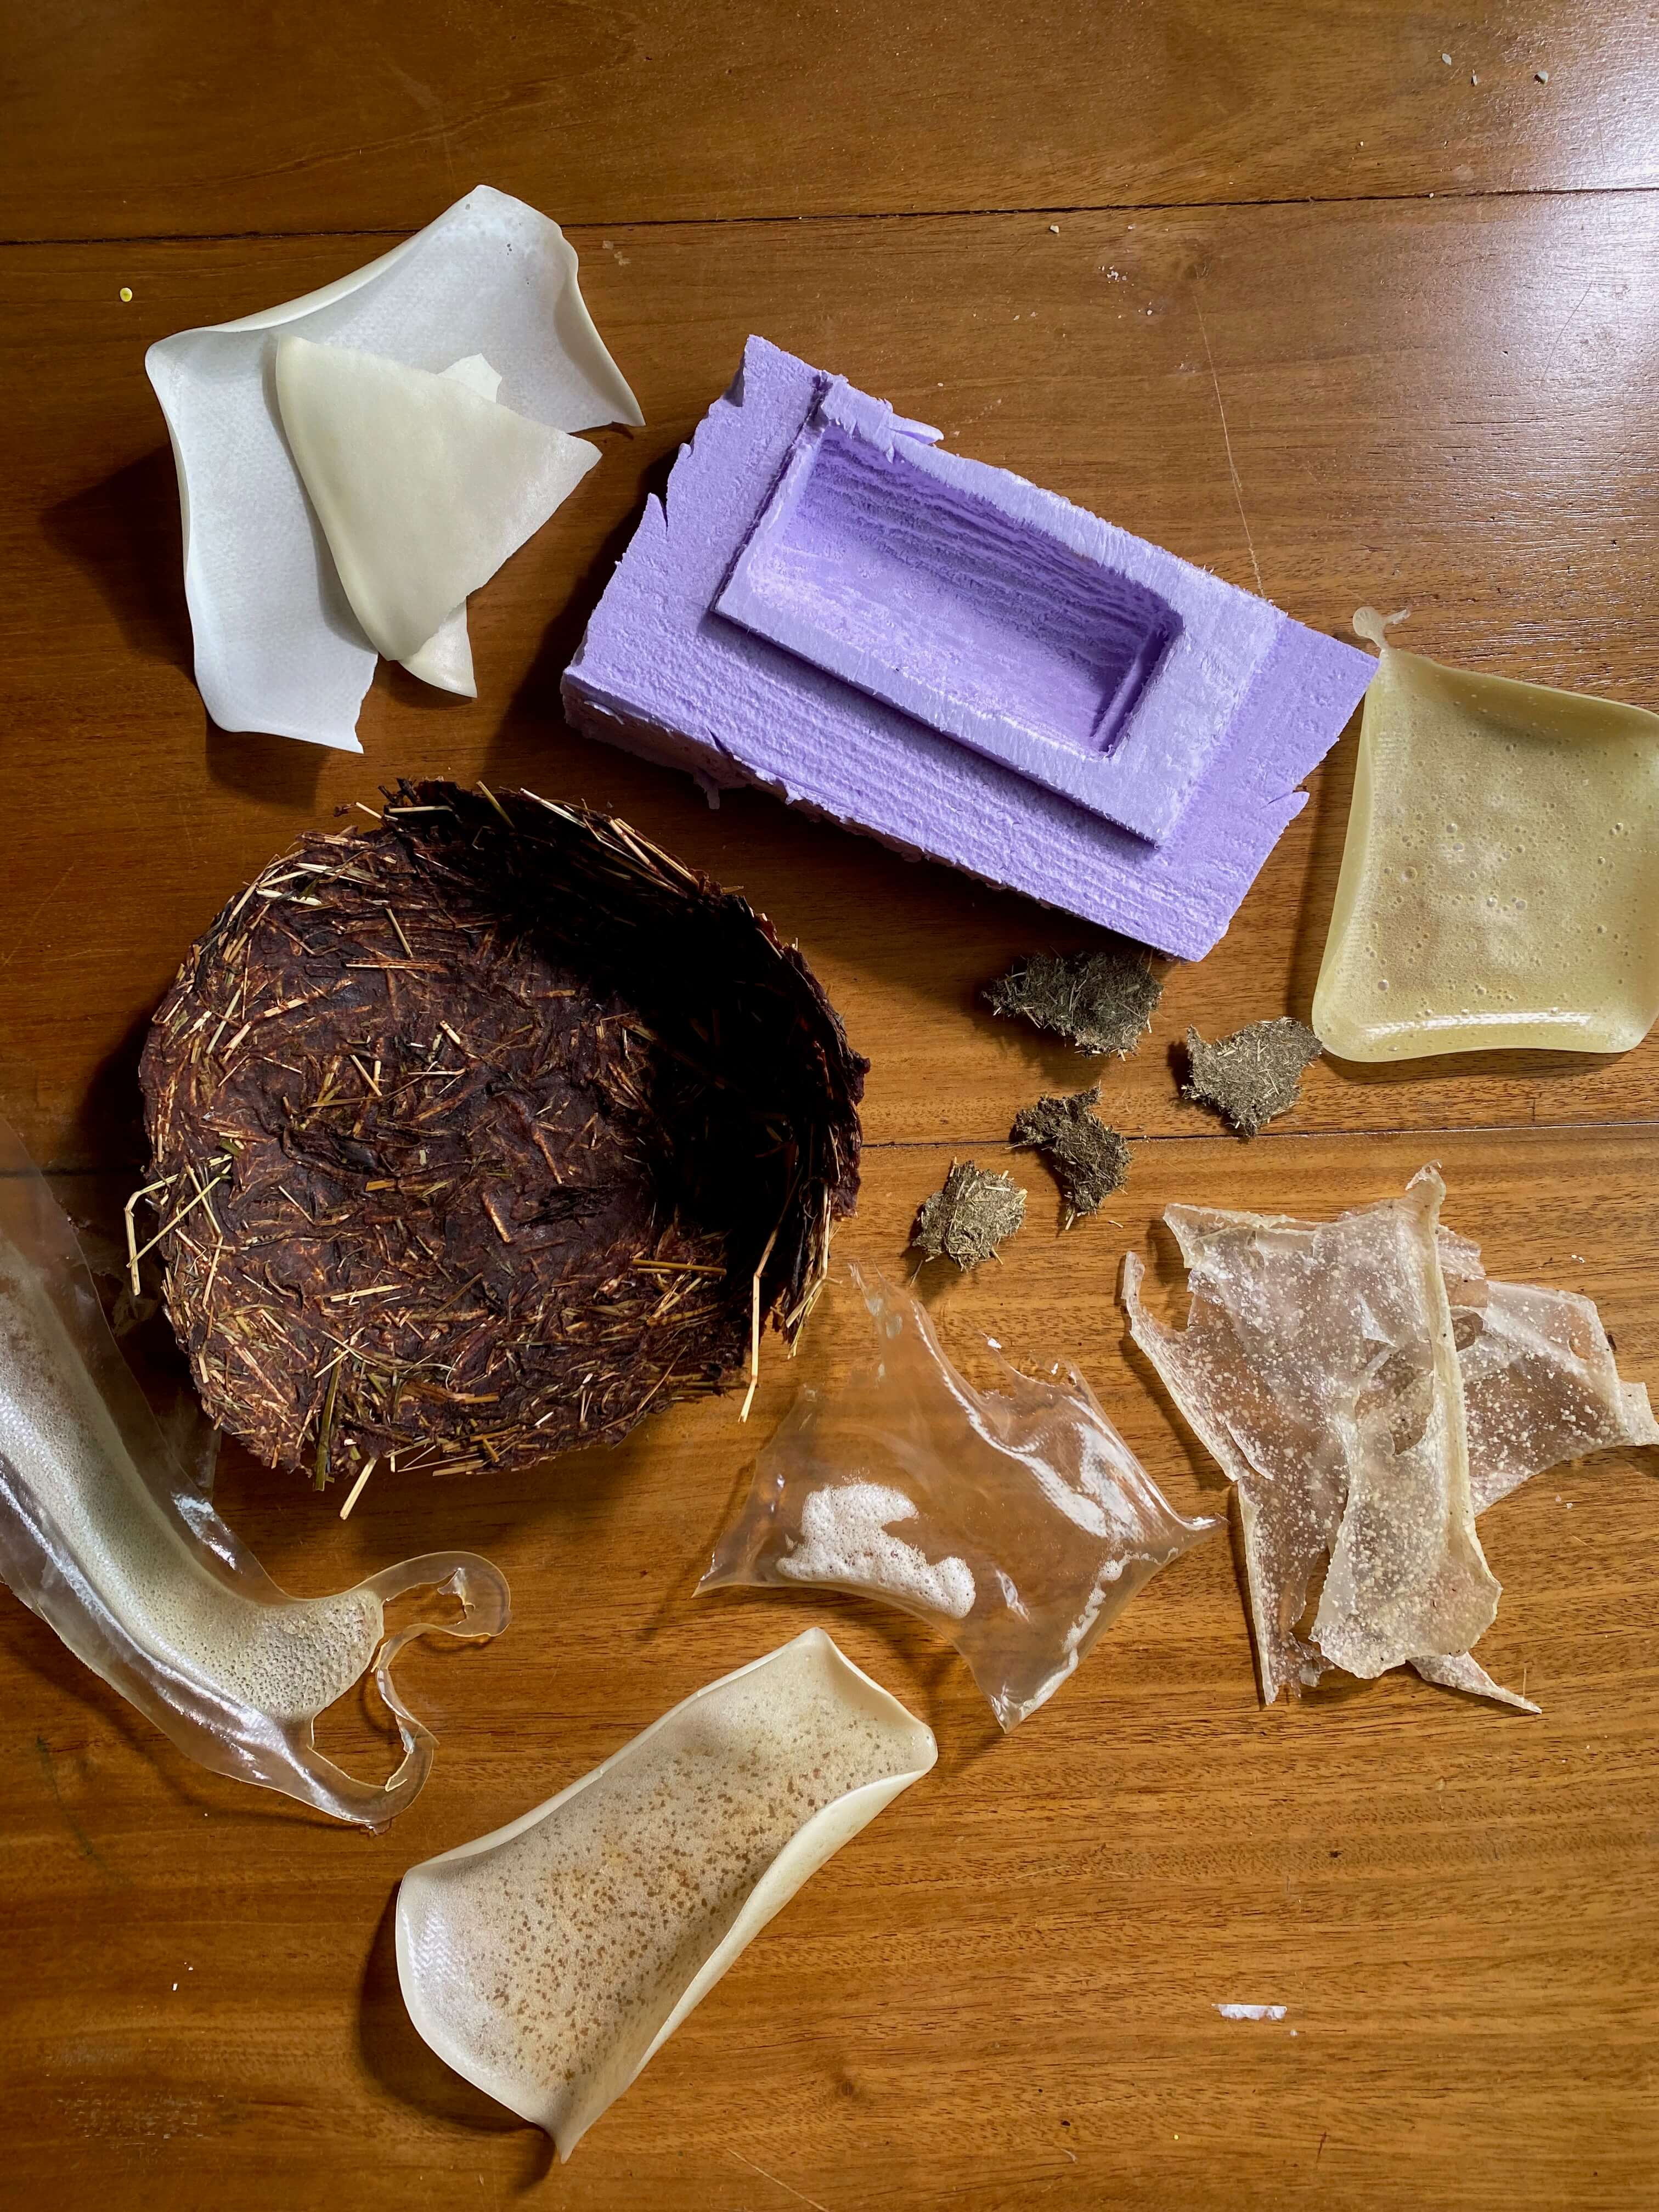
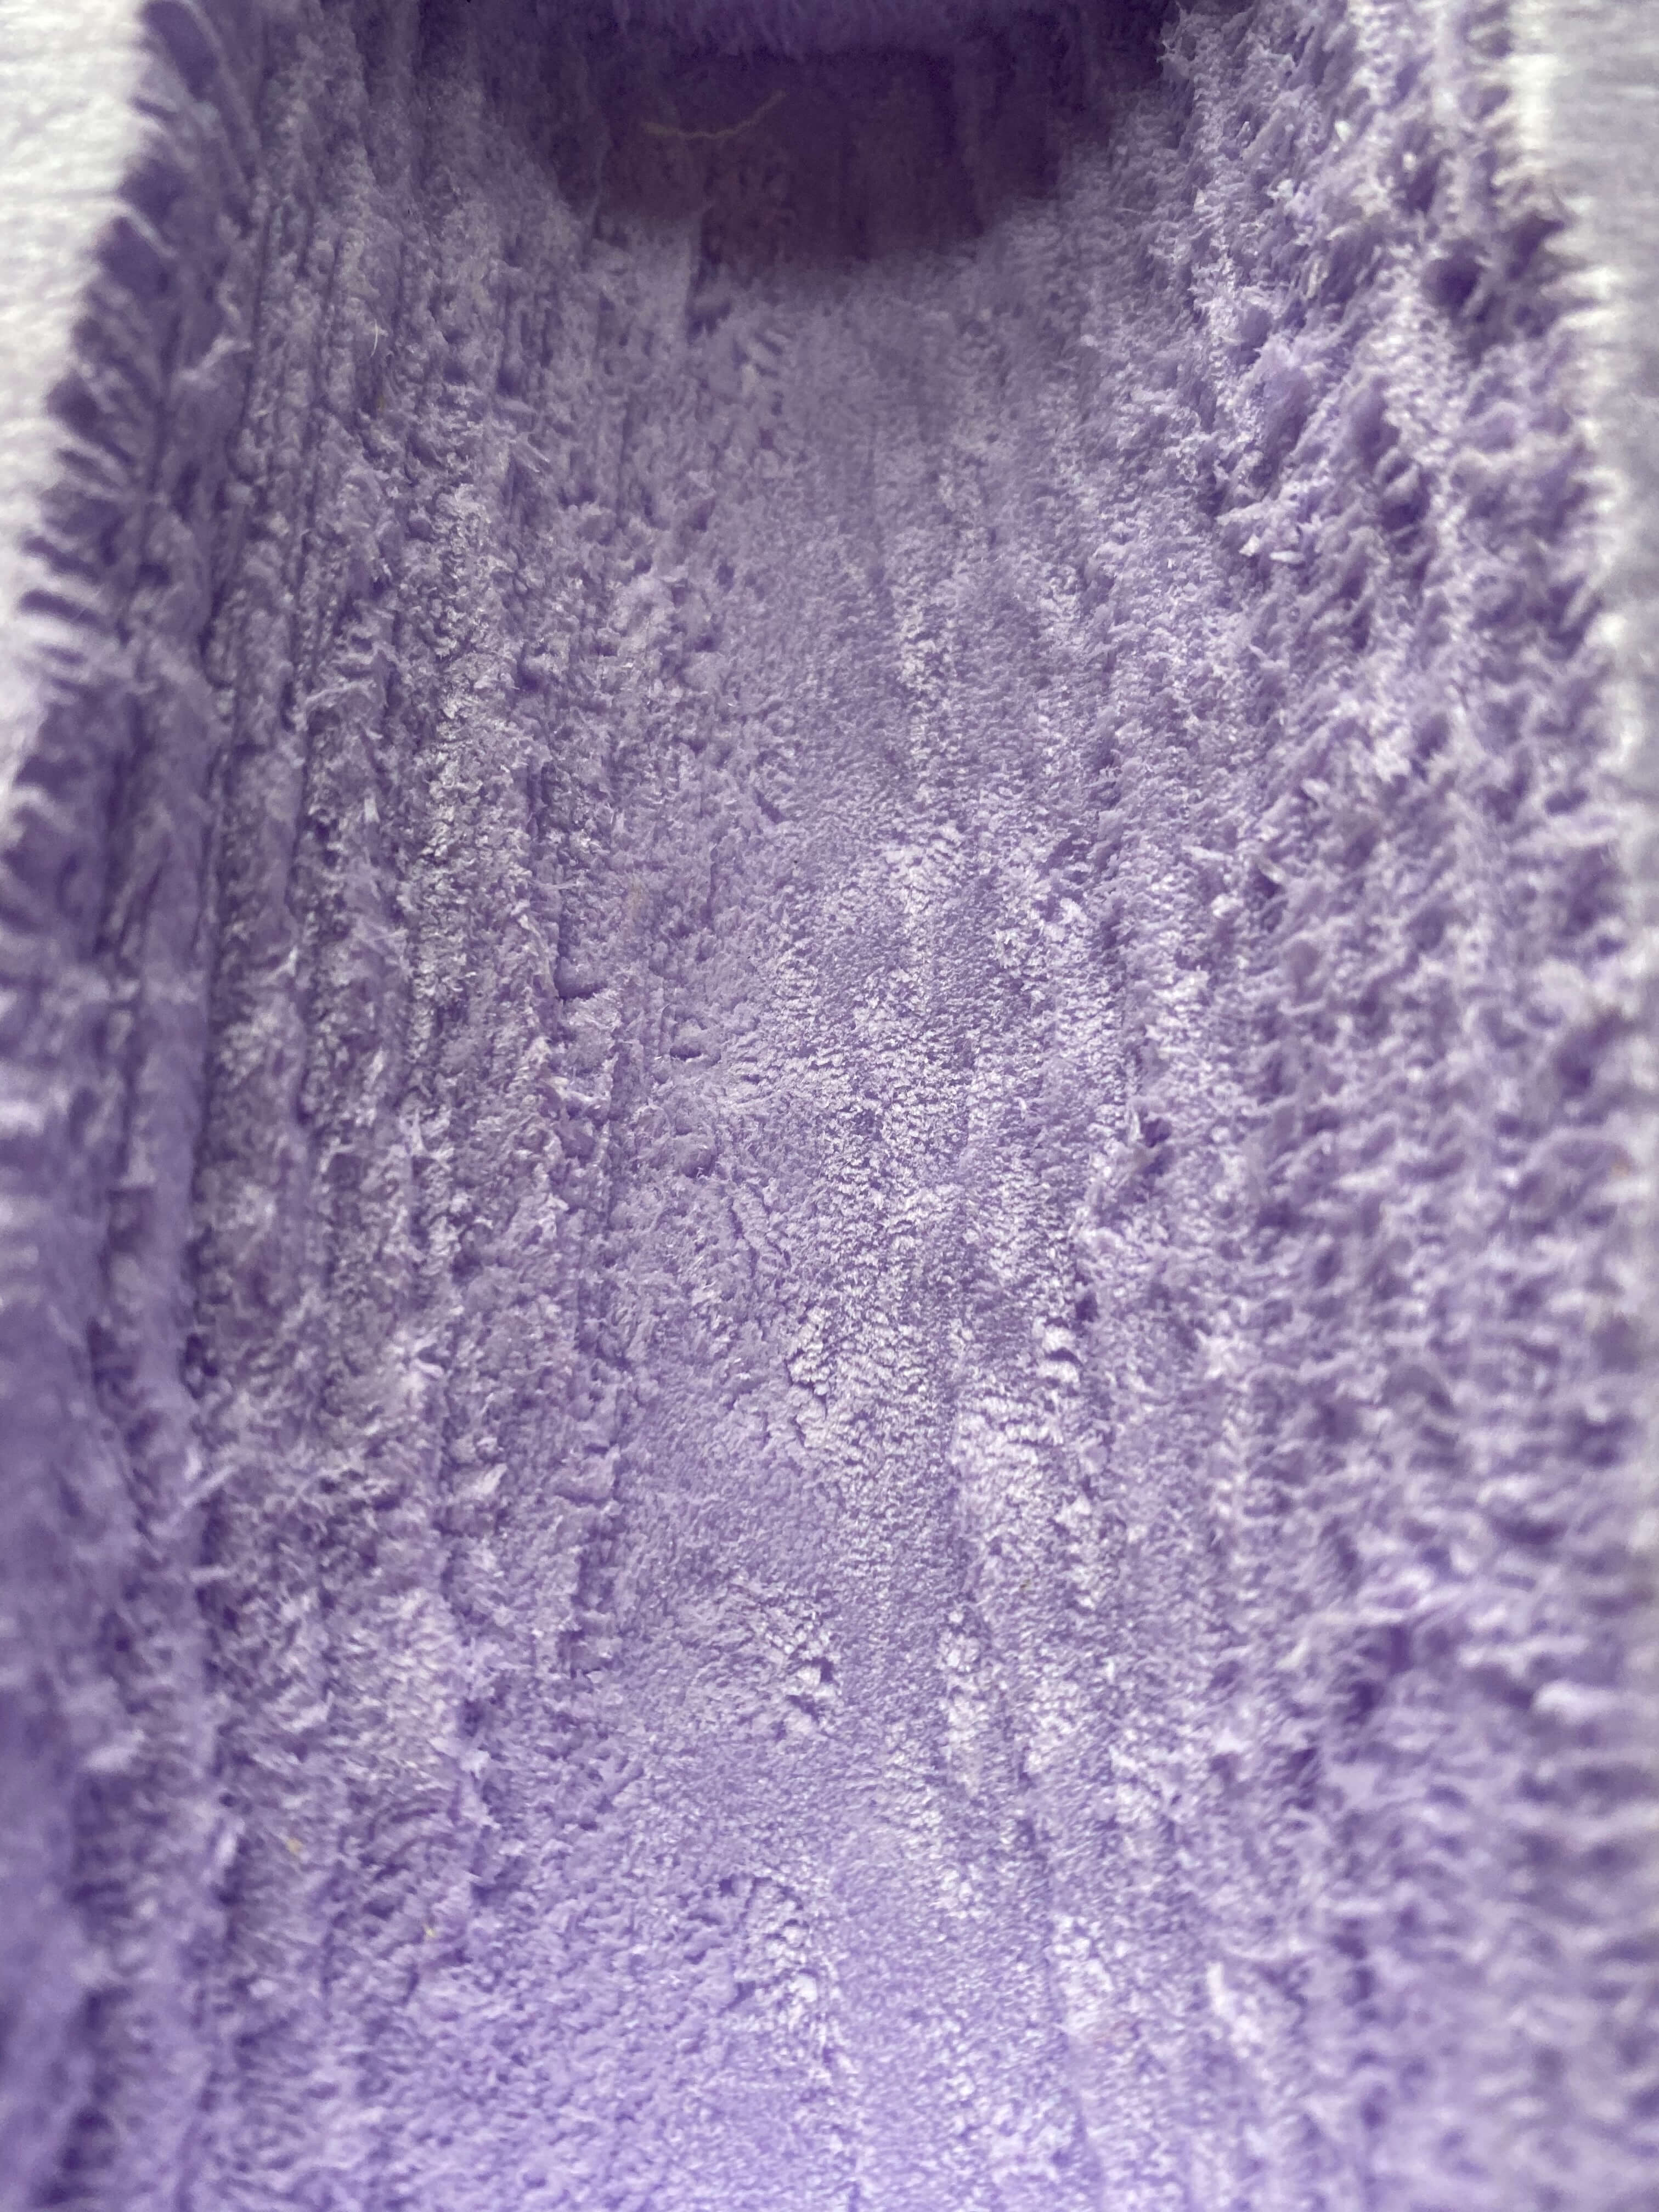
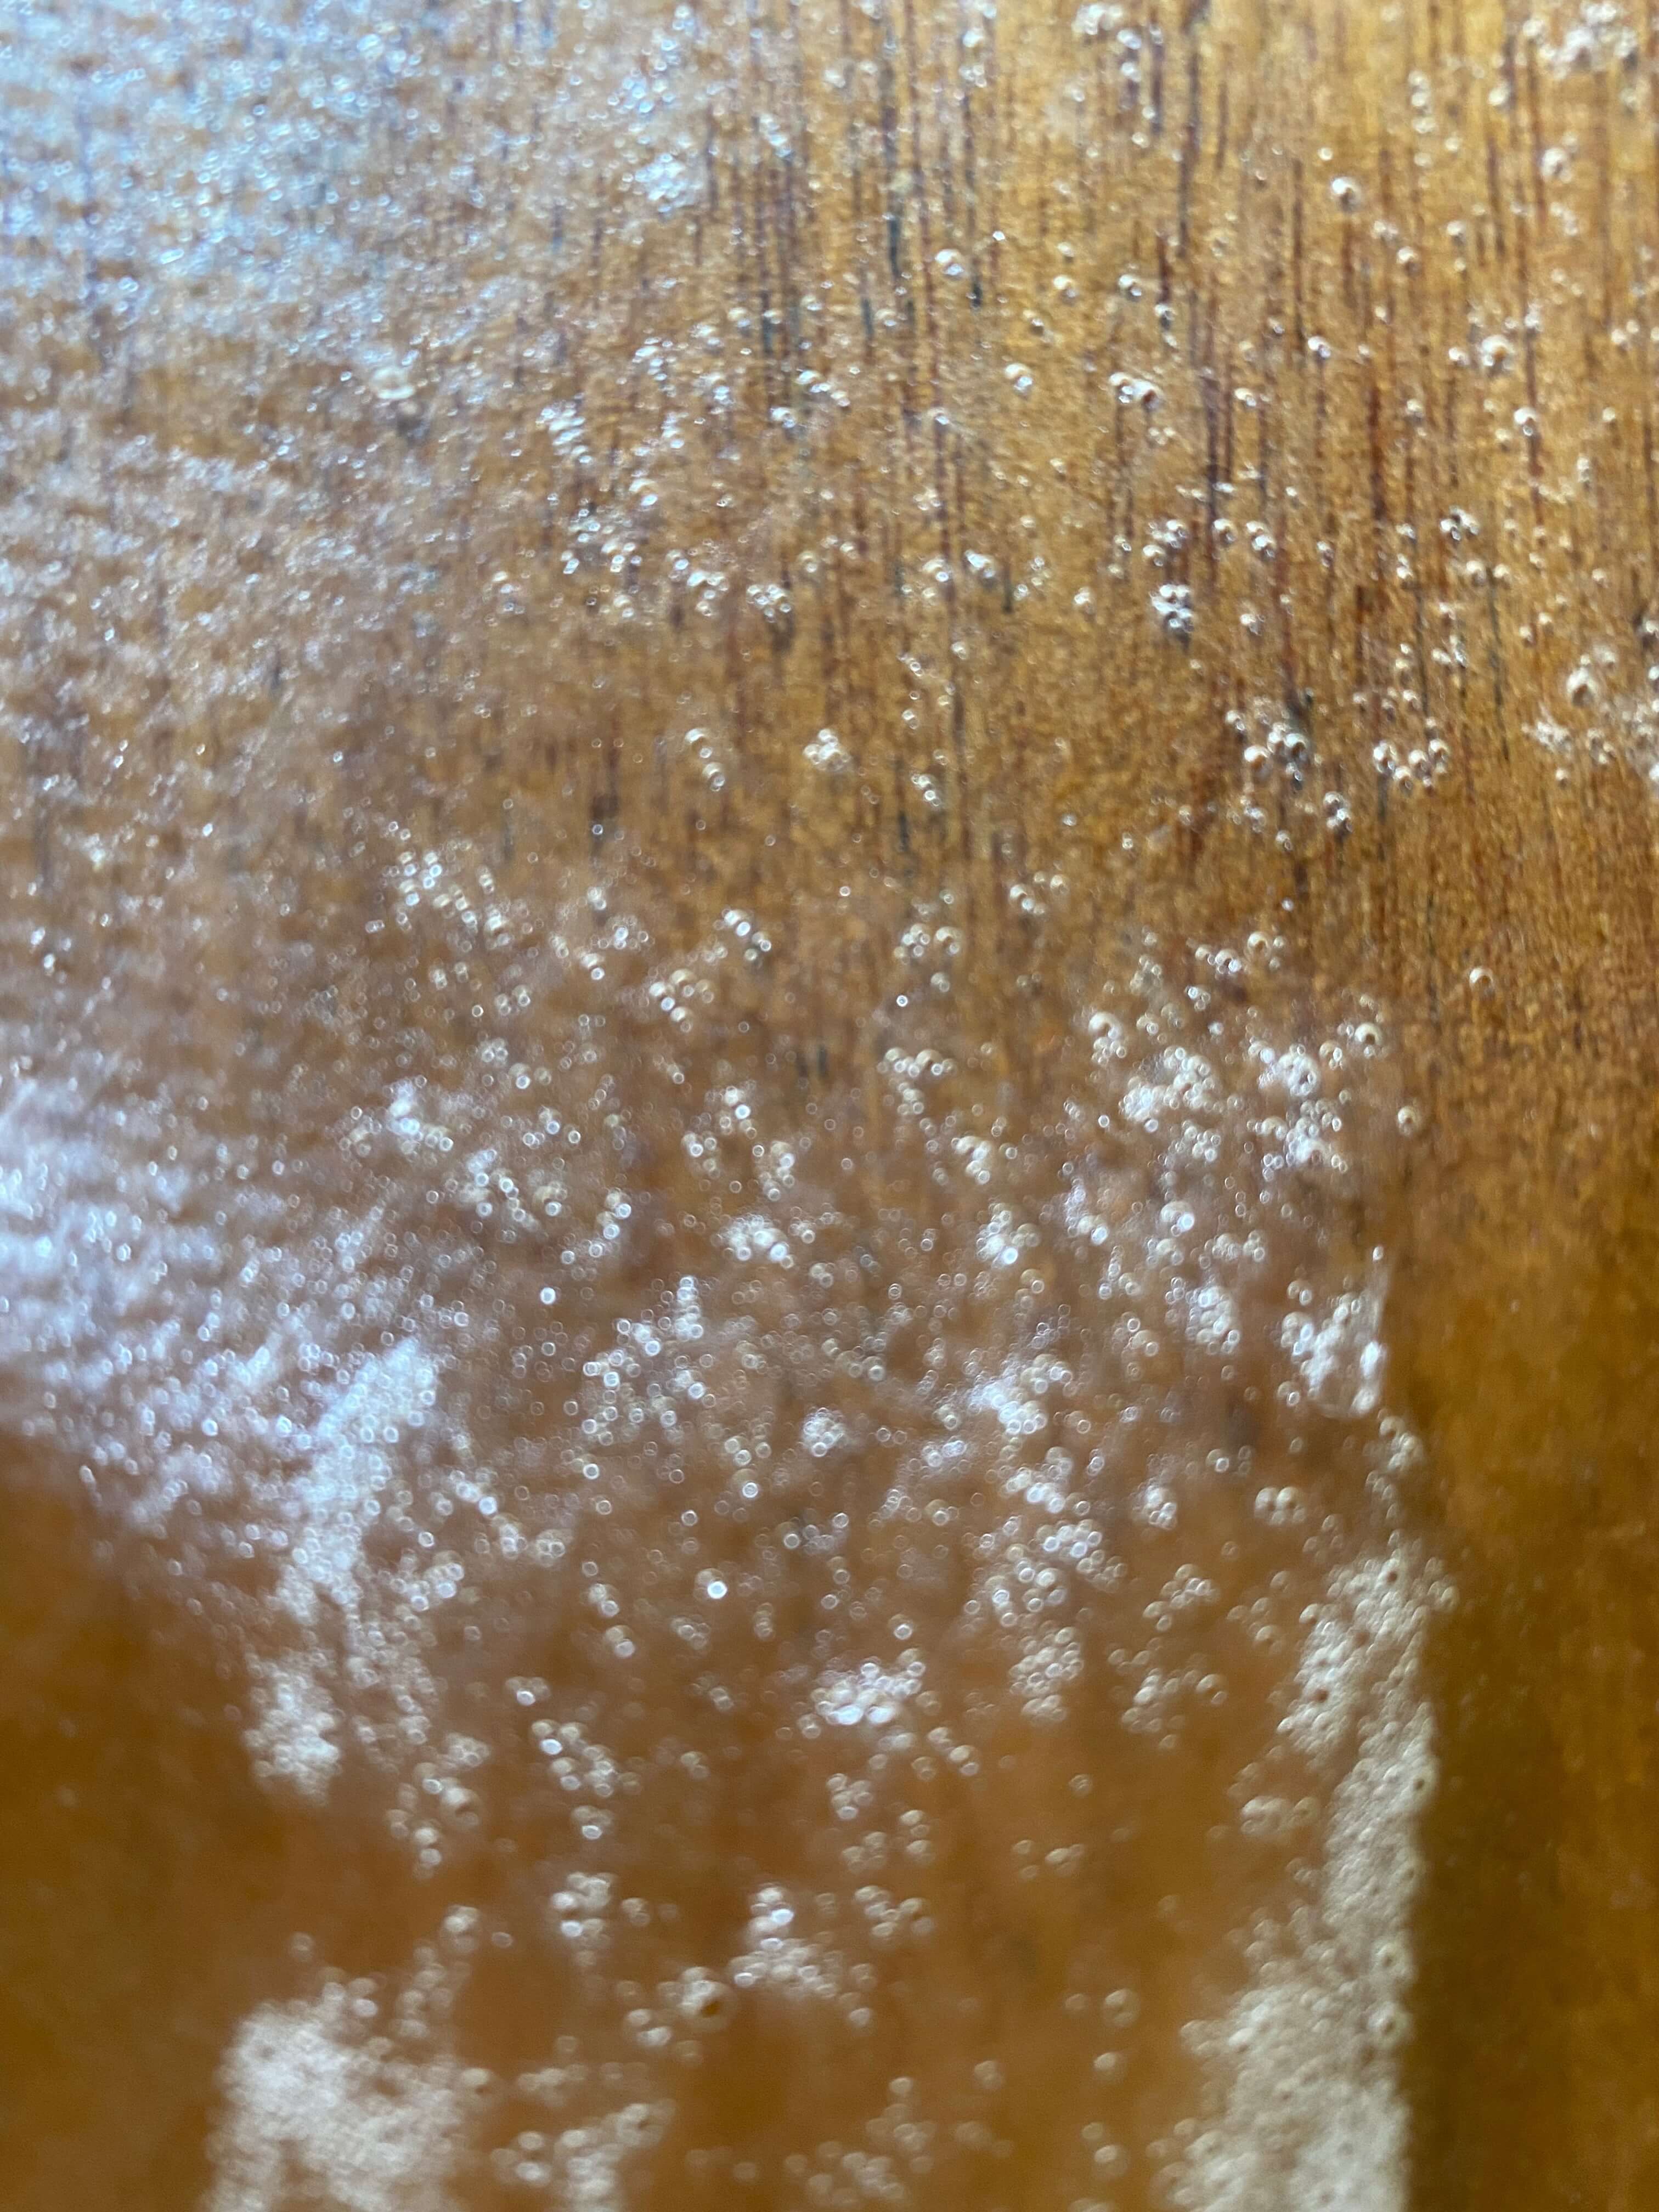
Several weeks ago I started growing a sheet of alternative whey leather with some brown walnut ink from week 6. This semi-dry sheet I now laid to rest in the mold. I would love to see the texture of the tree bark imprinted in the whey leather.
Growing mycelium
Mycelium leather is a vegan-friendly material used as a sustainable and environmentally friendly alternative to animal leather. It is made from mycelium, the vegetative part of a fungus. A fungus is any member of the group of eukaryotic organisms, which include microorganisms such as moulds and yeasts, as well as mushrooms.
For our experiments, we used ready-to-use hemp fibers, which were already inoculated with mycelium. So we did not have to make broth or inoculate any substrate.
Obviously we had to be careful not to contaminate our mycelium, so working hygienic was important. This meant wiping off all surfaces, and our hands with ethanol.
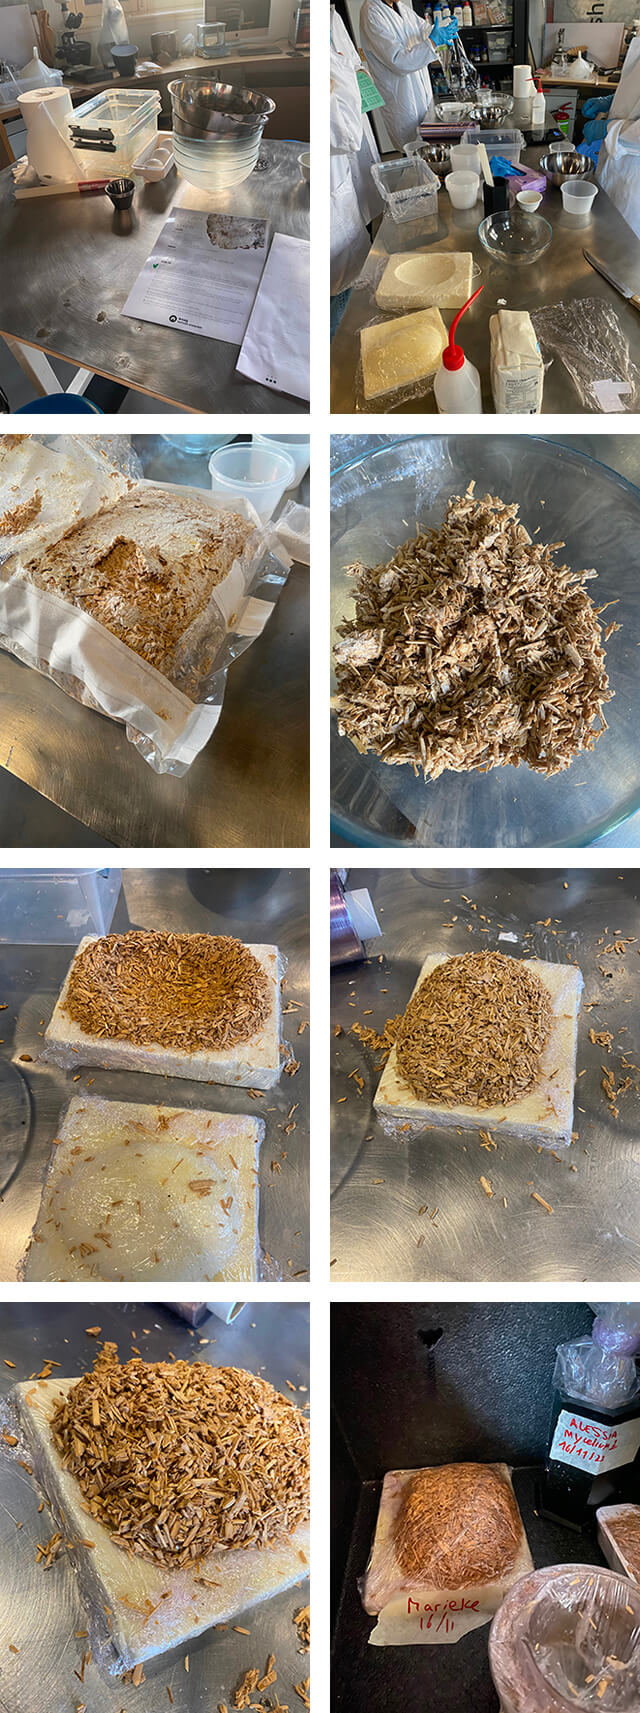
We took the following steps 1 to prepare our mycelium:
* A piece of ready-to-use mycelium
* Flour: 3% of the mycelium weight
* A bit of water
* Knife
- Scale
- Measuring bowls
- Molds
- Clinging film
* Cut a piece of mycelium and weigh it on a scale
* Weigh off 3% of the weight of the mycelium in flour
* Mix the mycelium, flour and water
- Tear up the mycelium into small pieces
- Fill the mold with mycelium and press lightly
- Cover the mycelium with cling film
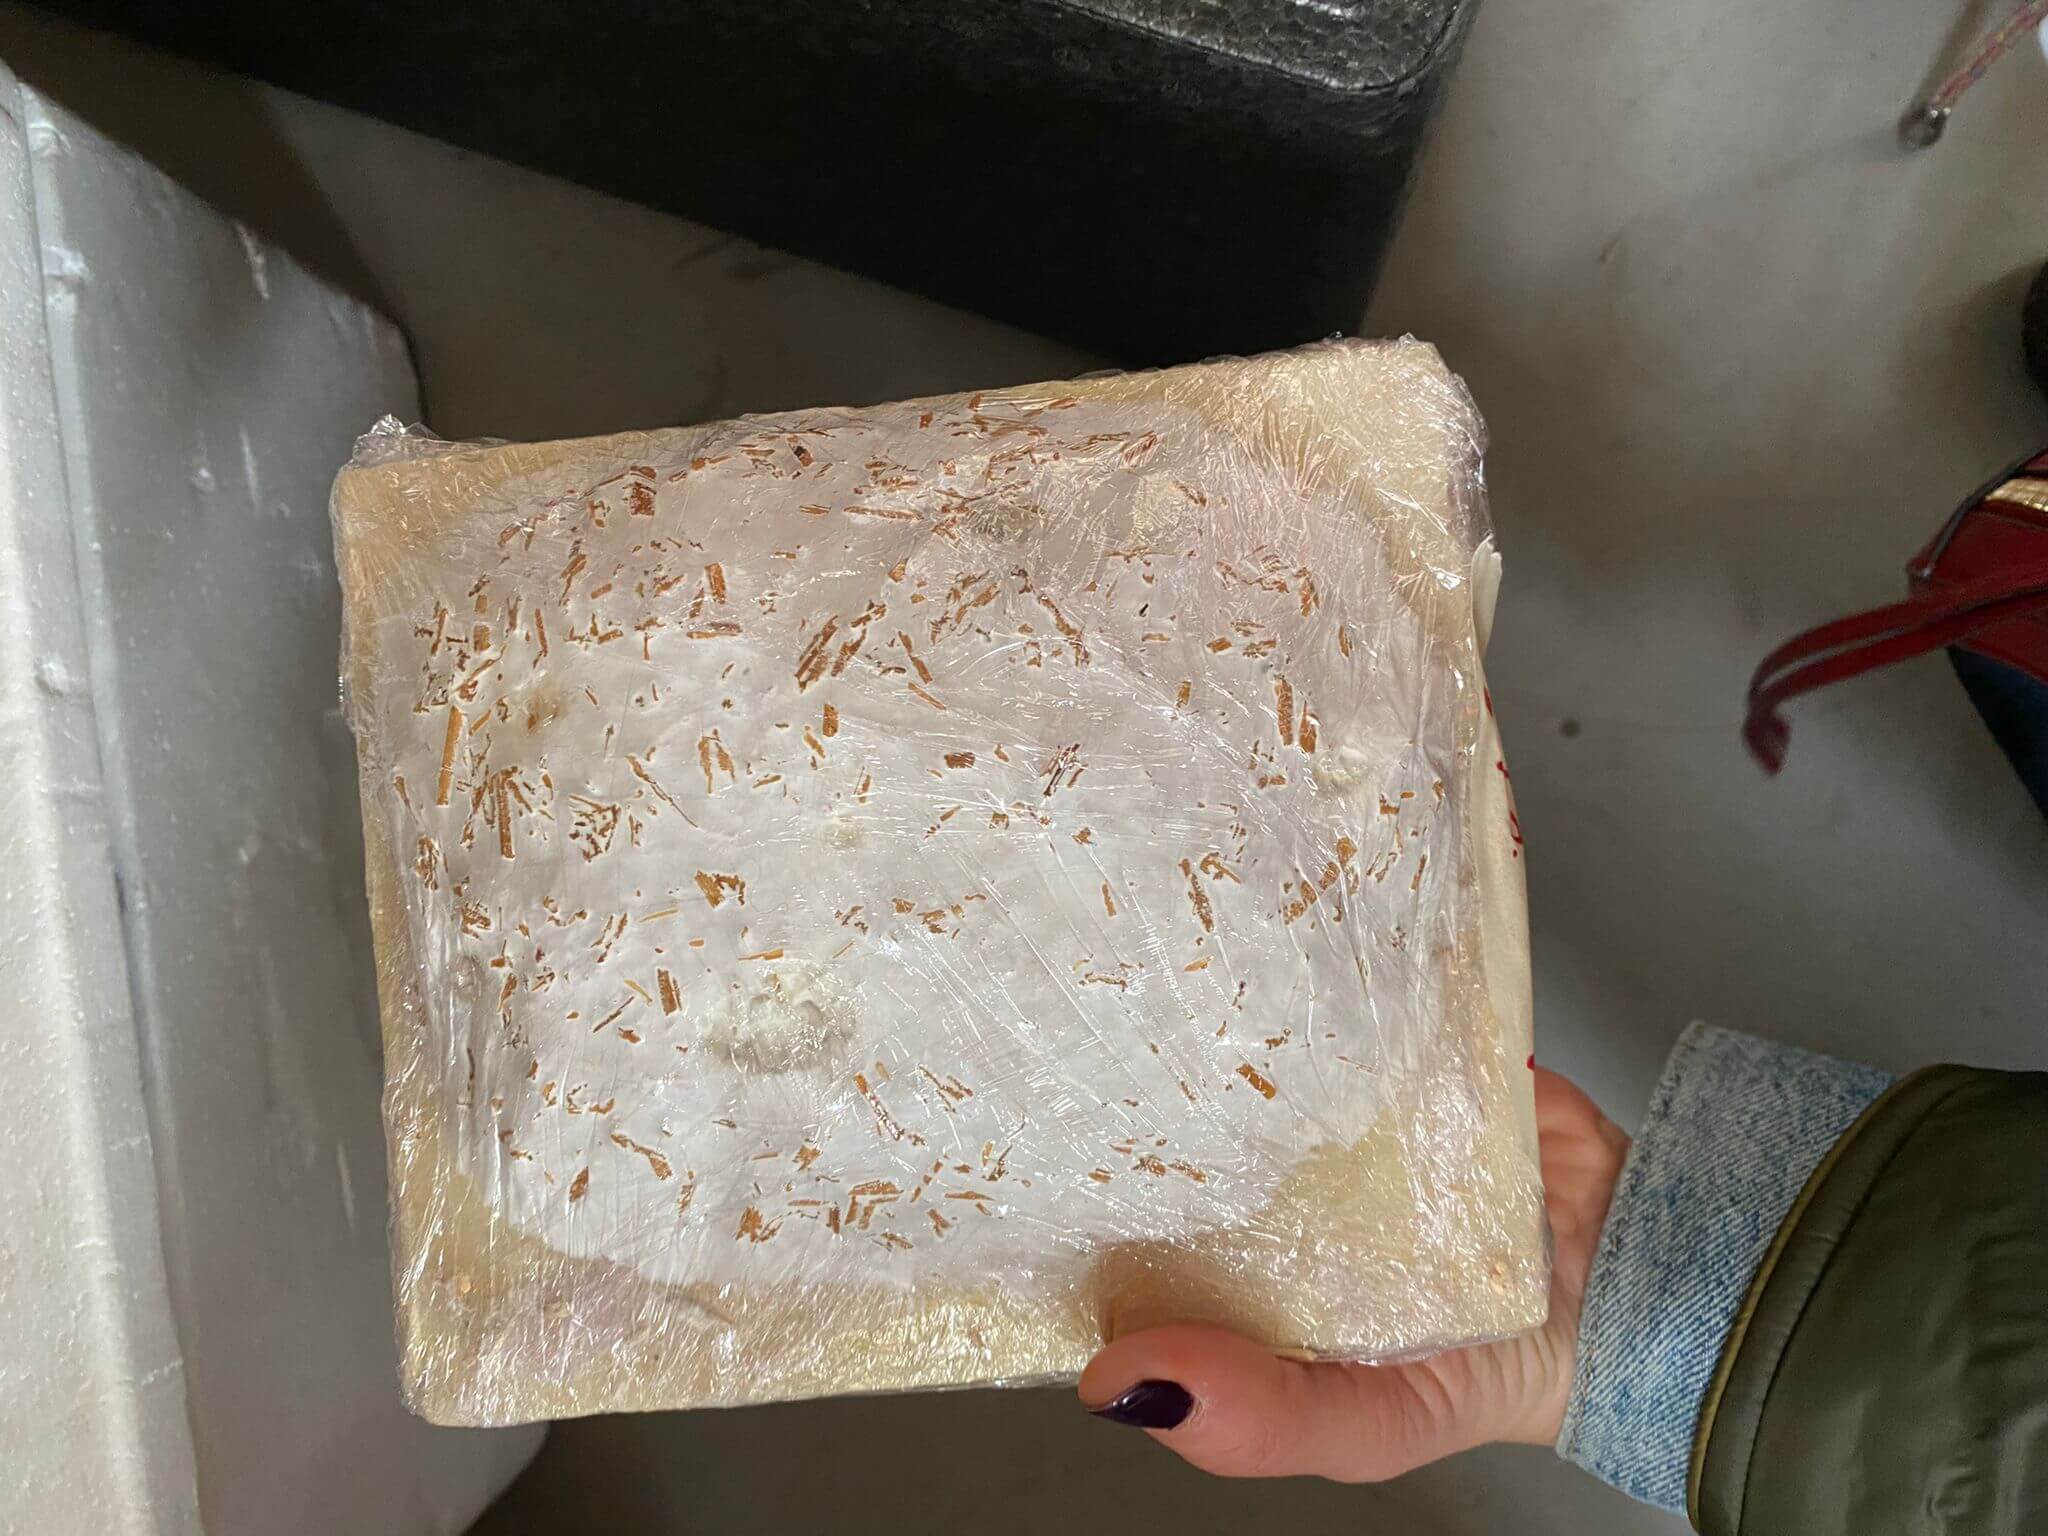
- Place it in a polystyrene box and wait at least a week
Working with casein
In the Biofabricating week I focused on leveraging the lactose in our whey wastewater by growing alternative whey leather. This Textile Scaffold week I want to focus on working with the casein fraction in our whey wastewater.
Characteristics of casein
The whey wastewater in our cheese factory is made up of around 93% of water and 7% of solids. Dependant on the type of milk and the type of cheese, those solids are:
- 54-75% lactose or milksugar.
- 12-36% proteins, a mixture of caseins, whey proteins and minor proteins.
- 7-8% minerals, like calcium, phosporus, potassium, amnd sodium.
- 3-5% fat.
In order to apply casein for biofabricating, it should be extracted and purified.
Impact of pH on casein
Casein is a phospho-protein, it contains a large number of phosphate groups attached to the amino acid side chains in its polypeptide structure. The negatively charged phosphate groups are balanced by positive calcium ions. Casein is almost completely insoluble in water at neutral pH of around 7.
Casein, like other proteins, is an ionic species containing amino groups and carboxyl groups on its terminal amino acids. It also contains a variety of other acidic and basic groups on the side chains of its non-terminal amino acids. The effect of pH on the solubility of casein reflects the ionization of the acidic and basic groups in its structure.
At high pH of around 10, casein will have a net negative charge due to ionization of its acidic side chains (—CO2-). The micelles will unfold in this situation. Because casein is ionized at high pH values, it is soluble in dilute alkaline solutions.
At very low pH of around below 2, casein will have a net positive charge due to protonation of its basic side chains (—NH3+). Because casein is ionized at low pH values, casein is also soluble in strongly acidic solutions.
At intermediate pH values, casein will contain an equal number of positively and negatively charged groups and the protein will have a net charge of zero. The micelles will fold into balls and aggregate under these conditions. Casein is insoluble in neutral solutions because it is not charged under these conditions.
The solubility of a protein is usually at a minimum at its isoelectric point. The isoelectric point is defined as the pH at which a protein has a net charge of zero. For casein, due to the attached phosphate groups, the isoelectric point is close to pH = 4,6.
Extracting and purifying casein
For the extraction and purification of casein, the solubility of casein at different pH levels can be used.2
Pre-purification: fat centrifuging
Milk fat consists of triglycerides, di- and monoglycerides, fatty acids, sterols, carotenoids, and vitamins. The milk fats are present in the form of globules. The globules are surrounded by a protein and phospholipid membrane that stabilizes the globules in the water phase of the whey. The globules range in size from less than 0,1 µm to 20 µm.3
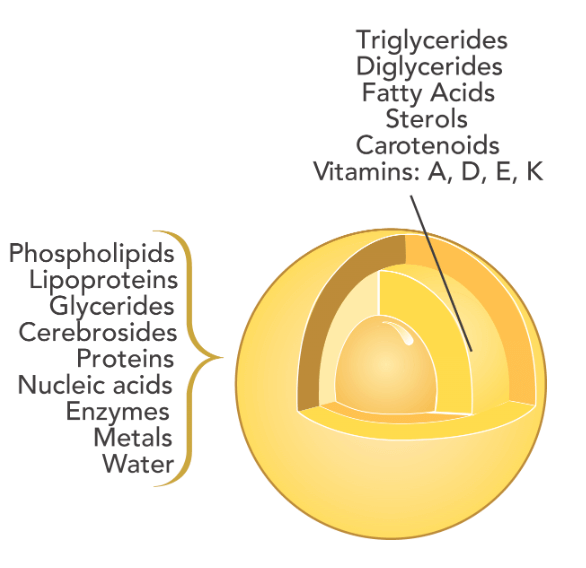
When casein precipitates, it's micelles pull together, aggregate and form a 3-D matrix. Within this matrix fat globules are captured. Once the fat globules are encapsulated in this matrix, it is harder to clean them out. Therefore it is better to first get rid of as much fat as possible, before casein extraction is performed.
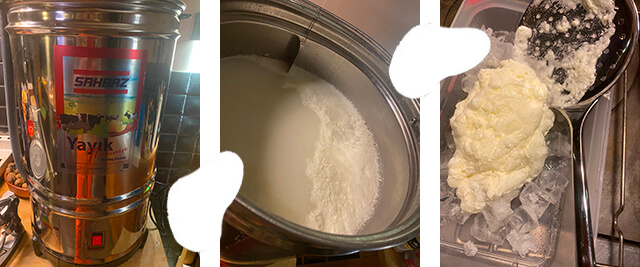
Filtering out fat is a semi-perfect approach. With a microfilter only the biggest fat globules will be captured. Therefore it is more effective to get rid of fat by centrifuging. Fat globules are not only the largest particles in milk, but also the lighest. When the whey is rotated at a high speed in a machine, a centrifugal force act on the lighter particles, and they get separated from the mixture and float to the surface.
Casein purification after extraction
The most simple extraction of casein from whey is in effect the recipe for making ricotta:
* 6 liter of raw cow whey
* Around 47 ml of acetic acid or 10% citric acid solution
* Measuring cups
* Pan and heating stove
* Spoon
* Thermometer
* Colander and paper towel
* Add the whey in the pan
* Heat the whey to 93 degrees celcius without stirring
* Add the acid and stir shortly
* Casein flocks will rise to the surface
* Slowly push them out of the center with a spoon
* Wait for 5 minutes after the floculation has stopped, to harden the flocks
* Cover the colander with paper towel
* Laddle the casein into the colander
* Let the casein drain for a few hours
* Press the remaining liquid out of the casein
Extracting casein
In order to further purify the casein, it's solubility at different pH levels can be leveraged. Add some dilute alkaline solution (like soda ash, baking soda, caustic soda, ptassium hydroxide, or ammonia) to the fresh casein and stir it till the casein dissolves. Filter the impurities off. Then precipitate the casein again with an acidic solution (like acetic acid or citric acid). This process of dissolving and precipitating can be repeated several times. The end result is a purified casein.
Another method is adding some ethanol or methanol to the fresh casein. Stir it for 5 minutes and decant the liquid off. The casein is purified but pretty stiff. In order to plasticize it again, it has to be stirred for around 5-10 minutes in boiling water.
Casein purification before extraction
The casein can also be purified before it is extracted out off the whey.
Slowly add an alkaline solution to the whey while stirring, till the pH is around 10. For example for 1 liter of whey, around 2-4 gram of caustic soda dissolved in 100 ml hot water is required. Leave the mixture resting for a few hours. Over time a yellowish sediment will sink to the bottom and a greenish or reddish liquid will collect above that. In the liquid the dissolved casein is present. The sediment is residual fat and minerals.
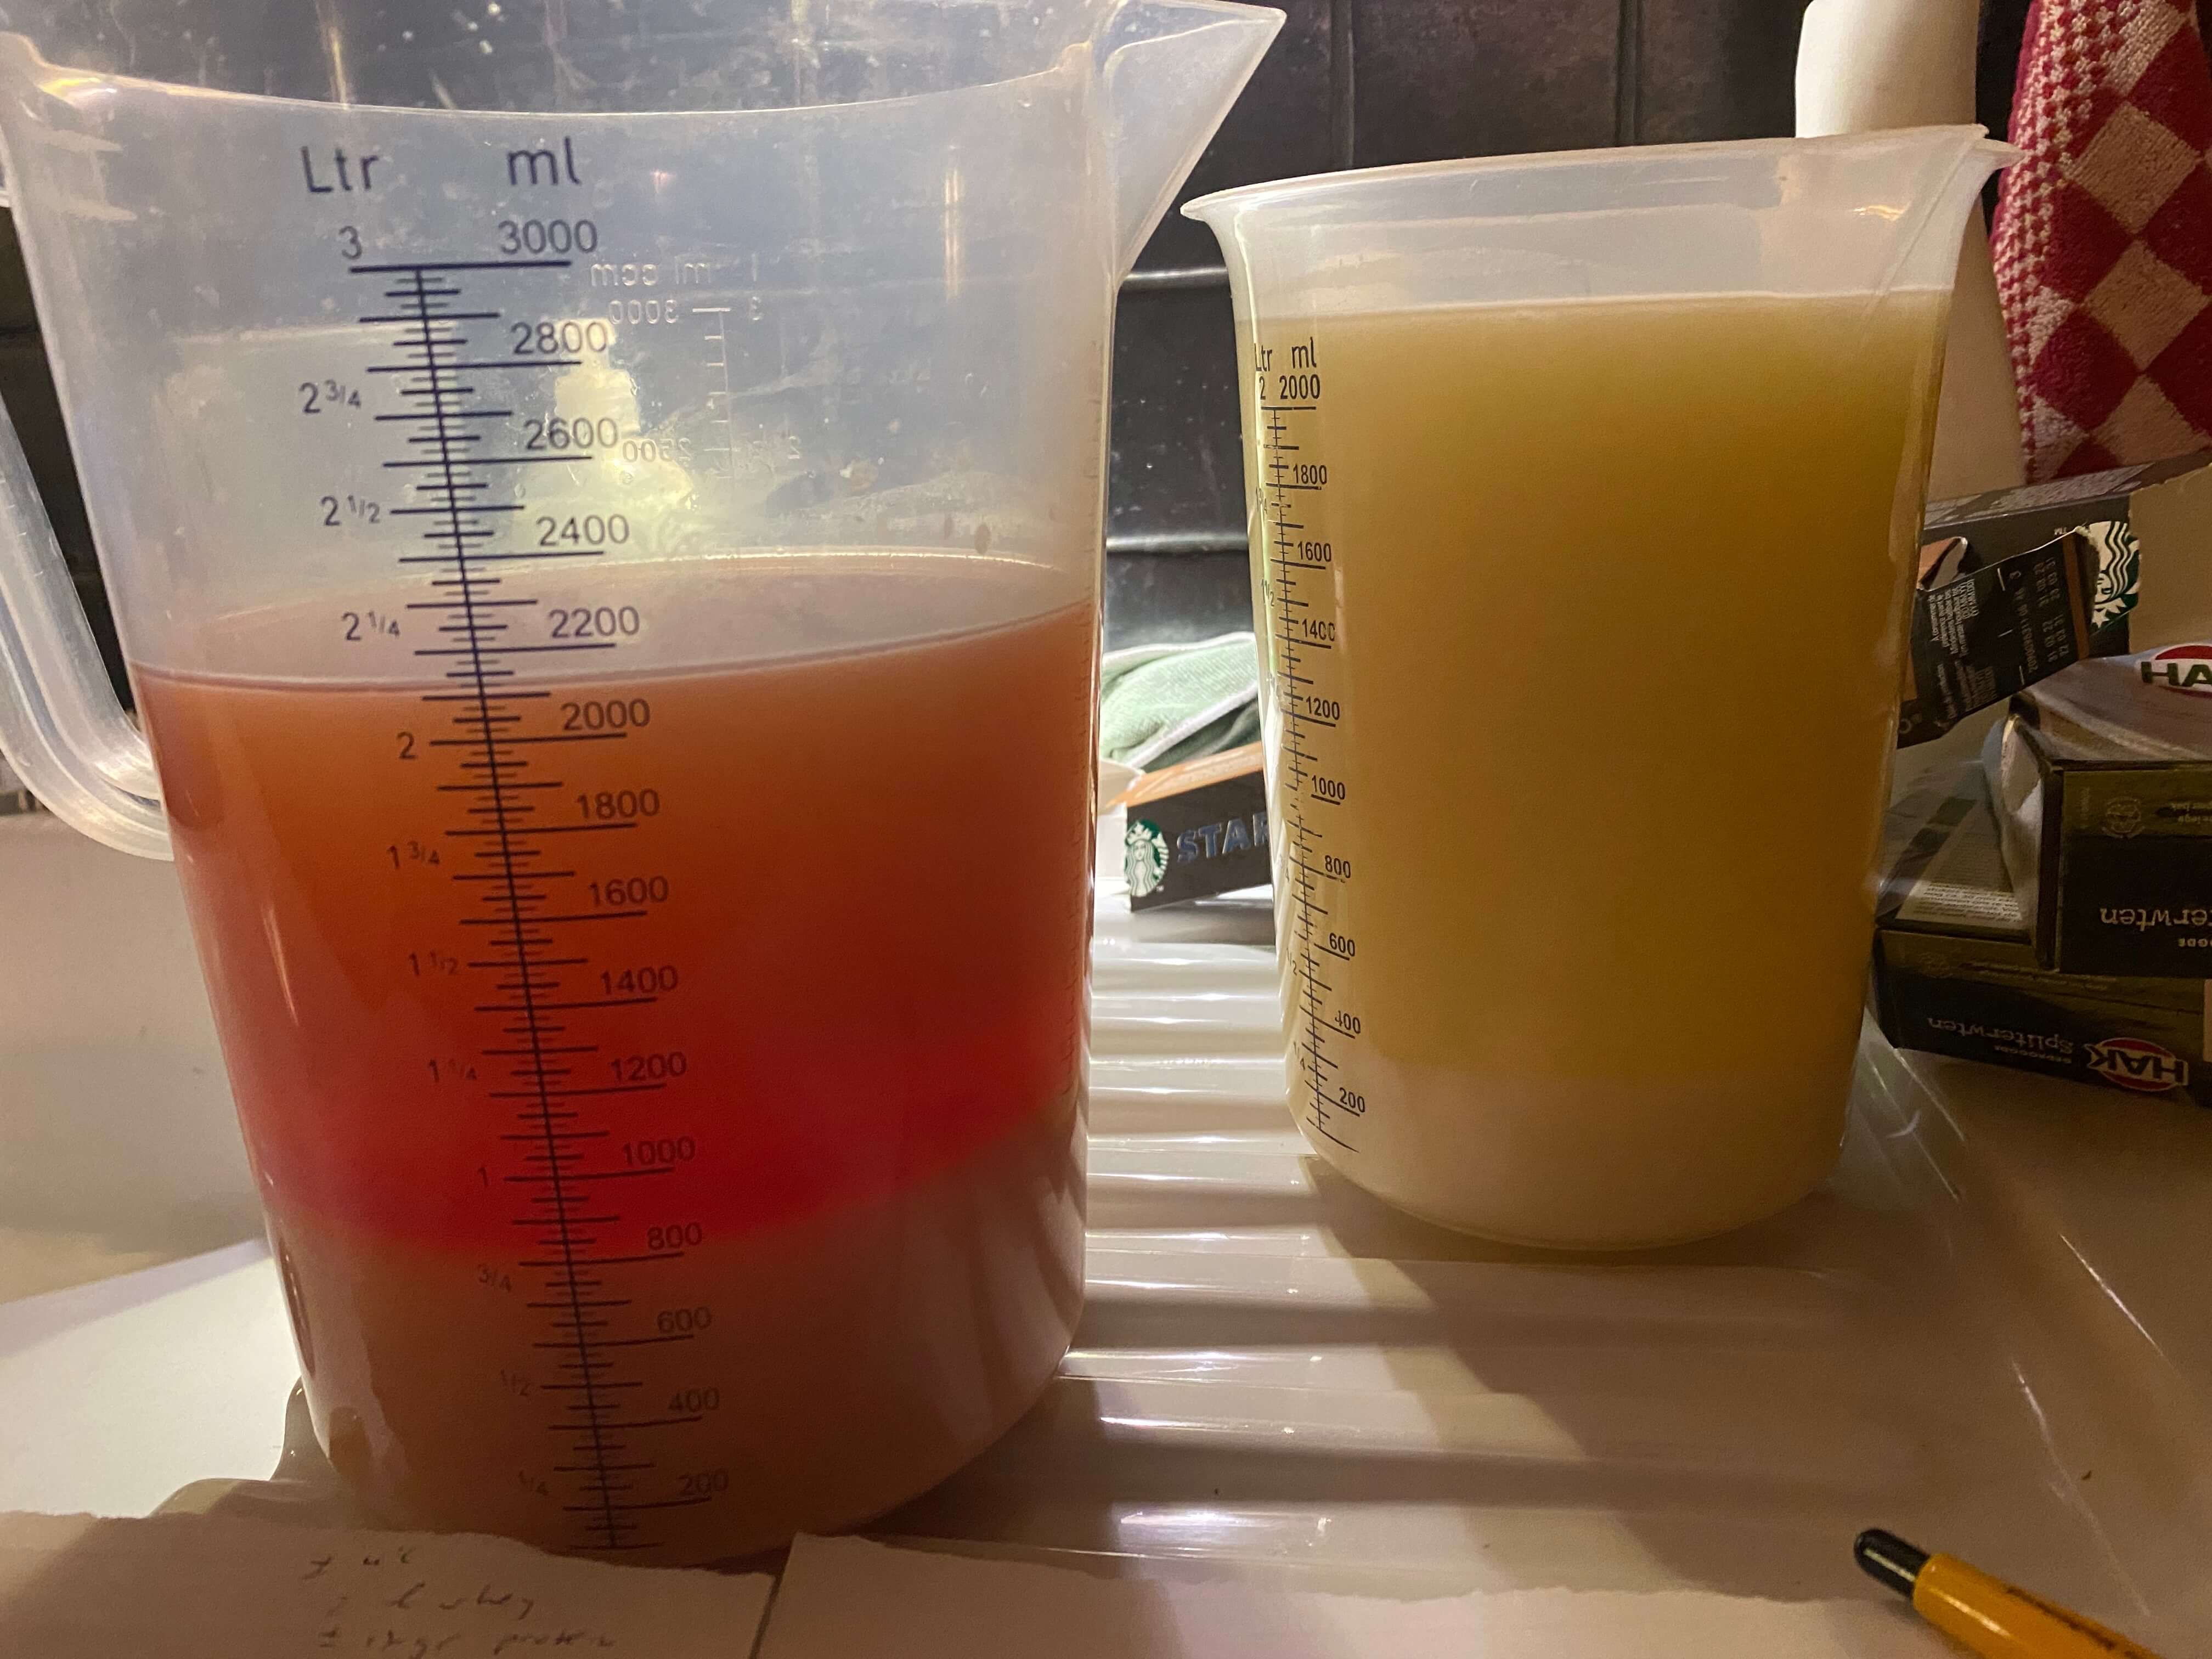
Carefully filter off the liquid and discard the sediment.
Add to the liquid a dilute acid till the pH is around 4,6. A white precipitate, which is the purified casein, will form. Leave the mixture resting for a few hours. Filter off the white precipitate, press out as much water as possible, and then let dry overnight in a dehydrator at around 40 degrees celcius. As a last step the dried casein is grinded into a powder. On an industrial scale, the powder is obtained by nozzle spray drying which provides a smaller particle size.
Since casein is difficult to dissolve in water and some other liquids, the smaller the particle size, the better dispersion can be obtained while making for example bioplastics.
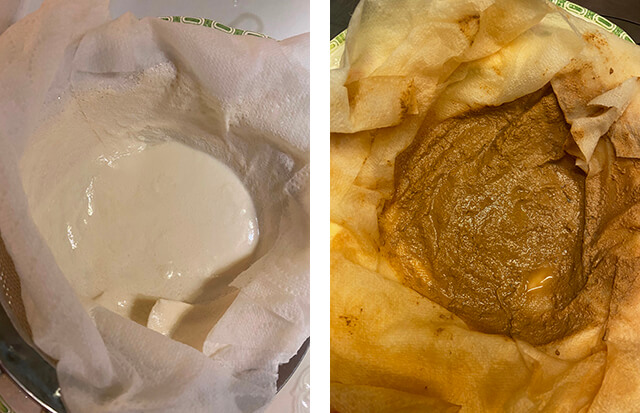
Caustic soda might turn the casein into a a more brown slurry, therefore I prefer soda ash, which provides a transparant white casein.
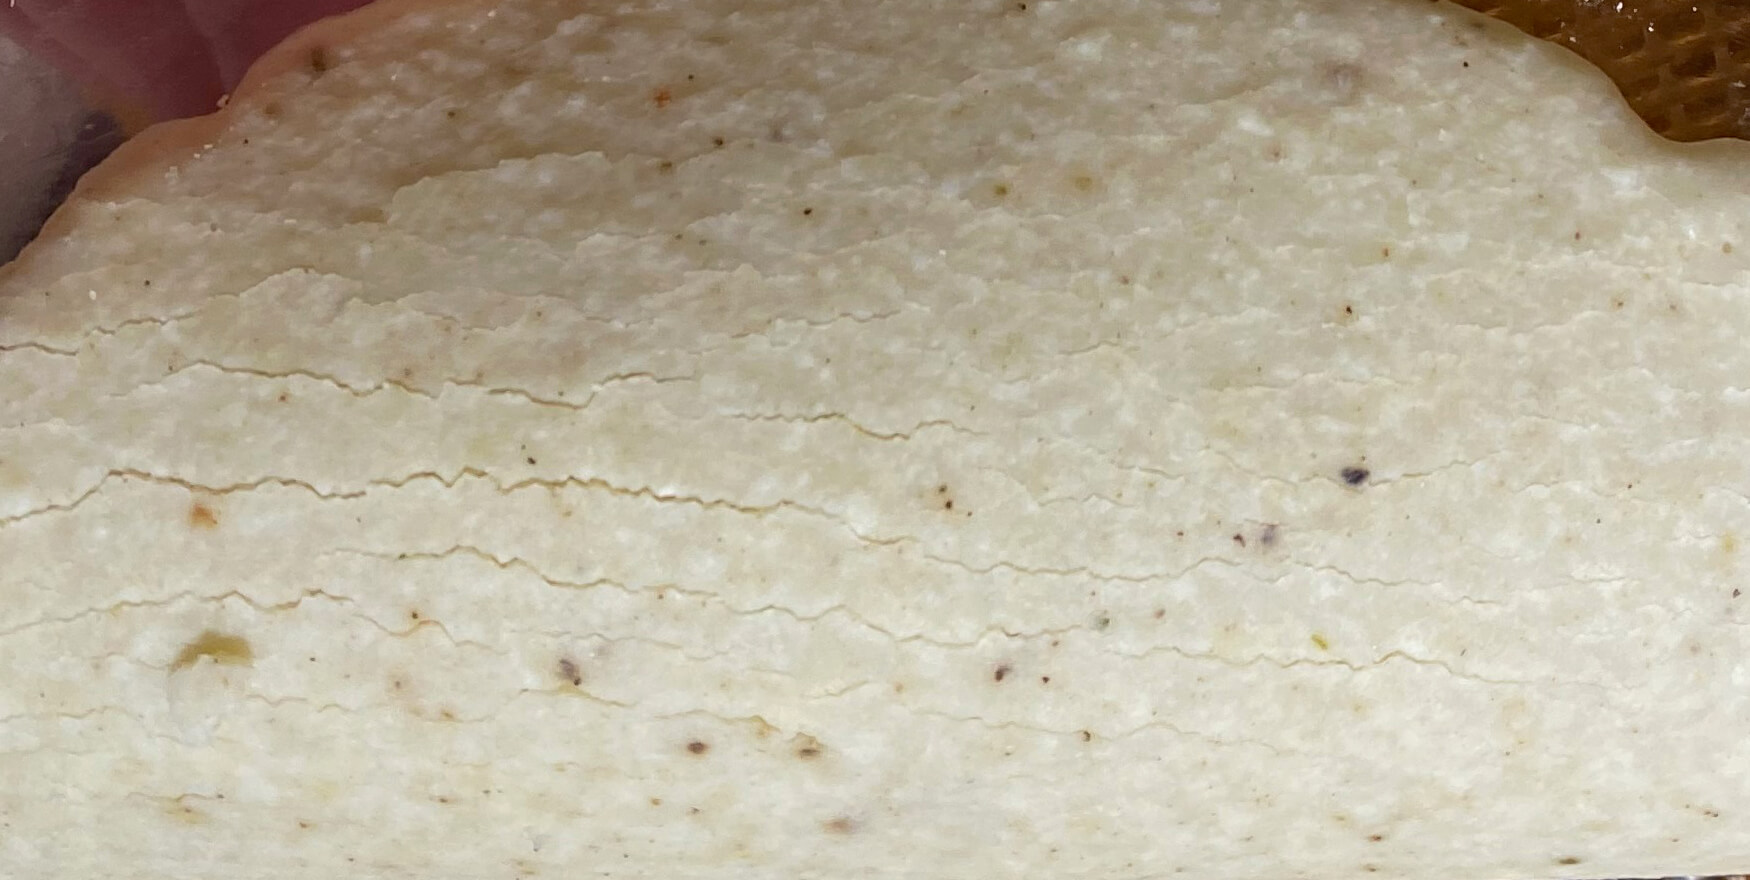
Imitation leather from casein
This summer I found a 100-year old book about industrial uses of casein.4 I tried to reproduce some caseine recipes from this book Unfortunately the recipes aren't detailed. So this was really try and error.
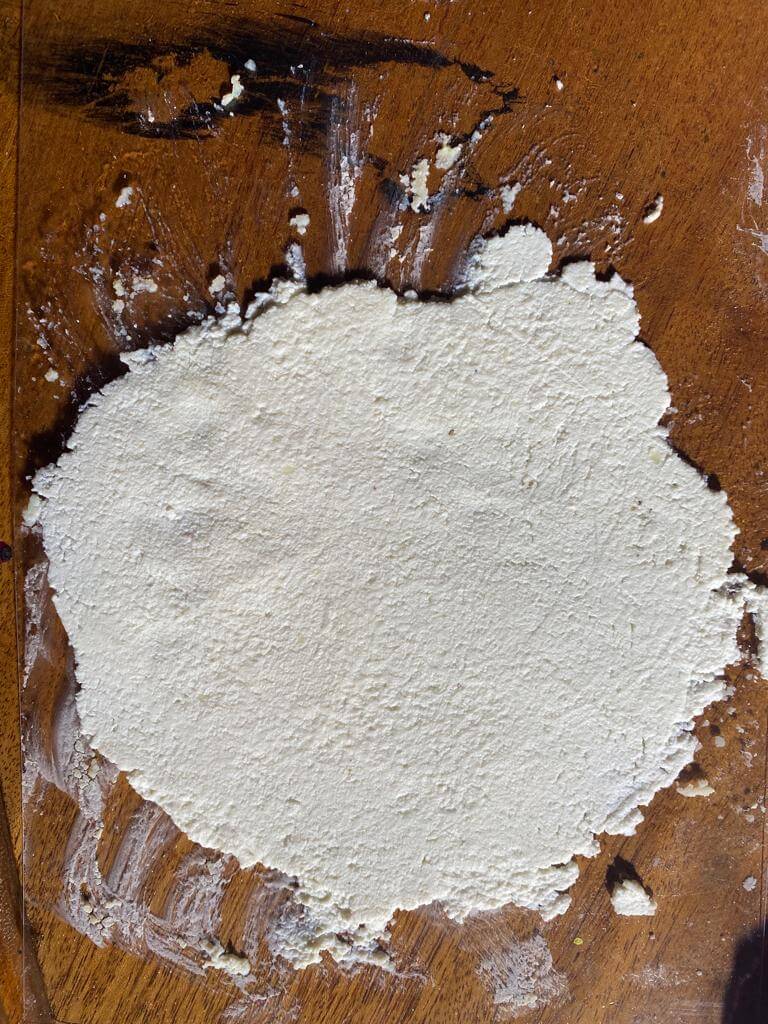
My first aim was to make imitation leather from casein. For this I used freshly prepared, slightly wet casein.
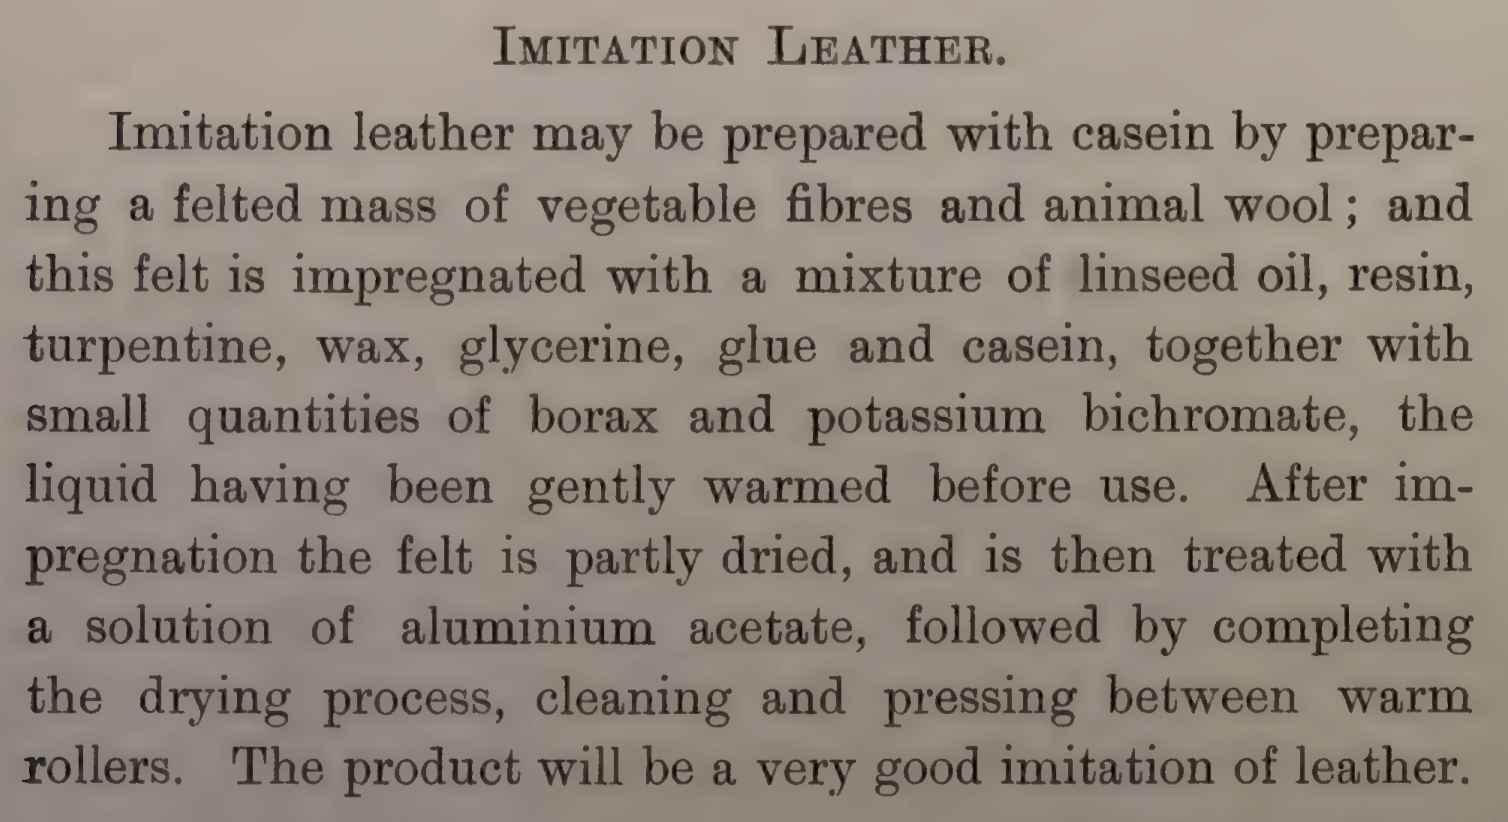
Mixture 1
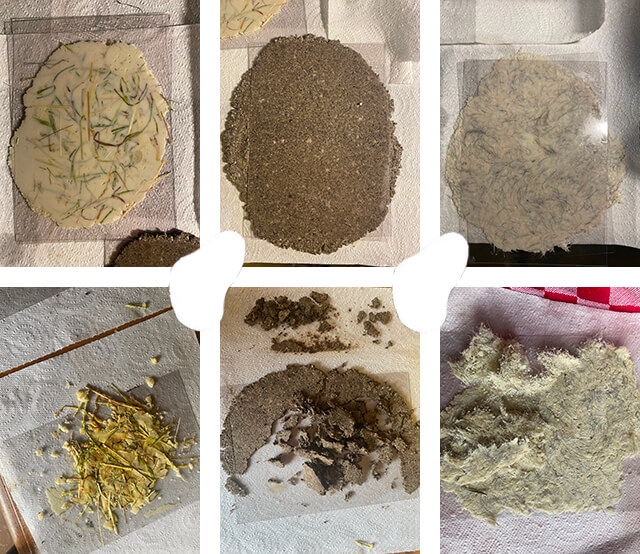
Since the recipe didn't give any ratio's I just had to guess. For the filler I used three different substances:
- dried clay
- cow hair
- dried and chopped grass
I first oiled the surface of three acrylaat sheets and distributed the filler substances on it.
To make the mixture I used the following quantities, and stirred those for around 5 minutes on a medium fire:
- 250 gr wet casein
- 55 gr borax
- 6 gr glycerine
- 13 gr walnut oil
- 9 gr dammar resin
- 9 gr beeswax
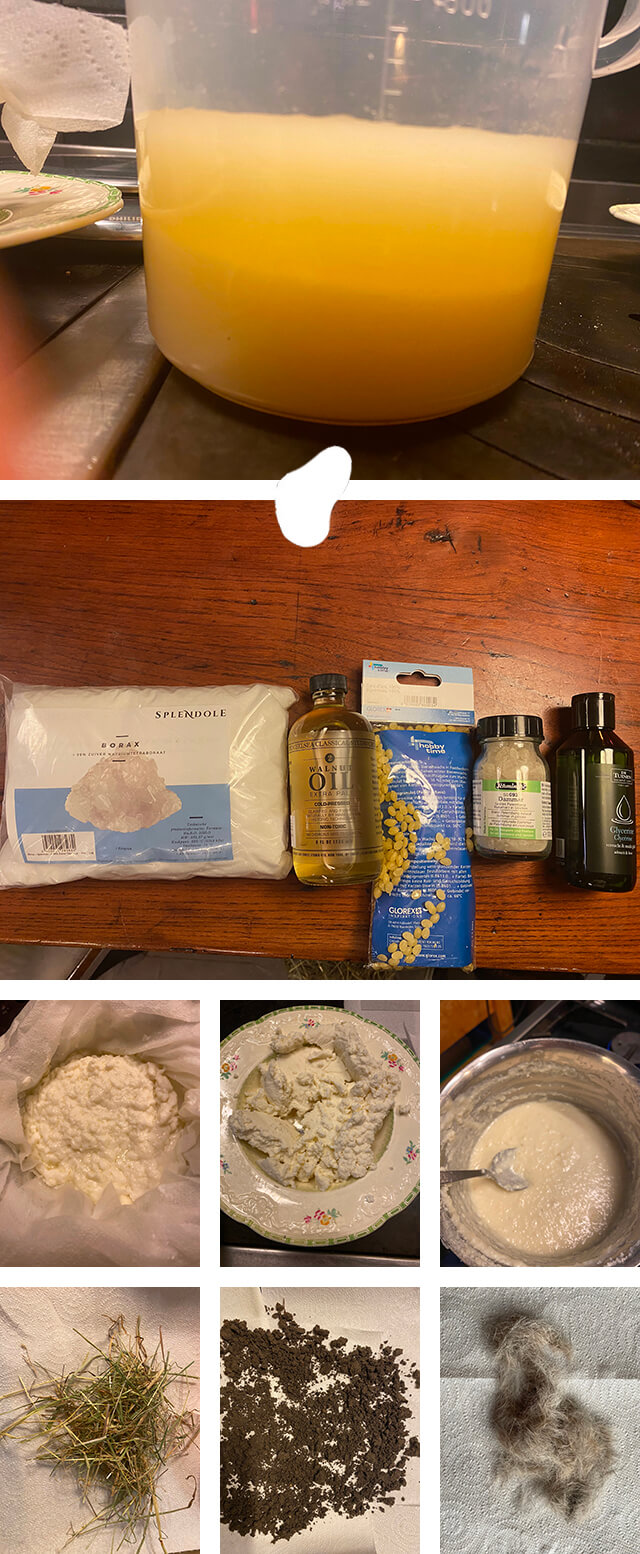
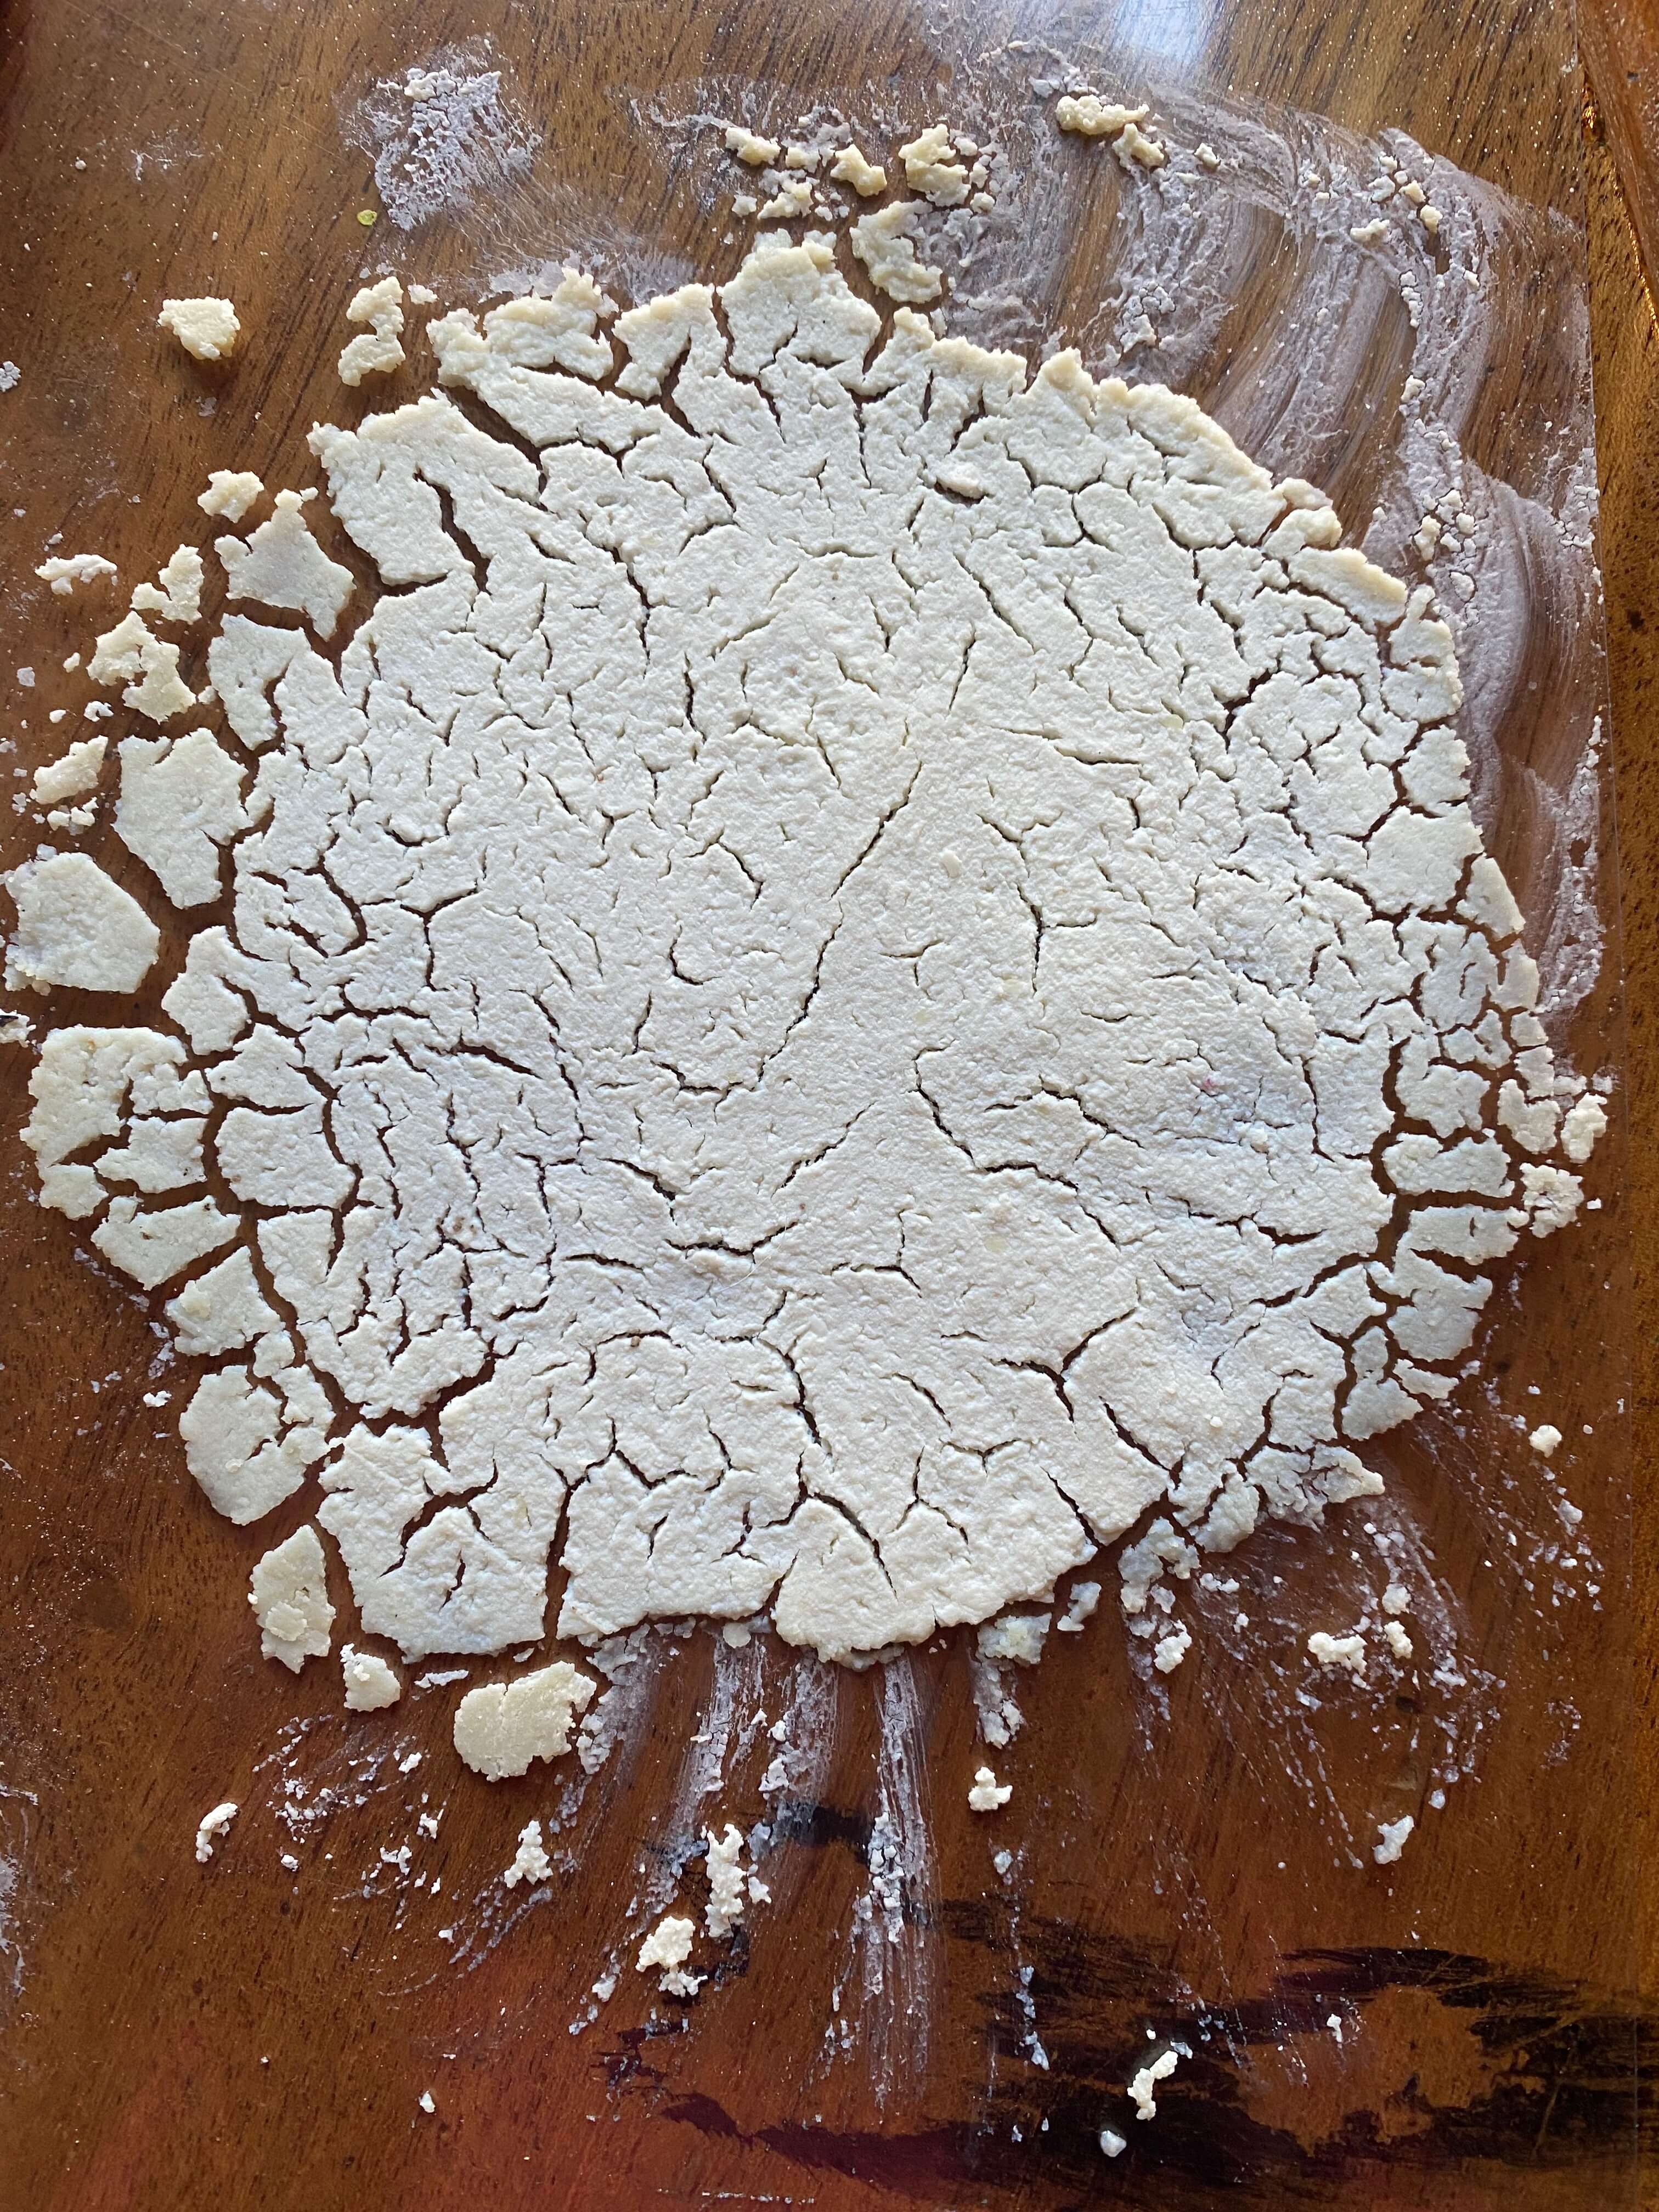
After 24 hours of drying all looked neat, however after 36 hours all three plates started cracking.
Only after I created the mixture plates, I realized the following: borax as a weak base, is added to open up and dissolve the casein. The aluminium acetate called for in the book, will help cure the casein, as the acidity will force the casein to aggregate. When mixing finely dispersed casein in a base solution, casein will interlink with the other materials in the mixture. And when this interlinked casein is acidified, the casein will aggregate around the other materials. These 2 steps will create the composition strength.
But I used pretty wet casein, in a rather large particle size, and did not stir very long. Because of this, I most likely did not accomplish to create a fine dispersion with open casein molecules, let alone casein which in the end interlinked with and folded around the other material molecules.
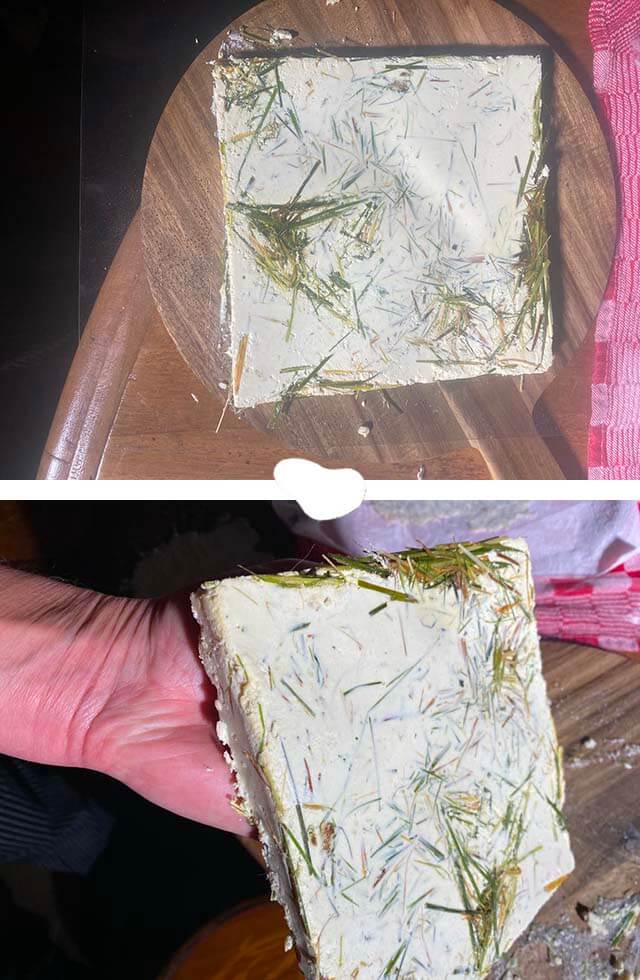
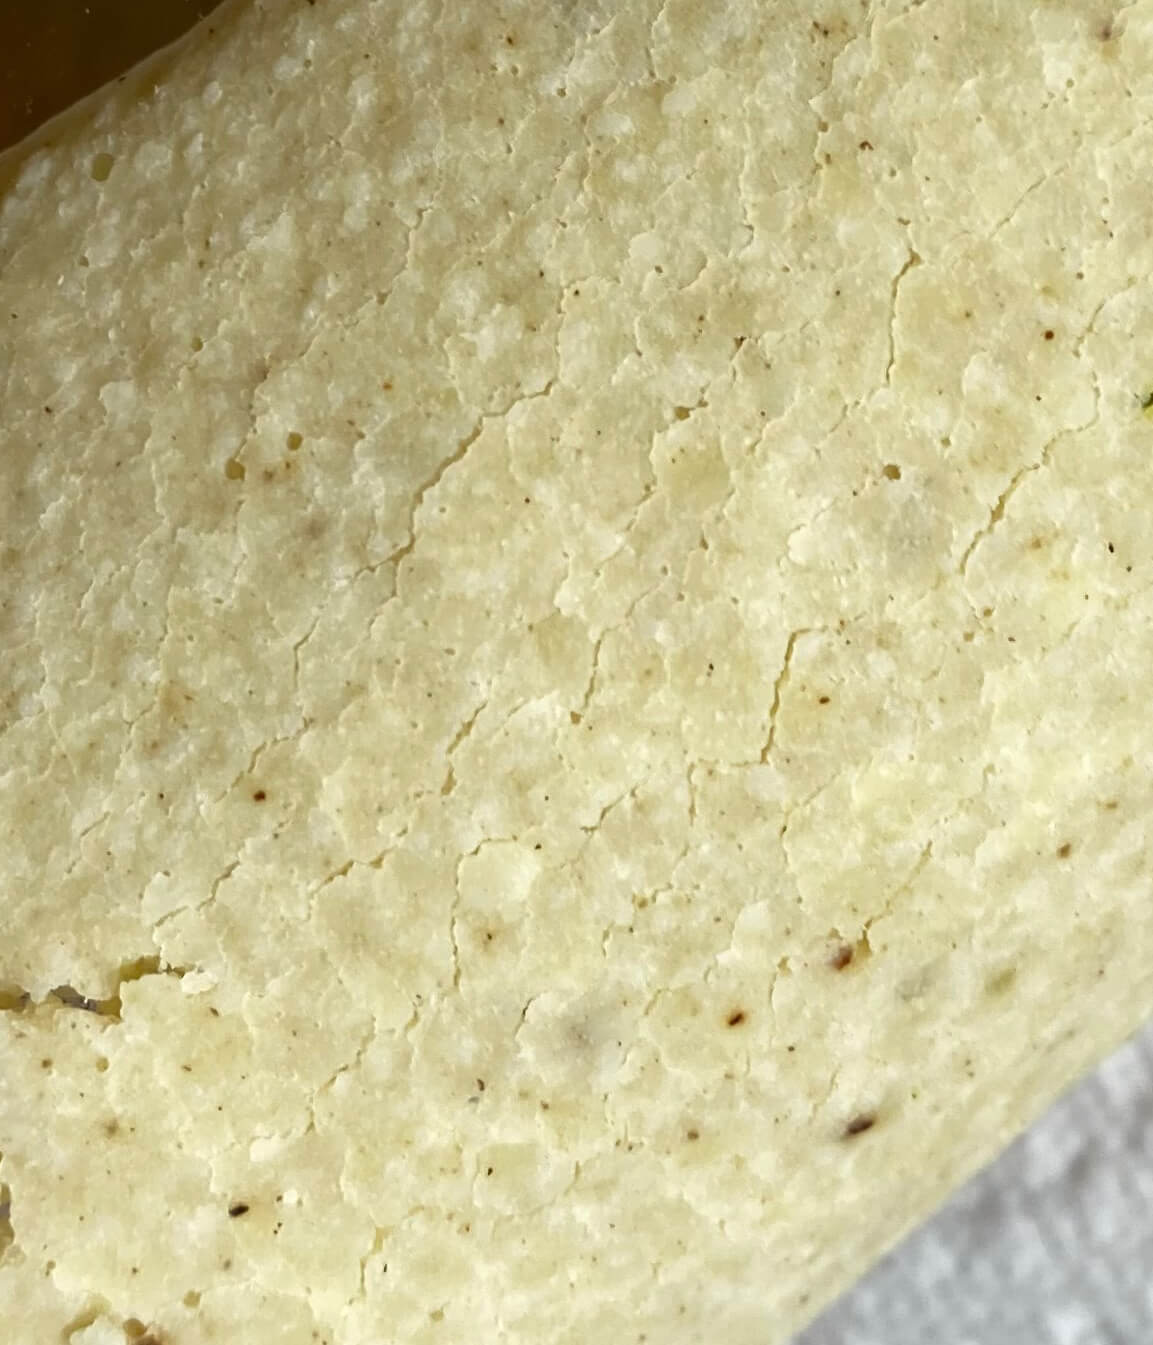
Mixture 2
For my second try I altered three things:
- I first grinded the wet casein into a finer mass
- I altered the ratio's of the ingredients
- I stirred the mixture for 30 minutes
The ratio's I used:
- 250 gr wet casein
- 55 gr borax
- 7,5 gr glycerine
- 16 gr walnut oil
- 37,5 gr dammar resin
- 125 gr beeswax
For the filler I used dried grass. The resulting thick block took around 72 hours to dry, and kept it's solid structure.
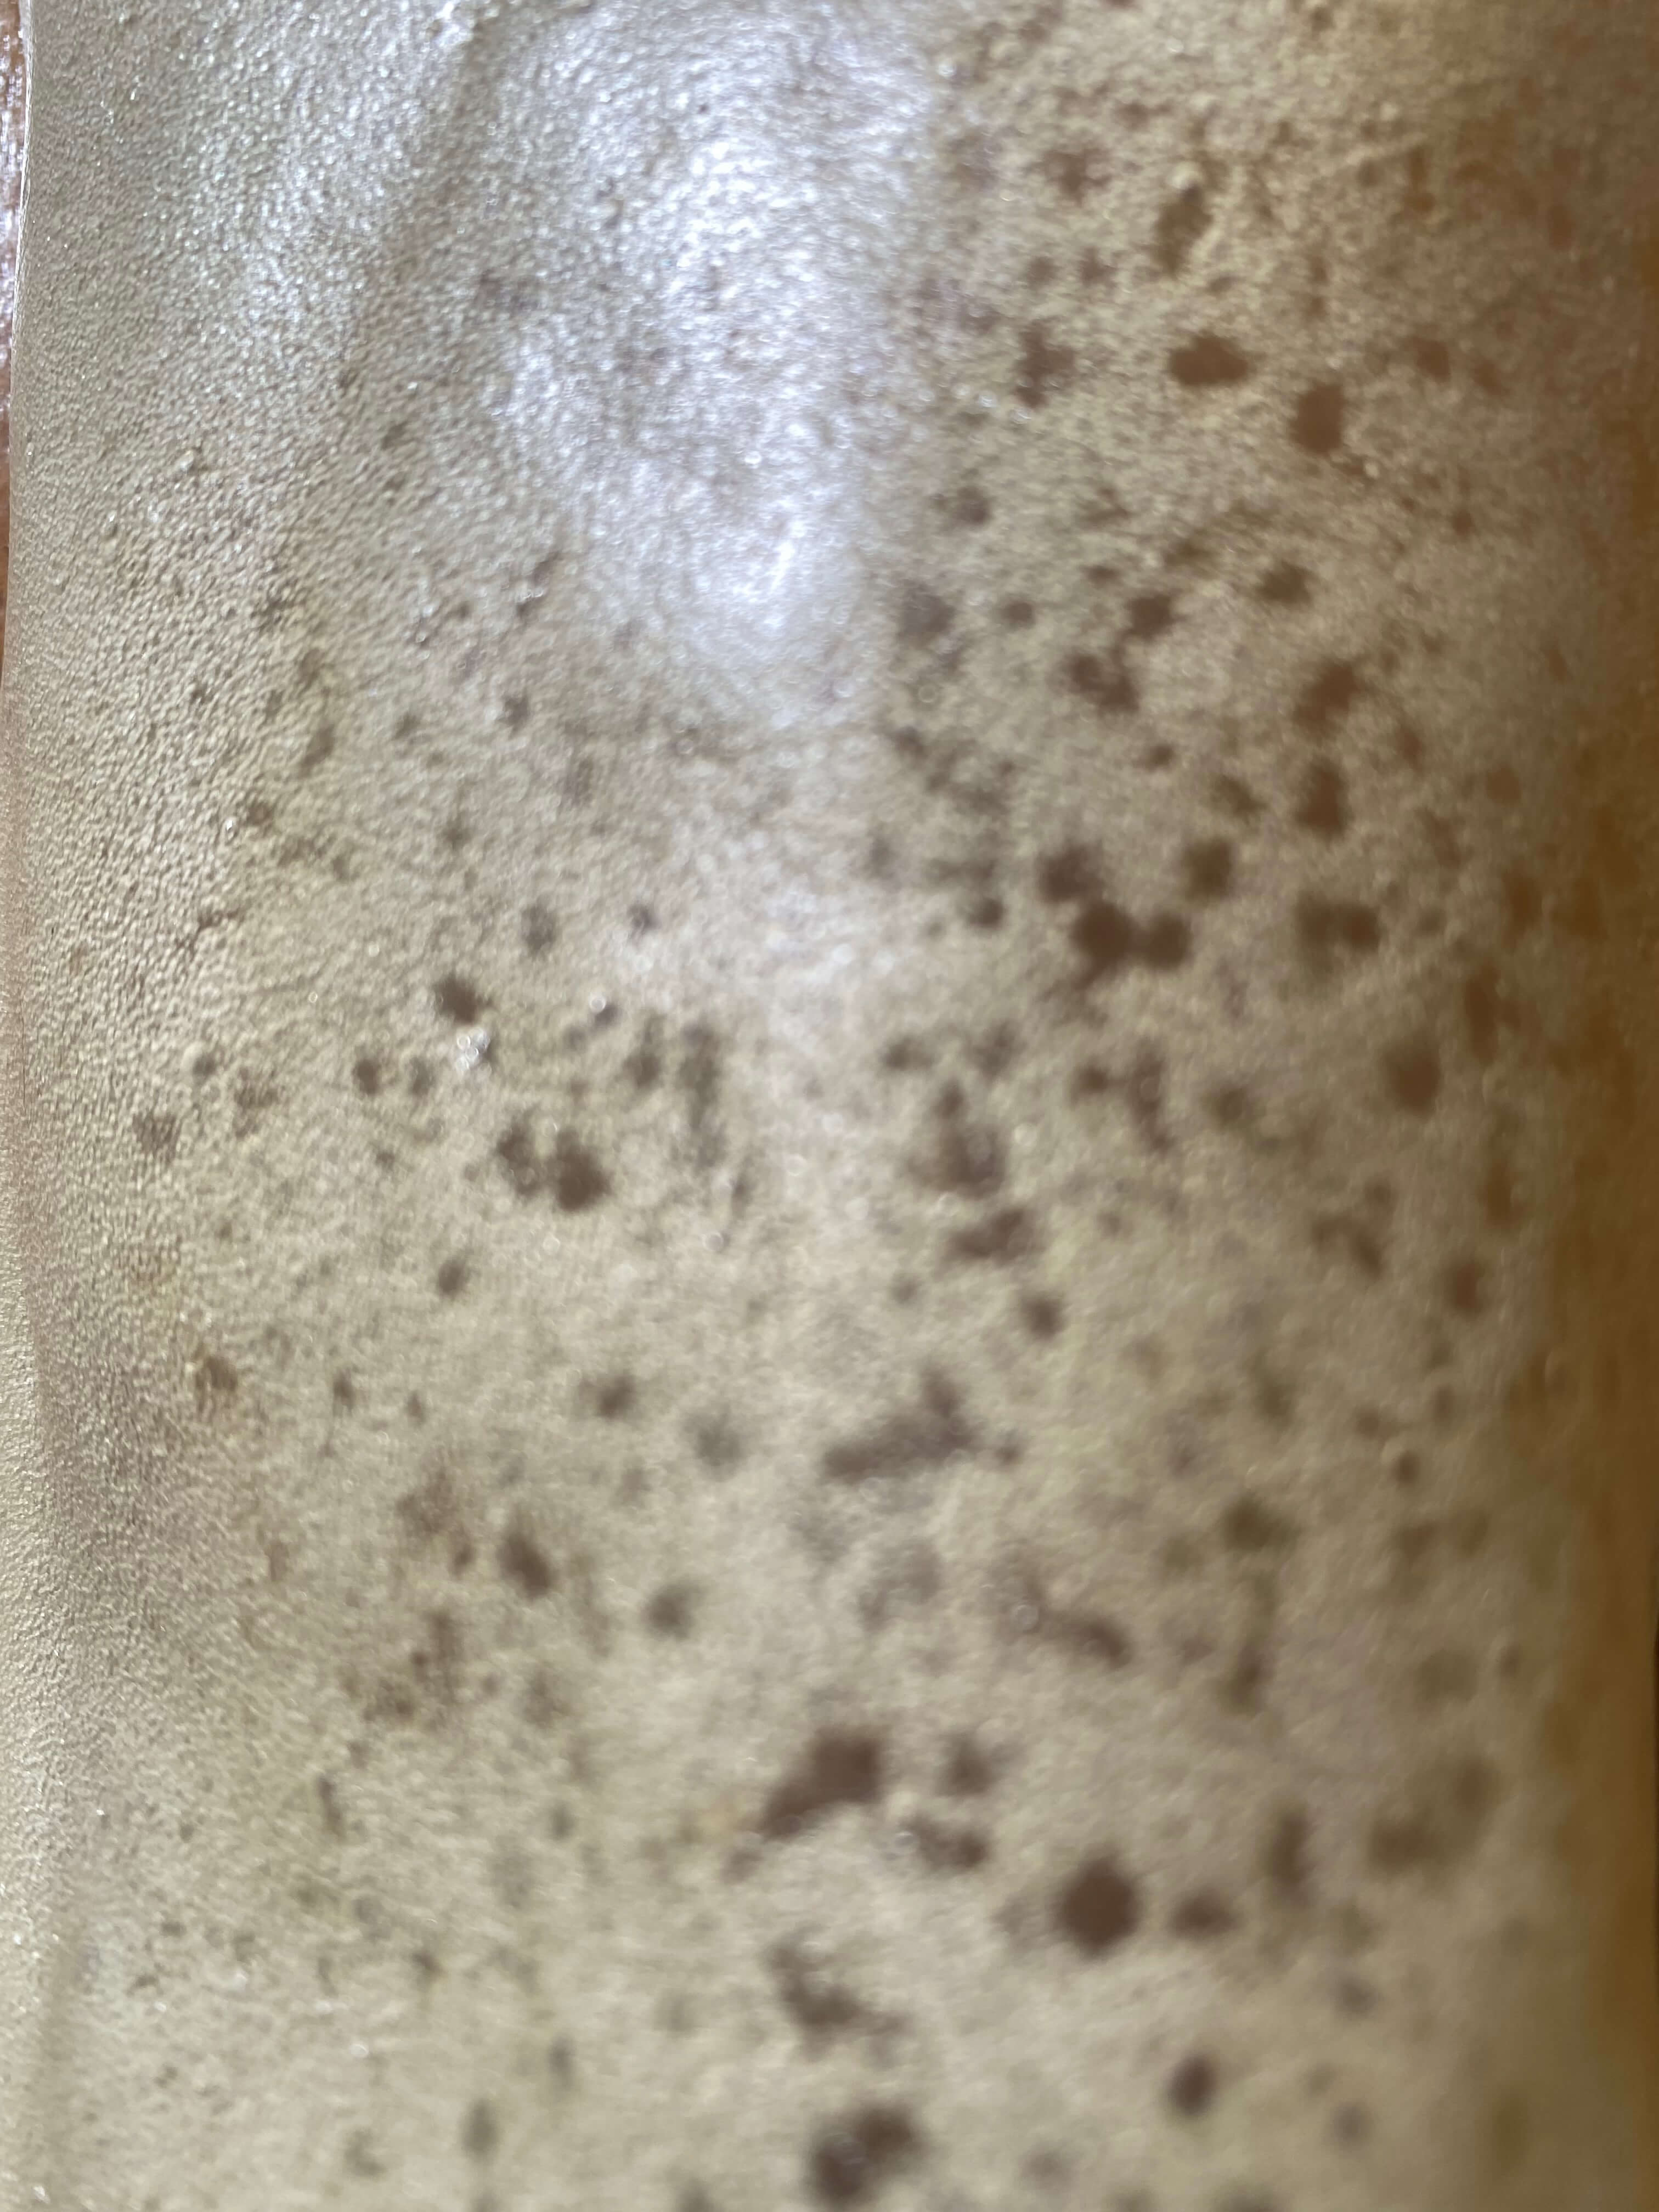
Ammonium caseinate
I tested a recipe from the book to make the the salt ammonium caseinate from my home-made fresh caseine.4 The first day the thin layer dried beautifully.
But the second day, while almost dry, the layer starting cracking (oh dear).
Again, most likely, my casein was too wet, the particle size was too large, and the drying went too fast. All those factors cause the brittleness of the end-product.
Casein-cellulose composite
As a next experiment, I prepared a composite of casein and cellulose from the book.4
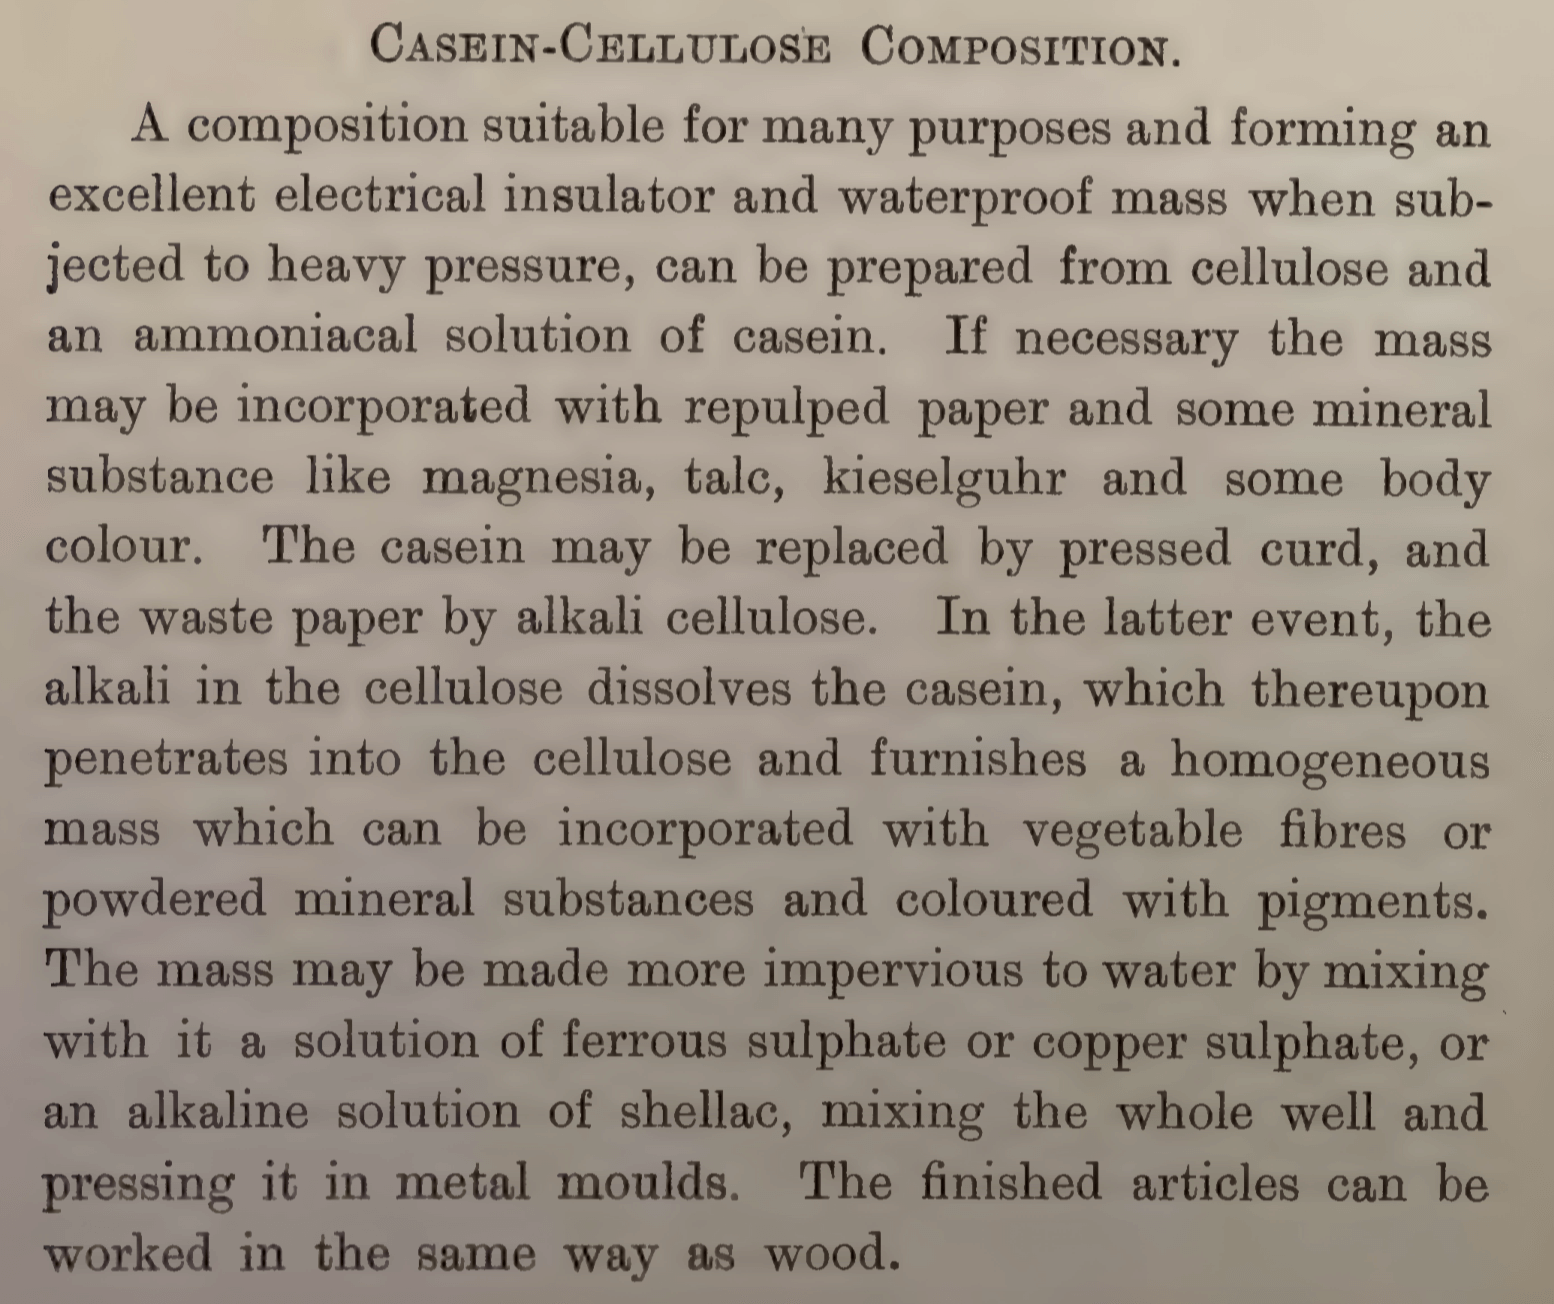
The steps and chemistry are pretty logical:
- First you dissolve casein into ammonia so that all casein is opened up.
- Then you mix this solution with a source of cellulose (I decided to use some discarded Kombucha mothers).
- The solution will penetrate the cellulose.
- And when the ammonia slowly evaporates, the casein aggregates and will form bonds with the cellulose.
* 100 gr of fresh home-made casein
* 100 gr of Kombucha mother
- 20 ml ammonia 6%
- 20 ml of a solution of shellac flakes dissolved in 95% alcohol
- Dried grass
* Measuring cups
- Scale
- Kitchen grinder
- Pan and heating stove
- Spoon
- Thermometer
- 2 Metal pots
- Glue clamps
- Cheese cloth
- Cling film
* Grind the Kombucha mothers to a fine paste
- Add the casein in the pan
- Heat the casein to 60 degrees celcius while stirring
- Add the ammonia and keep stirring till the casein is dissolved
- Add the Kombucha paste and keep stiring till the mass is homogeneous
- Add the shellac solution and grass and stirr till it is evenly dispersed in the mixture
- Take the pan off the fire and let the mixture cool
- Cover the inside of a metal bowl first with cheese cloth, and then with cling film
- Cover the cling film evenly with the mixture along the inside of the bowl
- Place first a layer of cling film, and then a layer of cheese cloth over the mixture
- Place the other bowl on top of the first bowl
- Put pressure on this 'mold' by placing 4 glue clamps
- Leave to dry
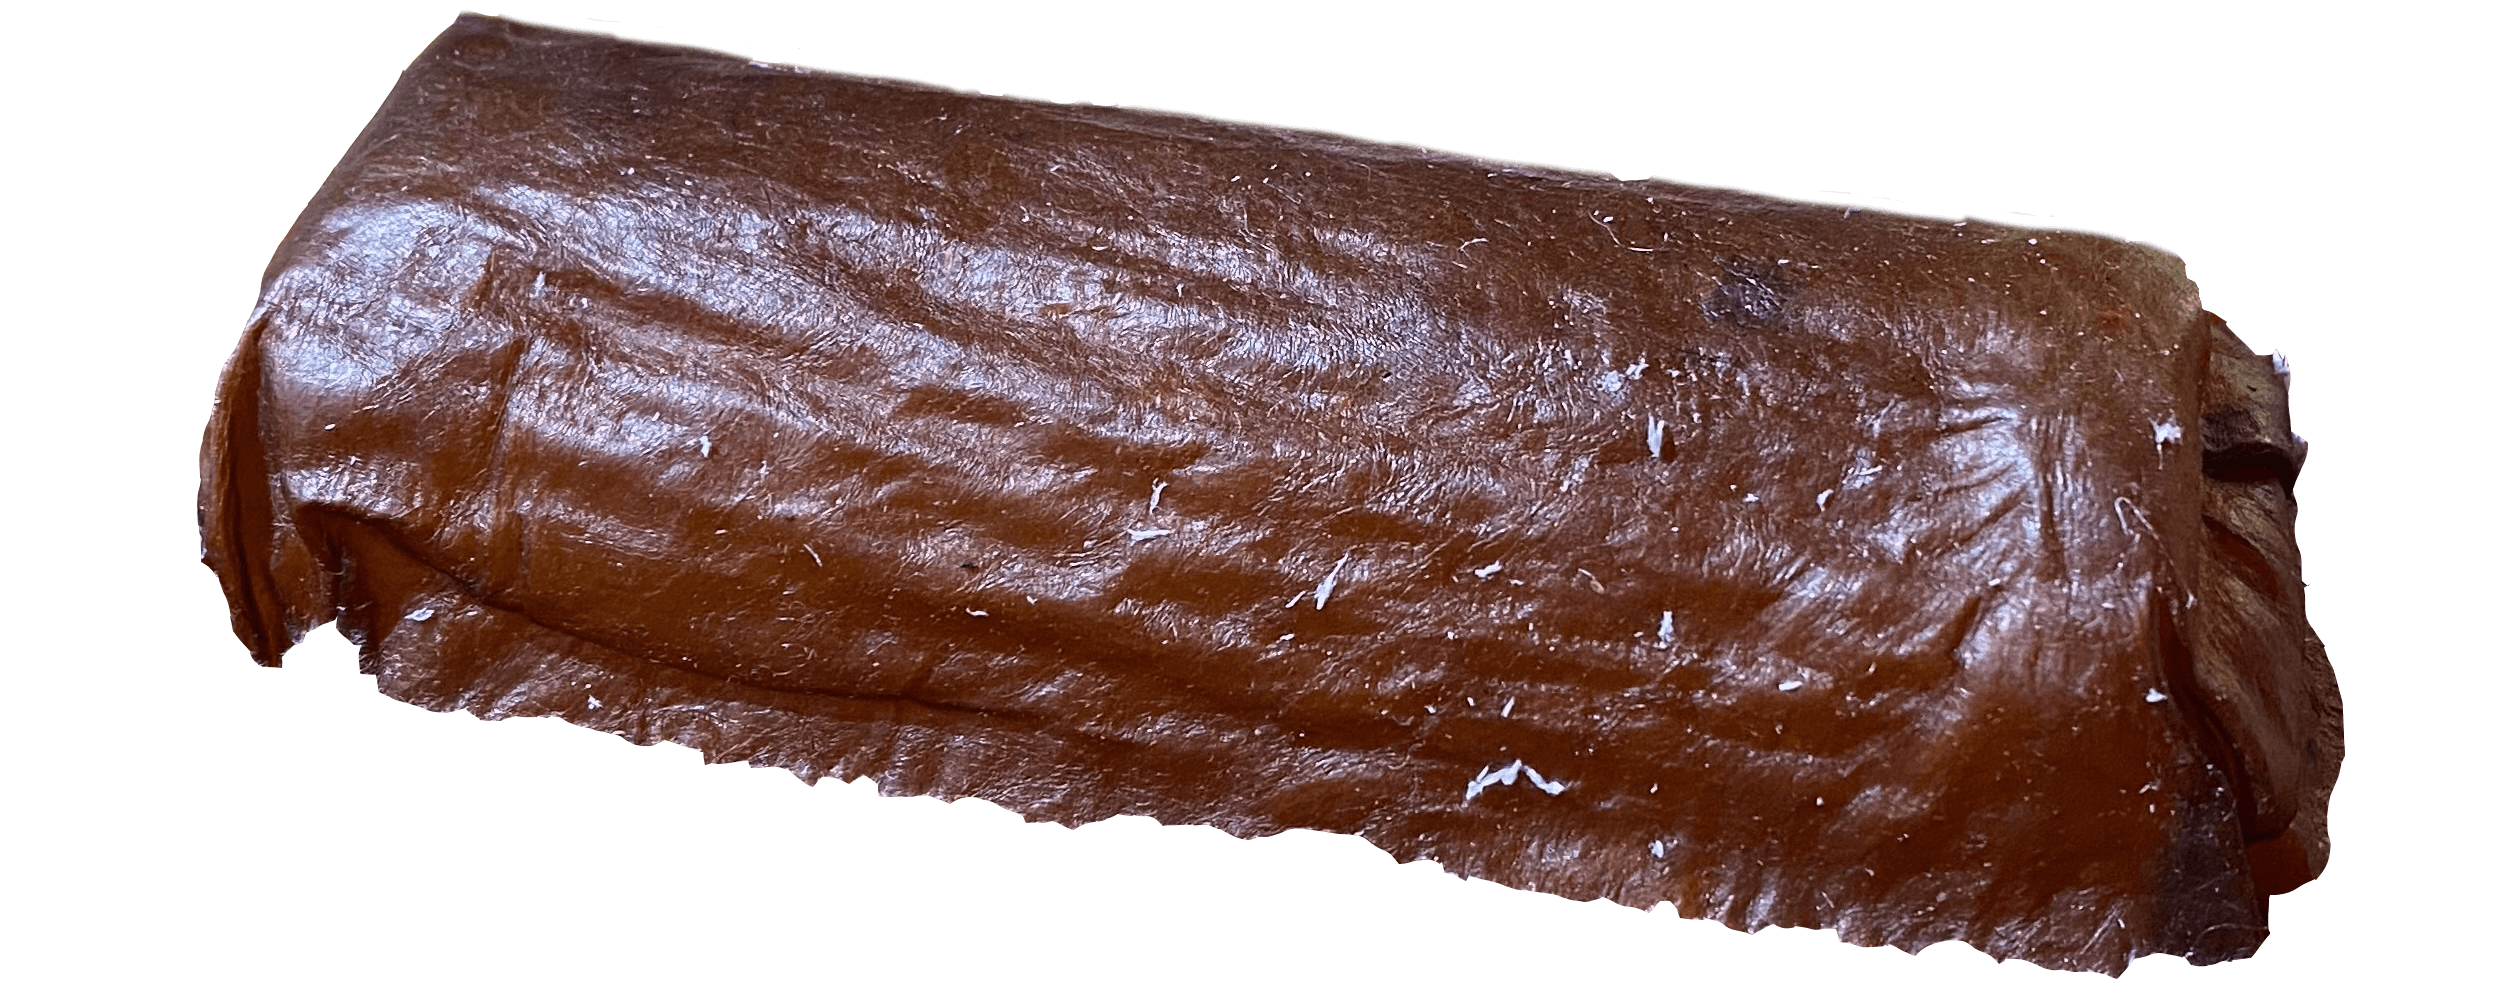
The recipe in the book calls for letting the composite dry in the mold. However, after 48 hours the composite mixture in the mold was still soaking wet. Therefore, I took the second bowl off after 48 hours, and let the mixture dry on the air. Only after a week, the mixture was completely dry. And I had a leathery composite in the form of a basket which was water-resistant due to the shellac added.
This composite might be used for building and sculpting purposes.
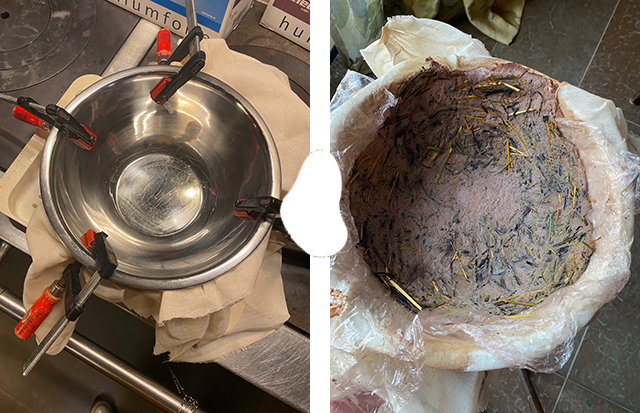
Final casein-cellulose basket
Casein-hemp-tea composite
When searching on the internet about casein, I found a wonderful explanation about how to make casein-hemp-tea composite from Robert Murray-Smith.
Again, the steps and chemistry are pretty logical:
- First hemp material is grinded in water in a chocolate grinder to create an array of single fibres.
- Then dried casein powder is added and some dilute base to dissolve and open up the casein, so that it can interlink with the hemp fibres.
- Next you add a tannic acid solution. Tannin molecules can cross-link proteins at the level of specific amino acids, and modify the folding, the molecular weight, and the core binding sites, to form soluble complexes.
- Lastly a dilute acid is added to precipitate the composite.
- After filtering, this composite is dried overnight in a dehydrator, and grinded to a powder.
- The powder can be formed in a mold while heat-pressed.
The secret is using finely dispersed particles and prolonged periods of stirring. Unfortunately I do not have a chocolate grinder, so replaced this with a kitchen aid mixer. The tannic acid I replaced with green tea.
Steps for preparing casein-hemp-tea composite
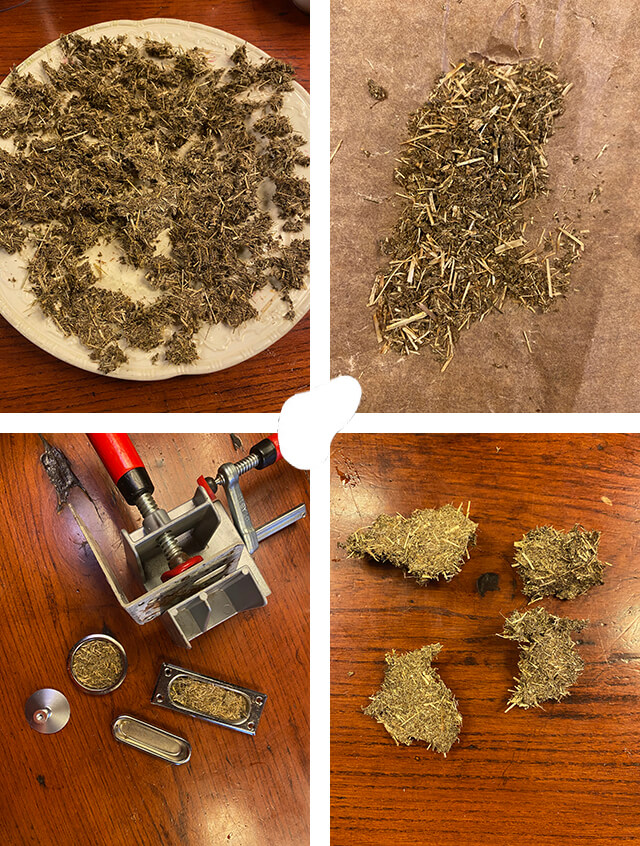
The recipe I followed:
* 30 gr of dried hemp, grinded in a herb grinder
* 30 gr of dry casein powder
- 1,4 gr casustic soda dissolved in 100 ml of hot water
- 15 gr glycerine
- 100 ml of green tea from 3 tea bags (soaked for 2 hrs)
- 120 ml 6% acetic acid
* Measuring cups
- Scale
- Kitchen grinder
- Kitchen mixer
- Cheese cloth
- Colander
- Dehydrator
* Add the grinded hemp to 1 liter water
- Mix for 2 hours
- Add the casein and caustic soda solution to the pot
- Mix for around 3 hours
- Add the glycerine
- Mix for around 4 hours
- Add the green tea
- Mix for 12 hours
- Add the acetic acid, stirr shortly till a precipitate starts to form
- Let the mixture rest for a while and then filter off the precipitate in a cheese cloth
- Press out the water, crumble in small pieces and dry overnight in the dehydrator at 40 degrees celcius
- Grind the clumps to a fine powder
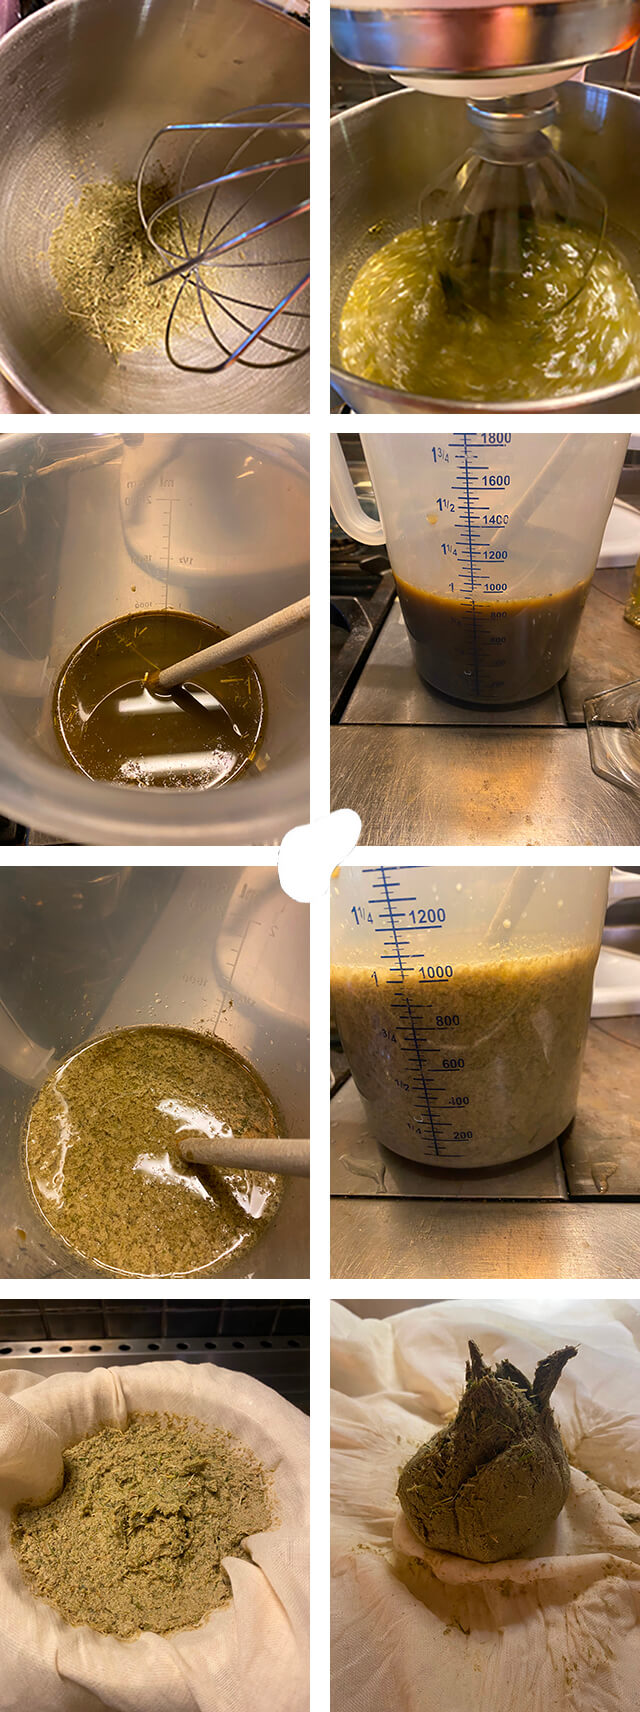
For the composite powder to be applied, the recipe calls for filling a metal mold with the powder, which should be heated to 150 degrees celcius, and then be pressed till cooled down. For metal molds I used some aluminium doorprotectors. I filled those with powder, clamped them with glue clamps, and put them in an oven of 150 degrees celcius for 20 minutes. Since I did not have a hydraulic press machine, I had to be slightly creative. So I parked the wheel of my car on top of the hot mold for 20 minutes. Not a perfect lab solution with equal heating and pressing, but it worked to create some pretty tough casein-hemp-tea composite pieces.
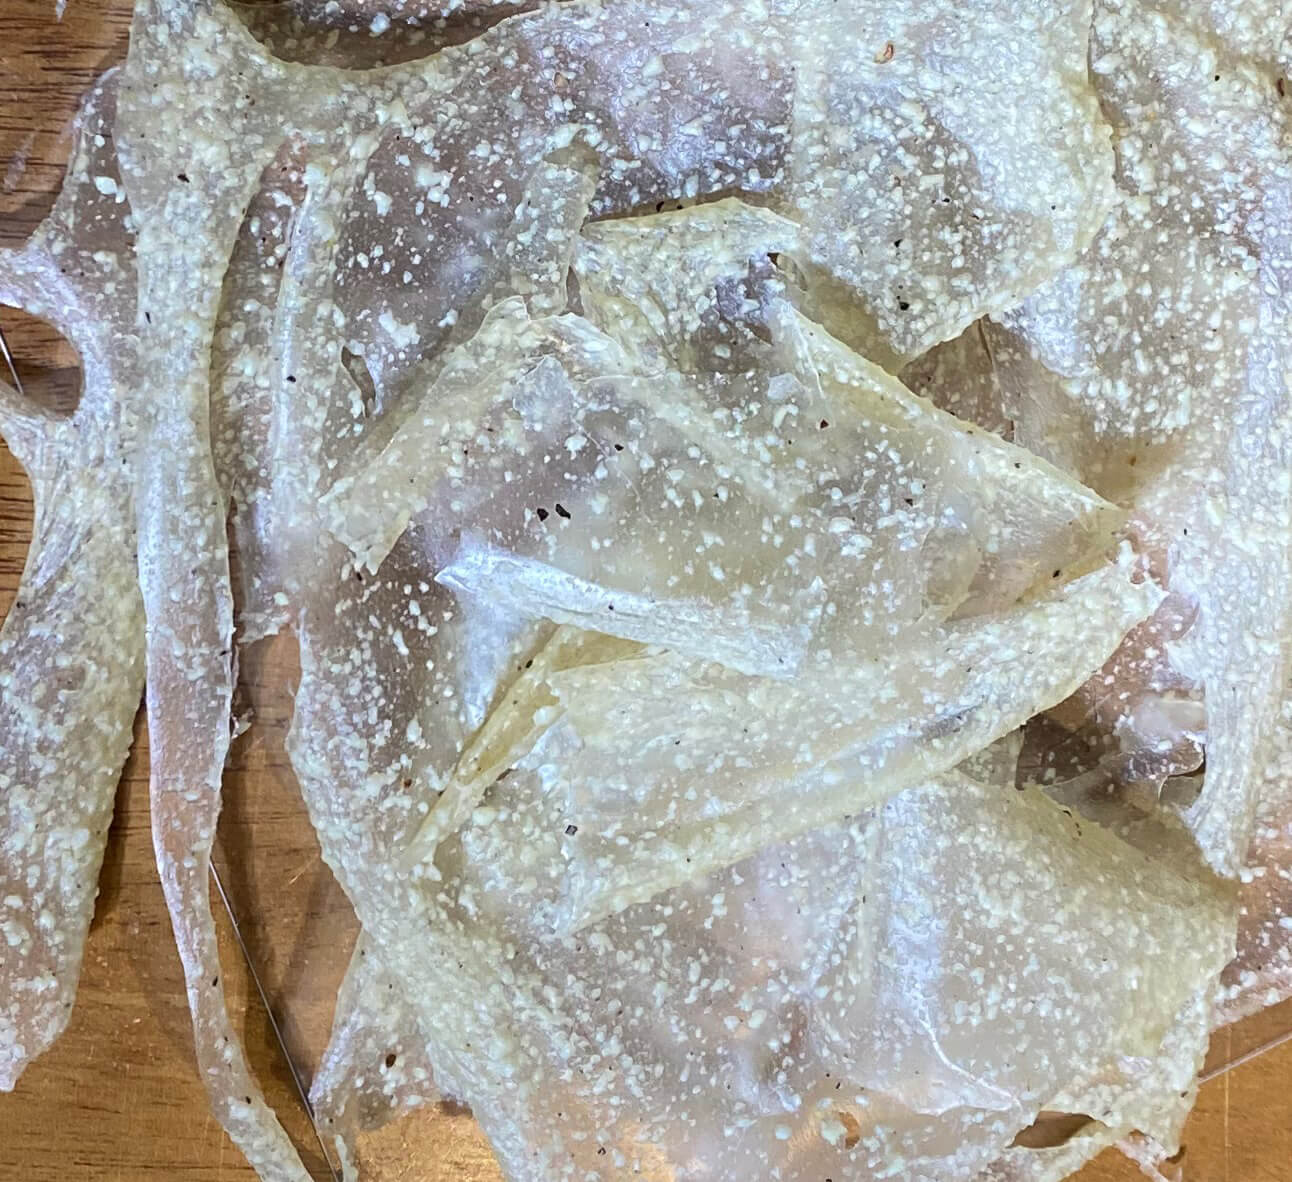
Casein plastics
Bioplastics made solely from casein are weak and brittle. Therefore it is better to combine the casein with one or more other polymers when making bioplastics. The potential additional links between the different polymers, help strenghten the bioplastics. I used several scientific articles to get ideas for various polymers and the ratio's and recipes.5, 6, 7
Test serie casein bioplastic
| Material pic | Step 1 | Step 2 | Step 3 | Drying | Result |
|---|---|---|---|---|---|
 |
Mix: 10 gr casein and 10 gr glycerine | Mix: 15 gr maizena in 10 gr vinegar | Stir: combined mixtures for 20 minutes on low heat | Dehydrate: overnight at 40 degrees celcius | Translucent/white, slightly brittle |
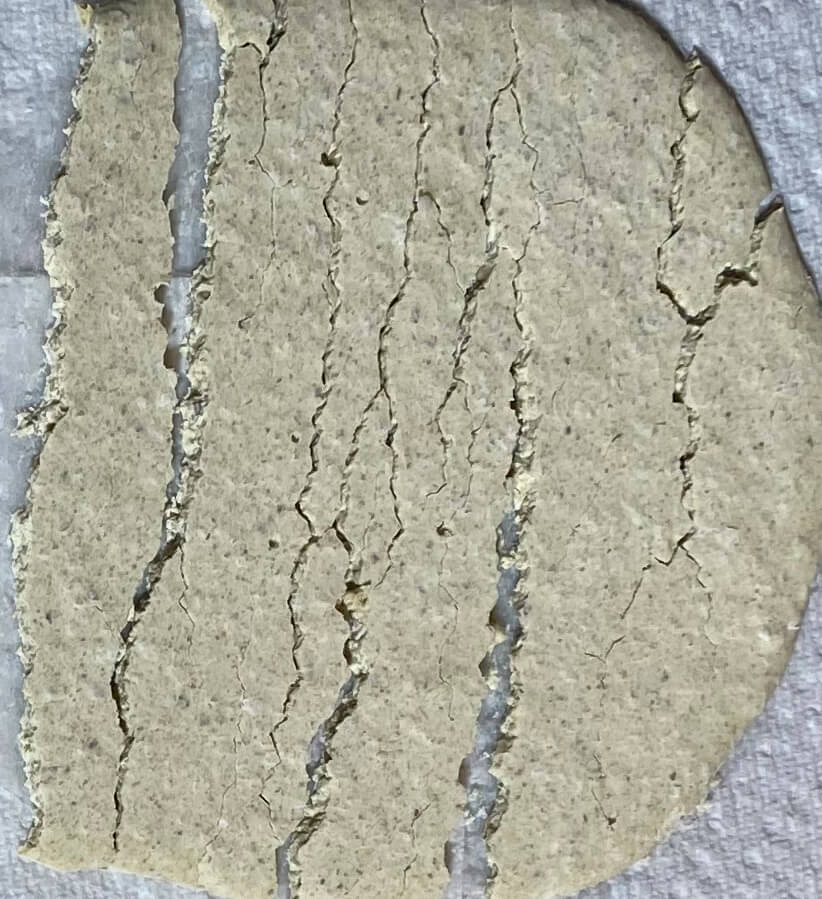 |
Mix: 10 gr casein and 7,5 gr glycerine | Mix: 15 gr maizena and 7,5 gr water | Stir: combined mixtures for 5 minutes at room temperature | Dehydrate: overnight at 40 degrees celcius | White, very brittle |
 |
Mix: 10 gr casein and 7,5 gr glycerine | Mix: 25 gr maizena and 7,5 gr glycerine | Stir: combined mixtures for 5 minutes at room temperature | Dehydrate: overnight at 40 degrees celcius | White, slightly brittle |
 |
Mix: 10 gr casein and 3 gr glycerine | Mix: 3,75 gr maizena and 3 gr glycerine | Stir: combined mixtures for 5 minutes at room temperature | Dehydrate: overnight at 40 degrees celcius | White, slightly brittle |
 |
Mix: 5 gr glycerine and 85 ml water | Mix: 15 gr casein | Stir: combined mixtures for 15 minutes at room temperature | Dehydrate: 72 hours at room temperature | Translucent/white, leather-like, foldable |
 |
Mix: 3,75 gr glycerine, 10 gr maizena and 75 ml water | Mix: 11,25 gr casein | Stir: combined mixtures for 15 minutes at room temperature | Dehydrate: 72 hours at room temperature | White, plastic/resin-like, easily breakable |
 |
Mix: 3,75 gr glycerine, 10 gr egg white and 75 ml water | Mix: 11,25 gr casein | Stir: combined mixtures for 15 minutes at room temperature | Dehydrate: 72 hours at room temperature | Translucent, plastic-like, foldable |
 |
Mix: 3,75 gr glycerine, 10 gr natural latex and 75 ml water | Mix: 11,25 gr casein | Stir: combined mixtures for 15 minutes at room temperature | Dehydrate: 72 hours at room temperature | Yellow/white, rubber-like, foldable |
 |
Mix: 3,68 gr glycerine, 0,3 gr pectine and 85 ml water | Mix: 11,03 gr casein | Stir: combined mixtures for 15 minutes at room temperature | Dehydrate: 72 hours at room temperature | Translucent, plastic-like, foldable |
The combinations of casein with latex, egg white and pectin respectively provide opportunity for further exploration. For all mixtures it is important to let them rest a while before casting, in order to let the air bubbles evade.
In the previous tests, I had just casted a bit of mixture on a silicon mat. The mixtures were pretty heigh at the start, and the edges were not bound by a mold. In order to better understand the characteristics of the most promising casein mixtures, I did one further experiment.
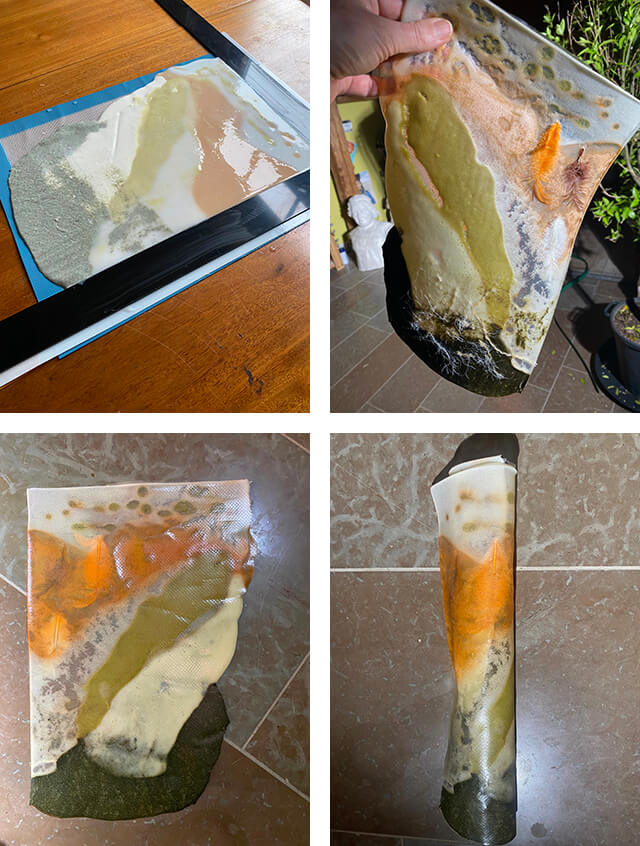
I made a mold by cutting out an acrylaat sheet of 3 mm thickness, and placed this on a silicone mat. I created six mixtures:
- Casein with latex
- Casein with latex with dried and grinded nettle leaves (dark green)
- Casein with egg white
- Casein with egg white with willow leaf diluted ink (light green)
- Casein with pectin
- Casein with pectin with elderberry diluted ink (orange)
I casted these mixtures next to each other in the mold. I also dropped some hemp thread and feathers on top of the surface.
The mixtures were completely dry after 72 hours.
Some observations:
- At the edges the different mixtures had merged together
- The sheet was rubbery and foldable
- The sheet had not shrunk in the lenght and the width
- The latex part had a thickness of around 1 mm, with no difference between the white and dark green parts
- The part with egg white was uneven, the thickness of the light green part was around 1,5 mm and of the white part 0,5 mm
- The part with pectin was more even than the egg white part, with a thickness of around 1 mm. However the orange part here and there was slightly thicker, while the white part here and there was thinner
- Where I had dripped the egg white mixture into the latex and pectin parts, the egg white drips clearly had a lower surface
- The latex part was more opaque
- The egg white and pectin parts were more transparant
- The thread and feathers were tightly fastened to the surface
I think you can conclude that water in the various mixtures has a different diffusion and evaporation profile. Also the addition of colored inks has an impact on this water profile. When you want to accomplish marbled effects, it does not seem to be wise to combine different mixtures in one mold. Coloring effects for the casein mixtures with latex and pectin are giving more even results than with the casein and egg white mixture. But all in all I love the appearance of this very first sheet made from casein!
Files
All files for milling the tree trunk mold can be found here.