6. BioFabricating Materials
This week in one sentence: look to nature, it is fabulous!!
Why biomaterials?
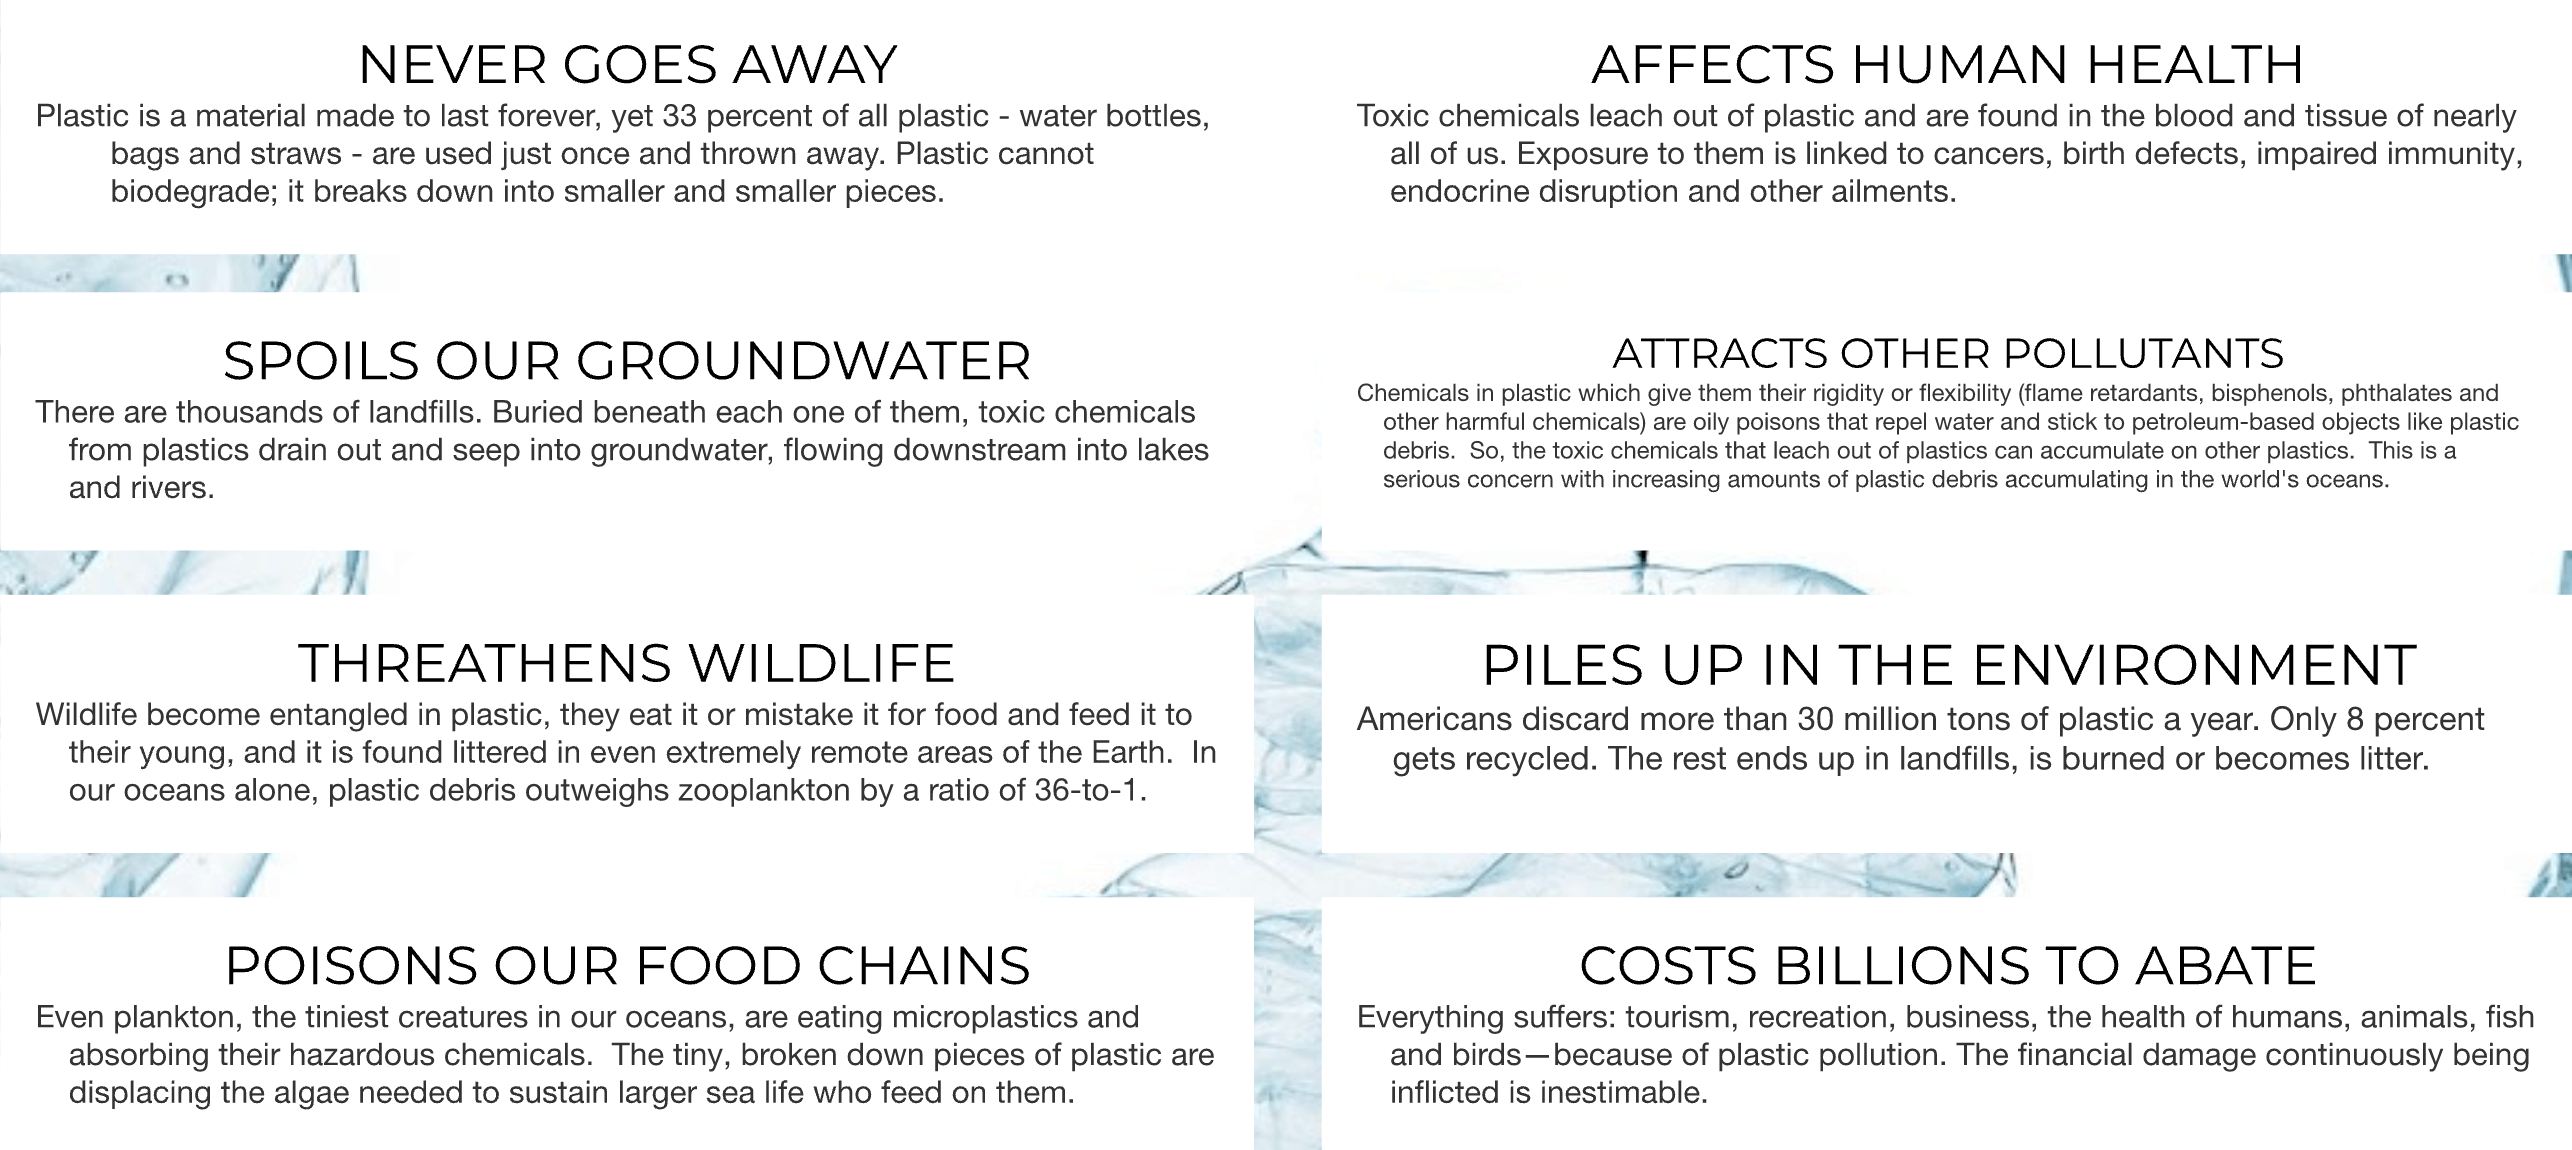
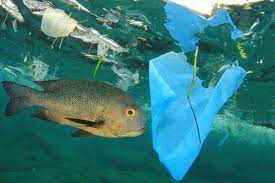
Well, plastics and synthetics seem to inevitably leak away in the environment. And that's bad news, because this type of material:
Inspiration

I love the work of Iza Awad. He is a Chemistry student, who developed as his Master project a collection solely made of Kombucha. It is raw, and he masterfully plays with the contrast between very feminine and masculine.
Experimentation in the lab
The world of biomaterials can be clustered into three main areas:
- Bioplastics, which can be crafted from resources like agar, gelatine, alginate, vegetal resources and food waste.
- Alternative leathers, which can either be crafted from vegetal, fruit, or animal ingredients, or grown from mycelium and bacterial resources.
- Bio yarns and fabrics which can be grown and crafted. Think silks, roots, flowers, algae and animals.
The ingredients and resources for biomaterials are biobased. But that is only part of the trick. We should think further than production and usage. But design materials with their entire lifecycle in mind. Therefore a true biomaterial is also biodegradable and biocompostable.
Biodegradable means that a material can break into smaller pieces under certain conditions, what can take from a short time to many years for the full process to happen. While biocompostable can be defined as the process when a complete microbiotic breakdown happens and usually in 180 days or less.
It is also important to realize that the biomaterial recipes are not inventions but recreations of traditional techniques that are forgotten/substituted by fossil based materials.
In Amsterdam for our biofabricating week we worked side-by-side. For every ingredient, each one of us tested different recipes and approaches.
Bioplastics
The main ingredient for making a bioplastic is a suitable polymer. Optionally you can add a plasticizer, filler, stiffening or expanding agents. To add color on the bioplastic, natural inks and pigments or food colorant can be used.
Bioplastics can be assembled, glued, stitched, casted, machine cutted, extruded and injected.
Tapioca
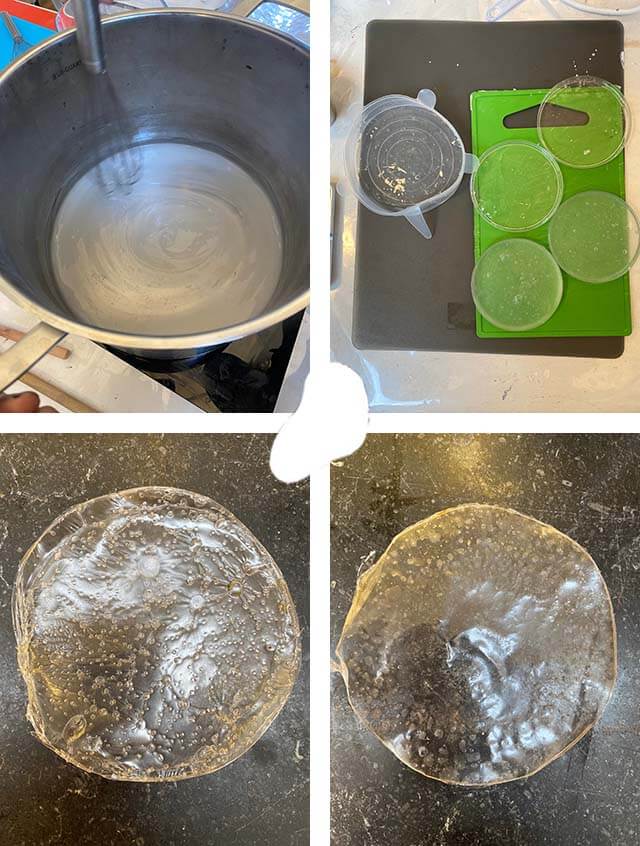
The first experiment we did was with tapioca, a starch made from cassava roots. We created very thin, smooth, shiny, bendable, and translucent films.
Heating tapioca
Observations: I used petri dishes as a mould and created two films. One very thin and translucent and one a notch thicker and translucent. After drying, the films were easy to peel off the petri dishes. They dind't deform in doing so. The look and feel was almost that of plastic. Depending on it's thickness I could see this material being used as jewelry, decorations, packaging and for art. It feels slightly stiff and a bit cold on the skin so I wouldn't like it for clothing.
Prepare this recipe 1 according to the description below:
* 250 ml water
* 25 gr tapioca
* 10 ml glycerine
* 10 ml vinegar
* Measuring cups
* Bowls
* Spoons
* Pan
* Stove
* Moulds
* Dehydrator
* Combine the vinegar with the glycerin and gently stir them together
* Dilute the tapioca in a little bit of water
* Add the two solutions to the 250ml of water at a low heat
* Stir till the consistency gets thicker and whiter (don't let it boil)
* Pour the sticky mixture in a mould
* Let the film dry in a dehydrator overnight
Gelatin
The next polymer in the cluster of bioplastics was gelatin. Gelatin is a protein obtained by boiling skin, tendons, ligaments, and bones with water. It is usually obtained from cows or pigs. Gelatin is used in shampoos, face masks, and other cosmetics; as a thickener for fruit gelatins and puddings; in candies, marshmallows, cakes, ice cream, and yogurts; on photographic film; and in vitamins as a coating and as capsules, and it is sometimes used to assist in “clearing” wines. Gelatin is not vegan.
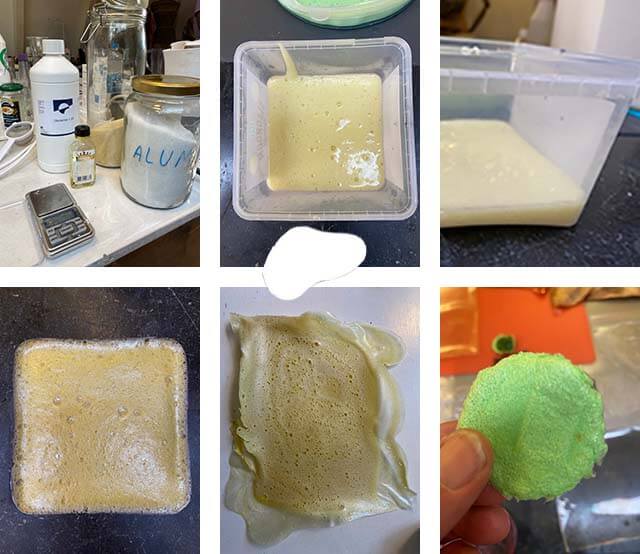
I made the foam recipe.2 The standard procedure for foam is that you add soap as an expanding agent. But remembering the foam we got from adding a soda ash solution to an alum solution while making pigments, I decided to interchange the soap for soda ash and alum. I also used a bit of yellow food coloring to spark up the foam with a bit of color. As moulds I prepared a square tub and a rubber mat.
Making gelatin foam
Observations: The foam came out beautifully. And stayed upright and foamy while drying. It had a shiny gloss. And felt strong. Especially the foam I had casted in the square tub had from top to bottom a foam-like structure and felt truly rubbery and foamy and was easily bendable after some early drying. It felt nice and warm touching it. The mixture I had casted on the mat kept it's foam-like appearance only on the top but not on the bottom, and immediately felt hard and couldn't be bend. The difference between the two was that I poured the first foam out of the pan in the square tub. The bottom-layer of the mixture was casted on the rubber mat. This was a mixture of liquid and foam. After several days, the foam from the tub kept it's foam-like structure but became quite hard as well.
Alessia made the standard foam recipe with soap as an expansion agent and a green food coloring. Her green foam sunk during drying, and became way more dense and mat compared to my shiny, bubbly yellow foam. So maybe the soda ash/alum solution was a great addition to the foam recipe!
* 240 ml water
* 48 gr gelatine
* 8 gr glycerine
* 8 gr of alum dissolved in a little bit of hot water
* 4 gr of soda ash dissolved in a little bit of hot water
* tablespoon of yellow food coloring
* Measuring cups
* Bowls
* Spoons
* Pan
* Stove
* Whisk
* Moulds
* Warm up the water in a pot on the stove
* Add the colorant
* Add the glycerine
* Add the gelatine
* Mix the ingredients gently till they form a smooth mix
* Boil for 15-20 minutes (86 degrees max), whisking continuously till your mixture has thickened
* Pour in the soda ash solution and mix it through the mixture
* Add quickly the alum solution
* The mixture will start to foam, help the foaming by mixing and stirring
* Pour the foam on the chosen moulds or surfaces
* Once you start pouring, try to cast slowly, without inglobating air, and by carefully puring on the liquid itself)
* Let the mould dry in a ventilated and dry room, turning the piece till it feels dry (and not cold anymore)
Alginate
The last in the cluster of bioplastics was sodium alginate. This is the salt form of alginic acid, extracted from within the cell walls of brown algae. It is considered extremely safe as it is most naturally extracted from the cells as a polysaccharide.
Alginate has a unique ability to hold upwards of 200-300 times its own weight in water, making it a naturally gelling substance. The alginate can be adapted to the thickness needed to perform the casting or use – making it a diverse product for casting, thickening or pharmaceutical needs. In order for alginate to stiffen, it has to be cured with calcium chloride. Calcium has the ability to form two bonds, which will hold the alginate into a long link forming this gel as a molecule called a polymer. Gels formed from alginate can withstand temperatures as high as 150 degrees celcius.
Making alginate threads
Together we first made a large bowl of alginate solution to create flexible biosheets according to the below recipe.3 Together with Cecilia we first made some alginate threads, by pouring the alginate mixture through a syringe in a solution of calcium chloride.
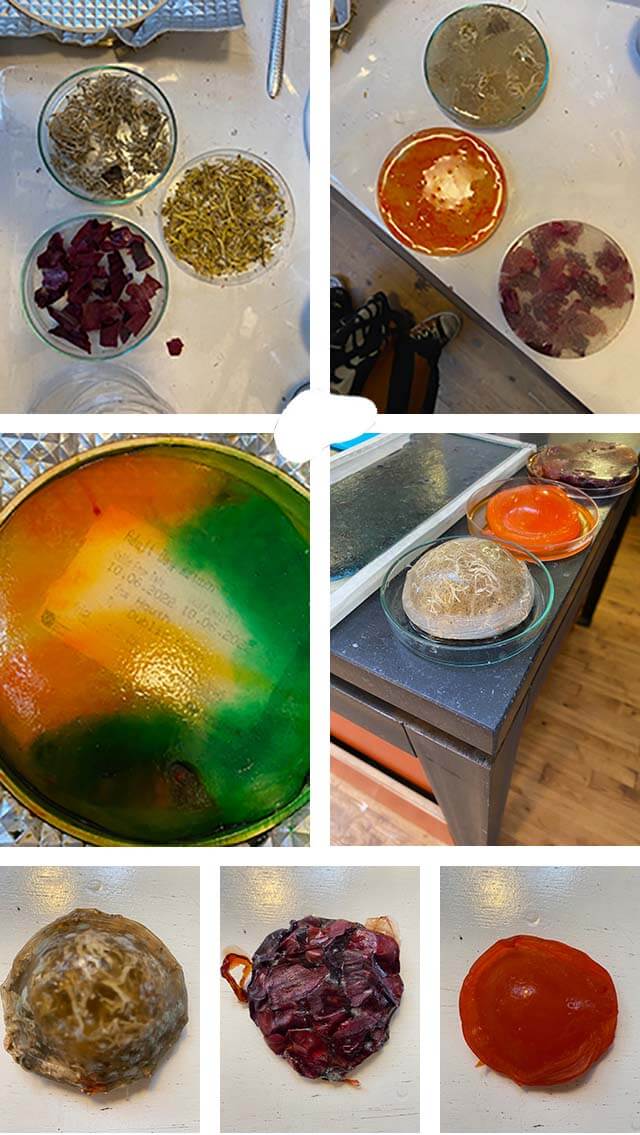
After that, I first prepared three petri dishes, one with red onion peels, the second with moss, and the last with some orange pigment. On top of those fillings I casted the alginate mixture, and then cured it with calcium chloride. I also took a larger bowl, tossed in a treasured train ticket from Dublin (good memories), poured in the alginate solution, and sprinkled it with green and orange pigments (colors of the Irish).
Making an alginate sheet
Observations: Immediately after curing all four dishes looked beautifully. The fillings were clearly visible in a translucent film. The next morning, the casted sheets had come loose from the slippery glas walls, and they all had transformed into big blobs. They were still translucent and clearly showed their fillings.
After five days, they started to get drier, but unfortunately two other transformations had occured. The onion and moss fillings had given off their colour to the alginate film and mold had started to grow on those blobs.
Even after seven days, most of the blobs had not completely dried. The only blob that behaved decent was the blob with orange pigment. It blobbed for sure, but was completely dry in five days, didn't develop any mold, and had an even color from the pigments.
* 400 ml water
* 12 gr alginate
* 40 gr glycerine
* 10 ml calcium chloride hydrate (for curing agent)
* 100 ml water (for curing agent)
* Measuring cups
* Bowls
* Spoons
* Handmixer
* Sprayer
* Moulds and mats
* Mix the alginate with water and glycerine with a handmixer till the liquid is smooth
* Let it sit for a few hours till the air bubbles have disappeared
* Prepeare a solution of 10% calcium chloride in a small spray bottle
* Spray the surface of the moulds and mats with the calcium solution
* Cast the alginate solution in the moulds
* Spread the alginate mixture evenly
* After a couple of minutes spray the casted alginate mixture with the calcium chloride
* Once the alginate mixture is cured, dip it in water to remove any calcium chloride residue
Bioprinting with filled alginate
Apart from casting the alginate mixture, it is also possible to perform 3D bioprinting with it. As a basis you make the same alginate solution as for casting alginate sheets. Then for every 50 ml of prepared alginate solution, you add 15 gram of filling agent, like sand, oyster shells, coffee ground, or grinded eggshells. This is the base recipe. With a syringe filled with the thickened paste, you can bioprint a 3D model. After bioprinting, the alginate model should be cured again with calcium chloride. Linette and I tested this recipe with grounded eggshells as filler. We had two types of filler, finely grounded (powder) and medium grounded eggshells. We soon discovered that the base recipe had to be adjusted with the eggshell as filler. In the below table my observations.
| Alginate solution | Eggshell type | Result |
|---|---|---|
| 50 ml | fine, 15 gr | too weak, 3D model collapses |
| 50 ml | fine, 20 gr | too weak, 3D model collapses |
| 50 ml | fine, 30 gr | too weak, 3D model collapses |
| 50 ml | fine, 50 gr | weak, 3D model has to be cured regularly to keep upright |
| 50 ml | fine, 75 gr | reasonable, 3D model has now and then to be cured to keep upright |
| 50 ml | medium, 30 gr | too weak, 3D model collapses |
| 50 ml | medium, 50 gr | reasonable, 3D model has now and then to be cured to keep upright |
| 50 ml | medium, 60 gr | ok, 3D model keeps upright till cured at the end |
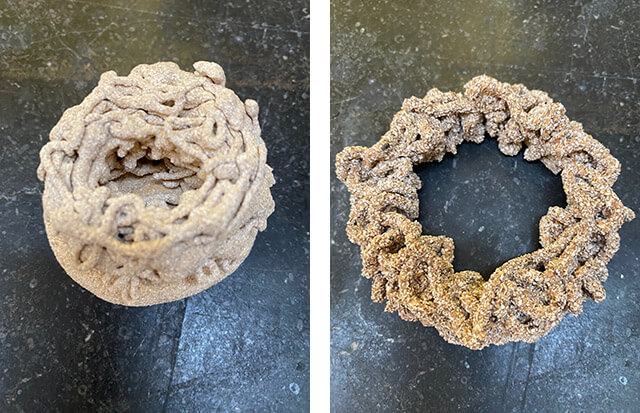
In the left photo, the 3D model with 75 gr of finely grounded eggshell. In the right photo, the 3D model with 60 gr of medium grounded eggshell. The difference in strength is clearly visible. For the model with medium grounded eggshell I added some walnut pigment I had made some weeks earlier in the class about biochromes. I love the result. It's just like I made a little doodle on the beach with wet sand.
* 400 ml water
* 12 gr alginate
* 40 gr glycerine
* 135 gr filler (sand, eggshell, etc)
* 10 ml calcium chloride hydrate (for curing agent)
* 100 ml water (for curing agent)
* Measuring cups
* Bowls
* Spoons
* Handmixer
* Sprayer
* Moulds and mats
* Syringe with medium-large opening
* Mix the alginate with water and glycerine with a handmixer till the liquid is smooth
* Let it sit for a few hours till the air bubbles have disappeared
* Prepeare a solution of 10% calcium chloride in a small spray bottle
* Mix the filler through the alginate solution till you have a smooth paste
* Fill the syringe with the paste
* Spray the surface of the mat with the calcium chloride
* 3D print a model on the mat
* After a couple of minutes spray the model with the calcium chloride
* Once the alginate model is cured, dip it in water to remove any calcium chloride residue
Alternative leathers
In the category alternative leathers there are crafted leathers, like leathers from fish-skin, cow-stomach, fruit or vegetal resources. And there are grown leathers like microbial and mycelium leathers.
Alternative fruit leathers
Fruit leathers and other vegetable food waste leathers are based on the idea of finding and exploring alternative uses for natural materials that would otherwise be discarded, when either unsold, not conforming to expected beauty standards, or wasted because starting to decay and no longer considered to be fresh.
Those leathers are:
- Biobased and biodegradable
- Made from a continuous material stream, and as such create more opportunity for upscaling
- Context-specific, in that they exploit materials that are locally over-abundant
- A bridge between local horeca, markets, and food shops and makers that are locally active
Rachel and I made fruit leather from discarded yellow and purple plums. The base recipe consist of fruit (vegetable) pulp, vinegar (as a preservative and stabilizer), and salt. Cinnamon, some beeswax, clove oil or curry can be added to keep moulds from growing. This base recipe creates a translucent type of leather sheet. To make the material stronger, tapioca can be added. This provides a more matte-looking leather.
We mixed different recipes:
- Purple plum without tapioca
- Purple plum with tapioca
- Yellow plum without tapioca
- Yellow plum with tapioca
- Purple and yellow plum with tapioca
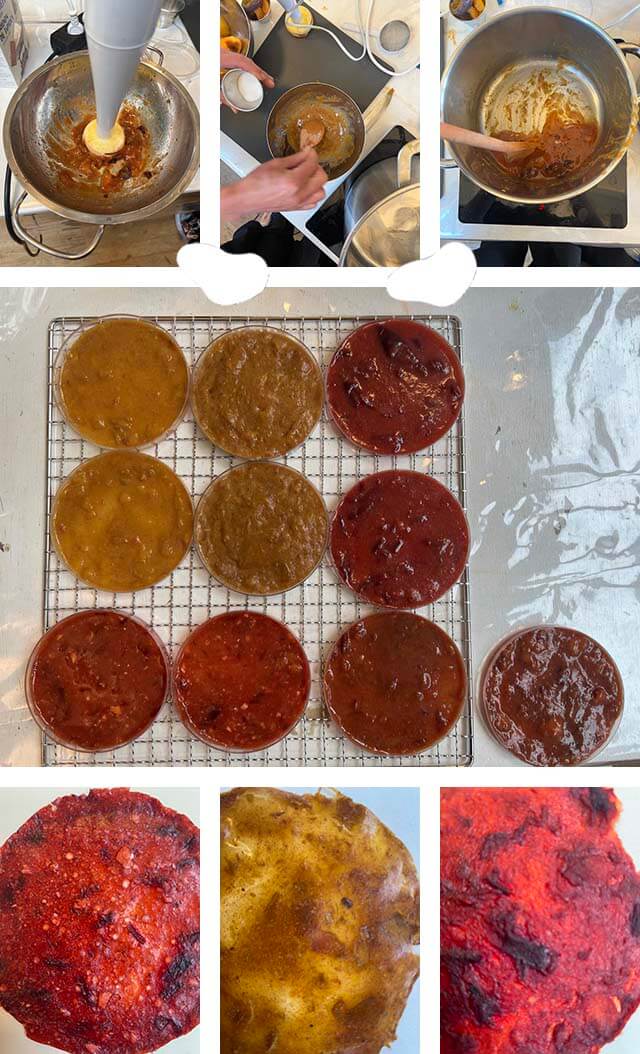
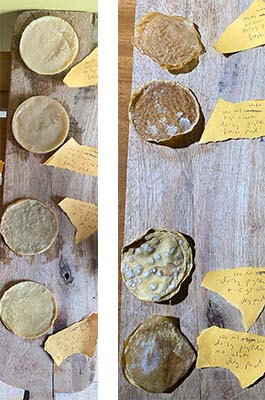
Observations: In the bottom row on the left is shown the purple plum leather without tapioca, and on the right with tapioca. The right one is clearly less translucent. But on touch it feels stronger and slightly more plastic-like than the one without the tapioca. Personally, I like the translucent appearance of the leather without the tapioca. It has a more lively presence, especially in the light.
The purple plums gave a deep reddish colour. The yellow plums a brown-yellow color. The mix of yellow and purple plums had a notch more a reddish/orange colour. This last colour I liked best.
We prepared our leather according to the following recipe:4
* 150 gr fruit (vegetable) waste
* 8,5 gr vinegar
* pinch of salt
* pinch of cinnamon (or curry or clove oil)
* 5 gr beeswax (optionally)
* 150 gr of tapioca (optionally)
* Measuring cups
* Bowls
* Spoons
* Handmixer
* Pan
* Stove
* Whisk
* Moulds and mats
* Mix the fruit to a pulp with the handmixer
* Add the pulp, with the vinegar, salt and cinnamon to the pan
* When using tapioca, add this to the pan as well
* Heat the pulp slowly while stirring
* Melt the beeswax au-bain-marie
* Take the required amount of beeswax with a warm spoon and pour into the pan while stiring
* When the heated pulp starts to thicken, pour it in the moulds
* Dehydrate the fruit leather overnight in the dehydrator at 40 degrees celcius
Kombucha leather
What is Kombucha leather? Cecilia gives the following description in her presentation:
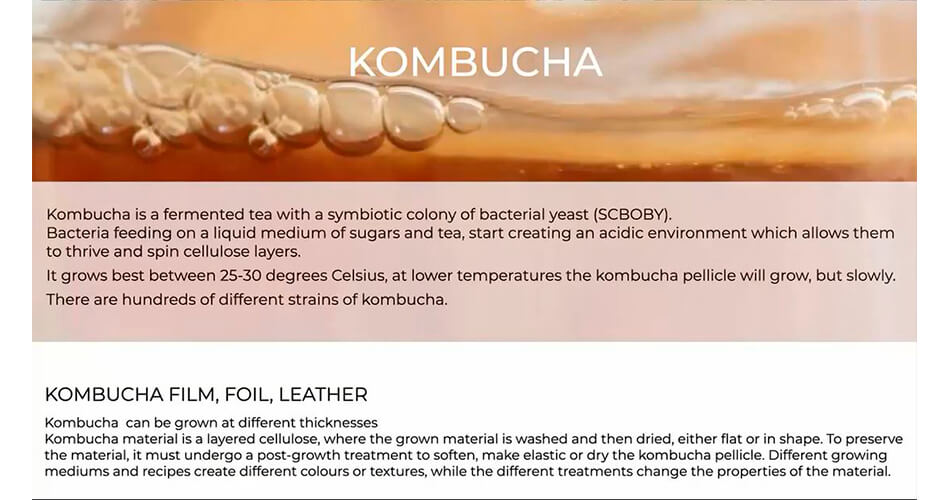
In other words, you need a growing liquid medium, sugar in the liquid and specific bacteria that feed on the sugar while spinning biocellulose. Nature at it best!
How does Kombucha leather compare to animal-based leather:
- Durability - Animal-based leather is more durable compared to Kombucha leather due to the fact that it has stronger bonds. Whereas Kombucha leather, without treatment is not waterproof and could breakdown a lot easier.
- Quality - Animal-based leather is of higher quality, and physically more robust than Kombucha leather. Animal leather can also withstand extreme heat while Kombucha leather cannot as it is made from cellulose which degrades much faster when exposed to excessive heat.
- Waterproof - Animal-based leather is considered to be fully waterproof, while Kombucha leather has to undergo a special treatment to make it waterproof. This process reduces the biodegradability of Kombucha leather as it relies on some strong chemicals such as sealants.
But on the other hand, Kombucha leather is biobased, biodegradable and biocompostable. Animal leather is none of that!
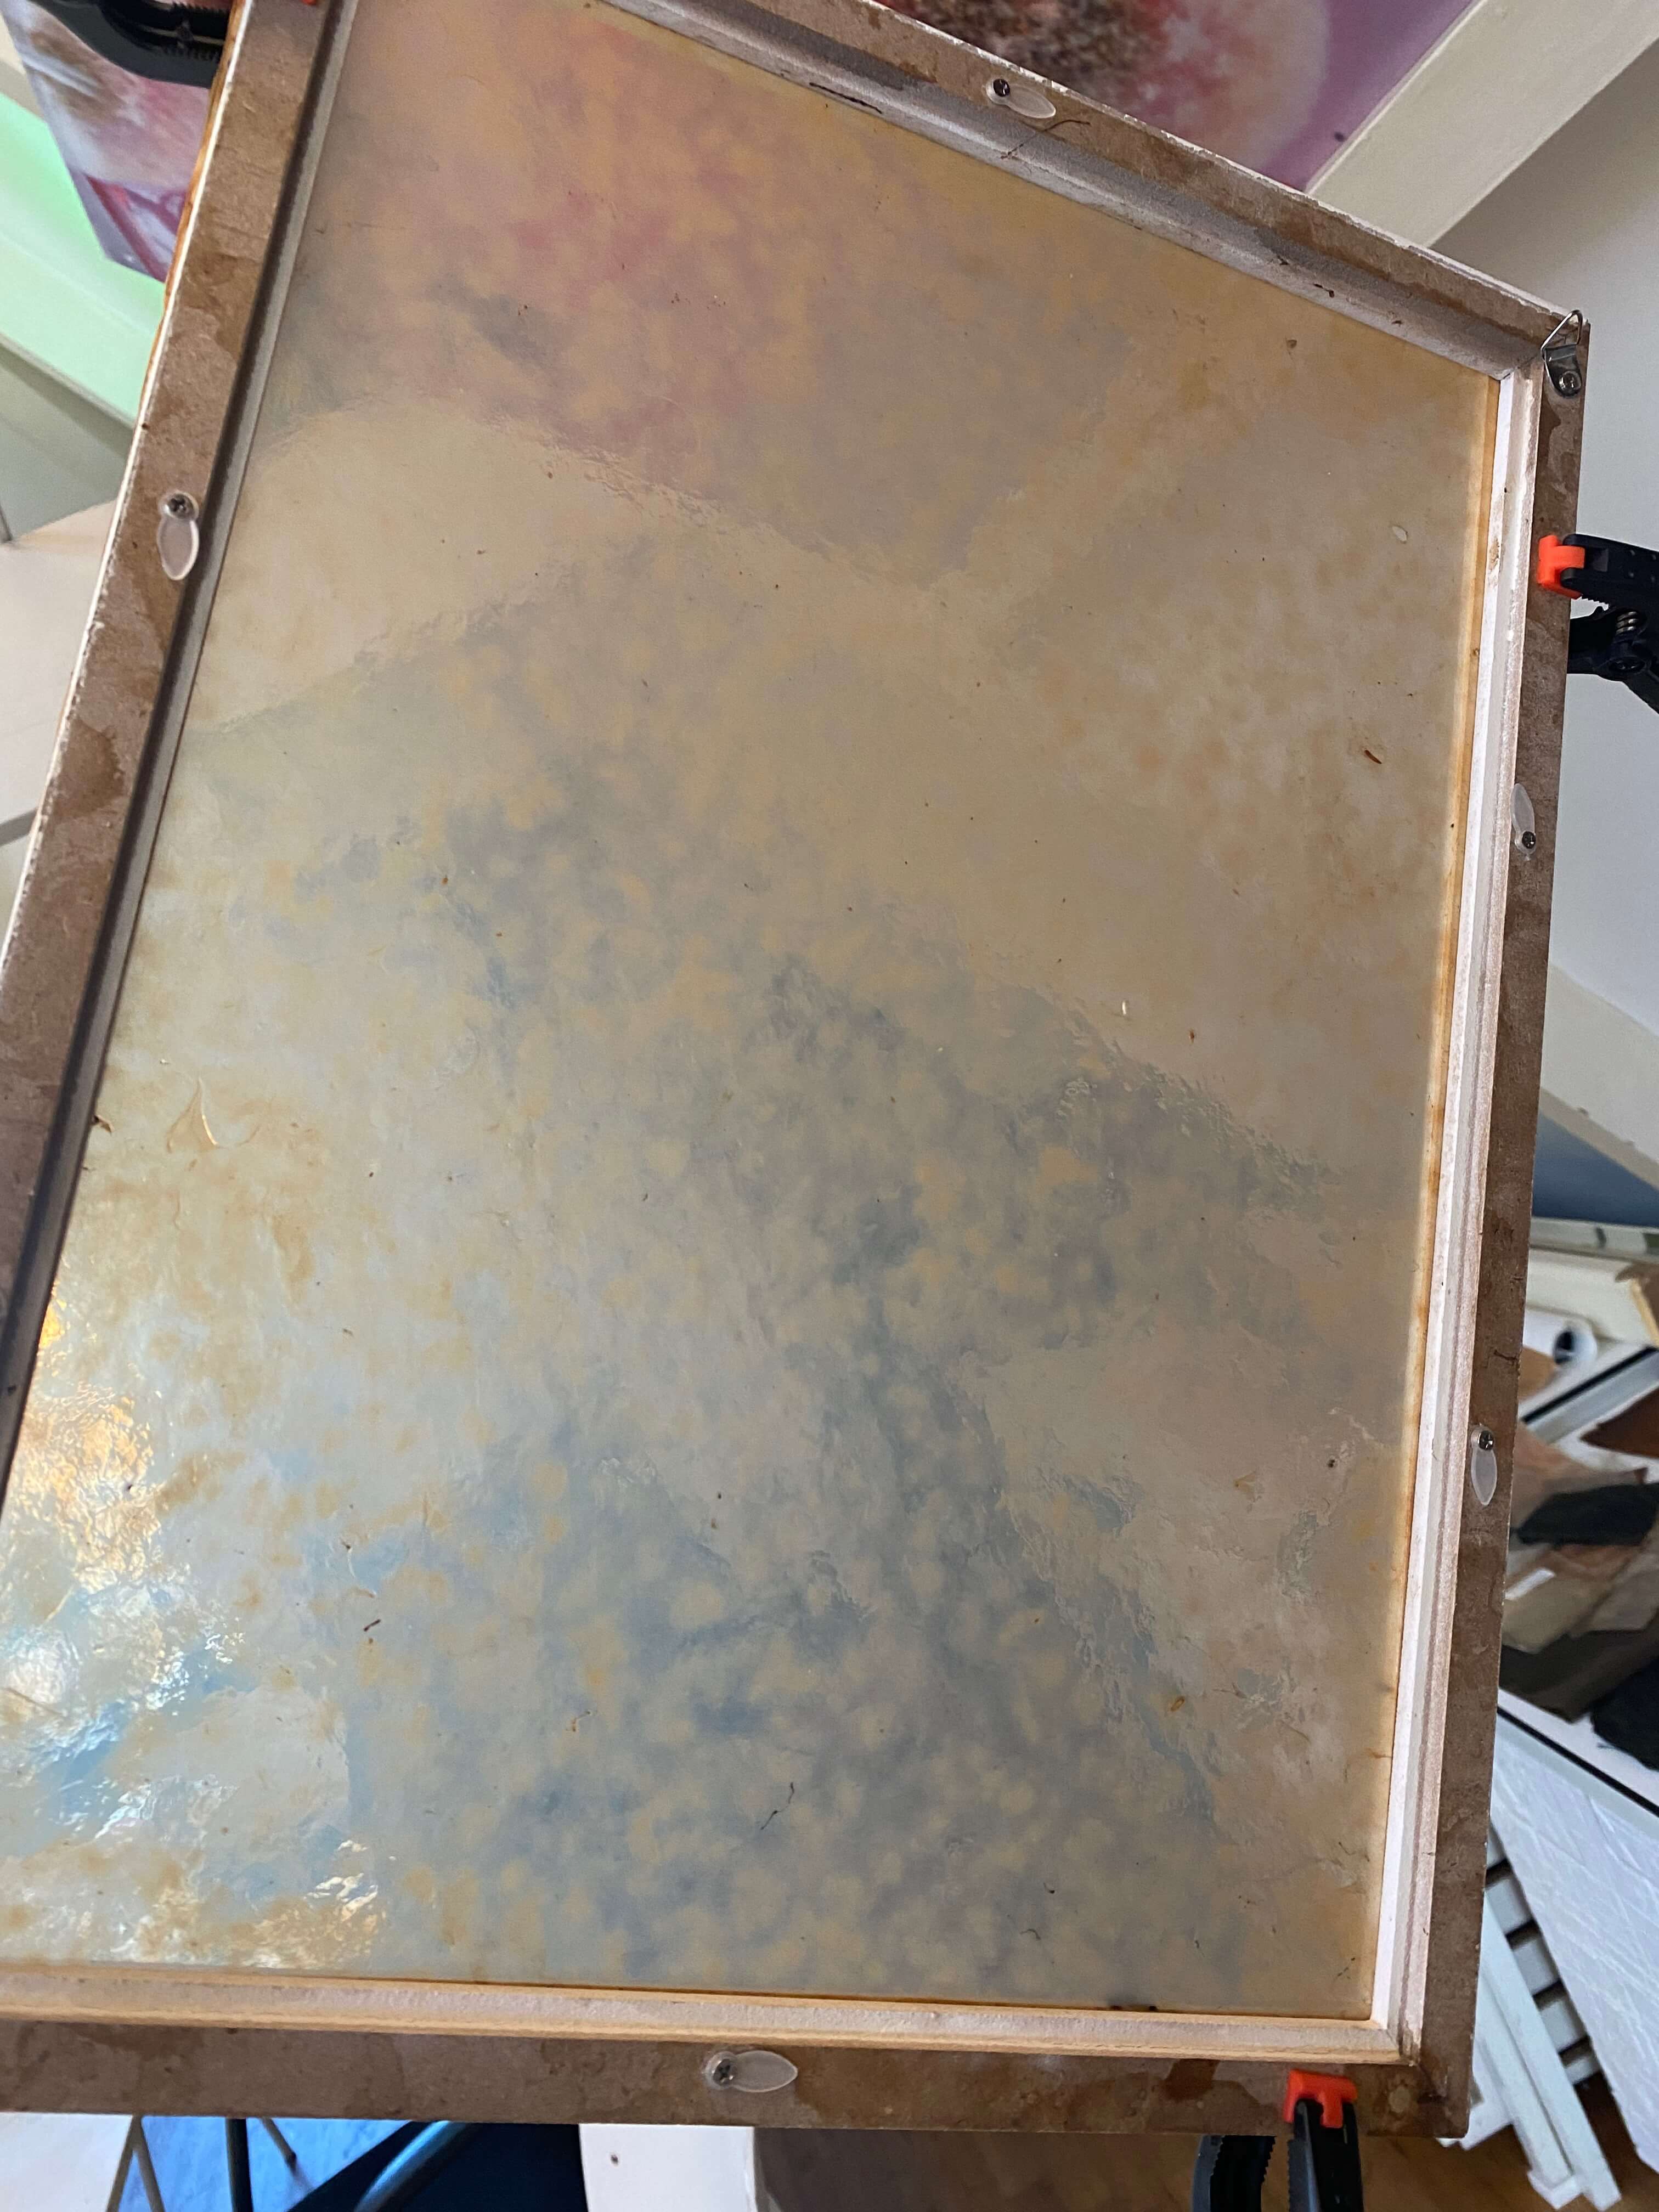
We made our own Kombucha, but before we did that, we first harvested some Kombucha leather pellets from a previous session.
We took them out of their container, and cleaned them with water and a bit of soap. We then spread them on mats to dry. The thinnest layer we stretched in a frame.
Harvesting Kombucha leather
In Amsterdam together, we made several different Kombucha brews, one from green tea, one from black tea and one from beer, according to the following recipe:
* 1 liter green or black tea, wine, beer or herbal mix
* 1 Kombucha Scoby
* 120 gr white sugar
* Natural dyes (optionally)
* Measuring cups
* Clean container with lid
* Brew 1 liter of black or green tea or any other growing medium
* Add a minimum of 10% sugar/liter growing medium
* Stir till the sugar is dissolved and let cool
* Fill the container with this mixture
* Add the Kombucha Scoby and its liquid
* Place a lid on top, but don't close it completely (Kombucha needs some air)
* Place the container in a warm spot or on a heat map (25-30 degrees celcius is perfect)
* Let is stand for 14-30 days
* Check now and then to see if the developing leather layer on top stays in contact with the liquid
* if air bubbles arise, carefully push the leather layer back (clean hands)
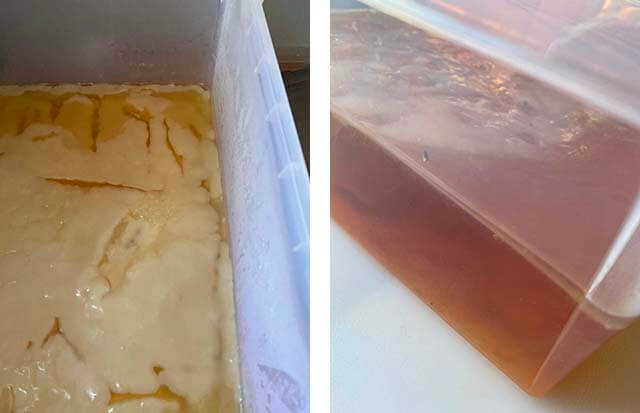
Our Kombucha brews
Observations: The second week we had to discard the black tea brew due to mould development. But our beer and green tea Kombucha brews are doing marvelous after 3 weeks:
Experimentation with whey
My main focus for Fabricademy is to dramatically reduce the organic compounds in the whey of our cheese factory, while at the same time valorizing this waste-water stream.
Whey is the yellow-green watery part of milk that remains when the curd is separated during cheesemaking. It accounts for about 85-90% of the volume of milk.
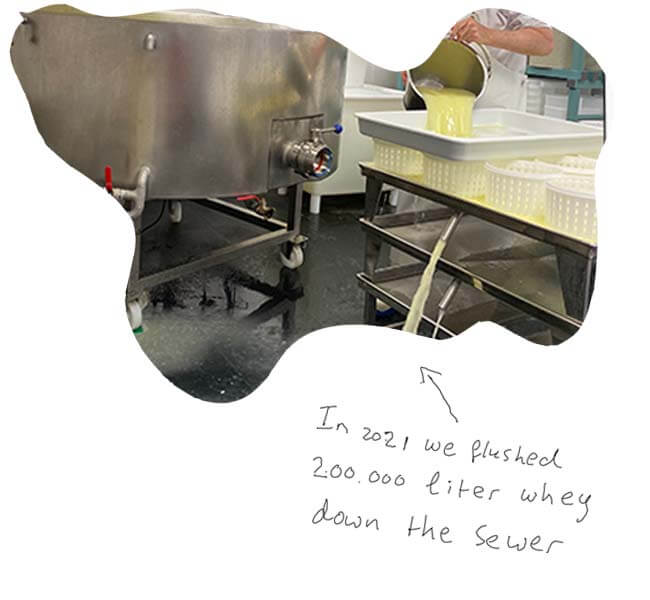
Whey flushing, photo by Marieke van Eyndhoven
The average content of whey dry residue is:
- 70% lactose
- 14% proteins (especially casein)
- 9% minerals
- 4% fats
- 3% lactic acid
Due to this high organic load (fat, lactose and casein), disposal of whey has severe polluting effects on the environment, and on waters in particular.2
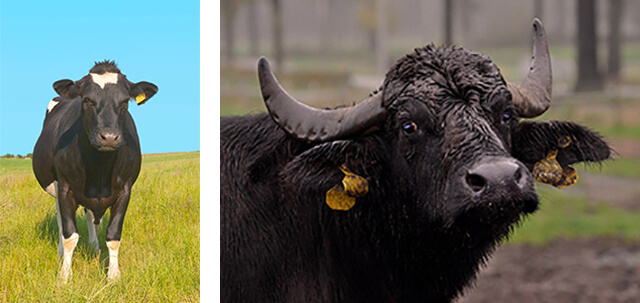
In our cheese factory we work with cow milk and buffalo milk. Buffalo milk is even higher in lactose content than cow milk. But it also contains more caseine and dramatically more fat.
The food industry has been applying several main-stream techniques to seperate fat, lactose and casein from whey.
Fat can be (partly) removed by for example filtering or centrifuging the whey. Traditionally butter has been made in this way.
There are a few ways to remove lactose. These methods include:
- Adding the enzyme lactase to whey or passing the whey over lactase that is bound to a carrier. This essentially predigests the lactose into glucose and galactose. But glucose and galactose are still bad for the environmnet.
- Membrane fractionation and other ultrafiltration techniques that mechanically separate lactose from whey. These methods completely remove the lactose. This lactose is dried and sold as powder.
The latter technique demands sizeable investments in machinery and requires a lot of energy during the drying phase.
Casein can be precipitated by adding a dilute acid to the whey. Ricotta is in effect the paste of fresh casein flocks. The casein can also be dried. Nowadays this is often sold as whey or milk protein powder. Producing ricotta can be done in the same infrastructure that is used for cheese making, and requires a small amount of energy. But the subsequent drying process is lenghty and demands a high energy load.
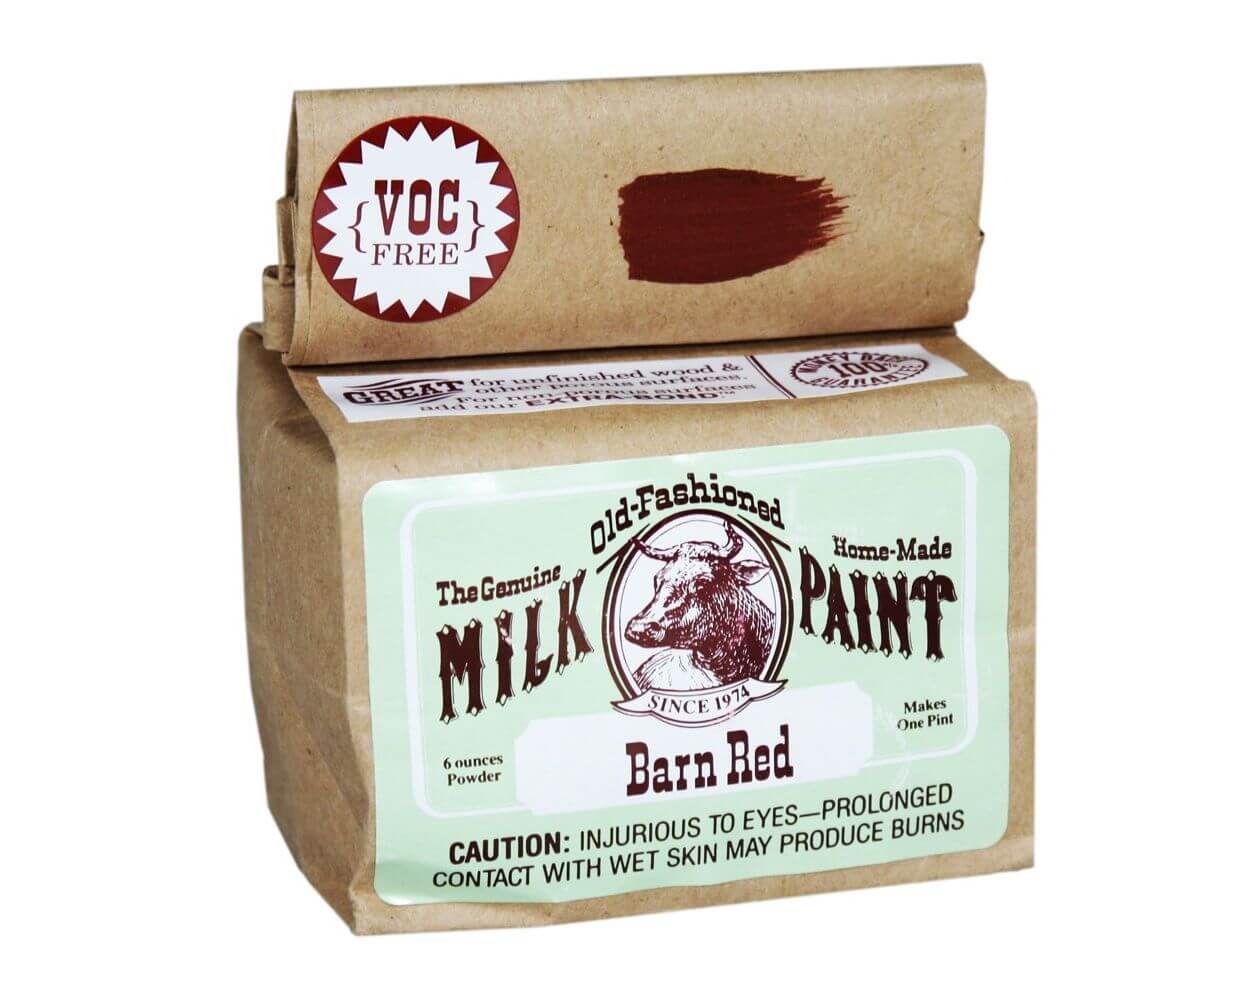
In the old days, there was a whole industry around casein, working it up to adhesives, putties, glues, resins, paints and plastics. However, this industry has mostly died out. The only product still around is casein paint (or milk paint as it is called as well). These old-fashioned techniques and products might provide clues what to do with the casein paste.
Since a few years, casein is back in the spotlight, as a potential source of (edible) bioplastic for food packaging.
My quest is to develop a series of low-cost and low-impact whey treatments, executable in our standard cheese factory tools, requiring no or low energy and the usage of non-toxic, (preferably) biobased and locally sourced excipients, to extract fat, lactose, and casein out of our whey, converting those in materials that can be applied for artistic design purposes.
Whey leather growing
Since whey contains lactose (a form of sugar), in theory whey should be an ideal growing medium for Kombucha leather (let's call it whey leather). And the best news, while the bacterial biocellulose is growing, the lactose is reduced. And the process certainly adheres to my definition of succes as stated above. Whey leather growing requires simple tools, no energy, and the usage of biobased excipients. The question is if the other compounds present in the whey allow for the leather growing process. Some early tests last summer proved that it certainly is possible to grow leather from the raw whey:
| Type of whey | Other treatments | Leather pellet |
|---|---|---|
| Cow, unfiltered | No further treatment | 1-4 mm thickness |
| Cow, unfiltered | + 5% acetic acid | 4-10 mm thickness |
| Cow, 1x filtered | No further treatment | 2-3 mm thickness |
| Cow, 1x filtered | + 5% acetic acid | 6-10 mm thickness |
Observations: In the summer I concluded that it was important to bring the pH of the growing medium down to about 4 by adding some acetic acid. It also seemed that filtering some of the fat out was helping the growth.
Last summer's whey leather growing, photos by Marieke van Eyndhoven
During this biofabricating week I did some more tests:
| Type of whey | Other treatments | Leather pellet |
|---|---|---|
| Buffalo, unfiltered | + 5% acetic acid | 1-2 mm thickness |
| Buffalo, 1x filtered | + 5% acetic acid | 5-8 mm thickness |
| Cow, unfiltered | + 5% acetic acid | 5-9 mm thickness |
| Cow, 1x filtered | + 5% acetic acid | 8-11 mm thickness |
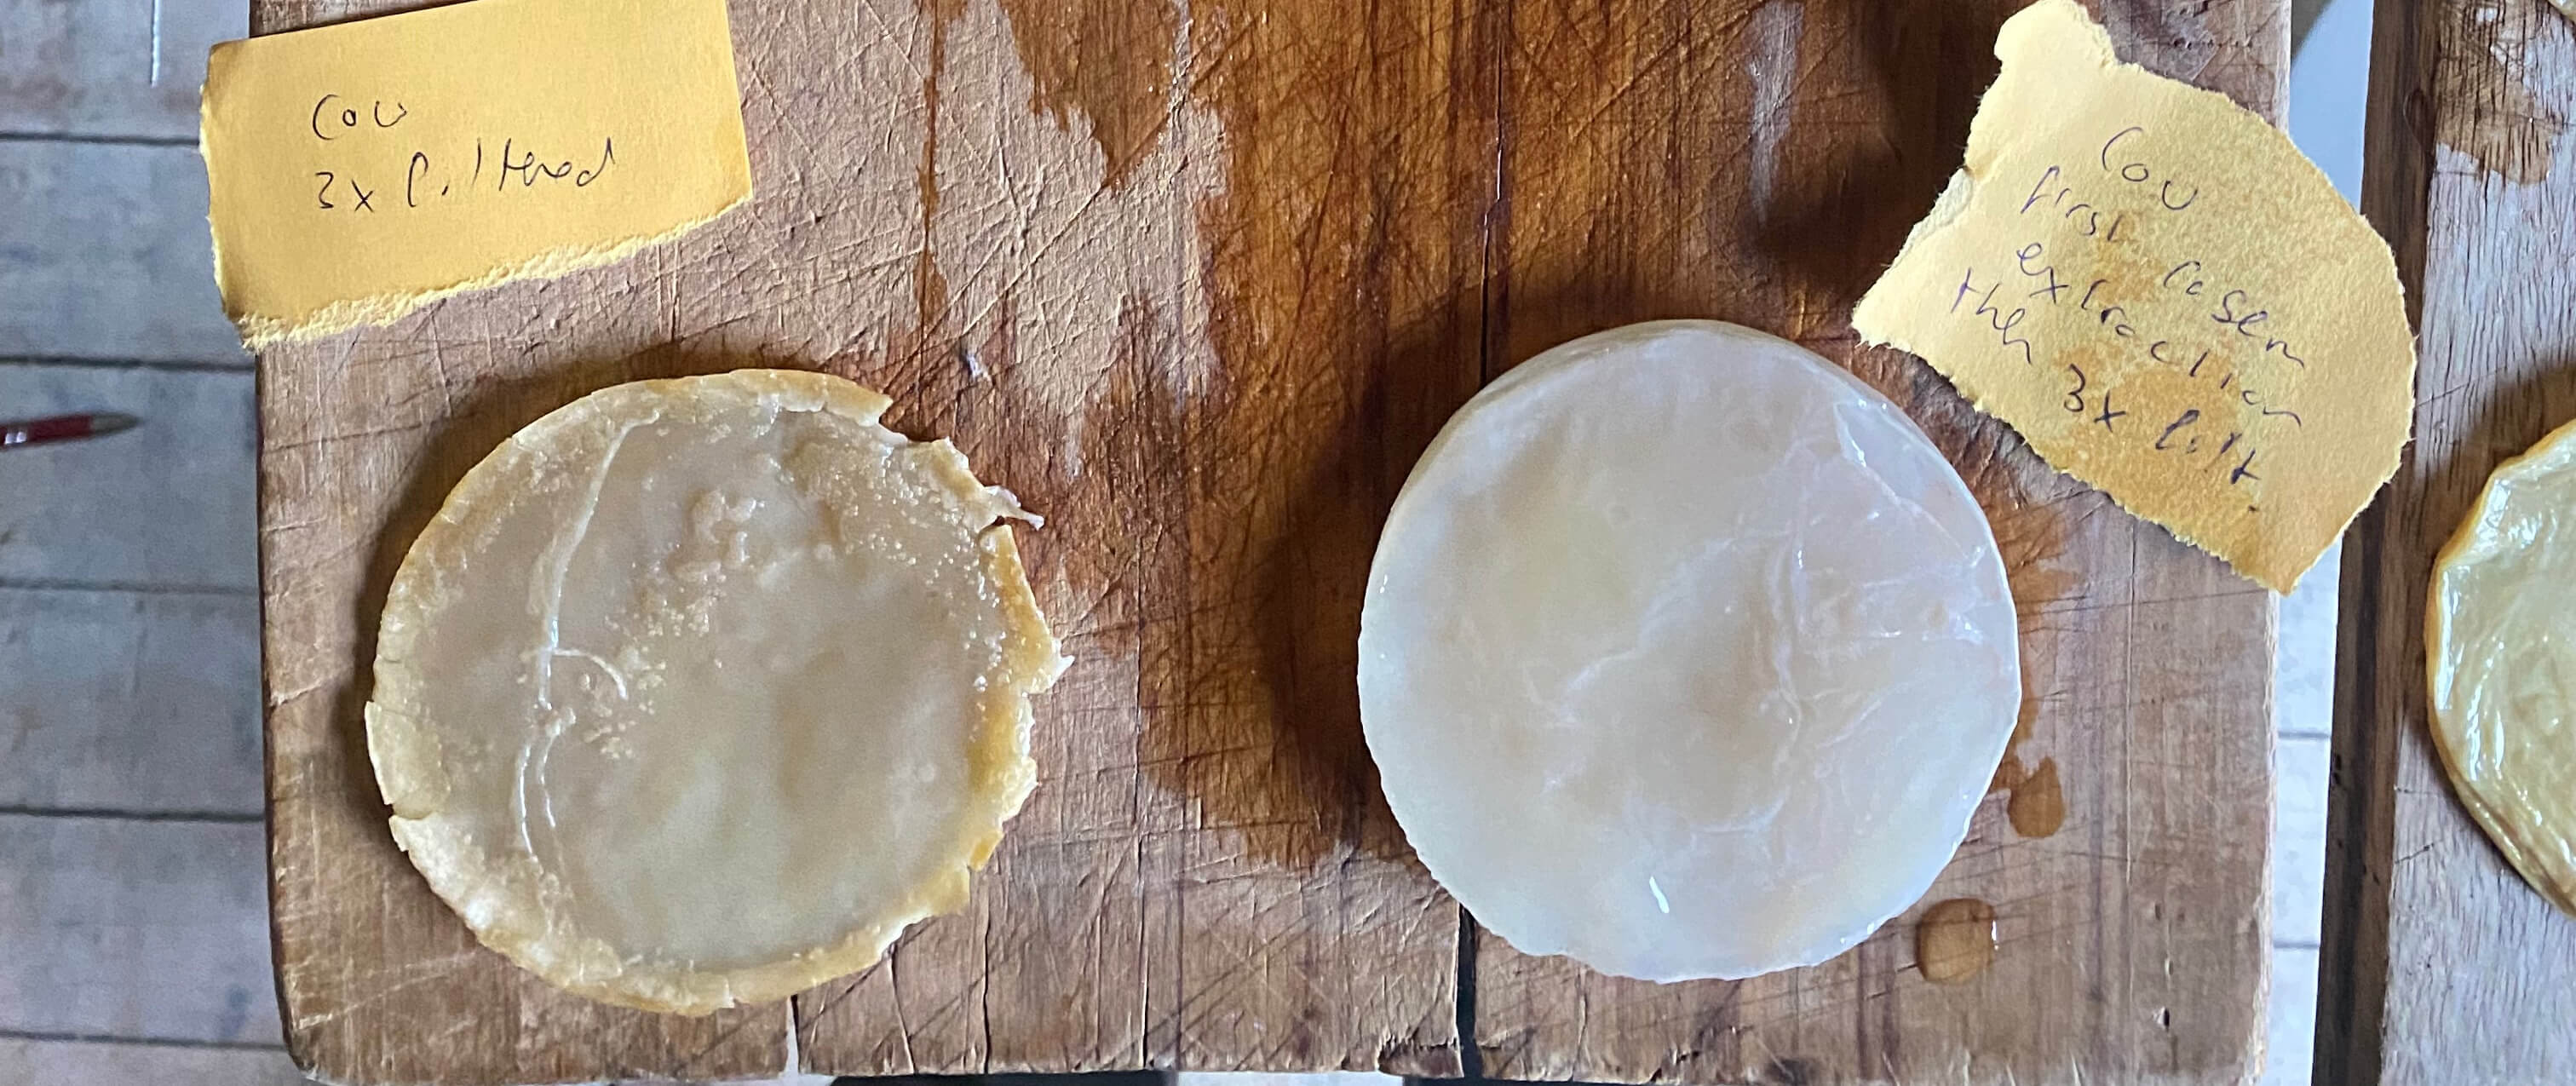
| Cow, 3x filtered | + 5% acetic acid | 10-12 mm thickness |
| Cow, 3x filtered | + 5% acetic acid, after extraction of caseine | 10-13 mm thickness, translucent |
Observations: Although buffalo milk has a higher lactose content, it seems that the high casein and fat content might hinder the growth of the whey leather. Cow milk whey seems better suitable.
It also seems that the more fat is taken out, the better it is.
Last but not least, extracting the caseine (by a ricotta making process) AND removing fat by multiple filtering steps, seems to be the best preparation before starting the whey leather growing process. I love the translucency of the pellet of the last experiment!
I also tested the source of whey wastewater. Apart from applying both cow and buffalo milk, we make three types of cheese in our factory. Namely redflora cheeses, blue mould cheeses and white mould cheeses. For each type of cheese the milk is first pasteurised, and after that the milk in the vat is inoculated with an acidifying starter culture and ripening cultures:
- For the redflora cheese the milk is inoculated with some yeasts and the redflora Brevibacterium linens.
- For the blue mould cheese, the main ripening culture is Penicillium roqueforti.
- For the white mould cheese the ripening cultures are several yeasts and Penicillium neige.
Those cultures are still present in the resulting whey:
| Type of whey | Other treatments | Leather pellet |
|---|---|---|
| Cow, 3x filtered, Redflora | + 5% acetic acid | 10-12 mm thickness, opaque yellowish-brown color |
| Cow, 3x filtered, Blue mould | + 5% acetic acid | 8-11 mm thickness, opaque yellowish-brown color |
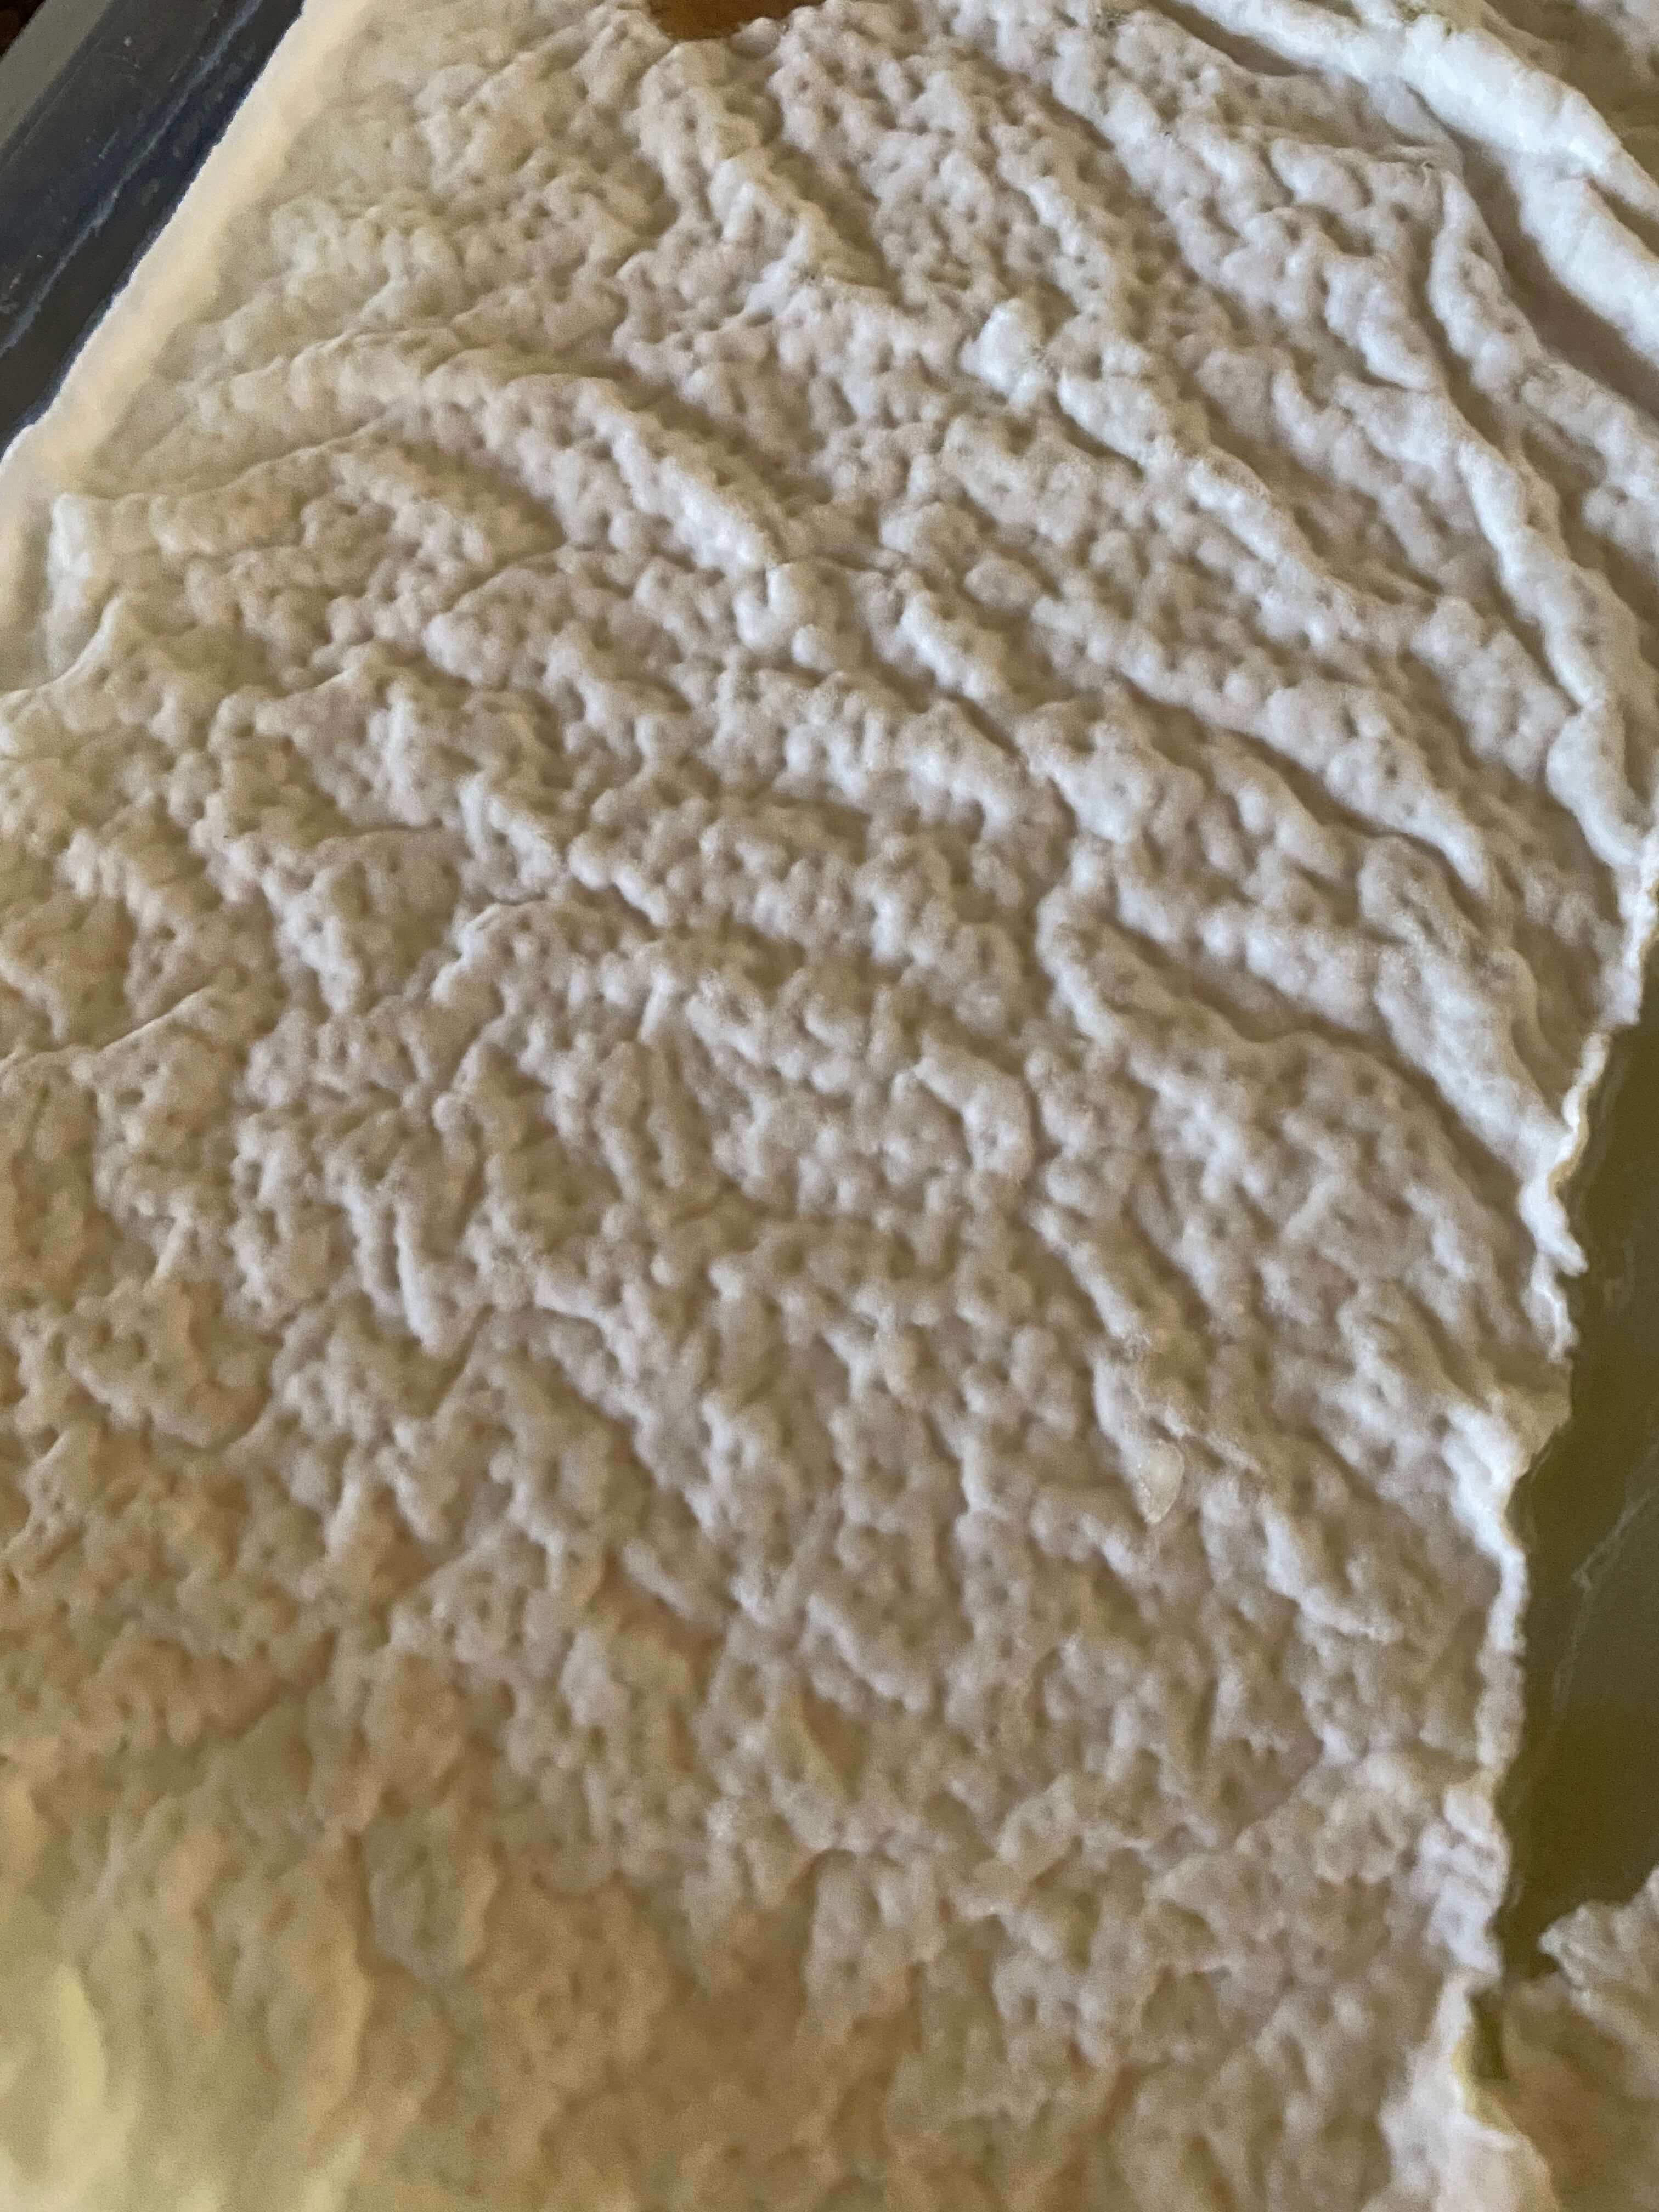
| Cow, 3x filtered, White mould | + 5% acetic acid | 5-7 mm thickness, white fluffy top layer |
Observation: The redflora bacteria and blue mould do not seem to interfere with the whey leather growing process. However the white mould Penicillium neige is colonizing the top-layer of the whey leather pellet.
This is rather logical. Both the redflora bacteria and Penicillium roqueforti need oxygen and a salty environment to start growing, and will then slowly colonize their environment. However Penicillium neige only requires oxygen and at the optimum growth temperature range of 20–25 °C, will rapidly colonize its environment.
The question is if this white fluffy top layer of the whey leather might serve a technical or design purpose.
Early measurements suggest that in the whey leather growing process, the Kombucha bacteria consume around 10% of the lactose present in the whey.
Some outstanding questions I still have:
- What is the right sequence, first perform fat filtering and then casein extraction, or the other way around?
- Should the fat be filtered out, or is centrifuging better?
- What is the exact reduction of lactose due to leather growing and how can this reduction be further increased?
Whey leather coloring experiments
In-situ coloring
I wanted to test the coloring of whey leather as well. Last summer I made several lake pigments from plants and trees that naturally grow in the pasture behind our farm. I have pigments from willow tree leafs, pear and apple bark, daisies and dandelions, grass, etc. In summer I also dried several plants and grinded those to a fine powder. I did this for elderly berries, nettles, etc.
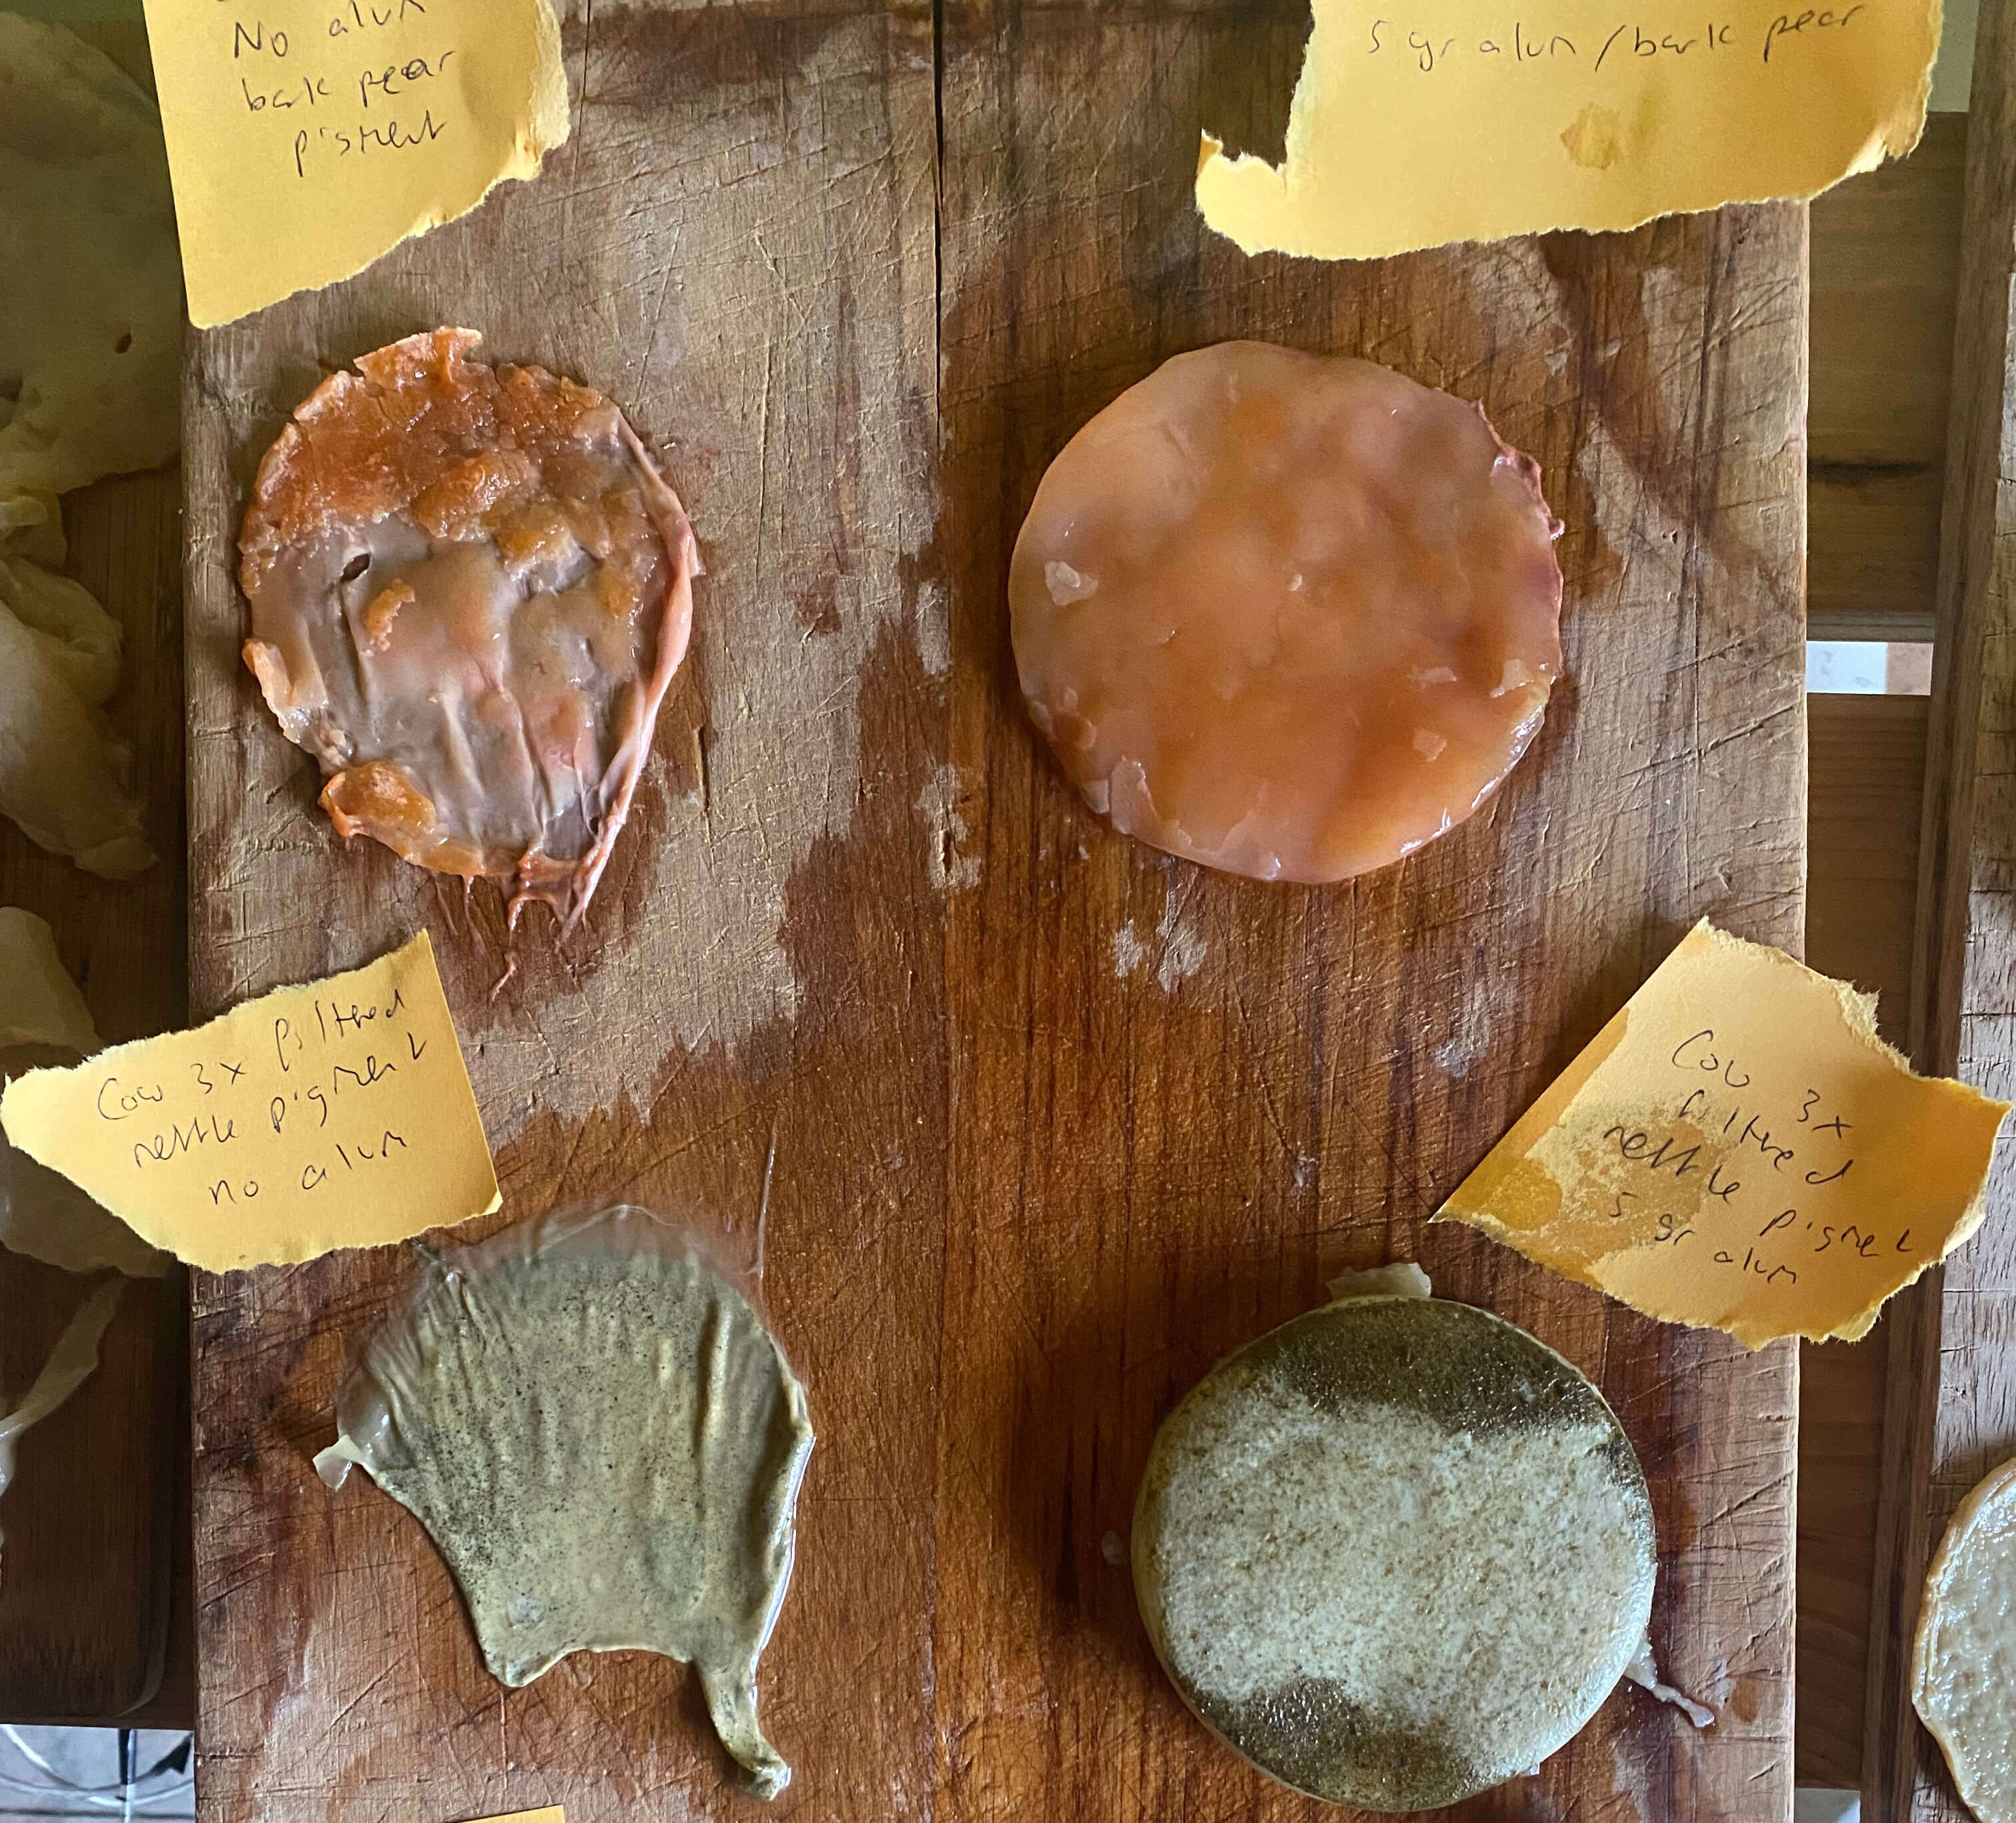
For some in-situ coloring experiments I dissolved red pear bark lake pigment and green dried nettle powder in some acetic acid. I created 4 erlenmeyers with 250 ml of 3x filtered cow whey and a Scoby. I added the red pear bark solution to 2 erlenmeyers and the green nettle solution to the other 2. Then I added 5 gr of alum, dissolved in a bit of water, to 1 red and to 1 green erlenmeyer.
| Type of whey | Other treatments | Leather pellet |
|---|---|---|
| Cow, 3x filtered | Pear bark pigment | 3-4 mm, red color throughout (note: whey had mostly evaporated from erlenmeyer) |
| Cow, 3x filtered | Pear bark pigment + 5 gr alum | 5-9 mm, red color throughout |
| Cow, 3x filtered | Nettle powder | paper thin, green color on top only |
| Cow, 3x filtered | Nettle powder + 5 gr alum | 10-15 mm, green color on top only |
Observations: The addition of alum seems to help the whey leather growing (alum is a weak acid). It also seems to produce a slightly deeper and even color in the pellets. The red pigments had been pretty well absorbed by the leather pellets. The nettle powder seemed to have a too large particle size, and thus didn't impregnate the pellets throughout. It just left a green spickled result on the top of the pellet. One fun thing: the Scoby mothers were slightly colored as well!
Ex-situ coloring
I also did some ex-situ coloring experiments. For this I used my daisy lake pigment. I dissolved the pigment in some acetic acid. Then I prepared 4 bowls with 100 ml of water and added to each 25 ml of dissolved pigment. In 2 bowls I also added 5 gr of alum. I added to the bowls without alum 1 fresh leather pellet and 1 dried pad. To the other 2 bowls I added dried whey leather pellets.
| Type of pellet | Other treatments | Leather pellet |
|---|---|---|
| Fresh | Daisy pigment | Warm yellow color |
| Fresh | Daisy pigment + 5 gr alum | Slightly lighter warm yellow color |
| Dried | Daisy pigment | Greyish yellow color |
| Dried | Daisy pigment + 5 gr alum | Slightly lighter greyish yellow color |
Observations: The fresh pads gave superior results, especially after drying, their color was a warmish yellow-brown, whereas the dried pads had a greyish hue. Also the dried pads showed more tension during the drying phase. The alum caused the yellow to come out slightly lighter.
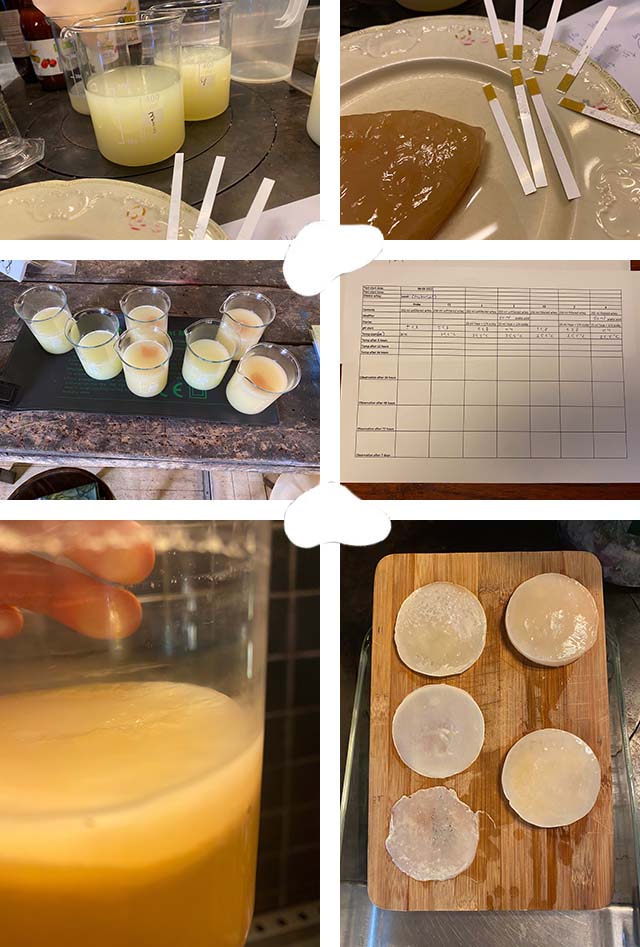
Casein trims
In order to extract casein from the whey for the leather whey growing, I conducted a ricotta making process according to the following process:
* 6 liter of raw cow whey
* Around 47 ml of acetic acid or 10% citric acid solution
* Measuring cups
* Pan and heating stove
* Spoon
* Thermometer
* Colander and paper towel
* Add the whey in the pan
* Heat the whey to 93 degrees celcius without stirring
* Add the acid and stir shortly
* Casein flocks will rise to the surface
* Slowly push them out of the center with a spoon
* Wait for 5 minutes after the floculation has stopped, to harden the flocks
* Cover the colander with paper towel
* Laddle the casein into the colander
* Let the casein drain for a few hours
* Press the remaining liquid out of the casein
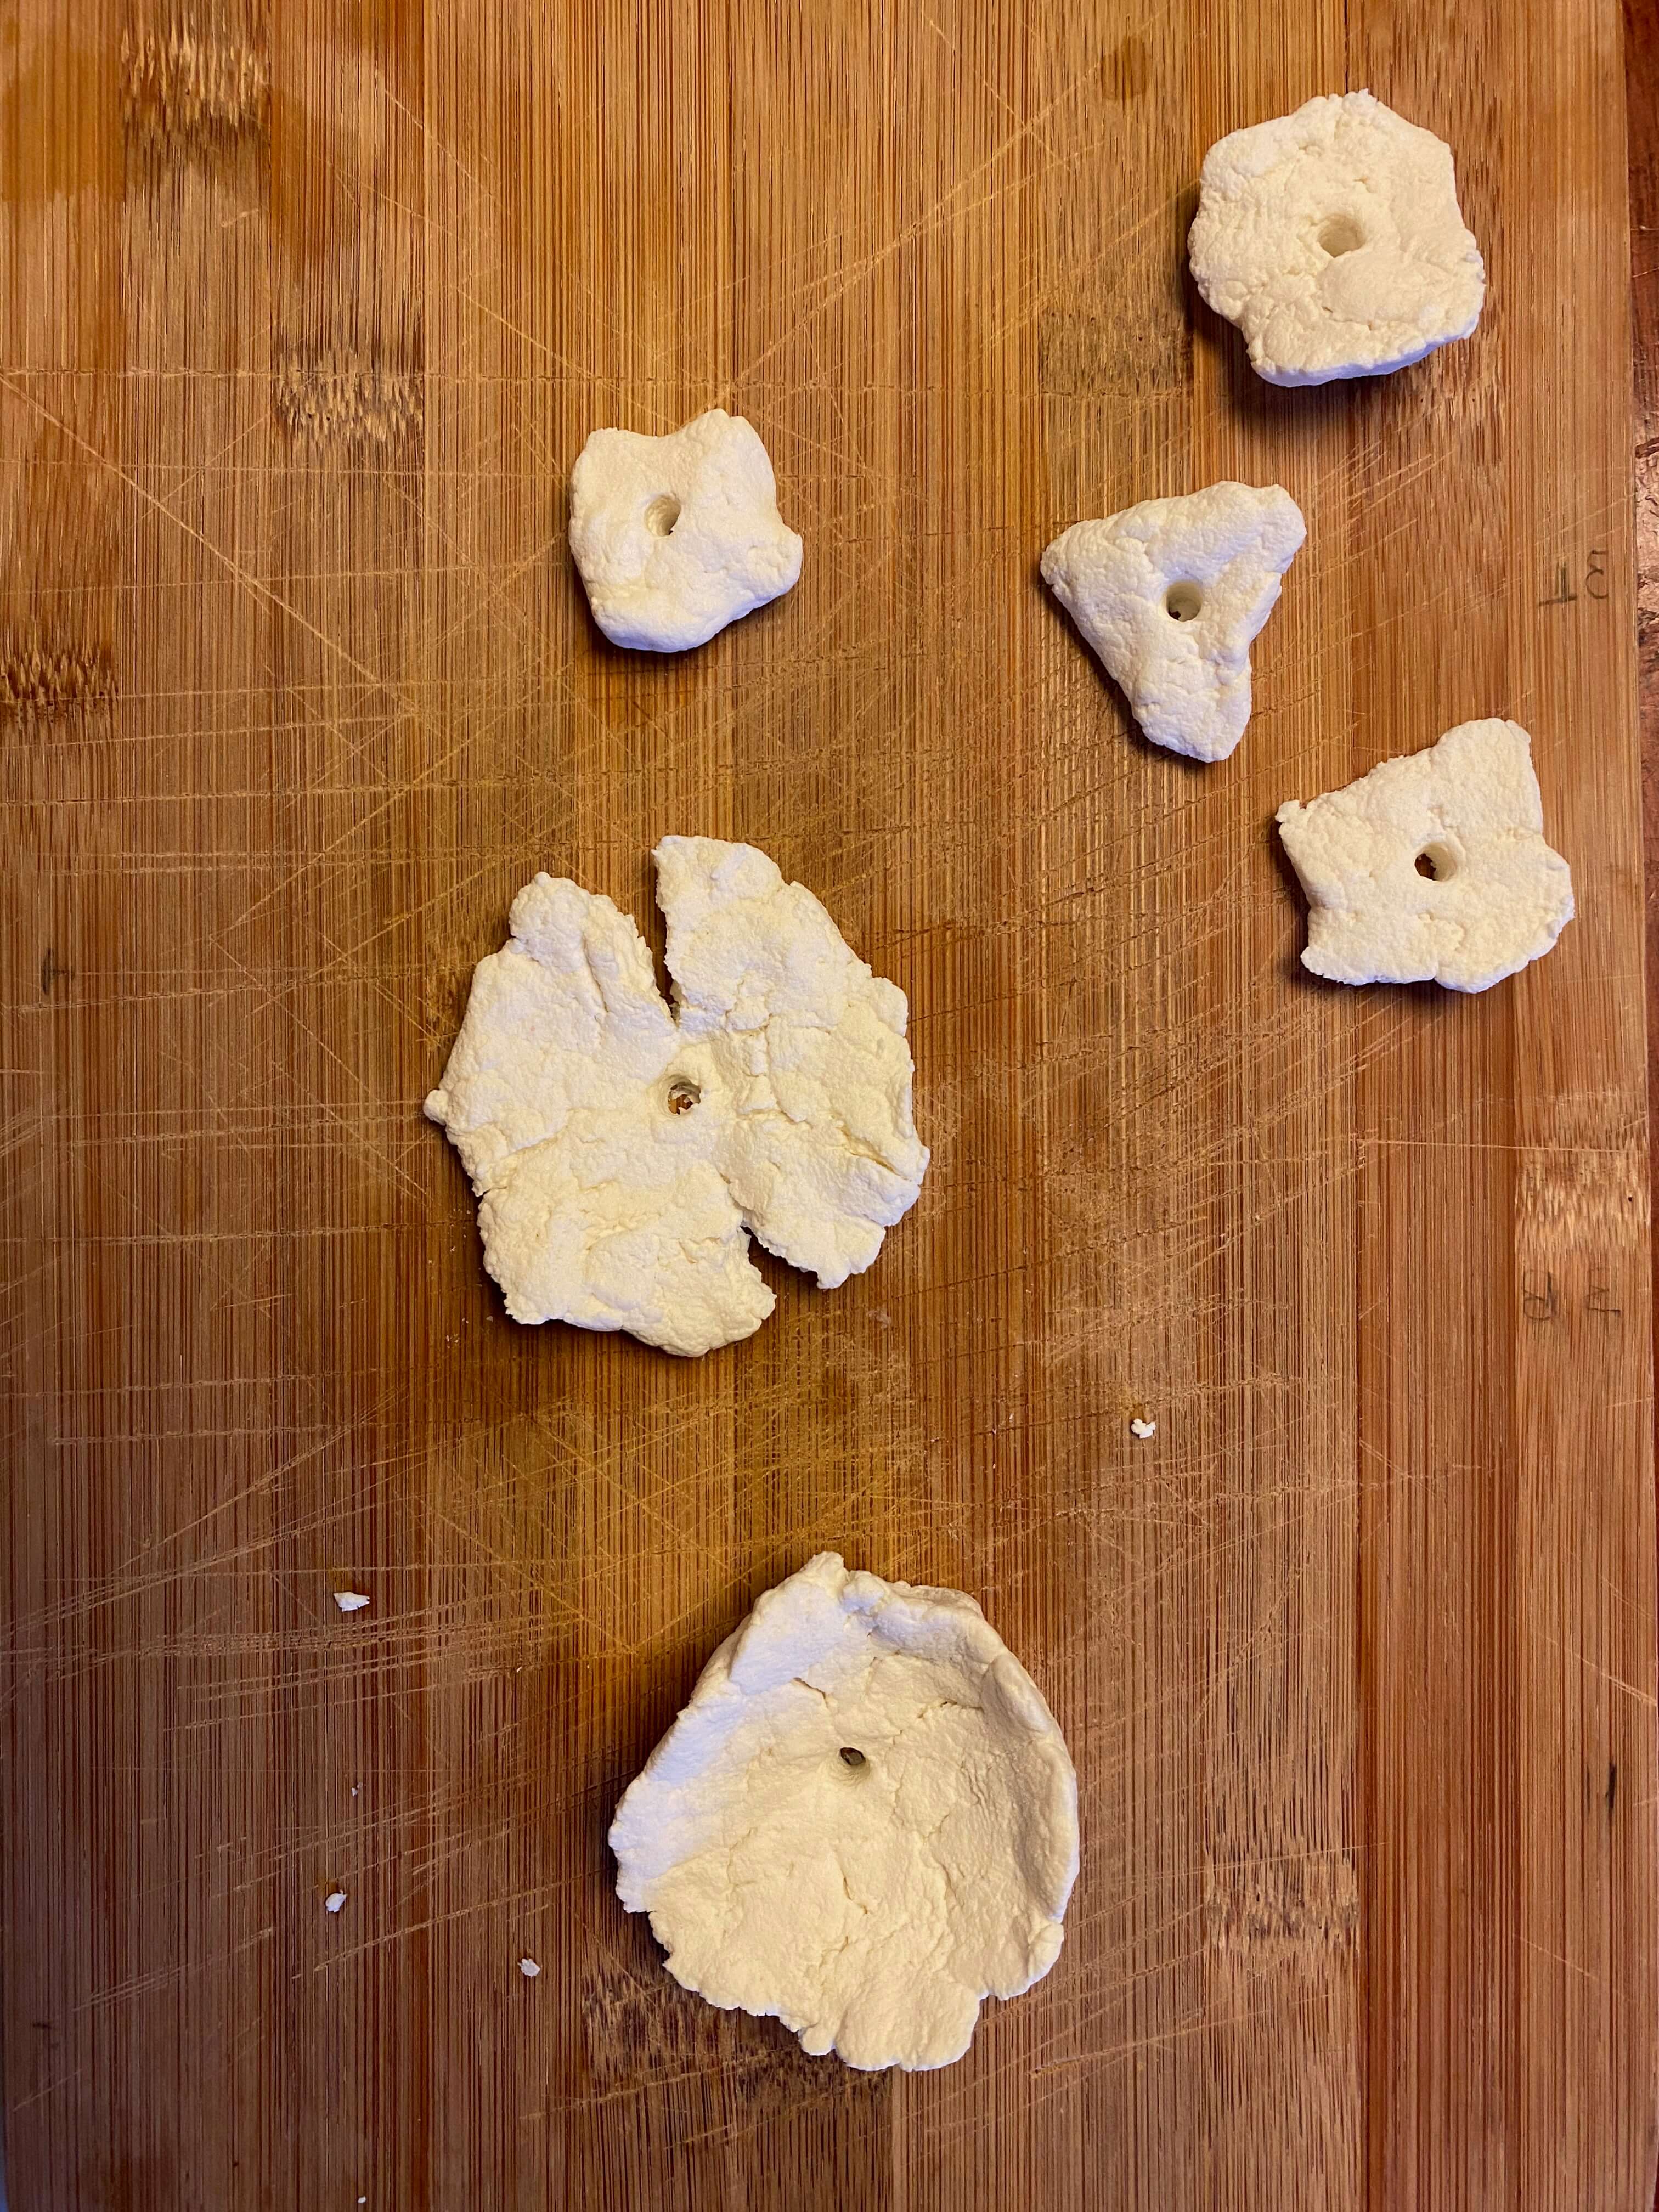
Producing casein
At this stage I was focused on cleaning the whey, and as such didn't spend too much thought on the casein. In order to further process casein, it normally should be cleaned. For now I molded the left-over casein into some organic trims. Further experimentation with casein seems to be something for the Textile scaffold week!