3. Circular Open Source Fashion
Final result by Marieke van Eyndhoven
The week started with a presentation of Zoe Romano about circular, agile fashion and open value chains. Our focus was on developing a seamless piece of garment from modular elements.
Research & Ideation
For this week's assignment I wanted to keep my final project idea in mind and test how I could potentially apply a modular approach to my intended dress from wastestream whey bioleather.
Therefore I set myself the following goals:
- Use leather
- Go for zero waste
- Get inspiration from the polder meadows
Artists
I am following Chloe Uyen Tran who designs with her firm Tomtex, biomaterials. Some of her prototypes are gorgeous. I also love the work of Eunsuk Hur. What both their designs share is a build up of organic yet whimsical shapes into 3D volume and the use of multiple colors.
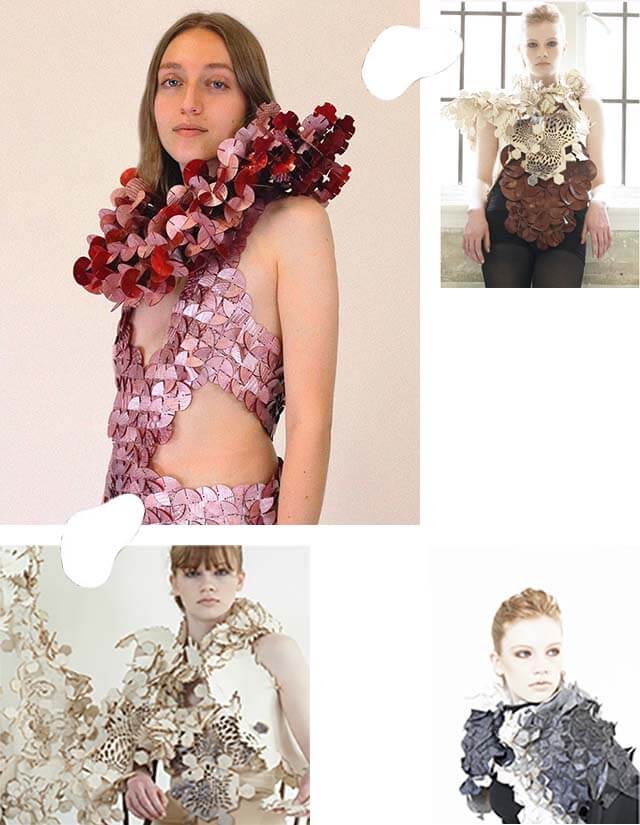
Photo left top: design Chloe Uyen Tran
Photo right top: design Eunsuk Hur
Photos bottom: design Eunsuk Hur
Another artist that comes to mind is Wayne Thiebaud. He is most famous for his candies and bakery paintings. But his landscapes are also beautiful. For his landscapes he is using mostly geometric surfaces on a grid to build up the picture. Although he ignores perspective and is applying an abstract kaleidoscopic, colorful mixture of squares, triangles, circles and rectangles, you can clearly recognize the landscape and even feel the vibe of the season and the weather.
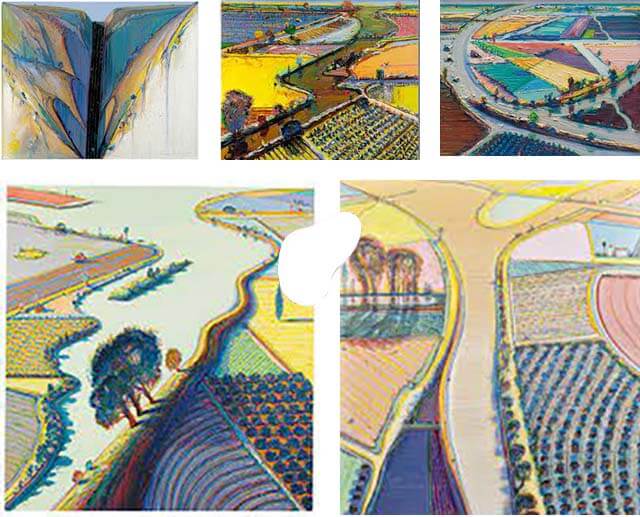
Photos of paintings by Wayne Thiebaud
Nature
In my head I was playing around with words like polder - meadow - willow - cow - milk. And then I had to think of an article about milk I was reading the other week. In that article there were some beuatiful pictures of lactose crystals!
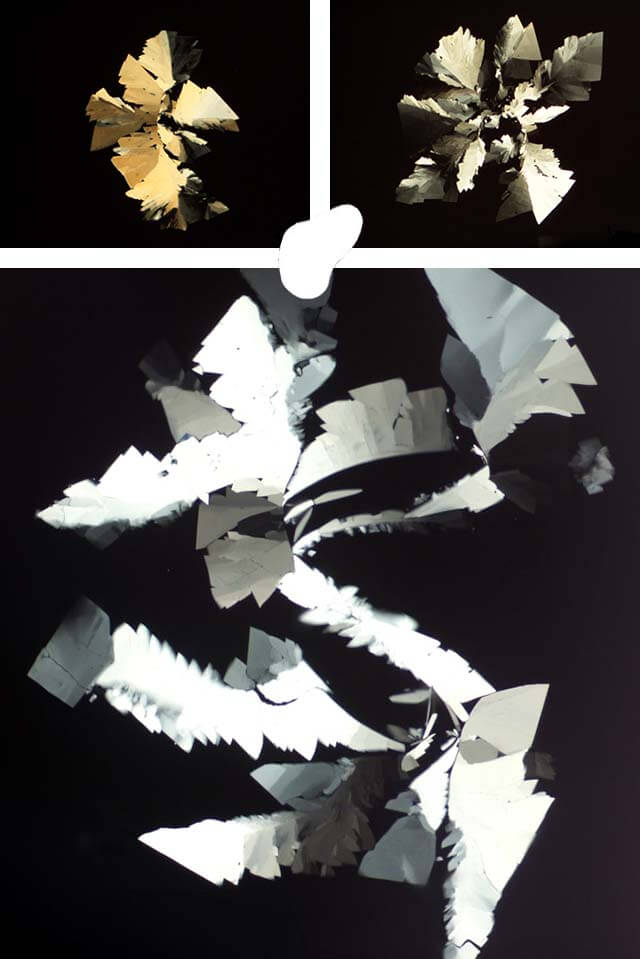
Photos of lactose crystals from Wikimedia
True, it's only boring crystals. But ain't they beautiful? They are curving slenderly around their axes while bits and bytes are poking in all directions, almost like leafs in the wind. I feel they have some fiery elegance.
Might be a strange association, but in a way those crystals (in the micro world) remind me of the willow trees (in the macro world) during springtime. Their twisted trunks rising out of a bed of yellow rapeseed and their heads surrounded by a cloud of tiny leafs.
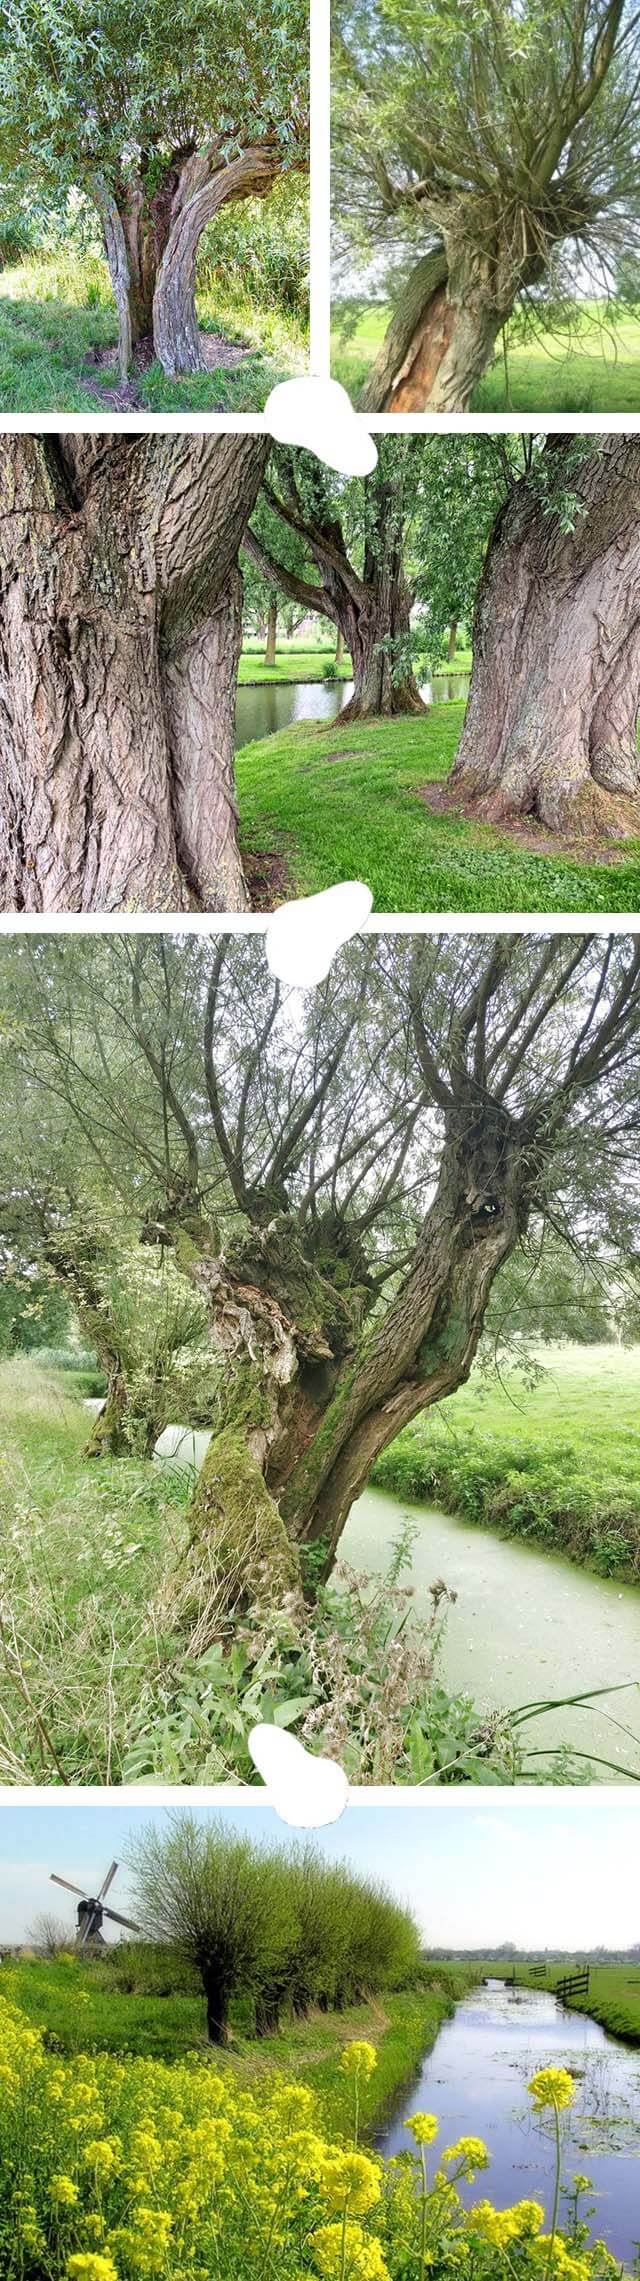
Photos by Marieke van Eyndhoven
Concept
For translating these impressions and inspirations in a modular approach...
... I could consider the micro structure of the lactose crystal to be the inspiration for the module shapes. And for the garment in the macro world, I could follow the style of Wayne Thiebaud, creating an abstract colorful landscape of those modular geometric shapes. For example trying to capture the impression of a willow tree in a field of rapeseed flowers. Last but not least I would like to mix in whimsical 3D elememts like Eunsuk Hur and Chloe Uyen Tran do.
So in summary:
- The shape of my modules (micro world) will be inspired by the lactose crystals.
- My garment (macro world) will be inspired by an abstraction of a willow tree in a field of rapeseed.
- I need base modules to create a flat underlayer.
- Those base modules should have different sizes to be able to "wind" the base layer along a grid (the body).
- A second module is required to suggest the criss-cross 3D poking "leafs".
- The modules for the underlayer will be brown (willow trunk).
- The leaf modules will be green (willow leafs) and yellow (rapeseed flowers).
- I have to model the intended garment intuitively on the body.
Workflow
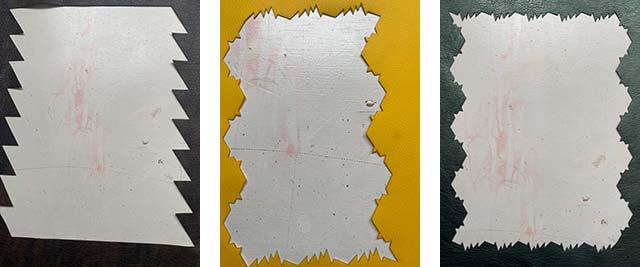
Sketching and experimenting with paper
I started with paper and a pencil to sketch some ideas for shapes for both modules. One way or another I got lost in the photo of the lactose crystal and ended up with pretty complicated forms. Playing with those forms didn't get me closer to any workable solution. It was only after Cecilia gave a gentle suggestion about keeping the base form simple, like for example a triangle, that I did see the light.
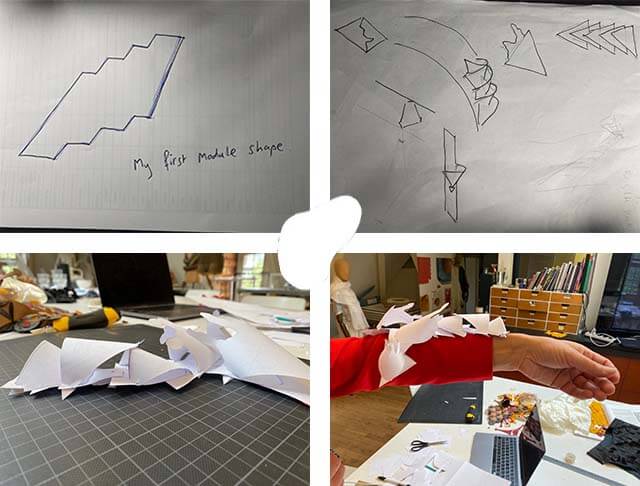
Photos by Marieke van Eyndhoven
Module design in Rhino - iteration 1
Since I want to be more proficient in Rhino, I decided to use that program for designing the modules.
The steps I followed in Rhino for the "base" module were as following:
- I only worked in the XY-plane.
- With the command "PolyLine" I draw an equilateral triangle with sides of 60 mm.
- With the command "Line" and the options "End", "Near", "Midpoint", "Center", "Intersection" and "Tangent" enabled I was able to draw helplines, which allowed me to draw neat female and male slots in each of the corners. Those would be the slots to secure the base modules with each other. I made sure that the female slots were around 5 mm to guarantee a secure connection.
The commands "Distance" and "DimAligned" came in handy, since they allowed me to keep on measuring all the distances of the various lines in order to double-check I was creating exact shapes and slots.
For the leaf module I had a decision to make. The leaf had to be attached on the base by three connection points. One head-connection and two tail-connections. When I did the paper prototype my leaf modules were way bigger than the base modules. But I only could connect them by having the tails secured to one base module and the head secured to another base module. In that way I wouldn't be agile in assembling later. So I decided the head and the tail had to be connected to the same base module. That meant the dimensions of the base and the leaf had to be at about the same. My self-imposed constraint of zero-waste further reduced the design option for the leaf module. So for the leaf module I started with the same equilateral triangle.
The steps I followed in Rhino to further refine the leaf module were as following:
- With helplines I created two inward triangles to shape the head. This would be the head male connection to secure the leaf to the base. I made sure the male connection was sizeable enough (10 mm) to guarantee a secure fix.
- With helplines I then created two outward triangles to shape the tails. This would be the tail male connection to secure the leaf to the base. I made sure the male connection was sizeable enough (6 mm) to guarantee a secure fix.
- Once satisfied I mirrored the leaf module and replaced the straight middle line with a free-form line to make the leafs more whimsical.
The steps I followed in Rhino to define the female slots for the leaf modules in the base module were as following:
- Once I was happy with the leaf module, I layered the leaf module over the base module in two directions.
- That allowed me to create two different female slots in the base for the head of the leaf. That would give me more options during assembling.
- Once the positions of the head connections were decided, on the base I made an arc for each tail leaf. On each arc I created several female slots. This assured I had more options for connecting the tails of the leafs.
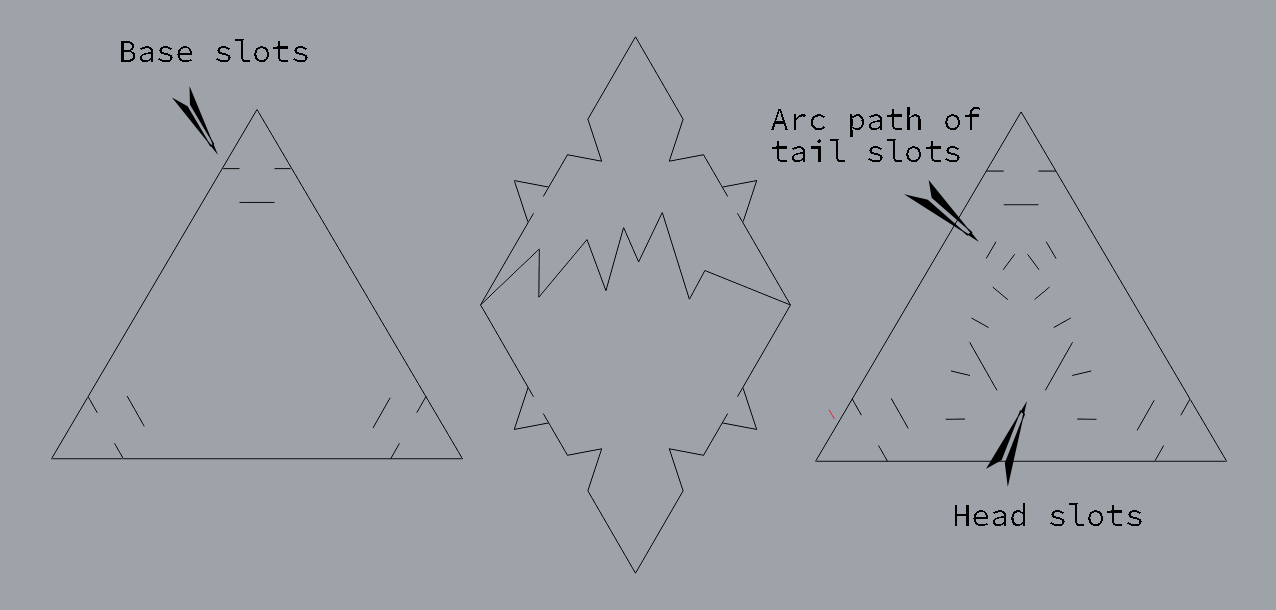
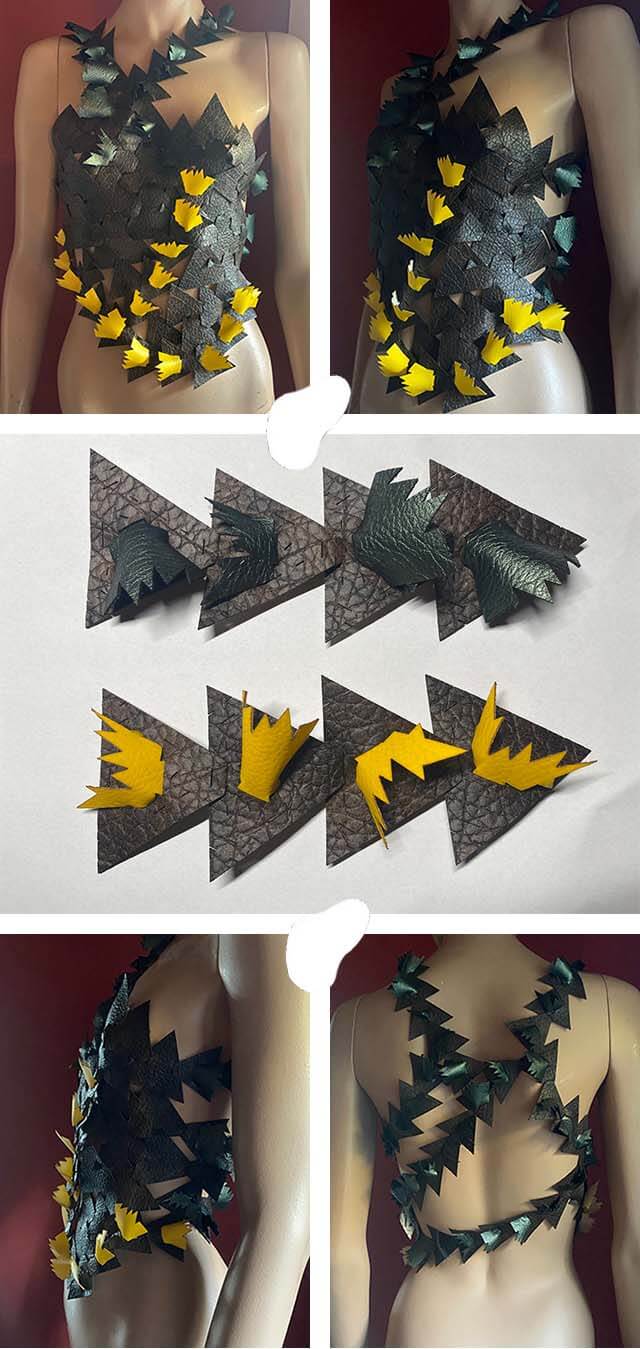
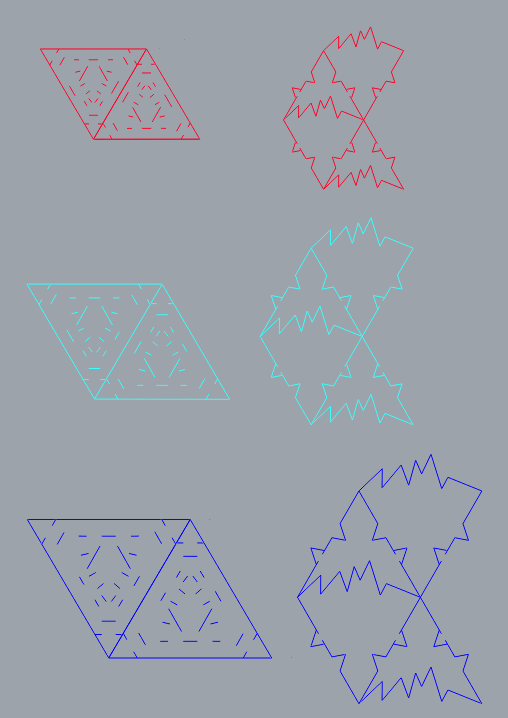
Screenshots by Marieke van Eyndhoven
Left: base module with base-interconnection slots
Mid: two mirrored leaf modules with male head and tails slots
Right base module with several female slots for male head and male tails
Time for a prototype! I found some leftover leather in the fabric cupboard and used that to lasercut some base and leaf modules. The leather was 1 mm in height and had no further specifications. I first ran a small test on the laser cutter to understand if no problems would arise with this leather in the laser cutter. No fumes and explosions, so I could move on. I tested several settings for speed and power. I got the best results with speed 120 and power 60. With those settings I had several shapes cut. Then I assembled the base layer and attached some leafs to it.
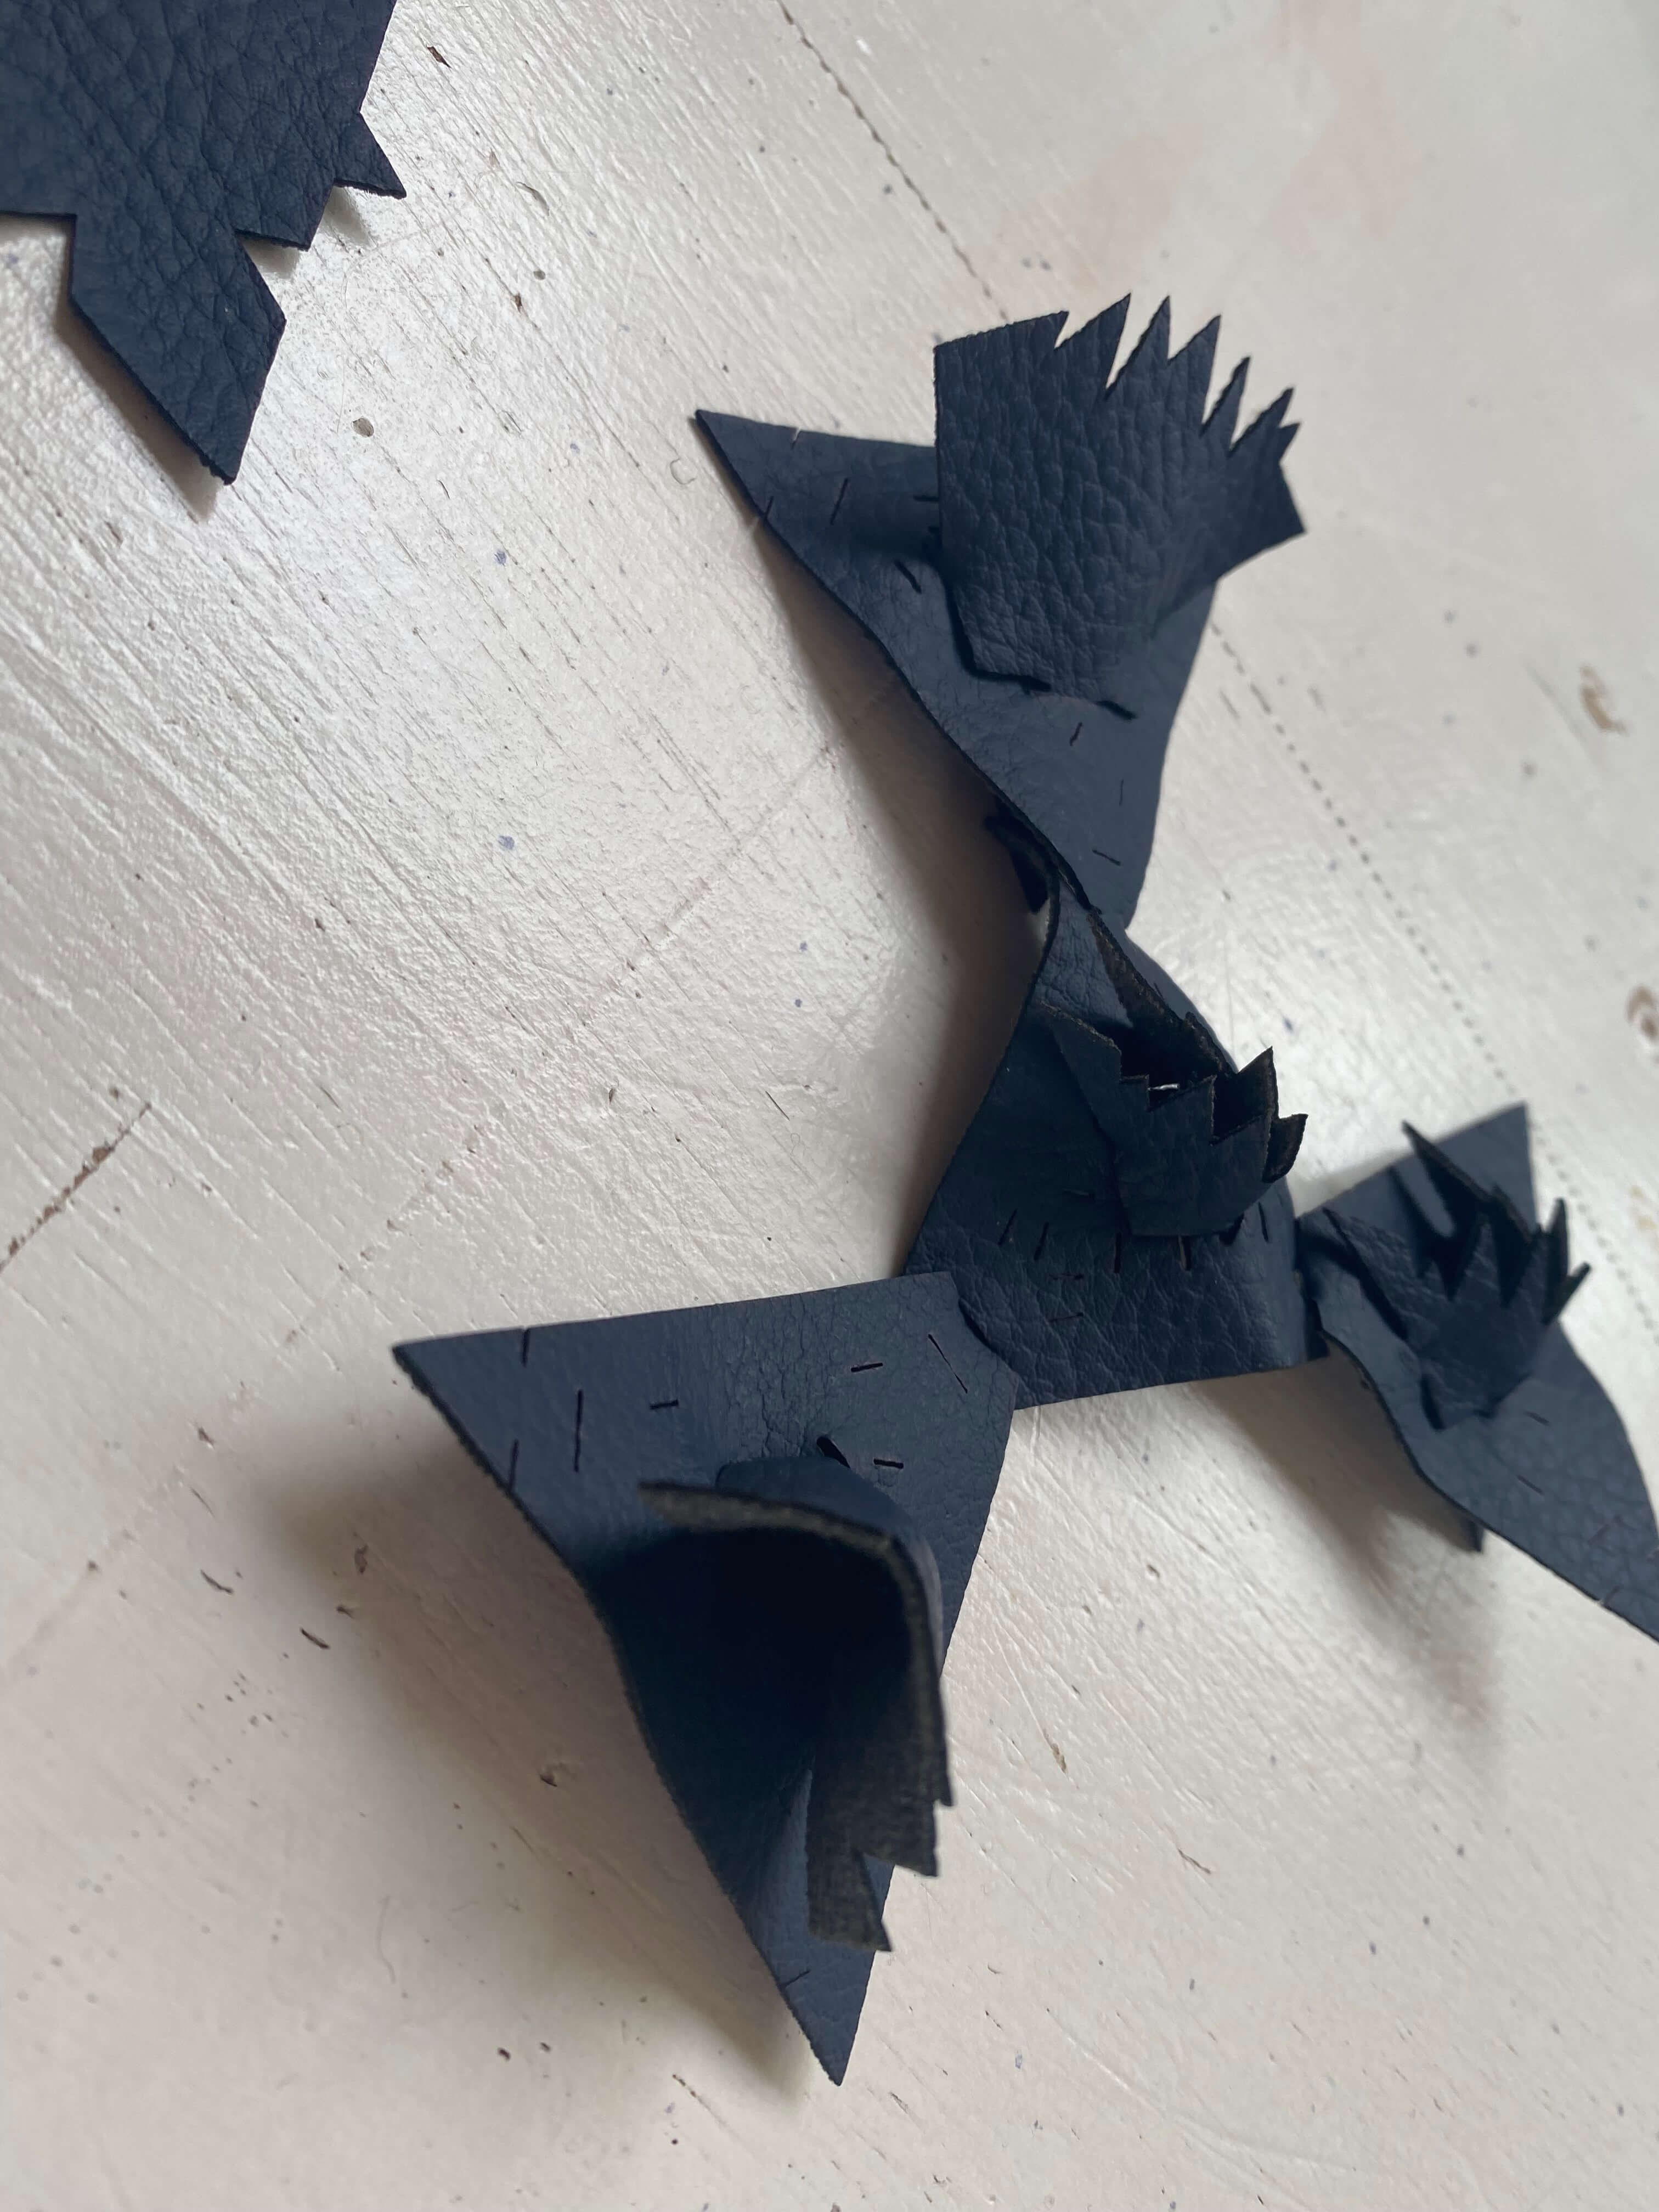
Photo of prototype in leather by Marieke van Eyndhoven
The base layer could be tightly connected. No problems with the slots. The only issue: I had forgotten to place female slots along each side of the triangle. A must in order to make sure I could create a closed base layer. The connection of the leafs to the base were solid and I could indeed vary the position of the tails. So no further changes required.
Module design in Rhino - iteration 2
I updated the base modules with three more female slots along each side of the triangle. Since I wanted to have different sizes to play with, I scaled up the base and leaf modules in a medium (128%) and large (154%) size, whereby I made sure that the slots on the large size modules still allowed connection to small base modules and vice versa.
Now it was time to think about tessellation. What combined shapes for base and leaf modules could I expand in such a way, that no overlaps and no gaps would be induced, i.e. zero waste accomplished. After some testing I came up with my final shapes.
One more thing was left before creating the final files for the laser cutter. I had to calculate the number of small, medium, and large base and leaf modules required. I decided I wanted to create a top. After some rough pattern sketching, my calculations showed I needed around the following modules:
- Small brown base - 80 modules - 40 x 50 cm leather.
- Small green leaf - 80 modules - 36 x 45 cm leather.
- Medium brown base - 18 modules - 19 x 29 cm leather.
- Medium green leaf - 8 modules - 12 x 18 cm leather.
- Large brown base - 12 modules - 24 x 28 cm leather.
- Small yellow leaf - 36 modules - 27 x 27 cm leather.
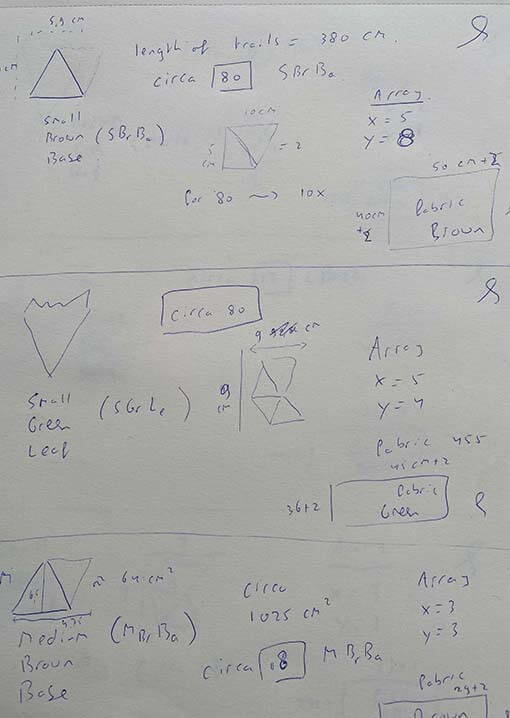
Screenshot of final shapes by Marieke van Eyndhoven
Photo of calculations by Marieke van Eyndhoven
The steps I followed in Rhino to do the netting of the tesselation figures:
- I used the command "Array" and expanded the basic tesselation figure over the x- and y-axis.
- Then I did "Ungroup".
- Thereafter I had to "Explode".
- Next I did a "Seldup" to check if no double lines were in place (delete them).
- Thereafter I could use the command "Join" to connect all lines.
- Then I applied the command "Group".
- Lastly I selected the group and with the command "Export Selected", I created the required .dxf files.
It is nerve-racking to do the "Array", especially if you have no mouse...
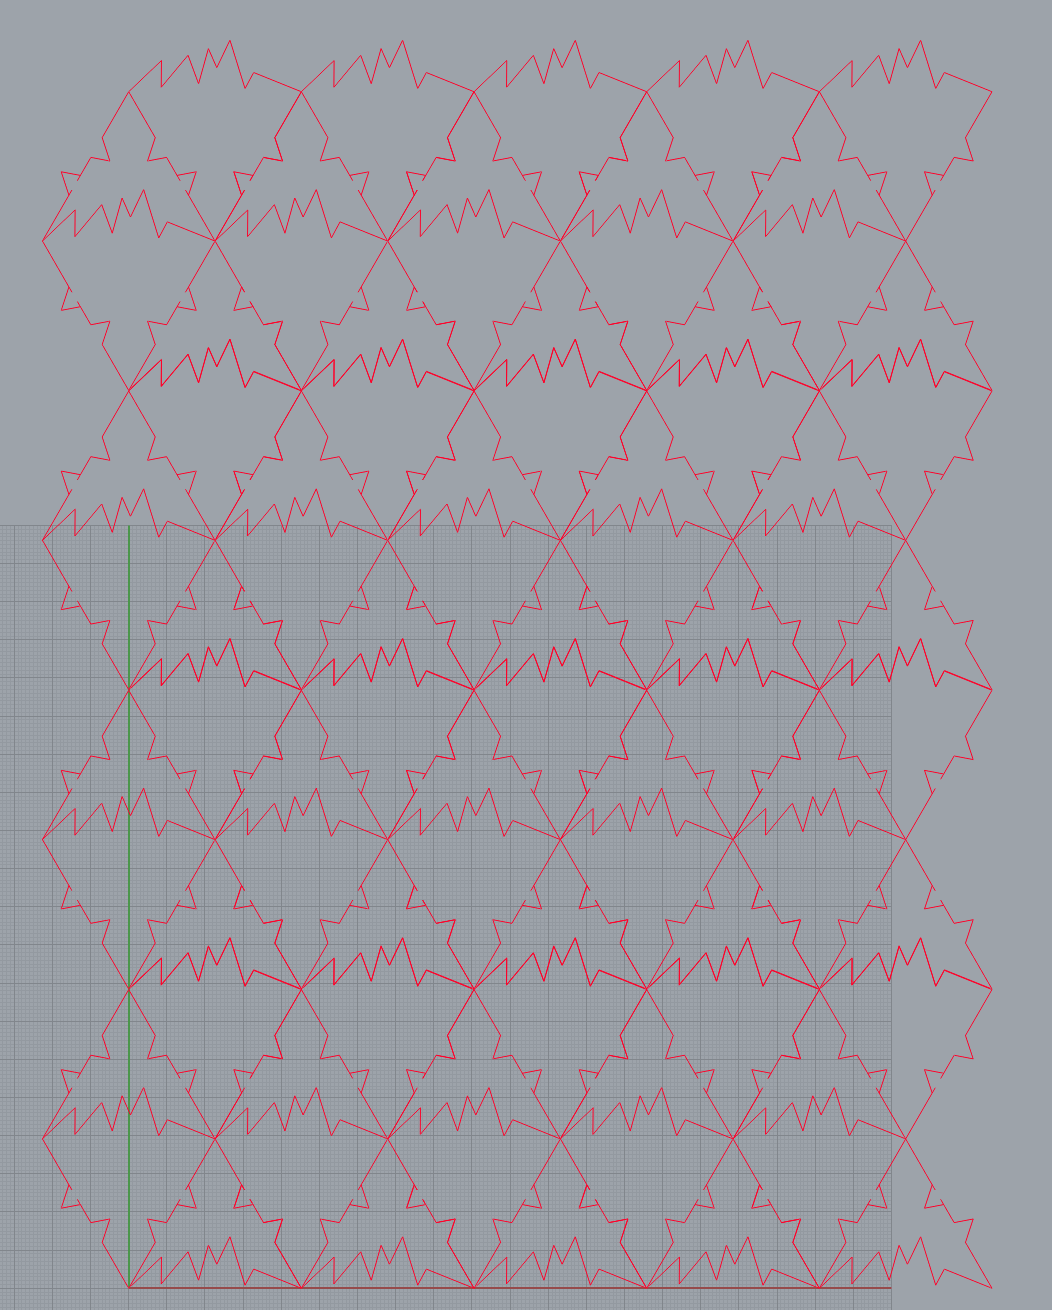
Screenshot of array in Rhino by Marieke van Eyndhoven
Leather hunt and laser cutting
I turned the whole Fabricademy cupboard over, but couldn't find any waste leather in brown, green or yellow. So I went around the corner to the fabric shop. Setback one, they had only synthetic leather. Setback two, I wasn't too excited about the brown colors (all too dark) and green colors (too blue-ish). Setback three, they didn't have any specifications, so couldn't guarantee the materials were suitable for laser cutting. I bought it anyway, and armed with my leather and .dxf files, it was off to the laser cutter.
I did run another little test for each type of leather and they all seemed to be safe for laser cutting. Each one of them was nicely cut with speed 120 and power 60. It seemed I was all set to laser cut my six sheets of modules.
However, when I loaded my first sheet with the small base modules, I discovered there were duplicate lines along the bases of the triangles. Something had gone wrong. Ashley and Michelle came to the rescue. After some deduction we concluded something had gone wrong when I mirrored the single base triangle to create the tesselation figure. Ashley helped me understand where it potentially had gone wrong. When you "Mirror" in Rhino you have to select your mirror plane. At that time I had still enabled the options "Near" and "Intersection" in Rhino. This can cause a non-perfect mirror image, whereby some misalignment is created. This error will duplicate itself when you then use the command "Array".
Two great tips from Ashley:
- The best way to perform the commands "Mirror" and "Rotate" is to do so with only the option "End" enabled. This makes sure you select the perfect mirror plane.
- When doing an array, first do it in the X-direction. Thereafter do a new array in the Y-direction.
Once this error was fixed, the laser cutting was a breeze.
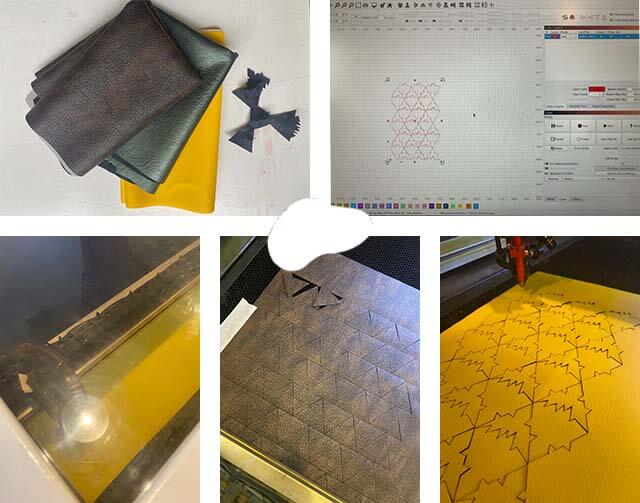
Photos by Marieke van Eyndhoven
And the good news? Almost no waste! I only should have placed the laser head even more to the edge of the leather surface, in order to save some more fabric.
Photos by Marieke van Eyndhoven
Assembling the garment
The actual assembly of the modules in a garment was in itself not difficult. But it took me a long time to figure out how I had to position the small, medium, and large base modules to follow seamlessly the contours of the body. It was after all the first-ever-piece of garment I created in my entire life!
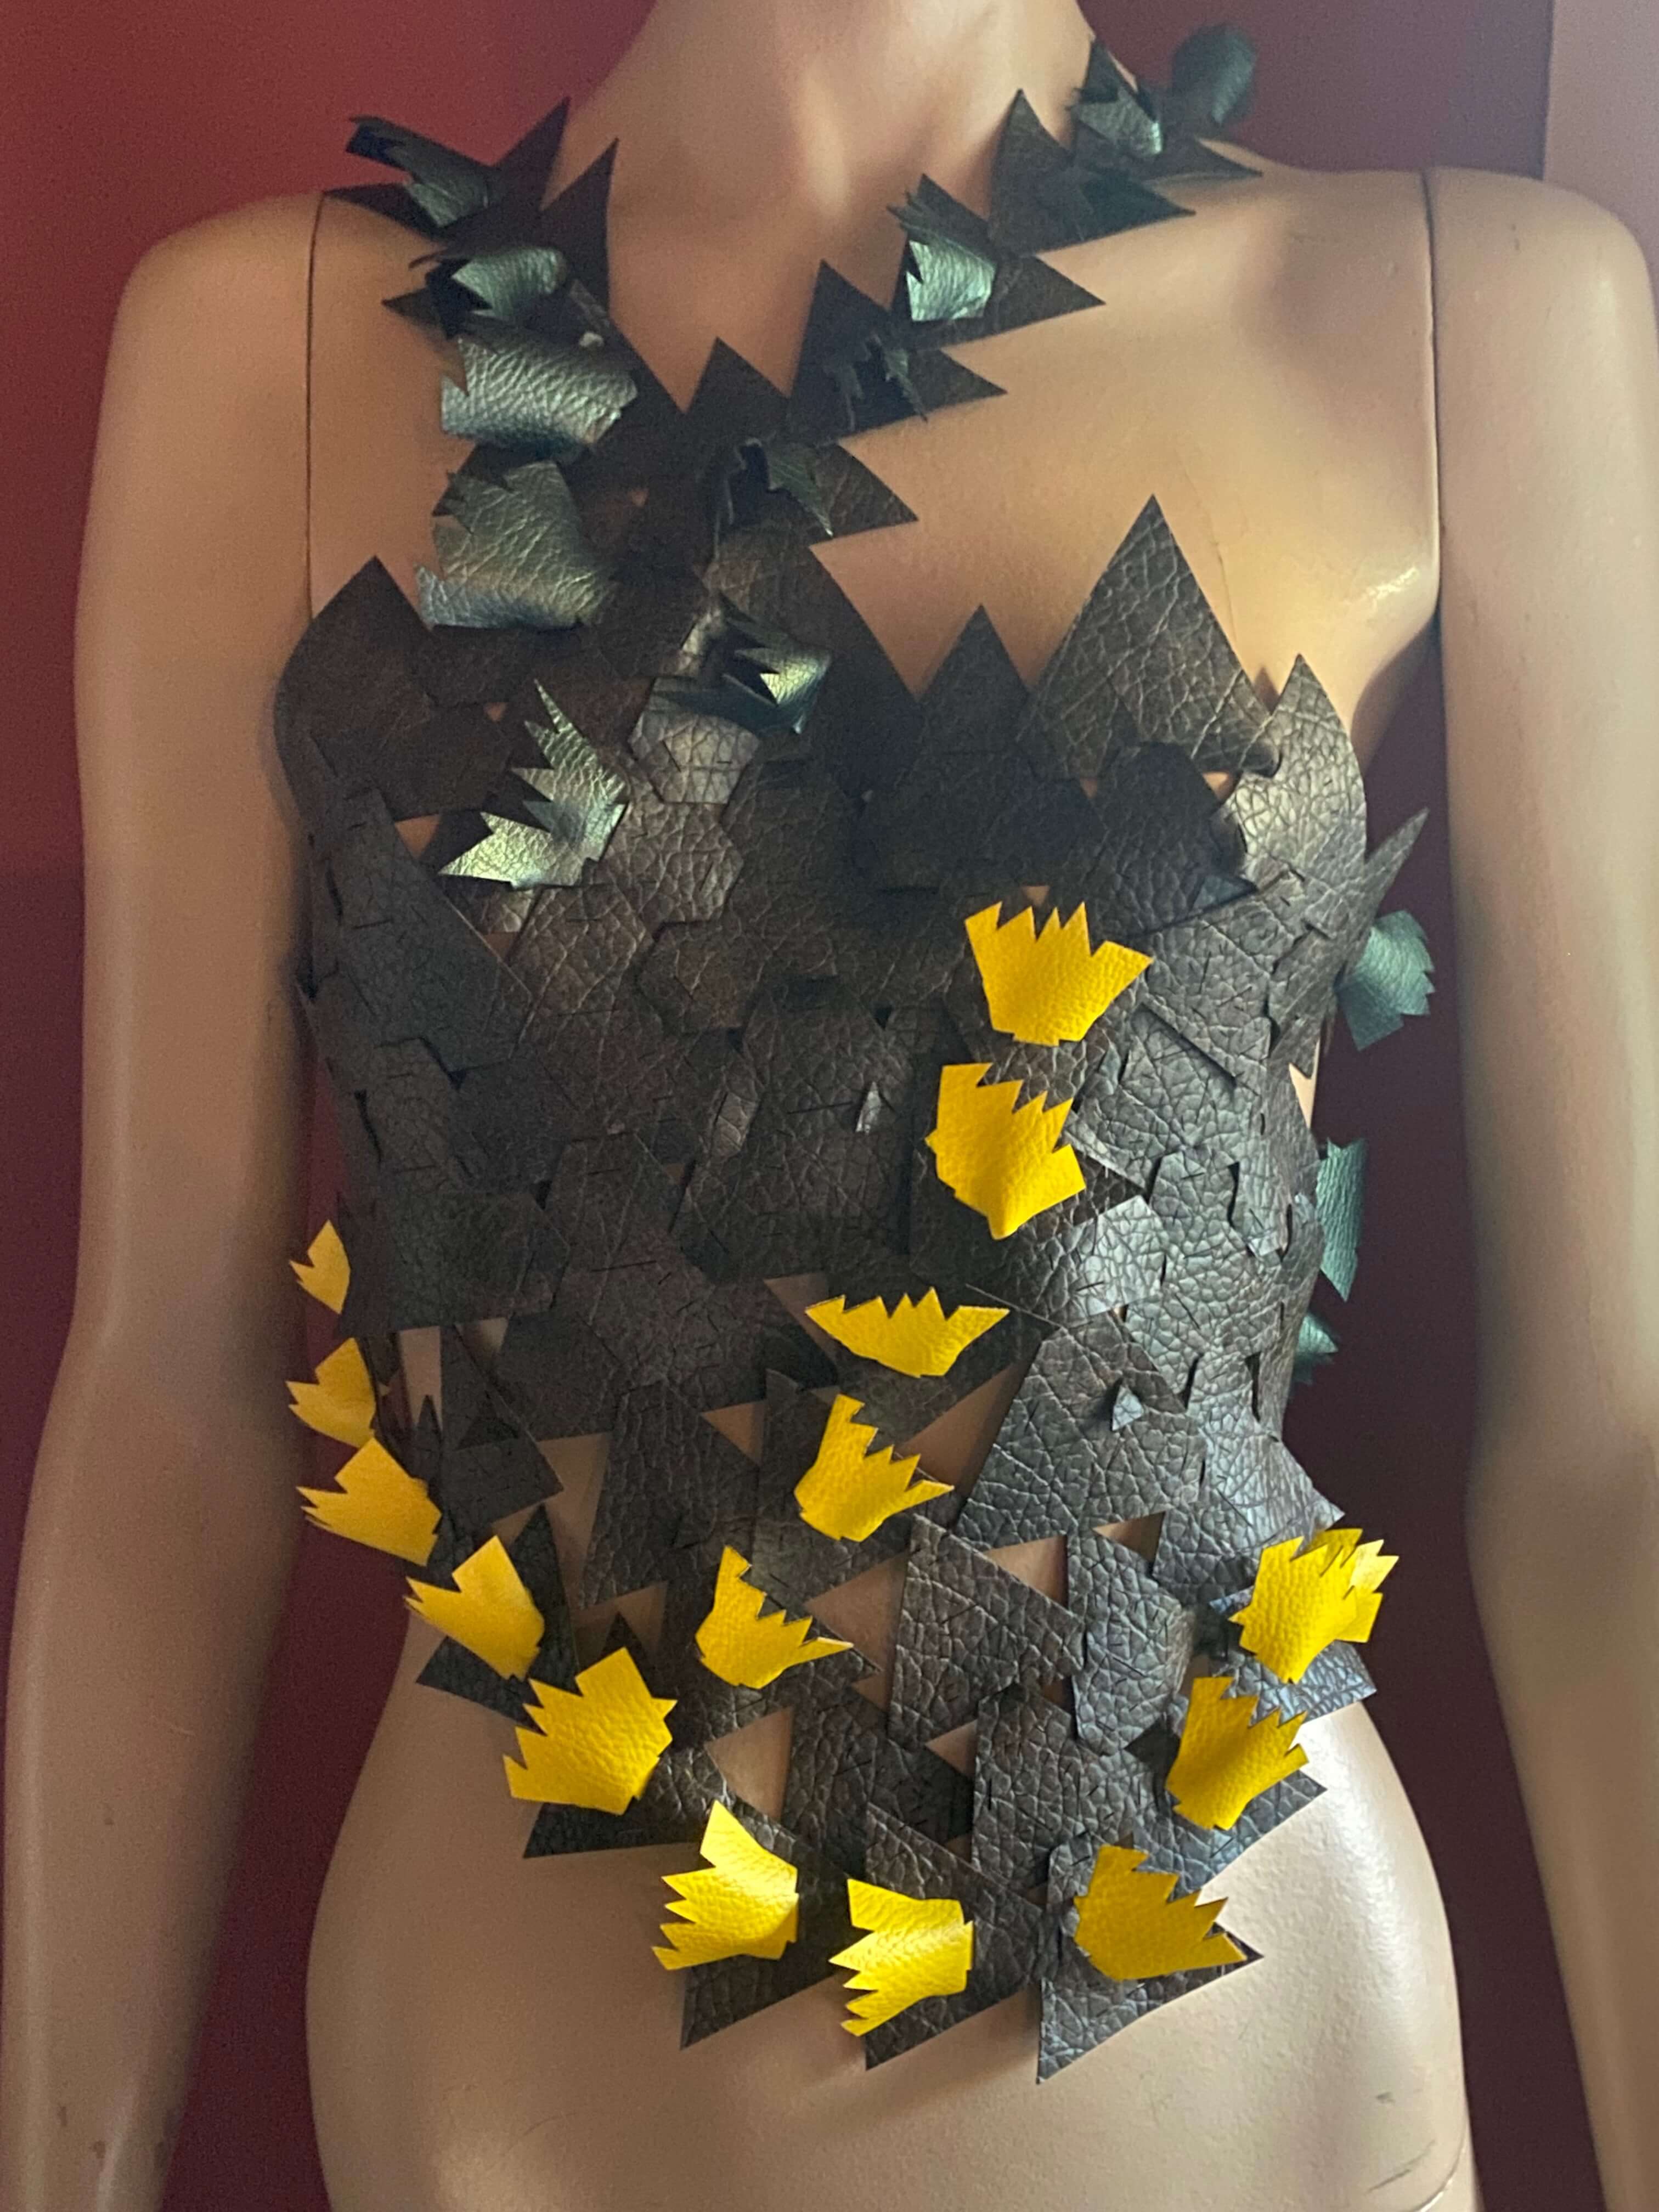
Photo by Marieke van Eyndhoven
Room for improvement
While assembling I had several observations for optimization.
Technical reflections
I had tested the connections between the base and the leaf with one type of leather. But you cannot assume that each piece of leather is the same. The yellow leather I used for my final design had a way more smooth surface than the leather of the prototype, hence the connection for the yellow leaf proved to be less solid than for the green leaf. So it is important to test the slots for each specific piece of fabric in the final design.
While trying to increase and decrease the base module size over the contour of the body, I encountered some assembly issues. I had to change multiple times the design to relief the tension in the base layer. The medium size was 128% and the large size was 154% of the small size. I could have avoided the assembly issue by scaling the base module with smaller increments.
Design reflections
I am super proud I went to this process from beginning to end and came out with a garment. However the vibe was not completely what I intended. I had wanted to come up with an organic, very 3D, almost futuristic interpretation of a landscape. But to me it looks more like the corset of a damsel from the Middle Ages.
I guess that is partly because of the combination of the brown leather and the triangle shapes. And partly because the leafs just form a modest additional layer on top of the base and look in the end more like embroidery.
For next time I would not try to mimic the real colors of nature, but do like Wayne Thiebaud, and use fantasy colors. Also I would try to use some big organic-sized planes only for the base layer, and then create various indentations on those planes and the leafs. In that way I really can build up multiple layers to get a true 3D effect. Doing so would require more rigid material I have been using now, and also would require a lot of planning to keep the final result zero-waste.
Files
All the files for modelling and cutting can be downloaded here.