9. Textile Scaffold
This week was about creating composites, molds and casting. The final products should be a result of the interplay between well designed, well planned factors and unintenional / unplanned results.
Let's Go!
Fabric, wood, and the Unknown
References & Inspiration
Selva Aparicio is an interdisciplinary artist who has a lot of interesting works, even though I'm a fan of most of her work, one in particular amazes me everytime I look at it and it's titled "childhood memories" in which she carved a carpet on wood by hand. I like the feelings associated with the work and the emotions it intruges as well as the details and the illusion -if we could say so- that it portrays.
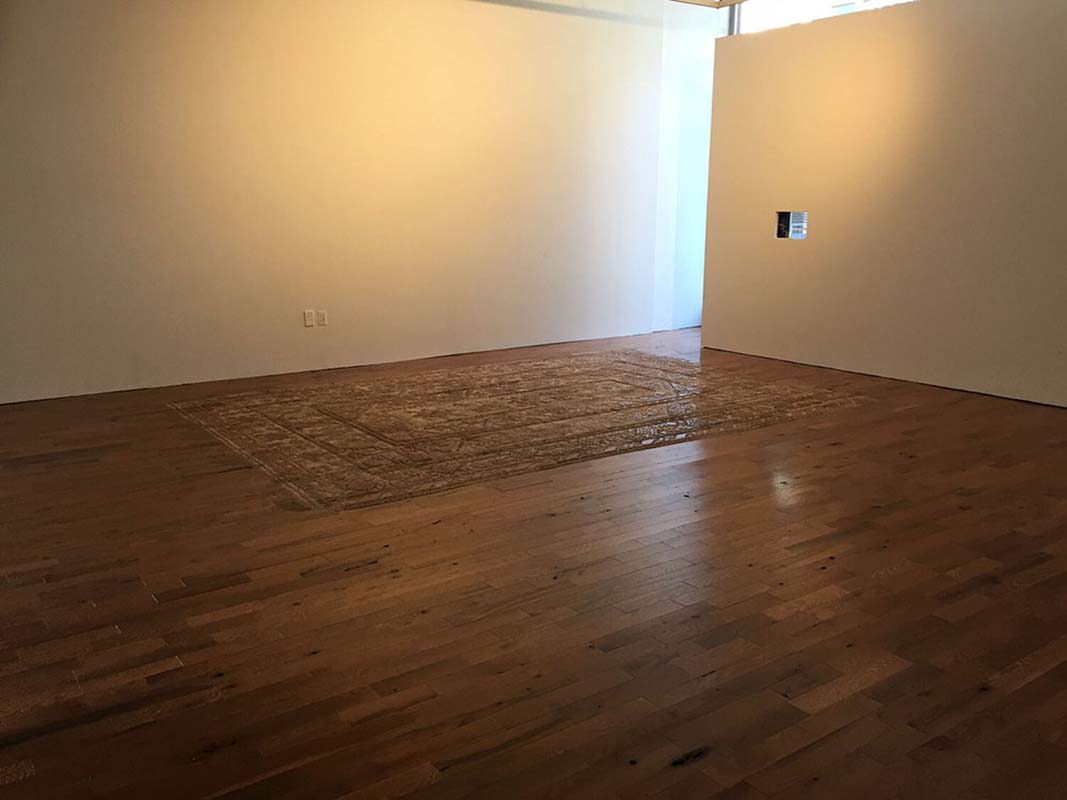
For this weeks assignment I looked into how I can turn the wood into a composite and maybe be color it during that process, and then use the CNC to carve out some parts, leaving the final product to be in the intersection of what's planned/designed and the unintentional. Sounds complicated, let me explain...
Colors and Composites
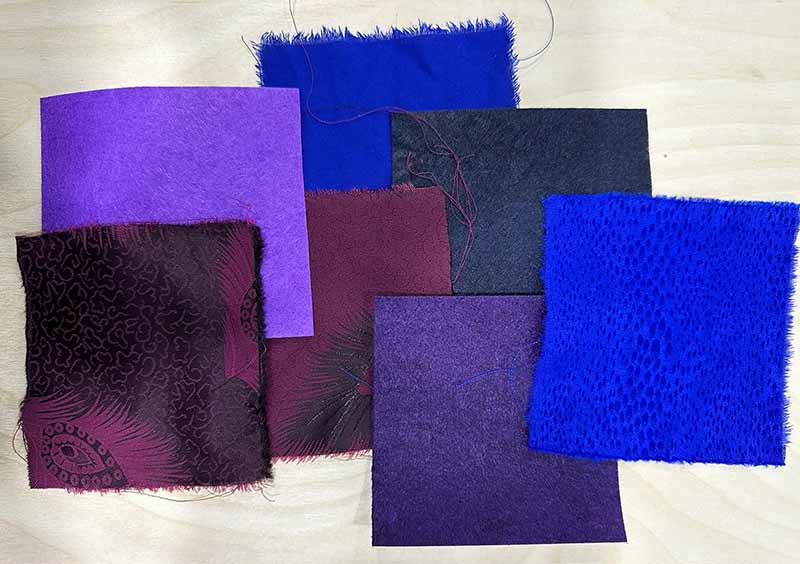
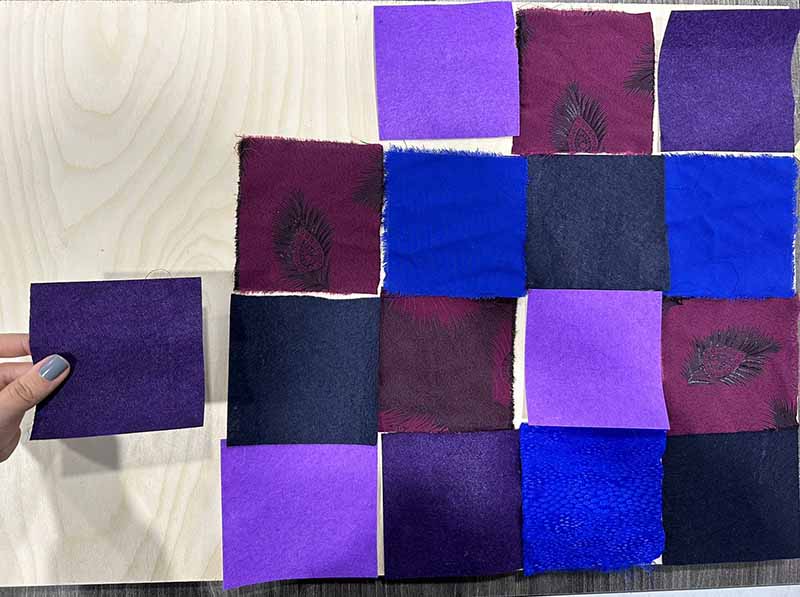
How can we color that wood? the convential answer would be: with colors, dyes, or spray paints. I wanted to color the wood with fabrics and to have the fabrics hold to the wood and become one part of it I added resin to the mix.
I figured if I used mulitple fabrics consisting of multiple colors I will end up with a colorful piece.
Prototyping / Testing
Before we go big, we need to test small and that's what I did.
I used a leftover wood waste I found in the lab alongside waste fabrics, felts, and ribbons. I cut them in smaller pieces and poured resin on top of the wood. Let them dry overnight.
CNC
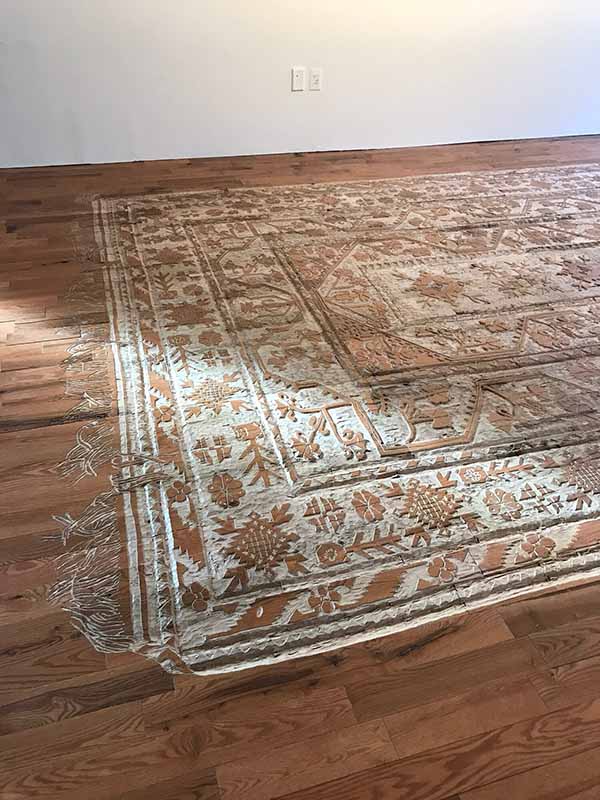
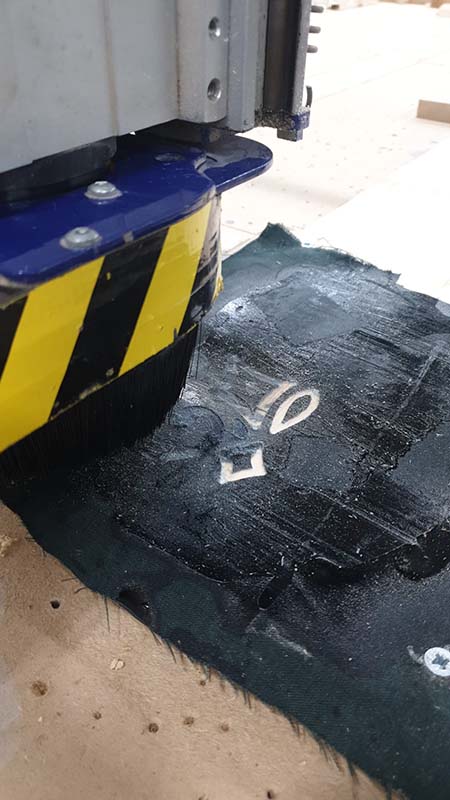
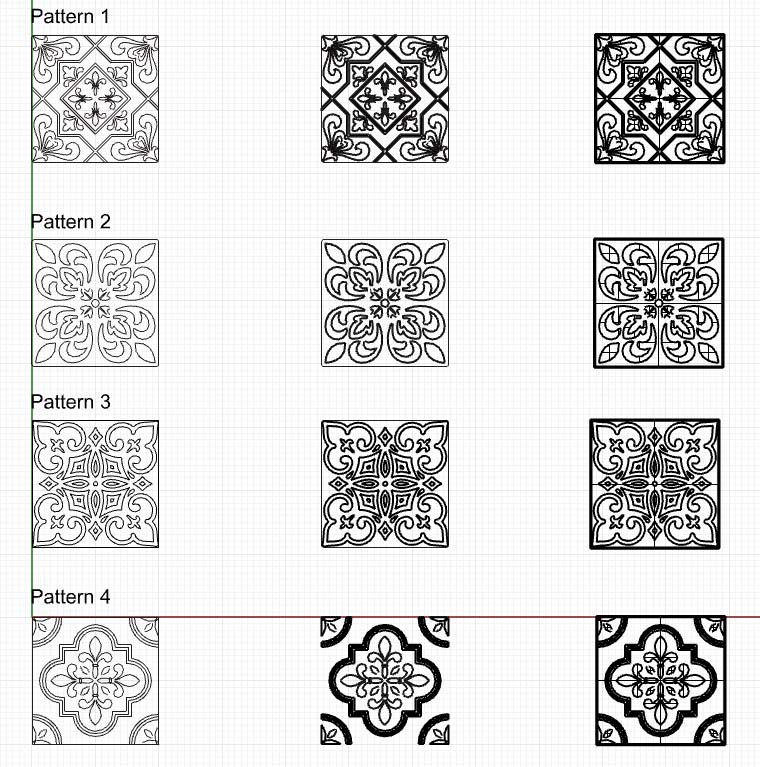
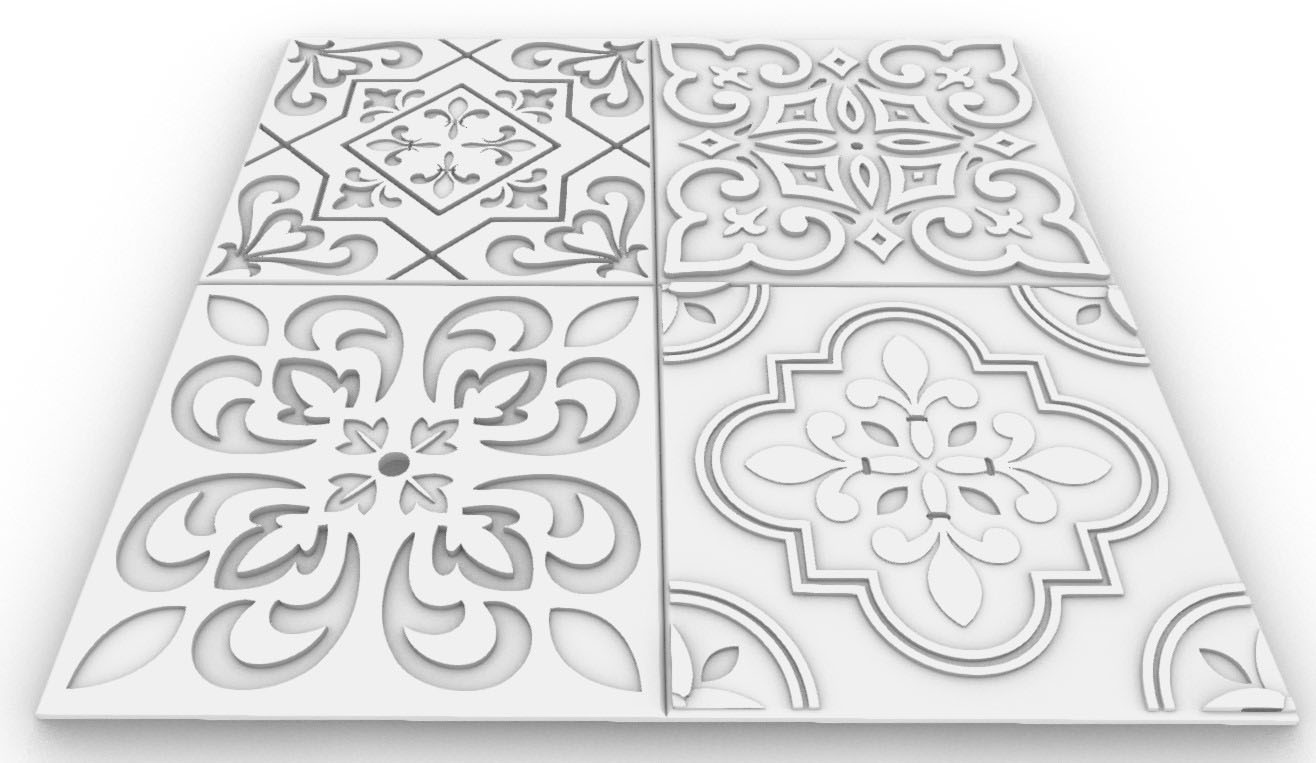
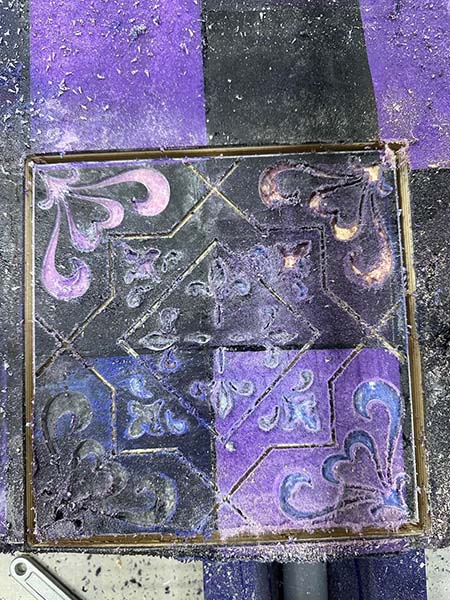
I'm planning to carve tiles on the final piece, ideally with Islamic patterns on them. So I used one of the patterns for the prototype too.
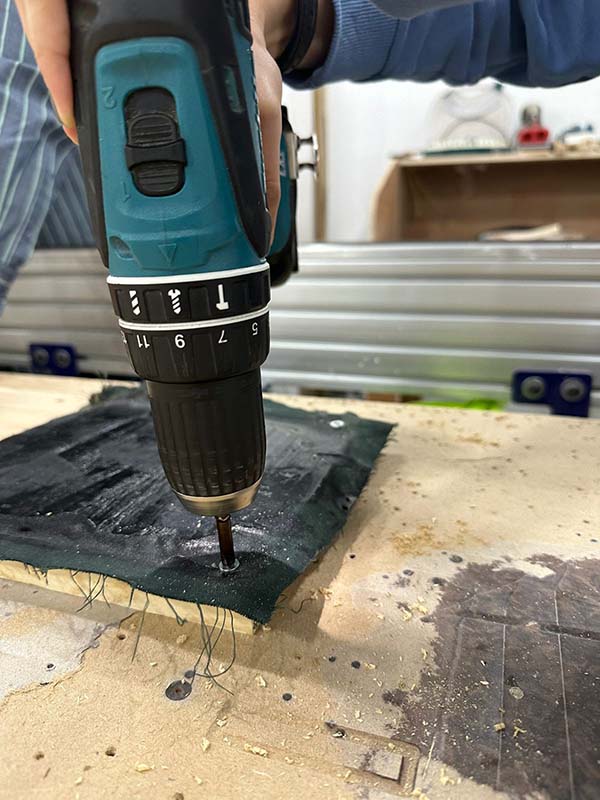
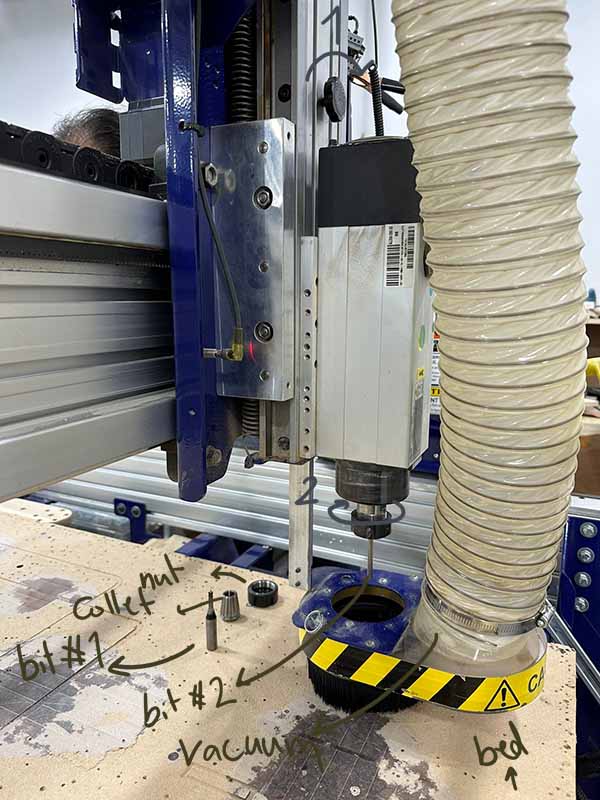
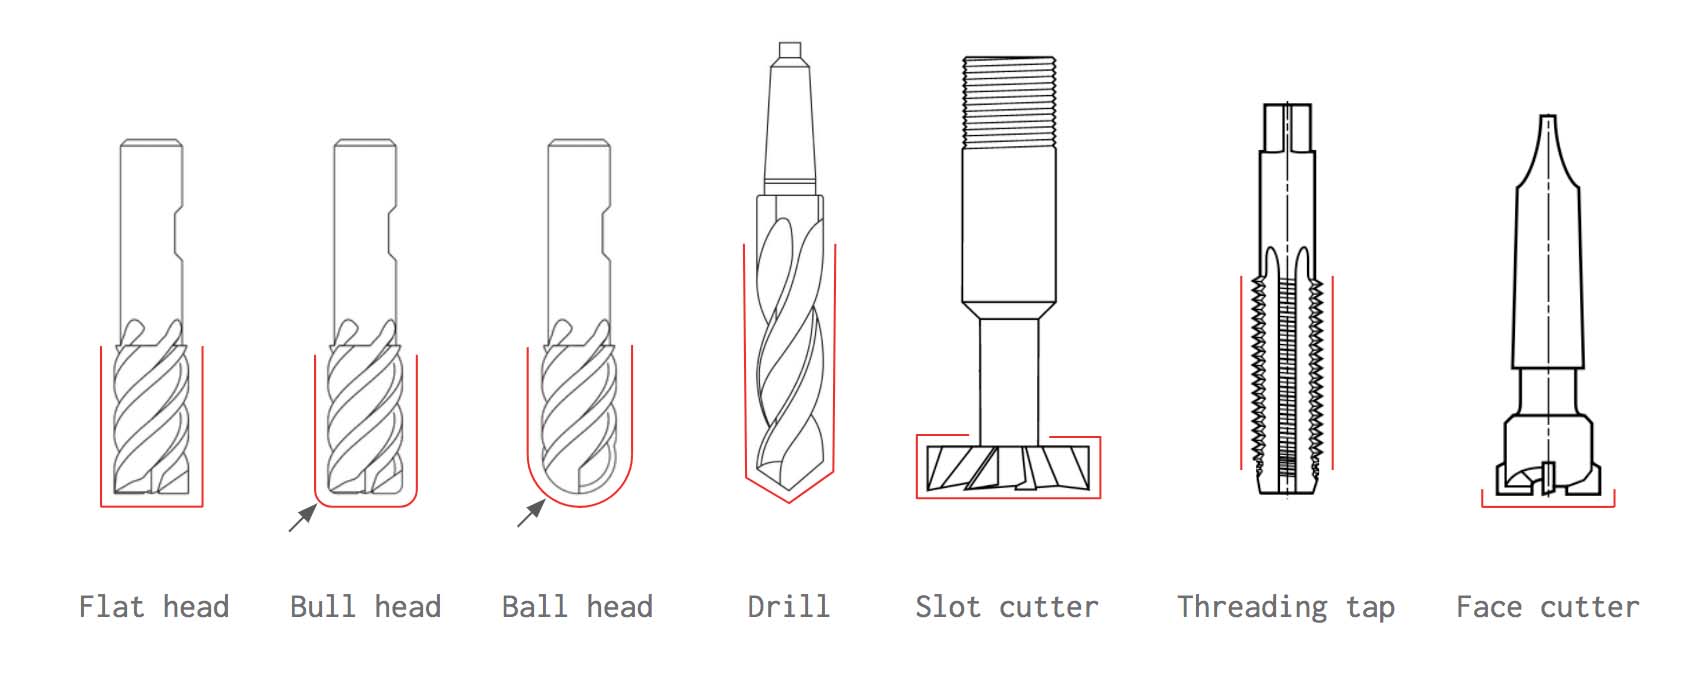
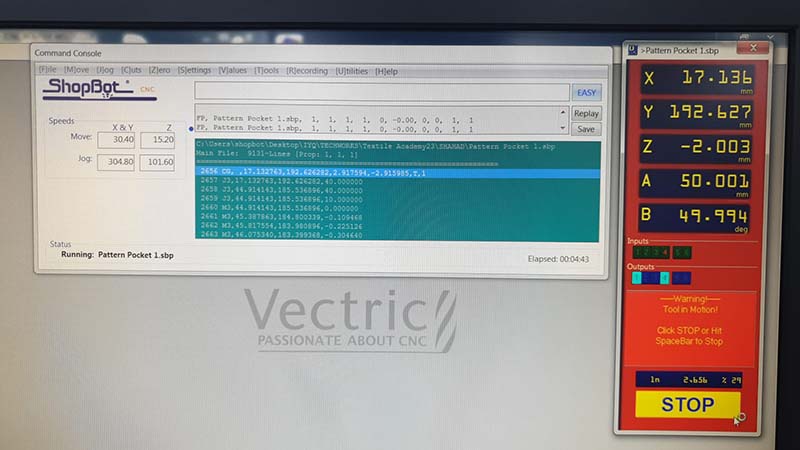
Here'sa quick guide how to use the CNC but if you have no prior knowledge you need to refer to a professional at your lab: 1. We pin the piece we're planning on carving on the bed of the CNC machine. We pin all sides and double check that the piece doesn't move after it's pinned with screws. (See picture 1) 2. Changing the tool - or the drilling bit- usually requires loosening the nut. 3. You always want to make sure that the nut is clean and regularly clean it. 4. Different types of bits have different impact, always consult with a CNC professional if you're unfamiliar.
See the pictures below for better illustration.

After I pinned the piece and changed the bit, It's time to prep the file and to send it to the CNC, for that I used Vcarve.
You want to know the measurements of the piece you want to work on (length, width, and thickness) After you enter these dimensions in Vcarve, you import the file you want to carve and it's either 2D (A vector) or 3D (stl file). In my case it was a 2D pattern saved in .dxf format.
After importing and translating the vectors on the desired place on the piece, I chose the different tool paths for the different lines on the art work, for my it was mostly pockets.
The most important settings to set in the toolpath dialogue box are; the tool you will be using, the depth of cut, number of passes and choosing the lines that will be cut or engraved. Here are the settings I used for the prototype.
| Toolpath | Cut Depth | Tool | Machine Vectors |
|---|---|---|---|
| Profile | 3 mm | 1/8 inch End Mill | On the line |
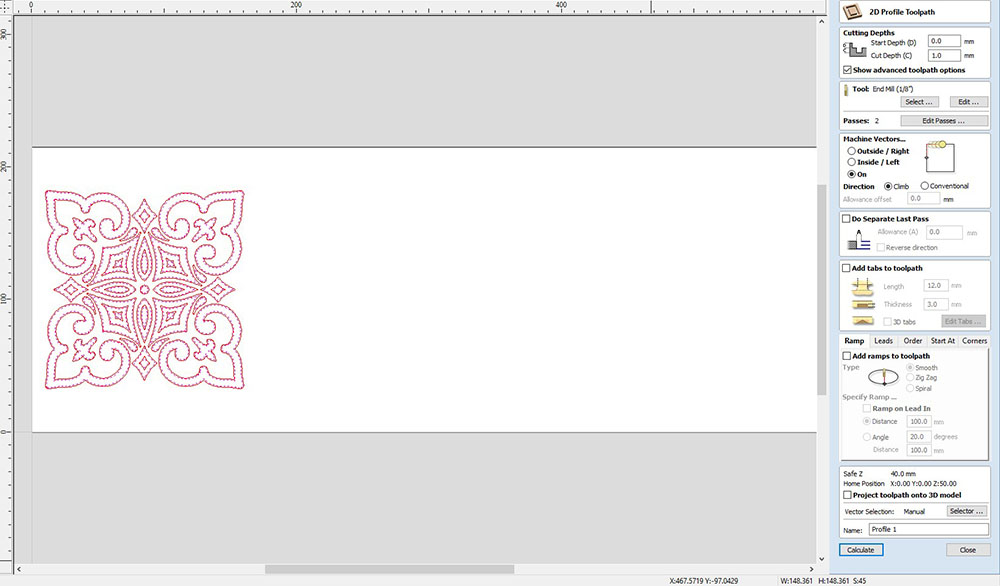

When done configuring the toolpaths settings and previewing them on Vcarve, it's time to export the toolpaths, either individually or all together, and finally we import them to the CNC operating software and we run the CNC router.
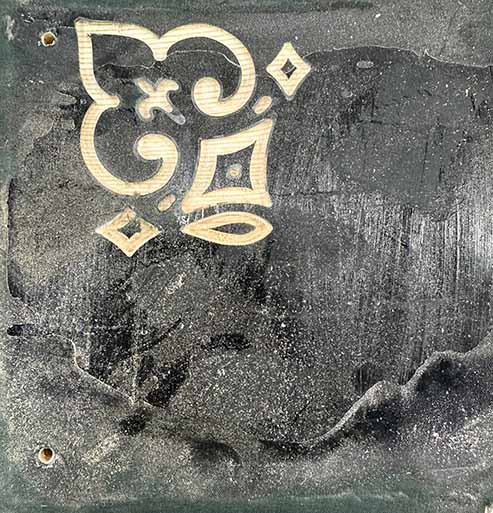
Takeaways from the prototype
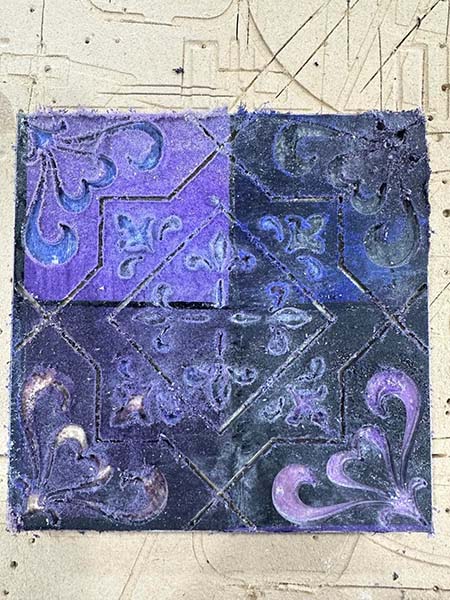
- Well, it works! (yaay).
- The fabric layer was too thin when the CNC cut through it you could only see what's on top and the wood carved, so Increase the fabric thickness to see the variety of colors of fabrics used.
- Though I didn't want the fabrics to be correctly leveled so I can have the element of unpredictability but it turns out to be a headache, so I should try to level the fabrics.
The Real Deal
Design
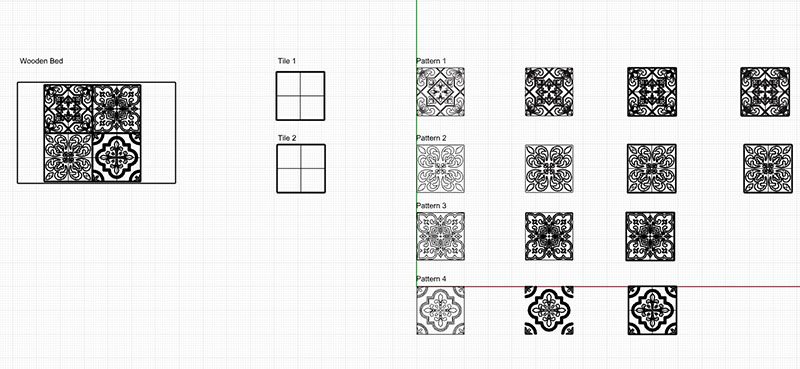
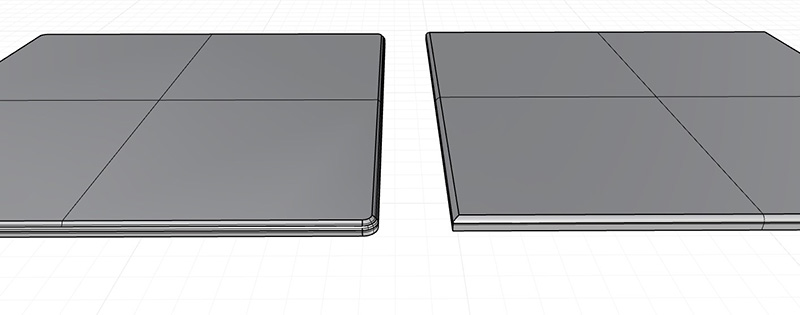
I designed two types of tiles, they vary according to the type of edge they have. I also translated 4 two-dimensional patterns into 3D models in Rhino. Check the images below to check my explorations.
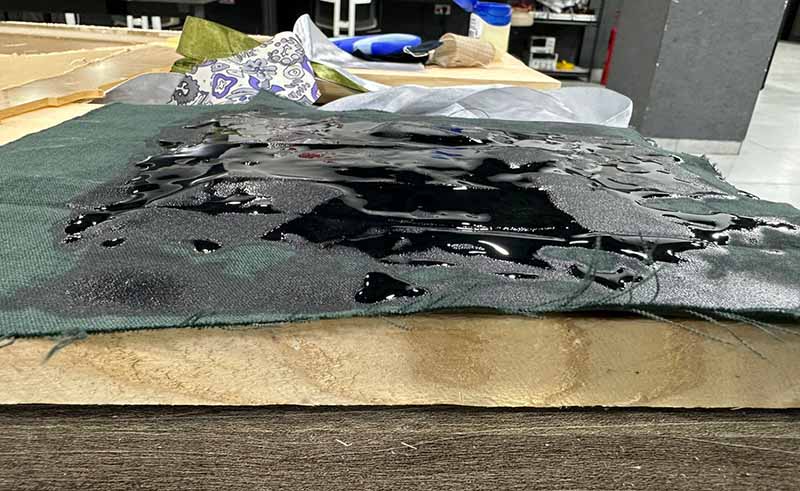
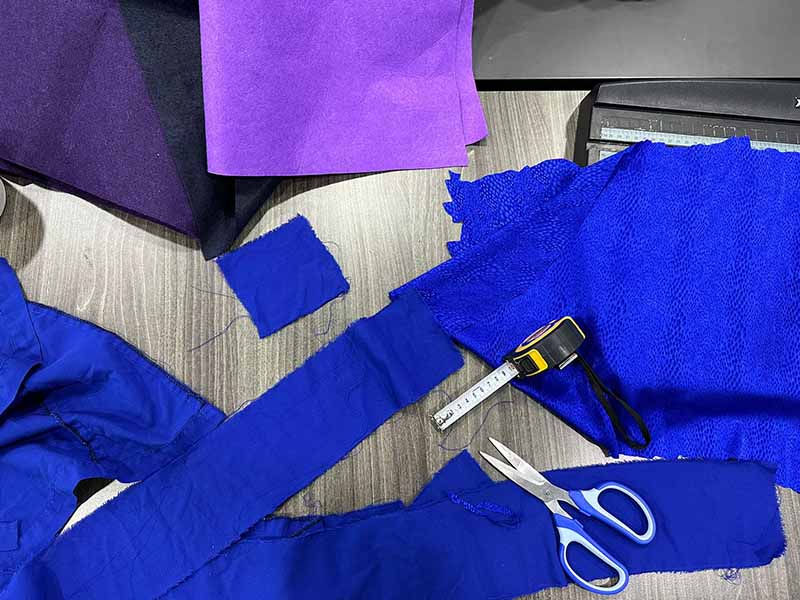
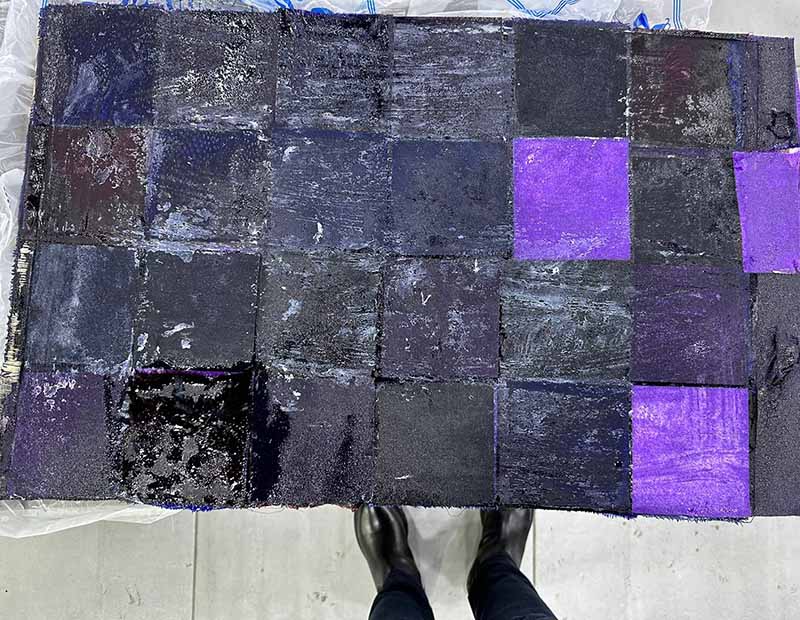
I used fabrics from 3 dresses that were no longer wanted, and I used 3 colors of felt. I cut them to 1 x 1 cm squares (approximately).
Now I laid them down on the wooden piece randomly
Of course it got messy.
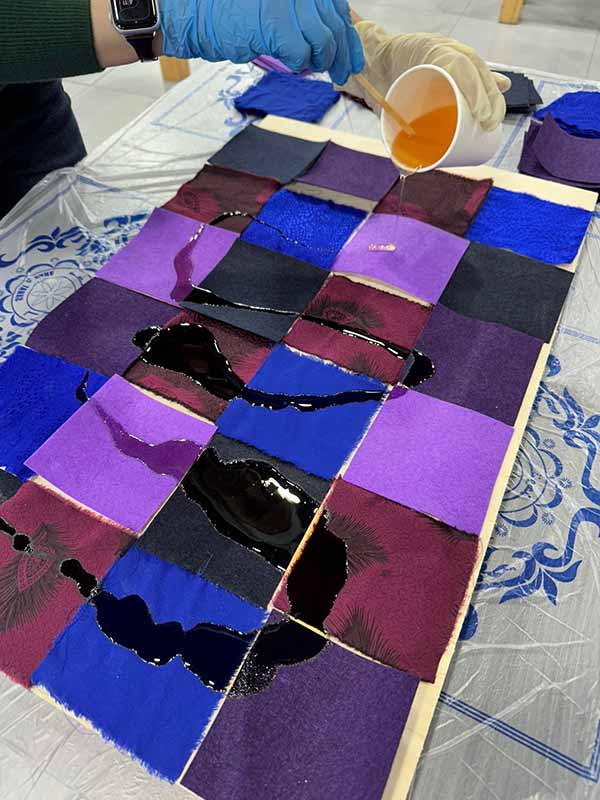

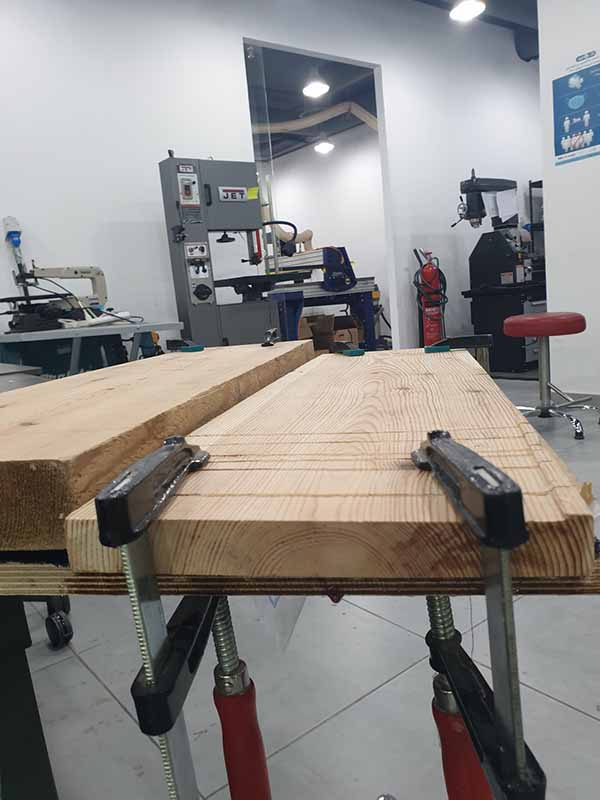
After I reached a good thickness taking into consideration that it will shrink when it's compressed and the resin escapes. I used a waste acrylic board, covered it with vaseline and put it on top of the resin and fabrics, I added big two wooden blanks to increase the pressure and clamped them together.
Results
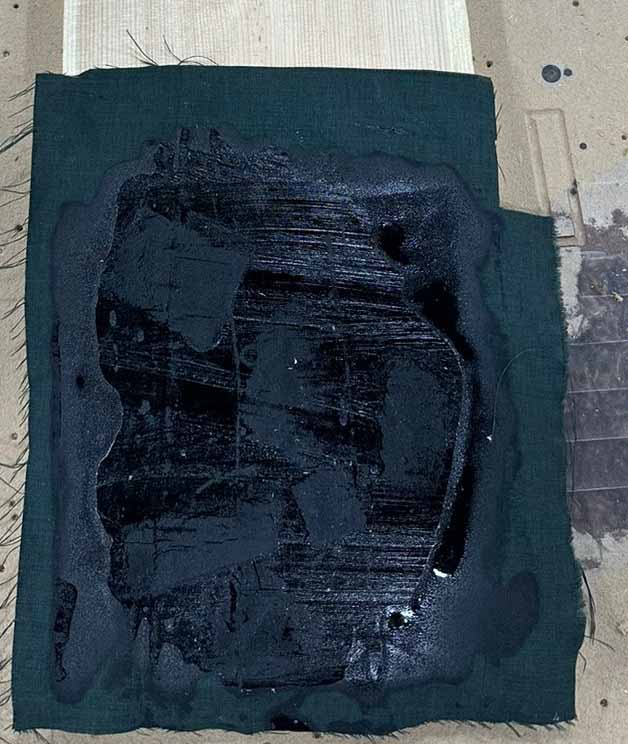
So I mixed two types of resins (I used BD 310 ratio 3:1, and Entropy Resins High Biobased Laminating Epoxy ratio 1:2) while making the composite, and for that reason the resin never really cured. I had to put it in front of my heater for a week or so and manually heat it with the heat gun. It got better but not really. And that reflected on the results.
But I can see the potential and I will repeat it correctly this time and post the results here.
Safety Measures
- Be sure to wear gloves whenever in contact with epoxy resin.
- Be careful not to spill resin or hardener on surrounding surfaces or clothes.
- Follow the instructions provided by the manufacturer.
Crystalization
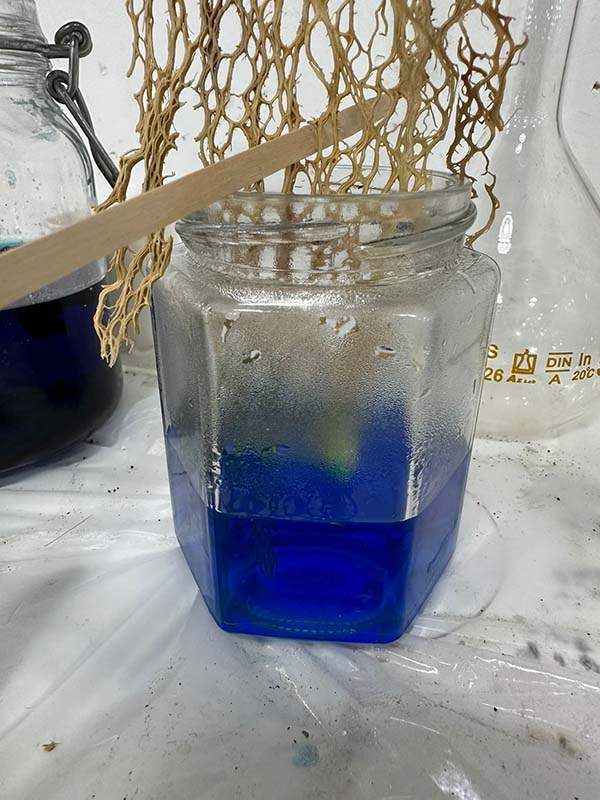
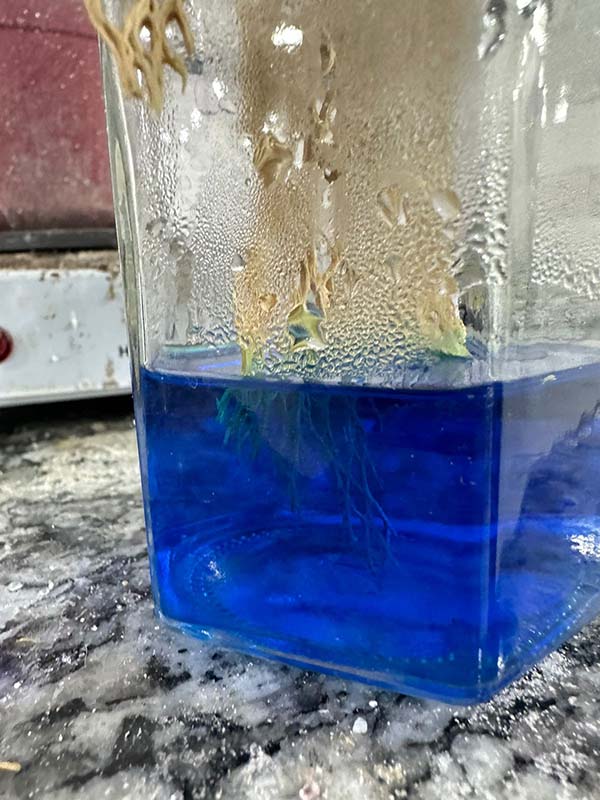
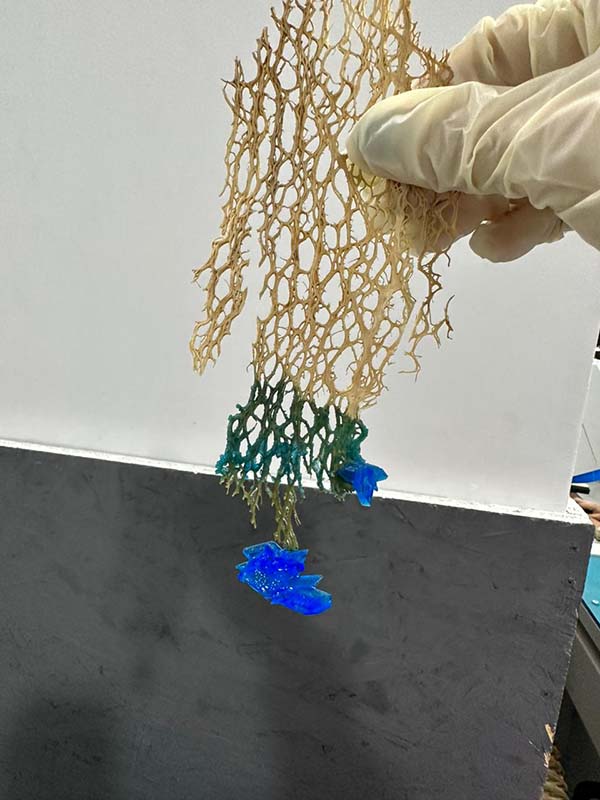
Since cyrstalization isn't completely new for me I decided to up the game a little bit this time and I crystalied Copper Sulfate (CuSO4) on a dried cactus plant. Here's how:
Ingredients & Recipes
There was a very little amount of CuSO4 left at the lab so I had to work with what I had:
Recipe:

    * 57 gr CuSO4
    * 90 ml Water
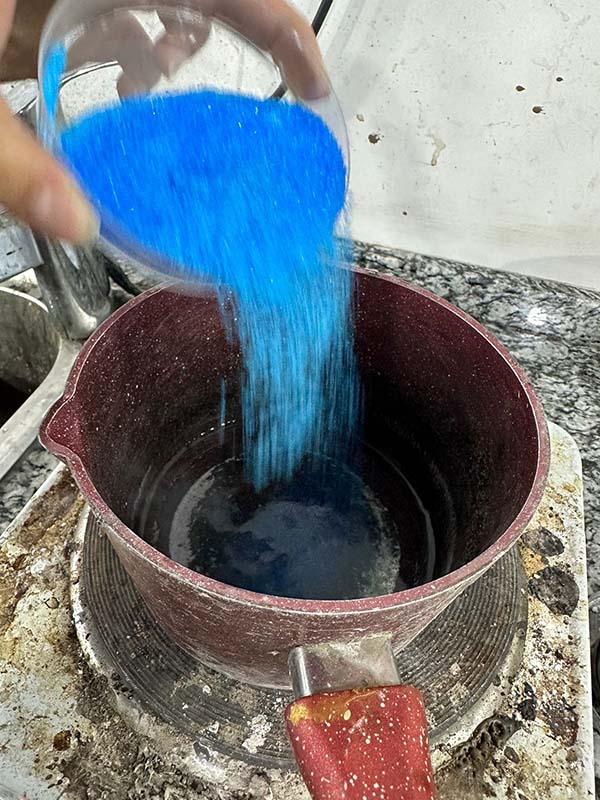
I boiled the water, then added the CuSO4, and stirred till dissolved. After the water became saturated, I filtered the solution using a coffee filter and poured the filtered solution in the a jar to crystallize my object.
Avoid Crystal Fails
-
Avoid your object touching the bottom or the sides of the jar or else the crystals will grow on the sides and your object will be stuck there forever and you'll also lose the jar.
-
Always make sure to sterilize the jar/s you're planning on using before you pour the solution in it.
-
You can re-heat the solution and pour again to grow more crystals.
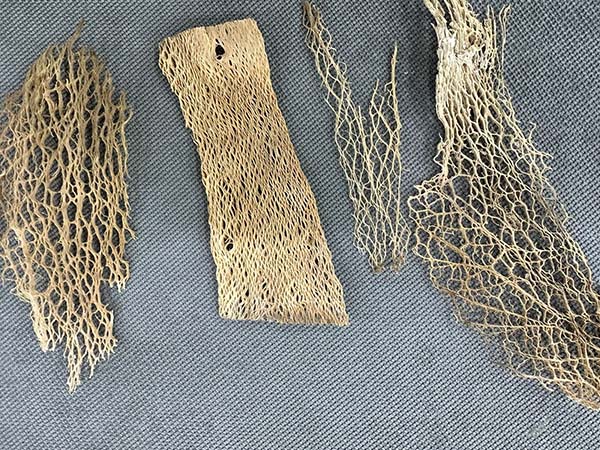
I saw very interesting patterns on the a dried cactus plant, and wanted to experiment the crystals growing on that pattern. Unfortunately, the solution's amount was little, the crystals didn't grow tall.
Paper Making
Can you create a blank page from a used one?
Yes! Here's how..
Setup
You need the following
Tools
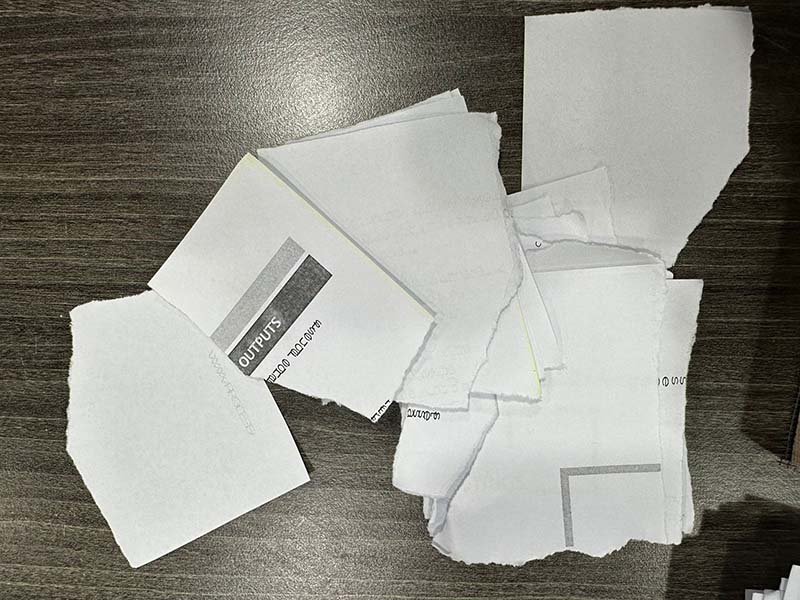
    * Papers to recycle.
    * Container.
    * A set of wooden frames that match the desired paper size
    * Cheese Cloth or similar
    * Blender
    * Fine mesh strainer
    * Sponge
    * Additives ( dyes, flowers, seeds, dried plants,.... )
Setting up the frames
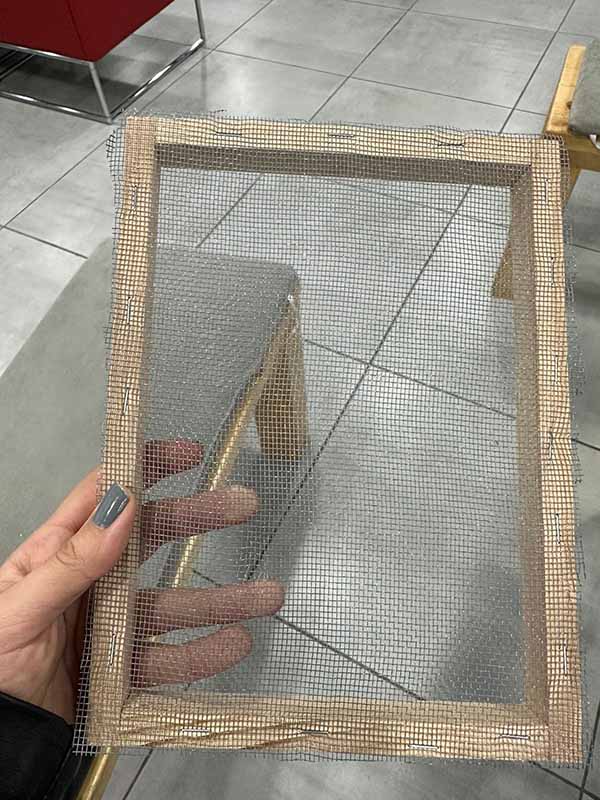
I had the wooden frames cut and glued to the desired paper dimensions, in my case I made A5 paper (148 * 210 mm). Then, I cut the fine mesh strainer to the same dimension and pinned it tightly to one of the frames with a stapler.
Setting up the container
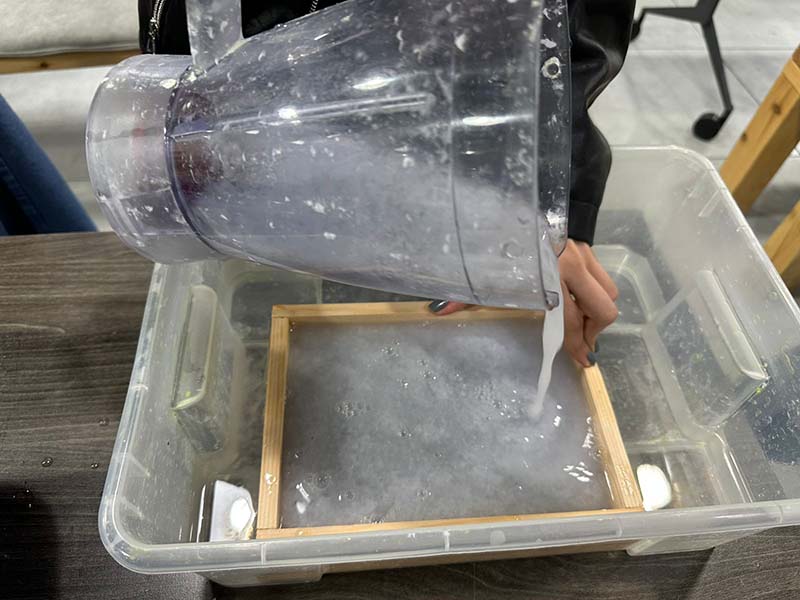
I used a big container filled with water. The water should reach two-thirds of the two frames on top of each other.
This container will be used to cast the mixture of used paper and water into the frames.
Paper Shredding
Pretty Straight Forward, shred the papers (I used my hand) into medium size pieces, I divided the A4 into approximately 6 pieces. Then, I added about a half liter of water to the shredded papers in the blender.
Casting
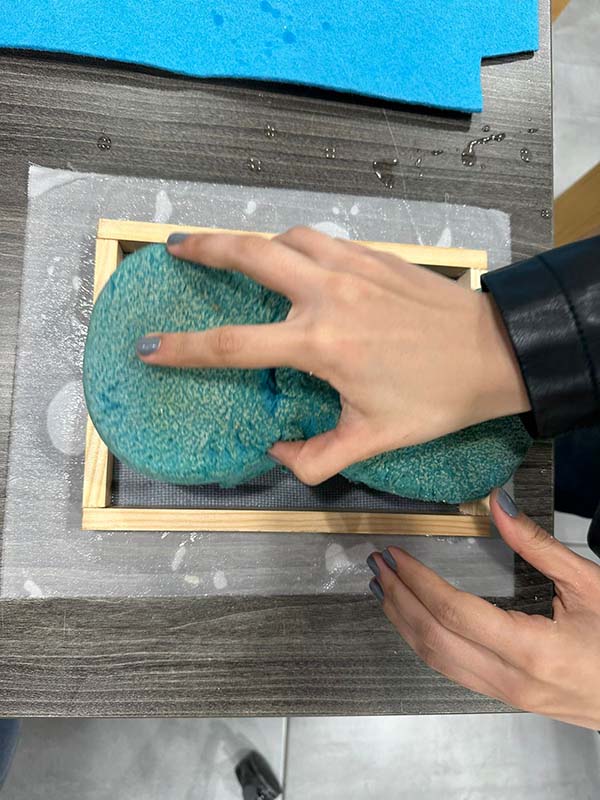
Cast the mixture of used paper and water in the frame set inside the container. Then take out the frames and dry the paper on a suitable surface (I used cotton cloth) from one side and a sponge from the other side.
Let it dry and you have yourself a brand new blank page

Decorate Your Papers
- You can use additives like coffee, safflower, coloring, dyes, or even seeds to be planted after you're done with the paper!