Digital Explorations
Learning by Doing
To better understand the readings, I took matter into my own hands and applied the logics and mathematics in grasshopper definitions. I will summarize my work here in this section.
2D Pattern Plan
I remapped two different logics to generate 2DPP. The first one was basic square unit that generated all 5 units mentioned in the research page. The second is the Ammann-Beeker Tessellation.
The Basic Square Unit.
I remapped the basic square presented in the paper. It starts with a square and then the logic builds relationships that manifests in 6 points connected together.
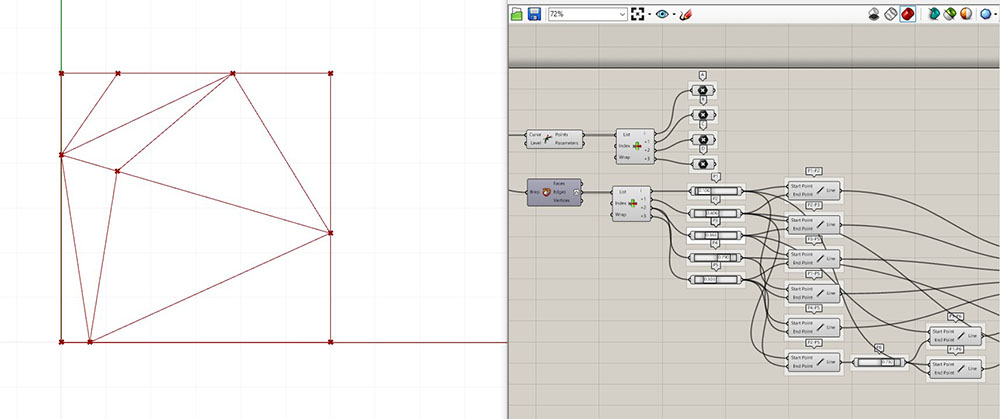
Since it's fully parametric, the points can be moved and it will reflect and update on the rest of the points.
Then I arrayed the square in two-directions.

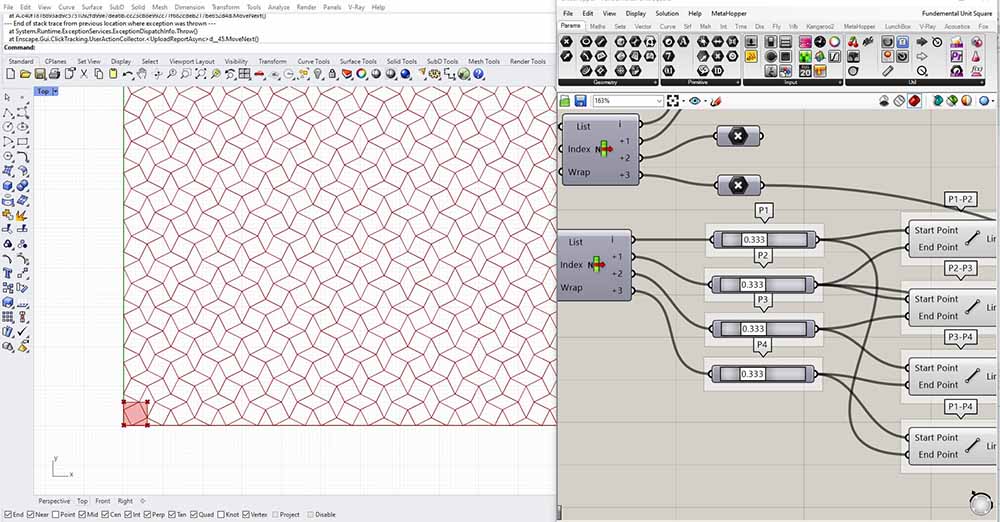
Ammann-Beeker Tessellation
The logic behind this lies in a square unit. I created a square, then divided it into 4 segments, then created a point on line slider for each segment and connected the points together.
The position of the point on each line can change and be manipulated.
For the purposes of this tessellation the points needed to be on the same distance.
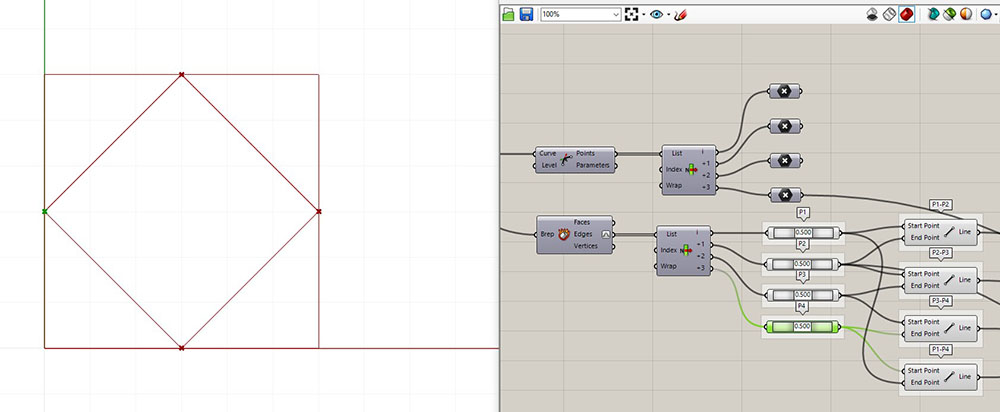
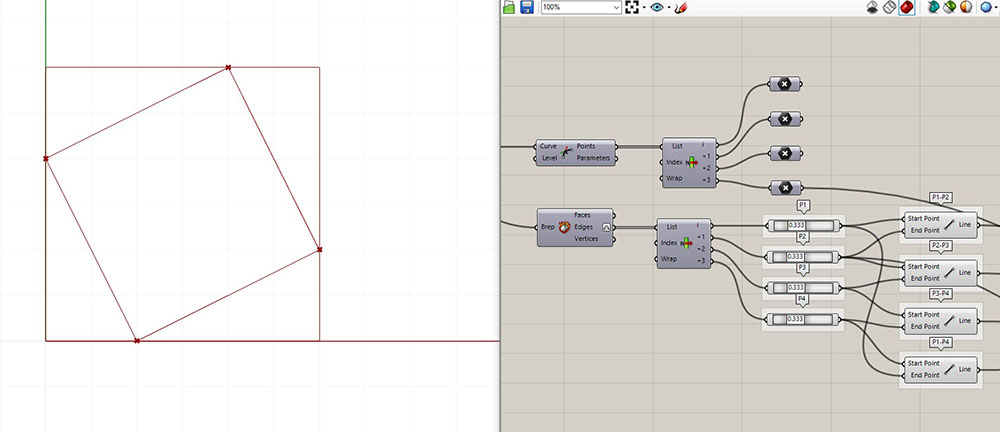
Then I arrayed the square and turned off the corners and kept the interior lines.
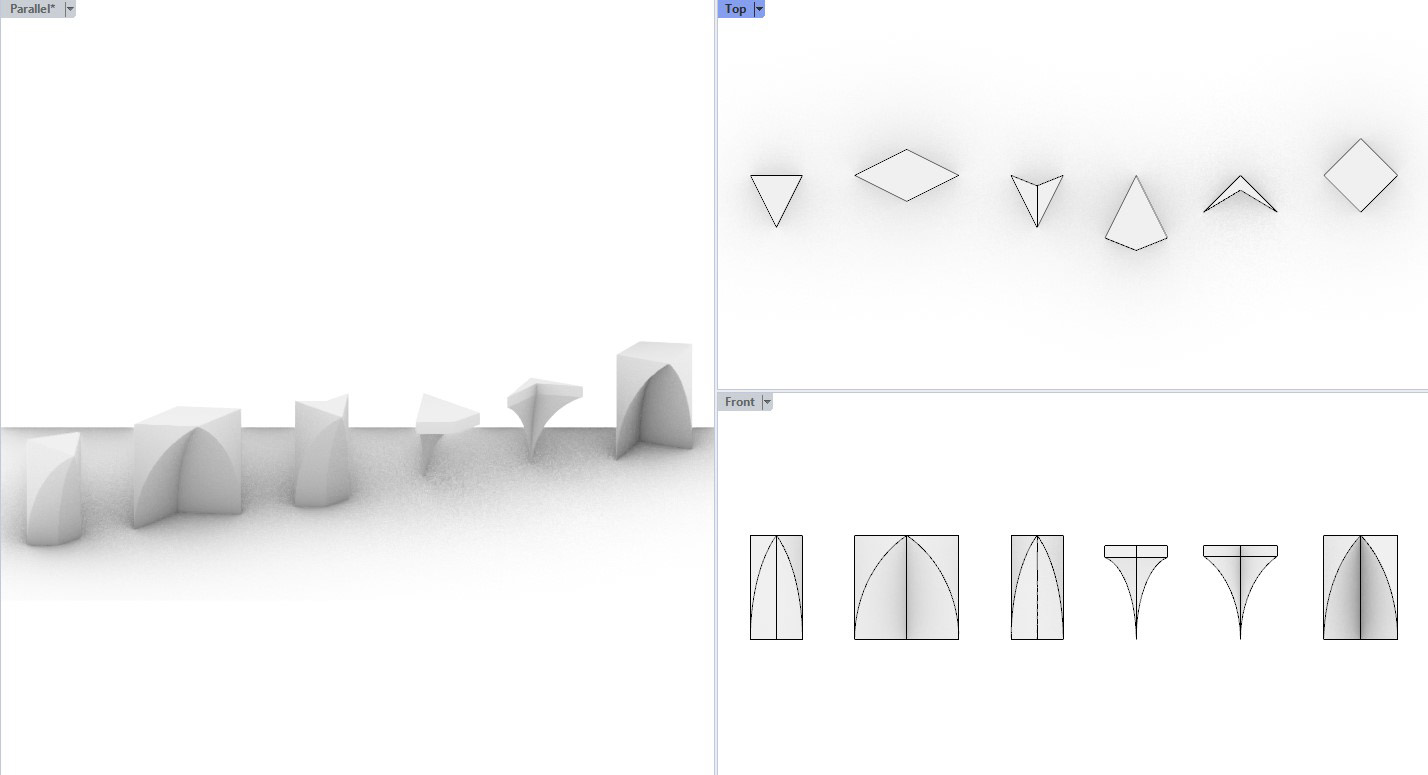
Units
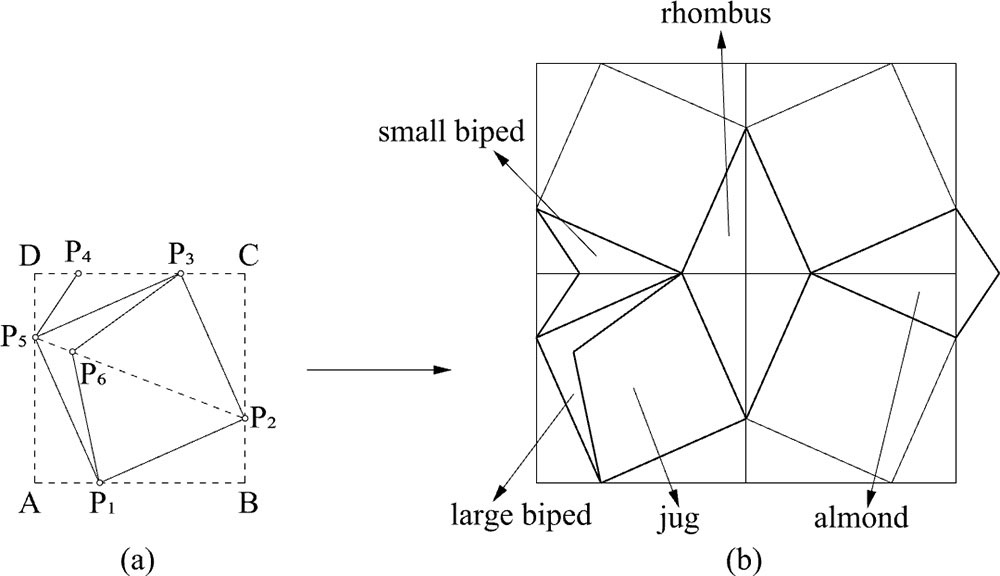
The traditional units presented in the paper A comparative analysis of the digital re-constructions of muqarnas systems: The case study of Sultanhanı muqarnas in central Anatolia can be categorized into two groups according to their base shape; rectangle, and a square.

So I translated the underlying principles and logic into a grasshopper definition while allowing my future self to have control of several parameters.

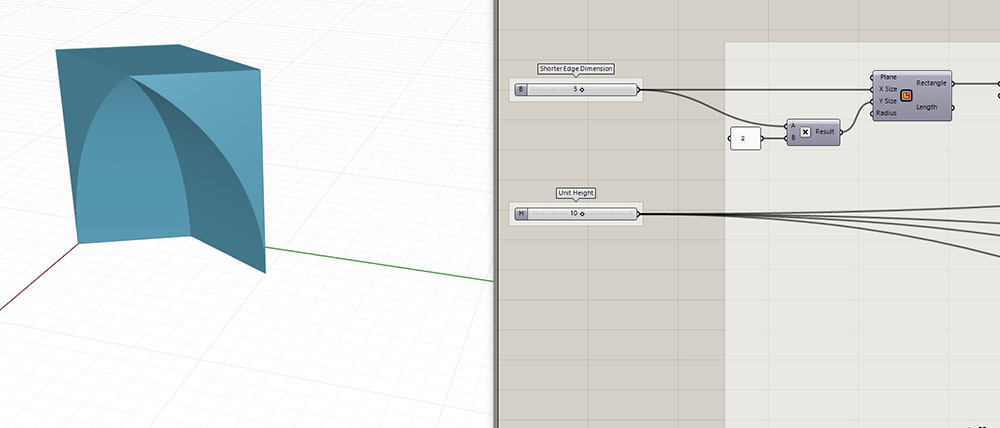
Rhombus
With reference to the research paper I translated the logic in grasshopper and added the width and height as parameters for this unit.
Small Biped
With reference to the research paper I translated the logic in grasshopper and added the width, height, and the peak point location as parameters for this unit.
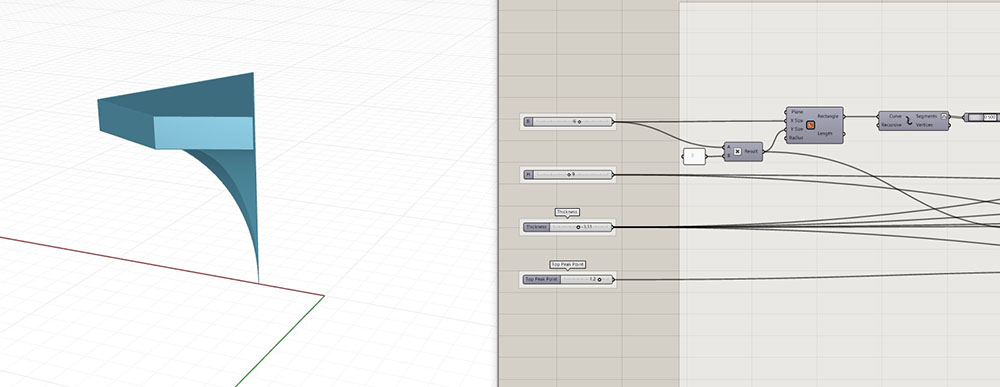
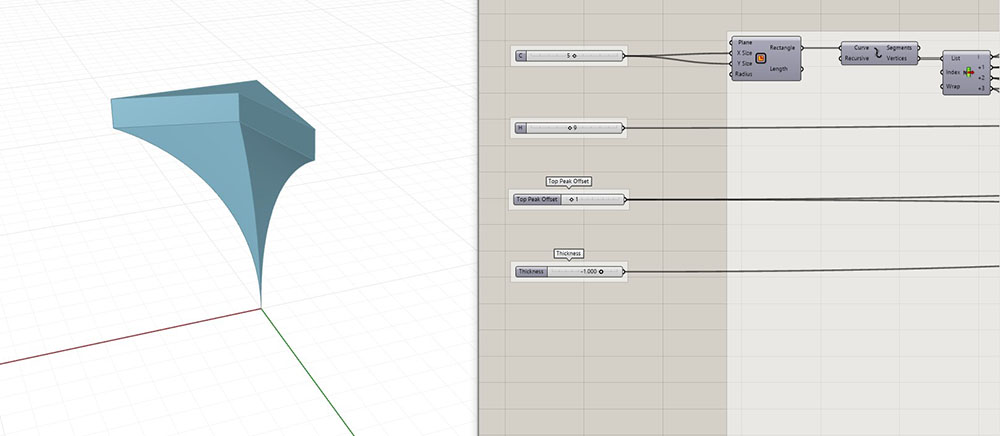
Almond
With reference to the research paper I translated the logic in grasshopper and added the width, height, the peak point location/ offset, and the thickness as parameters for this unit.
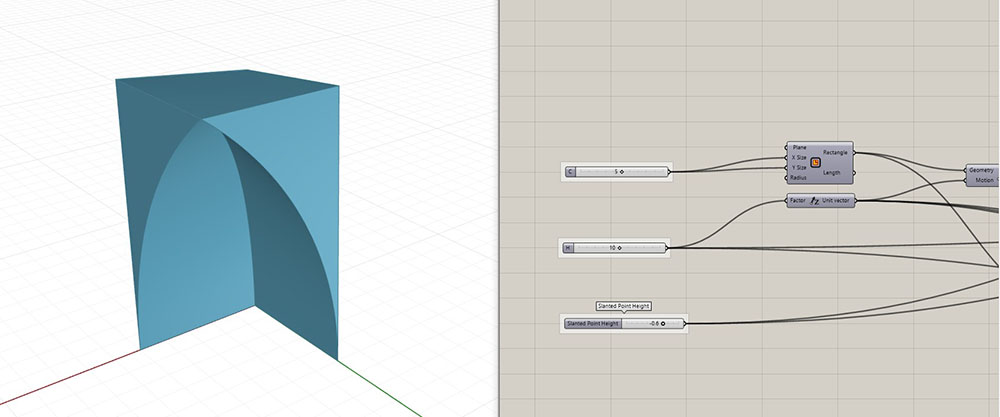
Jug
With reference to the research paper I translated the logic in grasshopper and added the width, height, and the inclination of the top surface as parameters for this unit.
Large Biped
With reference to the research paper I translated the logic in grasshopper and added the width, height, thickness, and top the peak point location as parameters for this unit.
Work In Progress
To move forward after loads of reading and applying the knowledge, I need to lock down a few things, just to reduce the amount of variables in this project, so I started with a decision on the units.
Units
While recreating the traditional units in grasshopper, I created a new one, I don't have a fancy name for it at the moment so I'm just calling it triangle and I will move forward with it. The second is the Rhombus from the traditional ones, with some modifications.
Modified Rhombus
At first, I decided to move forward with the Rhombus because it's somewhat wide and has a different base shape than the rest and is compatible with the triangle. Of course I needed to edit the traditional unit, the traditional unit was used for ornamental purposes, so it had very minimal thickness and was glued to the structure similar to plaster. I need these unit to support loads and to act as stand-alone so I thickened it in Rhino.
After going through the mold making process, which turned out to be very challenging and time-consuming, I decided to pick one unit and move forward with it and I chose the Jug for its circularity and modularity. The work done on the Rhombus and Triangle will remain for future use.
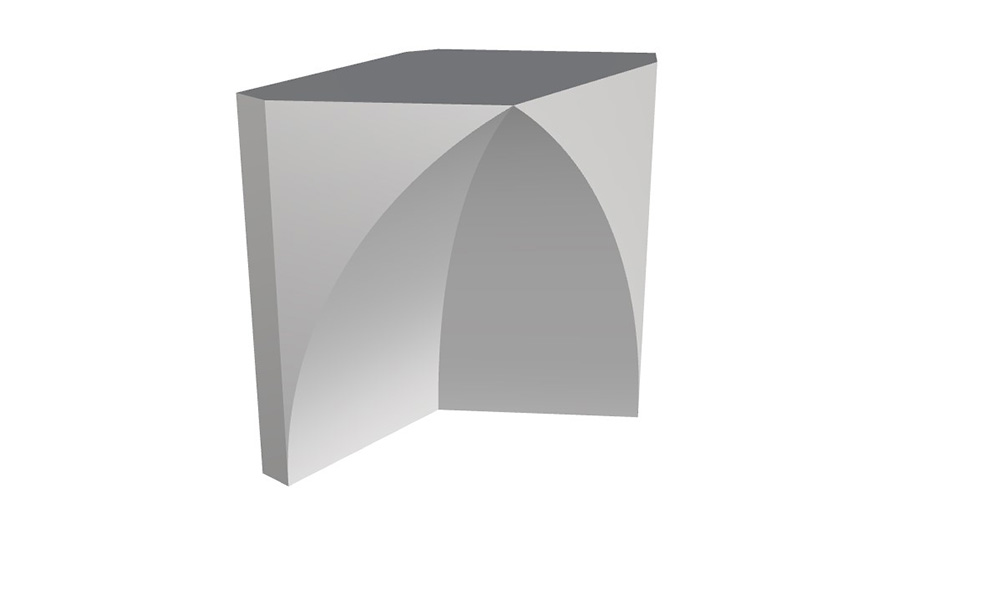
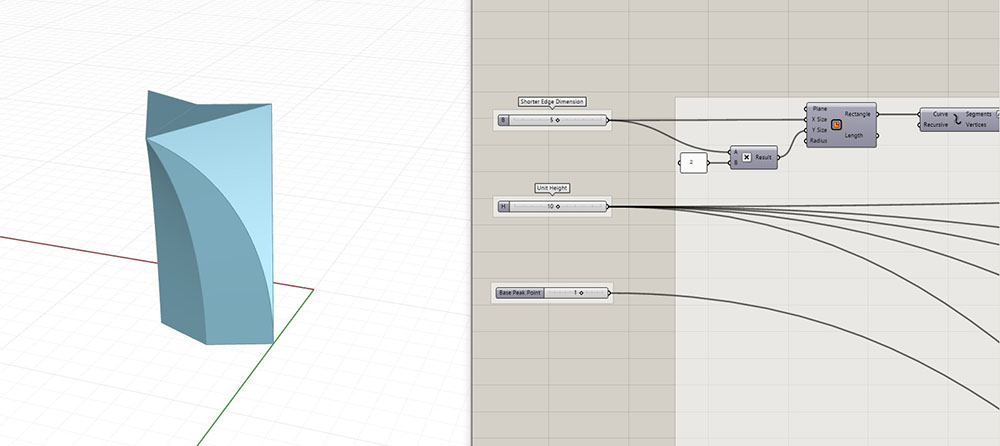
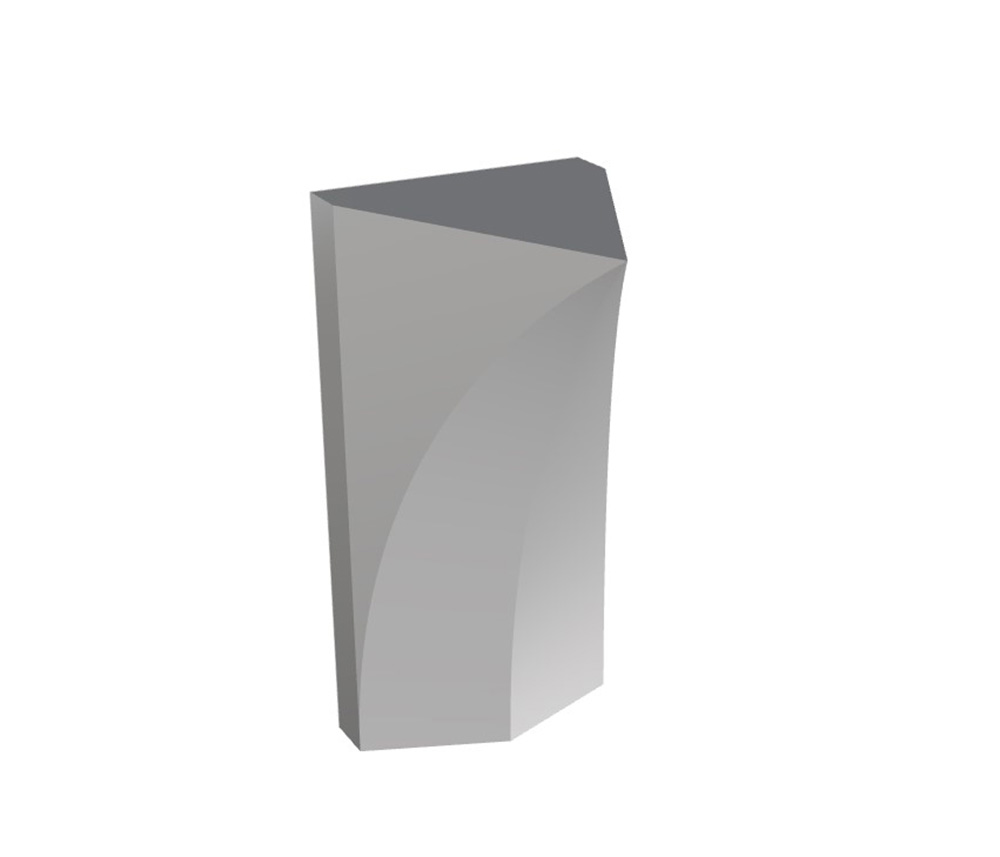
Triangle
This unit is derived from a triangle shape that morphs into another triangle.
In this grasshopper definition I can have the width, height, and the base peak point location as parameters for this unit.

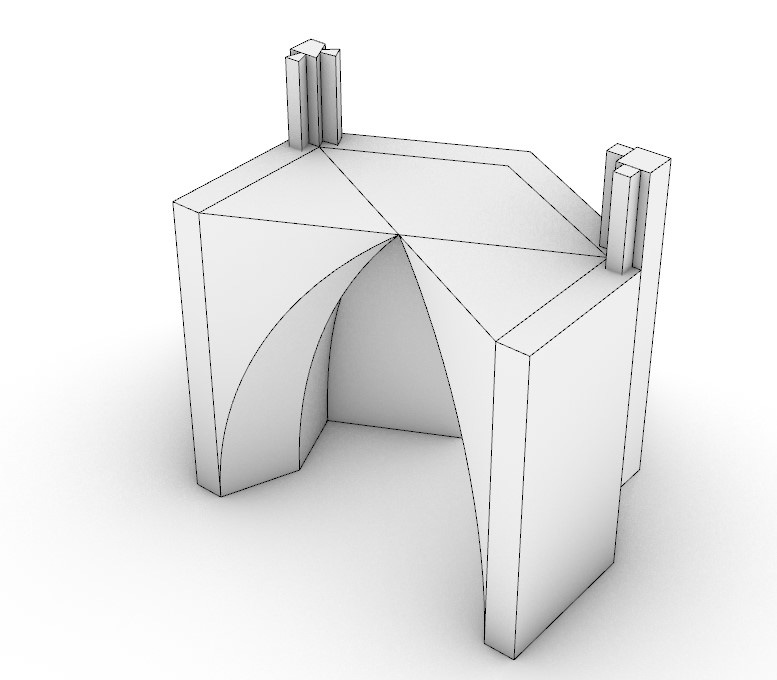
Modified Jug
After going through the mold making process, which turned out to be very challenging and time-consuming, I decided to pick one unit and move forward with it and I chose the Jug for its circularity and modularity, after all, its a square.
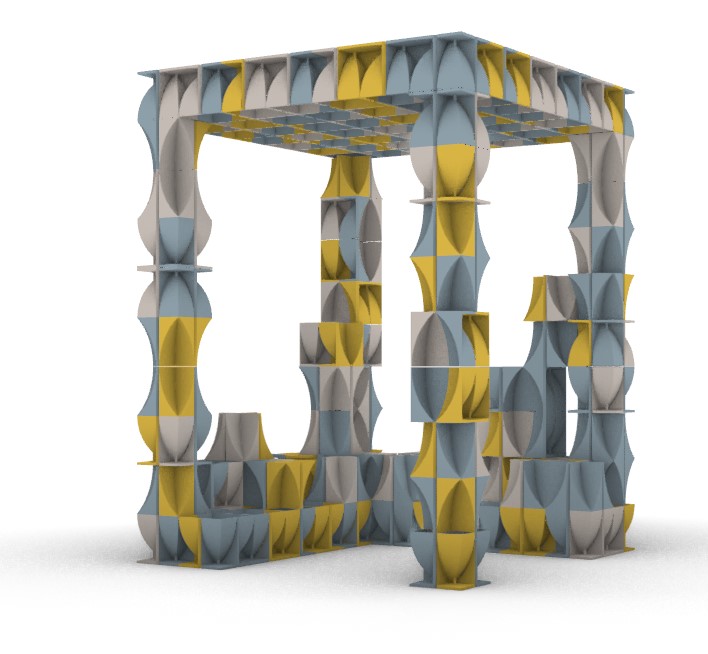
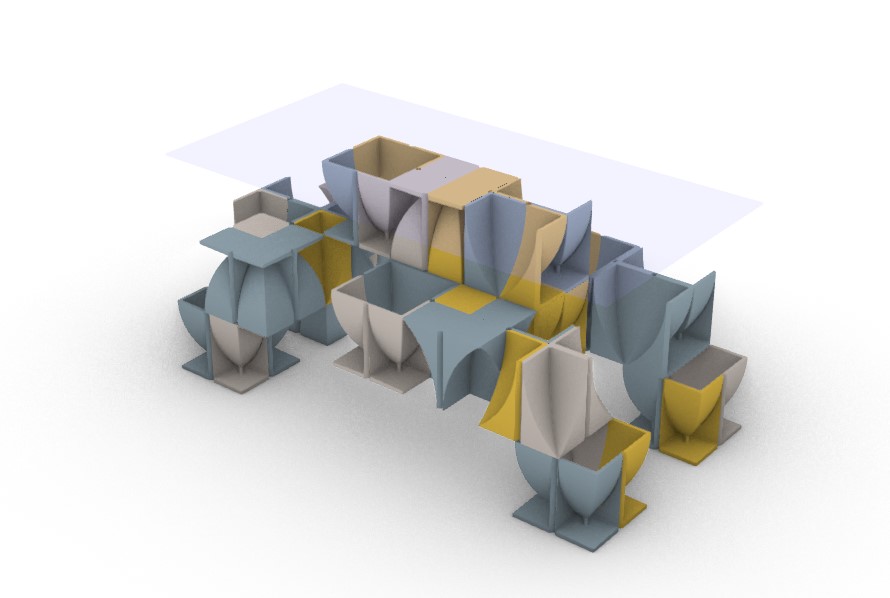
Configurations
Since one of the main reasons I chose the modified jug unit out of the rest it because of its square base and modularity. But before I reached this conclusion I explored possible configurations, here are pictures of the best two.
So I was aiming for different scales, one had to be big and the other smaller, so I tried to imagine a canopy-like structure and a coffee table with the same module.
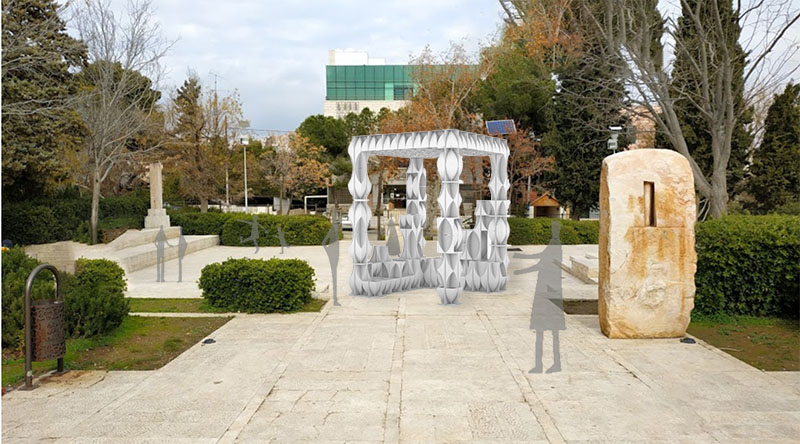
And I tried to visualize one of them in the proposed site.
Connections
One of the essential points for me is to leverage the modularity and encourage the users input. For that reason, I dedicated a good amount of time and resources to look into the different types of connections and joinery between the units.
Horizontal Connections
Now that I have the basic two units/modules (the modified rhombus and the triangle) and they align with each other, it's time to look into how to connect both of them and fill in the gaps in between.
I designed two different connections shown in the image below, the one on the right slides from the sides and the top while the one on the left slides only from top ensuring stability. So I'm moving forward with the one on the left only.
Vertical Connections
I was thinking that I'd have two different types of connections; horizontal and vertical. But to reduce the complexity of everything I was thinking that the horizontal connections would be taller than the piece itself and would also act as the vertical connections, they'd come in different lengths and would be cut according to preference and need.