8. Wearables
The term "wearables" encompasses any item that can be worn on the body, and while clothing and jewelry may be the first things that come to mind, they are not the only items that fall under this category. Furthermore, there are various ways to utilize wearables beyond their traditional uses. This week, we delved into the world of wearable technology, specifically exploring how electronics can be integrated into wearables to produce unique outputs using basic tools. Here's what we discovered...
References & Inspiration
Since I had no prior knowledge about this, I conducted extensive research and compiled a list of the leading individuals who have contributed to this emerging field.
- Ying Gao: This Canadian fashion designer and professor is known for her interactive clothing and installations, which incorporate smart fabrics and eye-tracking technology.
- Anouk Wipprecht: This Dutch designer is known for her futuristic and interactive fashion, which often incorporates wearable sensors and electronics. She has collaborated with brands like Audi and Swarovski.
- CuteCircuit: This fashion brand specializes in wearable technology, with designs that incorporate smart fabrics, LEDs, and other electronic components. Their work has been worn by celebrities like Katy Perry and Nicole Scherzinger.
- Behnaz Farahi: This Iranian-born designer and artist creates interactive installations and wearables that incorporate sensors, robotics, and smart fabrics. Her work explores themes of identity, perception, and embodiment.
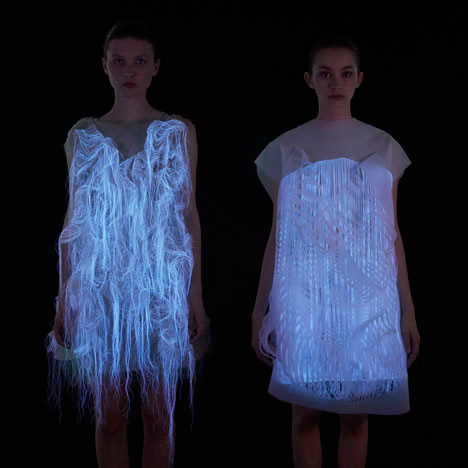
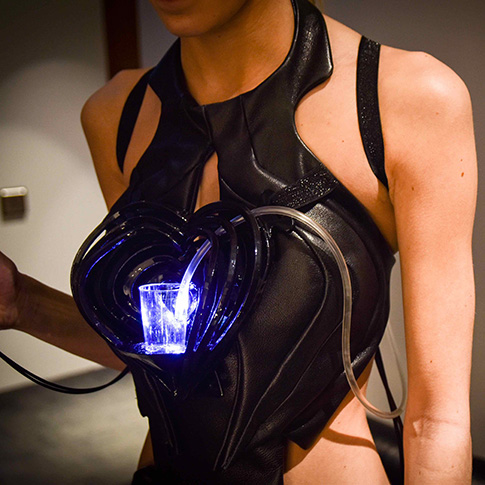
On the left, one example of the work of Ying Gao. On the right the work of Anouk Wipprecht
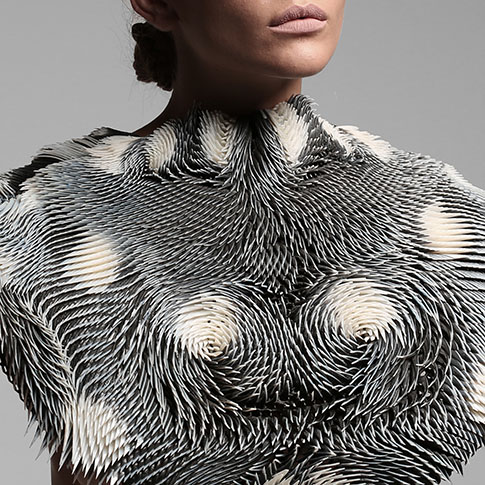
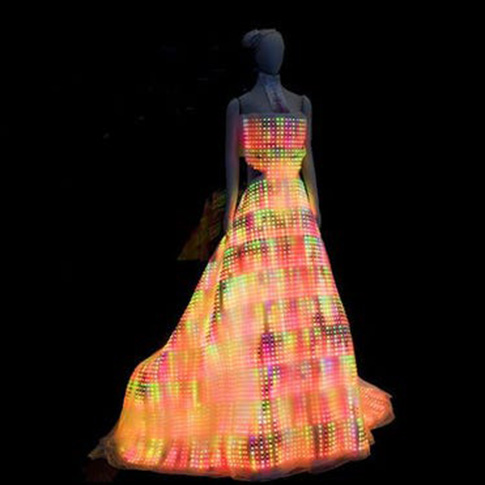
On the left, one example of the work of Behnaz Farahi. On the right the work of CuteCircuit.
Flipping Dot
This was a fun exercise to get us started up.
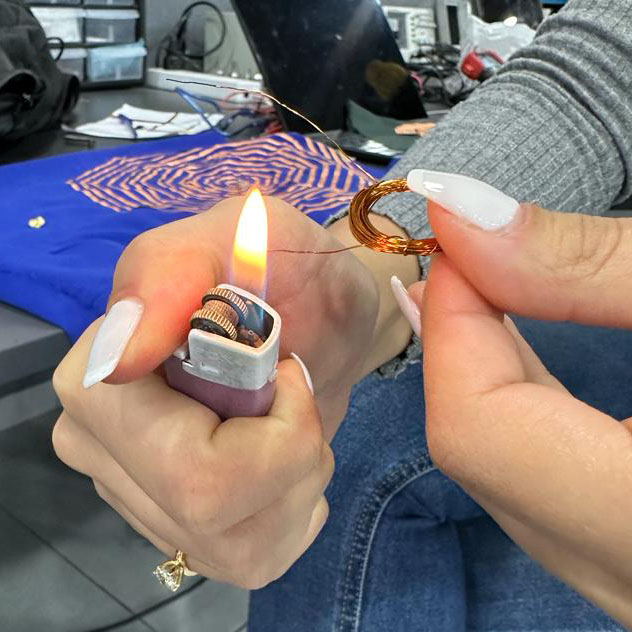
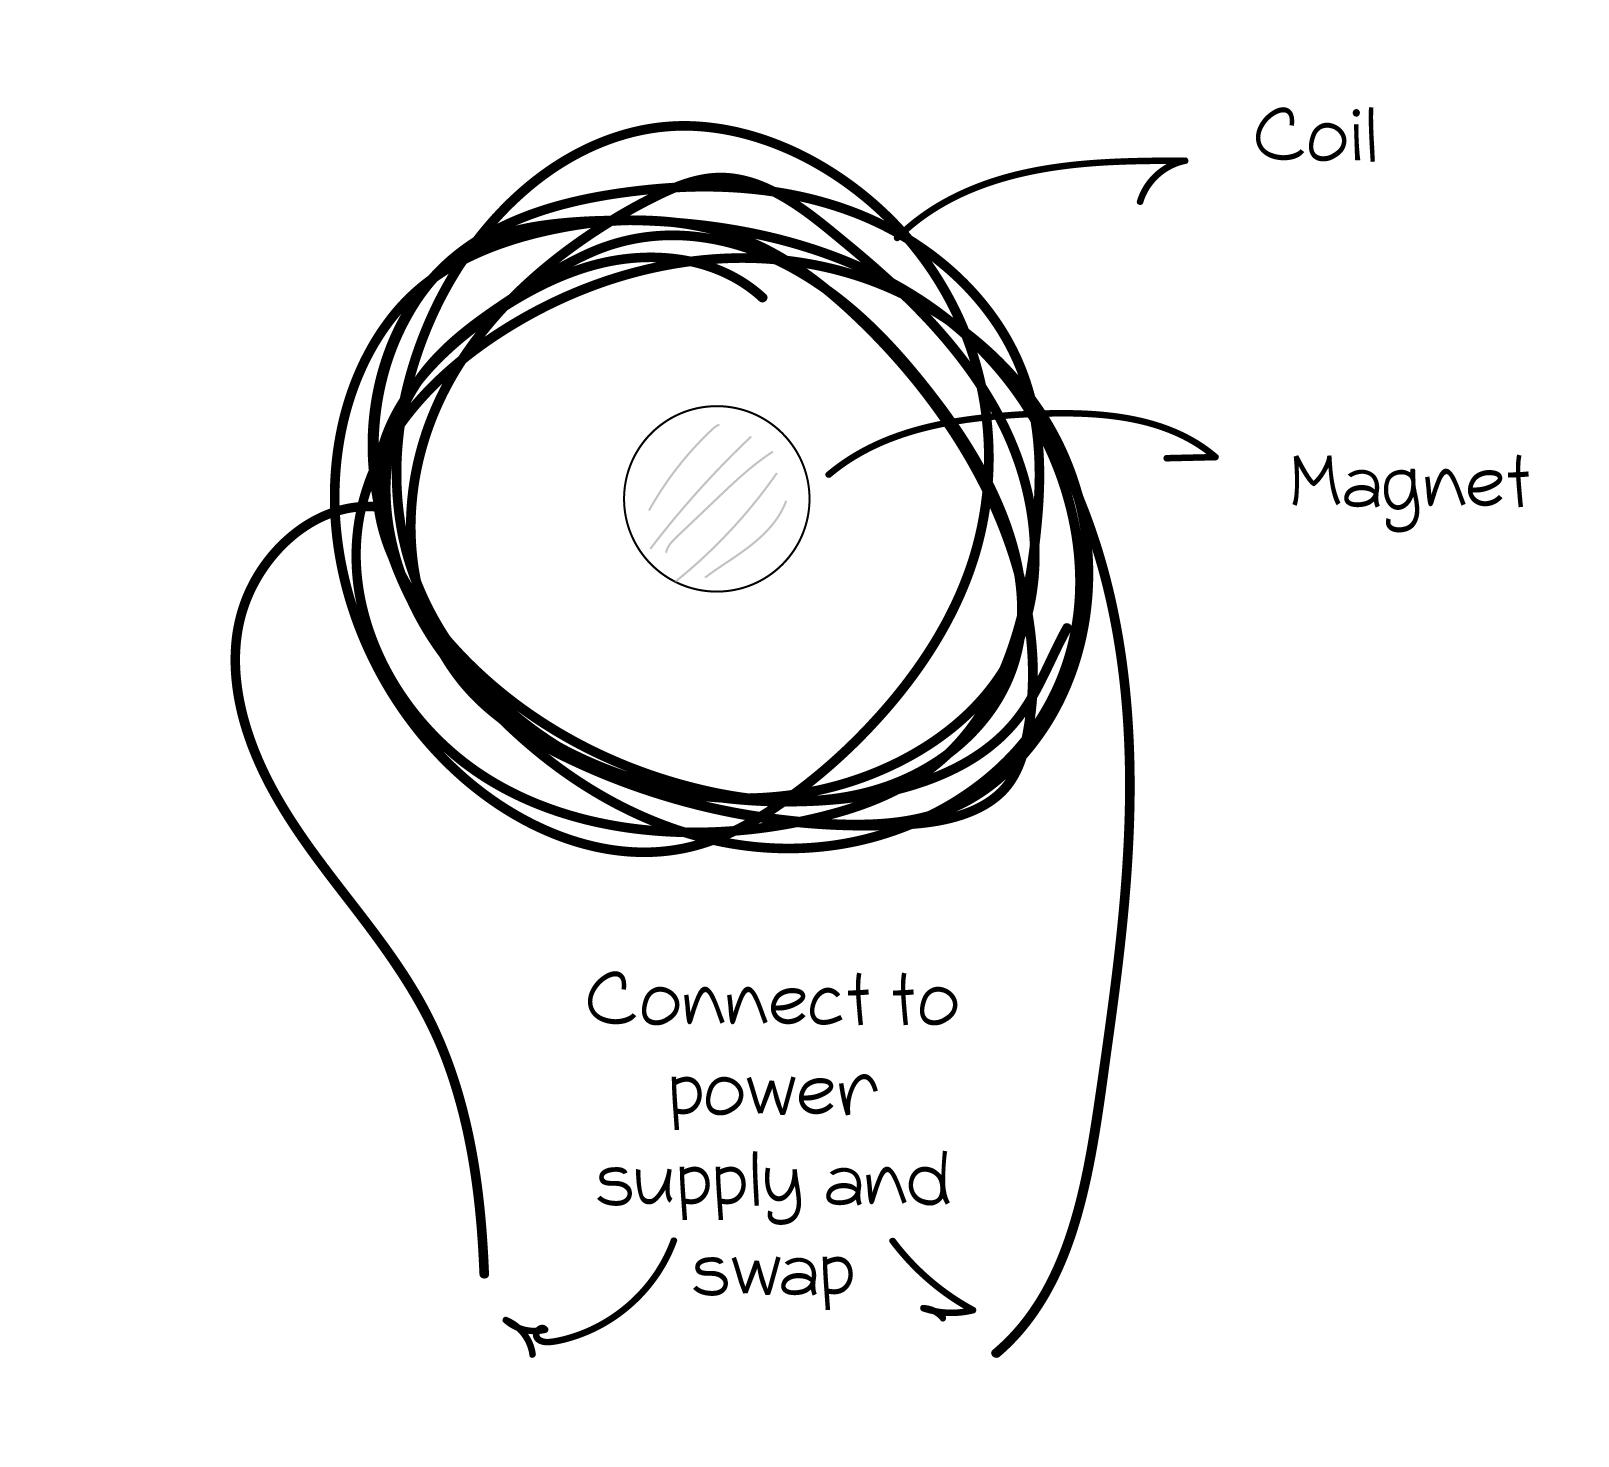
I took a copper coil and wrapped it around Sirar's mascara. The more rings the better, I did around 100 (But no one is really counting), leaving the two ends exposed.
I also wrapped a small magnet with tape and marked one side so we can tell if it actually flipped.

I burned the ends of the coil, then, with the magnet in the middle of the coil, I connected the ends of the coil to a power supply (you can also supply power through an Arduino board, or a battery), by doing so, we create a magnetic field with the current flowing from one side to the other. Then when we flip the direction of the power (by basically swapping the alligator wires) we change the direction of flow of the currents resulting in the magnet flipping!
Tools
Stepping Up the Game
To make this even more interesting. You can program the flipping movement here's how; First, you'll need to create the circuit below.
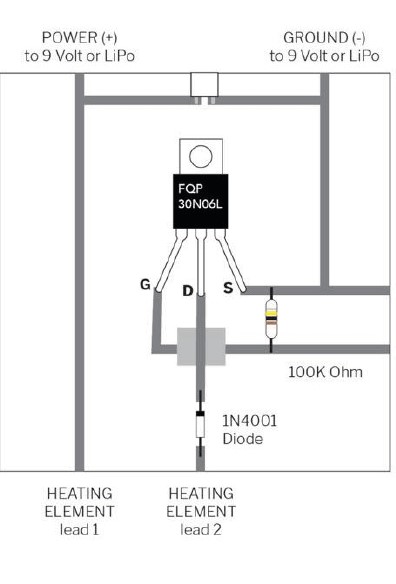
Following the instructions indicated in the picture above, connecting everything where it belongs. Then, open Arduino IDE and from file,examples, under basics open blink and upload it to the arduino uno board.
...
// the setup function runs once when you press reset or power the board
void setup() {
// initialize digital pin LED_BUILTIN as an output.
pinMode(LED_BUILTIN, OUTPUT);
}

// the loop function runs over and over again forever
void loop() {
 digitalWrite(LED_BUILTIN, HIGH);  // turn the LED on (HIGH is the voltage level)
 delay(1000);                      // wait for a second
 digitalWrite(LED_BUILTIN, LOW);   // turn the LED off by making the voltage LOW
  delay(1000);                      // wait for a second
}
...
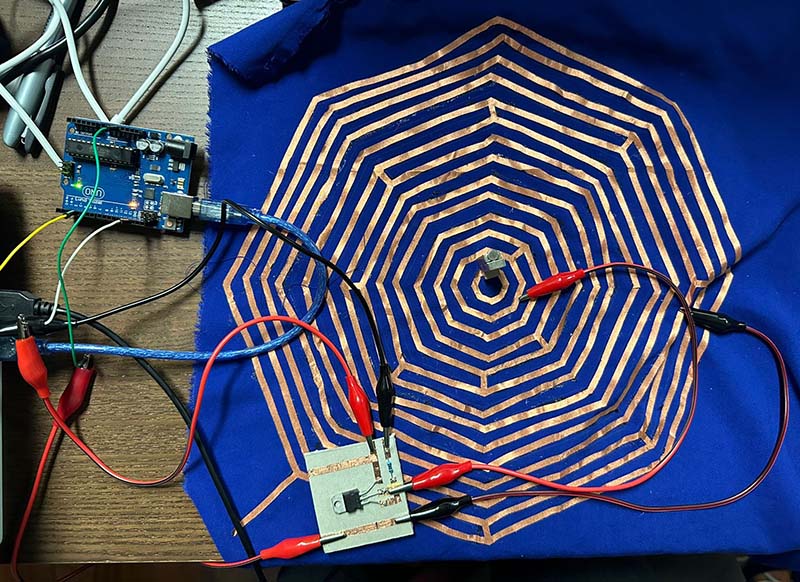
Textile Speaker
It is as cool as it sounds, we can play music/sound from a piece of textile, here's how...
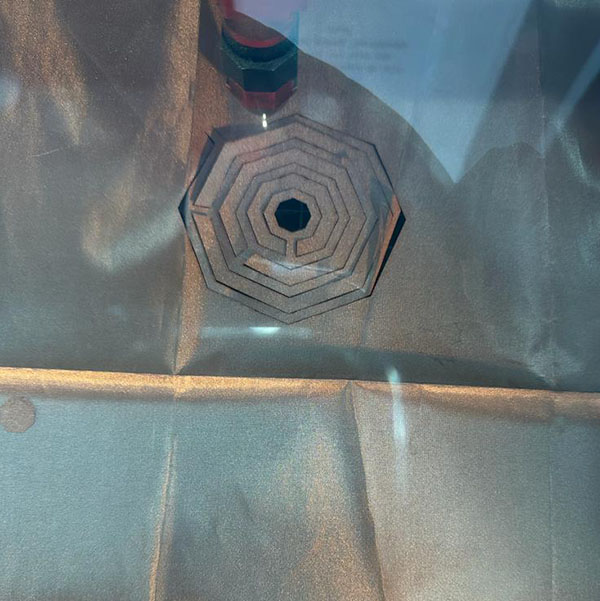
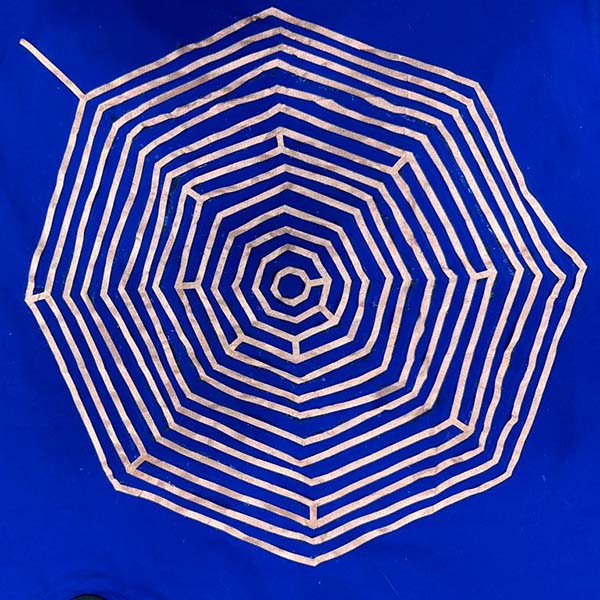
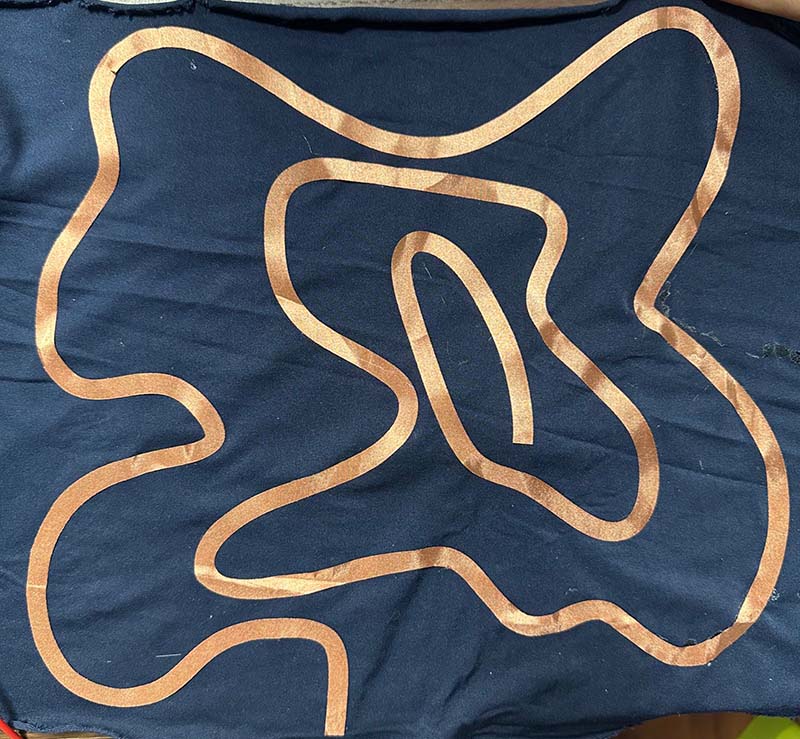
First things first, we need conductive fabric. I used copper fabric sheets and laser cut a loop of Octagons that get smaller as it progresses towards the center. It's essential that the fabric is connected to each other and in the form of a loop or a spiral.
Design
Using the polygon and offset commands in rhino, I designed this centric Octagon that scales down as we move towards the center. The Octagons are connected with each other.
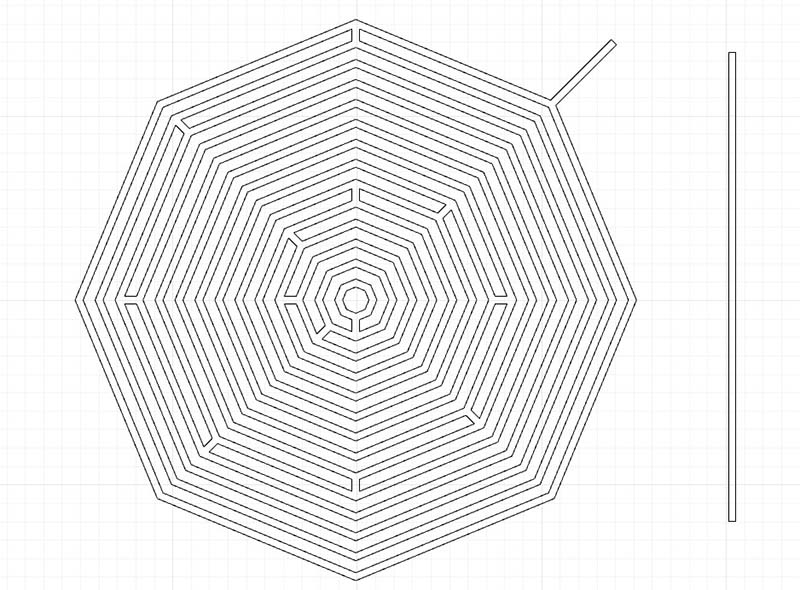
Laser Cutting
We have a Trotec Speedy 400 in the lab and that's the one I used for this assignment with the following settings:
| Color | Process | Power | Speed | PPI/Hz | Passes |
|---|---|---|---|---|---|
| Red | Cut | 15 | 2000 | 500 | 1 |
Untangling and Gluing
As excited as I was when the could see the shape after it was cut. Soon after I realized the trouble I was in, after removing the fabric from the laser cutter it tangled and it was really hard to sort out. Luckily, after about an hour and with the help of friends, we managed to untangle it using tape on a piece of paper.
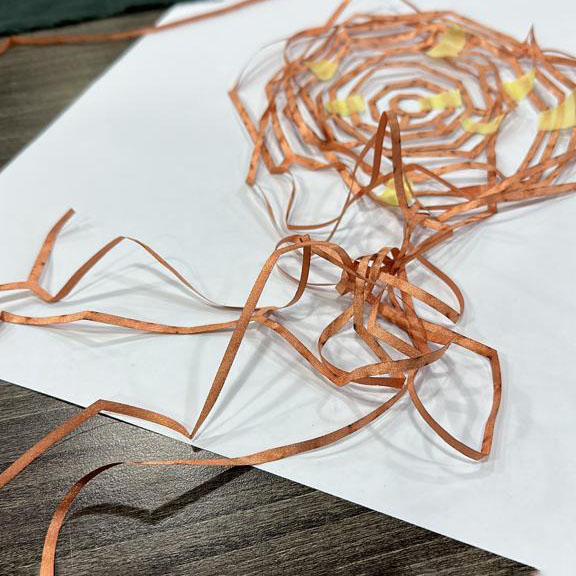
On handling Copper Fabric
It's a delicate material that easily wraps around itself and tangles. It's easier to handle if the design is somewhat smaller and wider, keep this in mind.
After experimenting with several options and asking around, I learned that the best way to glue the copper fabric to the -normal- fabric was through gluing it rather than ironing it, and for that I used B6000 Jewelry Glue Clear Rhinestone.
The Star of the week
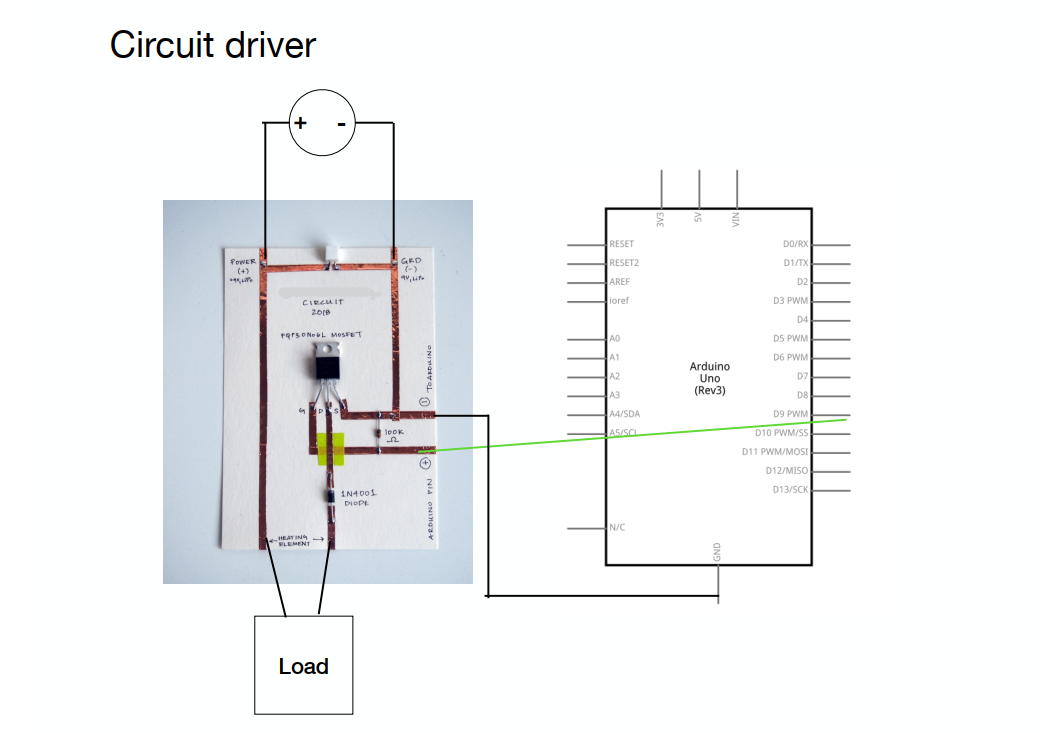
This week's queen was the driver circuit, which is a circuit that allows us to control other components/circuits. It uses transistors.
A transistor is an active component. Its behavior changes based on the voltage applied to one pin (Gate). By applying a small amount of voltage to the gate using the lilypad, current can flow between the drain and the source.
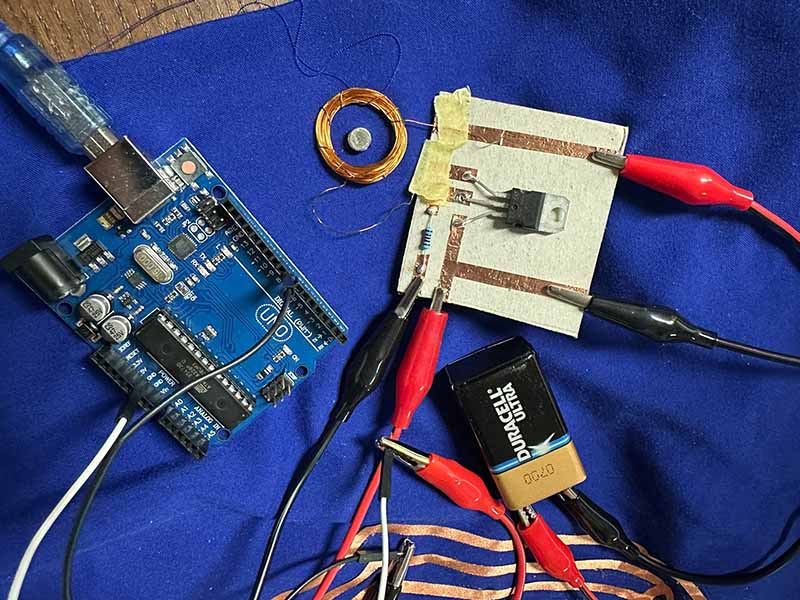
This is the driver circuit we used for this week.
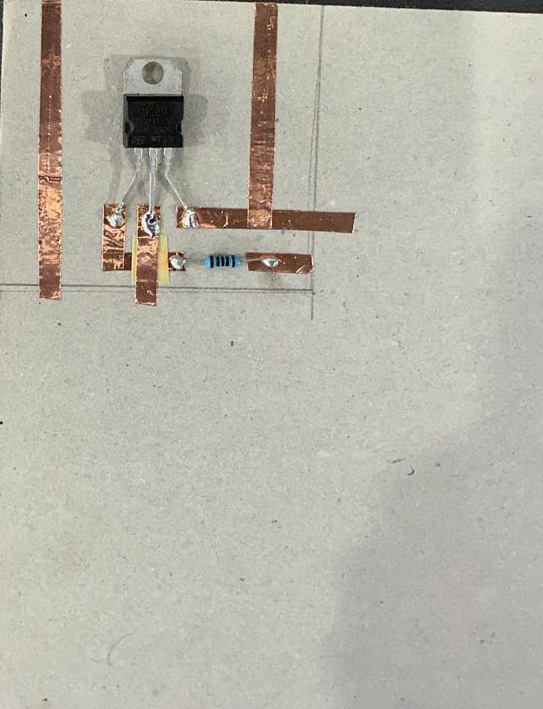
I figured since we might be integrating the circuit in wearables, I might need to have it small and doesn't take up much space so I created it on a hard board and tried my best to minimize its dimension.
Making A Sound
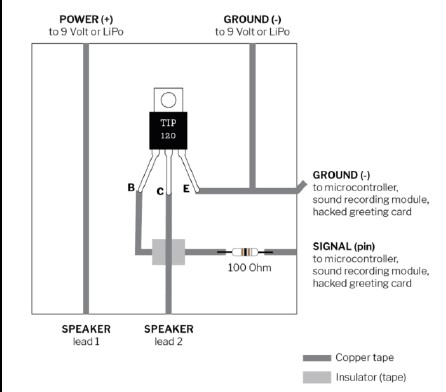
I followed Emma Pareschi's tutorial on how to connect the circuit with the speaker and Arduino Uno.
// the setup function runs once when you press reset or power the board
void setup() {
  // initialize digital pin LED_BUILTIN as an output.
  pinMode(LED_BUILTIN, OUTPUT);
}

// the loop function runs over and over again forever
void loop() {
  digitalWrite(LED_BUILTIN, HIGH);   // turn the LED on (HIGH is the voltage level)
  delay(1000);                       // wait for a second
  digitalWrite(LED_BUILTIN, LOW);    // turn the LED off by making the voltage LOW
  delay(1000);                       // wait for a second
}
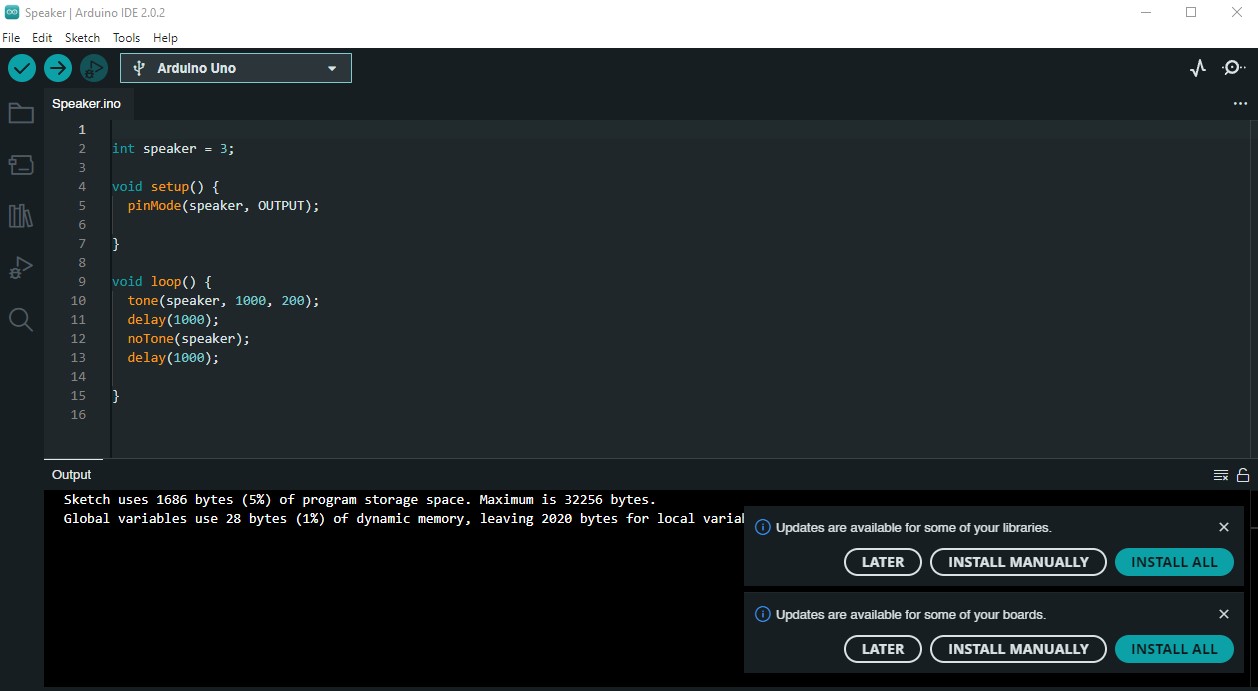
Unfortunately, no sound came out, I've tried to connect different power sources (batteries, power supply,...) and maximizing the number of magnets with no success.
I tried again, this time I took my own advice and made the copper fabric a bit wider to make it easier to glue it. I also tried to change the location of the magnets and have them under the fabric rather than on top. Unfortunately, it didn't work either.
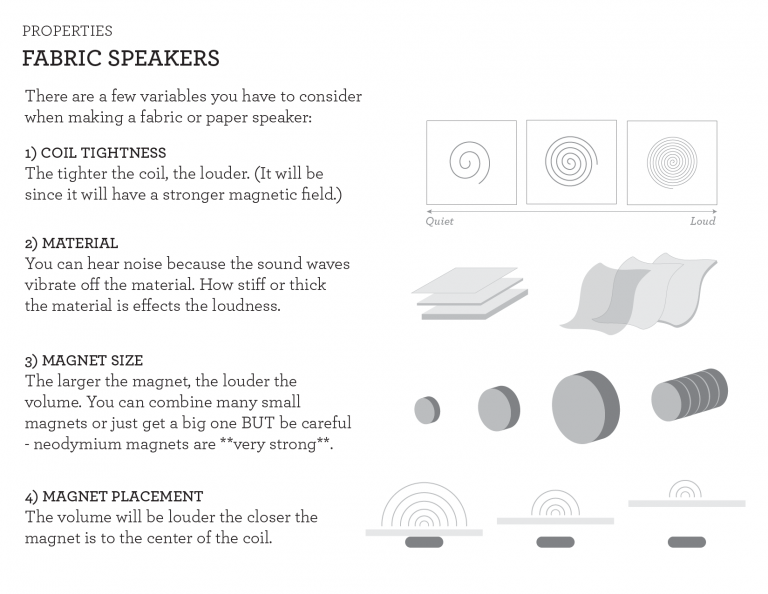
Anyway here are the factors that increase or decrease the success of the speaker according to Liza Stark.
BOM
Here's a list of the things I used for this week's assignment:
- Copper Fabric
- Fabric to glue the copper fabric on (I used textile waste)
- Transistor TIP 120
- 100 Ohm Resistor
- Soldering Kit
- Alligator Wires
- Copper Coil
- Magnet
- B6000 Jewelry Glue Clear Rhinestone