2. Digital bodies
Next step, becoming digital sculptures
Second week. After the lecture on Digital Bodies i was a bit overwhelmed at the volume of the information but also very exited to learn something new. While watching the lecture i thought to myself that this week we are going to become digital sculptures.
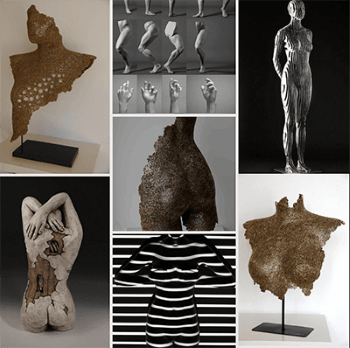
References & Inspiration
As always i star by browsing the Fabricademy page with the results of the students from previous years. After that i went to Pinterest search for my inspiration and my way. From searching references and ideas i put together the mood board that sets my mood for the next steps in this amazing assignments.
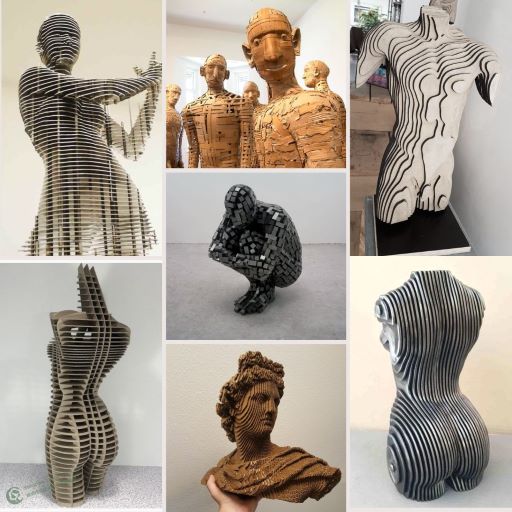
Following the inspirational air of the moodboard i continued with the process and research on the following theme.
Process and workflow
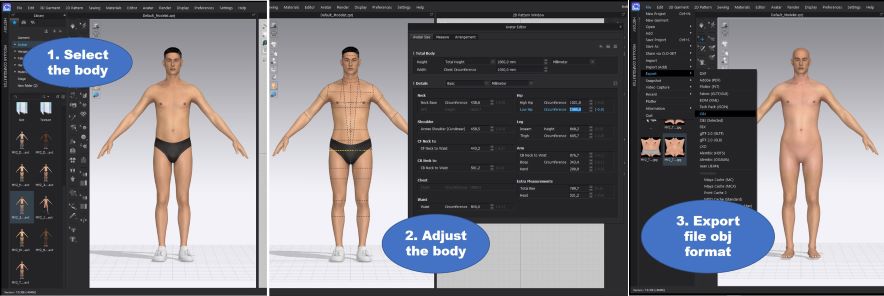
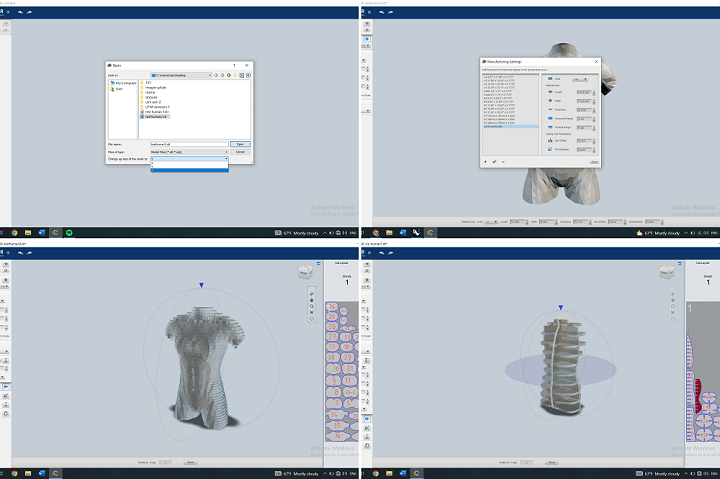
Following the Fabricademy 2022-23 TUTORIALS Make Human - Diane Wakim i started to play with the MakeHuman App and i began to design the body that i need for the next step

I also played around a little bit with CLO3D to try to adapt my avatar in size and appearance. Although in CLO3D we can't do many changes as in Make Human, the results obtained are good for the next part.
Following the tutorial Fabricademy 2022-23 TUTORIALS Slicer for Fusion 360 - Diane Wakim i continued to work with the avatar obtained previously. Firstly i used the Rhinoceros to edit the avatar and to get the needed body part with the command Meshslit and Cap. After that i exported the file in an [.stl] format for further use.
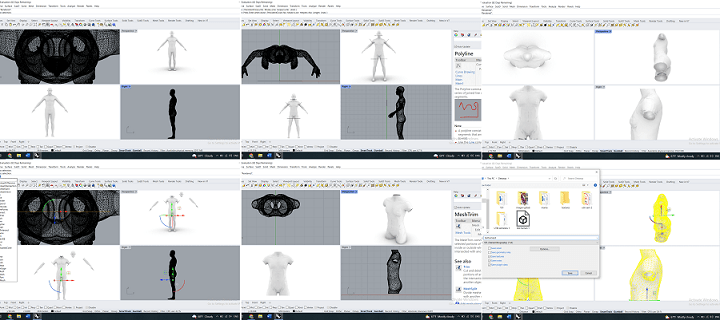
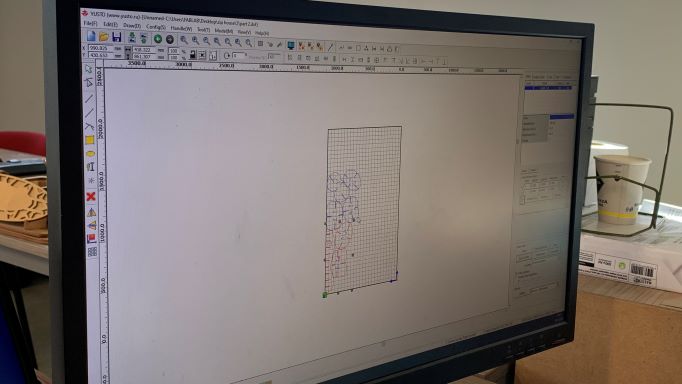
The next step is to use the exported file in Slicer for Fusion 360 to obtain the needed pieces for cutting. But, first, we set the needed size of the board, 740mm x 1520 mm and height =6mm. After that i started to choose the type of cut i want, the direction, etc. Then the final file is saved as a [.dxf] file ready to be cut.
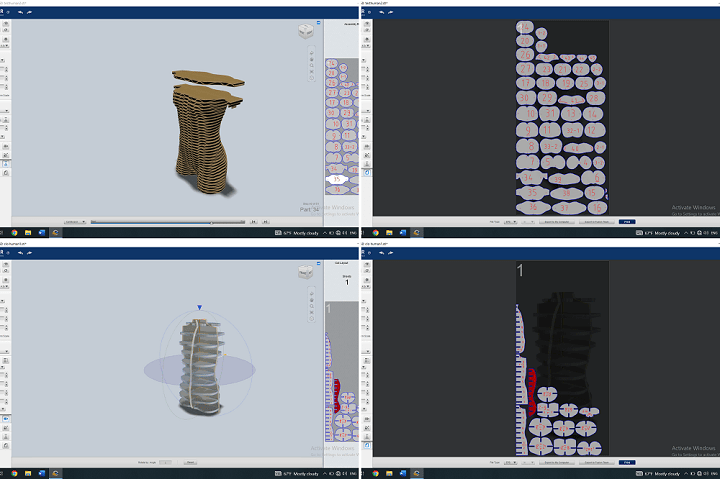
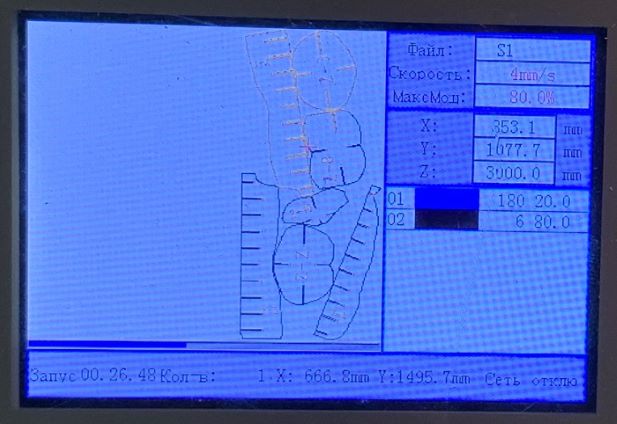
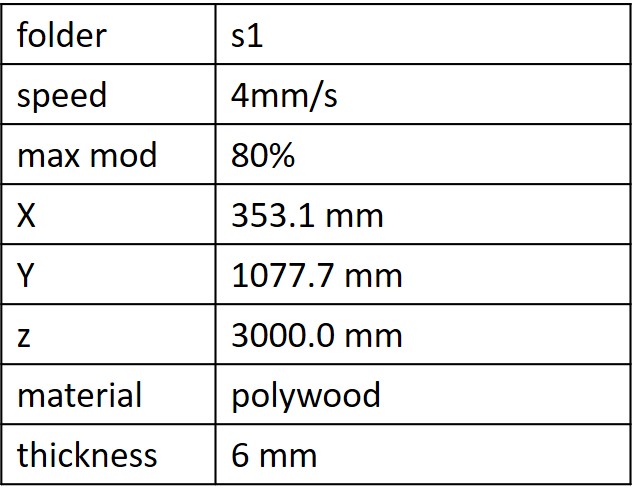
Slicer parameters

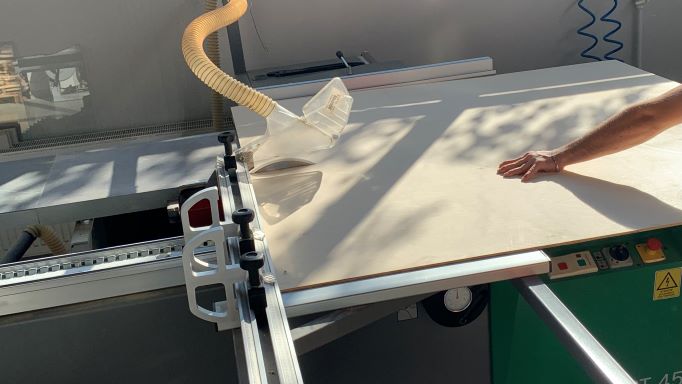
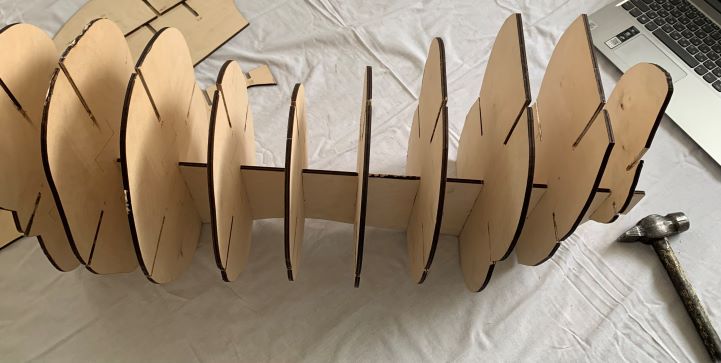
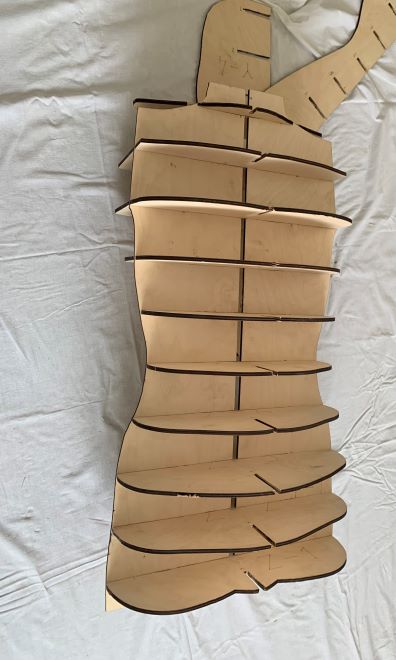
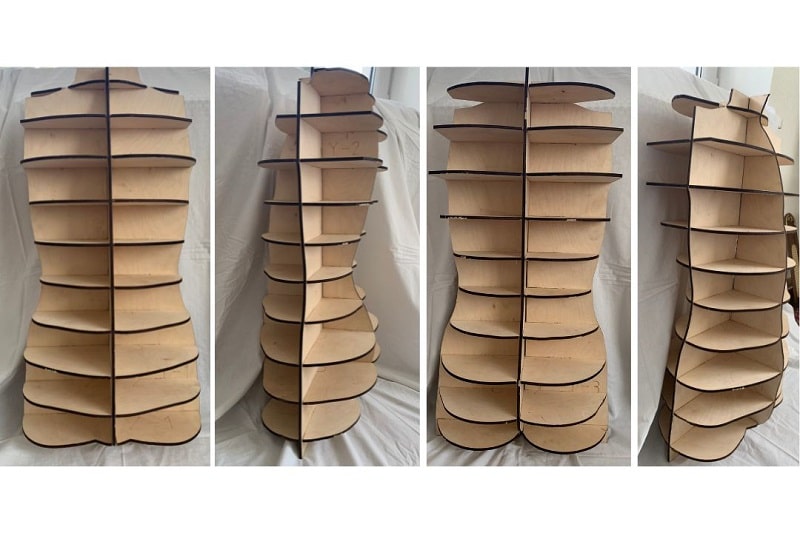
After i did the necessary parts to prepare everything, I went to our FabLab to use the laser cutter. There i got the help of the local instructor and together with him we prepared the needed surfaces for cutting, set the parameters, prepared the files and started to cut. First, we experimented with the speed and saw that if we use a high speed about 6 mm/s the polywood would not be cut through, so the needed speed for cutting was set at 4 mm/s. Second observations was that because the polywood has a height of 6 mm, the gasps where the parts have to connect was to small, so we have to enlarge the gasp in Rhinoceros, by about 2 mm so the parts can interlock with easy and stay connected. I used more than half of a sheet of polywood. I had 4 vertical pieces and 10 horizontal pieses. The laser cut the pieces for about 40 minutes because the speed used was 4 mm/s and the thickness of the polywood was 6 mm.
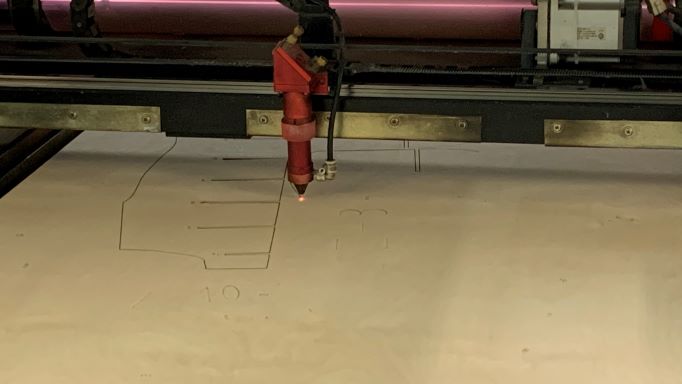
Laser parameters for cutting
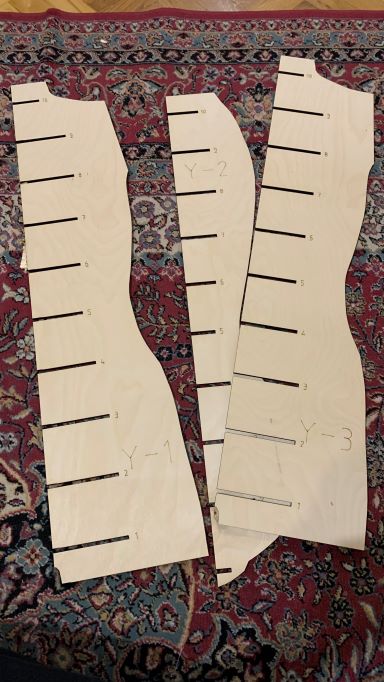
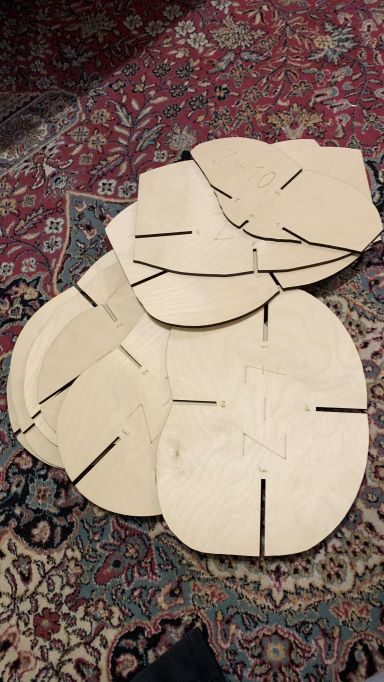
Results
And here are the results of this week.
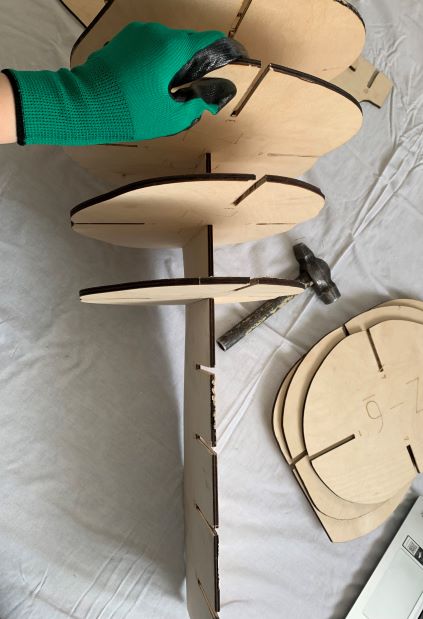
The assembly process as a simulation from the slicer
Conclusion
This week was a bit hard, much information, going back and forth with testing until i got the necessary results. But if we speak about it generally, it was ok.