6. BioFabricating Materials
This week was very interesting because we explored the magical world of biomaterials. we started with understanding their different characteristics and biofabrication techniques of crafted and grown materials. Also the needed ingredients that make them up.
Research
As always i start by browsing the Fabricademy page with the results of the students from previous years. A great help was the Diane Wakim page. Also Laura Caroline and Carolina Delgado were a very easy read and great help. The lecture on BioFabricating Materials and the tutorial were a big help and without it we wouldn't be able to do so many and diverse biomaterials.
When we say "biomaterials", we might be talking about materials which are any of the following, different concepts:
- bio-based: made from organic compounds, found in nature
- bio-degradable: degradable, but in a specific setting (not necessarily a natural one)
- bio-compostable: the real deal; compostable. Less impact, fully absorbed by the environment
Bio-materials can be either:
- crafted: bio-resin, bio-silicone, algae yarn, algae-leather, fruit or fish-leather, etc.
- grown: fungi-leather, tempeh-leather, kombucha-leather, spider-silk, etc. They can be used, depending on the resulting form, for plastic, bricks, yarns, leather...
References & Inspiration
After that i went to Pinterest to browse and search for my inspiration. From searching references and ideas i put together the mood for the next steps in this assignments.

Process and workflow
Crafted bio-materials
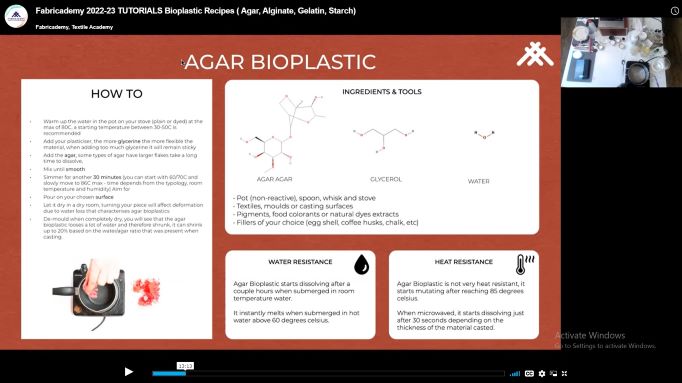
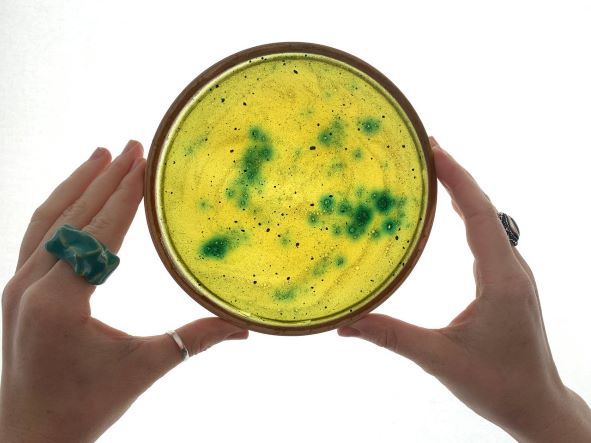
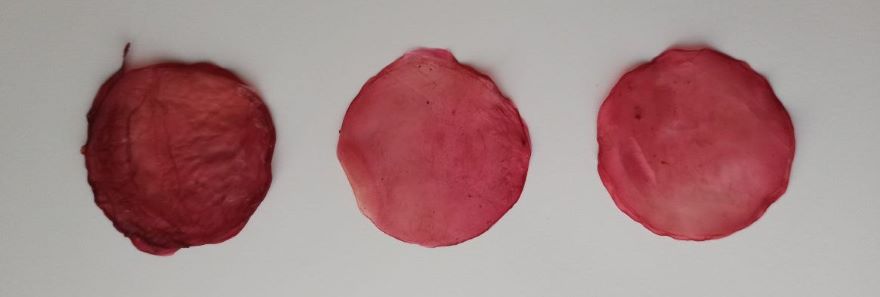
AGAR BIOPLASTIC
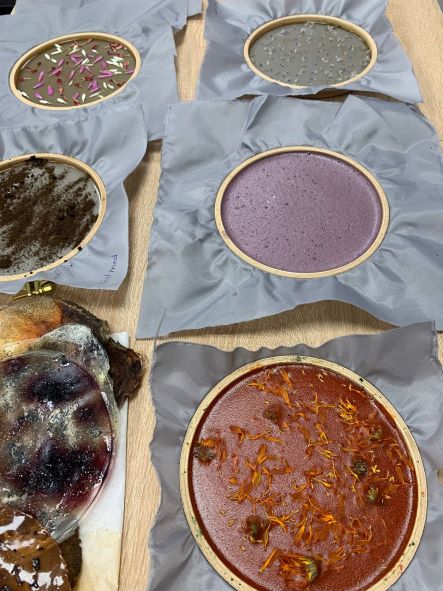
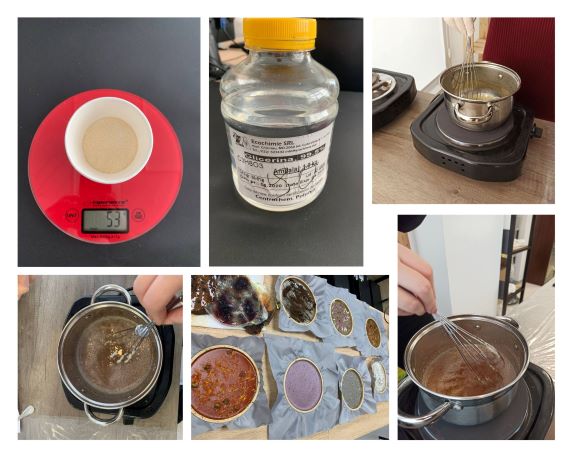
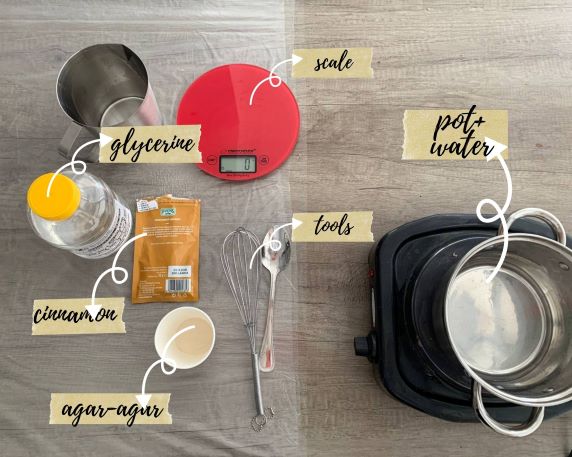
We started with the crafted bio-materials, more precisely with the agar bioplastic. Agar or agar-agar is a jelly like substance obtained from red algae. Agar bioplastic is made by mixing water, glycerine and agar-agar powder.
* agar-agar powder - 4 gr
* water - 100 ml
* glycerine - 0 gr (brittle);
            - 5 gr (semi-flexible);
            - 14 gr (flexible).
* pigments
* flowers, peels, etc.
* cinnamon
* spoon, tongs, wisk;
* stove;
* pots, jars;
* scale;
* molds, textiles, textures, etc
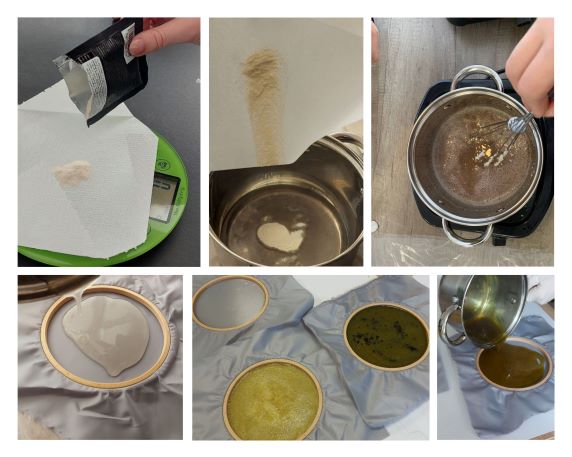
* Warm water in a pot
* Add the Glycerine
* Add the Agar
* Mix gently at 60 ºC so that Agar is dissolved with the Glycerine.
* Simmer more for 15-20 min at 80ºC.
* Prepare Molds.
* Prepare your colours in jars.
* Once it becomes thicker like a syrup, mix your colours on the jars and gently cast in moulds.
* Let it dry in a ventilated and dry room
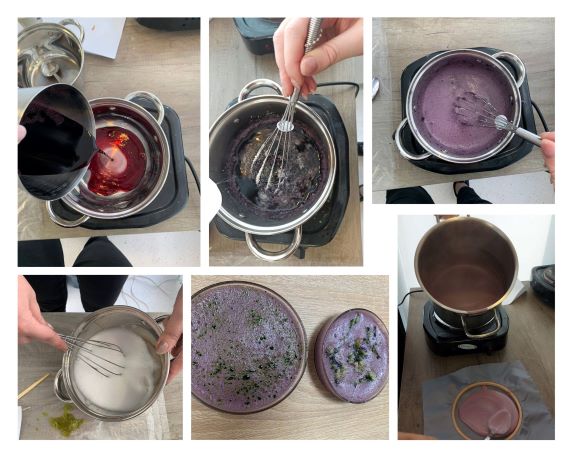
GELATINE BIOPLASTIC
Next we used the gelatine as the main ingredient. Gelatine is an animal derived ingredient, made from the collagen present in animal parts. Gelatine Bioplastic are crafted usually from powder, in combination with water and glycerine. Gelatine powder is sensitive to heat, starts to melt at about 60 °C, which makes it ideal for recycling.
* gelatine powder - 48 gr
* water - 250 ml
* glycerine - 0 gr (hard);
            - 24 gr (semi-elastic);
            - 48 gr (elastic).
* pigment, flowers, peels, etc.
* cinnamon
* spoon, tongs, wisk;
* stove;
* pots, jars;
* scale;
* molds, textiles, textures, etc
* Warm water in a pot on the stove (water can be plain or already dyed)
* Add the Glycerine
* Add the Gelatine
* Mix gently the ingredients until a smooth mix
* Boil for 15-20 min at 80-86ºC max whisking constantly.
* Prepare Molds.
* If you are paling to use multiple colors, prepare them in jars.
* Once it becomes thicker like a syrup, mix your colours on the jars and gently cast in moulds.
* Let it dry in a ventilated and dry room
GELATINE BIO FOAM
* gelatine powder - 48 gr
* water - 240 ml
* glycerine - 8 gr
* table spoon soap
* pigment
* cinnamon
* spoon, tongs, wisk;
* stove;
* pots, jars;
* scale;
* molds, textiles, textures, etc
* Warm water in a pot on the stove (water can be plain or already dyed)
* Add the Glycerine
* Add the Gelatine
* Mix gently the ingredients until a smooth mix
* Add a table spoon of dishwashing soap to the mixture
* Boil for 15-20 min at 80-86ºC max whisking constantly.
* Prepare Molds.
* If you are paling to use multiple colors, prepare them in jars.
* Once it becomes thicker like a syrup, mix your colours on the jars and gently cast in moulds.
* Let it dry in a ventilated and dry room
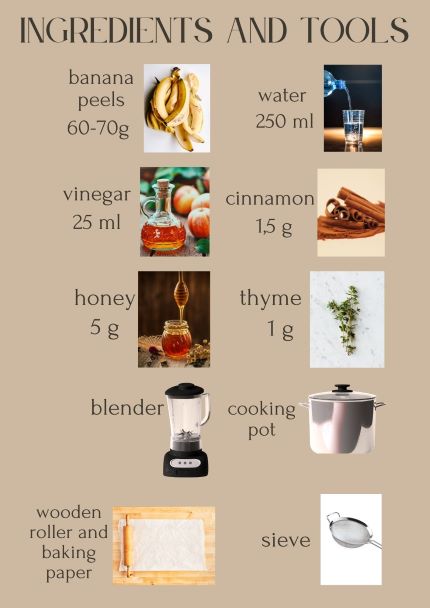
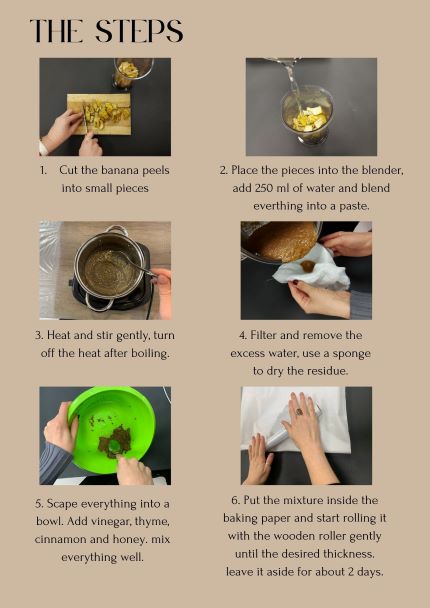
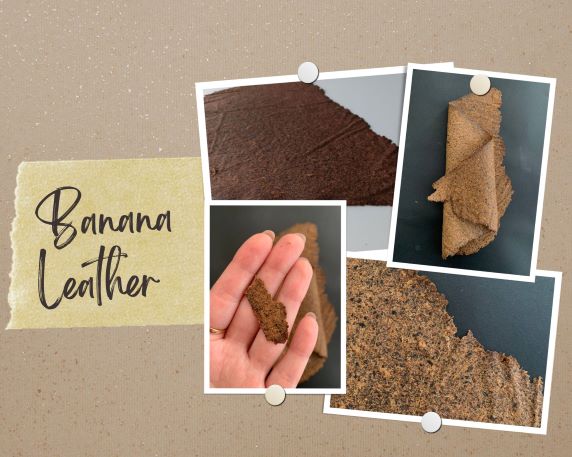
FRUIT LEATHER
While experimenting we also tried to create a fruit leather from bananas.
Grown bio-materials
KOMBUCHA FERMENTATION
Kombucha is a fermented beverage made from brewed tea and sugar. The kombucha process resembles Vinegar fermentation. Like vinegar, kombucha is a yeast fermentation of sugar to alcohol followed by a bacterial fermentation of alcohol to acetic acid. The symbiotic culture forms a pellicle and biofilm on the surface of the brew often called a mushroom or SCOBY "Symbiotic Colony of Bacteria and Yeast" which can be reused for subsequent batches. A scoby is the living home for the bacteria and yeast that transform sweet tea into tangy, fizzy kombucha — think of the scoby as the coral reef of the bacteria and yeast world. It a rubbery raft that floats on the surface of the kombucha. Aside from being a home for yeast and good bacteria, the scoby seals off the fermenting kombucha from the air and protects it from outside, undesirable bacterias while it’s fermenting. More information on the Kombucha can be foundhere.
Our Kombucha was fed with sweet tea infusion, changing the tea every 10 days.
* tea - 7 gr
* sugar - 70 g
* water - 1 l
The Kombucha development started from June from a small Kombucha scoby. Along the way it was divided into several parts. 24H before the Kombucha was taken out and put to dry we prepared hibiscus and sweet turmeric tea.
Individual Work
One of the themes i gravitate toward to for the final project is Bio Material. So this week i did some individual work and started to experiment with my ideas to see where it takes me. I tried to play around with gelatine and agar-agar. I followed the same recipe as above whitten.
- Agar-agar transparent trial
* agar-agar powder - 4 gr
* water - 100 ml
* glycerine - 5 gr
* cinnamon
* spoon, tongs, wisk;
* stove;
* pots, jars;
* scale;
* molds, textiles, textures, etc
* Warm water in a pot
* Add the Glycerine
* Add the Agar or Agar
* Mix gently at 60 ºC so that Agar is dissolved with the Glycerine.
* Simmer more for 80ºC.
* Prepare Molds.
* Once it becomes thicker like a syrup, gently cast in moulds.
* Let it dry in a ventilated and dry room
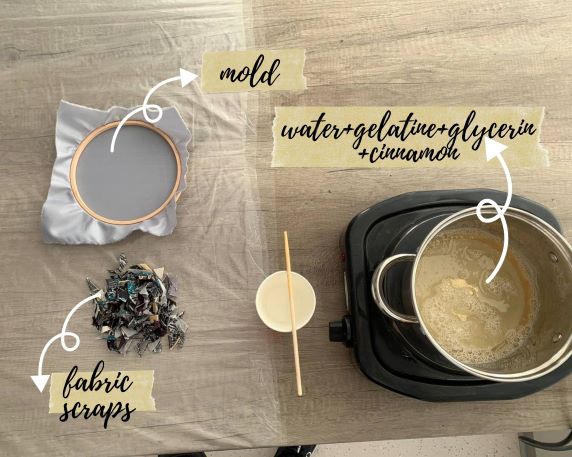
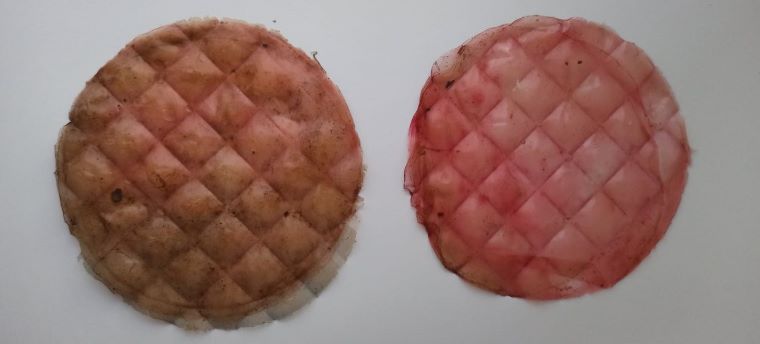
- Gelatine + fabric scraps
* gelatine powder - 48 gr
* water - 250 ml
* glycerine - 24 gr (hard);
* cinnamon
* fabric scraps
* spoon, tongs, wisk;
* stove;
* pots, jars;
* scale;
* molds, textiles, textures, etc
* Warm water in a pot on the stove (water can be plain or already dyed)
* Add the Glycerine
* Add the Gelatine
* Mix gently the ingredients until a smooth mix
* Boil for 15-20 min at 80-86ºC max whisking constantly.
* Prepare Molds.
* Prepare the fabric scraps.
* Once it becomes thicker like a syrup, mix your fabric scraps and gently cast in moulds.
* Let it dry in a ventilated and dry room
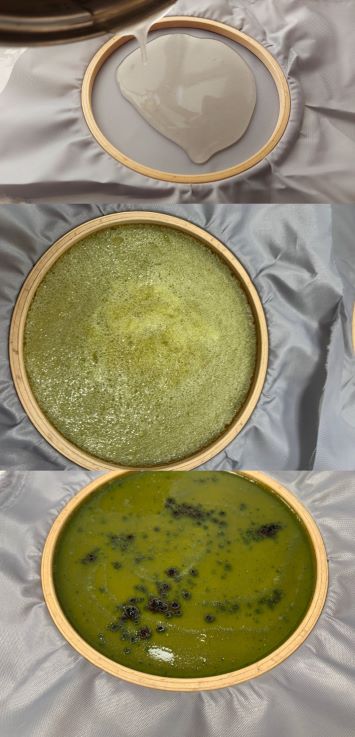
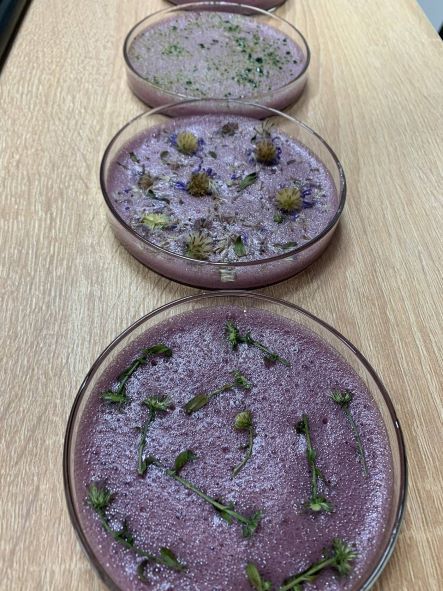
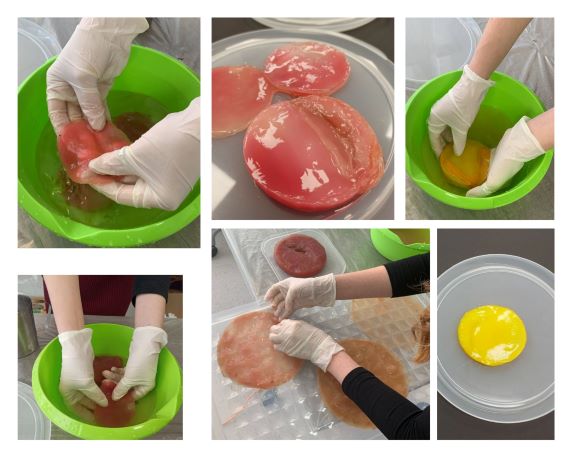
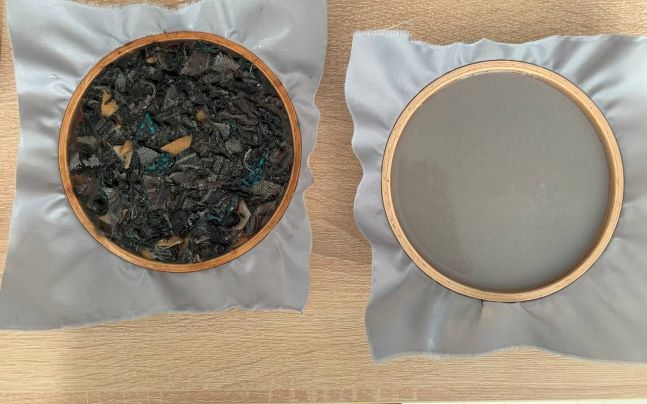
- Here are the freshly casted biomaterials.
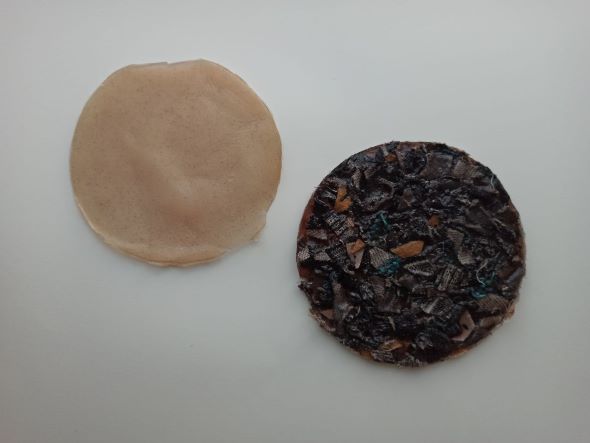
- Results! For the first time testing my idea i am satisfied with the results, but for future references i should choose a bigger form so that the material has more space and i can get thinner items.
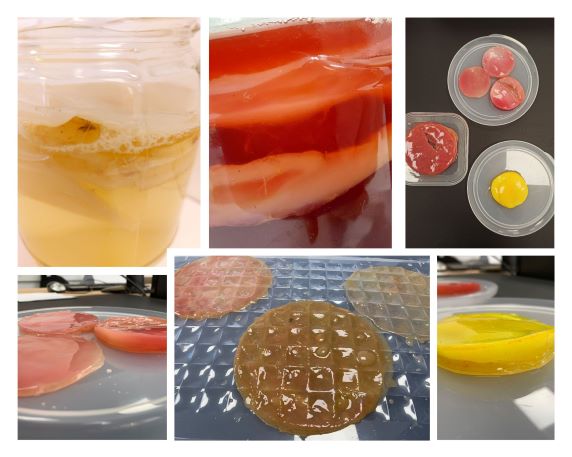
RESULTS
AGAR BIOPLASTIC
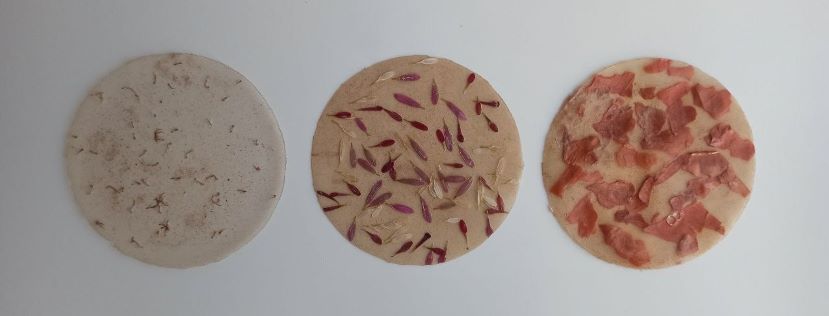
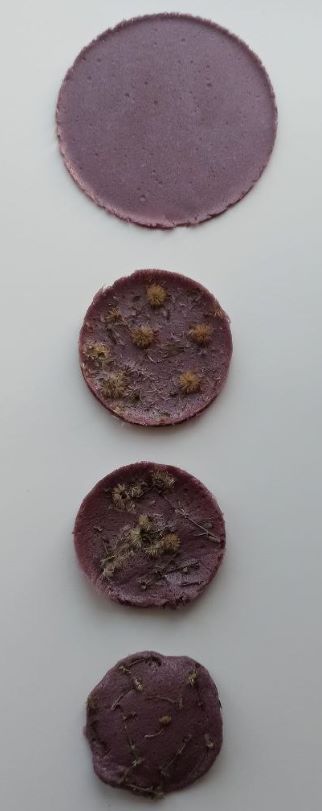
GELATINE BIOPLASTIC
GELATINE BIO FOAM

FRUIT LEATHER
KOMBUCHA
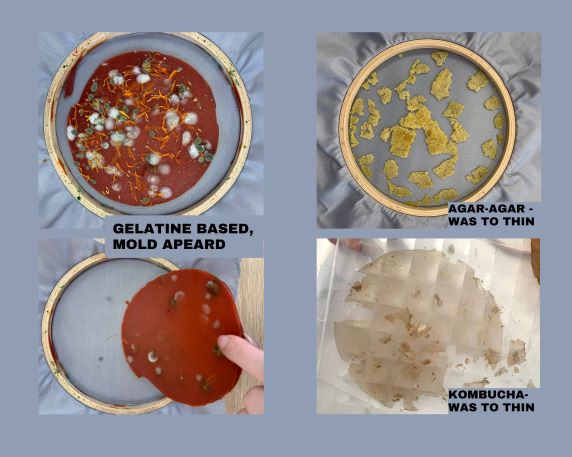
FAILED TRIALS
Here are some of ours failed examples, in some cases the prototypes were to thin, in other it caught mold and was ruined.