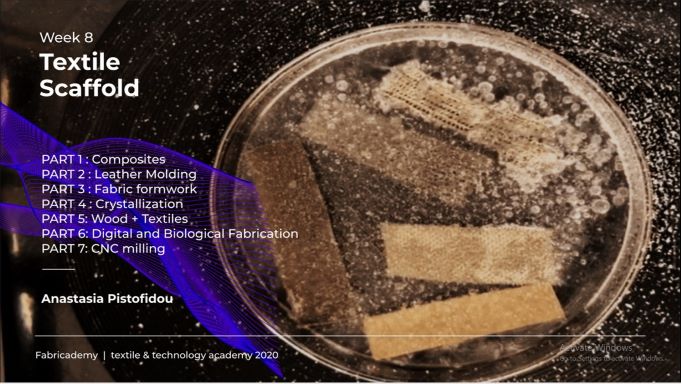
9. Textile Scaffold
This week started on a very positive note, compared to the last one.
Research
 As always i start by browsing the Fabricademy page with the results of the students from previous years. The first page i always browse is Diane Wakim page. This week Betiana Pavon, Saskia Helinska and Dominique Vial pages were a very easy read and great help.
Also the lecture on Textile Scaffold and the tutorial were amazing.
As always i start by browsing the Fabricademy page with the results of the students from previous years. The first page i always browse is Diane Wakim page. This week Betiana Pavon, Saskia Helinska and Dominique Vial pages were a very easy read and great help.
Also the lecture on Textile Scaffold and the tutorial were amazing.
References & Inspiration
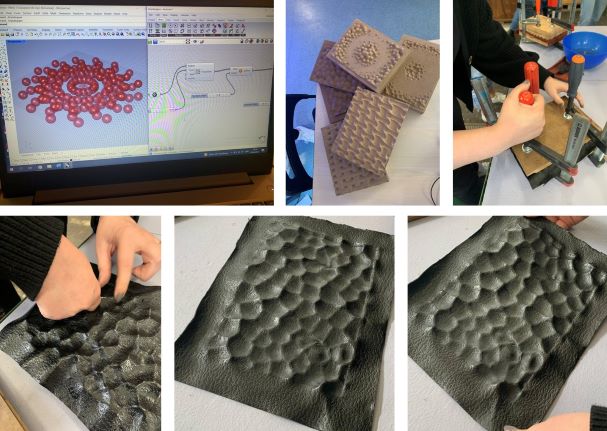
This week my main references and inspiration was the beautiful experience i had at the Fabricademy Geneva Bootcamp 2022. There we did leather molding. Together with Elena Florea-Burduja we had this great opportunity to dive a little bit in these theme and continue to dive deeper here.
Process and workflow
Crystallization
After the lecture the first technique i wanted to try was crystallization. With full determination i started to prepare the needed material right after the tutorial. But little did i know that i will kind of fail with this technique. I decided to start with table salt and sea salt. I also did 2 tries and the third one i tried to do with sugar. i tried to follow the recipies provided in the lecture notes .
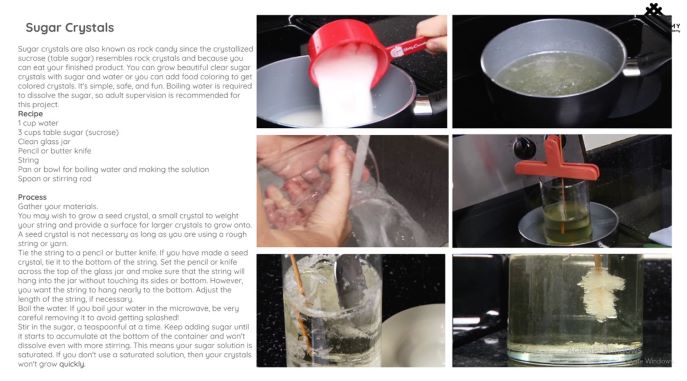
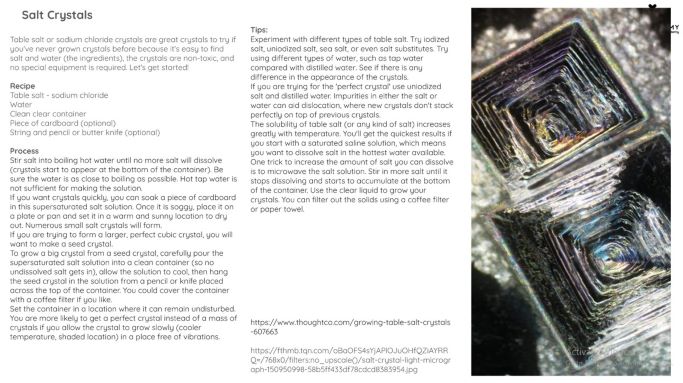
Following the instructions, i started by boiling my distelated water. When the water was done i transferred it to a glass jar and started to ad the salt/sugar little by little and was mixing until i sew that at the bottom the salt was not dissolving anymore and when the sugar water became quite thick like a syrup. Then on a chopstick i fixed my threads, material, etc. with wire and the put them in the jar carefully so it does not touch the bottom or the sides of the jar. At the end i covered the jars with some paper,and then i let it be.

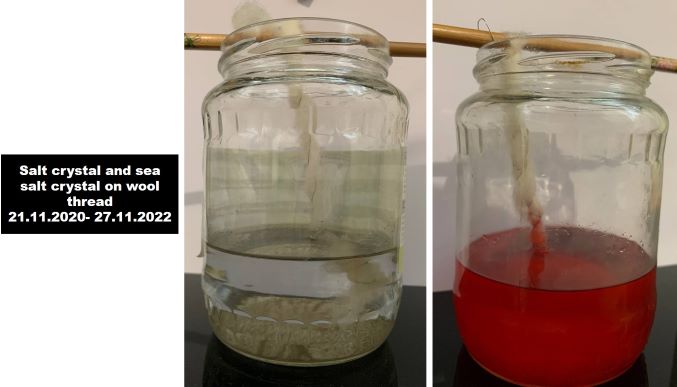
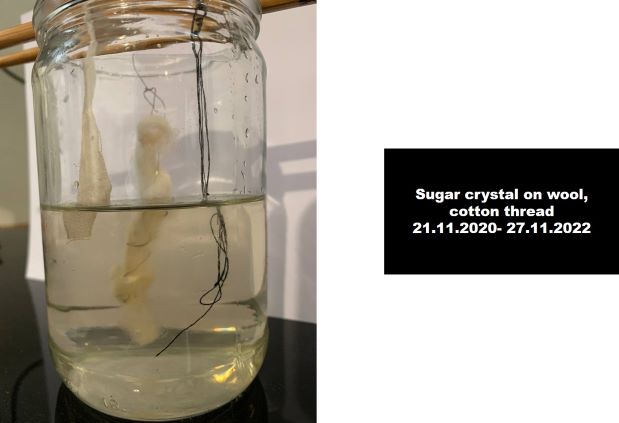
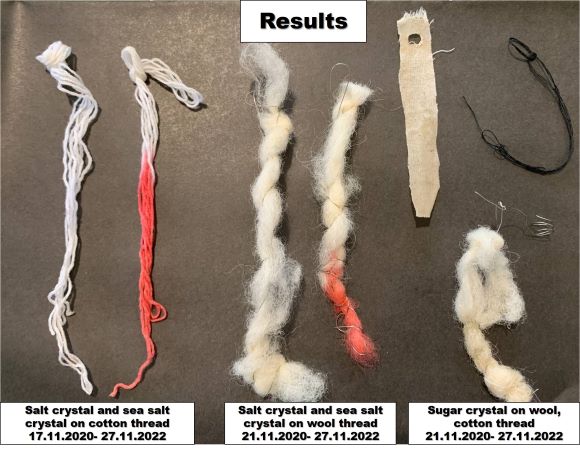
As can be seen in the images there were no results, but i did find some very small crystals in the first try with table salt.

So based on this i can say that the first technique is a failed one, but with a little bit of hope for success. I am not really sure why this happened. Maybe i did not saturated enough the water, or maybe the humidity was to high, or maybe it cooled down to fast and i should have put the jars in a more dry and warm place. I will try to experiment in the future to get the crystals.
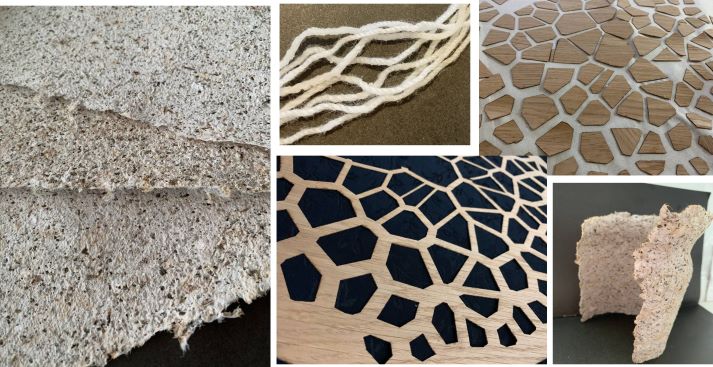
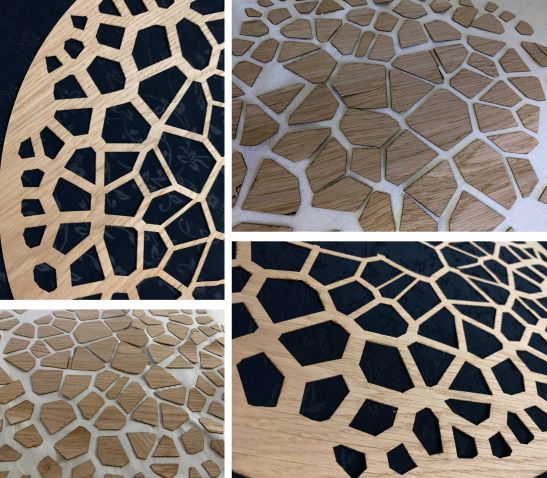
Wood+Textile Composite
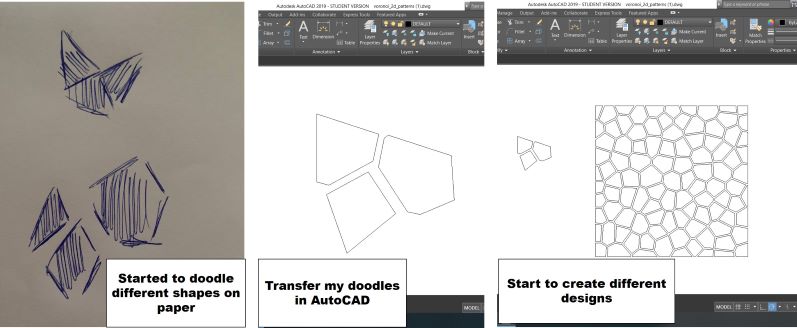
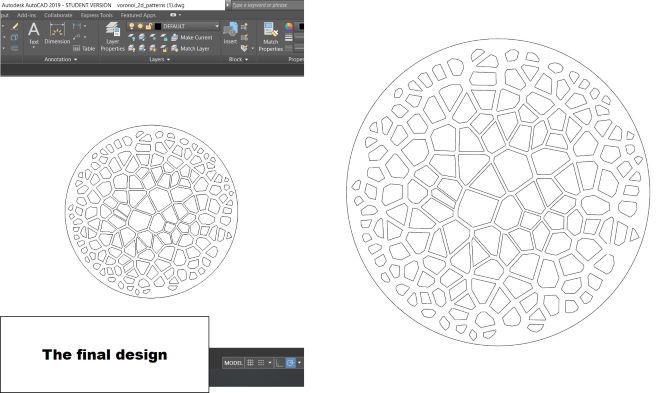
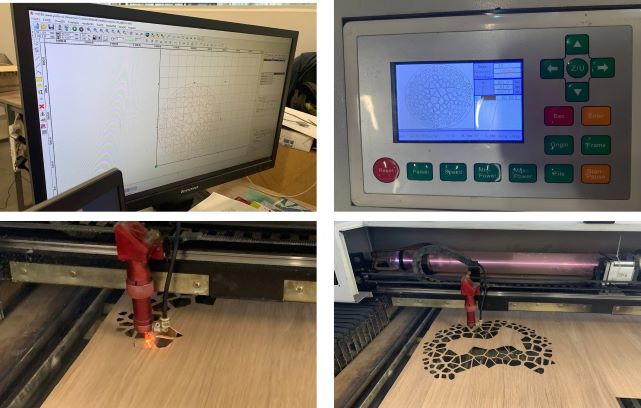
For the next technique i choose the wood+textile one. I really fell in love with this technique. it looks amazing and is quite easy to do compared with the last one. So this this i used veneer wood, some white glue and a textile of your choice. I decided to reuse some of my textile that i don't need anymore. I started with some doodling on a pice of paper, and the decided that i should do more doodling in AutoCAD. after some shapes i started to form different designs and in the end came up with one that i liked. i prepared the file in a [.dxf] format and went to the laser to cut the design.
Laser data
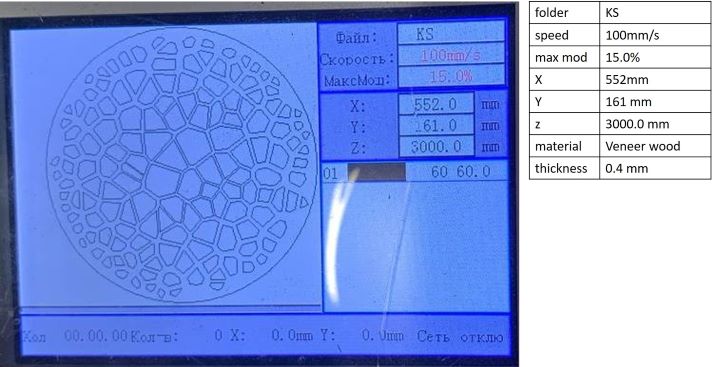
After the laser i started to glue the pieces like a puzzle on my textile and ended up with two very beautiful designs with i really like.
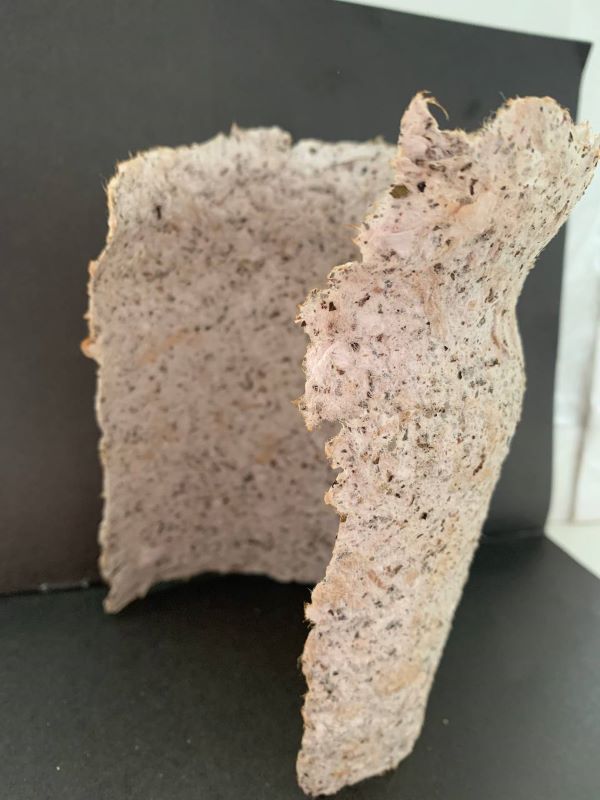
From Textile to Paper
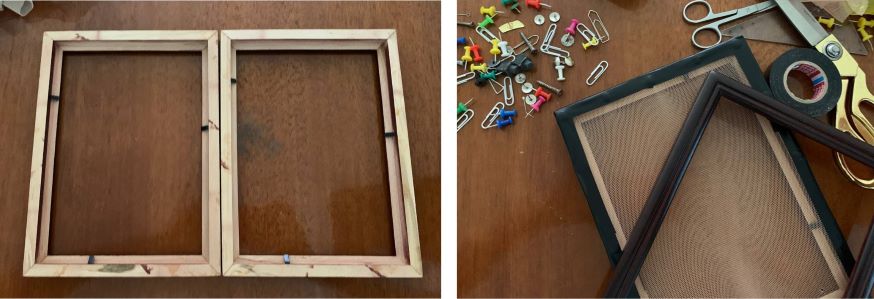
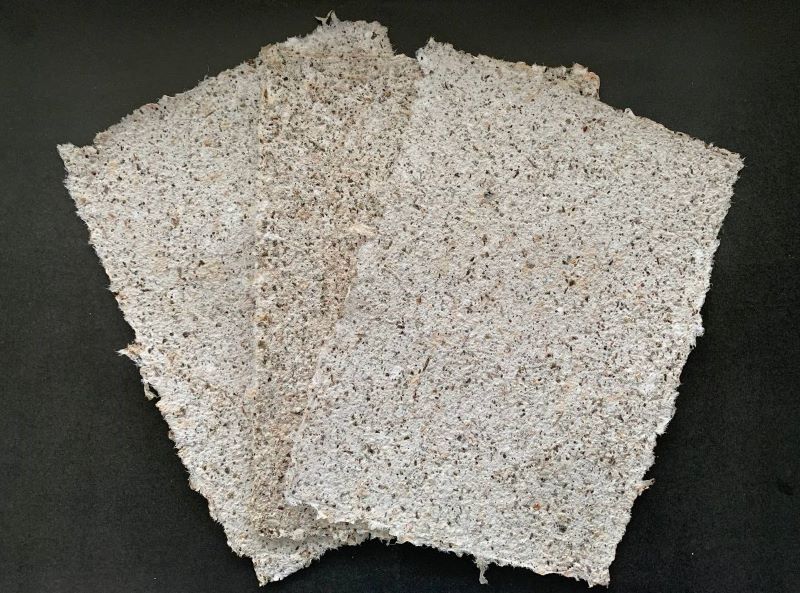
Because my first technique kind of failed i needed to try something else. I was quite desperate because i didn't know what to do, but as i was browsing the Fabricademy page i stumbled upon PETRA GARAJOVÁ page where i saw a workshop on making paper so i decided to try it. Folowing the PAPER MAKING Tutorial by Ângela Barbour i decided to use as the base tea bags and tea leaves. Because i am a huge fan of tea i have quite a lot of used tea bags. So for this technique i first had to make my own mold. I did it by following this tutorial.
After i made my mold i started to prepare my pulp and water container to get my paper.
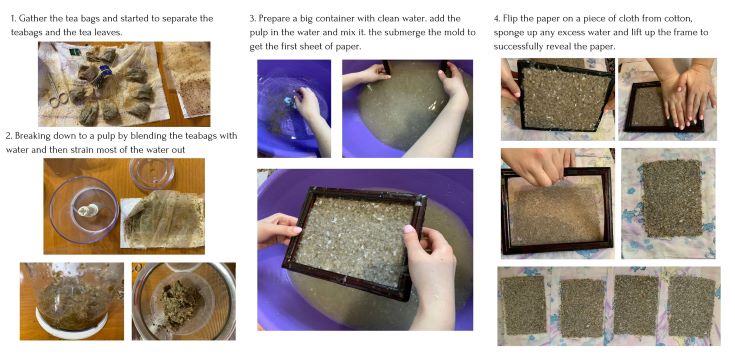
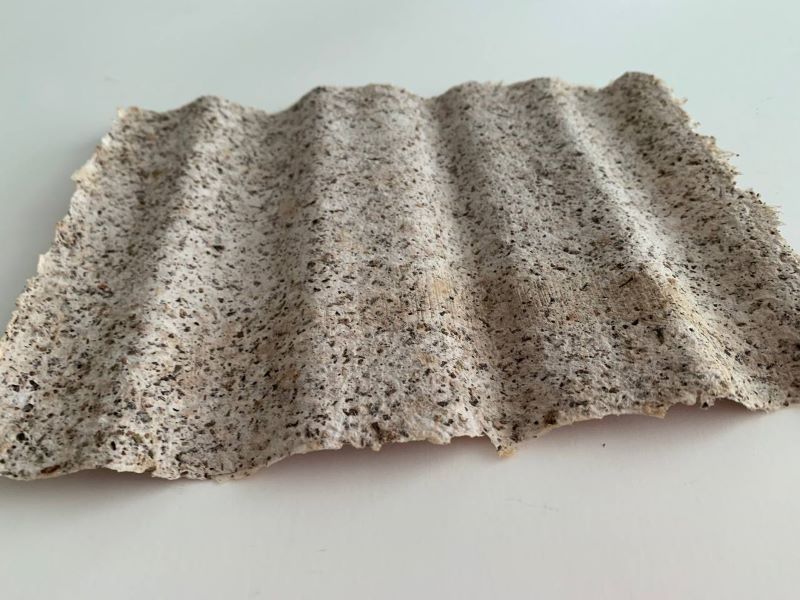
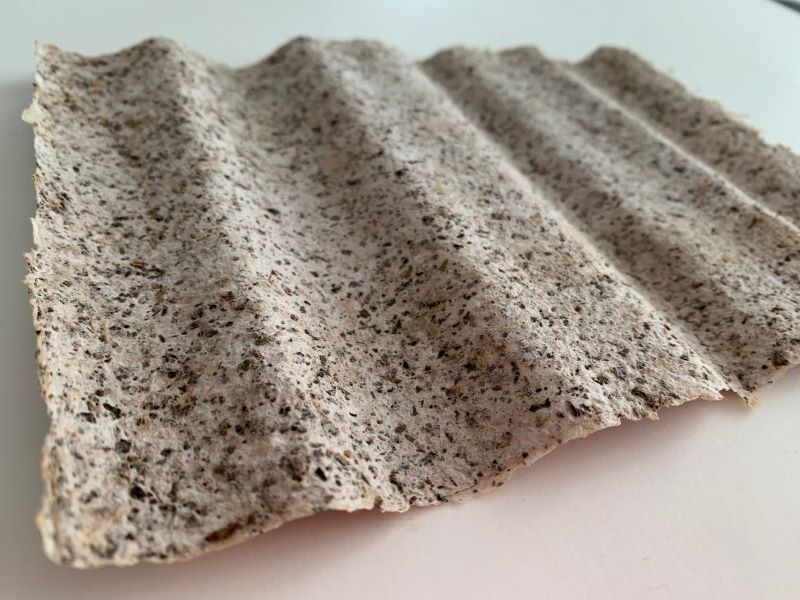
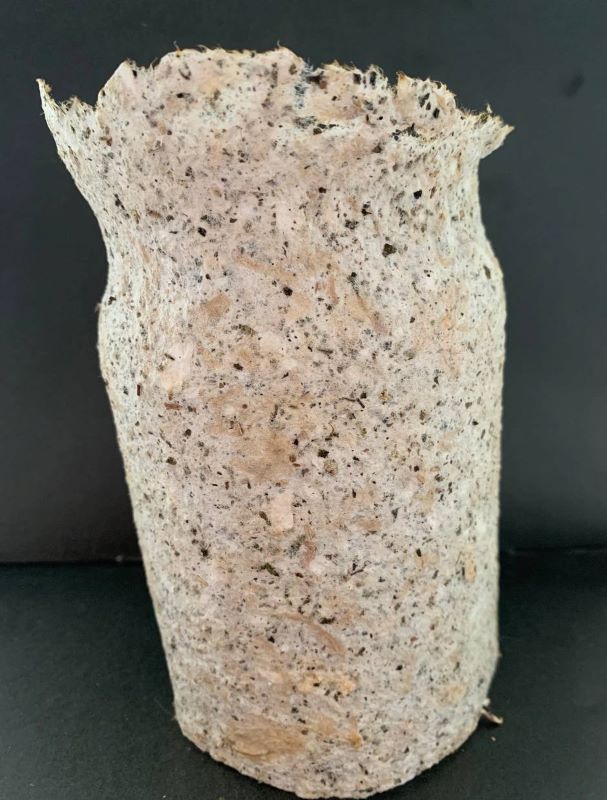
After laying my paper, i hanged it and let it dry. I tried to mold one piece of paper on a bottle and on a wave type of mold we had at the lab to see what kind of results i will get.
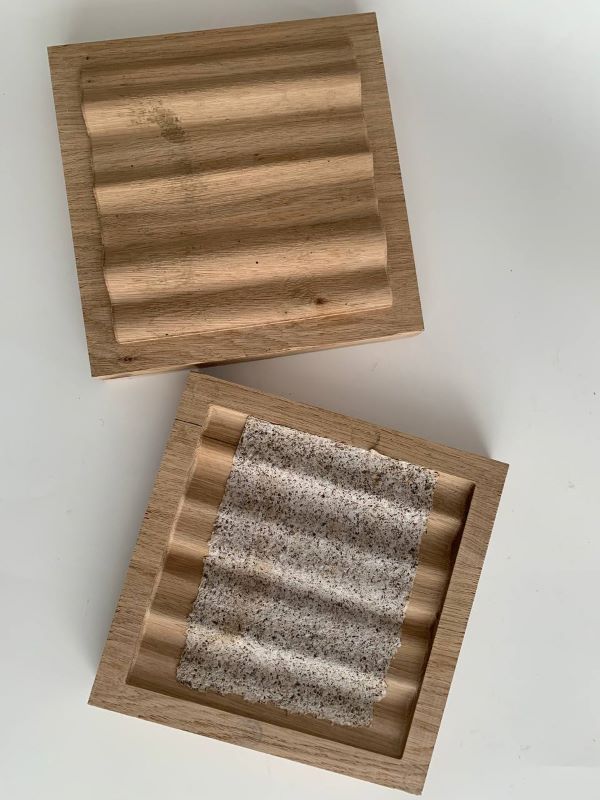
After drying i put the paper under a press to get them straight and smooth. So here are the final results obtained.
CNC milling machine
For more information on the CNC milling machine, how it works and how the process of creating the 3d molds went you can visit my colegues from ZipHouse page Elena Bannaia.
Results
Molded on a wave type of mold
Molded on a bottle
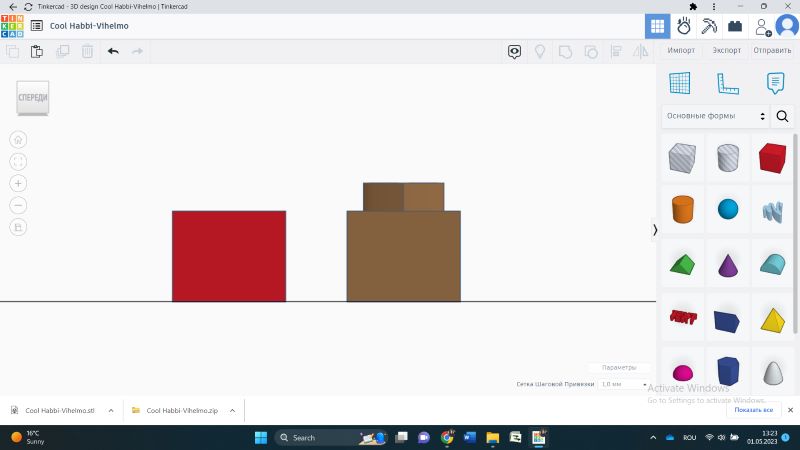
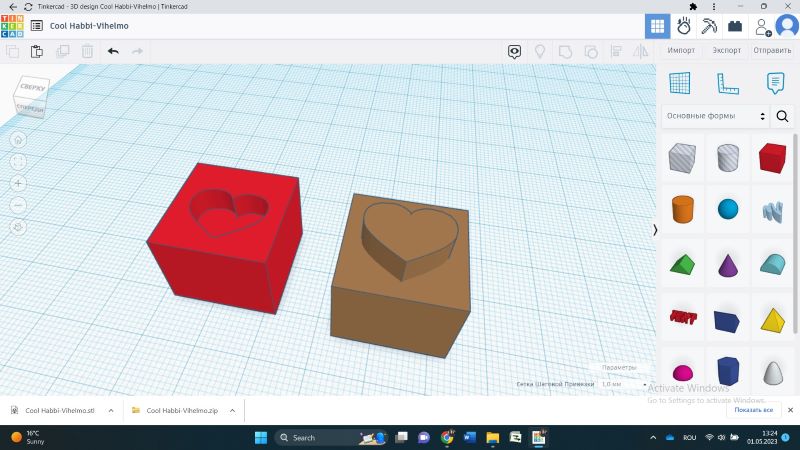
3DMold creation
Using Tinker i tried to make a 3D mold, because the one i used for the paper was a pre made one in our lab. So to understand the process, i tried to make one.
Conclusions
I am very proud of my results this week. I was a very interesting and quite stressful but still a beautiful one. I really hope i will get my crystals to grow one day. I will not stop experimenting new techniques and create beautiful things.
Fabrication files
-
File: 3D Mold stl ↩