Week 2: Digital bodies
In this class we were introduced to new digital tools that complement hand tools in order to design, represent, make and modify the human figure that can then be used as a canvas for creation.
This week we were focusing on using digital tools to fabricate a human body. The theme being 'Digital bodies'. One of the goals was to master the art of some of the software and tools that would aid us in the creating of our very own digital body. This was done by scanning a 3D object, creating a mesh from this and eventually translate this to flat pieces where it could then be cut by the laser cutter. Assembled as a sort of statue to your liking.
The intention was to end up with a body that we would find relevant and to see which technical difficulties one undergous when working with a software like the "ultimaker", but I'll get to the technical parts when you scroll down.
Leonardo Da Vinci's anatomical studies sketches:
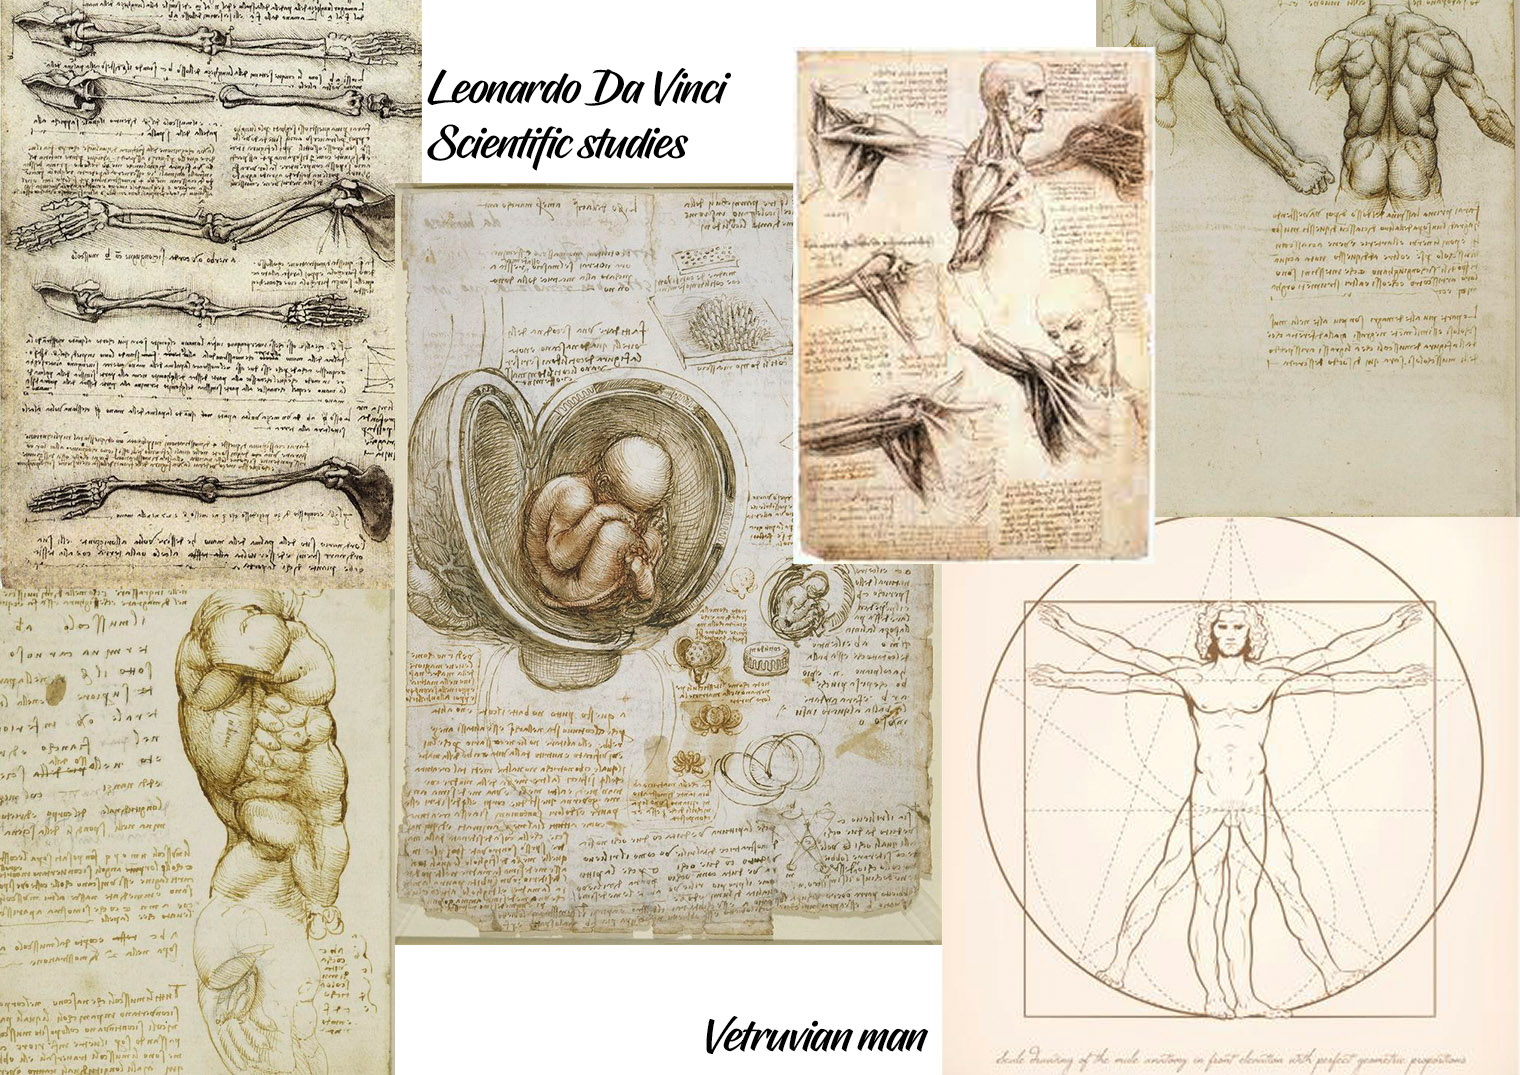
source: google.com
Inspiration:
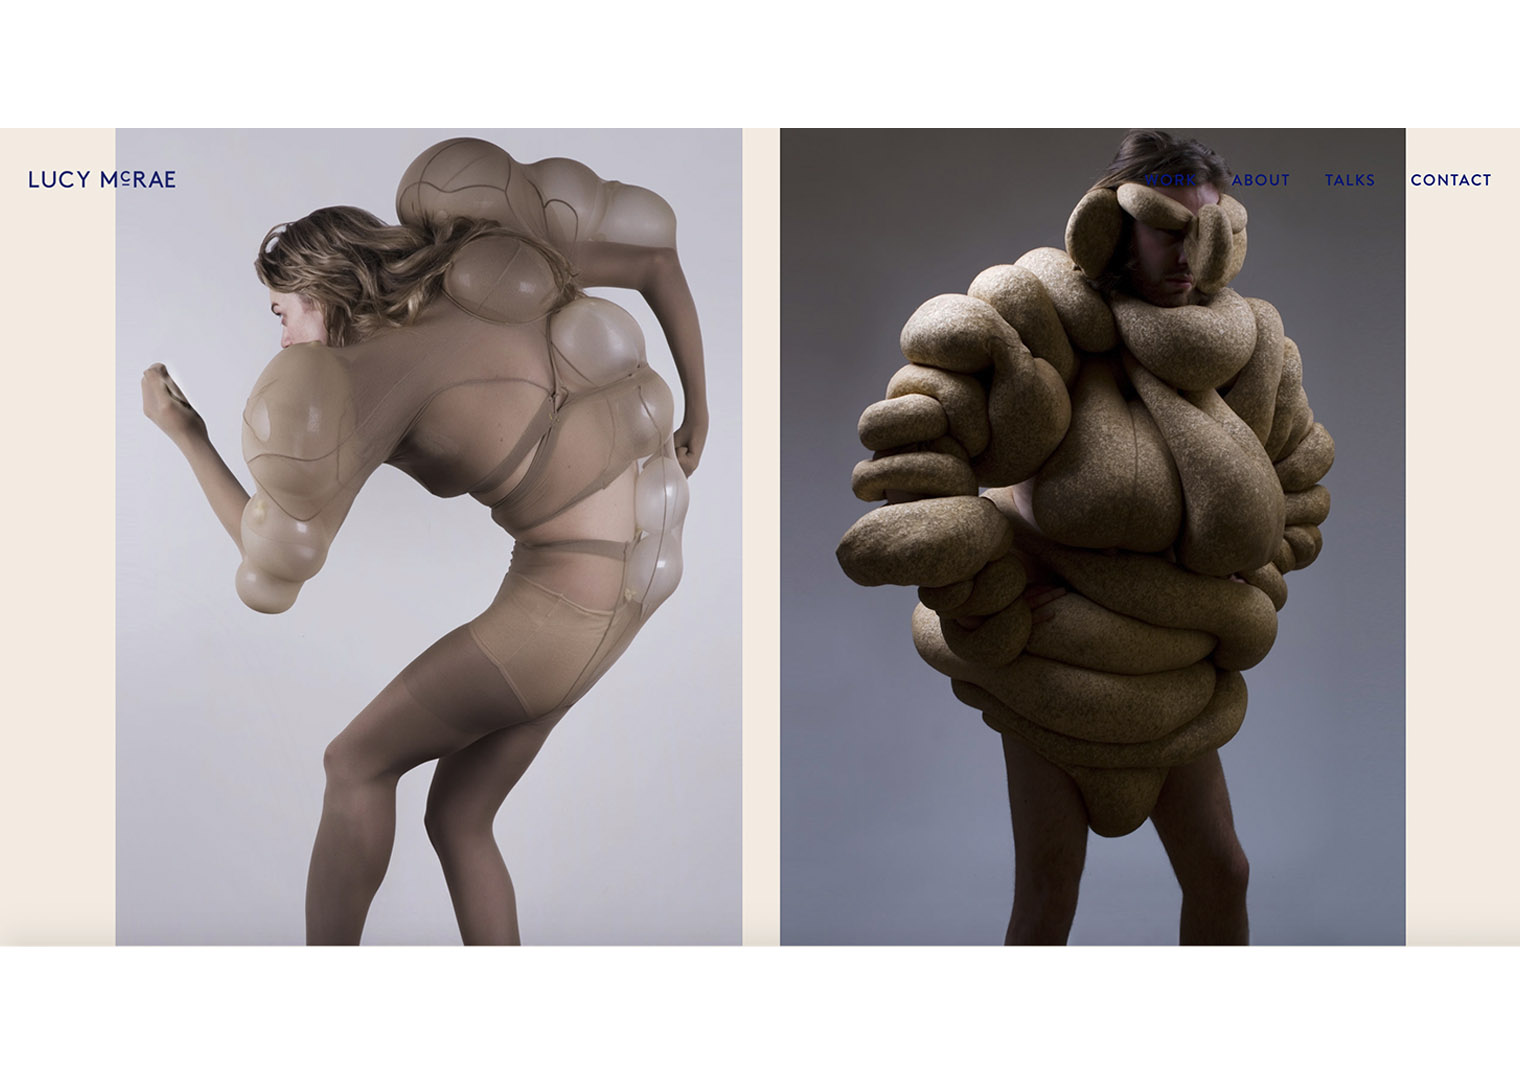
Lucy McRae and Barte Hess: Incredible yet strange textures.

Just look at this work!
source:
Lucy Rae is a body architect.
This was my first time hearing of any such thing as a body architect and this is exactly where my spark interested. Apparently a body architect is a way that Lucy can describe her hybride background in jobs. Trained as a ballerina and a former architect the best way she could explain to epople what she is doing is by labelling it as a "body architect". (This was in the article she held with the Dazed magazine on the 1st of December 2010)
Lucy is also involved in film making, she's and inventor and a science fiction artist. Her name is one of the most well known when it comes to exploring science and how it can impact the how someone chooses to redesign their body in an emotional and physical way. Seeing as her work is a result of the ability to cross section her different set of skills and areas of knowledge ,it is interesting to see how Lucy Rae's ideologies take form when tackling a project.
All interesting questons to ask if I were ever to meet her:
-
How does one tackle a digital body project so that it can teach people of its cause? Are people open to change?
-
Will everyone be able to understand that technology, design and science are merging together to aid eachother and not take over one another?
-
What does the meaning of a body mean to you? and how far way are we from transforming ourselves
Anyway, a lot of questions to ask before going any deeper... She is regarded as a pioneer who blurs the boundaries across art, architecture, design and technology with a healthy disregard for labels that limit interdisciplinary practice.
Why did this catch my attention?
Well, I grew up with a mother who was also formerly trained as a dancer. Having seen her dance on stages as a young child, I always that it was impressive in how the body moves in all particular ways and angles. The fluidity of a dancers movements is just as fascinating as the choreography and synchronistaion one has to have in order to control their body to such precission. A very high level of flexibility as well as strength and focus.
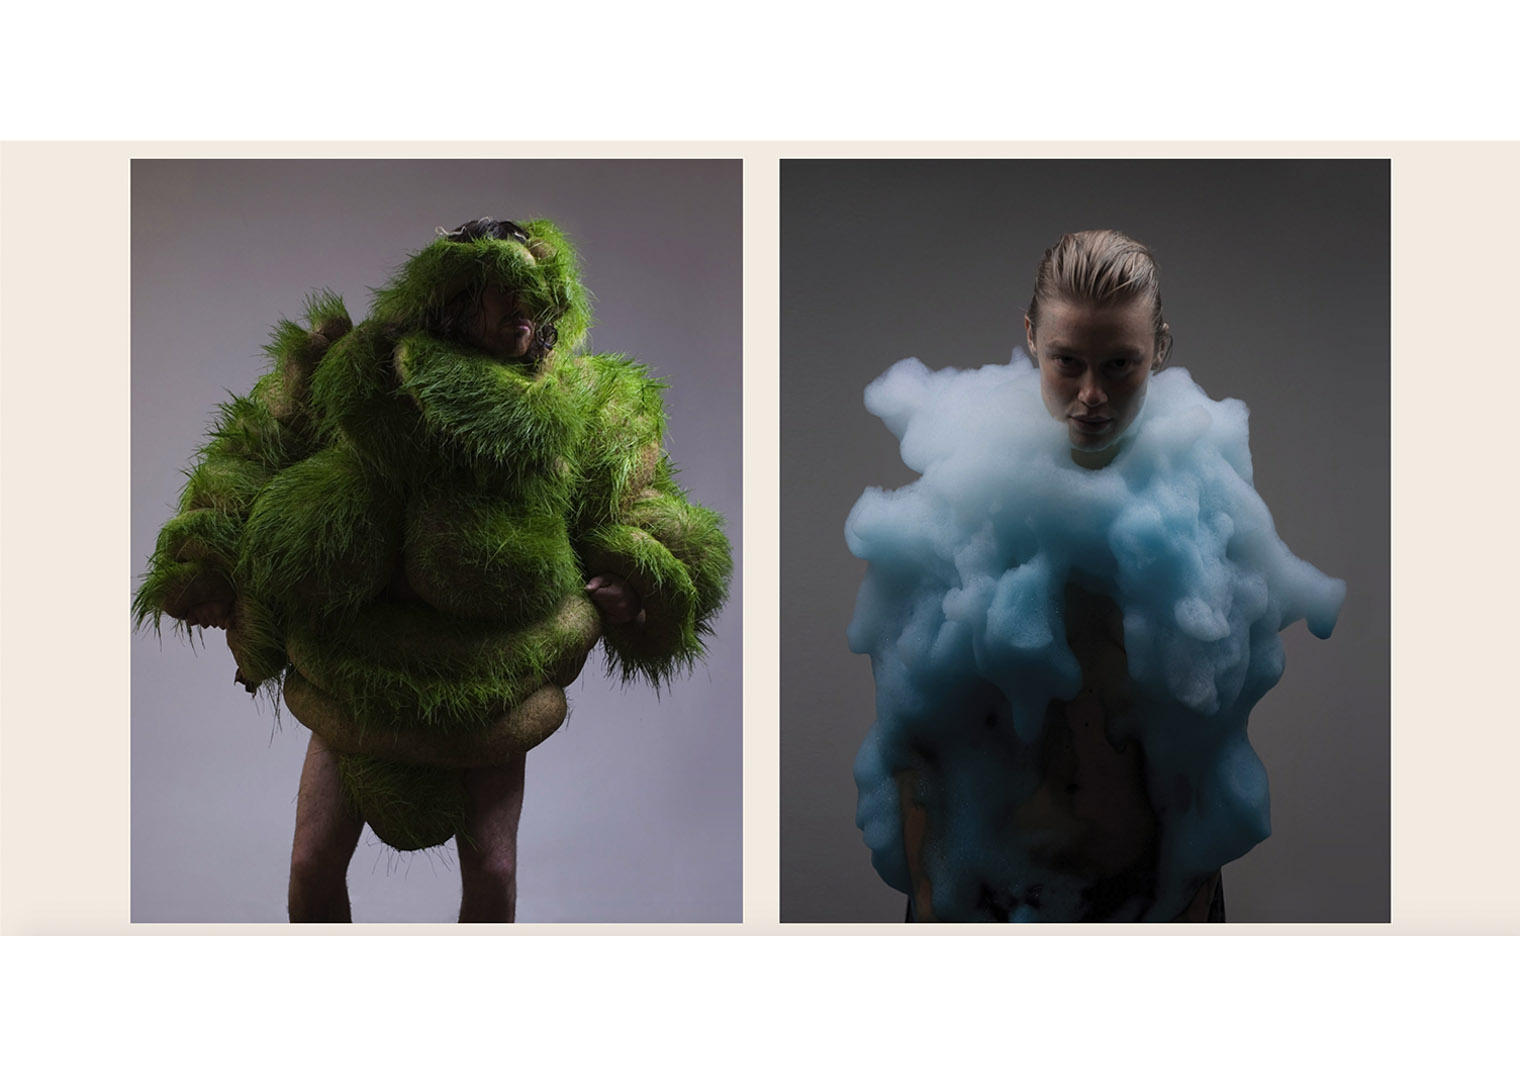
Who is Bart hess? A perfect duo when designing a beautiful art piece for or with the human body.
" Over the past ten years, Hess has developed an impressive roster of work. He has pinned, stretched, slimed and scraped materials in relation to the human body, and collaborated with the likes of Lucy McRae, Nick Knight, Lady Gaga, Iris van Herpen and Walter van Beirendonck. Hess feels that our bodies are increasingly becoming a platform for sensitive and interactive technology, and has constantly exposed the intimate relationship materials have upon our skin. “It felt like a natural instinct for me to start working on the body. When I create a new design I always place it on my own skin even-though it originally was created as, for example, a flooring material. The fascinating thing about it for me is the combination of a skin and a material. By using a material on the body that is not the body’s own, but making it look like it could possibly be, I create a tension between the body and material.”
sourced from his website: https://www.barthess.com/about
More work from their collaboration:
What did we learn this week:
3D scanning methods:
So in this lesson I we were shown many ways to scan a 3D object. The following seemed the most inetersting to me:
-
There are. land scanners that are combined with drones.
-
Skanet - the same system and camera Xbox uses for their kinect.
-
TRNIO - An iphone app that is made to scan a 3D object.
Other programmes: QIone, regard 3D, Clo3d, Meshlab, SculptGL, FreeCAD, Blender, 3D slash, Core 3D...etc.
So we decided to try out the Skanect, Sarah was our first test model:
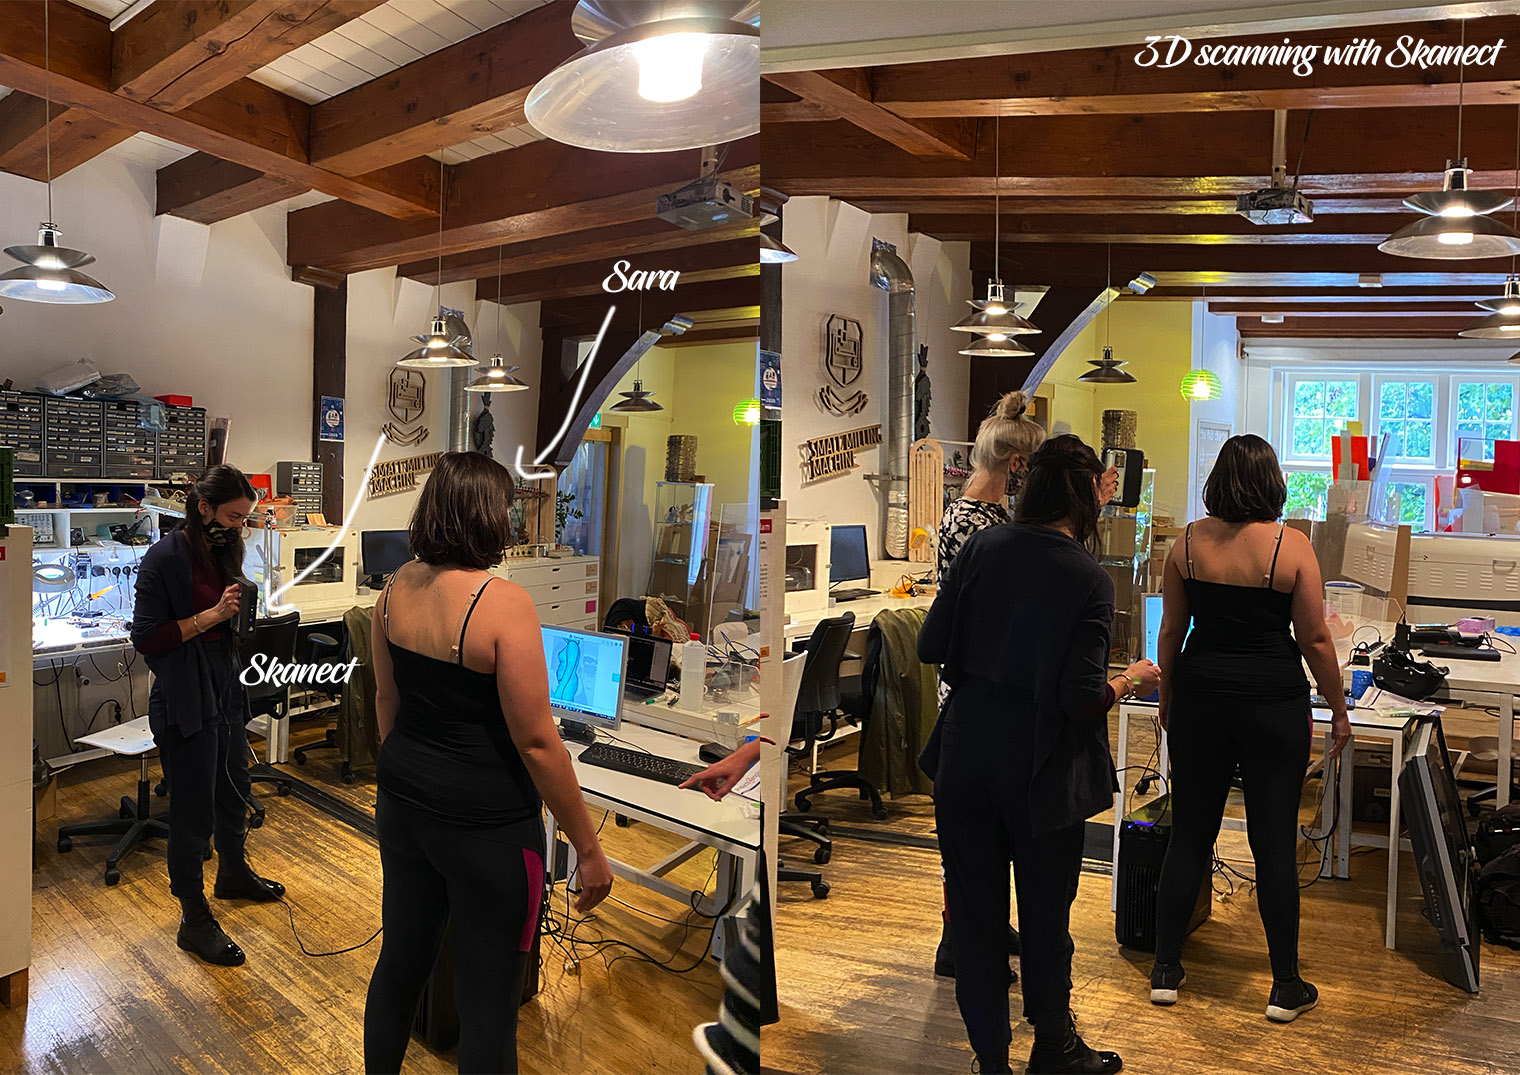
Using the skanect was quite tricky. You would have to move super slowly so that the camera could grab you properly so that the progamme could start creating parts of the mesh. Also the Skanect wasn't wireless therefore we had the model turning as well which caused quite a few problems as well!
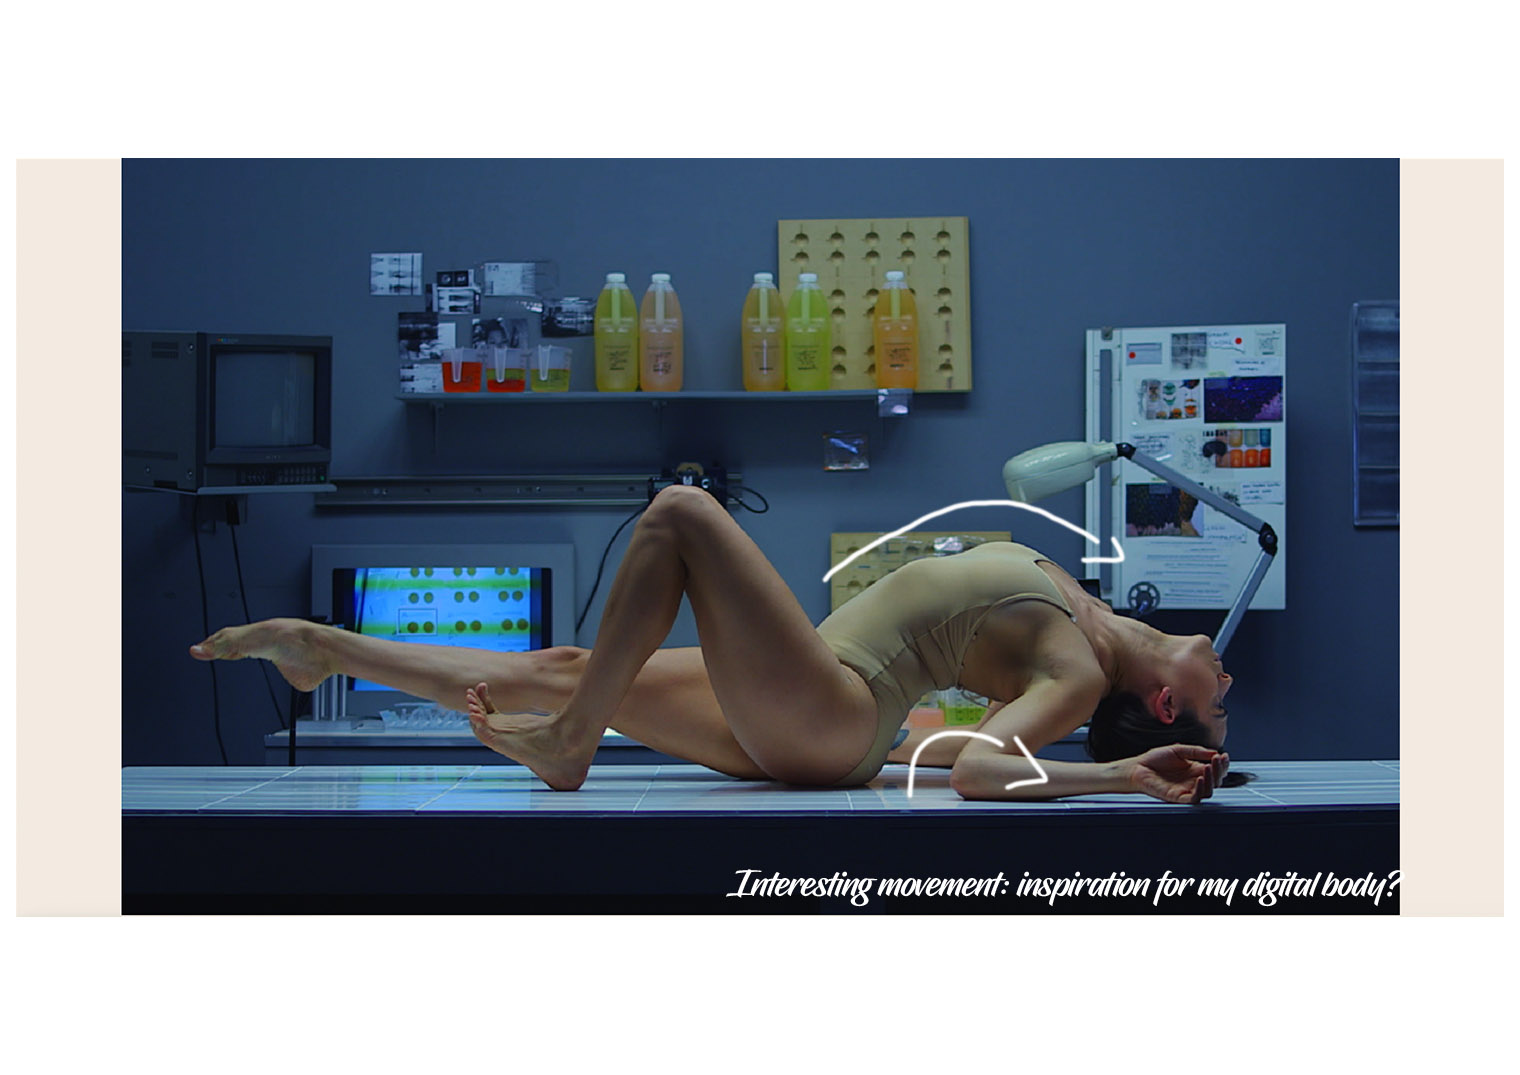
(Insert photo of your final piece) Inspiration: Pregnant lady doing a handstand.
- Visual mind map (Maybe a few sketches even from notebook).
Makehuman, Rhino and Ultimaker:
This week was our first week to access the laser cutter. This was my very first time so paying attention was extremely important. When you engage with the laser cutter taken into account:
- Clean workspace inside.
- the power of burn on the laser
- the speed of the laser
- the material components placed inside, NO VINYL because it is toxic when you inhale.
- you mostly start of with vectors.
- pay attention: "it is always better to measure twice than to cut twice."
So first, Makehuman (programme):
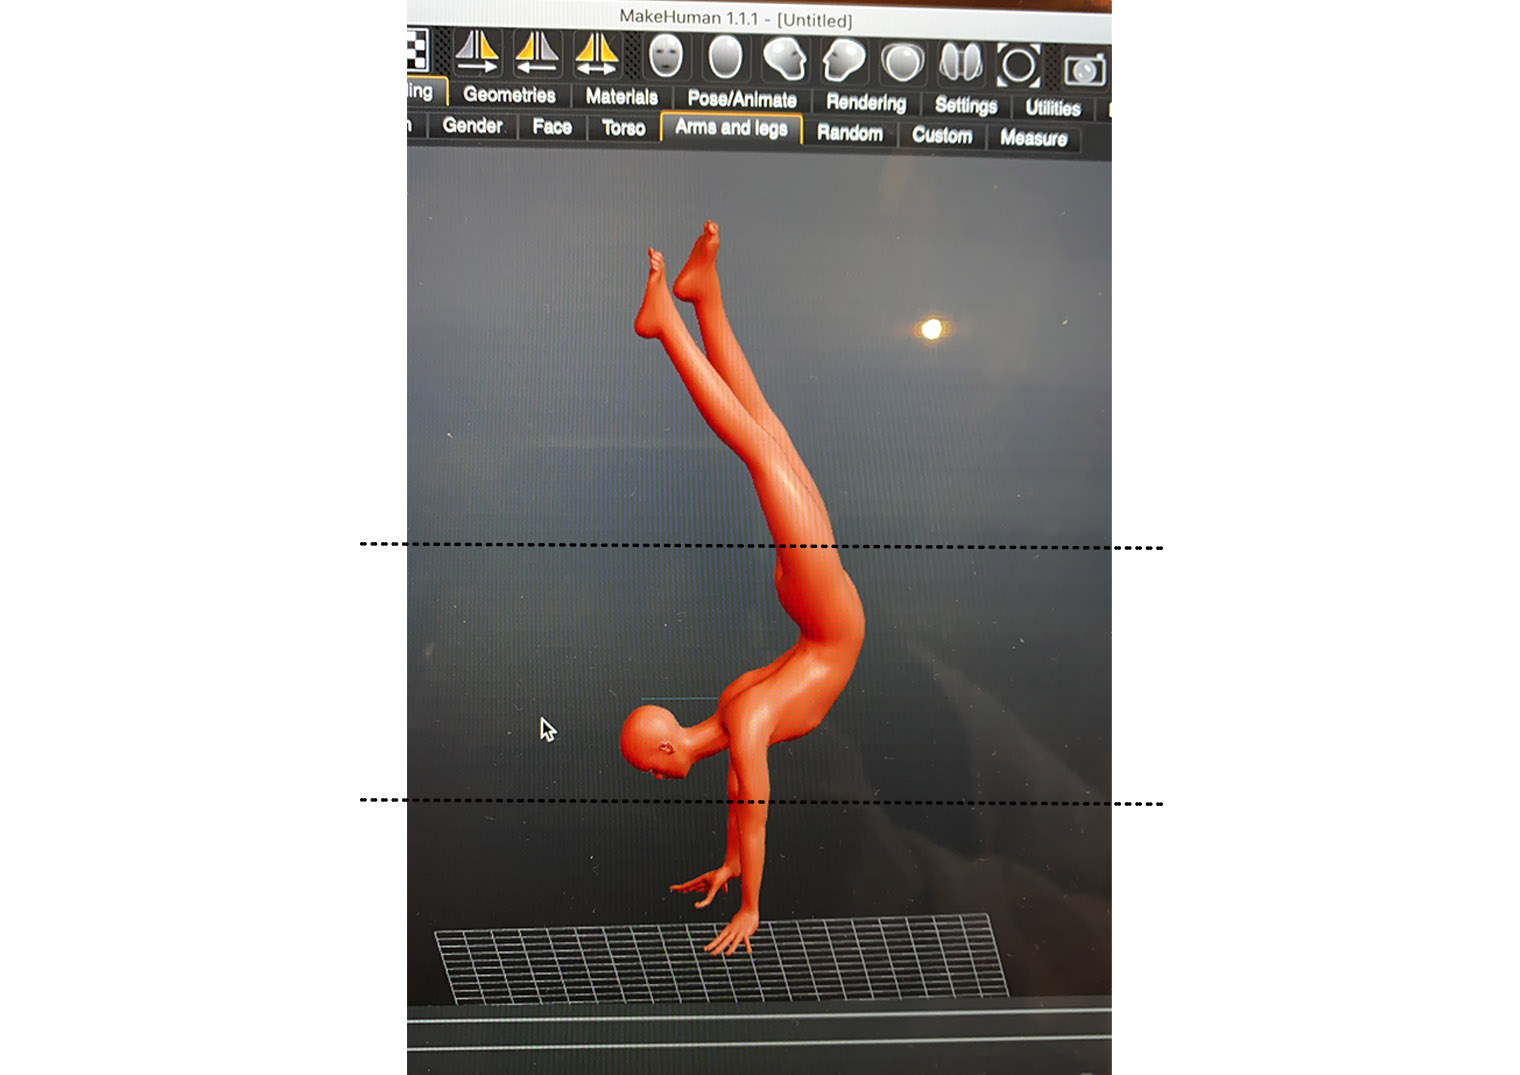
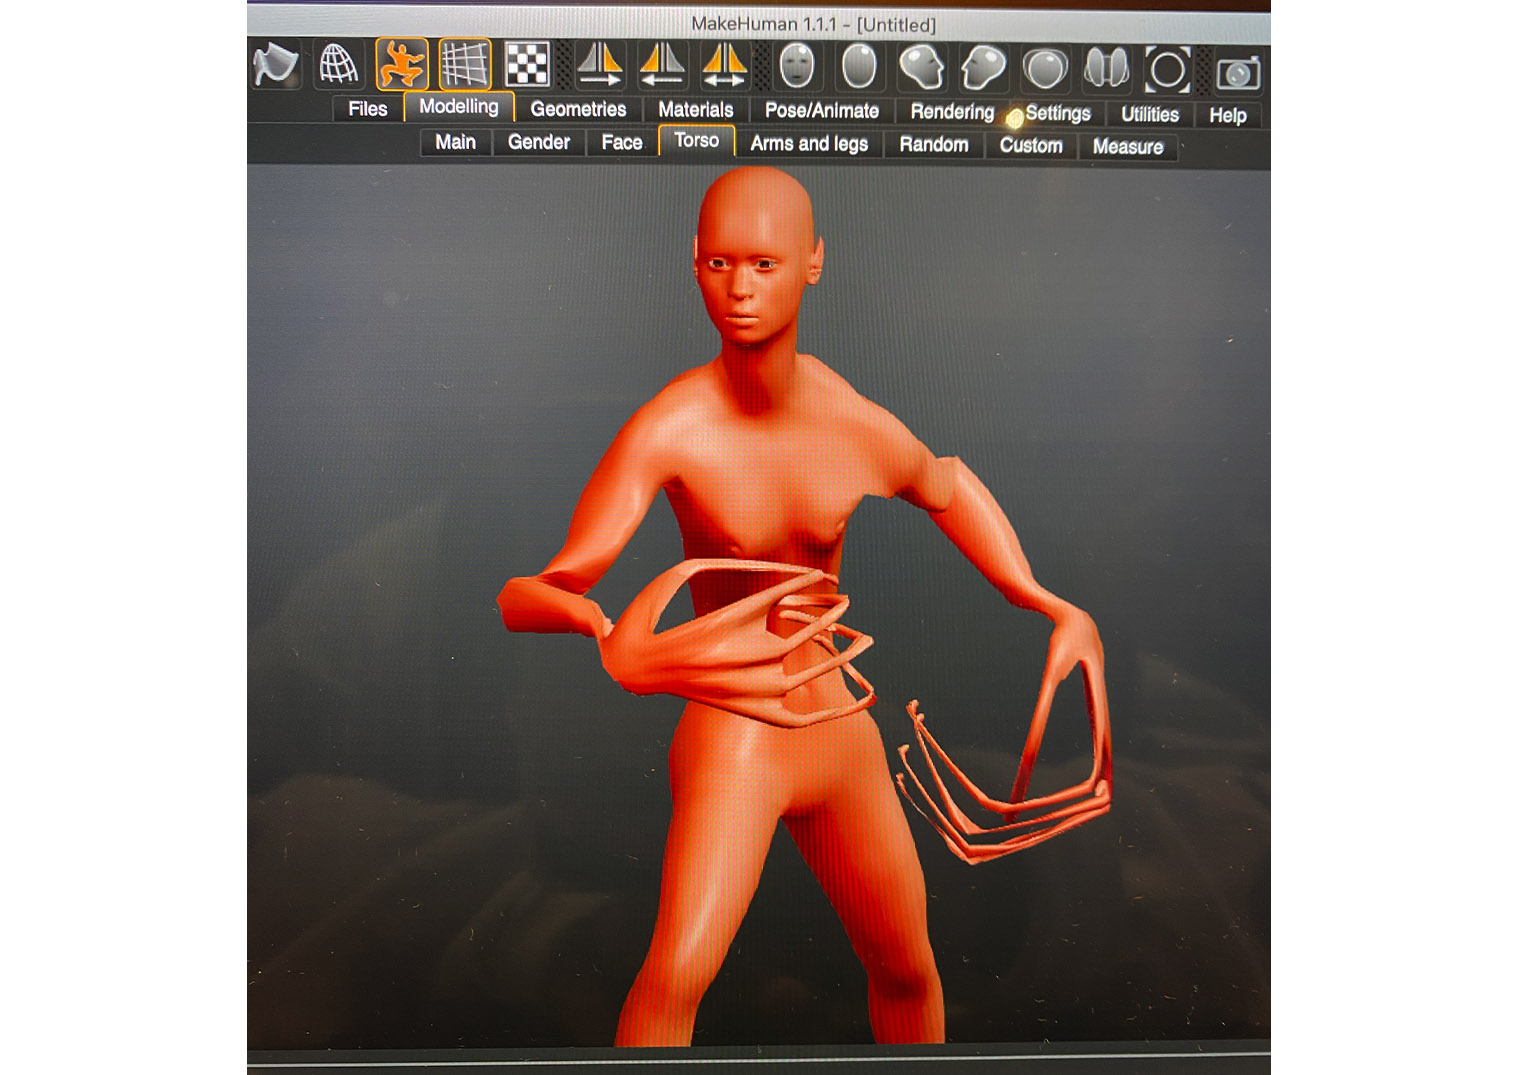
The introduction to the makehuman programme was relatively easy. This open source programme is use to create virtual humans with a GUI (Graphical User Interface). To create amore general human this programme is used often in the 3D modelling industry. The experience was: what you see is what you get, where you could play around with toggles idicated for different body parts so that we could customise our own human. I chose to do a woman that would balance on her hands like an acrobat doing a handstand.
Chop, chop: Handstand lady. I wanted to see whether this specific model could stand on her arms so that she could balance itself.
Another idea that I came up with, only this one had a problem seeing as the pieces would be too complicated once assembled after the laser cutter. So, this was was a no.
After having chosen my makehuman, it was time to save the file and import it onto the next programme: Rhinoceros.
Rhinoceros 3D:
This was also my first time using the Rhinoceros 3D programme. (Woops)
I was lucky to find the archtank blog: Here I was able to find all the functions for each command in Rhino. It was exactly like learning a new language but this helped me in the process.
https://pennarchtank.wordpress.com/2018/09/18/useful-rhino-commands/
Here is where I found ayoutube tutorial to accustomsie myself with the entire programme:
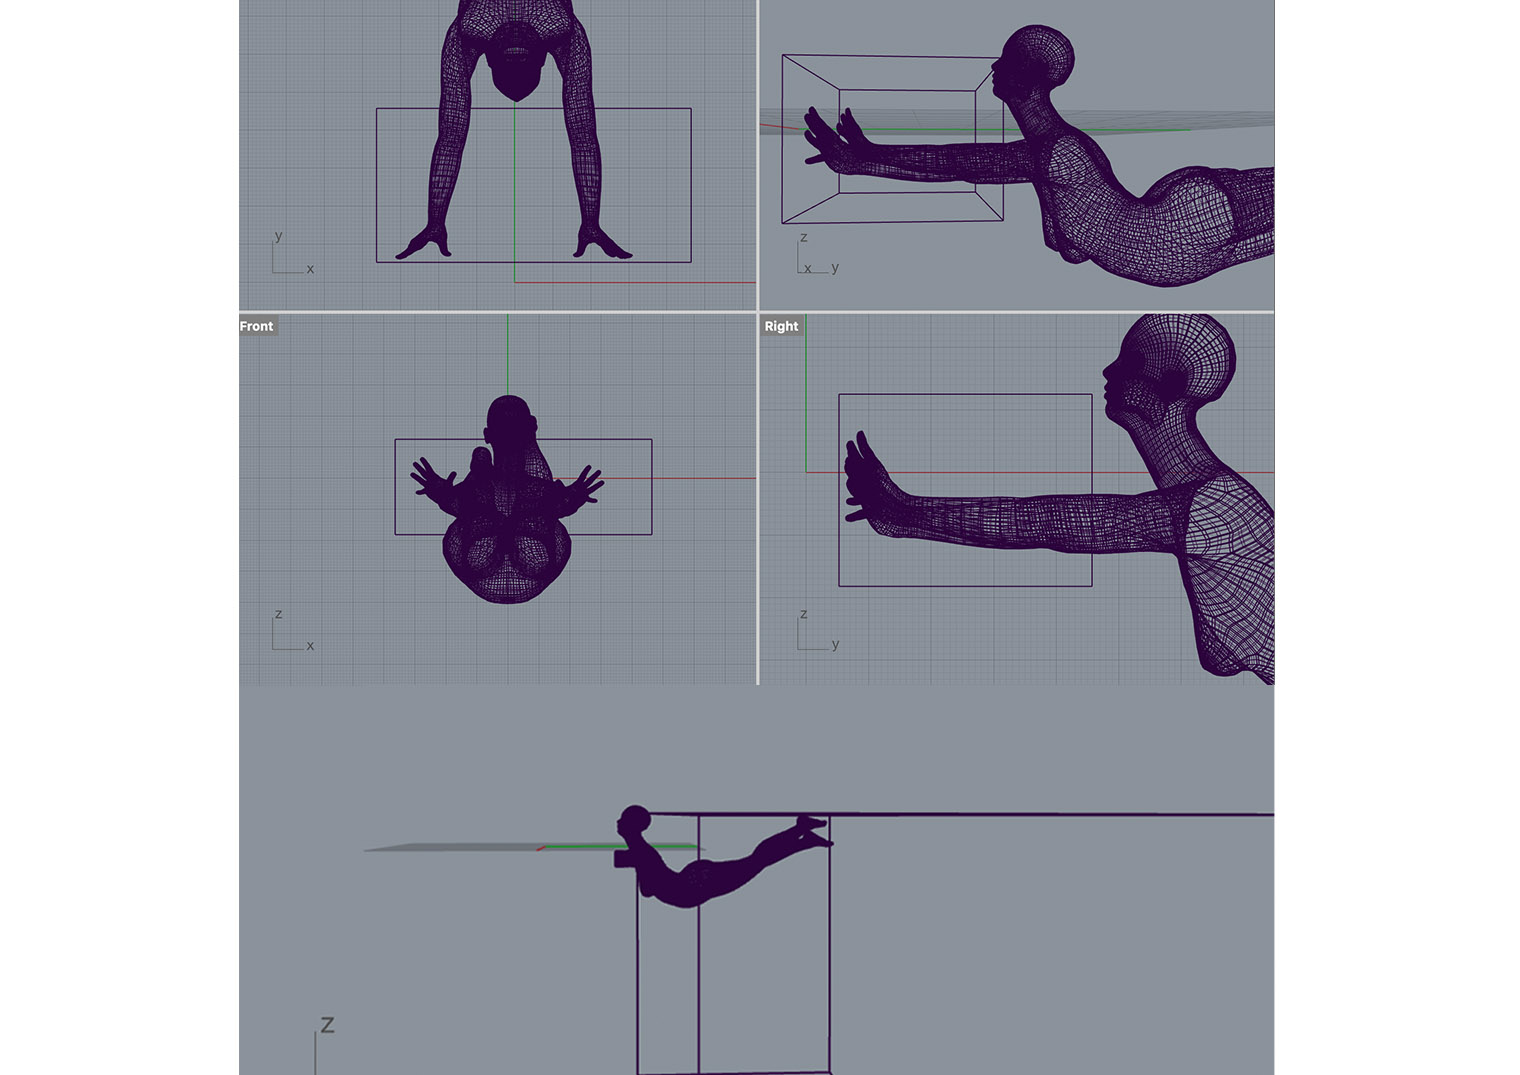
Once my 3D model was complete we would import the file into Rhino, we were ready to chop of the limbs of our models.

With the help of the previous rhino commands what we did was manipulating a 3D mesh and slicing it.
This was done by a number of functions but the most important was the Boolean difference.
For us to export our files we had to do the following steps:
- Chop the limbs and export. Selecting the body/mannequin.
- Export image - change the format to OBJ.
- Save the name with no spaces in between.
- Click O.K.
- turn the bar to the maximum and then O.K.
This was my model so far, and quite proud of the result as you could see:
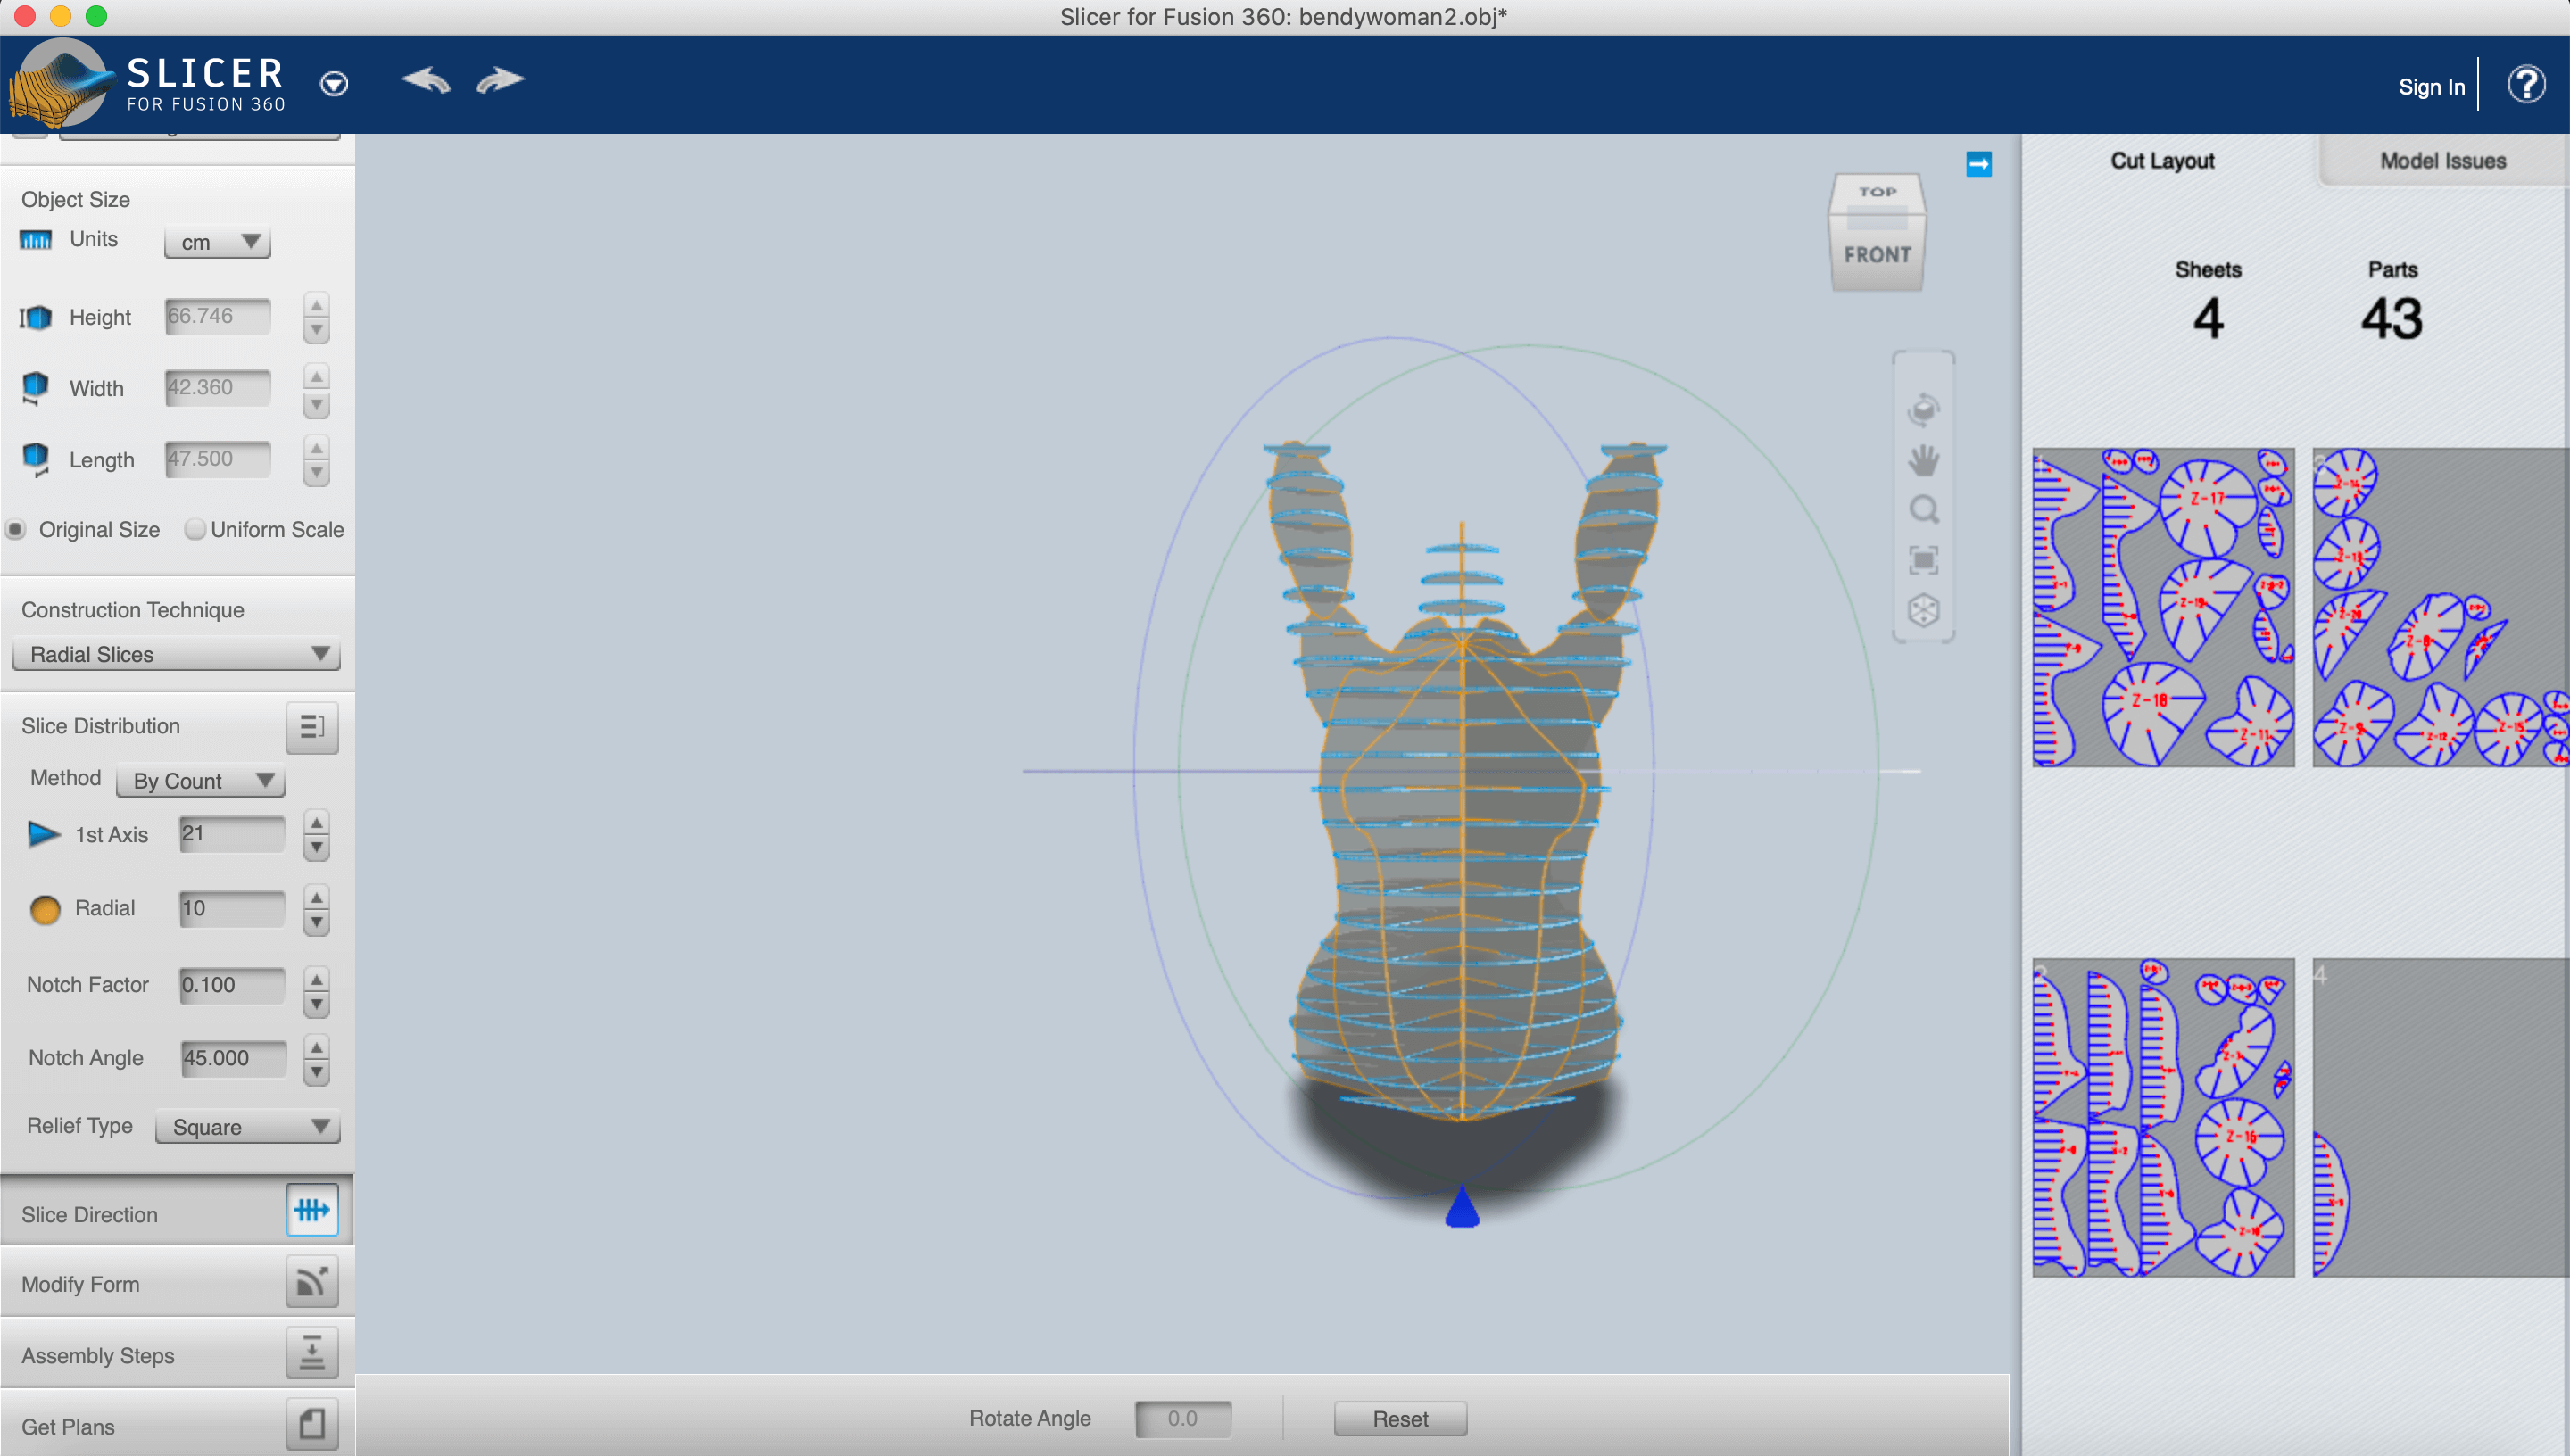
Finally, Slicer:
This programme is made for su to slice and assemble our model first. The next step for our 3D model would then have to be materialised and this is where slicer takes our 3D solid and transfers that into a map for the laser cutter. The file from slicer serves as the guide for the laser cutter in the next step.
So, how to slice?: This is the way I did it.
-
Import OBJ file.
-
Use the cube in the top right corner to turn object.
-
Manufacturing settings, click on drop down menu and select the preset for the material that youa re using. Name this file 'Digital bodies Week 2'.
-
Check the size of the object in cm.
-
There are also different construction techniques for your sliced model:
-
stacked slices.
-
Interlocked slices.
-
Curve.
-
Radial slices.
-
3D slices.
When we were working with the construction techniques, the red parts meant that there is an error and that we must figure out how many parts we need for our own structure. We were given 3 cardboard boards in de Waag to make our own structure. Double checking the sizes is important important to our blue print and playing around with the axis's on our models could mean that the pieces were placed more tactically on your bits of carddboard.
So when you save:
Get plans: and select .DXF. Then using the same scale as we used in Rhino cm or mm. Ready for lasercutting!
Result:
Laser cutting time:
Here are a few photos of the main component of the beloved laser cutter in de Waag.
Seeing as I was late to this one I ahd only followed a couple of lessons/ explanations from Bea.
This is what i got:
-
Use a usb to store your .DXF file. Place this on to your computer and tsore the file locally on the computer that is connected to the laser cutter.
-
Turn on the laser cutter.
-
Open the software for laser cutting in the computer.
-
Import your DXF file by clicking on File > Import and browsing to where your file is located.
-
When your checking the dimensions that you are going to use move your object on top of the grid area in the programme. The measurements should be all around. Select the object in the left bar if you need to scale it as well.
-
To see all of your layers look at the right side of your window. Your object will have its own assigned colour(layer). this colour is a way for the laser cutter to know which layer it is working with. If you change the colour of your layers you could use one for engraving and the other for cutting for example.
Here are some tools to help when figuring out the settings of the laser cutter:
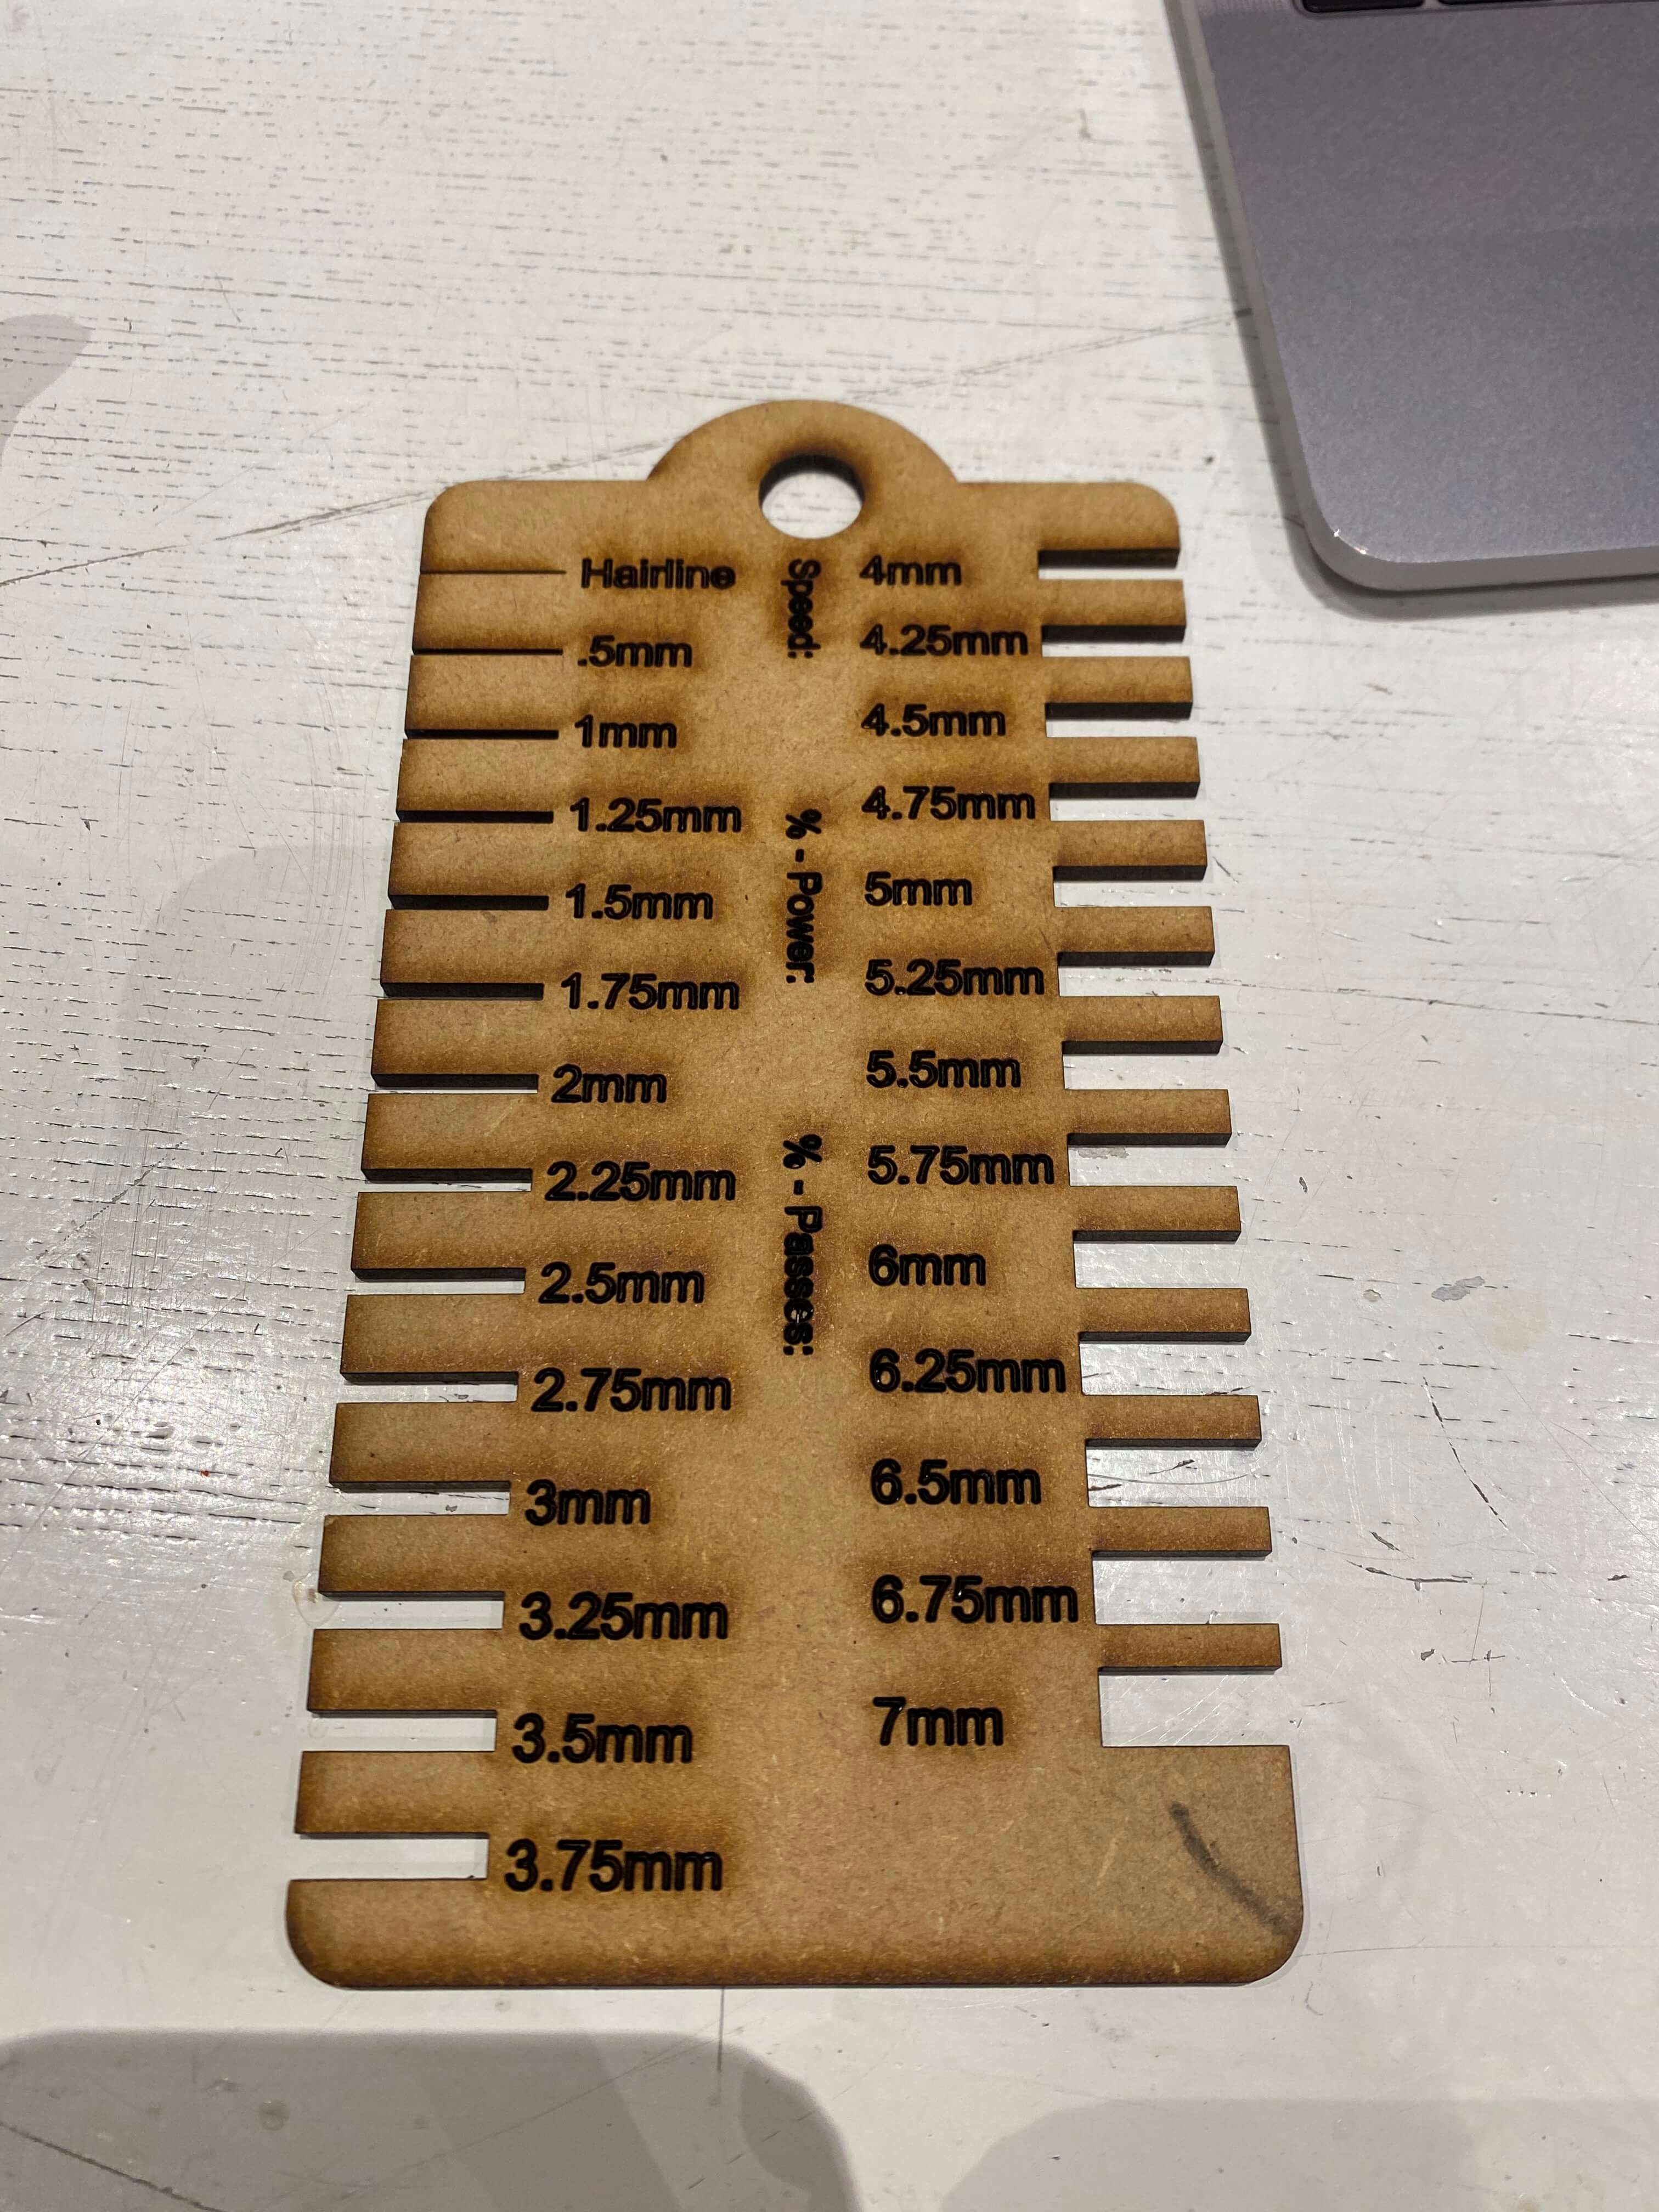
When you're drawing has the right colour, set the parameters of the laser cutter next to the colour on the right.
The parameters are:
-
Power: the intensity of the laser.
-
Speed: the velocity with which the laser head will move through the path of your drawing.
It is always good to test the parametres on a material that isn't your final one, seeing as different settings go with different materials.
My setting for the 3cm thick cardboard was:
-
Mode: Cutting
-
Speed: 100
-
Power: 40
Unfortunately not all the pieces cut through and this was because the cardboard was bent at some of its edges. SOme edges would be closer to the laser nozzle than others. Make sure to look at the top of your page for a blue dot, this means that this is the origin of your laser cut file. The starting point basically. Now click on download on the right and make sure to delete all the previous files on there by clicking on "download current". This will send the file off to the laser cutter.
-
Once your file is ready, now it is time to test. Place your material on the laser cutter bed and make sur ethat everything has been laid flat. The weights are a great aid inn this part to keep the material stable.
-
Use the arrows to allocate your machine to its starting point (Anchor). Once you're happy with the placement, click: Esc - Anchor - Enter. This is now the same anchor point as the blue dot on the software.
-
Press test to check the outline of the file. This is to check optimal material use and no mistakes. The laser head must also be adjusted so that it isn't set too low or too high from the laser bed. use the callibration tool, wooden piece/tool somewhere around the machine. If you place it under the head it should be fitting perfectly. Too tight, the wood doesnt move and too lose it doesn't get jammed. Adjust carefully with the ring at the top.
-
Now you close the lid of the machine and laser cutter and turn on the vacuum under the computer (green button). turn the black nob on the control panel to turn on the laser and press start.
Remarks: Stay close to the laser cutter when it's doing its job. You don't want to start any fires!
process:
Result: Flexi Lady
