Week 6: Bio Fabricating Materials
Welcome to the world of Bio Fabrication.
This week we explored the topic of sustainability by looking at ways to fabricate materials that could substitute some of world most polluting materials today in the day. Materials such as plastics and fossil fuels for example.
The importance here was to learn the techniques of the traditional craftsmanship’s and of the current technologies, in order to progress and process developed products which can be interesting in their use as well as their aesthetics.
The inspiration for this week is Bea Sandinis work from her final project in the previous year at de Waag: Some of her innovative work:
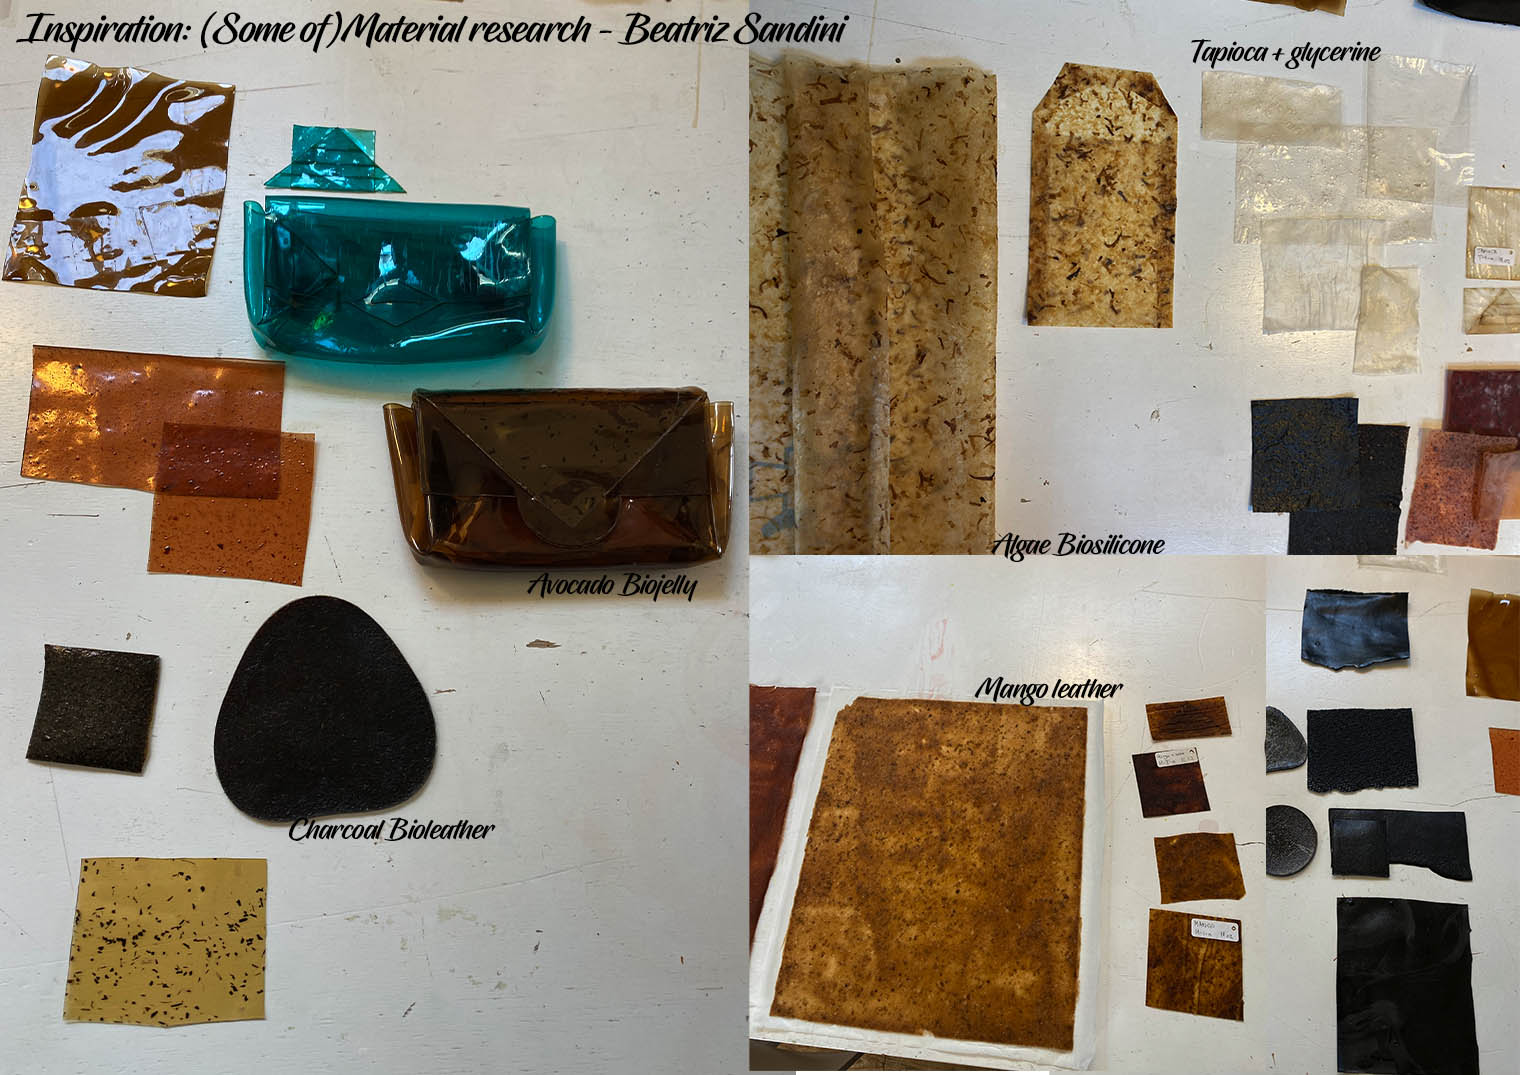
To see the rest of her collection be sure ot visit her page! It's very inspiring.
Marvellous Alginates:
The Alginate that Cecilia had brought with her was made the day before: How biofabricate materials are categorised:
Either: Crafter or grown.
Either: Plastic/Bricks/Yarn or Leathers.
Either: Raw ingredients/ made materials.
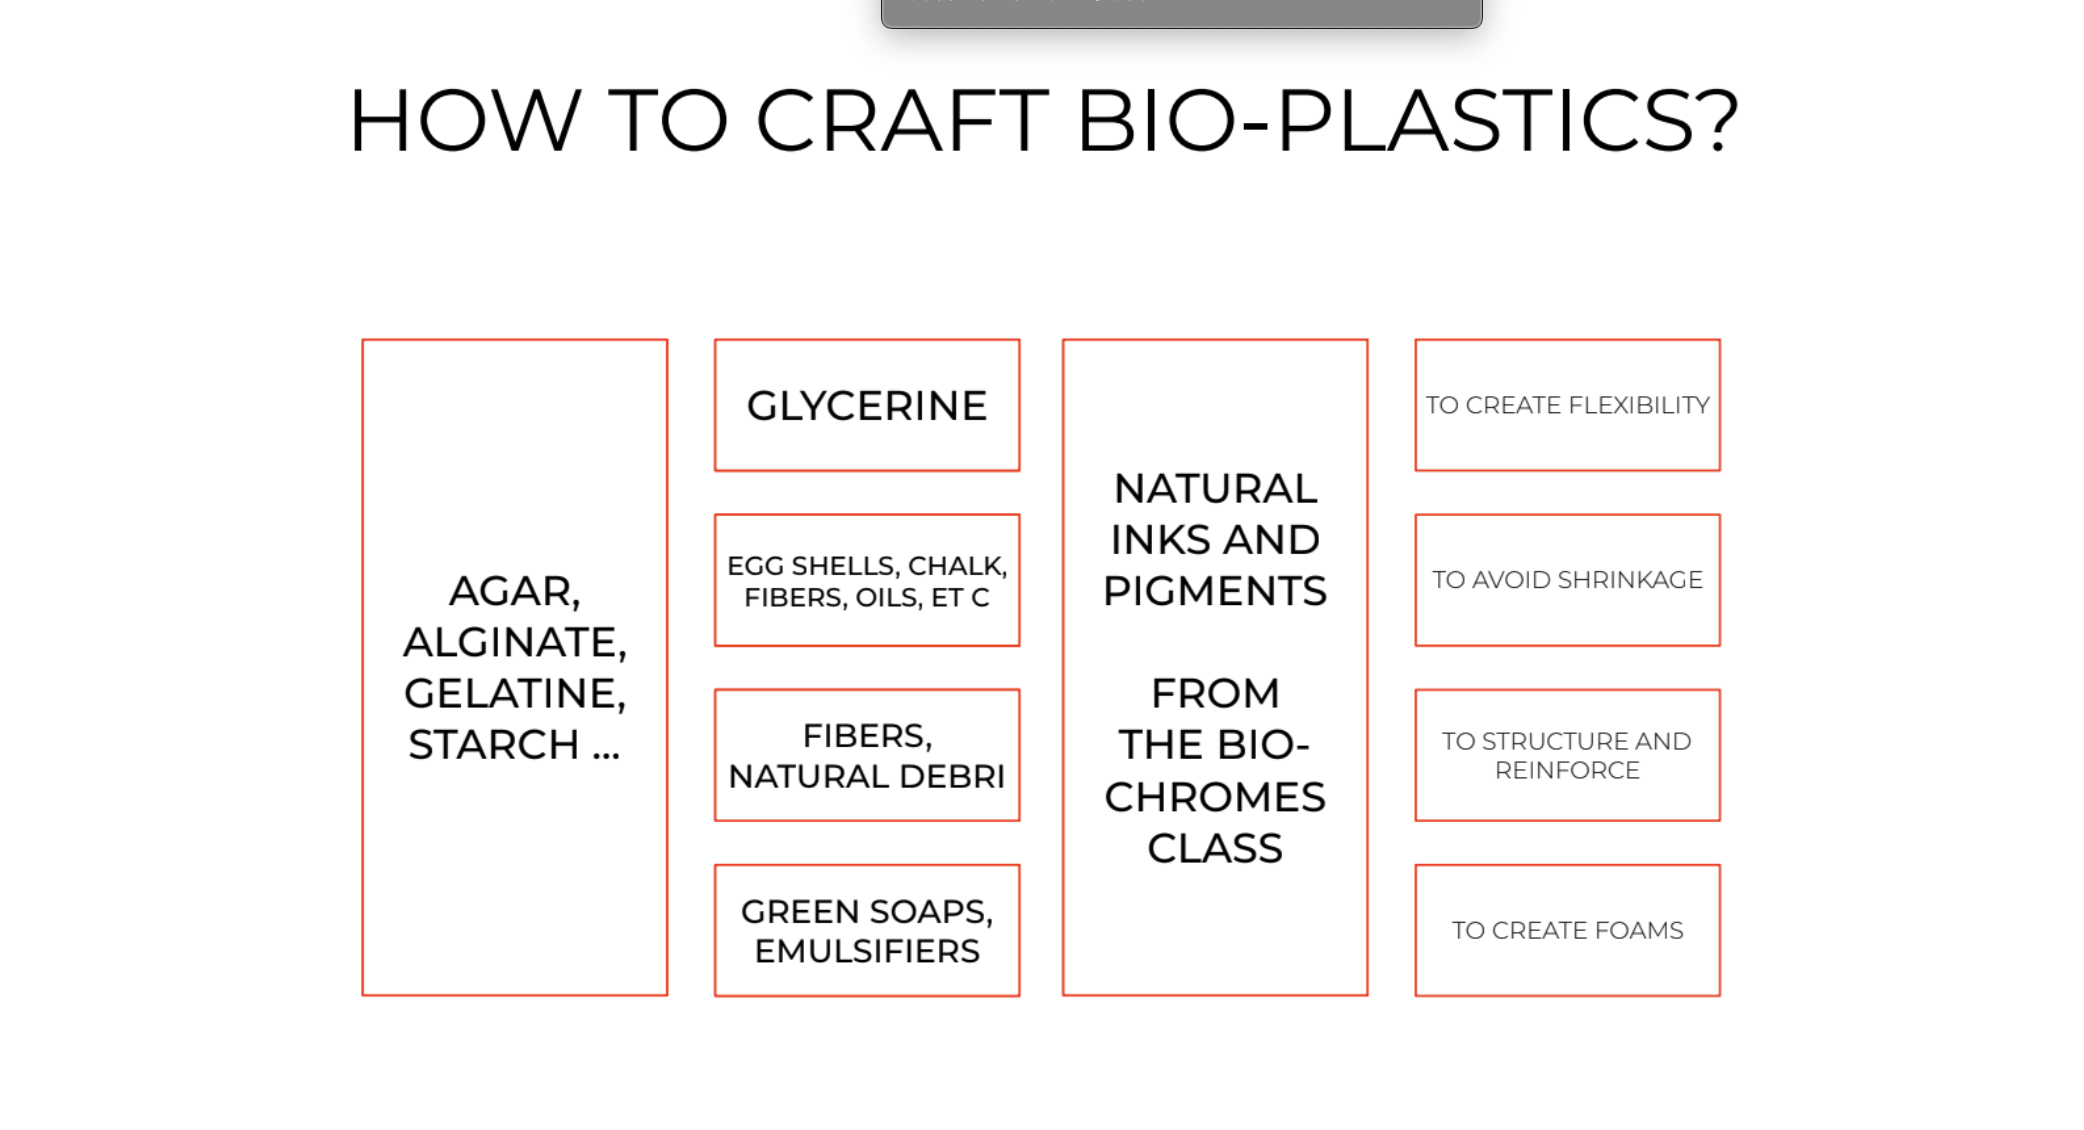
How to create bioplastics: Image was taken from Cecilias beautiful presentation:
Bioplastics - Alginate recipe:
The Alginate that were produced on the first day were all made with cold water. Materials:
-
Blender + Hand held blender.
-
Containers.
-
Not hot water.
-
Glycerin.
-
Calcium Chloride solution (made with the grains 10%).
-
Casting mats, some with interesting textures to cast you alginate on later.
Recipe 1: - Unique Alginate 24 gr.
- Water 800 ml + Glycerin 50 ml (Bland in uniform)
Method: Once the water/glycerine mixture is blending, slowly add the alginate to the mixture. Bubbles will be formed, let it sit.
Make a mix of Calcium C. 10g grains. + 100 ml water – place into hand sprayer.
Once you lay out your alginate onto a surface and you’re happy with the shape, spray the calcium carbonate solution on top to cure the solution. This helps to catalyse the process.
Method: Add alginate onto texturised surface and press down lightly with a flat mat. This will help with the textures on the alginate.
Result: The shapes will shrink as long as there is Calcium C. added to it. Insert photo collage of the process: one photoshop slide.
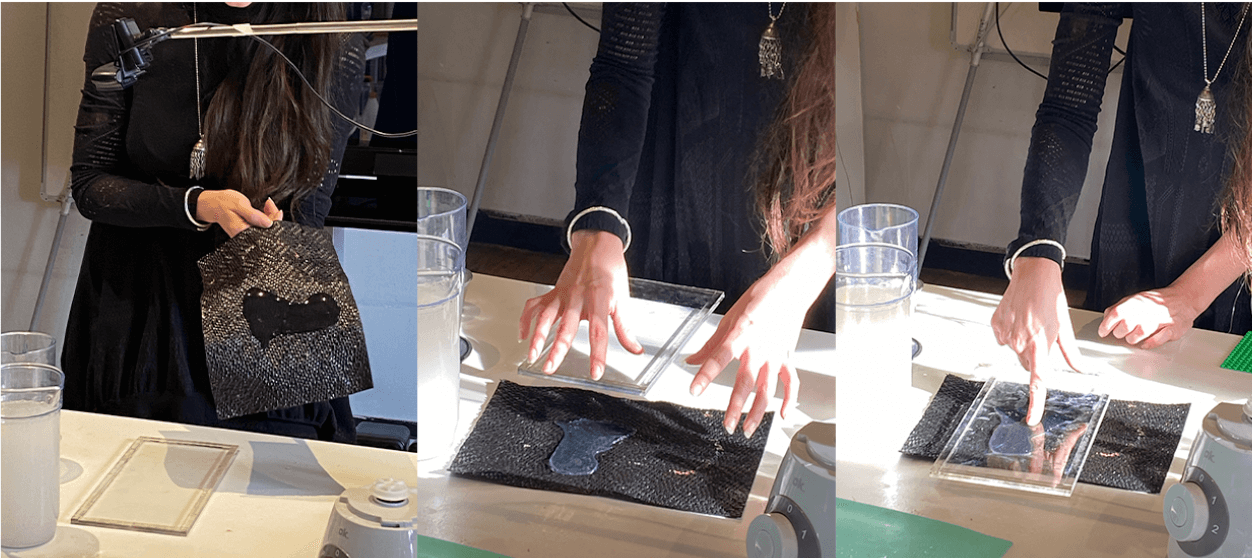
What you see here is that the Alginate starts to shrink immediately once the Calcium chloride solution is sprayed on top of the material.
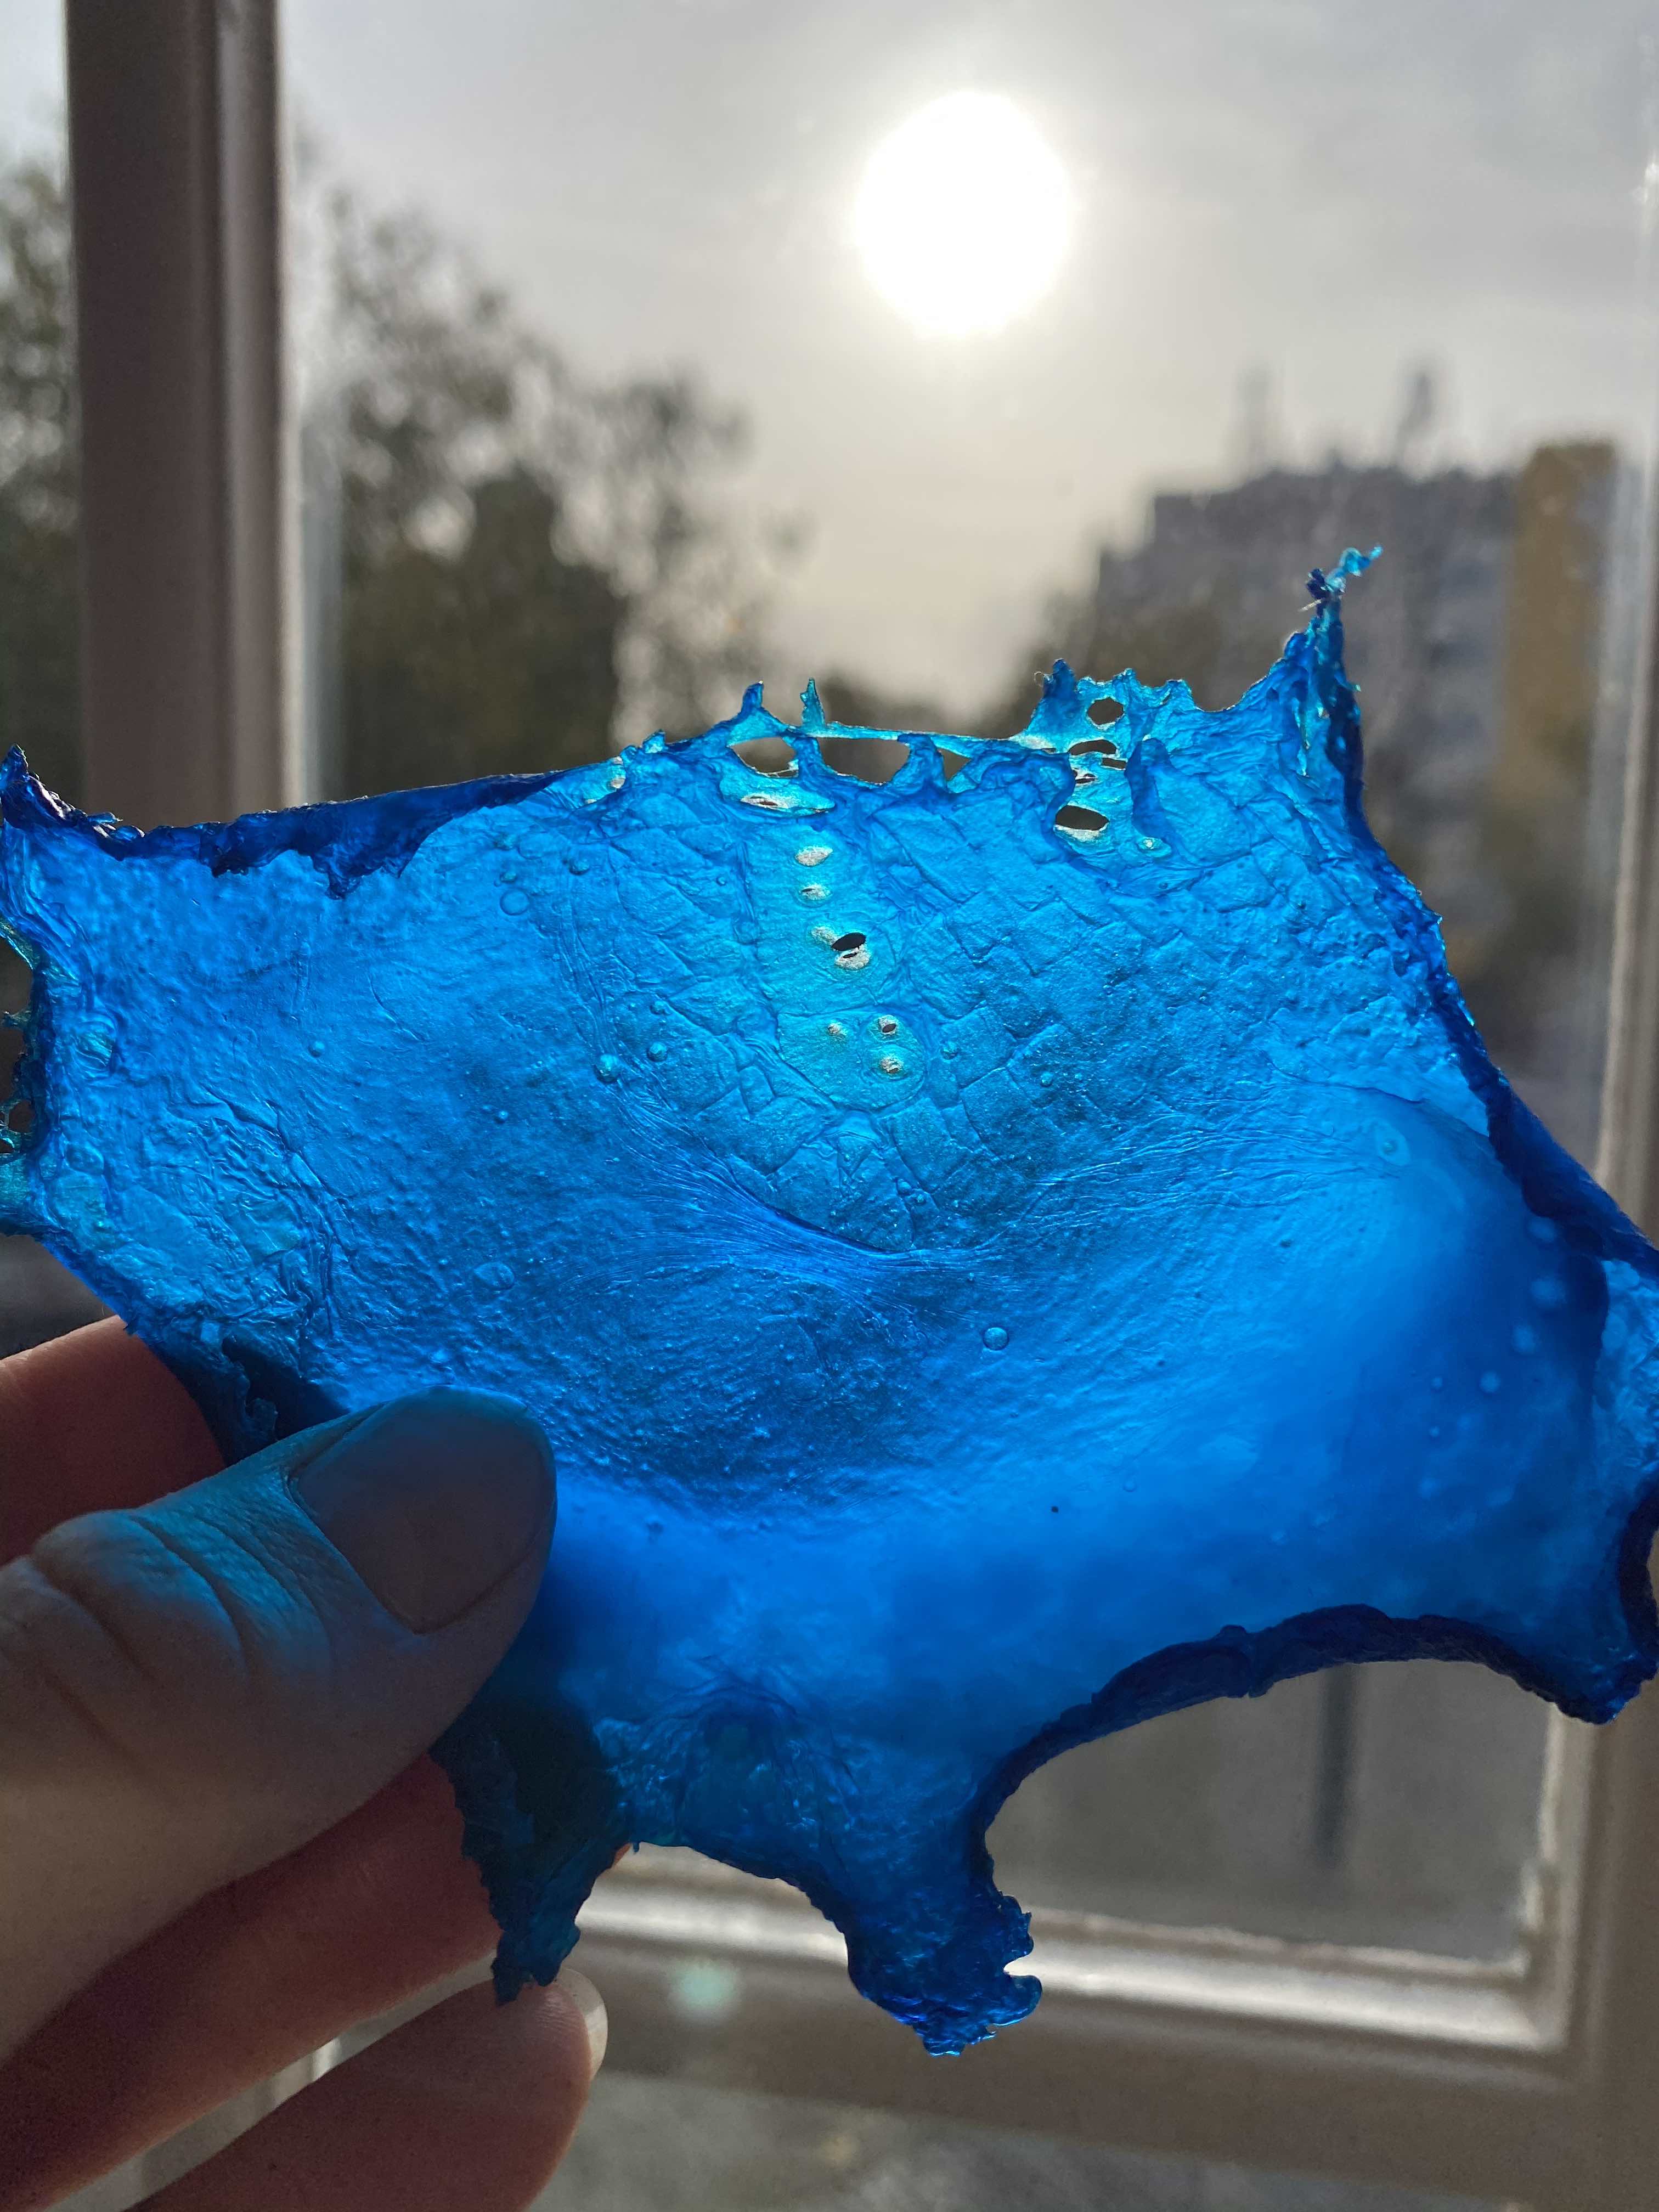
- Flexible thin Bio-Foil:
Before: Random shapes on textured surfaces.
After drying:
Saras turn – A different Alginate recipe
Flexible Bio-plastics (3 x the amount)
Material:
-
Alginate 36 gr.
-
Glycerin 60 gr.
-
Sunflower oil. 30 ml.
-
Water 600 ml.
-
Sodium chloride hydrate 30 ml.
-
Water 300 ml.
Method: - GLycerin + water 600 ml. Mix.
-
Add sunflower oil. Mix. (add water if your hand blender is failing a little because it is too thick)
-
Blend – cast and leave for 24 hours.
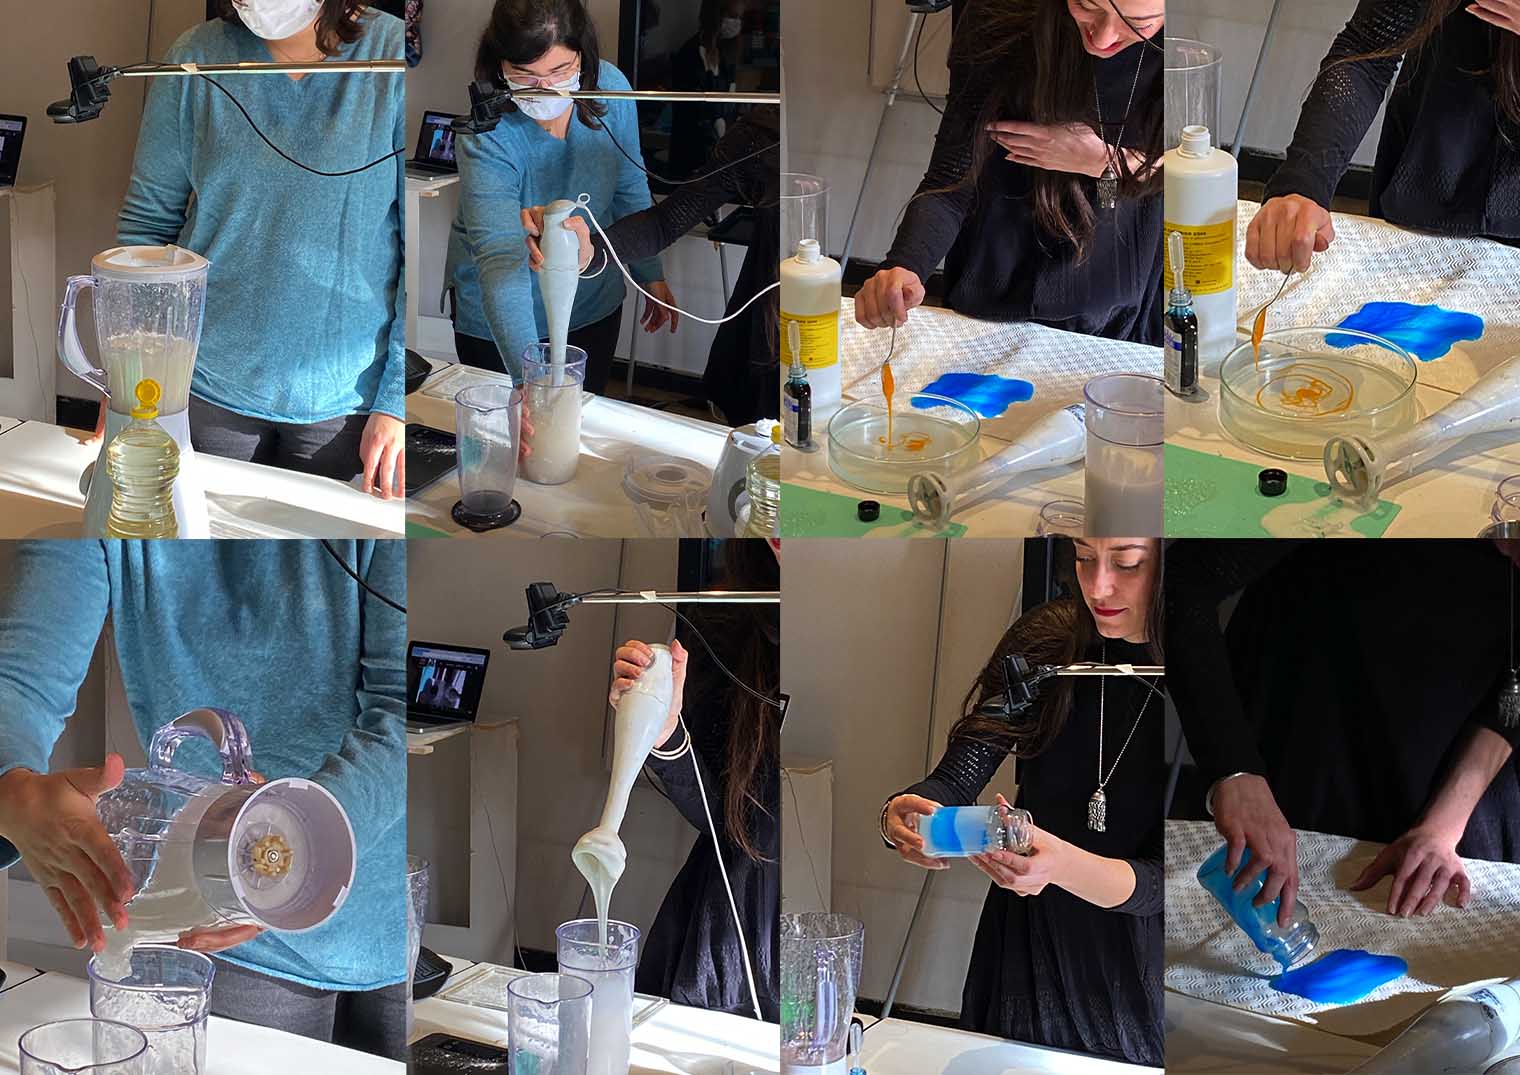
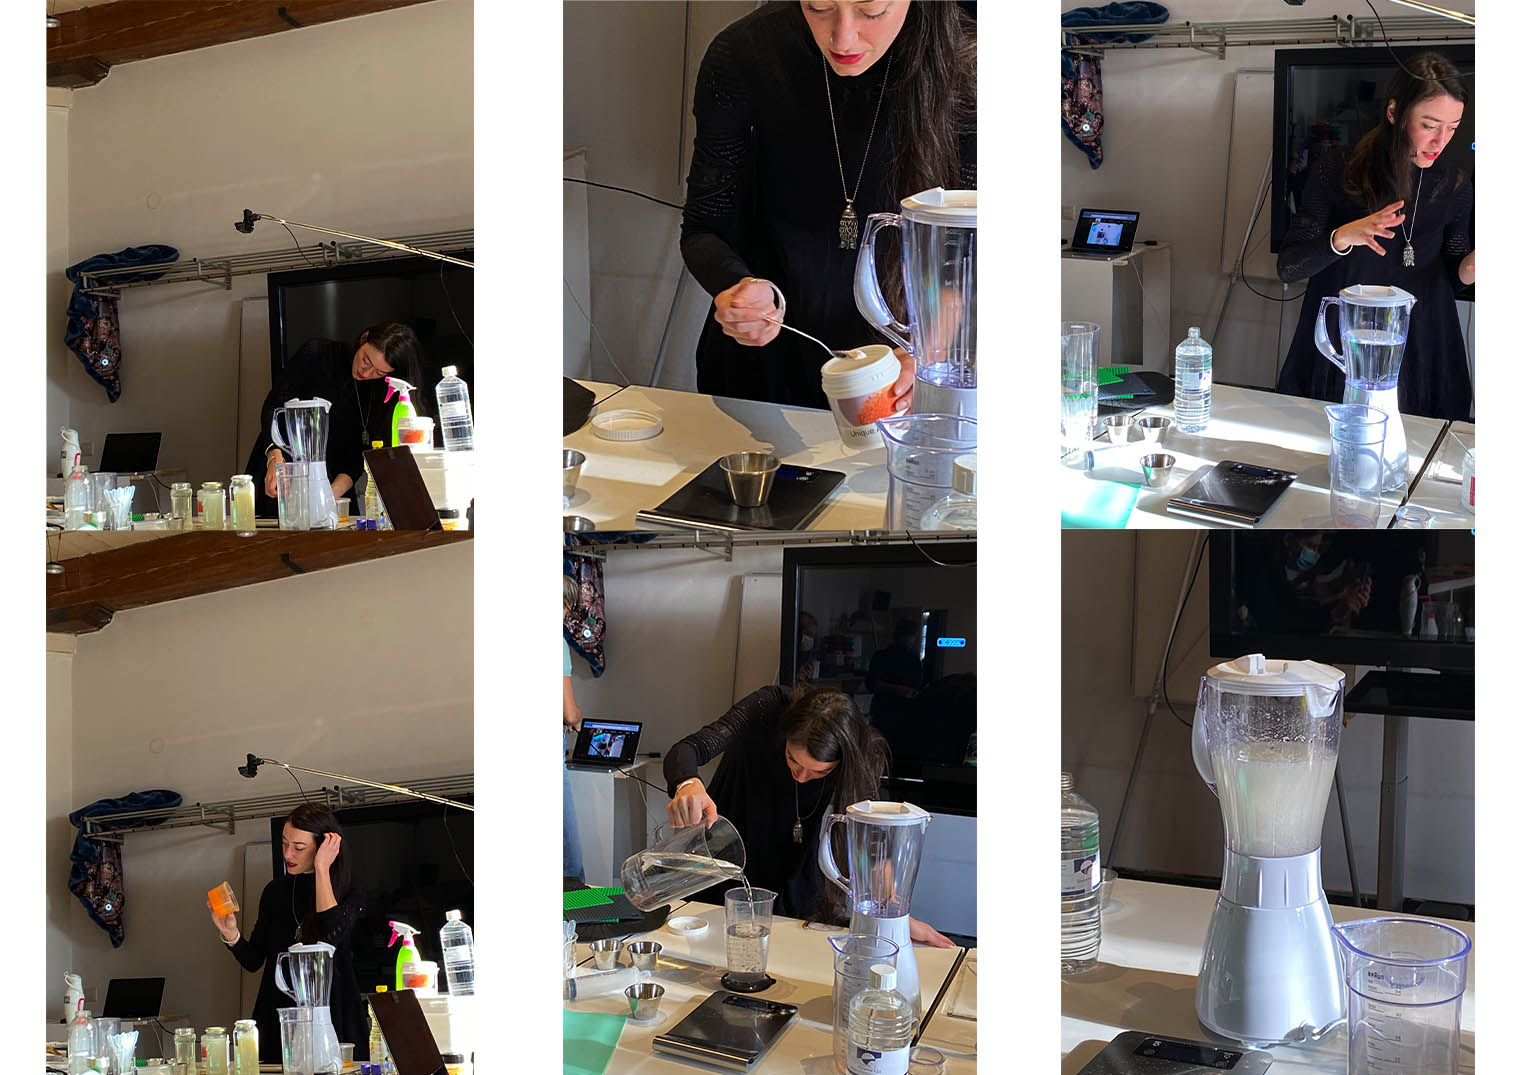
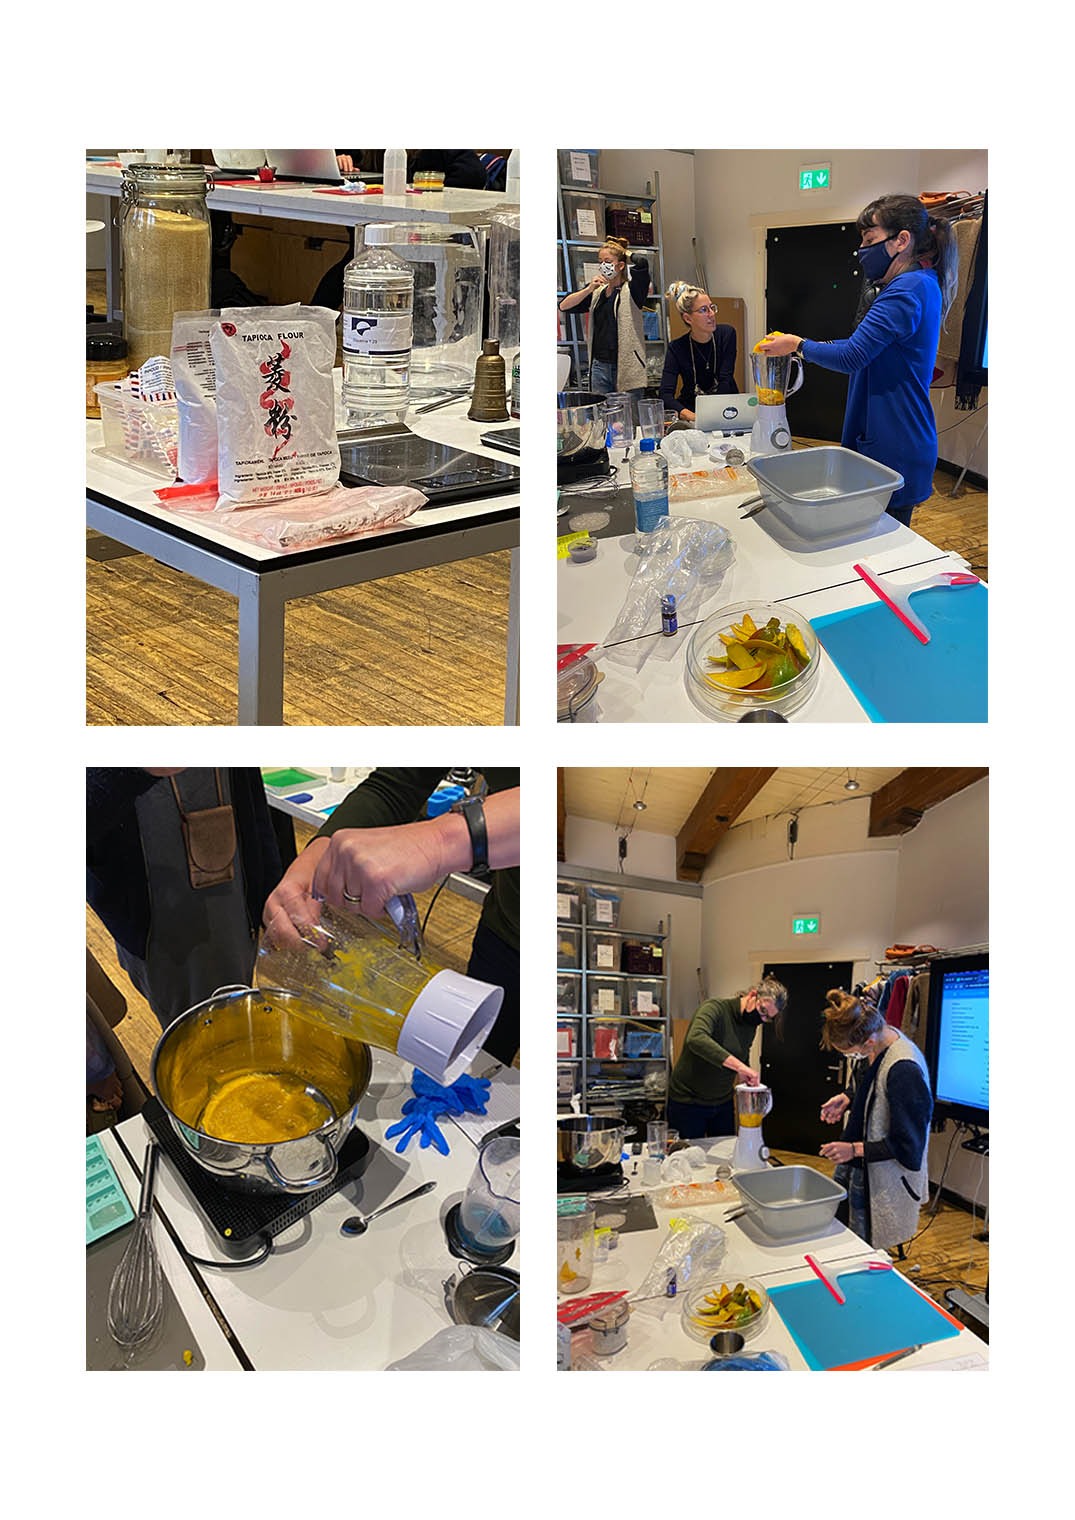
On the left we see Sara working on recipe no.4 of the Alginate. Once blended Cecilia (on the right), shows us how we are able to mix the Alginate with different colourants to create interesting pieces. The blue liquid is a food colouring and holds a strong colour. If you were to push this to a more sustainable level yuo could incorporate natural dyes or pigments to create the colour for the Bioplastics.
Experimentation time:
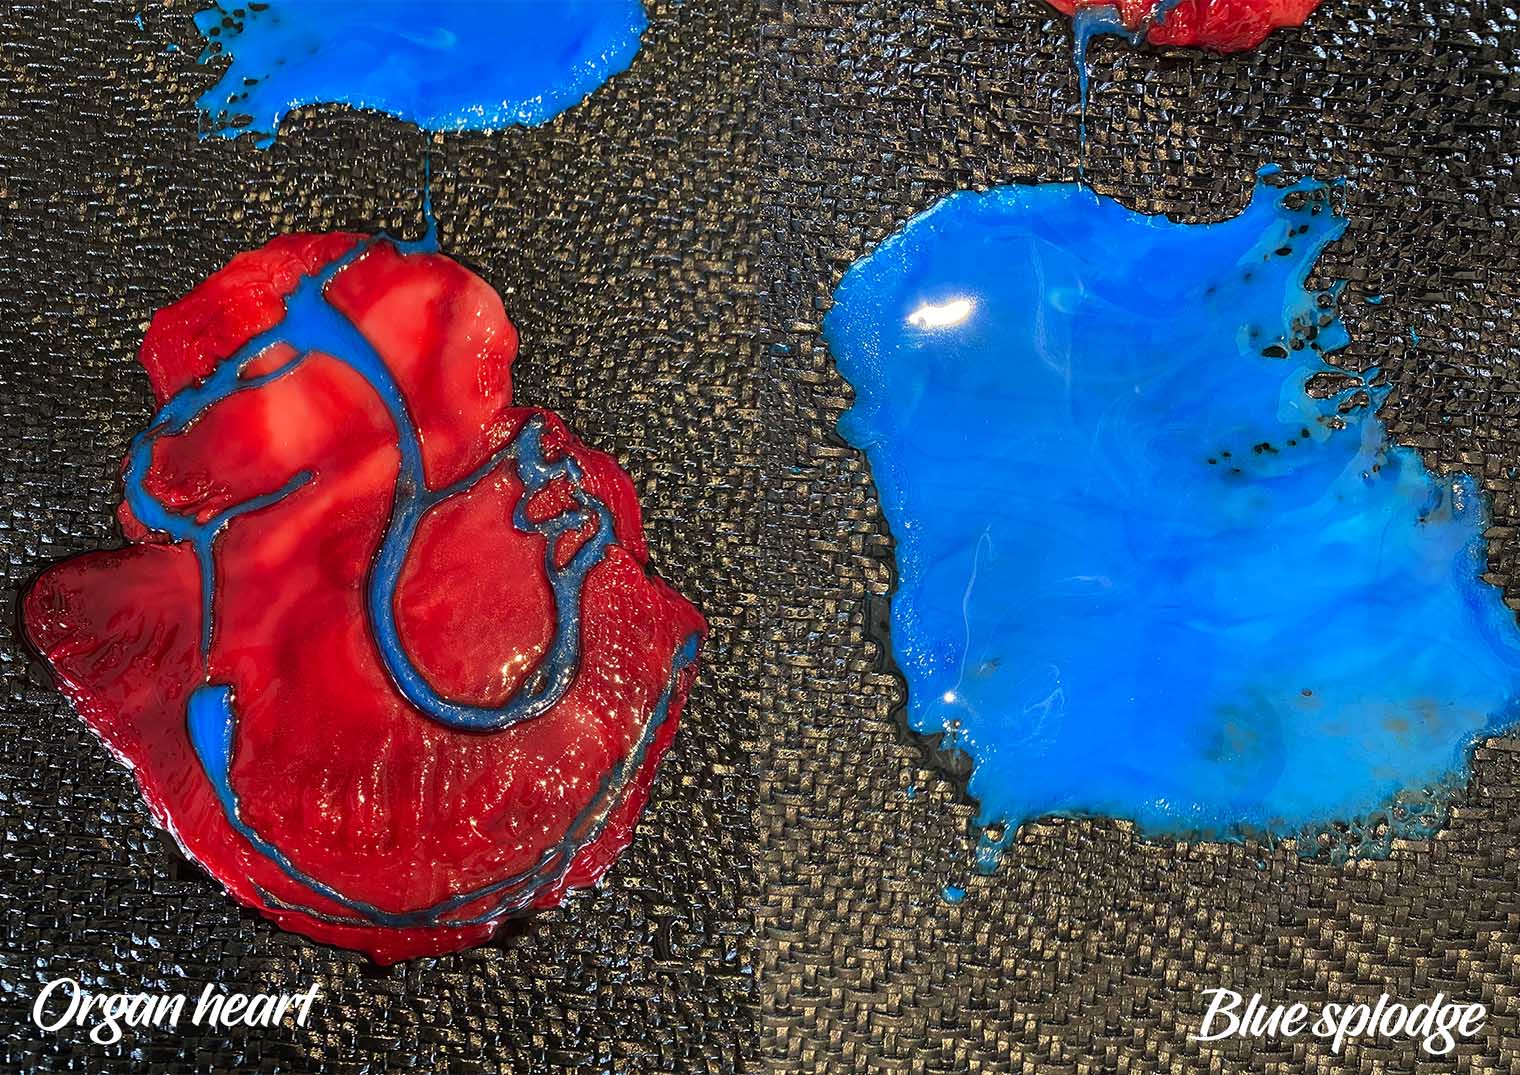
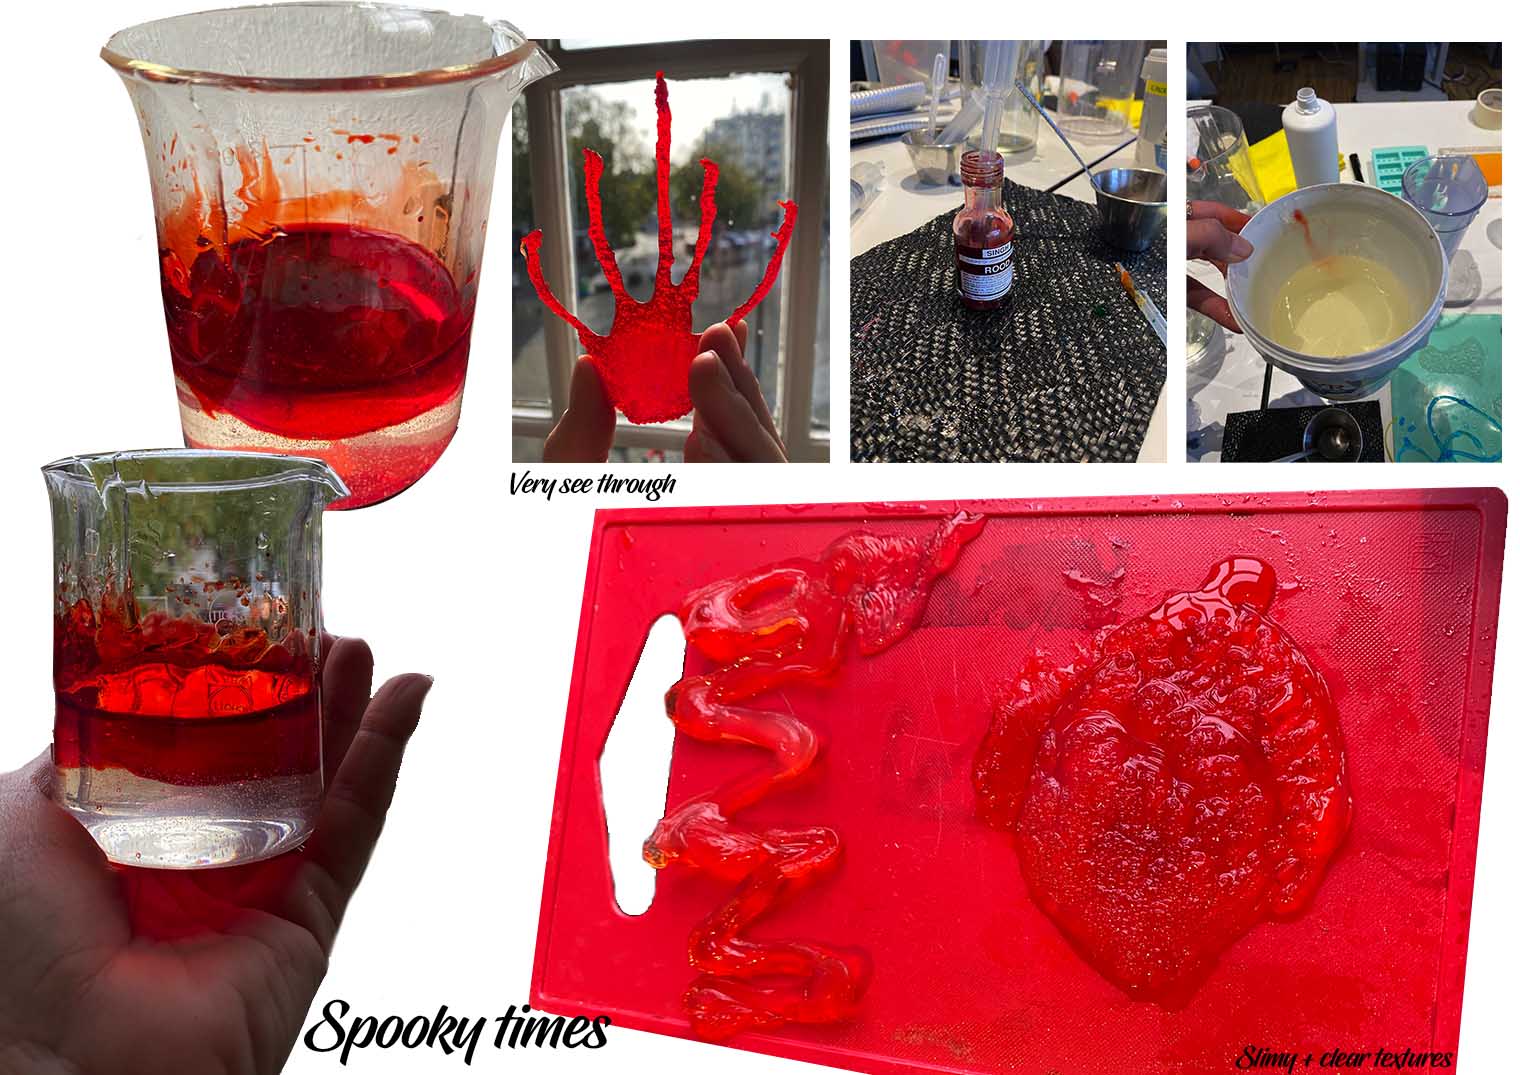
My very first experiment was based on the first recipe that we did. For this I used food colouring both red and blue to see if I could reach and intensity in colour. I only sprayed the Sodium chloride hydrate on one side of the material. My organ heart and blue splodge are a success as they dry on the textures surface. No particular shape was kept in mind for these two bioplastics. The shapes took two days to dry.
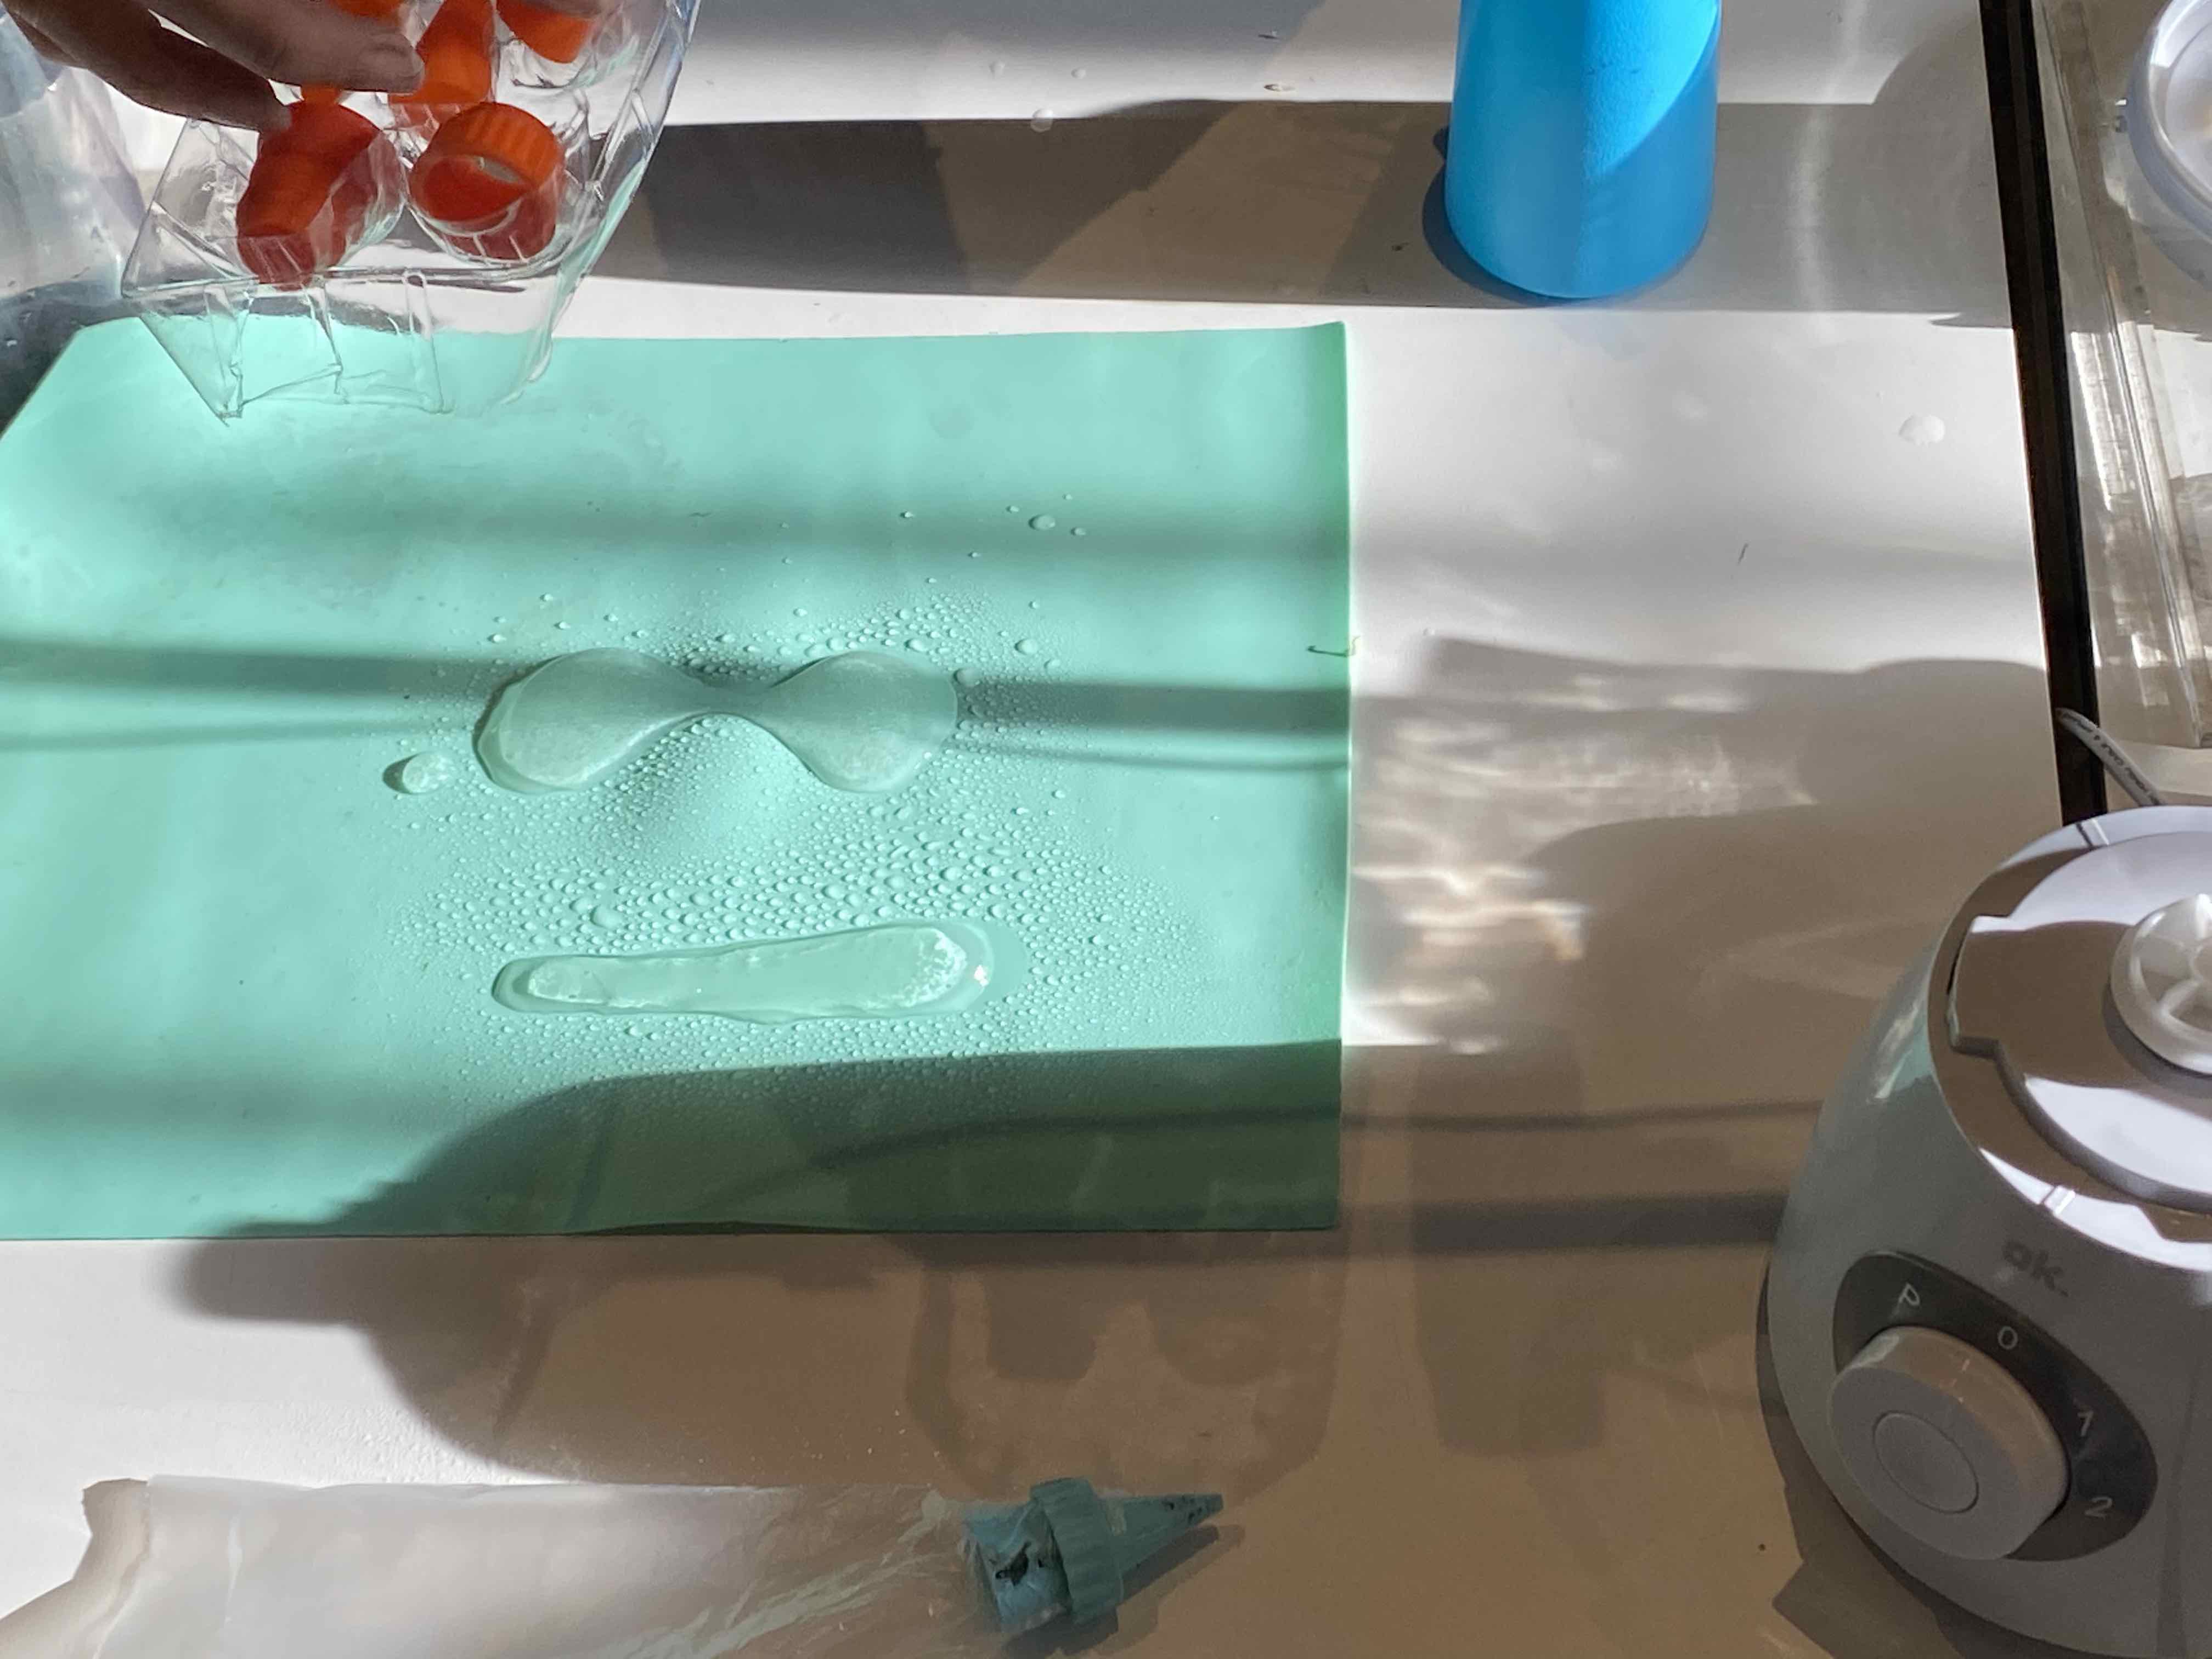
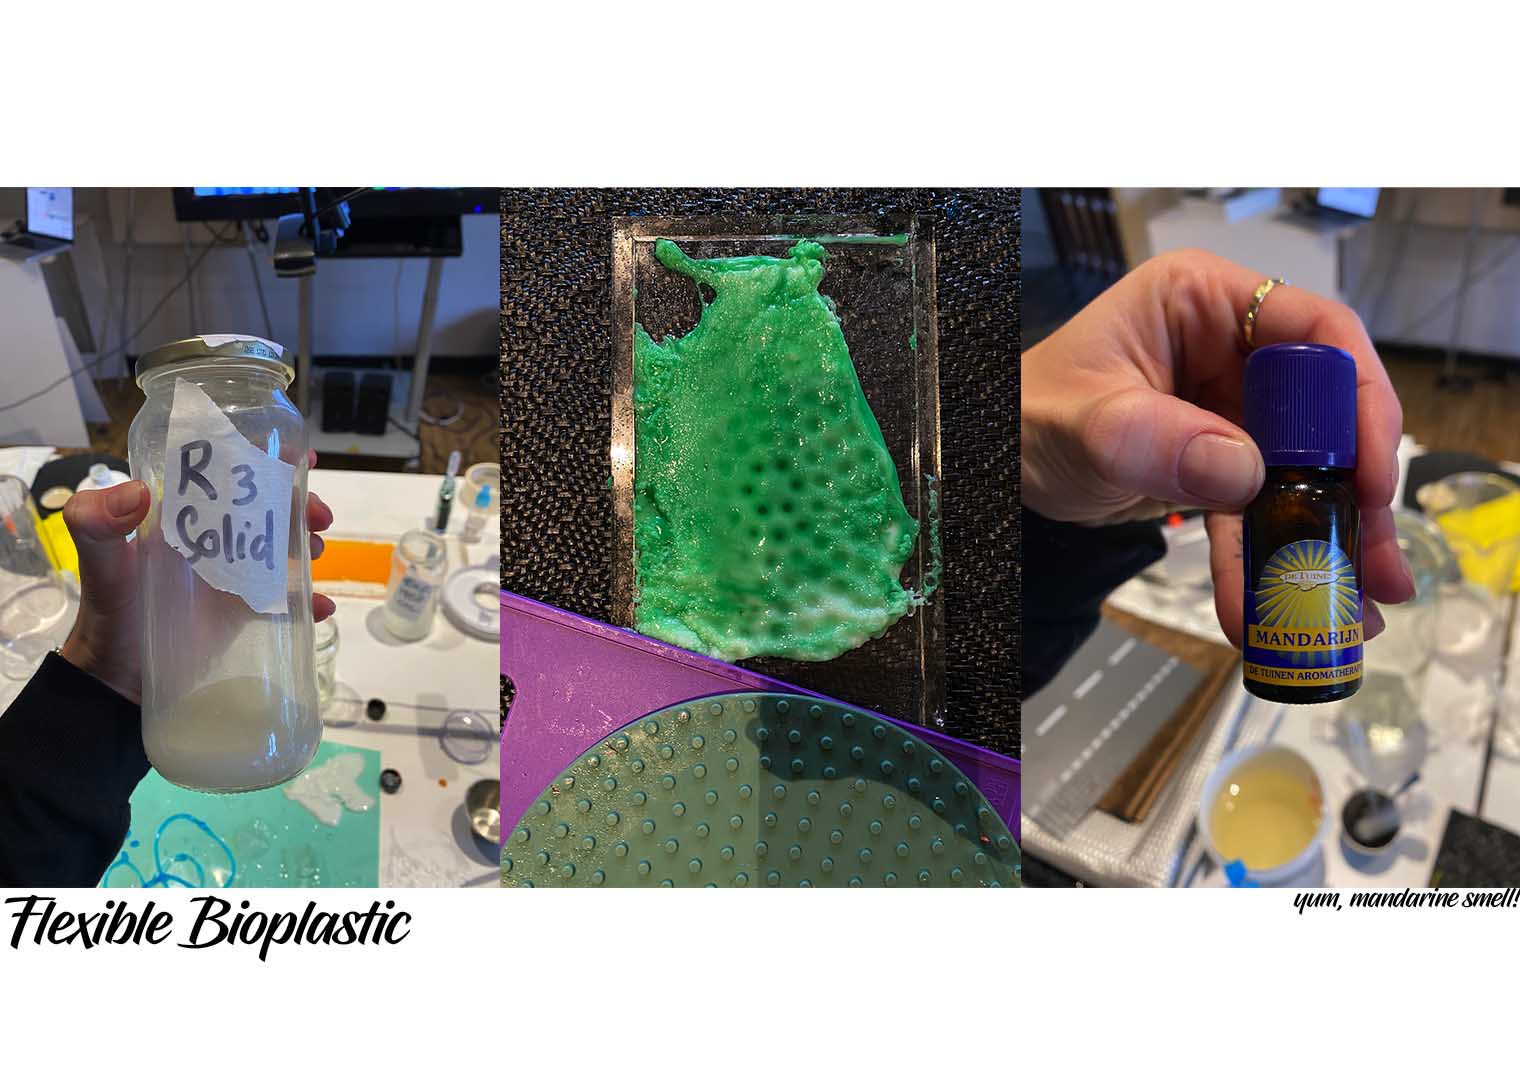
Green/white texture glass flat surface. Smells like mandarines.
Round circle eye and zig zag. See through.
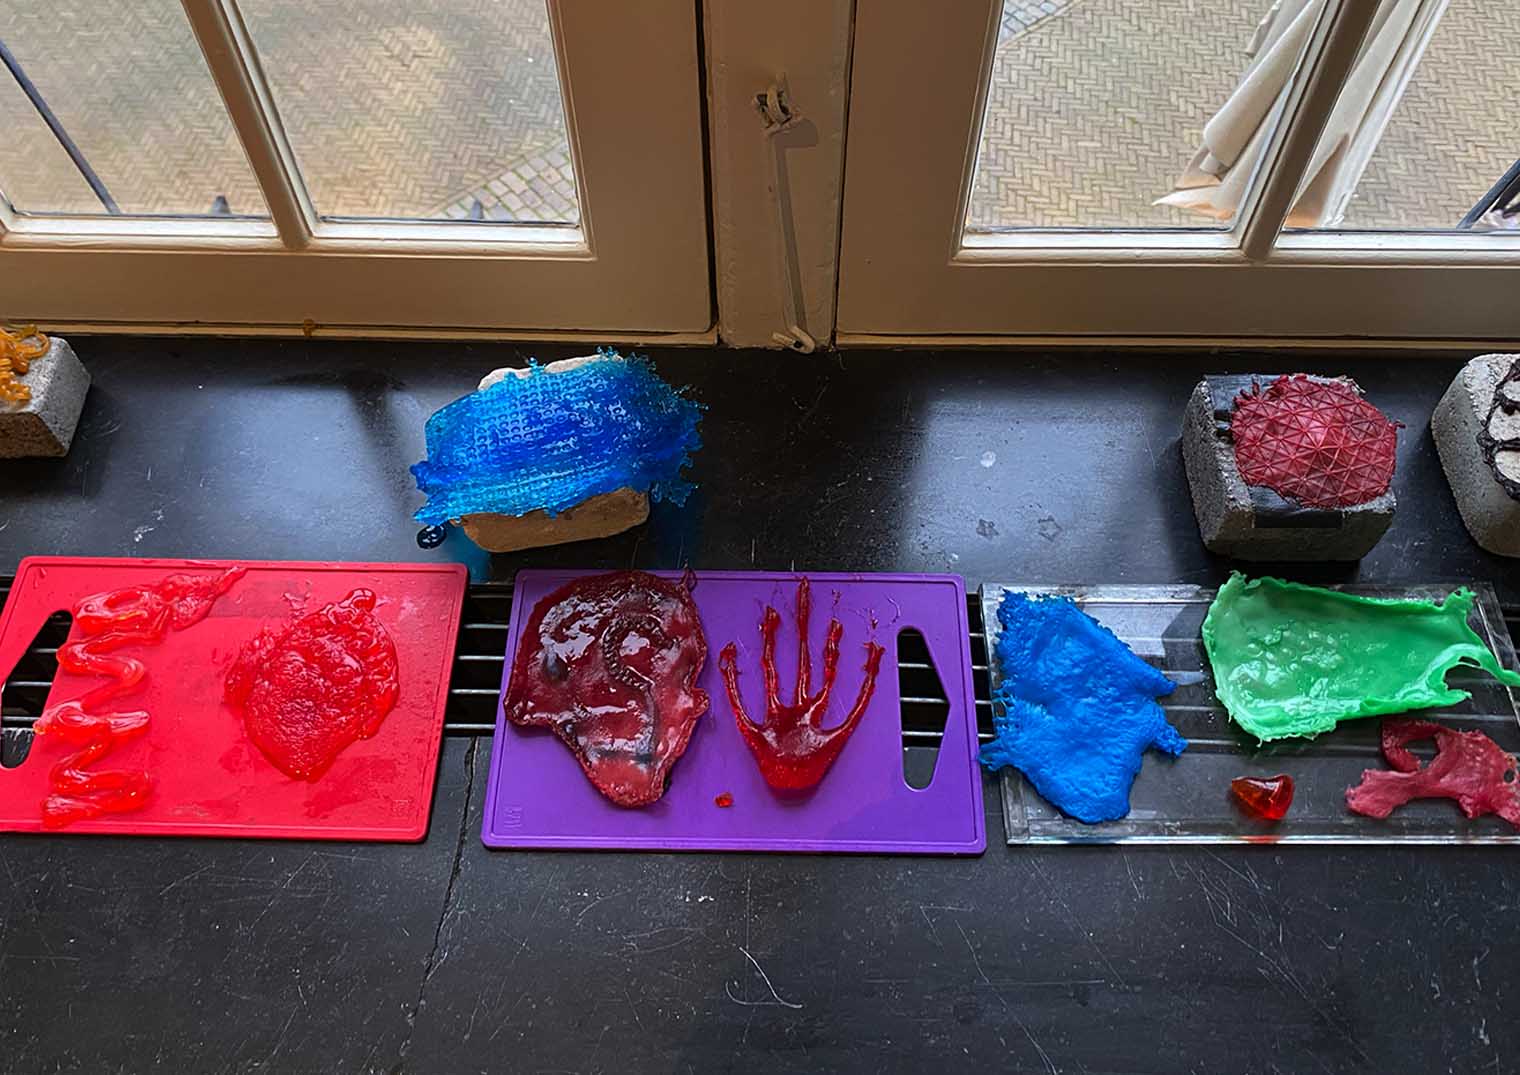
The final result: after drying the pieces next to the heater:
There was also another method to mold the alginate. This involved placing it inside a syringe and pressing this into a bath of Sodium chloride hydrate. The second the alginate meets the Sodium chloride hydrate , the material catalyses and stiffens into shape. The effect looks like something that could be drawn using a 3D pen.
Insert photo here: alginate noodles...
Mission of this week: create two bioplastics. Mango tapioca leather and alginate/gelatin.
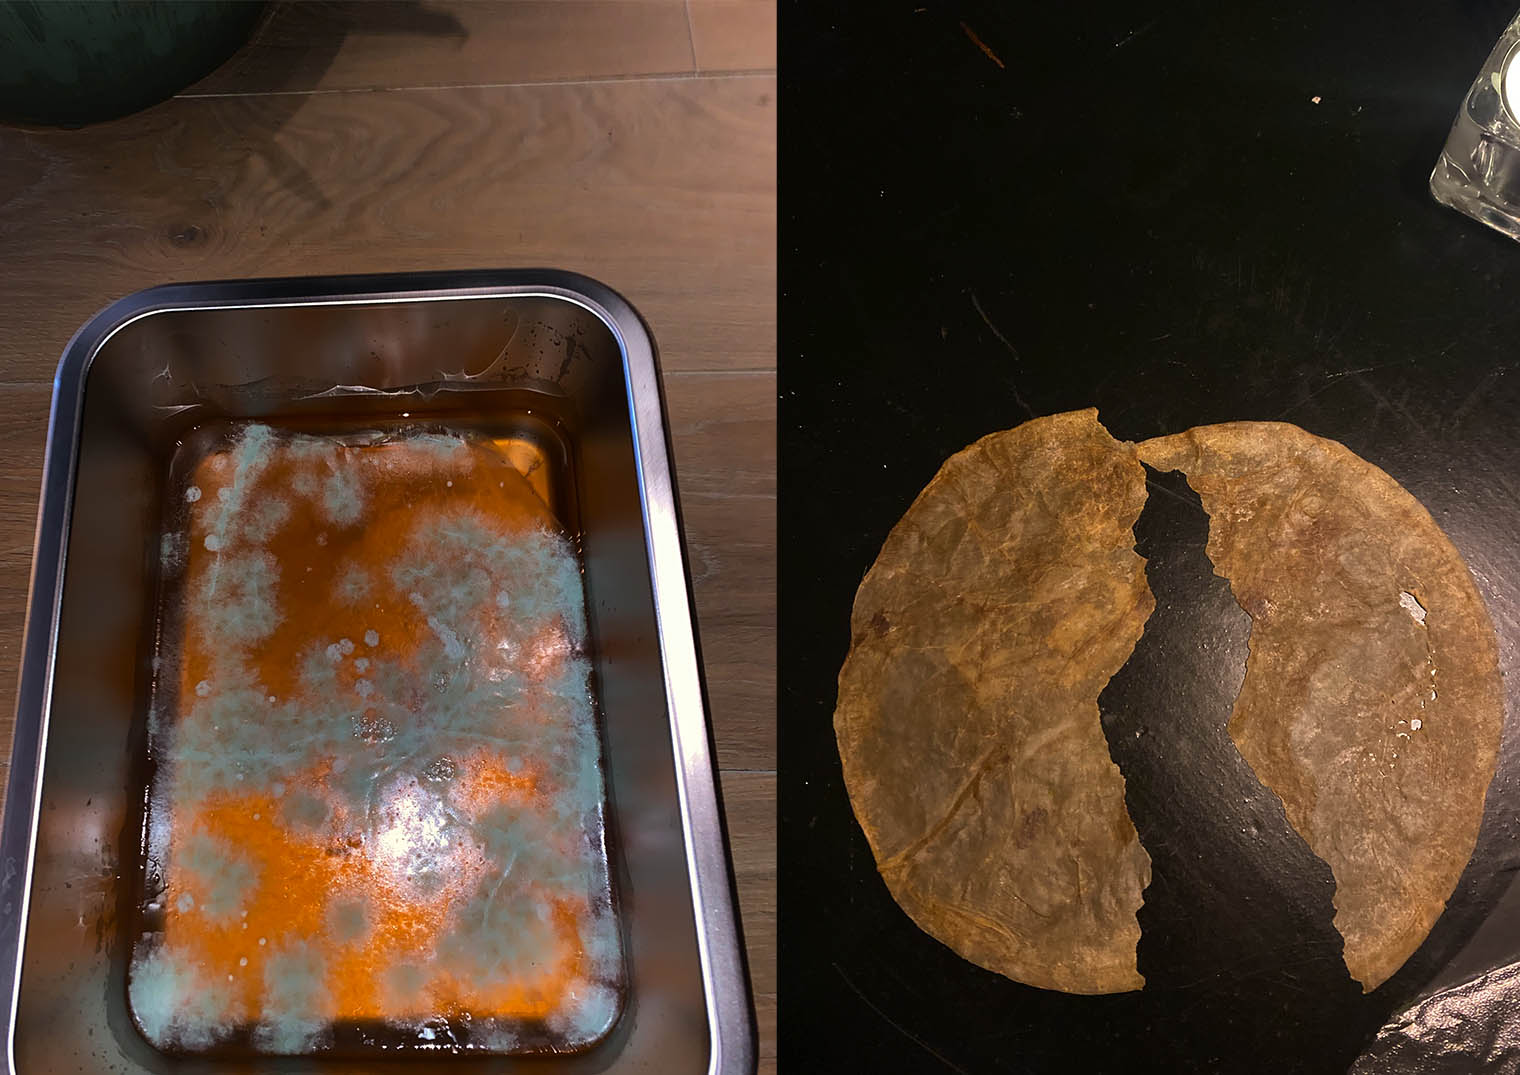
Kombucha time:
Guest speaker: Lorena.
What is Kombucha?:
 source: https://www.merriam-webster.com/dictionary/kombucha
SCOBY: Symbiotic Component of Bacteria and yeast.
Process: Sugars – Yeasts – Ethanol – Bacteria – Acetic Acid – Nanocellulose.
The bits at the top of the liquid are called microbial cellulose.
In Lorenas experiments she looked at: (liquid dyes) Food affects kombucha differently.
-
Red wine: for example: the ethanol in red wine causes the kombucha to boost in the velocity and structure of Kombucha.
-
Blueberries:
-
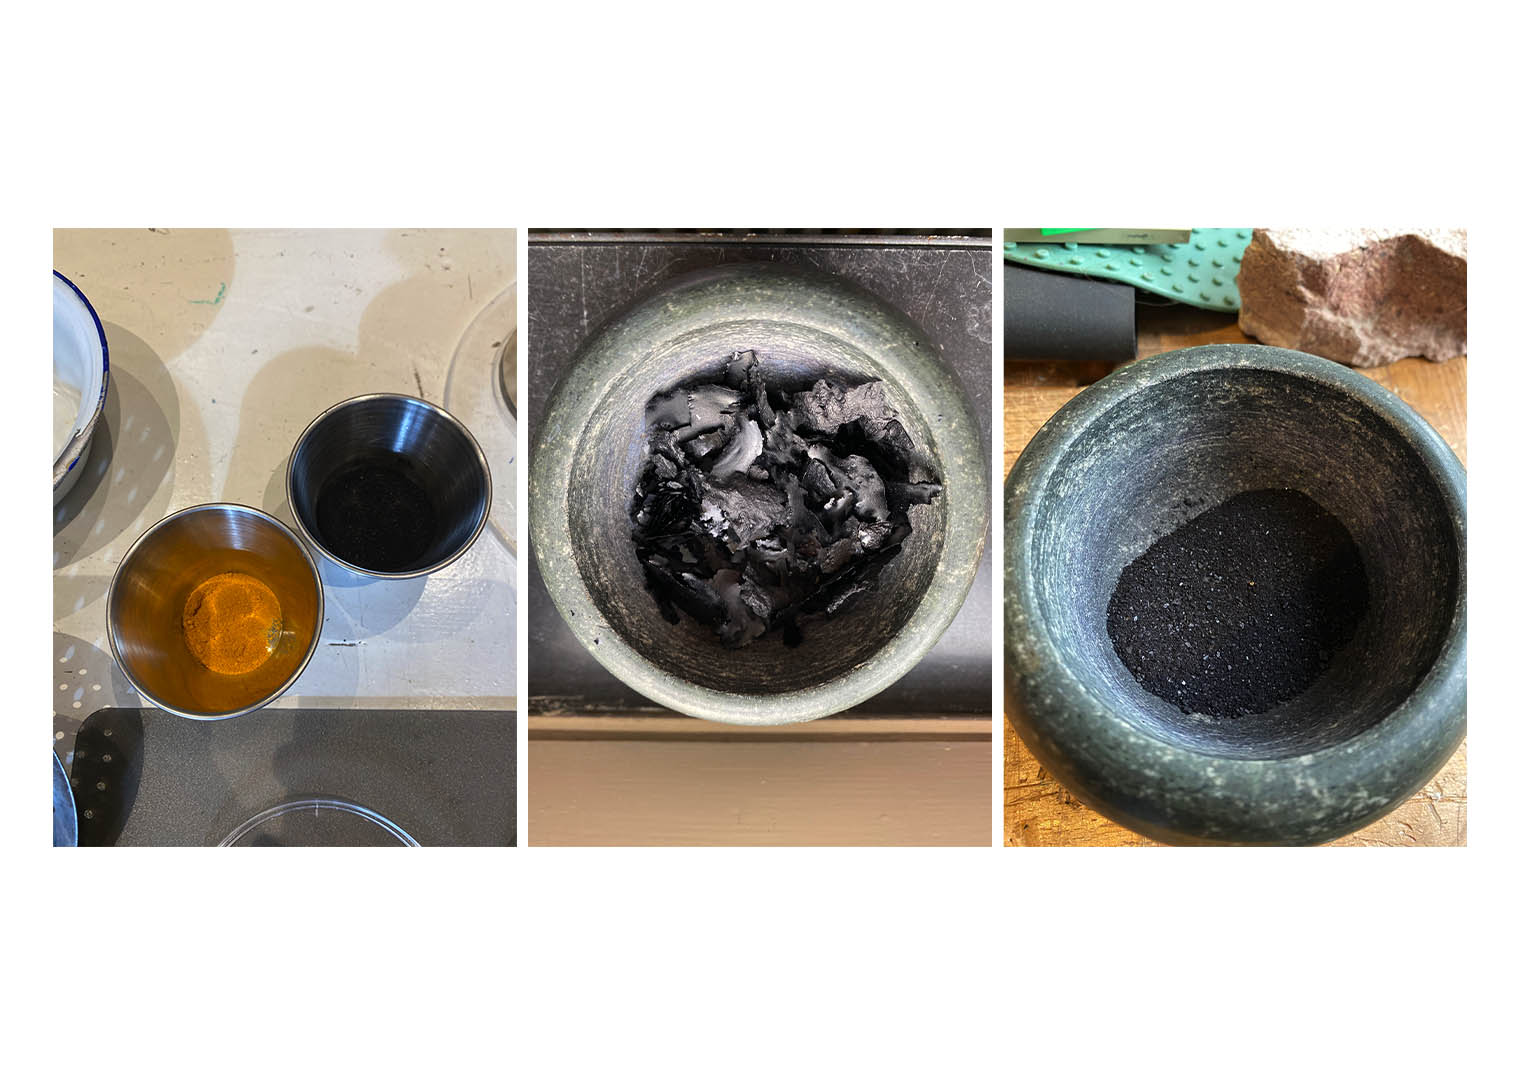
Turmeric. (pigment dyes)
-
Charcoal.
-
Spirulina.
-
Turmeric.
The great things you can do with this kombucha experiment:
-
Print on top.
-
Make it into a second skin with healing components. Aloe vera?
Examples of people who work with it already: - Suzanne Lee. - Lorena Trebbi. - Kawasaki Kazuya. - Zionum. - Emma van der Leedt. - Moya Hoke.
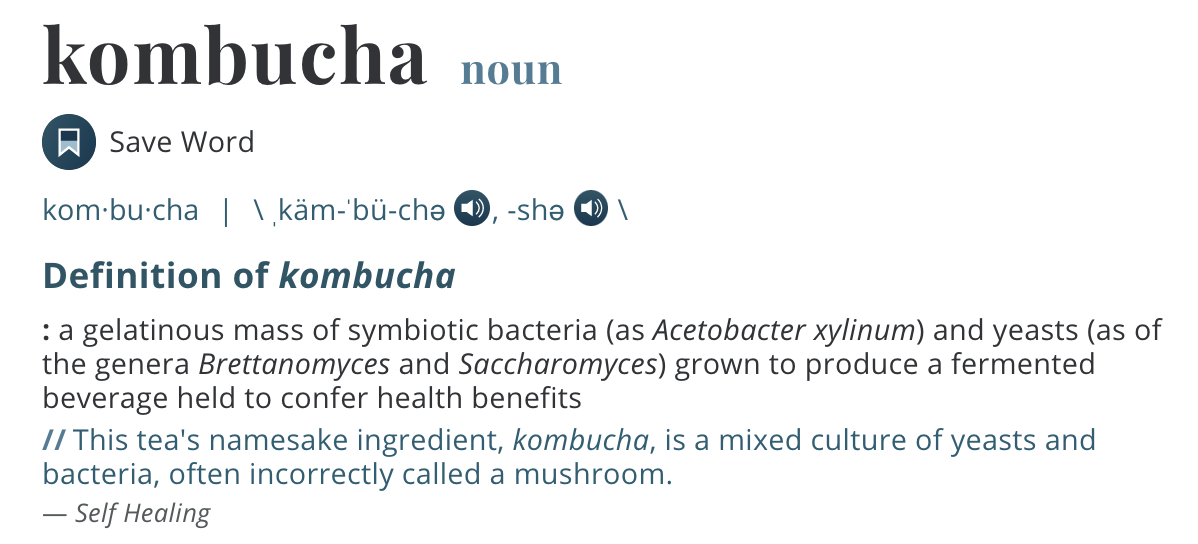
This weeks equipment for the experimentation:
Tips for the brewing of Kombucha leather:
-
There is a high risk for contamination with your brews, always wear gloves, tie your hair etc.
-
The perfect pH for it to brew is between a 2.5 and 3.5 pH.
-
If there is any mould forming on your kombucha feel free to kill it with some vinegar.
-
DO NOT close your lid on your batch entirely. This will cause for water droplets to form and damage your SCOBY. Sue a kitchen cloth or leave you lid slightly open. Watch out for insects though, you run a risk of contaminating you r batch with an open lid.
-
Other tannins may be used as well such as tea, coffee and wine.
-
Watch out for the cleanliness and pH of the water form your tap. The regions where you extract water from are sometime more contaminated than others. In Holland, fortunately we have very clean water! Less vinegar is needed to acidify the water.
-
Watch out with the material of your container. A material such as metal can cuase for fungus to grow on your S.C.O.B.Y and infect your whole batch! Like in the photo beneath.
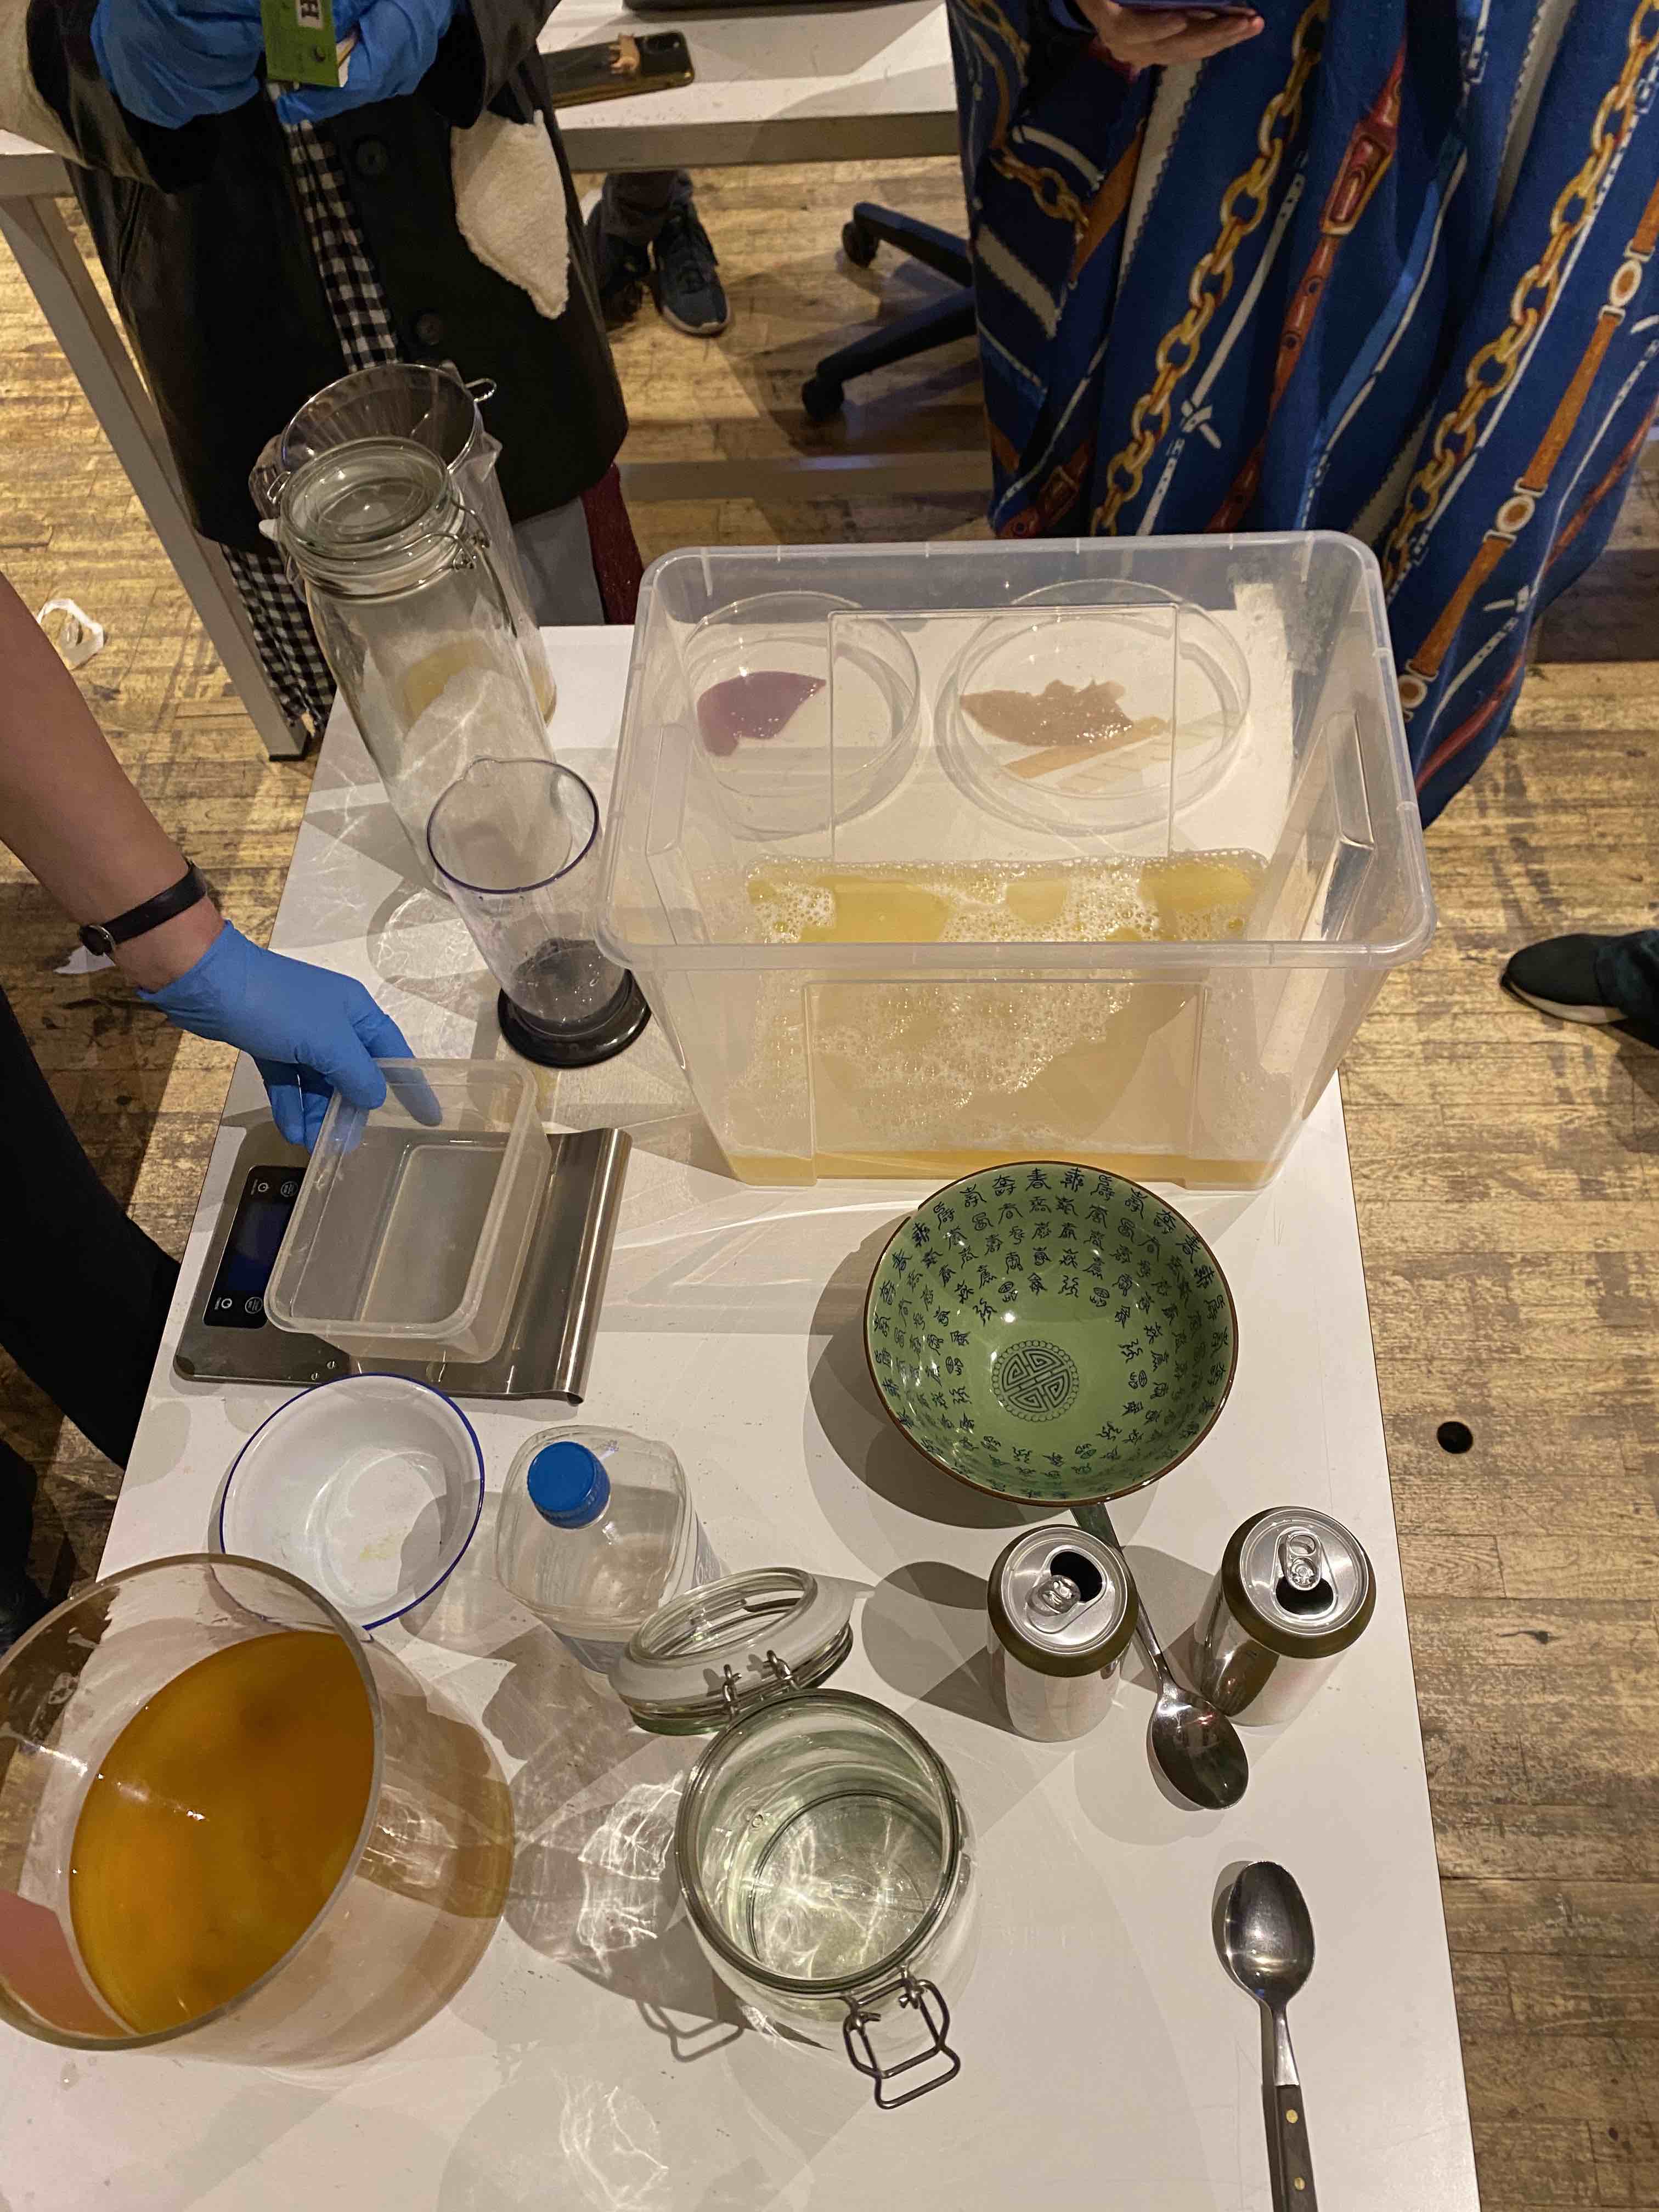
Kombuchafails:
Left: An untreated S.C.O.B.Y that dried out and ripped. Right: A contaminated Kombucha brew. This may have happened because the steel container wasn't disinfected properly before pouring the batch in. Believe me these things will happen as the brew is super fragile!
Experimentation time: Recipe: Green tea kombucha:
Materials: - Green tea extract: 1 litre.
-
SCOBY plus starter liquid 330ml.
-
White sugar 330 ml.
Method: 1. Mix the green tea with the starter liquid.
-
Measure its Ph – This was 3, so no vinegar added.
-
Add sugar – Stir Bea’s starter with the mixture.
-
Add SCOBY.
-
Close the lid half and label the box.
-
Place next to heater and let it ferment!
We will see the dried product of this Kombucha experiment in 3 - 5 days.
Kombucha beer brew:
Materials: - Schwartz beer – 1 litre.
-
Water – 1 litre.
-
White sugar – 200gr.
Method:
-
Mix the beer with the water.
-
Measure pH – we had to add some vinegar. Add little by little till you get pH 3.
-
Add sugar and stir.
-
Add starter liquid + Beas Beer SCOBY.
-
Close the lid half and label the box.
-
Place next to heater and let it ferment!
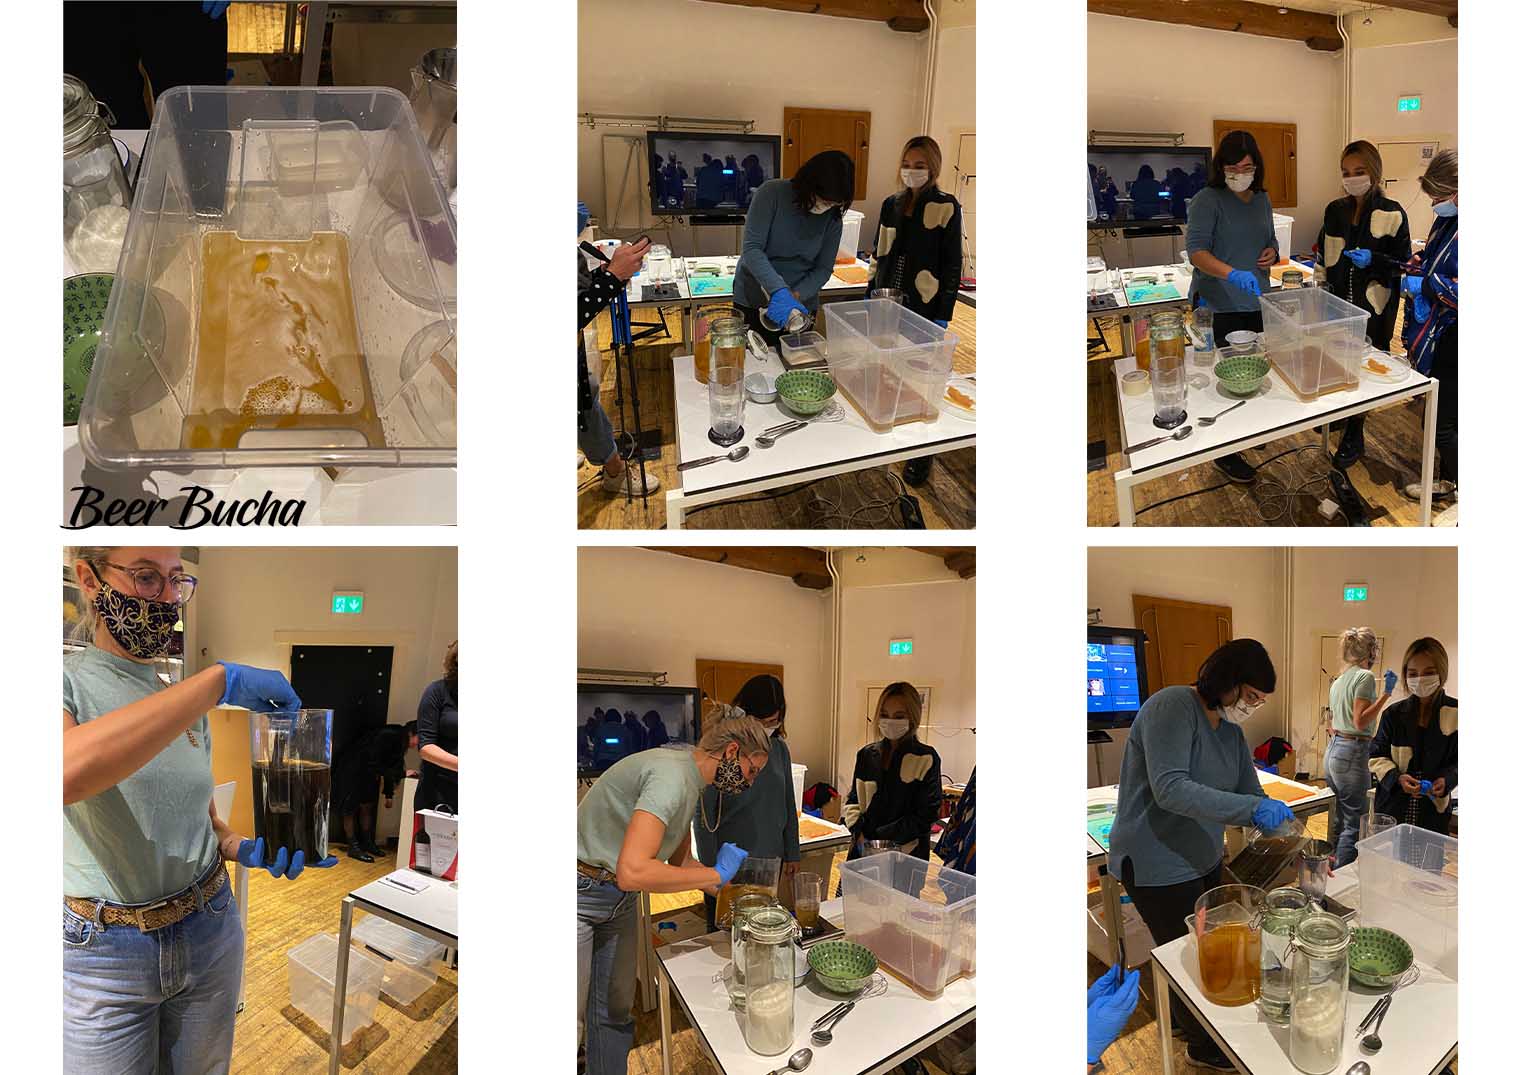
Sara and Bea working on the batch for the Beer brew.
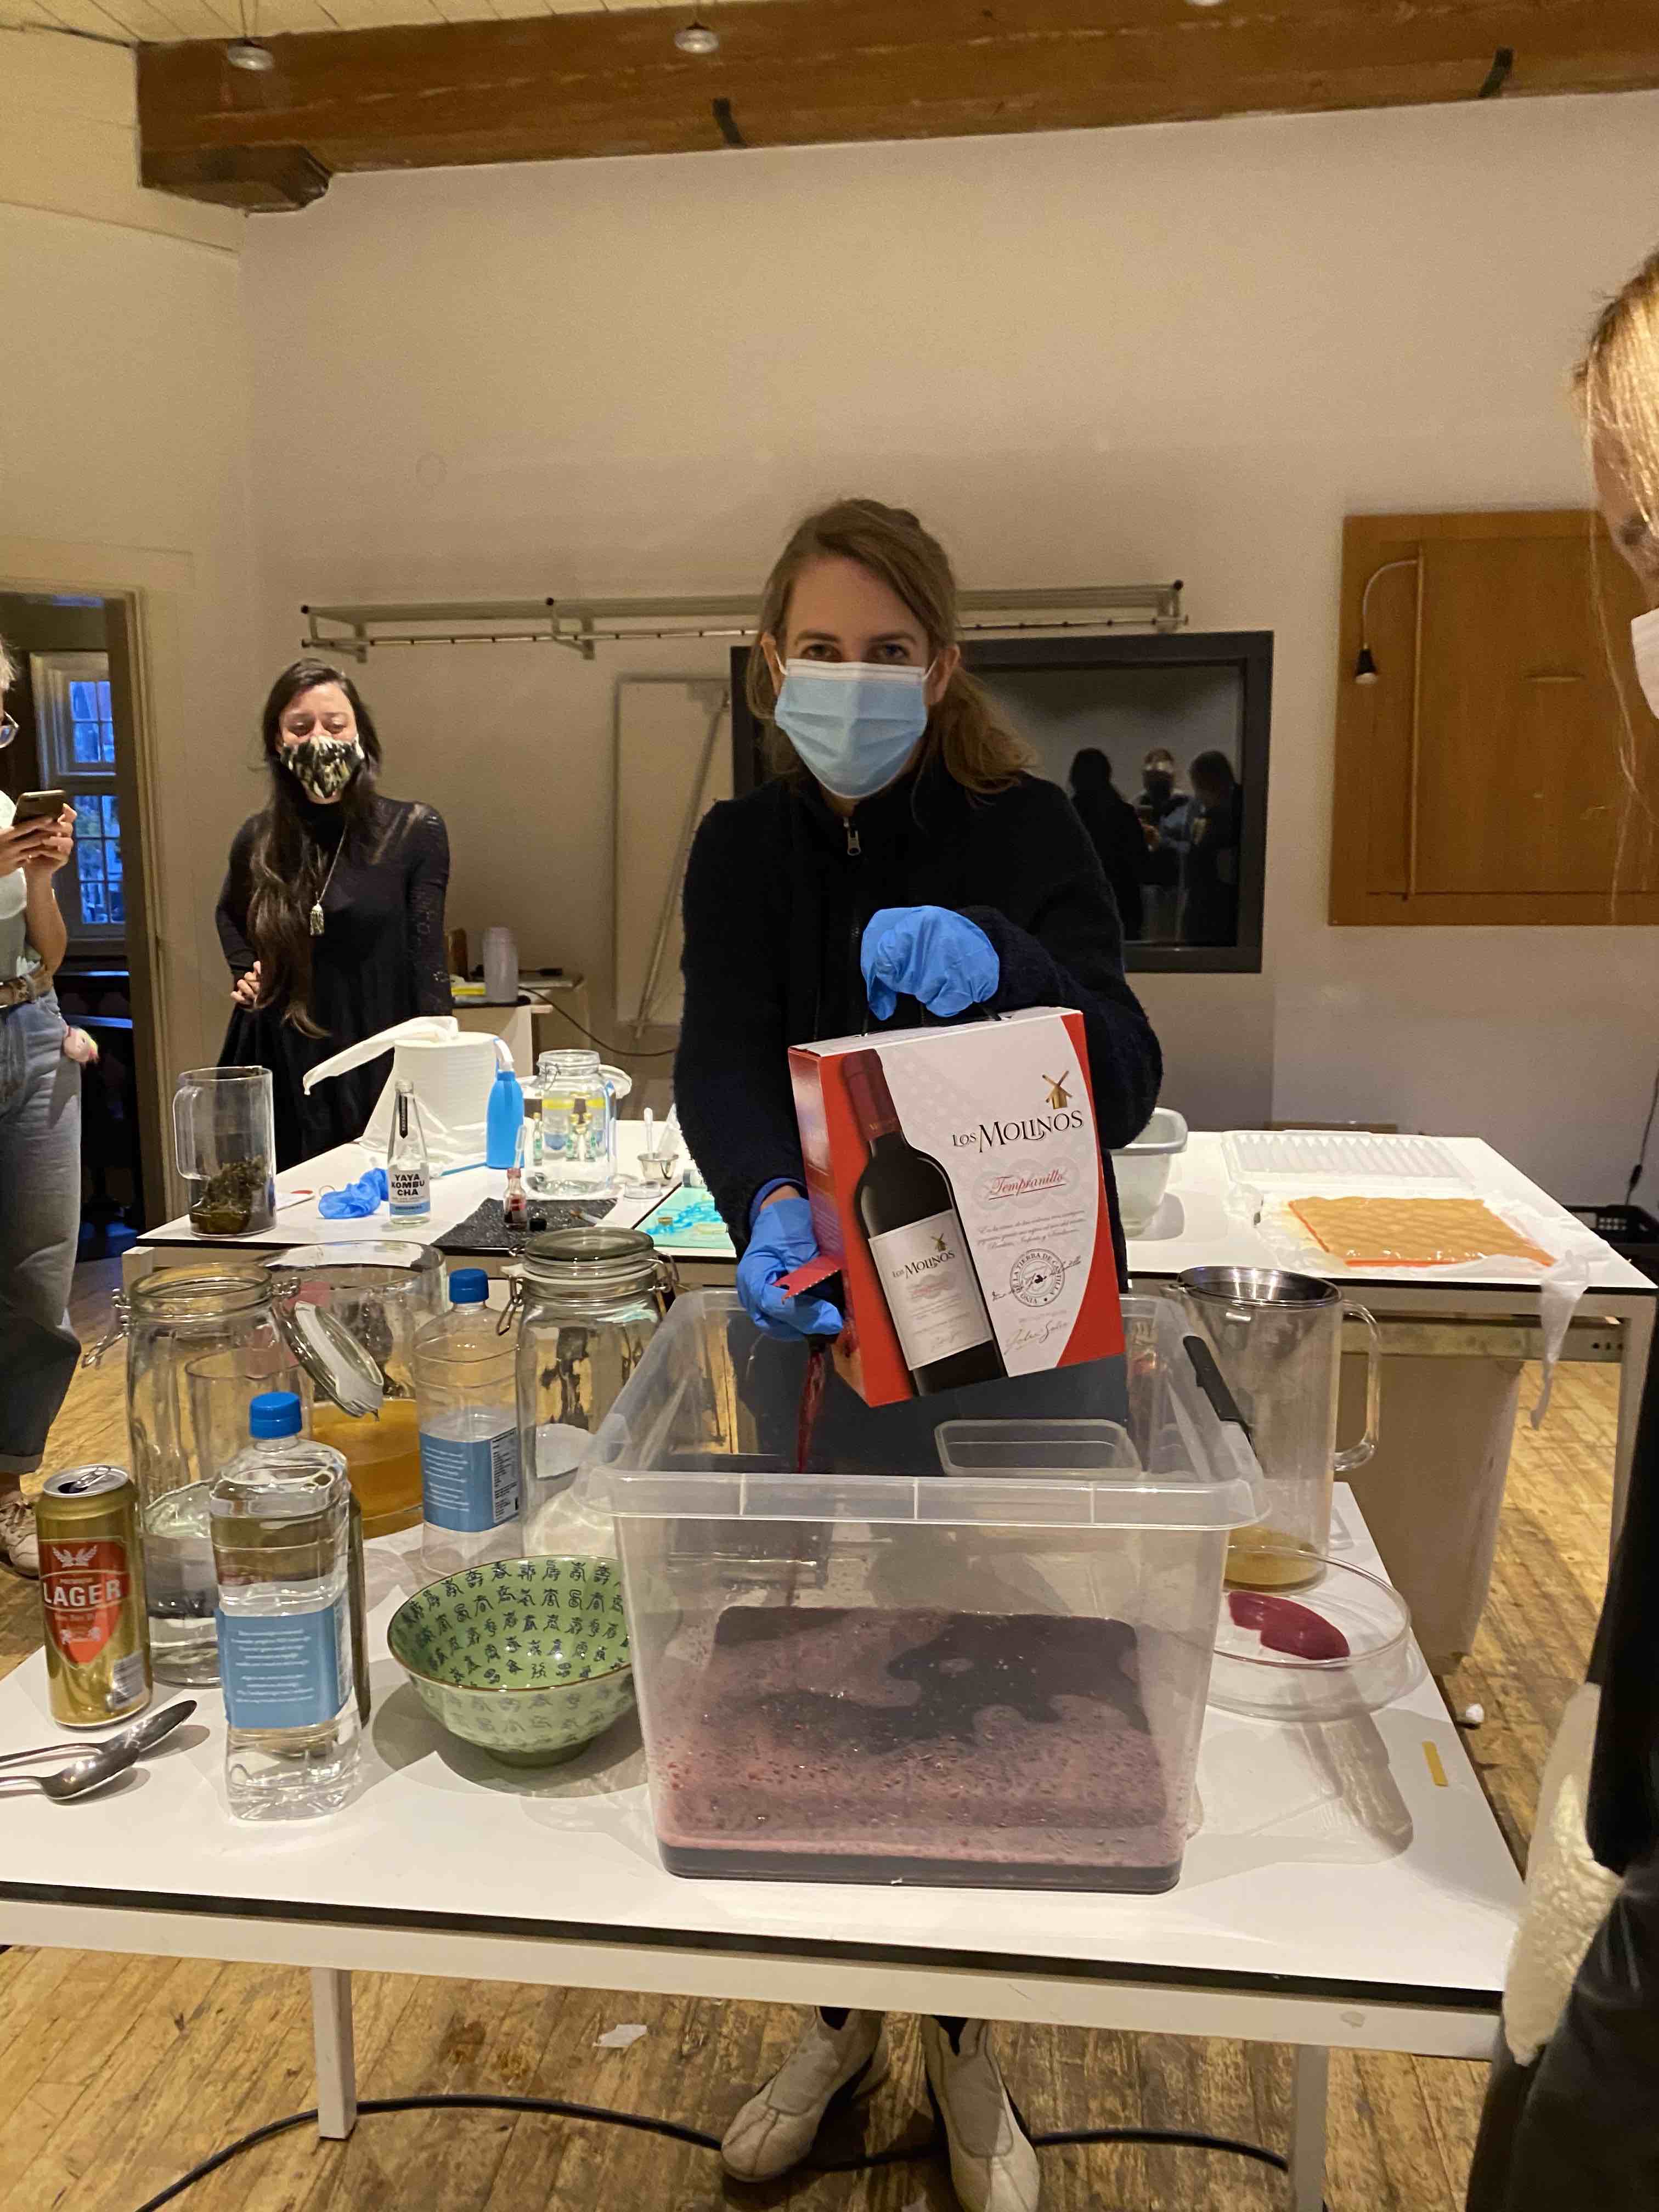
Kombucha wine brew:
-
Red wine - 3 litres.
-
Water 1 litre.
-
White sugar – 400 gr.
Method: 1. Mix the red wine + water.
-
Check the Ph of the wine. Add vinegar until the pH is a 3.
-
Add sugar + stir.
-
Add starter liquid + Beas red wine SCOBY.
-
Close the lid half and label the box.
-
Place next to heater and let it ferment!
Patty and her 3 litres of red wine kombucha brew:
1 week later:
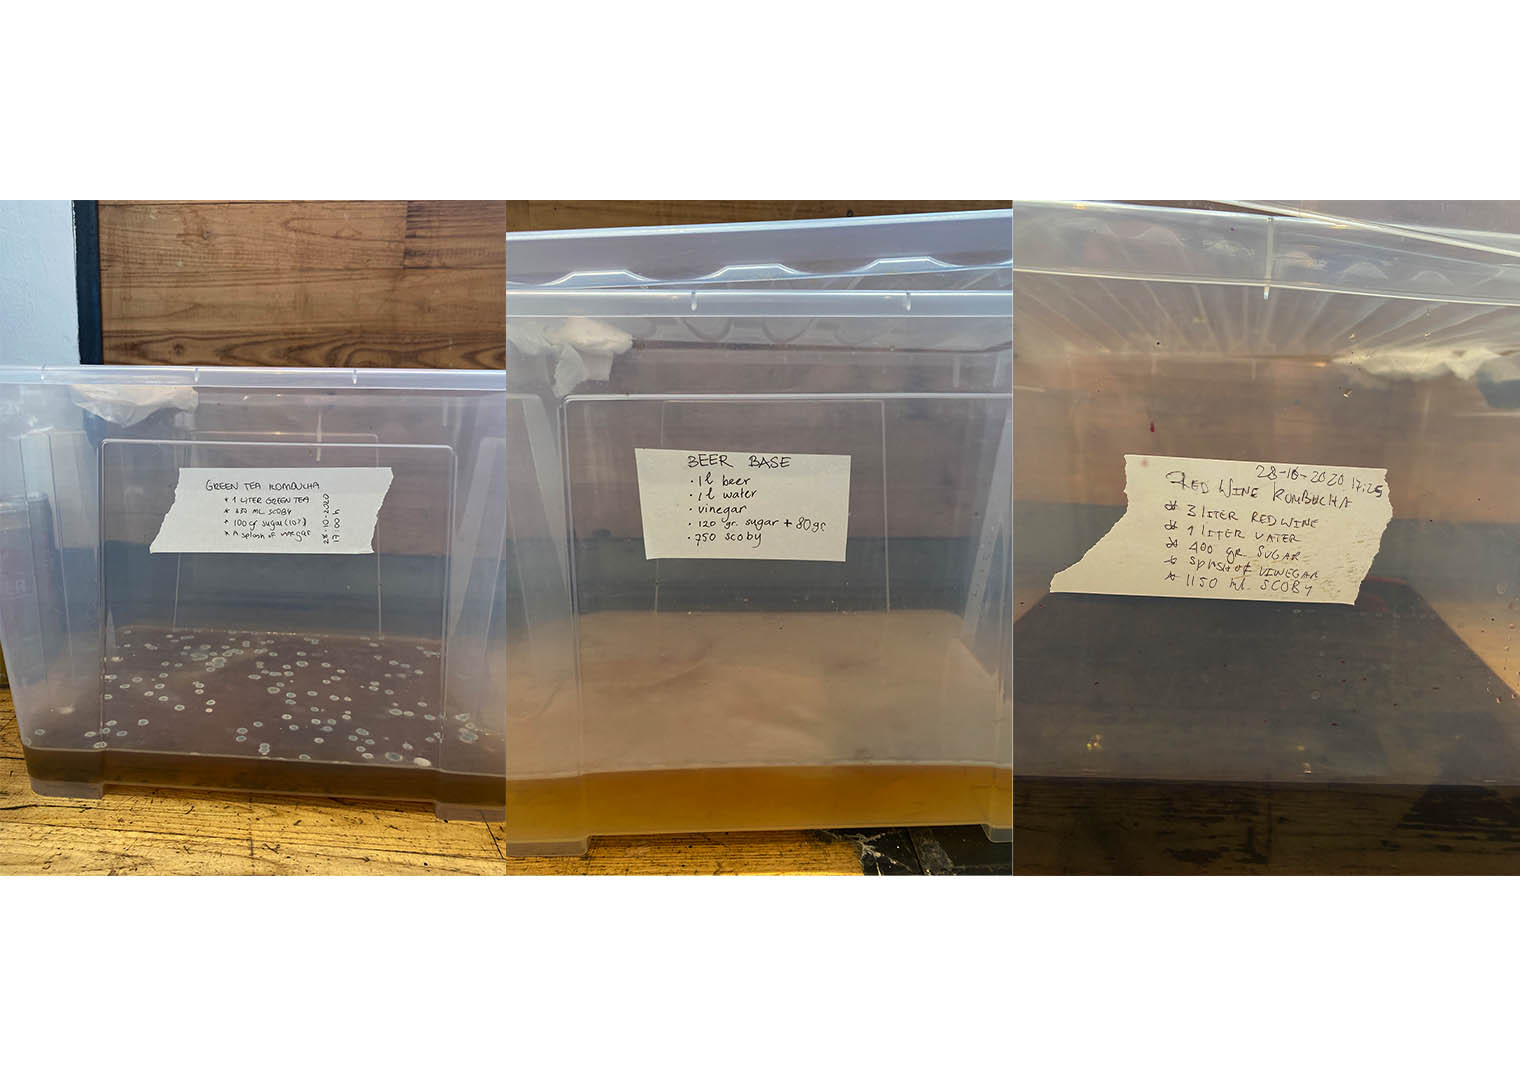
The green tea grew some fungus. This is where we added vinegar to save the batch. The red wine wasn't doing much, we think it's because the red iwne used isn't pasturised.
My own Kombucha: (Kombuchachos)

On the left you are able to see how I started my process of discovering the recipe for Kombucha brewing with a S.C.O.B.Y. The fail here was that I used an upasturized Kombucha drink and therefore no SCOBY sheet was forming in the Bucha bath. On the right I was thinking of ways to apply the actual textile into my graduate collection.
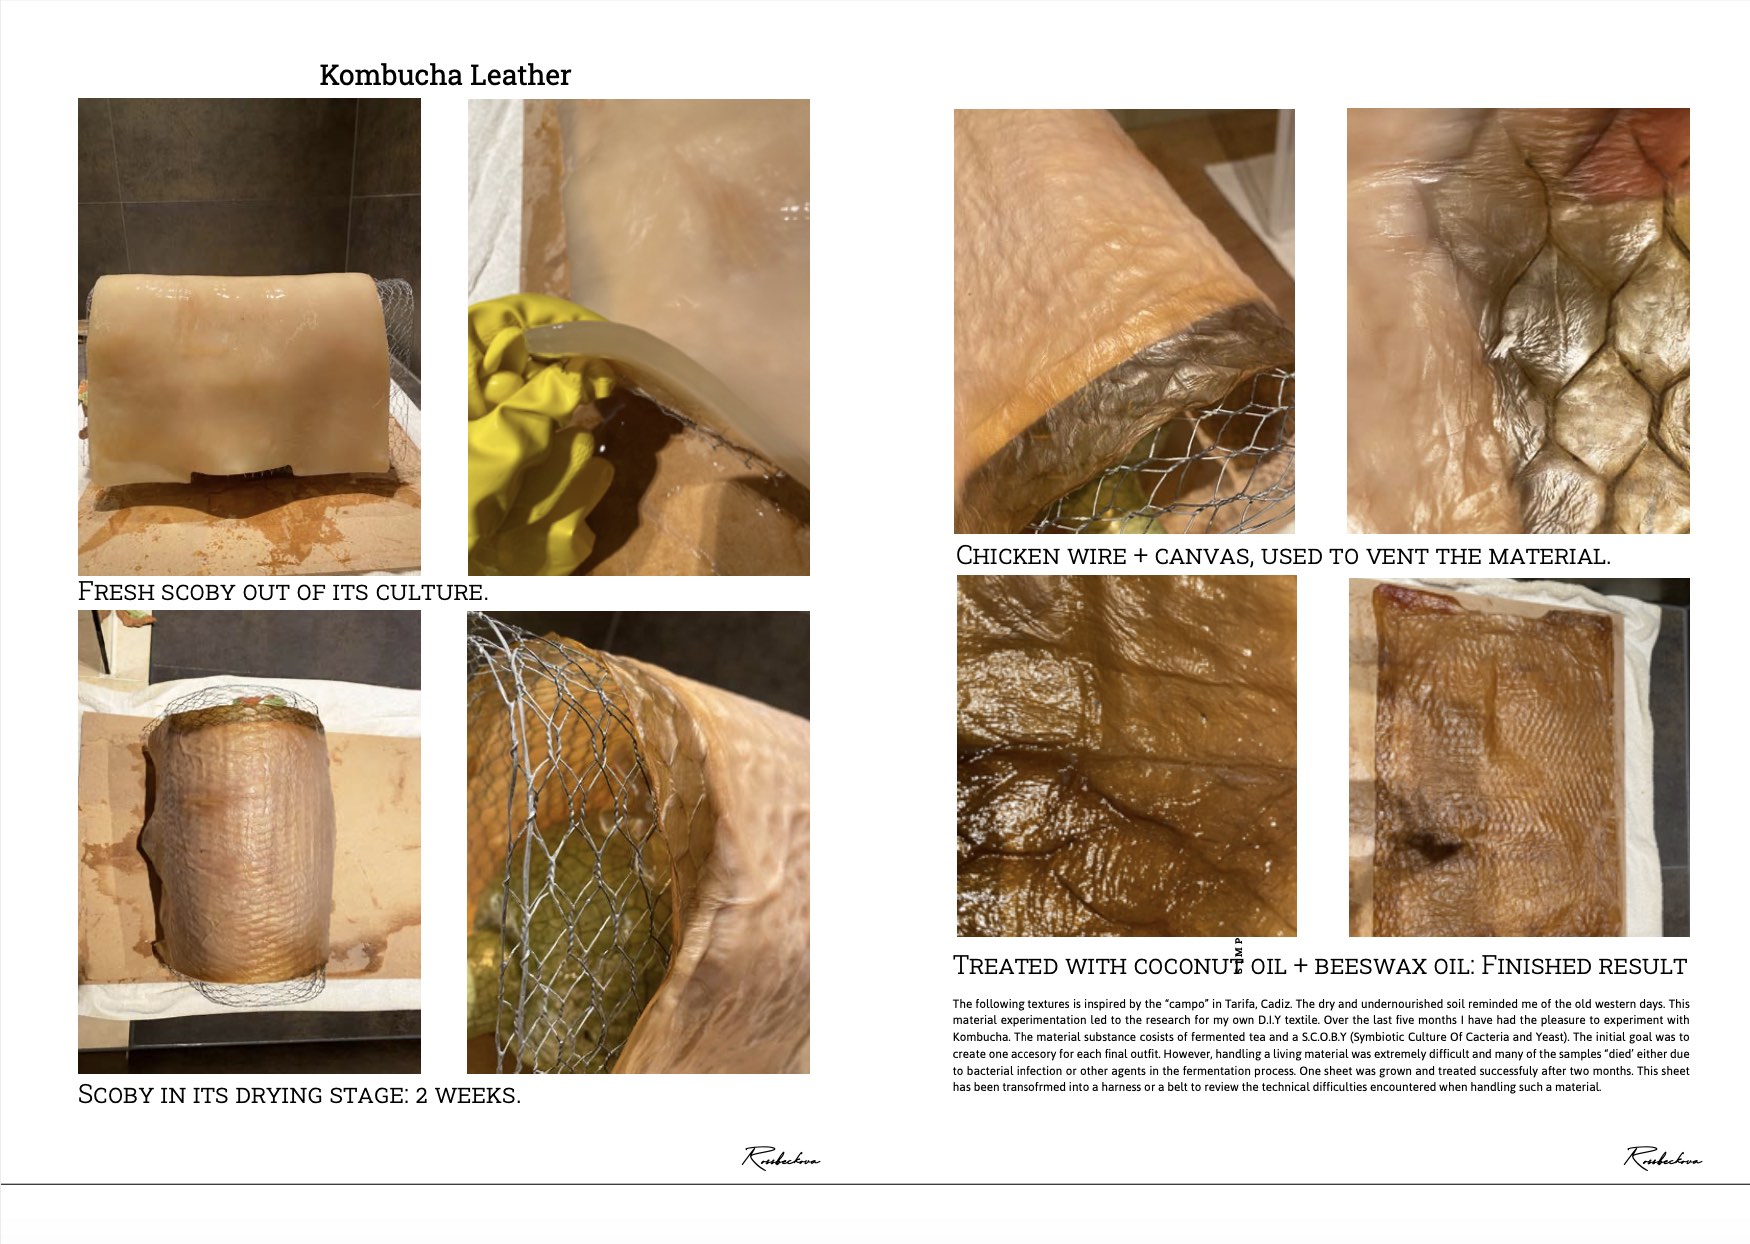
Kombucha S.C.O.B.Y trial 1:
The longer you leave the sheet to grow, the thicker the S.C.O.B.Y will get. Mine was about 1.5cm thick after brewing for a month and a half. Most of the material will shrink as the water inside evaporates, that is why a thick S.C.O.B.Y is of importance!
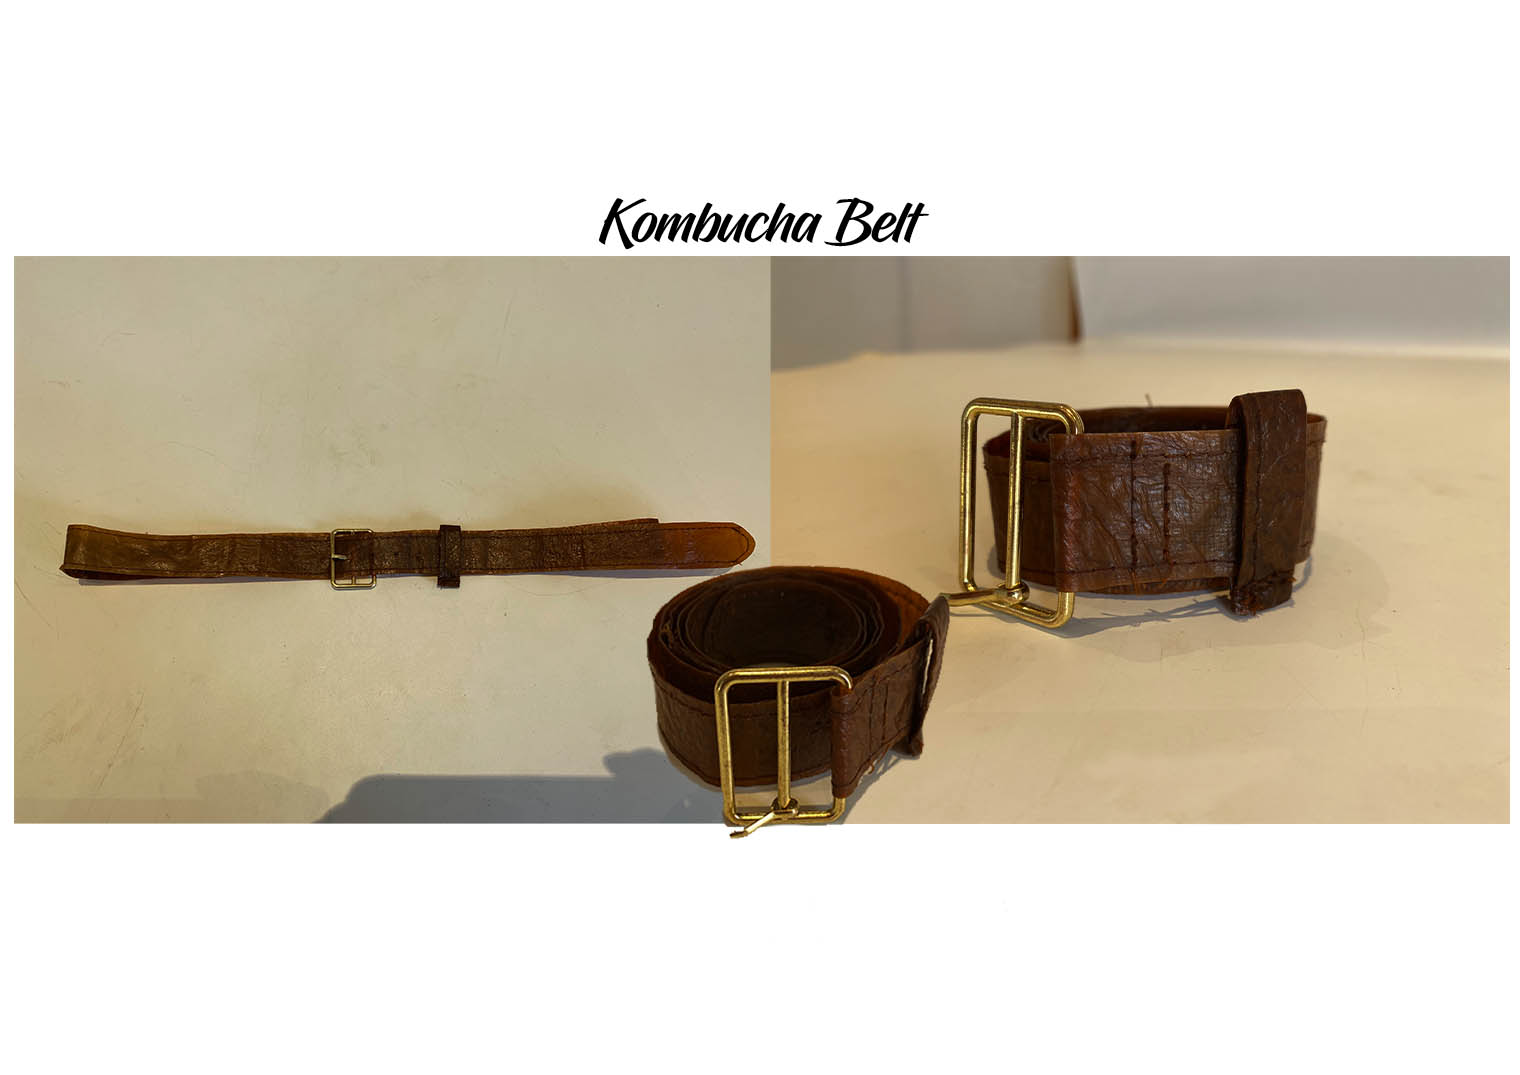
My very own Kombucha accessory.
Youtube:
Here's a small video of the Kombucha leather I made for my accesories in my graduate collection 2020:
Kombucha leather applied as a textile sample:
Useful links:
Turning Kombucha SCOBY into leather: https://www.youtube.com/watch?v=iooVlns4Noo
Gelatine Recipes:
We were making three gelatine recipes this week:
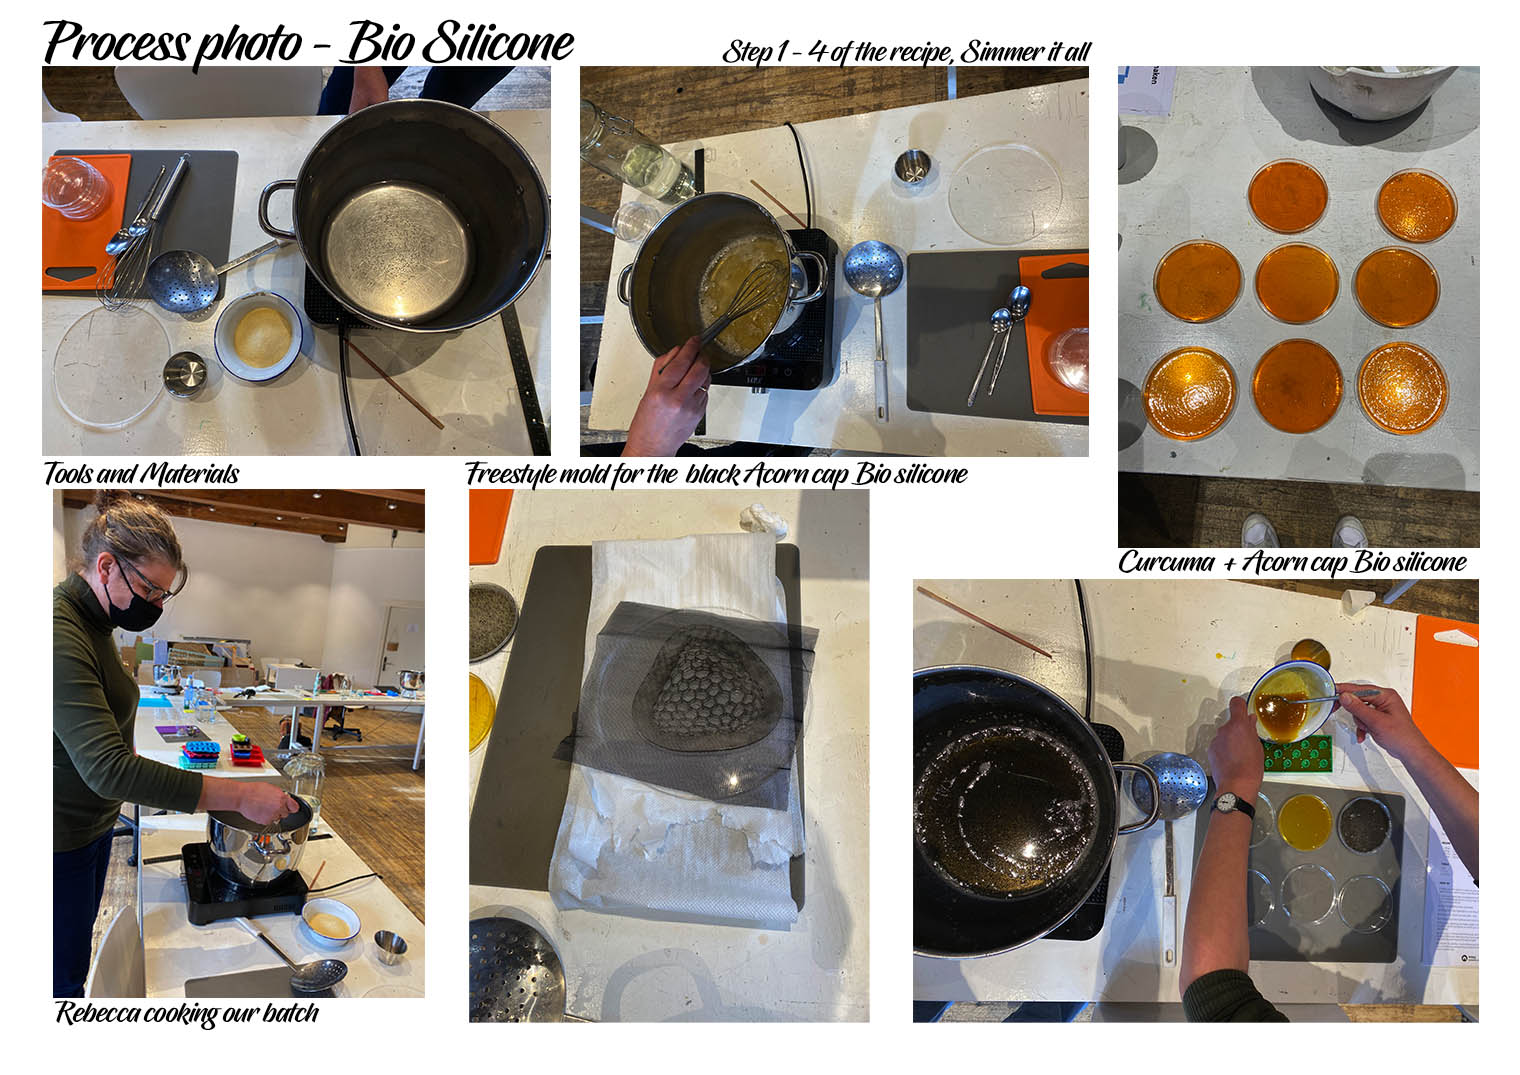
Recipe for Bio Silicone and Bio Foam:
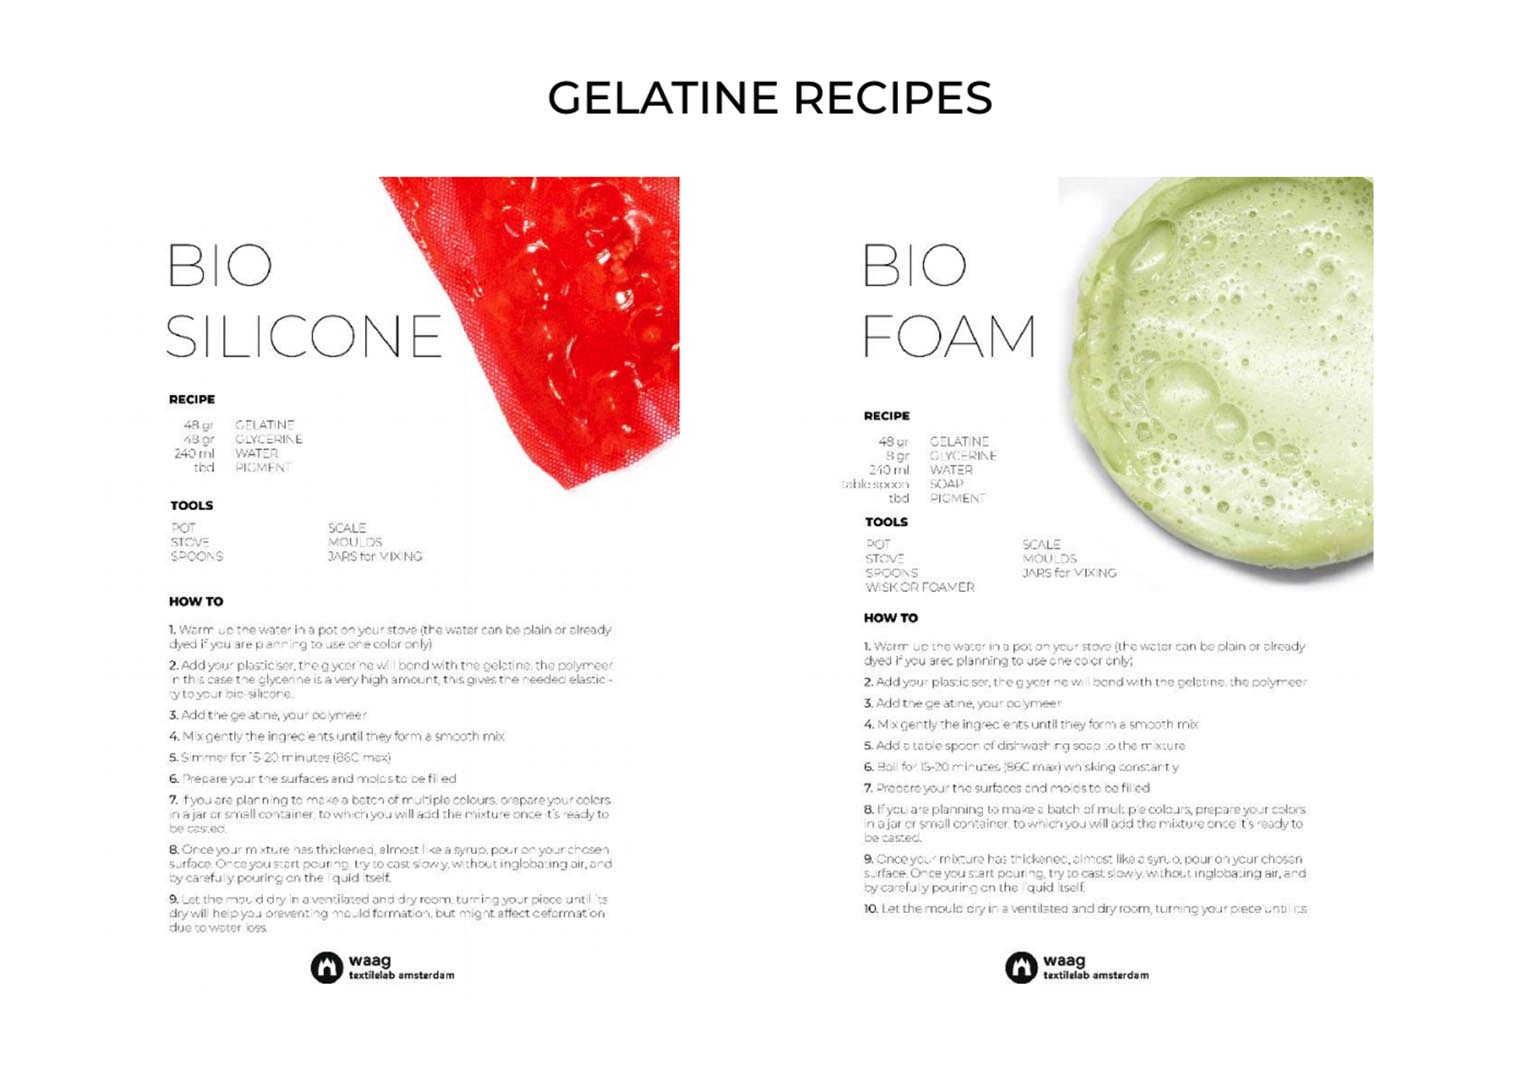
- Team Bio silicone: Rebecca & Rebecca B2B.
The texture of your plastic is affected by the type of filler and additive that is used. For the pigment we used: Curcuma, and some of my acorn caps pigment:
About the gelatine once it has been heated: “smells like wet dog” and “puppy pee” according to Rebecca and Bea. Results: the bioplastic is the most see through and clear one.
Rebecca & Rebecca:
Alginate result from previous experiment: alginate shrinks in size once it dries. Water is extracted. Today we are researching experiments with different levels of glycerine, gelatine and Agar.
- Team Bio - Foam: Sara
Results: the bioplastic shrinks its size as it is made up of bubbles. Photos of their results:
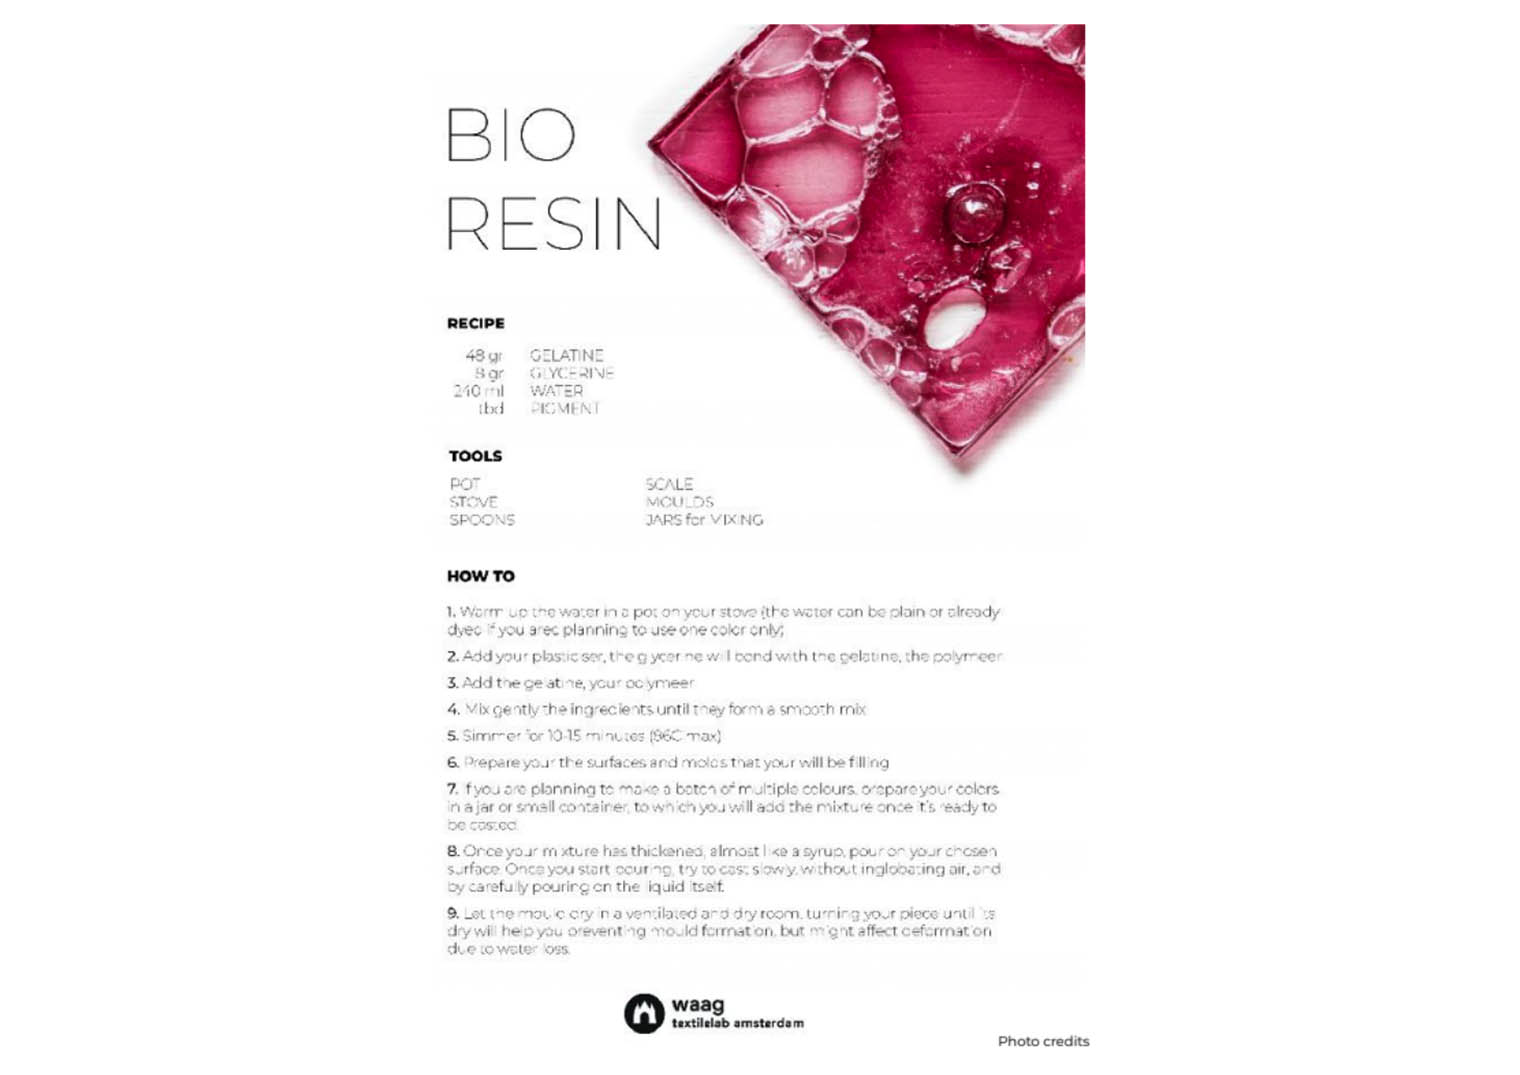
- Patty and Hannah: Gelatine bioResin Photos of their results: Results: the bioplastic has a stiff effect.
Recipe:
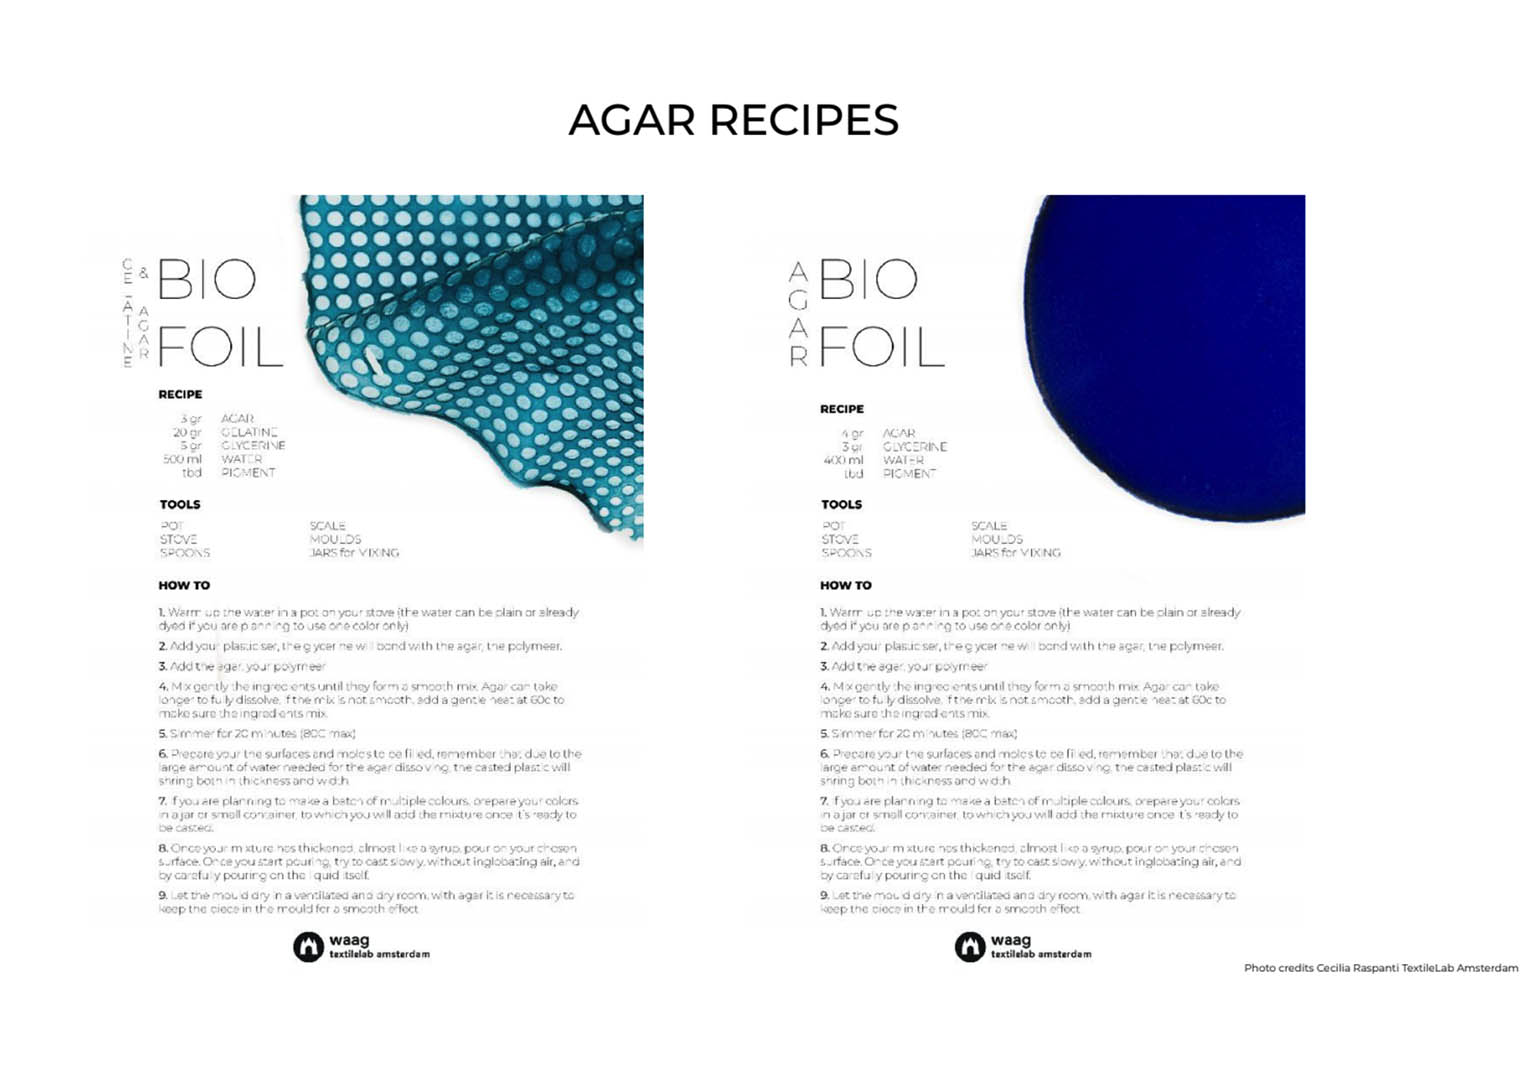
Agar and Agar + Gelatine Recipes:
-
Jen + Carolina: Agar BioFoil Results: the bioplastic is more mouldable and shapeable.
-
Bea Agar + Gelatine Biofoil Results:
Recipe:
Our Bioplastic family this week:

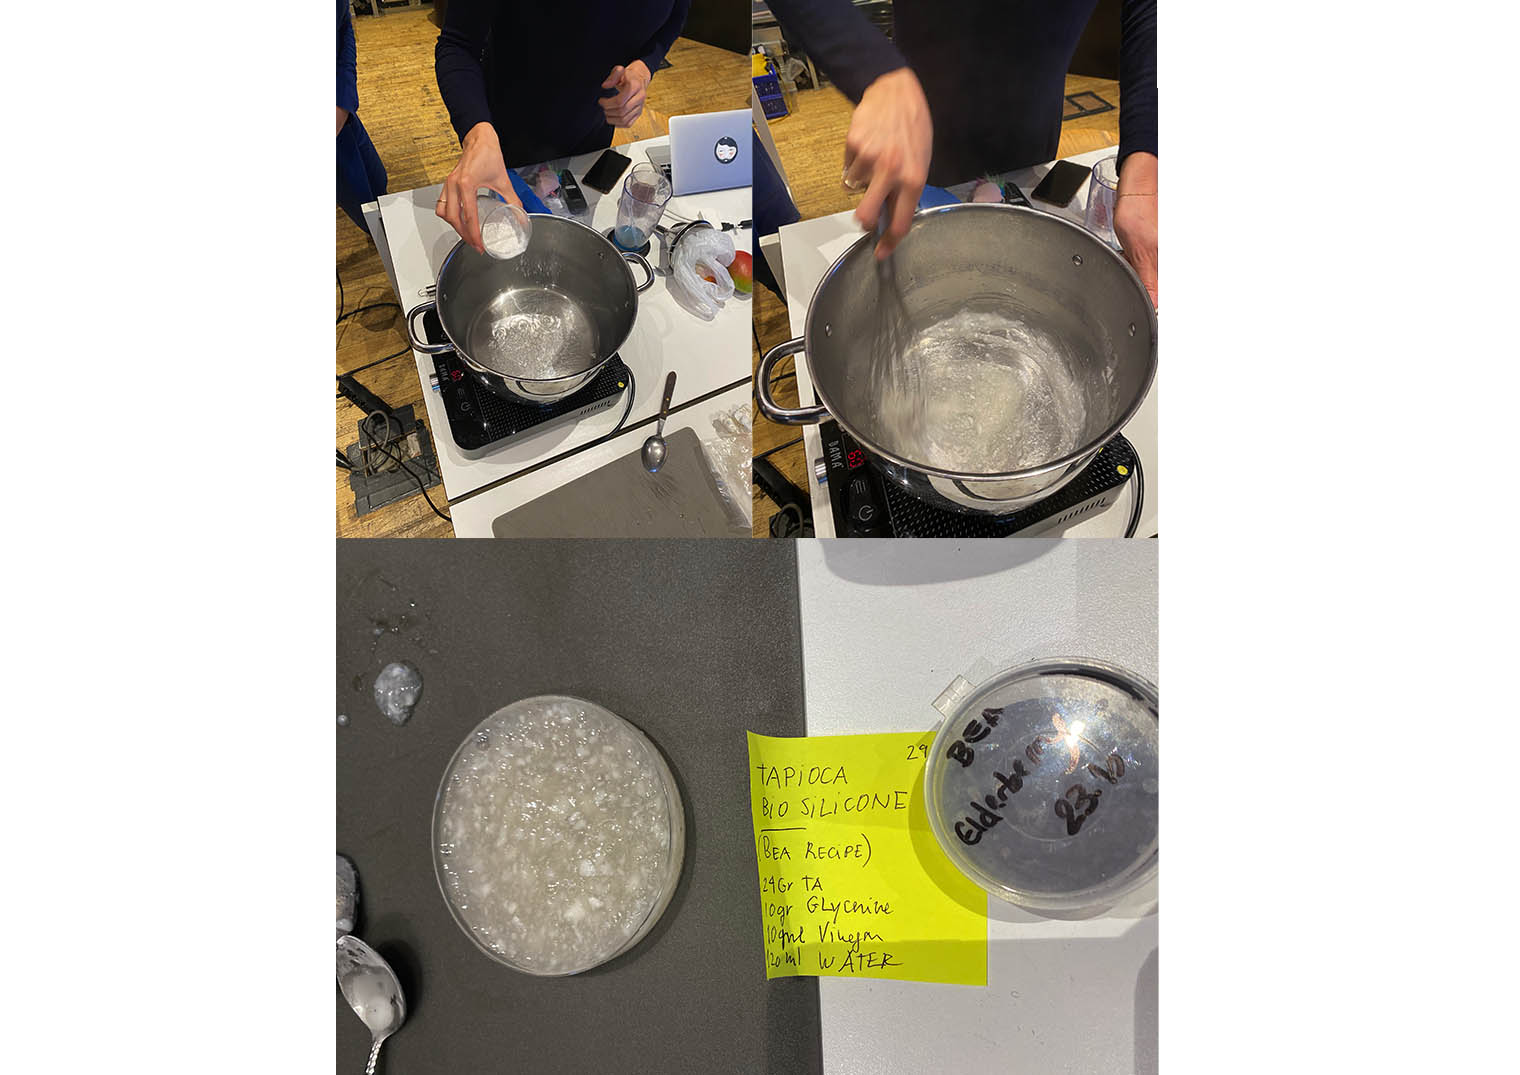
Tapioca Bio silicone
Tapioca: Cassava starch. We were creating a thin sheet of this for the sample.
Round 1: Failed batch as the pan was too hot to start with so the liquid was overcooked and therefore the mixture became cloggy and not smooth like icing. To fix this error 250 ml of water was added instead of 120ml to make the mixture smoother. Cook the tapioca water mixture on 60 degrees no more. Check Beas research page out for more information on the recipe for the tapioca! Also check Loes’s page for the 24 recipes.
Tip: When casting the Tapioca start by pouring in the centre and slowly work out towards the corners. Better too much Tapioca than too little. Be careful to spread the layer evenly. When cooking in the oven make sure that you use ventilation and cook it on 40 degrees celcius. 10 hours in total. After heating it lay it to cool off for 2 days.
A successful vtach of Tapioca! Looks like icing.
Mango Tapioca leather:
In the Academy Test no.1:
This recipe was based on the research that Bea Sandini collected last year. Click this link to see the recipe : ...
The result of the final material:
For my own research I looked at both Loes Bogers and Beatriz Sandinis research to combine the recipes. Click this link to follow Loes's recipe: ...
Creating the mango tapioca leather at home over the weekend:
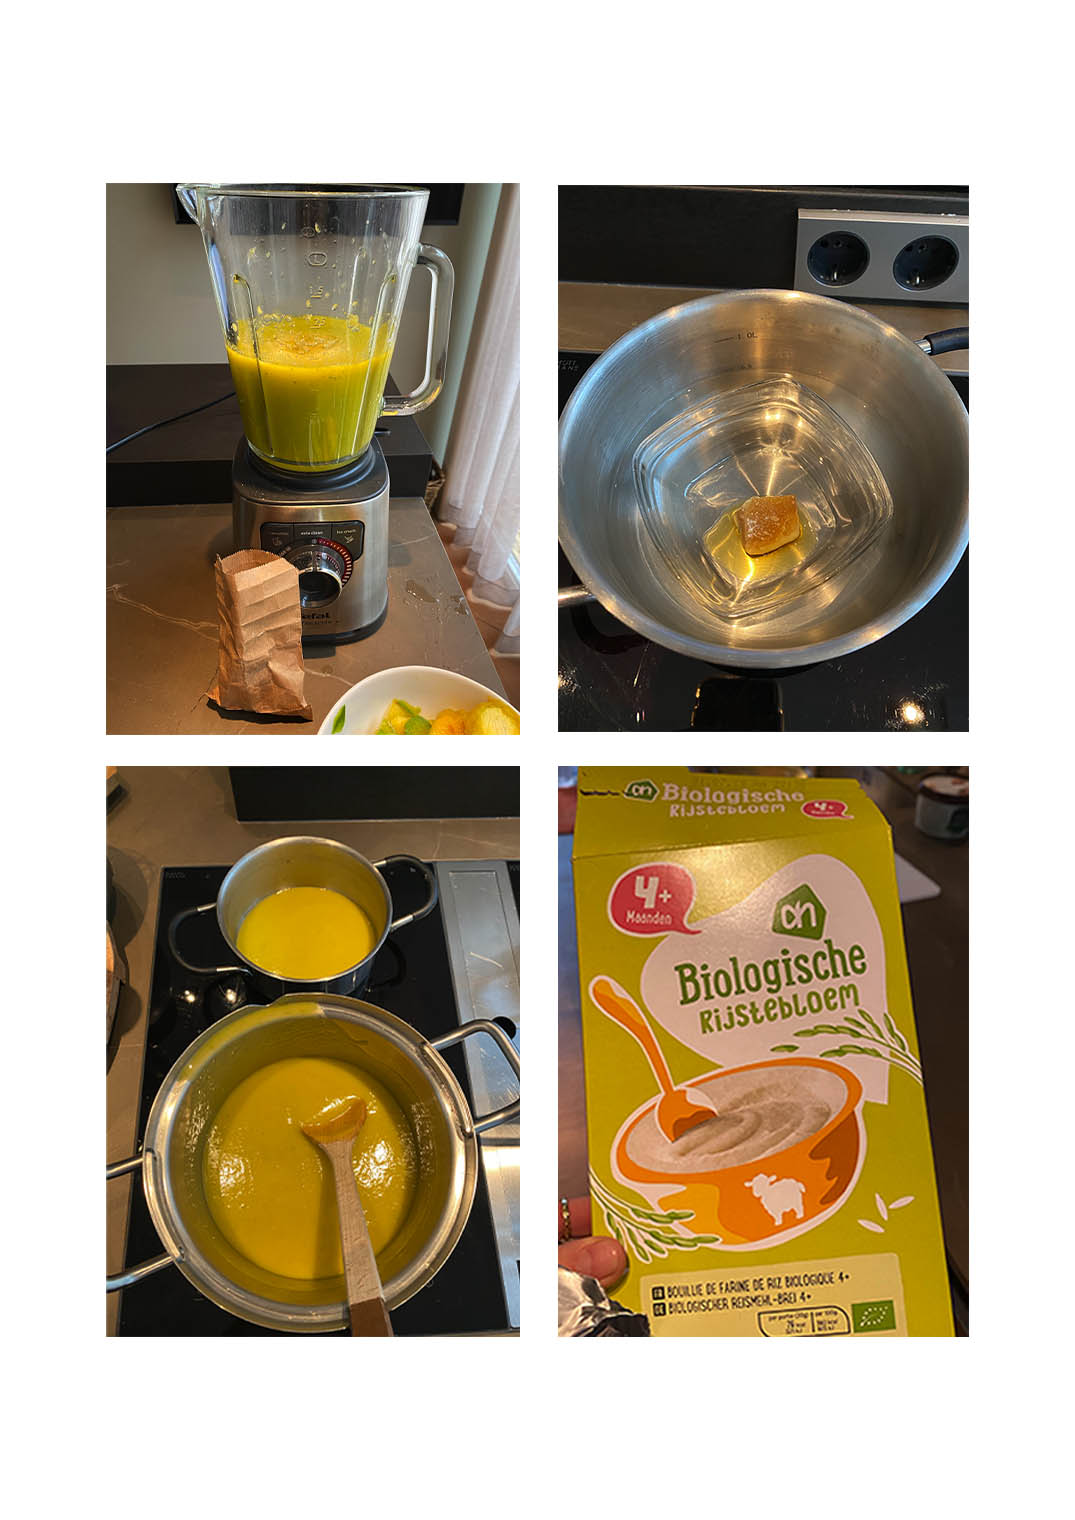
Difficulties in trial:
I used a 530 mm × 380 mm baking tray because I forgot the Beas customised cast at De Waag. This meant that when I poured the mango tapioca mix on to the tray I couldn’t regulate the spreading of the material. To spread the material I had to drag the corners with a wooden spoon. The edges of the material were drying quicker than the centre because of this. It isn’t drying easily or evenly.
The next time: I will use a tray that is smaller in size but big enough so that the Mango tapioca can spread at an even rate. I would like the cast to be big enough so that the mixture can spread and be of a 1cm thickness all over. Make the mixture homogenous.
Results:
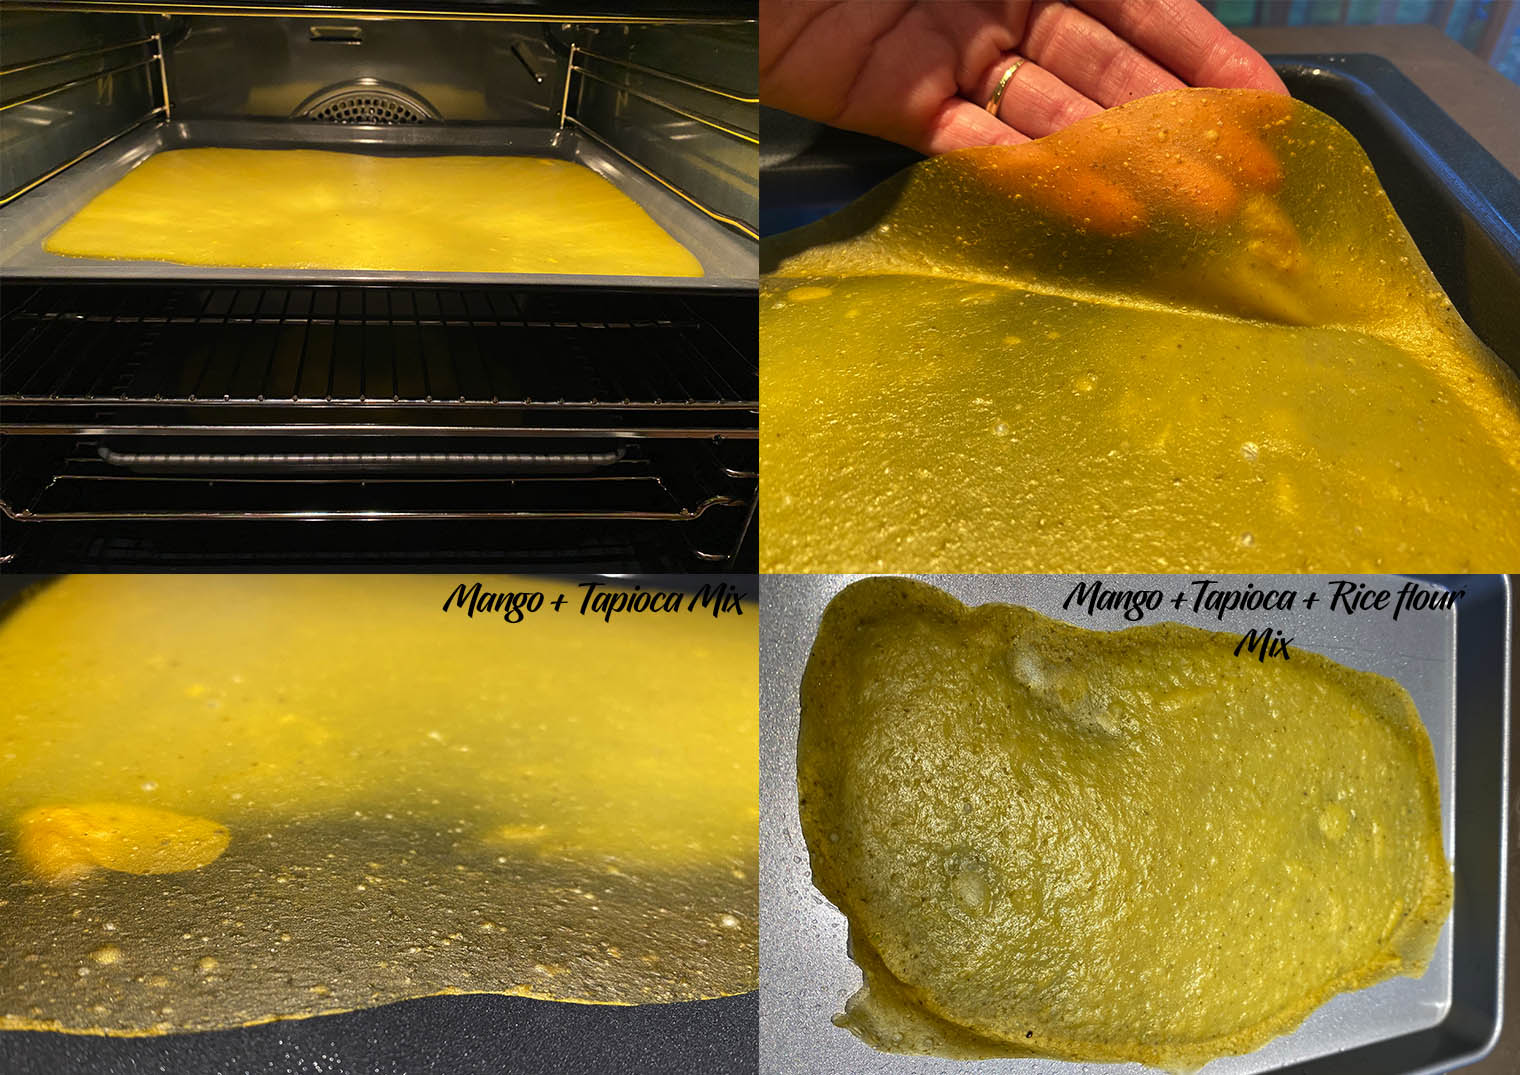 Gorgeous!
We missed out on mycelium this week because Margherita got the flue hopefully we’ll catch up on this soon! I was super excited to try this one out!
Inspiration for the final project:
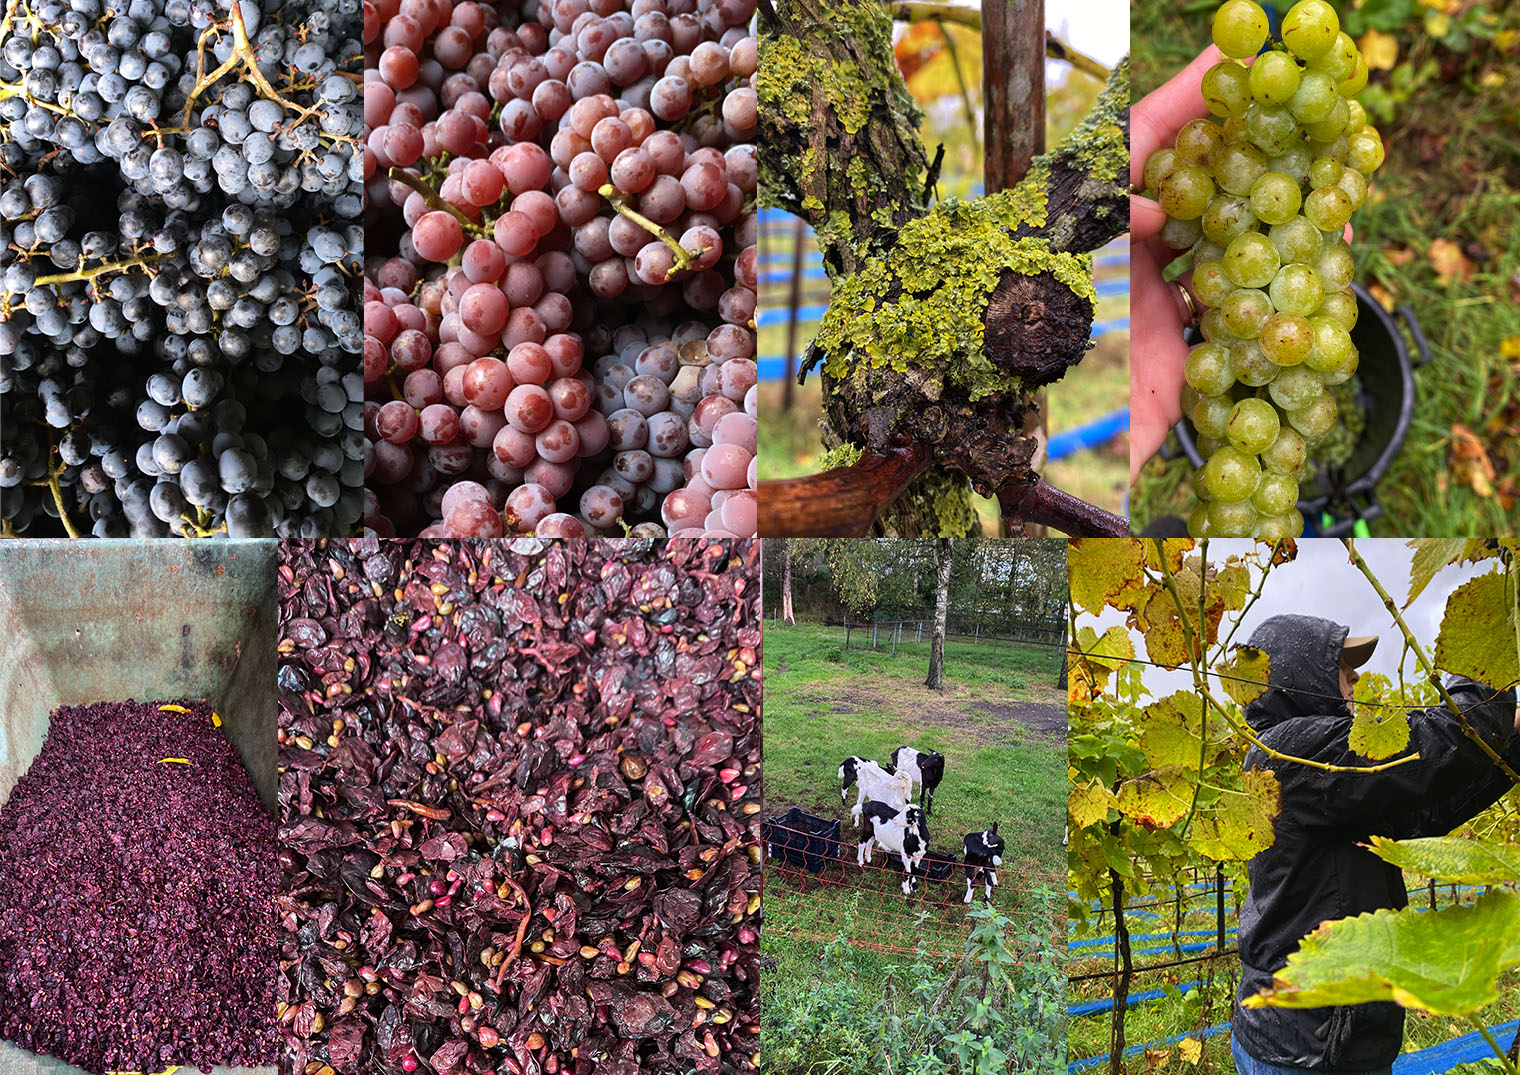
Ideas: Visit Amsterdamse bos to collect materials for your own further research. grapevine?: Look at Bi-products in your region (locally). Contact grape research.