Week 13: Skin Electronics
Documentation: To be continued...
So this week we came across a topic that I had never heard of before. As strange as it sounds, I'ne never taken a second to think about the different possibilities in the world of skin electronics. Together with Emmas help on the electronics and Katias help on current skin electronic trends, the idea was to create wearable that could enter the world of the human-device symbiosis.
This documentation is not yet complete because of technical difficulties using the Arduino and will be resolved over the winter holidays. Trust me, I was seriously frustrated. :(
Inspiration: Beauty technology
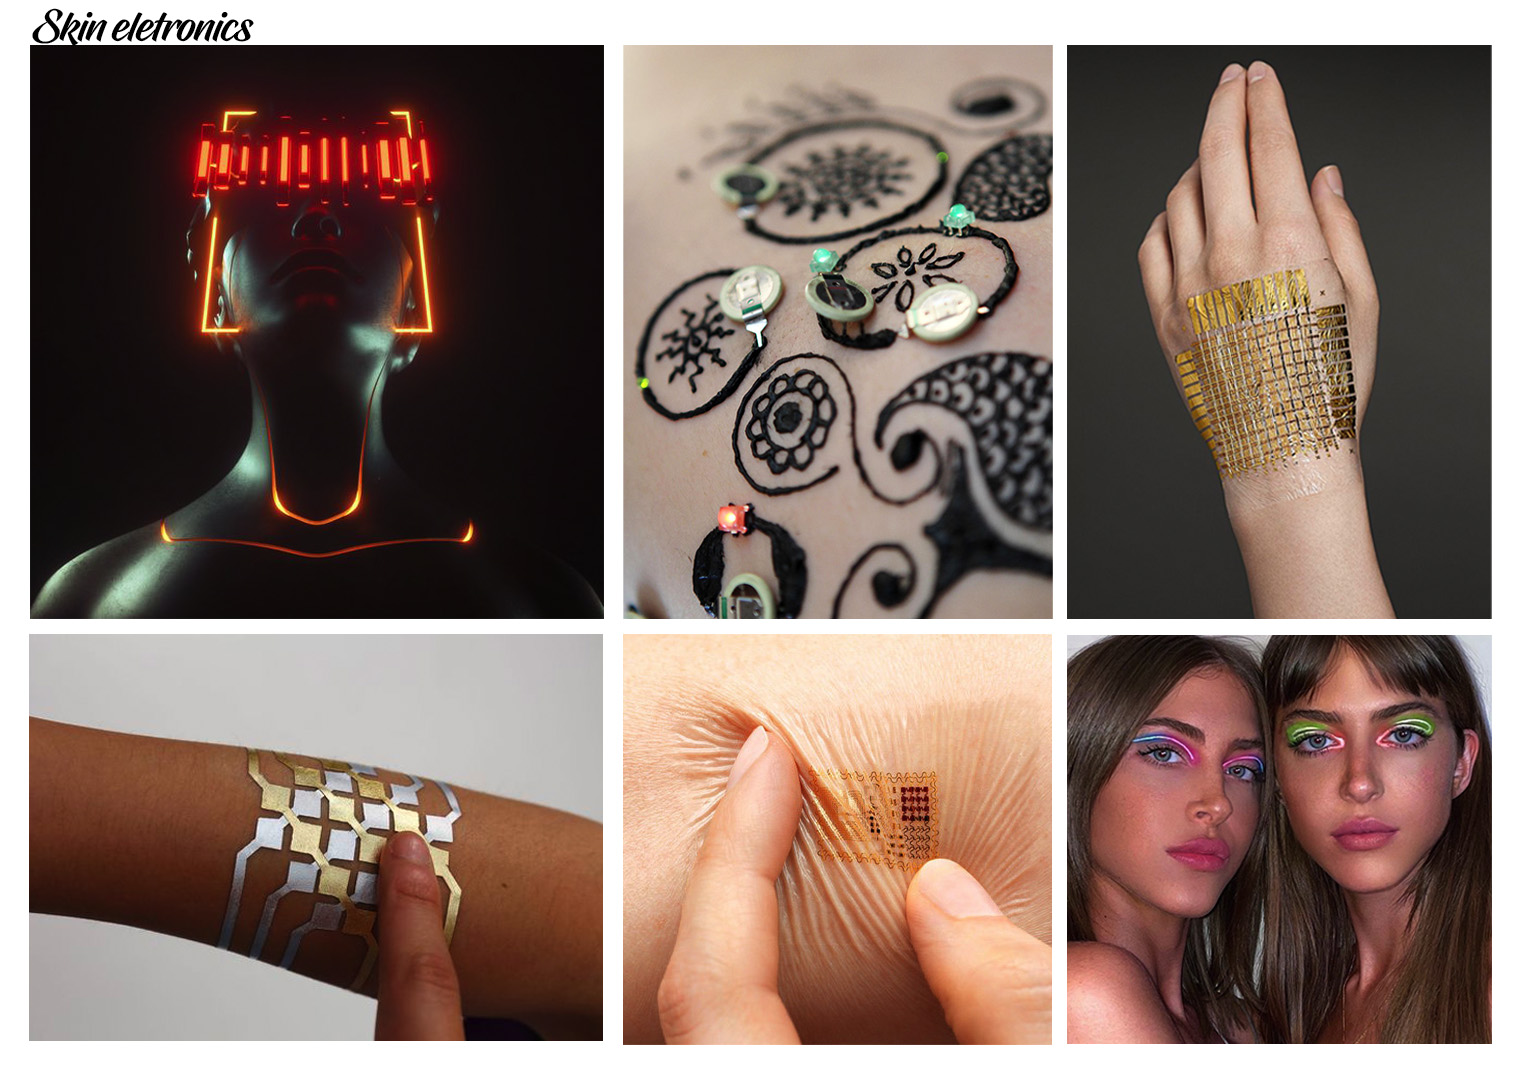

Conductive tattoos WOW! I like the idea behind the gold leaf illustration on a human body and how this could serve as some kind of functional element.
Many people are against tattoos because they are permanently engraved into that persons human skin. Though, if you gave the tattoos a more functional role other than aesthetics, I think that this could change the minds of many people. This is perhaps where their disgust or hate turnsfor them changes into the fascination for tattoos.
Another one of the most fascinating projects I have come across in a while: Sound wave tattoos.
These soundwave tattoos are played back via the skin motion app.
Ideas for the skin circuit:
-
Embedding crystals in a hair piece¶: Hairware
-
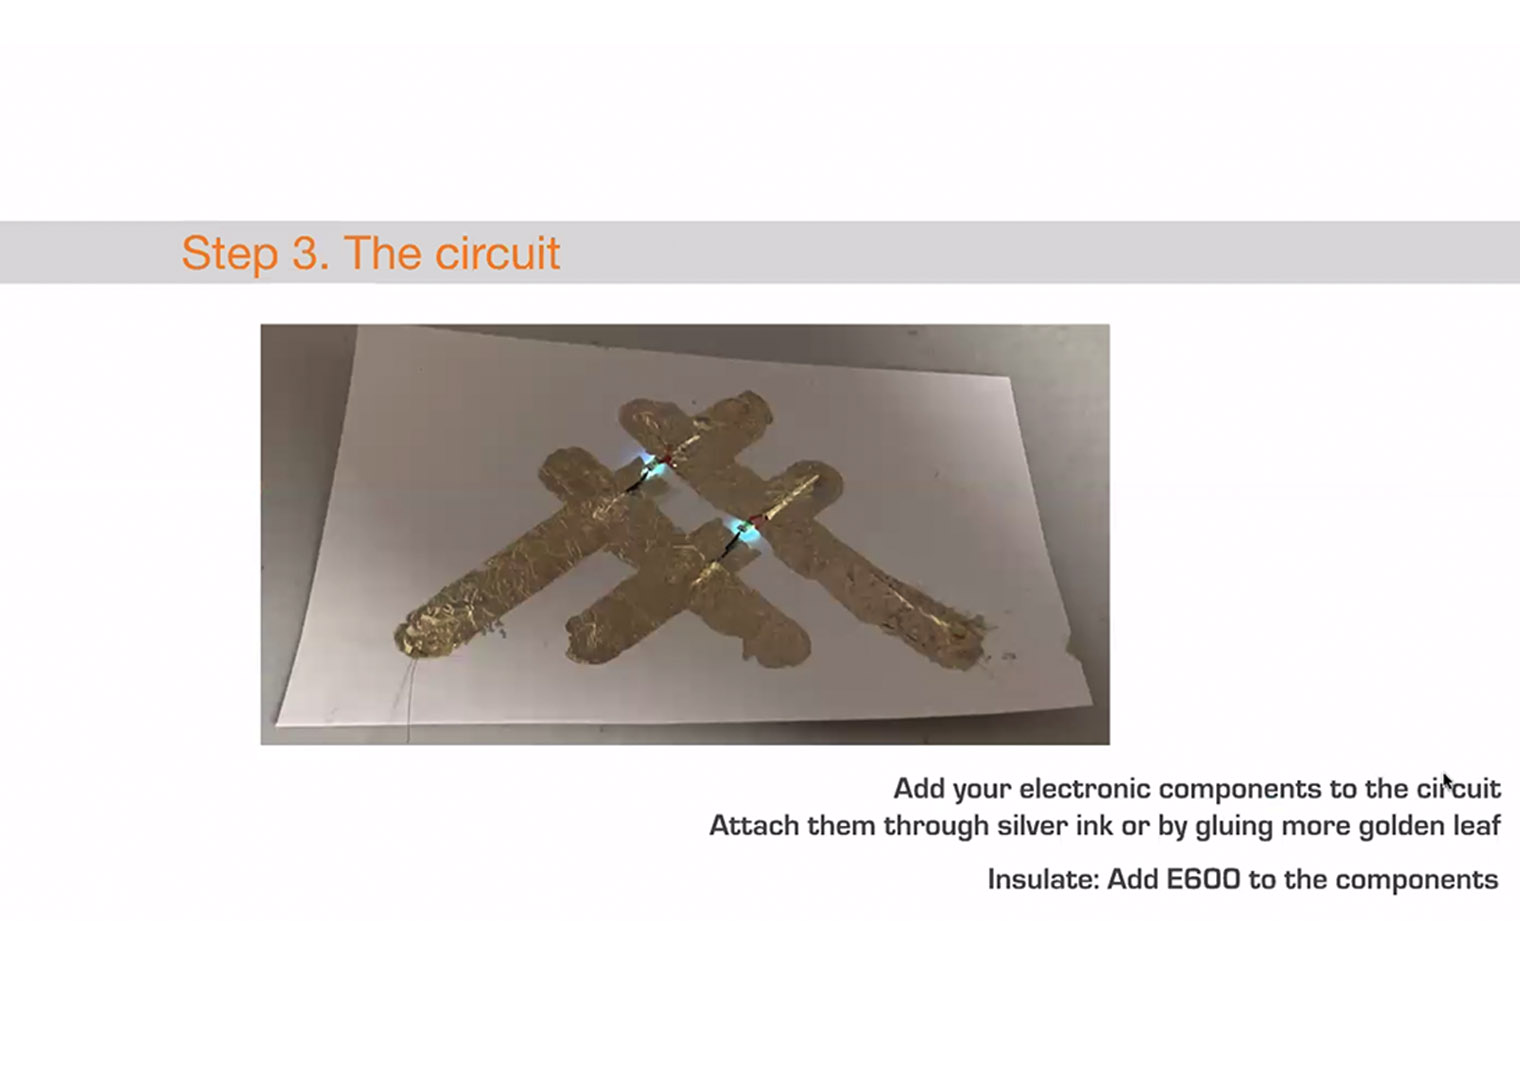
Tattooing a gold leaf circuit.
Skin Masquerade Party
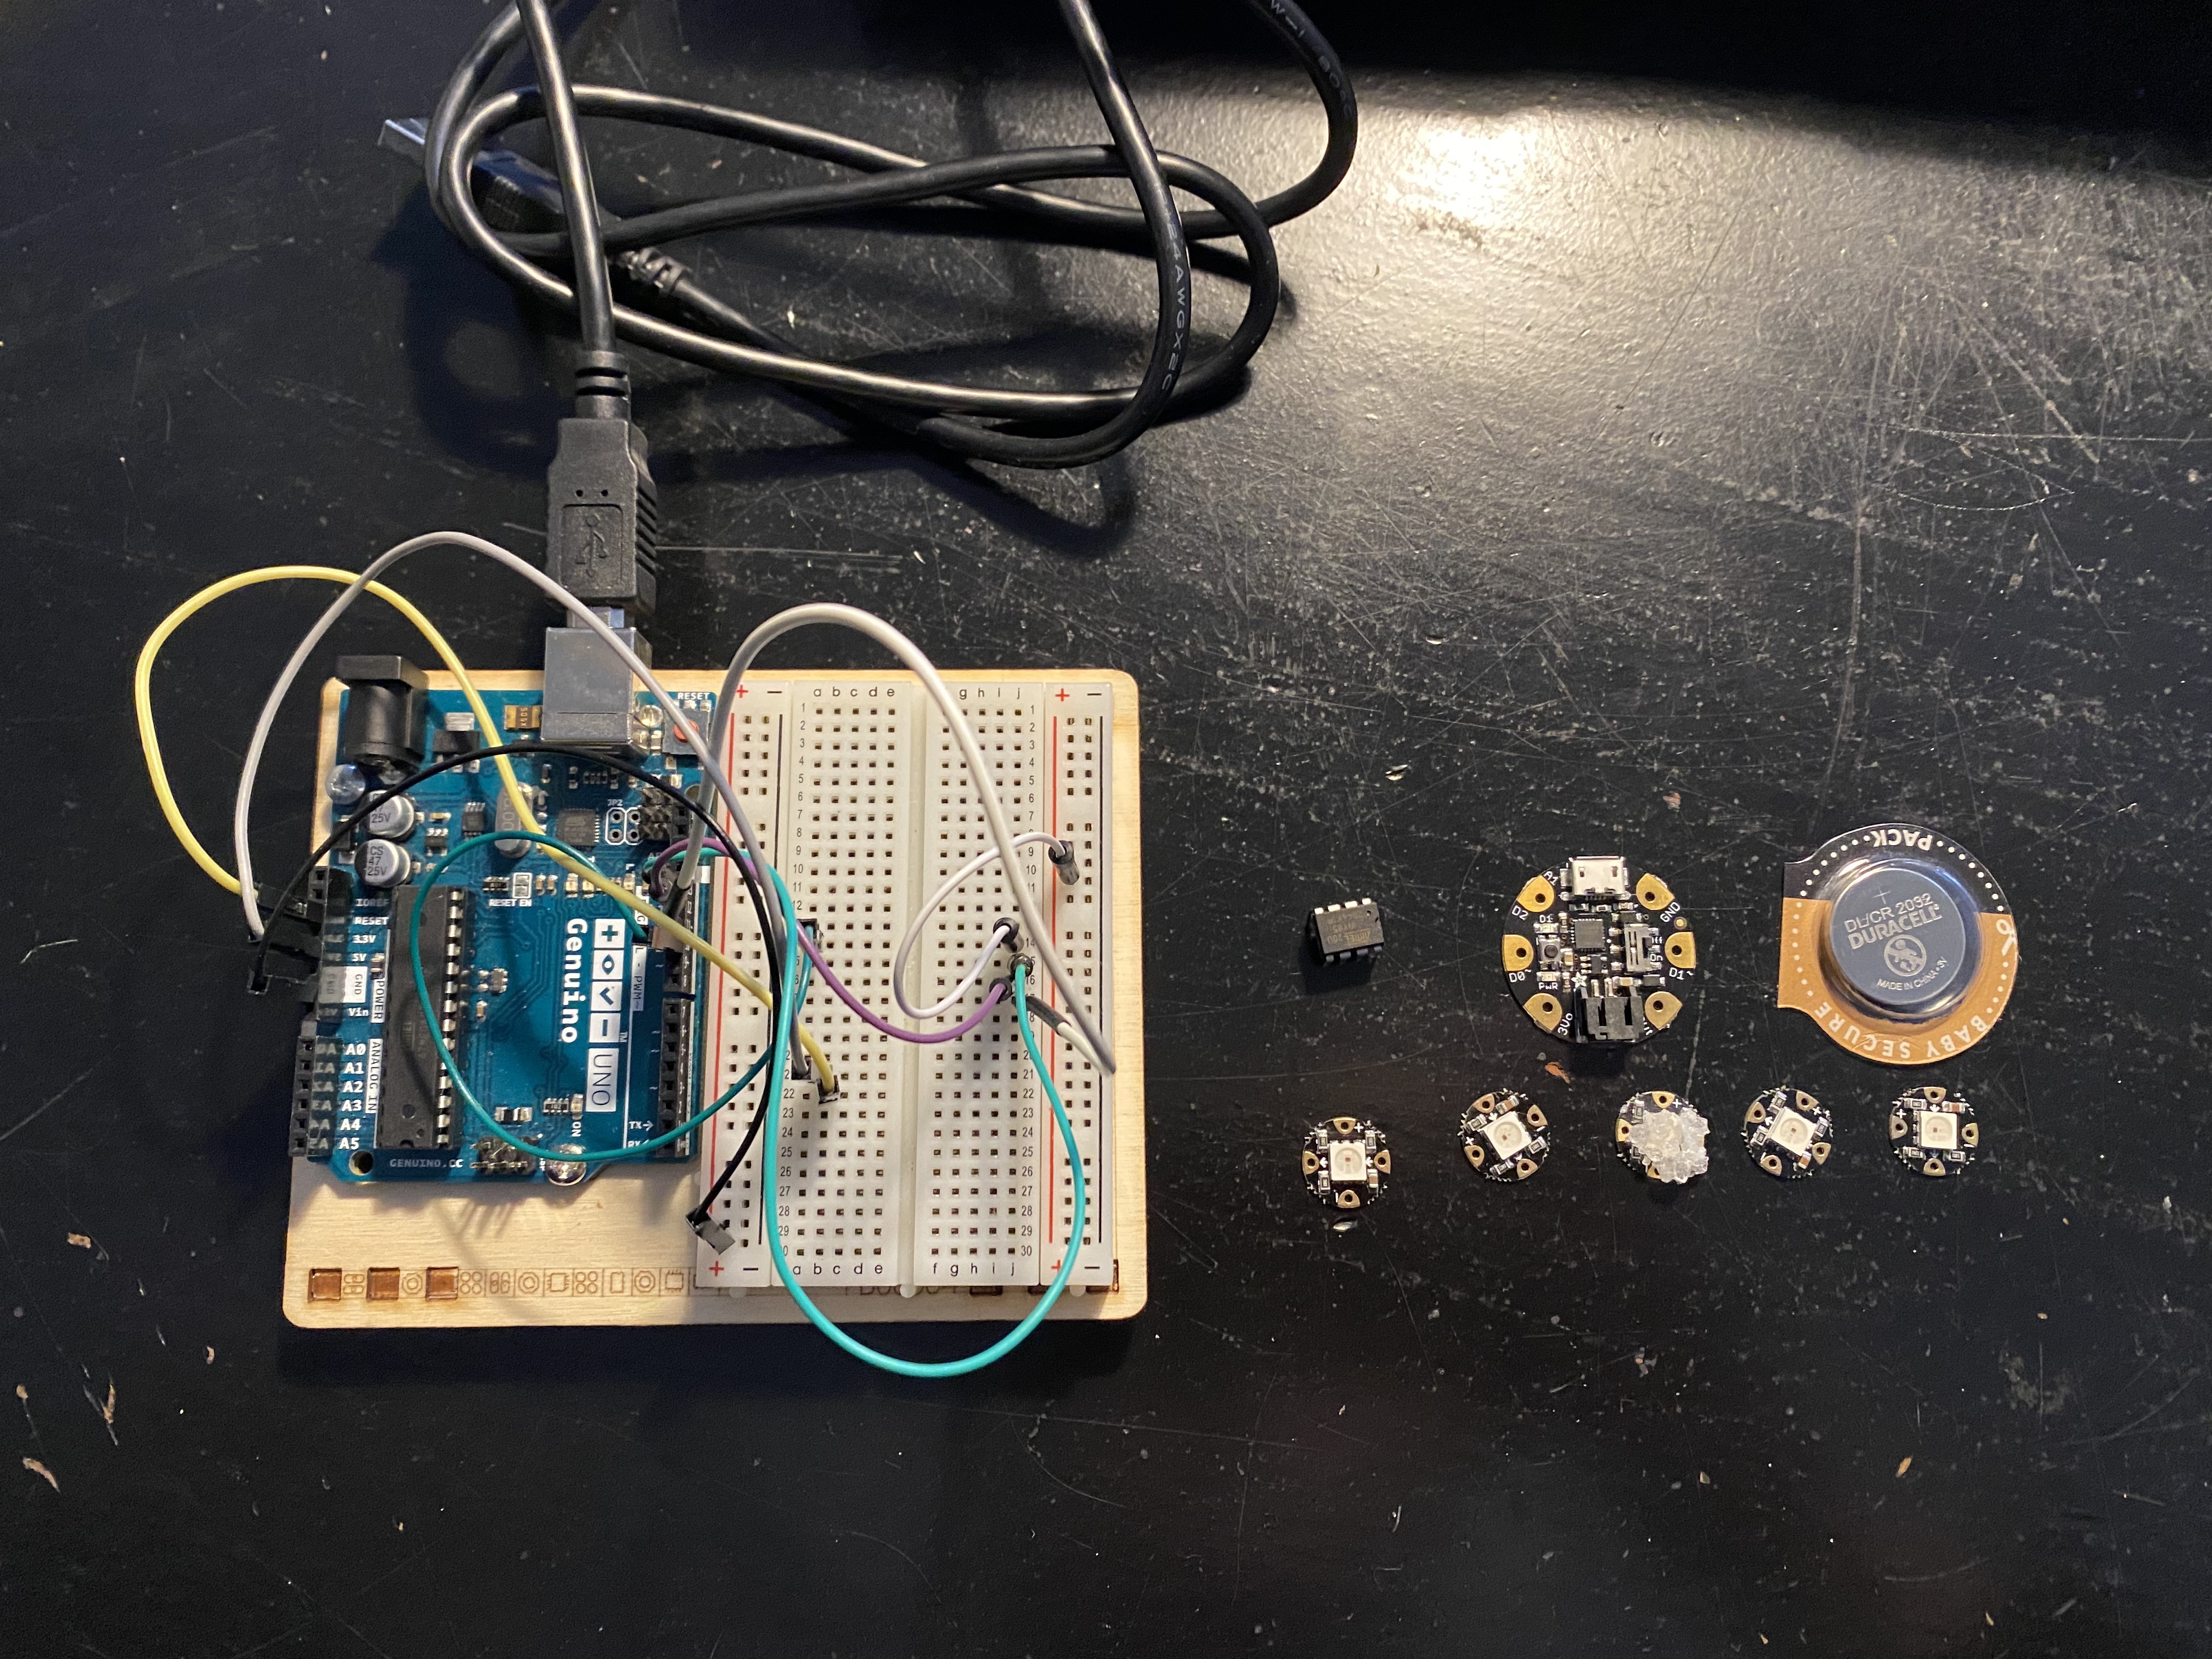
Materials:
-
1 x Adafruit GEMMA board
-
4 x Adafruit FLORA NeoPixels
-
1 x Coincell battery holder
-
2 CR2032 batteries
-
Thin Wires (insulated copper thin wire or silicone)
-
Insulated wire
-
Wire strippers, flush snips, and tweezers
-
Soldering iron and solder
-
E6000 craft glue
-
Plastic mask (as a mold)
-
Vaseline or release
-
Liquid latex or FX silicone
-
Sponge applicators
-
Glitter
-
Multimeter
Mask with glowing neopixels or sound reactive mask:
Materials: Skin Masquerade Party:
-
1 x Adafruit GEMMA board
-
4 x Adafruit FLORA NeoPixels
-
1 x Coincell battery holder
-
2 CR2032 batteries
-
Thin Wires (insulated copper thin wire or silicone)
-
Insulated wire
-
Wire strippers, flush snips, and tweezers
-
Soldering iron and solder
-
E6000 craft glue
-
Plastic mask (as a mold)
-
Vaseline or release
-
Liquid latex or FX silicone
-
Sponge applicators
-
Glitter
-
Multimeter
MIT Media lab:
Research
Design a skin circuit:
Gold leaf circuit tattoo: Use glue on the part you want tattooed:
Document the project and included all source files and all materials used.
Make a video with your skin electronic working
Emmas teachings:
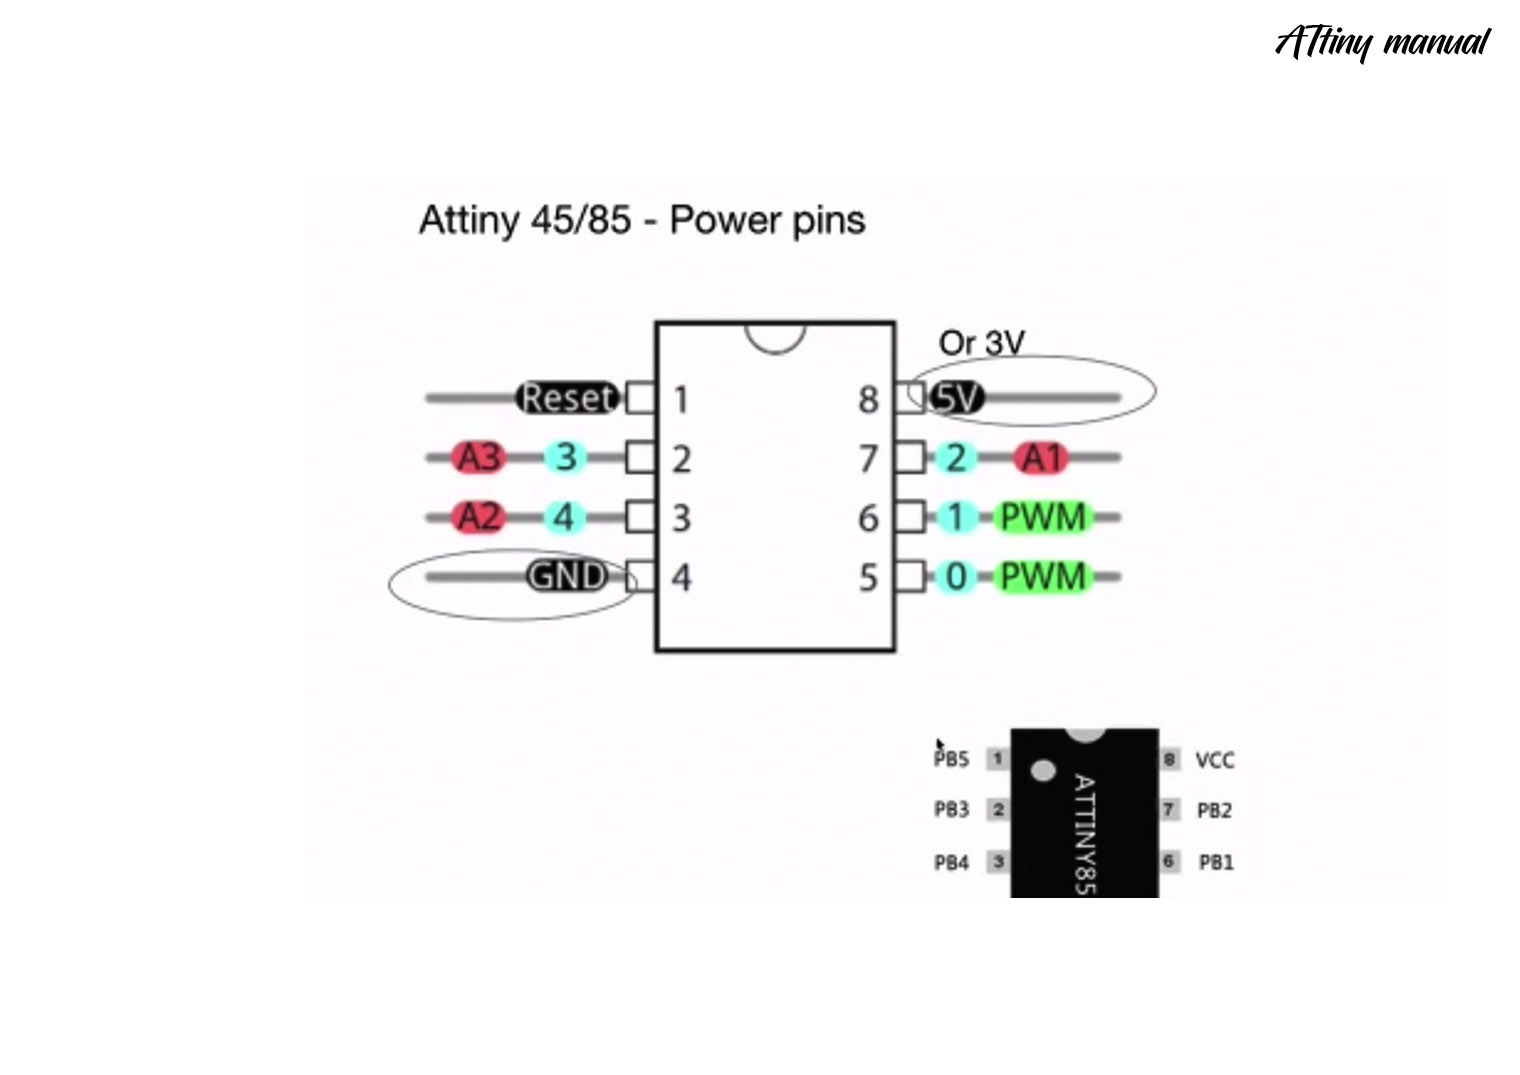
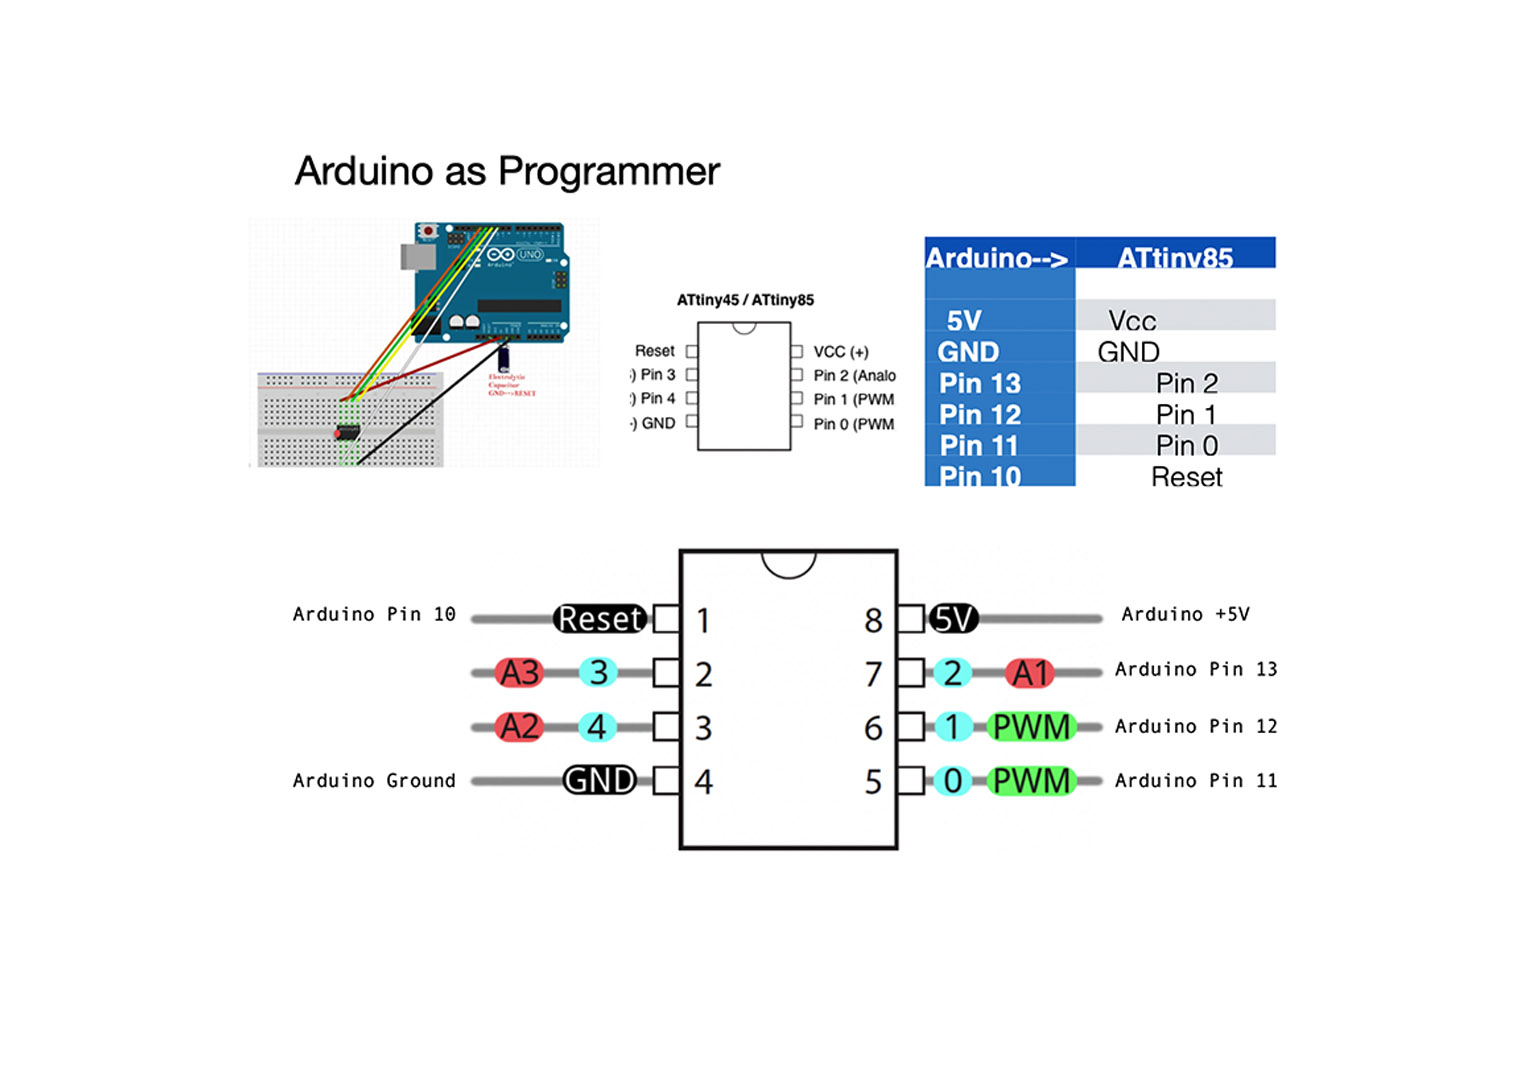
ATtiny:
Instructions:
- You can identify your arduino ATtiny by recognising a small circle at the top left of the square.
source: Emma
- In the arduino programme: the name of the software or device is in blue.
- How to programme:
source: Emma
-
Download the 1st link Arduino IDESetup and copy Emmasfirst link. GO to Arduino preferences..., go to link insert. Then copy Emmas link ina nd press ok.
-
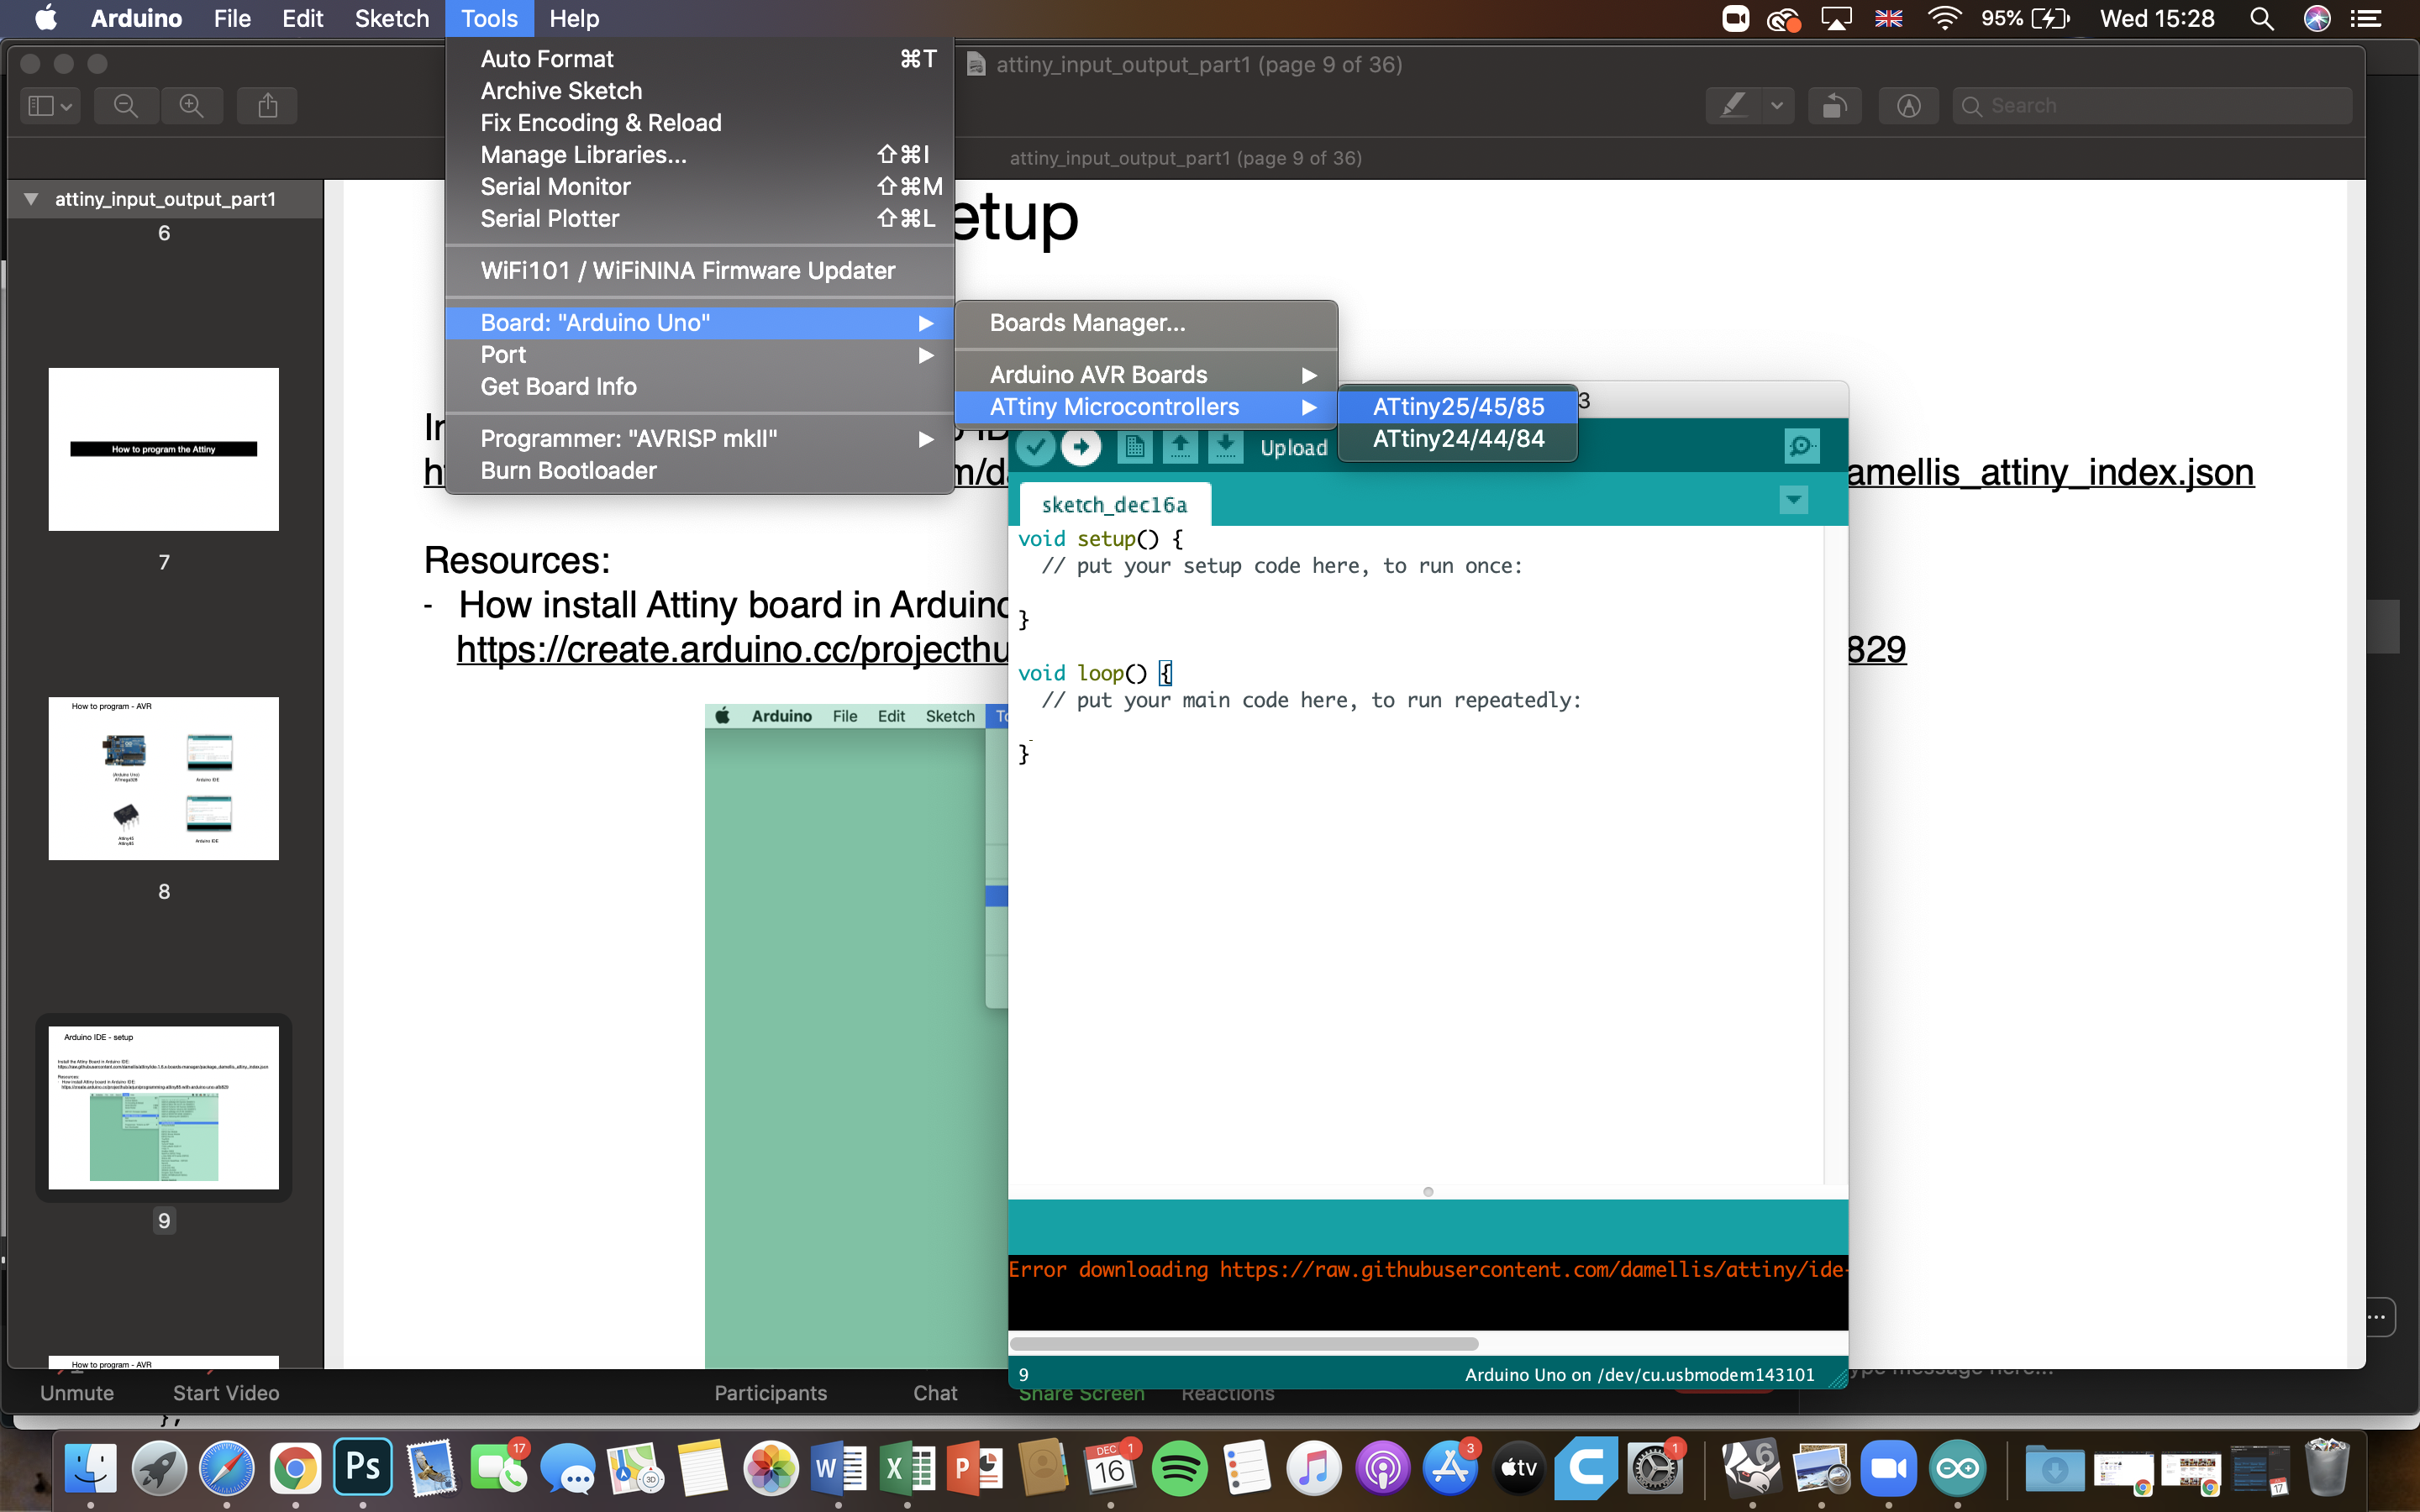
Go to tools - board preferences. Download ATtiny.
-
Go to board - ATtiny - 25 - 45/85. There are the settings used for the Attiny.
-
How to programme/ Arduino as a programming tool. File - example - ArduinoISP. Check that you're Arduino type , board and microcontrollers are correct.
My ATtiny was of a different format so I would refer back to this class as soon as I got a ATtiny that would fit in my breadboard.
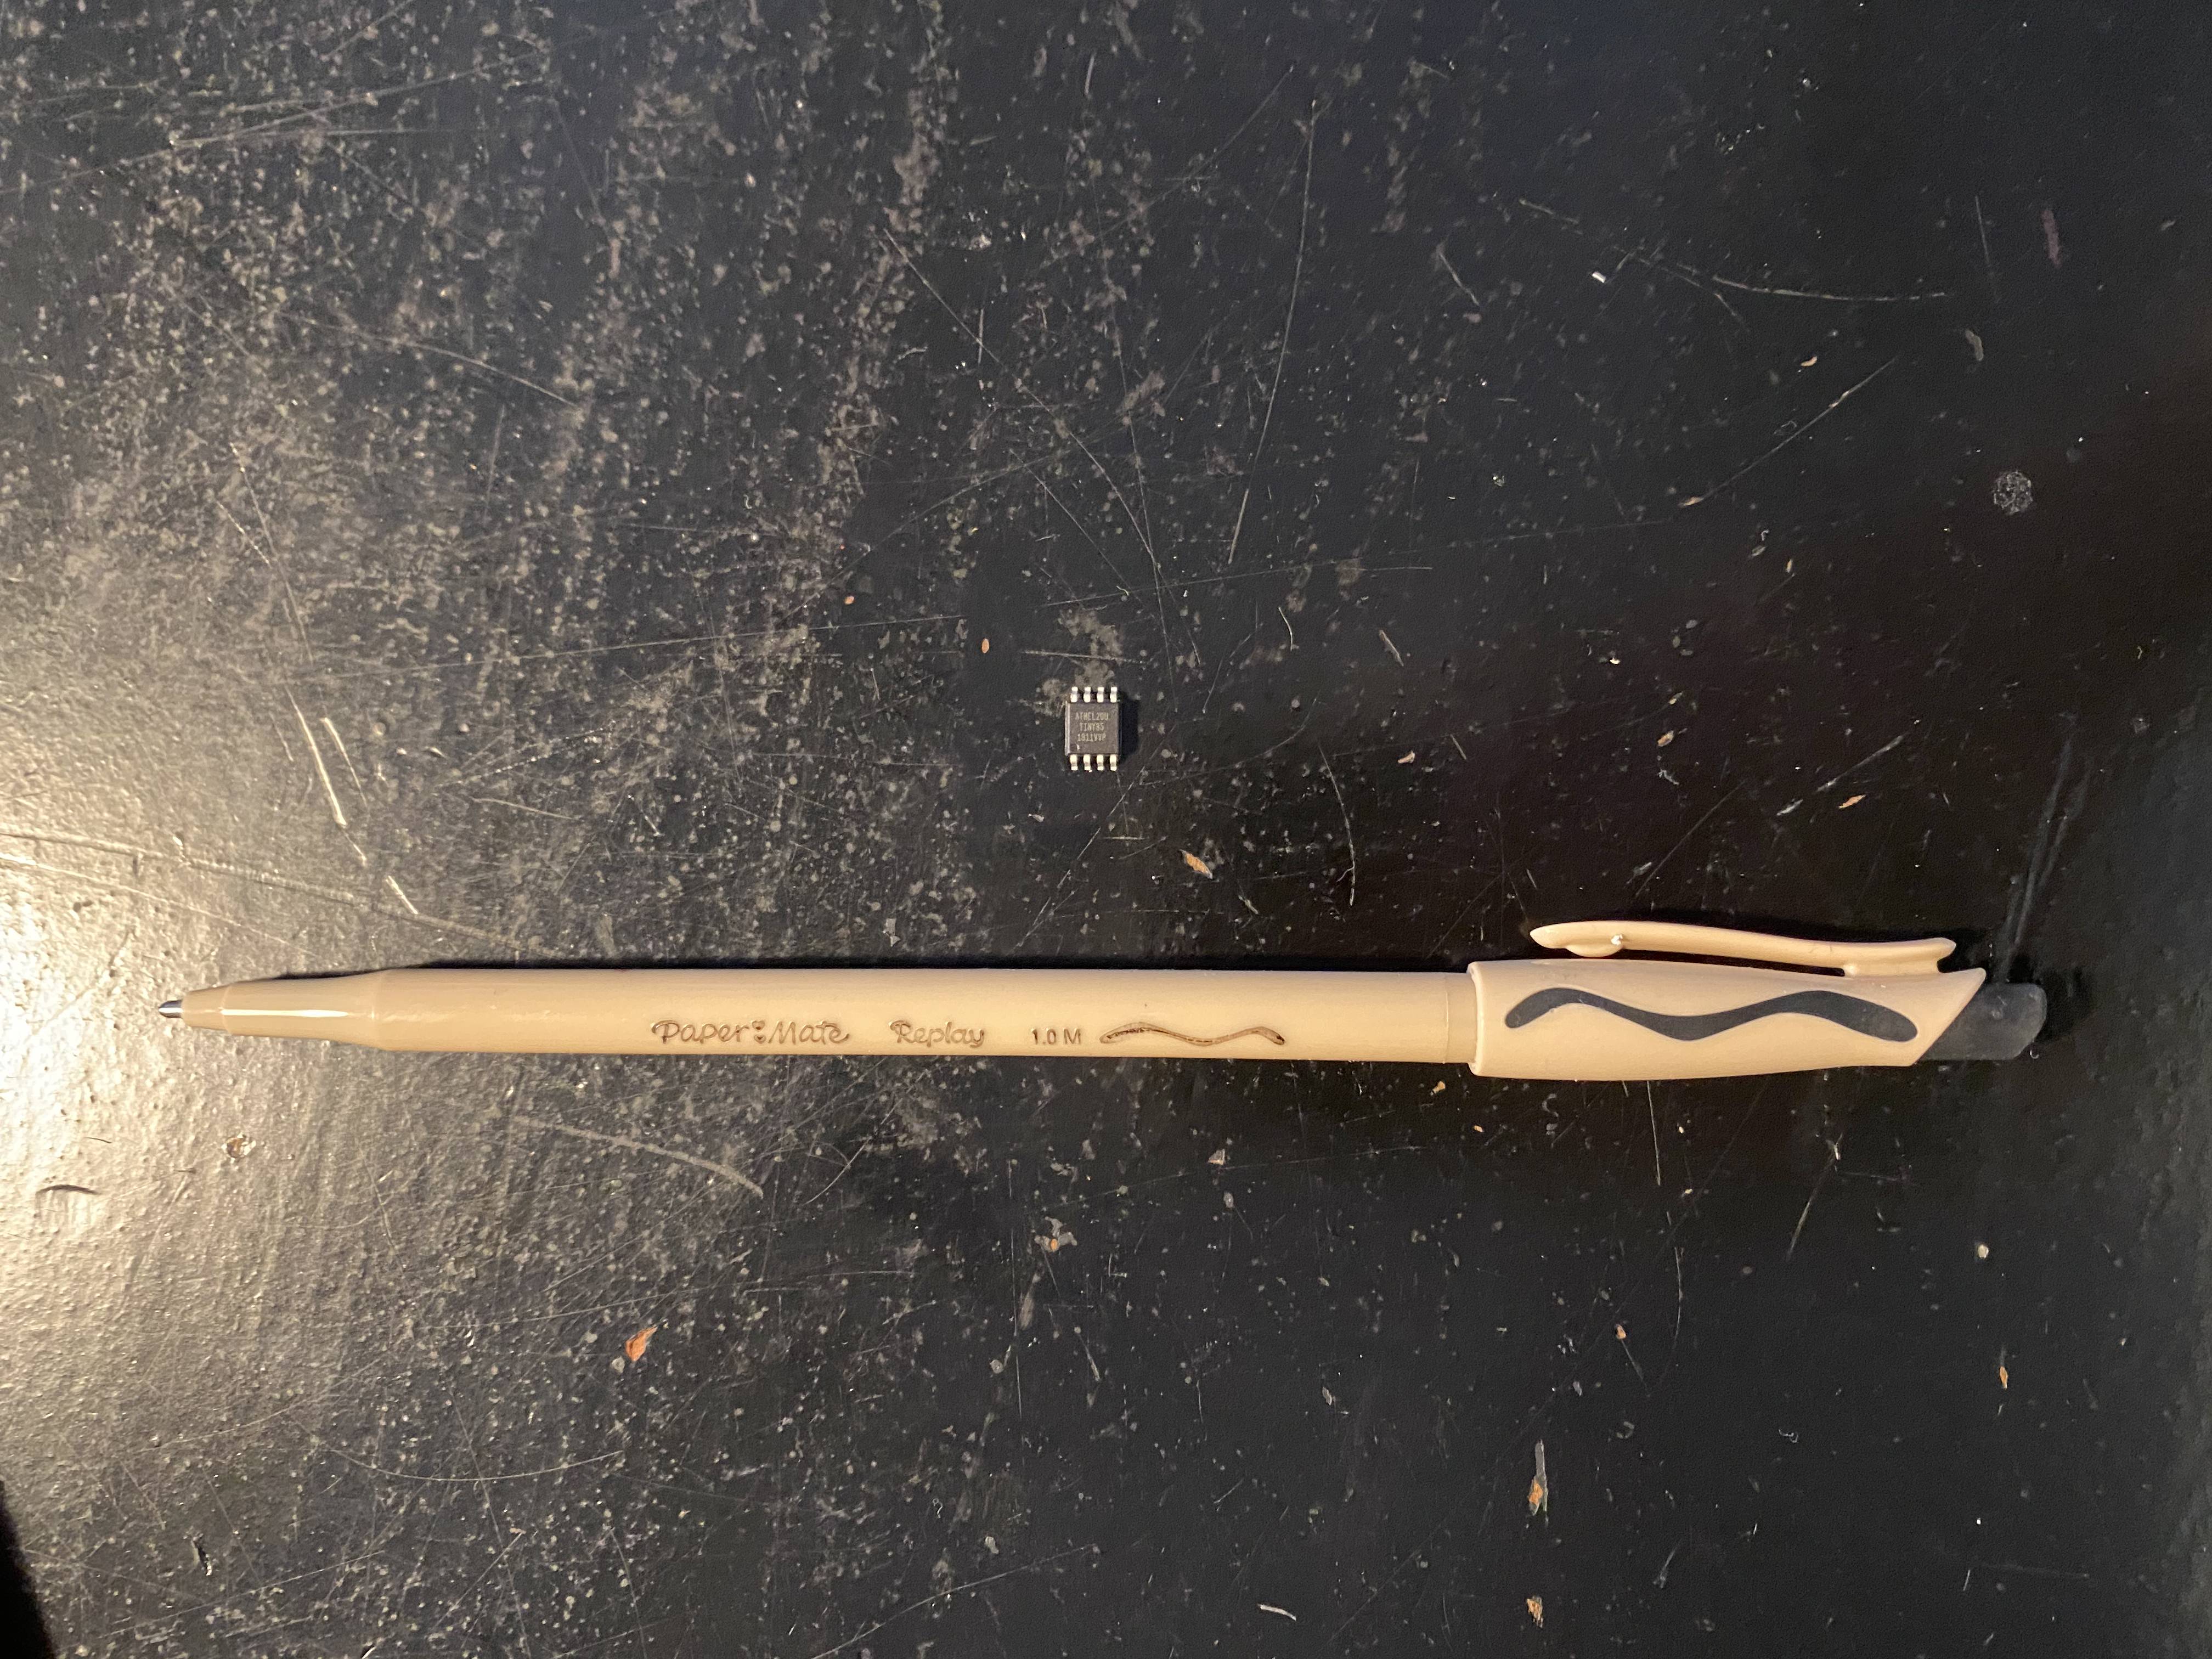
Look at how small this is!
Once you have uploaded a sketch to you Arduino with your ATtiny connected to it, you can remove the Arduinoand the code from that sketch will have been saved into your ATtiny. It will take care of the circuit just as the Arduino would previously. This makes the device more wearable and more playful to work with in terms of design.
code: ATtiny_45_led.
You could use the Attiny as a stand alone + switch + neopixel. This could be a wearable solution.

Lesson 2:
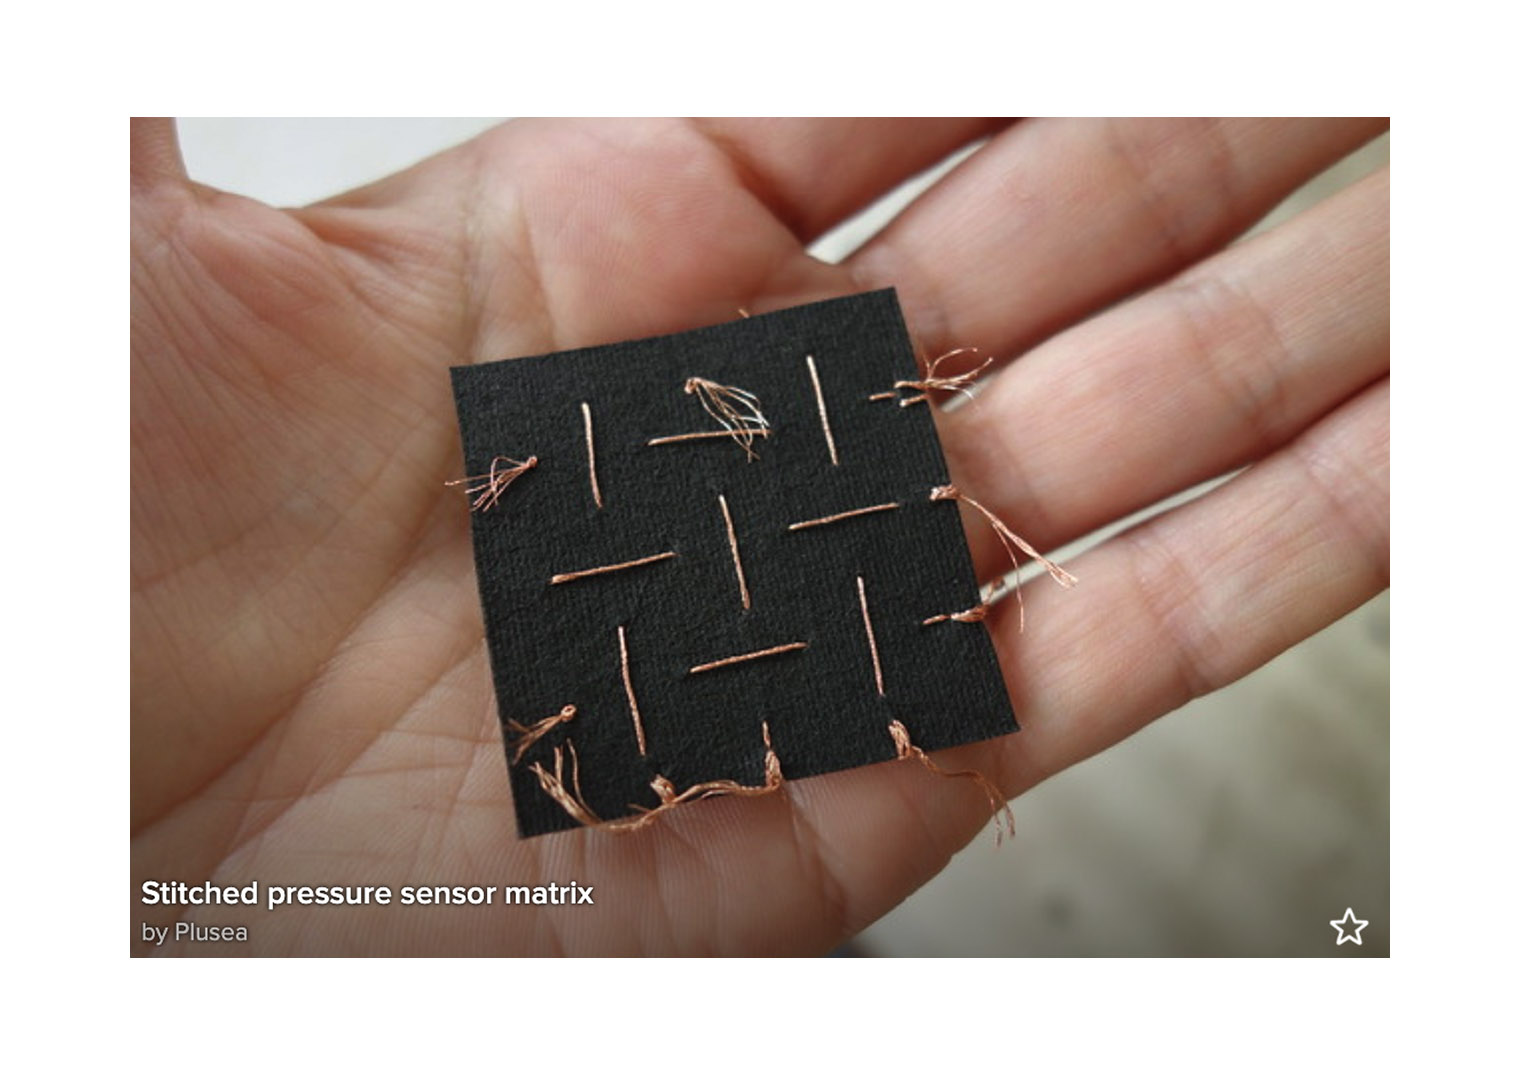
For this lesson we had prepared a matrix:
I know had the ATtiny. So I could continure Emmas tutorial.
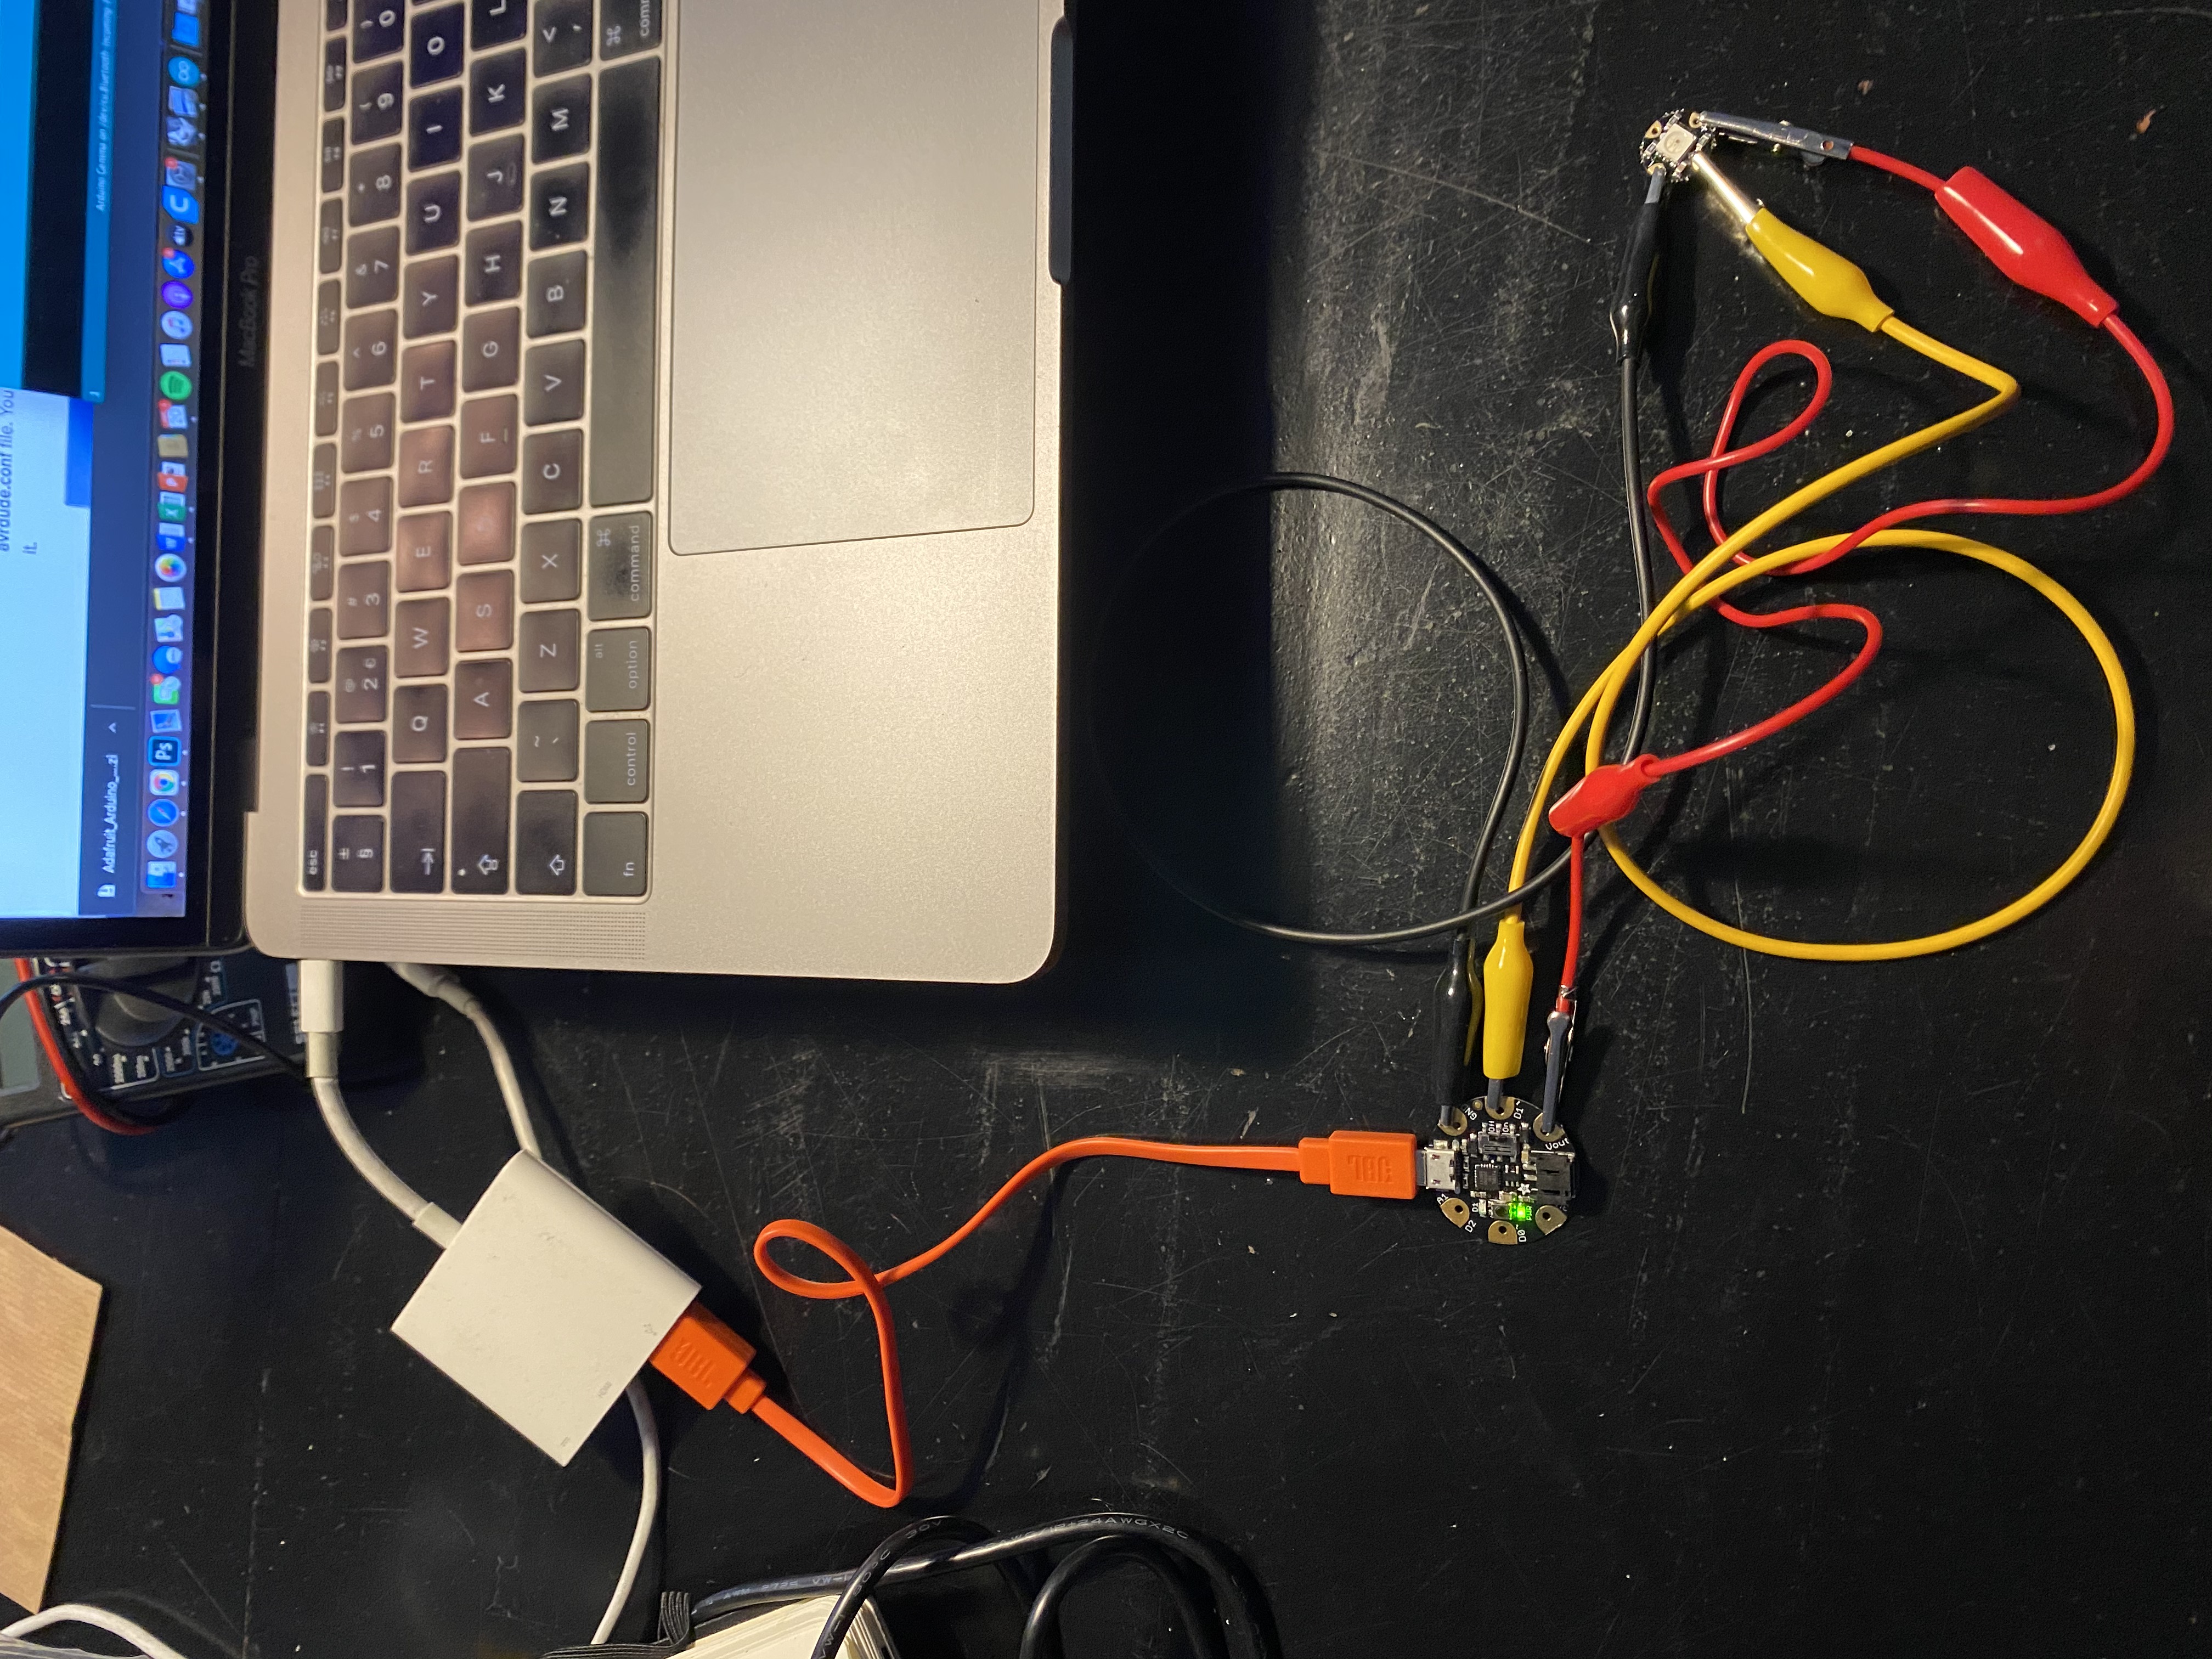
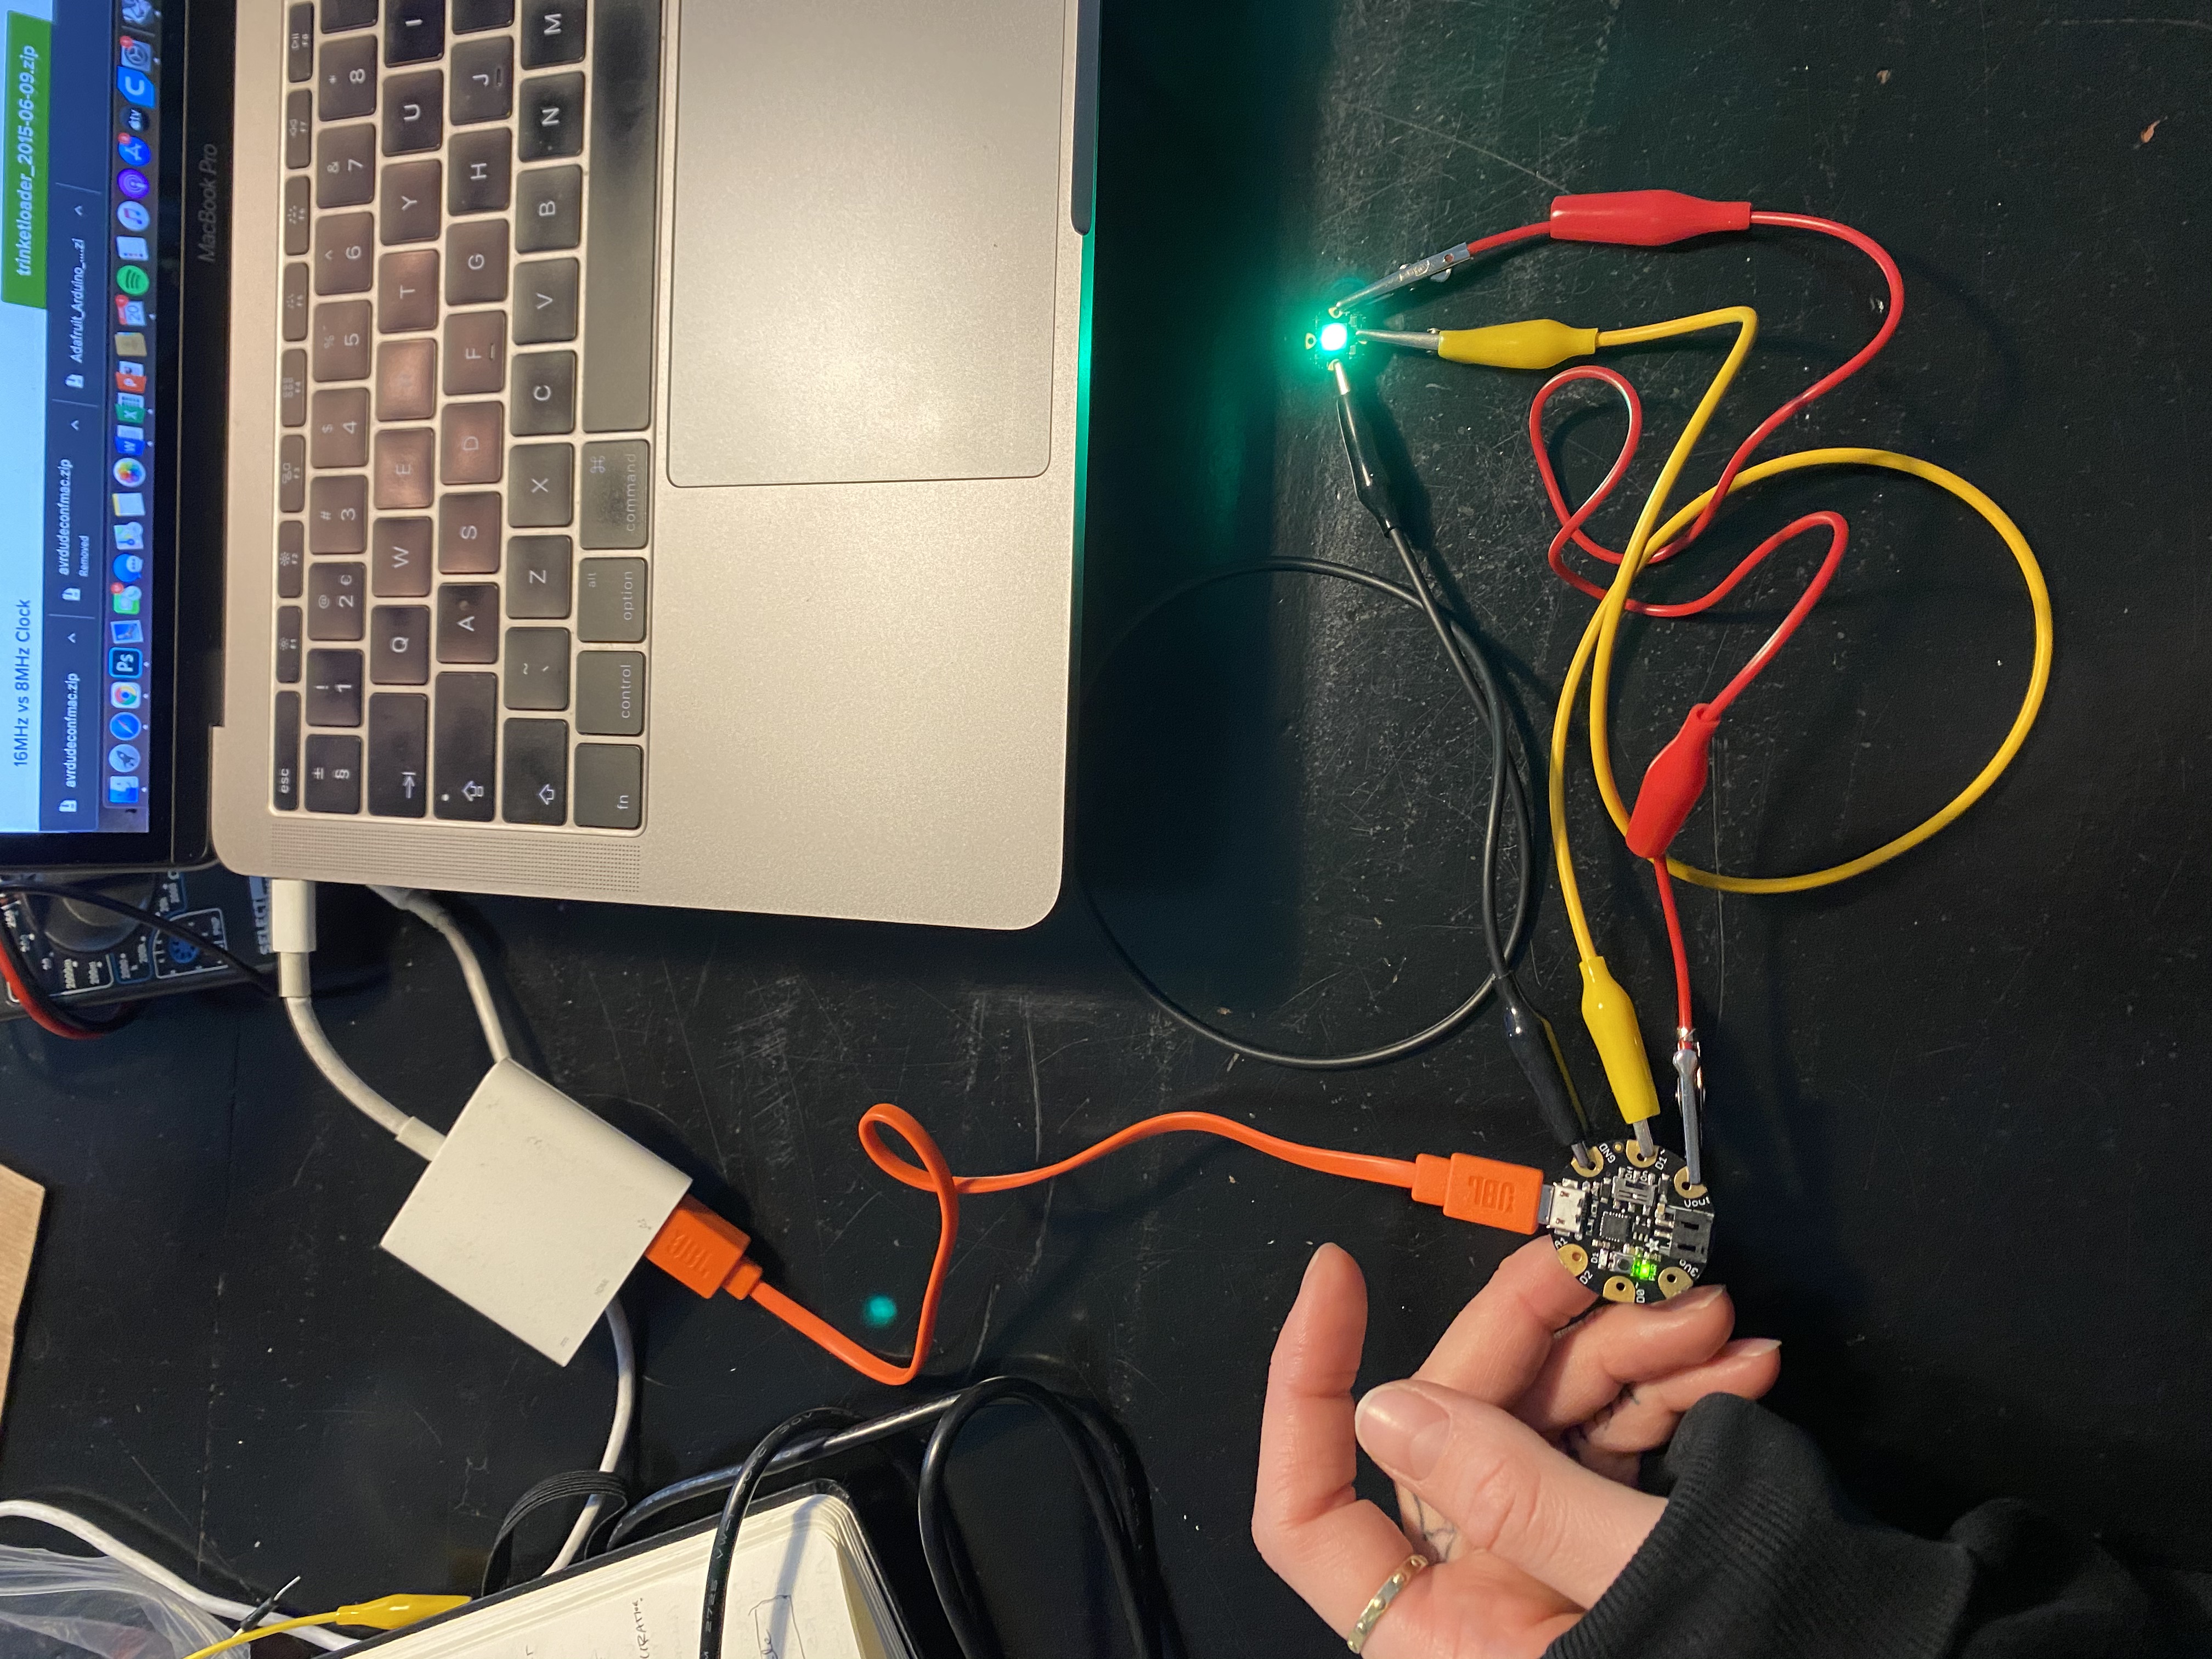
- FTDI board or cable:
Digital sensor:
Firstly, we needed to programme the ATtiny via the Arduino.
code: attiny_nalog_sensor
check if you can find this code in the library.
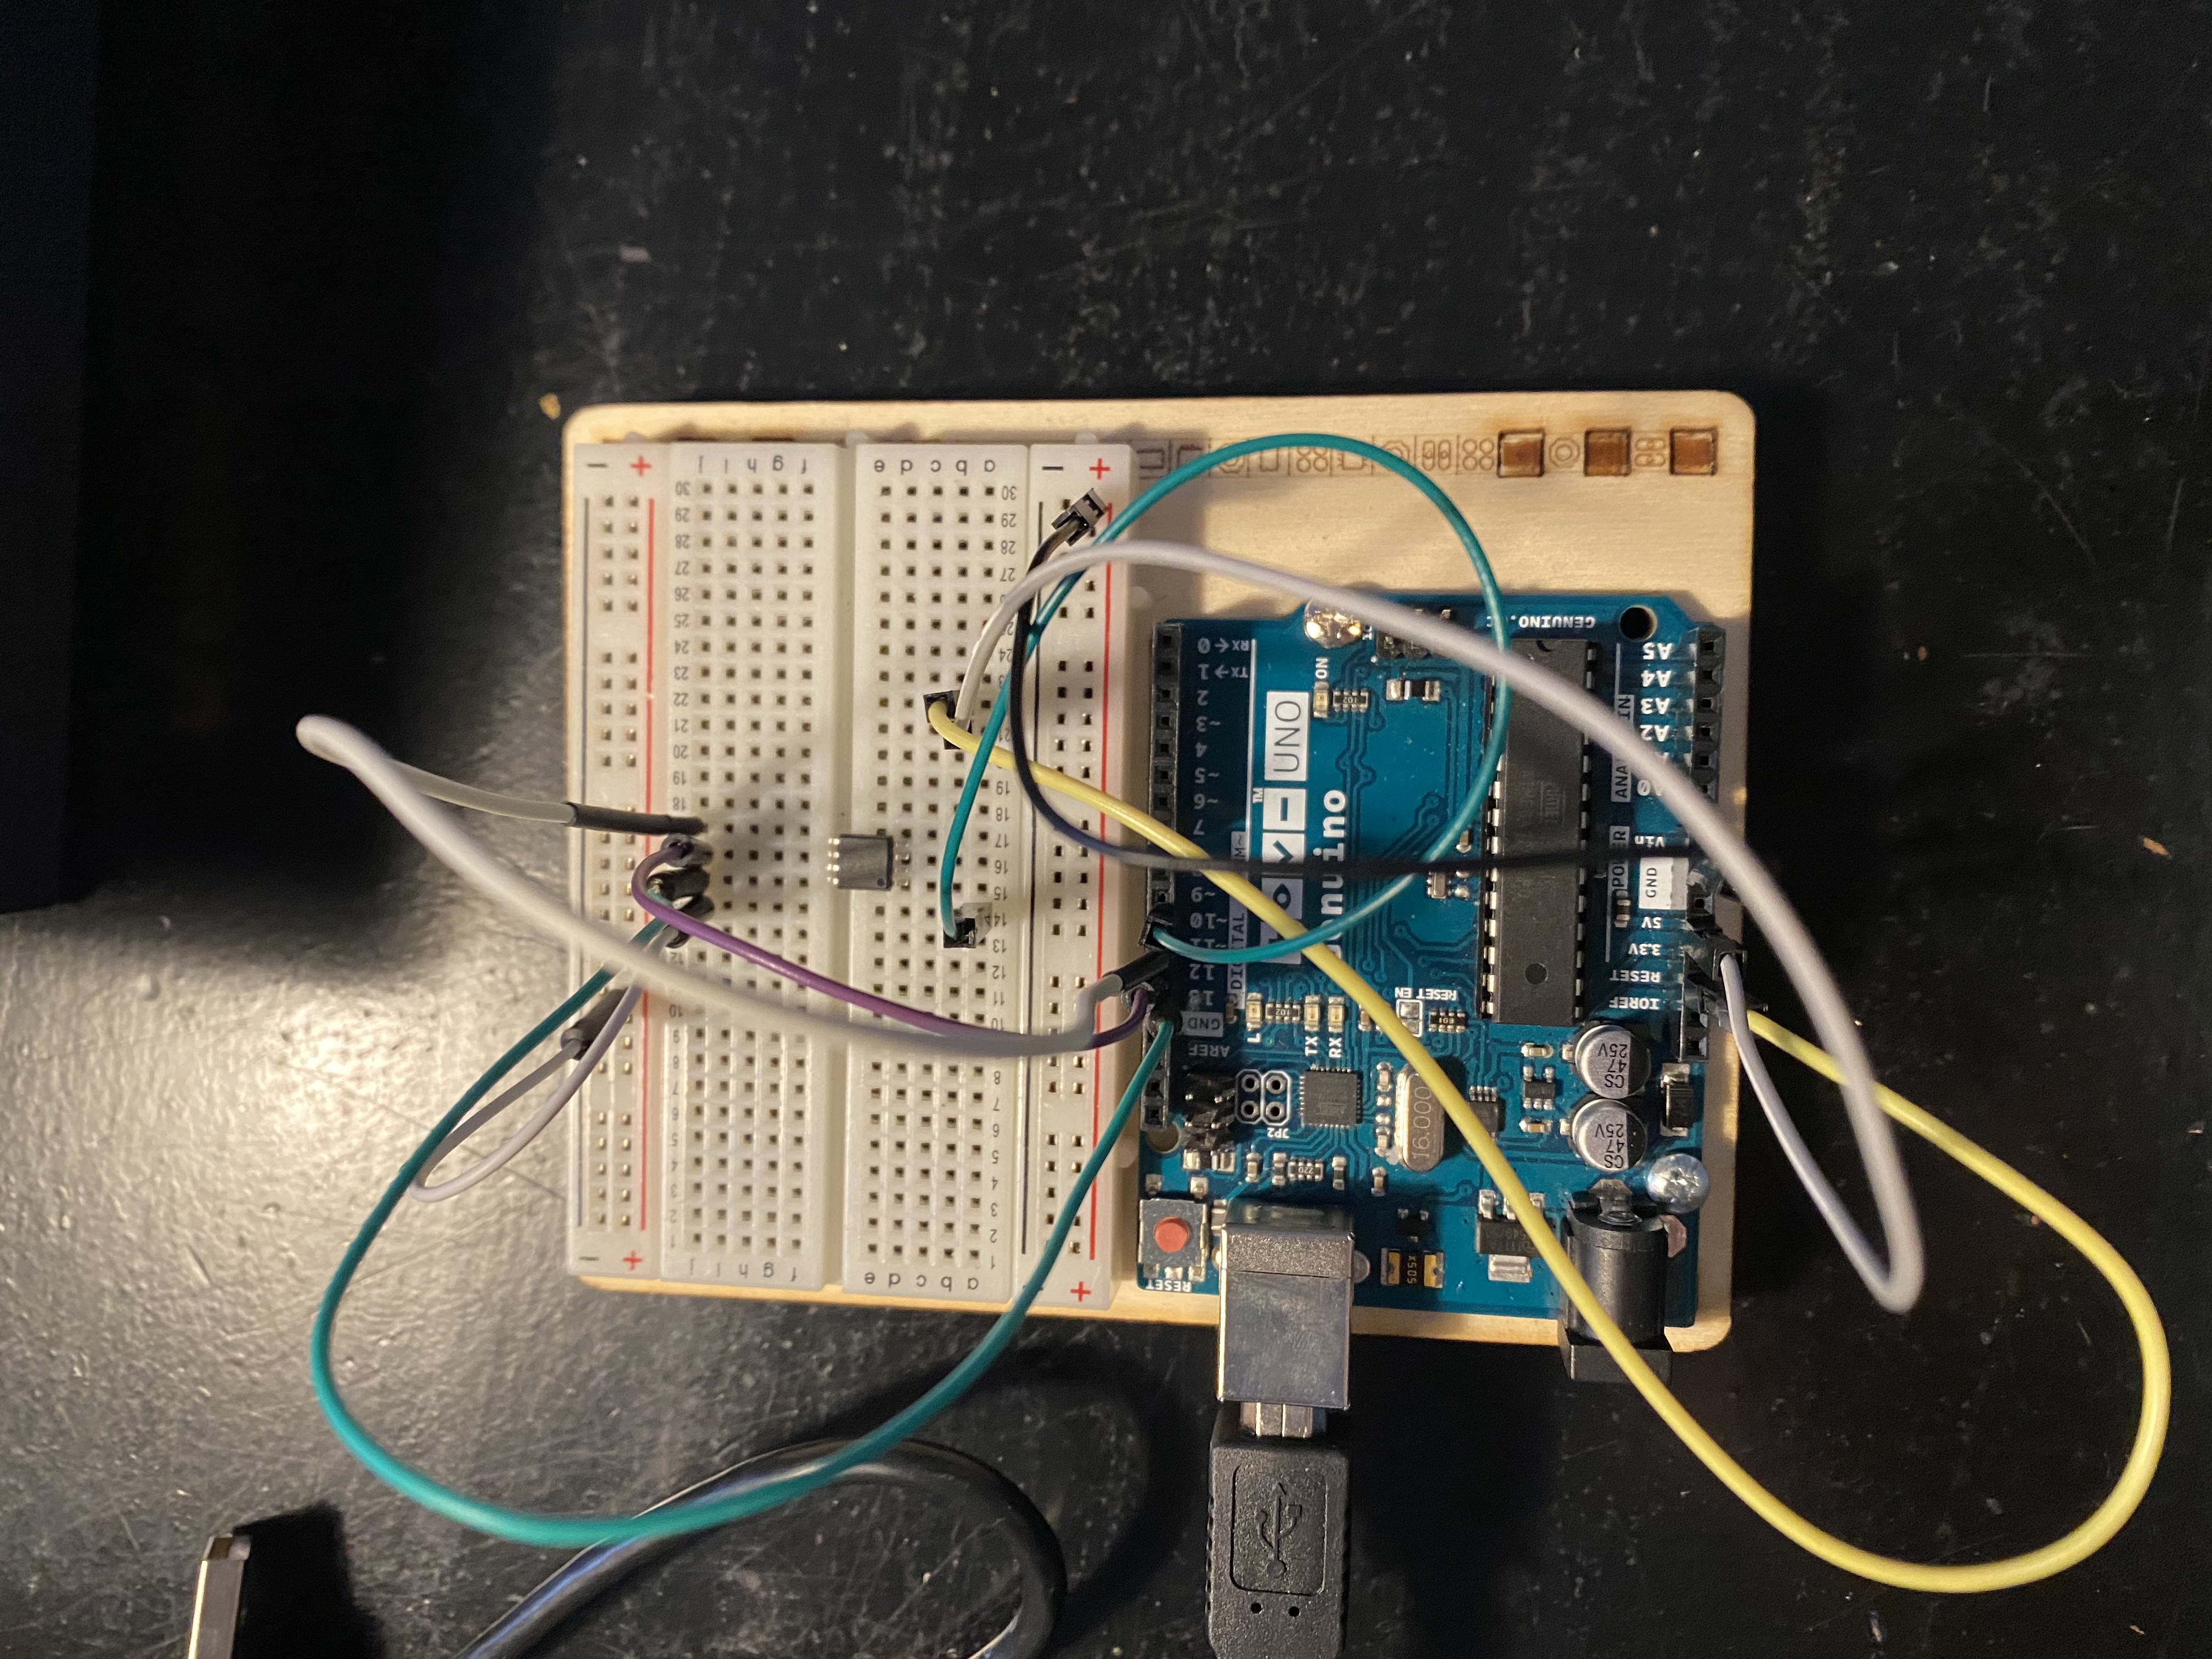
Plug it all in with the Arduino.
-
Select board: Attiny85
-
Internal: 8ghz
-
Upload
-
Connect your VCC to CC of your sensor. Connect attiny, light sensor, VCC, FTDI cable to laptop. Check your input on mac and make sure that it is set to usb.
code: analog_serial_value.
Select serial plotter.
to be continued...
Adafruit Gemma v2:
Inspiring projects: Loes Bogers:
This week was proabably the hardest one seeing as we were closing of the academy chapter. Overall my experinec was that I leaernt more on the technical side of the electrons, seeing as we werent able to complete this in Wearbales I & II weeks. I would like to dive into the aspect of beauty technology and see where this is leading to in the future.
This documentation therefore is still in progress. To be continued... Oyster card embedded in nails:
Simple matrix for testing: https://www.flickr.com/photos/plusea/albums/72157682272262213
Gallery
