Week 4: Biochromes
Natural dyes, inks, pigments and bacteria were the protagonists of this week. As we continue to consume garments, we often don’t know that one of the most harmful processes in the development of such a textile is the dyeing process. The use of the chemicals is harmful not only to ourselves but also the environment. As a designer it is important to reach out to alternatives as a medium to battle the on-going fast fashion industry.
So, Colour is the theme of the week.
“Colour is only present when there is life” – Cecilia Raspanti.
Colour by definition:
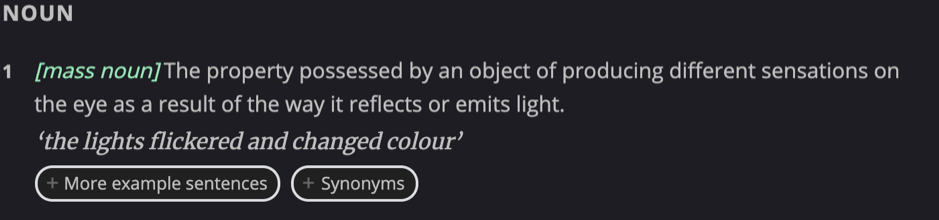 source: https://www.lexico.com/definition/colour
Perhaps one of the most famous cases we know about colour is the discover of Sir Isaac Newton:

Isaa Newton used a prism to identify and document the ROYGBIV colours. This being all the colours of our visible spectrum. Red, Orange, Yellow, Green, Blue, Indigo and Violet. The reason that us humans are able to see this small portion of colours in the electromagntic spectrum is because we own a set of cones that respond to the wavelengths that we find in this visible spectrum. Our eyes aren't able to distinguish other forms of electromagnetic radiation such as: gamma, mimcro or radio waves. This small portion of colours give sus the pleasure to see the enitre spectrum of a rainbow.
Colour symbolism and our emotions:
Before we can dive into the experimentation with natural dyes we must first get acqaunited with the concept of colours. I am particularly interested in seeing colours as ways or means to express our feelings. The impact of a colour can very well determine the way you will be feeling on a specific day. This is why I looked at the meanings behind each of them to further gain knowledge on the symbolism behind it. Colours are a magical concept and without them the world would just be an ordinary sphere containing different shades of monotone tints.
Just look at all of the beautiful places on this planet!:

How did colours earn their meaning?
Colours have always been affected by biological conditions as far the planet has been existing. To understand what they mean will give you an advantage when it comes to analysing peoples behaviour. Applying this knowledge to your very own designs will provoke feelings that only make your projects more powerful.
Where do they come from:
-
Effects that are psychological. We perceive colours on a day to day basis. Our brains take them all in.
-
Biological conditioning. Colours are a form of signs. Whether it be a sign for danger(red) or nature(green).
-
Development in cultures. Many colour mean different things in different cultures. One of the most common and outdated being blue(boy) and pink(girl).
Here is a beautiful poster to explain some of the feelings we encounter when accessing colours:
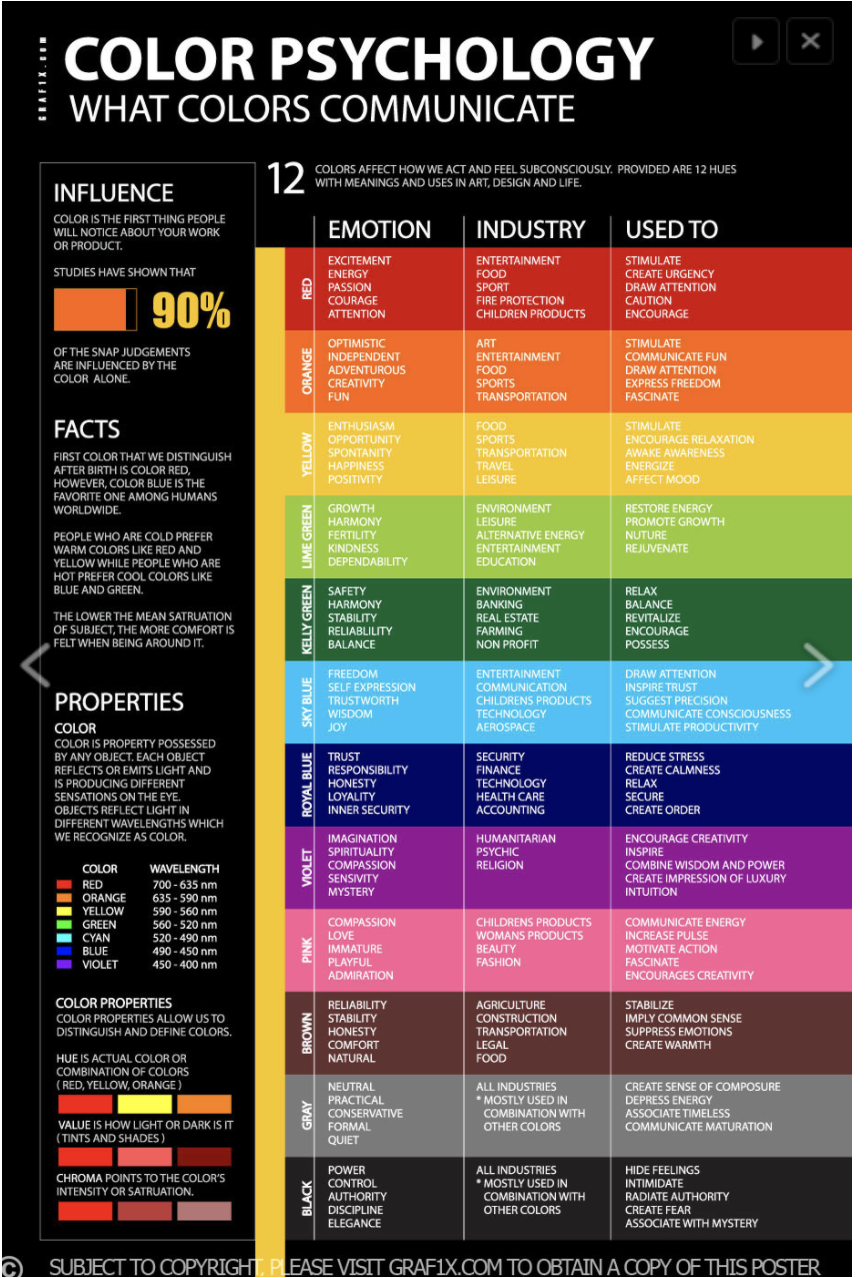 Credits to Graf1X.com

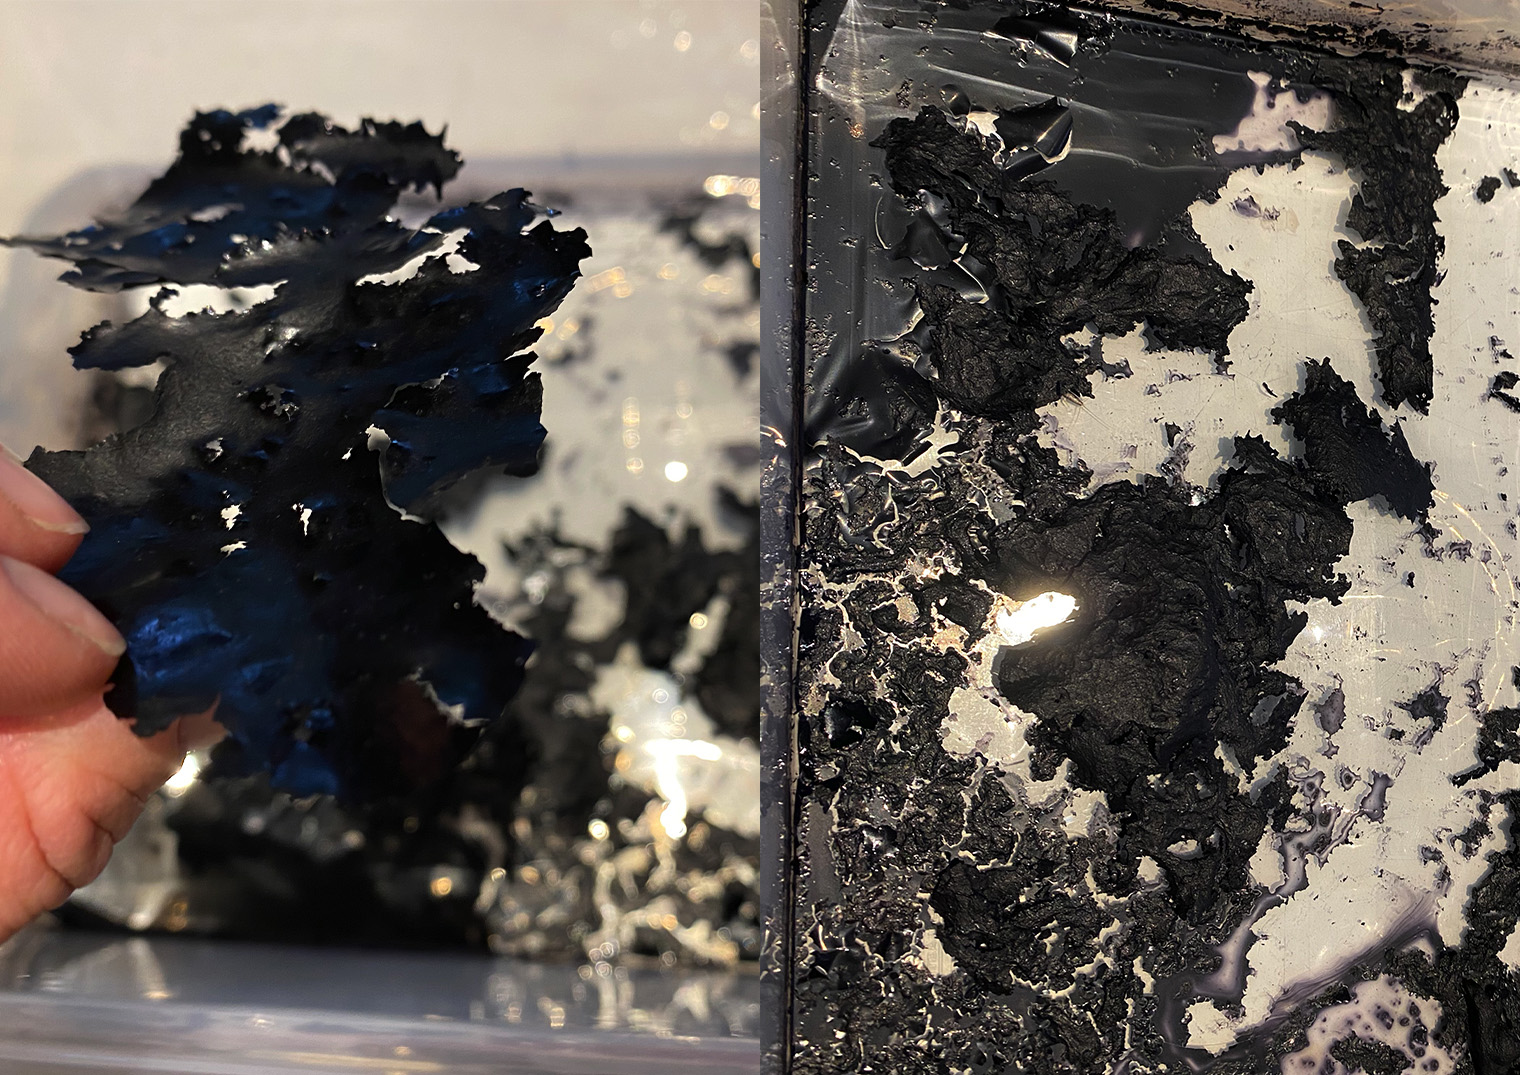
Back to Black.
Black is world's most worn colour and also the most unsustainable dye on this planet. Black is one of the most polluting colours on earth. Seeing as I always wear this colour, I feel a little guilty at times and so I thought I'd learn how to produce it so I could do less harm and make this my contribution to the planet. This time i'm doing a little egoistic-altruistic experiment to see if I can achieve the colour that possesses my closet. I dress very much like any other northern city girl and so I'd like to change our habits by acquanting evryone with the process of natural dyeing the colour black.
"The blacker the berry, the sweeter the juice." - Kenrick Lamar. (Only one of the most sensational rap talents of this time)
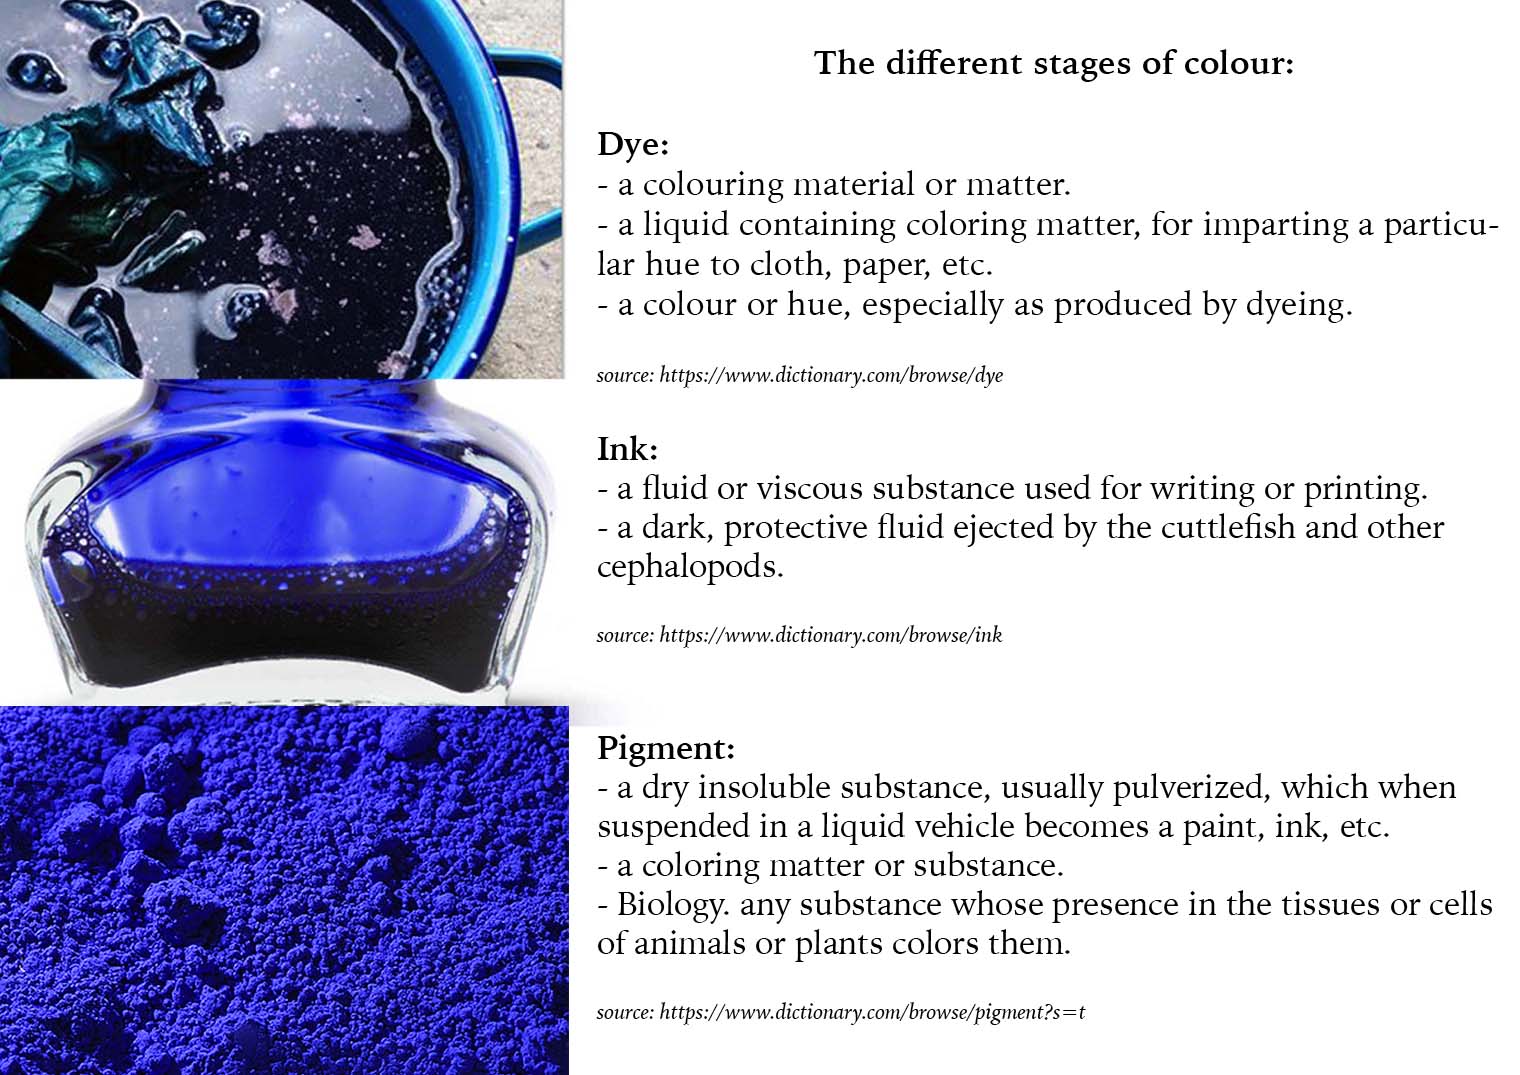
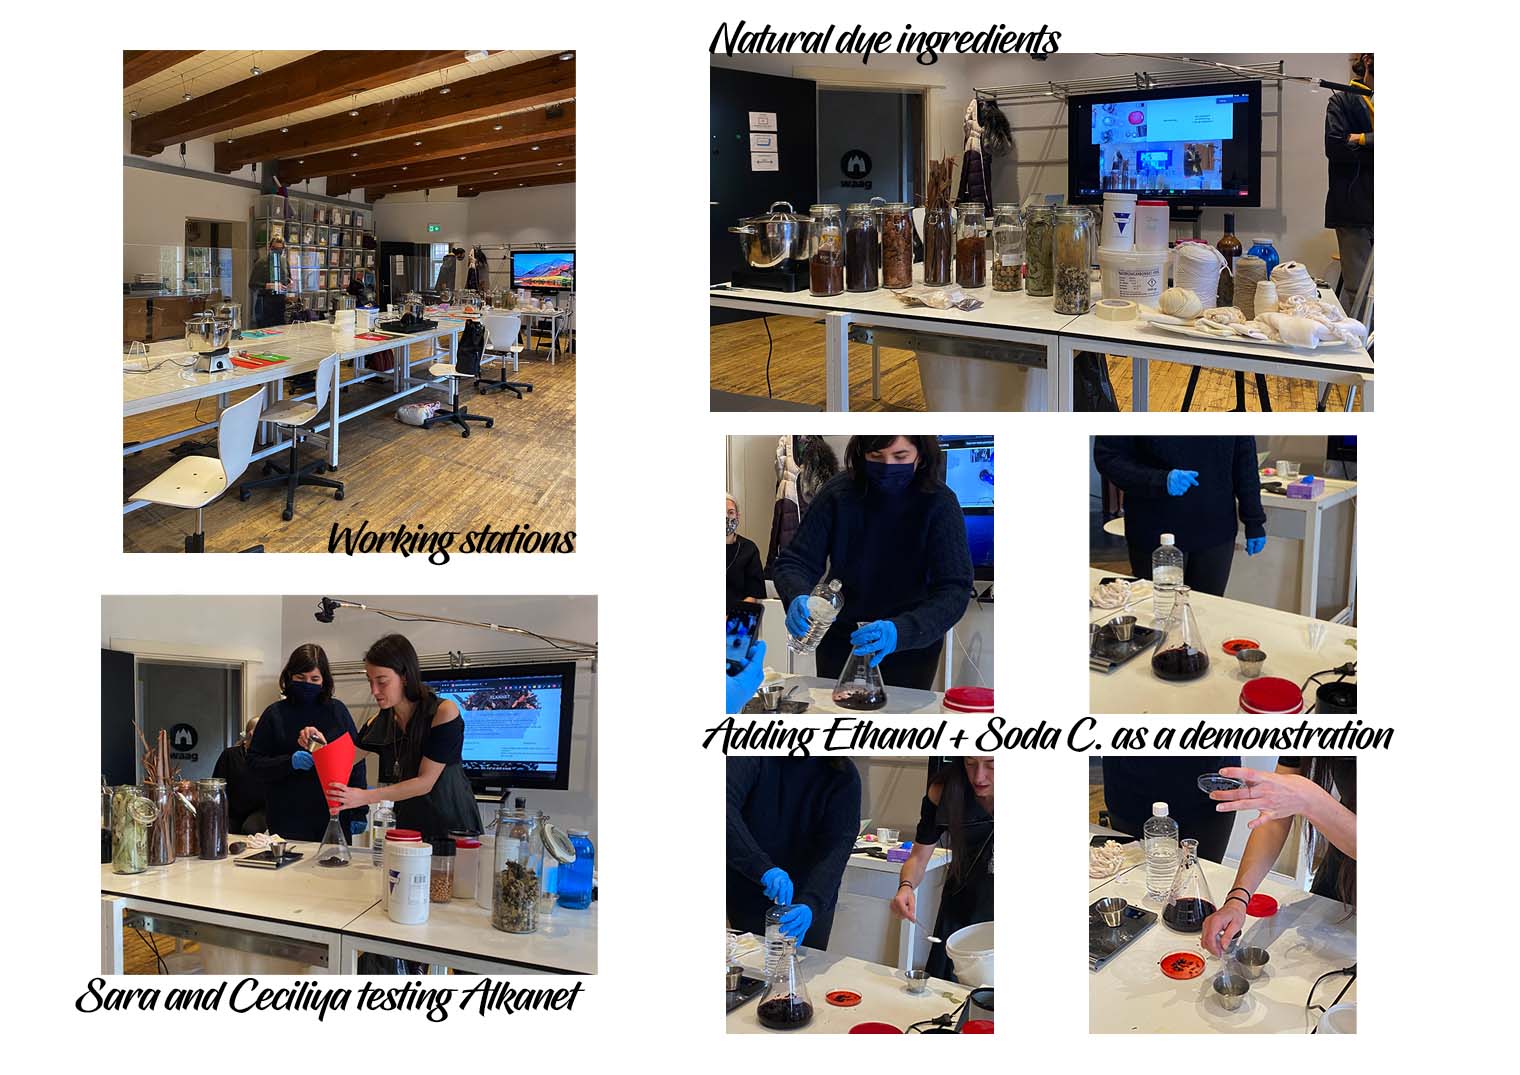
Documentation - How to Natural dye:
Before we can proceed into the world of colour we must grasp the understanding of the basic terms in this topic.
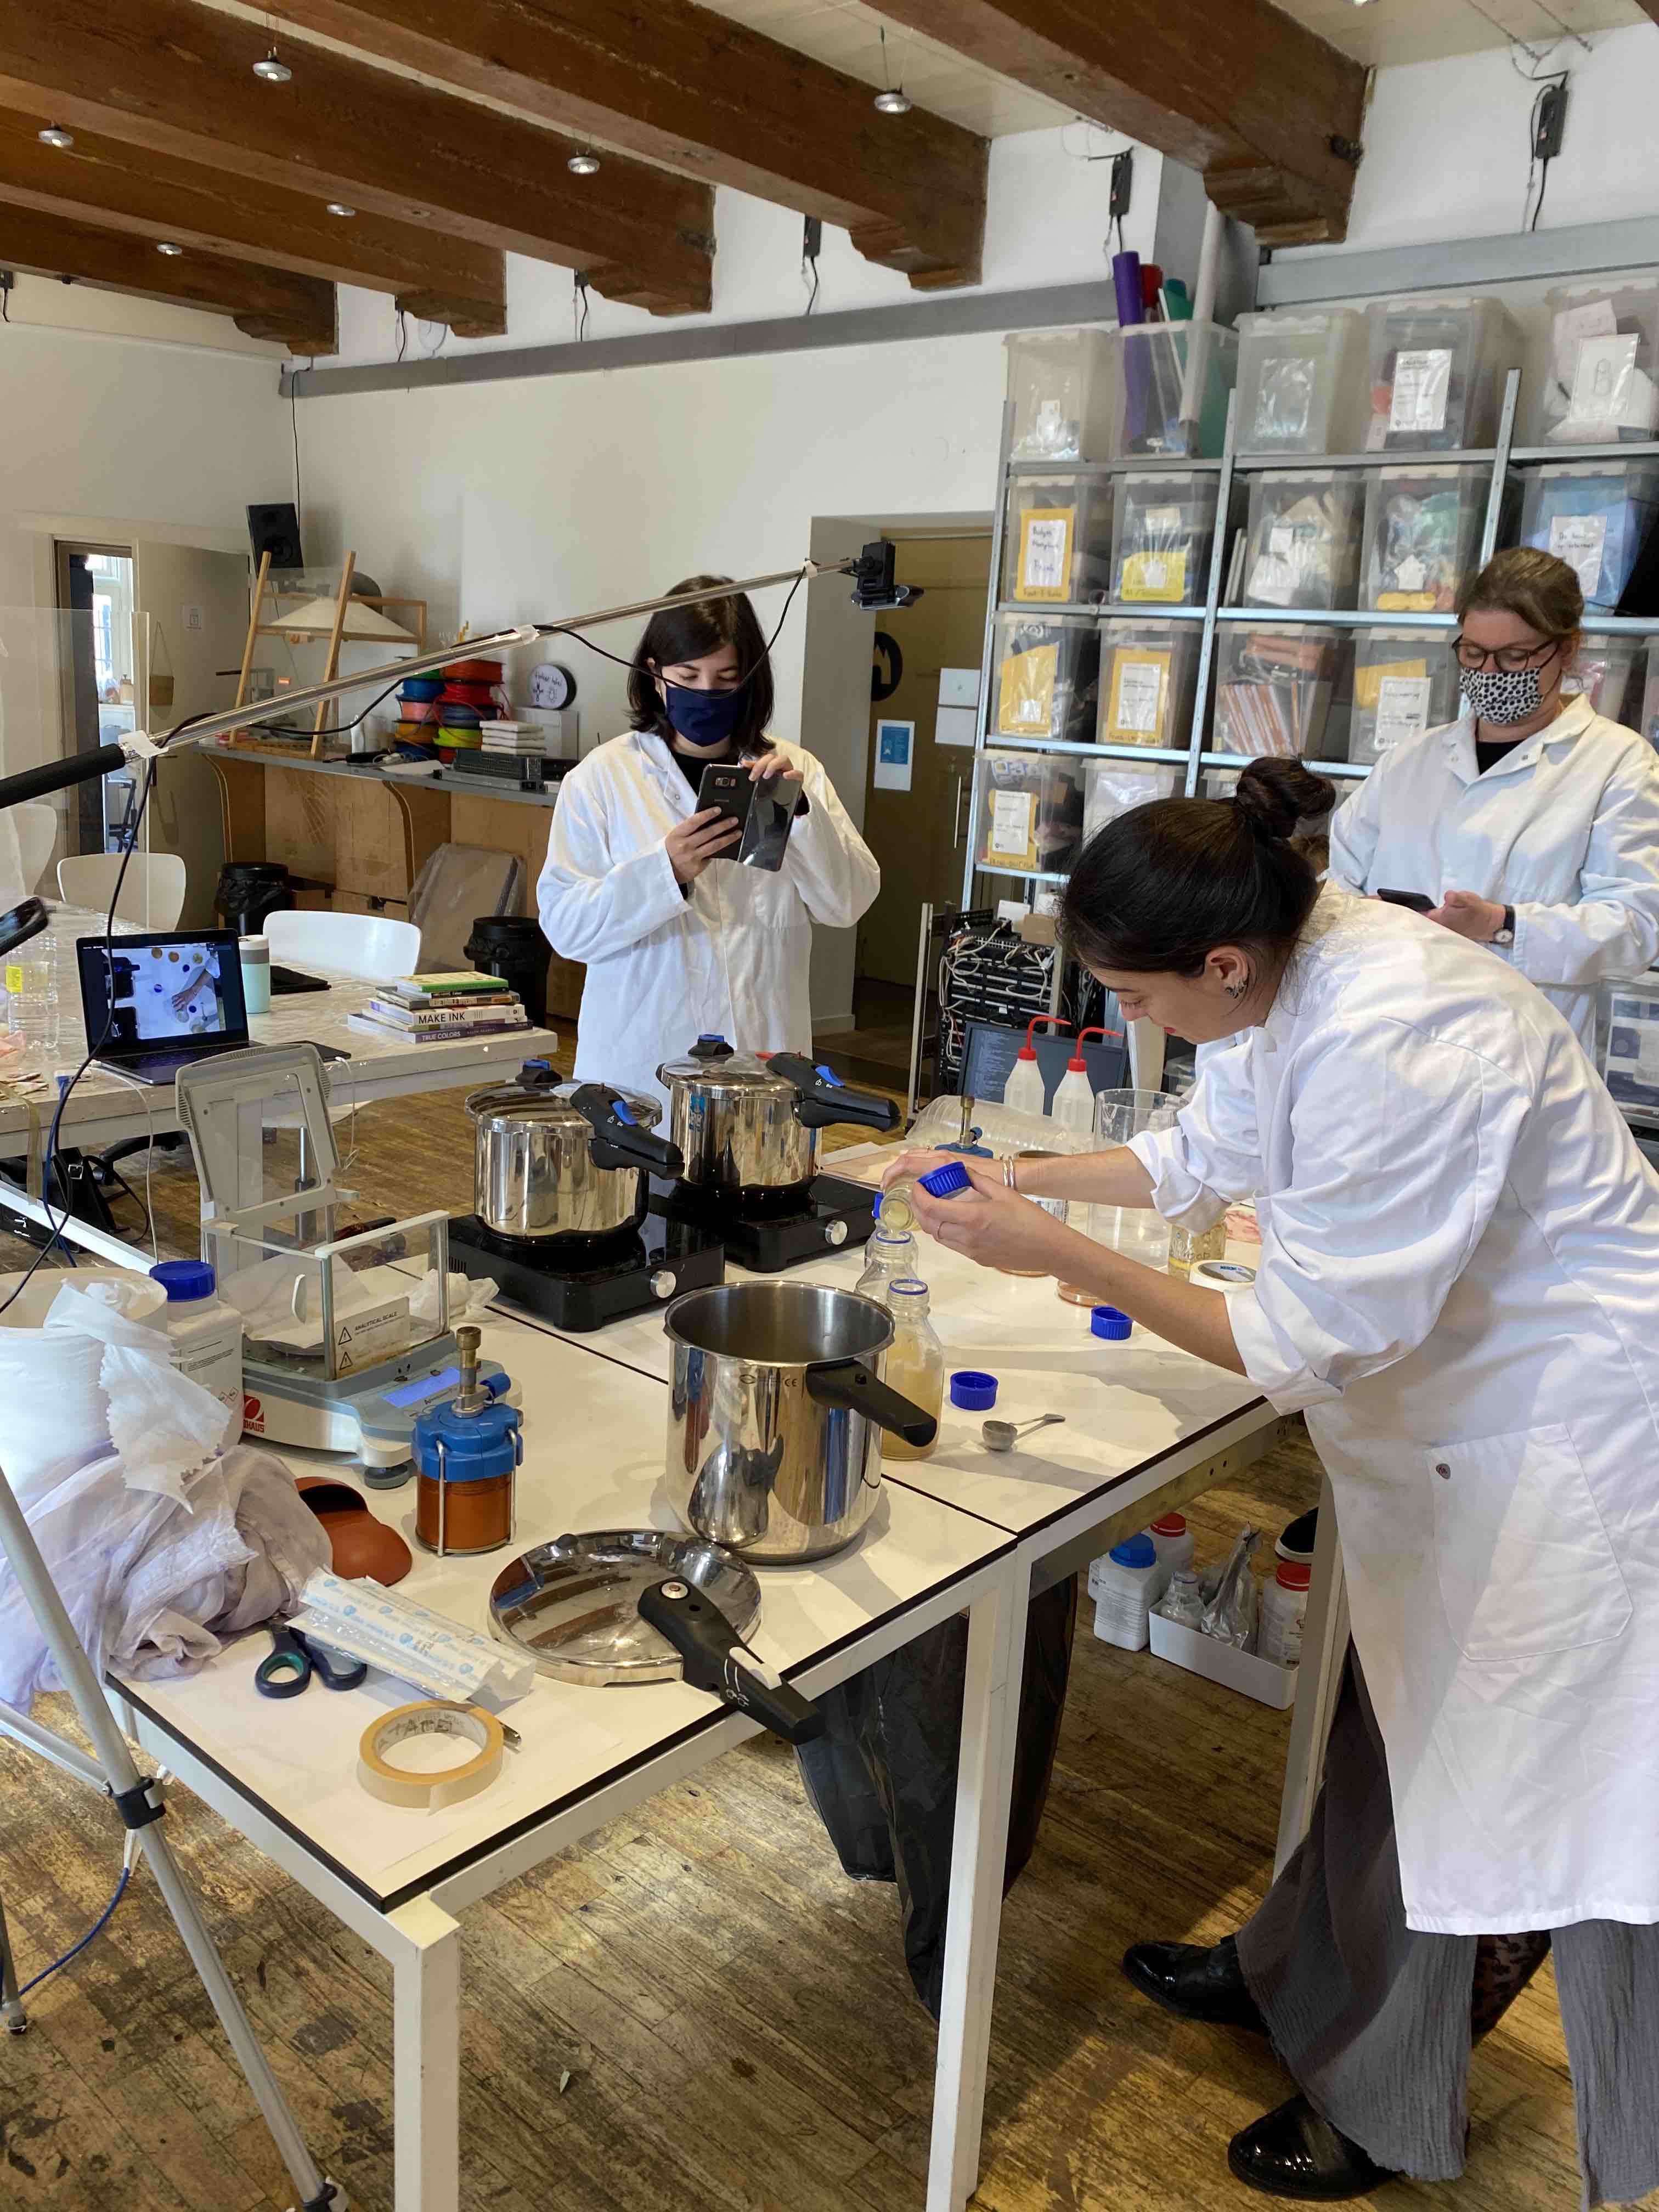
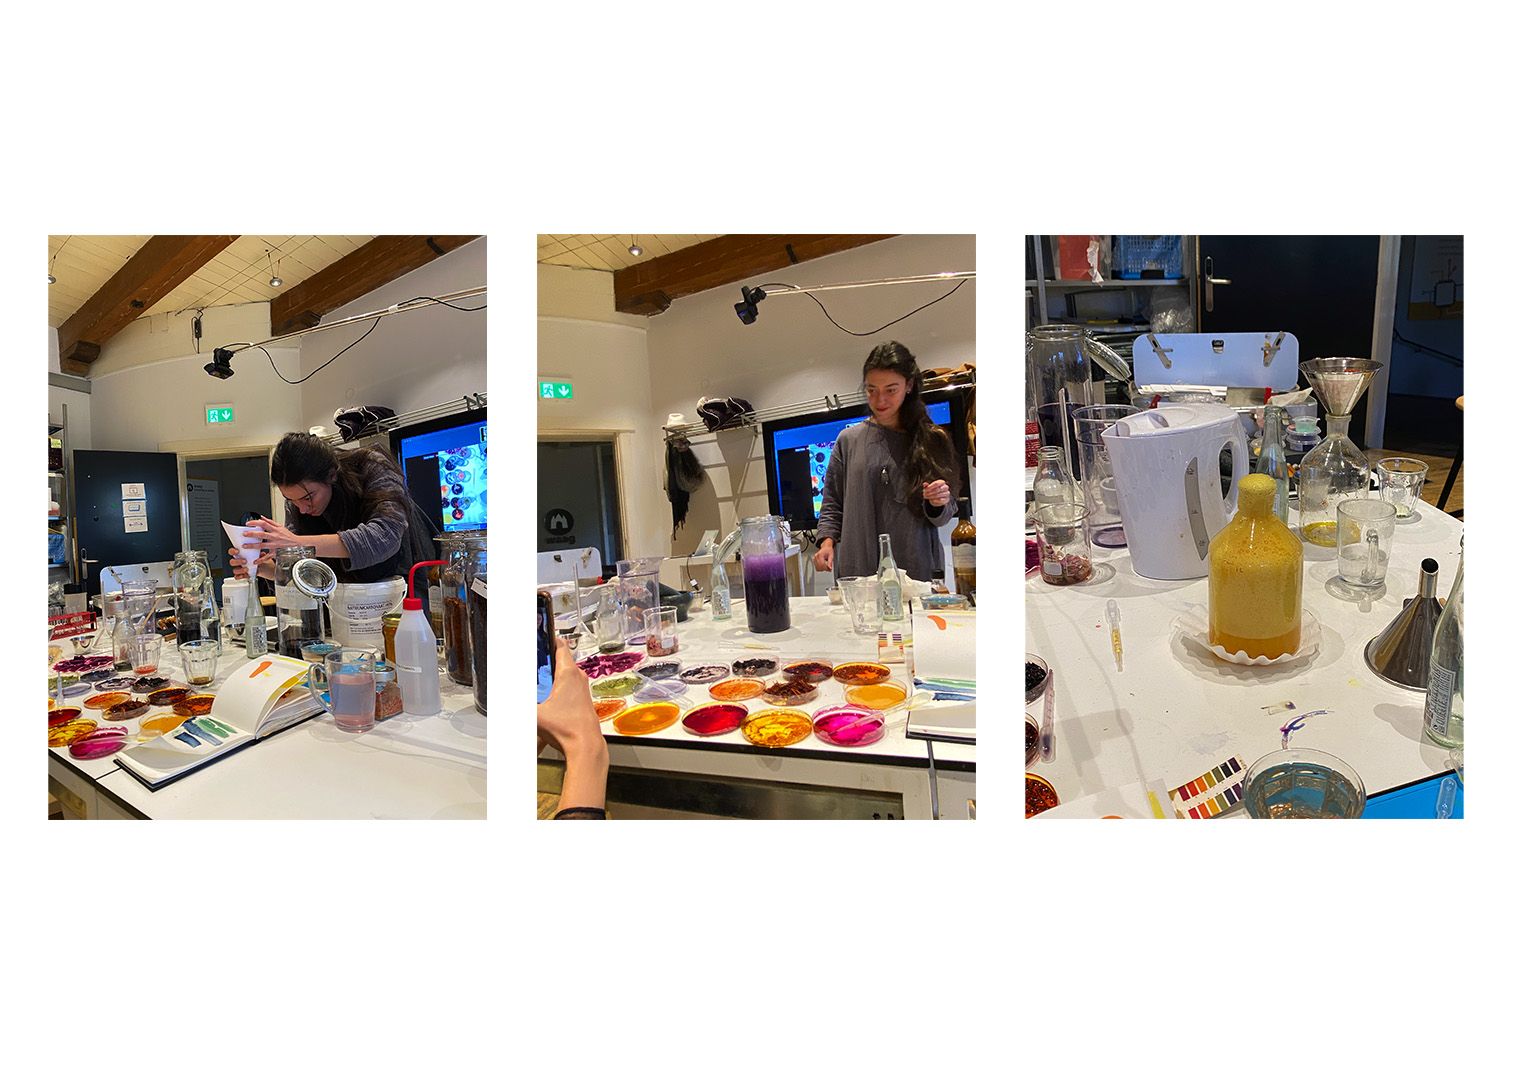
At the start of the week Fabric Academy made sure to set us off with a makeshift working environment to start our Biochrome week.
There were two types of natural textiles we used to dye this week:
- Animal based fibres: wool, felt, silk
- Plant based fibres: Hemp, cotton, algae.

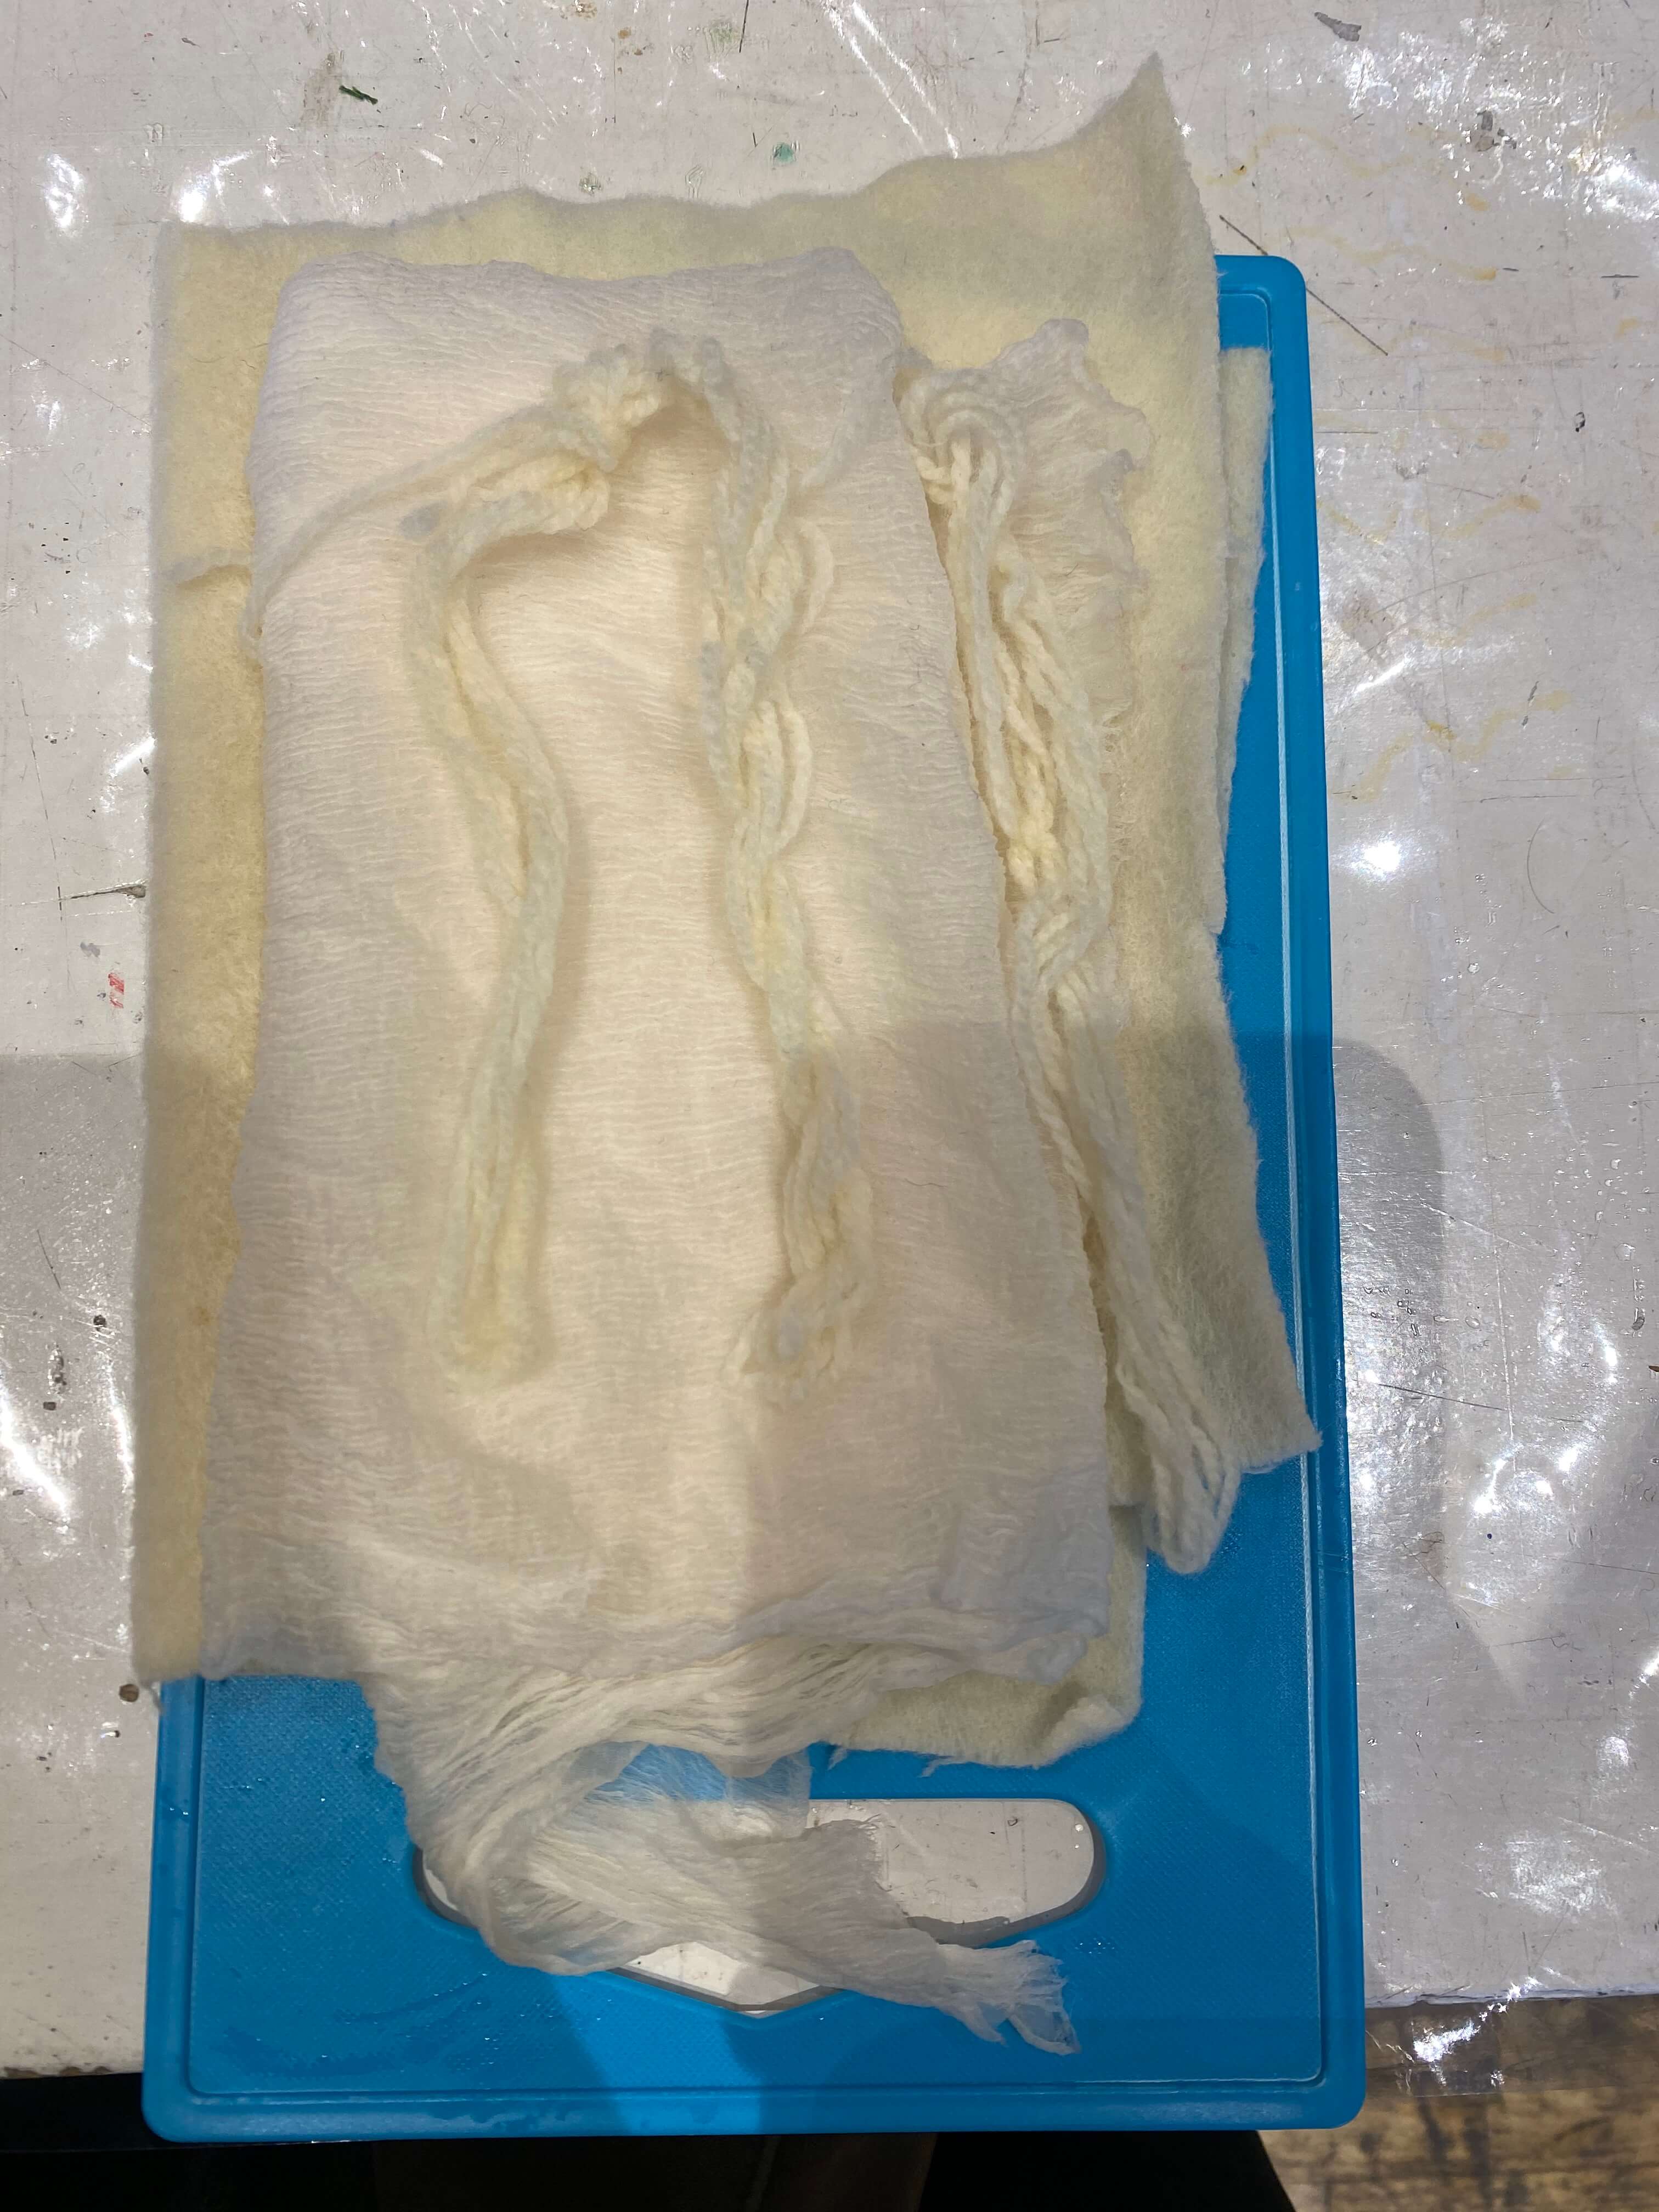
First we had to twist the fibres into Skeins like this:
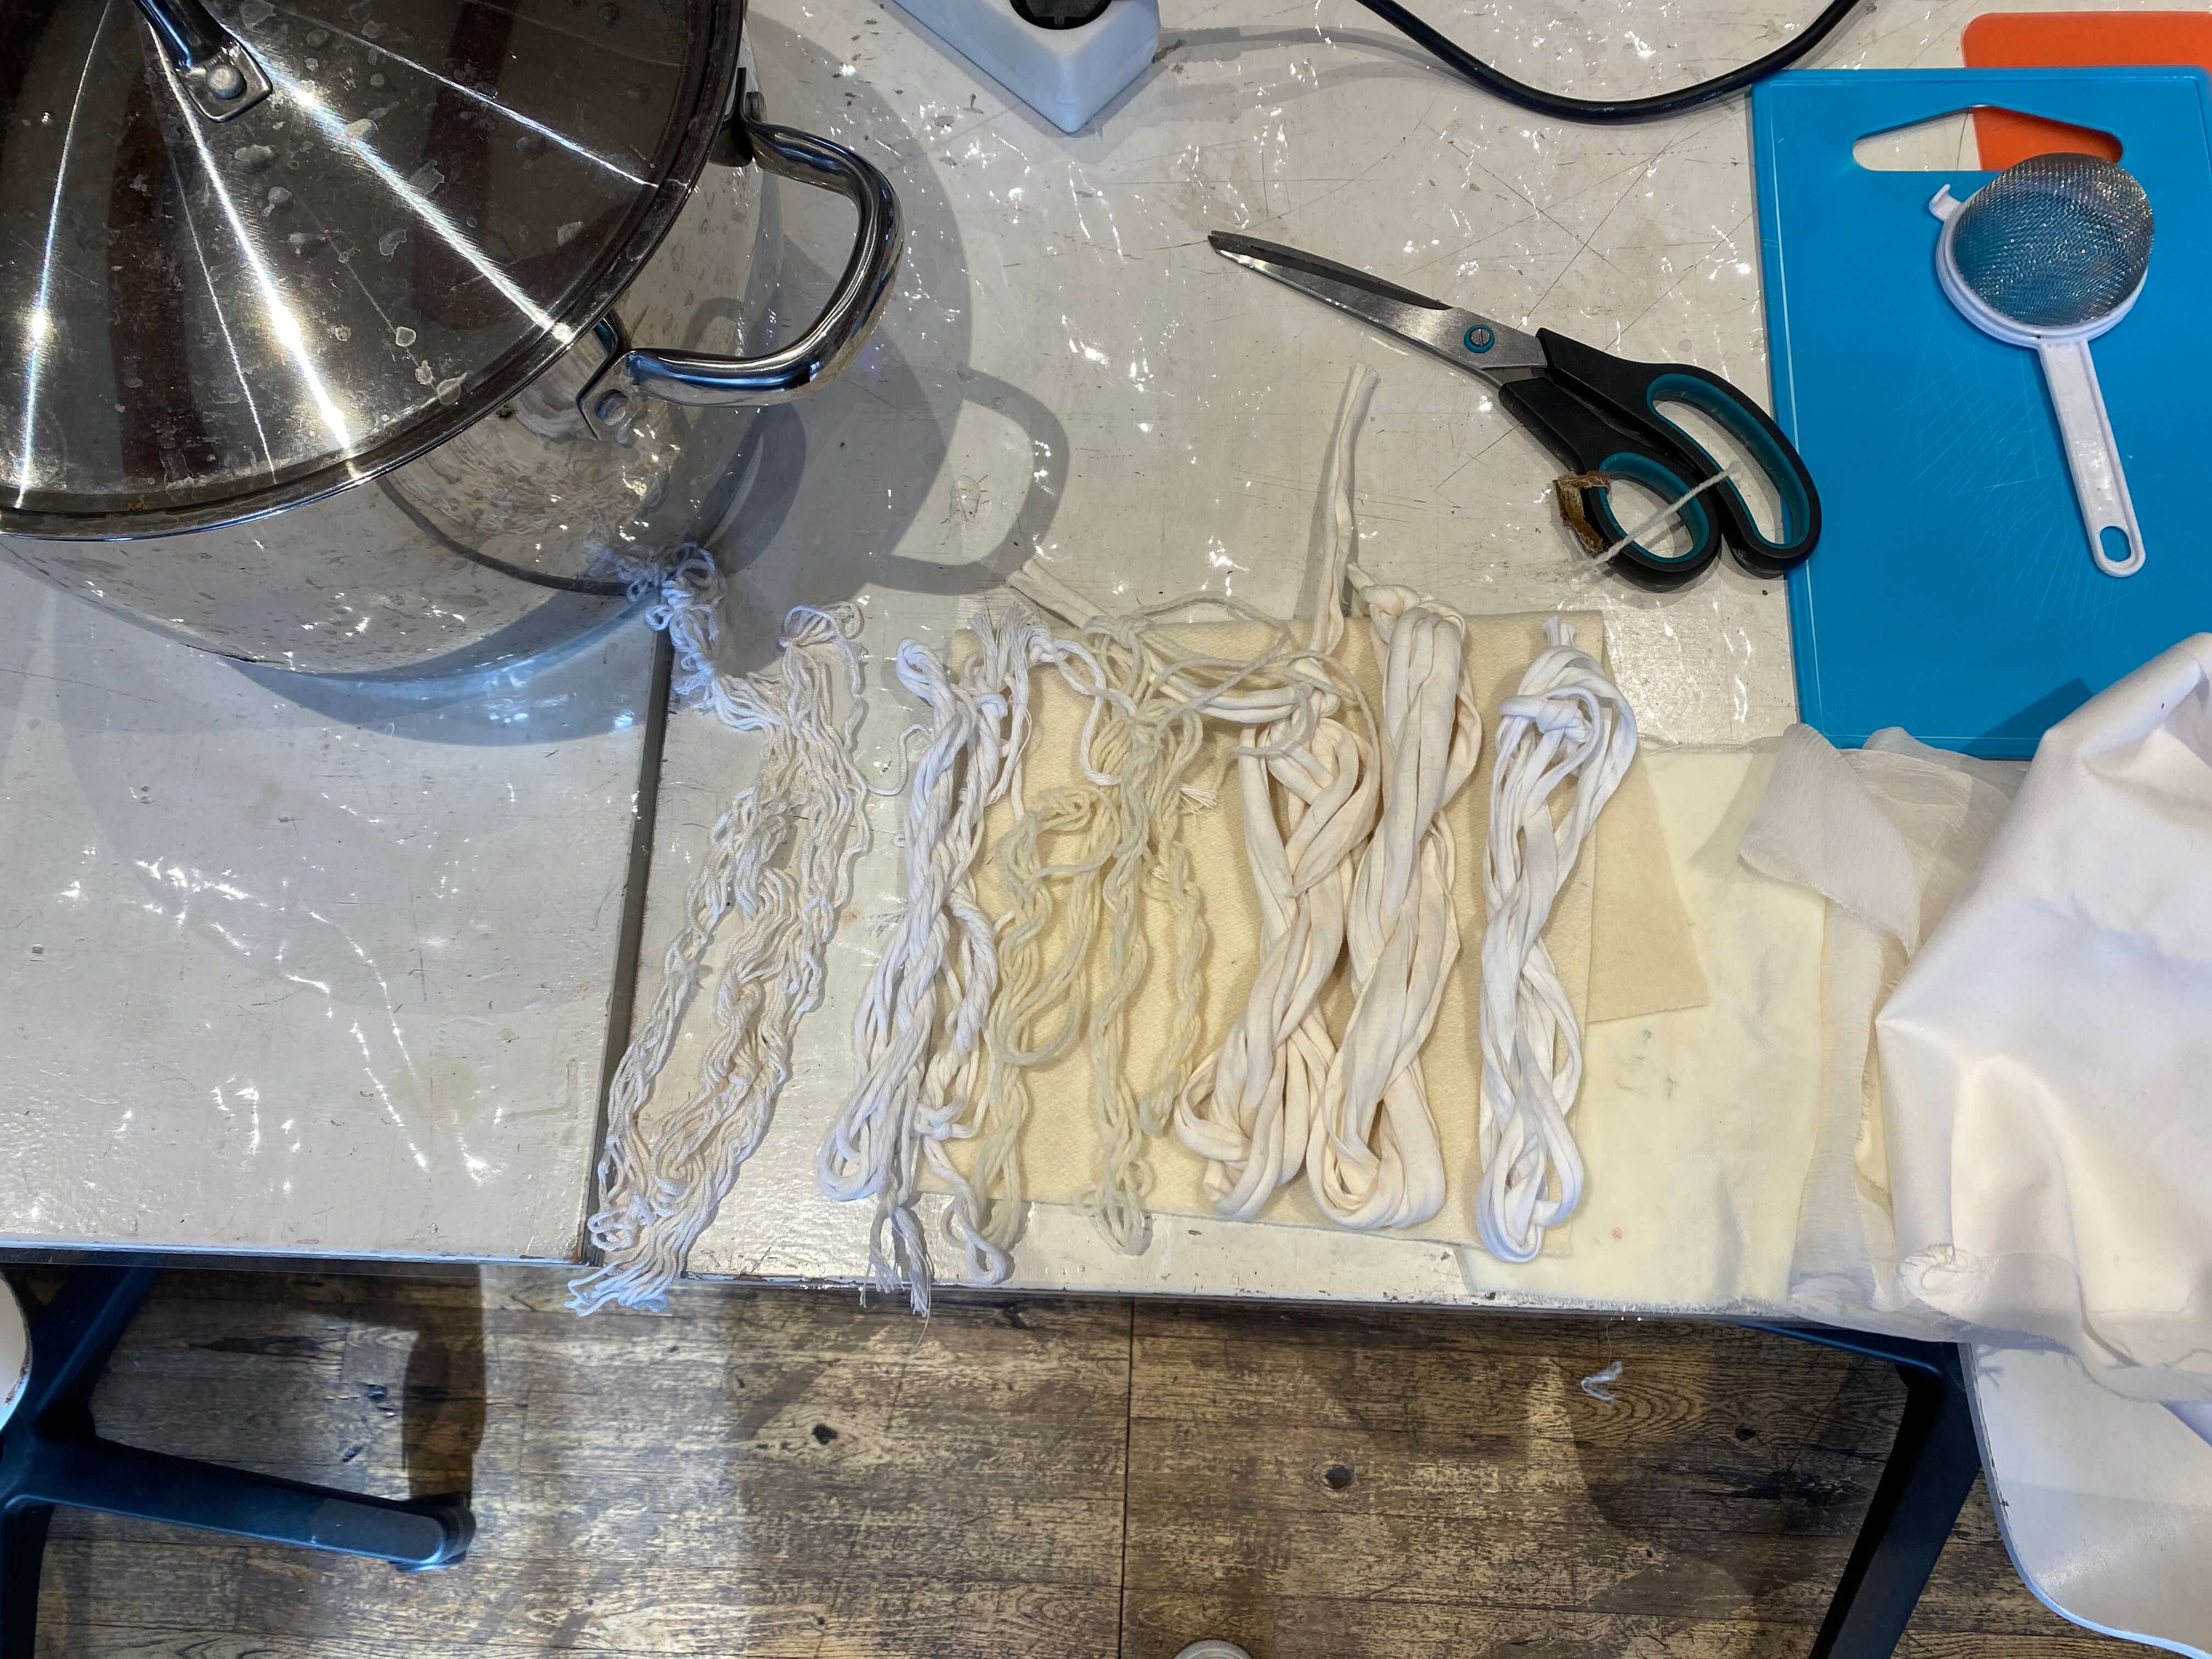
Then we had to scour or fibres for an hour in a pan! Check the following steps for your dye bath in the recipe for acorn caps!
Useful links for other natural dye baths:
-
https://www.architecturaldigest.com/story/how-to-naturally-dye-using-foods
-
https://drive.google.com/file/d/1N5FRQq4bYnVPLZRtsIjeZl2xg9bHpTDD/view - Cecilias presentation on colours & dyes
-
https://drive.google.com/file/d/1e86dZZcQkXxBwfpeebBYSSDNVC948oDz/view - Cecilias gorgeous presentation on Inks & pigments.
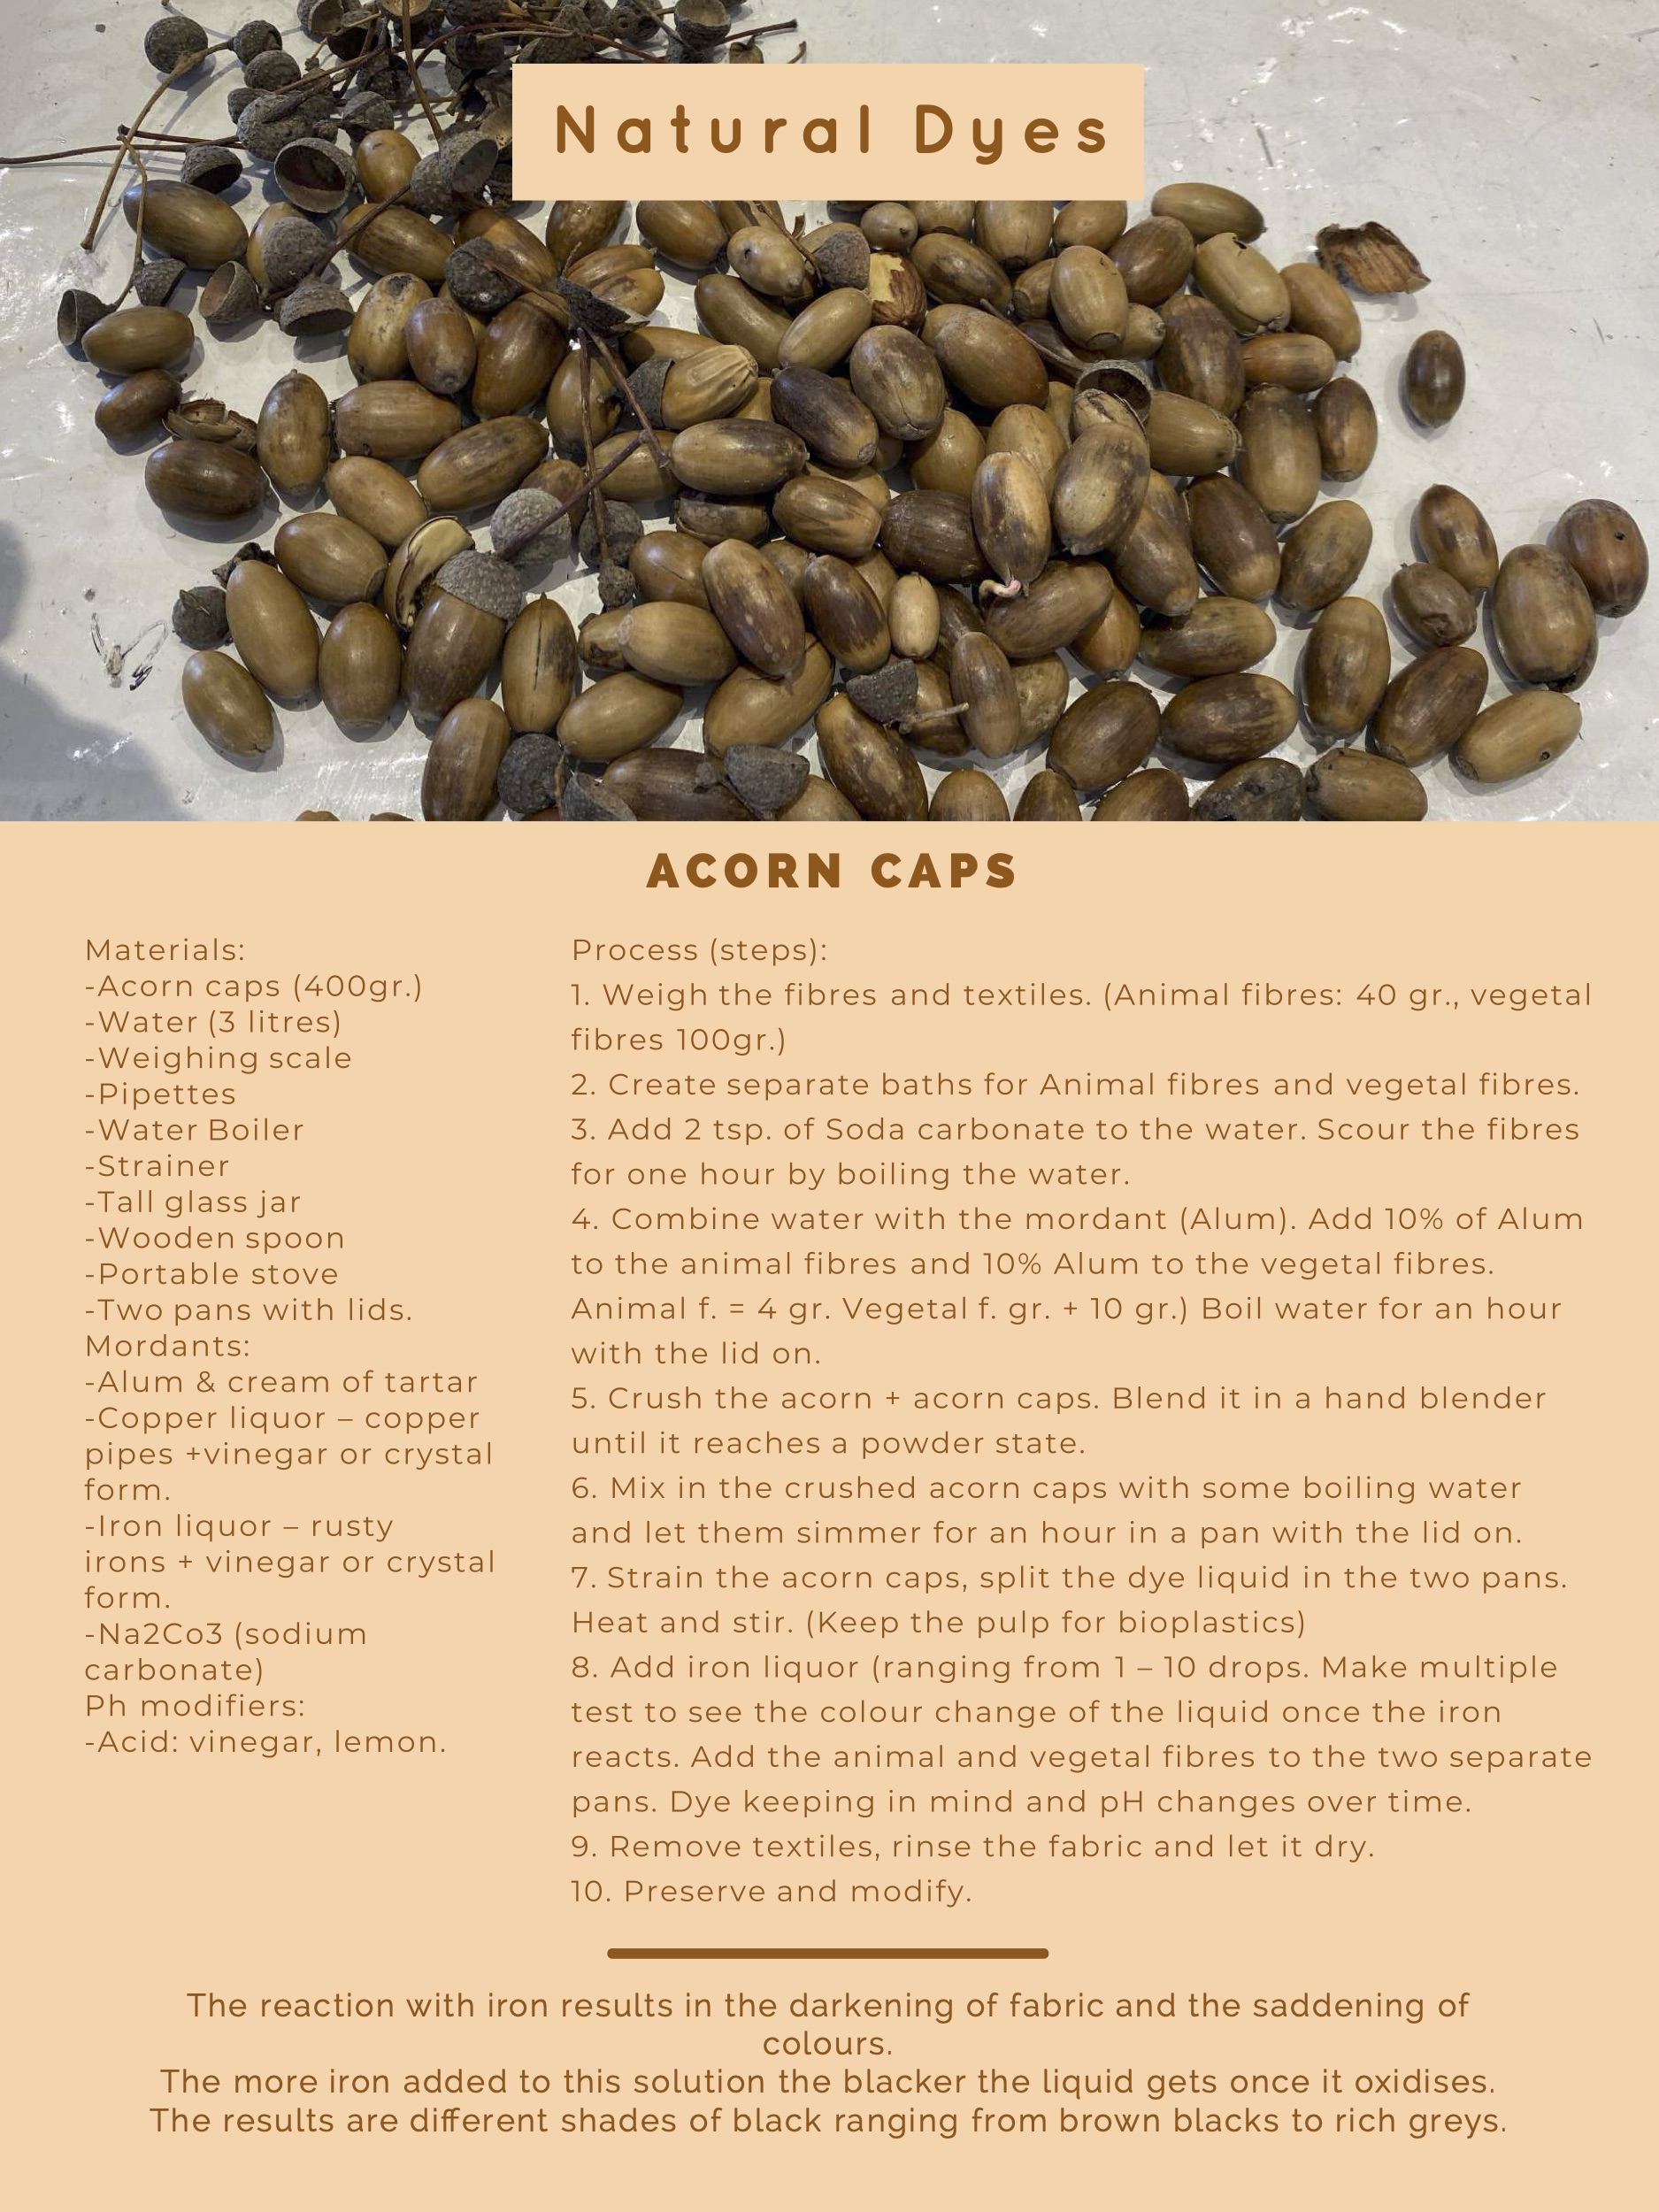
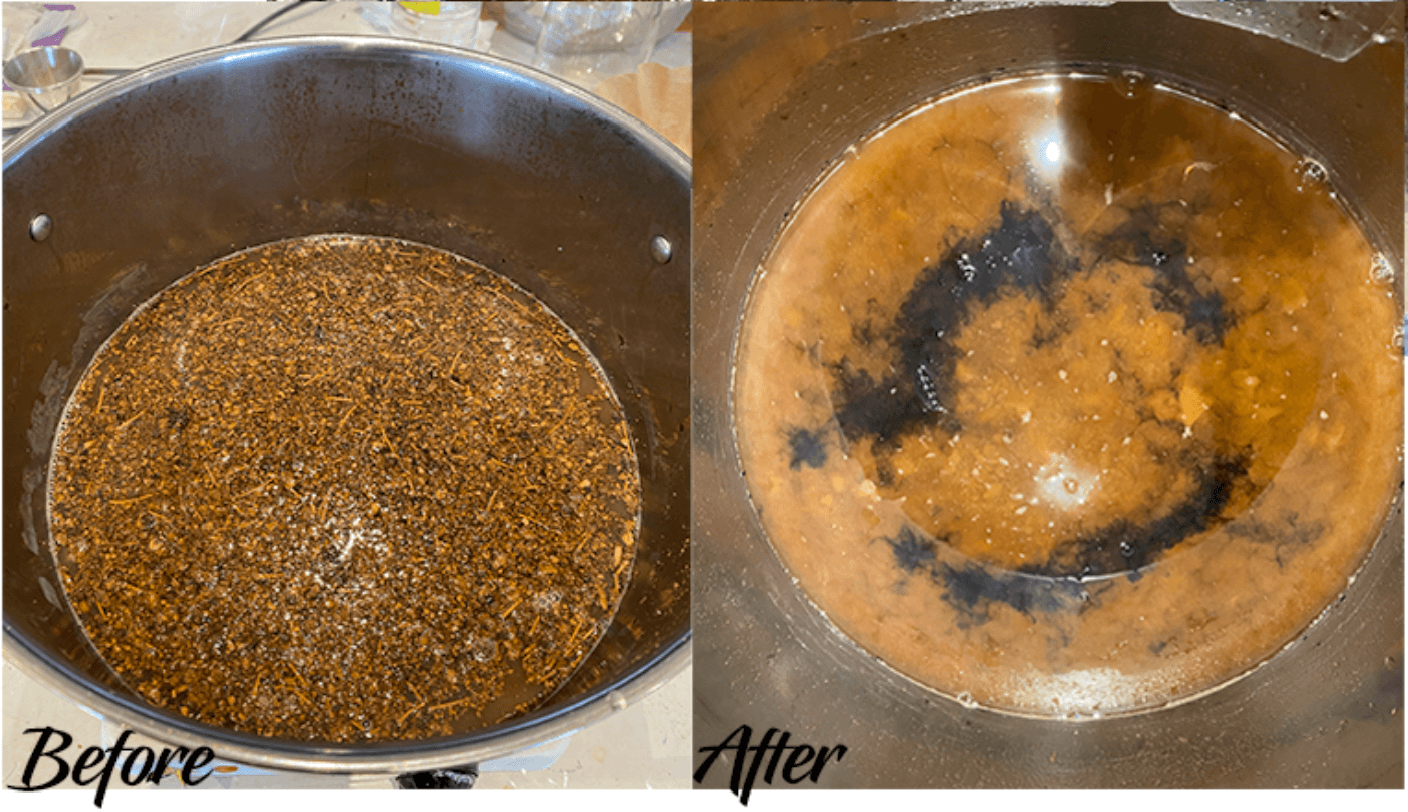
Acorn Caps
Here is my finalised recipe for Acorn caps:
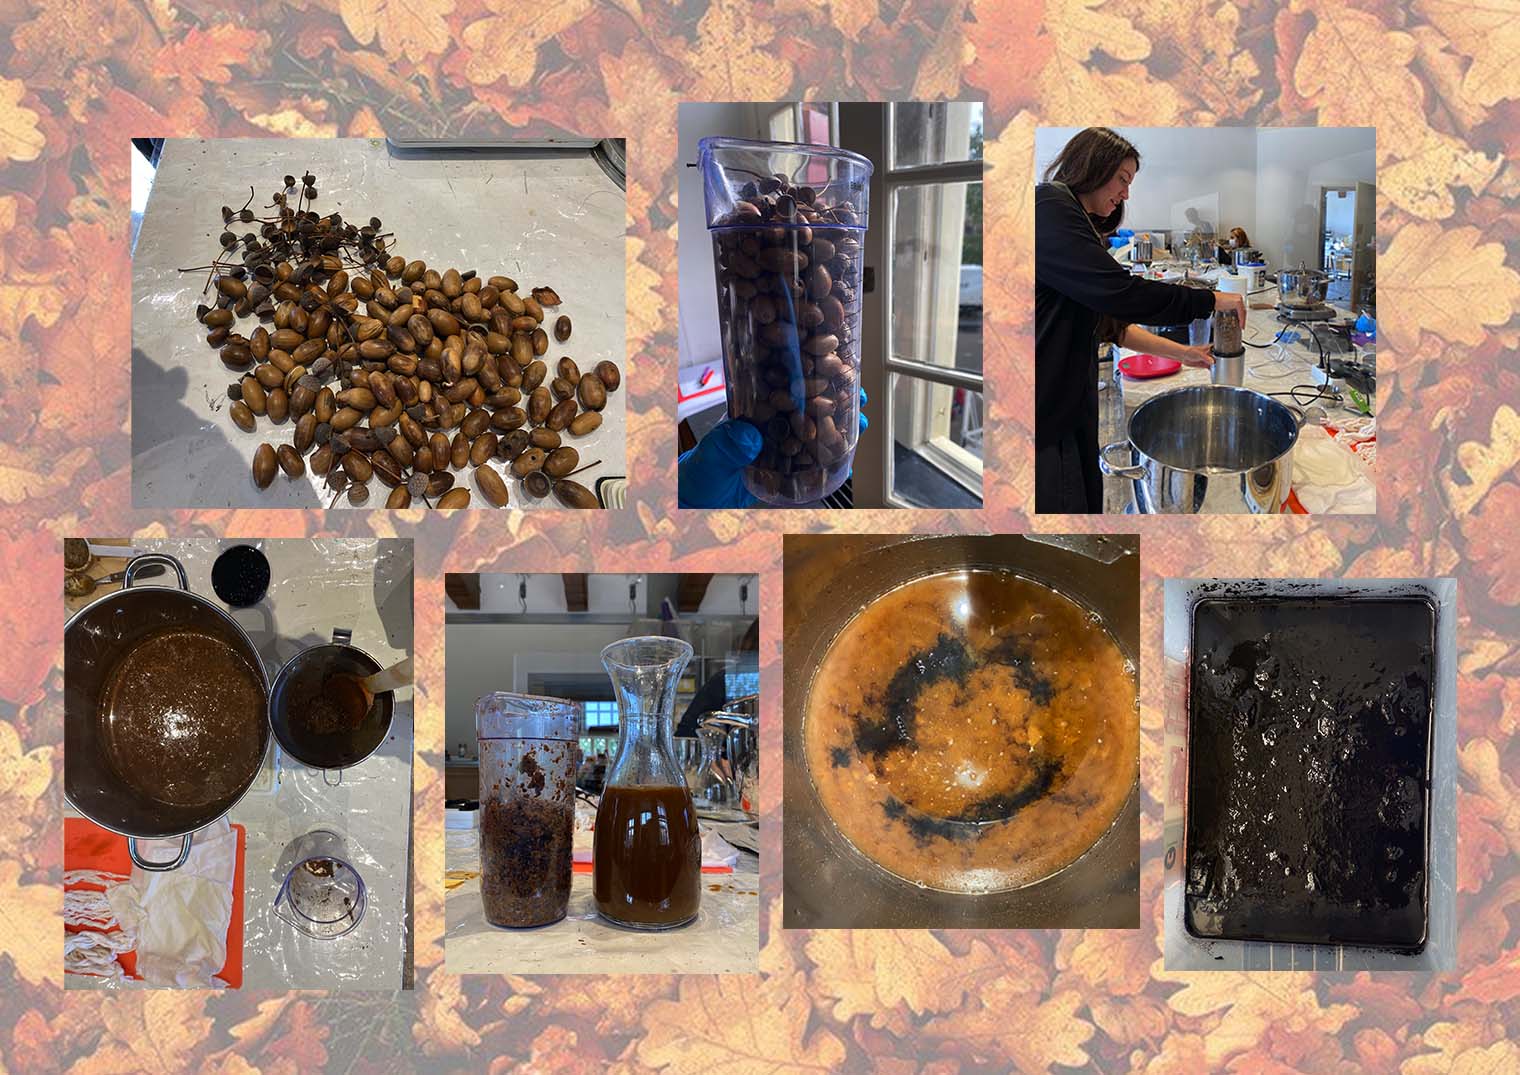
This project gave me a proper Autumn feeling. :) The Process photos:
My other classmates work:
Materials used:
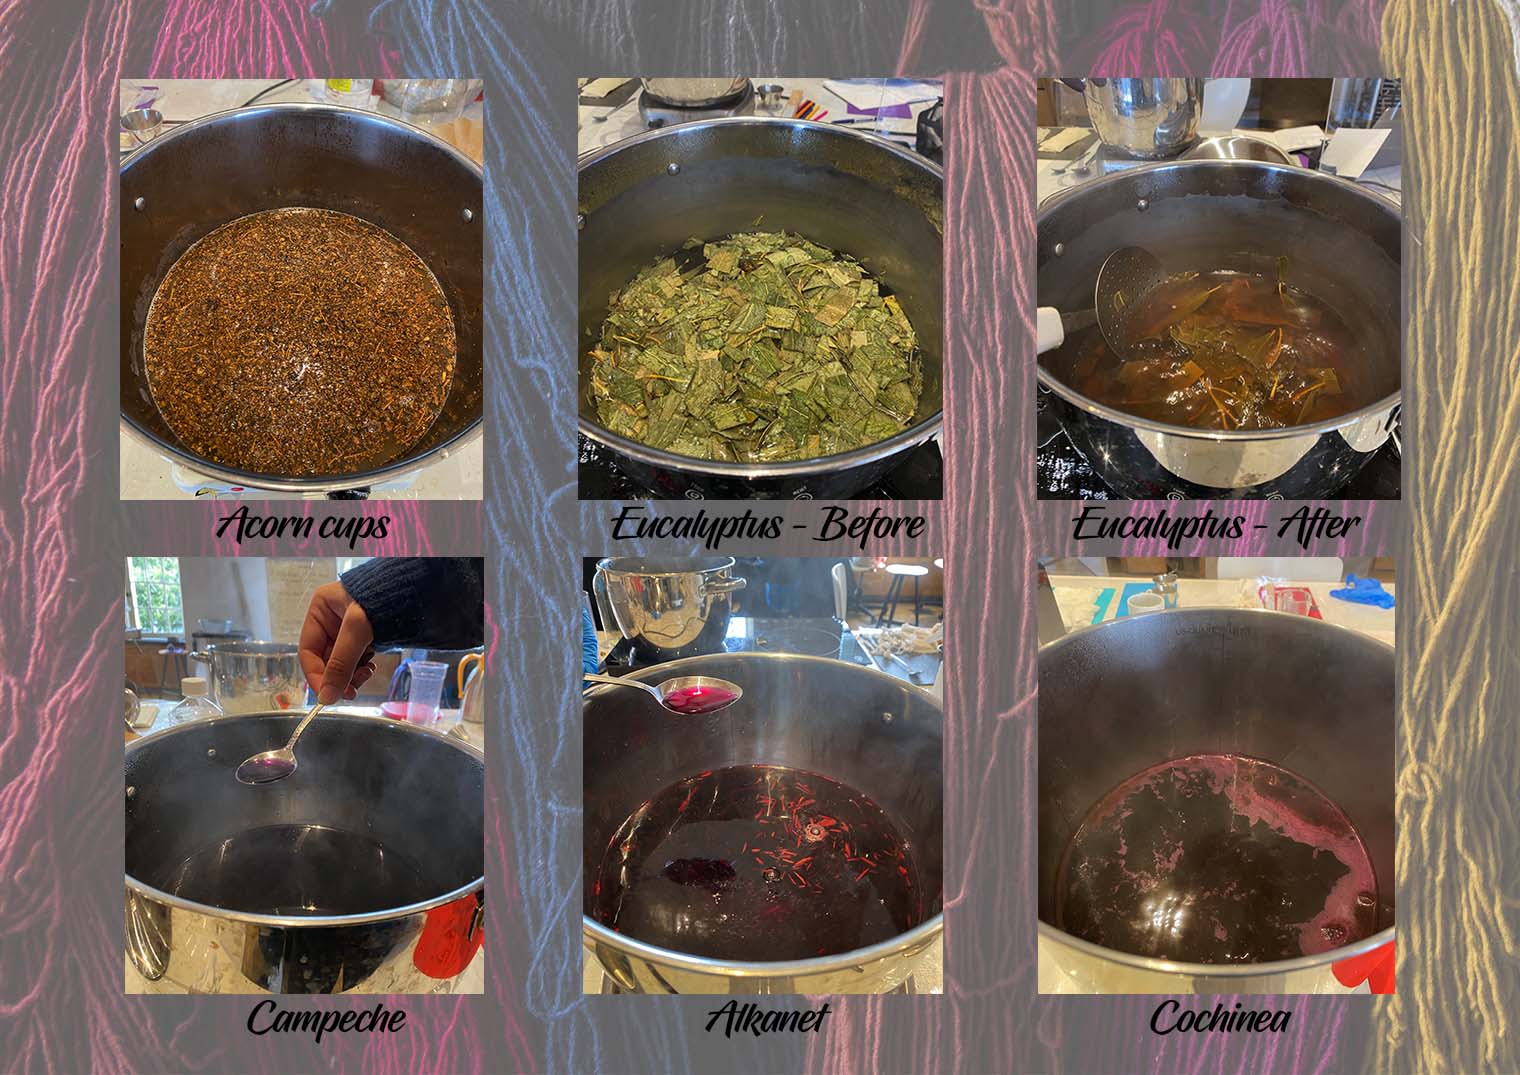
Natural Dye baths cooking process:
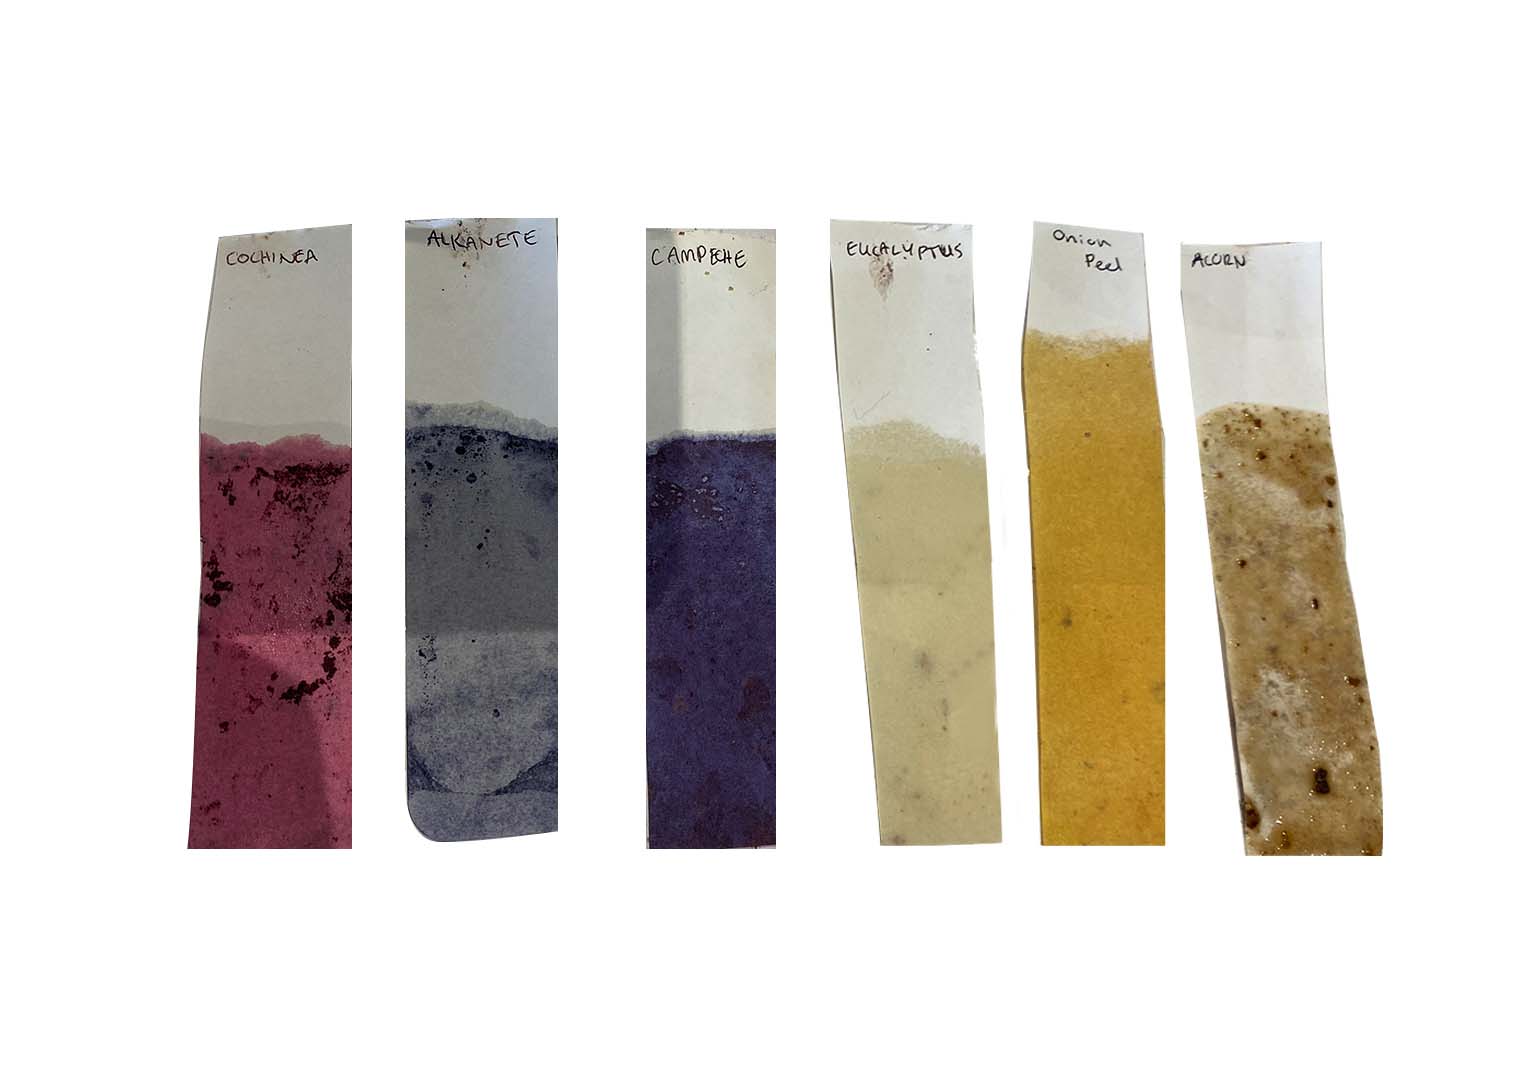
Acorn Dye results:
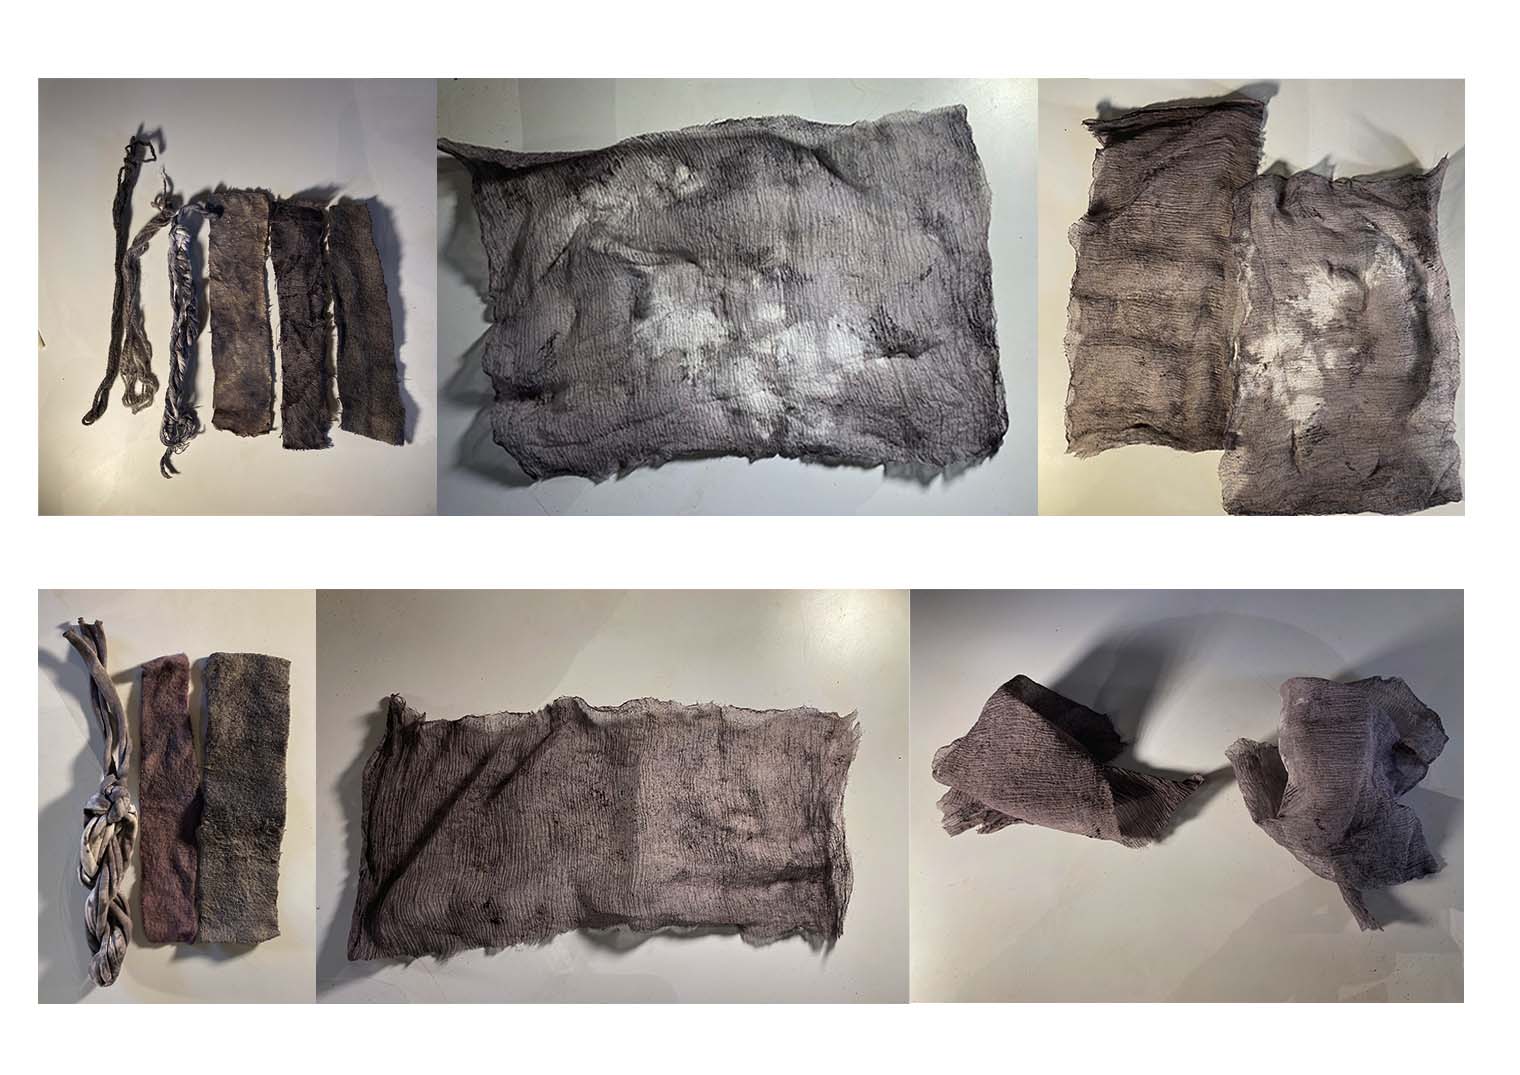
These were two dye baths:
Top row on the left was Dye bath 1. Process:
-
Start time of this die bath was at 14:28 and dye bath consisted of 500 litre water + 200 ml pressed acorn liquid + 3 drops of concetrated liquid iron.
-
The vegetal fibres (Top left) were simmering in the mixture for 30 minutes.
-
After 30 minutes, remove the fibres/textiles from liquid and rinse off in cold water. Leave on a surface or hang out to dry.
Bottom row (more of a reddish black tone)
Process:
-
Start time of this die bath was at 15:30 and dye bath consisted of 300 litre water + 200 ml pressed acorn liquid + 10 drops of concetrated liquid iron.
-
The vegetal fibres (Bottom left) were simmering in the mixture for 30 minutes.
-
- After 30 minutes, remove the fibres/textiles from liquid and rinse off in cold water. Leave on a surface or hang out to dry.
I'm loving the ashy black colours so far! In order for me to get to an absolute black colour with this natural dye I think that it would be necessary to redye each textile a few times before it reaches a darker undertone.
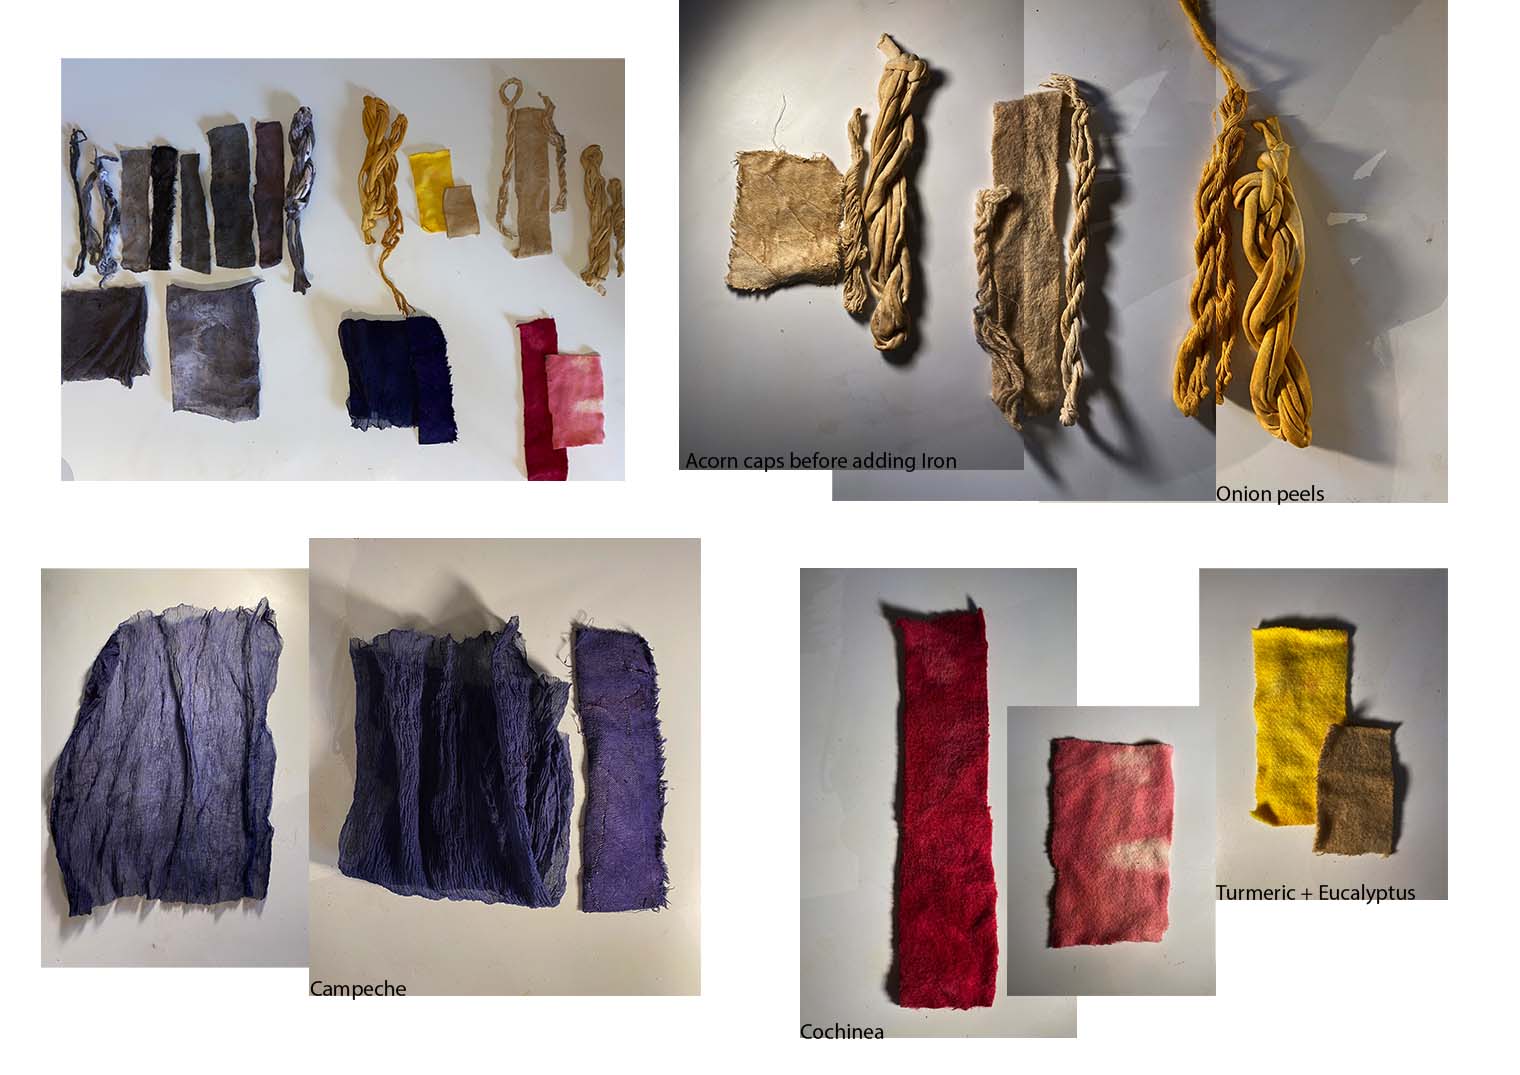
The dyes above were taken from my classmates, overall we had a successful dyeing session this week. My favourite development of the dyes was the Campeche.
Bacterial dyeing
Materials:
- Bacteria Serratia/ micrococcus luteus
- LB broth
- 100% peanut butter or glycerin
- Silk chiffon
- Thread
- Petri dishes
- Little basket
- Pressure cooker
- Boiled water (200ml) Ethanol Fire source
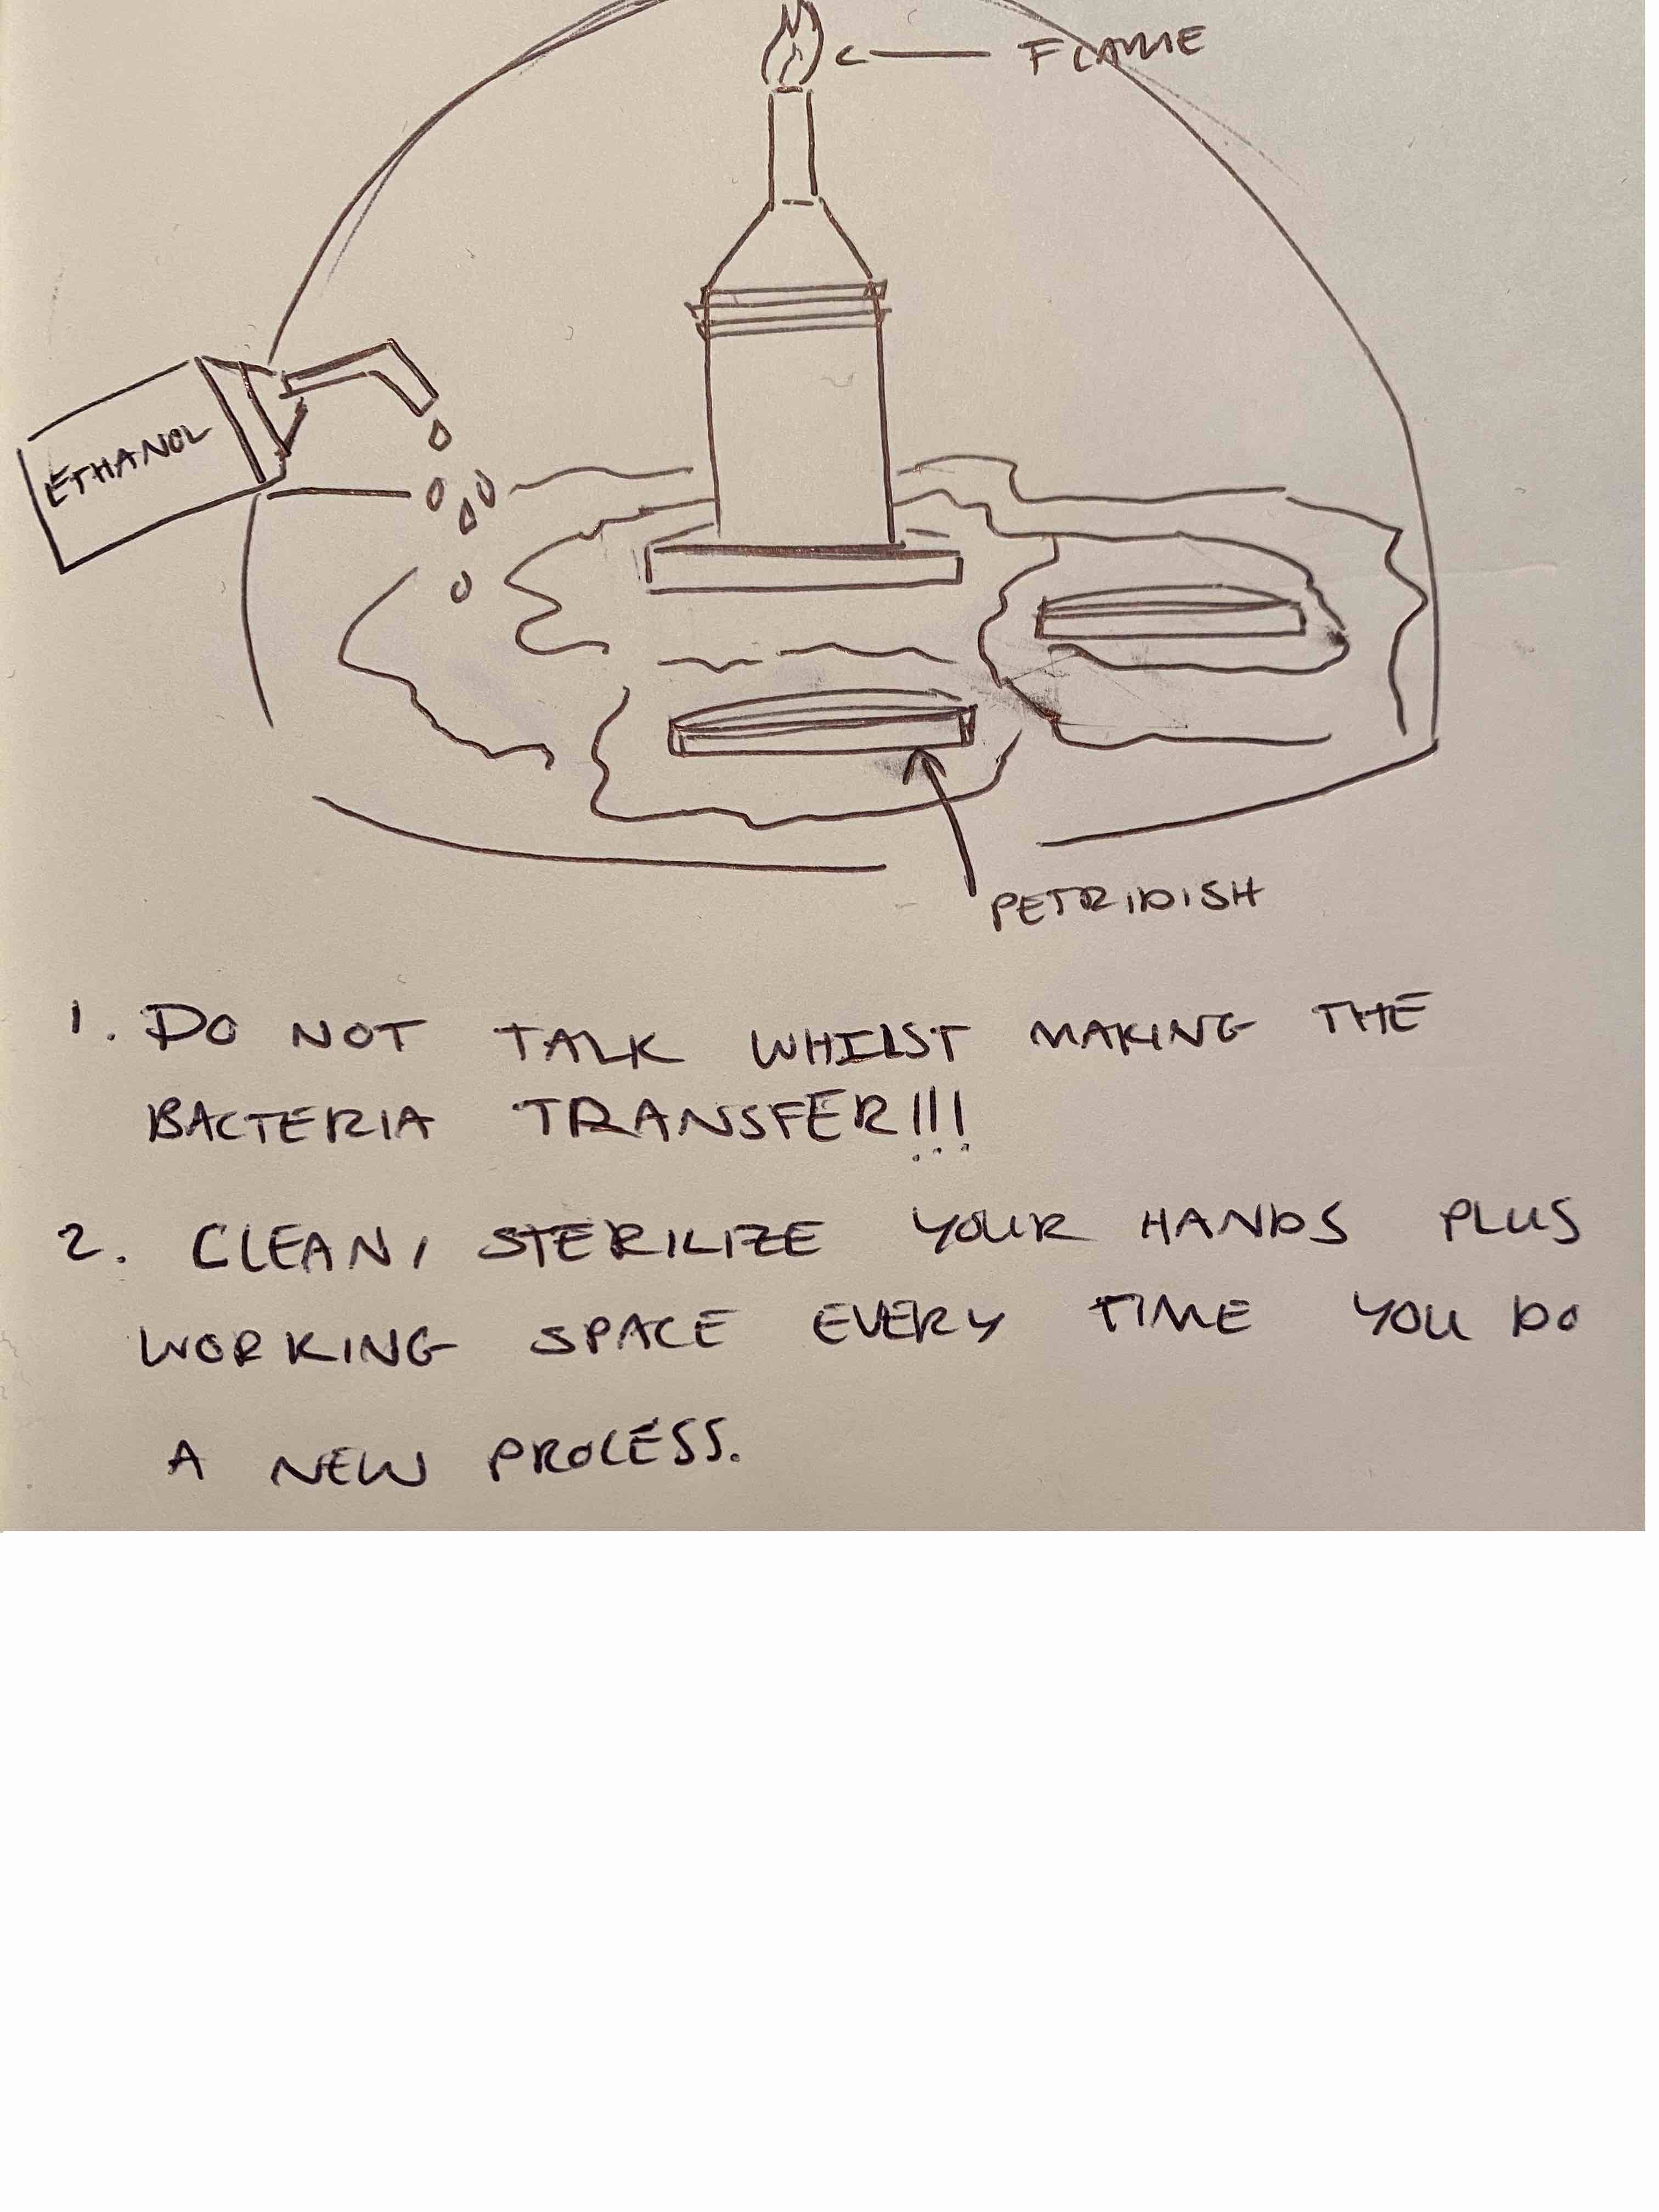
Before you start any project, please read the following:
Bacterial ink: There are two methods for dyeing textiles using bacteria. The first is by directly growing bacteria onto fabric using a clean pipette. The other method is as follows:
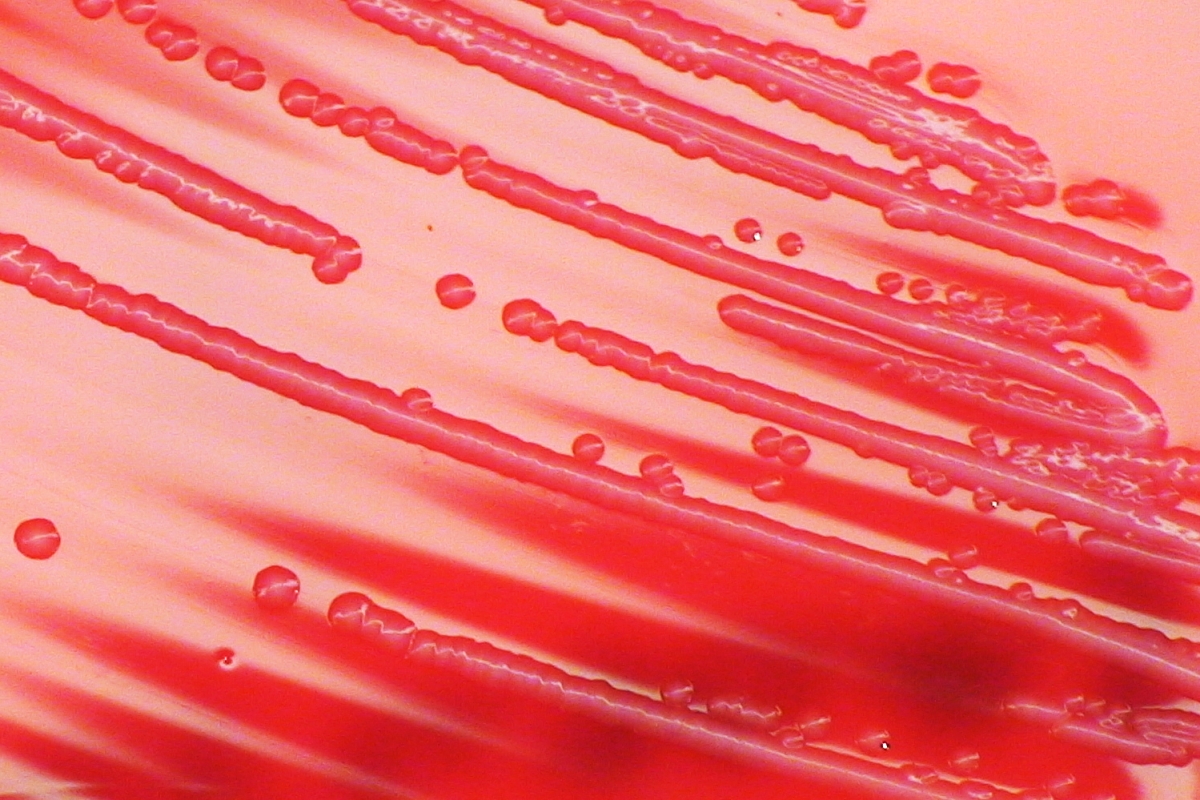
Pink bacteria: Serratia Marcescens
Serratia Marcescens is a bacteria with characteristics of a pink colour and it's PH sensitive. It reacts different to acid as it does to alkaline. The colours can range from pinks to reds - yellows. This time we're collaborating with Serratia to codesign a piece. Leaving it up the bacteria to take form and to create pieces that aren't only controlled by us humans.
Serratia:
Step 1: Fold your fabric piece and assemble at corners. Stitch in different places to determine how your fabric is going to be dyed. Different shibori techniques could result in controlled patterned shapes for example. I decided to tie mine in a loose not so that the bacteria has enough air in the fibres to attach itself. After this I braided the piece and stitched it in different corners.
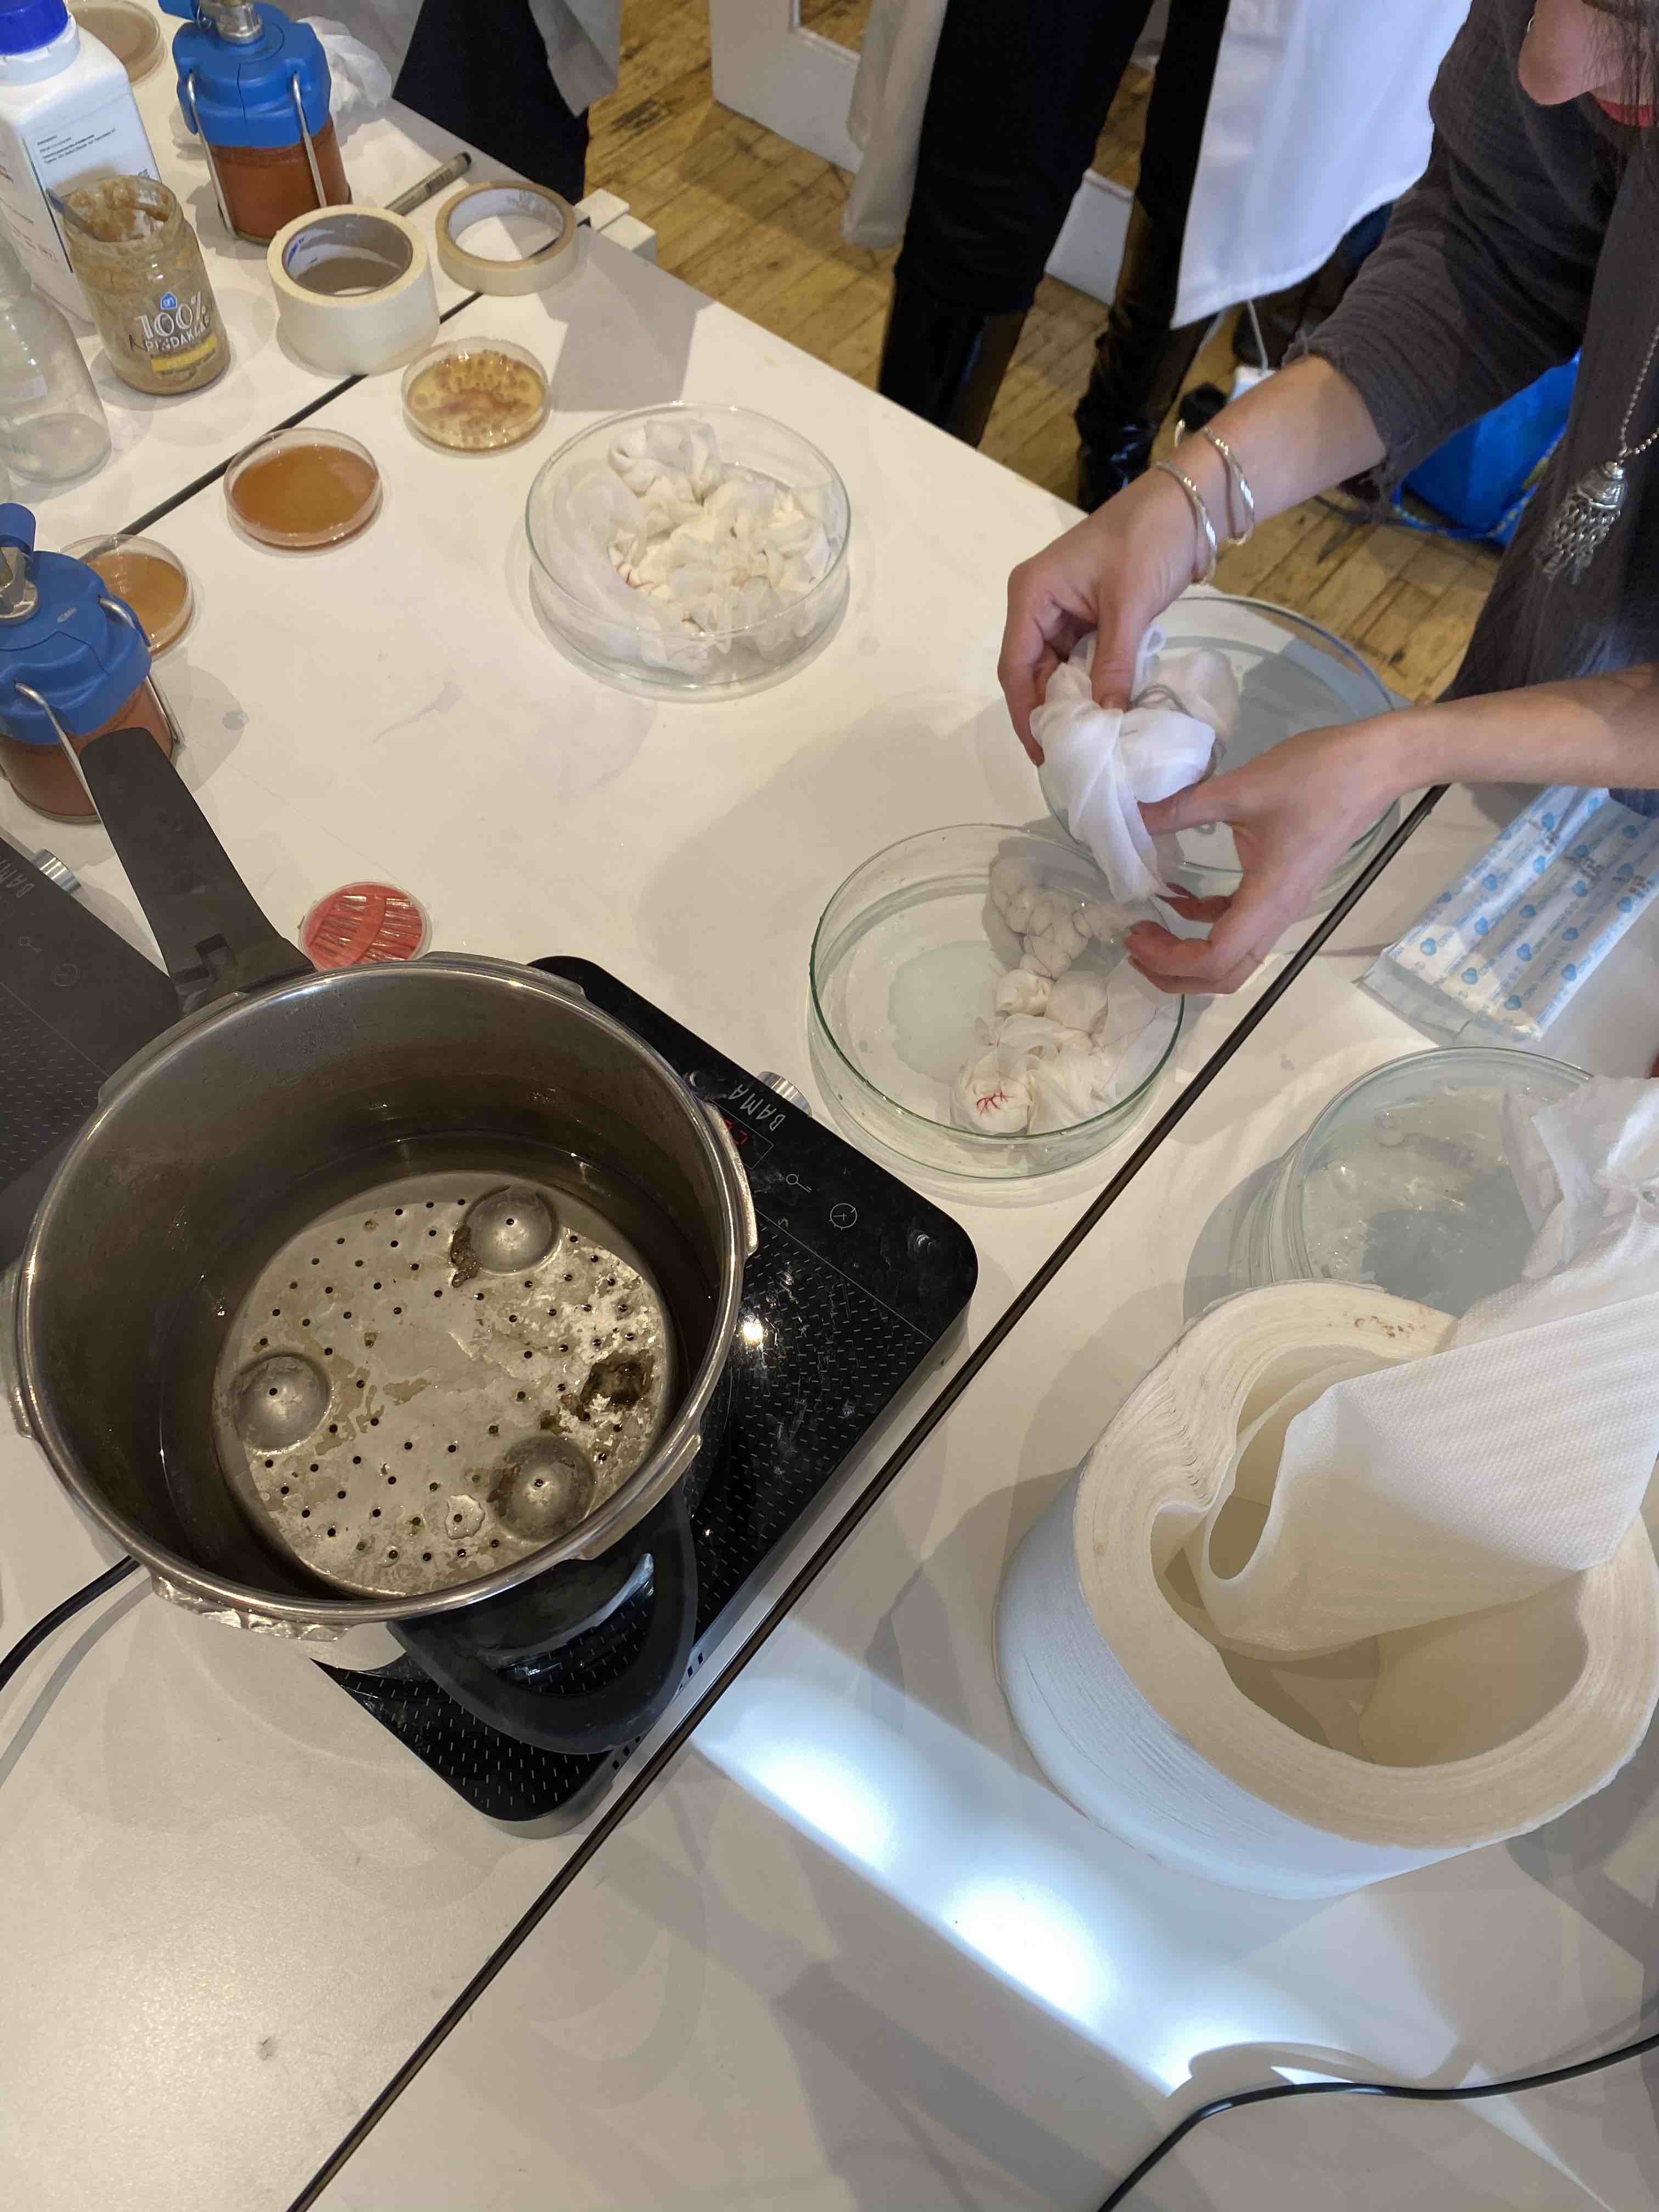
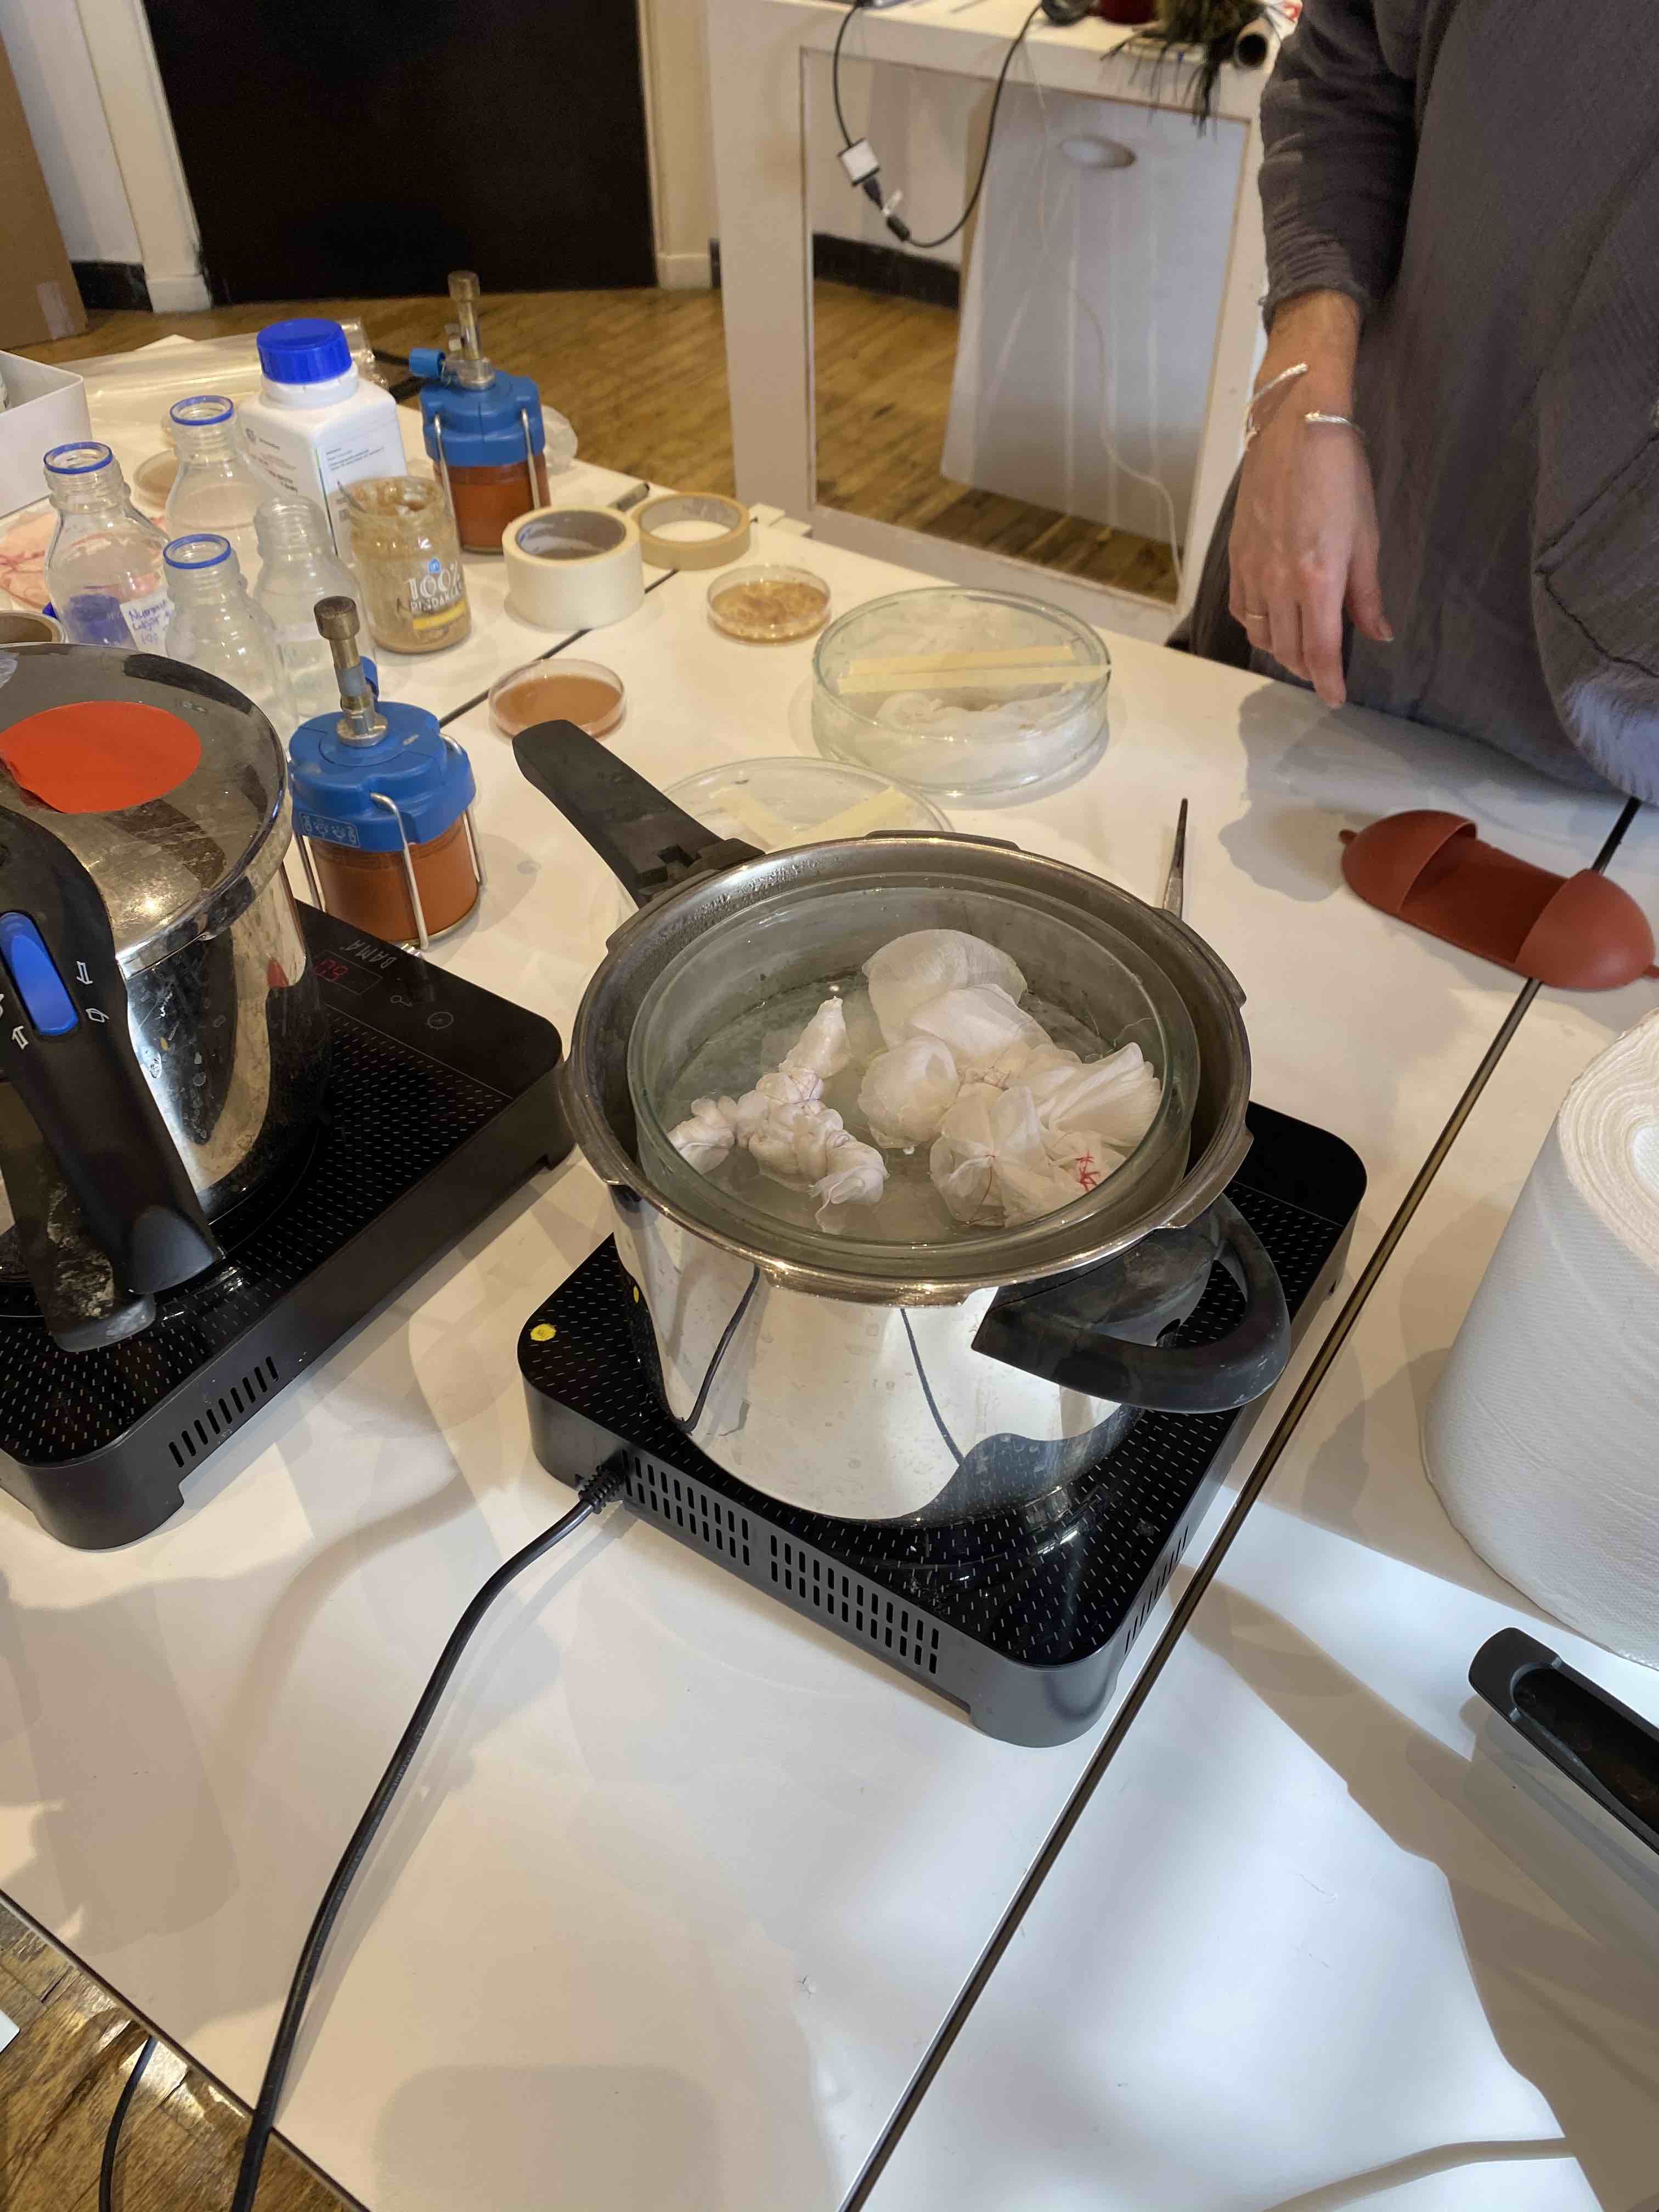
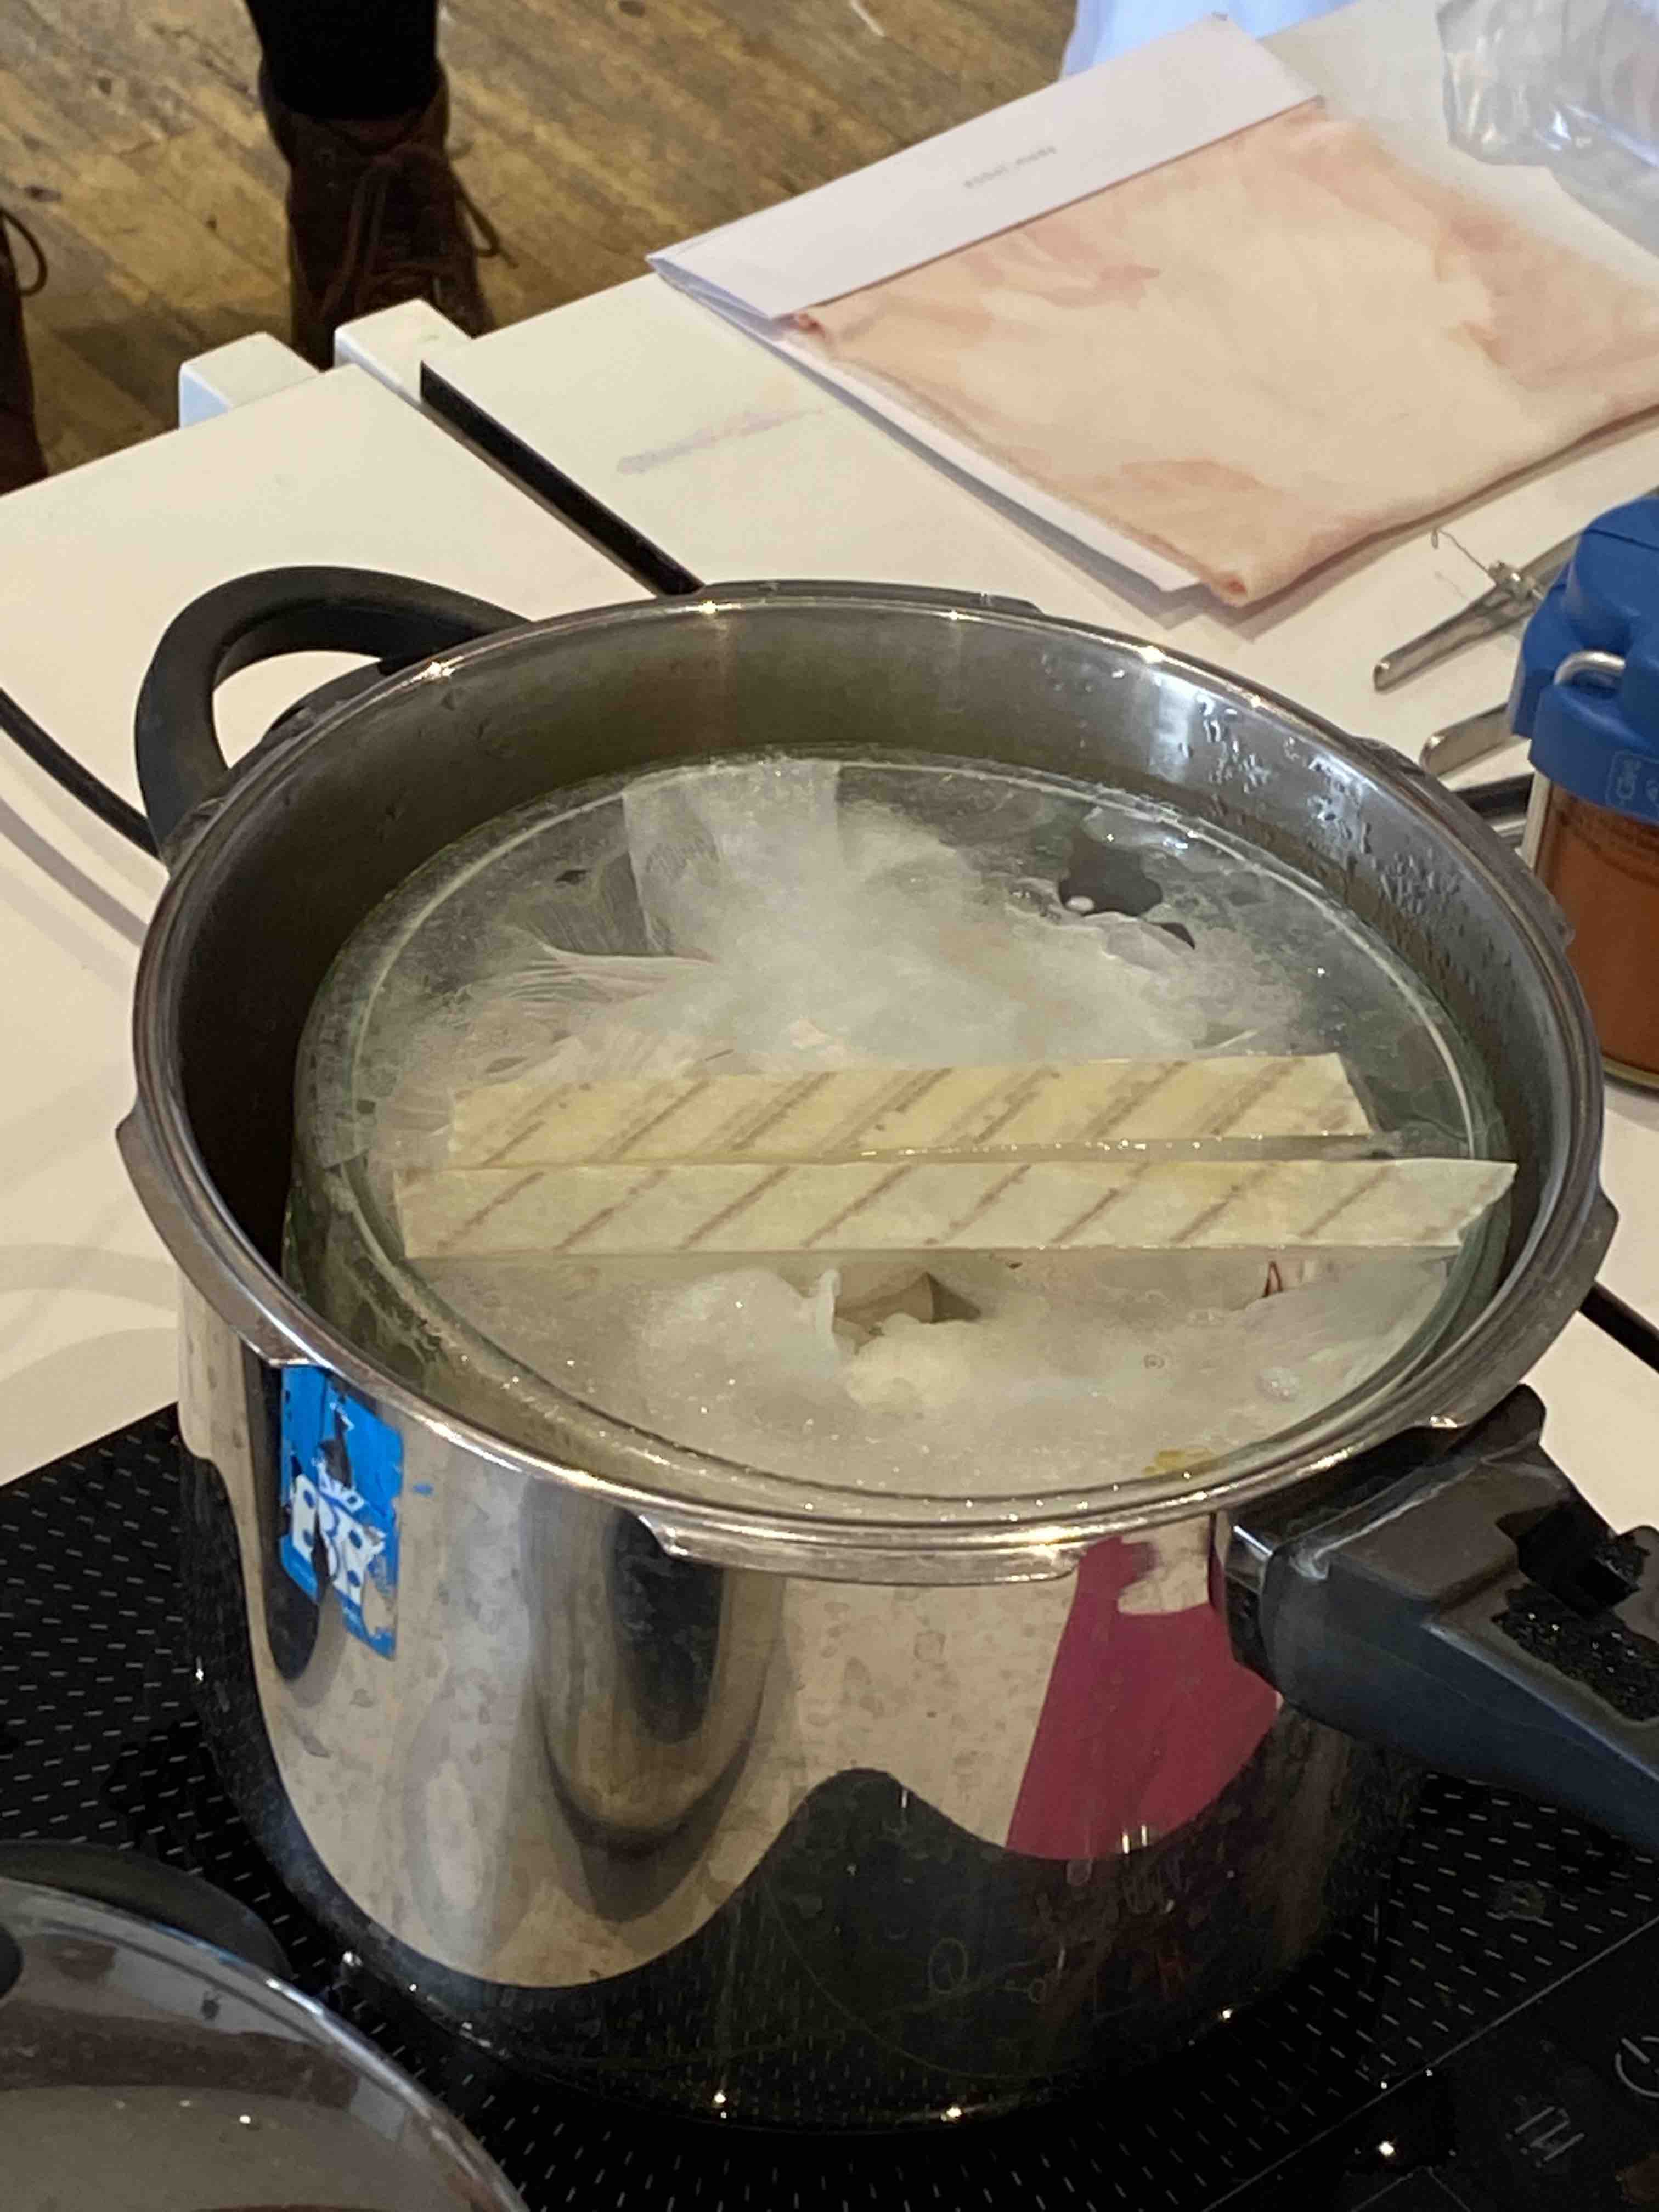
Step 2: Place your fabric in a sterile glass petri dish and into the pressure cooker. Make sure to place it strategically inside the glass, as the top part of bacteria wont dye if it is touching the glass. Stick a strip of masking tape on top of the petri dish. The pressure cooker should contain some boiled water and a little basket flipped upside down so that the petri dishes don’t directly touch the pressure cooker. Heat up the pressure cooker to a max of 120 degrees Celsius. Every other bacteria can die if you go over this limit. You want a healthy and happen environment for the bacteria to grow in.
Step 3: Prepare the bacteria food LB broth. Recipe: 6.25 gr. Luria broth + 250 ml. clean water + 1 tsp 100% peanut butter. Mix the solution in a glass bottle. Shake it up. Unscrew the lid so that the bottle isn’t airtight.
Step 4: Place bottles with the unscrewed lids into the pressure cooker to sterilize. The water in the pressure cooker must be around the same temperature as the content of the bacteria food. If not, the bottles will explode. 15 minutes cooking time.
Step 5: Release the heat of the other pressure cookers and check inside. If the tape has black lines on it, it means that you have completed the sterilization successfully. Remove the glass petri dish from the pressure cooker and let it cool down to room temperature.
Step 6: Grab your bacteria food, petri dish with your fabric inside, Bunsen burner, ethanol, inoculation loop, bacteria (Serratia). This process involves removing some of the previous grown bacteria and placing it on to the fabric inside the petri dish. It is very important that all windows are closed and not to speak seeing as this can contaminate the area and the bacteria are sensitive. First you clean your hands with ethanol and pour some ethanol around the fire on the table (NOT IN THE FIRE) to create a “sterilised sphere or ball” around the fire and the area you are working in. Then you remove the lid of your bacteria broth and hold the bottle opening over the fire also sterilizing it. Raise the lid of your petri dish and pour the bacteria broth over your cloth, covering the entire are around it as well. Close the lid and place the opening of the bottle over the fire again to clean it for the next persons use.
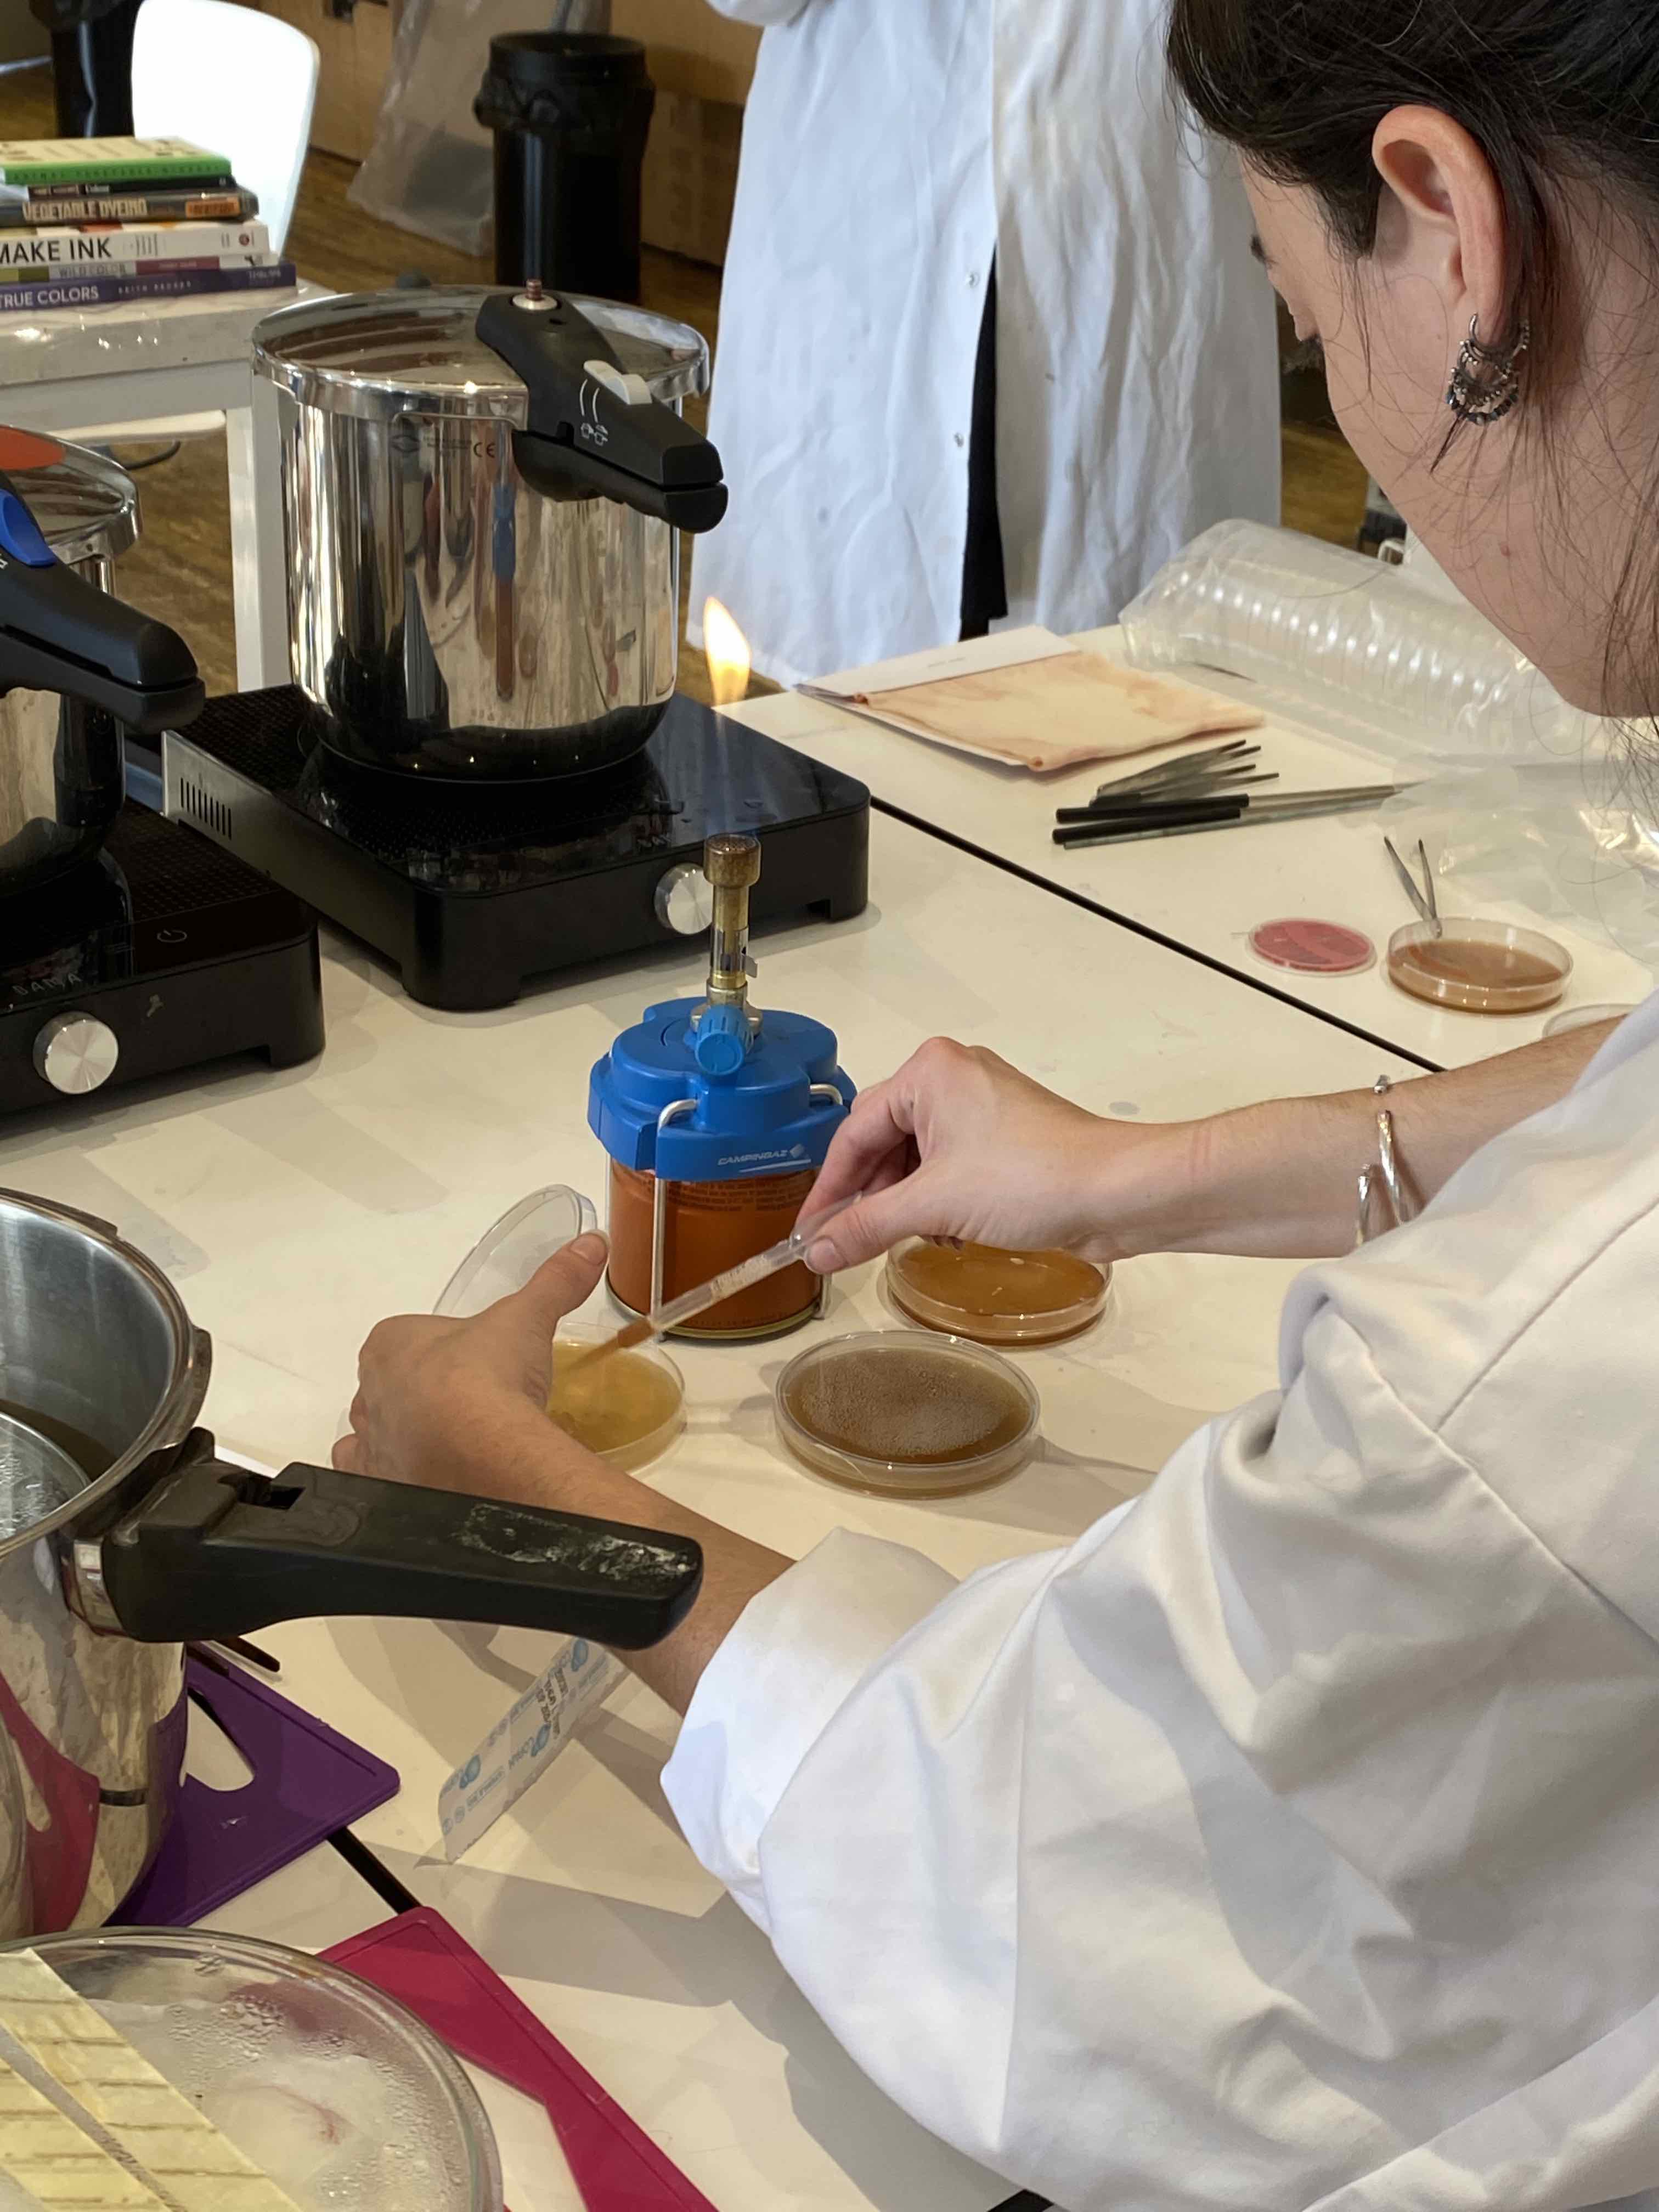
Step 7: Grab your bacteria in the petri dishes. Place your inoculation loop over the fire and then gently open the bacteria petri dish. Stick the inoculation loop inside and touch a surface that hasn’t been covered by bacteria to cool of loop. Once cooled, scrape off a good number of bacteria. Close the petri dish. Open the lid for the fabric and gently scrape the bacteria all over it. Close the lid and sterilize inoculation loop once more.
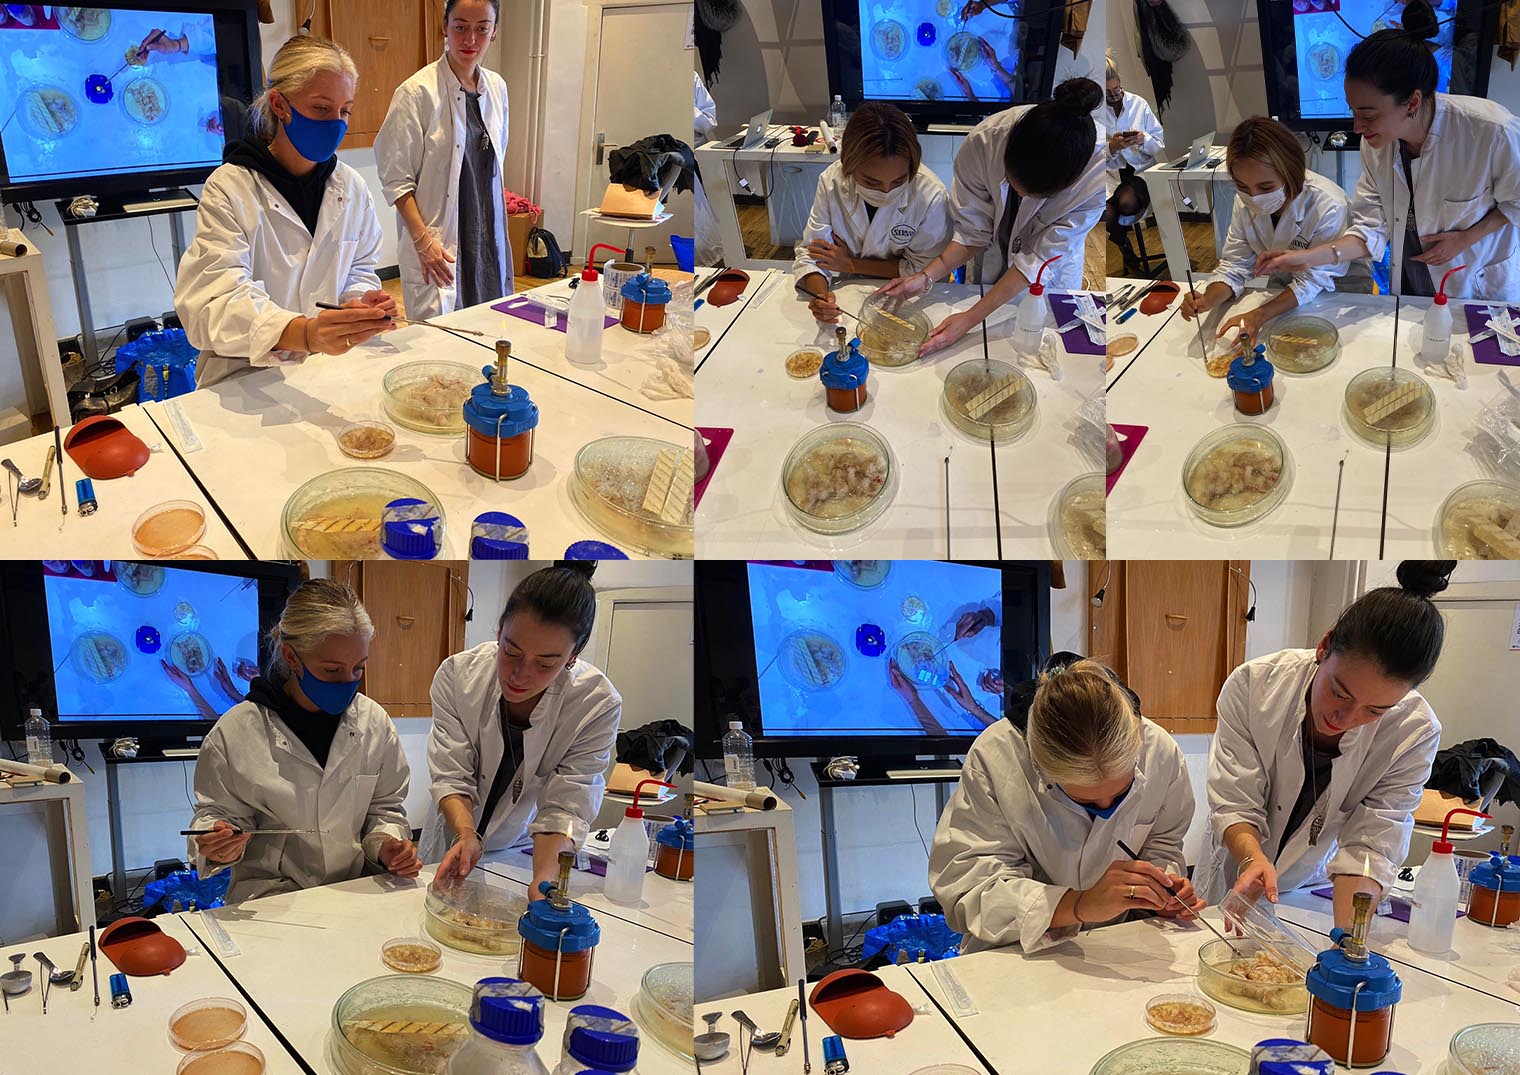
Jen and I making a Bacteria transfer to our textile. You have completed the transfer of bacteria on to your textile! Now wait 3 - 5 days before extracting your textile!
The result: Insert images, gifs here
I decided to do a freestyle shape for my piece of silk. I tied knots in random places ansd made sure to tie them tightly. This is to see what the colour differences would be like, if the bacteria wouldnt have enough space to "breathe". Cecilia had told me that placing the concentrated pieces of peanut butter would result in a strong pink from the Bacteria. This is evident on my bacteria syed silk piece.
Inks
Natural/Botanical inks:
This experimentation really reminded me of miniature galaxies:
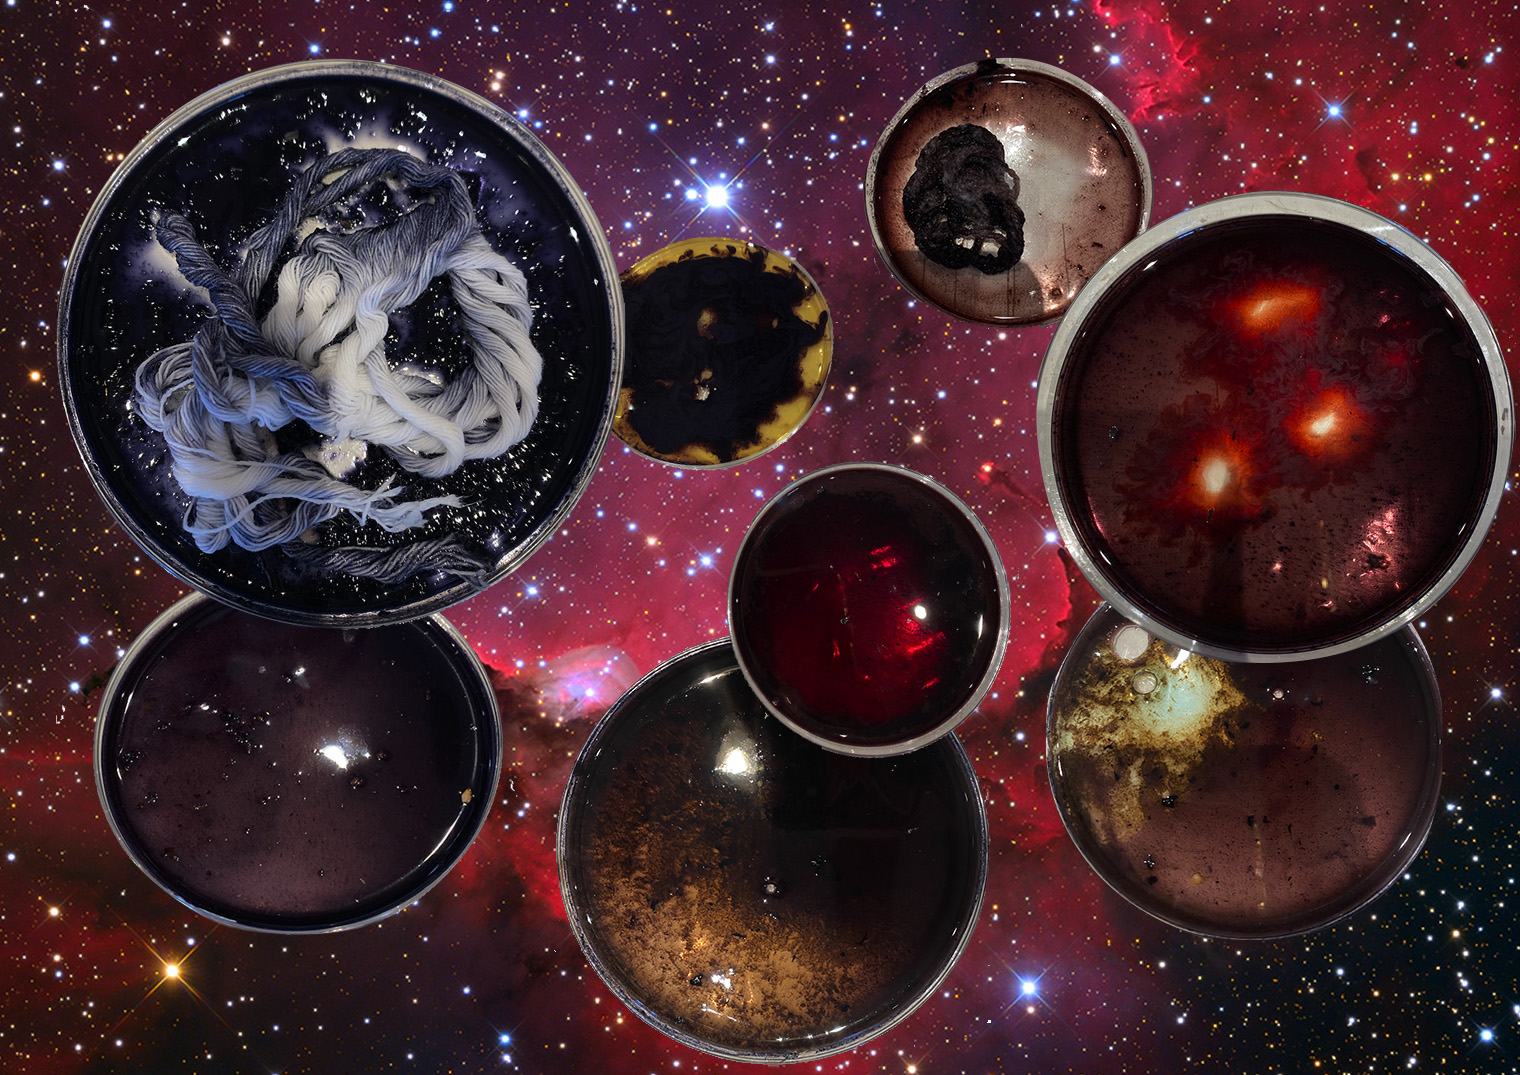
After having conceived our natural dye baths we moved onto looking at natural inks. We used our previously made dye baths for this experiment. Inks can either be made by mixing dye stuff with water, oil, gel or ethanol. Ethanol works really well with the extraction process so we decided to experiment more with this.
Ink recipe:
Materials:
-
Alum
-
Soda C. (Half the amount of Alum)
-
Water (boiled)
-
Glass bottles/jars (tall)
- Dye bath
Step 1: Grab your dye bath.
Step 2: Bottle 1: Place Alum into a sterlized glass jar or bottle with warm pre boiled water.
Bottle 2: Place Alum into another sterilized bottle and place half the amount of previous Alum in this one. Also dissolve the Alum in preboiled warm water.
Step 3: Add bottle 1 to half of your dye bath. There should be a slight reation inside the bottle once combining the two elements. If there isn't a raise in the liquids height, then you will have to add more alum the next time you try the reaction with bottle 2.
Be careful when you're combining the Alum mix with the Soda mix. Add little by little. If not, you will experince a mini "explosion" like the turmeric did in the right photo!
Acorn cap pigment: Important to know.
-
The process of Acorn caps ink is a little different seeing as we already have Iron in the dye bath.
-
This Iron liquor will serve as metal modifier already.
-
All we have to do with the Acorn cap bath is to pour it on to a bigger surface area and place on the heater to dry.
-
This will take a good 2 days to dry and as an end result you will have what is needed to make pigment.
Result:

Process photos, making pigments:
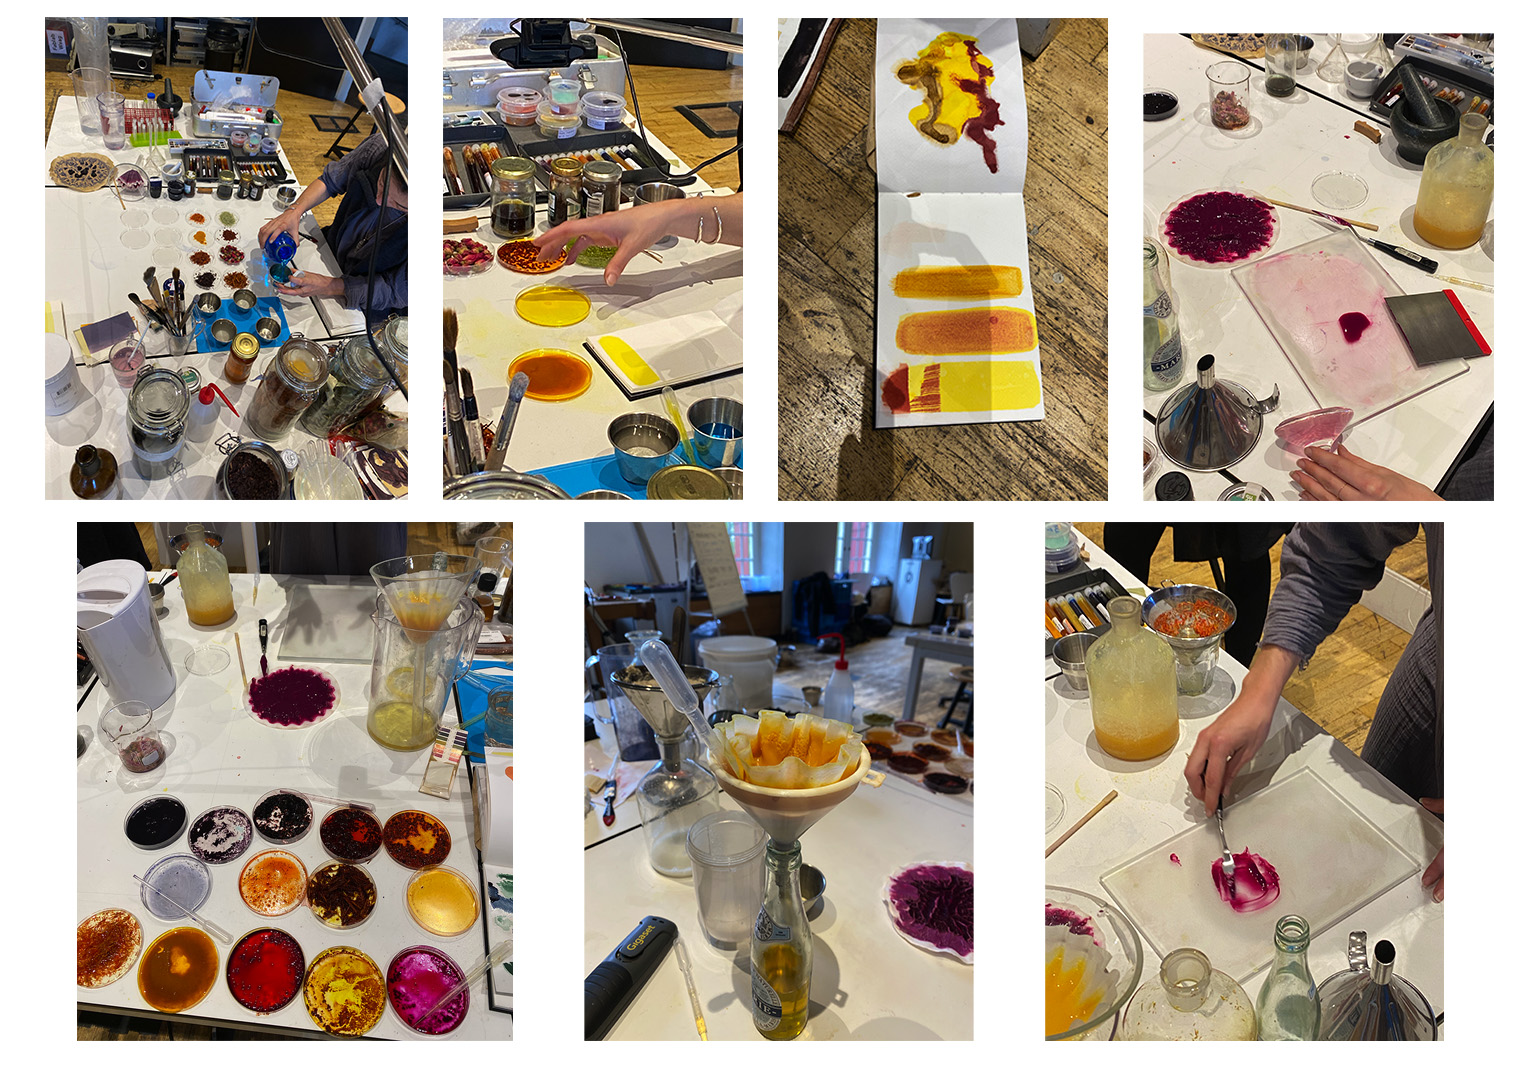
Painting with our inks:
In separate petri dishes we tested how the colour of the dye stuff would change depending on what type of modifier you use. Metal modifiers, acidic modifiers and alkaline modifiers were added to the petri dish to see the different reactions of the colour change.
Metal modifiers: Iron liquor Acidic modifier: Vinegar/ Citric acid Alkaline modifier: Soda
Use a Arabic gum as a binder unless you use a metal modifier because this could bind itself with the pigment and split itself.
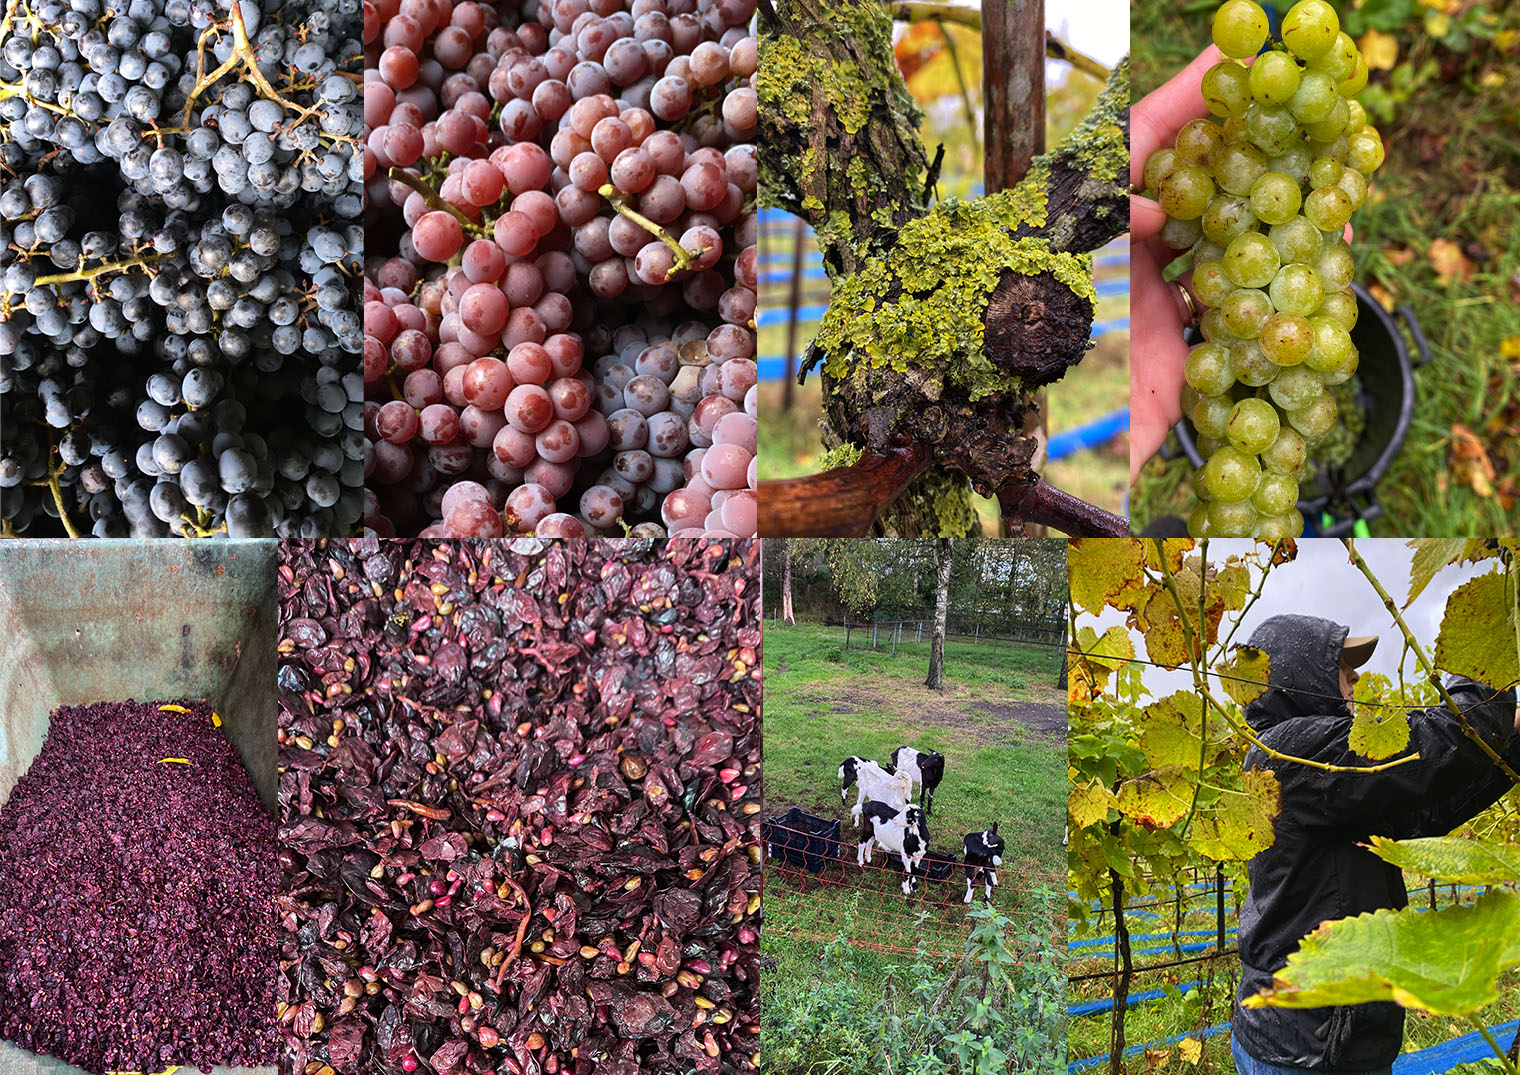
Inspiration for the final project: grapevine