Week 9. Textile as scaffold
In this week’s module we had a specific focus on the applications and techniques of the technical textiles in the fashion in many different industries. Some of the processes that were viewed in this class also involved a crystallisation process using materials such as Borax and Alum to create home grown crystals.
Another process that we were acquainted with was the introduction to a CNC machine with its purpose for milling. The purpose was to gain the fundaments and understanding of both the mechanical techniques as well as the grown technique to sculpt or mould using technical textiles.
This week mainly for me is to get to know about the chemistry behind the crystal methods that we were using and perhaps make examples of my own. Idea: Crystal jewellery. The other part was gaining an understanding of how the CNC machine works and to practise the ability of using it. The idea is that I mill a mould that isn’t too tricky for my given level of expertise, but it should still hold some kind of concept in its design.
Research/ Inspiration:
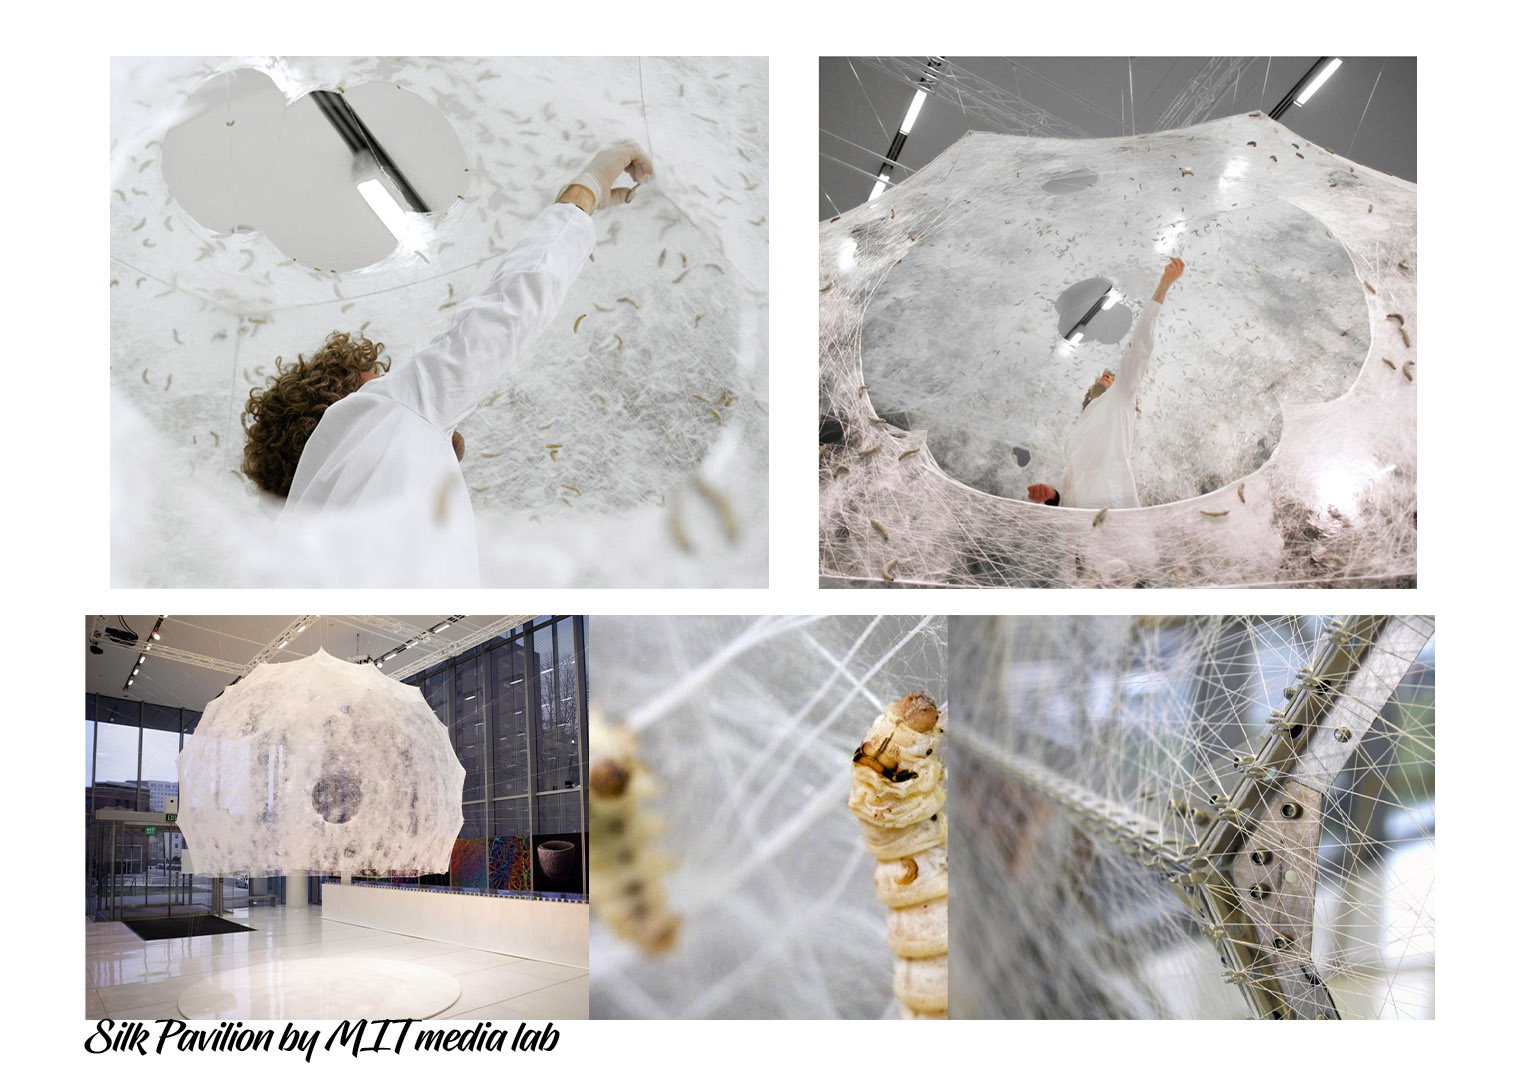
These following artists/designers had all caught my eye:
 This work is simply wonderful!

Different types of molding techniques: - Casting - Blow molding - Compression molding. (This can be done at home even) - Injection molding. - Matrix molding. - Thermoforming. - Vacuumforming. (This can also be done at home) - CNC – sculpting machine. This is the one the textiles lab in Amsterdam is focussing on this week. - FRP moulding. - Vacuum bag moulding. - … many more.
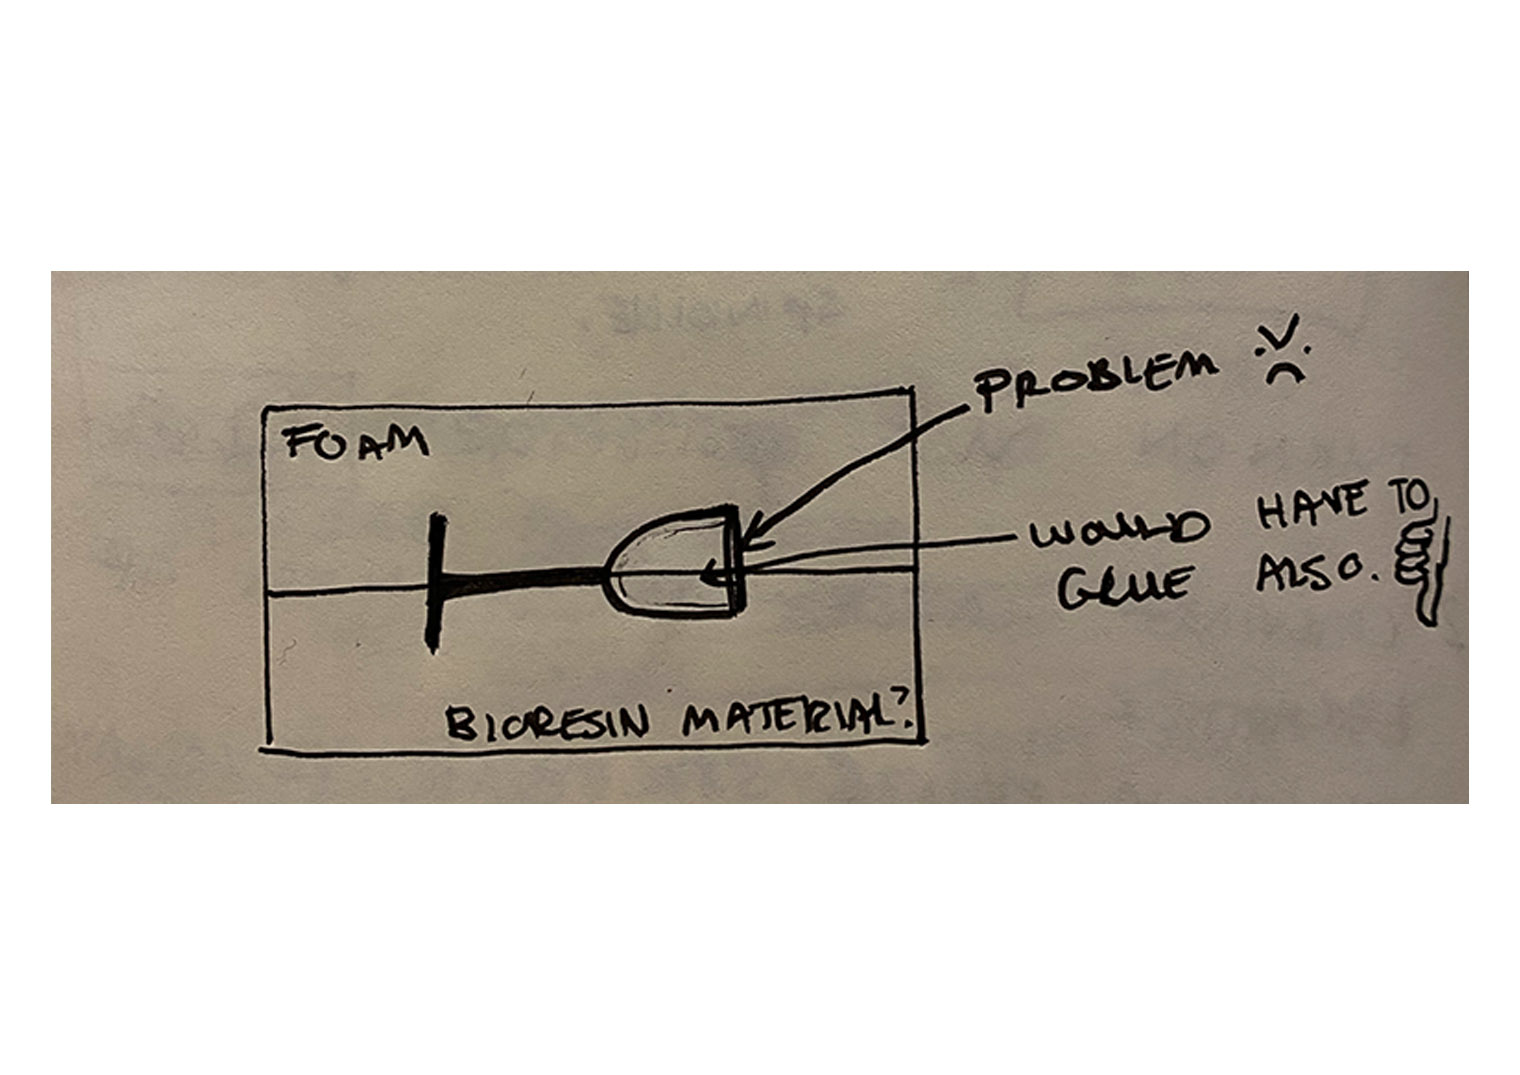
Mould brainstrom evolution: (From big ideas to small ideas) Frudtration lay high on the first day. -.-
Seeing as I previously had worked with Fashion Design I thought that it would be nice if I could recreate some kind of part of the mannequin as my mold. The only issue here is that we are working with a 3cm thick piece of foam this week. No wood just foam. The mannequin idea therefore was unrealistic.
Idea no.2: The idea was to focus on a specific area of the mannequin such as the head, hands or feet. The art of shoe making was something that was drawing my attention and therefoe I started epxerimenting in rhino with the shape of a foot that is sliced in two in side a box.
(Insert screenshots of this process) - rhino?
The fun part about this experiment is that eventually I would be able to use the mold myself in case I ever practised the art of shoe making. I also thought that this was genius until I realised that Sara was doing something similar only in a much more well thought design + I heard that the whole milling process was going to take much longer. Therefore, the idea was also not perfect for this week.
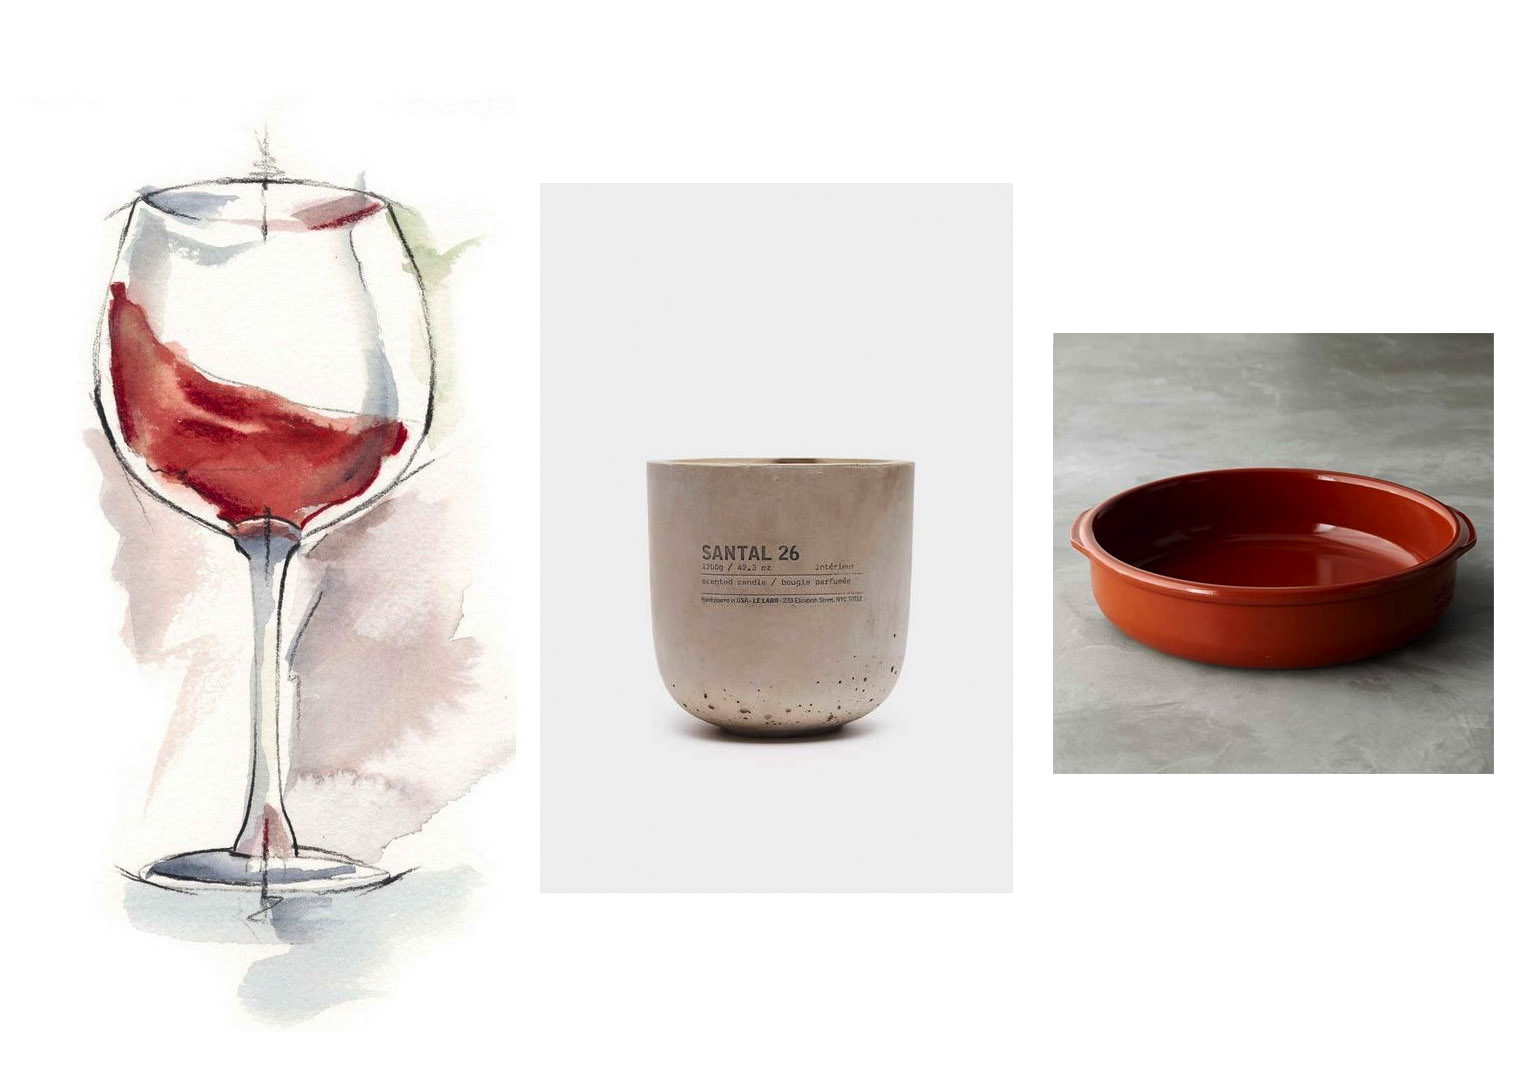
Idea no.3: Here I started thinking about different moulding utensils, seeing as I had broken my glass of wine the night before when cleaning. A wine glass would be perfect but challenging. In the wine glass case: a different milling technique is used for this seeing as you have to deal with the positives and negatives of the empty space. The empty space within the wine glass would have to be excavated some how and this was also going to take long. My idea was first to split the wine glass in half an place each half in a box. Then mill these two pieces seperately. The only thing is that once you fill the mould halves with material, there was no way to regulate how mch. you would pour in or how to excavate the material , so that you end up with an empty cup in your wine glass. The function after all is for it to hold liquid when it stick together.
Sketch:
So I guess that this would take me too long to make. Still to ambitious over here. -.-
So now we continue...:
Instructions:
Growing crystals:
Cecilias advise when it comes to choosing the best material to grow crystals on:
-
Choose a hairy thread.
-
Material with netting is perfect. The structure allows for the crystals to seep through and attach themselves to the fabric because of this structures.
-
Tulle (not too thin).
Idea: Conductive crystals – sensors adapted?
General tip:
When the mixture is cooling down, do not touch or move the jar seeing as this will disrupt the process of the crystallisation. Every time you move it, the process start all over again.
Cooling the liquid down slowly also results in sturdier crystals. Try to cool the jars down in a slow way. The quicker the liquid cools the more fragile your crystals will get.
Recipe – Margherita:
Tools:
-
Pot
-
Water
-
Boiler
-
Measuring tool
-
450 gr Alum
-
Food colouring
-
Indian ink
-
Electric conductive paint
-
Jars, petri dishes.
-
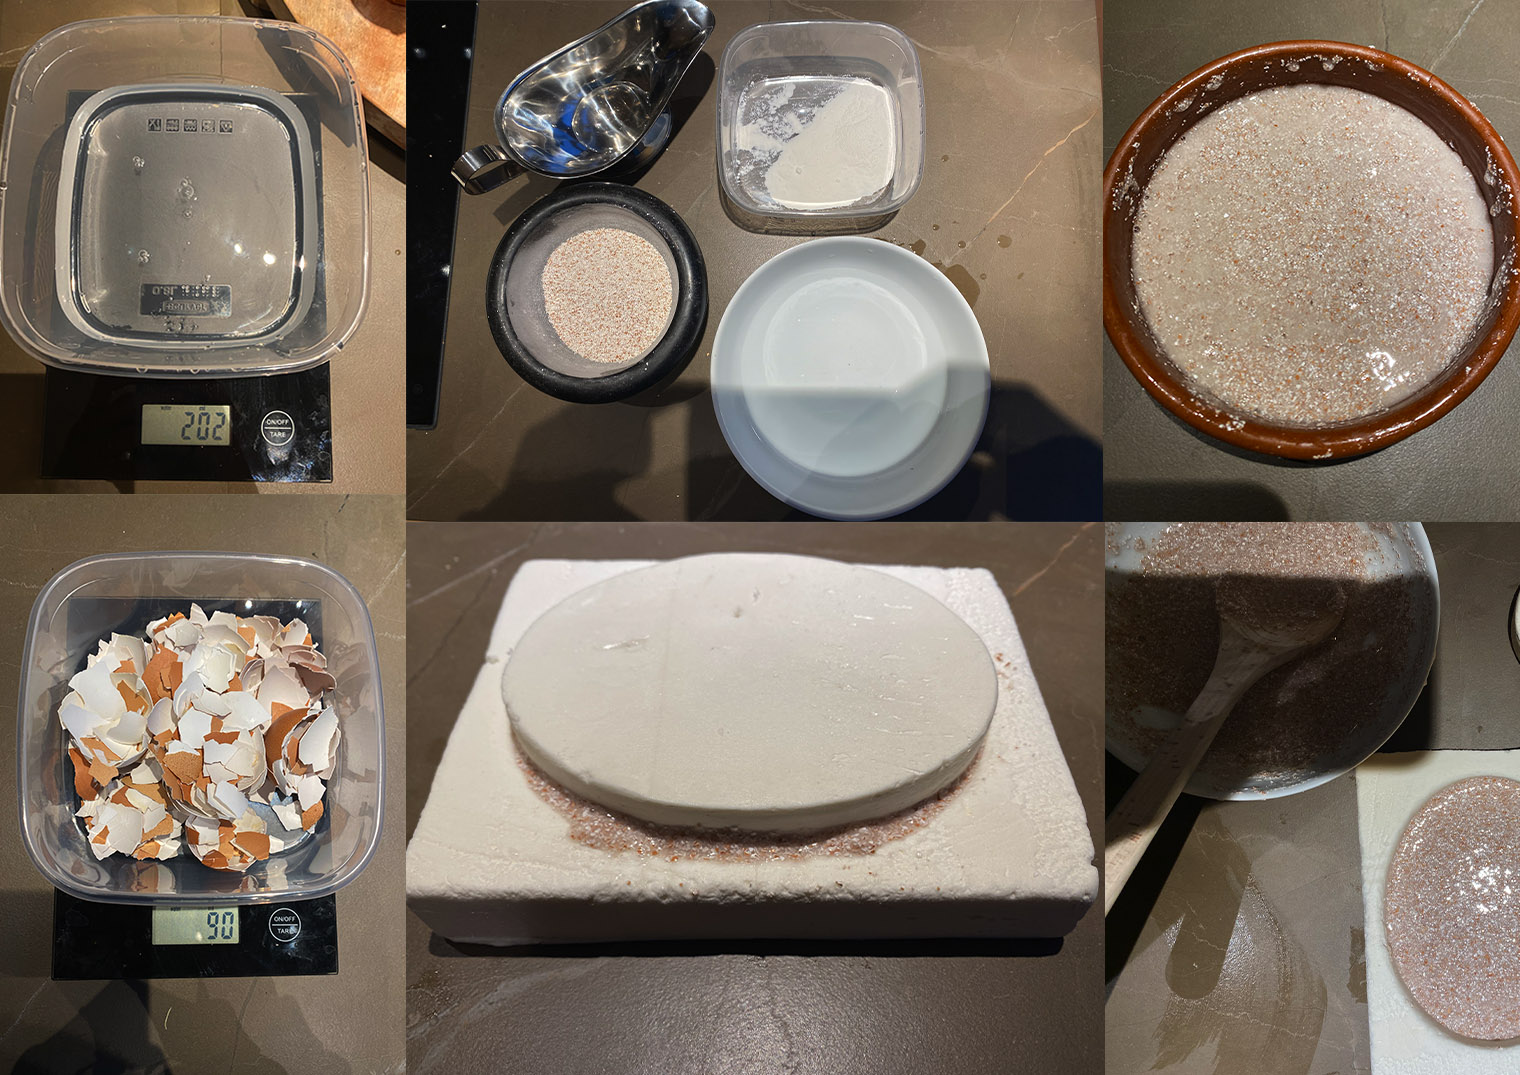
Add the 450 gr of Alum to the pot with the water. Heat up pan until it is at 80 degrees. Keep stirring the mixture. You would want the alum to dissolve and saturate in the water. You know that you will have added enough alum to your water if you’re Alum wont dissolve anymore. That’s how you know that you’re bath contains enough Alum.
-
Add food colouring, Indian ink, natural pigments…etc. For colour. Pour this liquid into a glass jar.
-
Repeat the process in step 1. In the second pan, melt the electric conductive paste with some water until the consistency loosens up. Add more water and also Alum.
-
Pour this mixture into another clean glass jar or petri dish.
-
Place your strips of fabric: linens, netting, macramé thread into the jars. Make sure that the fabric isn’t touching the ground because then the crystals wont form properly on the textile.
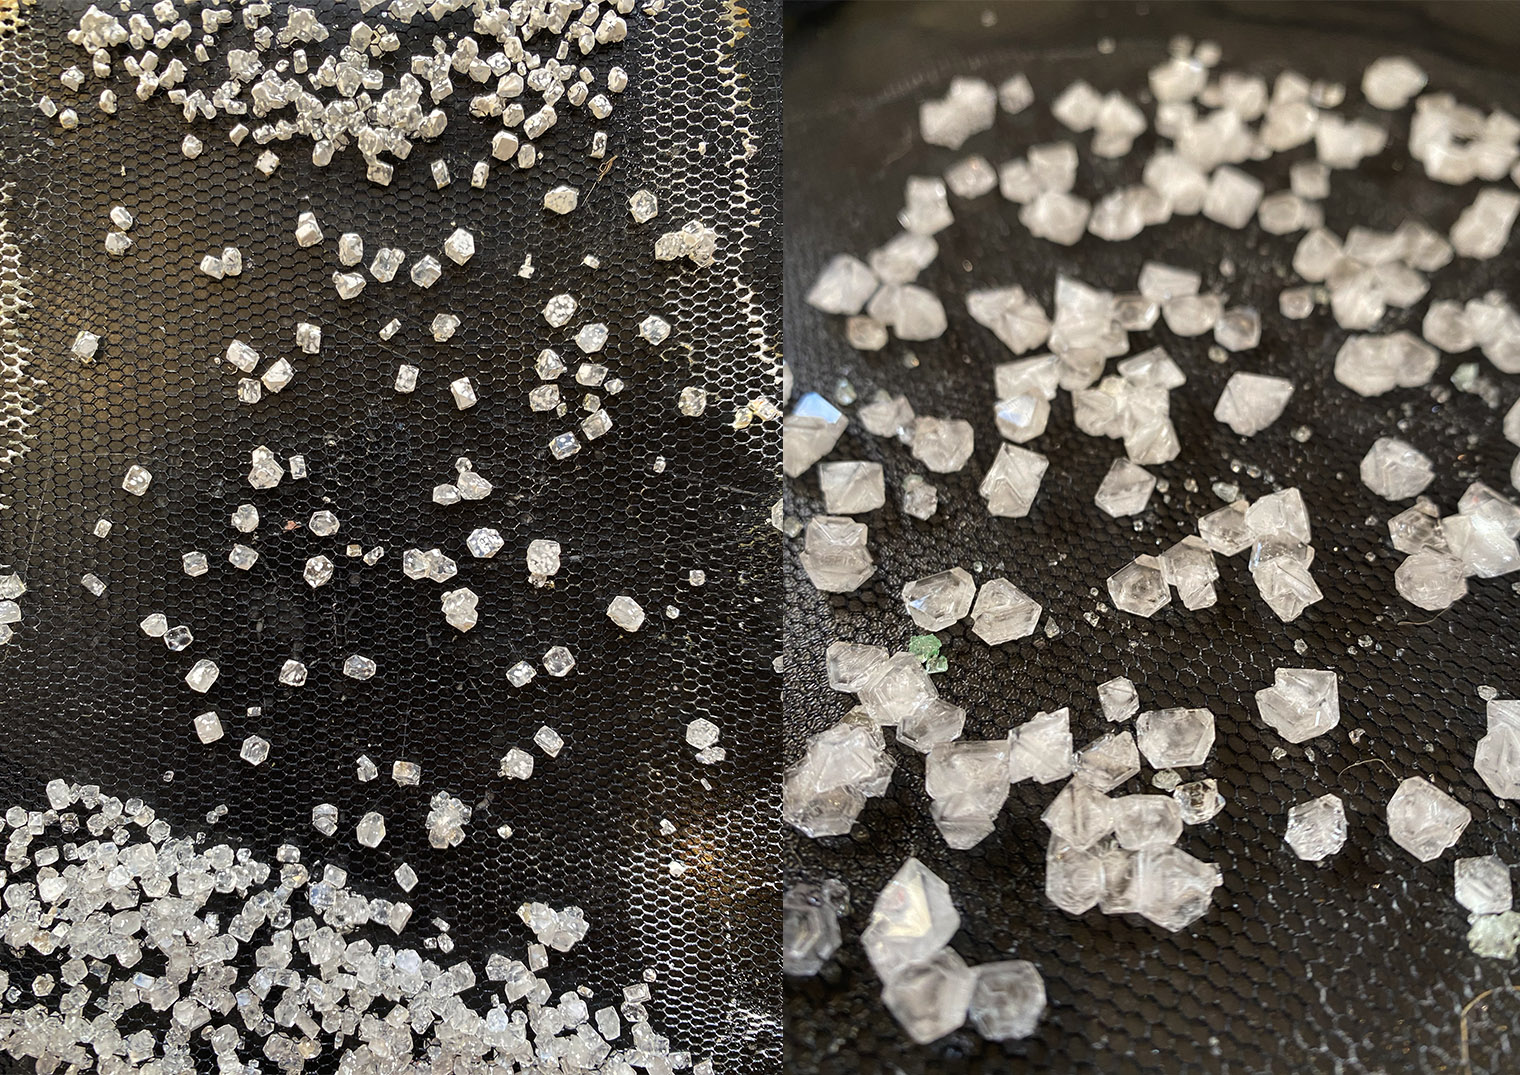
Results:
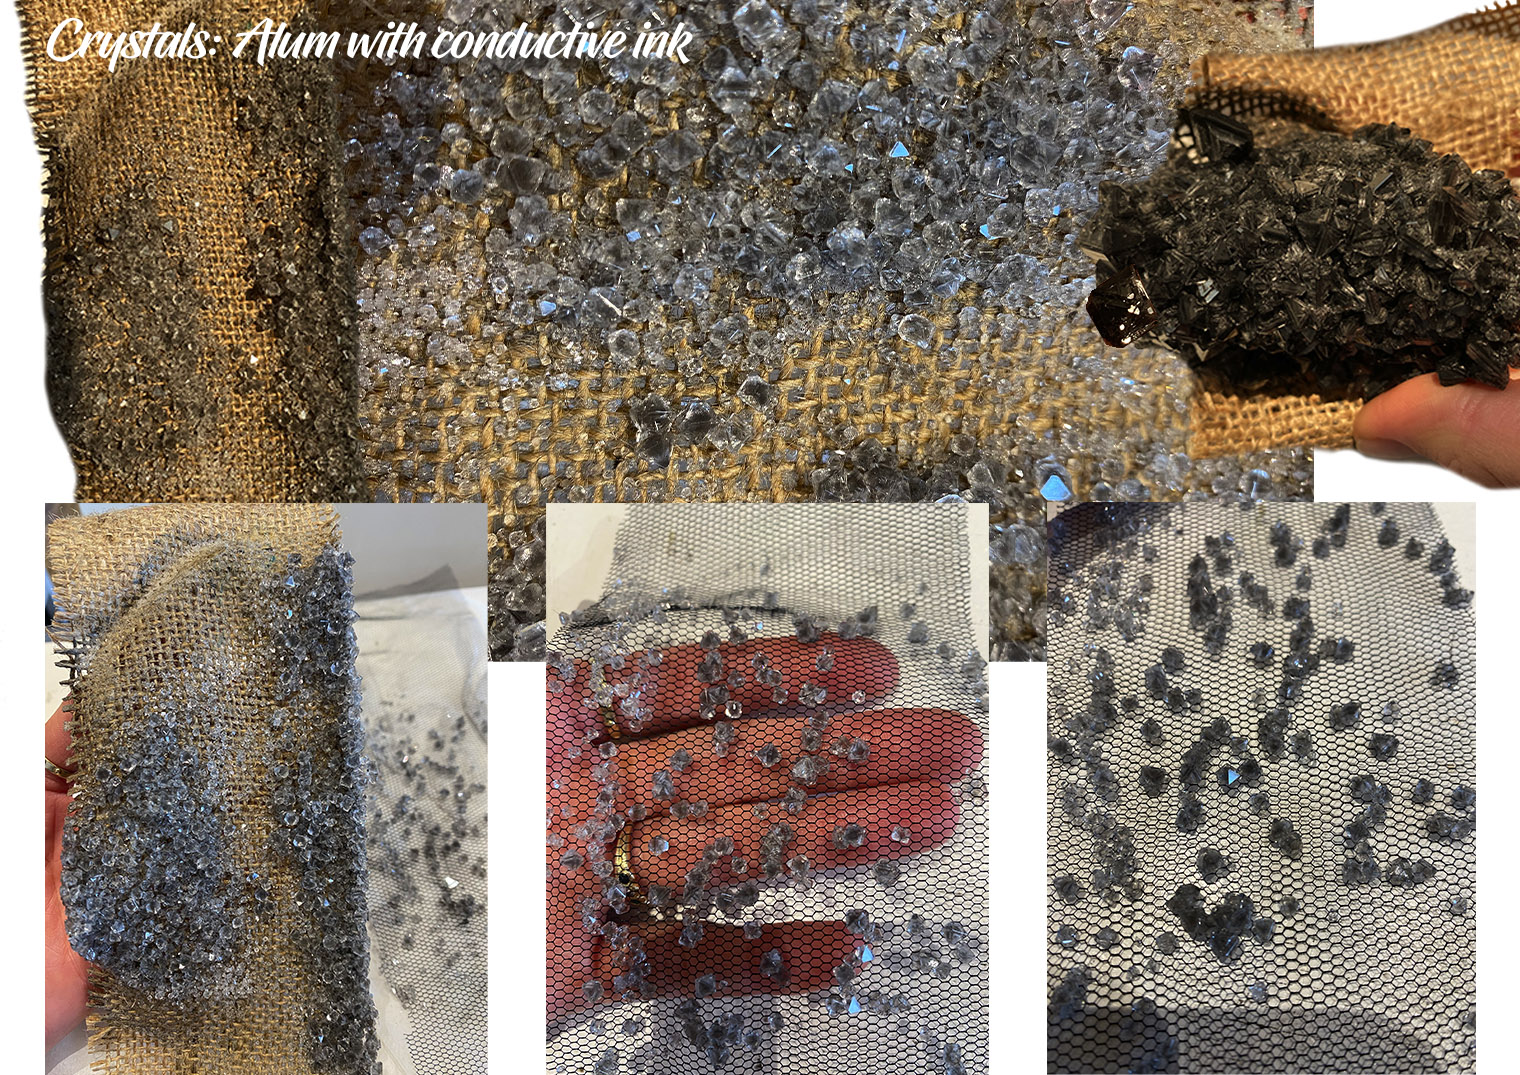
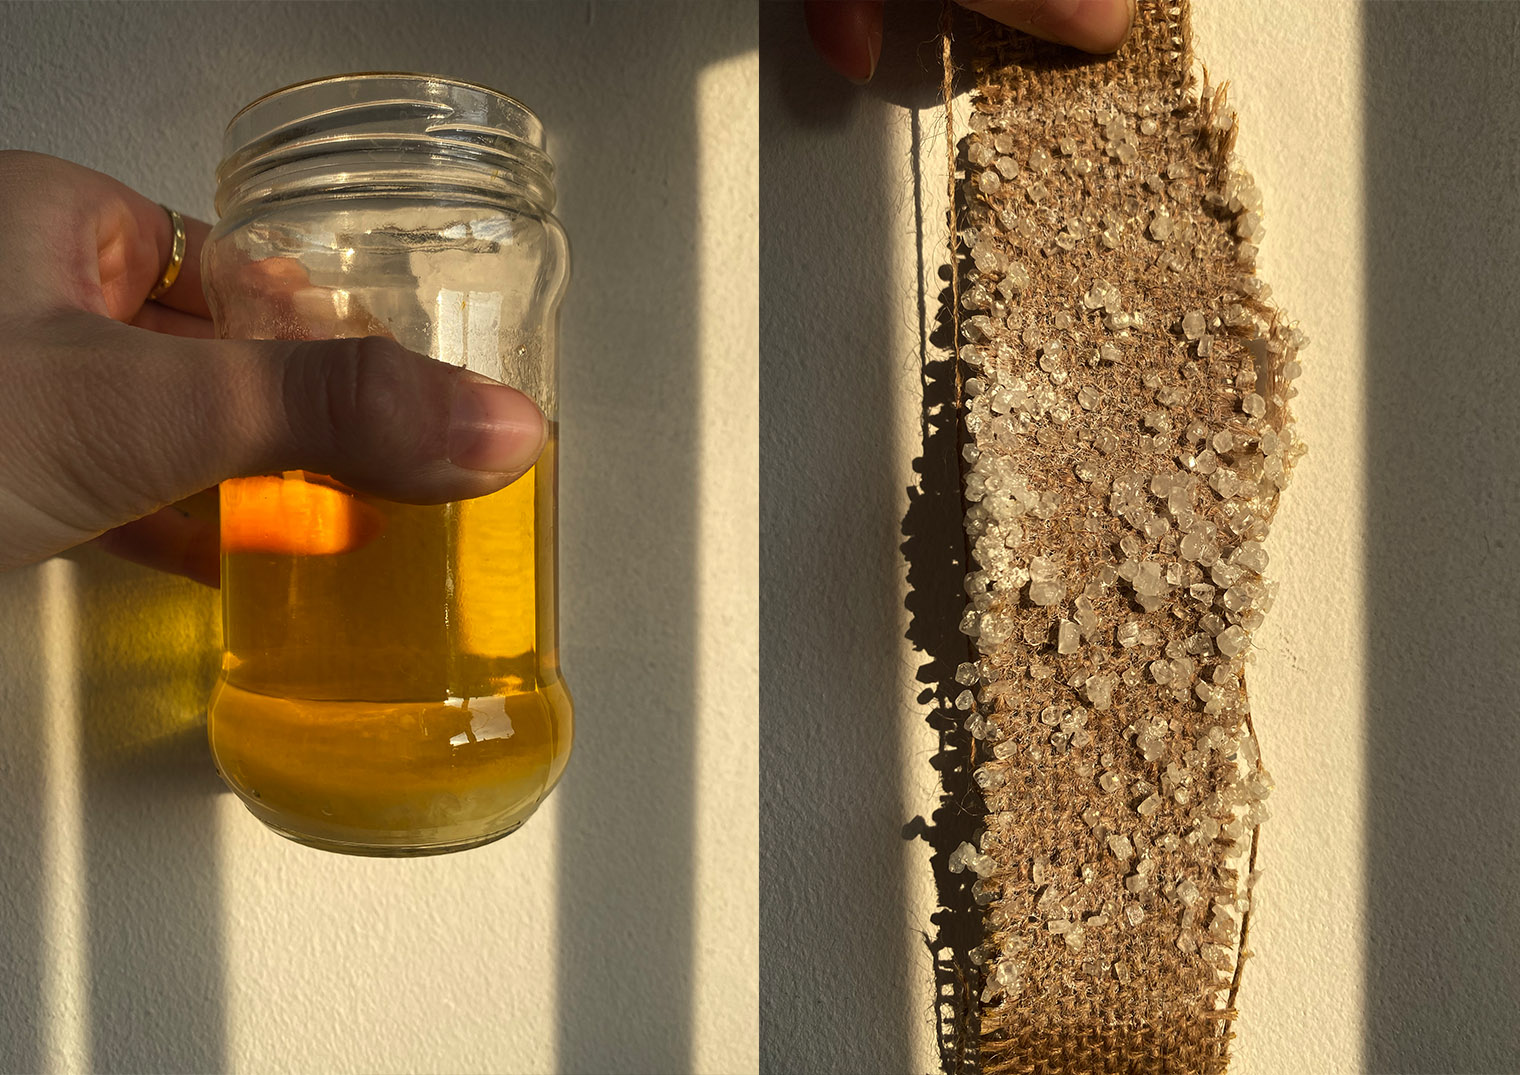
Unfortunately the b/orax crystals didn't turn yellow. The concentration of dye must've been a little weak for this crystal dye bath.
Rhino: The mould making basics:
-
Open a newmodel Rhino file. Open up all of the 4 different windows: perspectives.
-
Click the rectangle command. Make a square starting on point 0,0.
-
Click on copy command and duplicate the box. Place the two boxes on top of one another.
-
Click sphere diameter command. Make the sphere a size small enough to fit inside both of the boxes.
-
Click Boolean difference command. Select both solids (Boxes). Then select the sphere enter.
-
To make sphere on the inside with a tube attached to it. Click Boolean union command to shape them together. This is useful if you want to fill your cast with a material. Different type of mold making.
Idea: Walking cane. Wine bottle holder.
Beas explanation CNC milling machine: - CNC milling machine : substracting material , just like a laser cutter. - Material: 3 cm foam. - Think of shapes for the molding process. A 2 mm difference between your positive and negat8ive mold is a good thickness to work with to cast something. - Check thingyverse.
Henks milling class:
Safety measure notes:
-
This milling machine isn’t tolerant for mistakes.
-
It is basically a way to create 3D shapes by layerin g the 2d shapes on top of each other.
-
Always try to work alone in the room because you must have space to monitor the milling machine. Never leave the machine alone while in use.
-
This machine works with the X,Y,Z axises.
-
No housing , no protecting cover.
-
No drinks or food near the machine.
-
The dust collector is in the room in the back.
Setup – Safety intro:
-
Click on the red handle on the side of the machine.
-
Move the spindle manually with your arrows on the keyboard. This can get confusing so be aware in which direction your arm is moving.
-
Don’t touch the machine when it is moving.
-
Keep your workspace clean. Watch out with the wooden boards and cardboard next to machine. Keep it organised and separate from one another.
-
Turn on the dust collector: the button and twisty thing at the front of the machine.
-
Turn the machine on carefully.
-
If you do attach a piece of wood or foam on the platform and you use screws. Make sure that the spindle never touches them. The sparks caused by the rotation and friction of the spindle can cause flakes of fire. These can get sucked up into the tube and into the woodchip collector. A fat fire hazard. When you see sparks you turn the machine off and check for burnt wood chips in the bag. Remove these immediately.
-
There is a STOP button on the front in case of emergencies.
-
Tie your hair up into a bun, no loose clothing. No loose sleeves, loose and dangling jewellery, Cords of hoodies etc.
-
When you are ready to activate your spindle after having changed the milling piece: place the activation key into the machine and turn.
-
To stop the spindle take the key out immediately.
-
Wear goggles and ear plugs.
-
Always make a test before you use your actual material.
Setup of the milling piece:
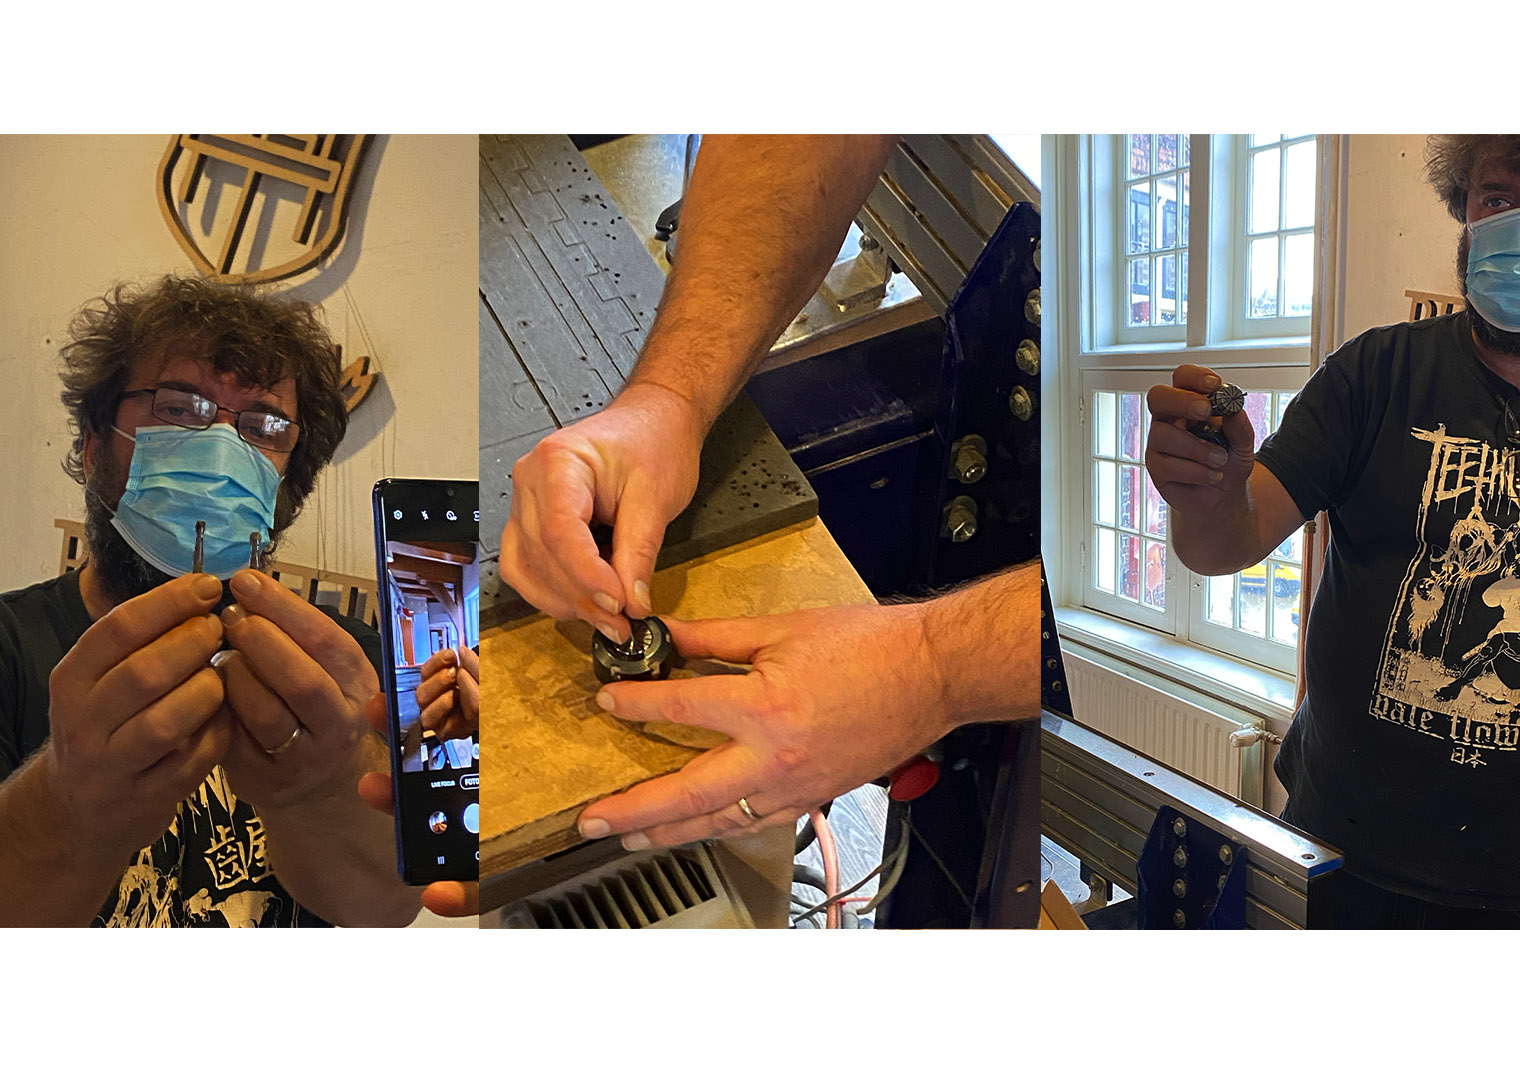
- Place the collet over the nut and finally attach the 3mm milling piece into the hole.
The standard size for the milling piece that we will use is a 5mm x 6cm two flute milling bit with a flat top.
The flat milling piece will give you ridges in your design and the ball nose milling bit will smoothing out curves in your design. The ball nose milling bit however can’t complete flatten a surface whereas a flat nose can.
Some milling bits have a spiral. This is so that the material can ben extruded at the same time as it is milling.
Stepovers are ways in which the milling pieces will flatten out your material. The lower the stepover percentage the longer it will take.
Software setup instructions:
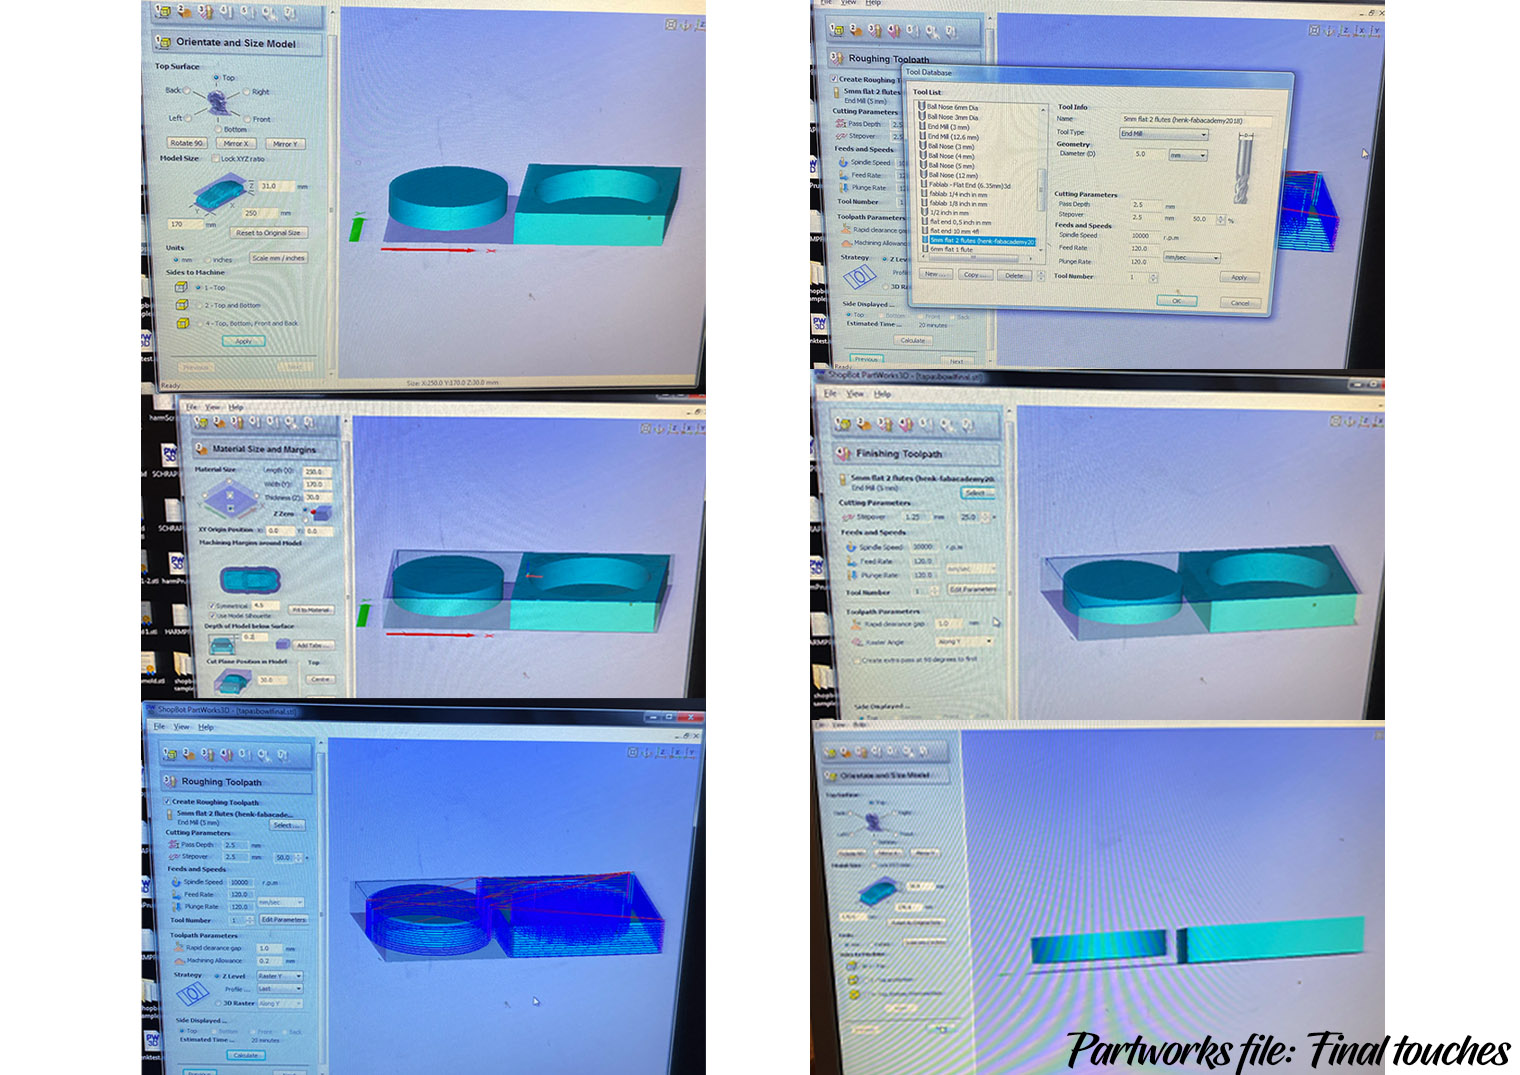
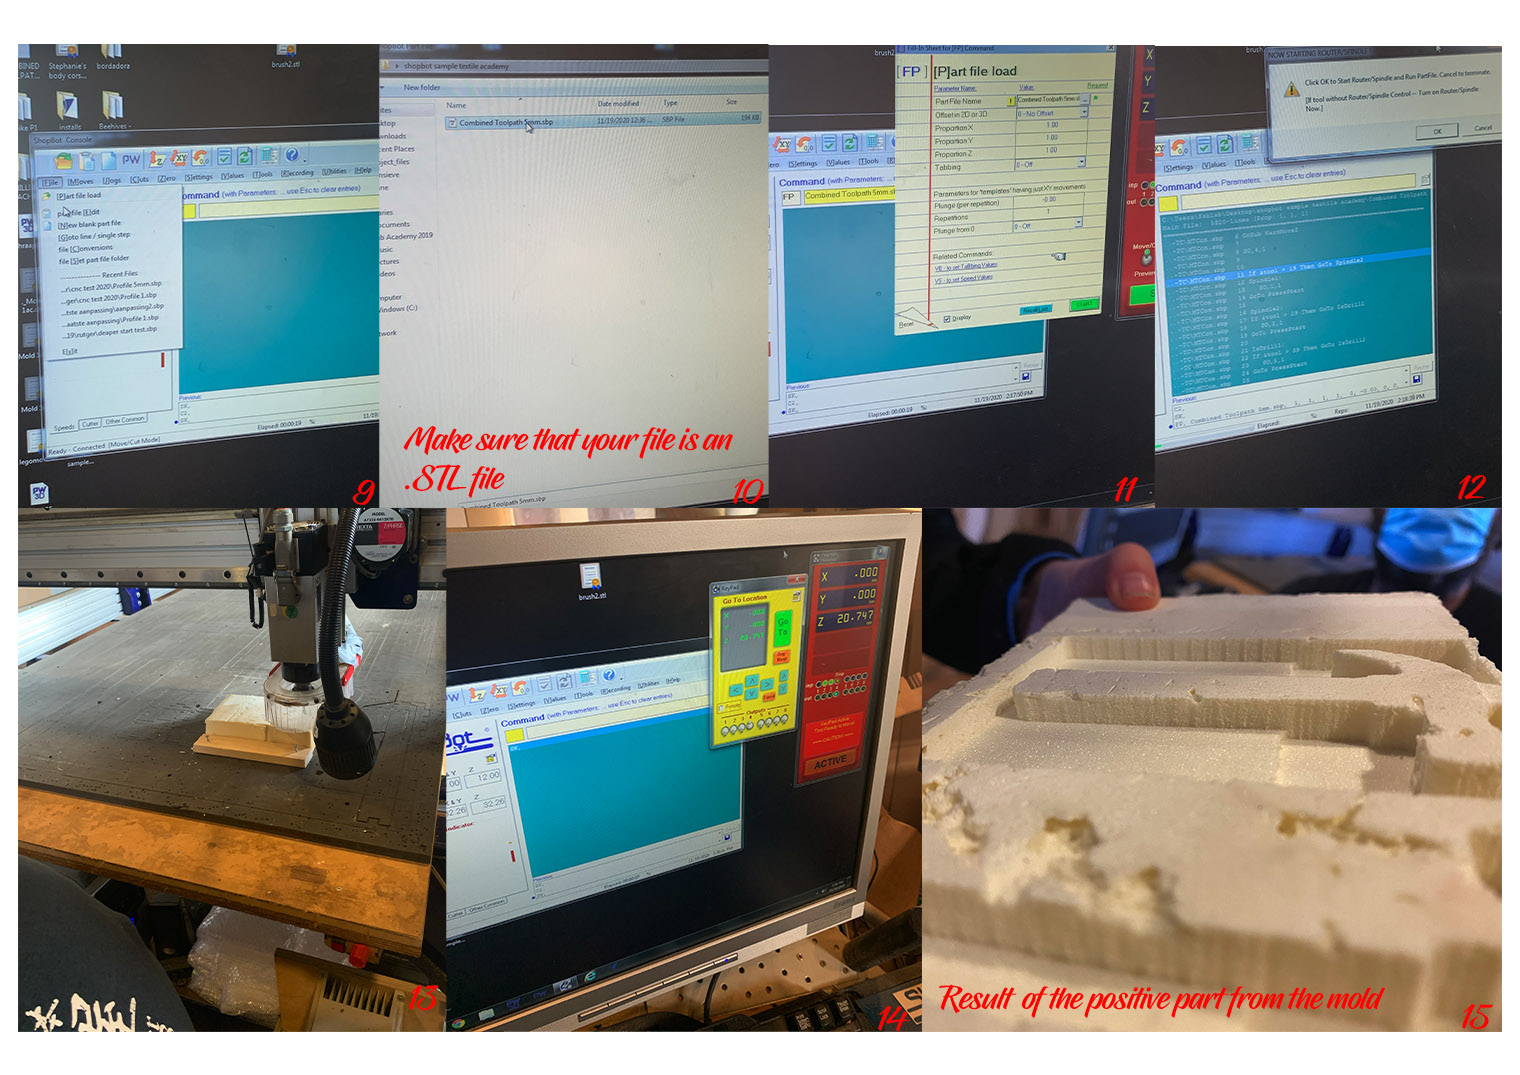
Partworks 3D software: (slicer for milling basically)
- 3D five Load model. Load .stl file to software. Fix the sizes of the different axis.
Sizes:
-
X axis: 130mm
-
Y axis: 220mm
-
Z axis: 50mm
-
Next make sure that you’re orientation is correct. Fill in the X,Y and Z Axis measurements. You’re anchor point is shown in the programme as a green and red line in the corner of your model.
-
Henk advised us to set the depth of the model below surface… to 0.2. Click apply. (This means that it saves your information.)
-
The roughing toolpath is the CNC machine roughly milling the shape of your object. It has been refined. This is shown on the left side of the foam face example.
-
Select the 5mm flat two flute mill in the drop-down menu. Select a 50% for the stepover setup. The spindle speed should be at 10,000 r.p.m. The feed rate is: 120 mm/second. Your plunge rate us 120 mm/second. Machine allowance: 0.2mm. Strategy + how does it move? Direction 3D raster model. Side displayed: Top.
-
The toolpath parameter is the way you can control the height of the travelling milling bit. It should be high enough so that it doesn’t damage if any pieces are sticking out or up.
-
Press calculate.
-
Finishing toolpath: Select the tool database and change the stepover to 25%. Click apply. Then next. The lower the stepover percentage the nicer the shape of your lines will be. Change the rapid clearance: 2.0mm. Change the raster angle: Along the Y – axis.
-
Preview machining: Roughing tool part is ok and so is the finishing tool part.
-
Click finishing toolpath and click save. Save the toolpaths to a single file. Save the file as – Describe the name of the object as well as the milling bit that was used for the milling. Open file with notepad: This should show your G-code of that file.
The shopbot software:
Before using the software: hoover your work space, in this case the bed on top if the cnc milling machine!
We were using foam and to safely stabilise this on to the milling bed we added double sided tape on the bottom part. To hold the sides of our foam piece we added two other smaller blocks of wood on the sides. The pieces were screwed into the milling bed surrounding the foam, so that it has no chance to move once the milling machine is on and carving into it.
Setup machine:
-
Turn the machine on.
-
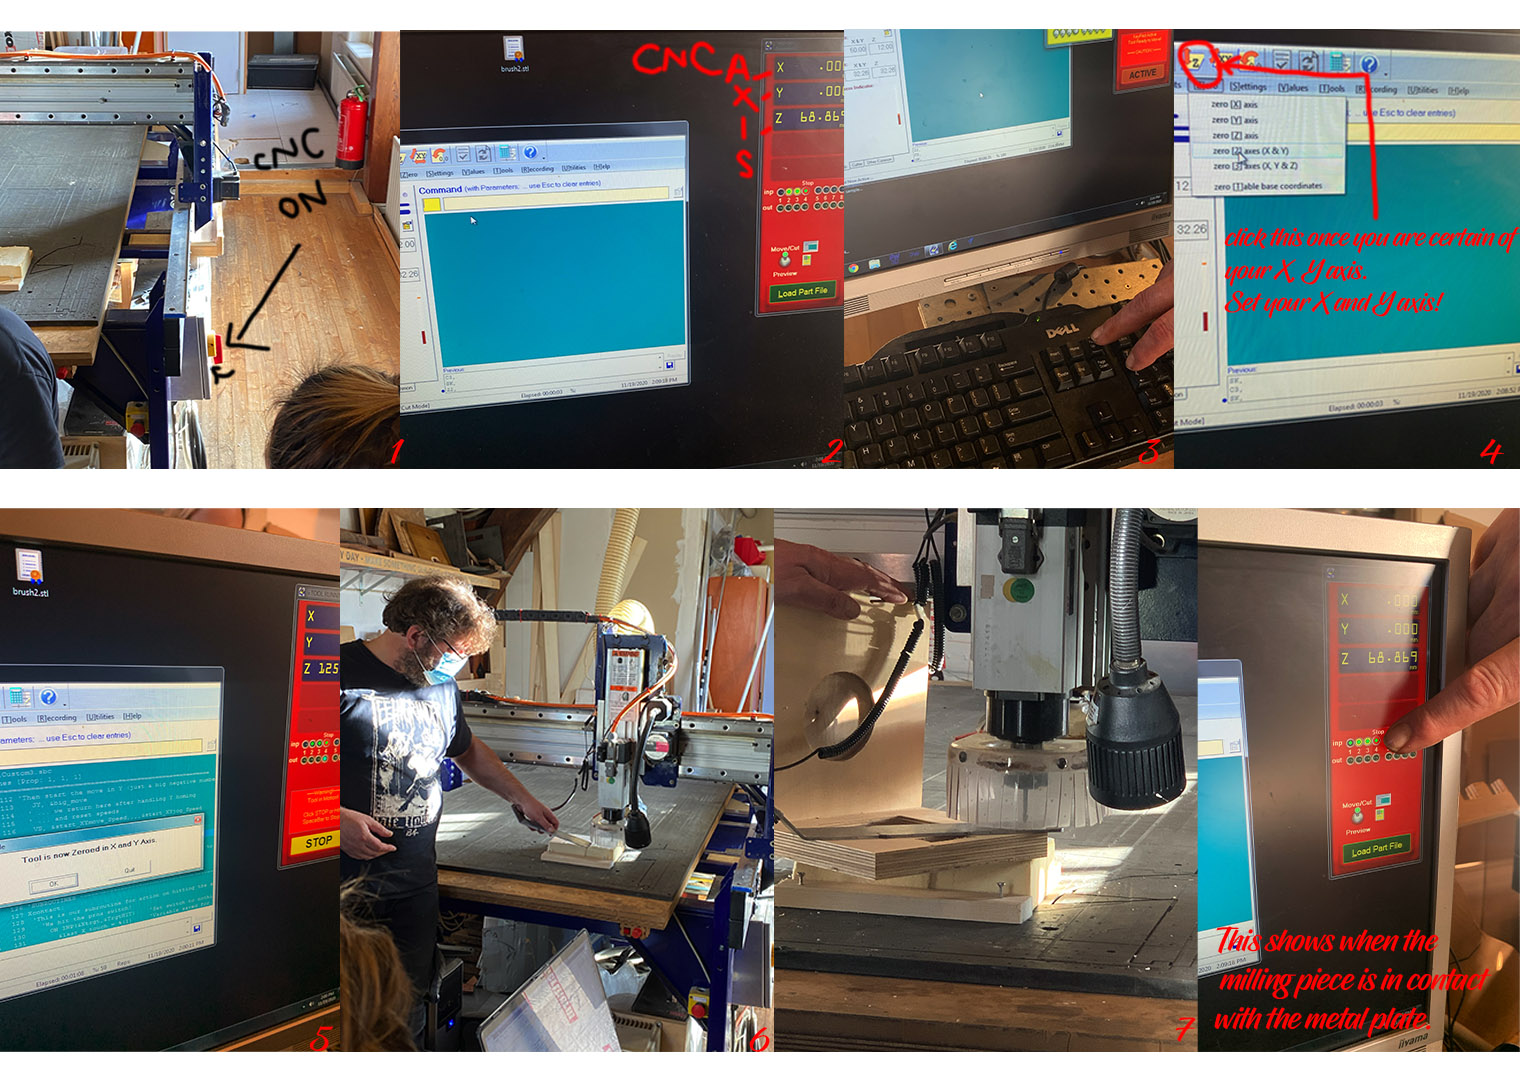
The shop bot software. Somewhere in this software a red window will pop up giving the X, Y, Z axis.
-
To move the arm or spindle manually press the K key on the keyboard. Then use the different arrows to move it. (up,down, left and right)
-
Use the position 0 of the machine. The only point that both the machine and software understand is that point 0.
-
Press the XY Icon at the top of the toolbar.
-
Set the anchor point. X,Y axis. I have circled in red which function to click to set the X and Y axis inthe images below.
-
Attach the milling bit two flute 5mm milling bit. Place the coil over the nut first and then place the milling bit. You always have to test the area that is going to be built first, therefore henk showed us that by placing a piece of wood in between the milling bit and actual foam was the way to test this.
-
Attach the milling bit ensemble to the spindle. Lower the spindle by clicking the latch on the back. Lower the plastic attachment. Then place the milling piece. Once you’ve screwed on the milling bit raise plastic up again.
-
Always check you starting point. When you enter you X, Y and Z axis Take a photo of the red window before you do anything. It is always good to know what your starting point is and if you get lost you can always refer back to it.
-
Click X + Y axis. Repositioning your job to 0.
-
For the Z -axis, you can use a metal ruler like structure to place in between the milling piece and the material(foam) that is being carved. The programme will indicate if the milling bit is touching a surface when the four circles all light up green. This is shown in the same red window as before.
-
Click Z to set Z axis. Then lift the spindle manually and use the keys Page up and Page down to either raise or lower the spindle. Firstly, test run to see if your piece is in place. Make a test of the Z height to see which space the CNC is covering.
-
Load the path file. Click START (green button).
-
Our first test failed. The calibration wasn’t correct. Here we hadn’t placed the origin in the place. It started in the middle whereas it should start in a corner.
The actual machine – Real deal:
-
Turn on the vacuum machine and make sure that you’re milling bit is screwed on right. Machine is set to zero. Then place the key into the milling so that the milling can start.
-
The speed of the milling should be the same for the CNC machine as it is for the software. In our case is was at 10,000 in the software so the CNC machine had to be tweaked from 18,000 to 10,000.
-
Turn on the dust collector (photo of dust collector).
-
To pause the process, press spacebar on the keyboard. A good time to pause is when the milling bit finds itself hovering over a place that isn’t on your direct object. In the middle or so.
Closing the bot: 1. Take out the key from the side of the machine. Close off all the rest, Handle on the side, vacuum machine handle, dust collector, software, laptop. Take out the milling bit and place back. Clean your environment.
My object: Bowl made out of biocompostable material.
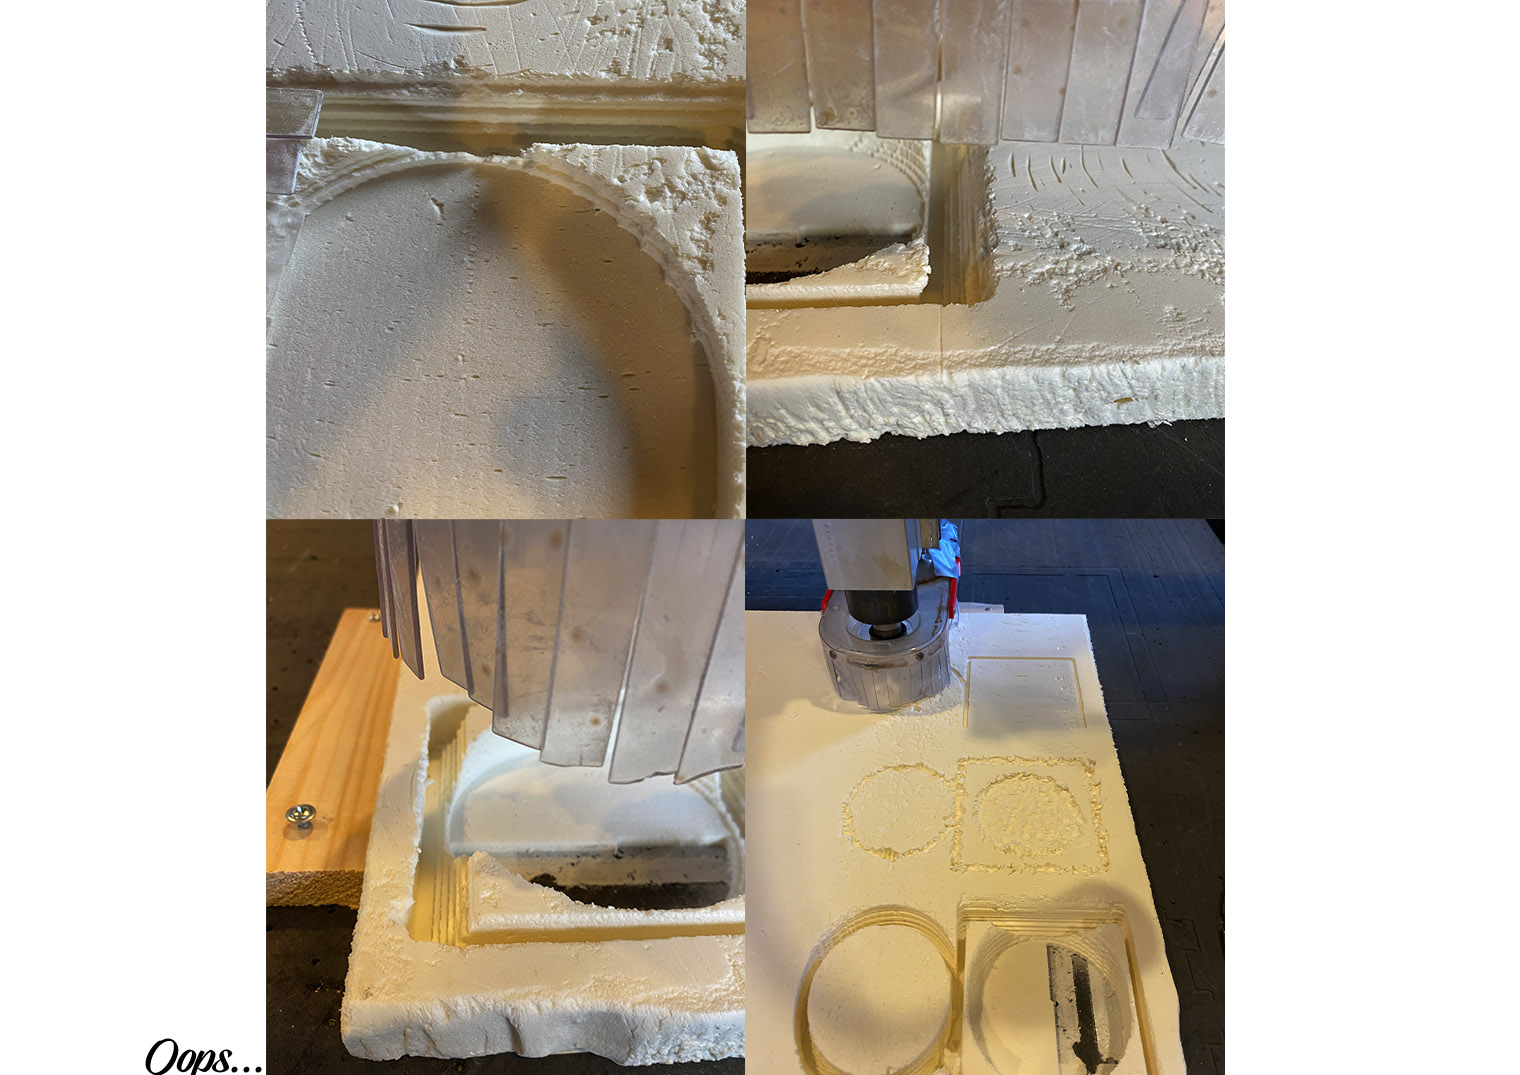
Problem this week:
I managed to change the settings on the CNC so that it became unusable :(. This caused a little delay in our week and my sincere apologies for this! I thought that tackling the CNC would be a piece of cake but I was wrong. OH , so, so wrong. This week it was an episode of Becca Vs. CNC machine. Oops!
Though I did have another go the next week and the CNc magically resolved itself. My mold came out well and the results were great. I've finally mastered the machine and confident to test more milling projects in the future:
Results:
Result: 3D Model the tapas bowl mold
very useful links:
https://www.youtube.com/watch?v=iFqW8b-Gsbc: Shopbot manual