5. E-textiles
The topics that we’re learning this week is one of the most difficult to me, Electronics. But i’m going to embrace this week, cause i want to fell in love with this theme, i think it’s one useful tool for what i want to do for my final project.
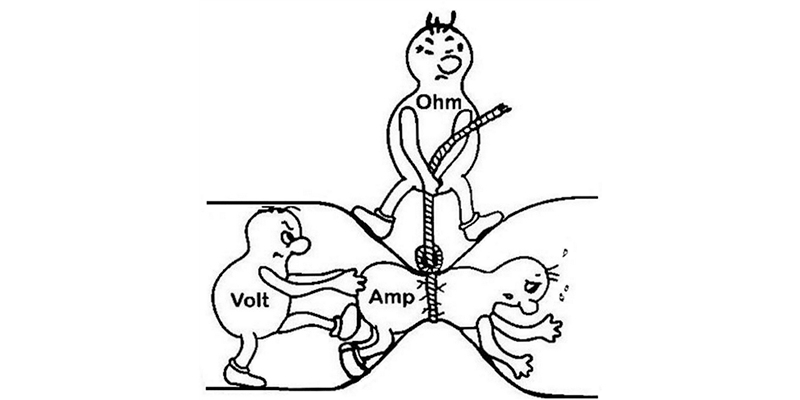
Let’s learn about the enemy
Here’s some basic information that we need to know before start working,
Voltage
When we force electrons to group in a certain area, leaving another area without electrons, we create a difference in voltage. When two objects have a difference in voltage, we can say that their electrons will try to jump from one another creating a current flow, to balance out the situation and become stable. Voltage is expressed in Volts (V).
Current
When two objects are subject to a difference voltage, electrons will try to come back to their position. When doing so, we say there is an electric current or just current. This movement of electrons inside a material is measured in Amperes (A) or just Amps. If we have alternating voltage, we will have also alternating current (AC), and the same with constant voltage, in which case we will have DC.
Resistance
It’s the difficult that the electrons will have to go through the current from one point to another, when subject to voltage. Resistance it’s measured in Ohms (Ω).
Light Sensor
Since i would like to put some lights into my final project, i decided to work with a light button made by me. Using the examples presented on the classes, i made one digital momentary button and one analog preassure button.
Digital Sensor
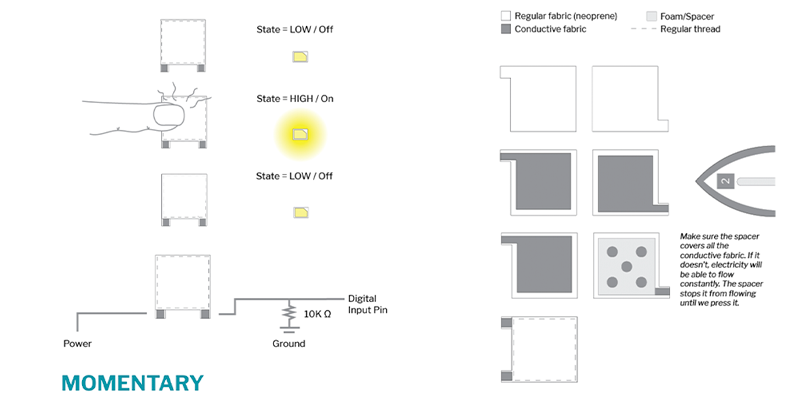
A digital sensor is a device that can adopt only two output values, 0 and 1, yes or no, on or off. These are absolute values.
Let's agree that this task is very difficult for me since I don't get along very well with electronics, in general, anything I try to connect doesn't work for me haha, so let's hope this one works.
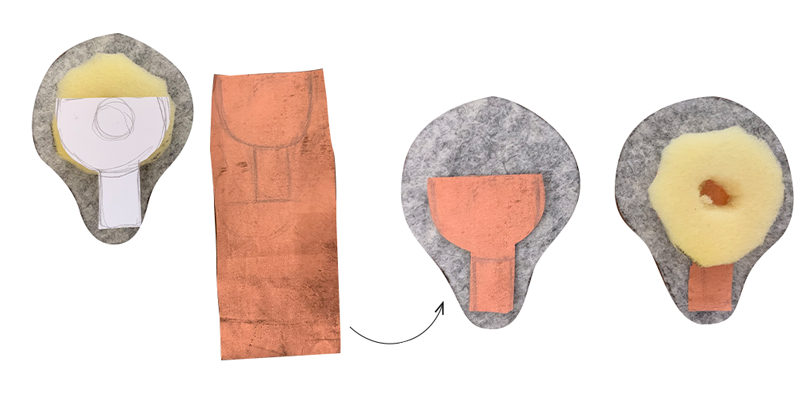
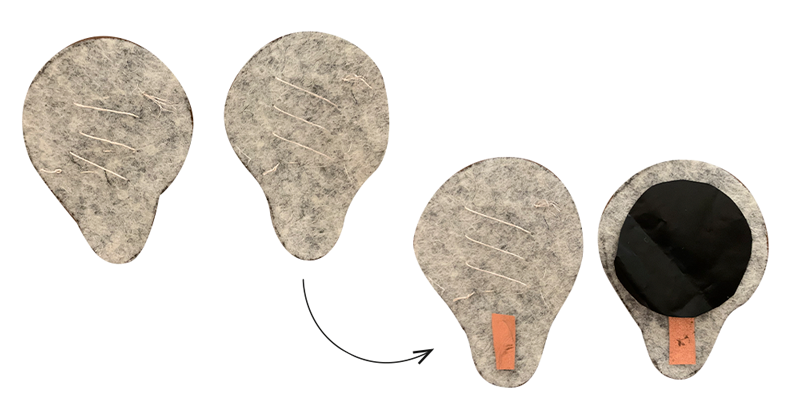
First of all I have to make my digital button, for that we need:
- Felt
- Copper Fabric
- Sponge
- Normal thread
- Snaps
The digital sensor consists of 2 pieces of conductive fabric and a sponge, to be able to separate the fabrics and for the current to pass when we want.
I wanted to give it a personal touch to be able to make a single board with my digital button and my analog button. So I decided to make them as close to the example so that nothing would go wrong, but I made them out of felt, since it is a material that I really like.
To make sure the current got through to the copper fabric, I put snaps in the spaces where I'm going to connect the cables.
Then we have to see how the circuit is going to be to prove that our button actually works.
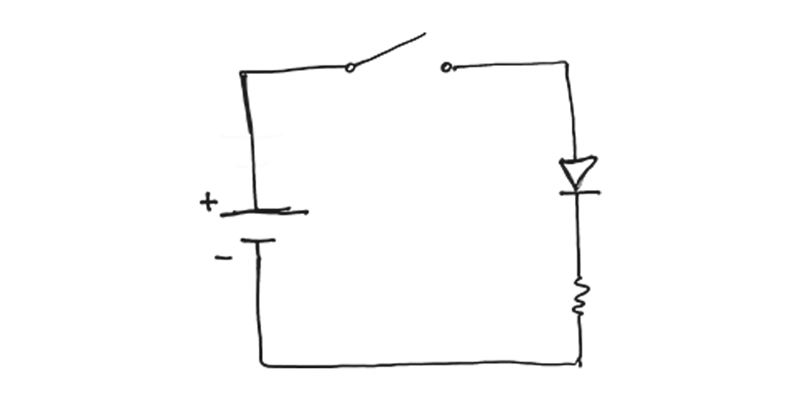
Manual Test, IT WORKS
Analog Sensor
Analog sensors are those that show us a much wider range of states depending on the magnitude they detect, making it possible to scale and obtain the real value. This is where the values can be from whole numbers to decimal numbers.
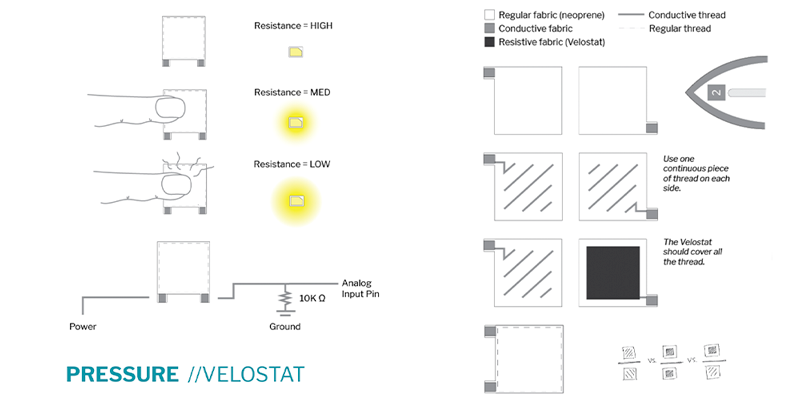
To make our Analog Button, analog sensor or pressure sensor, we need:
- Felt
- Velostate
- Conductive wire
- Copper Fabric
- Snaps
- Normal thread
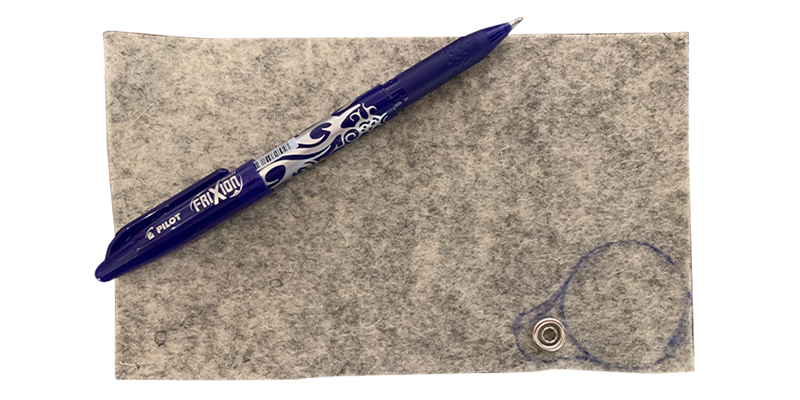
First we cut the pieces of felt to be able to have a limited area in which to sew the conductive thread, then, we have to cut two small pieces of copper fabric and try to join them to the seams with conductive thread.
Al medio, como el queso de un sandwitch, ponemos un trozo de veslostate, que finalmente es una resistencia que hace que se dificulte el paso de la corriente a través de los hilos
Then we have to see how the circuit is going to be to prove that our button actually works.
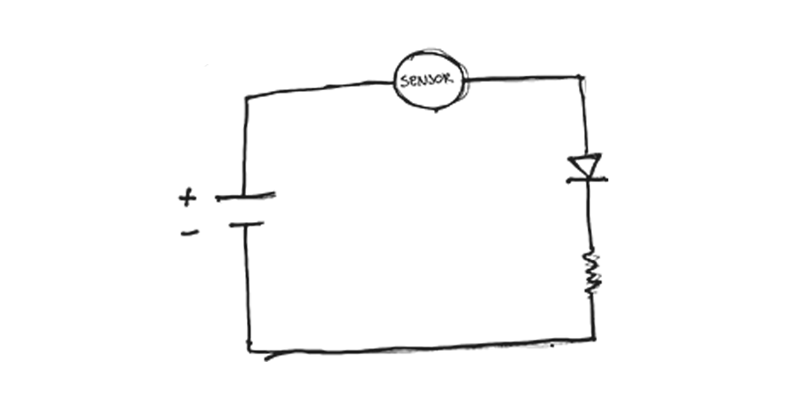
Manual Test, IT WORKS!
Then...Arduino was made
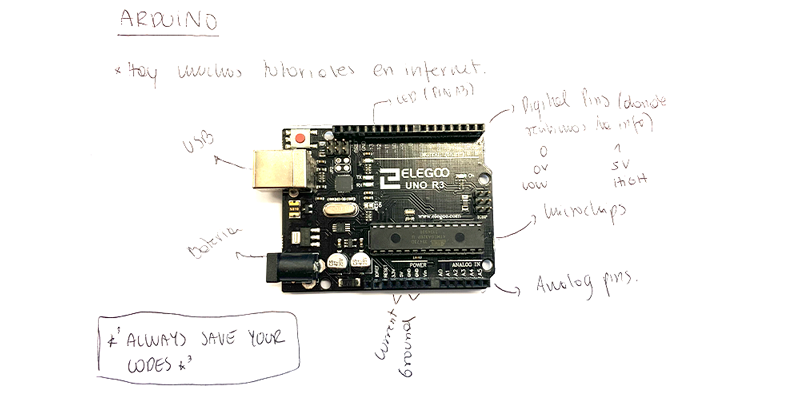
Arduino is an open source electronics creation platform, which is based on free hardware and software, flexible and easy to use for creators and developers. This platform allows the creation of different types of single-board microcomputers that the community of creators can give different types of use.
This is a free hardware that means that Arduino offers the bases so that any other person or company can create their own boards, being able to be different between them but equally functional from the same base.
This is why we have ELEGOO! Here are some specifications;
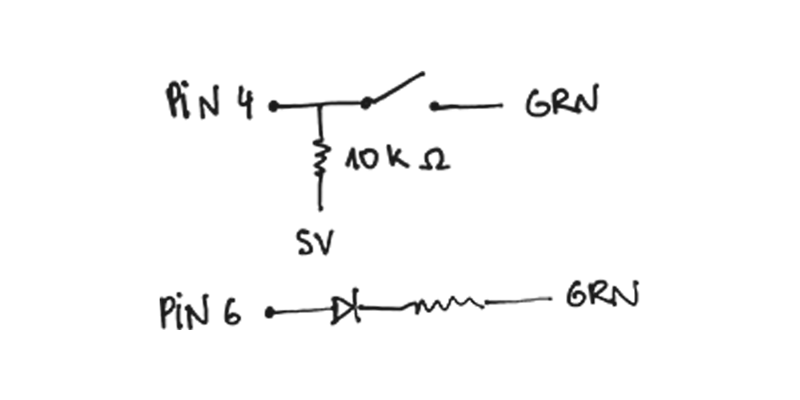
Digital Sensor Checking Code
int lecture;

void setup() {
  // put your setup code here, to run once:
  pinMode(4, INPUT);
  pinMode(6, OUTPUT);
}

void loop() {
  // put your main code here, to run repeatedly:
  lecture = digitalRead(4);
  Serial.println(lecture);
  digitalWrite(6, lecture);
  delay(100);
}
Analog Sensor Checking Code
int lecture;
int mapping;

void setup() {
  // put your setup code here, to run once:
  pinMode(A0, INPUT);
  pinMode(6, OUTPUT);
  Serial.begin(9600);
}

void loop() {
  // put your main code here, to run repeatedly:
  lecture = analogRead(A0);
  mapping = map(lecture, 400, 1000, 0, 255);
  Serial.println(lecture);
  analogWrite(6, lecture);
  delay(100);
}
Final experiment! Hopes it works!
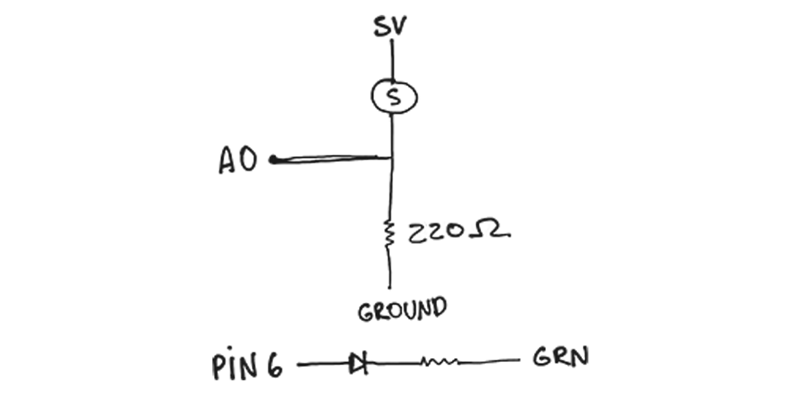
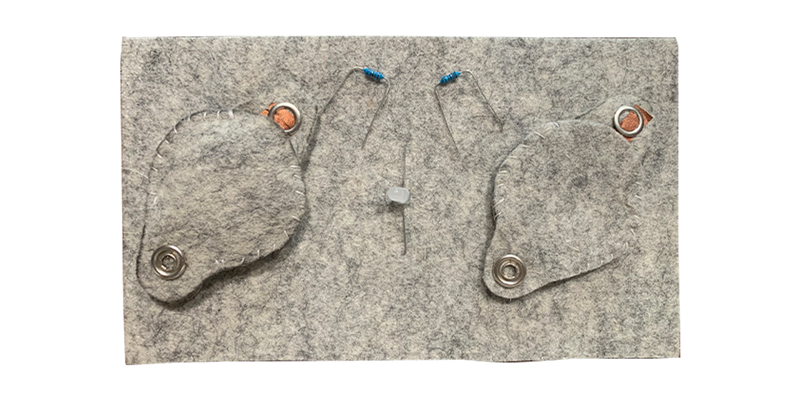
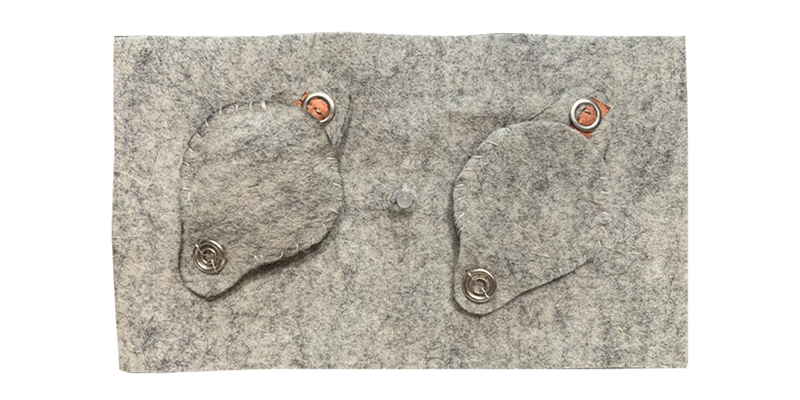
For my last attempt, I am going to believe I am a pro and I am going to put my two sensors together to make a board to light an LED, here is an idea,
Planning the circuits
The tester sounds when we open the current flow, so it works
Final look
Unfortunately, my experiment didn't work as i expected :( Well hopefully tomorrow I can see what went wrong
Thanks for reading! See you next week!