6. BioFabricating Materials
Welcome to one of the most interesting weeks of Fabricademy! Biomaterials
This week we’re going to produce our own grown materials and craft materials, so let’s get started!
GROWN MATERIALS
Myco-composites
We started our week with a mycocomposites presentation from Jessica, who’s been working with different types of mycelium for the past 3 years. She helps us to make our own mycelium grown objects with Reishii Mushroom. We divided the process in 2 phases, the first one is the “Growing our own objects”, and the second one is the “reproduction phase”.
Growing our own objects
always work with gloves, apron and your hair tied.
We started our objects with an already grown-inoculated bags of Reishii mycelium, this was all crowded so we have to separate it into small pieces so we can mix it with four and distilled water to make like a “mycelium dough”
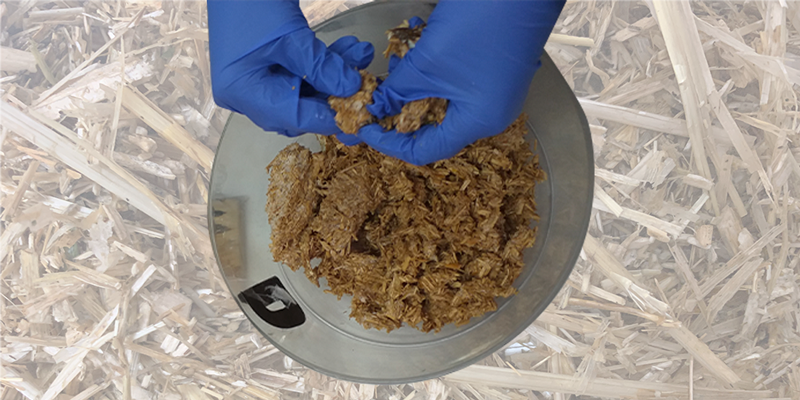
Then we have to prepare our molds. To make us sure that our object don’t get contaminated, we have to clean it with a lot of alcohol, and to make us sure that the mycelium doesn’t get sticked to our molds, we have to line them in plastic foil.
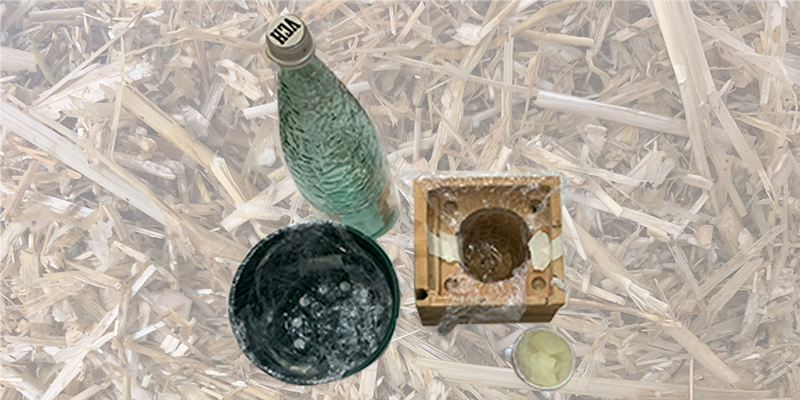
Once we have our molds ready, we start to fill them with our mycelium dough. To make sure that it is well assembled, you have to press and leave a tight and dense layer of our dough.
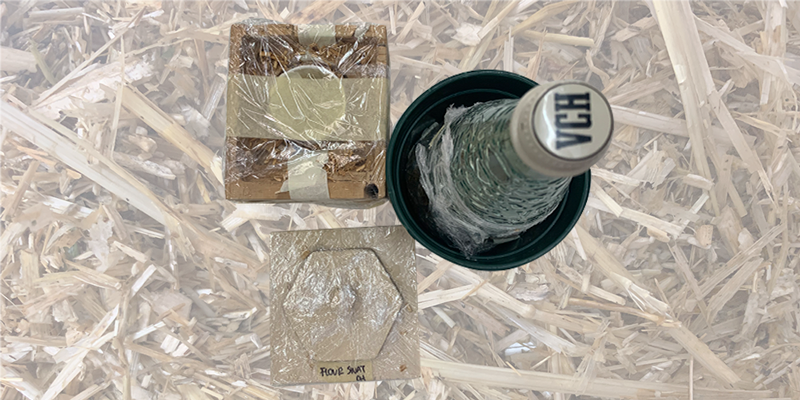
For the final step, we have to leave them in a room with not much light and a regular temperature, like at 25ºC.
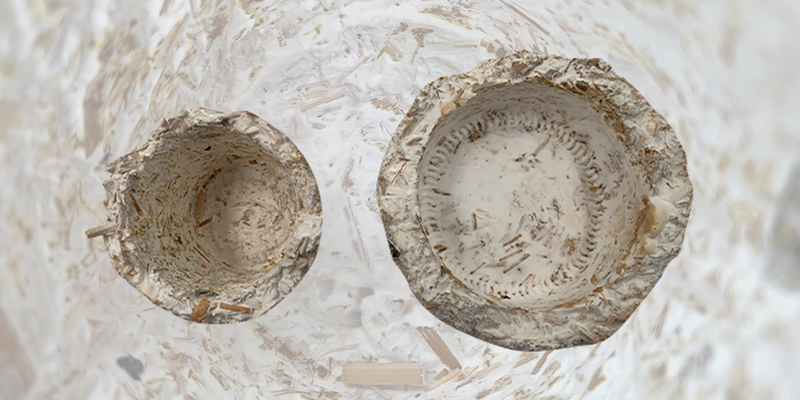
Final Results
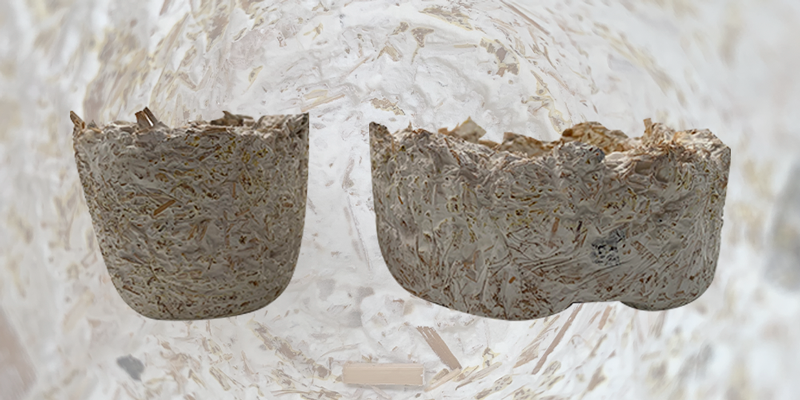
We leave our objects to grow for about a week, and these are the results.
Reproduction Phase
It’s my first time making mycelium grown in this kind of substrate, so...fingers crossed.
First of all, we have to prepare our substrate to make it very nutritious and delicious for our mycelium. To make it that way, I add Straw, Hemp, Wood chops and Coffee. All of this well mixed with a little bit of distilled water (to make sure that there are no strange components in the water) just to moisten the substrate.
So here are the proportions:
- 50% Straw
- 20% Hemp
- 20% Coffee
- 10% Wood Chops
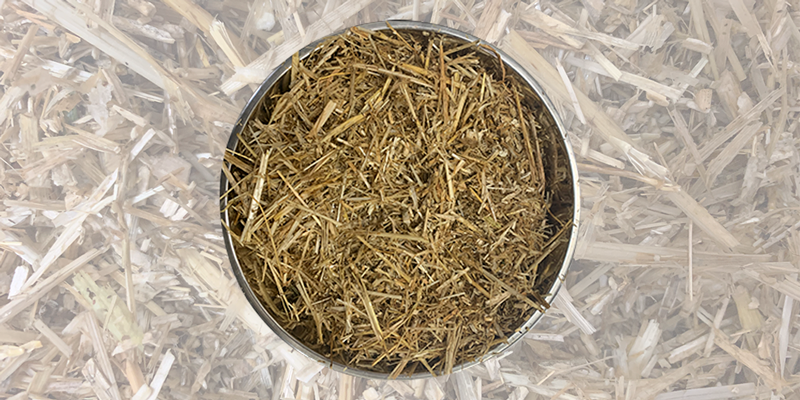
Then our bag with the substrate has to be sterilized in our pressure cook pot for 15 minutes.
Once we have it clean, we inoculate the bag with our mushroom spoon, in this case Reishii mycelium. Then we have to smash it and mix it with the substrate, and wait until it grows in a controlled temperature’s space.
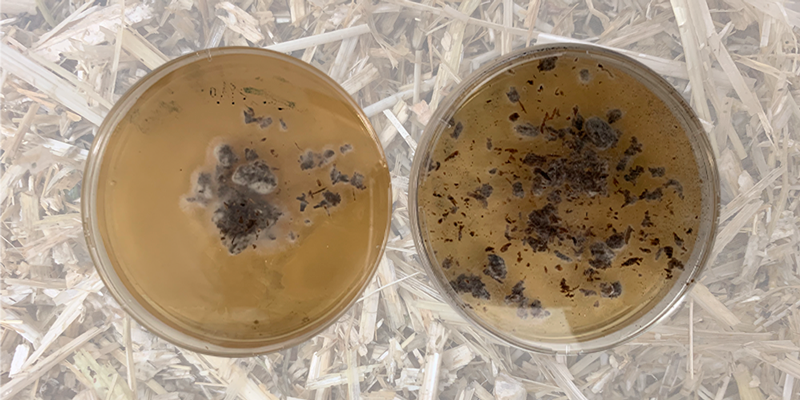
There’s another way to reproduce more samples of our mycelium which is the same as in the case of bacteria, inoculation in petri dishes. for these ones, we leave it to grow in the incubator.
Final Results
After a week of waiting, these are the results.
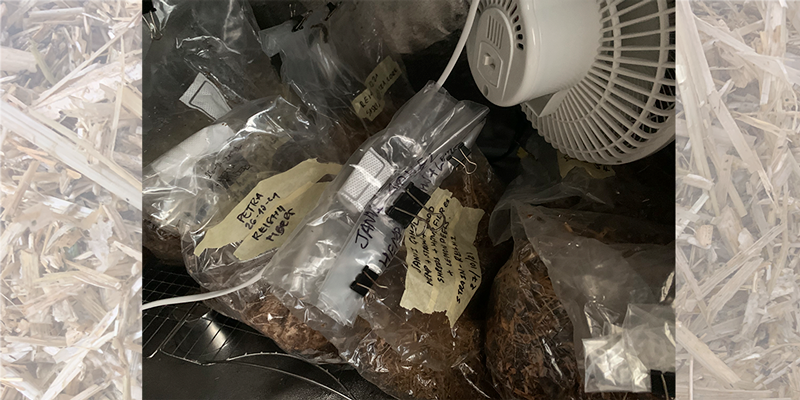
Still Growing :)
Still Growing :)
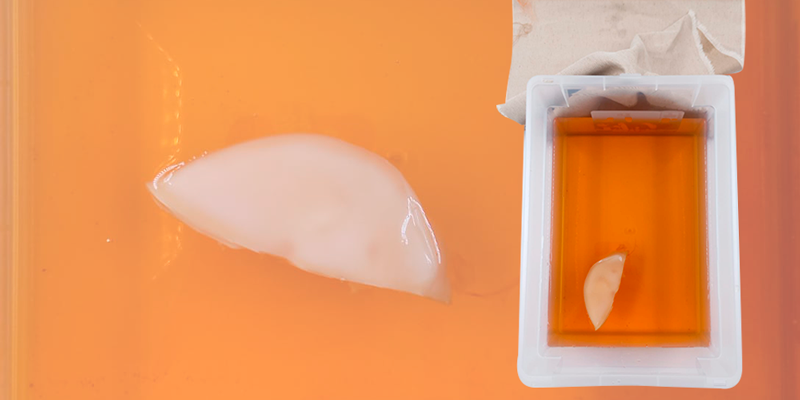
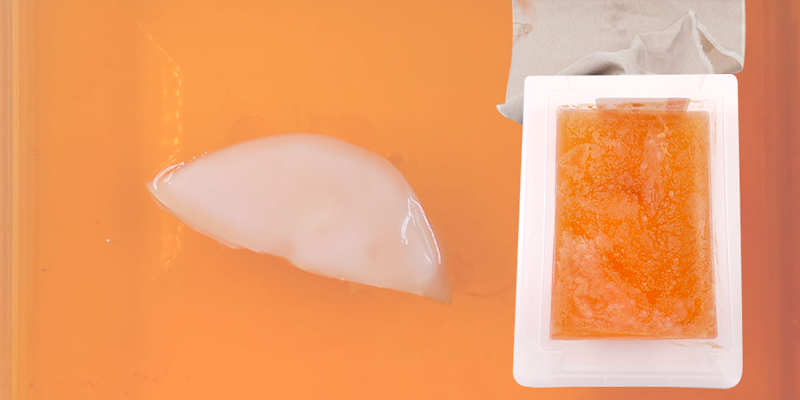
Scoby, well known as Kombucha
For the other part of our GROWN MATERIALS, we have the Scoby prototype, better known as Kombucha. The drink known by the name of kombucha is a traditional drink prepared by man that consists of the fermentation of yeasts and bacteria, of a tea infusion with sugar is added.
All this process is developed by a colony of gelatinous microorganisms with the scientific name Medusomyces gisevi (consisting mainly of strains of Bacterium xylinum, Gluconobcharacter oxydans and yeast-like fungi, of the genus Ascomycetes, such as Saccharomycodes ludwigii, Saccharomyces cerevísiae, Schizombecharomyces p. , Pichia fermentans and Zygosaccha- romyces bailii).
Within our experimentation we are looking to give a second use to this cellulose membrane that grows as it absorbs the sugar found in the infusion.
The recipe for the common tea substrate is:
- 8 lts of water
- 800 ml cider vinegar
- 800 gr sugar
- 8 black tea bags
To prepare the infusion, we need to put all of the ingredients in a big pot and make it boil, then we have to cool down the infusion and separate it in little “pools” that will be the house of our Scoby.
This is the most common way to grow this bacteria leather, but there’s other substrates that have good result too, some examples are,
- Red Wine substrate
- Green tea substrate
- Hibiscus Flowers infusion substrate
- Beer substrate
- Turmeric infusion substrate
Partial - Final Results
Since it’s been only a week, there’s not much growth in the pools, so we will have to wait a couple of days more to see better results.
CRAFT MATERIALS
For this crafted materials, i wanted to make a little experimentations with additives added to the original recipes, so let’s get started!
Urea
It is used for the chemical and plastic industry, it is present in adhesives, plastics, resins, inks, pharmaceutical products and finishes for textiles, paper, metals and tobacco. Such as urea formaldehyde resin. These resins have various applications in industry, such as the production of chipboard. It is also used in the production of paintings.
It is also used in the cosmetic industry for its moisturizing property (5-20%) and its exfoliating or keratolytic properties (30-50%). Helps to remove dead cells and calluses. In the skin it interacts with the keratin protein, breaking the hydrogen bond interactions that stabilize its secondary structure.
Some of the reasons that I wanted to experiment with UREA is that the results of the mixes get more brilliant colors and better finishing, that’s why I mixed with my Balck Beans powder from Biochrome’s week.
For the experiment i made 3 samples of Alginate,
- Sample 00: Normal recipe + 2 gr of Black Beans Powder
- Sample 01: Normal recipe + 12 gr of Urea + 2 gr of Black Beans Powder
- Sample 02: Normal recipe + 24 gr of Urea + 2 gr of Black Beans Powder
For the samples, first we need to prepare the Alginate base, the recipe is:
- 200 ml of water
- 4 gr of sodium alginate
- 8 gr of glycerine
Sample 00: Base Alginate recipe + 2 gr of black beans powder, to see how the alginate catch the colors of the pigments
Sample 01: Base Alginate recipe + 12 gr of Urea + 2 gr of Black Beans Powder, this is the first test with Urea, this experiment it’s to see that urea helps to catch the colors of the pigment, and make the bioplastic with additive darker than the sample 00.
Sample 02: Base Alginate recipe + 24 gr of Urea + 2 gr of Black Beans Powder, this sample helps me to see that the more urea, the brighter the color pick-up.
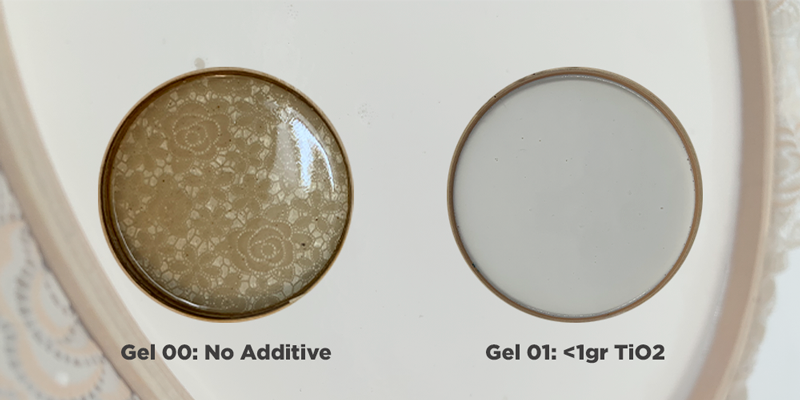
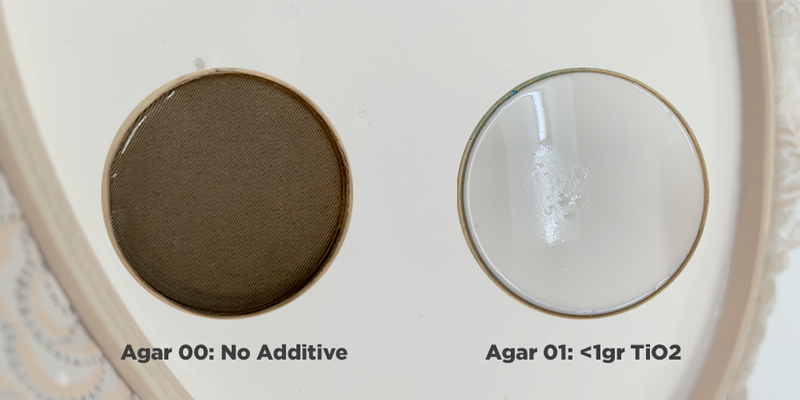
Titanium Dioxide
Titanium dioxide pigments are mainly used in the production of paints and plastics, as well as in paper, printing inks, cosmetics, textiles, pharmaceuticals and food. Titanium dioxide is the most commonly used pigment in the world, providing final products with brilliant whiteness, opacity and protection.
In the cosmetic industry this allows to hide skin imperfections and give it shine to make it look better. In sunscreens, the titanium dioxide pigment tends to reflect light, however the ultra-fine TiO2 has the ability to become transparent to visible light but absorbs ultraviolet light, thus protecting the skin from UV rays that generate problems to the skin.
The properties that i’m looking for is a more tense material and the ability to repel the UV rays.
For the experiment i made 3 samples of different materials,
- Alginate sample 00: Normal recipe
- Alginate sample 01: Normal recipe + < 1gr of TiO2
- Gelatine sample 00: Normal recipe
- Gelatine sample 01: Normal recipe + < 1gr of TiO2
- Agar Agar sample 00: Normal recipe
- Agar Agar sample 01: Normal recipe + < 1gr of TiO2
For the first samples, we need to prepare the Alginate base, the recipe is:
- 200 ml of water
- 4 gr of sodium alginate
- 8 gr of glycerine
Then for the Al. sample 01 i add less than 1 gr of Titanium dioxide to the base and mix it, the mix turned fully white, then i poured it into the mold.

For the second samples, we need to prepare the Gelatine base, the recipe is:
- 240 ml of water
- 48 gr of gelatine
- 24 gr of glycerine
For the gelatine samples i made them with the amount of glycerine to make a normal elasticity. Then for the Gel. sample 01 i add less than 1 gr of Titanium dioxide to the base and mix it, the mix turned fully white, then i poured it into the mold.
For the third samples, we need to prepare the Agar Agar base, the recipe is:
- 300 ml of water
- 10 gr of agar agar
- 16 gr of glycerine
For the Agar agar samples i made them with the amount of glycerine to make a normal elasticity. Then for the Agar. sample 01 i add less than 1 gr of Titanium dioxide to the base and mix it, the mix turned fully white, then i poured it into the mold.
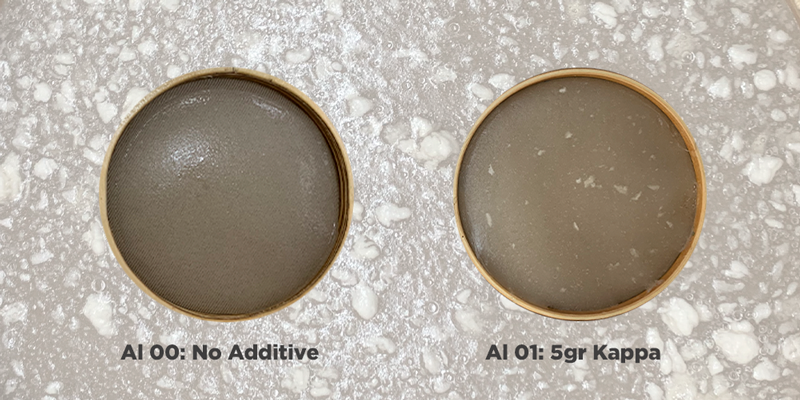
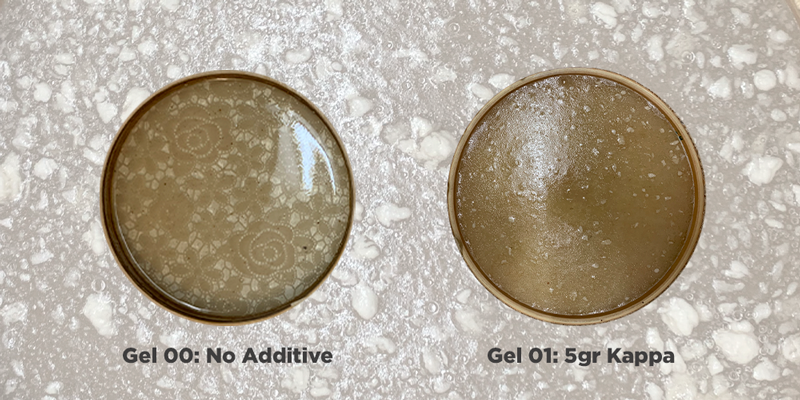
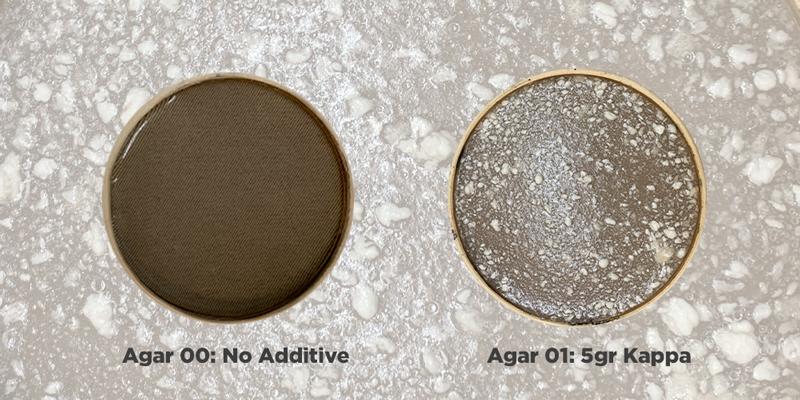
Carrageenan (Kappa)
Carrageenan is a chemical compound that is found filling the gaps in the cellulose structure of the cell walls of some algae of several families of Rhodophyceae (red algae). Chondrus crispus, the traditional carrageenan-producing alga, known as "Irish moss".
This component helps in the formation of gels and can make the components in which it is mixed to become more transparent.
For the experiment i made 3 samples of different materials,
- Alginate sample 00: Normal recipe
- Alginate sample 01: Normal recipe + 5 gr of Kappa
- Gelatine sample 00: Normal recipe
- Gelatine sample 01: Normal recipe + 5 gr of Kappa
- Agar Agar sample 00: Normal recipe
- Agar Agar sample 01: Normal recipe + 5 gr of Kappa
For the first samples, we need to prepare the Alginate base, the recipe is:
- 200 ml of water
- 4 gr of sodium alginate
- 8 gr of glycerine
Then for the Al. sample 01 i add 5 gr of Kappa to the base and mix it. The mixture was left with small white specks since a lot of additive may have been added to the mixture, that is, a lot of solute for a little solvent.
The other thing is that it is finally textured as it says in the descriptions, then I poured it into the mold.
For the second samples, we need to prepare the Gelatine base, the recipe is:
- 240 ml of water
- 48 gr of gelatine
- 24 gr of glycerine
For the Gelatine samples I made them with the amount of glycerine to make a normal elasticity. Then for the Gel. sample 01 i add 5 gr of Kappa to the base and mix it. The mixture was left with small white specks since a lot of additive may have been added to the mixture, that is, a lot of solute for a little solvent.
The other thing is that it is finally textured as it says in the descriptions, then I poured it into the mold.
For the third samples, we need to prepare the Agar Agar base, the recipe is:
- 300 ml of water
- 10 gr of agar agar
- 16 gr of glycerine
Then for the Agar. sample 01 i add 5 gr of Kappa to the base and mix it. For the Agar agar samples I made them with the amount of glycerine to make a normal elasticity. The mixture was left with small white specks since a lot of additive may have been added to the mixture, that is, a lot of solute for a little solvent.
The other thing is that it is finally textured as it says in the descriptions, then I poured it into the mold.
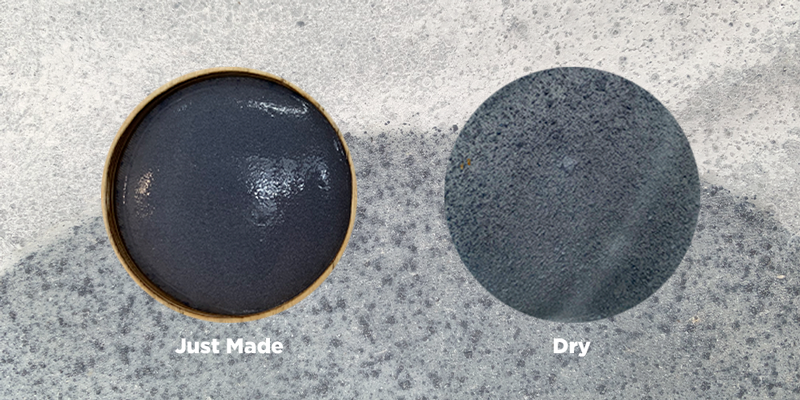
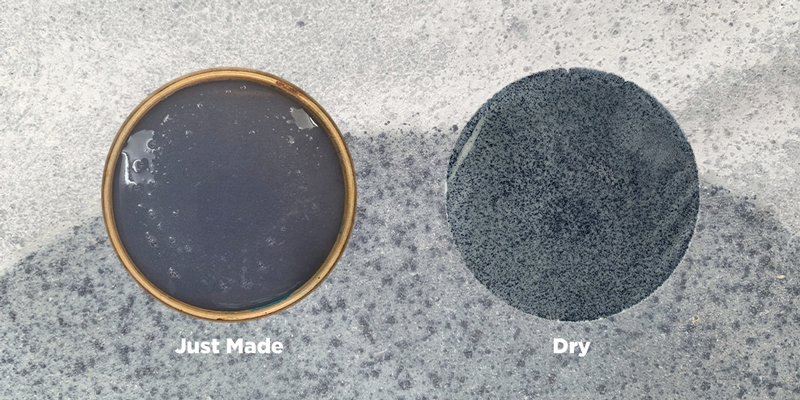
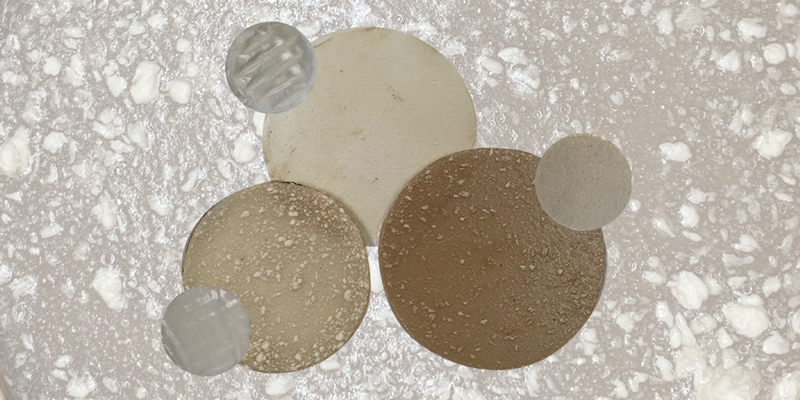
Final Results
Urea
Conclusions: With the final results, we can realize that the higher the amount of Urea, the brighter or clearer the colors are in our results.
Titanium Dioxide
Conclusions: We can say that our results were positive since the samples were more tense than the base samples, very pigmented and we will be doing an upgrade when the UV tests are done.

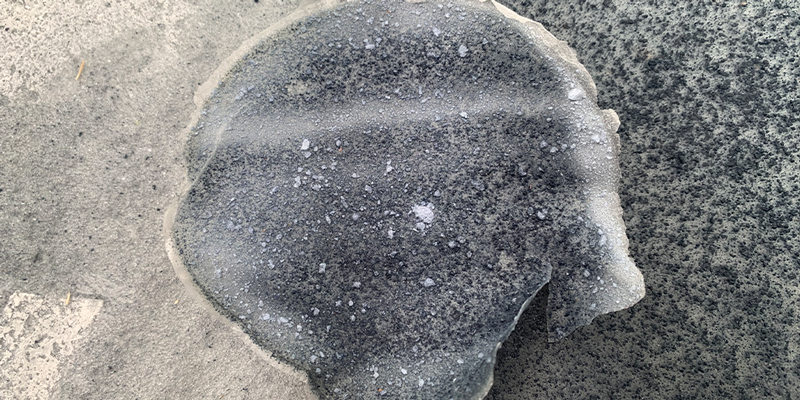
Carrageenan (Kappa)
Conclusions: Finally we believe that we should add less Kappa to the mixture since it was left with lumps, we should probably try with 3 gr from now on, we can consider that it was a somewhat unsuccessful experiment since it did not show the properties that we thought it would acquire with this additive that was the formation of gels or a more transparent material.
Photos

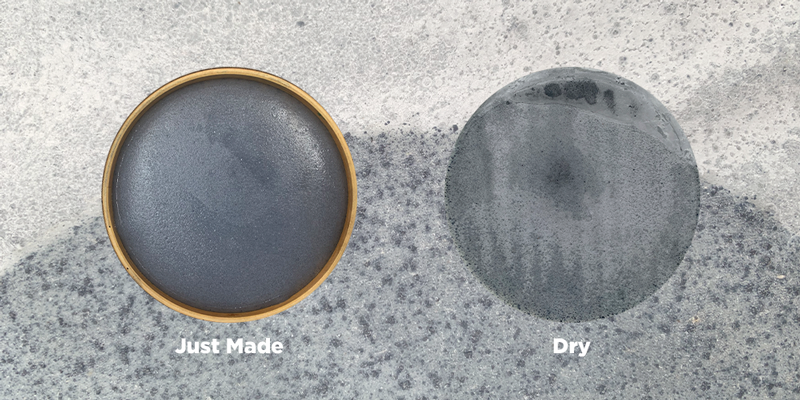
Dry urea samples
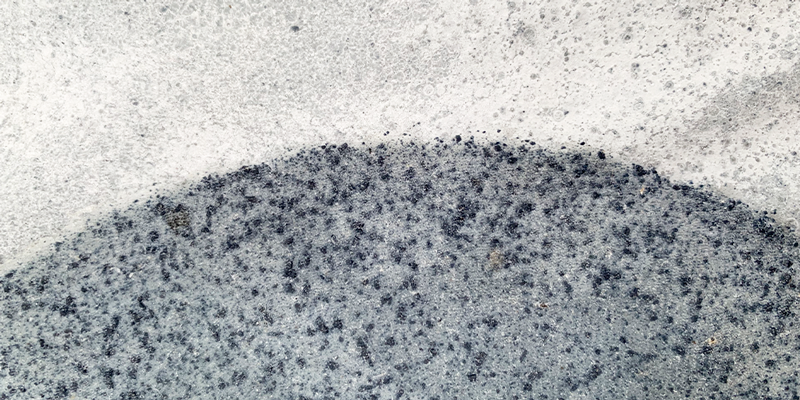
Dry urea samples, close up
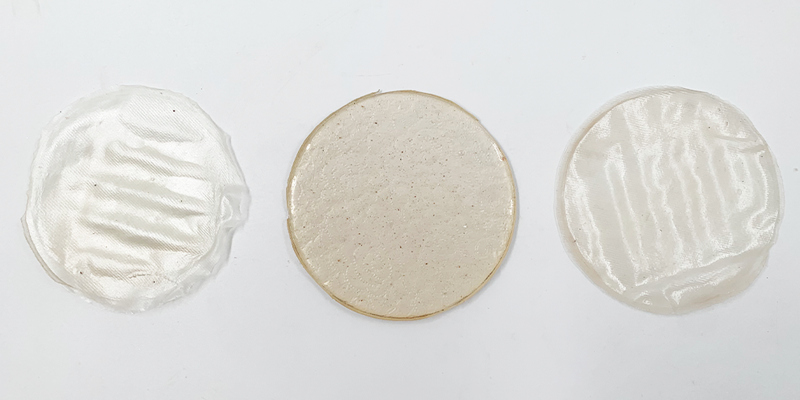
Samples 00; Alginate / Gelatine / Agar Agar
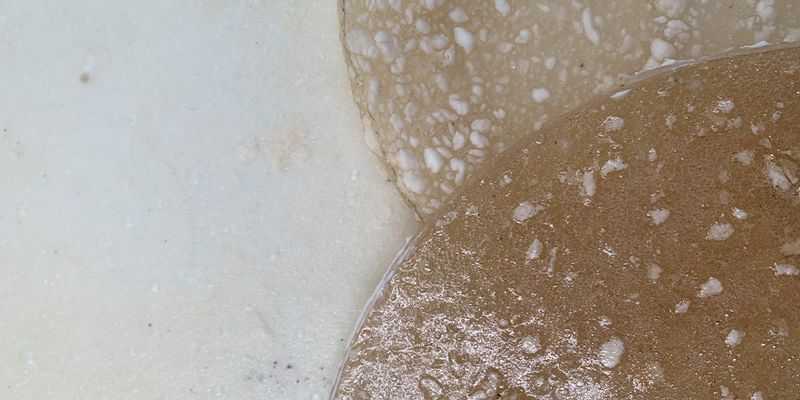
Kappa samples